

Page 1

For technical support, replacement services, user guides, and
other information, please visit https://www.tp-link.com/support
7106508970 REV1.0.0
Quick Installation Guide
Guide d'installation rapide
Guia de Instalação Rápido
Guia de Instalación Rápida
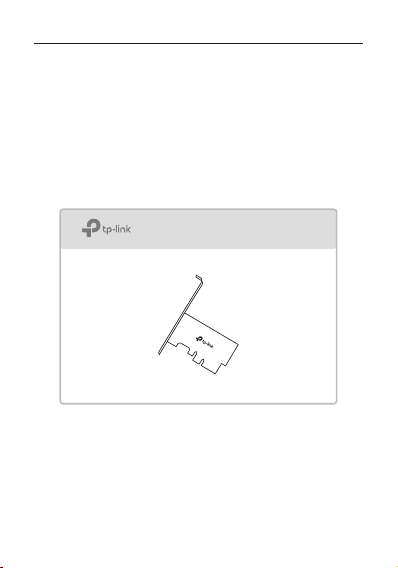
PCI Express Network Adapter
Images are for demonstration only.
Page 2

CONTENTS
01 / English
04 / Français
07 / Português Brasil
10 / Español(Latinoamérica)
Page 3
English
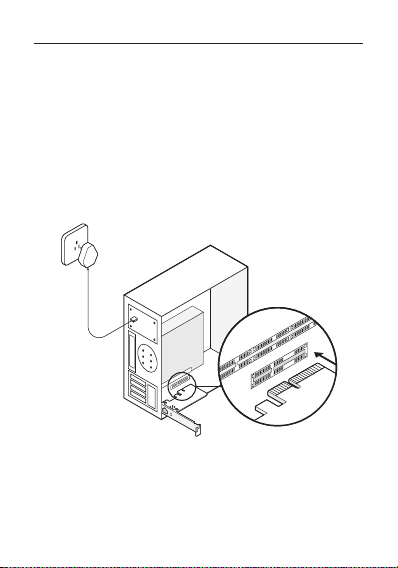
1 Hardware Connection
a. Turn o your computer, unplug the power
cable and remove the case panel.
b. Locate an available PCI-E slot and carefully
insert the adapter.
Note: If the bracket is not suitable for your computer,
detach it from the adapter's board and replace it with the
low-prole bracket.
c. Replace the case panel, plug in the power
cable and turn on your computer. Then
connect the Ethernet cable to the adapter.
01
Page 4
English
2 Driver Installation
a. Insert the CD and run the Autorun.exe.
Note:
If there is no Autorun.exe in your CD le, go to
https://www.tp-link.com/download-center and enter the
adapter model to get a detailed installation guide.
b. Select your adapter and follow the
instructions to complete the installation.
Note:
If you can’t install the driver successfully, disable the
antivirus software and rewall, then try again.
02
Page 5

English
FAQ (Frequently Asked Questions)
Q1: How do I nd the driver if the CD is lost or
broken?
A. You could nd and download the driver
at https://www.tp-link.com/download-center
Q2: How do I nd the hardware version of the
adapter?
A1. The hardware version (Ver:X.Y) is printed on the
product label on the package or the adapter. The
number X is the hardware version of the adapter.
A2. For more detailed instructions, please visit
https://www.tp-link.com/faq-46.html
Q3: What should I do if PC cannot nd the new
hardware?
A1. Restart your computer and try again.
A2. Power o the computer, then reinsert the
adapter or try to change another PCI-E slot.
A3. If the problem persists, contact our Technical
Support.
03
Page 6

Français
1 Connexion matérielle
a. Éteignez votre ordinateur, débranchez le câble
d'alimentation et retirez le panneau du boîtier.
b. Localisez un emplacement PCI-E disponible
et insérez soigneusement l'adaptateur.
Remarque: si le support ne convient pas à votre ordinateur,
détachez-le de la carte de l'adaptateur et remplacez-le par
le support extra-plat.
c. Remettez en place le panneau du boîtier,
branchez le câble d'alimentation et allumez
votre ordinateur. Connectez ensuite le câble
Ethernet à l'adaptateur.
04
Page 7

Français
2 Installation du pilote
a. Insérez le CD et exécutez Autorun.exe.
Remarque:
S'il n'y a pas Autorun.exe dans votre fichier CD, accédez à
https://www.tp-link.com/fr/download-center et entrez le
modèle d'adaptateur pour obtenir un guide d'installation
détaillé.
b. Sélectionnez votre adaptateur et suivez les
instructions pour terminer l'installation.
Remarque:
si vous ne parvenez pas à installer le pilote, désactivez le
logiciel antivirus et le pare-feu, puis réessayez.
05
Page 8

Français
FAQ (Questions fréquentes)
Q1: Comment trouver le pilote si le CD est perdu
ou cassé ?
A. Vous pouvez trouver et télécharger le pilote sur
https://www.tp-link.com/fr/download-center
Q2: Comment trouver la version matérielle de
l'adaptateur ?
A1. La version matérielle (Ver: X.Y) est imprimée
sur l'étiquette du produit sur l'emballage
ou l'adaptateur. Le nombre X est la version
matérielle de l'adaptateur.
A2. Pour des instructions plus détaillées, veuillez
visiter https://www.tp-link.com/fr/faq-46.html
Q3: Que dois-je faire si le PC ne trouve pas le
nouveau matériel ?
A1. Redémarrez votre ordinateur et réessayez.
A2. Éteignez l'ordinateur, puis réinsérez l'adaptateur
ou essayez de changer un autre emplacement
PCI-E.
A3. Si le problème persiste, contactez notre support
technique.
06
Page 9

Português Brasil
1 Conexão de Hardware
a. Desligue o computador, desconecte o cabo
de alimentação e remova o painel do
gabinete.
b. Localize um slot PCI-E disponível e insira
cuidadosamente o adaptador.
Nota: Se o suporte não for adequado para o seu
computador, desconecte-o da placa do adaptador e
substitua-o pelo suporte de perl baixo.
c. Substitua o painel do gabinete, conecte o
cabo de alimentação e ligue o computador.
Em seguida, conecte o cabo Ethernet ao
adaptador.
07
Page 10

Português Brasil
2 Instalação do Driver
a. Insira o CD e execute o Autorun.exe.
Nota:
Se não houver Autorun.exe no arquivo do CD, acesse
https://www.tp-link.com/download-center e digite o
modelo do adaptador para obter um guia de instalação
detalhado.
b. Selecione seu adaptador e siga as instruções
para concluir a instalação.
Nota:
Se você não conseguir instalar o driver com êxito, desative
o software antivírus e o rewall e tente novamente.
08
Page 11

Português Brasil
FAQ (Perguntas frequentes)
P1: Como localizo o driver se o CD estiver
perdido ou quebrado?
R. Você pode encontrar e baixar o driver em
https://www.tp-link.com/download-center
P2: Como encontro a versão de hardware do
adaptador?
R1. A versão do hardware (Ver: X.Y) está impressa
na etiqueta do produto na embalagem ou no
adaptador. O número X é a versão de hardware
do adaptador.
R2. Para instruções mais detalhadas, visite
https://www.tp-link.com/faq-46.html
P3. O que devo fazer se o PC não encontrar o
novo hardware?
R1. Reinicie o seu computador e tente novamente.
R2. Desligue o computador e reinsira o adaptador
ou tente alterar outro slot PCI-E.
R3. Se o problema persistir, entre em contato com o
suporte técnico.
09
Page 12

Español (Latinoamérica)
1 Conexión de Hardware
a. Apague su computadora, desconecte el
cable de alimentación y retire el panel de la
carcasa.
b. Localice una ranura PCI-E disponible e
inserte cuidadosamente el adaptador.
Nota: Si el soporte no es adecuado para su computadora,
sepárelo de la placa del adaptador y reemplácelo con el
soporte de bajo perl.
c. Vuelva a colocar el panel de la carcasa,
conecte el cable de alimentación y
encienda la computadora. Luego, conecte
el cable Ethernet al adaptador.
10
Page 13

Español (Latinoamérica)
2 Instalación del Controlador
a. Inserte el CD y ejecute el Autorun.exe.
Nota:
Si no hay Autorun.exe en su archivo de CD, vaya a
https://www.tp-link.com/download-center e ingrese el
modelo del adaptador para obtener una guía de instalación
detallada.
b. Seleccione su adaptador y siga las
instrucciones para completar la instalación.
Nota:
Si no puede instalar el controlador correctamente,
desactive el software antivirus y el rewall, luego intente
nuevamente.
11
Page 14

Español (Latinoamérica)
Preguntas frecuentes (preguntas
frecuentes)
P1: ¿Cómo encuentro el controlador si el CD se
pierde o se rompe?
A. Puede encontrar y descargar el controlador en
https://www.tp-link.com/download-center
P2: ¿Cómo encuentro la versión de hardware del
adaptador?
A1. La versión de hardware (Ver: X.Y) está impresa
en la etiqueta del producto en el paquete o el
adaptador. El número X es la versión de hardware
del adaptador.
A2. Para obtener instrucciones más detalladas, visite
https://www.tp-link.com/faq-46.html
P3: ¿Qué debo hacer si la PC no puede encontrar
el nuevo hardware?
A1. Reinicie su computadora e intente nuevamente.
A2. Apague la computadora, luego vuelva a insertar
el adaptador o intente cambiar otra ranura PCI-E.
A3. Si el problema persiste, comuníquese con
nuestro Soporte técnico.
12
Page 15

 Loading...