

Toyota Yaris SD 2016 Owners Manual


Table of contents
1 Warnings and Safety information.................................4
2 Getting started................................................................6
2.1 Before using the navigation system..................................................6
2.2 Navigation menu ................................................................................8
2.3 Buttons and other controls on the screen ......................................10
2.3.1 Using keyboards ..................................................................................10
2.3.2 Press and Hold.....................................................................................11
2.4 Map screen.................................................................................. ..... .12
2.4.1 Navigating on the map.........................................................................12
2.4.2 Position markers ..................................................................................13
2.4.2.1 Selected map location (Cursor) and selected map object........13
2.4.3 Objects on the map ............................................................. .................13
2.4.3.1 Streets and roads............................................. .........................13
2.4.3.2 Turn preview and Next street..................................................14
2.4.3.3 Lane information and Signposts........................................... ...16
2.4.3.4 Junction view............................................ ...............................17
2.4.3.5 Highway/Freeway exit services....................................... ........17
2.4.3.6 Elements of the active route................................ ....................19
2.4.4 Manipulating the map..........................................................................20
2.4.5 Checking the details of the current position (Where Am I?)...............23
3 On-road navigation ...................................................... 24
3.1 Selecting the destination of a route.................................................24
3.1.1 Entering an address or a part of the address ........................................25
3.1.1.1 Entering an address .................................................................25
3.1.1.2 Entering the midpoint of a street as the destination ................30
3.1.1.3 Selecting an intersection as the destination.............................33
3.1.1.4 Selecting a city center as the destination.................................36
3.1.2 Selecting the destination from the POI (point of interest)...................38
3.1.2.1 Quick search for a POI (point of interest)...............................38
3.1.2.2 Searching for Help nearby.......................................................41
3.1.2.3 Searching for a POI (point of interest) by category ................44
3.1.2.4 Searching for a POI (point of interest) by name .....................48
3.1.3 Searching for a Place using Local Search (Only some countries and
regions) ................................................................................................52
3.1.4 Selecting a map location as the destination.........................................54
2

3.1.5 Selecting the destination from your Favorites .....................................56
3.1.6 Selecting a recent destination from the History ................................... 58
3.1.7 Entering the coordinate of the destination...........................................60
3.2 Checking route parameters and accessing route related
functions............................................................................................62
3.3 Modifying the route .........................................................................64
3.3.1 Selecting a new destination when already having a route:
New Route, Waypoint or Final Destination.........................................64
3.3.2 Editing the list of destinations (Edit Route)......................................... 65
3.3.3 Checking route alternatives when planning the route..........................66
3.3.4 Changing the road types used in route planning..................................68
3.4 Saving a location as a Favorite destination....................................70
3.4.1 Editing the details of a Favorite destination ........................................70
4 Reference Guide ...........................................................72
4.1 Concepts............................................................................................72
4.1.1 Smart Zoom .........................................................................................72
4.1.2 Route calculation and recalculation.....................................................72
4.1.3 Road safety cameras and other proximity alert points (Only some
countries and regions)..........................................................................74
4.1.4 Speed limit warning (Only some countries and regions).....................75
4.1.5 Traffic information in route planning (Only some countries and
regions) ................................................................................................75
4.1.5.1 Historical traffic ......................................................................76
4.2 Settings menu ...................................................................................77
4.2.1 Guidance Settings.................................................................. ..............78
4.2.2 Warning Settings..................................................................................78
4.2.3 Traffic Settings ....................................................................................79
4.2.4 Route Settings......................................................................................80
4.2.5 Map Settings.................................................................. ......................81
4.2.6 Visual Guidance settings .....................................................................83
5 Glossary.........................................................................84
6 End-User Terms ...........................................................86
3

1 Warnings and Safety information
The navigation system guides you to your destination using the GPS receiver. The
navigation system does not transmit your GPS position and you cannot be tracked.
It is important that you look at the display only when it is safe to do so. If you
are the driver of the vehicle, we recommend that you operate the navigation
system before you start your journey. Plan the route before your departure and
stop if you need to change the route.
Drive the vehicle according to the road signs and the road shape. If you deviate from
the recommended route, the navigation system changes the instructions accordingly.
For more information, consult the End-User Terms (page 86).
4

Memo
1
2
3
4
5
6
5
2 Getting started
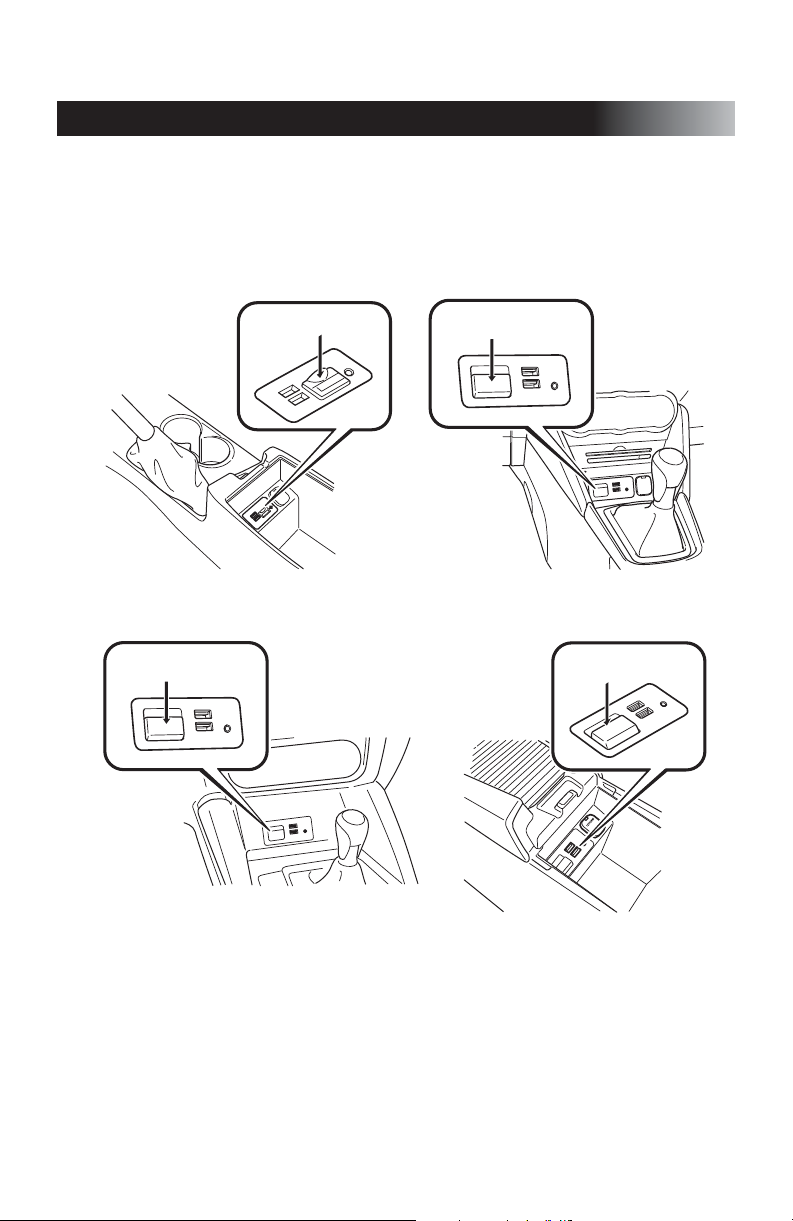
Type A
Type DType C
Type B
SD card slot
SD card slot
SD card slot
SD card slot
2.1 Before using the navigation system
To use the navigation system, the SD card containing the map information needs to
be inserted in the SD card slot.
6
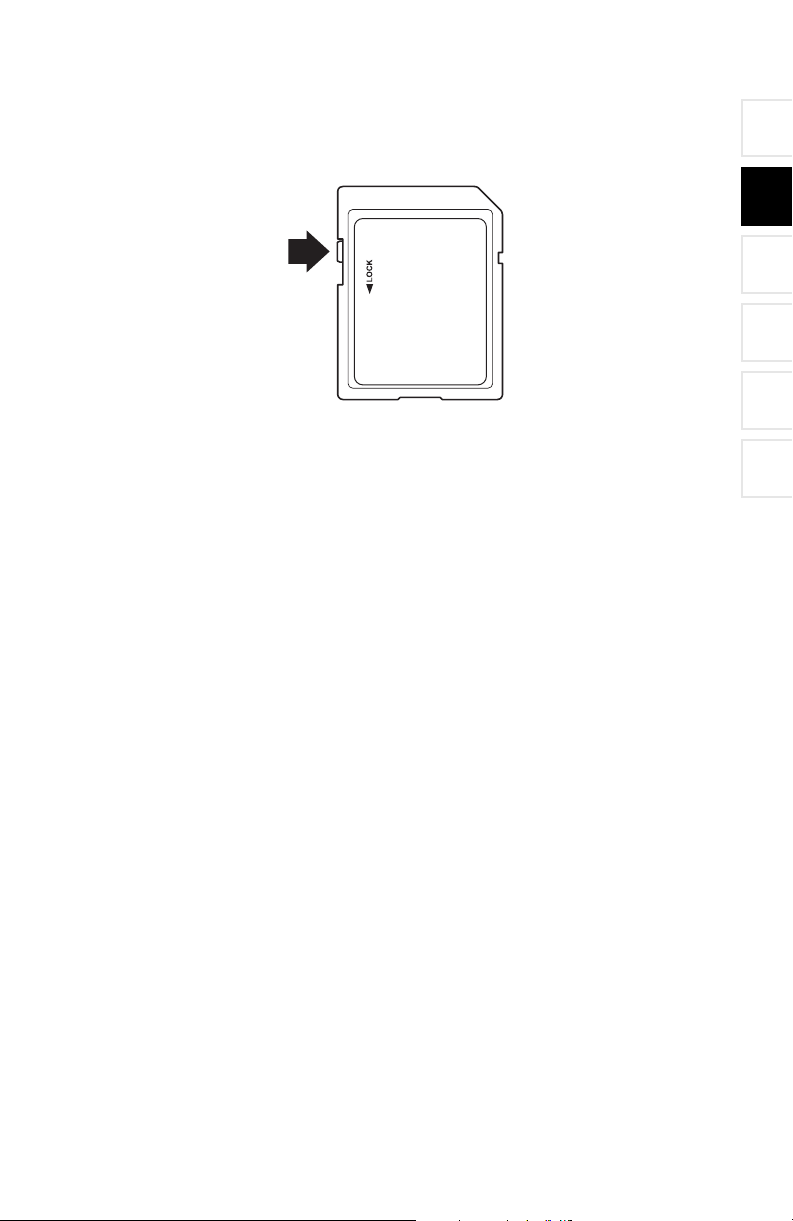
When inserting the SD card, never move the slider on the side of the SD card to the
LOCK position. If the slider is set to LOCK, the SD card cannot be read and the
navigation system will not operate.
1
2
3
4
This SD card is valid for use in only one vehicle. Never use it in another vehicle. If
the SD card is used first in one vehicle and then in another, the navigation system for
either one of the vehicles may become inoperable.
5
6
7
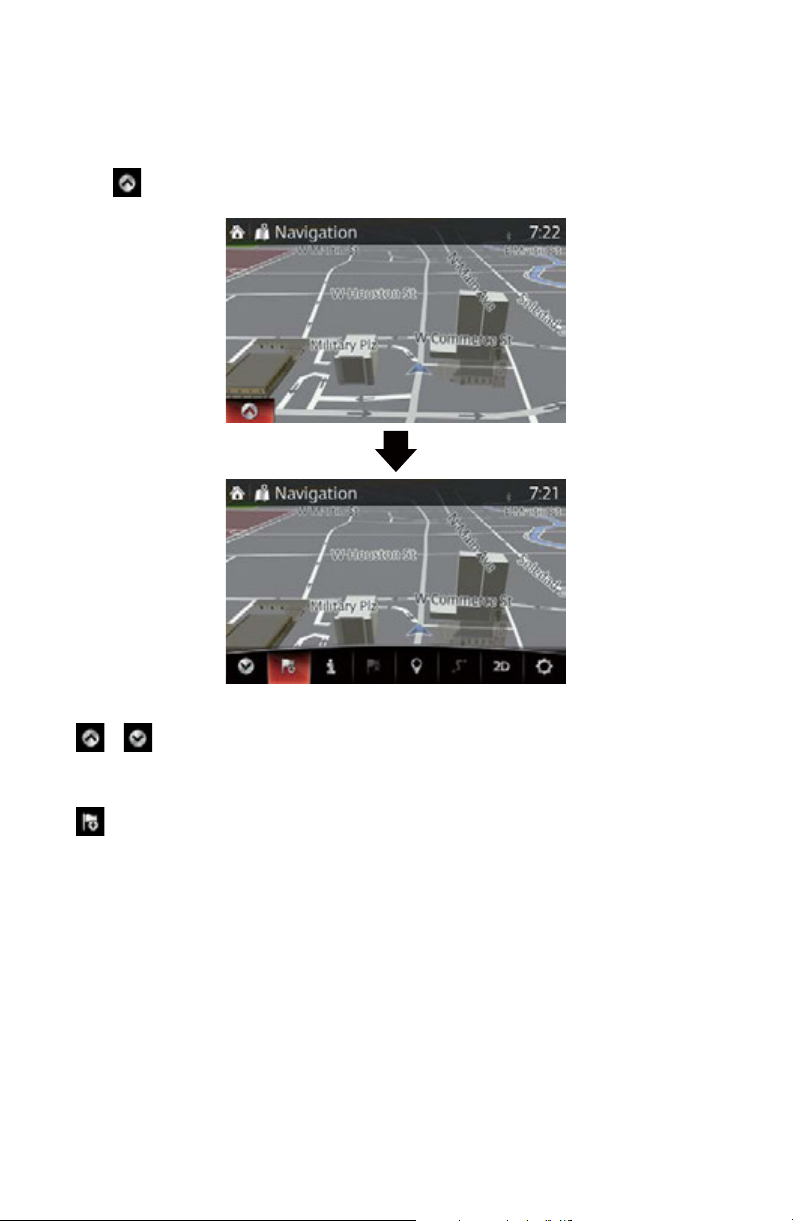
2.2 Navigation menu
You can reach all parts of the navigation system from the Navigation menu.
Select and open the navigation menu.
You have the following options:
• / : Open/close
Opens and closes the UMP (menu bar).
The UMP (menu bar) is displayed on the lower part of the screen.
• : Adds a destination.
Select your destination by entering an address or selecting a POI (point of interest),
a location on the map or one of your Favorite destinations. You can also look up
your recent destinations from the Smart History by entering the coordinates. If an
Internet connection is available, Local Search can be of further help to find your
destination.
8
• : Displays the screen where traffic information and the GPS reception
conditions can be set and verified.
• : Cancels waypoint/route
• : Finds Places nearby
You can search for points of interest (POI) near the vehicle position.
• : Displays the route parameters and the route in its full length on the map. You
can also perform route-related actions such as editing or canceling your route,
picking route alternatives, avoiding parts of the route, simulati ng navigation or
adding the destination to your Favorites.
• / / : Changes View mode
The map view mode can be changed (2D north up/2D heading up/3D).
• : Switches to the Settings screen where you change navigation settings.
Some functions are not available depending on some countries and regions.
1
2
3
4
5
6
9
2.3 Buttons and other controls on the screen
2.3.1 Using keyboa rds
You only need to enter letters or numbers when you cannot avoid it. You can type
with your fingertips on the full-screen keyboards and you can switch between
various keyboard layouts, for example English, Greek or numerical.
Task Instruction
Correcting your entry on
the keyboard
Entering a space, for
example between a first
name and a family name
or in multi-word street
names
Entering upper and lower
case letters
Finalizing the keyboard
entry
Canceling the keyboard
entry (returning to the
previous screen)
Select to remove the unneeded character(s).
Select and hold the button to delete several characters
or the entire input string.
Select the button at the
bottom center of the screen.
When entering a text, the first character appears in
upper case while the rest of the text is in lower case.
Select to enter an upper case letter or select twice
to turn on Caps Lock. Select again and lower case
letters return.
Select .
• Accepting the suggested search result
• Saving your input
Select .
• Opening the list of search results
Select .
10
2.3.2 Press and Hold
You usually need to select the screen only once, however, some useful features can
be accessed with combined touch screen selecting. Those are as follows:
Action Button(s) Details
Continue
pressing the
button.
,
,
,
Touching the button on the map screen once
changes the scale in one step. Continuously
touching the button changes the scale sequentially.
Touching the button on the map screen once
changes the point of view in one step.
Continuously touching the button changes the
point of view sequentially.
Touching the button on the map screen once
rotates the map. Continuously touching the button
rotates the map sequentially.
Touching the button on the keyboard screen once
erases one character. Continuously touching the
button erases several characters rapidly.
1
2
3
4
5
6
11
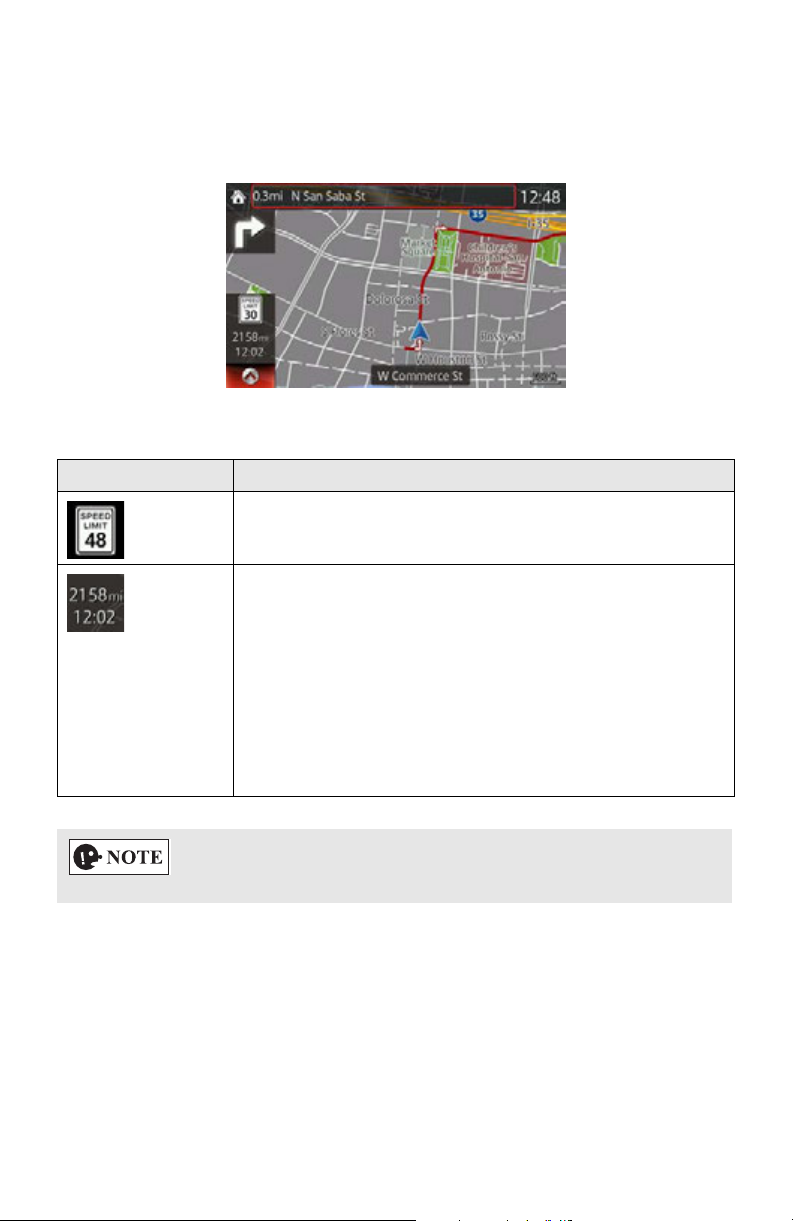
2.4 Map screen
2.4.1 Navigating on the map
The data fields are different when you are navigating an active route and when you
have no specified destination (the burgundy line is not displayed).
Field Description
Shows the speed limit of the current road if the map contains
it.
Shows the distance you need to travel on the route before
reaching your final destination.
Shows the estimated arrival time at the final destination of
the route.
If the navigation system is capable of receiving live traffic
information, the calculation takes into account traffic delays
affecting your route.
This estimation can be inaccurate at times.
Some functions are not available depending on some countries and regions.
12
2.4.2 Position markers
2.4.2.1 Selected map location (Cursor) and selected map object
1
You can mark a map location in the following ways:
• Select the map during route guidance.
• Select the map when asked so that the destination can be confirmed after the search
is completed.
• Select the destination from the map. (page 54)
When a map location is selected, the Cursor appears at the selected point on the map.
A symbol with a combined crosshair and red circle is displayed for easy
visibility of any map scale size.
The location of the Cursor can be used as the destination of the route.
You can search for a POI (point of interest), or you can save it as one of your
Favorites destinations.
You can also select some of the objects on the map. If you select the map at the icon
of a POI (point of interest) or a traffic event, the object will be selected. You can then
get information about this object or use it as a route point.
Some functions are not available depending on some countries and regions.
2.4.3 Objects on the map
2.4.3.1 Streets and roads
2
3
4
5
6
The navigation system shows the roads in different widths and colors so that they can
be easily identified. A highway/freeway will be thicker and a different color than a
small street.
13
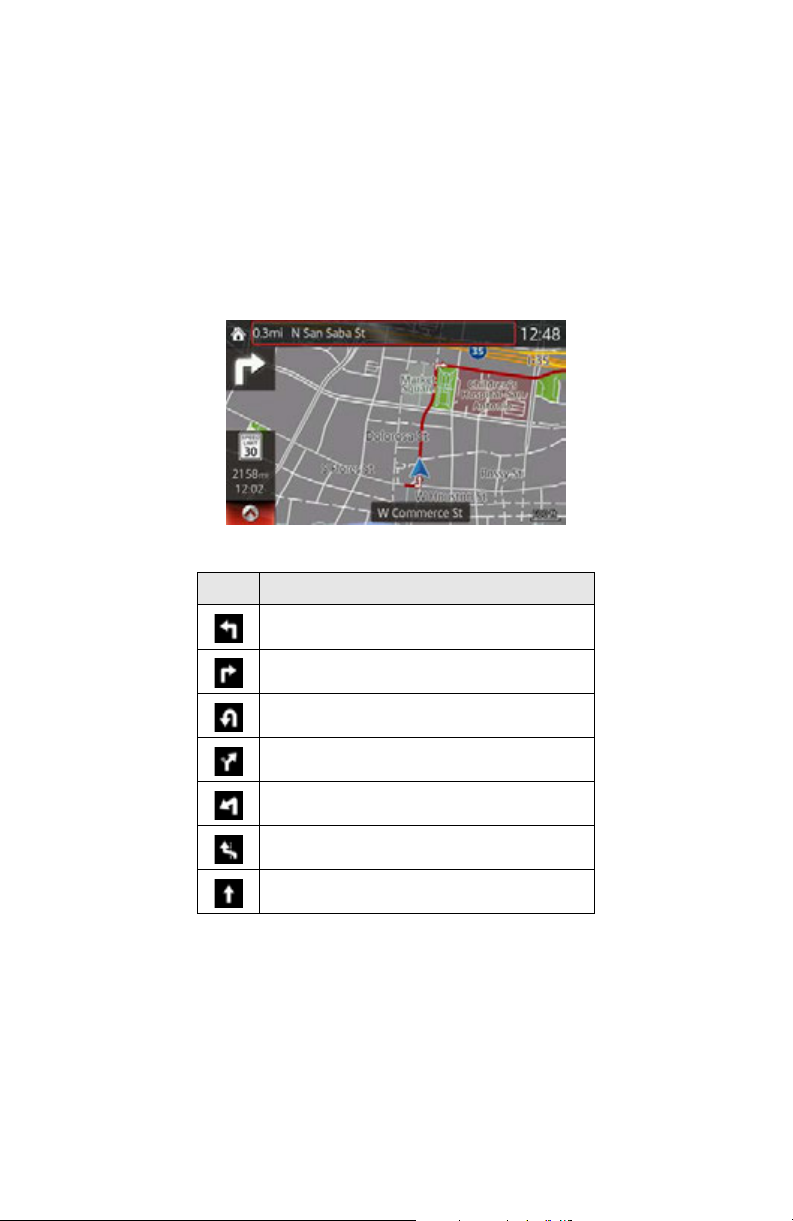
2.4.3.2 Turn preview and Next street
When navigating a route, the top section of the Map screen shows information about
the next maneuver, street or city.
There is an area at the top left part of screen which indicates the next operation.
Displays both the event type (such as turning, detouring, exiting expressways) and
the distance from the current position.
When the next event approaches, the second event is displayed using a small icon. If
there is no second event, only the next event is displayed.
Most of these icons are very intuitive. The same symbols are used in both fields:
Icon Description
Turn left.
Turn right.
Turn back.
Bear right.
Turn sharp left.
Keep left.
Continue straight in the intersection.
14
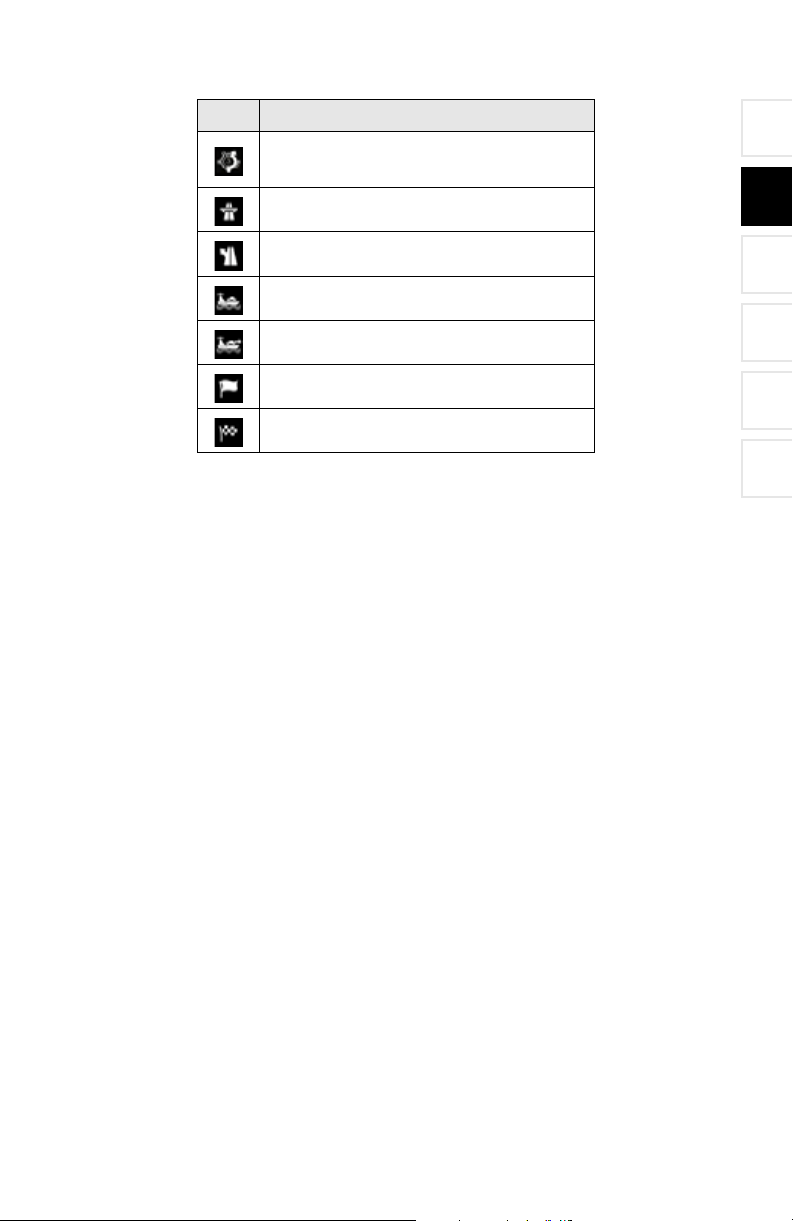
Icon Description
Go right on the roundabout, 3rd exit
(next maneuver).
Enter highway/freeway.
1
2
Exit highway/freeway.
Board ferry.
Leave ferry.
Approaching a waypoint.
Approaching the destination.
3
4
5
6
15
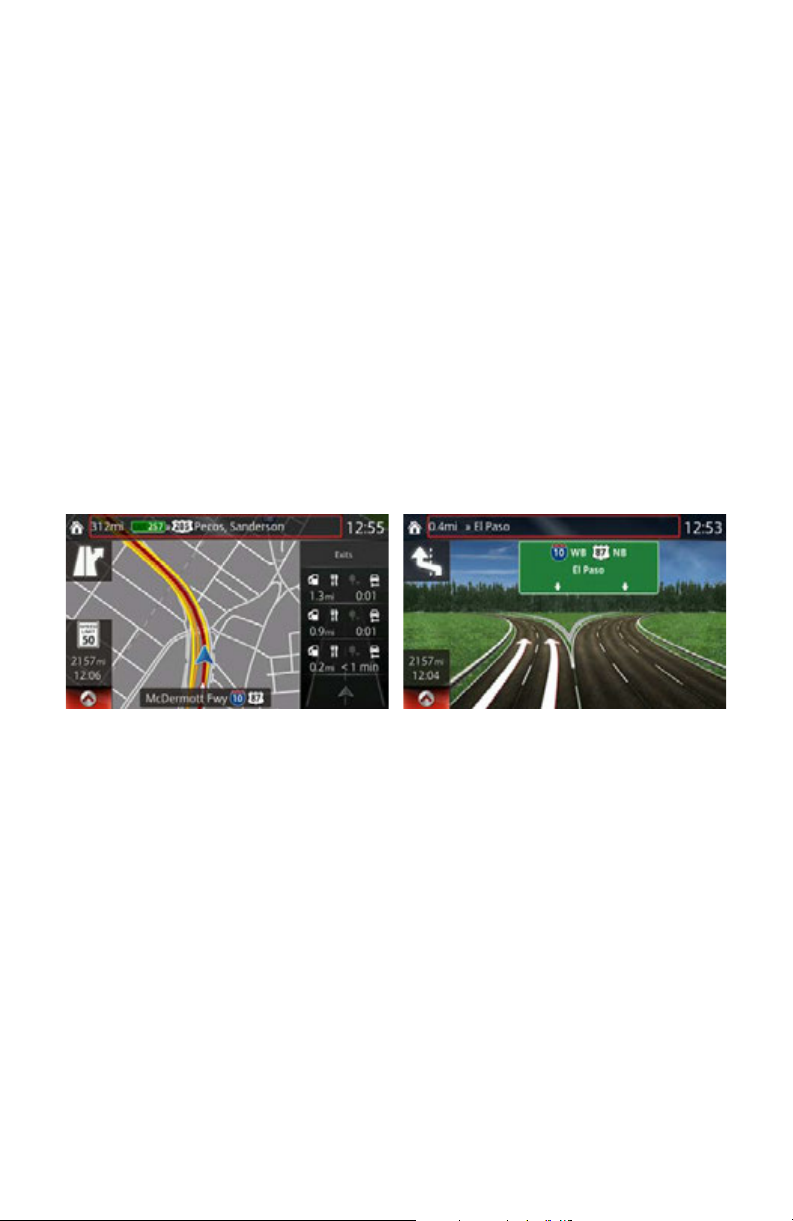
2.4.3.3 Lane information and Signposts
When navigating on multilane roads, it is important to take the appropriate lane in
order to follow the recommended route. If lane information is available in the map
data, the navigation system displays the lanes and their directions using small arrows
at the bottom of the map. Highlighted arrows represent the lanes and direction you
need to take.
Lane guidance is provided constantly if there is map information. Signposts are
displayed at the top of the map. The color and style of the signposts are similar to the
real ones you see above road or by the roadside. They show the available
destinations and the number of the road the lane leads to.
When navigating a route, only the signpost that points to the lane(s) to be taken is
displayed in bright colors; all others are darker. All signposts and lane guidance
arrows are displayed in vivid colors while driving (when there is no recommended
route).
If you want to hide the currently displayed signposts, touch anywhere and the normal
Map screen returns until new signpost information is received.
16
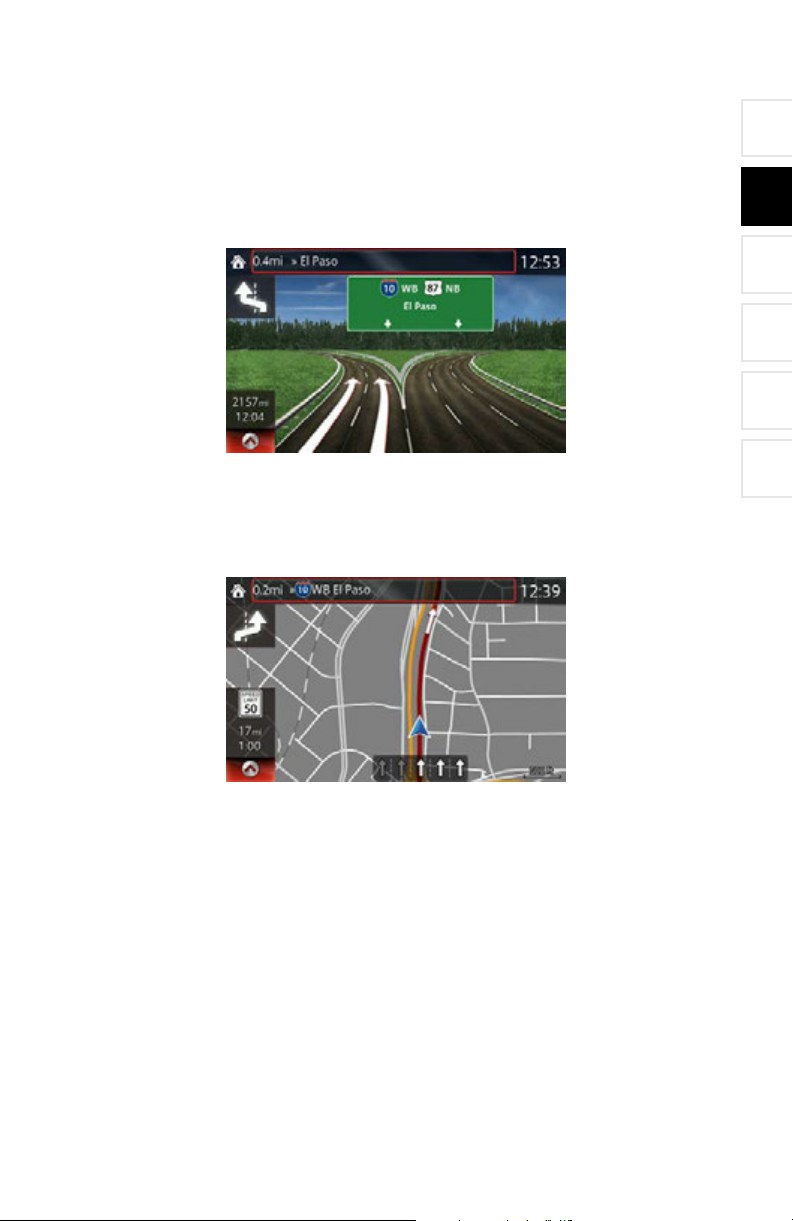
2.4.3.4 Junction view
If you are approaching a highway/freeway exit or a complex intersection and the
needed information exists, the map is replaced with a 3D view of the junction. The
optimum driving lane is indicated by an arrow, and road signs are displayed as
additional information at the top of the screen.
1
2
3
4
5
2.4.3.5 Highway/Freeway exit services
You may need a gasoline station or a restaurant during your journey. This feature
displays a new button on the map when you are driving on highways/freeways.
6
17
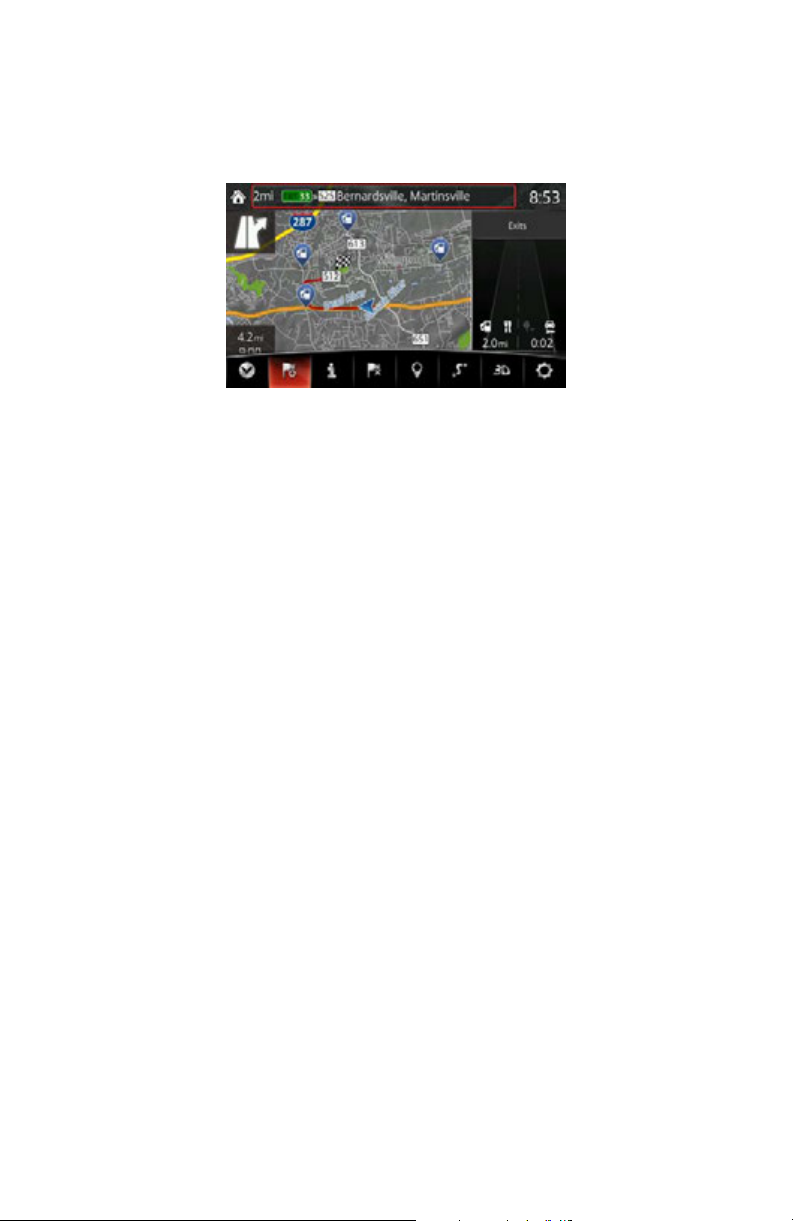
Select this Open button to open a panel with the details of the next few exits or
service stations.
Applicable only when the setting is “Only when menu is open”.
Select any of them to display the exit area on the map. You can now easily add this
exit as a waypoint to your route if needed.
There are two types of settings for displaying the next expressway exit; one which
constantly displays the next expressway exit while traveling on an expressway, or the
other which displays the next expressway exit only when the menu panel is open.
You can change the settings in Visual Guidance settings (page 83).
18
2.4.3.6 Elements of the active route
The navigation system shows the route in the following way:
1
Symbol Name Description
Current car position
marker
Waypoint
(intermediate
destination)
Destination (end
point)
Route color The route always stands out with its color on
Streets and roads that
are excluded from the
navigation
Streets and roads that
are affected by traffic
events
If there is a road close by, a blue-colored arrow
symbol moves to the road which is the closest.
The red mark present around a blue-colored
arrow symbol indicates the correct GPS
information. It may be indicated away from the
road because there is no existing road
information.
An intermediate destination of the route before
reaching the final destination.
The final destination of the route.
the map, both in daytime and in nighttime
mode.
You can choose whether you want to use or
avoid certain road types (page 80). However,
when the navigation system cannot avoid such
roads, the route will include them and it will
show them in a color that is different from the
route color.
Road segments may be affected by traffic
events received. These streets and roads are
displayed in an alternate color, and small
symbols displayed along the route show the
type of traffic event.
2
3
4
5
6
Some functions are not available depending on some countries and regions.
19

2.4.4 Manipulating the map
By touching and dragging any part of the map screen, it can be moved to a location
close to the currently displayed map.
In addition, the map operation button is displayed, and by touching each of the
buttons, you can zoom in and out of maps, change the map perspective and select a
destination.
Action Button(s) Description
Map movement
using touch and
drag
Zooming in
and out
No buttons You can move the map in any direction: select and
hold the map, and move your finger towards the
direction you want to move the map.
,
Changes how much of the map is displayed on the
screen.
The navigation system uses high-quality vector
maps that let you examine the map at various
zoom levels, always with optimized content.
Map scaling has a limit in 3D map view mode. If
you zoom out further, the map switches to 2D view
mode.
Select the button once to modify the view in large
steps, or select and hold the button to modify it
continuously and smoothly.
20
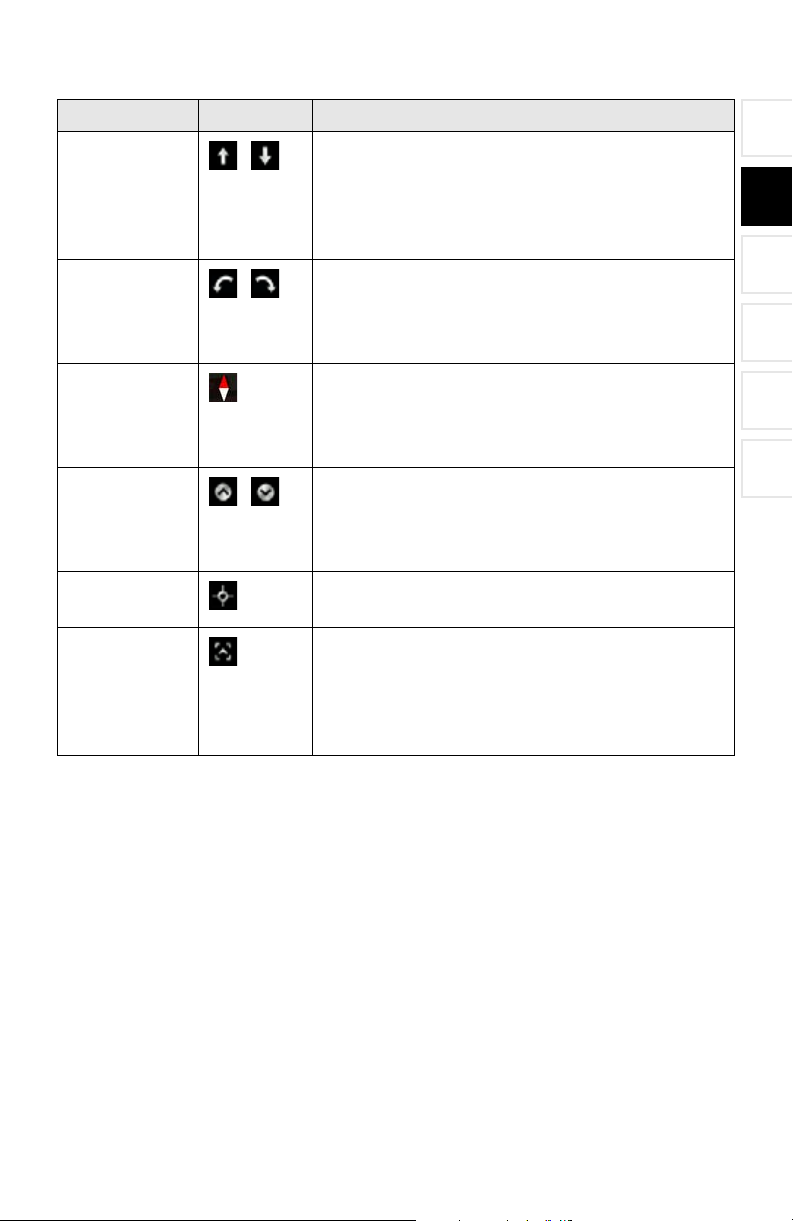
Action Button(s) Description
Tilting up and
down
Rotating left
and right
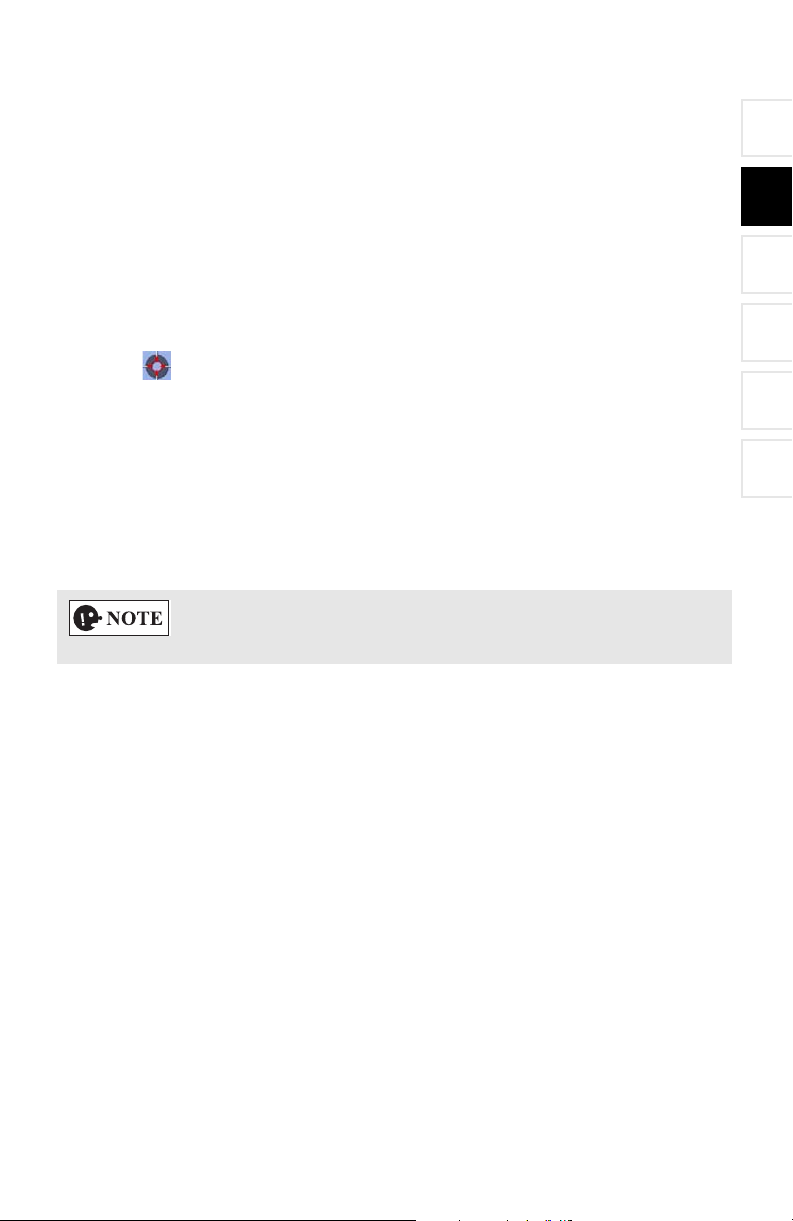
Compass The direction of the compass shows North. Select
Open/close
Select
destination
Return to
normal
navigation
,
,
,
Changes the vertical view angle of the map in 3D
mode.
Select the button once to modify the view in large
steps, or select and hold the button to modify it
continuously and smoothly.
Changes the horizontal view angle of the map.
Select the button once to modify the view in large
steps, or select and hold the button to modify it
continuously and smoothly.
the button to switch to North-up view, and then
select again to rotate the map in the previous
direction.
The UMP (menu bar) is displayed on the lower
part of the screen.
Hides the displayed UMP if the UMP has been
displayed.
Select this button to select the Cursor as a new
destination. The route is automatically calculated.
Select this button to move the map back to follow
the current GPS position. Automatic map rotation
is also re-enabled.
The map manipulation buttons disappear and
navigation continues.
1
2
3
4
5
6
21
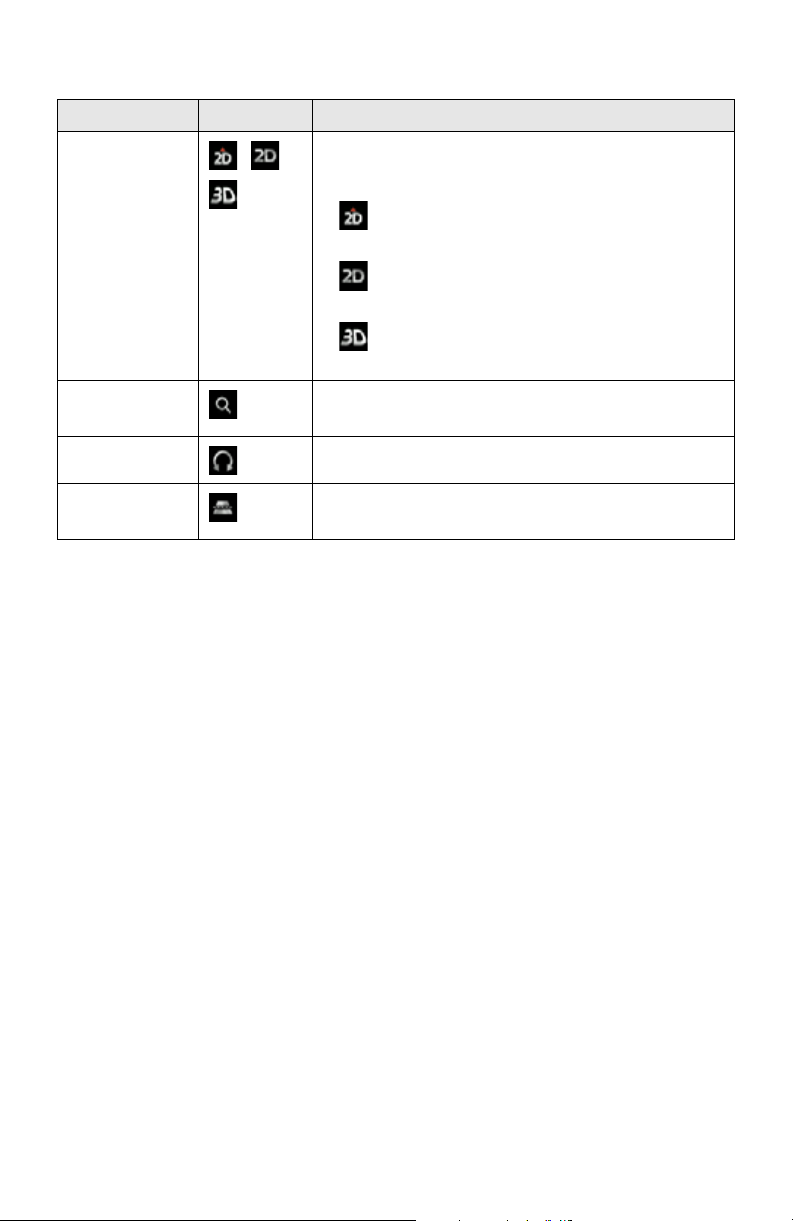
Action Button(s) Description
2D or 3D view
Zoom-in/
zoom-out mode
Rotate mode Rotates maps.
, ,
When this button is selected, the map view mode
can be changed.
• : The map is displayed so that north is up
regardless of the direction of travel.
• : The map is rotated so that the direction of
travel is displayed in the upward direction.
• : Displays things such as actual construction
sites three dimensionally on the map.
You can zoom-in/zoom-out of maps.
Perspective
angle mode
You can change the angle of perspective on a map.
22
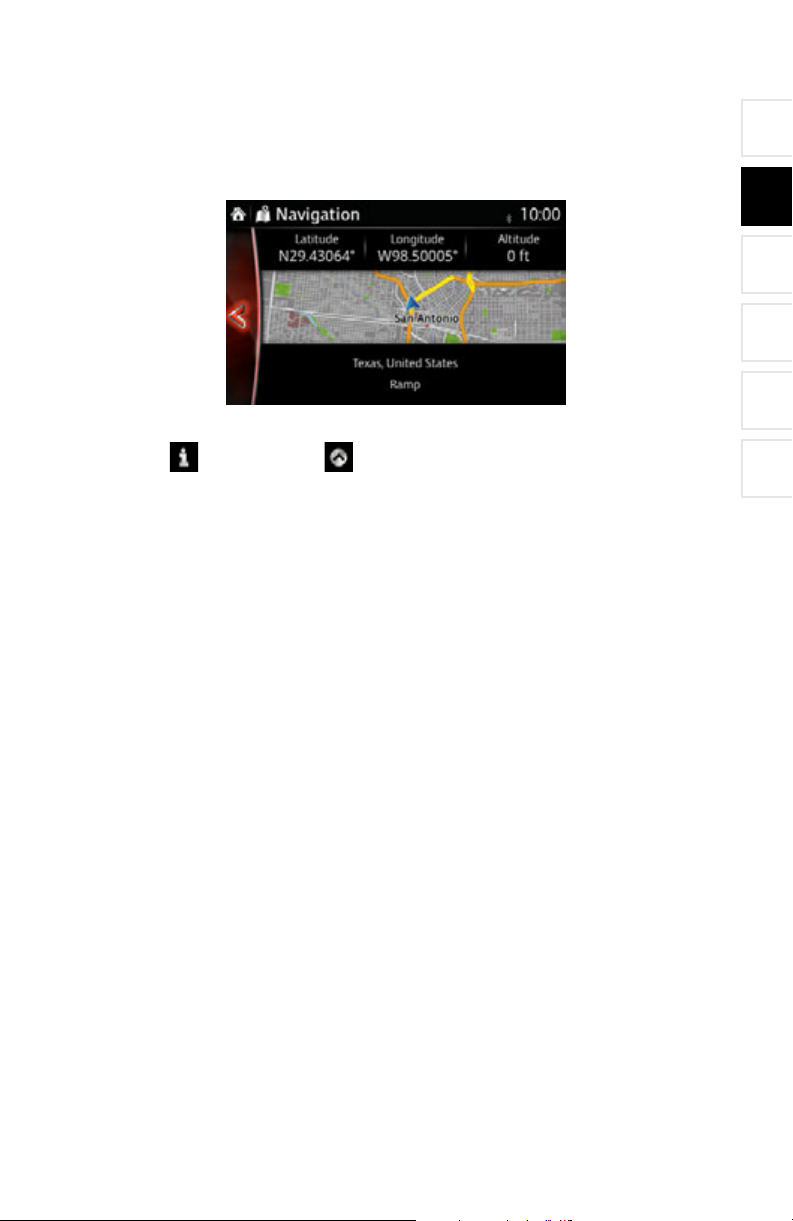
2.4.5 Checking the details of the current position (Where Am I?)
This screen contains information about the current position (or about the last known
position if GPS reception is not available).
You can access this screen from the map in one of the following ways:
1. Select after selecting on the MAP screen.
2. Select the Where Am I? screen.
1
2
3
4
5
6
23

3 On-road navigation
You can set up your route in different ways:
If you need a route for immediate navigation, you can select the destination and start
navigating to it right away (normal navigation).
You can plan routes with multiple destinations. Select the first destination. Then
select a second destination and add it to your route to create a multi-point route. You
can add as many destinations to your route as you like.
3.1 Selecting the destination of a route
The navigation system offers you several ways of choosing your destination:
• Enter a full address or a part of an address (page 25).
• Select a POI (point of interest) from a database as your destination (page 38).
• Searches the destination from the map (page 54).
• Use a previously saved Favorite destination (page 56).
• Select a location from the History of previously used destinations (page 58).
• Enter the coordinate of the destination (page 60).
There are other convenient functions.
24
3.1.1 Entering an address or a part of the address
If you know at least a part of the address, it is the quickest way to select the
destination of the route.
Using the same screen, you can find an address by entering:
• Destination address
• The center of a city
• An intersection
• The midpoint of a street
1
2
3
4
If an address or part of a facility name is input, a search candidate list including the
input characters is displayed. The greater the number of characters input the more
the list is refined.
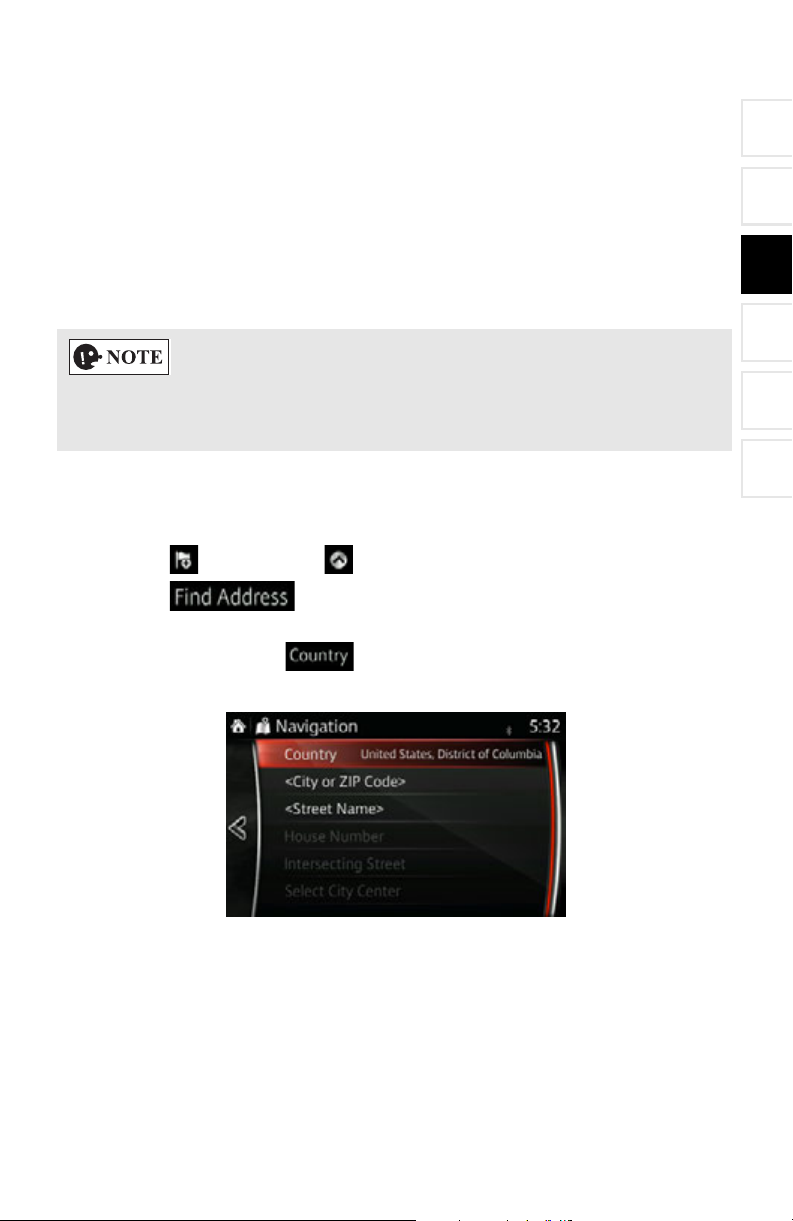
3.1.1.1 Entering an address
To enter an address as the destination, do as follows:
1. Select after selecting on the MAP screen.
2. Select .
3. By default, the navigation system proposes the country and city where you
are. If needed, select , enter the first few letters of the country name
on the keyboard, and select one country from the list of results.
5
6
25

4. If needed, select a new city:
a. Select .
b. Start entering the name of the city on the keyboard.
c. Find the city you need:
• The most likely city name is always shown in the input field. To accept
it, select .
• If the desired name does not show up, the names that match the string
appear in a list after entering a couple of characters (to open the list of
results before it appears automatically, select ). Select the city from
the list.
26
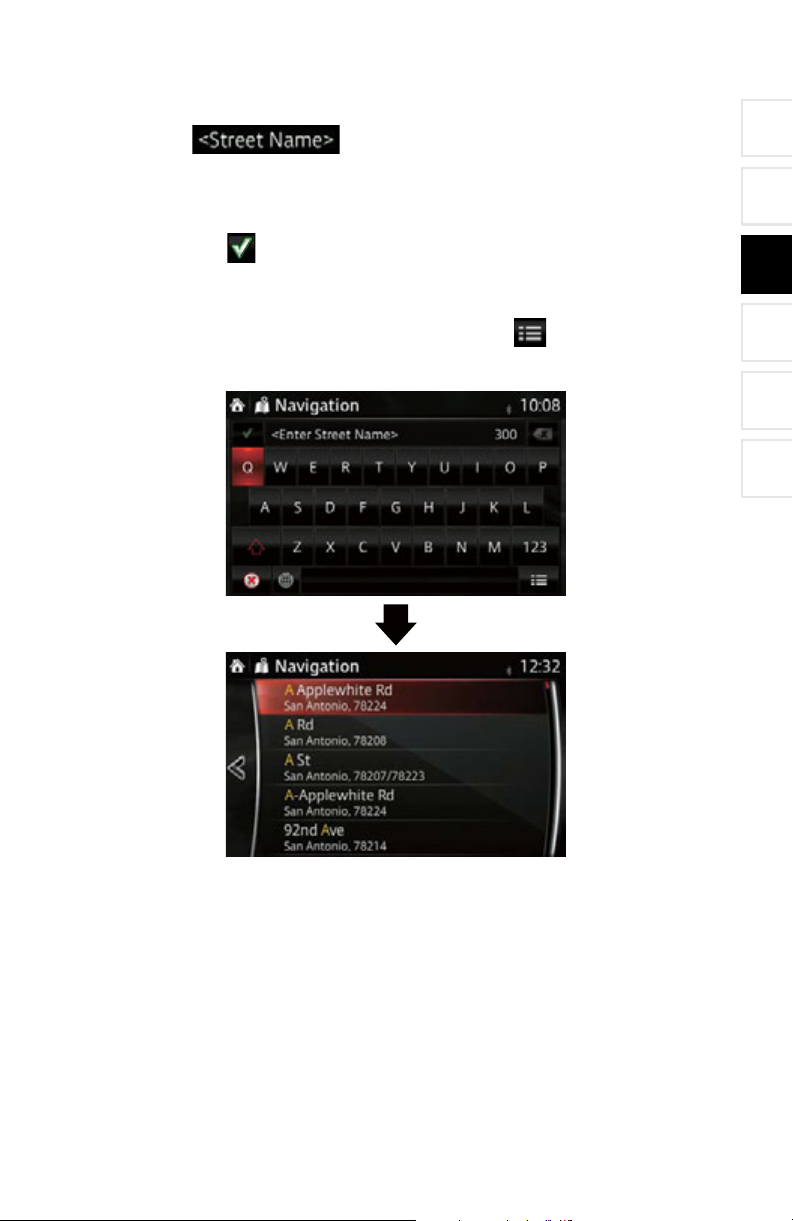
5. Enter the street name:
a. Select .
b. Start entering the street name on the keyboard.
c. Find the street you need:
• The most likely street name is always shown in the input field. To accept
it, select .
• If the desired name does not show up, the names that match the string
appear in a list after entering a couple of characters (to open the list of
results before it appears automatically, select ). Select the street from
the list.
1
2
3
4
5
6
27
 Loading...