

Page 1

WIRELESS CONTROLLER
OPERATION MANUAL
ENGLISH
For general public use
RB-RXS33-E
1112150138
Page 2

EN CONTENTS
1. PREPARATION BEFORE USE .................................................................................................................................................1
2. REMOTE CONTROL .................................................................................................................................................................1
3. AUTOMATIC / COOLING (DRY) / HEATING / FAN ONLY OPERATION ..................................................................................1
4. Hi POWER OPERATION ...........................................................................................................................................................1
5. ECO OPERATION .....................................................................................................................................................................1
6. TIMER OPERATION ..................................................................................................................................................................1
7. PRESET OPERATION ..............................................................................................................................................................2
8. FIREPLACE AND 8°C HEATING OPERATION .........................................................................................................................2
9. COMFORT SLEEP OPERATION ..............................................................................................................................................2
10. FILTER RESET ..........................................................................................................................................................................2
11. HADA CARE FLOW OPERATION .............................................................................................................................................2
12. DISPLAY LAMP BRIGHTNESS ADJUSTMENT ........................................................................................................................2
13. REMOTE CONTROL A-B SELECTION .....................................................................................................................................3
14. POWER-SELECTION AND SILENT OPERATION (OUTDOOR UNIT).....................................................................................3
15. WEEKLY TIMER OPERATION ..................................................................................................................................................3
Page 3
PREPARATION BEFORE USE1
Preparing Filters
1. Open the air inlet grille and
remove the air filters.
2. Attach the attachment filters
(see detail in the accessory
sheet).
Loading Batteries
1. Remove the battery cover.
2. Insert 2 new alkaline batteries
(AAA type) following the (+)
and (–) positions.
Removing the batteries
1. Remove the cover, and take out the batteries.
2. Reattach the cover.
• Please dispose of the batteries according to
the local regulation.
Pull the cover
away firmly.
Clock Setup
1. Push
2. Press
3. Press
Remote Control Reset
1. Remove the batteries.
2. Press .
3. Insert the batteries.
Remote Control Caring
1. Clean the remote control with a wet cloth when needed.
2. No benzine, thinner, polishing powder or chemically-
by tip of the pencil.
If timer indication is flashing, go to
the next step 2.
or : adjust the time.
: Set the time.
treated duster.
Insert direction of
(+) and (-) correctly
REMOTE CONTROL2
Infrared signal emitter
1
Memory and Preset button (PRESET)
2
Start/Stop button
3
Mode select button (MODE)
4
Air flow/HADA CARE FLOW button
5
Fireplace/8°C button
6
ECO button
7
Comfort sleep button (COMFORT SLEEP)
8
Weekly timer (ON/OFF)
9
Temp for Weekly timer
!
On timer button (ON)
"
Set clock button (CLOCK)
#
Check button (CHECK)
$
Filter reset button (FILTER)
%
Temperature button (TEMP)
&
Swing louver button (SWING)
(
Fan speed button (FAN)
)
Set louver button (FIX)
~
High power button (Hi POWER)
+
Power selection/Silent button (P-SEL/SILENT)
,
Program P1 - P4
-
Day/Edit button
.
Setup button (SET)
/
Off timer button (OFF)
:
Clear button (CLR)
;
Reset button (RESET)
<
Note:
• The provided Remote Controller is a wireless type, which
also can be used as a wire. Please see “How to Connect
The Remote Controller for Wired Operation”, located in
installation instruction, in case of wired control is required.
• In wire operation, remote controller will return to initial
condition (PRESET, TIMER and CLOCK will return to initial
condition) when user shutdown power supply of
Air conditioner.
1
2
3
4
5
6
7
8
9
!
"
#
$
%
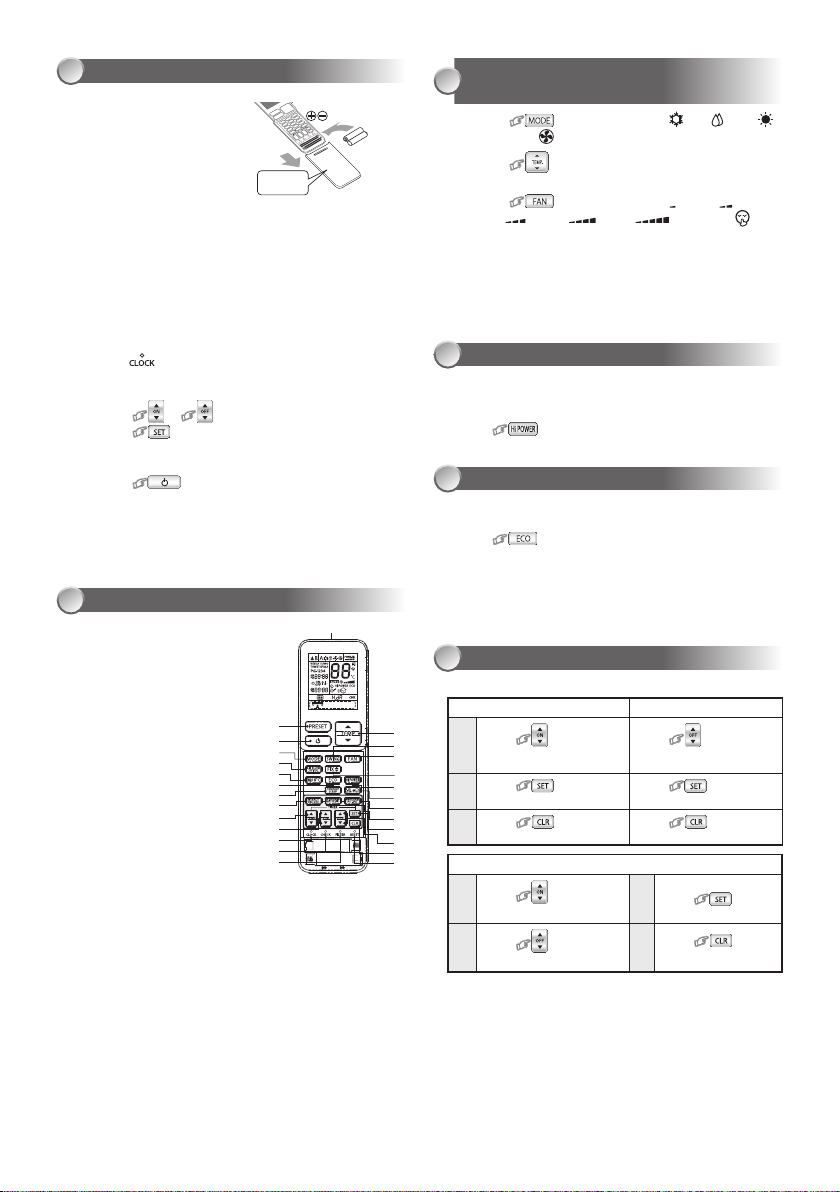
AUTOMATIC / COOLING (DRY) /
3
HEATING / FAN ONLY OPERATION
1. Press
: Select Auto A, Cool , Dry , Heat ,
or Fan only .
2. Press : Set the desired temperature.
Min. 17°C, Max. 30°C.
3. Press
MED
w AUTOM ATIC OPER ATION : Choos e cooling or heating
operation automatically.
w In DRY O PERATIO N mode, it ca n not select air volum e.
w In FAN ON LY OPERATION mode, it does not show
setting temperature.
4
Hi POWER OPERATION
To automatically control room temperature and airflow for
faster Auto, cooling or heating operation (except in DRY
mode).
Press
: Select AUTO, LOW , LOW+ ,
, MED+ , HIGH and QUIET .
: Start and stop the operation.
ECO OPERATION5
To automatically control room temperature to save energy
(except in DRY mode).
Press : Start and stop the operation.
Note: Cooling operation; the internal set temperature will
increase automatically 1 degree by 2 hours (maximum
2 degrees increase). For heating operation the internal
set temperature will decrease.
TIMER OPERATION6
Set the timer when the air conditioner is operating.
Setting the ON Timer Setting the OFF Timer
&
(
)
~
+
,
.
/
:
;
<
1
Press : Set the
1
Press : Set the
2
Press : Cancel
3
desired
ON timer.
timer.
the timer.
Setting the ON-OFF Timer
Press : Set the ON
1
Press : Set the
2
Note:
• Keep the remote control in accessible transmission to the
indoor unit; otherwise, the time lag of up to 15 minutes
will occur.
• The setting will be saved for the next same operation.
timer.
OFF timer.
Press : Set the
Press
Press : Cancel
3
Press .
Press :
4
Cancel the timer.
desired
OFF timer.
: Set the
timer.
the timer.
Page 4

PRESET OPERATION7
Set your preferred operation for future use. The setting will
be memorized by the unit for future operation (except airflow
direction).
1. Select your preferred operation.
2. Press and hold
mark displays.
3. Press
FIREPLACE AND 8°C HEATING OPERATION
8
Fireplace Operation ( )
Keep indoor unit’s fan blowing continuously during thermo off,
to circulate heat from other sources over the room.
There are three setting parameters:
Default setting > Fireplace 1 > Fireplace 2
Fireplace 1:
During thermo off period, the indoor unit’s fan will continue to
run by the same speed, previously selected by end-user.
Fireplace 2:
During thermo off period, the indoor unit’s fan will continue to
run at super-low speed, programmed from factory.
8°C Heating Operation (8°C)
Heat mode operation for keep room temperature (5-13°C) with
less of energy usage.
Fireplace and 8°C Heating Operation
FIREPLACE 1
until stop blinking and the P
: Operate the preset operation.
FIREPLACE 2
8°C
HADA CARE FLOW OPERATION11
HADA CARE FLOW
Air flow upward to the ceiling, provide Indirect air flow to body
and homogenize room temperture.
HADA CARE FLOW operation
Press
Note:
12
To decrease the display lamp brightness or turn it off.
For start and stop HADA CARE FLOW
Cancel
HADA CARE FLOW
HADA CARE FLOW
• During HADA CARE FLOW mode, FIX and SWING
button cannot active
DISPLAY LAMP BRIGHTNESS ADJUSTMENT
1. Press and hold
2. Press
control LCD
, , or ) is shown on remote control LCD
level (
then release the button.
in 4 levels.
Remote
)$1
for 3 seconds until brightness
Rise
or
Decrease
Operation display Brightness
to adjust brightness
Normal
Note:
• While Fireplace operation on heating mode, indoor unit
fan always runs and cold air breezing might be occurred.
• Fireplace and 8°C will operate in Heating mode only.
operation
COMFORT SLEEP OPERATION9
For comfortable sleep, automatically control air flow and
automatically turn OFF (Except in DRY mode and Fan only
mode).
1. Press
operation.
2. Press
Note: The cooling operation, the set temperature will increase
automatically 1 degree/hour for 2 hours (maximum
2 degrees increase). For heating operation, the set
temperature will decrease.
: Select 1, 3, 5 or 9 hrs for OFF timer
to cancel the comfort sleep operation.
FILTER RESET10
Firstly, turn off the circuit breaker.
FILTER lamp lights on; the filter must be cleaned.
To turn off the lamp, press RESET button on the indoor unit
for Hi-wall or ON/OFF button for Bi-flow console, also can
push the FILTER button on the remote control in another way.
(Please follow the instructions in the air conditioner owner’s
manual.)
Lamp illuminates full brightness.
Lamp illuminates 50%
brightness.
Lamp illuminates 50%
brightness and the operation
lamp is turned off.
All lamps are turned off.
• In the examples of and , the lamp illuminates for 5
seconds before going off.
2
100%
50%
50%
All turned
off
Page 5

REMOTE CONTROL A-B SELECTION13
A
To separate using of remote control for each indoor unit in
case of 2 air conditioners are installed nearly.
Remote Control B Setup.
1. Press RESET button on the indoor unit to turn the air
conditioner ON for Hi-wall type or press and hold MODE
button on the indoor unit more than 20 seconds for
Bi-flow console type. (Please follow the instructions in the
air conditioner owner’s manual.)
2. Point the remote control at the air conditioner.
3. Push and hold
the tip of the pencil. “00” will be shown on the display.
(Picture 1)
4. Press
display and “00” will disappear and the air conditioner will
turn OFF. The Remote Control B is memorized.
(Picture 2)
Note: 1. Repeat above step to reset Remote Control to be A.
2. Remote Control A has not “A” display.
3. Default setting of Remote Control from factory is A.
POWER-SELECTION AND SILENT
14
OPERATION (OUTDOOR UNIT)
Power-Selection ( )
This function is used when the circuit breaker is shared with
other electrical appliances. It limits the maximum current
and power consumption to 100%, 75%, or 50% and can be
implemented by POWER-SELECTION. The lower percentage,
the higher saving and also longer compressor lifetime.
Note:
• When the level is selected, POWER-SEL level flashes on
remote LCD display for 3 seconds.
In case of 75% and 50% level, number “75” or “50” also
flashes for 2 seconds.
• Due to the reason that POWER-SELECTION function
limits the maximum current, inadequate cooling or
heating capacity may occur.
Silent Operation (
Keep outdoor unit operating silently to ensure either yourself
or neighborhood will have a tight sleep in nighttime. By this
feature, the heating capacity will be optimized to deliver such
silent experience. The silent operation can be selected from
one of two purposes (Silent 1 and Silent 2).
There are three setting parameters: Standard level > Silent 1
> Silent 2
Silent 1:
Though operating silently, the Heating (or Cooling) capacity
is still prioritized to ensure having sufficient comfort inside the
room.
This setting is a perfect balance between the Heating
(or Cooling) capacity and the Sound level of outdoor unit.
Silent 2:
Compromising the Heating (or Cooling) capacity to the Sound
level in any circumstance where the outdoor unit’s sound level
is highly prioritized.
This setting has a purpose to reduce the maximum sound level
of outdoor unit by 4 dB(A).
button on the Remote Control by
during pushing . “B” will show on the
1
2
)
Note:
• While activating of Silent operation, inadequate heating
(or cooling) capacity may occur.
Power-Selection and Silent Operation (Outdoor Unit)
[100%] [75%] [50%]
SILENT#2
SILENT#1
WEEKLY TIMER OPERATION15
How to set WEEKLY TIMER
1. Press to enter WEEKLY TIMER
setting.
Blink
2. Press to select desired day in
sequence.
The sequence of day symbol appears on the
LCD.
SU t MO t TU t WE t TH t FR t S
WEEKLY SUMO
TUWETHFRSA
(All day)
3. Press to select the program number.
• The program 1 is ready for setting while
is pressed PG-1 appears on the
LCD.
• Press to change the program
number in the sequence program 1 to
program 4.
PG-1
PG- 2
PG- 3
4. Press or to select the desired
time.
• The time can be set between 0:00 and 23:50
in 10 minute intervals.
• Press and hold the button to change setting
time for 1 hr.
• Only one of ON or OFF timer can be set on
each program.
ON timer display OFF timer display*
* OFF timer is used to stop the air conditioner
only. The display does not show Operation
mode, Temperature, Fan speed and others.
PG- 4
3
Page 6

5. Press to select desired operation.
6. Press or to select desired temperature.
• The temperature can be set between 17°C and 30°C.
7. Press
to select the desired fan speed.
8. Add operations, if required.
• Press
(Notes: Fireplace cannot select and memorize in weekly
function)
• Press
• Press
• Press to use Silent operation.
9. Adding or editing the program.
The program can be set to perform on all the required days
until
editing a program is required, please repeat steps 2 - 8 before
setting confirmation.
10. After adding or editing, press
to use 8°C operation.
to use ECO operation.
to use Hi POWER operation.
is pressed to confirm the setting 10. If adding or
to confirm the setting*.
Operating Mode
Weekly timer running
Next program
Timer ON or OFF
Display after
pressing SET button
Edit Weekly timer program
To edit the program after confirming the weekly
timer setting, follow steps 1 - 3 below.
1. Press
• The day of the week and the program
number of the current day will be displayed.
2. Press
and press
to be confirmed.
.
to select the day of the week
to select program number
• Resetting the operation.
3. Press
to exit confirming mode.
Deactivating WEEKLY TIMER operation
Press while “WEEKLY” is displayed on
the LCD.
• The “WEEKLY” indicator will disappear from
the LCD. However, the program will remain in
the remote control.
• The TIMER lamp goes off.
• To reactivate the WEEKLY TIMER operation
again, press
next program. The program, after reactivation,
is related to the clock time.
again, LCD shows the
* Point remote control at air conditioner receiving module then,
press SET button until you hear the “PiPi” sound. This means
the setting operation has been completed. As the air conditioner
is receiving the signal, you will hear separate “Pi” sounds
corresponding to the number of days in the selected setting.
An incomplete setting is indicated if the TIMER lamp is blinking.
Press twice.
Next operation time
Operating Temperature and
Fan speed
Notes:
1. Place the remote control where the indoor unit can receive the
signal. This will increase the accuracy of the timing between
the remote control and the air conditioning unit.
2. The ON/OFF timer can be set during the WEEKLY TIMER
operation. In this situation, the air conditioner will first follow
the normal timer until it is complete; then, it will return to the
WEEKLY TIMER function.
3. During WEEKLY TIMER operation, all of operation such
as MODE, TEMP, FAN, Hi POWER, ECO and etc., can be
adjusted but when the clock reaches the program setting, the
operation will return to the set items in the program.
4. When the remote control is sending a signal to the air
conditioner, avoid interference from objects that can block the
signal.
To delete programs
The individual program
1. Press .
• The day of the week and the program
number is displayed.
• Select the day to delete the program.
2. Press
be deleted.
3. Press
• ON or OFF timer will be cleared and the
LCD will blink.
4. Press
• Press
The program has now been deleted.
to select the program number to
.
to delete the program.
while the LCD is blinking.
All programs
1. Press
• The day of the week and the program
number will be displayed.
2. Press
• All programs will be deleted and LCD
displays current operation.
Notes :
Make sure the remote control receiving module
on the air conditioner receives the signal from the
remote control.
.
and hold for 3 seconds.
4
Page 7

Information according to EMC Directive 2004/108/EC
(Name of the manufacturer) TOSHIBA CARRIER (THAILAND) CO., LTD.
(Address, city, country) 144/9 MOO 5, BANGKADI INDUSTRIAL PARK,
TIVANON ROAD, TAMBOL BANGKADI, AMPHUR
MUANG, PATHUMTHANI 12000, THAILAND.
(Name of the Importer / Distributor in EU) TOSHIBA CARRIER UK LTD.
(Address, city, country) Porsham Close, Belliver Industrial Estate, PLYMOUTH,
Devon, PL6 7DB. United Kingdom
 Loading...