

Toshiba IP4100 SIP DECT, IP4100 User Manual

BUSINESS COMMUNICATIONS DIVISION
IP4100 SIP DECT User Guide

TOSHIBA IP4100 DECT HANDSET
END USER GUIDE
FEATURES
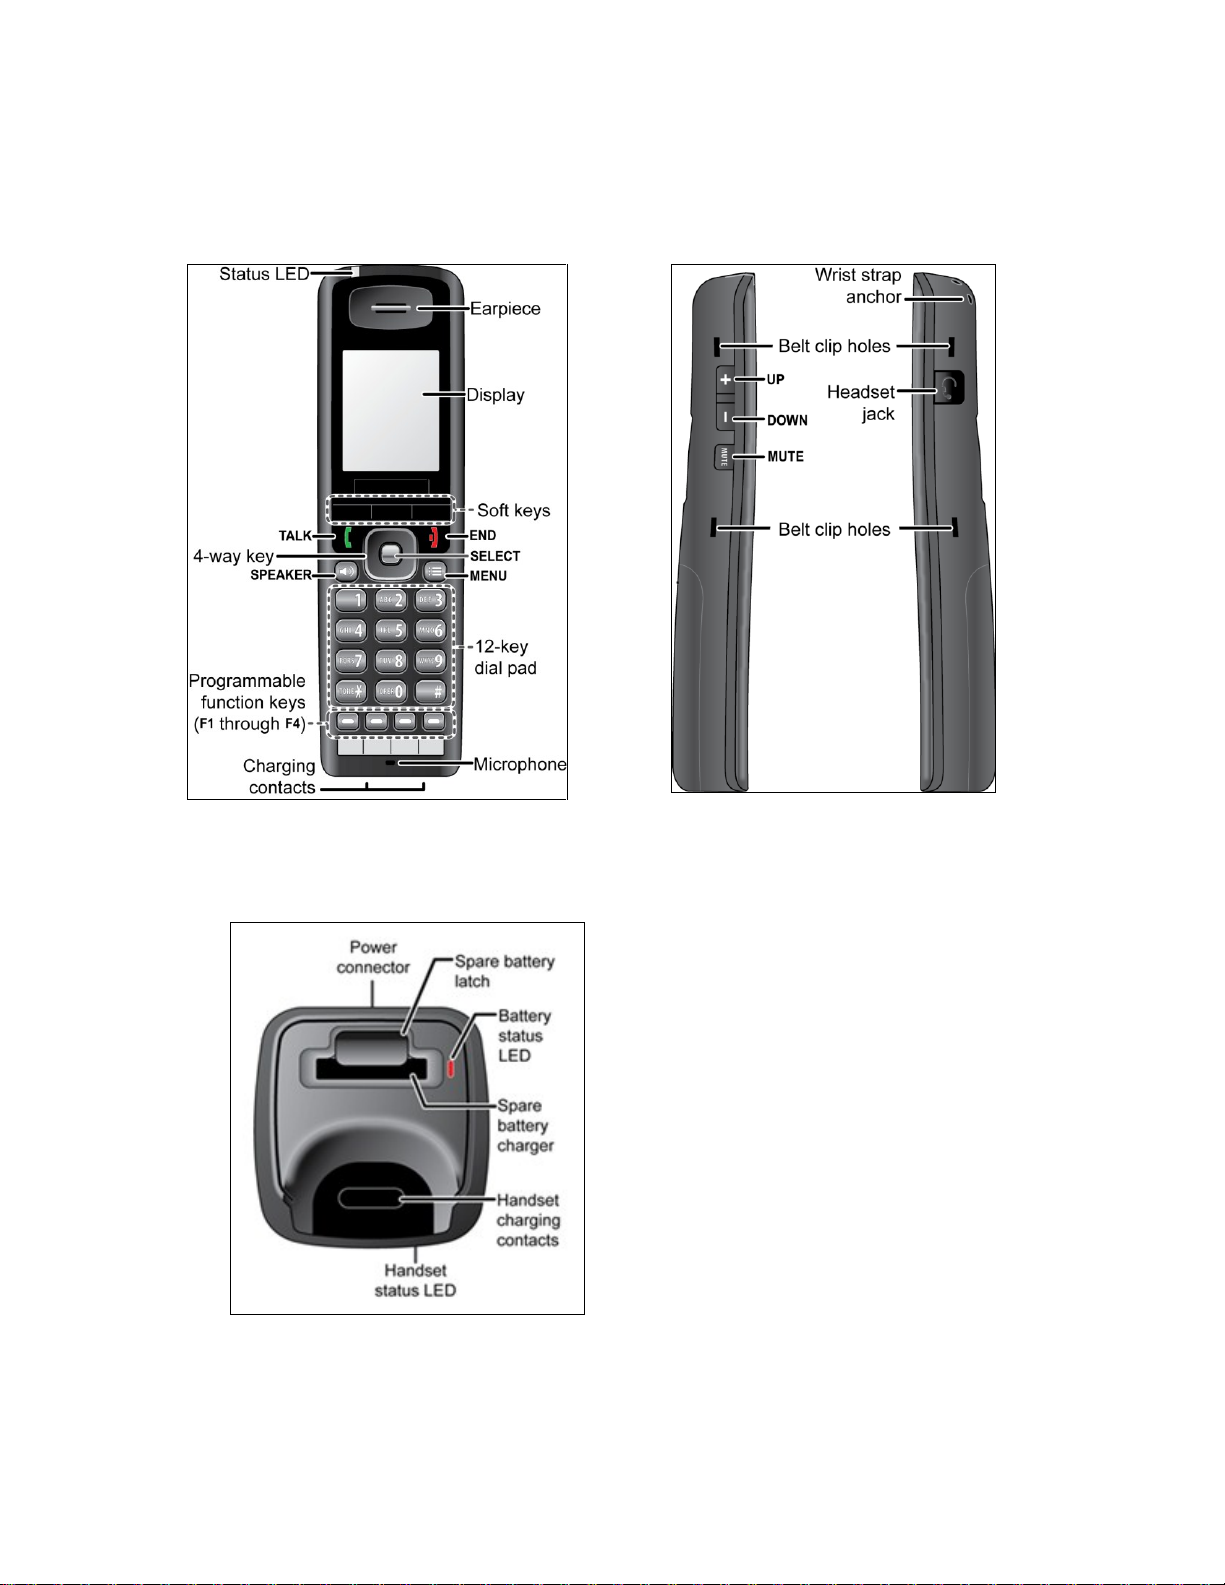
Toshiba IP4100 DECT Handset Features
2.0 inch colour TFT back-lit display
Li-ion battery for long talk time and standby time
Handset mode talk time is 21hrs (approximate)
Speaker mode talk time is 15hrs (approximate)
Standby time is 314hrs (approximate)
Over-air feature upgrade support
Status LED – Shows Message waiting, Missed call, Low battery.
Back-lit keypad for easy operation in low-lit environments
Laser-etched keypad numbers for extended life use
Three soft keys for ease of operation
Four programmable feature keys for flexibility in operations
2.5 mm headset jack
Polyphonic ringer support
Vibration ring support
Additional battery charging station in handset charger
High-quality speaker phone
Belt clip
User-programmable alarms
Supports G711a law,G726 codec
User-friendly interface with context sensitive soft keys.
Shared central directory with 200 entries.
Call log records the last 50 calls, whether incoming or outgoing.
Twelve speed dial keys (numbers 2 through 9 on the twelve-key dial pad and the four
bottom feature keys).
About This Document
This document explains how to use the Toshiba IP4100 DECT handsets; for information on
system configuration and base installation, see the System Installation Guide or contact your
administrator.
If you require more information the Toshiba IP4100 DECT-UK Features i.e. on call transfers,
Conferencing etc. please ask your Administrator for a copy of Toshiba IP4100 DECT Technical
Overview
Manual Conventions
Base
The main part of the system that connects to the VoIP network and
manages calls. All handsets must be registered to a base before use.
Charger
The cradle that stores and charges a handset; it also contains a spare
battery charger.
During a call
The station is currently on a call or has activated a dial tone.
Handset
The cordless handset that you use to dial and talk to callers.
In standby
The handset is inactive or idle.
This manual uses several different type styles to distinguish between different parts of the
system:
Bold underline indicates a key or button on the handset
Reverse out indicates a soft key on the handset.
Italics indicates text on the display, such as menu options, prompts, and confirmation
messages
ALL CAPS, NARROW indicates a status light on the handset or base.
Terms and Abbreviations
This document uses the following terms and abbreviations:
GETTING STARTED
Charging the Battery
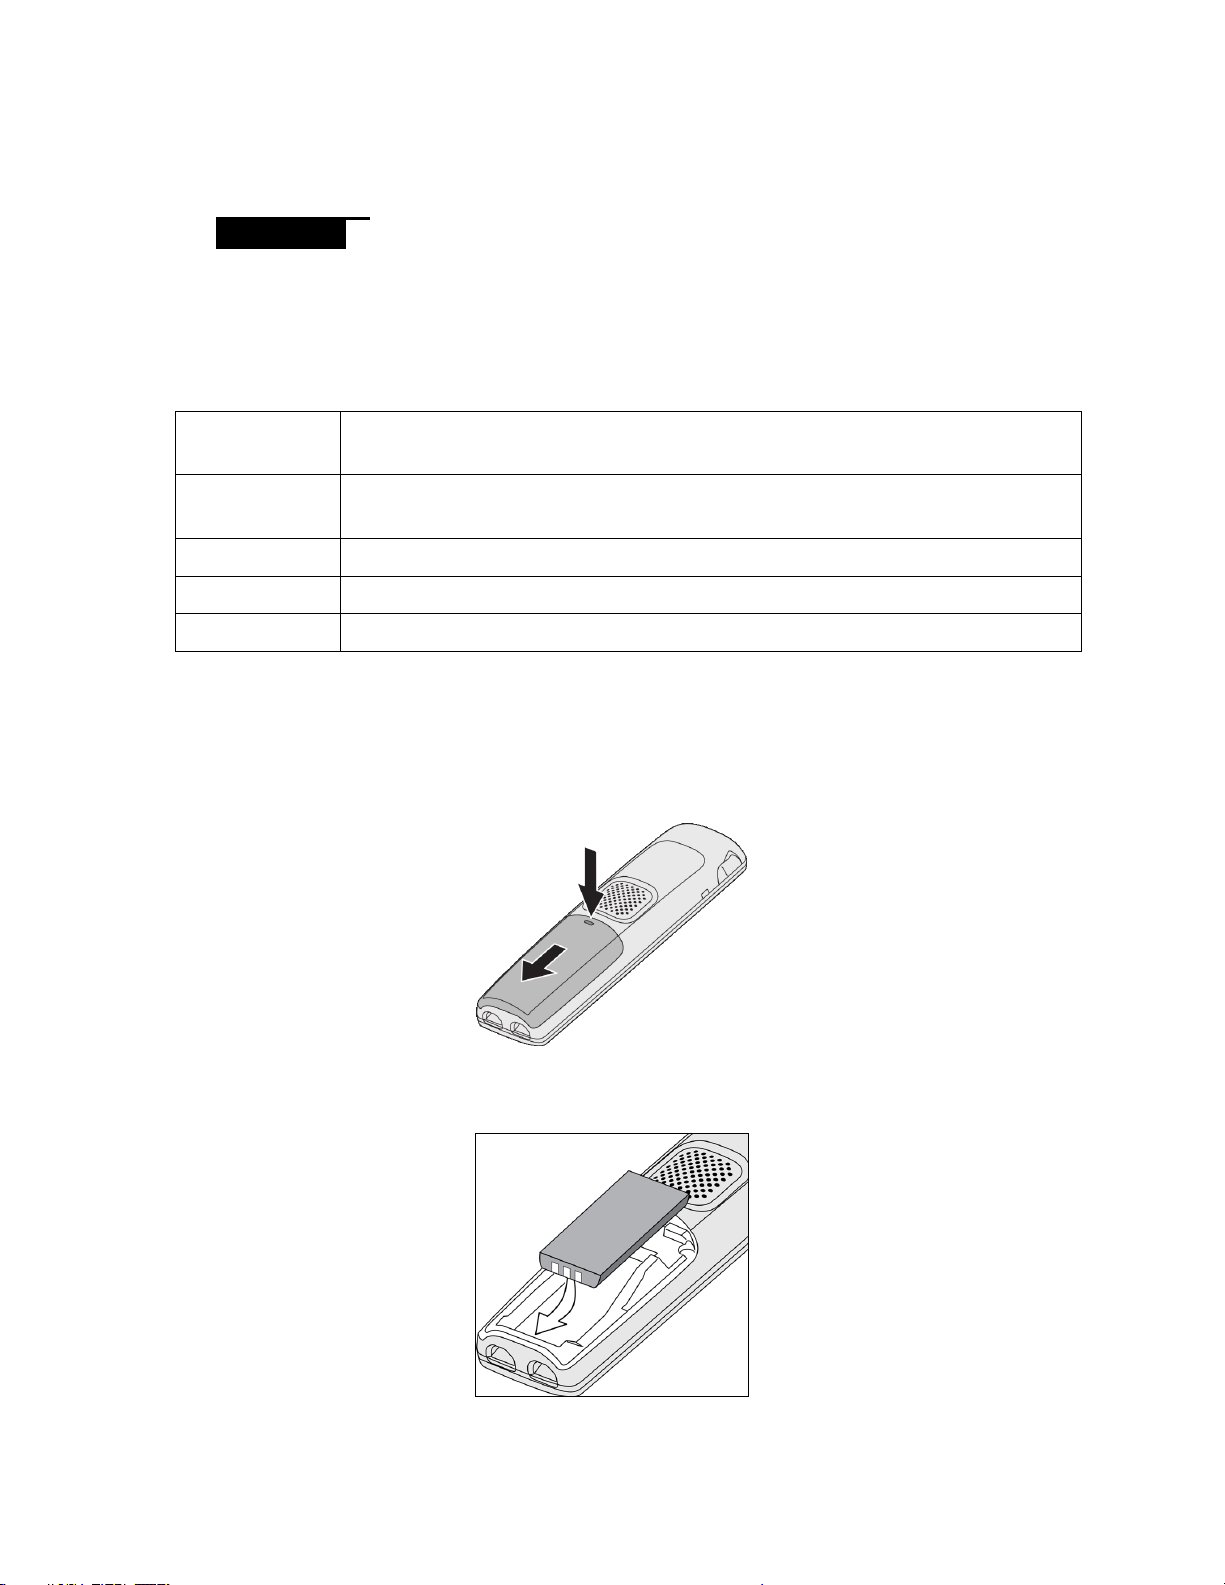
1) Unpack the handset, battery, and battery cover. If the battery cover is already on the
handset, press in on the notch and slide the cover down and off.
2) Align the battery so the contacts face the bottom of the handset and the flat side faces
up.
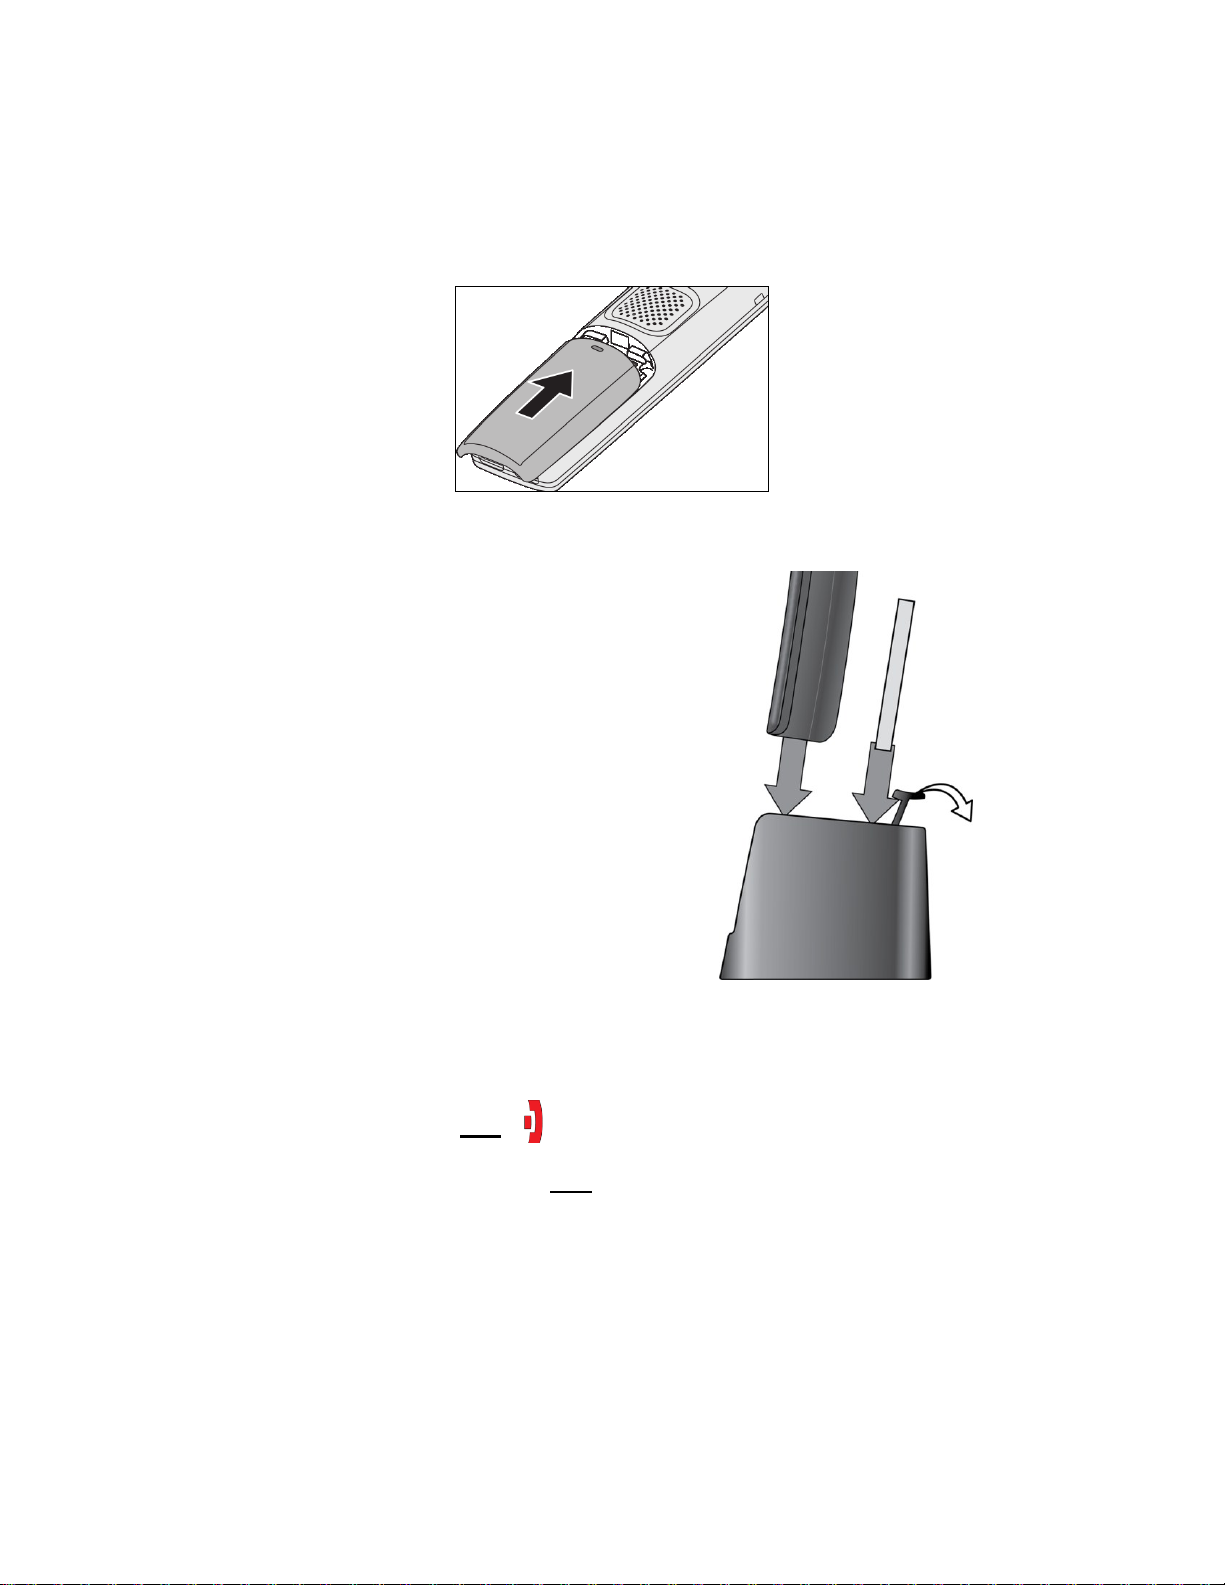
Connect the charger AC adapter to the
charger's AC jack.
Plug the other end of the adapter into
a standard 240V AC power outlet.
Place the handset in the charger with
the display facing forward. The display
on the handset should light up and the
charger LED should turn on. If it
doesn’t, reseat the handset or try
plugging the AC adapter into a
different outlet.
Place the spare battery in the back
section of the charger. (Pull the battery
latch back to insert the battery.
3) Insert the bottom of the battery first, then lay the battery down and push it gently until it
snaps into place.
4) Replace the cover and slide it up into place.
Charge each battery completely (about 10 hours) before using it.
Powering on the Handset
To power on the handset, press End (
the unit with the strongest signal.
To power off the handset, press and hold End for about 4 seconds.
Attaching the Belt Clip
Line up the holes on each side of the handset. Insert the belt clip into the holes on each side of
the handset. Press down until it clicks.
To remove the belt clip, pull either side of the belt clip to release the tabs from the holes.
). The handset searches for a base and connects to
BASIC OPERATION
Charging Cradle
Keys and Their Functions
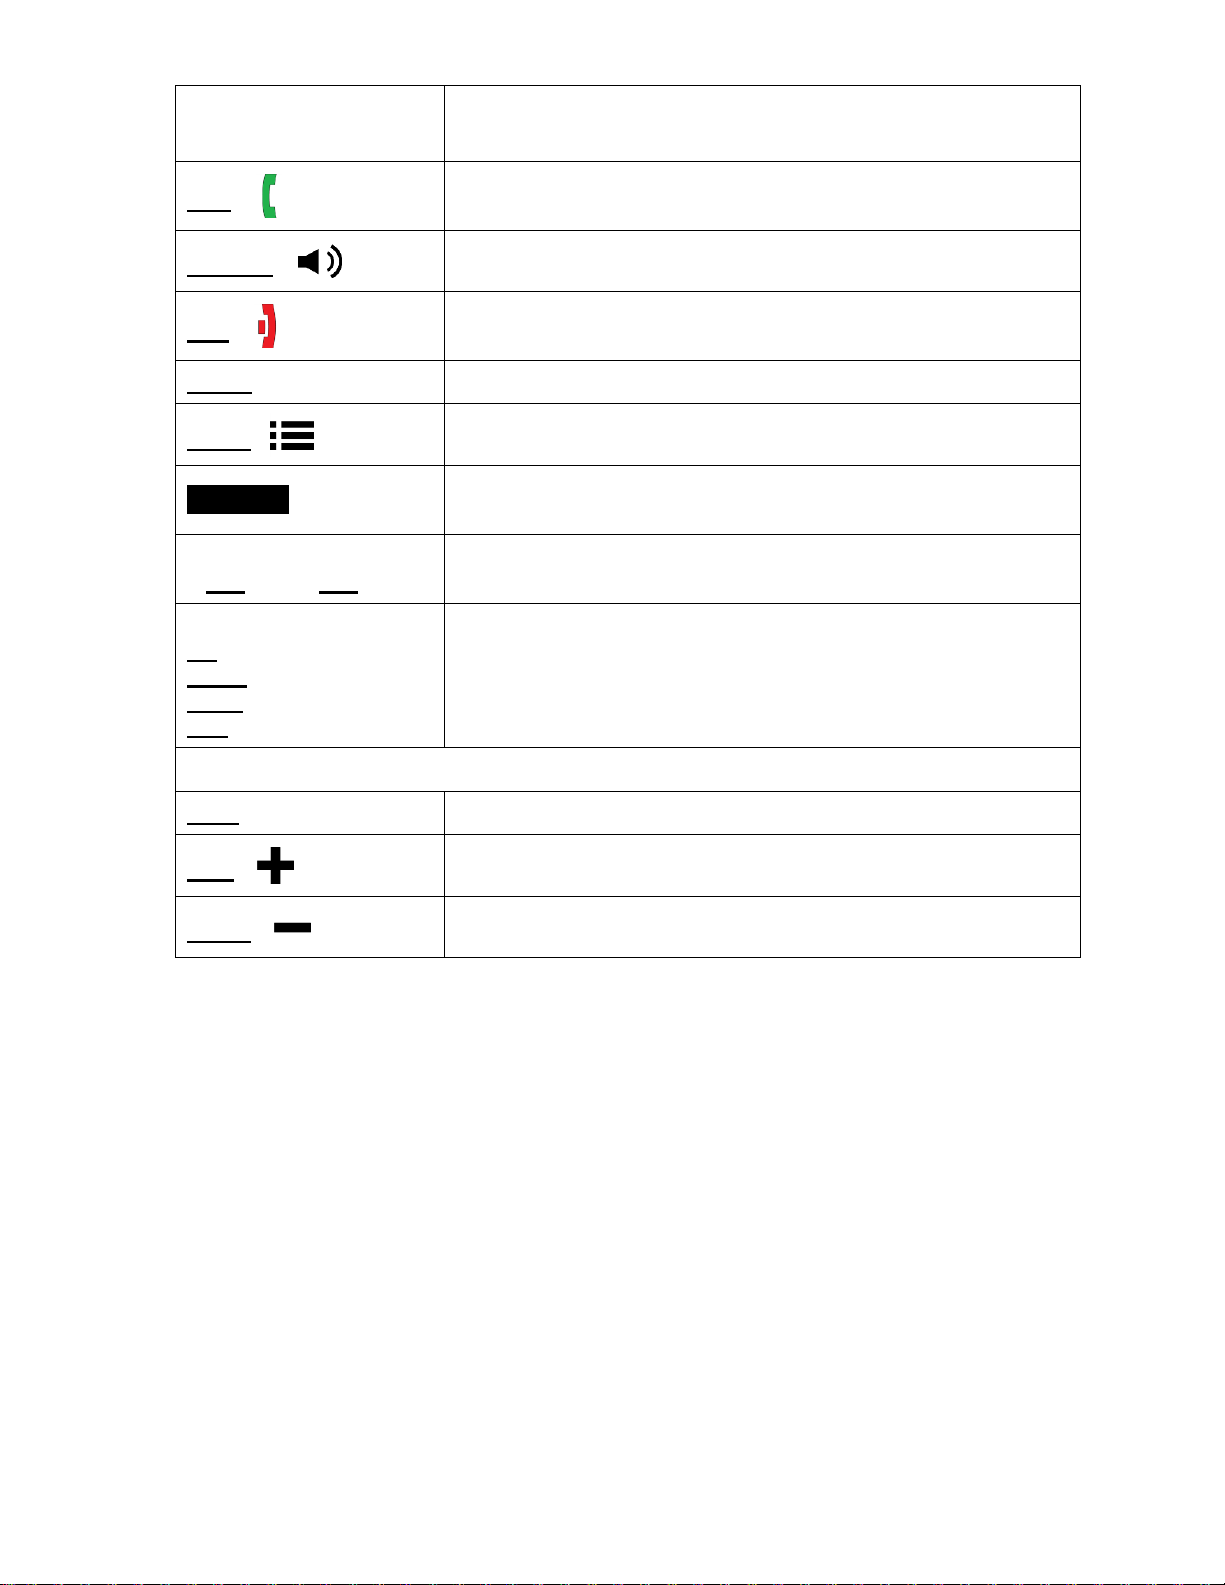
Key name (and icon)
What it does
Talk (
)
In standby: start a telephone call.
While the handset is ringing: answer the incoming call.
Speaker (
)
Switch a call to the speakerphone (and back).
End (
)
During a call: hang up.
In the menu or any list: go back one screen.
Select
In the menu or any list: select the highlighted item.
Menu (
)
Open or close the menu.
Soft keys
The soft keys automatically change their function based on
what you are doing. See "Using soft keys” on page ?.
Function keys 1 through
4 (F1 through F4)
Dials the contact assigned to the key
Four-way key:
Up
Down
Right
Left
Move the cursor up one line.
Move the cursor down one line.
Move the cursor to the right.
Move the cursor to the left.
Side Keys:
Mute
During a call: mute the microphone.
Plus (
)
During a call: increase the call volume.
Minus (
)
During a call: decrease the call volume.
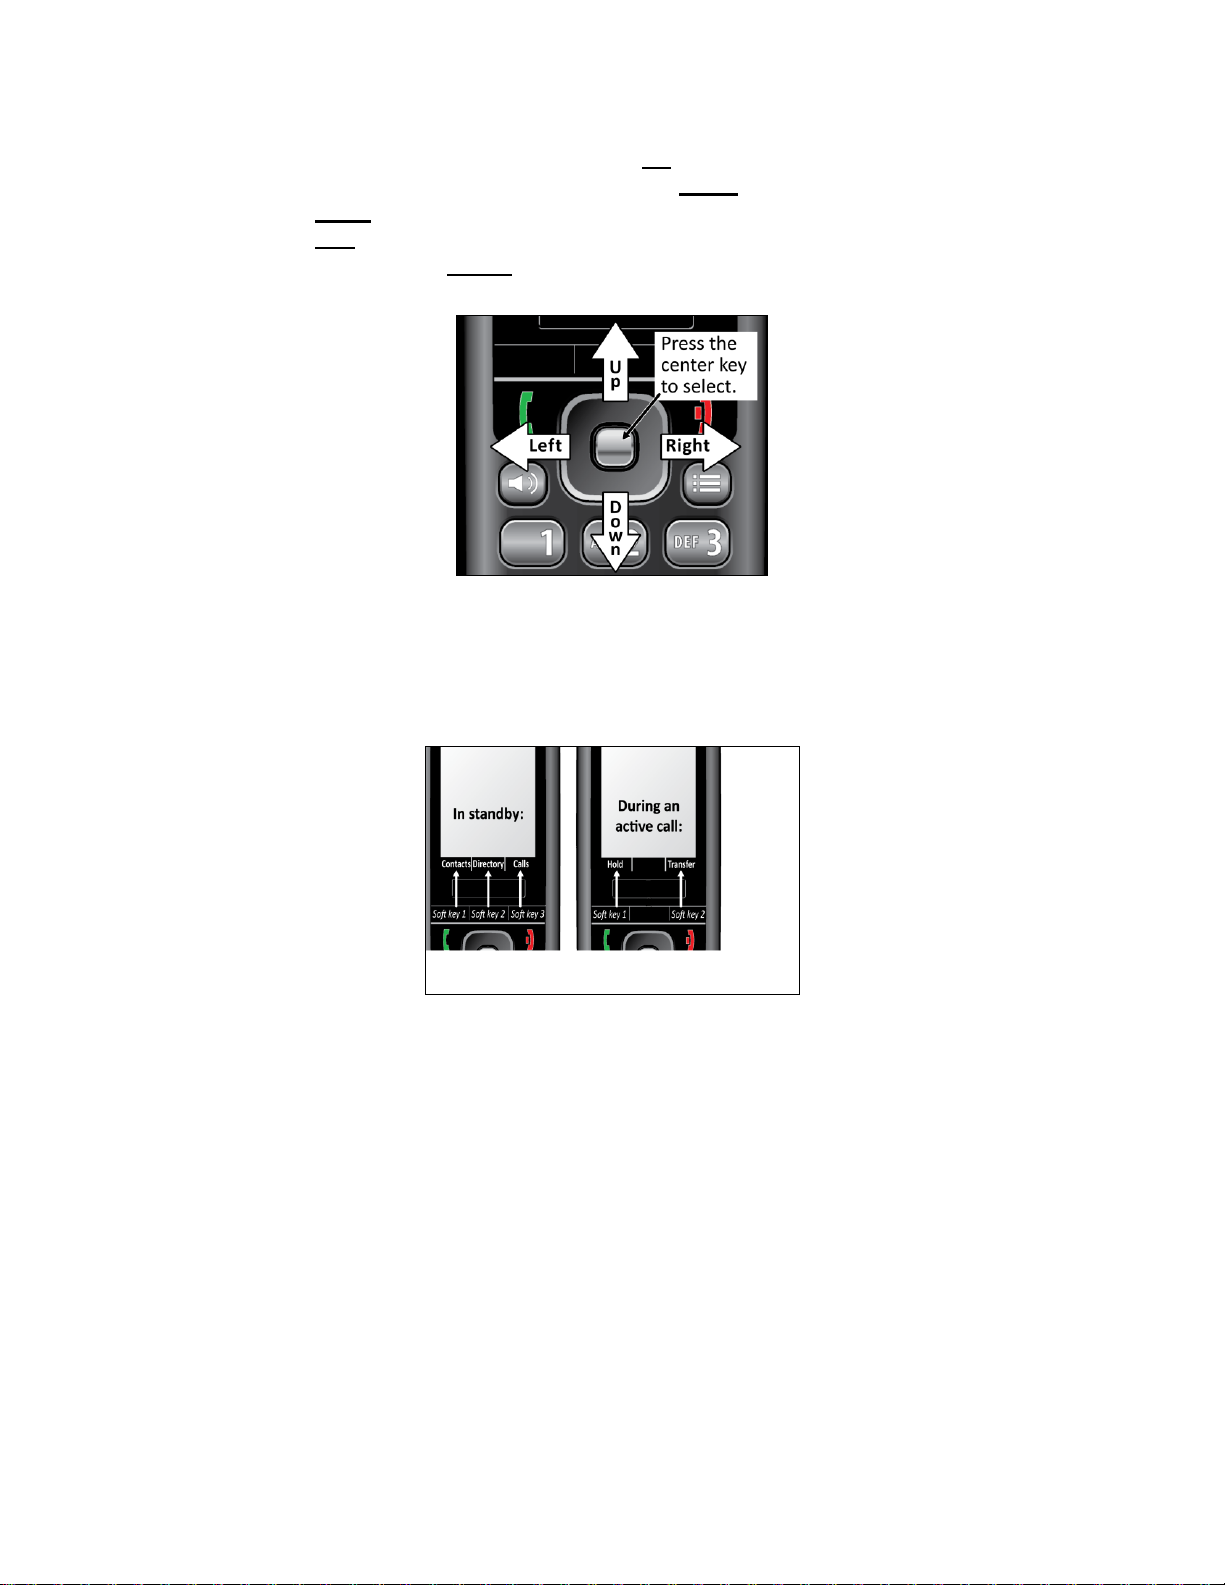
Using the four-way key
Press the top of the key to move the cursor Up.
Press the bottom of the key to move the cursor Down.
Press the Right side of the key to move the cursor to the right.
Press the Left side of the key to move the cursor to the left.
Press the centre key to Select the currently highlighted item.
Using soft keys
Soft keys are controlled by the software: they will automatically change their function depending
on what you're currently doing:
The description of the soft key's current function appears in the bottom of the display
directly above the corresponding key.
If the description for a soft key is blank, that key doesn't currently have a function.
Sometimes, the current function of a soft key can duplicate the function of a regular key.
If this happens, you can press either key.
When referring to a soft key, this manual prints the key description in white text on a
dark background.
Entering text on the handset
To enter text in the handset (for example, entering a name in the contact list), press the number
key that corresponds to the letter you want to enter.
Press the key once to enter the first letter on the number key.
Press the key twice to enter the second letter, and three times to enter the third.
 Loading...