

Toro 136-5850 Installation Instructions

FormNo.3410-320RevB
RearWheelKit
21inHeavy-DutyRecycler
22290,22291,22293,22295,22296,22297,and22298
ModelNo.136-5850
CALIFORNIA
Proposition65Warning
ThisproductcontainsachemicalorchemicalsknowntotheStateofCalifornia
tocausecancer,birthdefects,orreproductiveharm.
®
/RearBaggerLawnMower,Models
InstallationInstructions
WARNING
Installation
LooseParts
Usethechartbelowtoverifythatallpartshavebeenshipped.
Description
Wheelassembly1
Wheelcover1
Bolt(5/16x3/4inch)
PreparingtheMachine
1.Movethemachinetoalevelsurface(AofFigure
1).
2.Releasetheblade-controlbar(BofFigure1).
3.Disconnectthespark-plugwirefromthespark
plug(CofFigure1).
Qty.
Use
Installtherearwheel.
1
©2017—TheToro®Company
8111LyndaleAvenueSouth
Bloomington,MN55420
Registeratwww.T oro.com.
Figure1
OriginalInstructions(EN)
PrintedintheUSA
AllRightsReserved
g189830
*3410-320*B
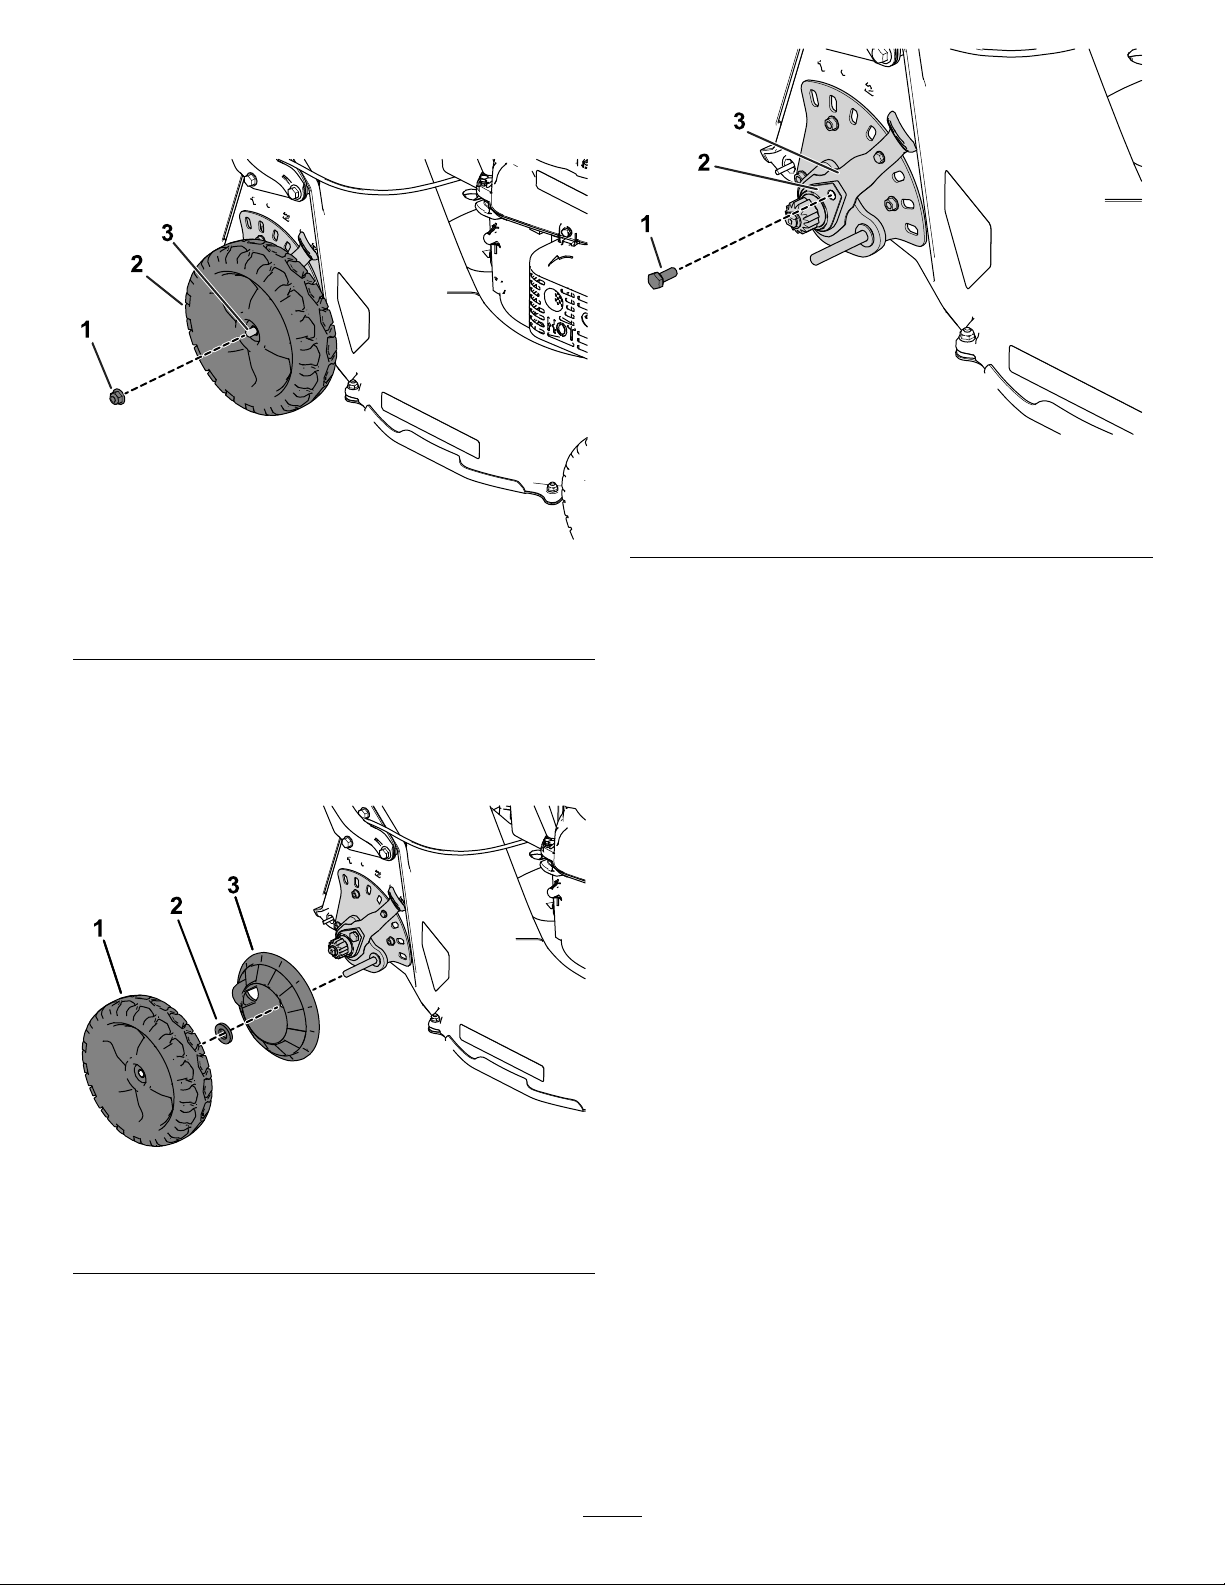
RemovingtheRearWheel
1.Loosenandremovethenutfromtheaxlebolt;
setthenutaside(Figure2).
Figure2
1.Nut3.Axlebolt
2.Wheel
g187972
Figure4
1.Bolt(5/16x3/4inch)3.Height-of-cutlever
2.Retainer
g187971
2.Removethewheelassembly,spacer,andwheel
cover(Figure3).
Important:Retainthespacerforuse
explainedlaterinthisprocedure.
Figure3
1.Wheelassembly3.Wheelcover
2.Spacer
g234379
3.Removetheboltfromtheretaineranddiscardit
(Figure4).
2
 Loading...