

Page 1

Deskmaster 142
KÄYTTÖOHJE
USER GUIDE
Page 2
Page 3
Deskmaster 142
!!Tärkeää!!
Tilaa teleoperaattorilta soittajan numeronäyttöpalvelu.
Ilman tätä tilausta puhelimen numeronäyttö ei toimi.
Pidätämme oikeuden muutoksiin.
!! Important !!
To use ‘Caller ID’ (display caller), this service has to be activated on your
phone line.Normally you need a separate subscription from your telephone
If you don’t have the Caller ID function on your phone line, the incoming
telephone numbers will NOT be shown on the display of your telephone.
company to activate this function.
Page 4

Deskmaster 142
1 Asennus 6
2 Näppäimet ja merkkivalot 6
3 Näyttö ja merkkivalot 7
3.1 Perusnäyttö 7
3.2 Merkkivalot 7
4 Käyttö 8
4.1 Näyttötekstien kielen valinta 8
4.2 Päivämäärän ja kellonajan asetus 8
4.3 Etunumeron asetus 8
4.4 Puhelimen nollaus 8
5 Puhelun soittaminen 9
5.1 Valinnan toisto 9
5.2 Mikrofonin mykistys 9
5.3 Soittoäänen voimakkuus 9
5.4 Katkosnäppäin 9
5.5 Kuuloke toiminnot(valinnainen 9
6 Soittajan numeronäyttö 10
6.1 Yleistä 10
6.2 Numeronäyttömuisti 10
6.2.1 Numeroluettelon selaaminen 10
6.2.2 Numeroiden poistaminen numeronäyttömuistista 11
6.2.3 Puhelun soittaminen numeronäyttömuistista 11
6.3 Ilmoitus puheviestistä 11
6.4 Ilmoitus sähköpostiviestistä 11
7 Puhelinmuistio 12
7.1 Aakkosnumeerisen näppäimistön käyttö 12
7.2 Numeron tallentaminen puhelinmuistioon 13
7.4 Soittaminen puhelinmuistiossa olevaan numeroon nimeä käyttäen 13
7.5 Puhelinmuistiossa olevan numeron ja nimen muuttaminen 13
7.6 Numeron ja nimen poistaminen puhelinmuistiosta 13
8 Pika- ja lyhytvalintamuistit 14
8.1 Puhelinnumeron tallentaminen pika- ja lyhytvalintamuistiin 14
8.2 Puhelinnumeron siirtäminen numeronäyttömuistista pika- tai lyhytvalintamuistiin 14
8.3 Soittaminen pika- ja lyhytvalintamuistia käyttäen 14
8.4 Numeron tai nimen muuttaminen pika- ja lyhytvalintamuistissa 14
8.5 Pika- ja lyhytvalintanumeron poistaminen 15
9 TAKUU 15
5
5
Page 5

Deskmaster 142
1 ASENNUS
• Liitä puhelinjohdon toinen pää seinässä olevaan puhelinpistorasiaan ja toinen pää puhelimen
pohjassa olevaan liitäntään.
• Asenna paristot, jolloin näyttö aktivoituu.
- Avaa puhelimen pohjassa oleva paristolokero.
- Aseta lokeroon 4 kpl 1,5 V AA-paristoja.
- Sulje lokero.
Paristojen sijasta voit myös käyttää verkkolaitetta (9 V DC / 300 mA ( ))
(Verkkolaite ei kuulu toimitukseen.)
Huom! Puhelimessa on haihtumaton muisti, jota sähkökatkot eivät tyhjennä!
2 NÄPPÄIMET JA MERKKIVALOT
1 Poisto/mykistysnäppäin
2 Handsfree-merkkivalo
3 Uuden puhelun merkkivalo
4 Muistinäppäin
5 Pikavalintanäppäin 2
6 Pikavalintanäppäin 1
7 Katkosnäppäin
8 Nuolinäppäin ALAS
4
5
6
7
9 Nuolinäppäin YLÖS
10 Soittonäppäin
11 Ohjelmointinäppäin
12 Uudelleenvalinta/tauko
13 Puhelinmuistion näppäin
14 Puhepostinäppäin VM
15 Kaiutintoiminnon näppäin
(handsfree)
16 Numero- ja kirjainnäpäimet
17 Soittoäänen voimakkuuden
säädin
18 Verkkolaitteen liitäntä
19 Puhelinlinjan liitäntä
20 Kuulokeliitäntä (valinnainen)
21 Kuuloke/Handsfree toiminta kytkin (valinnainen)
2
3
16
17 1821
1920
1
8
9
10
11
12
13
14
15
6
6
Page 6
Deskmaster 142
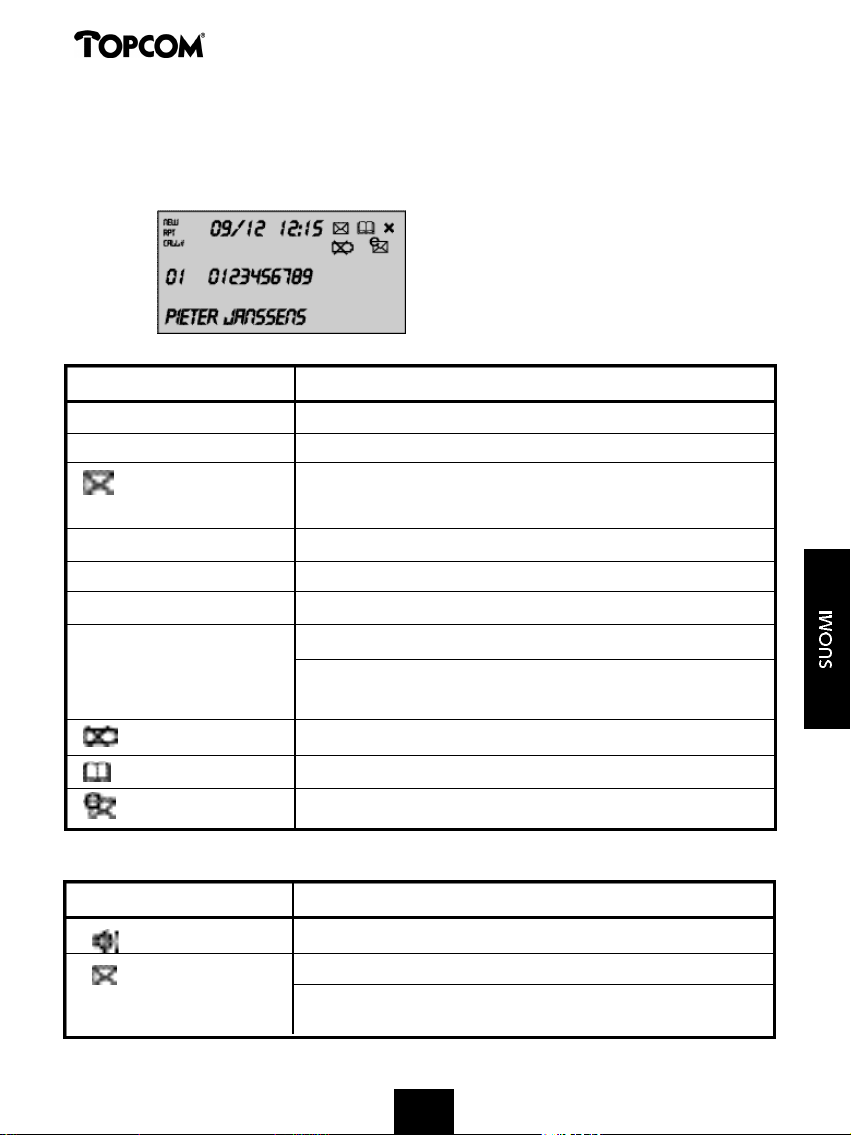
3 NÄYTTÖ JA MERKKIVALOT
3.1 Perusnäyttö
Näyttö Merkitys
12:15
09/12
0123456789
PIETER JANSSENS
NEW
02
Kellonaika (24 tunnin muodossa).
Päivämäärä (päivä/kuukausi).
Ilmoitus uudesta puheviestistä teleoperaattorin
vastaajapalvelussa .
Soittajan puhelinnumero.
Soittajan nimi.
Uusi puhelu soittoluettelossa.
Soiton järjestysnumero, jos sen ohellä näkyy CALL#.
Numerosta soitettujen puheluiden lukumäärä,
jos ruudussa näkyy RPT.
Paristovaroitus.
Puhelinmuistion symboli.
Ilmoitus uudesta sähköpostiviestistä.
3.2 Merkkivalot
Merkkivalo Merkitys
Kaiutinpuhelu (handsfree) tai puoli-handsfree
Vilkkuu kerran = uusi soitto soitto-luettelossa
Vilkkuu kaksi kertaa = uusi puheviesti vastaajapalvelussa
7
7
Page 7
Deskmaster 142
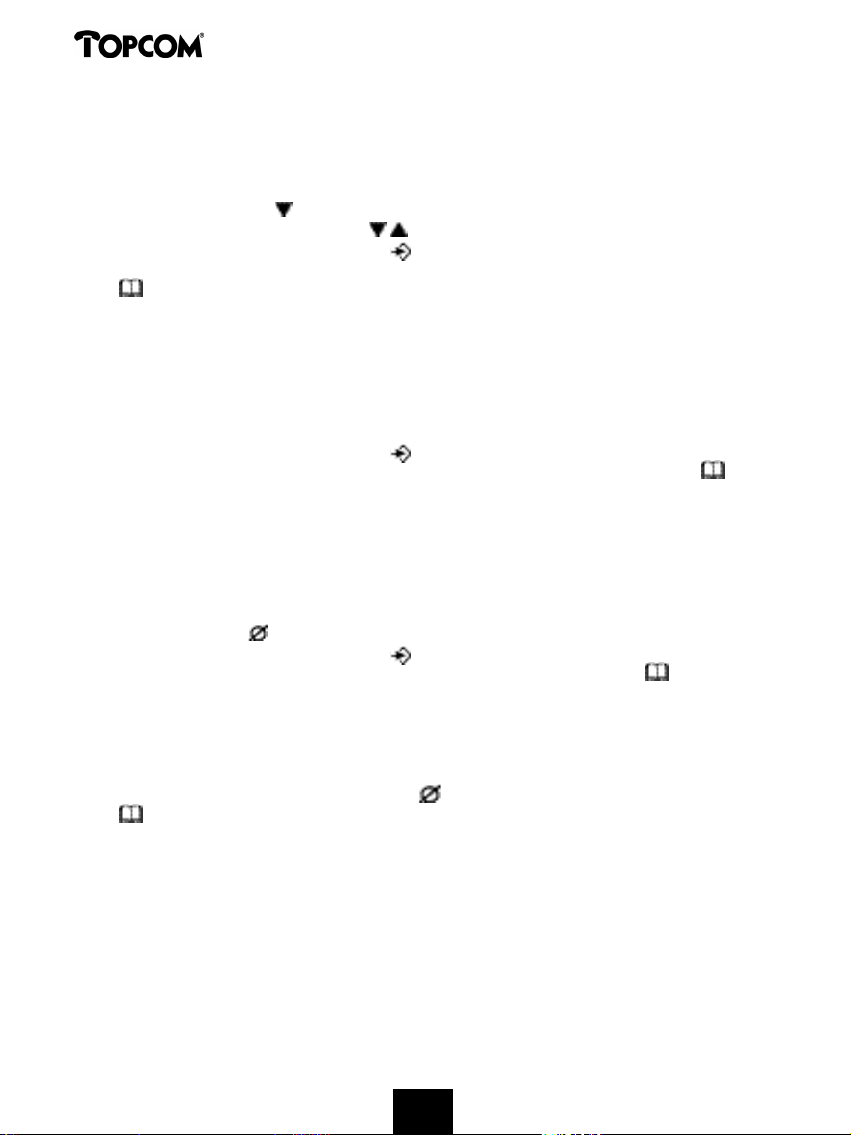
4 KÄYTTÖ
4.1 Näyttötekstien kielen valinta
Kieli valitaan seuraavalla tavalla:
• Paina ALAS-näppäintä 6 sekuntia, jolloin järjestelmän symboli tulee näyttöön.
• Etsi haluamasi kieli nuolinäppäimillä .
• Vahvista asetus ohjelmointinäppäimellä , jolloin siirryt seuraavaan asetukseen
(4.2 Päivämäärän ja kellonajan asetus) tai sulje valikko painamalla puhelinmuistionäppäintä
.
4.2 Päivämäärän ja kellonajan asetus
Jos käytät teleoperaattorin numeronäyttöpalvelua, johon sisältyy soittajan puhelinnumeron
lisäksi päivämäärä ja kellonaika, puhelimen kello päivittyy automaattisesti.
Voit myös asettaa kellon itse seuraavalla tavalla:
• Kielen valinnan jälkeen avautuu kellonasetustila.
• Aseta päivä, kuukausi ja kellonaika (24 tunnin muodossa) numeronäppäimillä.
• Vahvista asetus ohjelmointinäppäimellä , jolloin siirryt seuraavaan asetukseen (4.3
Vaihteenohitusnumeron asetus) tai sulje valikko painamalla puhelinmuistionäppäintä .
4.3 Etunumeron asetus
Kun soitat numeronäyttömuistissa olevaan numeroon, puhelin lisää asettamasi etunumeron
puhelinnumeron eteen. Tämä on tarpeen silloin, kun puhelin on vaihteen alaliittymänä ja
ulkolinjalle pääsy edellyttää vaihteen ohitusnumeron näppäilyä.
• Päivämäärän ja kellonajan asetuksen jälkeen avautuu vaihteenohitusnumeron ohjelmointitila.
• Aseta ohitusnumero numeronäppäimillä. (Väärin näppäilty numero poistetaan
poistonäppäimellä ).
• Vahvista asetus ohjelmointinäppäimellä , jolloin siirryt seuraavaan asetukseen
(4.4 Puhelimen nollaus) tai sulje valikko painamalla puhelinmuistionäppäintä .
4.4 Puhelimen nollaus
Puhelin on mahdollista palauttaa alkutilaansa eli nollata se. Nollauksessa kaikki tallennetut
tiedot häviävät muistista.
• Vaihteenohitusnumeron asetuksen jälkeen avautuu nollaustila.
• Suorita nollaus painamalla poistonäppäintä tai sulje valikko puhelinmuistionäppäimellä
.
Varoitus: Puhelimen nollaus hävittää kaikki muistiin tallennetut numerot ja soittajien
numeroluettelon.
8
88
Page 8
Deskmaster 142
5 PUHELUN SOITTAMINEN
Puhelu voidaan soittaa kahdella tavalla:
1.Näppäile puhelinnumero. Voit tarvittaessa poistaa viimeksi näppäilemäsi numeron
poistonäppäimellä . Nosta luuri tai paina kaiutinnäppäintä . Puhelin valitsee numeron
3 sekunnin kuluttua.
2.Nosta luuri tai paina kaiutinnäppäintä . Näppäile puhelinnumero.
Huom! Näytön alarivillä näkyy puhelun pituus [h:mm:ss].
5.1 Valinnan toisto
Deskmaster 142 tallentaa 5 viimeksi valittua puhelinnumeroa ja niille puheluiden pituuden sekä
kellonajan ja päivämäärän. Numeroita selataan uudelleenvalintanäppäimellä .
On kaksi tapaa soittaa uudelleen näytössä näkyvään numeroon:
1.Paina soittonäppäintä . Puhelin valitsee numeron automaattisesti ja kytkee kaiutinpuhelu-
toiminnon (handsfree).
2 . Nosta luuri tai paina kaiutinnäppäintä . Puhelin valitsee numeron 3 sekunnin kuluttua.
Huom.: Uudelleenvalintanäppäimellä on toinenkin toiminto: sillä asetetaan tauko puhelin-numeroon.
Puhelinnumerossa näkyy P-kirjain asetetun tauon kohdalla.
5.2 Mikrofonin mykistys
Mikrofoni mykistetään painamalla kerran poisto- ja mykistysnäppäintä . Mykistyksen aikana
toinen osapuoli ei kuule keskusteluasi läsnä olevan henkilön kanssa. Näytössä näkyy sana
VAIMENNUS.Mykistys poistetaan painamalla poisto- ja mykistysnäppäintä uudelleen.
5.3 Soittoäänen voimakkuus
Puhelin hälyttää puhelun tullessa. Hälytysäänen säädin on puhelimen takana (voimakas hiljainen - ei soittoääntä ).
5.4 Katkosnäppäin
Katkosnäppäintä (R) tarvitaan joitakin teleoperaattorin tarjoamia palveluja käytettäessä (esim.
koputus) tai siirrettäessä puhelua vaihteen alaliittymässä.
5.5 Kuuloke toiminnot(valinnainen)
Jos laitteen takaosassa on kuulokeliitäntä ja kytkin, voit sen avulla määritellä käytätkö kuuloketta vai handsfree toiminnetta.
• Käyttäessäsi kuulokkeita, kytke ne kuulokeliitäntään ja aseta kytkin ON-asentoon .
Paina Handsfree nappia soittaaksesi puhelun.
• Käyttäessäsi handsfree toimintoa, aseta kytkin ON-asentoon .
Paina Handsfree nappia soittaaksesi puhelun.
9
99
Page 9

Deskmaster 142
6 SOITTAJAN NUMERONÄYTTÖ
6.1 Yleistä
Jos olet tilannut numeronäyttöpalvelun teleoperaattorilta, soittajan numero näkyy puhelimen
näytössä. Jotkut operaattorit näyttävät myös soittajan nimen. Vaikka näyttöpalvelu ei näyttäisikään
nimeä, nimi näkyy näytössä siinä tapauksessa, että kyseinen puhelinnumero on tallennettu
puhelinmuistioon tai lyhyt- tai pikavalintamuistiin.
Puhelun tullessa näyttö voi myös olla jompikumpi seuraavista:
N E W 09 / 1 2 1 2 : 15
NUMERO TUNTEMATON
Numeronäyttöpalvelu on käytössä, mutta numeron
näyttö ei ole mahdollista (esim. ulkomaanpuhelut)
CALL#
0 1 - - - - - - - ----
T UNTEM A T O N N R O
NUMERO ESTETTY
Numeronäyttöpalvelu on käytössä, mutta soittaja on
estänyt numeronsa näytön tai numero on salainen.
N E W 09 /1 2 12 : 15
CALL#
0 1 - - - - - - - ----
NRO ESTET T Y
6.2 Numeronäyttömuisti
Deskmaster 142 pystyy tallentamaan vähintään 199 viimeksi tulleen puhelun numeroa ja nimeä.
Jos samasta numerosta on soitettu useampia kertoja, näyttö ilmoittaa soittokertojen lukumäärän
(enintään 7). Jokaisesta soitosta tallentuu puhelinnumeron lisäksi päivämäärä ja kellonaika.
Lepotilassa olevan puhelimen näytössä näkyy numeronäyttömuistissa olevien soittojen
lukumäärä. Esimerkki:
09 /1 2 1 2 : 15
-03- -10 -
U U D E T P UHE L U T
• UUDET 03 - Uusia, tarkastamattomia soittoja on 3 kappaletta.
• PUHELUT 10 - Muistissa on 10 soittoa, joista 3 on uusia ja 7 tarkastettuja.
6.2.1 Numeroluettelon selaaminen
Numeroluetteloa selataan nuolinäppäimillä . Luettelon alussa ja lopussa näkyvät sanat
ALKU ja LOPPU. Jokaisen uuden soiton ohella näkyy sana NEW. Soiton järjestysnumero näkyy
sanan CALL# alla. Viimeksi tulleen puhelun järjestys-nu-mero on luettelon suurin. Vanhin puhelu
on numero yksi.
Esimerkki: Numeronäyttömuistissa on 4 puhelua. Kun painat ALAS-näppäintä näyttöön
tulee uusin puhelu. Seuraava ALAS-näppäimen painallus tuo näyttöön toiseksi uusimman
puhelun.
10
1010
Page 10

Deskmaster 142
Down button 1st press 2nd press 3rd press 4th press 5th press
CALL# CALL# 4 CALL# 3 CALL# 2 CALL# 1
Display last call 2nd 3rd Oldest call TOP/END
6.2.2 Numeroiden poistaminen numeronäyttömuistista
a) Yhden numeron poistaminen
• Etsi poistettava numero nuolinäppäimillä .
• Paina poistonäppäintä kerran . Näyttö kysyy POISTA?
• Paina poistonäppäintä uudelleen. Ellet haluakaan poistaa numeroa, jatka selausta
nuolinäppäimillä .
b) Koko numeronäyttömuistin tyhjentäminen
• Kun puhelin on numeronäyttötilassa, paina poistonäppäintä niin kauan, että näyttöön
tulee teksti POISTA KAIKKI?
• Vahvista poisto painamalla poistonäppäintä uudelleen. Ellet haluakaan tyhjentää muistia,
paina jompaakumpaa nuolinäppäintä .
Huom! Voit poistaa kaikki numerot vain siinä tapauksessa, ettei muistissa ole uusia, tarkastamattomia
soittoja. Niitä ei ole mahdollista poistaa.
6.2.3 Puhelun soittaminen numeronäyttömuistista
• Etsi nuolinäppäimillä numero, johon haluat soittaa.
• Paina soittonäppäintä . Puhelin valitsee numeron ja kytkee kaiutinpuhelun. Nosta luuri,
jos haluat jatkaa luuripuheluna.
6.3 Ilmoitus puheviestistä
!!! Tämä toiminto on mahdollinen vain, jos teleoperaattori lähettää ilmoituksia puheviesteistä numeronäyttöpalvelun ohella !!!
Kun Deskmaster 142 ottaa vastaan ilmoituksen puheviestistä, sen näyttöön tulee kirjekuorisymboli
. Symboli häviää, kun olet kuunnellut viestit.
6.4 Ilmoitus sähköpostiviestistä
!!! Tämä toiminto on mahdollinen vain, jos sähköpostioperaattori ilmoittaa
sähköpostiviesteistä soittamalla puhelinnumeroosi !!!
Kun saat uuden sähköpostiviestin, operaattori soittaa puhelimeesi antaen määrätyn numeronäytön.
Tästä numerosta tiedät, että olet saanut sähköpostia. Jos tallennat tämän numeron
puhelinmuistioon erityisellä nimellä, Deskmaster 142 tietää, että on kysymys sähköpostin
ilmoitusnumerosta ja näyttää näytössä sähköpostin symbolin .
11
1111
Page 11

Deskmaster 142
• Paina ohjelmointinäppäintä , puhelin on lepotilassa.
• Näppäile puhelinnumero, josta operaattori soittaa ilmoittaen uusista viesteistä.
• Paina ohjelmointinäppäintä uudelleen.
• Paina 0-näppäintä neljä kertaa, jolloin näyttöön tulee ‘@’.
• Paina ohjelmointinäppäintä Sähköpostista ilmoittavalle numerolle tallentuu
puhelinmuistioon nimeksi ‘@’.
7 PUHELINMUISTIO
Deskmaster 142:n elektroniseen puhelinmuistioon mahtuu 99 nimeä (15-merkkistä) ja
puhelinnumeroa (22-numeroista).
7.1. Aakkosnumeerisen näppäimistön käyttö
Kirjaimet asetetaan numeronäppäimillä. Kun esimerkiksi painat numeronäppäintä 5, saat
näyttöön ensimmäisen sen alla olevan kirjaimen (J). Seuraavilla painalluksilla saat esiin muut
tähän näppäimeen sisältyvät merkit.
Kun haluat asettaa B-kirjaimen, paina kaksi kertaa numeronäppäintä 2. Jos asetat peräkkäin
kirjaimet A ja B, näppäile ensin A painamalla 2-näppäintä kerran. Odota sitten 2 sekuntia, että
kohdistin ehtii siirtyä seuraavaan asetuskohtaan ja näppäile kirjain B painamalla 2-näppäintä
kaksi kertaa.
Jos teet virheen, siirrä kohdistin nuolinäppäimellä väärän merkin kohdalle ja paina
poistonäppäintä . Kohdistimen edessä oleva merkki poistuu.
Numeronäppäimiin sisältyvät merkit :
[ 1 ] T y h j ä v ä l i . 1 ? ! : , “ ’ ( )
[ 2 ] A B C 2 Ä Å À Á Â Æ @ ß Ç
[ 3 ] D E F 3 Ë È É Ê
[ 4 ] G H I 4 Ğ Ï Ì Í Î
[ 5 ] J K L 5
[ 6 ] M N O 6 Ñ Ö Ò Ó Ô Ø
[ 7 ] P Q R S 7 ß $
[ 8 ] T U V 8 Ü Ù Ú Û
[ 9 ] W X Y Z 9
[ 0 ] 0 + - @ & / % $ £
[ * ] *
[ # ] #
12
1212
Page 12

Deskmaster 142
7.2 Numeron tallentaminen puhelinmuistioon
• Paina ohjelmointinäppäintä , kun puhelin on lepotilassa. Näytössä näkyy TALLENNA
NUMERO.
• Näppäile puhelinnumero ja paina ohjelmointinäppäintä .
• Aseta nimi ja vahvista tallennus painamalla ohjelmointinäppäintä .
7.3 Numeron siirtäminen numeronäyttömuistista puhelinmuistioon
• Etsi puhelinnumero soittoluettelosta nuolinäppäimillä .
• Paina ohjelmointinäppäintä . Numero näkyy näytössä.
• Muokkaa numeroa tarvittaessa tai vahvista se painamalla ohjelmointinäppäintä . Nimi
näkyy näytössä, jos numeronäyttöpalvelu on välittänyt sen.
• Muokkaa nimeä tarvittaessa tai aseta nimi, ellei sitä ole, ja vahvista ohjelmointinäppäimellä
. Numero ja nimi on nyt tallennettu puhelinmuistioon.
7.4 Soittaminen puhelinmuistiossa olevaan numeroon nimeä käyttäen
• Paina puhelinmuistionäppäintä .
• Näppäile yksi tai useampia nimen alkukirjaimista.
• Etsintä suoritetaan nuolinäppäimillä . Näytössä näkyy ensimmäinen näppäilemälläsi
kirjaimella alkava nimi. Ellei yhtään tällä kirjaimella alkavaa nimeä ole muistiossa, näyttöön
tulee seuraava aakkosjärjestyksen mukainen nimi.
• Selaa nimiä nuolinäppäimillä .
• Kun haluamasi nimi on näytössä, nosta luuri. Puhelin valitsee numeron automaattisesti.
7.5 Puhelinmuistiossa olevan numeron ja nimen muuttaminen
• Etsi puhelinnumero muistiosta edellisessä luvussa olevan ohjeen mukaan.
• Paina ohjelmointinäppäintä . Numero näkyy näytössä.
• Muokkaa numeroa tarvittaessa tai paina ohjelmointinäppäintä . Nimi tulee näyttöön.
• Muokkaa nimeä tarvittaessa tai paina ohjelmointinäppäintä . Muutos on nyt tallennettu
puhelinmuistioon.
7.6 Numeron ja nimen poistaminen puhelinmuistiosta
• Etsi numero puhelinmuistiosta luvussa 7.4 olevan ohjeen mukaan
• Paina poistonäppäintä . Näyttö kysyy POISTA?
• Paina poistonäppäintä uudelleen. Jos et halua poistaa numeroa, paina jotain muuta
näppäintä.
13
1313
Page 13

Deskmaster 142
8 PIKA- JA LYHYTVALINTAMUISTIT
Voit tallentaa 3 pikavalintanumeroa (M1, M2 ja puheposti) ja 10 lyhytvalintanumeroa (0 - 9)
puhelimen muistiin (puhelinnumeron enimmäispituus 22 numeroa, nimi 15 merkkiä). Nämä
numerot valitaan painamalla M1-, M2- tai VM-näppäintä (yksi näppäin) tai muistinäppäintä
+ numeronäppäintä 0 - 9 (kaksi näppäintä).
VM-näppäimelle on mahdollista ohjelmoida puhepostin numero. Tämän näppäimen painallus
kytkee kaiutinpuhelu-toiminnon ja valitsee automaattisesti puhepostin numeron.
8.1 Puhelinnumeron tallentaminen pika- ja lyhytvalintamuistiin
• Paina ohjelmointinäppäintä , kun puhelin on lepotilassa. Näytössä näkyy TALLENNA
NUMERO.
• Näppäile puhelinnumero ja tallenna se ohjelmointinäppäimellä .
• Anna nimi.
• Tallenna numero ja nimi muistipaikkaan:
Pikavalinta: paina pikavalintanäppäintä M1, M2 tai VM.
Lyhytvalinta: paina ensin muistinäppäintä ja sitten sitä numeronäppäintä (0 - 9), johon
haluat puhelinnumeron tallentaa.
8.2 Puhelinnumeron siirtäminen numeronäyttömuistista pika- tai lyhytvalintamuistiin
• Etsi puhelinnumero soittoluettelosta nuolinäppäimillä .
• Paina ohjelmointinäppäintä . Numero näkyy näytössä.
• Muokkaa numeroa tarvittaessa tai vahvista se painamalla ohjelmointinäppäintä .
Nimi näkyy näytössä, jos numeronäyttöpalvelu on välittänyt sen.
• Muokkaa nimeä tarvittaessa.
• Tallenna numero muistipaikkaan:
Pikavalinta: paina pikavalintanäppäintä M1, M2 tai VM.
Lyhytvalinta: paina ensin muistinäppäintä ja sitten sitä numeronäppäintä (0 - 9), johon
haluat puhelinnumeron tallentaa.
8.3 Soittaminen pika- ja lyhytvalintamuistia käyttäen
• Paina pikavalintanäppäintä (M1, M2 tai VM). Lyhytvalintaa varten paina muistinäppäintä
ja sen muistipaikan numeroa (0 - 9), johon puhelinnumero on tallennettu.
• Nosta luuri tai paina kaiutinnäppäintä Puhelin valitsee numeron automaattisesti.
Huom! Puhepostinäppäimen painallus kytkee automaattisesti kaiutinpuhelun.
8.4 Numeron tai nimen muuttaminen pika- ja lyhytvalintamuistissa
• Valitse haluamasi numero pika- tai lyhytvalintamuistista.
• Paina ohjelmointinäppäintä . Numero näkyy näytössä.
• Muuta numero tarvittaessa tai paina ohjelmointinäppäintä . Nimi näkyy näytössä.
• Muuta nimi tarvittaessa.
• Tallenna numero muistipaikkaan:
Pikavalinta: paina pikavalintanäppäintä M1, M2 tai VM.
Lyhytvalinta: paina ensin muistinäppäintä ja sitten sitä numeronäppäintä (0 - 9), johon
haluat puhelinnumeron tallentaa.
14
1414
Page 14

Deskmaster 142
Huom! Puhepostinäppäimeen tallennettua numeroa ei ole mahdollista muuttaa. Sen tilalle voidaan vain
asettaa toinen numero.
8.5 Pika- ja lyhytvalintanumeron poistaminen
a) Pikavalinnat M1, M2 ja VM
Paina ohjelmointinäppäintä ja sen jälkeen pikavalintanäppäintä.
b)Lyhytvalinnat (0 - 9)
Paina ohjelmointinäppäintä , muistinäppäintä ja kyseisen muistipaikan näppäintä 0 - 9.
9 TAKUU
Takuuaika: 1 vuosi puhelimen tekovioille.
Attention: Palauta laite alkuperäisessä pakkauksessaan.
Muista liittää mukaan ostokuitti.
Takuu ei ole voimassa ilman ostokuittia.
Maahantuoja: Oy Hedoy Ab
Teleosasto
Lauttasaarentie 50
00200 Helsinki
www.hedoy.fi
15
1515
Page 15

Deskmaster 142
1 Installation 17
2 Buttons/LED 17
3 Display/LED 18
3.1 Standard display information 18
3.2 LED indicators 18
4 Operation 19
4.1 Setting the language of the display text 19
4.2 Setting the Date and Time 19
4.3 Setting the Dial Prefi x 19
4.4 Telephone reset 19
5 Making a phone call 20
5.1 Last number redial 20
5.2 Deactivating the microphone (mute) 20
5.3 Ringer volume 20
5.4 Flash Key 20
5.5 Headset operations (optional) 20
6 Caller ID 21
6.1 General information 21
6.2 Call list 21
6.2.1 Scrolling through the Call List 21
6.2.2 Erasing numbers from the Call List 22
6.2.3 Calling a number from the Call List 22
6.3 Voice mail 22
6.4 E-mail notification 22
7 Phone Book 23
7.1 Use of the alphanumerical keypad 23
7.2 Adding a number to the Phone Book 24
7.3 Saving a number from the Call List in the Phone Book 24
7.4 Selecting and calling a number from the Phone Book by name 24
7.5 Changing a number and name from the Phone Book 24
7.6 Erasing a number and name from the Phone Book 24
8 Memory numbers 25
8.1 Programming Direct and Indirect memory numbers 25
8.2 Saving a number from the Call List as a Direct/Indirect Memory number 25
8.3 Calling a Direct/Indirect Memory number 25
8.4 Changing a number or name in the Direct/Indirect Memory 25
8.5 Erasing a number or name from the Direct/Indirect Memory 26
9 WARRANTY 26
16
1616161616
Page 16

Deskmaster 142
1 INSTALLATION
• Connect one end of the line cord to the telephone line wall socket and the other end to the
bottom of the phone.
• Put batteries in the battery compartment to activate the display :
- Open the battery compartment at the bottom of the unit.
- Insert 4 AA batteries (1,5V)
- Close the battery compartment.
Instead of using batteries, you can also use an adapter (DC 9V / 300 mA ( ))
(adapter not included).
Note: The memories remain saved, even without batteries or an electricity supply (flash memory) !
2 BUTTONS/LED
1 Erase/Mute-button
2 ‘Handsfree’ indicator
3 ‘New Calls’ indicator
4 Memory button
5 Direct Memory
button 2
6 Direct Memory
button 1
4
5
6
7
7 Flash
8 Down button
9 Up button
10 Dial back button
11 Set button
12 Redial / Pause button
13 Phone Book button
14 Voice Mail button VM
15 Handsfree button
16 Alphanumerical buttons
17 Ring volume switch
18 Adapter input
19 Telephone line input
20 Headset connection (optional)
21 Headset/Handsfree selection switch (optional)
2
3
16
17 1821
1920
1
8
9
10
11
12
13
14
15
17
1717171717
Page 17

Deskmaster 142
3 DISPLAY/LED
3.1 Standard display information
Display information Description
12:15
09/12
0123456789
PIETER JANSSENS
NEW
02
Time indication (24h format)
Date indication (day/month)
You received new messages in the telephone
network mailbox
Caller’s telephone number
Caller’s name
You received a new call
The number of the call in the Call list, when
shown together with ‘CALL#’ on the display
Repeated call counter, when shown together with
‘RPT’ on the display
The battery is almost empty
Phone Book entry indication
You received an email message
3.2 LED Indicators
LED Description
Handsfree or Semi-Handsfree ON
Blinks once = new call received in the Call list.
Blinks twice = new voice mail message received.
18
18181818
18
Page 18

Deskmaster 142
4 OPERATION
4.1 Setting the language of the display text
You can select the desired language as follows:
• Press and hold the Down button for 6 seconds until the default language is shown on
the display.
• Press the Up and Down buttons to select the language.
• Press the Set button to confirm your setting and to go to the next setting (4.2 Setting
the Date and Time) or press the Phone Book button to exit the menu.
4.2 Setting the Date and Time
When you have a subscription to the Caller ID service and your telephone provider sends the
date and time together with the telephone number, the phone’s clock will be set automatically.
It is also possible to set the clock manually:
• After setting the language, you will enter the setting of the Date and Time.
• Enter the day, the month and the time (24h format) by means of the alphanumerical buttons.
• Press the Set button , to confirm and to go the next setting (4.3. Setting the Dial Prefix)
or press the Phone Book button to exit the menu.
4.3. Setting the Dial Prefix
When you dial out a telephone number from the call list, the programmed prefix will be added
in front of the telephone number. This function is usefull when you have a PABX where you
have to dial a prefix to take the external line.
• After setting the date and time, you will enter the setting of the Dial Prefix.
• Enter the desired prefix by means of the numerical buttons (wrongly entered digits can be
erased by means of the Erase button ).
• Press the Set button to confirm and to go to the next setting (4.4.Telephone reset) or
press the Phone Book button to exit the menu.
4.4. Telephone reset
If you want to bring the telephone back in its initial status, it is possible to reset the telephone.
When you reset your telephone, all stored information will be lost.
• After setting the Dial Prefix, you will enter the Reset setting.
• Press the Erase button to confirm reset or press the Phone Book button to leave the
m e n u .
Warning : When you reset the unit all memory numbers and Call list numbers will be
erased!
19
1919191919
Page 19

Deskmaster 142
5 MAKING A PHONE CALL
There are 2 ways to make a phone call :
1.Enter the telephone number. If needed, you can erase the last digits by pressing the Erase
button . Pick up the handset or press the Handsfree button . After 3 seconds, the
phone number will be dialled automatically.
2. Pick up the receiver or press the Handsfree button . Enter the telephone number.
Note: The call duration timer is shown on the 3rd line of the display [h:mm:ss].
5.1 Last number redial
The Deskmaster 142 saves the 5 last dialled telephone numbers in the memory with indication
of the call duration, the date and the time. Press the Redial button to scroll through the
Redial memory. When the desired number appears on the display, there are two ways to call back :
1.Press the Call Back button . The unit will take the external line in handsfree mode and the
desired number will be dialled automatically.
2 . Pick up the receiver or press the Handsfree button . The number will be dialled automatically
after 3 seconds.
Note: The Redial button can be used as a Pause button while entering a telephone number !
The letter ‘P’ appears on the display on the location where you have added a pause of 3 sec.
5.2 Deactivating the microphone (mute)
It is possible to deactivate the microphone during a conversation by pressing the Erase/Mute
button . You can now talk freely without the caller hearing you. ‘MUTE’ appears on the
display when the microphone is deactivated. Press the Erase/Mute button again if you want
to resume your conversation.
5.3 Ringer volume
When you receive a phone call, the unit will ring. The ring volume can be adjusted by means of
the Ring Volume switch at the back of the phone (Hi- , Lo- , Off- ).
5.4 Flash Key
Press the Flash button (R) to use certain services as ‘Call Waiting’ (if this service is provided by your
telephone company); or to transfer phone calls when you are using a telephone exchange (PABX).
5.5 Headset operations (optional)
If the handset connection and switch are available at the back of the phone, you can choose
whether you want to use a headset or the handsfree function.
• When you use a headset, plug it into the headset connection and put the switch on .
Press the Handsfree button to make a phone call.
• When you use the handsfree function, put the switch on . Press the Handsfree button to
make a phone call.
20
2020202020
Page 20

Deskmaster 142
6 CALLER ID
6.1 General information
When you have a subscription to the Caller ID service from you telephone provider, the caller’s
phone number will appear on the display. Depending on the telephone network, the caller’s
name will also be shown on the display. If your telephone company doesn’t send the name,
but you saved the telephone number with a name in the Phone Book or in the direct/indirect
memory, the programmed name will be shown on the display (name tagging function).
During an incoming call, the following information can appear on the display:
NUMBER UNKNOWN
You have a subscription to the Caller ID service but the
caller’s number is not available (for ex. international calls)
NUMBER BLOCKED
You have a subscription to the Caller ID service but the
caller’s number is a private number.
N E W 09 / 1 2 12 :1 5
CALL#
0 1 - - - - - - - ----
N U N B ER UNK NO W N
N E W 09 / 1 2 12 :1 5
CALL#
0 1 - - - - - - - ----
N UM BER B L O CKED
6.2 Call list
The Deskmaster 142 has a Call List in which you can save at least 199 incoming telephone
numbers with name. The phone numbers you have received more than once, will also be saved
with indication of the repeat call counter (max 7). Every incoming number is saved in the Call
List with indication of date and time.
In standby mode the number of new received and total calls is shown on the display, for ex. :
09/12 12: 15
-03 - - 1 0 -
N E W T O T A L
• NEW 03 - You received 3 new calls in the Call List.
• TOTAL 10 - There are 10 calls in total in the Call List: 3 new and 7 old (already checked) calls.
6.2.1 Scrolling through the Call List
You can scroll through the Call list by means of the Up and Down buttons .
When you have reached the beginning/end of the list, “TOP/END” appears on the display.
Every time a new call comes in, “NEW” is shown on the display. The number of the incoming
call is shown under the indication “CALL#” on the display. The highest number is the last call
received. Number 1 is the oldest call.
For example: When you have received 4 calls and you press the Down button , the last call
will appear on the display. If you press the Down button again, the next call will be shown.
21
2121212121
Page 21

Deskmaster 142
Down button 1st press 2nd press 3rd press 4th press 5th press
CALL# CALL# 4 CALL# 3 CALL# 2 CALL# 1
Display last call 2nd 3rd Oldest call TOP/END
6.2.2 Erasing numbers from the Call List
a) Erasing one number
• Select the call you wish to erase by means of the Up and Down buttons .
• Press the Erase button once. “CLEAR?” appears on the display.
• Press the Erase button once again to confirm or press the Up or Down button to
scroll through the rest of the Call List.
b) Erasing the entire Call List
• Enter the Call List, press and hold the Erase button until “CLEAR ALL?“ appears on the
display.
• Press the Erase button once again to confirm or press the Up or Down button to
scroll through the rest of the Call List.
Note : You can only erase the entire Call List if you have no new calls. You have to read the new calls first
before they can be erased!
6.2.3 Calling a number from the Call List
• Select the desired telephone number with the Up or Down button .
• Press the Call Back button and the number will be dialled automatically in handsfree
mode. Pick up the handset if you want to communicate over the handset.
6.3 Voice mail
!!! This function only works if your telephone company sends the Voice Mail signals
together with the Caller ID information !!!
When the Deskmaster 142 has received a voice mail message, the Voice Mail symbol
appears on the display. As soon as you have listened to the messages in the mailbox, the
symbol disappears.
6.4 E-mail notification
!!! This function only works if your email service provider sends an email warning, by
calling your number when there is a new email!!!
When you have received a new email message, your ISP will call your telephone using a special
number. This call means you have received new email messages. If you program this number, with
a special name, in the Phone Book, the Deskmaster 142 will recognize this number and will show
the following symbol on the display:
22
2222222222
Page 22

Deskmaster 142
To set the ISP notification number:
• Press the Set button when the unit is in standby mode.
• Enter the telelphone number from your ISP (the number that will call you when there is an
email message).
• Press the Set button again.
• Press the numerical button ’0’ four times until ‘@’ appears on the display.
• Press the Set button again to save the ISP phone number and the name ‘@’ in the
Phone Book.
7 PHONE BOOK
You can store up to 99 names (max. 15 characters) and numbers (max. 22 digits) in the Phone
Book of the Deskmaster 142.
7.1. Use of the alphanumerical keypad
Use the alphanumerical keypad to enter text. To select a letter, press the corresponding button.
For ex. if you press numerical button ‘5’, the first character (J) will be shown on the display.
Press multiple times if you want to select another character under this button.
Press button ‘2’ twice to select the letter ‘B’. If you want to select ‘A’ as well as ‘B’, press
button ‘2’ once to select ‘A’, wait for 2 seconds until the cursor has moved to the next location
and press then button ‘2’ twice to select ‘B’.
Wrongly entered characters can be erased by pressing the Erase button . You can move the
cursor by pressing the Up and Down buttons . The character in front of the cursor will be
erased.
Available Characters
Press these buttons to get the following characters:
[ 1 ] S p a c e . 1 ? ! : , “ ’ ( )
[ 2 ] A B C 2 Ä Å À Á Â Æ @ ß Ç
[ 3 ] D E F 3 Ë È É Ê
[ 4 ] G H I 4 Ğ Ï Ì Í Î
[ 5 ] J K L 5
[ 6 ] M N O 6 Ñ Ö Ò Ó Ô Ø
[ 7 ] P Q R S 7 ß $
[ 8 ] T U V 8 Ü Ù Ú Û
[ 9 ] W X Y Z 9
[ 0 ] 0 + - @ & / % $ £
[ * ] *
[ # ] #
23
2323232323
Page 23

Deskmaster 142
7.2 Adding a number to the Phone Book
• Press the Set button when the unit is in standby mode. “ENTER NUMBER” appears on
the display.
• Enter the desired telephone number and press the Set button .
• Enter the name by means of the alphanumerical keypad and press the Set button to
c o n fir m .
7.3 Saving a number from the Call list in the Phone Book
• Select the desired call from the Call list with the Up and Down buttons .
• Press the Set button . The number is shown on the display.
• Modify the number if necessary or press the Set button to confirm. The name is shown
on the display (if sent by the Caller-ID).
• Modify or add the name if necessary and press the Set button to confirm. The number
and name are saved in the Phone Book.
7.4 Selecting and calling a number from the Phone Book by name
• Press the Phone Book button .
• Enter one or more characters of the desired name by means of the alphanumerical keypad.
• Search for the name in the Phone Book by pressing the Up and Down buttons . The
first name that begins with this charachter, appears on the display.When there is no name
with this character available, the next name of the alphabetical list will be shown on the display.
• Press the Up and Down buttons to search for a name.
• When the desired name is shown on the display, pick up the handset and the number will
be dialled automatically.
7.5 Changing a number and name from the Phone Book
• Select the desired number from the Phone Book by name as mentioned in 7.4.
• Press the Set button . The number is shown on the display.
• Change the number if necessary or press the Set button to confirm.
The name appears on the display.
• Change the name if necessary or press the Set button to confirm. The number and name
are saved in the Phone Book.
7.6 Erasing a number and name from the Phone Book
• Select the desired number from the Phone Book by name as mentioned in 7.4.
• Press the Erase button . “CLEAR?” appears on the display.
• Press the Erase button again to confirm or another button to exit the menu.
24
2424242424
Page 24

Deskmaster 142
8 MEMORY NUMBERS
You can program 3 Direct (M1-M2 and Voice Mail) and 10 Indirect (0-9) memory numbers
(number: max 22 digits, name: max. 15 characters). These memory numbers can be dialled :
by pressing M1, M2, or VM (one button) or the Memory button + 0…9 (two buttons).
Under the Voice Mail button VM you can program the Voice Mail number. If you press this
button, the unit goes to handsfree mode and the Voice Mail number will be dialled automatically.
8.1 Programming Direct and Indirect memory numbers
• Press the Set button in standby mode. “ENTER NUMBER” appears on the display.
• Enter the desired telephone number and press the Set button to confirm.
• Enter the desired name.
• Press the Direct Memory button (M1-M2-VM) to save it in the direct memory; or press the
Memory button , followed by the Indirect Memory number (0-9) to save it in the
indirect memory.
8.2 Saving a number from the Call List as a Direct/Indirect Memory number
• Select the desired call with the Up or Down button .
• Press the Set button . The number is shown on the display.
• Change the number if necessary or press the Set button to confirm.
The name appears on the display if it was sent together with the number.
• Change the name if necessary.
• Press the desired Direct Memory button (M1-M2-VM) if you wish to save the number in the
direct memory; or press the Memory button , followed by the Indirect Memory number
(0-9) if you prefer to save the number in the indirect memory.
8.3 Calling a Direct /Indirect Memory number
• Press the desired Direct Memory button (M1-M2-VM) or press the Memory button
followed by the Indirect Memory number (0-9) to call a number.
• Pick up the handset or press the Handsfree button and the number will be dialled
automatically.
Note: If the Voice Mail button (VM) is pressed, the number will be dialled automatically in handsfree mode.
8.4 Changing a number or name in the Direct/Indirect Memory
• Select the desired telephone number in the Direct/Indirect Memory.
• Press the Set button . The desired number appears on the display.
• Change the number if necessary or press the Set button to confirm. The name appears
on the display.
• Change the name if necessary.
• Press the desired Direct Memory button (M1-M2-VM) if you wish to save the number in the
direct memory; or press the Memory button , followed by the Indirect Memory number
(0-9) if you prefer to save the number in the indirect memory.
Note: The Voice Mail button VM can not be changed, only overwritten !! (see 8.1).
25
2525252525
Page 25

Deskmaster 142
8.5 Erasing a number or name from the Direct/Indirect Memory
a) Erasing a direct memory number (M1-M2-VM)
Press the Set button followed by the desired Memory button M1, M2 or VM.
b)Erasing an indirect memory number (0-9)
Press the Set button followed by the Memory button and corresponding memory
number 0-9.
9 WARRANTY
Warranty: 1 year on defects of the phone.
Attention: Return your phone in the original packaging.
Do not forget to include your purchase invoice.
The warranty is not valid without the purchase invoice.
26
2626
Page 26

www.topcom.be
 Loading...