

Page 1

Manual and Tutorials
TomTom Navigator Quickstart Guide
TomTom Navigator User Guide
Installation Poster
Copyright ©1996-2004 TomTom B.V., The Netherlands.
TomTom is a trademark of TomTom BV.
Data copyright ©2004 Tele Atlas N.V., The Netherlands.
Data copyright ©2004 Tele Atlas Inc, U.S.A.
http://www.tomtom.com
Page 2

Introduction
Thank you for purchasing TomTom Navigator as your navigation system. This Quick Start
Guide contains basic instructions for using TomTom Navigator. This guide is to be used after
the software has been installed on your Pocket PC and the GPS receiver has been connected.
If necessary, refer to one of the other two documents that have been supplied:
Installation poster
User guide
Refer to www.tomtom.com for the latest information.
The poster contains procedures for mounting and cabling the hardware,
and installing the software, to make the system ready for first use.
This guide is provided on the CD-ROM and contains detailed
instructions on using TomTom Navigator. For custom installation, refer
to this guide.
Chapter 1
Launching Navigator for the first time
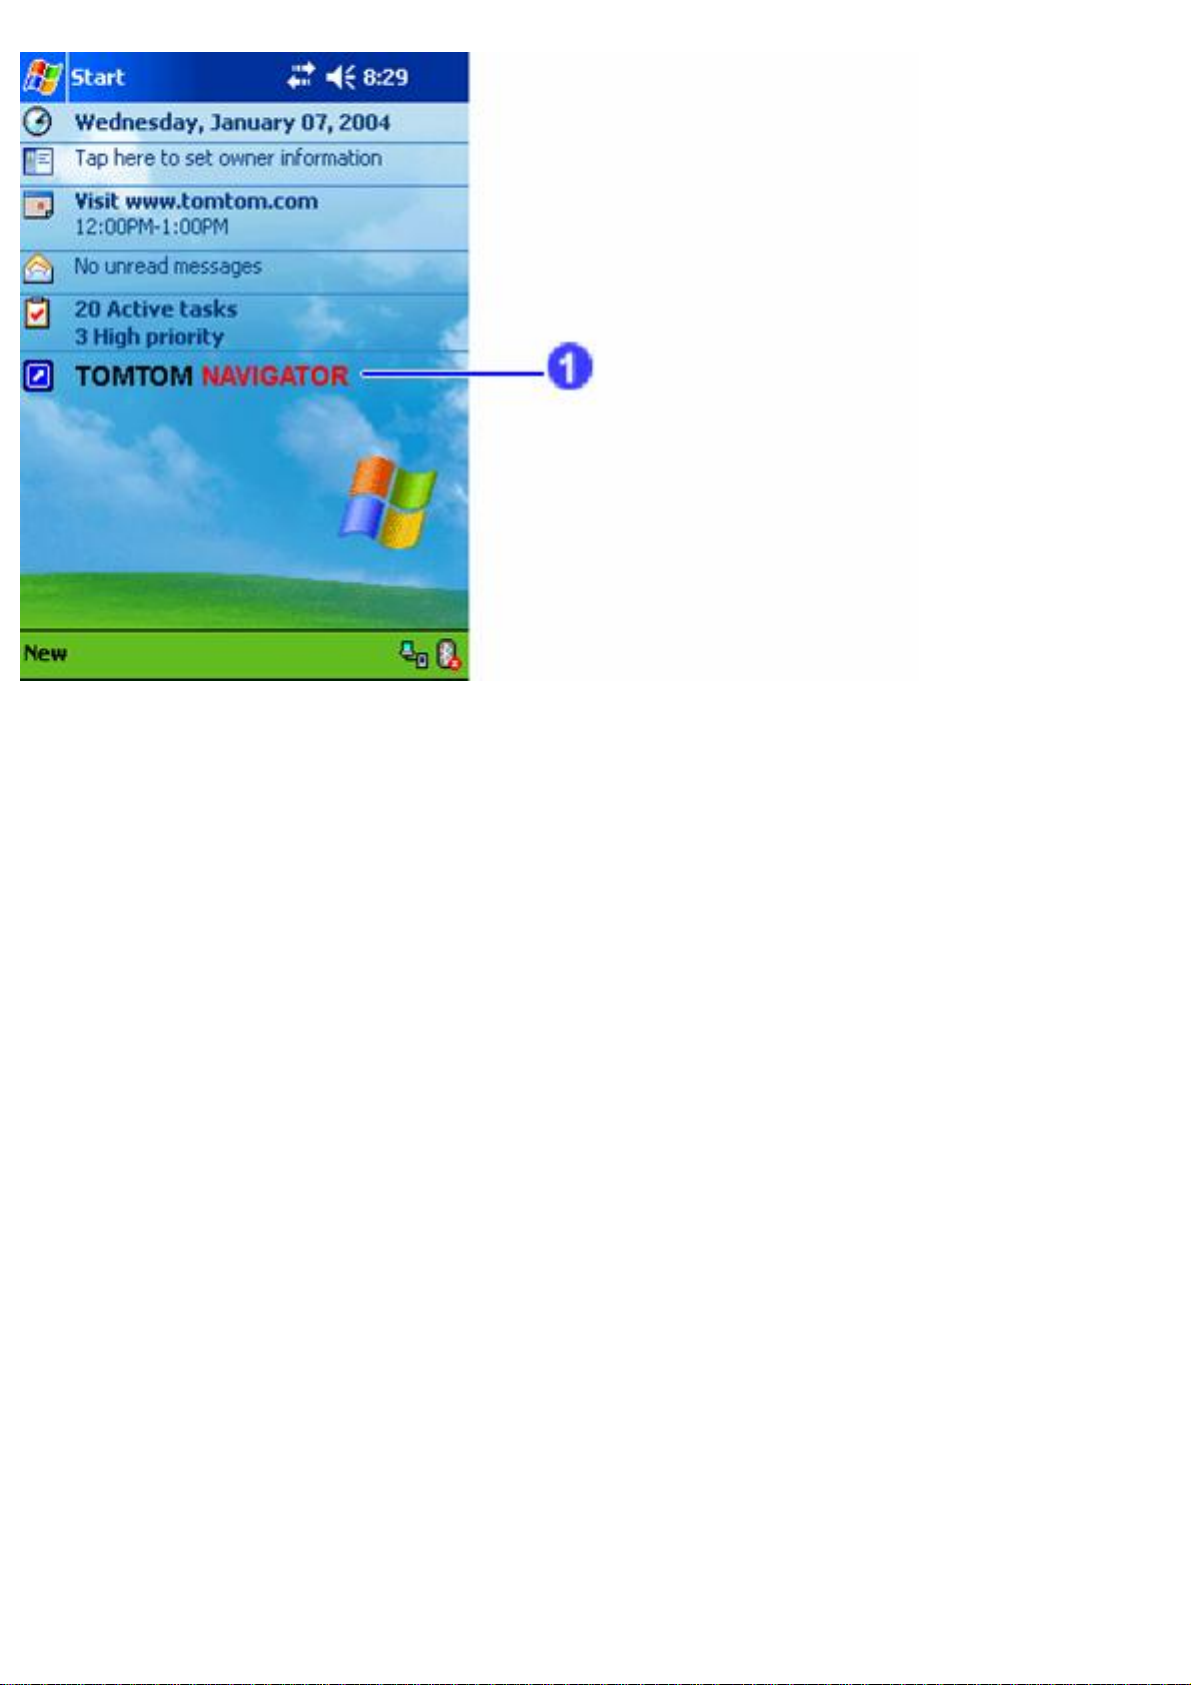
The GPS receiver is connected, and the TomTom Navigator software has been installed. Tap
TomTom Navigator on the Pocket PC’s start-up screen. The first time you do this, it will
start the installation wizard that will guide you through the configuration of TomTom
Navigator. After that, tapping
will start TomTom Navigator.
Page 3
If you cannot start TomTom Navigator, refer to the installation poster and verify that you have
properly installed TomTom Navigator. More information on the installation of TomTom
Navigator can be found in the user guide on CD-ROM 1.
Chapter 2
Understanding Navigator
When TomTom Navigator starts up it will show the Navigation View. It displays your position
on the map; TomTom Navigator gets this position from your GPS receiver. If your GPS
receiver is switched off, or has not (yet) determined a clear position from the GPS satellites,
the Navigation View will indicate the GPS position as unreliable.
Page 4
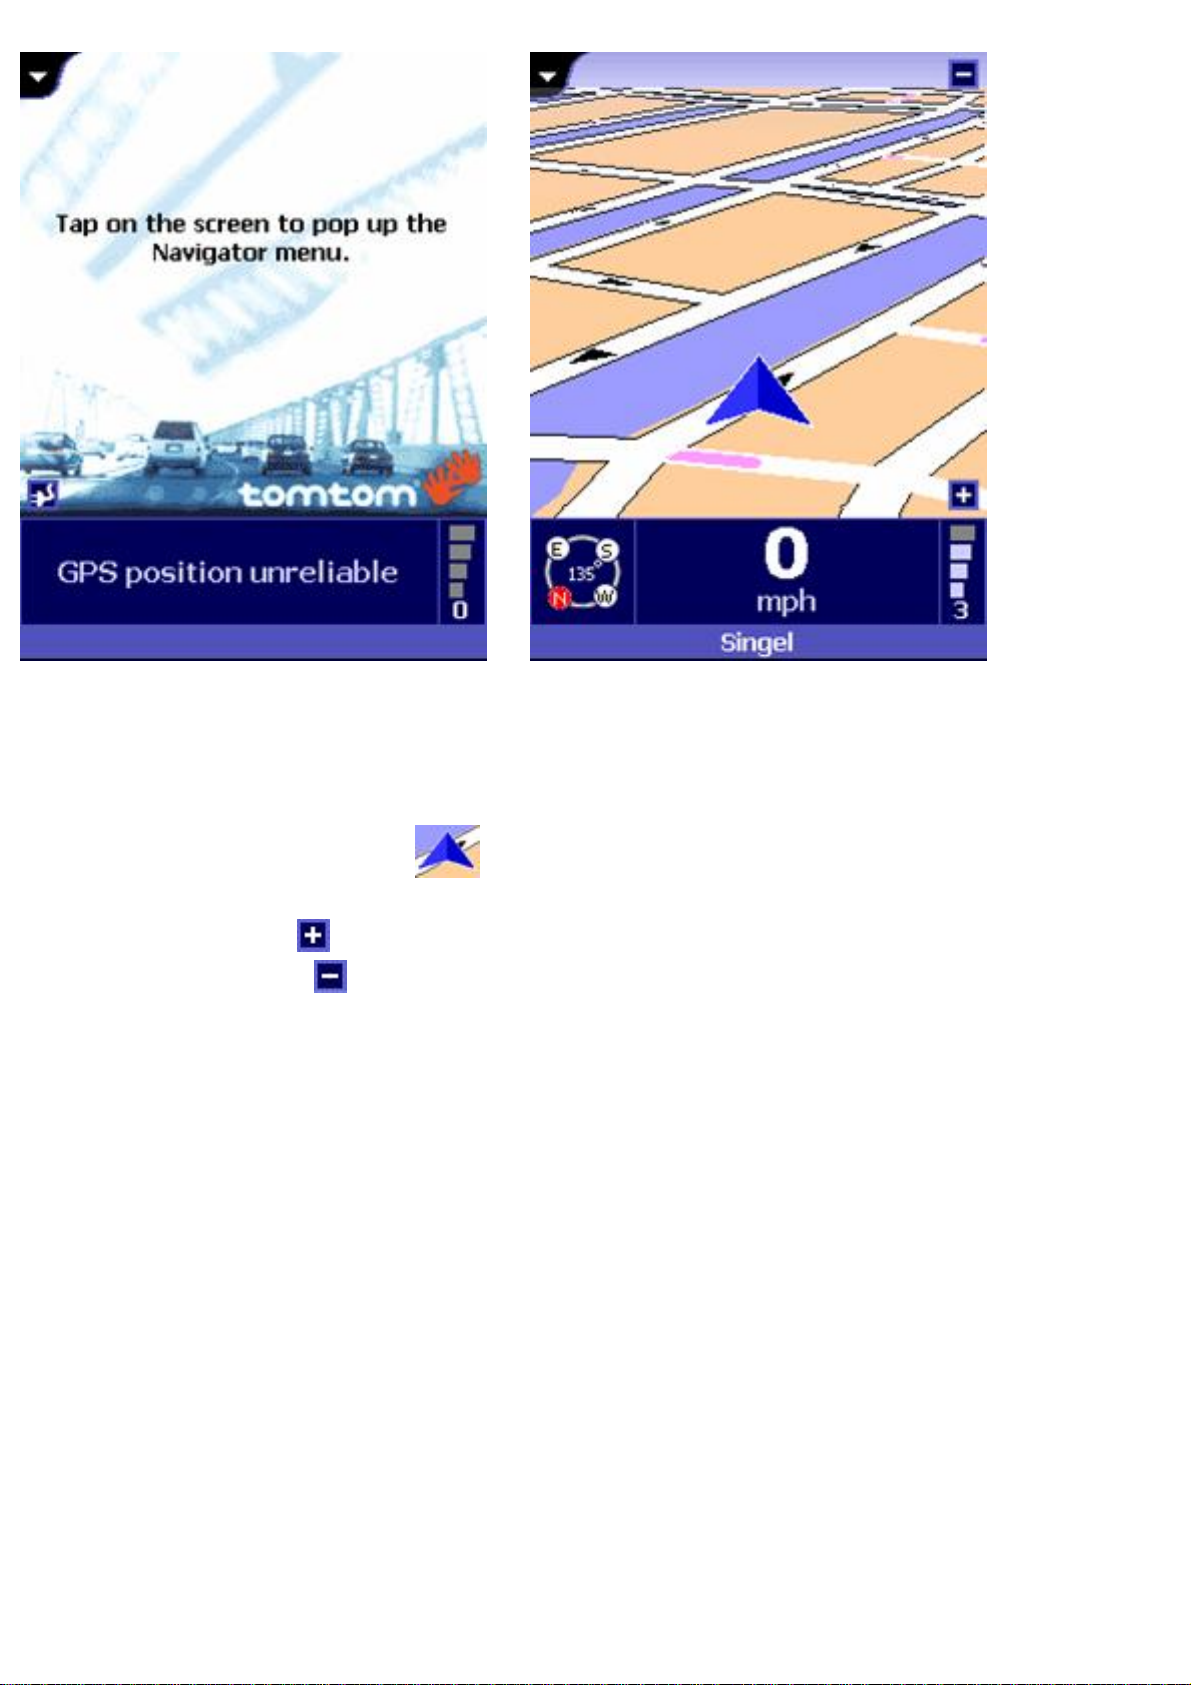
The Navigation View when your GPS
position is not known
Your position is indicated by the sign.
A. To zoom in, tap in the lower right-hand corner.
B. To zoom out, tap in the upper right-hand corner.
Please note that:
A. The first time you use the GPS receiver, it may take up to 45 minutes before it can
provide a position.
B. The GPS receiver has to have a free view to the sky.
C. In the car, place the GPS receiver behind the windscreen. If your car has a heat
reflecting windshield, place the GPS receiver behind the rear-view mirror or behind the
rear window, or use an external GPS antenna.
The Navigation View when your GPS
position is known but no destination has
yet been provided
Tap the centre of the screen to open the Navigation Menu, which provides access to all the
options and functions available.
Using Navigator
Page 5
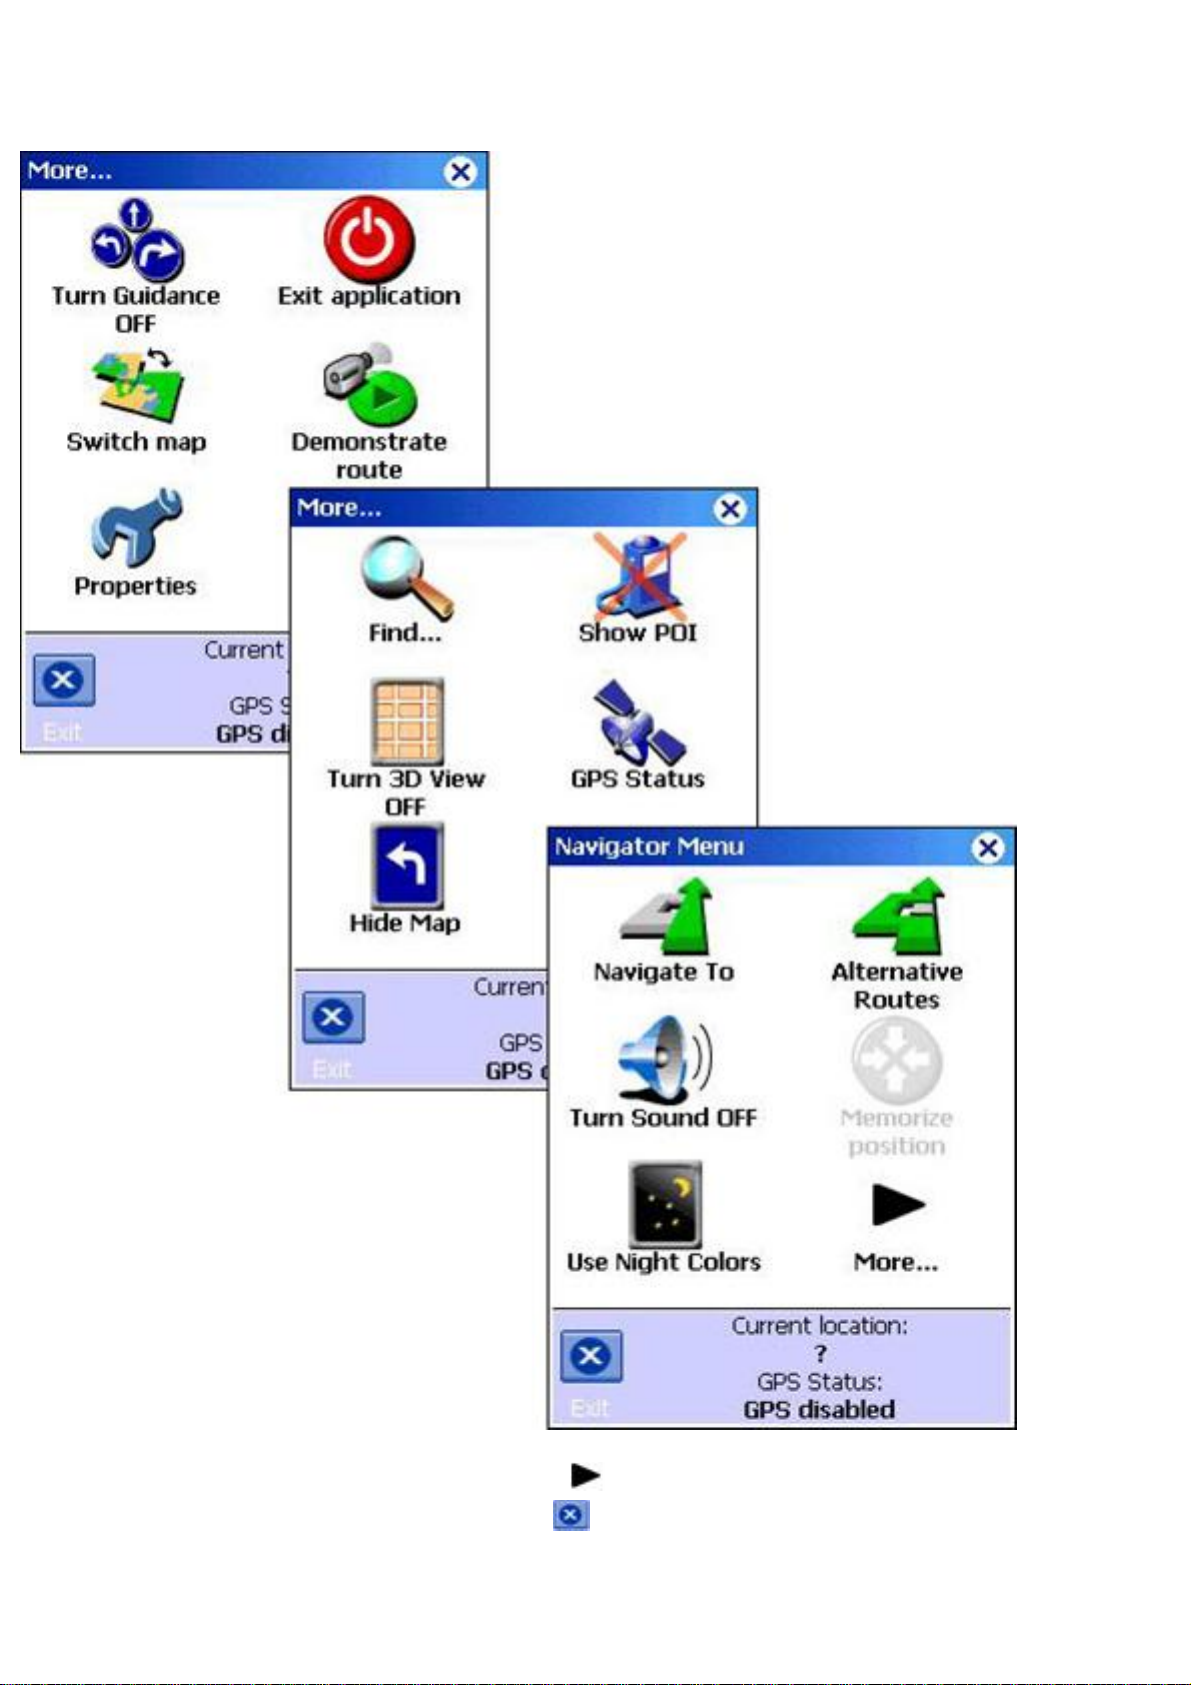
The Navigation Menu appears when you tap the centre of the Navigation View. It provides
access to all navigation functions.
1. To access any of the functions, tap the corresponding icon.
2. To browse to the next menu page, tap More….
3. To return to the Navigation View, tap Exit.
Page 6

Planning your first route
Navigate to an address
To plan a route from your current position to an address:
1. In the navigation menu, tap Navigate To.
You are now asked to choose a type of destination. Some of the items on this menu
may be dimmed, indicating that they are currently unavailable.
2. Tap Address.
3. Enter the first letters of the name of the city. A few letters should be enough. Cities with
a name that sounds like the entered letters will be displayed in the list. Tap the city in
the list.
Note: Depending on the postcode system of the country, you can also enter a postcode to find a
city.
Page 7
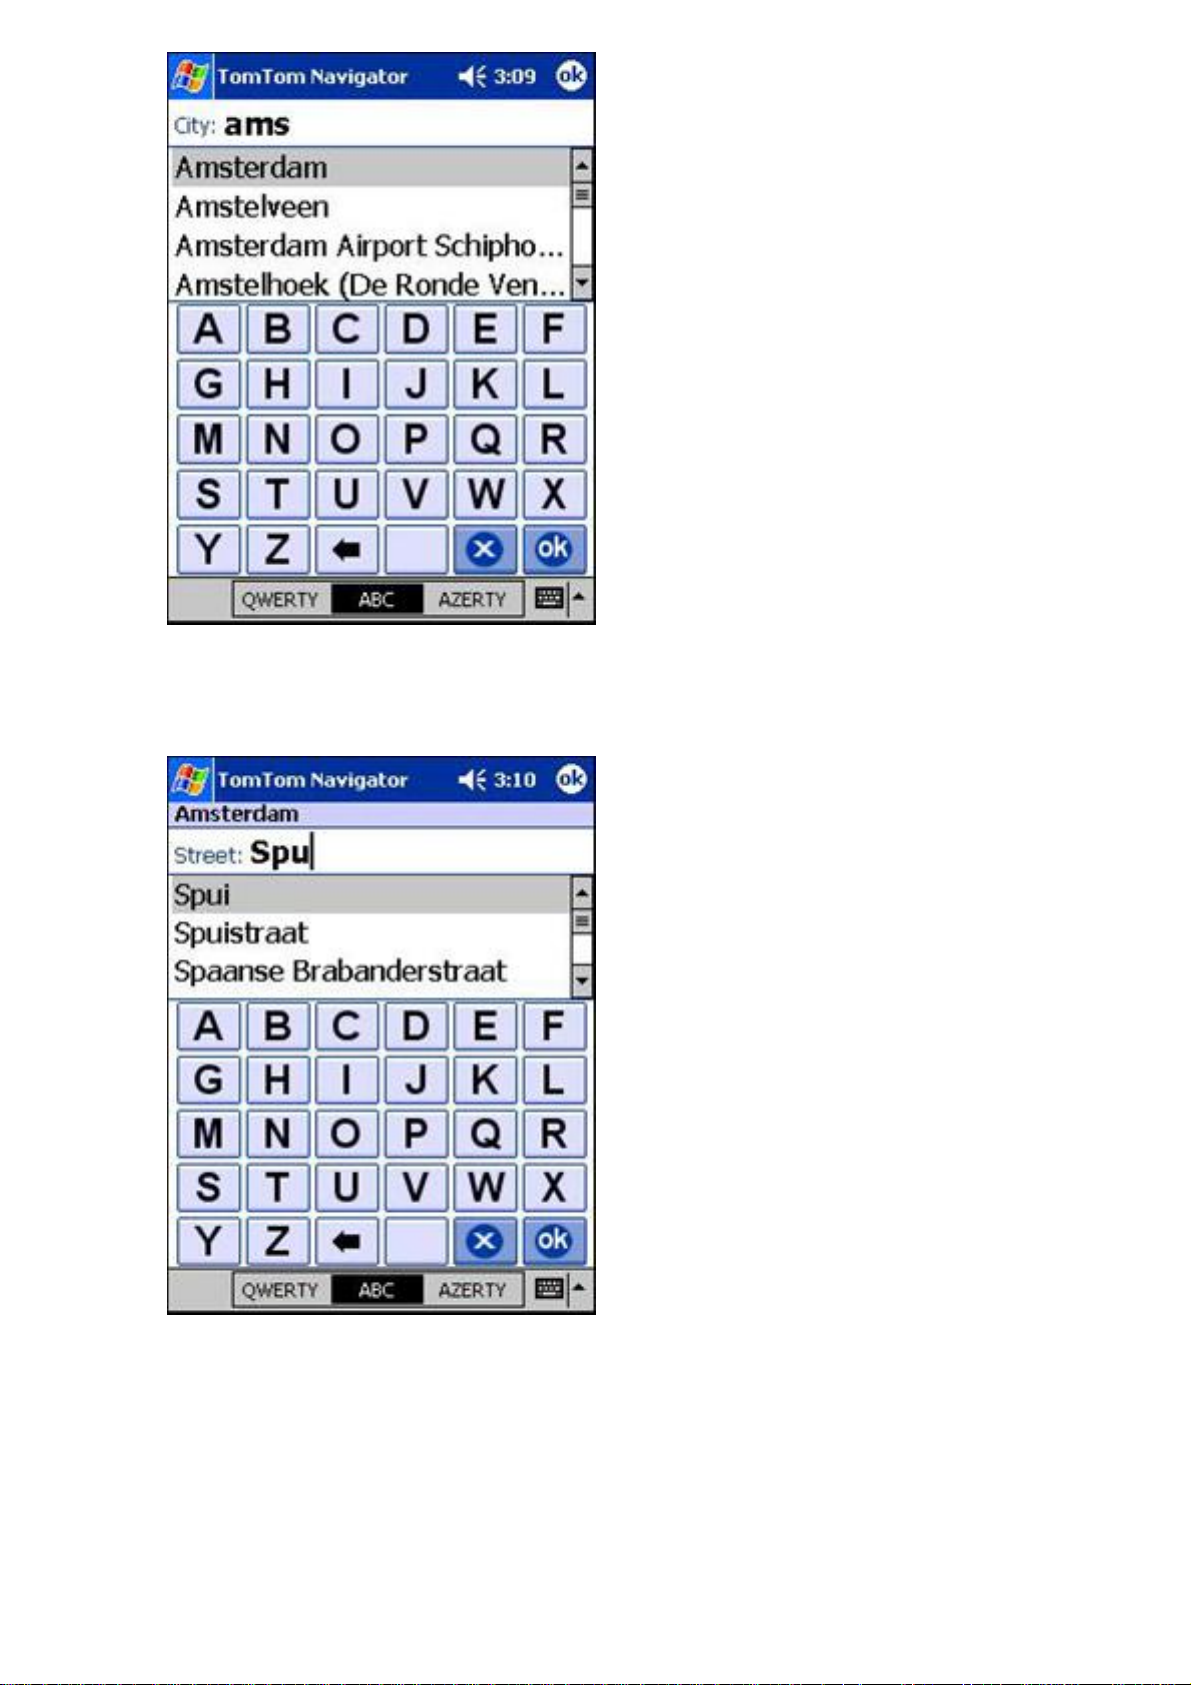
4. Enter the first letters of the street name until you see the street you are looking for in
the list. Then, tap on the street name.
5. Enter the house number or select a street crossing.
Page 8
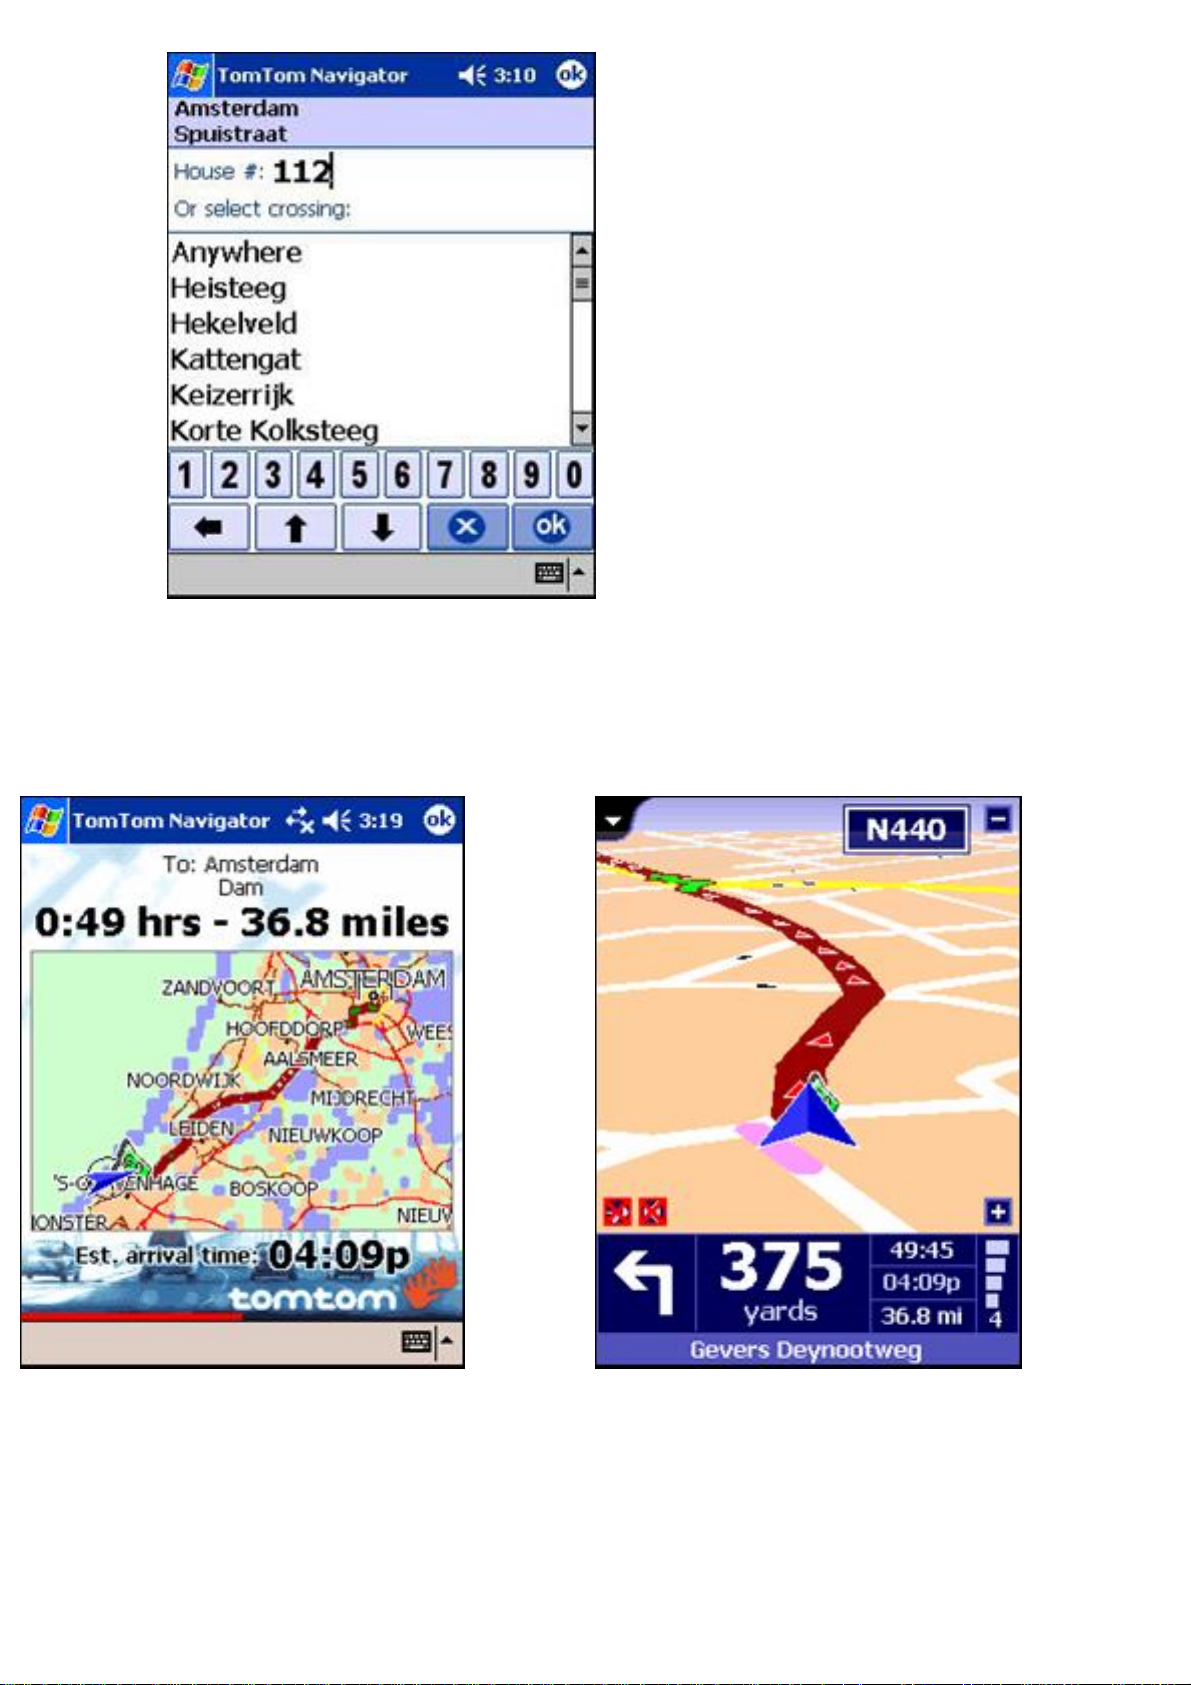
TomTom Navigator will now plan a route from your current GPS location to the destination
you have just entered. A summary of the route is shown. Wait a few seconds for the route
summary to close automatically, or tap the screen to close the route summary and to start
navigation immediately.
The route summary is shown for a few
Start driving
seconds
Note: route planning will not start unless TomTom Navigator knows your current location –
which requires a valid GPS signal. If necessary, refer to your installation poster to find out
how to connect your GPS device.
Page 9

Driving around
The screen will now look similar to this:
• On the map, a dark red path indicates the planned route.
• Shows the next driving instruction: an arrow showing what to do, and
a distance indicating when to do it.
• At the very bottom you should see the name of the next street.
The lower right-hand corner shows your journey information:
the remaining time to the destination
the estimated arrival time
the remaining distance to the destination
Once you start driving, driving instructions will be provided in advance, by a voice. If you
deviate from the proposed route, TomTom Navigator will provide a new route within seconds.
Should you miss a spoken
instruction, you can tap on the
driving instruction to repeat it.
Page 10
Tap the journey
information to display
the route summary
A step further
Now try navigating to a point of interest or a location. In the Navigation Menu tap
Navigate To, then:
• Tap Point of interest to navigate to a point of interest
• Tap Recent location to navigate to one of your last destinations
To navigate to Home, Favourites or an itinerary destination you first have to define these
locations. Refer to the User Guide for more information.
Set preferences
You can customise the look and feel of TomTom Navigator. Here's a quick guide to the most
relevant. For a full description of all preference settings refer to the TomTom Navigator user
guide on the CD-ROM.
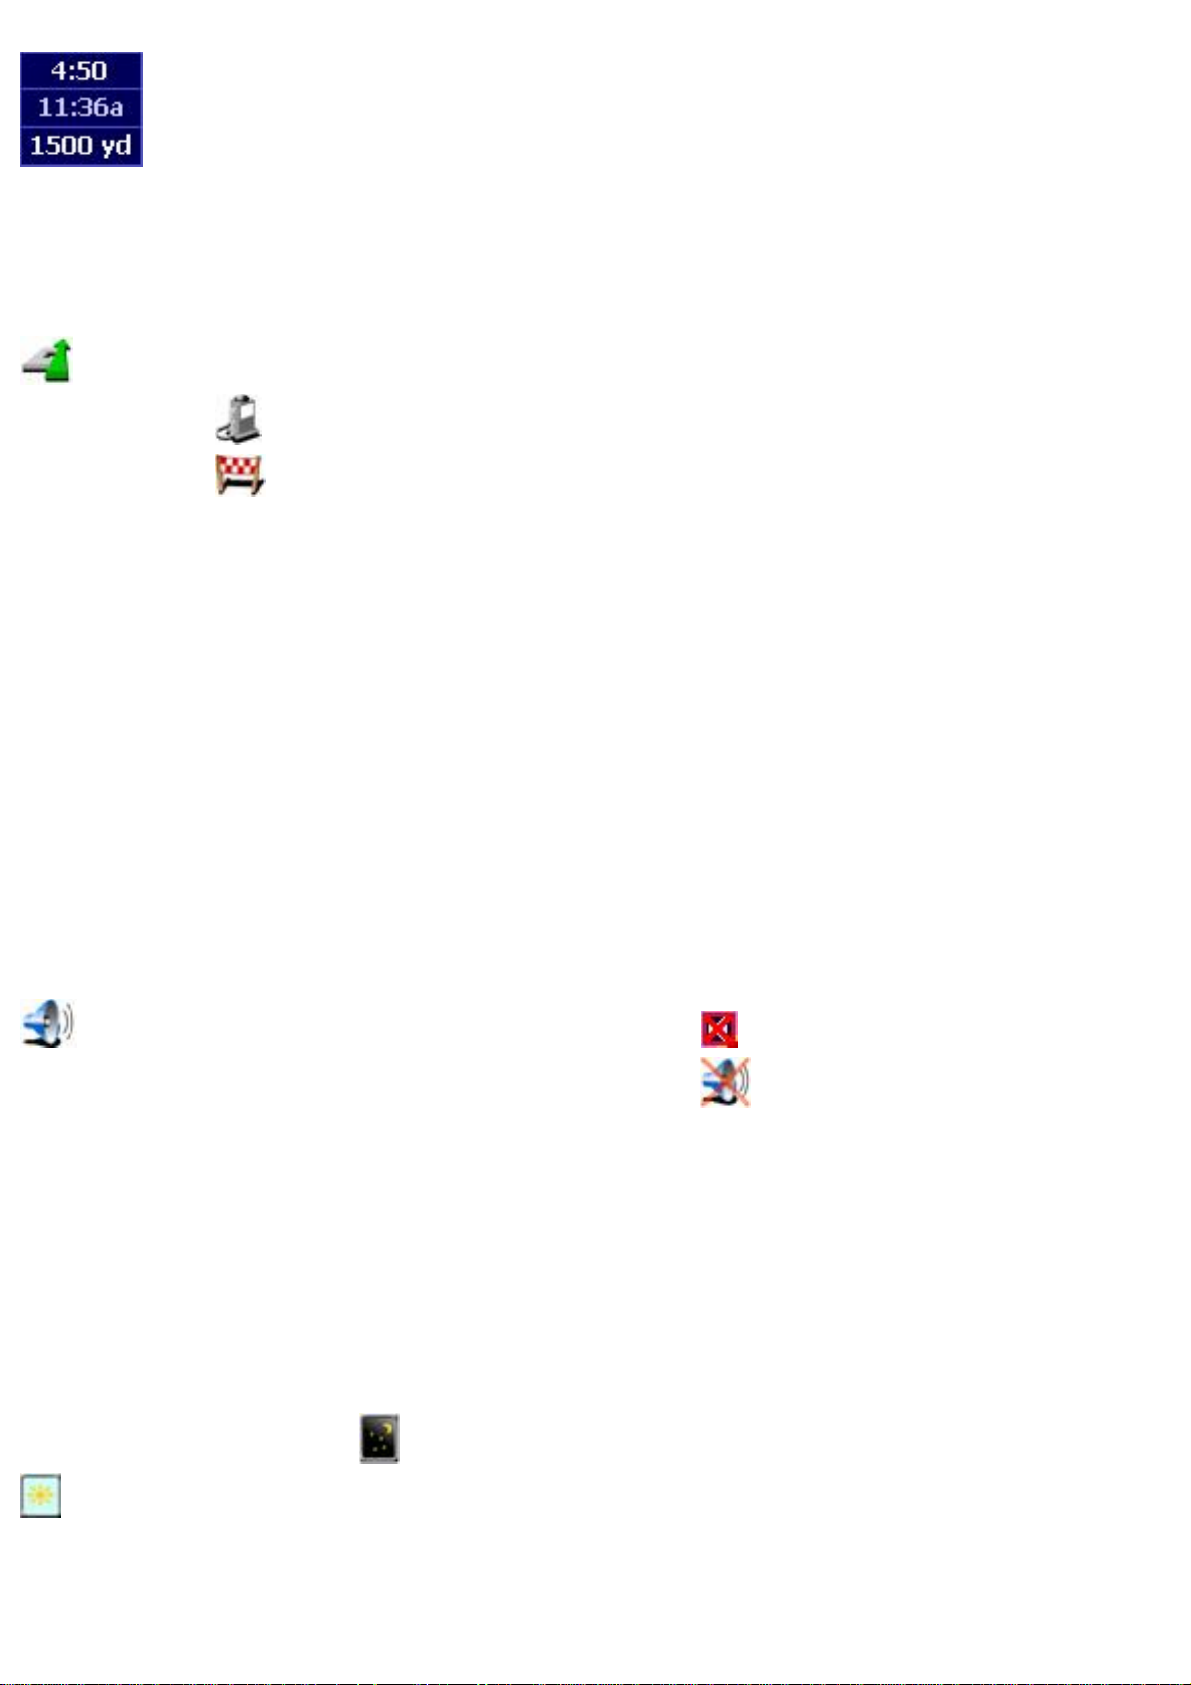
Turning the sound on and off
You can turn off the voice that gives navigation instructions: In the navigation menu tap
Turn Sound OFF. In the Navigation View the icon in the lower left corner of the map
indicates that sound is turned off. To turn on sound, tap
Navigation Menu.
Night and day colour scheme
Turn Sound ON in the
Normally, TomTom Navigator uses bright colours so that you can see the map even in bright
sunlight. When it is dark outside, you may want to switch to night colours. The map will then
be displayed using subdued colours that will not interfere with your night vision.
In the navigation menu, tap Use Night Colours. To switch back to day colours, tap
Use Daylight Colours.
Page 11
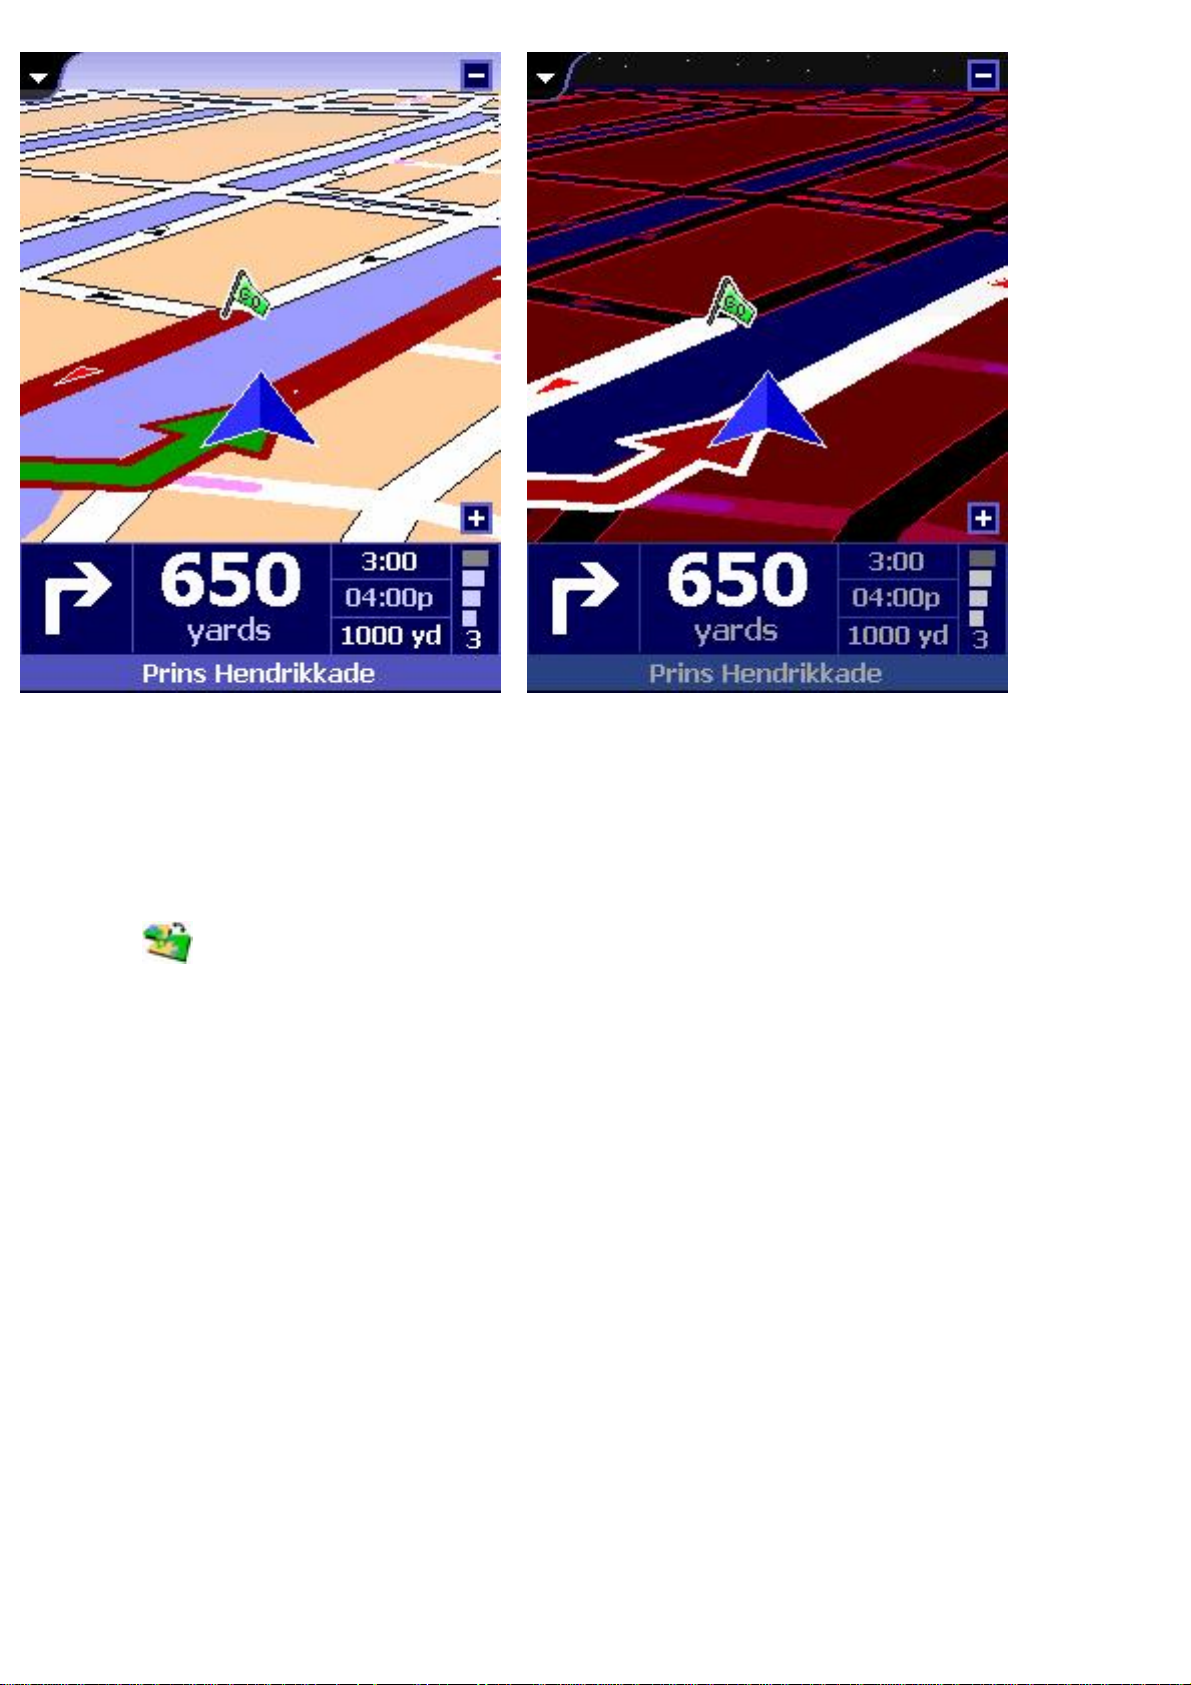
Daylight colours
Night colours
Switch map
To plan routes and navigate in another country or area, you change maps. In the navigation
menu tap
installed you can switch here to the major roads so that you can plan cross-border routes.
Switch map to load another map. Select a map from the list and tap OK. If
Chapter 3
Browsing the map
The view selector, always present in the top left corner of the screen, allows you to switch to
the various views of TomTom Navigator. Tap the black tab to open the View Selector:
Page 12
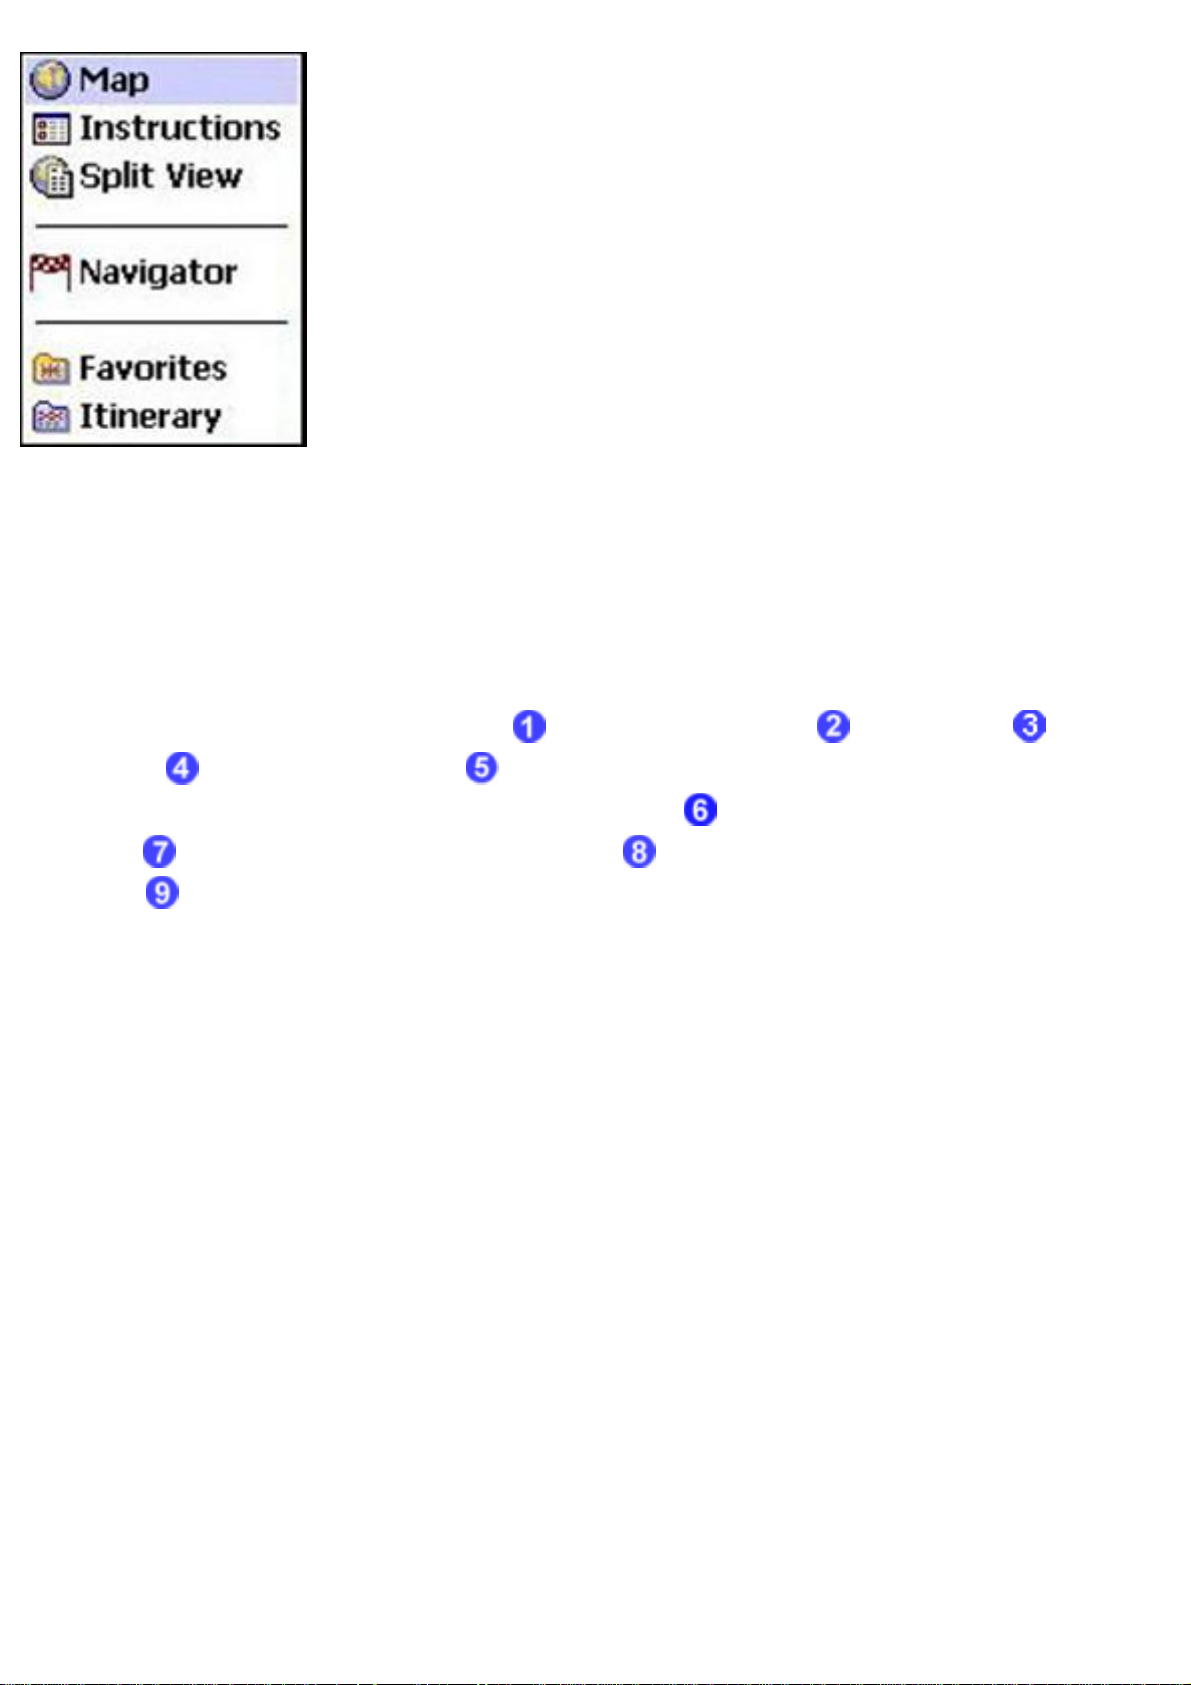
Map - Browse maps, look up addresses, routes, points of
interest, and favourites
Instructions – Route instructions in text
Split View – Route instructions in text with detailed maps
Navigator – Navigator view
Favourites – Overview of your favourite locations
Itinerary – Define and manage complex itineraries with multiple
destinations and drive-bys
In this section we will have a closer look at the Map view. Select Map from the view selector
to switch to the Map View.
On the map, you will find all the items you might find on a normal, paper map, such as cities;
towns; roads; streets; rivers and lakes; points of interest (such as petrol stations, restaurants
and hospitals) etc.
And around the map: the scale indicator , GPS signal indicator , zoom slider , route
instructions
personal elements, such as your current GPS position
and route
favourites
, and the map toolbar . On the map you will also find more dynamic and
, the current departure, destination
, itinerary destinations and drive-bys , and your home location and other
.
Page 13

The blinking icon is the map cursor. Tap the map anywhere to place the cursor at that
position. To browse around the map, tap and drag in any direction you want.
To increase or decrease the scale of the map, tap and hold the slider on the right side of the
map and move it up or down. The map will zoom in or out around your cursor position.
Tap and hold the cursor to open the pop-up menu. The pop-up menu items are explained in
the User Guide on the CD-ROM.
Button Function
Opens the Plan route screen for planning routes.
Allows you to search for a specific location and use it for a route, add it to your
favourites or itinerary, or show it on the map. You use it to locate:
• your home location
• an address
• a recent destination
• one of your favourite locations
• a nearby point of interest (e.g. a hotel or petrol station)
Page 14

Allows you to change the level of detail in the map and to show and hide points of
interest.
Chapter 4
Becoming an expert user
This Quick Start Guide explains only the most basic functions of TomTom Navigator. Read
the User Guide to discover the wealth of functions and options that TomTom Navigator offers,
such as:
• Store, label and manage your home and other frequently used locations as
favourites.
• Search for points of interest nearby, and along your route.
• Navigate to a point of interest, home, a favourite location, a recent
destination.
• Choose alternative routes, manually block areas and roads.
• Compose complex itineraries with multiple destinations and drive-bys.
• Create your own points of interest.
• View a route summary.
• Change map style, colour scheme, contents, and map details.
• Hide the map and use only instruction arrows.
• Turn on/off guidance, navigation map, speed indicator, next motorway
indicator.
• Change the default speeds used for route planning.
Page 15

Table of Contents
1. The Navigator View
2. The Map View
3. The Favourites view
TomTom Navigator User Guide
4. The Itinerary view
5. The Properties
6. The GPS Status
7. Pocket Outlook
8. The London Congestion Charge
9. Contacting TomTom
1. The Navigator View
Page 16

(1) View selector, (2) Map display, (3) Motorway indicator,
(4) Zoom-out button, (5) Zoom-in button,
(6) GPS signal indicator,
(7) Current location indicator, (8) Journey information,
(9) Distance to next instruction, (10) Next instruction symbol
The Navigator view provides driving instructions using a combination of text, symbols, voice
guidance and a moving map. The map shows your car and its immediate surroundings, rotated in
such a way that the direction in which you are moving is always "up". The route that TomTom
Navigator recommends is emphasised in dark red.
At the bottom of the screen is the Navigator status bar. It shows what you should do next (10), the
distance you still need to travel before you do it (9), and three estimates (8) concerning your
journey: how long before you reach your destination, what time you will arrive there, and the
distance to your destination.
It also shows the signal strength of your GPS receiver (6) and your current location (7).
Things you can do in this view
Switch to another view
First of all, you can switch to another view using the pull-down menu in the top left corner (1).
Incidentally, this also causes the default Pocket PC title bar to re-appear, allowing you to switch to
other applications.
Zoom in or out
Page 17

The map display will automatically rotate, zoom in and zoom out in order to present the current
traffic situation as clearly as possible; you can manually control the zoom level by tapping on (or
near) the manual zoom buttons (4) and (5).
Repeat the last instruction
If you touch the schematic arrow (10), TomTom Navigator will repeat the last spoken instruction
(unless you already passed the point it referred to).
Pop up the icon menu
If you tap anywhere in the center of the screen, a menu will pop up offering options that are useful
whilst navigating.
Navigator menu icons
Allows you to specify a destination and navigate to it. You can choose
from the following options:
Navigate to...
Guides you through the three-step address "wizard",
Address
Favourite
Home
allowing you to find towns, cities, roads, streets, city
centers, street corners, or individually numbered houses.
The first wizard screen asks for the name of the city, the
next for a street or key location, and the last for a house
number or intersecting street.
Note: Intersecting streets marked with an asterisk (*) can not be reached
by car. Crossings marked with a dash (-) can be reached by car, but the
crossing road itself can not.
Displays your list of favourite locations (which you've
made using the "Add to favourites" option)
Sets the destination to your "Home" location, the first
favourite location in your favourite locations list.
Recent
location
List all locations that recently were used as a
destination, or were marked with the "Memorize
position" in the Navigator menu.
Page 18

Guides you through a wizard that allows you to search
the built-in lists categorized locations. You can choose
Alternative
Routes
Point of
interest
Allows you to plan an alternative route to the same destination. A submenu will pop up with the following options:
Alternative
Avoid
Roadblock
from a category (such as petrol stations or restaurants).
Points of interest in a category are displayed in order of
distance to your current position. Icons indicate whether
a point of interest is on
route
the name of a specific Point of interest.
Plans a new route to the same destination, attempting to
use as few roads as possible from the currently planned
route. More than one alternative is possible.
Allows you to specify the next part of your route
(immediately ahead of you) as "blocked". A new route
will be planned avoiding this part of the route.
. You can narrow down the list by typing part of
, almost on , or near the
Turn 3D View
OFF
One, two or three of these icons may be available. They
allow you to mark specific parts of your route (such as
Avoid ***
Original
route
Turns off the three-dimensional display of the map.
the stretch on motorway E35) as blocked. An alternative
will be planned avoiding that stretch of motorway.
Note: The new route may still use another stretch of the
E35 to get you to your destination.
Discards all the road blocks, avoided areas and
alternatives you have introduced and calculates the
quickest route from your current location to your
destination.
Use Night
Colours
Displays the map in colours that provide extra contrast in the dark.
Page 19

Find...
The FIND button pops up a menu that allows you to find a specific
location, and then do something with it such as displaying it on the map,
or setting it as your destination.
Causes the application to simulate that you are actually driving the
Demonstrate
route
Switch map
Turn Sound
OFF
Hide Map
planned route. The demonstration will continue until you use the "STOP
demonstration" menu option.
Allows you to choose another map (provided you installed more than one
map)
Turns off spoken instructions.
Hides the map and only shows clear and large symbolic instructions. You
may find this display easier to interpret "at-a-glance". Normally, the map
is only hidden when you exceed the "safety speed" specified in your
properties.
Hide POI
Turn Guidance
OFF
Memorize
position
GPS Status
Hides all Point of interest symbols.
Turns of the spoken and symbolic instructions and hides the display of
the planned route.
Adds your current location to the list of recent locations. Later you can
set it as a favourite or Point of interest and set is as a destination.
Shows the GPS management application, offering detailed information
about your GPS receiver and its measurements, and allowing you to
change GPS-related properties.
Page 20

Provides access to the properties (see chapter 4)
Properties
2. The Map View
(1) Map display, (2) Zoom toolbar, (3) Route instruction indicator,
(4) View selector, (5) Scale indicator,
(6) GPS signal indicator, (7) Menu bar,
(8) PLAN button, (9) FIND button, (10) DETAIL button
What is displayed on the map
The map display area (1) displays information that you would also expect to see on a paper map:
roads, streets, parks, rivers and such. The menu option "legend" (see below) provides a lot of
information about what is displayed. On top of that, you may also encounter the following special
symbols on the map:
Page 21

Your departure location
The current destination
One of your "favourite" locations
The "Home" location
A Point of interest (POI). In this particular case, a petrol station.
The cursor
Your current location and direction (if and when your GPS
receiver has a valid satellite fix).
Your last known location (after your GPS receiver loses its
satellite fix)
House numbers. Odd numbers are always displayed yellow-onblue, and even numbers are always displayed in white-on-black.
Moving around in the map
The map view lets you browse around the map. You can do the following:
● Tap once on a street to get detail information about it, such as the name and the range of
house numbers between two crossings;
● Tap once on a Point of interest symbol to see its name and type;
● Tap, hold and drag it around to move the map;
● Move the control of the zoom bar (2) to zoom in or out;
● Tap and hold on a location to pop up the action-list for that location (see the next section for
details);
● Tap on the GPS indicator (6) to re-center the screen instantly around your current GPS
position;
● Tap on or near the left or right arrow in the instruction bar (3) to show the previous or next
route instruction; or tap in the middle of the bar to switch to the instruction table.
● Tap the detail button (10) to pop up the detail-controls; these controls allow you to influence
the number of roads and names displayed at the same time on the current map; Tap the icon
again to hide the controls.
How to use map locations
When you Tap and hold your pen on a location on the map, you will be presented with a choice of
options. Which options are presented depends on the situation. This is a list of all options that may
be presented for a particular location:
Sets the location as your destination and starts the navigation process
Navigate to…
(see chapter 1).
Page 22

Sets the location as the departure location for the next route to be
Set as
departure
Set as
destination
Add to
favourites...
View favourite
Add as point of
interest
planned - this is only relevant for routes planned using the "plan" button
(8), since normal turn-by-turn navigation will always depart from your
current GPS position.
Sets the location as the destination for the next route that is planned.
Allows you to turn the location into a "favourite" location (see chapter 3).
Allows you to view the details of an existing favourite.
Allows you to turn the location into a Point of interest. You will need to
specify the name and category of the Point of interest. Note that you can
only add locations to new categories that you have defined yourself. The
very first time, you must specify the name of a new category.
Nearby points
of interest...
Edit point of
interest
Delete point of
interest
Center on
screen
Reset GPS for
this location
Note: you can not convert built-in Points of interest to your own Point of interest categories.
Allows you to find points of interest near the location.
Allows you to edit the name and category of a Point of interest that you
added previously.
Allows you to delete a Point of interest that you added previously.
Redraws the map with the location in the exact center.
Informs your GPS receiver that you are roughly near the tapped location.
If you have not used your GPS for more than a week, or have travelled
more than 200 miles/300 kilometres since you last used it, this option
can seriously reduce the time it takes your GPS to find satellites.
Finding locations
The FIND button (9) pops up a menu that allows you to find a specific location, and then do
something with it such as displaying it on the map, or setting it as your destination. You can find
different types of locations:
Page 23

Guides you through the three-step address "wizard", allowing you to find
towns, cities, roads, streets, city centers, street corners, or individually
Address
Favourite
Home
Recent
numbered houses.
The first wizard screen asks for the name of the city, the next for a street
or key location, and the last for a house number or intersecting street.
Note: Intersecting streets marked with an asterisk (*) can not be reached by car. Crossings
marked with a dash (-) can be reached by car, but the crossing road itself can not.
Displays your list of favourite locations (which you've made using the
"Add to favourites" option)
Finds your "Home" location, the first favourite location in your favourite
locations list.
List all locations that recently were used as a destination, or were
marked with the "Memorize position" in the Navigator menu.
location
Guides you through a wizard that allows you to search the built-in lists
categorized locations. You can choose from a category (such as petrol
Point of
interest
stations or restaurants). Points of interest in a category are displayed in
order of distance to your current position. Icons indicate whether a
point of interest is on
, almost on , or near the route . You can
narrow down the list by typing part of the name of a specific Point of
interest.
How to plan a route
To travel to a particular destination, you would normally FIND it (see the previous section) and select
the "Navigate to..." option. If you wish to specify a different departure location (rather than use your
current location), we would recommend you use the FIND button (9).
Even so, the PLAN button (8) offers an "all-in-one" interactive dialog where you can specify a
departure address, a destination address and a route type. When you press the OK button, TomTom
Navigator will try to plan a route from the departure address to the destination address.
The route type, specified on the third tab of this dialog, offers special planning options that are not
available elsewhere in the application:
● Return trip: check this box to swap the departure and destination.
Page 24

● Shortest route: will plan the least-distance route - a route where every meter/yard counts
(rather than every minute).
● Walking route: will plan a walking route - which by definition is both least-distance and least-
time, and ignores several traffic rules.
File menu options
About...
Properties...
GPS status...
Displays the application version number and copyright notices.
Provides access to the application properties (see chapter 4).
Shows the GPS management application, offering detailed information
about your GPS receiver and its measurements, and allowing you to
change GPS-related properties.
Switch map...
Allows you to choose another map (provided you installed more than one
map)
Exit
Exits TomTom Navigator
Tools menu: Route-related menu options
Alternative
route...
If you have a planned route you may use this option to request an
alternative. TomTom Navigator will try to determine a completely
different route to your destination.
Original
route...
After planning one or more alternative routes use this option to revert to
your original route.
Route
Provides a summary of the currently planned route.
summary...
Zoom to route
Clear route...
Demonstrate
route
Re-centers and zooms the map to show the whole route on the screen.
Clears the route, departure and destinations.
Causes the application to simulate that you are actually driving the
planned route. The demonstration will continue until you use the "STOP
demonstration" menu option.
Tools menu: Other options
Page 25

Go to coordinates...
Allows you to find a specific location by entering longitude and latitude.
Zoom font +/Avoid area
Adjusts the size of the letters used to display names on the map.
Specifies a rectangular area on the map that needs to be avoided when
planning a route. TomTom Navigator will plan routes around such an
area (but not when for example your destination is inside the area).
Press the X in the top right corner of an avoided area to remove it. At
most 32 areas can be specified at the same time.
Clear avoid
Removes of all avoided areas at once.
(s)...
Legend...
Displays the map legend, showing the meaning of symbols, lines and
colours on the map currently being shown.
How to view a planned route
When you have planned a route, TomTom Navigator provides a table with detailed instructions. You
can view this list by selecting the "Instructions" view from the pull-down view-switching menu (1) in
the top-left corner. You can also divide the screen between this list and the map by selecting "Split
View" in the view selector (4).
The "Instructions" view allows you to review a planned route and to plan ahead. Each individual
instruction provides additional information:
● Tap on an instruction - in the "Instructions" view, this pops up full-screen details about the
instruction, including a small map; in the "Split View", tapping on an instruction highlights it,
and causes the cursor on the map to move to the location involved in the instruction.
● Tap and hold an instruction - pops up an action list with similar options as when tapping and
holding a location on the map. At the very least, it allows you to show the specific location of
the instruction on the screen. From there (with another tap and hold) you can get access to all
other options.
3. The Favourites view
TomTom Navigator allows you to maintain a list of up to 20 "favourite" locations.
Favourite locations can be accessed very easily. For example, you can start navigating to a favourite
location with only a few taps of your finger.
Page 26

The very first favourite is automatically assigned the "Home" location (you may of course assign it to
any other location such as your office). Navigating to your "Home" position requires even fewer taps.
Switch to the "Favourites" view using the view selector (4). To maintain your favourite locations:
● Tap on a favourite to view its details.
● Tap and hold on a favourite to get access to location options as described in the previous
chapter, or to edit, delete or move the favourite.
4. The Itinerary View
(1) View selector, (2) GPS signal indicator, (3) drive-by,
(4) Destination, (5) Add location, (6) Change order,
(7) Clear location, (8) Menu bar
The Itinerary view allows you to plan itineraries with multiple drive-bys (3) and destinations (4), using multiple
maps. When using an itinerary to plan or drive a route, TomTom Navigator will guide you to the destination, passing the
drive-bys. The locations on the itinerary are listed, starting with the first drive-by, ending with the final destination.
Page 27

Switch to another view using the pull-down menu in the top left corner (1).
At the bottom of the screen is the Menu bar. It allows you to add drive-bys and destinations to your itinerary (5), change
the order of the drive-bys in the itinerary (6) and remove drive-bys and destinations from the itinerary.
Tap and hold the itinerary list to open the itinerary popup menu. The popup allows you to create a new itinerary, save
the current itinerary, load a previously saved itinerary and to edit individual drive-bys and destinations.
By default, the itinerary contains one destination. To create itineraries with multiple destinations, open the File menu,
select Properties, then select the Advanced tab; check the setting multiple destinations in the section itinerary
View.
Tools to create an itinerary
At the bottom of the screen is the Menu bar.
Add a location to your itinerary. The first location you add will be the
itinerary’s destination, subsequent locations will be added as drive-bys. If
there is no itinerary loaded at the moment, this button will create a new
itinerary. You can choose from the following options:
Selects your "Home" location, the first favourite location in
your favourite locations list.
Home
Guides you through the three-step address "wizard",
allowing you to find towns, cities, roads, streets, city
centers, street corners, or individually numbered houses.
Address
The first wizard screen asks for the name of the city, the
next for a street or key location, and the last for a house
number or intersecting street.
Note: Intersecting streets marked with an asterisk (*) can not be reached
by car. Crossings marked with a dash (-) can be reached by car, but the
crossing road itself can not.
List all locations that recently were used as a destination, or
were marked with the "Memorize position" in the Navigator
Recent
menu.
location
Favourite
Point of
interest
Displays your list of favourite locations (which you've made
using the "Add to favourites" option)
Guides you through a wizard that allows you to search the
built-in lists categorized locations. You can choose from a
category (such as petrol stations or restaurants). Points of
interest in a category are displayed in order of distance to
your current position. Icons indicate whether a point of
interest is on
, almost on , or near the route . You
can narrow down the list by typing part of the name of a
specific Point of interest.
Page 28
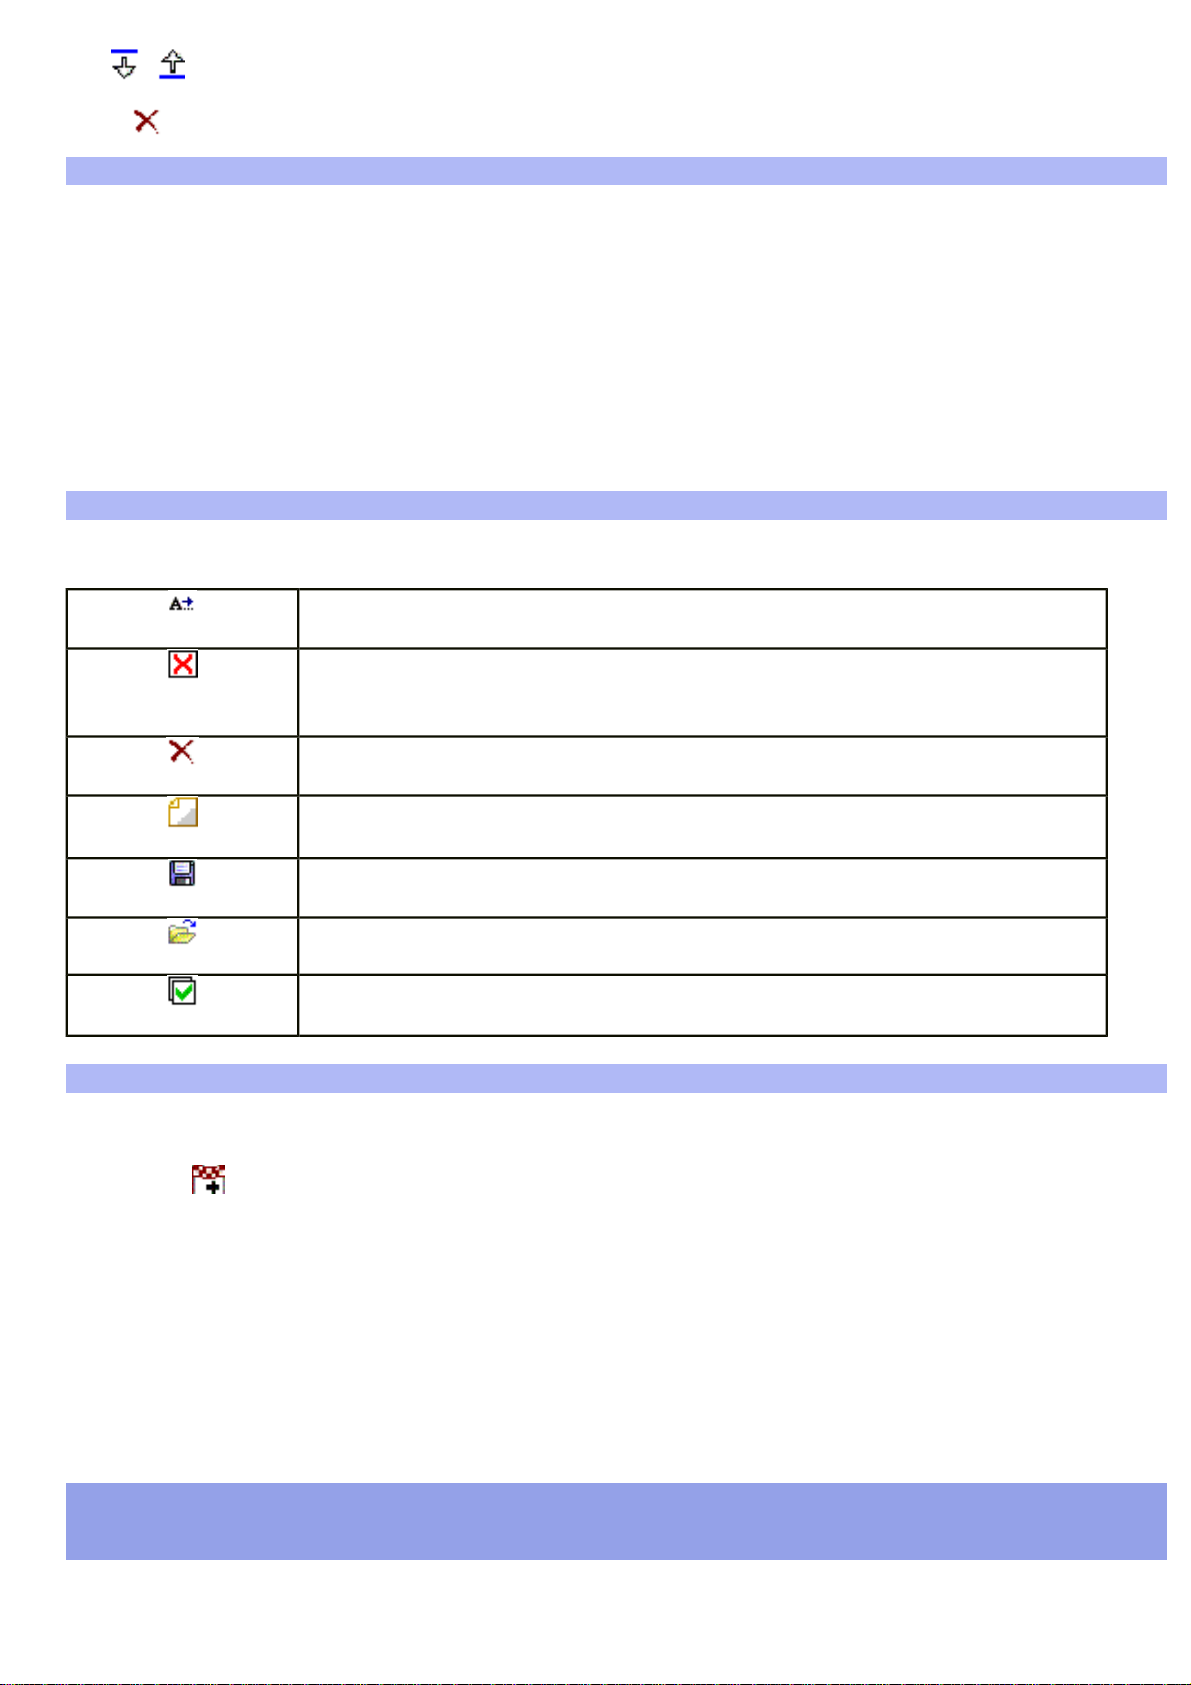
Change the order of drive-bys. Select a drive-by in the list and select the
down or up arrow to move the drive-by down or up in the itinerary.
Remove drive-by or destination from the itinerary.
Using an itinerary to plan or navigate routes
Selecting the button Plan will plan the route to the first active destination in the itinerary. First you will be prompted to
select from where you want to plan; the last known GPS position, the last destination or the centre of the map.
The button Navigate will also plan to the first active destination of the itinerary and will start guidance from the current
GPS location. If no GPS is available you will be asked to select the departure location. As you pass drive-bys and
destinations, these locations will be disabled in the itinerary. To skip the current destination on the itinerary and navigate
to the next, select Itinerary Destination from the Navigate to menu.
The button Done will close the Itinerary View and show Map View.
Itinerary popup menu
Tap and hold the itinerary list to access the itinerary popup menu. At the bottom of the screen is the Menu bar.
Change the name of the itinerary location, and its position in the
Edit/move
itinerary.
Disables the selected location as part of the itinerary. In the itinerary
Disable/Enable
list the name will be greyed. When planning or navigating the itinerary
the location will be ignored. Select again to enable the location.
Remove drive-by or destination from the itinerary.
Delete
New
Save
Load…
Enable all
Plan cross-border itinerary
You can compose an itinerary containing drive-bys and destinations from multiple maps. This enables you to plan a
complex itinerary crossing map borders. To compose a cross-border itinerary, load a map and add locations to the
itinerary. Tap
the itinerary.
Then load another map and add locations from the second map. The drive-bys and destinations that were added on the
previously loaded map are displayed as grey strikethrough text.
Selecting buttons Plan or Navigate, will result in a route to the first enabled destination on the current map. You can use
all TomTom Navigator maps, including the Major Roads map.
on the menu bar, or select Add to itinerary from the pop-up menu in Map view, to add a location to
Clear the current itinerary to create a new one.
Save the current itinerary.
Load a previously saved itinerary.
Enable all locations in the itinerary.
5. The Properties
Page 29

TomTom Navigator offers a "Properties" option from the "File" menu and the "Navigator" view menu
that allows you to specify your preferences with regard to many aspects of TomTom Navigator.
There are four property tabs:
Navigator properties
Safety speed
The driving speed above which TomTom Navigator will hide the map and
only show symbolic instructions when in Navigator view.
Display
compass on
Shows/hides a compass in the Navigator view in the map area.
map
Show next
motorway
Shows/hides the name of the next motorway or motorway exit in the top
right corner of the Navigator view.
Voice
Enables/disables voice guidance whilst navigating
instructions
Volume
Adjusts the volume for the voice instructions. Press the TEST button to
hear a sample instruction at the specified volume.
General properties
Map Style
Offers different ways of drawing streets on a map; The default is "Paper
map".
Colour Style
Units
Left handed
toolbar
Controlling the
Navigator...
Allows for different colour schemes for the map.
Specifies metric or imperial units for distances.
Places the zoom toolbar (2) in the Map view on the left or on the right
side (default) of the screen.
Displays basic instructions about operating the application in navigation
mode.
POI (Point of interest) properties
Show points of
interest
...
Shows/hides selected Points of interest on the map in Map and
Navigation views.
For every category available for the current map, you can check a box to
select whether Points of interest in that category are to be displayed on
the map.
Page 30

Advanced properties
Advanced properties influence the behaviour of TomTom Navigator at its most basic level. Do not
modify properties unless you are confident about the effects.
Navigator view
Display +/symbols
Full screen
Navigator
Show
Speed
Show 'no
power'
indicator
Show
'sound off'
indicator
Always
start in
Navigator
Shows/hides "+" and "-" zoom-buttons (note that they
will work even if they are hidden).
Shows/Hides the Pocket PC title bar and menu bar.
Shows/Hides current speed in the Navigator status bar.
Flashes a warning icon if no external power source is
present.
Flashes a warning icon if you have turned off the sound.
Always starts the application in the Navigator view.
view
2D (3D)
automatic
zooming
Show
summary
after
planning
Show
schematic
arrows
Automatically zooms in and out in 2D (3D) mode
depending on your current speed and the traffic
situation.
Show/Hides a route summary after (re-)planning a route
in navigation view.
When the map is hidden in Navigation view and this
option is turned on, the route instruction will be a
schematic representation of the real situation. When
turned off, fixed arrows will be used. In the schematic
representation, the route to be followed is indicated by a
green arrow. Streets that cannot be entered are
displayed in red.
Page 31

Fixed arrow and schematic arrow
Indicators
The indicator properties allow you to specify what status information is
displayed at the top, middle and bottom of the Navigator status bar.
Itinerary
Multiple
destinations
Show
numbers in
front of
items
Map view
Show
favourites
Show
itinerary
Route
indicator
Allows you to create itineraries with more than one
destination.
Show/Hide numbers in front of each item in the itinerary.
Shows/Hides your favourite locations on the map.
Shows/Hides your itinerary destinations and drive-bys on
the map.
Automatically positions the map cursor depending on
follows
table
Always
zoom to
planned
route
Keep GPS
position on
screen
Route
which driving instruction is highlighted
Redraws the map after a route has been planned, in such
a way that the whole route is displayed
Continuously updates the map so that your current GPS
position remains visible
Controls how your planned route is displayed.
Page 32

Borders
General
Sets the level of border detail (district, city, county and
country borders).
Big
keyboard
Show
house
number
before
street
name
Chooses between the default Pocket PC pop-up keyboard
and the TomTom Navigator keyboard offering large
buttons.
Controls the display of addresses.
Warnings
The "Re-activate warnings" button re-activates all the warnings that were
disabled by tapping "never show me this warning again".
Congestion Charge (Not available on all maps)
Warnings
Avoid area
Provides a warning when you are on a route that passes
through the London Congestion Charge zone.
Forces TomTom Navigator to always avoid the London
Congestion Charge zone.
Route planning
Automatic
re-planning
Calculation
Automatically calculates a new route whenever you veer
off the currently planned route.
Influences the speed and precision of the route
calculation. The default is "Normal".
Preferred speeds
These properties specify the average speeds for particular types of roads, and
fine-tune the way routes are planned as well as the calculation of travel times.
Navigator menu: Main
Page 33

These properties define which five buttons are offered on the Navigator pop-up
menu (the sixth button is always the "More" button).
Navigator menu: More
These properties define which buttons appear on the second and third
Navigator pop-up menu.
POI settings
Enable POI
Enables the "quick-select" pop-up menu showing the five
quick-
"most important" Points of interest categories.
menu
Poi Menu
Items 1-4
The first four "most important" Point of interest
categories (the fifth will always be set to the most
recently selected Point of interest category)
Maximum
POI on
map
Controls the maximum number of Points of interest that
are displayed on a map simultaneously. The default is
20.
Changing the function of the hardware buttons
These properties define the behaviour of each of the hardware buttons of your
Pocket PC when you are navigating.
6. The GPS Status
In order to use TomTom Navigator for turn-by-turn navigation you need to have a working
connection between your Pocket PC and your GPS receiver. The GPS Status view provides access to
GPS receiver information and settings. Choose "GPS Status..." from the "File" menu or from the
Navigator pop-up menu to access the GPS Status. You can choose from three tabs:
Status
Displays your current position, speed, direction and the GPS time (UTC/
GMT). With most GPS receivers the position of the satellites used to
establish your position is displayed as well as the signal strength. A
moving indicator
signifies whether there is a working link
between your Pocket PC and your GPS receiver.
Page 34

GPS
Allows you to modify GPS settings. Tap the checkmark to change your
GPS receiver model and the communication port of your Pocket PC to
which the GPS receiver is connected. Use the slider buttons to keep the
Pocket PC powered up
(and TomTom Navigator is active) and to get a sound signal
as long as it is connected to the GPS receiver
when the
GPS receiver has proper coverage.
Log
Whilst navigating you can record your itinerary. Use the VCR type
controls to record and play back your itinerary.
7. Pocket Outlook
The built-in "Contacts" application of your Pocket PC works together with TomTom Navigator.
Tap and hold any of your contacts; you may choose to navigate to that contact (Navigate to...), or to
show the address of the contact on the map (Show TomTom map...). The address of the selected
contact must be on the currently selected map.
People enter addresses in different ways into the Contacts application. When TomTom Navigator tries
to establish the location on the map for the selected contact it will try to do so in a smart way. To
make sure that TomTom Navigator interprets your address information correctly you will be asked to
confirm the details first.
8. The London Congestion Charge
As of 17 February 2003 the city of London (UK) operates a Congestion Charging Zone to reduce
traffic congestion in the center of the city. Upon entering the zone you will need to pay a "congestion
charge". TomTom Navigator helps you navigating the London Congestion Charge Zone:
● You will get a warning if your destination is inside the zone.
● You will get a warning if the currently planned route passes through the zone.
● There are two advanced options allowing you to disable such warnings, and to specify if you
always, sometimes or never wish to avoid the zone.
Page 35

9. Contacting TomTom
For more information, free software upgrades, free add-on products, and answers to frequently
asked questions, or to contact our support team, please visit us on-line at
www.tomtom.com
Notice
The information in this document is subject to change without notice. TomTom B.V. shall not be
liable for technical or editorial errors or omissions contained herein; not for incidental or
consequential damages resulting from the performance or use of this material. This document
contains information protected by copyright. No part of this document may be photocopied or
reproduced in any form without prior written consent from TomTom B.V.
© Copyright 2004 TomTom BV
© Copyright 2003 Tele Atlas NV Digital Mapping
© British maps Ordnance Survey Crown Copyright
© Norwegian Mapping Authority
© Statens Kartverk
© DAV
© Pocket PC and the Pocket PC logo are the property of Microsoft Corporation.
TomTom and the TomTom logo are registered trademarks of TomTom BV, The Netherlands. All
other marks are the property of their respective owners. The use of the TomTom products is
governed by a license agreement which is included in this package and/or the products. This
license contains a limited warranty and limitation of liability. You can review the license
conditions at
All rights reserved - Tous droits réservés - Tutti i diritti riservati - Reservados todos los derechos
- Alle Rechte vorbehalten – Alle rechten voorbehouden - Med ensamrätt - Alle rettigheder
www.tomtom.com
forbeholdes.
Patents pending.
Page 36

Installation Poster
TomTom GPS + Car Kit
TomTom GPS + Holder
TomTom Wireless GPS + Car Kit
TomTom Wireless GPS + Holder
Page 37

Page 38

Page 39

Page 40

Page 41

Page 42

Page 43

Page 44

 Loading...