


TomTom GPS
User Manual
1.0

Contents
Welcome 5
What's new 6
What's new in this release ........................................................................................ 6
Getting started 7
Your watch 9
About your watch .................................................................................................. 9
Wearing your watch ............................................................................................... 9
Cleaning your watch ............................................................................................. 10
The heart rate sensor ........................................................................................... 10
Removing your watch from the strap ........................................................................ 11
Charging your watch using the desk dock ................................................................... 11
Using the bike mount ........................................................................................... 12
Removing your watch from the holder ....................................................................... 16
Using an O-ring ................................................................................................... 17
About screen ...................................................................................................... 18
Performing a reset ............................................................................................... 19
Route Exploration 21
About viewing trails ............................................................................................. 21
Following a new trail ............................................................................................ 22
Manage trails with MySports ................................................................................... 22
Using breadcrumb trails ........................................................................................ 24
Using the compass ............................................................................................... 25
Calibrating the compass ........................................................................................ 26
Adventurer activity types 28
Trail running ...................................................................................................... 28
Hiking .............................................................................................................. 28
Skiing and snowboarding ....................................................................................... 29
Activity tracking 30
About activity tracking ......................................................................................... 30
Setting a daily activity goal .................................................................................... 30
Switch off activity tracking .................................................................................... 30
Monitoring your activity ........................................................................................ 31
Sleep tracking 32
About sleep tracking ............................................................................................ 32
Tracking your sleep .............................................................................................. 32
Monitoring sleep using the mobile app....................................................................... 32
2

Music 33
About music ....................................................................................................... 33
Charging supplied headphones ................................................................................ 33
Pairing headphones to watch .................................................................................. 34
Changing earbuds ................................................................................................ 36
Wearing your headphones ...................................................................................... 36
Putting music on your watch .................................................................................. 37
Playing music ..................................................................................................... 37
Backing up music on your watch .............................................................................. 39
About the voice coach .......................................................................................... 40
Headphones troubleshooting .................................................................................. 40
Activities 41
About activities .................................................................................................. 41
About calorie estimation ....................................................................................... 42
About 24/7 heart rate monitoring ............................................................................ 42
Starting an activity .............................................................................................. 43
Pausing and stopping an activity .............................................................................. 44
Choosing which metrics to display ............................................................................ 44
Settings for Running ............................................................................................. 46
Settings for Outdoor Cycling ................................................................................... 46
Settings for Swimming .......................................................................................... 46
Settings for Treadmill ........................................................................................... 47
Settings for Gym activities ..................................................................................... 48
Settings for Cycle activities .................................................................................... 48
Using the stopwatch ............................................................................................. 49
Training programs ............................................................................................... 50
About training programs .................................................................................... 50
None ............................................................................................................ 50
Goals ........................................................................................................... 50
Intervals ....................................................................................................... 51
Laps ............................................................................................................ 52
Splits ........................................................................................................... 52
Zones ........................................................................................................... 53
Race ............................................................................................................ 56
Activity history ................................................................................................... 57
Exporting your activities to other websites and file types ............................................... 58
Settings 59
About settings .................................................................................................... 59
Clock ............................................................................................................... 59
Tracker ............................................................................................................ 60
Playlists ............................................................................................................ 60
Sensors ............................................................................................................. 60
Testing a heart rate sensor ................................................................................ 60
Phone .............................................................................................................. 61
Airplane mode .................................................................................................... 62
Options ............................................................................................................ 62
Profile .............................................................................................................. 63
Standards .......................................................................................................... 63
Adding sensors 64
About sensors ..................................................................................................... 64
External Heart Rate Sensor .................................................................................... 64
3

Cadence and Speed Sensor ..................................................................................... 65
TomTom MySports account 69
TomTom MySports Connect 70
TomTom MySports mobile app 71
Sharing your activities 72
Addendum 73
Copyright notices 77
4

This User Manual explains everything you need to know about your new TomTom Runner 3, TomTom
Welcome
Spark 3 or TomTom Adventurer watch.
If you want a quick read of the essentials, we recommend that you read the Getting started page.
This covers downloading TomTom MySports Connect and using the desk dock.
Here are some good starting points:
About your watch
Starting an activity
Activity tracking
Music
Training programs
Using your Adventurer watch
Tip: There are also frequently asked questions (FAQs) at tomtom.com/support. Start typing the
product name to see a list of products to choose from.
We hope you enjoy reading about and, most importantly, achieving your fitness goals using your new
TomTom GPS Sports Watch!
Note: The Music feature and built-in Heart Rate Sensor are not available on all watch models.
5

What's new in this release
What's new
TomTom Runner 3 / Spark 3
Route Exploration
Explore new terrain and upload trails to your watch. To learn more, go to Following a new trail in
this manual
You can use MySports to preload a trail onto your TomTom GPS watch for use during an activity and
to manage trails. To learn more, go to Manage trails with MySports.
Leave a path as you run to find your way back. Available on GPS-based activities: Run, Cycle,
Freestyle. To learn more, go to Using breadcrumb trails in this manual.
Built-in Compass
Your TomTom GPS watch has a built-in compass so that you can instantly see which direction you
are going.
To learn more, go to Using the compass.
TomTom Adventurer
GPS and Barometer tracking in New Outdoor Sports Modes
New special modes for trail-running, hiking, skiing and snowboarding.
Get accurate real-time info on the go, like altitude, 3D distance, speed, pace, total ascent and
descent and calories burned.
To learn more, go to Trail running, Hiking, Skiing and snowboarding.
Automatic Lift Detection
See the max speed, descent and max gradient of your last ski or snowboard run as you go up the
lift.
To learn more, go to Skiing and snowboarding.
Built-in Compass
Your TomTom GPS has a built-in compass so that you can instantly see which direction you are
going.
To learn more, go to Using the compass.
Long battery life
With up to 11 hours of power in GPS mode, and up to 24 hours in Hiking Mode.
6

Before you start training, it's a good idea to charge your watch, download any software updates and
Getting started
download QuickGPSfix.
Note: QuickGPSfix helps your watch get a GPS fix and find your location quickly. It also saves your
battery and prolongs its life.
1. Download TomTom MySports Connect from tomtom.com/123 and install it on your computer.
TomTom MySports Connect is available for free.
2. Place your watch in the desk dock and connect the dock to your computer.
Follow the instructions that TomTom MySports Connect gives you.
After your watch is charged, you can start your first activity.
Tip: Your watch is fully charged when the battery animation stops moving and shows a full
battery.
You should connect your watch to your computer regularly to charge it, upload activities, download
software updates and download QuickGPSfix information.
Battery life
When the battery is fully charged, your watch can be used for up to 11 hours of activities that need
GPS reception, such as running and cycling. The battery is used more quickly if you do any of the
following:
Use the Music feature.
Use the backlight on your watch frequently or all the time
e built-in heart rate sensor.
Connect the watch to external sensors, such as the Heart Rate Sensor or Cadence and Speed
Sensor.
Your watch will last longer on a battery charge if you turn off night mode and touch the screen to
turn on the back light only when you need it.
TomTom MySports app
You can download the TomTom MySports app for free from your usual app store or by going to
tomtom.com/app.
To learn more, go to TomTom MySports mobile app in this guide.
7

Pairing your watch with your phone
To learn more, go to Phone in this guide.
8

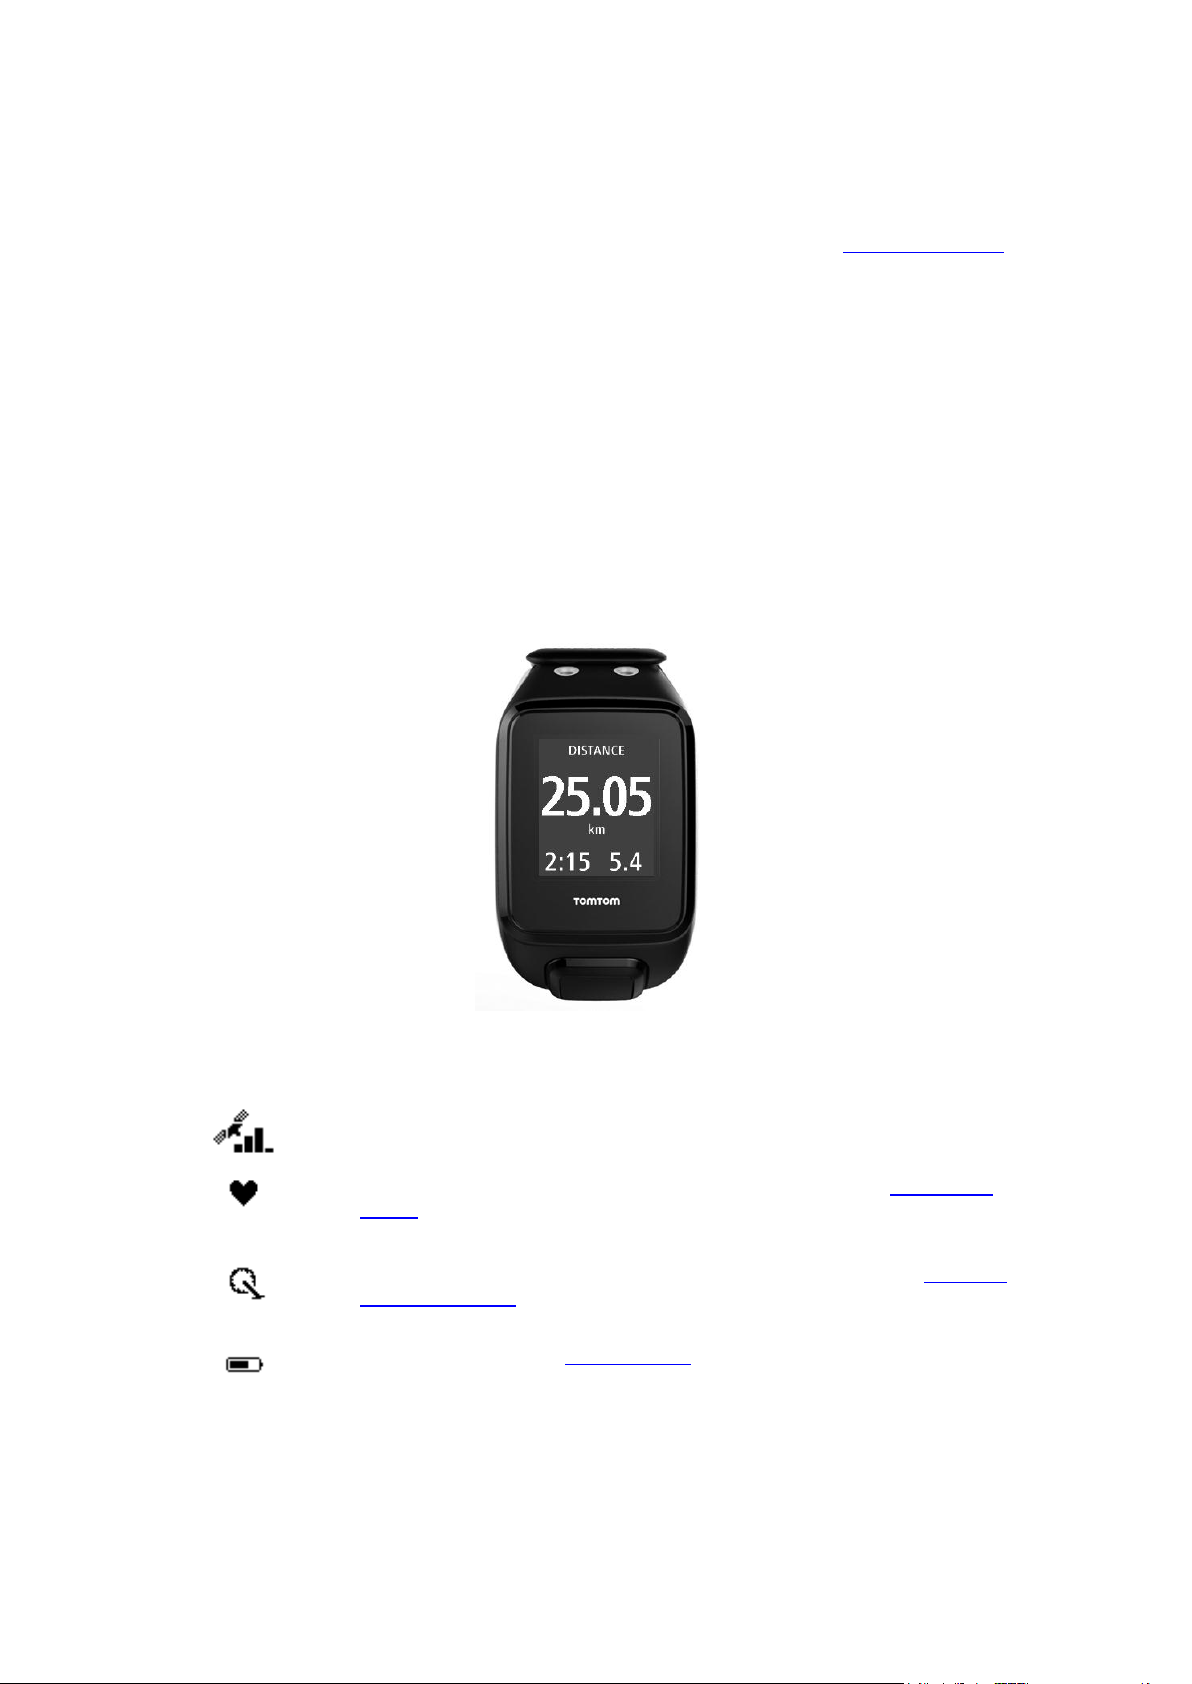
About your watch
Your watch
When you use your watch, you start from the clock screen. This screen shows the time and date.
The hour number is shown slightly dimmed and the minutes are shown brighter so you can see the
precise time more clearly.
Use the button to press up, down, left or right to go to other screens on your watch.
1. Press LEFT - opens the ACTIVITY TRACKING screen.
2. Press DOWN - opens the SETTINGS menu.
3. Press RIGHT - opens the ACTIVITIES menu.
4. Press UP - opens the MUSIC screen.
5. GPS receiver. While wearing the watch, the GPS receiver should face upwards.
6. Cover the screen with your palm briefly to turn on the back light.
The clock screen shows the time and date. You can choose to show the time in 12 hour or 24 hour
format by pressing DOWN to open the SETTINGS menu, then selecting CLOCK.
Using your watch
Press UP or DOWN to select items in a menu.
Press RIGHT to select an item and open the menu for that item.
Press LEFT to exit a menu.
To select an option in a menu, make sure it is highlighted when you leave the menu. Your watch
remembers the option you highlighted.
If an option in a menu switches on and off, press UP or DOWN to change the setting.
Important: Your watch sleeps if it isn't used for a while. Press any button once to wake up your
watch. Your watch will then pair with the MySports app automatically and you can carry on using it.
Wearing your watch
The way you wear your watch is important because it can affect the performance of the Heart Rate
Sensor. For more information on how this sensor works, see The heart rate sensor.
9

Wear the watch in the normal way, with the watch face on top of your wrist and the bottom of
the watch touching your skin, away from the wrist bone.
Do the strap up so that it is tight to your wrist without being uncomfortable.
You get the most accurate results from the heart rate sensor when you are warmed up.
Important: To improve accuracy, KEEP STILL until your heart rate is detected.
Cleaning your watch
It is recommended that you clean your watch once a week if you use it frequently.
Wipe the watch with a damp cloth as needed. Use mild soap to remove oil or dirt.
Do not expose your watch to strong chemicals such as gasoline, cleaning solvents, acetone,
alcohol, or insect repellents. Chemicals can damage the watch’s seal, case and finish.
After swimming, rinse your watch with tap water and dry it with a soft cloth.
Clean the heart rate sensor area and connection pads with mild soap and water as needed.
Do not scratch the heart rate sensor area. Protect it from damage.
The heart rate sensor
If your watch has a built-in heart rate sensor it can help you train more efficiently.
You can choose to use the built-in heart rate sensor or an external sensor if the watch is mounted
on your bike handlebars, or not to use a sensor at all.
Note: If your watch doesn’t have an integrated heart rate monitor, you can also buy a separate
chest strap to record the same information.
How the sensor works
Your heartbeat is measured by using light to measure changes in your blood flow. This is done on
the top of your wrist by shining light through the skin onto the capillary veins just below the skin
and detecting the changing light reflections.
The performance of the heart rate sensor is not affected by skin type, body fat percentage or body
hair. It IS however affected by how you wear the watch on your wrist and by whether you have
warmed up or not.
10

Using the heart rate sensor
To get the best performance from the heart rate sensor, see Wearing your watch. Continuous heart
rate tracking is switched OFF by default.
Note: The sensor cannot measure your heart rate while swimming.
Removing your watch from the strap
You may want to remove your watch from the wrist strap in order to charge it or before placing it in
the holder before using the bike mount.
To remove your watch from the wrist strap, do the following:
1. Press inwards on the TomTom logo whilst holding the watch strap.
2. Remove the watch from the strap.
Charging your watch using the desk dock
Important: You can also use any USB wall charger to charge your watch. Place your watch in the
desk dock and then connect the USB connector from the desk dock to your USB wall charger.
You can use the desk dock when your watch is in the wrist strap or you can remove your watch from
the wrist strap first.
Removing the watch from the strap
For more information, see Removing your watch from the strap.
Charging using the desk dock
To place your watch in the desk dock, do the following:
1. Slide the watch into the dock, following the curve of the back of the watch.
2. Push the watch in again until you hear a click and get a full connection.
11

Charging using a wall socket or USB socket with no data capabilities.
Full connection including access to MySports.
Important: When you place your watch in the dock, you may get one of three types of connection:
3. To remove your watch from the desk dock, pull the watch away from the dock, following the
curve of the back of the watch.
Using the bike mount
If you have purchased the bike mount accessory, the mount consists of a holder for your watch and
a handlebar strap to attach the clip to your handlebars.
Important: These instructions show you how to attach the holder to the handlebars and THEN insert
the watch.
To use the bike mount, do the following:
12

1. Slide the handlebar strap into the hook at the back of the watch holder. Choose the right length
for the size of your handlebars.
Tip: The strap has two holes so that it fits a range of different sizes of handlebars from 22 mm
to 32 mm. Select the hole that fits your handlebars best.
13

2. Place the watch holder on your handlebar and wrap the strap around the bar.
3. Use the clip on the bottom of the holder to attach the handlebar strap.
The strap should now be attached securely around the handlebar.
14

4. Remove your watch from the wrist strap. Open the holder by pressing as shown below. Lift the
cover.
5. Slide your watch into the holder as shown.
6. Make sure your watch clicks securely into place.
15

7. Close the holder over the top of the watch, ensuring that it clicks as you close it. You are now
ready to go cycling!
Removing your watch from the holder
You may want to remove your watch from the holder in order to charge it or while attaching the
bike mount to your handlebars.
To remove the watch from the holder, do the following:
1. Open the holder by pressing as shown below and then lift the cover.
2. Push the watch back towards you to unlock it from the holder.
16

3. Slide the watch out towards you into the palm of your hand.
Using an O-ring
If you lose your bike mount strap, you can use a standard O-ring to mount your watch on your
handlebars.
To use an O-ring, do the following:
1. Turn the watch over and insert the O-ring in the hook nearest the front of the watch.
2. Find a piece of rubber, for example, a piece of an old bicycle inner tube. This is needed to sit
between the mount and handle bars and prevents slipping.
3. Place the mount onto the handle bars so that the piece of rubber is sandwiched between the
mount and the bars.
4. Wrap the O-ring around the handle bars and lift it over the back hooks.
17

QuickGPSfix on your watch is up-to-date.
QuickGPSfix on your watch is out-of-date. If the QuickGPSfix
information on your watch is out-of-date, your watch still works as
usual. It may, however, take longer to get a GPS fix when you want to
start an activity.
About screen
From the clock screen, press DOWN. Press UP until you see ABOUT at the top of the menu. Press
RIGHT to open the About screen.
The About screen shows the following information:
BATTERY - the battery power left on your watch.
To charge the battery, place the watch in the desk dock and connect the dock to your comput-
er.
STORAGE - the amount of space used up on your watch.
If you are running out of space, connect your watch to your computer. TomTom MySports
Connect transfers the workouts or activities to your computer. You can choose to have activities
uploaded automatically to your account on the TomTom MySports website, or another website
you have chosen.
Tip: The history, which is the summary of your last 10 workouts, remains on your watch. Older
workouts are sent to MySports.
QUICKGPS - the status of the QuickGPSfix information on your watch.
QuickGPSfix helps your watch find your precise location quickly so that you can start your
activity and helps to extend battery life. To update the QuickGPSfix information on your watch,
connect your watch to your computer. TomTom MySports Connect automatically updates
QuickGPSfix on your watch. QuickGPSfix information is valid for three days after you download
it.
These symbols are used to show the status of QuickGPSfix:
VERSION - the software version number. You may need this information if you contact Customer
Support. Every time you connect your watch to your computer, TomTom MySports Connect
checks if a software update is available for your watch.
SERIAL NUMBER - the serial number of your watch. You may need this information if you
contact Customer Support.
18

Performing a reset
Soft reset
A soft reset is performed each time you disconnect your watch from a wall charger or computer.
To perform a soft reset on your watch, follow these steps:
1. Connect your watch to a wall charger or computer.
Wait until your watch shows a battery symbol.
If you are using a computer, wait until MySports Connect finishes updating your watch.
2. Disconnect your watch from the wall charger or computer.
The software on your watch restarts. This performs a soft reset on your watch.
Recovery mode
The recovery mode allows you to reinstall the software on your watch without deleting any personal
data and settings.
To perform a reset on your watch using the recovery mode, follow these steps:
1. Place your watch in the dock BEFORE you connect the dock to the computer.
2. On your watch, press DOWN and keep the button pressed.*
3. Connect the dock to the computer, keep pressing the button until your watch shows
tomtom.com/reset.
4. Release the button and wait for MySports Connect to show Update.
5. Click Update in MySports Connect.
* If the USB port on your computer is not easily accessible, connect the dock to the computer
without the watch. Then press DOWN from the clock screen while you slide the watch into the
dock.
Factory reset
Important: When you perform a factory reset in MySports Connect, all personal data and settings,
including your export settings for MySports Connect, are deleted from your watch. This action
cannot be undone.
You should only use a factory reset as a last resort to restore your watch or if you really want to
remove all your data and settings.
A factory reset reinstalls the software on your watch and this removes the following:
Your activities.
Your settings on the watch.
Your settings for uploading activities in MySports Connect.
Important: When you perform a factory reset, do not disconnect your watch before MySports
Connect has finished restoring your watch. This takes several minutes. Check any messages shown in
MySports Connect and on your watch before you disconnect your watch.
To perform a factory reset on your watch, follow these steps:
1. Connect your watch to your computer and wait until MySports Connect finishes updating your
watch.
2. Expand SETTINGS in MySports Connect.
3. Click FACTORY RESET at the bottom of MySports Connect.
MySports Connect downloads the latest version of the software for your watch.
4. Keep your watch connected when the window for MySports Connect closes.
MySports Connect installs the software on your watch.
19

5. Keep your watch connected when the window for MySports Connect opens again.
6. Follow the instructions in MySports Connect to setup your watch.
20

About viewing trails
Route Exploration
Note: Available for all GPS-based activities: Run/Cycle/Freestyle (Runner3 and Spark3) and Trail
running/Hiking (TomTom Adventurer)
To view a trail while doing an activity, do the following :
1. Start an activity that uses a trail, for example, trail running.
2. To see your trail, press RIGHT and then press UP from the Heart Rate Zone screen.
Tip: If a trail has been pre-selected, you see it automatically.
You see the full trail displayed as a thin line. You also see the start of the activity marked by a
home icon, the start of trail marked by a flag and the end of the trail marked by a finish line
icon.
Your position is show by the arrow. The arrow tells you which direction you are facing when
standing still and which direction you are headed when moving. A thicker line shows your
breadcrumb trail, displaying where you have been.
3. To zoom in, press RIGHT to go to a zoomed-in view of your trail and press LEFT to zoom back
out.
21

Tip: A scale bar is shown at the bottom of the screen and the trail orientation is always North
Up.
Following a new trail
Note: Available for all GPS-based activities: Run/Cycle/Freestyle (Runner3 and Spark3) and Trail
running/Hiking (TomTom Adventurer)
You can use your TomTom Adventurer Watch to follow a new trail that has been uploaded to your
watch from MySports. During your trail run, you see the same metrics as for a run but with the
addition of elevation information.
To run a new trail, do the following :
1. Press RIGHT from the clock screen and then press UP or DOWN to select TRAIL RUN.
2. Press DOWN to go to the SETTINGS screen and select TRAILS.
Tip: Whilst in SETTINGS, you can also choose a training program, set metrics, choose a playlist
or switch splits on or off.
3. Select a trail from the list.
For more information about what you see on the screen, see About viewing trails.
Note: It is important to regularly calibrate the compass to ensure its accuracy.
Manage trails with MySports
Note: Available for all GPS-based activities: Run/Cycle/Freestyle (Runner3 and Spark3) and Trail
running/Hiking (TomTom Adventurer)
You use MySports to preload a trail onto your TomTom GPS Watch for use during an activity and to
manage trails.
22

Upload trails from MySports to your watch
15 trails can be stored on your watch. Any changes are automatically synced using the MySports
Mobile app or the MySports website.
Uploading a trail from a GPX file
To upload a trail to your watch from a .GPX file do the following:
1. Download a GPX file from a third party website such as Strava.com, RidewithGPS.com,
Mapmyrun.com etc.
2. Log in to the MySports website.
3. Click on the Planning tab.
4. Click Upload trail.
5. Double-click a GPX file on your computer.
MySports uploads the trail.
6. Click the name if you want to change it.
7. Connect your watch to your computer. Your trail is automatically uploaded to your watch when
a synchronisation is done.
Converting an activity to a trail
To convert a previous GPS activity to a trail on your watch, do the following:
1. Log in to the MySports website.
2. Open one of your previous GPS activities.
23

3. Click More in the top right hand corner of the screen.
4. Click COPY TO TRAILS.
The trail then appears in the trails list of the PLANNING section.
5. Connect your watch to your computer. Your trail is automatically uploaded to your watch when
a synchronisation is done.
Using breadcrumb trails
Note: Available for all GPS-based activities: Run/Cycle/Freestyle (Runner3 and Spark3) and Trail
running/Hiking (TomTom Adventurer)
Your TomTom GPS Watch can draw a breadcrumb trail for all activities that use GPS. Breadcrumb
trails allow you to see an overview of your route and understand the steps necessary to get back to
your starting point.
Breadcrumb trails show the following information:
Your current GPS position is shown with a chevron in the centre of the screen.
Your starting point is shown with a home icon.
The arrow tells you which direction you are facing when standing still and which direction you
are headed when moving.
The breadcrumb trail is shown in a North-up view.
You can switch between a detailed view and an overview depending on the total length of the
breadcrumb trail.
Important: If you are using your watch for the first time, you need to calibrate the compass.
To use a breadcrumb trail, do the following :
1. From the Clock screen, press RIGHT and choose an activity that uses GPS, for example, running.
24

2. After starting your activity, press RIGHT to review your heart rate if you have a Cardio watch
and you'll automatically see the breadcrumb trail.
For more information about what you see on the screen, see About viewing trails.
Using the compass
Note: Available for all GPS-based activities: Run/Cycle/Freestyle (Runner3 and Spark3) and Trail
running/Hiking (TomTom Adventurer)
Your TomTom GPS Watch has a compass so that you can instantly see which direction you are going.
This is particularly useful when you are not moving as the rotation of the watch indicates your
direction.
1. From the Clock screen, press RIGHT and choose an activity that uses GPS, for example, running.
2. After starting your activity, press RIGHT from the activity screen, then press UP.
Tip: If are following a trail, just press UP.
The compass shows your current direction, in this example North East.
25

The compass works best when the watch is kept level. If the compass doesn't show the correct
direction, you need to calibrate the compass.
Note: The compass may not work correctly when the watch is close to a magnetic object such as
when it is mounted on the steel handlebars of a bicycle.
Calibrating the compass
It is important to regularly calibrate your compass to maintain its accuracy.
To calibrate your compass, follow these steps:
1. From the Clock screen, press DOWN to go to SETTINGS.
2. Select SENSORS and press RIGHT.
3. Select COMPASS and press RIGHT.
4. Remove your watch from your wrist and rotate the WATCH itself around each of the three axes
as follows:
a. One full rotation sideways.
26

b. One full rotation forwards.
c. One full rotation with the screen facing you.
Repeat steps a-c until the compass is calibrated. When calibrated the watch gives an alert
and shows a tick.
To see a video of how to calibrate your watch, go to https://youtu.be/6pnQResxJRU
27

This section of the manual covers features that are specific to the TomTom Adventurer watch.
Adventurer activity types
Trail running
You can use your TomTom Adventurer Watch for trail running. During your run, you see the same
metrics as for a run but with the addition of elevation information as follows:
3D distance
Gradient
Altitude
Altitude delta
Total ascent or climb.
To run a trail, do the following :
1. Wait for a GPS signal and then press RIGHT from the clock screen and then press UP or DOWN to
select TRAIL RUN.
1. Press RIGHT to start your trail run.
2. During your run, scroll up or down to see a range of metrics.
3. To see your trail, press RIGHT and then press UP from the Heart Rate Zone screen.
Tip: If a trail has been pre-selected, you see it automatically.
For more information about what you see on the screen, see About viewing trails.
Note: It is important to regularly calibrate the compass to ensure its accuracy.
Note: If your watch gets dirty or wet, clean the holes around the barometer so that it can
measure pressure accurately.
Hiking
You can use your TomTom Adventurer Watch to hike a trail. During your hike, you see information
including the following:
3D distance
Gradient.
Altitude
Altitude delta
Total ascent or climb.
Average pace.
Tip: When hiking, your watch has a battery life of up to 24 hours assuming you have updated
QuickGPSfix. If you don't use the music feature or 24/7 heart monitoring, you should be able to
do several long walks of 6+ hours over a long weekend on a single charge.
To hike a trail, do the following :
1. Press RIGHT from the clock screen and then press UP or DOWN to select HIKE.
1. Press RIGHT to start your hike.
2. During your hike, scroll up or down to see a range of metrics.
3. To see your trail, press RIGHT and then press UP from the Heart Rate Zone screen.
28

Tip: If a trail has been pre-selected, you see it automatically.
For more information about what you see on the screen, see About viewing trails.
Note: It is important to regularly calibrate the compass to ensure its accuracy.
Note: If your watch gets dirty or wet, clean the holes around the barometer so that it can
measure pressure accurately.
Skiing and snowboarding
Note: Available on TomTom Adventurer watches only.
You can use your TomTom Adventurer Watch for skiing and snowboarding. You can get an overview
of your whole day on the mountain when using these activities. You see the same information when
choosing skiing or snowboarding but if you do both sports in one day, you can keep your stats
separate by choosing separate activities.
When skiing or snowboarding, your watch can detect when you are on a run or in a lift.
To go skiing or snowboarding, do the following :
1. Press RIGHT from the clock screen and then press UP or DOWN to select SKI or SNOWBOARD.
1. Whilst on a run, press UP or DOWN to cycle through a range of metrics including:
Total duration
Total distance
Heart rate
Speed
Altitude
Change in Altitude (delta)
Descent (total cumulative)
Run count
2. When you are in a lift, your watch shows a summary of your previous run including these
metrics:
Run number
Maximum speed
Descent (cumulative for that run)
Maximum gradient of your trail
Press any button to stop seeing the summary.
Note: It is important to regularly calibrate the compass to ensure its accuracy.
To change the metrics you see while skiing or snowboarding do the following:
1. Press RIGHT from the clock screen and then press UP or DOWN to select SKI or SNOWBOARD.
2. Press DOWN to go to the SETTINGS screen and select METRICS.
Tip: Whilst in SETTINGS, you can also choose a playlist or switch splits on or off.
1. To learn more, go to: Choosing which metrics to display.
29

About activity tracking
Activity tracking
You can use your TomTom GPS Watch to track how active you are. Here are some of things you can
do:
Track steps, time spent being physically active, calories burned and distance moved.
Set a daily goal for one of these metrics on your watch.
Use a weekly goal that is automatically generated based on your daily goal multiplied by 7.
See your daily and weekly progress for your set goal.
Upload your activity tracking metrics to the TomTom MySports website and TomTom MySports
mobile app.
Activity Tracking Accuracy
Activity tracking aims to provide information to encourage an active and healthy lifestyle. Your
watch uses sensors that track your movement. The data and information provided is intended as a
close estimation of your activity, but may not be completely accurate, including step, sleep,
distance and calorie data.
Setting a daily activity goal
Activity tracking is switched ON by default and 10,000 steps is automatically pre-set as a goal for
you. To change or set an activity tracking goal for the day, do the following:
1. From the Clock screen, press DOWN to open the SETTINGS menu.
2. Select TRACKER.
3. Select GOALS.
4. Select the goal you want to set: STEPS, TIME, CALORIES or DISTANCE.
5. Press RIGHT.
6. Set your goal for, for example, the number of steps you want to achieve.
7. Press RIGHT to go back to the TRACKER screen.
8. Press LEFT twice to go back to the clock screen.
Tip: Some examples of typical goals are 30 minutes of active time per day or 10,000 steps per
day.
Note: Unless you have an alarm switched on, when you reach a goal you see a badge on the
watch screen and hear an alert.
Switch off activity tracking
To switch activity tracking off, do the following:
1. From the Clock screen, press DOWN to open the SETTINGS menu.
2. Select TRACKER.
3. Select GOALS.
4. On the GOALS screen, select OFF.
30

Monitoring your activity
To see how active you have been, do the following:
1. From the Clock screen, press LEFT to see how you are progressing towards your goal.
2. Press UP or DOWN to see distance, time, or calories, depending on the goals you have set.
3. To see steps per week, press LEFT again.
4. Press RIGHT twice to go back to the Clock screen.
31

About sleep tracking
Sleep tracking
You can track how much you sleep using your TomTom GPS Watch. Here are some of things you can
do:
Track your how long you are sleeping for each day, week, month or year.
You can upload your sleep tracking metrics to the TomTom MySports website and TomTom
MySports mobile app.
Your watch measures sleep based on motion and it makes an assumption that when you are not
moving after a certain time in the afternoon, you are asleep.
The day 'resets' at 16:00 and your watch starts counting a new 'night' at that point.
Activity Tracking Accuracy
Activity tracking aims to provide information to encourage an active and healthy lifestyle. Your
watch uses sensors that track your movement. The data and information provided is intended as a
close estimation of your activity, but may not be completely accurate, including step, sleep,
distance and calorie data.
Tracking your sleep
To track your sleep, you need to wear your TomTom GPS Watch when you sleep.
Sleep tracking on switched ON by default but you change this setting in TRACKER in the SETTINGS
menu.
To see how long you slept the previous night, press LEFT from the Clock screen, then press UP.
Press LEFT to see your cumulative amount of sleep for that week.
Monitoring sleep using the mobile app
You can upload your sleep activity to both TomTom MySports and the TomTom MySports mobile app.
Viewing your sleep activity on the mobile app
1. On your phone or tablet, select Progress.
2. Select the Sleep panel.
3. Swipe to move between graphs showing today's sleep time and yesterday's sleep time.
4. Select Day or Week or Month or Year to show graphs of your sleep for that time period.
32

About music
Music
You can store and play music on your TomTom GPS Watch and listen to it during your activities.
After you have paired your headset and started an activity, you see a music screen.
Pairing headphones to watch
Wearing your headphones
Putting music on your watch
Playing music
Note: Music is not available on all watch models.
Charging supplied headphones
Some TomTom GPS watches are supplied with their own headphones for listening to music.
Tip: The headphones are supplied with approximately a 50% battery charge.
Note: The headphones can also be charged using a computer USB port but you cannot use the
headset as computer headphones.
To charge the headphones supplied with your watch, do the following:
1. Open the USB socket cover.
2. Connect the USB cable.
3. Plug the other end of the USB cable into your computer or a wall charger and switch the power
supply on.
Your headphones are now charging. They take 2.5 hours to charge from empty.
33

Note: When the USB socket cover is open, be careful not to get dirt, sand or water etc. in the
socket.
Pairing headphones to watch
Some TomTom GPS watches are supplied with their own headphones for listening to music.
Alternatively you can use most Bluetooth headsets or speakers to listen to music played on your
watch.
Tip: If you wish to use or buy your own headphones, search for the 'Headphone Compatibility' FAQ
at tomtom.com/support to see a list of compatible headphones.
To pair your supplied Bluetooth headphones with your watch, do the following:
1. Switch the headphones OFF.
2. To enter pairing mode, hold the centre button down on the headset control for 10 seconds.
Tip: Blue and red lights alternately flash when the headphones are in pairing mode.
34

You could also put one earbud in one ear so you can hear the audio feedback during pairing.
3. Press UP from the Clock screen.
Your watch searches for headphones.
4. If only one set of headphones is found, pairing starts.
Note: If more than one set of headphones are found, move at least 10m away from the other
sets of headphones.
5. When pairing between your watch and headphones is successful, a tick appears with the name
of your headphones shown.
You can now start listening to music played on your watch!
When you start an activity, you see a music screen with your current playlist.
35

Important: If pairing is not successful, switch OFF your headphones and try again.
Changing earbuds
Some TomTom GPS watches are supplied with their own headphones for listening to music.
The supplied headphones come with either the medium or large earbuds fitted, and with other sizes
in the box.
To change the earbuds for the supplied headphones so that they are the correct size, pull the bud
off the stalk and swap it as shown below:
Wearing your headphones
We want to make sure that your headphones are correctly fitted and hence don't interfere when you
are doing activities.
To put on the supplied headphones, do the following:
1. Hold the earbuds so that the one marked L is on your left and the one marked R is on your right.
Tip: When L and R are the right way up, the headphones are ready be inserted.
2. Lift the headphones up and over your head from BEHIND so that the cord sits behind your head
and neck. The cables should lie behind your ears as shown below.
3. Fit the earbuds and then tighten the cable to ensure a snug fit.
36

Putting music on your watch
You can store and play music on your TomTom GPS Watch and listen to it during your activities.
Your watch supports the following music file types:
MP3
Sample rate: 16KHz to 48KHz
Bit rate: 8 kbps to 320 kbps
Mono/stereo channels and joint stereo.
Artist, track title and length are displayed for the following languages: English, Czech, Danish,
German, Spanish, French, Italian, Dutch, Norwegian, Polish, Portuguese, Finnish and Swedish.
Other languages display correctly if the characters used are available in a supported language.
AAC
MPEG2 and MPEG4 AAC-LC and HE-AACv2 are supported.
Sample rate: up to 48KHz
Bit rate: up to 320 kbps
Mono/stereo/dual mono are supported.
Artist, track title and length for AAC is not supported.
The watch does not support files with DRM of any type.
Uploading and syncing music
You can upload complete playlists of music from ITunes and Windows Media Player on your
computer to your watch.
Note: You cannot sync playlists using the MySports mobile app.
To sync music playlists with your watch, follow these steps:
1. Connect your music watch to your computer.
MySports Connect opens and checks for updates.
2. In MySports Connect, select the MUSIC tab.
MySports Connect scans your computer for music playlists and lists them on the left hand side. If
you don’t see all of the playlists on your computer in the list, click SCAN.
3. Click the + next to a playlist to copy the playlist to your watch.
You can now play the playlists on your watch.
How much music fits on the watch?
There is around 3 GB of space for music on your watch. Depending on the size of the tracks, this is
enough space for 500 songs.
Playing music
You can store and play music on your TomTom GPS Watch and listen to it during your activities.
Switching the headphones on and off
1. Press the middle button for 2 seconds to switch on the headphones - the blue light flashes
twice.
37

2. Press the middle button for 3 seconds to switch off the headphones - the red light flashes twice.
PLAY
Press the middle button to play music.
PAUSE
Press the middle button to pause the music.
Tip: You can also press UP on your watch to pause a track.
VOLUME UP
Press the right-hand button as shown in the image above to increase the
volume.
VOLUME DOWN
Press the left-hand button as shown in the image above to decrease the
volume.
NEXT TRACK
Hold down the right-hand button for 2 seconds to go to the next track.
PREVIOUS TRACK
Hold down the left-hand button 3 down for 2 seconds to go to the previous
track.
Using the headset controls
To play music using the controls on the supplied headset, do the following:
Using the watch
To play music using your watch, do the following:
1. Switch the headphones on following the instructions supplied with your headphones.
2. Press UP from the Clock screen.
A track starts to play.
3. Press UP to pause a track.
38

Note: You cannot play music while swimming or using the stopwatch.
4. To select the next song, press RIGHT.
5. If more than 3 seconds of the track has played, press LEFT to restart the track. Pressing LEFT
again takes you to the previous song.
Tip: When you are carrying out an activity the Music player screen can be found at the very
top of the metric list. The same player controls apply.
Tip: To select a music playlist, press DOWN when you see the GO message on starting an
activity. You can also select from different Playlists in Settings when you are not doing an
activity, or by pressing DOWN when paused.
Backing up music on your watch
To back up the music on your watch, follow these steps.
Windows
1. Connect your watch to your computer.
2. Press the Windows logo key +E.
3. Double-click your watch in the Devices with Removable Storage list. Your watch should be listed
as MUSIC.
Note: Your watch might not have a label or name, but only a drive letter.
4. Double-click the MySportsConnect folder.
5. Right-click the Music folder and select Copy.
6. Choose a location on your computer where you want to store your backup, right-click it and
select Paste.
To restore music to your watch, follow these steps:
1. Click on the MySports connect icon in the notification area and click Exit.
2. Connect your watch to your computer.
3. Press the Windows logo key.
4. Copy your backed up Music folder back into the MySports Connect folder on your watch.
5. Restart MySports Connect from All Programs > TomTom.
Mac
1. Connect your watch to your computer.
2. Open Finder.
3. Select the watch in the Finder side bar. It should be listed as MUSIC.
4. Double-click the MySportsConnect folder.
5. Control-click (right-click) the Music folder and choose Copy "Music".
6. Choose a location on your Mac where you want to store your backup, control-click (right-click) it
and select Paste Item.
To restore music to your watch, follow these steps:
1. Connect your watch to your computer.
2. Open Finder.
3. Click on the MySports connect icon in the status bar and click Exit.
4. Copy your backed up Music folder back into the MySports Connect folder on your watch.
5. Restart MySports Connect from Launchpad or from the Applications folder.
39

About the voice coach
When playing music, a voice coach guides you through the important stages of your training.
The voice coach is on by default and you hear the voice coach every time the watch beeps or buzzes
with a message that needs your attention. As you are listening to music, the buzzer in the watch
cannot be heard so your watch interrupts the music with a brief message.
General prompts:
Watch ready, Demo mode, Bluetooth not working when swimming.
TrainingPartner prompts:
Zone: in zone, above zone, below zone.
Goal: at 50%, 90% 100% and 110% of goal.
Race: ahead, behind, lost, won.
Note: You can switch off the voice coach by pressing DOWN to open the SETTINGS menu, then
select PROFILE and press RIGHT to open the PROFILE menu. Press VOICE and select NONE.
You can also change the language of the voice coach using the same VOICE option within
PROFILE.
Headphones troubleshooting
Some TomTom GPS watches are supplied with their own headphones for listening to music.
If you experience gaps or clicks in the music, this may be due to your body blocking the Bluetooth
signal between your watch and the headset controls.
Try wearing the watch on the other wrist to improve the reception and audio quality. The best
position for the watch is on the right wrist.
40

About activities
Run
Cycle
Swim
Treadmill
Freestyle
Gym
Indoor cycling
Stopwatch
Activities
In the activities menu, you can start one of the activities available on your watch:
When you select RUN, CYCLE or FREESTYLE, your watch uses its internal GPS receiver to measure
your speed, and to record the route you have taken.
If your watch has a heart rate sensor and the heart rate sensor is set to ON, your heart rate is shown
during your activity. This includes running, cycling, treadmill and freestyle.
When you select SWIM or TREADMILL, your watch uses its internal motion sensor to measure your
strides on the treadmill, and strokes and turns in the swimming pool. Your watch uses this
information to estimate your speed and the distance you have covered.
When you select INDOOR for indoor cycling, your watch uses the connected Cadence and Speed
Sensor to show your speed, heart rate information if available and calories burnt vs time.
Select GYM to show heart rate information and calories burnt over time. You need an external or
internal heart rate sensor for this activity.
Select FREESTYLE when you want to do an activity other than running, cycling or swimming. This
means that you can keep clean histories and totals for running, cycling and swimming.
When you select STOPWATCH, you can use your watch to show elapsed time, mark laps and see
times for your current and previous laps.
41

About calorie estimation
Calories are estimated based on the type of sport, your gender, your weight and the intensity and
duration of the exercise.
24x7 calorie estimation is based on your BMI and then adjusted for steps, active time, sports
activities, etc., to generate a theoretical total for the day. Heart rate is not used during 24x7
calorie counting because it would drain the watch battery too quickly.
Note: Not all activities are available on all watches.
Running, cycling, swimming, treadmill or indoor cycling
For running, cycling, swimming or treadmill, the calorie calculations are based on metabolic
equivalent of task tables (MET or simply metabolic equivalent).
We use the MET tables of Ainsworth BE, Haskell WL, Herrmann SD, Meckes N, Bassett Jr DR,
Tudor-Locke C, Greer JL, Vezina J, Whitt-Glover MC, Leon AS. 2011 Compendium of Physical
Activities: a second update of codes and MET values. Medicine and Science in Sports and Exercise,
2011;43(8):1575-1581.
Freestyle or gym
Calories for freestyle and gym activities are based on heart rate. For other activities calories are
linked to that specific sport but for freestyle and gym, the watch doesn’t know which sport you are
doing. Hence when no heart rate measurement is available, calories are not shown for freestyle and
gym activities.
Tracker
The calorie metric measures how many calories you burn during the day including your basal
metabolic rate (BMR). Your BMR represents the minimum amount of energy that you need to keep
your body functioning, including breathing and keeping your heart beating. Because BMR is
included, your calorie metric in the tracker will be higher than your calorie metric in an activity.
About 24/7 heart rate monitoring
Your TomTom GPS Watch allows you to monitor your heart rate during the day. It takes a reading
every 10 minutes for 24/7 tracking versus every second for sports tracking.
Note: Continuous heart rate monitoring is only available on watch models with an optical sensor.
Switching on 24/7 heart rate monitoring on your watch
Continuous heart rate monitoring is OFF by default. To switch on 24/7 heart rate monitoring on your
watch, follow these steps:
1. From the Clock screen, press DOWN to open the SETTINGS menu.
2. Select TRACKER.
3. Select HEART.
4. Select ON.
5. Synchronise your watch by connecting it to MySports Connect on your computer or to the
MySports mobile app.
Your watch is now measuring your heart rate when you wear it.
Note: 24x7 heart rate monitoring requires software version 1.2.0 or higher.
Viewing your heart rate on the MySports website
1. Go to mysports.tomtom.com/app/progress.
42

2. Click All sports and select Activity tracking.
3. Click All and select Day.
4. At the bottom of the page, select Max Heart Rate.
View your heart rate in the MySports mobile app
Note: 24x7 heart rate information is only available in the daily view, day by day.
1. On the ACTIVITIES screen, tap Today.
2. Below the date, swipe left.
3. Tap Max Heart Rate.
Starting an activity
To start an activity on your watch, do the following.
1. From the clock, press RIGHT.
2. Select one of the activities, then press RIGHT.
RUN
CYCLE
SWIM
TREADMILL
GYM
INDOOR CYCLING
FREESTYLE
STOPWATCH
3. For RUN, CYCLE and FREESTYLE activities, until your watch has a GPS fix you see the message
Please wait, and the GPS icon flashes in the top left hand corner of the screen. When it's ready
to start an activity, your watch shows the message GO and the GPS icon stops flashing.
Tip: To select a music playlist, press DOWN when you see the GO message on starting an
activity.
For Cycle activities, if you are using a Cadence and Speed Sensor, once your watch is connected to
the sensor, your watch shows the message GO. The Cadence & Speed Sensor is then used to provide
speed and distance information about your activity. Your watch may not have a GPS fix at this
point. If you would like to track the route of your activity, wait until the GPS icon stops flashing
before starting your activity.
Note: It can take a short time to find your GPS position, especially the first time you use your
watch or if the QuickGPSfix information is not up-to-date. Moving does not speed up getting a
fix so stay still and wait until your position has been found.
To ensure good GPS reception, make sure you are outdoors with a clear view of the sky. Large
objects such as tall buildings can sometimes interfere with reception.
If your watch has a heart rate sensor, you may see a message saying "Warm up" at the start of
an activity while your watch gets a GPS position. This is because the sensor performs most
accurately when you are warmed up with good circulation in your arms.
From this screen, press in one of these directions to choose an option:
RIGHT - start your activity, once your watch has a GPS fix.
DOWN - select a training program or set the information displayed while you train.
UP - see your past activities.
LEFT - go back to the list of activities.
43

Press RIGHT to start your activity.
1. When you are doing an activity, your watch shows information, such as the distance, time, pace
and heart rate if you have a monitor. Press UP and DOWN to change the information that you
see.
2. You can pause the activity if you're just taking a break, or stop the activity completely.
For each type of activity, you can select different training programs, and select to see different
information while you are training.
Pausing and stopping an activity
Pausing and stopping an activity
During an activity, press and hold LEFT to stop the clock and pause your activity.
To restart the activity again, press RIGHT.
To stop the activity completely, press LEFT to pause the activity, then press LEFT again.
How pause works
If you upload your activity to your MySports account and view it on a map, you see your whole
course with the pause shown as a straight line.
GPS tracking stops and the start pause and end pause locations are linked together. When you start
you activity again after a pause, your location is known immediately.
The averages shown are calculated for the time that the watch wasn't paused. For example, if you
run 5 km, then pause and walk for 2 km, then start and run for another 5 km, you see your entire
route, but your average is only valid for the 10 km.
Tip: Your watch turns itself off if you leave it paused for too long to prevent draining the battery.
We recommend not leaving the watch paused for too long if possible.
Choosing which metrics to display
Before you start an activity you can choose a training program and also decide what information you
would like to see as you train.
While you train, three different metrics are available at any one time:
One main metric is shown in a larger figure in the main part of the screen.
Two minor metrics are shown at the bottom of the screen.
Changing the main metric
As you train, you can change the information shown by the larger figure by moving UP and DOWN.
The text above the main metric shows which information is currently being displayed.
Setting the minor metrics
Do the following to choose the information shown by the smaller figures:
1. From the activity start screen, press DOWN to the SETTINGS menu.
2. Select METRICS, then press RIGHT.
3. Select DISPLAY, then press RIGHT.
4. Select LEFT or RIGHT to set the metric shown on the left or the right.
5. Select the metric to be displayed from the list.
The metrics that are available depend on your current activity.
44
Some examples of metrics available:
This symbol shows the strength of GPS reception. While your watch is
looking for GPS satellites, the satellite images flashes.
The heart symbol shows that your watch is connected to a Heart Rate
Sensor. When your watch is trying to connect to the Heart Rate Sensor,
the heart flashes.
The chainring symbol shows that your watch is connected to a Cadence
and Speed Sensor. When your watch is trying to connect to the Cadence&
Speed Sensor, the chainring flashes.
This symbol shows the battery status.
PACE - your current pace. For swimming, this is shown in minutes per 100m.
AVG PACE - your average pace for the current activity.
HEART RATE - your heart rate. This metric is only available if you have a Heart Rate Sensor
connected.
SPEED, PACE or BOTH - for activities other than swimming, you can choose to see speed, pace
or both metrics at once.
SWOLF - this metric is only given for swimming activities. The SWOLF score is calculated by
adding the time in seconds and the number of strokes you make to swim one length of the pool.
SWOLF shows your swimming efficiency. The lower the score, the better. The word SWOLF is a
mixture of swimming and golf.
CALORIES - Calories for the freestyle activity are based on heart rate. For other activities
calories are linked to that specific sport but for freestyle, the watch doesn’t know which sport
you are doing. Hence when no heart rate measurement is available, calories are not shown for
the freestyle activity.
For activity tracking, sports and activities, the calorie metric measures how many calories you
burn during the day including your basal metabolic rate (BMR). Your BMR represents the minimum amount of energy that you need to keep your body functioning, including breathing and
keeping your heart beating.
Icons on the screen
The following icons can be shown along the top of the screen while you are training:
45

Settings for Running
Before you start an activity you can choose a training program and also decide what information you
would like to see as you train.
There are a wide range of metrics that you can choose to see while running including calories, heart
rate, heart rate zone and distance.
Choosing other metrics to display
Note: To get help on choosing which metrics you want to see during an activity, see Choosing
which metrics to display.
To choose to see just one metric for speed, average speed, pace or average pace, press DOWN to
the SETTINGS menu. Select METRICS, then press RIGHT. Select SPEED, AVG SPEED, PACE or AVG
PACE.
To choose to see speed, pace or both metrics, press DOWN to the SETTINGS menu. Select METRICS
then press RIGHT. Select SPEED, then press RIGHT. Select SPEED, PACE or BOTH.
Settings for Outdoor Cycling
You can log your heart rate, speed and location using the integrated sensors when cycling.
If you want to review your performance while cycling, in the interest of your own safety it is best to
mount the GPS watch using the optional bike mount so that you can keep both hands on the handle
bars.
If you want to review your heart rate while cycling, we recommend connecting an optional external
heart rate sensor so that you can review your heart rate safely.
Setting the wheel size for use with a Cadence & Speed Sensor
If you are using a Cadence and Speed Sensor, you should set the WHEEL SIZE setting to increase the
accuracy of the metrics provided by the sensor. This setting is the circumference of your rear tyre
in millimetres (mm).
To set your wheel size, do the following:
1. From the activity start screen, press DOWN to open the SETTINGS menu.
2. Select WHEEL SIZE, then press RIGHT.
3. Set the size so it's correct for your rear wheel.
To find the circumference of your rear wheel, you can either measure the wheel yourself using a
tape measure, or look up the value in an online calculator. For example, on this site you can find
the circumference using the diameter of the wheel and the thickness of the tyre:
www.bikecalc.com/wheel_size_math
For example, if your wheel size is 700c and the tyres are 25 mm thick, the circumference is 2111
mm. This is the value you should enter.
Note: To get help on choosing which metrics you want to see during an activity, see Choosing
which metrics to display.
Settings for Swimming
Note: TomTom GPS watches are water-resistant. You can swim with these watches. However, the
built-in Heart Rate Monitor does not work under water.
Before you start a swimming activity, you should check the POOL SIZE setting for the pool where
you are swimming. This setting is the length of the pool in metres or yards.
46

As you swim, your watch registers your strokes and the number of turns you make in the pool. To
calculate the distance you have swum and your speed, your watch uses the pool size and the
number of turns you have made. If the pool size is not accurate, the metrics for your swimming
activity cannot be worked out correctly.
To change the POOL SIZE settings, do the following:
1. From the activity start screen, press DOWN to open the SETTINGS menu.
2. Select POOL SIZE, then press RIGHT.
3. Set the size so it shows the nominal length of the pool, then move RIGHT.
4. Set the fraction size so it shows the additional fraction length of the pool, then move RIGHT.
5. Set the measurement unit to metres or yards.
6. Press RIGHT to go immediately back to the activity screen.
When you select SWIM, your watch does not use its internal GPS receiver.
To set which metrics to display do the following:
1. From the activity start screen, press DOWN to the SETTINGS menu.
2. Select METRICS, then press RIGHT.
3. Select DISPLAY, then press RIGHT.
4. Select LEFT or RIGHT to set the metric shown on the left or the right.
5. Select the metric to be displayed from the list, such as STROKES or LENGTHS.
Settings for Treadmill
Your height is set on the very first use of your watch. Before you start an activity on the treadmill
for the first time, you should check that your height has been set correctly. You can do this in your
TomTom MySports account or on your watch.
As you run on a treadmill, your watch registers the number of times you swing your arm back and
forward and how quickly. This matches the number of strides you make as you run. Your watch uses
your height to calculate the length of your stride, and from this the distance you have run and your
pace.
To check your height on your watch, do the following:
1. From the clock, press DOWN to open the SETTINGS menu.
2. Select PROFILE, then press RIGHT.
3. Select HEIGHT, then press RIGHT.
4. Set your height.
Calibrating your watch for Treadmill activities
The distance measurements your watch makes for Treadmill activities are less accurate than for Run
activities. When you run outdoors, your watch uses GPS to measure the distance you cover.
You are not asked to calibrate each single treadmill activity. You get a reminder to do so in the
following situations:
Your activity distance is 400 metres or more.
Your activity duration is 1 minute or longer.
Your number of steps is 60 or more.
You have done less than 6 calibrated runs.
If you calibrate your watch, the distance measurements for Treadmill activities become more
accurate.
Tip: You are always asked if you want to change your distance at the end of a treadmill session.
To calibrate your watch, do the following:
47

1. When prompted to calibrate your watch, pause the treadmill.
To pause your watch, press LEFT during the activity.
2. On your watch, press DOWN to open the SETTINGS menu.
3. Select CALIBRATE then press RIGHT.
4. Change the distance to match the distance shown on the treadmill.
5. Press RIGHT to go immediately back to the activity screen.
Choosing other metrics to display
Note: To get help on choosing which metrics you want to see during an activity, see Choosing
which metrics to display.
To choose to see just one metric for speed, average speed, pace or average pace, press DOWN to
the SETTINGS menu. Select METRICS, then press RIGHT. Select SPEED, AVG SPEED, PACE or AVG
PACE.
To choose to see speed, pace or both metrics, press DOWN to the SETTINGS menu. Select METRICS,
then press RIGHT. Select SPEED, then press RIGHT. Select SPEED, PACE or BOTH.
Settings for Gym activities
Before you start an activity you can choose a training program and also decide what information you
would like to see as you train.
There are a wide range of metrics that you can choose to see while in the gym including calories,
heart rate, heart rate zone, and duration.
Choosing other metrics to display
Note: To get help on choosing which metrics you want to see during an activity, see Choosing
which metrics to display.
To choose to see just one metric for speed, average speed, pace or average pace, press DOWN to
the SETTINGS menu. Select METRICS, then press RIGHT. Select SPEED, AVG SPEED, PACE or AVG
PACE.
To choose to see speed, pace or both metrics, press DOWN to the SETTINGS menu. Select METRICS,
then press RIGHT. Select SPEED, then press RIGHT. Select SPEED, PACE or BOTH.
Settings for Cycle activities
You can log your heart rate and speed when cycling indoors.
If you want to review your performance while cycling, in the interest of your own safety it is best to
mount the GPS watch using the optional bike mount so that you can keep both hands on the handle
bars.
If you want to review your heart rate while cycling, we recommend connecting an optional external
heart rate monitor so that you can review your heart rate safely.
Setting the wheel size for use with a Cadence & Speed sensor
If you are using a Cadence and Speed Sensor, you should set the WHEEL SIZE setting to increase the
accuracy of the metrics provided by the sensor. This setting is the circumference of your rear tyre
in millimetres (mm).
To set your wheel size, do the following:
1. From the activity start screen, press DOWN to open the SETTINGS menu.
2. Select WHEEL SIZE, then press RIGHT.
3. Set the size so it's correct for your rear wheel.
48

To find the circumference of your rear wheel, you can either measure the wheel yourself using a
tape measure, or look up the value in an online calculator. For example, on this site you can find
the circumference using the diameter of the wheel and the thickness of the tyre:
www.bikecalc.com/wheel_size_math
For example, if your wheel size is 700c and the tyres are 25 mm thick, the circumference is 2111
mm. This is the value you should enter.
Note: To get help on choosing which metrics you want to see during an activity, see Choosing
which metrics to display.
Using the stopwatch
To use the stopwatch, do the following.
1. From the clock, press RIGHT.
2. Select STOPWATCH, then press RIGHT.
Your watch shows an image of a stopwatch and the word GO.
3. Press RIGHT to start the stopwatch.
The stopwatch starts and shows the elapsed time.
4. To pause the stopwatch, press LEFT. Press RIGHT to resume counting.
Tip: When paused, to see more of your previous laps, press DOWN and press UP.
5. To mark each lap, touch the right side of the watch screen while the stopwatch is running, or
press RIGHT.
The big number is the total elapsed time of all your laps added together.
Your current lap time, for example lap 12 below, is shown under the total elapsed time. Your
previous laps, here laps 11 and 10, are shown under your current lap.
To see more of your previous laps, press DOWN and press UP.
6. To leave the stopwatch activity, press LEFT twice.
Tip: The stopwatch does not run in the background after you leave the stopwatch activity. No
GPS information or activity information is stored.
Tip: To reset the stopwatch, leave the stopwatch activity and then go back into it again.
49

Training programs
About training programs
For each type of activity, the following training programs are available:
NONE
GOALS
INTERVALS
LAPS
ZONES
RACE
From the clock screen, do the following to see the list of training programs:
1. Press RIGHT and then select your choice of activity.
2. Press RIGHT.
3. Press DOWN and select TRAINING.
4. Press RIGHT and choose a training program.
When you select a training program, your watch remembers which program you are using and any
options you have selected for that program.
Tip: If you want to start a program immediately after selecting it, press RIGHT to go straight to
the activity screen.
None
How to get there: Activity screen > Press DOWN > TRAINING > NONE
Select this option to do your activity without using a training program. In this mode, your watch
records your activity and shows metrics for your activity.
Goals
How to get there: Activity screen > Press DOWN > TRAINING > GOALS > DISTANCE, TIME or
CALORIES
Select this option to set yourself training goals.
You can set yourself three types of goals:
DISTANCE - select this option to set yourself a distance to cover in your activity.
TIME - select this option to set yourself a duration for your activity.
CALORIES - select this option to set yourself a number of calories to burn during your activity.
The calories burnt can be calculated more accurately if you set your profile.
Watching your progress
To see an overview of your progress towards your goal, press RIGHT from the activity progress
screen.
50

This screen shows the percentage of your target you have reached and the remaining distance, time
or number of calories.
Tip: When running, you can head away from home until your progress reads 50% and then turn
and come back again.
Progress alerts
When training to a goal, your watch alerts you at these stages:
50%
90%
100%
110%
Intervals
How to get there: Activity screen > Press DOWN > TRAINING > INTERVALS > WARMUP, WORK,
REST, # SETS, or COOLDOWN.
Select this option to use interval training.
Interval training is short periods of exercise followed by rest. The main aim of interval training is to
improve speed and cardiovascular fitness. For example, during a 20 minute walk-jog workout you
could do an 8 minute fast walk, followed by 3 sets of 1 minute running and 2 minutes walking, then
a 5 minute walk to cool down.
For warmup, work, rest and cooldown, you can set either a time or a distance. For sets, you choose
the number of sets you want to include in your interval training program.
Tip: If you press RIGHT after setting the warmup details, you are then in the correct place to
setup the rest of that interval set including work, rest etc.
51

During interval training, you see an alert for the next stage of interval training:
You see the name of what you are doing, and how long this part of the set is in either time or
distance.
You are also warned with beeps and buzzes when you need to switch to the next stage in your
interval training.
Tip: When you use interval training on the watch, interval sections are marked as laps so you can
better track pace and other metrics for each interval section.
Laps
How to get there: Activity screen > Press DOWN > TRAINING > LAPS > TIME, DISTANCE, or
MANUAL.
Select this option to measure your activity against set lap times, distances or by manually recording
when you complete a lap.
You can set up your watch to measure laps in three ways:
TIME - select this option to set a duration for a lap. After you start your activity, your watch
alerts you when the time for each lap passes. If you set a lap time of 1 minute, your watch
alerts you each minute and the screen shows the number of laps completed.
DISTANCE - select this option to set the length of a lap. After you start your activity, your
watch alerts you whenever you reach the target distance for one lap. If you set a lap distance of
400 m, your watch alerts you after each 400 m you cover and the screen shows the number of
laps completed.
MANUAL - select this option to record yourself when you complete a lap. To mark the end of a
lap, cover the screen with your palm. Your watch shows the number of laps completed and
alerts you that a lap is complete.
Splits
How to get there: Activity screen > Press DOWN > TRAINING > SPLITS.
Select this option to switch ON or OFF split times for any GPS-based activity. Splits are off by
default but when switched on, you get an alert and a split time for your current pace at the end of
each mile or kilometre.
Splits can be used with any GPS-based activity or outdoor activity.
Note: Split times can be used together with other training modes.
52

Zones
How to get there: Activity screen > Press DOWN > TRAINING > ZONES > PACE, SPEED, HEART or
CADENCE.
Select this option to train within a target zone.
You can select from the following training zones, depending on the activity:
PACE - select this option to set your target time per mile or kilometre. You can set your target
time and a minimum and maximum above and below the target that you allow yourself.
SPEED - select this option to set your target speed and a margin above and below the target
that you allow yourself.
HEART - select this option to set your target heart rate using a custom heart rate zone or
choose a predefined heart rate zone. For your watch to be able to measure your heart rate, it
must be connected to a Heart Rate Sensor.
CADENCE - select this option to set your target cadence for your cycling activity. For your
watch to be able to track your cadence, it must be connected to a Cadence and Speed Sensor.
You can set your target cadence and a margin above and below the target that you allow
yourself. Not all watches are able to connect to a Cadence & Speed Sensor.
Setting a zone for Heart and Pace
If you want to set up a custom heart rate zone or a pace zone, choose a minimum and maximum as
shown below:
Setting a zone for Speed and Cadence
If you want to set up a speed or cadence zone, choose a target value and allowed percentage to
deviate as shown below:
53

Monitoring your progress
From the activity progress screen, press RIGHT to see a graphical overview of how close your
training is to the zone you set. The graph shows if you are above or below your target zone and by
how much, throughout your activity.
You regularly receive alerts to tell you if you are in your zone or outside your zone:
If you are outside your training zone, an alert is played and the screen shows if you are above or
below your zone.
When you are back in your training zone, an alert is played and the screen shows a target
symbol.
Heart rate zones
Note: For your watch to be able to measure your heart rate, it must be connected to a Heart
Rate Sensor.
Your watch uses heart rate zone boundaries based on your age. Using TomTom MySports, you can
adapt these heart rate zone boundaries and they are then synchronised with your watch.
To train using a heart rate zone, do the following :
1. Press RIGHT from the clock screen and then select your choice of activity.
2. Press RIGHT.
3. Press DOWN and select TRAINING.
54

4. Press RIGHT and choose ZONES.
5. Press RIGHT and choose HEART.
6. Press RIGHT and choose from the following heart rate zones:
SPRINT - select this zone when using interval training.
SPEED - select this zone for high tempo training to improve your speed and fitness.
ENDURE - select this zone for moderate to high tempo training to improve your lung and
heart capacity.
FAT BURN - select this zone for moderate tempo training that is great for weight loss.
EASY - select this zone for easy tempo training, mostly used for warm-up and cool down.
CUSTOM - select this option to set your own minimum and maximum heart rate.
Monitoring progress in a heart rate zone
Note: For your watch to be able to measure your heart rate, it must be connected to a Heart
Rate Sensor.
From the activity progress screen, press RIGHT to scroll through graphs showing how close your
training is to the zone you set. The graph shows if you are above or below your target zone and by
how much, throughout your activity.
The zone you are using is highlighted in white. Press RIGHT to see the heart rate zone summary.
55

This graph, shown above, is a heart rate zone summary. It shows the percentage of time spent in
each zone with your current zone highlighted in white.
This graph shows your heart rate over the last 2.5 minutes of activity and the percentage of time
spent in each heart rate zone after an activity.
Tip: You can view your progress in a heart rate zone even when you are using a Graphical Training
Partner like Race or Goal. During training, from the screen showing a main metric, press RIGHT to
see the graphical training screen. Press DOWN to see the heart rate zone screens as described
above.
Recovery
About heart rate recovery
Heart rate recovery is your heart's ability to return to a normal rate after an activity within a
specific amount of time. In general, a faster heart rate recovery from an activity is an indication of
an improved fitness level.
Heart rate recovery has two decreasing phases. During the first minute after exercise the heart rate
drops sharply. After the first minute, during the resting plateau, the heart rate gradually decreases.
Your TomTom GPS watch shows you the difference between the heart rate at the start and the end
of the minute as well as a 'score' for your recovery.
How do you measure heart rate recovery?
For activities that use a heart rate sensor, your watch shows you how your heart rate is recovering
when you pause an activity. After a period of one minute your watch gives a score for your heart
rate recovery. The faster your heart rate drops after exercise, the fitter you are.
Monitoring of heart rate recovery works with the built-in Heart Rate Sensor or an external Heart
Rate Sensor.
Race
How to get there: Activity screen > Press DOWN > TRAINING > RACE > RECENT or MYSPORTS.
Select this option to race against one of your ten most recent activities or race against an activity
from the MySports website. You can use race for running, treadmill, freestyle and cycling activities.
Tip: To add more races to the website, click RACE THIS on the activity details page for a
particular activity on the MySports website.
56

Note: If your watch is already connected to the website and you make changes to your races, the
changes won’t get synchronised automatically - you need to disconnect and reconnect your
watch.
The activity or race from the MySports website consists of a distance and a time.
When you use the Race training program, you can see if you are ahead or behind in the race and by
how much, as you train.
On your watch, press RIGHT from the activity screen to see a representation of the race. The
graphics screen shows whether you, as shown by the black arrow, are pacing ahead or behind your
previous activity, as shown by the shaded arrow.
The distance at the top of the screen shows the remaining distance in the race, and the distance at
the bottom shows how much you are ahead or behind.
Your watch alerts you so you know if you are in front (#1) or behind (#2) in your race. In this
example you are 23 metres behind your previous activity and you have a remaining distance to race
of 2.3 kilometres.
Tip: To get information on adding previous activities to your watch, go to tomtom.com/support
and read the FAQ.
Activity history
Whenever you train, your activity is logged by your watch for that type of activity. To see the
summary or history of your training for each type of activity on your watch, do the following:
1. From the activity start screen, press UP to open the HISTORY for that type of activity.
2. From the list, select the activity you want to look at. The list shows the date you started the
activity and distance covered.
3. Press RIGHT.
Information about the activity is shown, for example, fastest pace/speed and the time spent in
each heart rate zone. The information available depends on the activity.
57

Transferring your activities to TomTom MySports
Connect your watch to your computer to transfer details of your activities to TomTom MySports or
another sports website that you choose, using TomTom MySports Connect. You can also transfer
details about the activity to your computer in several different file formats.
See: Exporting your activities to other websites and file types
Exporting your activities to other websites and file types
When you connect your watch to MySports Connect on your computer or to the MySports mobile
app, your new activities are automatically uploaded to MySports. You can also choose to automati-
cally upload your activities to various other websites or file types.
To add more websites or file types in MySports, follow these steps:
1. Go to mysports.tomtom.com/settings/exporters.
2. Click the + next to the exporter you wish to add.
3. To add an exporter for a website, click Log in and log into the website.
To add a file type, select a type.
Once a new sports website or file type is added, all new activities are also transferred to that
website or file type.
Note: Files cannot be generated using the MySports mobile app. You can only generate files by
connecting to MySports Connect on your computer.
Websites
Endomondo
Jawbone
MapMyFitness
NikePlus
Runkeeper
Strava
TaiwanMySports
TrainingPeaks
File types
Tip: To get the best results we recommend that you use .FIT files. If this format does not give
you the desired results, try .TCX, and then try .GPX.
GPX – GPS Exchange format. This is an open standard for location data that stores the track and
time stamps of your workout. Only locations, elevation and time are stored, no heart rate,
cadence or other information can be stored in this file format.
KML – Google Earth’s native file format. Stores location (track) with elevation and time. Heart
rate and other sensor information are stored as additional information and are shown as ‘labels’
in Google Earth
TCX – Garmin Training Centre file format. This is a file format dedicated to sports and fitness
and captures location/elevation, time and all of the sensor data.
FIT – ANT+/Garmin format, smaller and more advanced than TCX.
PWX - dedicated format for TrainingPeaks.
58

About settings
Settings
From the clock screen, press DOWN to open the SETTINGS menu. These settings determine the
overall behaviour of your watch. For each activity, there are also settings related to that activity.
The following settings are available for your watch:
CLOCK
TRACKER
PLAYLISTS
SENSORS
PHONE
AIRPLANE mode
OPTIONS
PROFILE
STANDARDS
These settings are available for activities:
Settings for Running
Settings for Outdoor Cycling
Settings for Swimming
Settings for Treadmill
Settings for Gym
Settings for Indoor Cycling
Clock
From the Clock screen, press DOWN to open the SETTINGS menu, then select CLOCK and press
RIGHT to open the CLOCK menu.
ALARM
Select ALARM to turn the alarm on and off and to set the alarm time.
When the alarm goes off, you can choose to stop it or snooze. If you snooze the alarm, it goes off
again in 9 minutes.
TIME
Select TIME to set the time on your watch. The time is either set using the 12 or 24 hour clock,
depending on the setting for 24HR.
Tip: The watch uses a UTC (Coordinated Universal Time) time stamp for 24/7 activity tracking.
This is automatically set by the factory, MySports mobile app, MySports Connect or GPS. Based on
UTC the watch gets the date. You can only change the date by changing the time.
24HR
Select 24HR to switch between using the 12 hour clock and the 24 hour clock to display and set the
time. RIGHT to switch between ON and OFF for this setting.
59

Tracker
Switching off activity tracking
From the Clock screen on your watch, press DOWN to open the SETTINGS menu, then select
TRACKER. Activity tracking is ON by default so select OFF to switch off activity tracking.
GOALS
From the Clock screen on your watch, press DOWN to open the SETTINGS menu, then select
TRACKER. Press RIGHT to select GOALS.
For more information, see Setting a daily activity goal.
SLEEP
From the Clock screen on your watch, press DOWN to open the SETTINGS menu, then select
TRACKER. Press RIGHT to select SLEEP and then press RIGHT again to switch sleep tracking on or
off.
Note: You cannot set a sleep goal.
Playlists
You can select a playlist when not doing an activity from the SETTINGS menu.
From the Clock screen on your watch, press DOWN to open the SETTINGS menu, then select
PLAYLISTS.
Sensors
From the Clock screen press DOWN to open the SETTINGS menu, then select SENSORS and press
RIGHT to open the SENSORS menu.
You can switch on and off two types of sensors:
HEART - this is a built-in or external heart rate sensor.
BIKE - this is a cadence and speed sensor.
You can also calibrate the compass:
COMPASS - this is a built-in compass that needs calibrating before first use and on a regular
basis thereafter to maintain accuracy.
Tip: To help your watch last for up to 20% longer on a battery charge, turn off sensors that you
are not using. Your watch keeps searching for sensors even if you are not using a sensor.
You can check if a heart rate sensor is working without having to start an activity. See Testing a
heart rate sensor.
Testing a heart rate sensor
You can check if a heart rate sensor is working without having to start an activity. Do the following:
1. From the Clock screen, press DOWN to open the SETTINGS menu.
2. Select SENSORS and press RIGHT to open the SENSORS menu.
3. Select HEART and press RIGHT.
You see ON, OFF or EXTERNAL. If the setting is set to ON or EXTERNAL you see bpm which
means that your heart rate is measured in beats per minute.
You then see either your heart rate shown immediately or dashes which blink to show that your
watch is searching for the heart rate sensor.
60

Tip: When the heart rate is detected, the monitor stays active for another 30 seconds in case
you want to start an activity straight away.
Phone
For information as to why you should want to pair your watch with your phone or mobile device, see
TomTom MySports app.
To pair your watch with a phone or mobile device, do the following:
1. Make sure that your phone or mobile device is close by.
2. On your phone, make sure that Bluetooth is enabled.
3. From the Clock screen on your watch, press DOWN to open the SETTINGS screen, then select
PHONE and press RIGHT.
4. Press RIGHT to start pairing.
5. On your phone, start the MySports Connect app and tap to connect.
6. When the name of your watch appears, select it.
7. On your phone, enter the pin number shown on the watch, then select PAIR.
Your watch is now paired with your phone or mobile device.
When pairing has been completed, you see a CONNECTED message on your watch.
61

As long as you have the mobile app active or running in the background on your phone or mobile
device, the watch automatically tries to connect when it has a new activity to upload or when
the QuickGPSfix data is out-of-date.
If you open the MySports app on your phone and it is trying to connect to your watch, you may
need to wake up your watch by moving away from the clock screen. Press DOWN, LEFT or
RIGHT from the clock screen.
Synchronising your activities
You can automatically upload your activities to your TomTom MySports account by using this
setting.
From the Clock screen on your watch, press DOWN to open the SETTINGS screen, then select
PHONE and press RIGHT.
Select SYNC. If automatic uploading is currently switched OFF, press UP or DOWN to switch
automatic uploading on.
Airplane mode
From the Clock screen on your watch, press DOWN to open the SETTINGS screen, select AIRPLANE
mode and then press RIGHT.
Press UP or DOWN to switch on airplane or flight mode.
When airplane mode or flight mode is switched on, an airplane icon is shown on the clock screen
and all Bluetooth connectivity is disabled.
To switch airplane mode off, press UP or DOWN again.
Options
From the Clock screen, press DOWN to open the SETTINGS menu, then select OPTIONS and press
RIGHT to open the OPTIONS menu.
UNITS
Select UNITS to set the distance and weight units used on your watch. You can select any
combination of miles or kilometres, and pounds or kilogrammes.
CLICK
Select CLICK to set what your watch does as you move through menus. Your watch can make a
clicking sound and you can urn on or off.
62

DEMO
Select DEMO to turn the demo mode on and off. In demo mode, your watch behaves as if it has a
GPS fix and you are training, even if you are not. Any activities completed in demo mode are not
added to your history of activities.
NIGHT
Select NIGHT to turn the night mode on or off. If the night mode is on, the backlight comes on and
stays on during an activity. When you stop the activity, the light goes off again.
Note: The battery will run down much more quickly than normal if you use the night mode while
training.
Lock
Select Lock to turn the activity lock function on and off. The lock function prevents your current
activity being paused or stopped if you accidentally press LEFT.
Profile
From the Clock screen on your watch, press DOWN to open the SETTINGS menu, then select
PROFILE and press RIGHT to open the PROFILE menu.
Select the following options to set your details in each case:
LANGUAGE
VOICE
WEIGHT
HEIGHT
AGE
GENDER
Information from your profile is used for the following:
To work out the number of calories you burn during an activity.
To set the target heart rates for you in the heart rate training zones. The zones are worked out
by your TomTom MySports account.
To work out your stride length if you are training on a treadmill.
LANGUAGE
Select LANGUAGE to set the language used for menus and messages on your watch.
VOICE
Select VOICE to change the language for the voice coach or to switch it off.
Standards
To see certification information on your watch, press DOWN from the Clock screen to open the
SETTINGS menu.
Select STANDARDS and then press RIGHT to scroll through the certification information.
63

About sensors
Adding sensors
Sensors are external devices which you can link to your watch to provide information about your
activity. Two types of sensors can be used with your watch:
External Heart Rate Sensor - this measures your heart rate as you train. The external TomTom
Heart Rate Sensor is included in some products and available as an accessory for others.
Cadence & Speed Sensor - this measures your cadence and speed as you cycle. The TomTom
Cadence & Speed Sensor is included in some products and available as an accessory for others.
Cadence
Cadence measures the rate at which you pedal in revolutions per minute (rpm). In a low gear, you
may have a very high cadence but a lower speed. In a high gear, you may have a low cadence but a
higher speed. Cyclists train to find the balance between cadence and speed which allows them to
cycle as efficiently as possible.
External Heart Rate Sensor
To use the external TomTom Heart Rate Sensor with your watch, do the following:
1. Attach the monitor to the strap.
2. Attach the strap around your chest, so the monitor sits just above the base of your chest bone.
Make sure the monitor is the right way up so that the word TomTom is the right way up for
someone standing in front of you.
Tip: Wet the sensors on the inside of the strap before placing it around your chest. This makes
it easier for the sensor to pick up your heartbeat.
3. From the Clock screen on your watch, press DOWN.
4. Select SENSORS then press RIGHT.
64

5. Select HEART, then press RIGHT to turn it on.
6. When you begin an activity, your watch connects to the sensor and you see a heart icon at the
bottom of the screen.
When your watch is trying to connect to the sensor, the heart flashes.
The first time your watch tries to connect to your sensor, if it finds more than one sensor, your
watch doesn't know which sensor to connect to. Move to a place where there are no other
sensors within range of your watch.
When you have connected to your sensor once, your watch always reconnects to your sensor.
While you train, you can choose to show your heart rate.
You can also use a training program to train to a target heart rate zone.
You can also use the external Heart Rate Sensor with other Bluetooth® Smart Ready devices and
apps. See the documentation that comes with your product or app for more information.
To change the CR2032 battery on the sensor, use a coin to open the back of the sensor. The battery
must be recycled or disposed of according to local laws and regulations.
Cadence and Speed Sensor
The TomTom Cadence & Speed Sensor consists of the following parts:
1. Spoke magnet
2. Crankarm magnet
3. Chainstay sensor
4. Cable ties
To use the TomTom Cadence & Speed Sensor with your watch, do the following:
1. Attach the chainstay sensor to the chainstay on your bike, using three of the cable ties
provided. Use two ties for the main body of the sensor and one tie for the smaller part of the
sensor. You may need to adjust the position of the sensors so don't tighten the ties completely
just yet.
65

Important: The smaller part of the sensor needs to face the crankarms and should not be
attached to the top of the chainstay. You may have to tilt the main body of the sensor towards
the wheel depending on your bike. You should make this adjustment after you have attached
the spoke magnet.
2. Attach the spoke magnet to one of the spokes on your bike. The magnet should face the
chainstay where you attached the chainstay sensor.
3. Adjust the position of the spoke magnet and the chainstay sensor so that when the wheel turns,
the spoke magnet passes the tip of the main body of the chainstay sensor.
Important: The distance between the chainstay sensor and the spoke magnet should not be
more than 2 mm when they pass each other. On some bikes, you may have to tilt the main
body of the sensor towards the wheel.
66

4. Attach the crankarm magnet to one of the crankarms on your bike. The magnet should face the
chainstay where you attached the chainstay sensor.
Tip: Make sure the different parts of the Cadence & Speed Sensor are lined up correctly on
your bike. The spoke magnet should pass the main body of the chainstay sensor and the
crankarm magnet should pass the tip of the sensor.
Once you have adjusted the sensors to the right position, tighten the cable ties so they are held
securely in place.
5. On your watch, set the wheel size to help increase the accuracy of the metrics provided by the
sensor. The wheel size is the circumference of your tyre in millimetres (mm).
6. Move your bike or its crankarm so that at least one of the magnets passes the sensor. This
switches on the sensor.
7. From the Clock screen, press DOWN.
8. Select SENSORS, then press RIGHT.
9. Select BIKE, then press RIGHT to turn it on.
10. When you begin a workout, your watch connects to the sensor and you see an icon of a chainring
at the bottom of the screen.
When your watch is trying to connect to the Cadence & Speed Sensor, the chainring flashes.
The first time your watch tries to connect to your sensor, if it finds more than one sensor, your
watch doesn't know which sensor to connect to. Move to a place where there are no other
sensors within range of your watch.
67

When you have connected to your sensor once, your watch always reconnects to your sensor.
When the chainring icon has stopped flashing, your watch is ready to measure your speed and
cadence. You can start cycling with no GPS fix but for proper GPS tracking, wait until the GPS
icon has also stopped flashing before you start your cycling activity.
Tip: When you are using the Cadence & Speed Sensor for cycling activities, you are warned when
no speed data is being received from the sensor.
While you train, you can choose to show your current cadence or change the display to see your
cadence.
You can also use a training program to train to a target cadence zone.
You can also use the Cadence & Speed Sensor with other Bluetooth® Smart Ready devices and apps.
See the documentation that comes with your product or app for more information.
To change the CR2032 battery on the sensor, use a coin to open the back of the sensor. The battery
must be recycled or disposed of properly according to local laws and regulations.
68

Your TomTom MySports account is a central storage location for all your training and fitness
TomTom MySports account
information.
To create an account, click the button in TomTom MySports Connect, or go directly to the website:
mysports.tomtom.com
As you can see from the diagram below, you can transfer your activities to your MySports account
using either TomTom MySports Connect or the TomTom MySports app.
If you transfer your activities to your TomTom MySports account, you can store, analyse and view
your previous activities. You can view the routes you have taken and all the metrics associated with
your activities.
Using TomTom MySports Connect on your computer, you can also choose to transfer your activities
to your account on other sports websites.
Note: If you use an export file format such as CSV, FIT or TCX files, you should not use the
TomTom MySports mobile app to transfer activities to other sports websites. However, any
automatic uploads using, for example RunKeeper, will work.
69

TomTom MySports Connect does the following:
TomTom MySports Connect
Helps you set up your watch.
Updates the software on your watch when new versions become available.
Transfers your activity information to your TomTom MySports account or another sports website
that you choose. We can currently transfer activity information to Endomondo, Strava, MapMyFitness, RunKeeper, Jawbone and Nike+.
TomTom MySports Connect can also transfer activity information to your computer in a number
of file formats.
See: Exporting your activities to other websites and file types
Transfers any settings you make on TomTom MySports to your watch.
Updates the QuickGPSfix information on your watch.
Installing TomTom MySports Connect
You can download TomTom MySports Connect for free from here: tomtom.com/123/
Once installed, connect your watch to your computer using the desk dock.
70

The TomTom MySports mobile app does the following:
TomTom MySports mobile app
Transfers your activity information to your TomTom MySports account automatically when in
range of your phone. See: Exporting your activities to other websites and file types
Transfers any settings you make on TomTom MySports to your watch.
Updates the QuickGPSfix information on your watch.
Provides an alternative to TomTom MySports Connect for transferring activity information to
your MySports account and updating QuickGPSfix.
Supported phones and mobile devices
iOS
The TomTom MySports app is supported on the following phones and mobile devices:
iPhone 4S or later
iPod touch 5th generation
iPad3 or later
All iPad mini.
Android
The TomTom MySports app requires Bluetooth Smart (or Bluetooth LE) and Android 4.4 or higher to
communicate with your watch. A range of Bluetooth Smart enabled Android devices have been
tested to confirm their compatibility with the MySports app. Check your phone's compatibility with
the MySports app by visiting the Google Play Store.
Note: You can pair your watch with several Android Lollipop or later devices to upload your
activities. For compatibility visit the Google Play Store.
Important: You must update your MySports mobile app to version 1.3.0 for Android and 1.0.9 for iOS
or higher. After this update you need to pair your watch with your smartphone again.
Before using the TomTom MySports app
You can download the TomTom MySports app for free from your usual app store or by going to
tomtom.com/app.
71

You can share MySports activities using the Social Sharing feature of your MySports account.
Sharing your activities
To start sharing, do the following:
1. Log in to MySports.
2. Select an activity from your MySports dashboard.
3. Click the Share button in the top-right corner.
4. Choose, for example, Facebook or Twitter and add a comment to personalise your post.
72

Warning
Addendum
Warning - TomTom GPS watch
The TomTom GPS watch provides you with information that encourages you to adopt a more active
lifestyle. The information and data provided is a close estimate of your activity and may not be
completely accurate. Data shown can vary per device used or per person and may be dependent on
their height, weight, age, build, and activity level. The TomTom GPS watch cannot be relied on or
used as a replacement for medical advice. We recommend that you consult your physician before
starting a new exercise or fitness plan. See tomtom.com for more information.
Warning - Heart Rate Monitor
This heart rate monitor is not a medical device. Always consult a physician before starting an
exercise program. If you have a pacemaker or other implanted electronic device, consult your
physician before using this product. The use of this product while exercising might distract from
your surroundings or your activity. Interference with the signal from external sources, poor contact
with your wrist and other factors may prevent accurate heart rate data readings or transmissions.
TomTom disclaims all liability arising from any such inaccuracies.
Waterproofing
The reliability of the watch when you use it under water depends on water pressure, depth changes,
water contamination, water saltiness, water temperature, and other environmental factors. Moving
the watch vigorously under water at a depth of 40 m (5 ATM) is not advised. If the watch is
subjected to vigorous movement underwater, TomTom cannot guarantee that the watch will still
function to its full capacity.
How TomTom uses your information
Information regarding the use of personal information can be found at:
tomtom.com/privacy.
Battery and Environmental information
This product uses a lithium polymer battery that is not user accessible or user replaceable. Do not
open the case or (attempt to) remove the battery. Substances in the product and/or battery may be
harmful to the environment or your health if disposed of improperly. The battery contained in the
product must be recycled or disposed of properly according to the local laws and regulations and
always kept separate from household waste.
73

WEEE directive
The wheelie bin symbol on the product or its packaging indicates that this product shall not be
treated as household waste. In line with EU Directive 2012/19/EU for waste electrical and
electronic equipment (WEEE), this electrical product must not be disposed of as unsorted municipal
waste. Please dispose of this product by returning it to the point of sale or to your local municipal
collection point for recycling. By doing this you will help conserve the environment.
Battery operating temperatures
Operating temperatures: -20°C (-4°F) to 60°C (140°F). Do not expose to temperatures beyond this.
R&TTE directive
Hereby, TomTom declares that TomTom products and accessories are in compliance with the
essential requirements and other relevant provisions of the EU Directive 1999/5/EC. The declaration
of conformity can be found here: tomtom.com/legal.
FCC information for the user
THE DEVICE COMPLIES WITH PART 15 OF THE FCC RULES
Federal Communications Commission (FCC) Statement
This equipment radiates radio frequency energy and if not used properly - that is, in strict
accordance with the instructions in this manual - may cause interference to radio communications
and television reception.
Operation is subject to the following two conditions: (1) this device may not cause harmful
interference and (2) this device must accept any interference, including interference that may
cause undesired operation of the device.
This device has been tested and found to comply with the limits for a Class B digital device,
pursuant to part 15 of the FCC rules. These limits are designed to provide reasonable protection
against harmful interference in a residential installation. This equipment generates, uses and can
radiate radio frequency energy and, if not installed and used in accordance with the instructions,
may cause harmful interference to radio communications. However, there is no guarantee that
interference will not occur in a particular installation. If this equipment does cause harmful
interference to radio or television reception, which can be determined by turning the equipment off
and on, the user is encouraged to try to correct the interference by one or more of the following
measures:
Reorient or relocate the receiving antenna.
Increase the separation between the equipment and receiver.
Connect the equipment into an outlet on a circuit different from that to which the receiver
is connected.
Consult the dealer or an experienced radio/TV technician for help.
74

Changes or modifications not expressly approved by the party responsible for compliance could void
the user's authority to operate the equipment.
FCC ID: S4L-4REM, S4L-4RFM, S4L-4R0M
IC ID: 5767A-4REM, 5767A-4RFM, 5767A4R0M
FCC RF Radiation Exposure Statement
The transmitters within this device must not be co-located or operating in conjunction with any
other antenna or transmitter.
Responsible party in North America
TomTom, Inc., 2400 District Avenue, Burlington, MA 01803
Tel: 866 486-6866 option 1 (1-866-4-TomTom)
Emissions information for Canada
Operation is subject to the following two conditions:
This device may not cause interference.
This device must accept any interference, including interference that may cause undesired
operation of the device.
Operation is subject to the condition that this device does not cause harmful interference.
This Class B digital apparatus complies with Canadian ICES-003. CAN ICES-3(B)/NMB-3(B)
The Country Code Selection feature is disabled for products marketed in the US or Canada.
IMPORTANT NOTE
IC Radiation Exposure Statement:
This equipment complies with IC RSS-102 radiation exposure limits set forth for an uncon-
trolled environment.
This device and its antenna(s) must not be co-located or operating in conjunction with any
other antenna or transmitter.
This equipment complies with IC radiation exposure limits set forth for an uncontrolled environment. End users must follow the specific operating instructions for satisfying RF exposure
compliance. To maintain with IC RF exposure compliance requirements please follow operation
instruction as documented in this manual.
Regulatory Compliance Mark
This product displays the Regulatory Compliance Mark (RCM) to show that it complies with relevant
Australian regulations.
Notice for New Zealand
This product displays R-NZ to show it complies with relevant New Zealand regulations.
Customer support contact (Australia and New Zealand)
Australia: 1300 135 604
75

New Zealand: 0800 450 973
Accessories supplied with this device
USB cable
Headphones supplied with some models
Model names
TomTom GPS: TomTom GPS Watch: 4REM
TomTom GPS Cardio Watch: 4RFM
TomTom GPS Watch Cable: 4R00
TomTom GPS Watch: 4REM, TomTom GPS Cardio Watch: 4RFM, TomTom GPS Watch Cable: 4R00,
TomTom Bluetooth Sports Headset: 4R0M
76

© 2014 - 2016 TomTom. All rights reserved. TomTom and the "two hands" logo are trademarks or
Copyright notices
registered trademarks of TomTom N.V. or one of its subsidiaries. Please see tomtom.com/legal for
limited warranty and end user licence agreements applying to this product.
Linotype, Frutiger and Univers are trademarks of Linotype GmbH registered in the U.S. Patent and
Trademark Office and may be registered in certain other jurisdictions.
MHei is a trademark of The Monotype Corporation and may be registered in certain jurisdictions.
AES code
The software included in this product contains AES code under Copyright (c) 1998-2008, Brian
Gladman, Worcester, UK. All rights reserved.
Licence terms:
The redistribution and use of this software (with or without changes) is allowed without the
payment of fees or royalties provided that the following conditions are adhered to:
Source code distributions include the above copyright notice, this list of conditions and the
following disclaimer.
Binary distributions include the above copyright notice, this list of conditions and the following
disclaimer in their documentation.
The name of the copyright holder is not used to endorse products built using this software without
specific written permission.
Calorie calculations
Calorie calculations in this products are based on MET values from:
Ainsworth BE, Haskell WL, Herrmann SD, Meckes N, Bassett Jr DR, Tudor-Locke C, Greer JL, Vezina
J, Whitt-Glover MC, Leon AS. 2011 Compendium of Physical Activities: a second update of codes and
MET values. Medicine and Science in Sports and Exercise, 2011;43(8):1575-1581.
77
 Loading...