


TG185n

Setup and User Guide
THOMSON TG185n
Ethernet-to-WiFi Convertor/Wireless-n Repeater


THOMSON TG185n
Setup and User Guide

Copyright
Copyright ©1999-2008 THOMSON. All rights reserved.
Distribution and copying of this document, use and communication of its contents is not permitted without written authorization
from THOMSON. The content of this document is furnished for informational use only, may be subject to change without notice,
and should not be construed as a commitment by THOMSON. THOMSON assumes no responsibility or liability for any errors or
inaccuracies that may appear in this document.
Thomson Telecom Belgium
Prins Boudewijnlaan, 47
B-2650 Edegem
Belgium
http://www.thomson-broadband.com
Trademarks
The following trademarks may be used in this document:
DECT is a trademark of ETSI.
Bluetooth® word mark and logos are owned by the Bluetooth SIG, Inc.
Ethernet™ is a trademark of Xerox Corporation.
Wi-Fi®, WMM® and the Wi-Fi logo are registered trademarks of the Wi-Fi Alliance®. "Wi-Fi CERTIFIED", "Wi-Fi ZONE",
"Wi-Fi Protected Access", "Wi-Fi Multimedia", "Wi-Fi Protected Setup", WPA", WPA2" and their respective logos are trade-
marks of the Wi-Fi Alliance®.
UPnP™ is a certification mark of the UPnP™ Implementers Corporation.
Microsoft®, MS-DOS®, Windows®, Windows NT® and Windows Vista® are either registered trademarks or trademarks
of Microsoft Corporation in the United States and/or other countries.
Apple® and Mac OS® are registered trademarks of Apple Computer, Incorporated, registered in the United States and
other countries.
UNIX® is a registered trademark of UNIX System Laboratories, Incorporated.
Adobe®, the Adobe logo, Acrobat and Acrobat Reader are trademarks or registered trademarks of Adobe Systems, Incor-
porated, registered in the United States and/or other countries.
Other brands and product names may be trademarks or registered trademarks of their respective holders.
Document Information
Status: v2.0 (October 2008)
Reference: E-DOC-CTC-20080624-0009
Short Title: Setup and User Guide TG185n R8.2 (en)

E-DOC-CTC-20080624-0009 v2.0
i
Contents
About this Setup and User Guide ............................................. 1
1 Introduction..................................................................................3
2 Installation....................................................................................5
3 The THOMSON TG185n as Wireless Access Point................... 7
3.1 Configuring The THOMSON TG185n As Access Point.................................... 8
3.2 Connecting a Wireless Client via WPS .......................................................... 11
3.2.1 Push Button Configuration ..................................................................................................................12
3.2.2 PIN Code Entry On The Wireless Client.............................................................................................. 13
3.2.3 PIN Code Entry On the THOMSON TG185n .......................................................................................14
3.3 Manually Configuring a Wireless Client ........................................................ 15
3.4 Securing Your Wireless Network .................................................................. 16
3.4.1 Configuring WPA(2)-PSK Encryption..................................................................................................17
3.4.2 Configuring WPA Encryption .............................................................................................................. 18
3.4.3 Configuring WEP Encryption...............................................................................................................19
4 The THOMSON TG185n as Wireless Repeater .......................21
4.1 Automatic Configuration (Via WPS).............................................................. 22
4.1.1 Push Button Configuration ..................................................................................................................23
4.1.2 PIN Code Entry On The Access Point..................................................................................................24
4.1.3 PIN Code Entry On the THOMSON TG185n .......................................................................................25
4.2 Manual Configuration (Without WPS) ........................................................... 26
5 Your THOMSON TG185n as Wireless Client ........................... 29
5.1 Automatic Configuration (Via WPS).............................................................. 30
5.1.1 Push Button Configuration ..................................................................................................................31
5.1.2 PIN Code From Your Access Point...................................................................................................... 32
5.2 Manual Configuration (Without WPS) ........................................................... 33
6 THOMSON TG185n Basics........................................................ 35
6.1 THOMSON TG185n LED Behaviour ............................................................... 36
6.1.1 Status LEDs ........................................................................................................................................... 37
6.1.2 WPS Button LED ................................................................................................................................... 38
6.1.3 Ethernet LEDs ....................................................................................................................................... 39

E-DOC-CTC-20080624-0009 v2.0
ii
Contents
6.2 THOMSON TG185n Web Interface ................................................................ 40
6.3 Saving/Restoring Your Configuration ........................................................... 41
7 Support....................................................................................... 43
7.1 Assigning a Static IP to Your Computer ....................................................... 44
7.1.1 Assigning a Static IP Address On Windows Vista .............................................................................45
7.1.2 Assigning a Static IP Address On Windows XP.................................................................................46
7.1.3 Assigning a Static IP Address On Mac OS X......................................................................................47
7.2 Restoring the IP Settings of Your Computer ................................................ 48
7.3 General THOMSON TG185n Troubleshooting ............................................... 49
7.3.1 Wired Connection Troubleshooting.................................................................................................... 50
7.3.2 Wireless Connection Troubleshooting ............................................................................................... 51
7.4 Reset to Factory Defaults ............................................................................. 52

E-DOC-CTC-20080624-0009 v2.0
1
About this Setup and User Guide
About this Setup and User Guide
Used Symbols
Typographical Conventions
Following typographical convention is used throughout this manual:
Sample text indicates a hyperlink to a Web site.
Example: For more information, visit us at www.thomson-broadband.com
.
Sample text indicates an internal cross-reference.
Example: If you want to know more about guide, see “1 Introduction” on page 7”.
Sample text indicates an important content-related word.
Example: To enter the network, you must authenticate yourself.
Sample text indicates a GUI element (commands on menus and buttons, dialog box elements, file
names, paths and folders).
Example: On the File menu, click Open to open a file.
Documentation and software updates
THOMSON continuously develops new solutions, but is also committed to improving its existing products.
For more information on THOMSON's latest technological innovations, documents and software releases,
visit us at http://www.thomson-broadband.com
.
A note provides additional information about a topic.
A caution warns you about potential problems or specific precautions that need to be taken.

E-DOC-CTC-20080624-0009 v2.0
2
About this Setup and
User Guide
E-DOC-CTC-20080624-0009 v2.0
3
1 Introduction
1 Introduction
Introduction
This Setup and User Guide will show you how to set up your THOMSON TG185n.
Supported wireless standards
The THOMSON TG185n supports the following wireless standards:
THOMSON TG185n Modes
You can use the THOMSON TG185n as:
Wireless Access Point
Wireless Repeater
Wireless Client
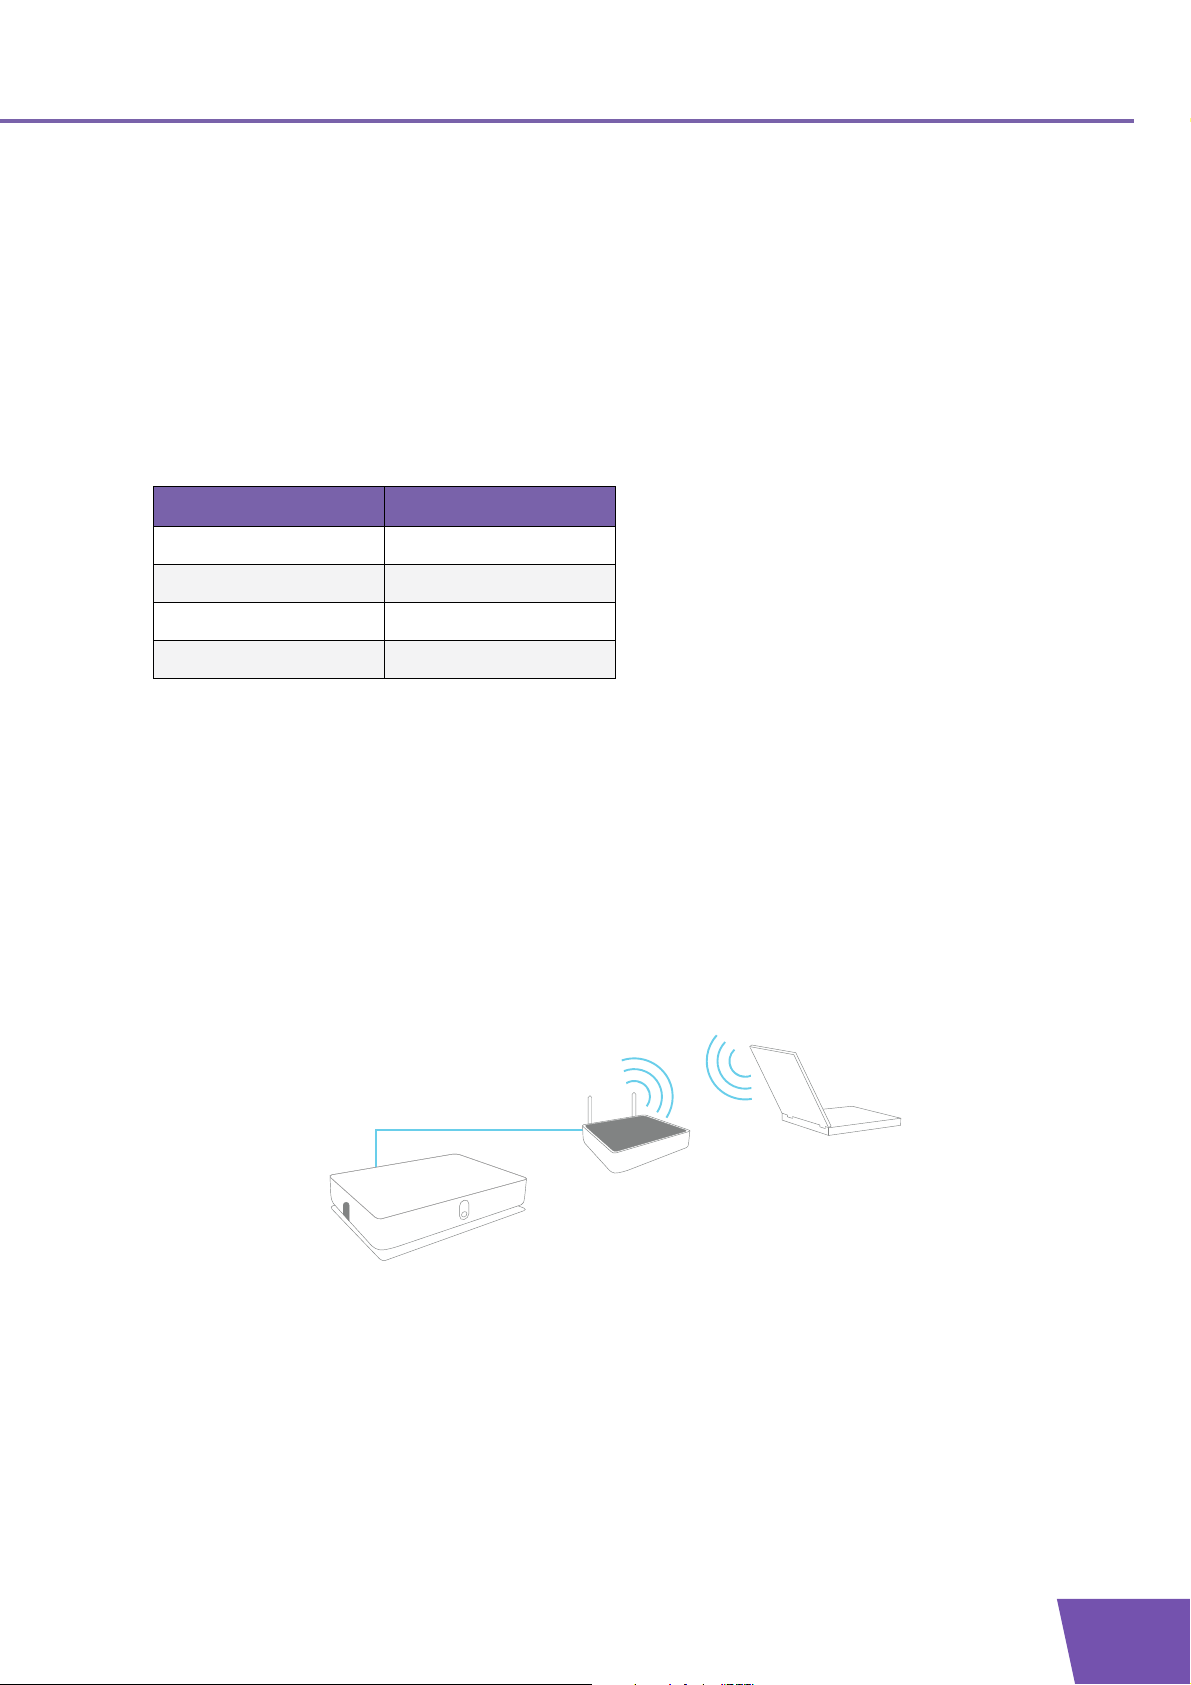
Wireless Access Point
Use this mode if you are using a wired network and you now want to be able to access your network
wirelessly.
Standard Maximum Data Rate
IEEE 802.11n 300 Mbps
IEEE 802.11g 54 Mbps
IEEE 802.11b 11 Mbps
IEEE 802.11a 54 Mbps
E-DOC-CTC-20080624-0009 v2.0
4
1 Introduction
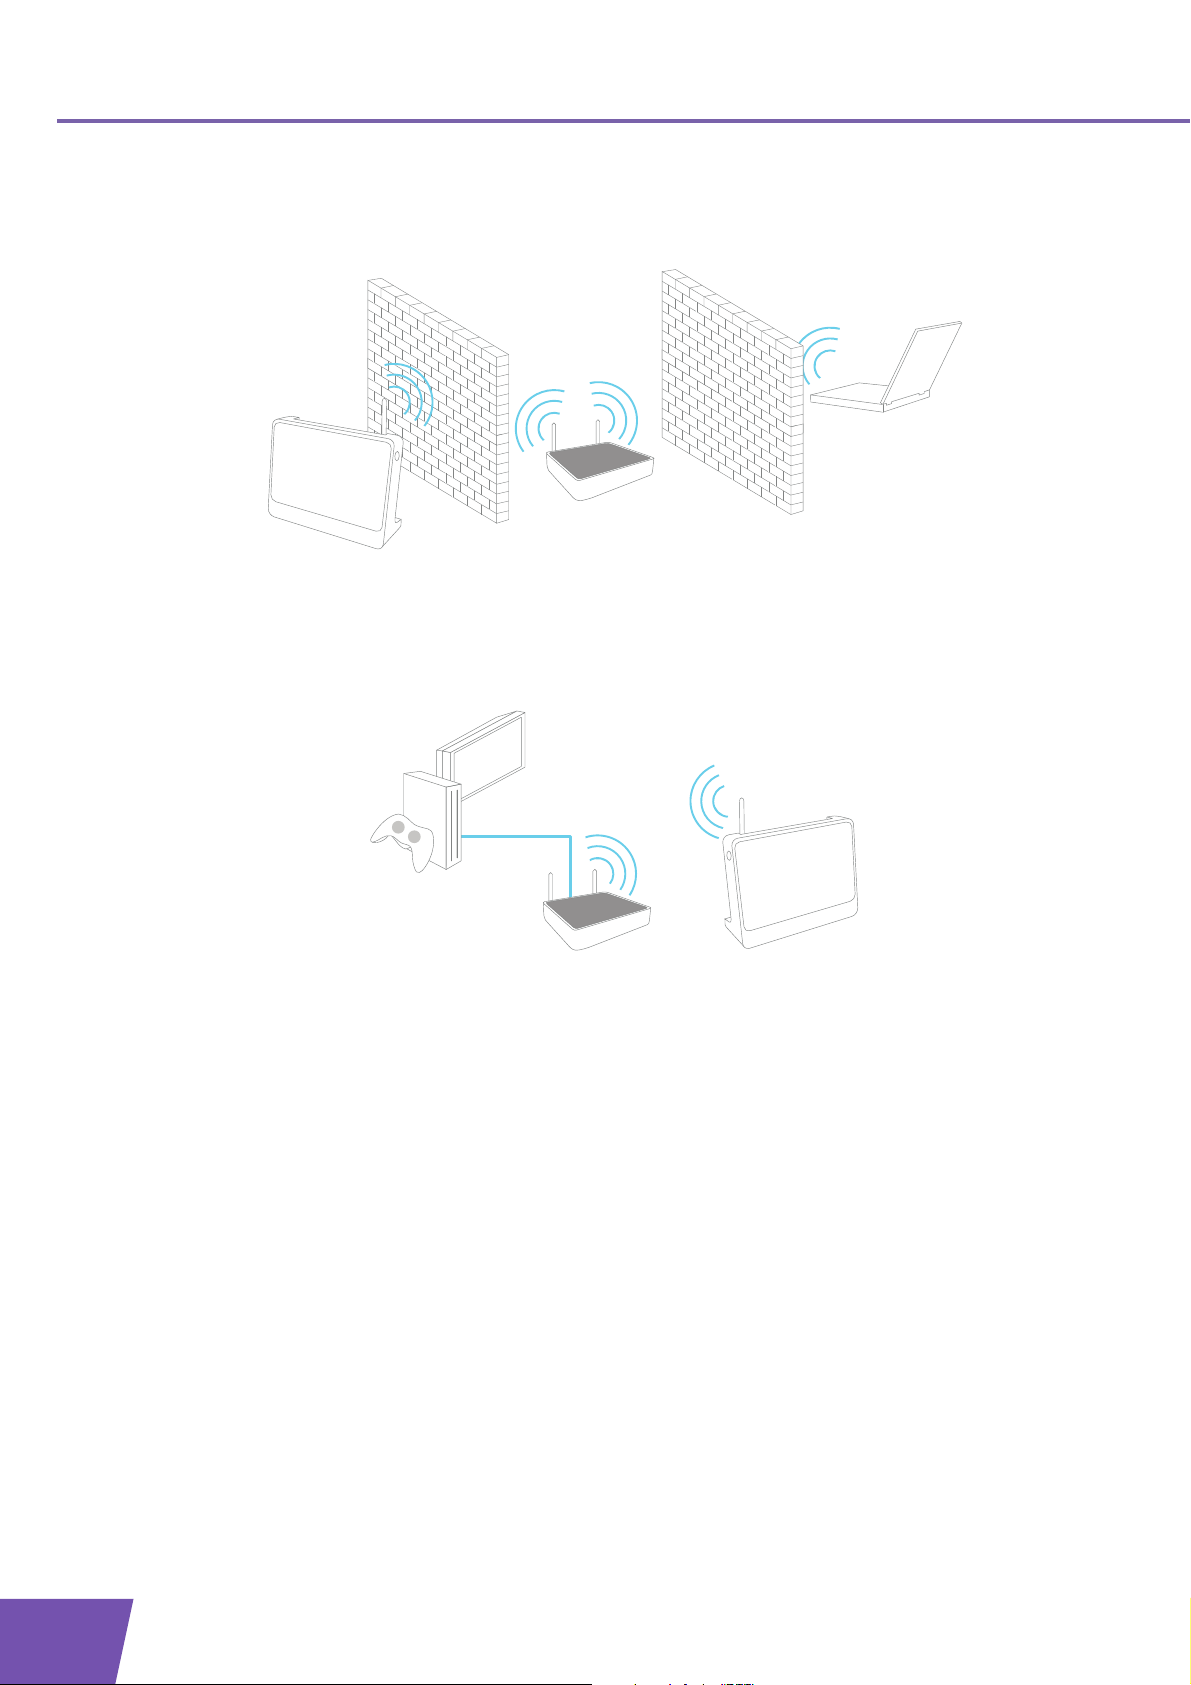
Wireless Repeater
Use this mode to extend the coverage of an existing wireless network:
Wireless Client
Use this mode to connect a wired Ethernet device (for example: a laptop, a gaming console with Ethernet
connectivity,...):

E-DOC-CTC-20080624-0009 v2.0
5
2 Installation
2 Installation
Introduction
In this chapter we will help you to:
1 Connect the cables.
2 Configure the THOMSON TG185n.
Connect the cables
Proceed as follows:
1 Plug the connector of the electric power supply adapter into the power inlet port on the back panel of
your THOMSON TG185n.
2 Plug the adapter into a nearby mains socket.
3 Plug one end of the Ethernet cable into the Ethernet port of your THOMSON TG185n.
4 Plug the other end of the Ethernet cable in the Ethernet port on your computer.
Configure the THOMSON TG185n
If you want to configure your THOMSON TG185n as:
Wireless Access Point, proceed with “3.1 Configuring The THOMSON TG185n As Access Point” on
page 8.
Wireless Repeater, proceed with “4 The THOMSON TG185n as Wireless Repeater” on page 21.
Wireless Client, proceed with “5 Your THOMSON TG185n as Wireless Client” on page 29.
Ethernet ports are often marked with the following label:

E-DOC-CTC-20080624-0009 v2.0
6
2 Installation
E-DOC-CTC-20080624-0009 v2.0
7
3 The THOMSON TG185n as Wireless Access Point
3 The THOMSON TG185n as Wireless Access Point
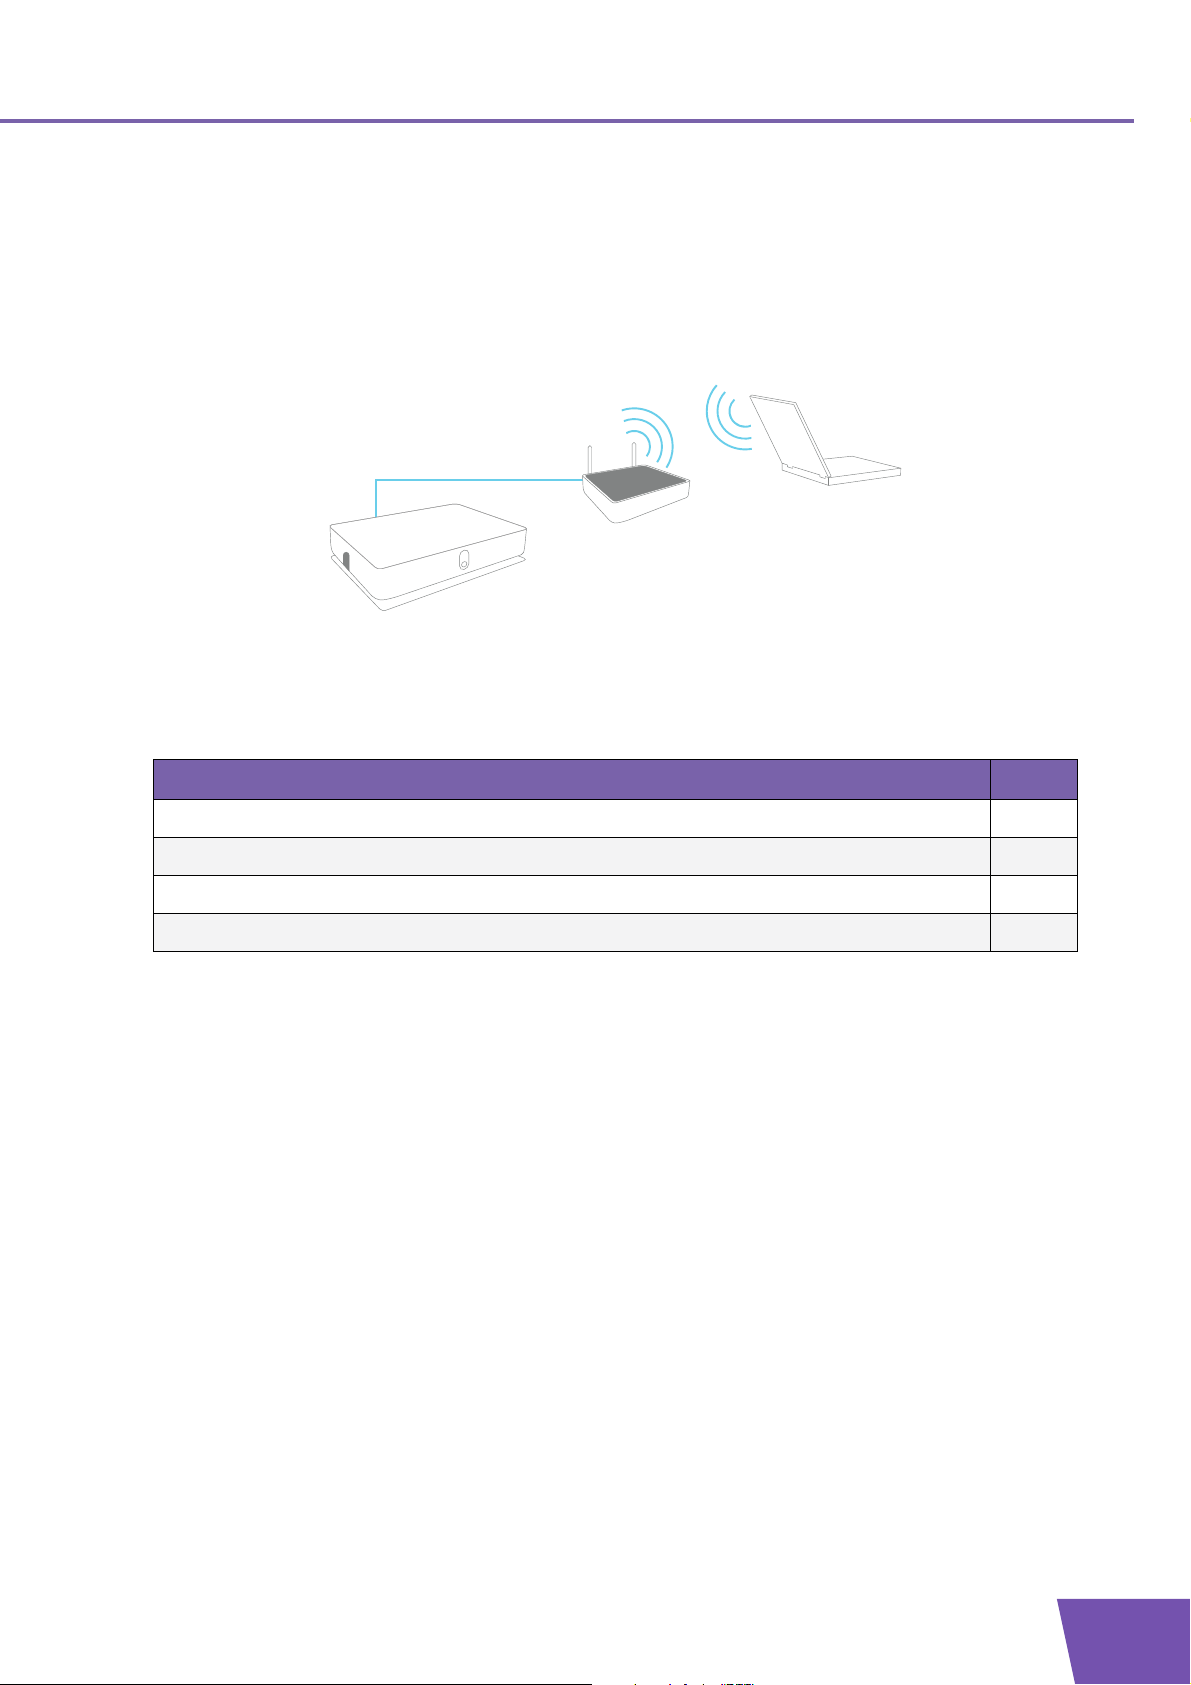
Usage
Use this mode if you are using a wired network and you now want to be able to access your network
wirelessly.
In this chapter
Topi c Page
Configuring The THOMSON TG185n As Access Point 8
Connecting a Wireless Client via WPS 11
Manually Configuring a Wireless Client 15
Securing Your Wireless Network 16
E-DOC-CTC-20080624-0009 v2.0
8
3 The THOMSON TG
185n as Wireless Acces
s Point
3.1 Configuring The THOMSON TG185n As Access Point
Procedure
Before you can use your THOMSON TG185n as wireless access point you have to complete following steps:
1 Switch the THOMSON TG185n to access point mode.
2 Assign a static IP address to your computer.
3 Configure the wireless settings of your THOMSON TG185n.
4 Configure the IP settings of your THOMSON TG185n (optional).
5 Connect your THOMSON TG185n to your Internet gateway.
6 Configure your wireless clients.
7 Configure your computer to obtain an IP address automatically.
Switch the THOMSON TG185n to access point mode
Proceed as follows:
1 On the back panel of your THOMSON TG185n, move the switch to the access point position.
2 After a few seconds the Access Point LED will turn green.
Assign a static IP address to your computer
The IP address must be between 192.168.1.14 and 192.168.1.63 (for example 192.168.1.20). The subnet mask
must be 255.255.255.0.
For more information, see “7.1 Assigning a Static IP to Your Computer” on page 44.
Configure the wireless settings of your THOMSON TG185n
Proceed as follows:
1 Open your web browser and browse to http://192.168.1.11
.
2 The THOMSON TG185n Web Interface appears. On the Basic Setting menu, click Wireless Setting.
3 The Wireless Settings page appears.
4 In the Network ID (SSID) box, you can change the name of your wireless network.
This name will be displayed in the list of available networks when you try to connect a device to your
THOMSON TG185n access point.

E-DOC-CTC-20080624-0009 v2.0
9
3 The THOMSON TG185n as Wireless Access Point
5 In the Select Security Policy list, select the security policy of your choice and enter a passphrase/
encryption key. For more information, see “3.4 Securing Your Wireless Network” on page 16.
6 Select the WPS Configured check box, this way you are sure that your settings will not be changes during
WPS.
7 Click Apply.
8 The THOMSON TG185n prompts you that the configuration was successful.
Configure the IP settings of your THOMSON TG185n (optional)
If you still want to be able to access your THOMSON TG185n after connecting it to your Internet gateway, you
have to make sure that they are both using the same IP range.
If you choose not to do this configuration or you don’t know the IP settings of your Internet gateway, yo u will
only be able to access the THOMSON TG185n by assigning a static IP address to your computer that is the
same range as your THOMSON TG185n.
To change the IP settings of your THOMSON TG185n:
1 On the Basic Setting menu, click Device IP Setting.
2 The Device IP Setting page appears. On this page you can configure the IP address of your THOMSON
TG185n. Select:
Assign static IP address to this device if you want to choose the IP address for your THOMSON
TG185n yourself.
1 In the IP address box, type an IP address that is in the same range as your Internet gateway.
2 In the IP Subnet Mask, type the same subnet mask as your Internet gateway.
3 In the Gateway IP Address, type the type the IP address of your Internet gateway.
4 Write down this IP address and subnet mask. From now on, you can only access the THOMSON
TG185n at this address
Use the DHCP client protocol to automatically get the IP address for this device if you want your
Internet gateway to assign an IP address to your THOMSON TG185n. In this case you do not have to
provide an IP address, IP Subnet Mask and Gateway IP Address.
3 Click Apply.
Connect your THOMSON TG185n to your Internet gateway
Proceed as follows:
1 Disconnect the Ethernet cable from your computer.
2 Plug the Ethernet in an Ethernet port on your Internet gateway.
3 Your THOMSON TG185n is now connected your Internet gateway via the Ethernet cable.
If the Enable WPS (Wi-Fi Protected Setup) check box is enabled you can only select the
following policies:
None
WPA-PSK
WPA2-PSK
WPA-PSK-AUTO
If you want to select another policy (not recommended), clear the Enable WPS (Wi-Fi Protected
Setup) check box.
For more information on WPS, see “3.2 Connecting a Wireless Client via WPS”.
If your Internet gateway is also a THOMSON product, this will automatically be the case and no
extra configuration is needed. Continue with the next topic.

E-DOC-CTC-20080624-0009 v2.0
10
3 The THOMSON TG
185n as Wireless Acces
s Point
Configure your wireless clients
In order to connect your wireless clients to the THOMSON TG185n you must configure them with the same
Network ID (SSID) and security as your wireless access point. You can do this:
Automatically via WPS.
For more information, see “3.2 Connecting a Wireless Client via WPS” on page 11
Manually entering these settings on the configuration utility of your wireless clients.either using Wi-Fi
Protected Setup (WPS) or manually. For more information, see “3.3 Manually Configuring a Wireless
Client” on page 15.
Configure your computer to obtain an IP address automatically
For more information, see “7.2 Restoring the IP Settings of Your Computer” on page 48.

E-DOC-CTC-20080624-0009 v2.0
11
3 The THOMSON TG185n as Wireless Access Point
3.2 Connecting a Wireless Client via WPS
WPS
Wi-Fi Protected Setup (WPS) allows you to add new wireless clients to your network in a swift and easy way,
without the need to enter all of your wireless settings (SSID, encryption,...).
Requirements
Your wireless clients must supports WPS. Check the documentation of your wireless client for this.
WPS must be enabled on your THOMSON TG185n (factory default).
You can only use WPS with the following security levels:
WPA-PSK
WPA2-PSK
No encryption
Supported WPS options
The THOMSON TG185n supports the following options:
Push Button Configuration (PBC):
This is the easiest way to connect your wireless client. You have to push a button both on the THOMSON
TG185n and the wireless client. For more information, see “3.2.1 Push Button Configuration” on page 12.
PIN code entry on the wireless client:
The THOMSON TG185n generates a PIN code that you have to enter in the configuration utility of your
wireless client. For more information, see “3.2.2 PIN Code Entry On The Wireless Client” on page 13.
PIN code entry on the THOMSON TG185n:
The wireless client generates a PIN code that you have to enter on the web interface of your THOMSON
TG185n. For more information, see “3.2.3 PIN Code Entry On the THOMSON TG185n” on page 14.
Troubleshooting
If you are having trouble connecting your wireless client via WPS, try to configure it manually. For more
information, see “3.3 Manually Configuring a Wireless Client” on page 15.
Your wireless client may not support all of these options. For more information, consult the
documentation of your wireless client.

E-DOC-CTC-20080624-0009 v2.0
12
3 The THOMSON TG
185n as Wireless Acces
s Point
3.2.1 Push Button Configuration
Procedure
Proceed as follows:
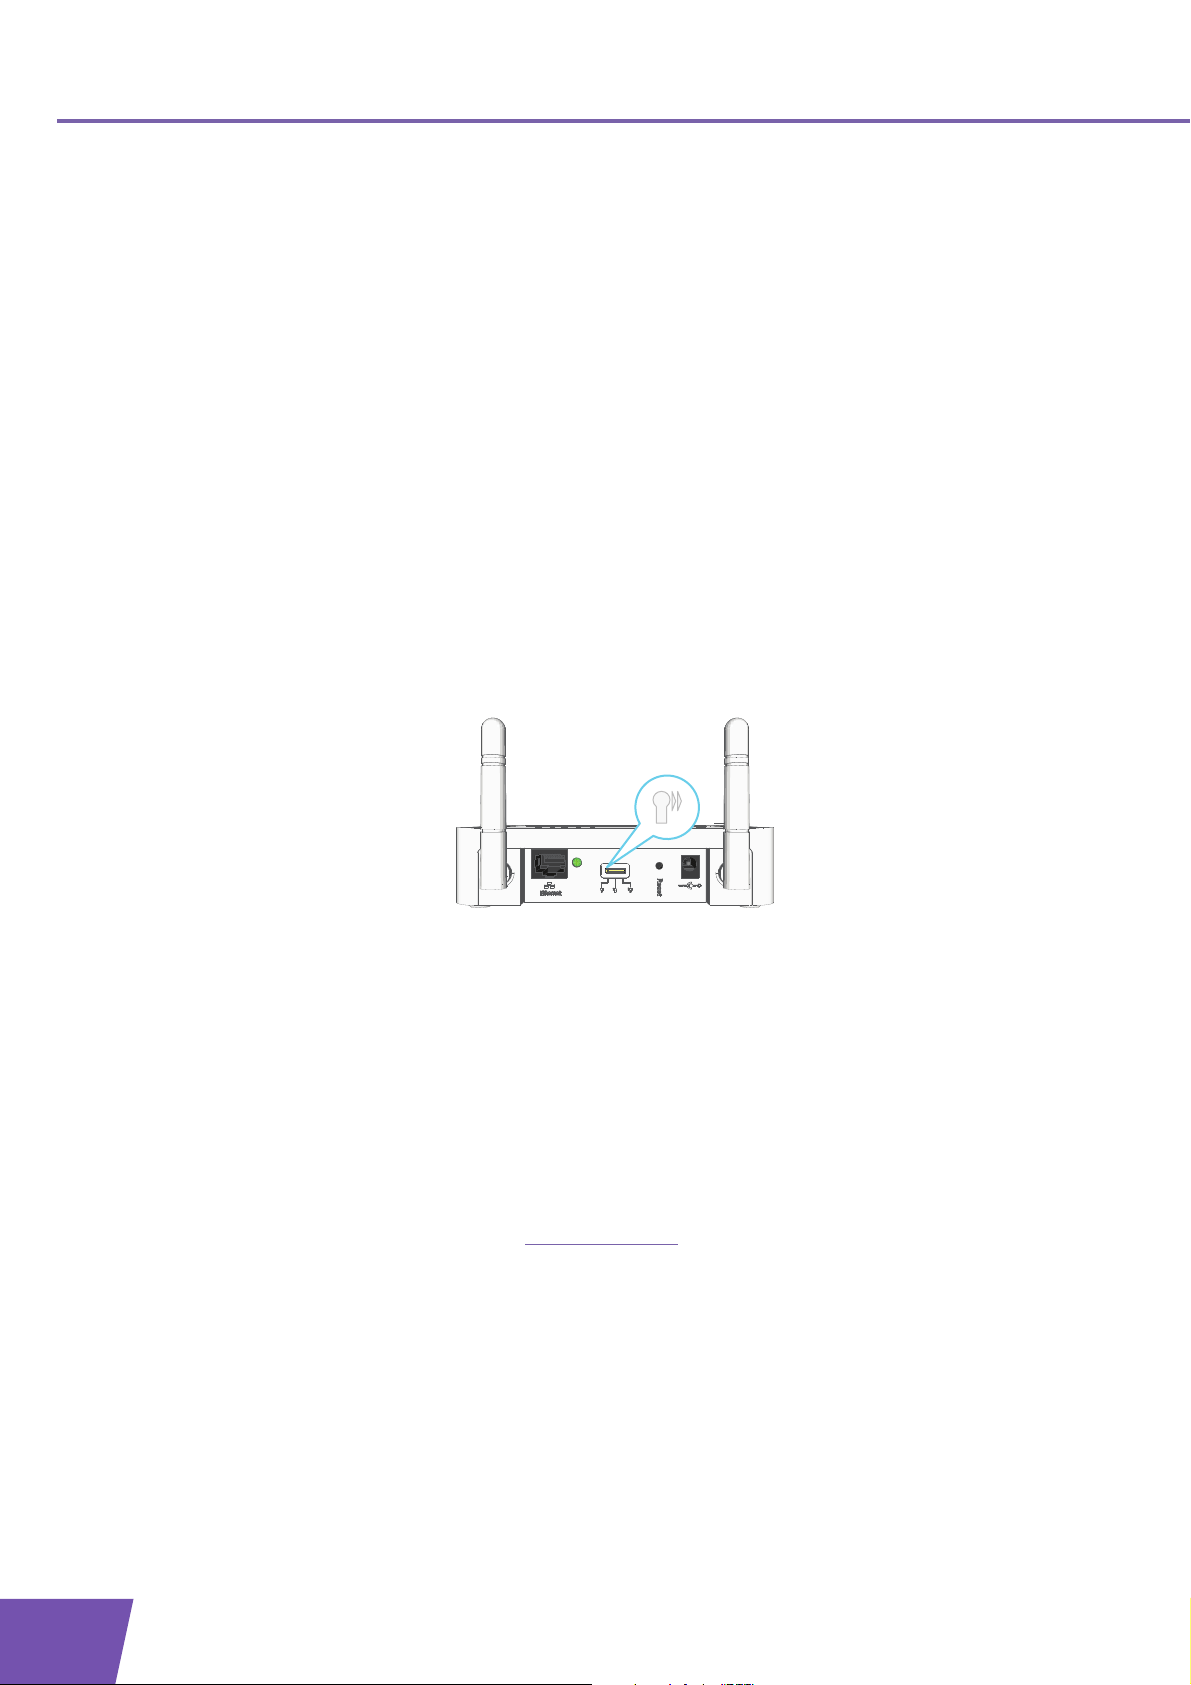
1 Shortly press the WPS button on the THOMSON TG185n:
2 The WPS button LED starts blinking green. This indicates that the THOMSON TG185n is now searching
for wireless clients that are in registration mode. You now have two minutes to start WPS on your
wireless client.
3 Start WPS on your wireless client and choose Push Button Configuration (PBC) as method.
For more information, consult the documentation of your wireless client.
If the LED does not start to blink, WPS is not enabled on your THOMSON TG185n. For more
information on how to enable WPS, see “ WPS does not work” on page 51.
 Loading...