

Page 1

Getting Started with the
TI-Nspire™/
TI-Nspire™ CAS Handheld
This guidebook applies to TI-Nspire™ software version 3.2. To obtain the
latest version of the documentation, go to education.ti.com/guides.
Page 2

Important Information
Except as otherwise expressly stated in the License that accompanies a
program, Texas Instruments makes no warranty, either express or
implied, including but not limited to any implied warranties of
merchantability and fitness for a particular purpose, regarding any
programs or book materials and makes such materials available solely on
an "as-is" basis. In no event shall Texas In strumen ts be li able to anyon e
for special, collateral, incidental, or consequential damages in connection
with or arising out of the purchase or use of these materials, and the sole
and exclusive liability of Texas Instruments, regardless of the form of
action, shall not exceed the amount set forth in the license for the
program. Moreover, Texas Instruments shall not be liable for any claim of
any kind whatsoever against the use of these materials by any other
party.
FCC Statement
Note: This equipment has been tested and found to comply with the
limits for a Class B digital device, pursuant to Part 15 of the FCC Rules.
These limits are designed to provide reasonable protection against
harmful interference in a residential installation. This equipment
generates, uses and can radiate radio frequency energy and, if not
installed and used in accordance with the instructions, may cause
harmful interference to radio communications. However, there is no
guarantee that interference will not occur in a particular installation.
If this equipment does cause harmful interference to radio or television
reception, which can be determined by turning the equipment off and
on, the user is encouraged to try to correct the interference by one or
more of the following measures:
•Reorient or relocate the receiving antenna.
•Increase the separation between the equipment and receiver.
•Connect the equipment into an outlet on a circuit different from
that to which the receiver is connected.
•Consult the dealer or an experienced radio/TV technician for help.
Modifications not expressly approved by the manufacturer could void the
user’s authority to operate the equipment under FCC rules.
Vernier DataQuest™ is a trademark of its respective owner.
© 2006 - 2012 Texas Instruments Incorporated
ii
Page 3

Contents
Important Information................................................................... ii
Getting Started with the TI-Nspire™ Handheld....................1
About CAS....................................................................................... 1
TI-Nspire™ Handheld Keys ............................................................ 2
Preparing the Handheld for Use ................................................... 3
Turn ing On t he TI-Ns pire™ Han dheld for the First Time............. 3
Using the TI-Nspire™ Touchpad .................................................... 5
Using the Home Screen.................................................................. 6
Understanding the Scratchpad...................................................... 9
The TI-Nspire™ Handheld Screen.................................................. 9
Using Hints.................................................................................... 10
Using the Scratchpad ............................................................11
Opening and Closing the Scratchpad.......................................... 11
Calculating with the Scratchpad ................................................. 12
Inserting Items from the Catalog ................................................ 13
Viewing the History...................................................................... 17
Editing Scratchpad Expressions ................................................... 18
Graphing with the Scratchpad .................................................... 19
Working with Variables in the Scratchpad ................................. 24
Saving the Scratchpad Contents.................................................. 24
Clearing Scratchpad Contents ..................................................... 25
Working with Documents on TI-Nspire™ Handhelds ..........27
Opening a Document................................................................... 27
Creating a New Document .......................................................... 28
Saving Documents ........................................................................ 29
Working with Applications .......................................................... 30
Using the Application Menu........................................................ 35
Context Menus ............................................................................. 37
Working with Problems and Pages ............................................. 37
Adding a Problem to a Document .............................................. 37
Viewing and Reordering Pages in a Document.......................... 38
Copying, Pasting, and Deleting Problems................................... 41
Renaming a Problem .................................................................... 42
Adding a Page to a Problem........................................................ 42
Moving Through Pages in a Document ...................................... 43
Managing Documents .................................................................. 43
Closing a Document ..................................................................... 47
iii
Page 4

Understanding the TI-Nspire™ Tools...........................................47
Working with Images ........................................................... 53
Working with Images on a Handheld ......................................... 53
Working in a TI-Nspire™ Navigator™ Teacher Software
Classroom ....................................................................... 57
Logging In .....................................................................................57
Pausing a Class Session .................................................................58
Understanding File Transfers .......................................................58
Configuring Handhelds........................................................ 61
Installing the AAA Batteries.........................................................61
Replacing AAA Batteries .............................................................. 63
Inserting the TI-Nspire™ Rechargeable Battery .........................63
Checking Battery Status ............................................................... 65
Recharging the Handheld ............................................................ 65
Changing Handheld Settings ....................................................... 66
Changing the Preferred Language .............................................. 67
Customizing the Handheld Setup ................................................ 68
Customizing Document Settings.................................................. 69
Customizing Graphs & Geometry Settings .................................. 73
Viewing Handheld Status ............................................................. 75
Using Wireless Communication Hardware..................................76
Connecting Handhelds and Transferring Files.................... 79
Connecting Handhelds ................................................................. 79
Tra nsf err ing F iles t o a nd from Ha ndh e lds...... ....... ... ... ....... . ...... .. 80
Tra nsferring Files Bet ween Compu ters and Handhelds .. ........ ... 82
Handling Errors Resulting from Sending Folders........................84
Memory and File Management ........................................... 89
Checking Available Memory ........................................................ 89
Freeing Memory............................................................................ 90
Resetting the Memory.................................................................. 92
Updating the Handheld Operating System......................... 95
What You Need to Know .............................................................95
Finding Operating System Updates............................................. 96
Updating the Operating System.................................................. 97
Updating the OS on Multiple Handhelds..................................101
iv
Page 5

OS Upgrade Messages ................................................................ 102
Using Keyboard Shortcuts..................................................107
Keyboard Shortcuts.................................................................... 107
Working in TI-84 Mode........................................................111
Understanding Dual-Mode Operation...................................... 111
TI-84 Plus Mode Cables .............................................................. 113
Capturing Screens in TI-84 Mode .............................................. 113
Upgrading the TI-84 Plus OS...................................................... 114
Appendix: Service and Support .........................................115
Battery Precautions .................................................................... 115
Tex as Instr uments S upport a nd Servic e..................................... 116
Service and Warranty Information............................................ 116
Index ....................................................................................117
v
Page 6

vi
Page 7

Getting Started with the TI-Nspire™
Handheld
The TI-Nspire™ handheld and the TI-Nspire™ CAS handheld are the
second generation handhelds in the TI-Nspire™ family of products. These
handhelds provide touchpad navigation, dynamic graphing, and
interactive computer features.
The handheld and the TI-Nspire™ software share the same functionality,
enabling you to transfer class assignments from the handheld to the
computer or transfer documents to the handheld when you need to be
mobile. Start assignments at school, and then finish the work at home to
take advantage of the software’s full-color display and easy-to-use
navigation. Use the software to download the latest software and
handheld operating system updates as they become available to ensure
you have the latest enhancements.
This guide covers both the TI-Nspire™ handheld and the TI-Nspire™ CAS
handheld. While they operate identically in many ways, there are a few
distinctions. If the TI-Nspire™ CAS handheld has additional functionality,
it is pointed out and the CAS operation is described.
About CAS
With CAS, or the Computer Algebra System, you can:
•Perform both symbolic and numeric calculations.
•Factor and expand expressions and solve for common denominators.
TI-Nspire™ CAS technology makes it possible to recognize, simplify, and
calculate math expressions, preserving the symbols including variables
and terms such as “e” and S.
This ability to enter and view equations and expressions on screen as they
appear in textbooks is especially useful for step-by-step, arithmetic,
algebraic, and calculus calculations.
Getting Started with the TI-Nspire™ Handheld 1
Page 8
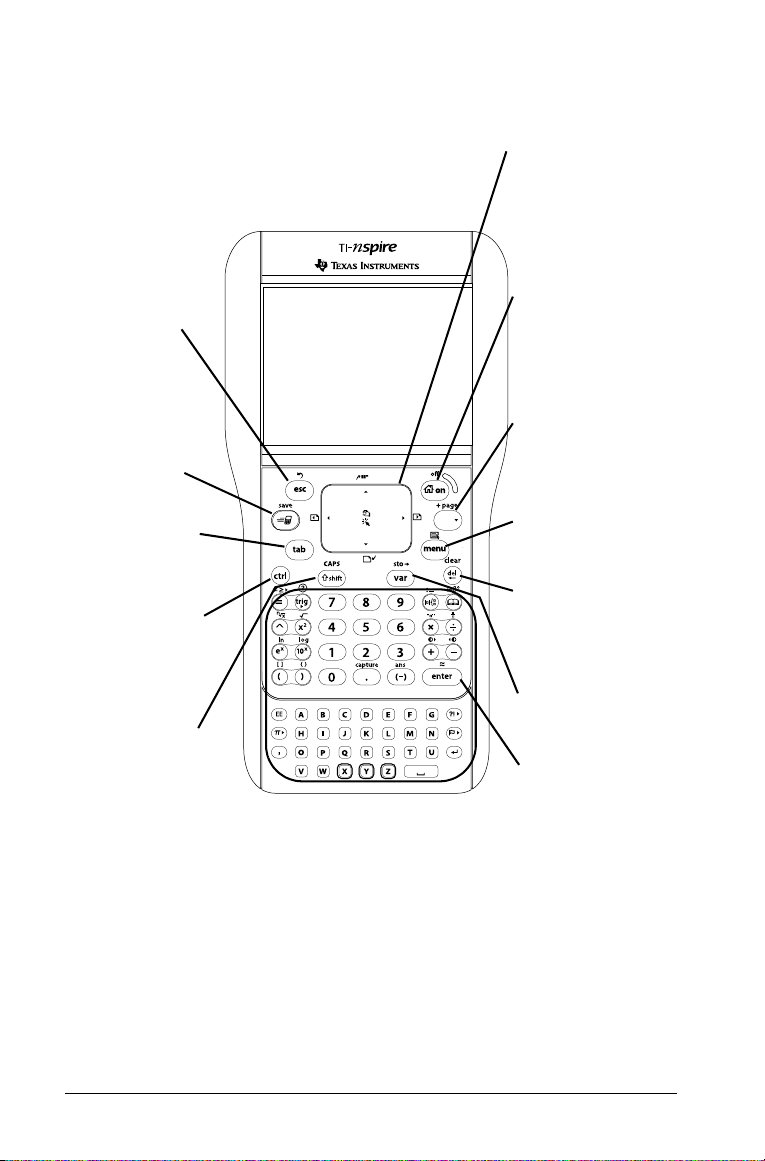
TI-Nspire™ Handheld Keys
Use the TI-Nspire™
Tou ch pa d as you
would a laptop
touchpad. You can also
press the outer edges
to move right, left, up,
and down.
e Moves to the
next entry field.
/ Provides access to
the function or
character shown
above each key. Also
enables shortcuts in
combination with
other keys.
c Tur ns o n th e
handheld. If the
handheld is on, this
key displays the home
screen.
~ Opens the
Document menu.
· Evaluates an
expression,
executes an
instruction, or
selects a menu
item.
g Makes the
next character typed
upper-case.
. Deletes the
previous character.
» Opens the
Scratchpad for
performing quick
calculations and
graphing.
d Removes menus
or dialog boxes from
the screen. Also stops
a calculation in
progress.
h Displays
stored variables.
b Displays the
application or
context menu.
Note: A ¢ symbol on a key indicates access to multiple
options. To access an option, press º repeatedly or use
the arrow keys on the Touchpad. Press · or click to
select the option.
TI Nspire Touchpad
doc
2Getting Started with the TI-Nspire™ Handheld
Page 9

Preparing the Handheld for Use
TI-Nspire™ handhelds are shipped with four alkaline AAA batteries and a
standard A male to mini B male USB cable. Handhelds can also be
powered using the TI-Nspire™ Rechargeable Battery or an approved wall
charger, which are sold separately.
Before using the handheld, either install the AAA batteries or install and
charge the TI-Nspire™ Rechargeable Battery (if purchased). You can also
connect your handheld to an external power source if you have the wall
charger.
Note: For more information about installing batteries, see Configuring
Handhelds.
Tur ni ng O n th e TI-Ns pi re ™ Handhel d fo r th e Fi rs t
Time
1. Ensure that batteries have been installed or charged, or that the
handheld is connected to a power source.
2. Press c to turn on the handheld.
A progress bar displays while the operating system loads, and then
you are prompted to choose preferences for language and font size.
To t urn the handheld off, press
contents are retained.
Note: For more information about installing and charging batteries, see
Configuring Handhelds.
/c. The settings and memory
Using Automatic Power Down™
To p rolong batter y life, the Aut omatic Po wer Dow n™ (APD™ ) featu re
turns off the handheld after three minutes of inactivity. When this
happens, press
document or menu accessed. To change the default setting, press
c to turn the handheld on and return to the last
c53 to access the Handheld Setup screen where you can
change the
Note: For more information about setting up the handheld, see
Configuring Handhelds.
Choosing a Language
After the OS is loaded, select a preferred language.
Power Standby setting.
Getting Started with the TI-Nspire™ Handheld 3
Page 10
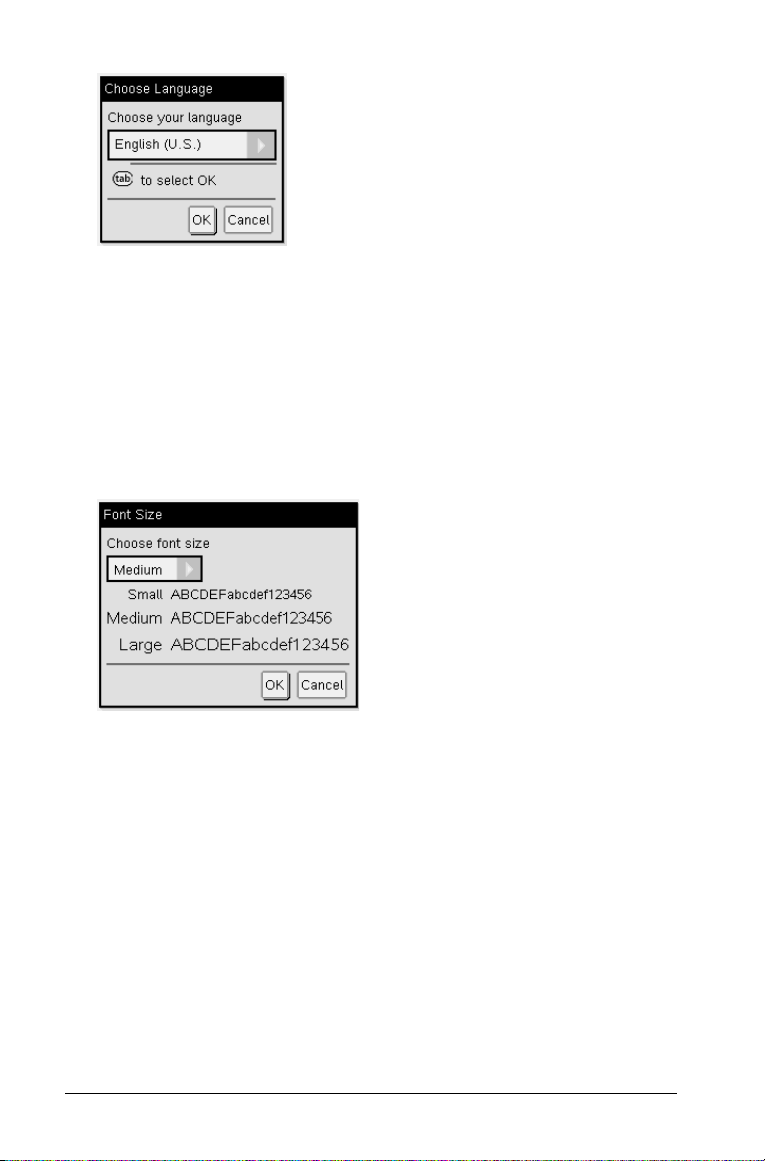
1. Press ¢ to open the drop-down list.
2. Press
3. Press
to scroll through the languages, and then press x or ·
to select a language.
e to highlight the OK button, and then press x or · to
save the language selection.
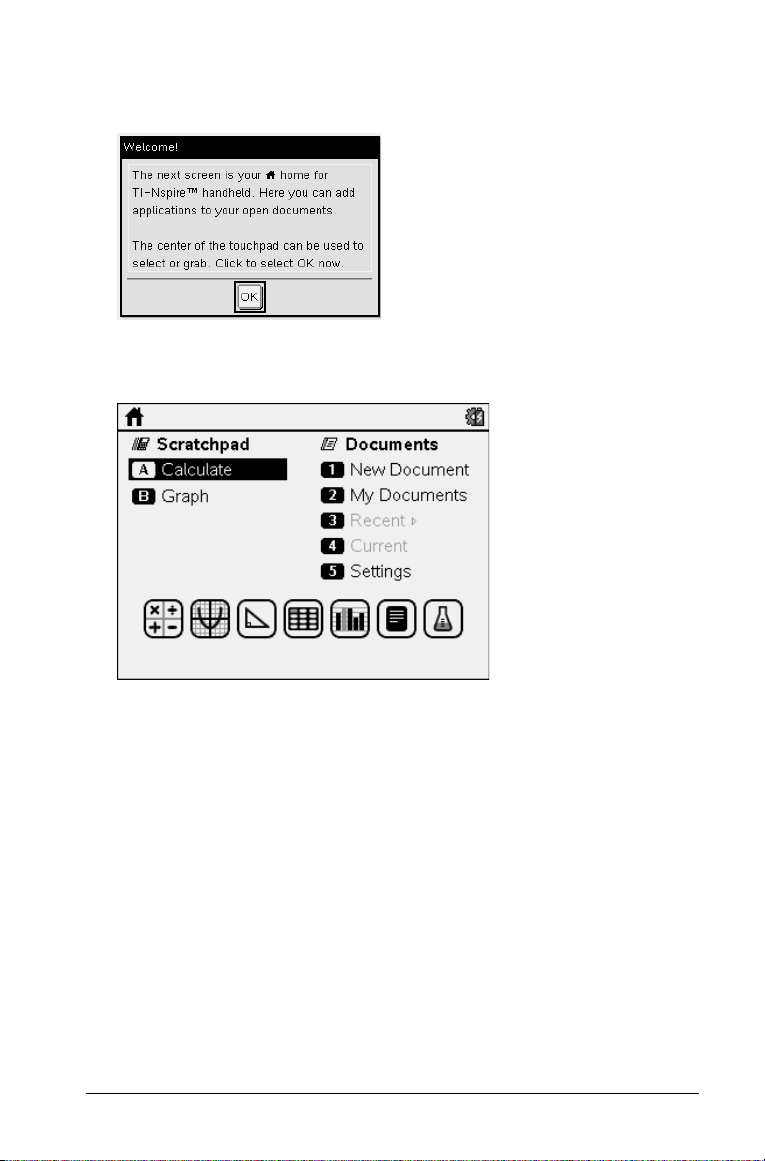
Choosing a font size
Next, select a font size for the display.
1. Press
2. Press
¢ to open the drop-down list.
to highlight the font size, and then press x or · to select
it.
4Getting Started with the TI-Nspire™ Handheld
Page 11
3. Press e to highlight the OK button, and then press x or · to
save the selection and open the
Welcome! screen.
4. To continue, click
screen.
x or press · to select OK and open the Home
Using the TI-Nspire™ Touchpad
Use the Touchpad to navigate or complete any task that can be
completed using the arrow and Enter keys. Use the Touchpad to navigate
in two ways:
•Use it like a computer touchpad by moving your fingertip in a sliding
motion on the center area of the Touchpad to activate and move the
mouse pointer. Click or tap the center of the Touchpad to select a
menu option or complete an action.
•Press the arrow keys on the outside edge of the Touchpad to nudge
the mouse pointer up, down, left, or right, and then click x or
press
· to complete an action.
If you hold down an arrow key, the mouse pointer continues to move
in that direction.
Getting Started with the TI-Nspire™ Handheld 5
Page 12

Note: If the mouse pointer is visible on a command or file, click or
x in the center of the Touchpad to select that command or file. If
tap
the command or file is highlighted, move the pointer over that item or
press · to select it.
When working in an application, use the Touchpad to access more
information about problems. For example, hovering over a Graphs &
Geometry object displays information about variables used in that object
and about tools that are available.
Some users prefer to customize their Touchpad s ettings; to speed up or
slow down the pointer, or to enable tap to click. To change default
settings for the Touchpad see Configuring Handhelds.
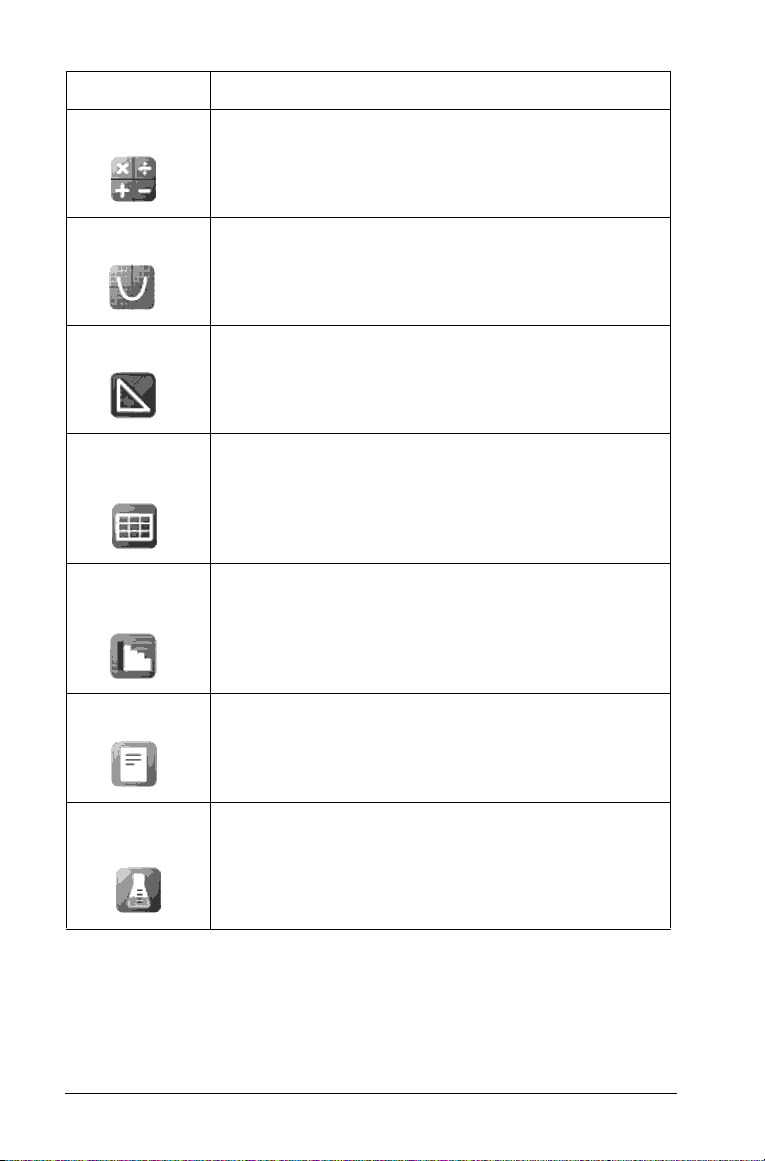
Using the Home Screen
The Home screen opens when you power on your handheld for the first
time. The Home screen provides a starting point for all activities
performed on a handheld:
•Opening the Scratchpad for quick calculations and graphing
•Creating new documents
•Opening and managing existing documents
•Defining settings and viewing status
•Viewing hints for operating the handheld
•Accessing recent documents
•Returning to the current document
Note: To return to the Home screen from any other location, press c.
Selecting Options on the Home Screen
•By default, the cursor is not active. To activate the cursor, swipe the
Touc hpad wit h your f ingertip .
•Use the Touchpad to click on any of the application icons or any of
the Scratchpad or Documents menu options.
•Press the arrows on the Touchpad (
options on the Home screen.
•Move the mouse pointer over each application icon to view a brief
description.
•Press
6Getting Started with the TI-Nspire™ Handheld
x or · to select a highlighted option, or press the number
or letter associated with the option.
, , ,or) to move among the
Page 13

Adjusting the Contrast
To l ighten t he display, press an d hold / and tap -.
To d arken th e displ ay, press and hol d / and tap +.
Home Screen Options
Menu Option Purpose
Scratchpad
Use the Scratchpad menu options to open a Calculator or Graph
application without affecting your document.
While in Scratchpad, press » to toggle between Scratchpad
applications: Calculate and Graph.
Calculate Opens the Scratchpad with a Calculator application
active. From the Home screen, press
Graph Opens the Scratchpad with a Graph application
active. From the Home screen, press
Documents
To s elect opt ions fo r workin g with documents, press the associated
number or use the Touchpad to select an icon then press
A.
B.
x or ·.
New
Document
My
Documents
Recent Lists the five most recently saved documents.
Current Goes to the document that is currently open.
Settings Check the status of the handheld and change
Application icons
To a dd a new page to the curre nt docum ent, se lect an ap plicati on
icon. If no document is open, a new document opens with the
selected application on a new page.
Opens a new TI-Nspire™ document with available
applications listed.
Opens the file browser where you can open existing
TI-Nspire™ documents or send files to others.
settings.
Getting Started with the TI-Nspire™ Handheld 7
Page 14
Menu Option Purpose
Calculator
Graphs
Geometry
Lists &
Spreadsheet
Data &
Statistics
Adds a page to a document for entering and
evaluating math expressions.
Adds a page for graphing and exploring functions.
Adds a page for creating and exploring geometric
shapes.
Adds a page for working with data in tables.
Adds a page and provides tools used to visualize
sets of data in different types of plots and provides
tools for manipulating data sets to explore
relationships between the sets of data.
Notes
Provides text editing functions for adding text to
TI-Nspire™ documents for use as notes or to share
with other users.
Ver nie r
DataQuest™
Adds a page for collecting and analyzing data from
sensors or probes.
To l earn mor e about applic ations and documents, see the Working with
Documents on the TI-Nspire™ Handhelds.
8Getting Started with the TI-Nspire™ Handheld
Page 15
Understanding the Scratchpad
Use the Scratchpad to make quick calculations and graphs without
affecting the current TI-Nspire™ document. For example, when you need
a quick way to test a calculation before you add it to a document, you
can open the Scratchpad application and perform the calculation. Then,
you can either discard the calculation or add it to a document. For more
information about the Scratchpad, please see Using the Scratchpad.
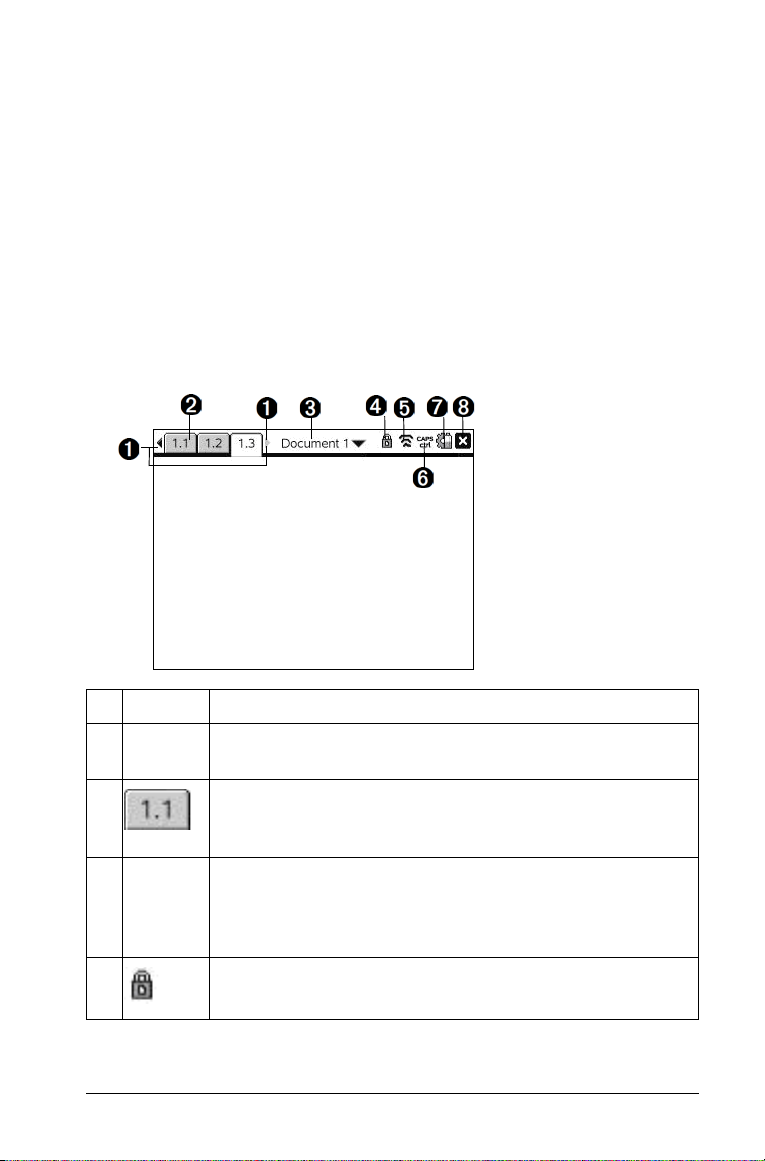
The TI-Nspire™ Handheld Screen
The icons on the handheld screen provide information about the status
of handheld operations and provide an easy way to access and change
settings. This screen shows the icons, which are described below.
Icon Function
À
Á
Â
Ã
Page scrolling arrows - Use the Touchpad and these
arrows to scroll through the pages in a document.
Page tabs - Indicate the problem number followed by
the page number. If problems are named, move the
Touc hpad poi nter ove r the ta b to vi ew the p age nam e.
Document name - Shows the current document name.
Click here to access the Documents menu. An asterisk by
the document name indicates changes were made since
the document was last saved.
Press to Test - Indicates that the handheld is in Press-to-
Tes t mode.
Getting Started with the TI-Nspire™ Handheld 9
Page 16
Icon Function
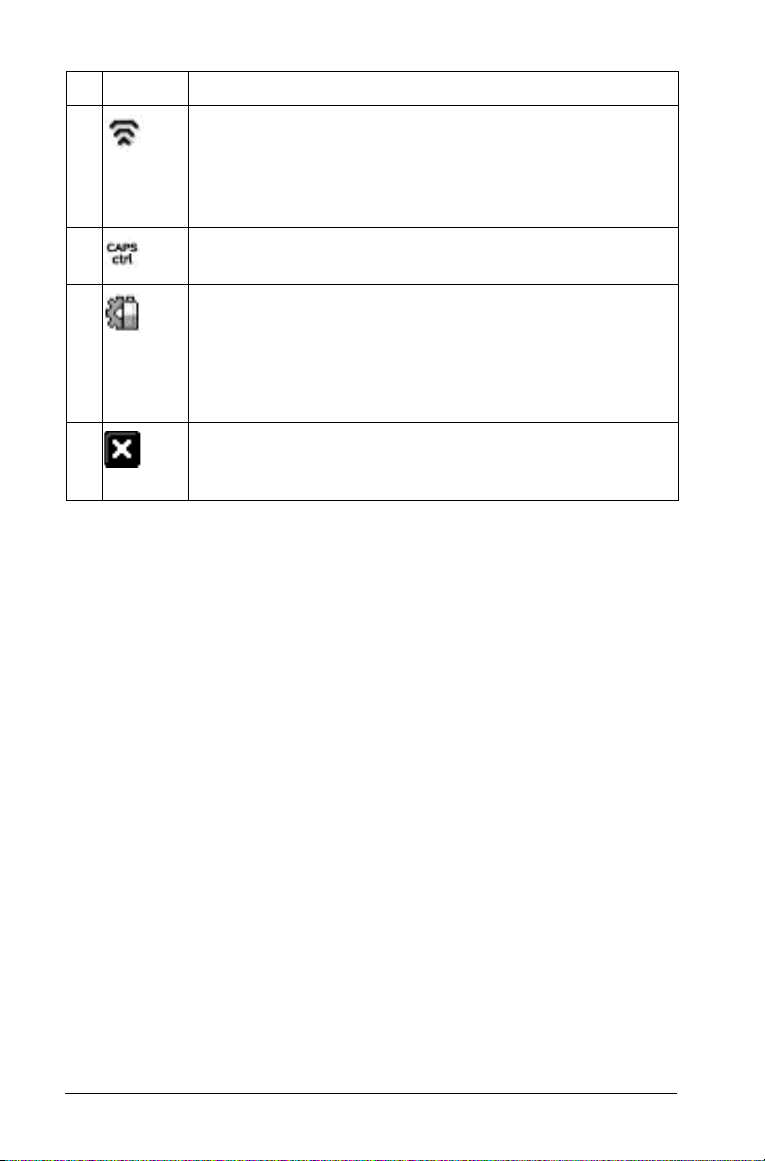
Ä
Å
Login status - Shows whether the handheld is searching
for an access point (blinking), found an access point
(solid), not communicating, connected and ready to log
in (a blinking arrow), or logged in and charged (a solid
arrow). Click here to view Settings & Status.
g, /,or Ê status
Æ
Ç
Settings & Status:
•Hover the cursor over the icon to show the angle
mode setting in effect for the active application and
the status of the batteries.
•Click the icon to open the Settings menu.
Close document - Click here to close the current
document. If information is unsaved, save or discard
when prompted.
Using Hints
Hints are quick tips available throughout the software on the handheld.
There are several easy ways to access Hints:
•Press
•Some dialog boxes contain a question mark icon. Click this icon to
f To scrol l through t he Hints, use the Touchpad or arrow keys:
/ ¨.
open Hints for that task.
–To page down, press / 3.
–To page up, press
–To go to the end of the Hints file, press
–To go back to the beginning of the file, press
/ 9.
/ 1.
/ 7.
10 Getting Started with the TI-Nspire™ Handheld
Page 17
Using the Scratchpad
The Scratchpad is a feature of the TI-Nspire™ handheld that lets you
quickly:
•Evaluate math expressions.
•Graph functions.
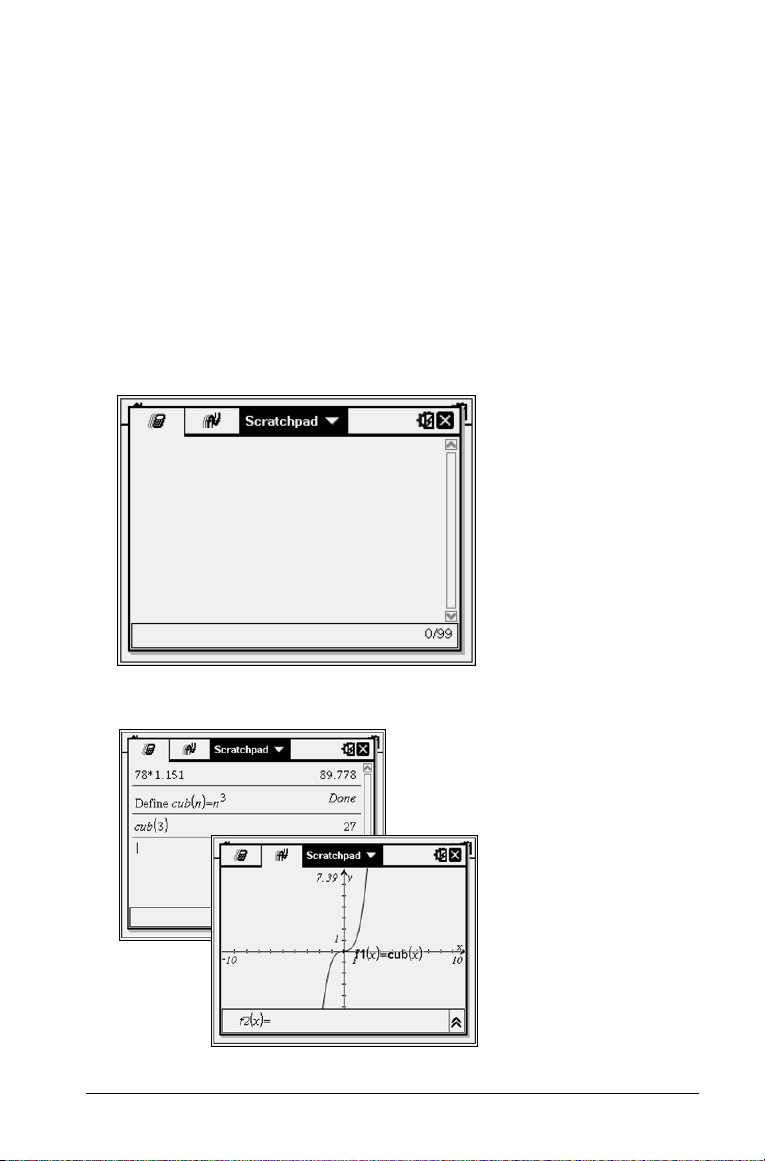
Opening and Closing the Scratchpad
f From the Home screen, press » to open the Scratchpad.
The first time you open the Scratchpad, a blank page opens with the
Calculator active.
f Press
» to alternate between the Calculate and Graph pages.
Using the Scratchpad 11
Page 18
f Press b to see the Scratchpad Calculate or Scratchpad Graph
menu. These menus are subsets of the TI-Nspire™ menus for the
Calculator and Graphs applications. For complete listings of those
menus, see the documentation for those applications.
f Press
d to close the Scratchpad.
Calculating with the Scratchpad
From the Scratchpad Calculate page, type a math expression on the entry
line, and then press
displayed in standard mathematical notation as you enter them.
Each evaluated expression and result becomes part of the Scratchpad
history, displayed above the entry line.
· to evaluate the expression. Expressions are
Entering Simple Math Expressions
Note: To enter a negative number, press v and then type the number.
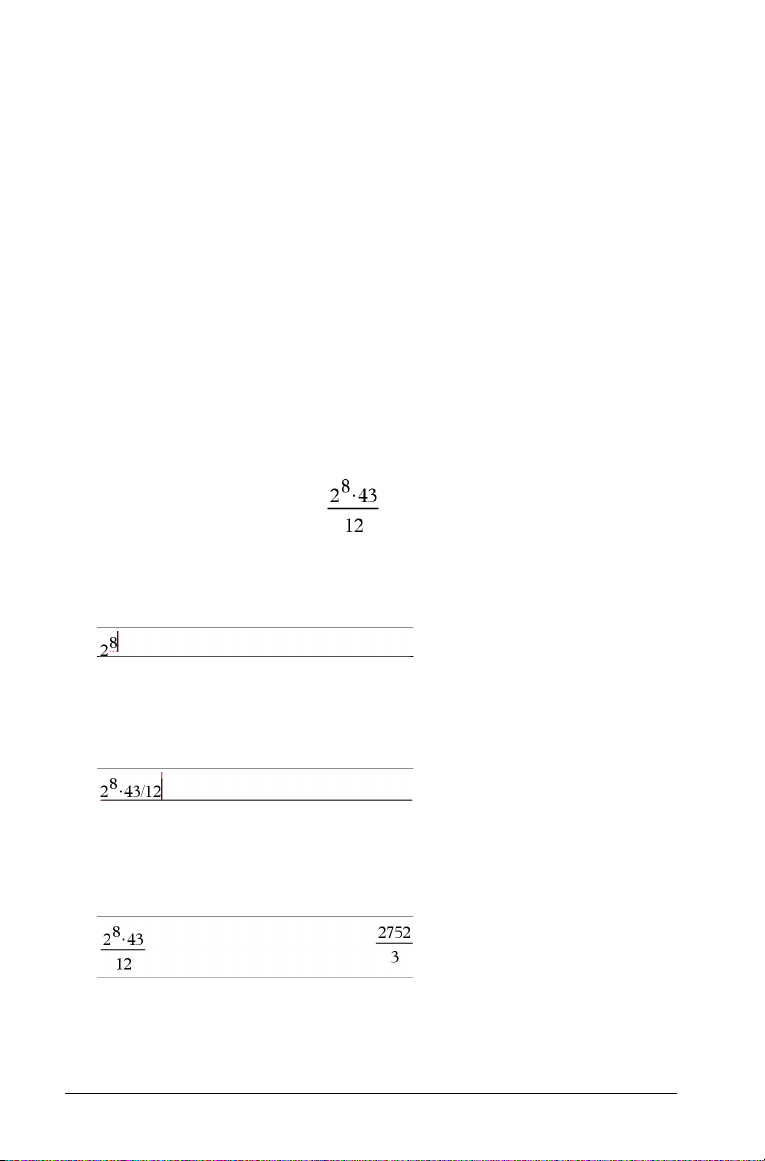
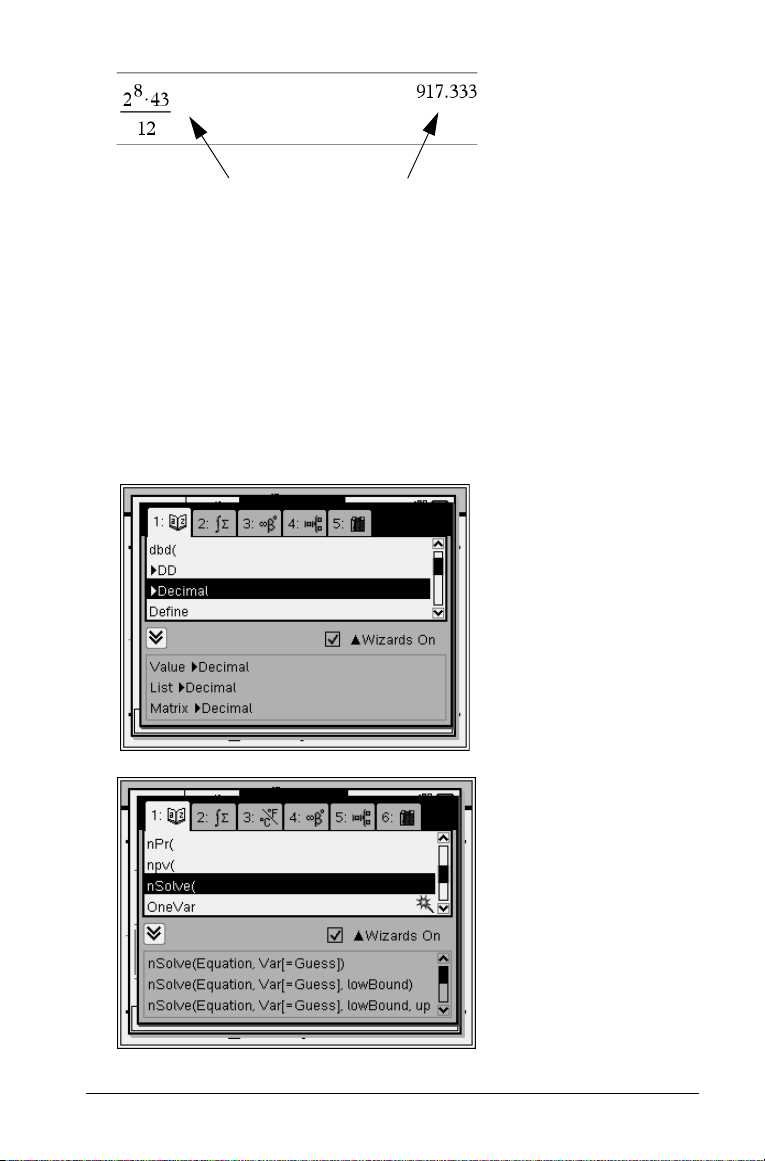
Suppose you want to evaluate
1. Select the entry line in the work area.
2. Type
3. Press
2 l 8 to begin the expression.
¢ to return the cursor to the baseline, and then complete the
expression by typing:
r 43 p 12
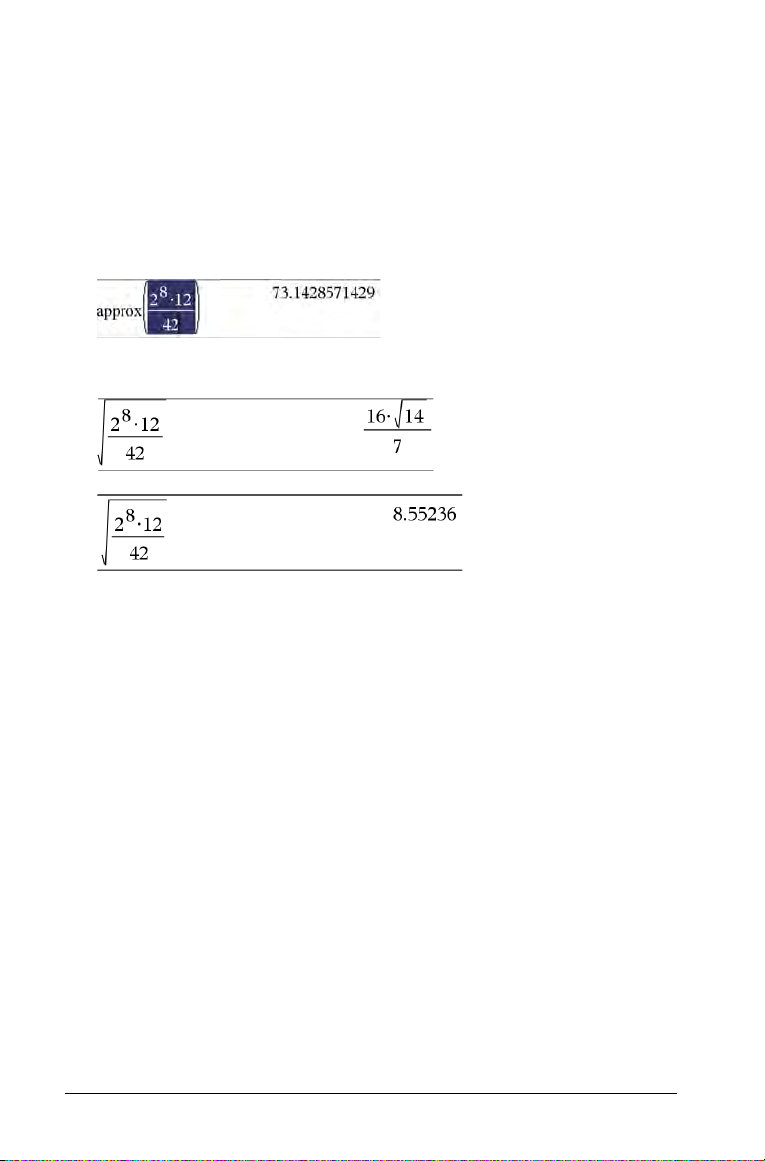
4. Press · to evaluate the expression.
The expression displays in standard mathematical notation, and the
result displays on the right side of the page.
Note: You can force a decimal approximation in a result by pressing
/
· instead of ·.
12 Using the Scratchpad
Page 19
Note: Results formatting can also be adjusted in settings. For more
Pressing
/
· forces the approximate
result.
Catalog
for a nonCAS
handheld
Catalog for
a CAS
handheld
information about customizing settings, see Configuring Handhelds.
Inserting Items from the Catalog
You c an u se th e Ca tal og t o in se rt f unctions and commands, symbols, and
expression templates into the entry line.
1. Press
k to open the Catalog. By default, the first tab is displayed,
which lists all commands and functions in alphabetical order.
Using the Scratchpad 13
Page 20
2. If the function you are inserting is visible in the list, select it and press
· to insert it.
3. If the function is not visible:
a) Press a letter key to jump to the entries that begin with that letter.
b) Press
c) Click a numbered tab to list functions by category: math functions,
d) Press
¤ or £ as necessary to highlight the item you are inserting.
symbols, math templates, library objects, and value for standard
measurement units (CAS).
· to insert the item into the entry line.
Using an Expression Template
Tem plates h elp you enter matri ces, piecewise functions, systems of
equations, integrals, derivatives, products, and other math expressions.
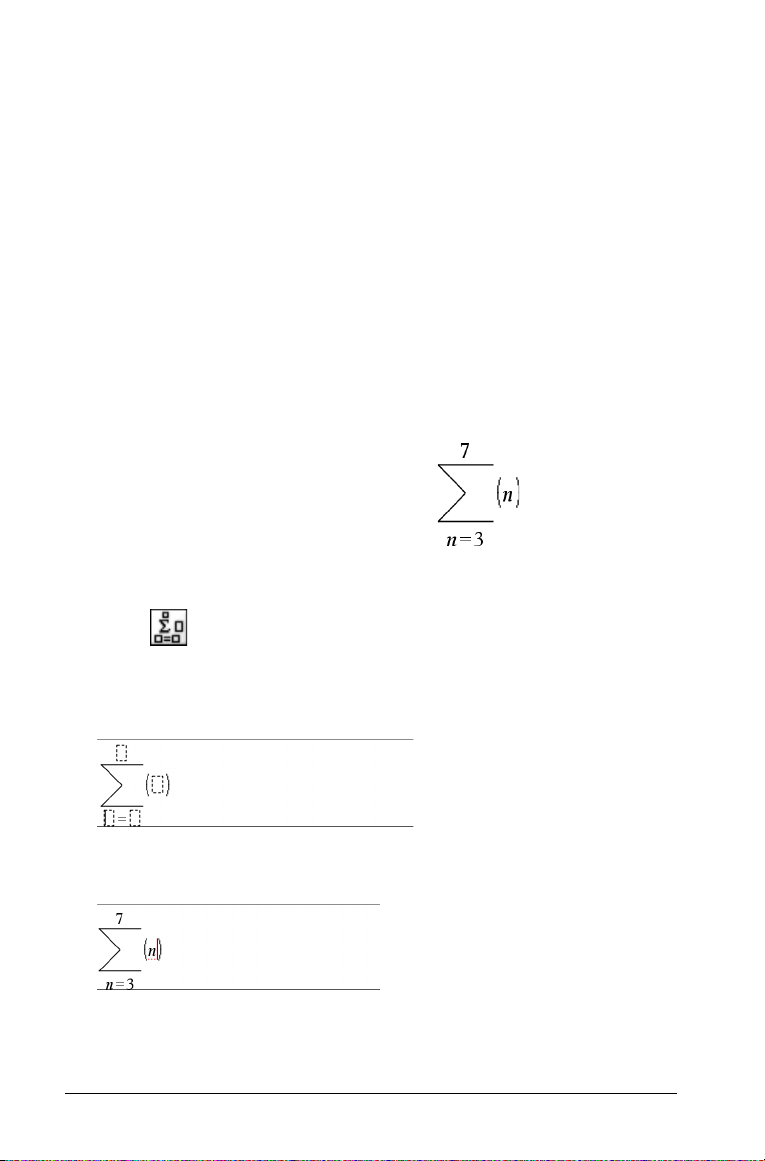
For example, suppose you want to evaluate
1. Press
2. Select to insert the algebraic sum template.
t to open the Template palette.
The template appears on the entry line with small blocks representing
elements that you can enter. A cursor appears next to one of the
elements to show that you can type a value for that element.
3. Use the arrow keys to move the cursor to each element’s position, and
type a value or expression for each element.
4. Press
14 Using the Scratchpad
· to evaluate the expression.
Page 21
Inserting Expressions Using a Wizard
LinRegMx
function in a
non-CAS
handheld
You c an u se a wi za rd t o si mpl if y ent ering some expressions. The wizard
contains labeled boxes to help you enter the arguments in the
expression.
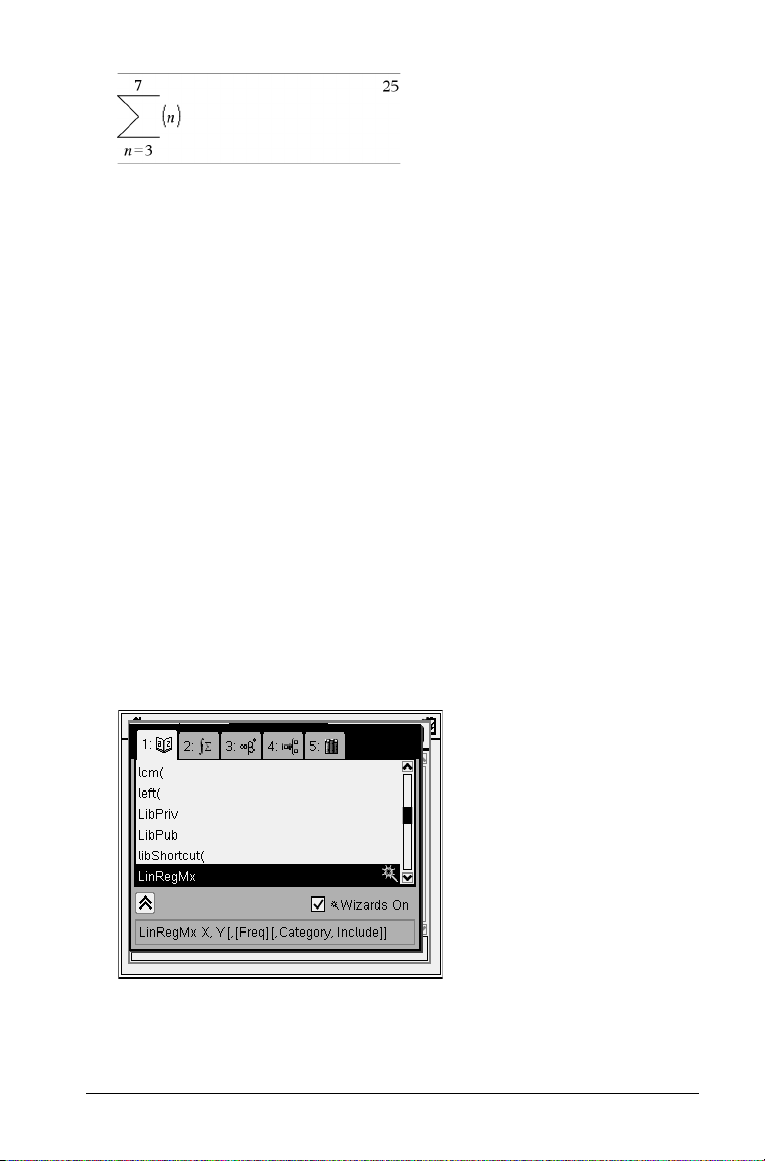
For example, suppose you want to fit a y=mx+b linear regression model
to the following two lists:
{1,2,3,4,5}
{5,8,11,14,17}
1. Press
2. Click inside the list, and then press
3. Press
4. If the
5. Press · to change the setting.
6. Press
k1 to open the Catalog and show the alphabetic list of
functions.
begin with “L.”
¤ as necessary to highlight LinRegMx.
Wizards On option is not checked, press ee to highlight
Wizards On.
ee to highlight LinRegMx again.
L to jump to the entries that
Using the Scratchpad 15
Page 22
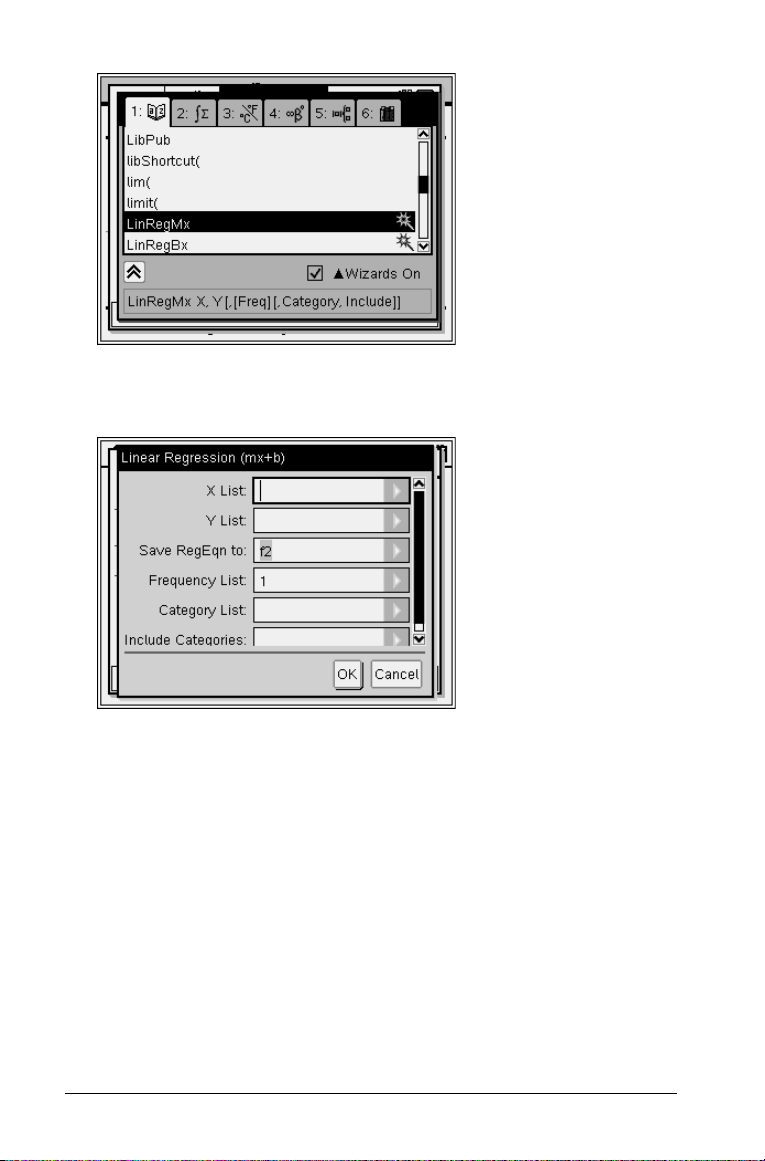
7. Press ·.
LinRegMx
function in a
CAS
handheld
A wizard opens, giving you a labeled box to type each argument.
8. Type {
1,2,3,4,5} as X List.
9. Press e to move to the Y List field.
10. Type
{5,8,11,14,17} as Y List.
11. If you want to store the regression equation in a specific variable,
press e, and then replace Save RegEqn To with the name of the
function variable (f1 through f99).
12. Click
OK to close the wizard and insert the expression into the entry
line.
The expression is inserted along with statements to copy the
regression equation and display the variable stat.results, which will
contain the results.
16 Using the Scratchpad
Page 23
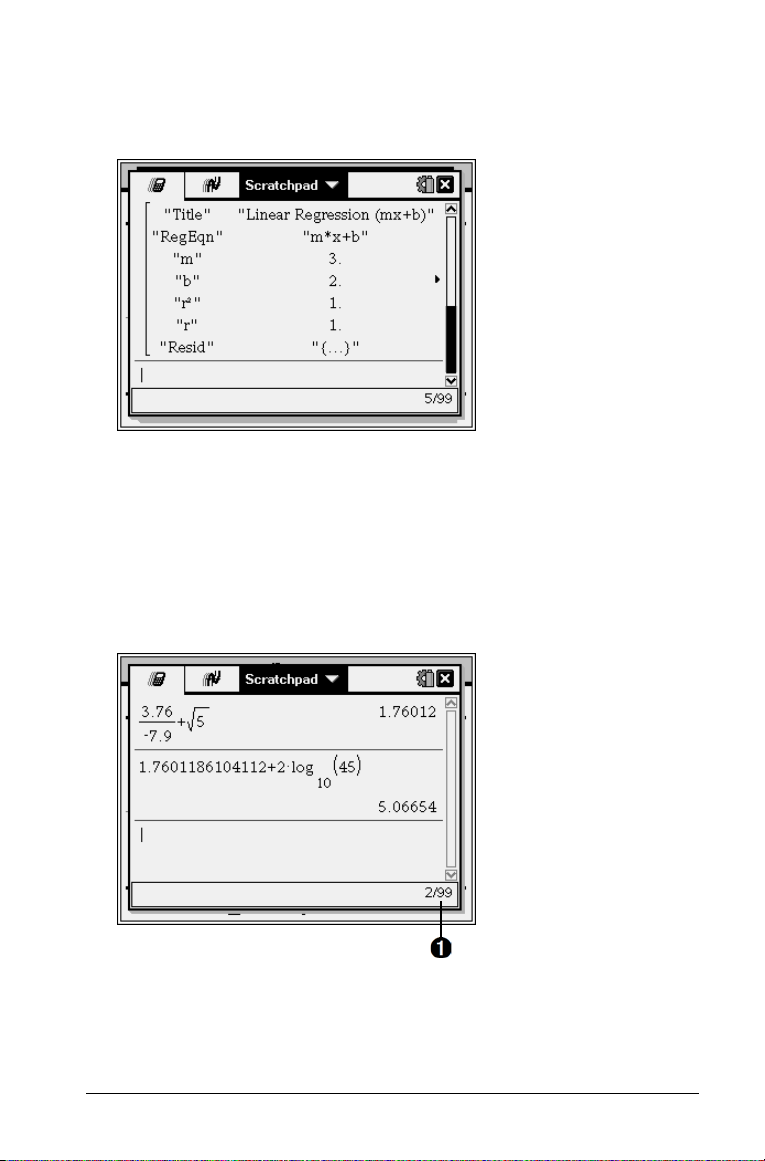
LinRegMx {1,2,3,4,5},{5,8,11,14,17},1: CopyVar stat.RegEqn,f1:
stat.results
The Scratchpad then displays the stat.results variables.
Note: You can copy values from the stat.results variables and paste
them into the entry line.
Viewing the History
Each evaluated expression and result becomes part of the Scratchpad
history, displayed above the entry line.
f Press
À
£ or ¤ to scroll through the history.
Current entry/total entries
Using the Scratchpad 17
Page 24
Copying a History Item to the Entry Line
You c an q ui ck ly co py a n ex pre ss io n, subexpression, or result from the
history into the entry line.
1. Press
2. Optionally, select part of the expression or result by using
3. Press
£ or ¤ to move through the history and select the item that
you want to copy.
g in
combination with the arrow keys.
· to copy the selection and insert it into the entry line.
Clearing the History
When you clear the history, all variables and functions defined in the
history retain their current values. If you clear the history by mistake, use
the undo feature.
f From the
—or—
Actions menu, click Clear History.
b 1 5.
Press
All expressions and results are removed from the history.
Editing Scratchpad Expressions
Although you cannot edit a Scratchpad Calculate expression in the
history, you can copy all or part of an expression from the history and
paste it to the entry line. You can then edit the entry line.
Inserting Elements into the Entry Line
1. Press e, ¡, ¢, £, or ¤ to position the cursor in the expression.
18 Using the Scratchpad
Page 25

The cursor moves to the closest valid position in the direction that you
press.
2. Type the elements.
—or—
Insert them from the Catalog.
Selecting Part of an Expression
You c an de le te , c ut , or c op y a selected part of an expression.
1. Press
2. Press and hold
¡, ¢, £, or ¤ to move the cursor to a starting point in the
expression.
g and press ¡, ¢, £, or ¤ to select.
–To delete the selection, press
–To cut the selection to the Clipboard, press
–To copy the selection to the Clipboard, press
–To paste the selection to a new entry line in Scratchpad, press
..
/X.
/C.
/V.
Graphing with the Scratchpad
1. Press » to open the Scratchpad Graph page if it’s not already open.
By default, the entry line is displayed. The entry line displays the
required format for typing a relation. The default graph type is
Function, so the form f1(x)= is displayed.
If the entry line is not shown, press
display the entry line and type an expression to graph.
2. Press
b > Graph Entry/Edit and select a graph type.
For example:
•To graph an equation for a circle, press
Equation > Circle > (x-h)
Ctrl + G or press b23 to
b > Graph Entry/Edit >
2
+ (y-k)2 = r
2
or press
b3231. Fill in the equation and press · to
draw the circle.
•To graph a function, press
press b31.
b > Graph Entry/Edit > Function or
Using the Scratchpad 19
Page 26
The entry line changes to display the expression format for the
specified graph type. You can specify multiple relations of each graph
type.
3. Type an expression and any other parameters required for the graph
type.
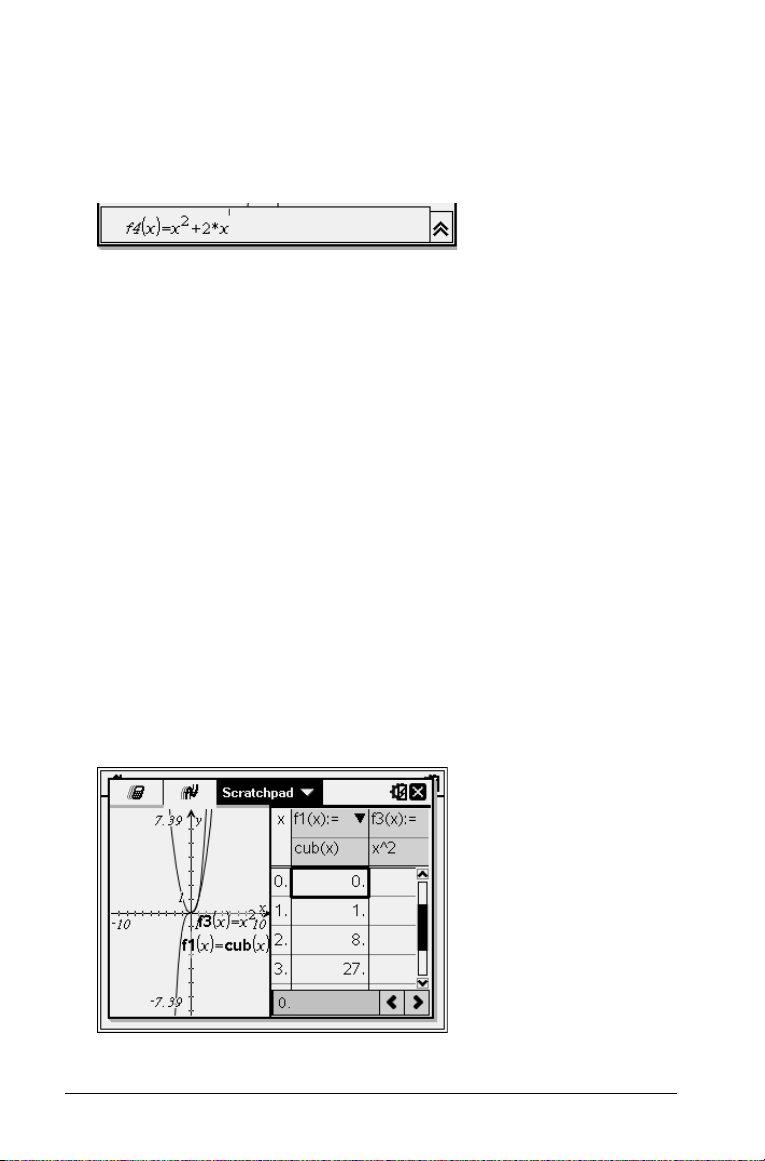
4. Press
5. Use the
· to graph the relation, or press ¤ to add another relation.
If necessary, you can use press b4 to choose a tool on the
Window/Zoom
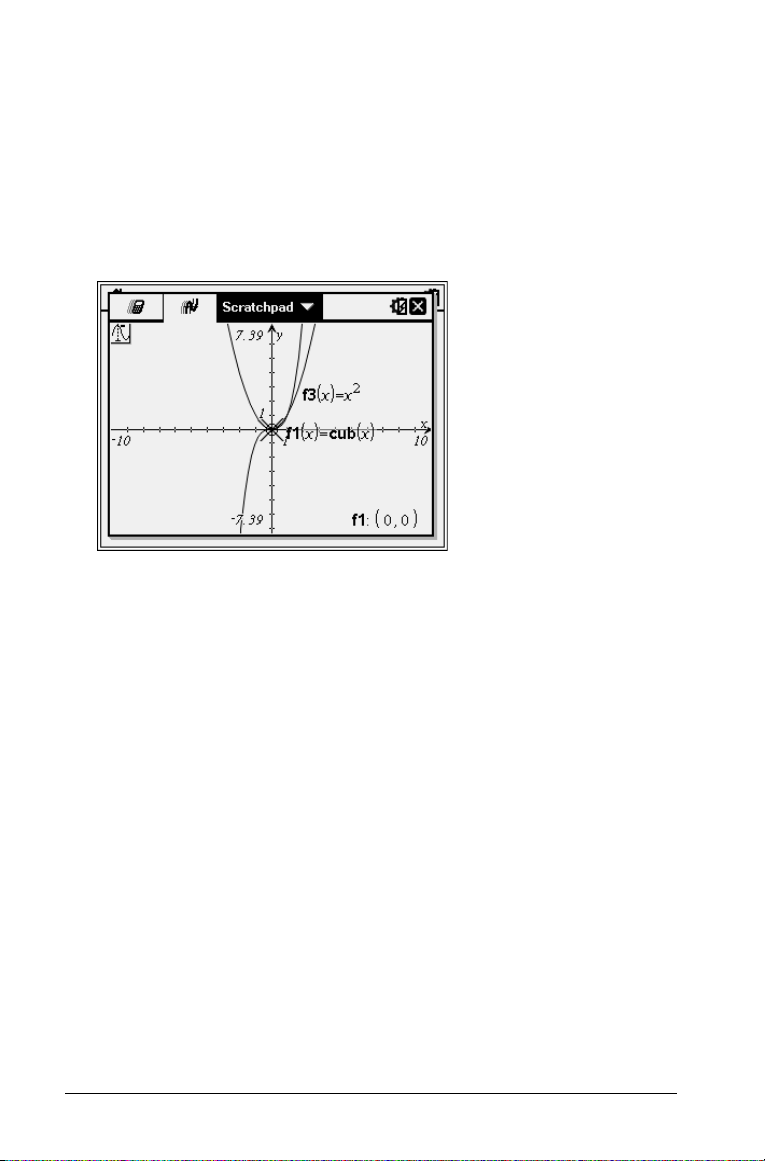
When you graph the relation, the entry line disappears to show an
uncluttered view of the graph. If you select or trace a plot, relation
that defines the plot is displayed on the entry line. Yo u ca n m od if y a
plot by defining a relation or by selecting and changing the graph.
As you graph multiple plots, the defining relation is displayed for
each. You can define and graph a maximum of 99 relations of each
type.
menu and adjust the viewing area.
b key to explore and analyze the relation to:
•Trace the relation.
•Find points of interest.
•Assign a variable in the expression to a slider.
Viewing the Table
f To display a tab le of val ues corr esponding to the current plots, press
b > Table > Split-screen Table (b71).
press
20 Using the Scratchpad
Page 27

f To hide the ta ble, clic k the grap h side of the split screen, and then
b > Table > Remove Table (b72).
press
f To resize col umns, cli ck the t able and press b > Actions > Resize
(b11).
f To dele te a co lumn, ed it a n e xpres sion, or edit table settings, click the
table and press
b > Table (b2).
Changing the Appearance of the Axes
As you work with graphs, the Cartesian axes are displayed by default.
You c an ch an ge t he a ppe ar an ce of t he a xe s in t he f ol lo wi ng wa ys :
1. Press
2. Select the axes and press
3. Adjust the axes scale and tic mark spacing manually.
4. Change axis end values by double-clicking them and typing new
5. Adjust the location of the axes. To move the existing axes without
6. Change the axes’ scales by pressing
b4 and choose the Zoom tool.
/b2 to activate the Attributes
tool.
a) Press
b) Press
c) Change any other attributes of the axes as required for your work,
a) Click and hold one tick mark, and move it on the axis. The spacing
b) To adjust the scale and tic mark spacing on a single axis, press and
values.
resizing or rescaling them, click in and drag an empty region of the
screen until the axes are in the desired location.
£ or ¤ to move to the attribute to change. For example,
choose the end style attribute.
¡ or ¢ to choose the style to apply.
and then press · to exit the attributes tool.
and number of tic marks increases (or decreases) on both axes.
g, and then grab and drag a tic mark on that axis.
hold
b > Window/Zoom > Window
Settings (
Type the val ues of y our choi ce over the current values for x-min,
x-max, y-min, and y-max, Xscale, and Yscale and click
b41).
OK.
7. Press b > View > Hide Axes (b21) to hide or show the
axes.
•If the axes are shown on the page, selecting this tool hides them.
Using the Scratchpad 21
Page 28
•If the axes are hidden on the page, selecting this tool redisplays
them.
Tracing a Plot
Graph Trace moves through the points of a graphed function,
parametric, polar, sequence, or scatter plot. To enable the trace tool:
1. Press
2. (Optional) To change the trace step increment for tracing, press
b > Trace > Graph Trace (b51) to move across the
plot in Trace model.
b53.
After you type a different step increment, the Graph Trace tool moves
across the graph in steps of that size.
3. Use Graph Trace to explore a plot in the following ways:
•Move to a point and hover to move the trace cursor to that point.
•Press
¡ or ¢to move from point to point on the function’s graph.
The coordinates of each point traced are displayed.
•Press
•Type a number and press · to move the trace cursor to the
22 Using the Scratchpad
£ or ¤ to move from one plot to another. The point’s
coordinates update to reflect the new location of the trace. The
trace cursor is positioned on the point of the new graph or plot
with the closest x value to the last point identified on the
previously traced function or graph.
point on the plot with independent coordinates nearest the typed
value.
Page 29

•Create a persistent point that remains on the graph by pressing
· when the trace point reaches the point you want to label.
The point remains after you exit Graph Trace mode.
Notes:
•The string undef is displayed instead of a value when you move
over a point that is not defined for the function (a discontinuity).
• When you trace beyond the initially visible graph, the screen pans
to show the area being traced.
4. Press
d or choose another tool to exit Graph Trace.
Finding Points of Interest
You c an u se t he t oo ls on t he Analyze Graph menu to find a point of
interest in a specified range of any graphed function. Choose a tool to
find zero, the minimum or maximum, the point of intersection or
inflection, or the numeric derivative (dy/dx) or Integral on the graph.
1. Select the point of interest that you want to find on the
Graph
menu. For example, to find a zero, press b61..
non-CAS CAS
Zero
Minimum
Maximum
Intersection
Inflection Not applicable
dy/dx
Integral
Analyze Conics
b61 b61
b62 b62
b63 b63
b64 b64
b65
b65 b66
b66 b67
b67 b68
Analyze
The icon for the selected tool displays at the top left on the work
area. Point to the icon to view a tooltip about how to use the selected
tool.
2. Click the graph you want to search for the point of interest, and then
click a second time to indicate where to start the search for the point.
Using the Scratchpad 23
Page 30

The second click marks the lower bound of the search region and a
dotted line displays.
Note: If you are finding the derivative (dy/dx), click the graph at the
point (numeric value) to use for finding the derivative.
3. Press
4. Press · at the point to start the search. The tool shades the range.
¡ or ¢ to move the dotted line that marks the search region, and
then click the point at which you want to stop the search (upper
bound of the search region).
If the search region you specified includes the point of interest, a
label for the point displays. If you change a graph that has points of
interest identified, be sure to check for changes in points of interest.
For example, if you edit the function on the entry line or manipulate
a plot, the point where the graph intersects zero can change.
The labeled points of interest remain visible on the graph. You can
exit the tool by pressing
d or choosing another tool.
Working with Variables in the Scratchpad
Scratchpad variables are shared between Scratchpad Calculate and
Scratchpad Graph, but not with any TI-Nspire™ documents. If you use the
same name for a Scratchpad variable and a variable in a document, no
conflict occurs unless you attempt to copy expressions between
documents and the Scratchpad.
Saving the Scratchpad Contents
You c an s ave t he S cr at ch pa d Cal cu la te p ag e, t he Sc ra tc hp ad G ra ph pa ge ,
or both as a TI-Nspire™ document.
1. Press
24 Using the Scratchpad
~, and then select Save to Document (~A).
Page 31

2. Press ·.
The Save to Document dialog box opens.
3. Select the page or pages to save.
4. If a document is open, select either New or Current document.
5. Click
Save.
•If you selected to save to a current (open) document, the
Scratchpad pages are added to the document.
•If you selected to save the Scratchpad pages to a new document,
the pages are converted to an unsaved document. To save the
document:
–Press
–Type a name for the document.
–Select
~ > Save. The Save As dialog box opens.
Save to save the new document.
Clearing Scratchpad Contents
Complete the following steps to delete the calculations and graphing
work from the Scratchpad application.
1. Press
2. Press
~ > Clear Scratchpad (~B).
· to delete the Scratchpad contents.
Using the Scratchpad 25
Page 32

26 Using the Scratchpad
Page 33

Working with Documents on TI-Nspire™
Handhelds
All of the work you do with a TI-Nspire™ handheld is contained in one or
more TI-Nspire™ documents, which you can share with other handheld
users and with those using the computer software.
•Each document is divided into at least one, and up to 30, problems.
•Each problem contains at least one, and up to 50, pages.
•Each page can be divided into as many as four work areas.
•Each work area can contain any of the TI-Nspire™ applications
(Calculator, Graph, Geometry, Lists & Spreadsheet, Data & Statistics,
Notes, and Vernier DataQuest™).
Opening a Document
1. From the Home screen, select My Documents.
—or—
Press
2.
The file manager opens.
2. Navigate to the file you want to open.
•Press
¤ to highlight the document name, and then press x or
· to open the document.
•If the file is in a folder, press
press
x or · to open the folder.
3. Press
~ to open the Documents menu to access options for
working with the open document.
Working with Documents on TI-Nspire™ Handhelds 27
¤ to highlight the folder, and then
Page 34
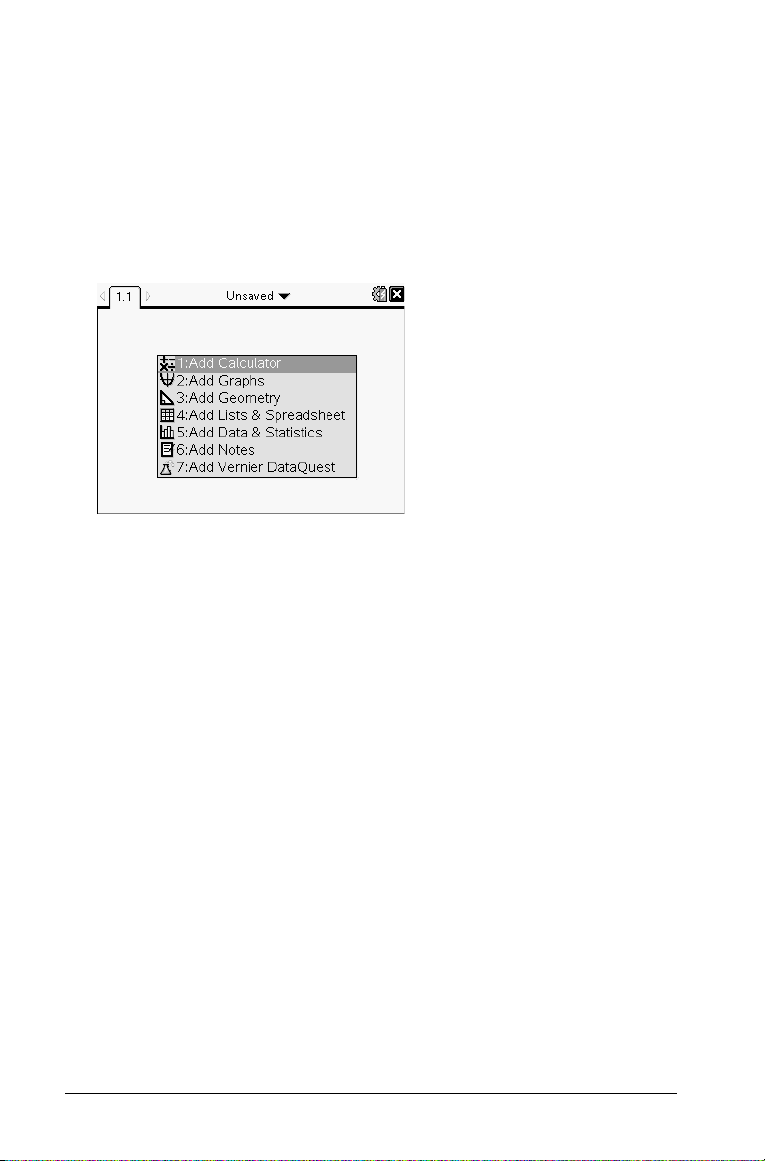
Creating a New Document
1. From the Home screen, select New Document.
—or—
Press 1.
You c an a ls o pre ss
A new document opens with a list of applications.
Note: The tab at the top left of the screen indicates that this is the
first page of the first problem.
2. Use
¤ and £ to highlight the application you want to add to the
page, and then press
/N.
· to open the page.
28 Working with Documents on TI-Nspire™ Handhelds
Page 35

Saving Documents
To s ave the d ocumen t in the My Doc uments fo lder:
1. Press
2. Type a name for the document.
3. Click
~ to open the Documents menu, and then select File > Save.
Note: You can also press
The Save As dialog box opens.
If you are saving the document for the first time, you will be asked
which folder to save it to, and what to name the document. The
default folder is My Documents.
Save to save the document in the My Documents folder.
~14 or /S to save a document.
Saving a Document in a Different Folder
To s ave the d ocument in a di ffer ent folde r:
1. From an open document, press
The Save As dialog box opens.
~15.
2. Press
3. Use the
4. To select and open a folder, press
5. Type a name for the document.
6. Click
ge to navigate to the list of existing folders. The first
folder in the list is selected.
¤ and £ to scroll through the list of folders.
x.
Save to save the document in the selected folder.
Saving a Document in a New Folder
To s ave the d ocumen t in a n ew fol der:
Working with Documents on TI-Nspire™ Handhelds 29
Page 36

1. From an open document, press ~15.
new folder
icon
Typ e ne w
folder name
The Save As dialog box opens.
2. Press
euntil the New Folder icon is highlighted, and then press
· to create a new folder.
The new folder is added to the bottom of the list of existing folders.
By default, the folder name is “Folder1.”
3. Type a name for the new folder, and then press
4. Press
5. Type a name for the document.
6. Click
· again to open the folder.
The File Name field becomes active.
Save to save the document in the new folder.
· to save.
Working with Applications
Options for working with applications include:
•Creating a new document and selecting an application
•Adding a new page and application to an open document
•Adding multiple applications to a page in a document
Adding an Application
There are multiple ways to add an application to a page:
•When creating a new document, use the Touchpad or corresponding
numbers to select an application from the list of applications.
•To add a new page and application to an open document, press
/~, and then select an application from the list.
30 Working with Documents on TI-Nspire™ Handhelds
Page 37

For example, press 2 to add the Graph application to the page. The
application opens in the work area.
You c an a ls o pre ss
screen by clicking one of the following application icons:
c, and then select an application from the Home
Calculator
Graphs
Geometry
Lists & Spreadsheet
Data & Statistics
Notes
Vernier DataQuest™
Using Multiple Applications on a Page
You c an a dd u p t o fo ur a pp lic at io ns t o ea ch p ag e.
When you create a new document, it contains space to add one
application. If you need to add more than one application to a page, you
can change the layout to accommodate as many as four applications.
You c an c ho os e a st an dar d la yo ut , pr ovi de d as a m en u it em , or y ou ca n
customize a layout to suit your needs.
Working with Documents on TI-Nspire™ Handhelds 31
Page 38

Choosing a Standard Page Layout
1. Press ~52 to display layout options.
2. Press the number that corresponds to the layout you want.
For example, press 2 to create a two-pane layout, divided vertically
on the page.
3. Press
4. Press
32 Working with Documents on TI-Nspire™ Handhelds
/e to move between panes. Bold lines around the pane
indicate that the pane is active.
b, and then press the number of the application you want to
add the new pane. For example, press 4 to add the Lists &
Spreadsheet application.
Page 39

Note: If you need to change the layout of the page to add or delete
applications, you can do so at any time. When deleting an
application, select the application to be deleted first.
Creating a Custom Page Layout
If the standard layouts do not meet your needs, you can customize the
space allotted to applications on a page.
1. Press
2. Press
~5 to display layout options.
1 to select the custom split option.
The standard layout is displayed with a divider between the
application panes. Use the arrows ( ) in the middle of the divider to
adjust the size of the panes.
Working with Documents on TI-Nspire™ Handhelds 33
Page 40

3. Press £, ¤, ¡,or¢ to move the divider to adjust the height or width
of the panes in the layout.
4. Press
5. Press
6. Press
+ or - to select a defined layout:
•Pressing
•Pressing
horizontal layout. Press
•Pressing
multiple times enables you to choose between a vertical and
horizontal page layout with three panes.
•Pressing + five times adds a fourth pane to the page. Press - to
cycle through the previous layout options.
- returns to a full page layout.
+ once switches layout from a vertical layout to a
- to go back to a vertical layout.
+ twice adds a third pane to the page. Pressing +
xor · to accept the layout dimensions.
/e to move between panes. Bold lines around the pane
indicate that the pane is active.
Swapping Applications on a Page
If you want to change the position of applications on a page with
multiple applications, you can do so by “swapping“ the positions of two
applications.
1. Press
~5 Page Layout 4 Swap Application.
The selected application is surrounded by a heavy, flashing black
border, and the Swap App cursor
Note: On a two-pane page layout, the selected application
automatically swaps position with the opposite pane. Press
or
· to complete the swap.
é is displayed on the screen.
x
34 Working with Documents on TI-Nspire™ Handhelds
Page 41

2. Press £, ¤, ¡,or¢ to position the cursor over the application you are
targeting to swap.
3. Press
xor · to complete the swap.
Note: Press
d to cancel the swap.
Grouping Applications
To g roup up to four applicatio n pages in to a sing le page:
1. Select the first page in the series.
2. From the
Press ~57.
The next page is grouped with the first page. The page layout
automatically adjusts to display all the pages in the group.
Document menu, select Page Layout > Group.
Ungrouping Pages
To u ngroup the page s:
1. Select the grouped page.
2. From the
—or—
Press ~58.
The material becomes individual pages for each application.
Document menu, select Page Layout > Ungroup.
Deleting an Application from a Page
1. Click the application you want to delete.
2. From the Document menu, select Page Layout > Delete Application.
—or—
Press ~55.
The selected application is deleted.
If you want to undo the delete, press
Ctrl-Z.
Using the Application Menu
The Application menu enables you to select tools for working with a
specific application. Each application has a unique menu.
Using the Application Menu
1. From a blank page, press b to display the Application menu.
Working with Documents on TI-Nspire™ Handhelds 35
Page 42

The menu displays applications that you can add to the page.
2. Press the number of the application you want to add to the page. For
example, press
4 to add the Lists & Spreadsheet application.
3. Press
36 Working with Documents on TI-Nspire™ Handhelds
b to display the Application menu, which lists the options
for working with the current application.
The example below displays the Application menu for the Lists &
Spreadsheet application.
Page 43

Context Menus
Context menus display options that are specific to the selected object or
the current cursor location.
Using the Context Menu
f To access a co ntext-s ensitiv e menu from an application, press
/b.
In the example below, the context menu displays options available for
the selected cell in Lists & Spreadsheet.
Working with Problems and Pages
The options on the Documents menu let you:
•Save a document
•Access edit functions such as undo, redo, cut, copy, paste, and delete
•Move between pages and open the page sorter view for documents
with multiple pages
•Modify page layout, insert pages or problems, delete pages, and
change settings
•Add problems, pages, and applications to open documents
•Access page layout options
Adding a Problem to a Document
Adding problems to a document enables you to reuse variable names. A
document can contain as many as 30 problems. To add a new problem:
1. Press
~41 to open the Insert options.
Working with Documents on TI-Nspire™ Handhelds 37
Page 44

A new problem with one page is added to the document. The tab at
the top left of the screen indicates that this is the first page of the
second problem.
2. Press b to open the Application menu, and then press the number
corresponding to the application you want to add to the new page.
Viewing and Reordering Pages in a Document
The Page Sorter displays all of the problems in your document and all
pages within each problem in thumbnail format. You can use the Page
Sorter to rearrange and delete pages, copy a page from one problem and
paste it into another, and apply templates to pages.
Viewing Multiple Pages with the Page Sorter
Although the handheld typically displays the pages in your document
one at a time, the Page Sorter lets you see all of the problems in your
document and all pages within each problem in thumbnail format. You
can use the Page Sorter to rearrange and delete pages, and copy a page
from one problem and paste it in another.
38 Working with Documents on TI-Nspire™ Handhelds
Page 45

Opening the Page Sorter from a Document
f Press / £.
The Page Sorter screen displays all of the problems and pages in the
current document.
Reordering Pages in a Problem
Use the Page Sorter (press /£) to move a page within a problem with
multiple pages:
1. Press the or key to select the page you want to move.
A heavy border around the page indicates that it is selected.
2. Either press and hold
displayed.
3. Press , , or to move the page to the desired position.
4. Press
x or · to finish the move.
Note: You can press
The page moves to the new location within the problem, and the
counter adjusts accordingly.
x or press /x until the grab cursor ÷ is
d to cancel.
Working with Documents on TI-Nspire™ Handhelds 39
Page 46

Copying a Page to Another Problem
To c opy a p age from one problem to another in the same document:
1. Press
2. Press , , , or to select the page you want to copy.
3. Press
4. Press , , , or to select the desired position in the problem where
5. Press
Note: If the page contains variables with the same names as the new
problem, a conflict may occur. Rename the variables if necessary.
/£ to open Page Sorter.
A heavy border around the page indicates that it is selected.
/C to copy the page.
you will paste the page. The copied page will be placed after the
page you select.
/V to paste the page in the new location.
The page is copied to the new location within the problem, and the
counter adjusts accordingly.
Copying a Page to Another Document
To c opy a pag e from one document to another document:
1. Press
2. Press , , , or to select the page you want to copy.
3. Press
4. Press
5. Press and to highlight the folder containing the document you
6. Press to open the folder.
40 Working with Documents on TI-Nspire™ Handhelds
/£ to open the Page Sorter.
A heavy border around the page indicates that it is selected.
/ C to copy the page.
c 2 to open My Documents.
want to copy the page to.
Page 47

—or—
Press b3.
7. Press the and keys to highlight the document.
8. Press
9. Press
10. Press , , , or to move the page to the desired position in the
11. Press
x or · to open the document.
/ to display the Page Sorter.
document.
/V to paste the page in the new location.
The page moves to the new location within the problem, and the
counter adjusts accordingly.
Copying, Pasting, and Deleting Problems
You c an c op y an d pa st e a si ng le pr ob lem f ro m on e lo ca ti on to a no the r
within the same document or a different document. You can also delete
a problem from the document.
Copying and Pasting a Problem
To c opy an d paste a probl em:
1. Open the Page Sorter.
/ £.
Press
—or—
Press
~ 3 3.
2. Select the problem. If there are multiple problems, you can press
b2 to collapse the Page Sorter to list the problems by number
and title only.
Working with Documents on TI-Nspire™ Handhelds 41
Page 48

3. Press /C.
4. Go to the location where you want the problem to appear.
5. Press
/V.
A duplicate problem is placed in the new location.
Deleting a Problem
To d elete a problem fr om the d ocument:
1. Select the problem from the Page Sorter.
2. Press
/X.
The problem is deleted from the document.
Renaming a Problem
To r ename a p roblem:
1. With the document active, open the Page Sorter.
Press
/ £.
2. Select the problem name.
3. Press
4. Select
5. Press
/b.
7 Rename and type the name.
/S to save the change.
Adding a Page to a Problem
Each problem can contain up to 50 pages. To add a new page to a
problem:
f Press
f Press c to display the Home screen, and then point to the
42 Working with Documents on TI-Nspire™ Handhelds
/~ or /I to add a blank page and select an application.
—or—
application you would like to add to the new page and click or tap.
A new page is added to the current problem.
Page 49

Note: The tab at the top left of the screen indicates that this is the
second page of the second problem.
Moving Through Pages in a Document
Tab s d isplay up t o three multiple pages. When a document contains more
than three pages, arrows appear on the left and right of the tabs.
Use the following keys to navigate through your documents.
• / displays the previous page.
•
/ displays the next page.
•
/ displays the Page Sorter.
/ ¤ displays the previous view.
•
•Use the Touchpad to click on the arrows that appear on either side of
the tabs to show additional pages in a document containing more
than three pages.
Managing Documents
My Documents is a file manager in which you store and organize your
documents. The example below illustrates the My Documents screen with
its main parts labeled. Following the screen, you can find descriptions of
each labeled part.
Working with Documents on TI-Nspire™ Handhelds 43
Page 50

Expanded folder
À
Current, unsaved document
Á
Collapsed folder
Â
System status indicators
Ã
File size
Ä
Browsing Files in My Documents
To o pen My Documents:
f Press
44 Working with Documents on TI-Nspire™ Handhelds
c2.
Note: If you are working in a page, press / / .
The My Documents screen opens, displaying all folders and files on
the handheld.
Page 51

•To sort columns by name or size, click that column head. Click
again to change the sort from ascending to descending.
•To scroll through My Documents, click or grab the scroll bar.
•To expand a single folder, point to the folder and click on the
folder icon or press
/¢. To collapse, click again or press /¡.
•To expand all folders, press
b7. To collapse, press
b8.
Renaming Folders or Documents
To r ename a f older o r docum ent:
1. Press the and keys to highlight the document or folder you want
to rename.
2. Press
3. Type a new name and press
b2.
The document or folder name is highlighted.
· to complete the change.
Note: Press
d to cancel.
Creating Folders
You c an c re at e fo ld er s tw o di ff er en t wa ys :
•You can create a folder when you save a new document: The
and Save As menu commands allow you to enter a new folder name
for the document.
•You can create a folder directly from the My Documents screen. Press
Save
b1. Type a name for new folder, and press x or · to add
it.
Working with Documents on TI-Nspire™ Handhelds 45
Page 52
File and Folder Naming Conventions
Folder names must be unique. File and folder names can be very long,
and can include almost all characters, including spaces and punctuation.
Note: If you are planning to transfer these documents to your computer
for use in the TI-Nspire™ software, it is best to use names that are
accepted on your computer. Avoid punctuation, \, /, or symbols.
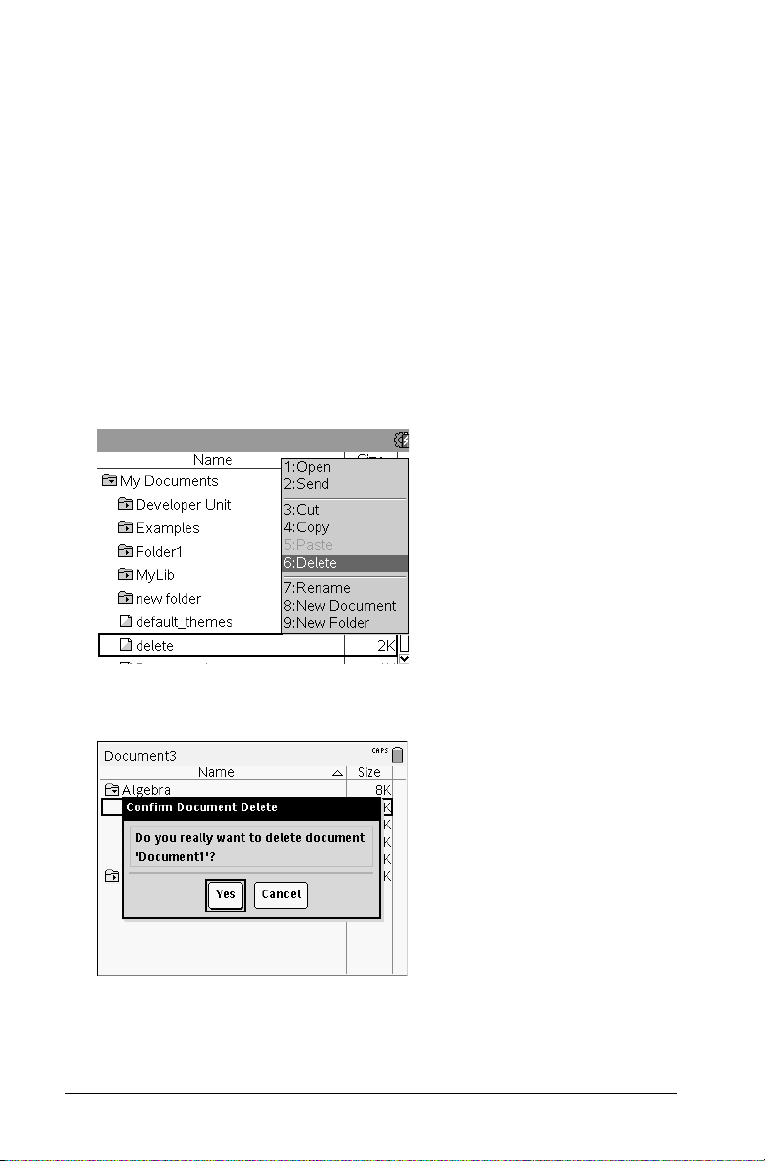
Deleting Documents and Folders
1. Press and to highlight the document or folder you want to
delete.
2. Press /b6.
—or—
Press
..
A dialog box opens, confirming that you want to delete the file or
folder.
3. Press xor · to select Ye s.
The document is deleted.
46 Working with Documents on TI-Nspire™ Handhelds
Page 53

Duplicating Documents and Folders
Use Copy /C and Paste /V to duplicate documents and folders.
To copy a do cument to an other f older, select the desired folder, and then
paste.
Recovering Deleted Documents
Most operations performed in My Documents can be undone. Press
/Z (Undo) to cancel the last operation until the deleted document is
restored.
Closing a Document
1. To close a document, press ~13.
—or—
Press
/ W.
If you have changed the document, you will be asked whether you
want to save those changes.
2. Click
Yes to save the document or click No to abandon the changes.
Understanding the TI-Nspire™ Tools
This section provides an overview of the tools used when working with
TI-Nspire™ documents on a handheld, including variables, catalog,
symbols, and math templates.
Creating TI-Nspire™ Variables
Variables can be any p ort ion or attribute of an object or function created
within an application. Examples of attributes that can become variables
are the area of a rectangle, the radius of a circle, the value contained in a
spreadsheet cell or the contents of a column, or a function expression.
When you create a variable, it is stored in memory within the problem.
You w il l fi nd m or e in for ma ti on a bo ut variables in the chapter titled
Using Variables.
Using the Catalog
Use the catalog to access a list of TI-Nspire™ commands and functions,
units, symbols and expression templates. Commands and functions are
listed alphabetically. Commands or functions not beginning with a letter
are found at the end of the list (&, /, +, -, and so on). To open the catalog:
1. From an open document, press
Working with Documents on TI-Nspire™ Handhelds 47
k to open the catalog.
Page 54

2. Press the number key corresponding to the appropriate tab.
For example, press 2 to show a list of math functions.
3. Press until the item you want to insert is highlighted.
A syntax example for the selected item is displayed at the bottom of
the screen.
Note: To see additional syntax examples of the selected item, press
e, and then press · to maximize or minimize the Help. To move
back to the selected item, press
ge.
4. Press
· to insert the item.
About the Catalog Window
The catalog window uses these tabs to categorize commands, special
characters, and templates in documents:
Contains all commands and functions, in alphabetical
order
Contains all math functions
Provides a symbol palette for adding special characters
Contains math templates for creating two dimensional
objects, including product, sum, square root, and integral
Shows public library (LibPub) objects
48 Working with Documents on TI-Nspire™ Handhelds
Page 55

CAS:
Contains all commands and functions, in alphabetical
order
Contains all math functions
Provides the values for standard measurement units
Provides a symbol palette for adding special characters
Contains math templates for creating two dimensional
objects, including product, sum, square root, and integral
Shows public library (LibPub) objects
Using Wizards
Some catalog functions have a wizard to help you enter function
arguments. To use a wizard, press
highlighted. Press
x or · to select the check box.
e until the Wizards On box is
Entering Special Characters
The symbol palette contains a subset of the objects found in the catalog.
To o pen the s ymbol pale tte:
1. In an open document, press
Working with Documents on TI-Nspire™ Handhelds 49
/k.
Page 56

2. Press , , , or to select a symbol.
3. Press · to insert the symbol.
Entering Math Expressions
Use math expression templates to create two-dimensional objects such as
summation, integral, derivative, and square root. To open the math
expressions palette:
1. In an open document, press t.
2. Press , , , or to select an expression.
3. Press
x or · to insert the expression.
Entering International Language Characters
Use the ; key to enter specially accented or punctuated characters in
applications such as Notes that allow text input.
1. Open an application such as Notes that allows text input.
2. Type the desired text.
50 Working with Documents on TI-Nspire™ Handhelds
Page 57

3. Position the cursor after the letter that you want to accent. For
example, “e” while in the French locale.
4. Press
; on the keypad. Notice that the “e" changes to “é.“ Keep
pressing
Press
_ or the next letter of your text to accept the character and
continue typing.
; until you find the accented version of e that you want.
Working with Documents on TI-Nspire™ Handhelds 51
Page 58

52 Working with Documents on TI-Nspire™ Handhelds
Page 59

Working with Images
Images can be used in TI-Nspire™ applications for reference, assessment,
and instructional purposes. You can add images to the following
TI-Nspire™ applications:
•Graphs & Geometry
•Data & Statistics
•Notes
•Question, including Quick Poll
In the Graphs & Geometry and Data & Statistics applications, images are
set in the background behind the axis and other objects. In the Notes and
Question applications, the image is set at the cursor location inline with
the text (in the foreground).
You c an in se rt t he f ol lo wi ng i ma ge f ile t yp es : .j pg , .p ng , o r .b mp.
Note: The transparency feature of a .png file type is not supported.
Tra nsparent backgr ounds ar e displ ayed a s white.
Working with Images on a Handheld
On a handheld, images can be copied from one document to another or
resized or repositioned within a document. You can also delete images
from a document.
You c an no t ad d or i ns ert i ma ges i nt o a do cu me nt w hen w or kin g on a
handheld. However, you can transfer a document containing an image
from your computer to a handheld. If using a TI-Nspire™ CX handheld,
colors are retained. If transferred to a TI-Nspire™ handheld, the colors in
the image are converted to gray scale.
Note: If there is not enough memory on the handheld to accommodate a
document containing an image, an error message is displayed.
Copying an Image
Complete the following steps to copy an image from one document to
another or from one page to another within the same document.
1. Open the document that contains the image you want to copy.
2. Select the image.
•In the Question or Notes applications, move the cursor over the
image and press
•In the Graphs & Geometry application, press
x.
b122.
Working with Images 53
Page 60

•In the Data & Statistics application, press b36.
A border appears around the image.
3. Press
4. Open the document where you want to paste the image or select a
5. Press
/b, and then click Copy. You can also press /C.
page in the current document.
Note: If you open a new document, you will be prompted to save and
close the current document.
/V.
Note: If pasting an image into the Graphs & Geometry application,
·, and then press /V.
press
The image is copied to the page in the document.
Repositioning an Image
Complete the following steps to reposition an image on a page.
1. Open the document and navigate to the page that contains the
image.
2. Select the image.
•In the Question or Notes applications, move the cursor over the
image, and then press, hold, and release
shaded.
•In the Graphs & Geometry application, press
•In the Data & Statistics application, press
A border appears around the image.
3. Move the image.
•In the Question or Notes applications, move the cursor to the new
location and press
x.
x. The image appears
b122.
b36.
•In the Graphs & Geometry or Data & Statistics applications:
–Press and hold
arrow ( ). The image floats in the background and the
border changes to a dashed line.
–Move your finger over the Touchpad to move the image to the
new location, and then press
54 Working with Images
x until the cursor changes to a four-sided
x or · to place the image.
Page 61

Resizing an Image
Complete the following steps to resize an image on a page.
1. Open the document that contains the image.
2. Select the image.
•In the Question or Notes applications, or in Quick Poll, move the
cursor over the image and press, hold, and then release
image appears shaded.
x. The
•In the Graphs & Geometry application, press
•In the Data & Statistics application, press
A border appears around the image.
3. Move the cursor to one of the corners.
The cursor changes to a four-sided directional arrow ( ).
Note: If you move the cursor to the edge of an image, the cursor
changes to a two-sided directional arrow. You can drag the image left
or right to resize it, but the image will become distorted.
4. Press
5. Move your finger over the Touchpad in any direction to resize the
6. To accept the new size, press
x.
The tool is enabled.
image.
A dashed line appears to indicate the new size.
x or ·.
b122.
b36.
Deleting an Image
Complete the following steps to remove an image from a page.
1. Open the document that contains the image.
2. Select the image.
•In the Question or Notes applications, move the cursor over the
image, and then press, hold, and release
shaded.
x. The image appears
•In the Graphs & Geometry application, press
•In the Data & Statistics application, press
A border appears around the image.
b122.
b36.
Working with Images 55
Page 62

3. Press /b, and then select Delete.
The image is removed.
Note: In the Question and Notes applications, you can also press
to remove a selected image.
.
56 Working with Images
Page 63

Working in a TI-Nspire™ Navigator™
Teac h e r Soft w a re C l a s sro o m
If you are in a classroom where TI-Nspire™ Navigator™ Teacher Software
is used, you will need to log in to class to communicate with the teacher’s
computer. The teacher can communicate with your handheld in the
following ways:
•Send files
•Collect files
•Delete files
•Send Quick Polls
The teacher can also pause and restart your handheld. When class is
paused, you will receive a message on your handheld. You cannot use
your handheld until the teacher releases the handheld from pause mode.
Logging In
Complete the following steps to connect to a classroom session.
1. From the Home screen, press
55. From an open document, press
~8.
Login to Class dialog box opens.
The
2. Type your user name and password.
3. Click
4. Click
Login.
The Login Successful screen opens.
OK.
Working in a TI-Nspire™ Navigator™ Teacher Software Classroom 57
Page 64

TI-Nspire™ Handheld Login Status Icons
The icons on the TI-Nspire™ CX, TI-Nspire™ CX CAS, TI-Nspire™, and
TI-Nspire™ CAS handheld screens indicate the communication status
between the handheld and the access point, wireless adapter, wireless
cradle, or TI-Navigator™ network. The icons indicate status as follows.
Icon Status Meaning
Blinking The handheld is searching for an access
point.
Solid The handheld has found an access point.
Solid The handheld is not communicating
with the adapter or cradle. Unattach the
handheld from the adapter or cradle,
wait for the icon to disappear, and then
reattach the handheld to the adapter or
cradle.
Blinking The handheld is connected to the
network and is ready to login.
Solid The handheld is logged in to the
network and is fully charged.
Pausing a Class Session
There are times when a teacher may want to pause a class. Pausing a class
suspends all activity on your handheld. When the teacher resumes class,
the message clears and you are able to use the handheld.
Understanding File Transfers
During a class session, the teacher may send, collect, or delete files. If she
sends files, you see a dialog box with the options to Open, Go To, or
Cancel. If she collects or deletes files, you see a dialog box that tells you a
file transfer has been made, and your only option is to choose Cancel to
close the box.
Note: If the teacher sets up actions to send or collect files before the class
session starts, those actions take place when you log in. If she sets up
multiple actions, such as both sending and collecting files, the only dialog
box you will see is the one for the last action to take place.
See the section below for more information on each option.
58 Working in a TI-Nspire™ Navigator™ Teacher Software Classroom
Page 65

Opening Files
When the teacher sends a file to your handheld, the Transfers Complete
dialog box opens.
f Click
Open to open the file. If the teacher sent multiple files, this
opens the last file in the list.
Note: The files are sent alphabetically by name, no matter which
order the teacher sent them in. The last file in the list is the last
alphabetical file.
f Click
Go To to go to the location on the handheld where the file was
sent. The file name is highlighted. You ca n op en th at f ile , or n av ig at e
to another file. If the teacher sent multiple files, the last alphabetical
file in the list is highlighted.
f Click
Cancel to dismiss the dialog box without opening the file. Your
handheld returns to the state it was in when the message was sent.
Collecting or Deleting Files
You r t ea ch er ma y c ol le ct o r de le te fi le s from your handheld during a class
session. For example, she may be collecting a homework assignment, or
she may delete certain files prior to a test. When the teacher collects or
deletes files, you receive a message on your handheld.
f Click
Cancel to dismiss the message.
Working in a TI-Nspire™ Navigator™ Teacher Software Classroom 59
Page 66

60 Working in a TI-Nspire™ Navigator™ Teacher Software Classroom
Page 67

Configuring Handhelds
Slide switch
to the right
as shown
here.
This chapter provides information needed to:
•Maintain batteries used in the handheld.
•Change the default settings.
Installing the AAA Batteries
To i nstall the batte ries shi pped wi th your handheld, complete the
following steps.
1. Remove the keypad from the front of the handheld.
•To unlock the keypad, turn the handheld over and slide the switch
on the back of the handheld to the right.
•Lift the keypad out.
2. Insert the four alkaline AAA batteries provided with the handheld
into the battery compartment. Arrange the batteries according to the
polarity (+ and -) diagram.
Configuring Handhelds 61
Page 68

3. Replace the keypad.
•Align the keypad with the grooves as shown. Don’t try to slide the
keypad in from the bottom of the handheld. Place the keypad
about an inch below the screen so that it fits into the grooves and
lies flat.
•Push the keypad firmly into place. You will hear a click and the
switch on the back of the keypad is in the locked position.
62 Configuring Handhelds
Page 69

Replacing AAA Batteries
Caution: When removing the keypad to change AAA batteries, be
certain that the handheld is completely powered down. Removing the
keypad before the display is cleared may result in loss of data.
1. Save any open documents and turn off the handheld.
2. Remove the keypad from the handheld.
3. Carefully remove the batteries.
Caution: You may need to use a
tool to remove the batteries as
they fit tightly in the unit. If using
a tool, be careful not to damage
either the batteries or the
handheld.
4. Insert fresh batteries.
Ensure that the + side of each
battery faces away from the
display screen.
5. Replace the keypad.
Inserting the TI-Nspire™ Rechargeable Battery
If purchased, complete the following steps to insert the TI-Nspire™
Rechargeable Battery into a handheld.
1. Use a small screwdriver to release the panel from the back of the
handheld.
Configuring Handhelds 63
Page 70
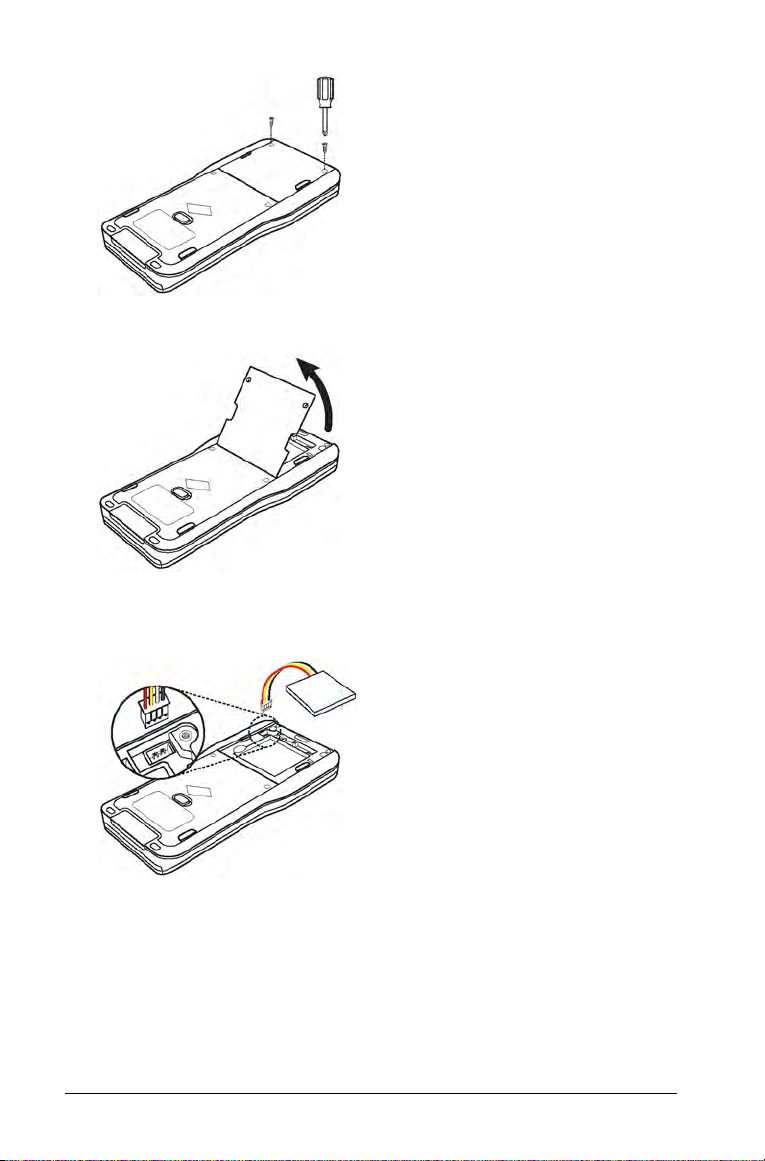
2. Remove the panel.
3. Insert the white connector into the jack, as shown.
Note: The red wire in the connector should face downward.
4. Thread the wire into the case to secure it. Insert the rechargeable
battery into its compartment.
64 Configuring Handhelds
Page 71

5. Replace the back panel and fasten the screws with a screwdriver.
Checking Battery Status
To c heck the s tatus of b oth the TI-N spire™ Rechargeable Battery and the
AAA batteries in a handheld:
1. Press c to access the Home screen.
2. Press
Note: From an open document, press
54 to open the Handheld Status window.
~74.
Recharging the Handheld
To r echa rge t he T I-Nspir e™ R echargeable Battery in a handheld, connect
it to either of the following power sources:
•A standard USB cable connected to a computer
•A standard, TI USB wall charger (sold separately in Europe and
Asia)
The amount of time required to fully charge the battery may vary, but
charging normally takes about six hours. It is not necessary to remove the
TI-Nspire™ Rechargeable Battery from the handheld to recharge it. The
handheld operates normally while it is attached to a charging source.
Configuring Handhelds 65
Page 72

Recharging a Battery from a Computer
To r echarge a handhel d from a computer, a TI- Nspire™ U SB drive r must
be installed. USB drivers are standard with any TI-Nspire™ software,
which includes:
•TI-Nspire™ Teacher Software
•TI-Nspire™ CAS Teacher Software
•TI-Nspire™ Student Software
•TI-Nspire™ CAS Student Software
•TI-Nspire™ Navigator™ Teacher Software
•TI-Nspire™ CAS Navigator™ Teacher Software
To d ownload software that includes a driver, go to
education.ti.com/software.
Understanding the Priority of Power Sources
After installing and charging the rechargeable battery, use the handheld
with or without the AAA (non-rechargeable) batteries. The handheld
draws power in the following order:
• First, from a connected external power source, such as:
–A computer connected through a standard USB cable
–A TI USB wall charger (sold separately in Europe and Asia)
•Second, from the TI-Nspire™ Rechargeable Battery (sold separately)
•Last, from the AAA (non-rechargeable) batteries
Disposing of Used Batteries Safely and Properly
Do not mutilate, puncture, or dispose of batteries in fire. The batteries
can burst or explode, releasing hazardous chemicals. Discard used
batteries according to local regulations.
Changing Handheld Settings
Use the options on the Settings menu to change or view the following
settings:
•Change language
•Settings (General and Graphs & Geometry)
–Define or restore settings for open documents and the Scratchpad
–Define or restore default settings for the handheld
•Handheld Setup
66 Configuring Handhelds
Page 73

• Status
• Login
Note: Not all options are accessible at all times. Options that are
unavailable are dimmed.
Opening the Settings Menu
f From the Home screen, press 5 or use the Touchpad to select
Settings.
The Settings menu opens.
Changing the Preferred Language
Complete the following steps to change the preferred language:
1. From the Home screen, press
menu.
2. From the menu, select
The Change Language dialog box opens.
3. Press ¢ to open the drop-down list.
5 or select Settings to open the
Change Language or press 1.
Configuring Handhelds 67
Page 74

4. Press ¤ to highlight a language, and then press x or · to select
it.
5. Press
e to highlight the OK button, and then press x or · to
save the language selection.
Customizing the Handheld Setup
Handheld setup options enable you to customize options to suit your
needs.
•Font size (small, medium, or large).
•Power standby. (1, 3, 5, 10, or 30 minutes).
–Use this option to extend battery life.
–By default, the handheld automatically powers down after three
minutes of inactivity.
•Hibernate (1, 2, 3, 4, 5 days, or never).
–Use this option to extend battery life.
–By default, the handheld hibernates after four days.
–When hibernating, the handheld saves current work in memory.
– When you turn the handheld on again, the system reboots and
opens saved work.
•Pointer speed (slow, normal, or fast).
•Enable tapping to click.
Changing Handheld Setup Options
1. From the Home screen, press 53 (Settings > Handheld Setup).
The Handheld Setup dialog box opens.
68 Configuring Handhelds
Page 75

2. Press e until the desired category is highlighted.
3. Press
4. Press
5. Press
6. When you have changed all the settings to suit your needs, press
¢ to view the list of possible settings.
to highlight the desired setting.
x or · to select the new setting.
e until OK is highlighted, and then press x or · to apply your
changes.
Note: Click
Note: When operating in TI-84 mode, you cannot modify the power
standby or hibernate options. TI-84 mode will follow the same power
settings established within the TI-Nspire™ native mode.
Restore to return the handheld to the factory settings.
Customizing Document Settings
Document settings control how the handheld displays and interprets
information in TI-Nspire™ documents and in Scratchpad. All numbers,
including elements of matrices and lists are displayed according to the
document settings. You can change the default settings at anytime and
you can also specify settings for a particular document.
Document settings and their possible values are listed in the following
table.
Field Val ues
Display Digits Float
Float1 - Float12
Fix0 - Fix12
Angle Radian
Degree
Gradian
Exponential Format Normal
Scientific
Engineering
Real or Complex Real
Rectangular
Polar
Configuring Handhelds 69
Page 76

Field Values
Calculation Mode Auto
CAS: Exact
Approximate
Note: Auto mode displays an
answer that is not a whole number
as a fraction except when a decimal
is used in the problem. Exact mode
(CAS) displays an answer that is not
a whole number as a fraction or in
symbolic form, except when a
decimal is used in the problem.
Vector Format Rectangular
Cylindrical
Spherical
Base Decimal
Hex
Binary
Unit System (CAS) SI
Eng/US
Changing Default Document Settings
Complete the following steps to define default document settings for
TI-Nspire™ documents and Scratchpad.
1. Save and close any open documents.
2. From the Home screen, press
Settings
The Document Settings dialog box opens.
Note: If a document is open, the Document Settings dialog box also
contains an
the open document.
70 Configuring Handhelds
).
OK button. If you select OK, settings are only applied to
52 (Settings > Document
Page 77

3. Press e to move through the list of settings. Press £ to move
backward through the list.
A bold line around a box indicates it is active.
4. Press
5. Press the
6. Select
7. Click
¢ to open the drop-down list to view the values for each setting.
£ and ¤ keys to highlight the desired option, and then
press
x or · to select the value.
Make Default.
The Apply and Save as Default dialog box opens.
OK to save the settings as default settings that will be applied to
all TI-Nspire™ documents and to Scratchpad.
Changing Document Settings in a TI-Nspire™ Document
Complete the following steps to change document settings for an open
TI-Nspire™ document. You can apply the settings to the current
document only or choose to make the settings the default settings for
the open document and all future documents.
Configuring Handhelds 71
Page 78

1. From an open document, press c52 (c > Settings >
Document Settings
The Document Settings dialog box opens.
).
2. Press
3. When you reach the desired setting, press
4. Press the
5. Click OK or press
e to move through the list of settings. Press £ to move
backward through the list.
A bold line around a box indicates it is active.
¢ to open the drop-down
list to view values for each setting.
and keys to highlight the desired option, and then
press x or · to select the value.
x or · to apply the new settings to the open
document.
The Home screen opens and the new settings are only applied to the
open document.
To a pply th e new settings to the open doc ument and to documents
created in the future:
•Select
•Click
Make Default and press x or ·.
OK to apply the settings to any open documents and save the
settings as defaults for new documents and for Scratchpad.
Restoring Document Settings
Complete the following steps to restore the original factory settings to
open or new documents and to the Scratchpad.
1. From the Home screen, press
Settings
The Document Settings dialog box opens.
).
52 (Settings > Document
72 Configuring Handhelds
Page 79

2. Use the Touchpad or press e to select Restore, and then press
·.
The Restore Defaults dialog box opens.
3. Click OK to restore settings to the factory default settings.
4. Press OK or d to return to the Home screen.
Customizing Graphs & Geometry Settings
Graphs & Geometry settings control how information is displayed in
open problems and in subsequent new problems. When you customize
application settings, your selections become the default settings for all of
your work in the Graphs &Geometry application.
Complete the following steps to change the Graphs & Geometry Settings
and make these settings the default for all new graphs and geometry
documents and Scratchpad.
1. Open a document with the Graphs or Geometry application active.
2. Press
b9 (b > Settings).
The Graphs & Geometry Settings dialog box opens.
Configuring Handhelds 73
Page 80

3. Press e to move through the list of settings. Click ¢ to open the
drop-down list to view the values for each setting.
Field Val ues
Display Digits Auto
Float
Float1 - Float12
Fix0 - Fix12
Graphing Angle Auto
Radian
Degree
Gradian
Geometry Angle Auto
Radian
Degree
Gradian
4. Press
5. In the lower half of the dialog, select a check box to enable an option
74 Configuring Handhelds
¤ to view the values, and then press x or · to select a
value.
or clear a check box to disable an option.
Check box Operation when selected
Automatically hide
plot labels
Show axis end values Displays a numeric label at
Show tool tips for
function manipulation
Automatically find a
point of interest
Plot labels display only when
a plot is hovered, selected,
or grabbed.
the least and greatest values
visible on an axis.
Shows helpful information
as you manipulate function
graphs.
Shows zeros, minima, and
maxima for graphed
functions and objects while
tracing function graphs.
Page 81

6. Choose one of the following options:
•To apply the customized settings to ALL graphs and geometry
documents, click Make Default. When the Apply and Save as
Default dialog box opens, click
•To apply the settings to the open document only, click
•To restore default settings, click Restore. When the Restore
Defaults dialog box opens, click OK.
•Click Cancel to close the dialog box without making changes.
OK.
OK.
Viewing Handheld Status
The Handheld Status screen provides the following information about
the current state of the handheld:
• Status of the AAA and the rechargeable batteries
•Software version
•Available space
•Network (if any)
•Your student login name and whether you are logged in
•About
Opening the Handheld Status Screen
1. From the Home screen, press 54 (Settings > Status).
Handheld Status screen opens.
The
2. Click
OK to close the Handheld Status screen.
Viewing Handheld Details
The About screen provides additional information about the handheld
type, the operating system (OS) version, and the product ID.
Configuring Handhelds 75
Page 82

1. From the Home screen, press 54 (Settings > Status).
Lock in OFF position.
Handheld Status screen opens.
The
2. Click About to view details about the handheld.
3. Click
4. Click OK to return to the Home screen.
OK to close the About dialog box.
Using Wireless Communication Hardware
Tea chers using TI-Nspir e™ Navigator™ Teach er Sof t ware in the clas sro om
can use TI-Nspire™ Navigator™ Cradles to establish a wireless connection
between the teacher computer and any TI-Nspire™ handheld.
Attaching a Wireless Cradle to a Handheld
The TI-Nspire™ Navigator™ Cradles can be used with all TI-Nspire™
handhelds to wirelessly connect to the teacher computer. To connect a
handheld to a cradle:
1. Slide the lock on the back of the cradle to the OFF position.
76 Configuring Handhelds
Page 83

2. To attach the handheld, face the screen upward and slide the
Lock in ON position.
handheld onto the top of the TI-Nspire™ Navigator™ wireless cradle.
Be sure that both sides of the handheld are inserted into both of the
side guides.
3. Press firmly to make a good connection. When properly connected,
the TI-Nspire™ handheld appears to be sitting on top of the cradle.
4. Lock the handheld in place by sliding the lock on the back of the
cradle to the ON position.
Configuring Handhelds 77
Page 84

78 Configuring Handhelds
Page 85

Connecting Handhelds and Transferring
TI-Nspire™ USB connection
cable to connect handheld to
a computer.
TI-Nspire™ handheld mini-USB
cable to connect two
TI-Nspire™ handhelds.
Files
This chapter describes how to connect one TI-Nspire™ handheld to
another, how to connect handhelds to a computer, and how to transfer
files between them.
The TI-Nspire™ handhelds have a USB port that enables connectivity with
another TI-Nspire™ handheld or with a computer.
Note: When using the TI-Nspire™ TI-84 Plus keypad, you can connect
with another TI-Nspire™ handheld using the TI-Nspire™ TI-84 Plus
keypad or a TI-84 Plus using the USB port or the I/O port.
Connecting Handhelds
Using USB Cables
You c an u se U SB c ab le s t o c on ne ct t wo T I- Ns pir e™ h an dh el ds , to c on ne ct
a TI-Nspire™ handheld to a computer, or to connect one TI-Nspire™
handheld using TI-Nspire™ TI-84 Plus keypad to another.
Connecting Two TI-Nspire™ Handhelds with the Mini-USB
Cable
You c an c on ne ct tw o ha nd he ld s as l ong a s bo th h an dh el ds ar e us ing t he
same keypad. You cannot connect a handheld using the TI-Nspire™ TI-84
Plus keypad to a handheld using the native TI-Nspire™ keypad.
Connecting Handhelds and Transferring Files 79
Page 86

The TI-Nspire™ handheld USB
Port for
connecting a
wireless
adapter
USB port on the
CX handheld
port is located in the center on
the top of the TI-Nspire™
handheld.
The USB port is located on the top
of the TI-Nspire™ CX handheld on
the right side when holding the
handheld with the screen facing
you.
To con nect t he h andhel ds:
1. Firmly insert either end of the mini-USB cable into the USB port.
2. Insert the other end of the cable into the receiving handhelds’s USB
port.
Connecting the TI-Nspire™ Handheld to a Computer
1. Firmly insert the mini-USB end of the cable into the port at the top
of your handheld.
2. Firmly insert the USB end of the cable into the USB port of the
computer.
Transferri ng F il es t o and fro m Handhel ds
You c an se nd d oc um en ts, O pe rat in g System (OS) files, and folders to
another TI-Nspire™ handheld.
80 Connecting Handhelds and Transferring Files
Page 87

Rules for Transferring Files and Folders
•You can transfer documents and OS files.
•Operating systems are not interchangeable between different
handheld types. For example, you cannot transfer a CAS operating
system to a non-CAS handheld.
•If a document with the same name as the one you are sending
already exists on the receiving handheld, the document will be
renamed. The system appends a number to the name to make it
unique. For example, if Mydata existed on the receiving handheld, it
would be renamed Mydata(2).
Both the sending and receiving handhelds will display a message that
shows the new name.
•There is a 255-character maximum length for a file name, including
the entire path. If a transmitted file has the same name as an existing
file on the receiving handheld and the file names contain 255
characters, the name of the transmitted file will be truncated to
enable the software to follow the renaming scheme described in the
previous paragraph.
•All variables associated with the document being transmitted are
transferred with the document.
•Transmissions will time out after 30 seconds.
Caution: Some older TI-Nspire™ handhelds cannot receive folders; only
files. If you receive an error in sending to an older TI-Nspire™ handheld,
see Common error and notification messages.
Sending a Document or Folder to Another Handheld
1. Ensure the two handhelds are connected.
2. Open the My Documents file browser and navigate to the file or
folder you want to transfer.
3. Press the and keys on the Touchpad to highlight the document or
folder you want to send.
4. Press ~16 to select Send from the Documents menu.
TI-Nspire™ handheld: Press
5. The file transfer begins. A progress bar shows the status of the
transfer. There is also a cancel button in the Sending... dialog box to
enable you to cancel the transmission while it is in progress.
~1 6.
Connecting Handhelds and Transferring Files 81
Page 88

At the end of a successful transmission, the message
“<Folder / File name> transferred as <Folder / File name>.” is
displayed. If the file had to be renamed on the receiving handheld,
the message will show the new file name.
Receiving a Document or Folder
No action is required by the user of the receiving TI-Nspire™ handheld.
Handhelds are automatically powered on when the cable is attached.
At the end of a successful transmission, the message “<Folder / File
name> received.” is displayed. If the file had to be renamed, the message
will show the new file name.
Caution: Some older TI-Nspire™ handhelds cannot receive folders; only
files. If you receive an error in sending to an older TI-Nspire™ handheld,
see Common error and notification messages.
Canceling a Transfer
1. To cancel a transmission in progress, press Cancel on the sending
handheld. The user of either handheld can also press
TI-Nspire™ handheld: press
d.
d.
2. Press
d or · to cancel the transmission error message.
TI-Nspire™ handheld: press d or ·.
Transfer ri ng F il es B et we en Comput er s an d
Handhelds
In the Documents Workspace, teachers and students can use the “drag
and drop” method to quickly transfer files and folders from a computer
to a handheld or transfer files from a handheld to a computer.
1. Connect the handheld to the computer using a standard A to mini-B
USB cable.
2. In the TI-Nspire™ software, open the Documents Workspace.
3. In the Documents Toolbox, click to open the Content Explorer.
82 Connecting Handhelds and Transferring Files
Page 89

4. Navigate to the folder that contains the file you want to transfer.
Computer panel
Connected Handhelds
•To transfer a file from a handheld to the computer, click the file,
and then drag the file to a folder in the Computer panel.
•To transfer a file from the computer to a handheld, click the file,
and then drag the file to a connected handheld.
Note: Those using the TI-Nspire™ Teacher Software or the TI-Nspire™
Navigator™ Teacher Software can also use options in the Content
Workspace to transfer files from a handheld to a computer.
Using the Save to Handheld Option
In the Documents Workspace, you can also use the Save to Handheld
option on the File menu to transfer a file to a connected handheld when
you want to save a file to a specific folder on the handheld.
1. Ensure the handheld is connected to the computer.
2. In the Computer panel, navigate to the folder where the file is
located.
3. Click the file.
Connecting Handhelds and Transferring Files 83
Page 90

4. Click File > Save to Handheld. The Save to Handheld dialog box
opens.
5. Double-click the handheld name, and then navigate to the folder
where you want to save the file.
6. Click Save. The file is saved to the selected folder and the Save to
Handheld dialog box closes.
Handling Errors Resulting from Sending Folders
If you receive an error after attempting to send a file, it may mean the
receiving handheld has an operating system that does not support the
transfer. To resolve this, update the receiving handheld’s OS and try the
send again.
84 Connecting Handhelds and Transferring Files
Page 91

Common Error and Notification Messages
“This folder structure is not
supported on the receiving
handheld. The receiving
handheld’s OS may need to
be updated, which you can
do by selecting Send OS
from the My Documents
menu.”
OK
“Transfer failed. Check cable
and try again.“
OK
Shown on Message and Description
Sending handheld
If you get an error when sending a folder to an
older TI-Nspire™ handheld, try updating the OS on
the receiving handheld. If the error persists, you
may have to send the files individually.
Sending handheld
This message is displayed if a cable is not attached
to the sending handheld’s link port. Remove and
then reinsert the cable and try the document
transmission again.
OK to cancel the transmission message.
Click
Note: The sending handheld may not always
display this message. Instead, it may remain BUSY
until you cancel the transmission.
Connecting Handhelds and Transferring Files 85
Page 92

Shown on Message and Description
“Receiver does not have enough
storage space for file transfer.“
OK
“<folder>/<filename>
transferred as
<folder>/<filename(#).“
Sending handheld
This message indicates that the receiving handheld
does not have enough memory to accept the file
being transmitted.
The user of the receiving handheld must free space
to obtain the new file. To do this:
•Delete unneeded files.
•Store files on a computer for later retrieval,
and then delete them from the TI-Nspire™
handheld.
Sending handheld
This message is displayed at the end of a successful
transfer when the file had to be renamed because
a file already exists on the receiving handheld with
the original name. The transmitted file is renamed
by appending a number to the end of the name.
Rename numbering always begins with (2) and can
increment by one, as needed.
86 Connecting Handhelds and Transferring Files
Page 93

Shown on Message and Description
“<folder>/<filename>
<folder>/<new filename>.“
transferred as
“<folder>/<filename(x)>
received.“
“<new folder>/<new filename>
received.“
Sending handheld
This message indicates that a new folder was
created on the receiving handheld to contain the
transmitted document.
Receiving
handheld
This message indicates that the receiving handheld
has a document with the same name as the
document being sent.
Receiving
handheld
This message indicates that a new folder has been
created to contain the transmitted document.
Connecting Handhelds and Transferring Files 87
Page 94

Shown on Message and Description
“Transfer failed. Check cable
and try again.“
OK
Receiving
handheld
This message indicates that the cable is not
correctly attached to the receiving handheld’s link
port. Remove the cable then reattach it and try the
transmission again.
OK to cancel the transmission message.
Click
88 Connecting Handhelds and Transferring Files
Page 95

Memory and File Management
The TI-Nspire™ Handheld comes equipped with 64 MB of memory. Of the
total memory, 32 MB is dedicated to Flash storage and 32 MB is RAM.
When the operating system is loaded, and as documents are created and
stored on the handheld, memory is used and you may find that you need
to free or restore memory after several months of use. If there is
insufficient memory on the handheld, use one of the following options
to restore space on the handheld:
• Delete documents and folders you no longer use.
•Back up files and folders to another handheld or computer.
•Reset the memory, which deletes ALL files and folders on the
handheld.
Checking Available Memory
Complete the following steps to view the amount of memory (in bytes)
used by all documents and variables on your handheld.
1. From the Home screen, select Status from the
Press c54.
The Handheld Status window opens.
Settings menu.
2. View the Available Space field to determine how much memory is
available on the handheld.
3. Click
OK to return to the Home screen.
Memory and File Management 89
Page 96

Freeing Memory
To f ree or r ecover memory, de lete documents and/or folders from the
handheld. To keep the documents and folders for later use, transfer them
to another handheld or to a computer using the TI-Nspire™ software.
Deleting Files from the Handheld
1. Press c2 to open the My Documents file browser.
2. Press
3. Press
4. Press
£ or ¤ to select the folder or document you want to delete.
..
—or—
/b6.
Press
A dialog box opens, asking you to confirm the deletion.
·to confirm or d to cancel.
The folder/document is permanently removed from the handheld.
Backing up Files to Another Handheld
1. Connect the two handhelds using the USB-to-USB connectivity cable.
2. Press c2 to open My Documents on the sending handheld.
3. Press the and keys to highlight the document you want to send.
4. Press
5. When the file transfer is complete, a message is displayed on the
90 Memory and File Management
b, and then select Send.
—or—
/b2.
Press
receiving handheld.
Page 97

Transferring File s t o a C om pu ter
Computer
pane
Connected
Handhelds
pane
Use the TI-Nspire™ software to transfer files and folders from a handheld
to a computer.
1. Connect your handheld to the computer using a standard A to mini-B
USB cable.
2. In the TI-Nspire™ software, open the Documents Workspace.
3. In the Documents Toolbox, click to open the Content Explorer.
4. In the Computer pane, navigate to the folder in which you want to
save the files.
5. In the Connected Handhelds pane, double-click the handheld name
to view the folders and files on the handheld.
Memory and File Management 91
Page 98

6. Select the file or folder you want to save to the computer.
•Click the file to select one file or folder at a time.
•To select all files on the handheld, select the first file in the list,
hold down the Shift key, and then click the last file or folder in
the list.
•To select random files, click the first file, and then hold the Ctrl
key while selecting additional files.
Note: If you select multiple files, it is saved as lesson bundle (.tilb file).
7. Drag the files to the folder in the Computer pane.
—or—
Select
File > Save as.
The files are copied to the folder on the computer.
8. Verify that the files you need are available on your computer, and
then delete the files from the handheld.
Note: Those using the TI-Nspire™ Teacher Software or the TI-Nspire™
Navigator™ Teacher Software can also use options in the Content
Workspace to copy files from a handheld to a computer.
Resetting the Memory
Complete these steps only if you want to delete ALL files and folders on
your handheld.
Caution: Before you reset all memory, consider restoring sufficient
available memory by deleting only selected data. If you reset all memory,
the pre-installed applications on your handheld will remain, but any
applications that have been downloaded in TI-84 mode will be deleted.
1. After making certain you want to clear all files, press
open the
92 Memory and File Management
My Documents file browser.
c2 to
Page 99

2. Press b to open the context menu.
3. Select
Delete All.
—or—
Press C.
The Data Loss dialog box opens.
4. Click
OK to confirm that you want to clear the handheld memory.
Memory and File Management 93
Page 100

94 Memory and File Management
 Loading...