


Teacher software
Guidebook
This guidebook applies to TI-Nspire™ software version 3.0. To obtain the
latest version of the documentation, go to education.ti.com/guides.

Important Information
Except as otherwise expressly stated in the License that accompanies a
program, Texas Instruments makes no warranty, either express or
implied, including but not limited to any implied warranties of
merchantability and fitness for a particular purpose, regarding any
programs or book materials and makes such materials available solely on
an "as-is" basis. In no event shall Texas Instruments be liable to anyone
for special, collateral, incidental, or consequential damages in connection
with or arising out of the purchase or use of these materials, and the sole
and exclusive liability of Texas Instruments, regardless of the form of
action, shall not exceed the amount set forth in the license for the
program. Moreover, Texas Instruments shall not be liable for any claim of
any kind whatsoever against the use of these materials by any other
party.
FCC Statement
Note: This equipment has been tested and found to comply with the
limits for a Class B digital device, pursuant to Part 15 of the FCC Rules.
These limits are designed to provide reasonable protection against
harmful interference in a residential installation. This equipment
generates, uses and can radiate radio frequency energy and, if not
installed and used in accordance with the instructions, may cause
harmful interference to radio communications. However, there is no
guarantee that interference will not occur in a particular installation.
If this equipment does cause harmful interference to radio or television
reception, which can be determined by turning the equipment off and
on, the user is encouraged to try to correct the interference by one or
more of the following measures:
• Reorient or relocate the receiving antenna.
• Increase the separation between the equipment and receiver.
• Connect the equipment into an outlet on a circuit different from
that to which the receiver is connected.
• Consult the dealer or an experienced radio/TV technician for help.
License
Please see the complete license installed in C:\Program Files\TI
Education\TI-Nspire CAS.
© 2006 - 2011 Texas Instruments Incorporated
Macintosh®, Windows®, Excel®, PowerPoint®, Microsoft® Internet
Explorer®, Mozilla® FireFox®, Java™, Google® Chrome®, Apple®
Safari®, Vernier EasyLink®, EasyTemp®, Go!Link®, Go!Motion®,
Go!Temp®, DataQuest™, and Blackboard™ are trademarks of their
respective owners.
ii

iii

iv

Contents
Important Information................................................................... ii
Getting started with TI-Nspire™ Software ...........................1
Using the Welcome screen............................................................. 1
Exploring the Content workspace................................................. 3
Exploring the Documents workspace............................................ 4
Changing language........................................................................ 9
Getting help.................................................................................... 9
Updating your software............................................................... 13
About the software...................................................................... 16
Using the Content Workspace..............................................19
Exploring the Content workspace............................................... 19
Using the tool bar ........................................................................ 20
Locating resources........................................................................ 21
Exploring the Content pane ........................................................ 22
Working with Links ...................................................................... 26
Using Web Content...................................................................... 28
Working with lesson bundles ...................................................... 32
Working with connected handhelds........................................... 40
Using Identify Selected to locate handhelds .............................. 47
Renaming handhelds ................................................................... 48
Using Screen Capture in the Content workspace....................... 48
Using the Documents Workspace ........................................51
Exploring the Documents workspace.......................................... 51
Exploring the menu bar and the tool bar...................................52
Using the Documents Toolbox..................................................... 61
Using the workspace.................................................................... 70
Viewing and changing document settings................................. 71
Sending files to a handheld......................................................... 75
Working with Lesson Bundles...................................................... 75
Using Screen Capture................................................................... 82
Updating the handheld OS.......................................................... 83
Working with TI-Nspire™ documents..................................87
About documents......................................................................... 87
Managing TI-Nspire™ documents............................................... 88
Using Content Explorer to locate files ........................................ 90
Saving a document to a connected handheld............................ 92
v

Working with multiple documents..............................................95
Working with applications...........................................................96
Selecting and moving pages with the Page Sorter...................100
Working with problems and pages ...........................................102
Using Utilities in documents ......................................................104
Using colors in documents .........................................................108
Using Screen Capture .................................................................109
Printing documents ....................................................................111
Viewing document properties and copyright information...... 112
Working with Images......................................................... 115
TI-Nspire™ applications that can accept images ......................115
Image types available.................................................................117
Inserting the image ....................................................................117
Working with images .................................................................120
Technical considerations.............................................................122
Working with PublishView™ documents ......................... 123
Software requirements...............................................................123
Creating a new PublishView™ document.................................124
Saving PublishView™ documents..............................................129
Exploring the Documents workspace........................................130
Working with PublishView™ objects ........................................134
Working with TI-Nspire™ applications......................................140
Working with problems .............................................................144
Organizing PublishView™ sheets..............................................146
Adding text to a PublishView™ document...............................151
Using hyperlinks in PublishView™ documents .........................153
Working with images .................................................................158
Working with video files............................................................160
Converting documents ...............................................................162
Printing PublishView™ documents ...........................................165
Embedding documents in web pages ............................... 167
Using embedded web pages......................................................167
Viewing embedded web pages .................................................167
Using TI-Nspire™ HTML Inline Frames ......................................168
Using dynamically-generated iframes.......................................171
Using the TI-Nspire™ Document Player ....................................172
Exporting to a web page............................................................172
Customizing an embedded TI-Nspire™ Document Player .......175
Using Export to generate HTML source code ...........................179
Exporting HTML to the clipboard..............................................184
vi

Storing and sharing your documents........................................ 185
Launching a dedicated TI-Nspire™ Document Player
window ................................................................................. 188
.............................................................................................189
Using the Scratchpad..........................................................191
Opening and closing the Scratchpad ........................................ 191
Calculating with the Scratchpad ............................................... 192
Inserting items from the Catalog .............................................. 193
Viewing the history.................................................................... 197
Editing Scratchpad expressions ................................................. 198
Graphing with the Scratchpad .................................................. 199
Working with variables in the Scratchpad................................ 203
Saving the Scratchpad contents ................................................ 203
Clearing Scratchpad contents.................................................... 204
.............................................................................................204
Calculator ............................................................................205
Getting started with the Calculator application ...................... 205
Calculator menu ......................................................................... 206
Entering and evaluating math expressions .............................. 212
Working with variables.............................................................. 220
CAS: Working with measurement units.................................... 221
Creating user-defined functions and programs ....................... 223
Editing Calculator expressions................................................... 227
Financial calculations ................................................................. 228
Working with the Calculator history......................................... 230
Using Variables ...................................................................233
Linking values on pages............................................................. 233
Creating variables....................................................................... 233
Using (linking) variables............................................................. 239
Naming variables........................................................................ 241
Locking and unlocking variables............................................... 243
Graphs & Geometry ............................................................247
Getting started with Graphs & Geometry................................. 247
Graphs & Geometry menu ......................................................... 248
Using keystroke shortcuts.......................................................... 258
Using the context menu............................................................. 259
Using the work area................................................................... 260
vii

Graphs & Geometry views..........................................................268
Using the Graphing View...........................................................269
Customizing the work area........................................................270
Adjusting variable values with a slider......................................273
Using the Trace tools ..................................................................276
Working with relations ..............................................................278
Using the Plane Geometry View................................................302
Graphing 3D functions ...............................................................341
Using Lists & Spreadsheet.................................................. 349
Getting started with tabular data .............................................349
The menu and work area...........................................................350
Creating and sharing spreadsheet data as lists.........................354
Creating spreadsheet data.........................................................356
Working with cells......................................................................359
Working with rows and columns of data..................................362
Sorting data ................................................................................365
Generating columns of data ......................................................365
Graphing spreadsheet data........................................................369
Exchanging data with other computer software .....................372
Capturing data from Graphs & Geometry.................................374
Using table data for statistical analysis .....................................377
Statistics Input Descriptions .......................................................378
Statistical calculations.................................................................380
Distributions................................................................................ 384
Confidence Intervals...................................................................389
Stat Tests......................................................................................391
Working with function tables....................................................396
Using Data & Statistics ....................................................... 399
Data & Statistics menu................................................................400
Getting started with the Data & Statistics application.............405
Overview of raw and summary data .........................................409
Working with numeric plot types..............................................410
Working with categorical plot types .........................................419
Exploring data.............................................................................427
Using Window/Zoom tools.........................................................436
Graphing Functions ....................................................................437
Using Graph Trace.......................................................................442
Customizing your workspace.....................................................443
Adjusting variable values with a slider......................................444
Inferential Statistics ....................................................................448
viii

Using Notes .........................................................................451
Getting started with the Notes application.............................. 451
Using templates.......................................................................... 453
Formatting text in Notes............................................................ 455
Using color in Notes ................................................................... 456
Inserting Images ......................................................................... 457
Inserting math expressions, shapes, or comments ................... 458
Entering math expressions......................................................... 460
Evaluating and approximating math expressions.................... 461
Deactivating math expression boxes......................................... 463
Changing the attributes of math expression boxes ................. 464
Using calculations in Notes........................................................ 464
Using hints on the handheld ..................................................... 467
Exploring Notes with examples................................................. 467
Using Question in the Teacher Software ...........................473
Understanding the Question Tool Palette................................ 473
Understanding the configuration tool ..................................... 474
Using the Teacher Tool Palette.................................................. 475
Adding images to questions...................................................... 476
Adding questions ....................................................................... 477
Using Question for Students ..............................................487
Accessing the Question Toolbar ................................................ 487
Understanding the Question toolbar........................................ 487
Navigating in the Question application.................................... 487
Types of questions...................................................................... 488
Answering questions.................................................................. 488
Libraries...............................................................................497
What is a library?........................................................................ 497
Creating libraries and library objects........................................ 497
Private and Public library objects .............................................. 498
Using library objects................................................................... 499
Creating shortcuts to library objects......................................... 500
Included libraries........................................................................ 501
Restoring an included library .................................................... 501
Changing the library folder location (computer only)............. 502
Programming ......................................................................503
Overview of the Program Editor ............................................... 503
Program Editor menu................................................................. 504
Defining a program or function................................................ 507
ix

Viewing a program or function.................................................510
Opening a function or program for editing .............................511
Importing a program from a library..........................................511
Creating a copy of a function or program................................512
Renaming a program or function..............................................512
Changing the library access level...............................................513
Finding text.................................................................................513
Finding and replacing text.........................................................513
Closing the current function or program..................................514
Running programs and evaluating functions...........................514
Getting values into a program...................................................517
Displaying information...............................................................519
Using local variables ...................................................................520
Differences between functions and programs .........................521
Calling one program from another...........................................522
Controlling the flow of a function or program........................524
Using If, Lbl, and Goto to control program flow......................524
Using loops to repeat a group of commands ...........................526
Changing mode settings ............................................................530
Debugging programs and handling errors ...............................531
Data Collection and Analysis............................................. 533
Chapter organization .................................................................533
Introduction and navigation......................................................534
Using a computer or handheld..................................................535
Navigating the screens ...............................................................536
Selecting views............................................................................540
Performing an experiment.........................................................541
Experiment Details......................................................................544
Starting a new document or problem.......................................544
Connecting a sensor ...................................................................546
Data collection devices...............................................................546
Setting and using a collection mode.........................................548
Modifying sensor settings ..........................................................554
Starting a data collection...........................................................556
Using the Keep option ...............................................................556
Stopping a collection..................................................................558
Analyzing data............................................................................558
Examining data points................................................................558
Data analysis calculations...........................................................562
Removing analysis options.........................................................569
Examining the View Details area data ......................................569
Showing and hiding details .......................................................572
x

Storing data................................................................................ 573
Saving an experiment ................................................................ 573
Working with data and Graph View......................................... 573
Showing graphs.......................................................................... 574
Adding a title to a graph........................................................... 577
Setting min and max axis ranges............................................... 578
Selecting a Data Set to plot....................................................... 581
Using autoscale...........................................................................582
Using zoom in and zoom out .................................................... 583
Selecting a range........................................................................ 584
Setting the point display............................................................ 585
Selecting an independent variable column.............................. 588
Selecting a dependent variable column ................................... 588
Working with data and Table View ..........................................589
Defining column options ........................................................... 589
Changing a data set name......................................................... 592
Adding a new manual column .................................................. 593
Adding a calculated column...................................................... 594
Creating a new data set............................................................. 597
Using advanced data collection options................................... 597
Setting up an offline sensor ...................................................... 597
Selecting a remote collection unit ............................................ 598
Collecting remote data .............................................................. 600
Retrieving remote data.............................................................. 603
Setting up Triggering................................................................. 604
Working with advanced analysis features ................................ 606
Replaying the data collection.................................................... 607
Striking and restoring data........................................................ 609
Adjusting derivative settings..................................................... 614
Drawing a predictive plot.......................................................... 615
Using Motion Match .................................................................. 616
Examining graphs using Page Layout .......................................617
Printing data views..................................................................... 622
Using sensors and data with other Apps .................................. 624
Reference of Menus ................................................................... 631
Using the TI-SmartView™ emulator ..................................647
Opening the TI-SmartView™ emulator ................................... 647
Choosing a keypad..................................................................... 649
Choosing a display option ......................................................... 649
Changing the size of the TI-SmartView™ panel and
side screen............................................................................. 649
Working with the emulated handheld ..................................... 650
xi

Using the Touchpad....................................................................651
Using the Clickpad......................................................................651
Using settings and status............................................................652
Changing TI-SmartView™ options ............................................652
Working with documents...........................................................653
Using Screen Capture .................................................................654
Appendix: Service and Support......................................... 655
Texas Instruments Support and Service ..................................... 655
Service..........................................................................................655
Battery Precautions.....................................................................655
Index ................................................................................... 657
xii
Getting started with TI-Nspire™ Software
TI-Nspire™ software enables students and teachers to use PC and MAC®
computers to perform the same functions as on a handheld. This
document covers the following TI-Nspire™ software:
• TI-Nspire™ Teacher Software
• TI-Nspire™ Student Software
• TI-Nspire™ CAS Teacher Software
• TI-Nspire™ CAS Student Software
Note: When there are differences between the software, those
differences are described.
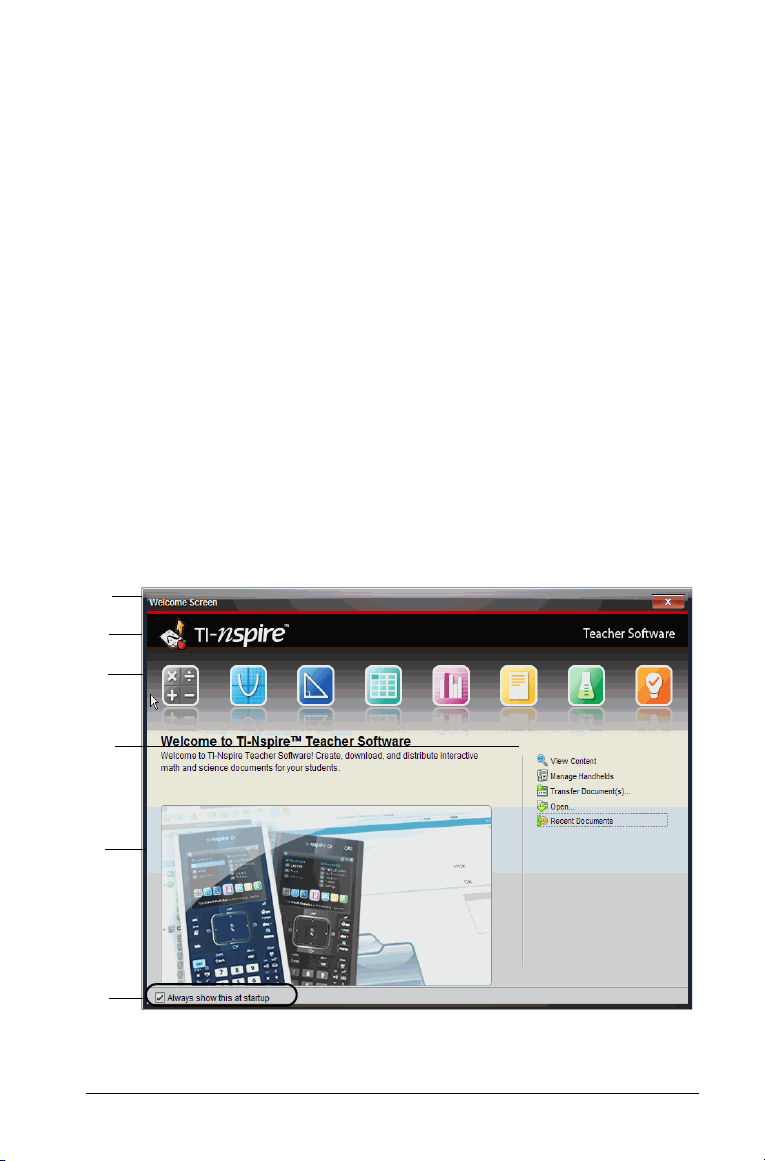
Using the Welcome screen
By default, the Welcome Screen opens the first time you start the
software after installation is complete. To begin working with
documents, click an icon or link, or close this screen manually. Any normal
action that takes place automatically, such as upgrade prompts or the
ability to begin using connected handhelds, appears after you close the
Welcome Screen.
À
Á
Â
Ã
Ä
Å
À Title bar. Shows the screen name. The close button is also located
here.
Getting started with TI-Nspire™ Software 1

Á Name. Shows software name.
 TI-Nspire™ applications. Click one of these icons to create a new
document with the selected application active. The icon applications
are Calculator, Graphs, Geometry, Lists & Spreadsheet, Data &
Statistics, Notes, and the Vernier DataQuest™ application. The icon
for the Question application also appears in this space in the
TI-Nspire™ Teacher Software. When you click an icon, the Welcome
Screen closes and the selected application opens.
à Quick Start links. Click one of these options to:
• Create a new document with the application you select as the first
page.
• Create a new, blank document.
• Find and open an existing document.
• In the TI-Nspire™ Teacher Software, teachers can use the
following links to:
– View content. Find content on your computer, the web, or
connected handhelds.
– Manage handhelds. Use the Content Workspace to see every
handheld connected to your computer as well as the status of
each handheld.
– Transfer documents. Use the Content Workspace to send
documents, folders, or new handheld OS files to connected
handhelds.
Ä Preview area. When you move your mouse pointer over the icons, a
definition and example of the selected application is displayed.
Å Always show this at startup. Deselect this checkbox to skip this
screen when you open your software.
Closing the Welcome screen
To access the default workspace and begin working with documents,
click to close the Welcome Screen. To open the Welcome screen
again, click
• In the TI-Nspire™ Teacher Software, the Content workspace is
displayed when you open the software for the first time.
• In the TI-Nspire™ Student Software, the Documents workspace is the
default workspace.
Note: The next time you open the software, the last workspace used is
displayed.
2 Getting started with TI-Nspire™ Software
Help > Welcome Screen.
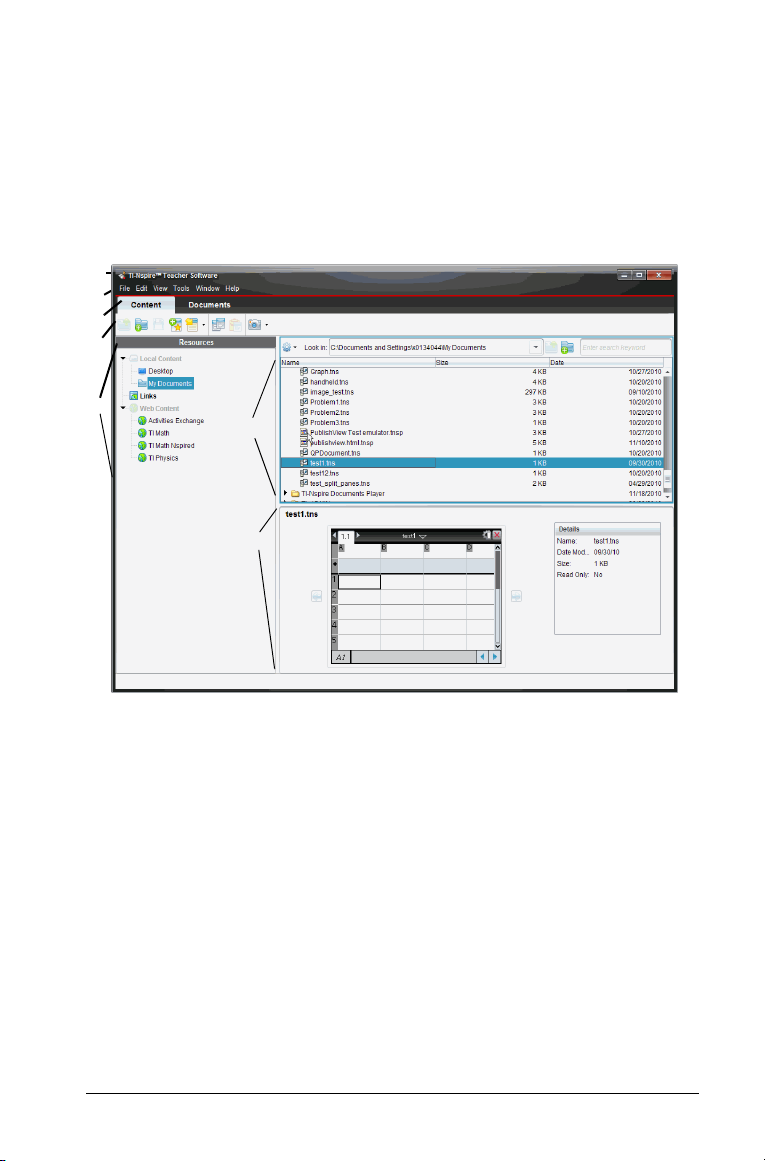
Exploring the Content workspace
À
In the TI-Nspire™ Teacher Software, the Content workspace provides
access to the files on your computer, to files on connected handhelds,
and links to web resources. Teachers can also use this workspace to create
and manage lesson bundles.
Note: Those using the TI-Nspire™ Student software will not see the
Content workspace.
Á
Â
Ã
Å
Ä
Æ
Ç
À Title bar. Shows the name of the software. The minimize, maximize,
and close buttons are located in the right corner.
Á Menu bar. Contains options used to work with files and to modify
system settings. In the Content workspace these are File, Edit, View,
Tools, Window, and Help.
 Content/Documents tabs. In the TI-Nspire™ Teacher Software, use
these tabs to switch between the Content workspace to the
Documents workspace. These tabs are not shown in the student
software.
à Tool bar. Contains shortcuts to tools used to create folders, save files,
create lesson bundles, send files to handhelds, and copy/paste.
Getting started with TI-Nspire™ Software 3

Ä Resources pane. Enables you to locate and view files on your
computer, access web links, and access files on connected handhelds.
When you select a resource, the details for that resource are displayed
in the content pane.
Å Navigation bar. Contains tools needed to search for and navigate to
folders and files on your computer, on a web site, or on a connected
handheld. When you select a resource, the options available are
specific to that resource.
Æ Content pane. Shows the content based on the resource selected.
Use the content pane as you would a file manager to locate and view
folders, lesson bundles, TI-Nspire™ documents, and PublishView™
documents on your computer or on connected handhelds. Click to
access options applicable to the selected folder or TI-Nspire™
document.
Ç Preview pane. Details about the selected file or folder are displayed
in the bottom half of the space.
Working with lesson bundles
Teachers can use lesson bundles to collect and package multiple files
needed for a lesson. Use lesson bundles to easily collect and distribute
lessons to connected handhelds or to share with other educators. For
detailed information about lesson bundles, refer to Using the Content
Workspace or Using the Documents Workspace.
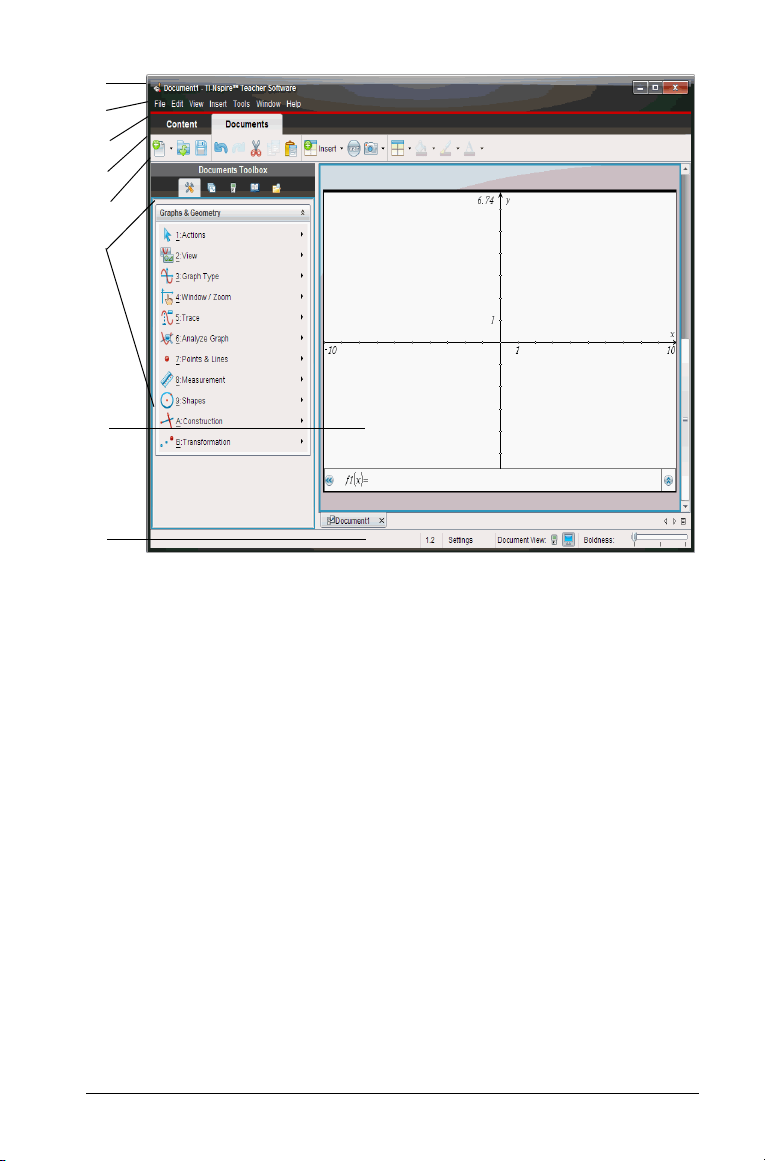
Exploring the Documents workspace
Use the Documents workspace to create or edit TI-Nspire™ and
PublishView™ documents and work with applications and problems. The
tools in the workspace are specific to working with open documents.
4 Getting started with TI-Nspire™ Software
À
Á
Â
Ã
Ä
Å
Æ
Ç
À Title bar. Shows the name of the current document and the name of
the software. The minimize, maximize, and close buttons are located
in the right corner.
Á Menu bar. Contains tools for working with documents. In the
Documents Workspace, these are File, Edit, View, Insert, Tools,
Window, and Help. In the student software, the Submit Response
option is active when a teacher sends a question to your computer.
 Workspace tabs. The name of the active workspace. In the
TI-Nspire™ Teacher Software, use the tabs to switch between the
Documents workspace and the Content workspace. In the TI-Nspire™
Student Software, the Document workspace is the only available
workspace; these tabs are not shown
à Workspace toolbar. Contains shortcuts to frequently performed tasks
such as creating new documents, opening existing documents, saving
documents, inserting applications, inserting variables, and taking
screen captures. The cut, copy, and paste icons are also located in the
toolbar.
Getting started with TI-Nspire™ Software 5
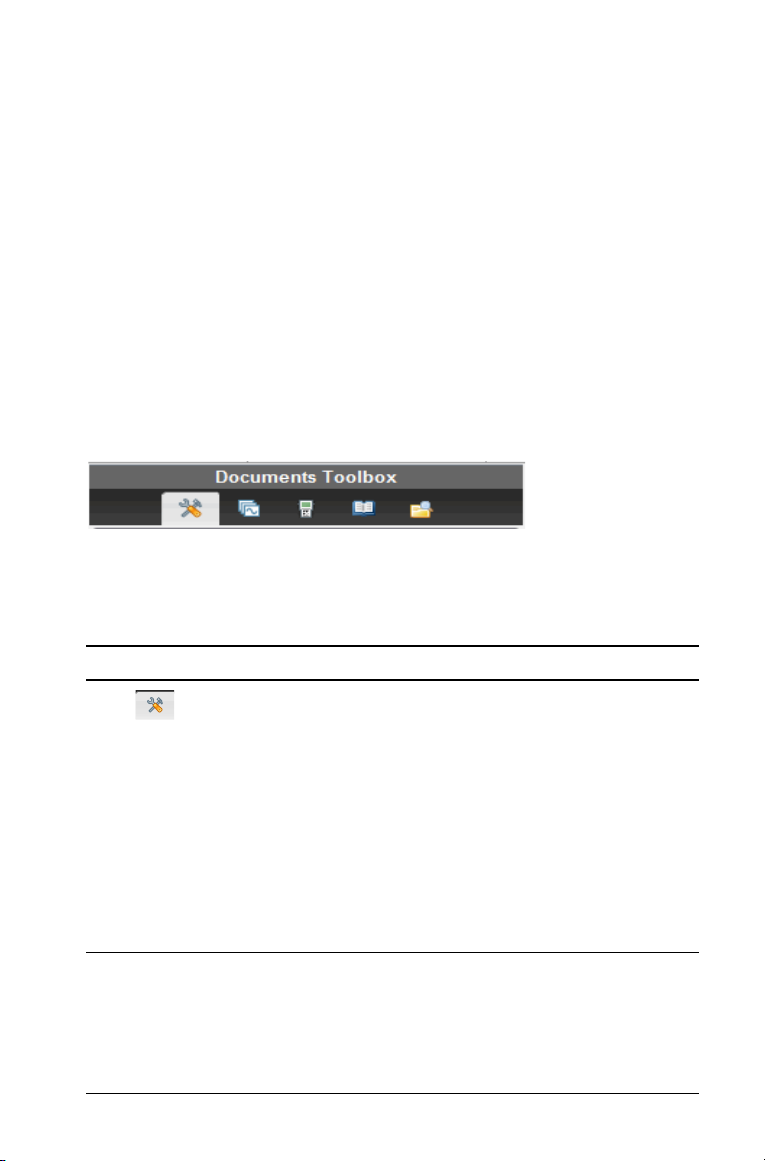
Ä Documents Toolbox. Contains tools needed to work with
TI-Nspire™ and PublishView™ documents. Use these tools to insert
applications, use the page sorter to view TI-Nspire™ documents, open
the TI-SmartView™ emulator, open Content Explorer, insert utilities
such as math templates and the symbols from the catalog, and insert
text and images into PublishView™ documents. Click each icon to
access the available tools.
Å Toolbox pane. Options for the selected tool are displayed in this area.
For example, click the Document Tools icon to access tools needed to
work with the active application.
Note: In the TI-Nspire™ Teacher Software, the tool for configuring
questions opens in this space when you insert a question. For more
information, see Using Question in the TI-Nspire™ Teacher Software
Guidebook.
Æ Workspace. Shows the current document and enables you to
perform calculations, add applications, and add problems and pages.
Only one document at a time is active (selected). Multiple documents
appear as tabs.
Ç Status bar. Provides information about the document.
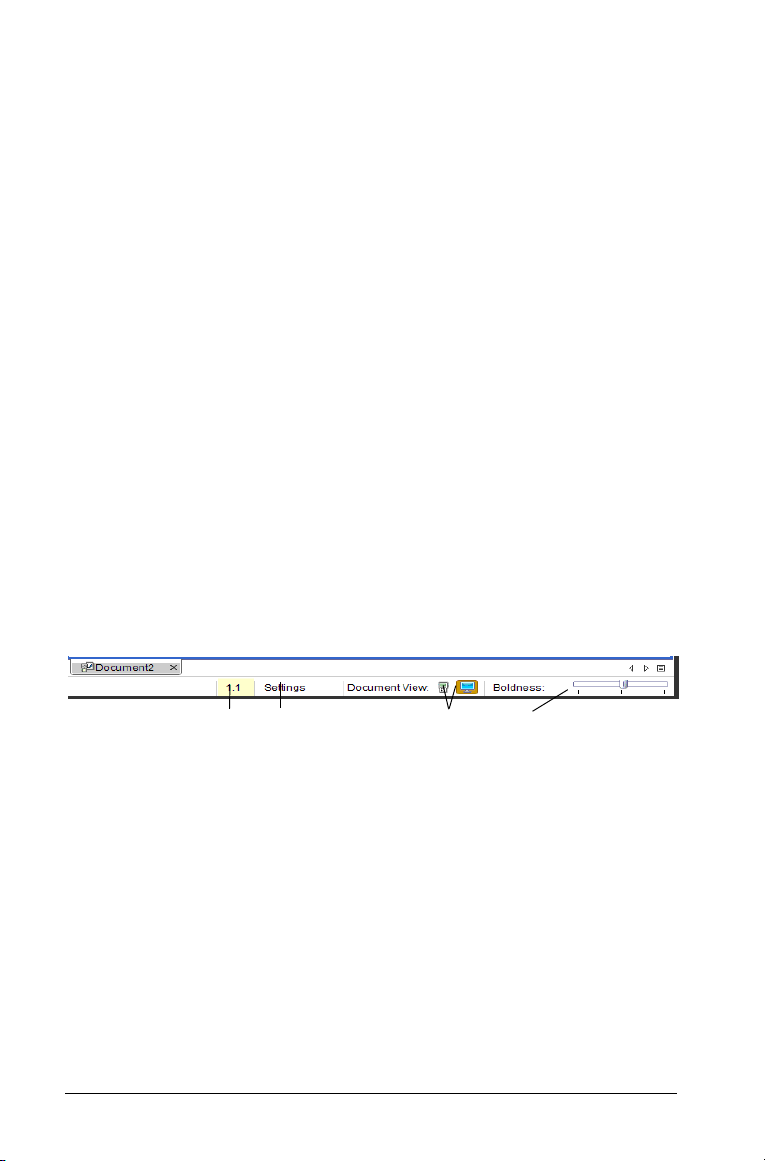
Understanding the status bar
The status bar provides information about the current document,
enables you to toggle between Handheld and Computer mode, and
adjust how the document appears in the workspace.
À
Á
Â
Ã
À Problem and page number. References current document. This is not
displayed in PublishView™ documents.
Á Settings. Current settings for Angle, Auto or Approximate, and Real
or Complex. Click here to change General or Graphs & Geometry
settings.
 Document View. Choose between Handheld and Computer modes.
• Handheld: Enables you to see documents as they appear on a
handheld screen. The screen size is limited as it would be on the
handheld.
• Computer: This is the default view in the software.
Note: These icons are disabled in a PublishView™ document.
6 Getting started with TI-Nspire™ Software
à Scale. When working with a document in computer mode, use the
Boldness slider to increase or decrease the boldness of the lines in a
document. Go to the left to decrease the boldness. Go to the right to
increase the boldness.
When working with a document in handheld mode, use the Scale
slider to control the size of the document in the workspace. Go left to
make the document smaller. Go right to make the document larger.
Teachers will find the boldness and scale sliders useful when giving
presentations. The ability to adjust the contrast or size of the
displayed document will improve visibility when the image is
projected on a screen.
Using the Documents Toolbox
The Documents Toolbox, located on the left side of the workspace,
contains tools needed for working with both TI-Nspire™ documents and
PublishView™ documents.
When you click a documents tool icon, the associated tools are displayed
in the toolbox panel. Refer to the following table for information about
each tool.
Icon What you can do
Opens the Application Menu.
In a TI-Nspire™ document, you can select tools
Document
Too ls
available for working with an application. By default,
the tools listed are specific to the application in the
active problem or page.
In a PublishView™ document, Document Tools
contains tools needed to insert TI-Nspire™
applications and TI-Nspire™ documents.
Note: For more information about PublishView™
documents, see Working with PublishView™
documents.
Getting started with TI-Nspire™ Software 7
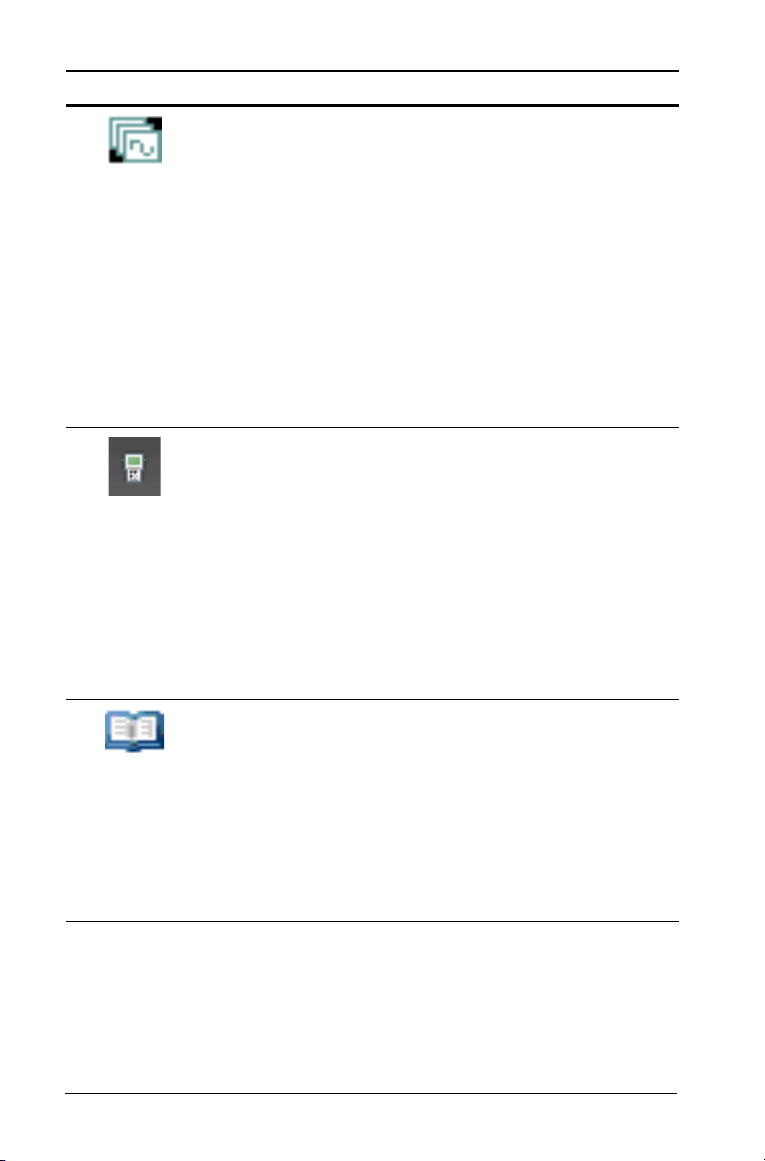
Icon What you can do
Provides a view of the pages in the active document,
which enables you to:
• See the number of problems in your document
Page Sorter
and where you are.
• Move from one page to the other by clicking on
the page you want.
• Add, cut, copy, and paste pages within the same
problem or between problems and documents.
• Add, cut, copy, and paste problems within the
same document or between documents.
Note: The Page Sorter icon is not available in a
PublishView™ document.
Teachers can use the TI-Smartview™ emulator to
demonstrate concepts on the handheld. The
TI-Smartview™ emulator works the same as the
TI-SmartView™
handheld.
Note: Content is displayed on the TI-Smartview™
small screen only when the document is in Handheld
mode.
Students can use TI-Smartview™ feature to emulate a
keypad and use the software as if using a handheld.
The TI-Nspire™ SmartView™ emulator is not available
when working in a PublishView™ document.
Provides access to the following utilities:
•Math Templates
Utilities
• Symbols
•Catalog
• Math Operators
• Unit Conversions
•Libraries
8 Getting started with TI-Nspire™ Software
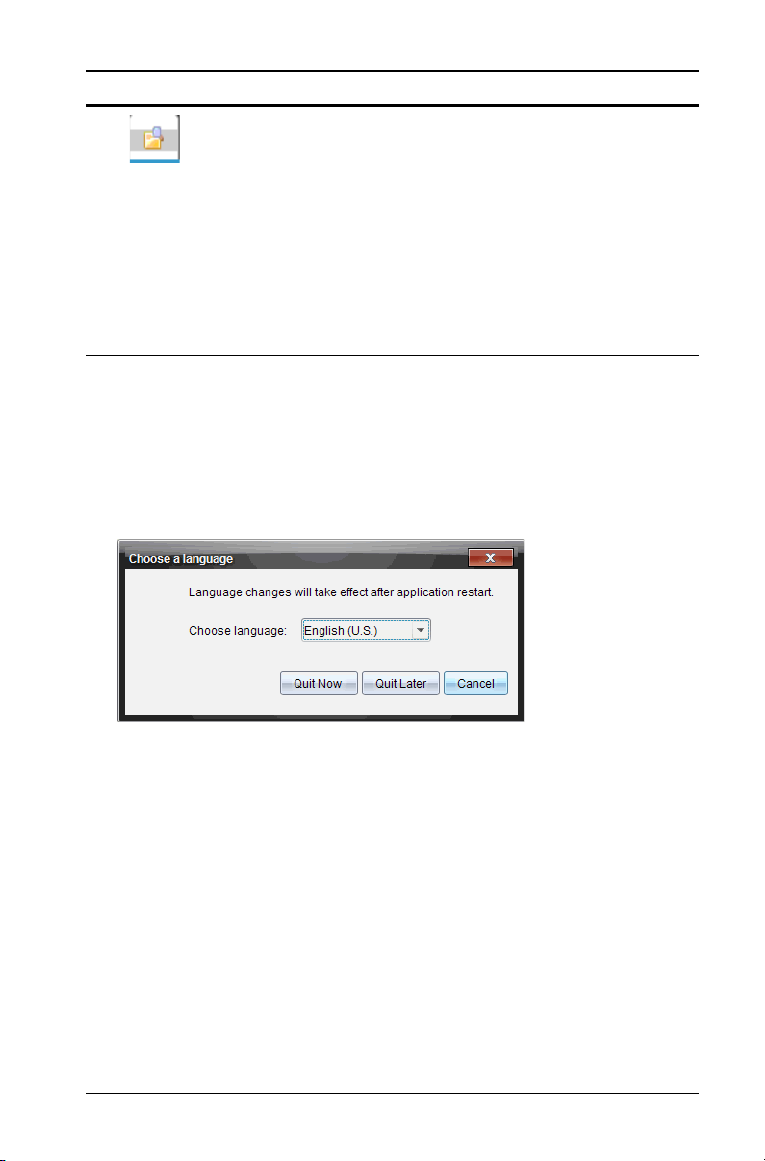
Icon What you can do
• See a list of files on your computer
• See a list of files on any connected handheld
Content
Explorer
• Create and manage lesson bundles
• Update the OS on connected handhelds
Use the Content Explorer tool to send or collect
documents between a computer and connected
handhelds. More information about using Content
Explorer is available in Using the Documents
Workspace.
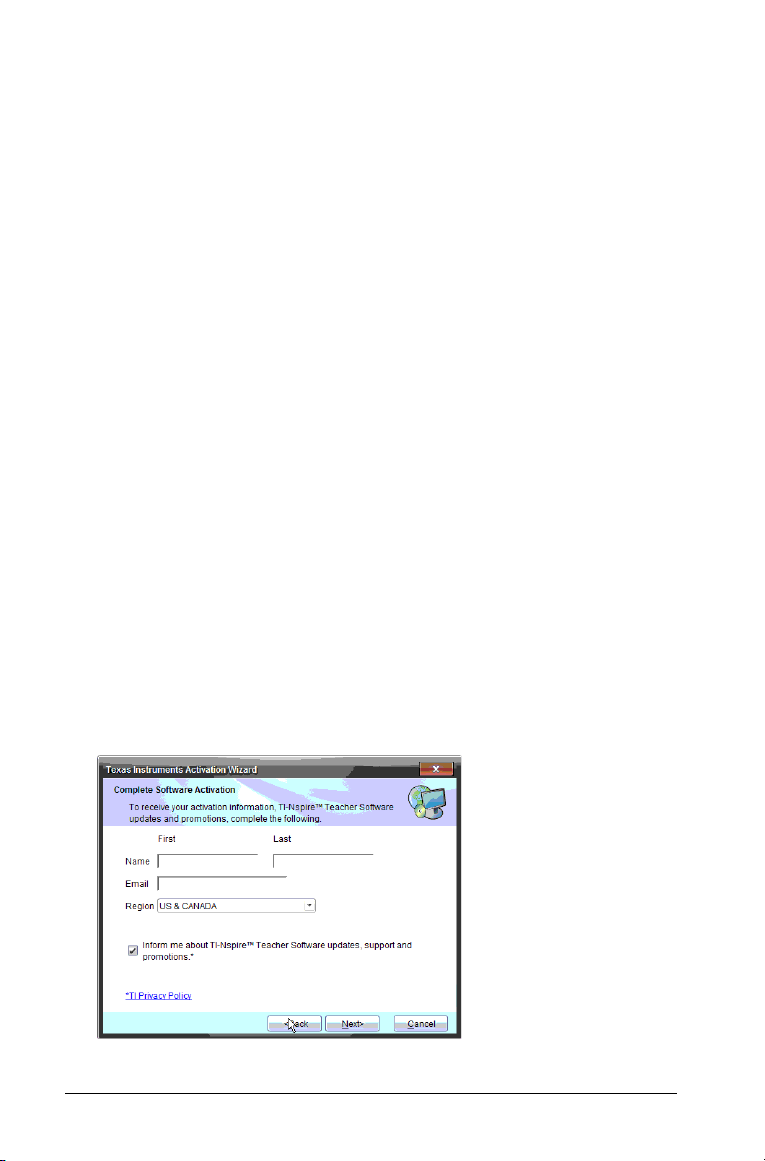
Changing language
Use this option to select a preferred language. You must restart the
software for the language to take effect.
1. Select File
The Choose a Language dialog box opens.
> Settings > Change Language.
2. Click
3. Select a language from the list.
4. Click
¤ to open the drop-down menu.
Quit Now to close the software immediately. You will be
prompted to save any open documents. When you restart the
software, the language change is effective.
-OR-
Click Quit Later to continue your work. The language change is not
applied until you close and restart the software at a later time.
Getting help
From the Help menu, you can perform tasks and get useful information
to help you use the software more productively. You can:
Getting started with TI-Nspire™ Software 9
• Open the help file (Press F1 or select Help > TI-Nspire™ Software
)
Help
• Activate the software license
• Register your TI product
• Download the latest guidebooks.
– Find information easily and quickly.
– Learn how to perform new tasks more easily and efficiently.
• Visit knowledge sites on the Internet to improve your proficiency with
the product. On these sites, you can find information about how to
use TI products as well as lessons, quizzes, and other instructive
activities shared by educators.
Note: Activities may vary depending on your geographical language.
• Explore online troubleshooting
• Run TI-Nspire™ diagnostics
• Check for updates to the software and handheld operating systems.
• Find information about the current software version.
• Open the Welcome Screen
Activating your software license
1. Ensure you are connected to the Internet.
2. Click Help > Activate to open the Texas Instruments Activation
Wizard.
3. Select Activate your License, then click Next. The Complete Software
Activation dialog box opens.
10 Getting started with TI-Nspire™ Software
4. Complete the name and e-mail fields, then select the region where
you live if different from the default entry. If you want to receive
e-mails from TI about updates, support, and promotions, ensure the
check box is selected.
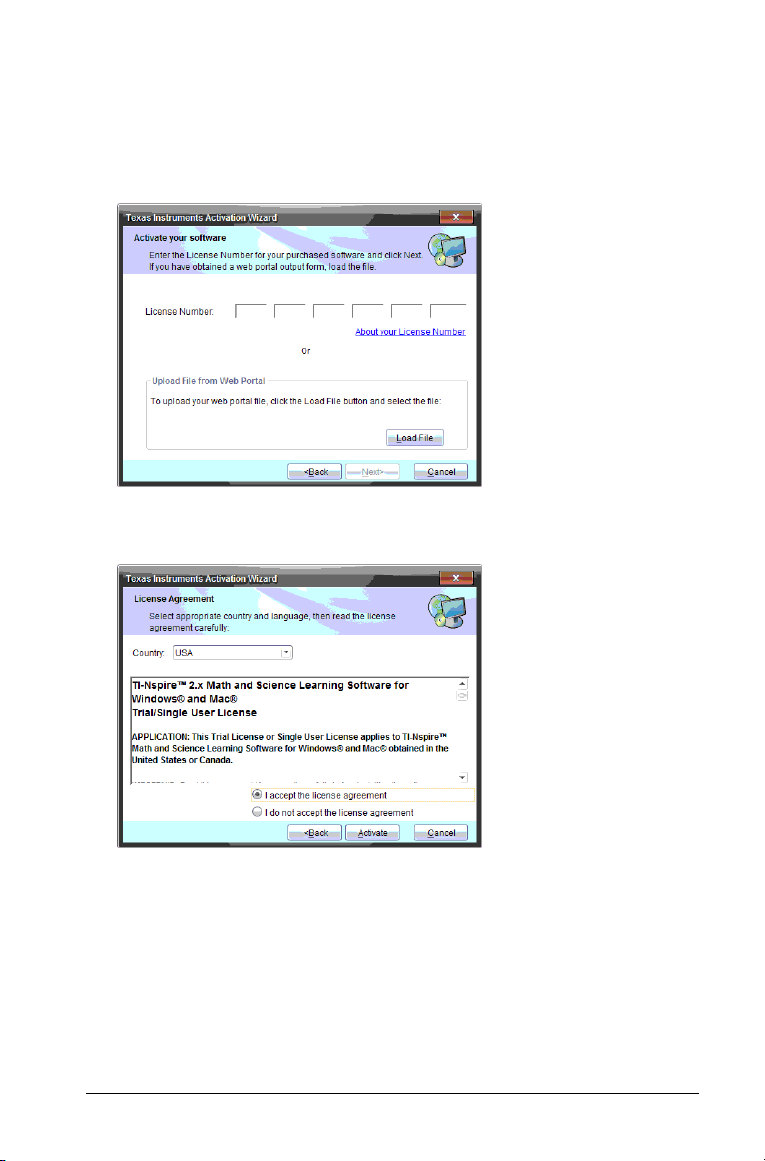
5. Click
Next to open the Activate your software dialog box.
6. Type the license number or upload your web portal file, then click
Next. The Licence Agreement dialog is displayed.
7. In the Country field, select your country from the drop-down menu if
it is different from the default entry.
8. Review the license agreement, then select to accept the agreement.
9. Click
Activate. The license number is validated against the TI
database to ensure it is valid.
If the license number is valid, the Successful Activation dialog opens.
Getting started with TI-Nspire™ Software 11
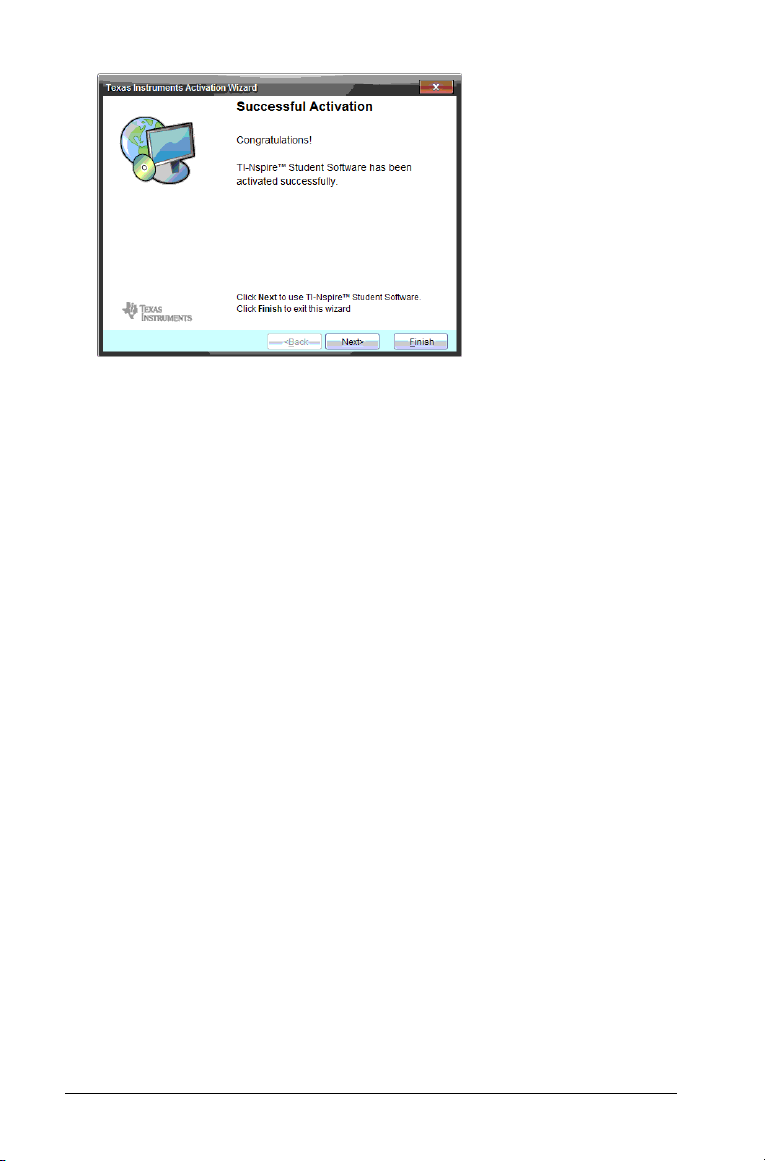
10. Click Next or Finish to launch the software.
11. When prompted, click OK to accept the default location for your
TI-Nspire™ folder. If needed, navigate to the location on your
computer where you want to store your TI-Nspire™ documents and
files.
12. Select whether or not to replace any documents that have the same
name.
The software launches and the
Note: If the license number is not valid, check to make sure the numbers
are entered correctly. If the problem persists, contact TI Support.
Welcome Screen is displayed.
Registering your product
1. Ensure you are connected to the Internet.
2. Click Help > Register to access the TI Registration Product site.
3. Follow the instructions on the web site to complete the product
registration process.
Downloading the latest guidebook
1. Ensure you are connected to the Internet.
2. Click Help > Download latest Guidebook.
3. When the Download Central web site opens, click
download the corresponding guidebook.
Download to
Exploring TI resources
The Help menu also provides links to TI resources and web sites.
f Click
12 Getting started with TI-Nspire™ Software
Help > Visit education.ti.com to access the Texas Instruments
Education Technology web site.

f Click Help > Visit Activities Exchange to access the Texas Instruments
Activities Exchange site. This site contains over 500 TI-Nspire™
activities.
f Click
Explore Online Troubleshooting to access TI’s Knowledge Base
where you can get troubleshooting help.
Running TI-Nspire™ diagnostics
In the event you have trouble with your software, this option enables
you to run a short diagnostics program that will help TI support
personnel troubleshoot the problem. You do not need Internet access to
run diagnostics; however, Internet access is required to send the log file
to TI Support. To run diagnostics:
1. Click
2. Click Start to run the program.
3. Navigate to the folder where you want to save the file, then click
4. When the Software Diagnostics dialog box appears:
Help > Run TI-Nspire™ Diagnostics.
The Software Diagnostics dialog box opens.
The log file is created and the Save as dialog box opens.
Save As.
• Click
• Click Restart to run the program again.
• Click Cancel to quit, then click OK to confirm and close the dialog
Send to TI to send the file to TI Support.
box.
Updating your software
Here are some important notes to remember about updating your
software:
• If you are connected to the Internet and you have automatic
notification enabled, your system will notify you of any TI-Nspire™
software updates when you open the desktop software.
– The automatic check occurs once each time you open the
software.
– If your system is up-to-date, you will receive no notification.
– You can turn off this feature if you don’t want to receive
notifications automatically.
• You can also check for updates manually.
Getting started with TI-Nspire™ Software 13
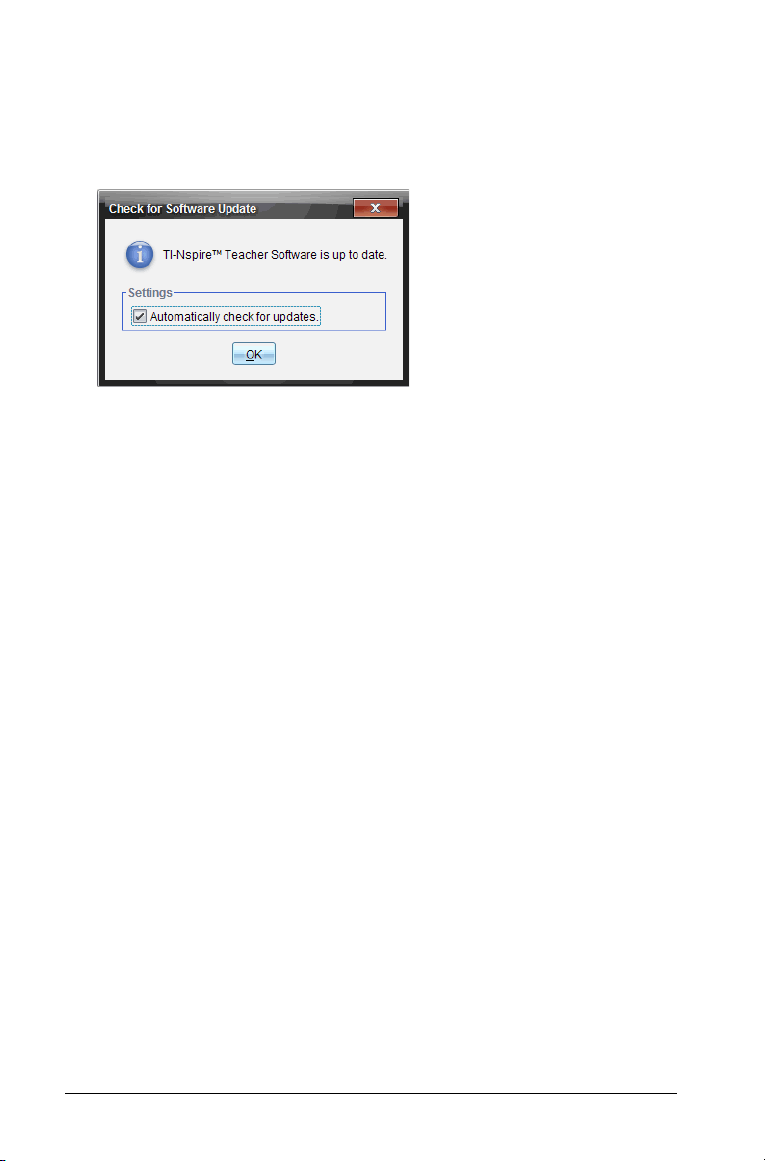
Manually checking for software updates
1. Click Help > Check for Software Updates.
If your software is current, the Check for Software Update dialog is
displayed indicating that you have the latest version of the software.
2. To turn off automatic notifications, deselect “Automatically check for
updates.” By default, this option is turned on.
3. Click
OK to close the window.
Installing updated software
After the system checks for an update, the Check for Software update
dialog box is displayed with a message informing you that a newer
version of the software is available.
To install the software update and manage your update notifications:
1. Check to make sure you’re connected to the Internet.
2. To turn off automatic notifications, deselect “Automatically check for
updates.“
3. Click
Note: If you receive a connection error, check your Internet connection
and try again.
Update to save the settings and begin the download.
A progress message box opens to show the download progress.
Upgrading a handheld operating system
This option is active only if a handheld is connected. To check for OS
updates for a connected, selected handheld, complete the following
steps.
1. Open the Content Explorer, then select a connected handheld.
2. Click Help > Check for Handheld OS Update.
14 Getting started with TI-Nspire™ Software
If the operating system is current, the Check for Handheld OS Update
dialog is displayed indicating that the operating system on the
handheld is current.
3. To turn off automatic notifications, deselect updates.” for updates.”
By default, this option is turned on.
4. Click
OK to close the window.
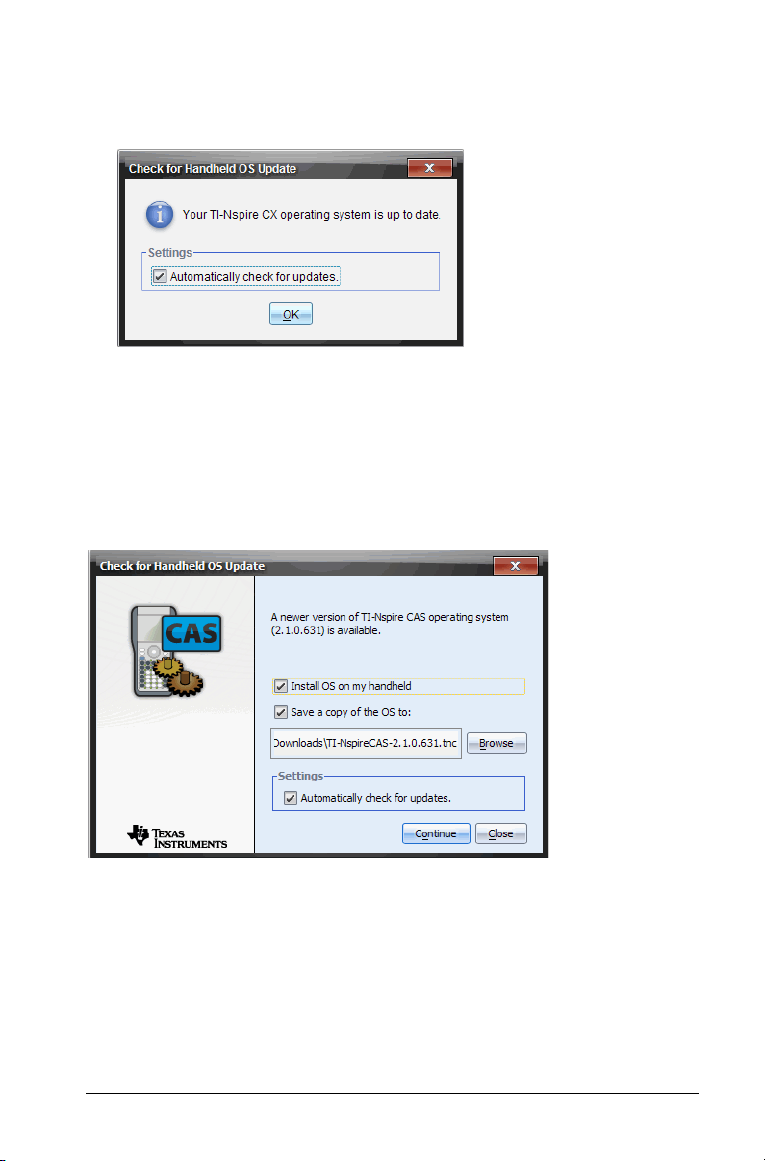
Installing an updated operating system
If the operating system is not current, the Check for Handheld OS Update
dialog box is displayed.
1. Click
Browse if you want to change the location where the operating
system file is saved.
2. Click Continue to download the OS and update the handheld.
3. Accept the license agreement and click
Continue.
4. When the message warning you that any unsaved data will be lost is
displayed, click Ye s. The Installing OS dialog opens indicating the
progress of the download.
Getting started with TI-Nspire™ Software 15
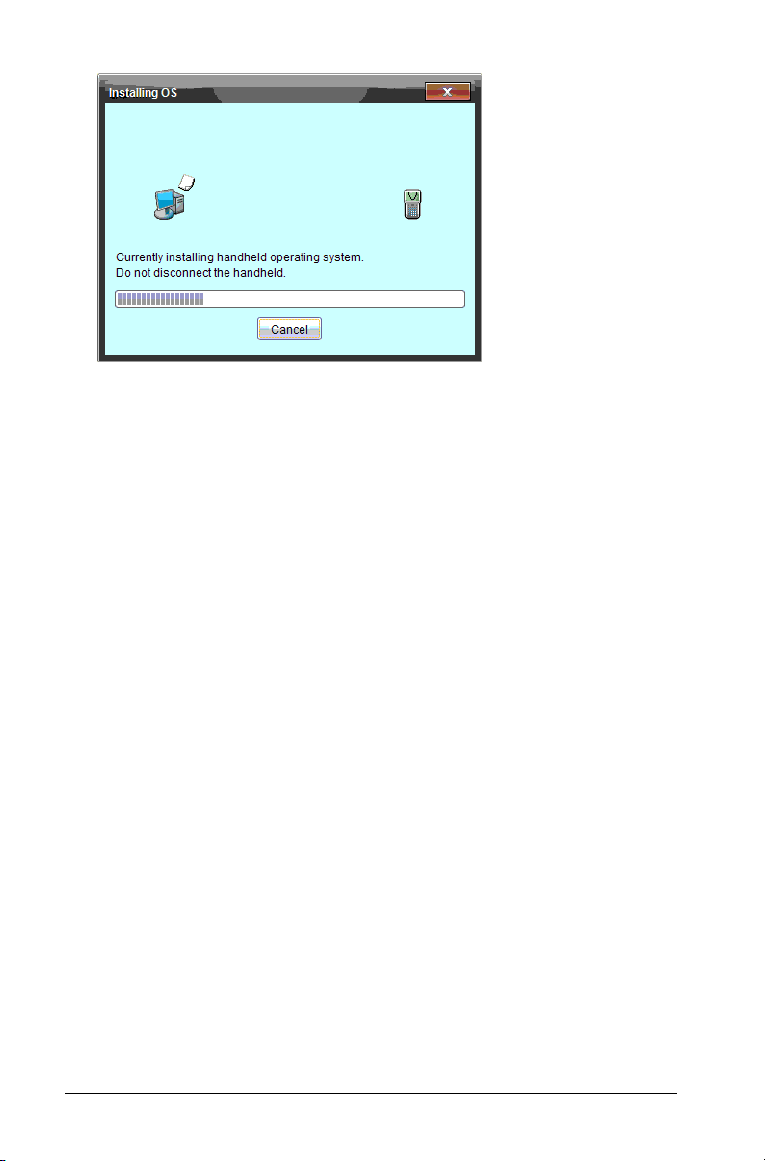
When the download is complete, the Information dialog box opens
informing you that the OS has been downloaded and that you can
disconnect the handheld from the computer.
5. Click
6. On the handheld, follow the prompts to:
7. When the Welcome Screen opens, click
OK. The updated operating system is installed on the handheld.
When the update is complete, the handheld reboots.
• Choose your preferred language
• Select a preferred font size
OK. The Home screen is
displayed.
About the software
Complete the following steps to open the About window, which provides
legal information about the software and indicates which version you
have.
1. Click
Help > About “Student” TI-Nspire™ Software.
Note: You do not need an Internet connection to open this window.
16 Getting started with TI-Nspire™ Software
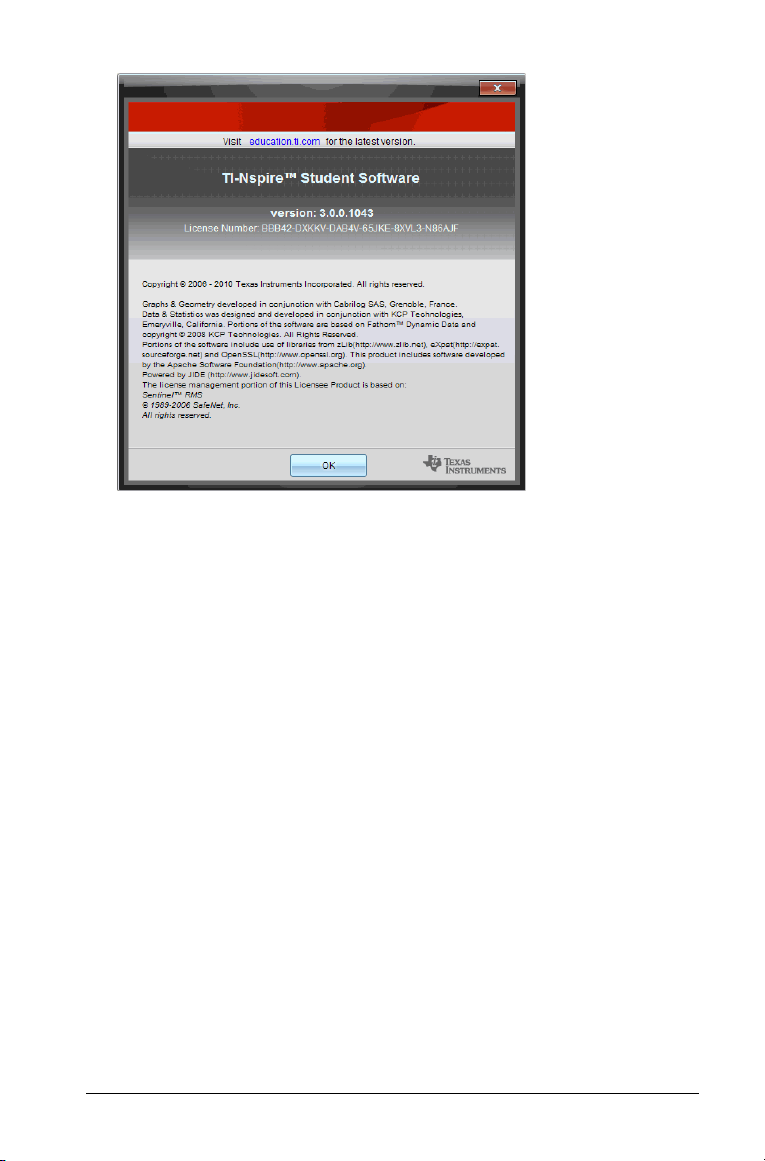
2. Click OK to close the window.
Getting started with TI-Nspire™ Software 17

18 Getting started with TI-Nspire™ Software

Using the Content Workspace
Å
Æ
Use the Content workspace to move, copy, and transfer content between
a computer and connected handhelds. This document covers the
following TI-Nspire™ software:
• TI-Nspire™ Teacher Software
• TI-Nspire™ CAS Teacher Software
Note: The Content workspace is not part of the TI-Nspire™ Student
Software or TI-Nspire™ CAS Student software.
Exploring the Content workspace
À
Á
Â
Ã
Ä
À Menu bar - Contains tools for working with files and modifying
system settings.
Á Content/Documents tabs. In the TI-Nspire™ Teacher software, use
these tabs to switch between the Content workspace and the
Documents workspace. (These tabs are not available in the Student
Software.)
 Content Workspace tool bar. Shows tools frequently used when
working in the Content workspace.
Using the Content Workspace 19

à Resources pane. Select location of content here. You can select from
folders and shortcuts on your computer, web content, and choose a
handheld from within Connected Handhelds. Select only one item at
a time (selecting multiple items will cause an error in the Preview
pane).
Note: You can add your own links to the Links section, but you
cannot save web site links to the Web Content section.
Ä Navigation bar. Contains tools needed to navigate to folders and
files on a computer, on a web site, or on a connected handheld. When
you select a resource, the options displayed are specific to that
resource.
Å Content pane. By default, the folders on your desktop are displayed.
Use this space to locate and view files on a computer or connected
handheld. Use the top half of the space as you would a file manager.
Æ Preview pane. Shows details about the selected file or folder.
Using the tool bar
The tool bar in the Content workspace provides shortcuts to tasks you
perform frequently. When icons are grayed out, they are not available
for the current task.
Icon Function
Click to move up a level in the file manager
hierarchy. This function becomes available when
you open a folder on a computer or connected
handheld.
Create a new folder. When you click the icon, a new
folder is created in the content pane with a default
name. Type a name for the folder, then press Enter.
Click this icon to open the Save Selected Files
dialog, which enables you to navigate to a folder
on your computer or a connected handheld to save
a file with same name or a different name.
Click this icon to create a new lesson bundle. See
Working with Lesson Bundles for more information.
20 Using the Content Workspace

Icon Function
Click this icon to save selected files to connected
handhelds.
Click this icon to copy a selected file on your
computer or on a connected handheld to the
clipboard.
Click this icon to paste the contents of the clipboard
to a selected folder on your computer or to
connected handhelds.
In the Content workspace, use Screen Capture to
copy the current screen or page on a connected
handheld to the clipboard and to the TI-Nspire™
Screen Capture window.
• Select the handheld.
•Click
• Select
Note: The Screen Capture option is not available in
the Content Workspace.
¤ to select Capture Selected Handheld.
Window > Screen Capture Window to
open the TI-Nspire™ Screen Capture window.
Locating resources
Use the Resources pane to locate TI-Nspire™ and PublishView™
documents on a computer, work with connected handhelds, and access
web content.
À
Á
Â
Ã
Using the Content Workspace 21

À Local Content. Enables navigation to files on a computer. Local
Content expands and collapses to show the following shortcuts:
• Desktop
• My Documents
When you select an item in Local Content, the file structure appears
in the Content pane. When you select a folder or supported file, the
detail is displayed in the Preview pane. If you open a folder that does
not contain .tns or .tnsp files, an error message is displayed.
Á Links. By default, links to helpful Texas Instruments sites are listed.
Clicking a link launches your web browser. You can add your own
links to this section. Links from the latest version of the TI-Nspire™
software are added when you upgrade. (By default, this list of links is
collapsed. Click on it to expand.)
Users located in the United States can search U.S. standards or
textbooks by selecting the search option from Links.
 Web Content. Lists links to Texas Instruments sites that contain
TI-Nspire™-supported activities that are available to a user who is
connected to the Internet. You can save material that you find on
these sites to your computer and share items through the Local
Content pane and Connected Handhelds. You cannot save links to
web sites in the Web Content section.
Note: The web content available varies depending on region. If there
is no online content, this section will not appear.
When you select an item in Web Content, the list of activities is
displayed in the Content pane, with a preview of the activity selected
appearing in the Preview pane.
à Connected Handhelds. A list of handhelds connected to your
computer. Click the Connected Handheld label to view information
about each handheld in the Content pane. To see folders and files on
a specific handheld, click the handheld name. This is not shown if
there are no handhelds connected.
Exploring the Content pane
By default, the Desktop and My Documents folders are listed. Use the
Content pane as you would a file manager to navigate to folders and
files on a computer.
22 Using the Content Workspace

tool bar
Content
pane
Preview
pane
Using the content pane tool bar
The Content pane tool bar provides tools needed to locate folders and
files.
Â
Á
À
À
Á
Â
Ã
Ä
Options. Click ¤ to open the drop-down menu to access
options for working with files and folders.
Look in: field. Contains the path and name of the current
folder and file. Click
Click to move up a level in the folder hierarchy.
Click to create a new folder. The new folder is added to the
list. Type a name for the folder and and press Enter.
Search. Enter a search keyword and press Enter to find all files
containing that word.
¤ to view a history of accessed folders.
Using the Content Workspace 23
Ã
Ä

Using the Preview pane
In the Content workspace, detail about a selected folder, file, or lesson
bundle is displayed in the Preview pane.
Â
Ã
À
A thumbnail preview of the selected folder, file, or lesson
À
bundle.
If a lesson bundle is empty, this space is blank. If you selected a
folder that does not contain supported files, an error message
is displayed.
Á
If a document has multiple pages, use the forward arrow to
preview the next page. The backward arrow becomes active so
you can move backward through the pages. If working with a
lesson bundle, you can choose to preview a TI-Nspire™
document within the bundle.
If a lesson bundle is selected the Files window appears above
Â
Details window listing the files in the lesson bundle.
the
Á
24 Using the Content Workspace

• If a folder is selected, the Details window shows the name
Ã
of the folder, the path where the folder is located, and the
date modified.
• For document files and lesson bundle files, the
window shows the name, the date the file was modified,
the file size, and whether or not the file is read only.
Details
Using shortcuts
Use this option to add folders or lesson bundles containing frequently
used files to the Local Content list. If a selected folder does not contain
TI-Nspire™ (.tns or .tnsp) files, an error message is displayed.
Adding a shortcut
To access files on a drive, you must add the shortcut to the Local Content
pane. To add a shortcut:
1. Navigate to the folder that contains the frequently used files.
2. Click , then select
The folder is added to the list of folders under the Local Content
heading in the Resources pane.
Create Shortcuts.
Deleting a shortcut
To delete a shortcut:
Using the Content Workspace 25

1. From the Local Content list, select the folder to be deleted.
2. Right-click on the selected folder to open the context menu, then
click Remove Shortcut.
Note: You cannot remove default shortcuts.
Working with Links
By default, the Links list contains a list of links to Texas Instruments web
sites. Click a link to launch your web browser and access the web site.
Using the Links toolbar
When you select Links in the Resource pane, the tools on the toolbar are
specific to working with links. Use these tools to add, edit, or delete links
from the list. You can also move a link up or down in the list.
Options. Click ¤ to open the drop-down menu to access
options for working with links.
Click this icon to add a link to the list.
Select an existing link, then click this icon to edit the link’s
attributes.
Click this icon to delete a link. You cannot delete a default link.
Select a link and click this icon to move the link up in the list.
Select a link and click this icon to move the link down in the list.
Adding a link
Complete the following steps to add a link to the list of Links in the
Resource pane.
1. Click to open the Add Link dialog box.
26 Using the Content Workspace

2. Type the name of the link.
3. Type the URL in the Address field.
4. Click Add Link.
The link is added to the bottom of the list of existing links.
Editing an existing link
Complete the following steps to edit an existing link.
1. Select the link you want to change.
2. Click to open the Edit Link dialog box.
3. Make needed changes to the name of the link or to the URL.
4. Click
Edit Link.
The changes are applied to the link.
Removing a link
Complete the following steps to delete a link.
1. Select the link you want to delete.
2. Click .
3. Click
Remove Link when the confirmation window opens.
Using the Content Workspace 27

The link is removed from the list.
Note: You cannot delete a default link.
Moving links up or down in the list
You can change the order of the links in the list to suit your needs.
f Click to move a selected link up one place in the list.
f Click to move a selected link down one place in the link.
f Click , then select
Move to Top of List to relocate a selected link
to the top of the list.
f Click , then select
Move to Bottom of List to relocate a selected
link to the bottom of the list.
Using Web Content
Web Content provides links to online materials on Texas Instruments web
sites. You can save material found on these web sites to your computer
and share items using the Local Content pane and Connected Handhelds.
Information provided for each activity includes the name of the activity,
the author, the date the activity was posted, the size of the file, and the
source.
Too l bar
Column
headings
List of available
activities
List of the files
contained in the
activity.
Details about
the selected
activity. A
description of
the file is also
shown.
28 Using the Content Workspace

Note: An Internet connection is required to access Texas Instruments web
sites.
Sorting the list of activities
Use the column headings to sort the information in the list of activities.
By default the list is displayed in alphabetical order by Name.
• Click the Name heading to list activities in reverse alphabetical order.
Click the heading again to return to A to Z order.
• Click the Author heading to list the activities in alphabetical order by
author name.
• Click the Posted Date heading to list the activities in order from
newest to oldest or from oldest to newest.
• Click the Size heading to list the activities according to file size.
• Click the Source heading to list the activities in order by source.
• Right-click a column heading to customize the heading name.
Filtering the list of activities
By default, all available activities are listed in the Content pane. Options
on the tool bar enable you to filter the activities by subject, topic, and
category. You can also search for an activity using a keyword search.
To find all activities related to a particular subject:
1. In the Subject field, click
2. Select a subject.
All activities related to the selected subject are listed.
3. To narrow the search, click
topic related to the subject selected.
4. Use the Category field to narrow the search even further. Click
select a category related to the selected subject and topic.
¤ to open the drop-down menu.
¤ in the Topic field to view and select a
¤ to
Using keywords to search for an activity
Complete the following steps to search for an activity using a keyword or
phrase.
1. Type a keyword or phrase in the "Filter by Keyword" field.
2. Press
Enter.
All activities that contain the keyword or phrase are listed.
Using the Content Workspace 29

Opening an activity
1. Select the activity you want to open.
2. Click , then select
a list of all documents related to the selected activity.
You can open a .tns or .tsnp in the TI-Nspire™ software. Other files
such as Microsoft® Word and Adobe® PDF files will open in their
respective applications.
3. Select the .tns file and click ¢, then select Open.
The selected .tns document opens in the Documents workspace.
4. To open a .doc file or .pdf file:
• Select the file.
• Right-click, then select Open.
Open. The Open Activity dialog box opens with
Saving an activity to your computer
Complete the following steps to save an activity to your computer.
1. Select the activity you want to save. The file details are displayed in
the bottom half of the window.
2. Click
30 Using the Content Workspace
Save this Activity to Computer.

3. When the Save Selected Files dialog opens, navigate to the folder
where you want to save the file.
4. Click Save. The activity is saved to your computer as a lesson bundle.
Copying an activity
Complete the following steps to copy an activity. Once the activity is
copied to the clipboard, you can paste the activity into a folder on your
computer, then drag the activity to your list of shortcuts in the Local
Content pane.
1. Click the activity you want to copy to select it.
2. Use one of the following methods to copy the activity to the
clipboard:
• Select the activity with your mouse, then drag it to a folder in the
Local Content list.
• Click , then select
• Right-click, then select Copy from the context menu.
• Right-click on a file in the Files list, then select
• Click (Copy icon), which is located in the tool bar.
The activity is copied to the clipboard.
3. Open a folder on your computer, then select Edit > Paste to copy the
activity to the selected folder.
Copy.
Copy.
Sending an activity to a connected handheld
Complete the following steps to send a selected activity to connected
handhelds.
1. Select the file you want to send to connected handhelds. The file
details are displayed in the bottom half of the window.
2. Use one of the following options to send the file to the selected
handhelds:
• To "drag and drop" the file, click the file to select it, then drag it
to the Selected Handhelds label to transfer to the file to all
connected handhelds. To transfer the file to a specific handheld,
drag the file to a specific handheld name.
• To transfer the file using Transfer Tool:
Using the Content Workspace 31

– From the tool bar, click , then select Send to Connected
Handhelds
.
– Click , then select
The Transfer Tool opens.
3. Select the file, then click Start Transfer.
The Status window opens and the Stop Transfer button is enabled.
The selected files and folders are transferred to the selected
handhelds.
4. When the transfer is complete, close the Transfer Tool.
Send to Connected Handhelds.
Working with lesson bundles
Many lessons or activities contain multiple files. For example, teachers
usually have a teacher version of a file, a student version, assessments,
and sometimes supporting files. A lesson bundle is a container that
enables you to group all files needed for a lesson together. Using lesson
bundles enables you to:
• Add any type of file (.tns, .tnsp, .doc, .pdf, .ppt) to a lesson bundle.
You can send lesson bundles to connected handhelds; however, only
the .tns files are sent to the handheld.
• View all the files in a lesson bundle using the TI-Nspire™ Teacher
Software
• Group all files associated with one lesson in one place
32 Using the Content Workspace

• E-mail one lesson bundle file to teachers or students instead of
looking for and attaching multiple files.
Creating a new lesson bundle
Complete the following steps to create a new lesson bundle.
1. In the Content workspace, navigate to the folder in Local Content
where you want to save the lesson bundle.
2. Click or select
The new lesson bundle file is created with a default name and placed
in your list of files.
3. Type a name for your lesson bundle and press
File > New Lesson Bundle.
Enter to save the file.
Adding files to a lesson bundle
By default, lesson bundles are empty when created. Use any of the
following methods to add files to a lesson bundle:
• "Drag and drop" any file into a selected lesson bundle. This method
moves the file to the lesson bundle. If you delete the lesson bundle,
the file is deleted from your computer. You can recover the file from
the Recycle Bin.
• Copy and paste any file into a selected lesson bundle.
• Use the "Add files to lesson bundle" option. This method copies the
selected files into the lesson bundle. The file is not moved from its
original location.
Using the Add files lesson bundle option
To add files to the bundle using the Add files to lesson bundle option:
1. In the content pane, select the lesson bundle name. The file details
are displayed in the Preview pane.
Note: If the lesson bundle already contains files, the first file in the
lesson bundle is also shown in the Preview pane.
Using the Content Workspace 33

2. To open the lesson bundle window:
• Double-click the lesson bundle file.
• Right-click the name of the lesson bundle to open the context
menu, then select Open.
3. Click
Add Files to Lesson Bundle to open the Add window.
Note: You can also click Add Files to Lesson Bundle in the Preview
Pane.
34 Using the Content Workspace

4. Use the file manager in the Add window to navigate to and select the
file you want to add to the lesson bundle.
• You can select multiple files at one time if they are located in the
same folder.
• If files are located in different folders, you can add them one at a
time.
• You cannot create a folder within a lesson bundle or add a folder
to a lesson bundle.
5. Click Add to add the file to the bundle.
The file is copied to the lesson bundle and the file name is listed in
the lesson bundle window.
6. Repeat this process until all needed files are added to the lesson
bundle.
Selecting files to create a lesson bundle
Within the software, you can select multiple files in a folder, then create
the lesson bundle. You cannot add a folder to a lesson bundle.
1. In the Content workspace, navigate to the folder that contains the
files you want to bundle.
2. Select the files. To select multiple files, select the first file then hold
down the
files, select the first file, then hold down the Ctrl key and click the
other files to select them.
Shift key and select the last file in the list. To select random
3. Click , then select
Lesson Bundles > New Lesson Bundle.
4. A new lesson bundle is created and placed in the open folder. The
lesson bundle contains copies of the selected files.
5. Type a name for the lesson bundle and press
Enter.
Opening a lesson bundle
To view and work with files within a lesson bundle, complete one of the
following steps to open the lesson bundle file.
f Double-click the lesson bundle name.
f Select the lesson bundle, then right-click and select
context menu.
f Select the lesson bundle, click , then select
f Select the lesson bundle, then press Ctrl + O. (Macintosh®: “ + O).
Using the Content Workspace 35
Open from the
Open.

When you open a lesson bundle, the files in the bundle are displayed in a
separate window.
Note: You cannot open a lesson bundle outside of the TI-Nspire™
software. For example, if you open the folder using the file manager on
your computer and double-click the lesson bundle name, it does not
automatically launch the software.
Opening files within a lesson bundle
You can open any file within a lesson bundle on your computer if you
have the program associated with the file type.
• When you open a .tns or .tnsp file, the file opens in the Documents
workspace in the TI-Nspire™ software.
• When you open another file type, it launches the application or
program associated with that file. For example, if you open a .doc
file, it opens in Microsoft® Word.
Use one of the following options to open a file within a lesson bundle:
f Double-click the lesson bundle, then double-click a file within the
lesson bundle.
f Within a lesson bundle, select the file, then click
file name and select
Open from the context menu.
¢ or right-click the
Managing files in a lesson bundle
You can open, copy/paste, delete, and rename files in an existing lesson
bundle. To locate and work with files in an existing lesson bundle:
1. In the content pane, select the lesson bundle name. The Files window
shows the file details in the Preview pane.
36 Using the Content Workspace

In the Preview pane, select the file name in the Files window and click
¢ to open the context menu.
2. Select the action you want to perform:
• Click
• Click Copy to place the file in the clipboard.
• Navigate to a folder on your computer or select a connected
• Click Delete to delete the file from the lesson bundle. Use caution
• Click Rename to give the file a new name. To cancel this action,
• To add more files to the lesson bundle, click
• Click
• Select Package Lesson Bundle to create a .tilb file.
• Click Send to Connected Handhelds to open the Transfer Tool
Open. TI-Nspire™ and PublishView™ documents open in the
Documents workspace. When you open another file type, it
launches the application or program associated with that file.
handheld, then right-click and select
Paste to place the copied file
in a new location.
when deleting a file from a lesson bundle. You should ensure files
contained in the bundle are backed up if you need the files for
future use.
press the
Bundle
Esc key.
Add Files to Lesson
.
Refresh to update the list of files in the bundle.
and send the selected file to a handheld. Only .tns files can be sent
to handhelds.
Using the Content Workspace 37

Managing lesson bundles
Use the options menu or the context menu to copy, delete, rename, or
send a lesson bundle to connected handhelds. You can also create a
shortcut to the lesson bundle.
Note: You cannot add a folder to a lesson bundle.
1. Select
Local Content in the Resources pane.
2. In the Content pane, navigate to the lesson bundle you want to work
with, then right-click to open the context menu or click to open
the menu of options.
3. Select the action you want to perform:
• Click Open to open the lesson bundle.
• Click Copy to place the lesson bundle file in the clipboard.
• Navigate to a folder on your computer or select a connected
handheld, then right-click and select Paste to place the copied file
in a new location.
• Click Delete to delete the lesson bundle. Use caution when
deleting a lesson bundle. You should ensure files contained in the
bundle are backed up if you need the files for future use.
• Click Refresh to update the list of files in the bundle.
• Click Rename to give the lesson bundle a new name. To cancel this
action, press the Esc key.
• To move up a level in the folder hierarchy, click Up a Level.
• To add the lesson bundle to the list of shortcuts in Local Content,
select Create Shortcut.
38 Using the Content Workspace

• To add more files to the lesson bundle, select Lesson Bundles >
Add Files to Lesson Bundle.
• Select
Lesson Bundles > Package Lesson Bundle to create a .tilb
file.
• Click Send to Connected Handhelds to open Transfer Tool and
send the lesson bundle to connected handheld. Only .tns files are
sent to the handheld.
Packaging lesson bundles
Packaging lesson bundles creates a "package" folder with a .tilb file. This
file contains all contents of the lesson bundle. You must package the
lesson before you can e-mail the lesson bundle (.tilb file) to colleagues or
students. By default, the lesson bundle is saved in the following folder:
...\TI-Nspire\New Lesson Bundle1.tilb\package\...
To package a lesson from the Content workspace:
1. Select
2. Select the lesson bundle you want to package in the Content pane.
3. Use one of the following methods to create the package:
Local Content in the Resources pane.
The Lesson Bundle details are displayed in the Preview pane.
• From the Preview pane, click ¢ in the Files window, then select
Package Lesson Bundle.
• From the Content pane, Right-click the lesson bundle name, then
select Lesson Bundles > Package Lesson Bundle.
A dialog box opens confirming that the lesson bundle was created.
4. Click Yes to open the folder where the lesson package is stored. Click
No to close the dialog box.
E-mailing a lesson bundle
After a lesson bundle is packaged, you can e-mail the .tilb file to other
teachers or students. To attach the lesson bundle to an e-mail:
1. In your e-mail client, select attach, then navigate to the .tilb folder.
2. Make sure you open the folder and select the .tilb file to attach to the
email. You cannot email the .tilb folder.
Using the Content Workspace 39

Working with connected handhelds
When handhelds are connected, the tools in the Content workspace
enable you to:
• View the status of each connected handheld including name, battery
status for the rechargeable and AAA batteries, the storage space, and
the OS in use.
• View and open files on connected handhelds.
• Rename connected handhelds.
• Transfer documents and lesson bundles to and from connected
handhelds.
• Check for OS updates and install an OS.
Connecting handhelds
To use the features described in this section, handhelds must be turned
on and connected by one of these means:
• The TI-Nspire™ Docking Station or TI-Nspire™ CX Docking Station
• A direct connection through a standard USB cable
Note: Some capabilities described in this section rely on other Texas
Instruments products. Please also see the documentation related to those
products referenced throughout this section.
Note: The tasks in this section can only be performed using TI-Nspire™
handhelds. TI-84 handhelds are not supported for these tasks.
Viewing handheld status
When handhelds are connected, Connected Handhelds becomes active
in the Resources pane. All connected handhelds are listed.
When Connected Handhelds is selected, the Content pane shows details
about handhelds that are connected and turned on:
•
Name of each handheld.
•
Battery (Li-ion) - Indicates level of battery charge: Critical 2%, 25%,
50%, 75%, 100%, or "--" to indicate no battery is present
• Battery (AAA) - Indicates level of AAA battery charge: Critical 2%,
25%, 50%, 75%, 100%, or "--" to indicate no battery is present
• Storage / Size - The amount of space left and available on the
handheld
• OS version - Indicates which version of the operating system is
currently running on the handheld
40 Using the Content Workspace

Viewing content on a connected handheld
When you select a handheld, all files and folders on the handheld appear
in the Content pane. When a .tns file is selected, the document details
are displayed in the Preview pane. Click the icon to preview the
document.
From the Content workspace, complete the following steps to access
content on handhelds:
1. Ensure the handhelds are connected and turned on. The
Handhelds
resource is not active if handhelds are not connected.
Connected
2. To see folders and files on a specific handheld, click the handheld
name in the Resources pane.
The folders and files on the handheld are listed in the Content pane.
Using the Content Workspace 41

Details about the selected folder or file are shown in the Preview
pane.
Details for selected folder Details for selected file
3. To view the files in a folder, double-click the folder name. The files in
the folder are listed in the Content pane. To preview the file contents,
select "Click here to preview document" to open the document
preview.
Opening a selected file
You cannot edit or change a document in the Preview pane. To open a
document for editing:
1. Select the file you want to open.
2. Use one of the following options to open the file:
• Click , then select
• Right-click the selected file, then select Open from the context
menu.
• Double-click the image in the Preview pane.
The document opens in the Documents workspace. The Document
Tools menu opens.
Open.
Saving a file
To save files and folders on the handheld to a computer, complete the
following steps:
1. Select the file or folder you want to save.
42 Using the Content Workspace

2. Use one of the following options to open the Save Selected Files
dialog box:
• From the tool bar, click
• Click , then select
• Right-click the selected file name, then select
Save to Computer.
Save to Computer.
3. Navigate to the location on the computer where you want to save the
file or folder.
4. Click Save. The file or folder is saved in the location you selected.
Sending files to connected handhelds
Using the Content workspace, you can transfer content from one
connected handheld to other connected handhelds. Selecting the Send
to Connected Handhelds option opens Transfer Tool, where you can add
supported documents and operating system files and folders from a
connected to handheld to the list of files to be transferred.
Items you can transfer include:
• Folders
• Supported files
.tns .edc .fig .tco
.tnc .tno .tilb .tcc
To transfer a file or folder from one connected handheld to all other
connected handhelds, complete the following steps:
1. Select the file or folder you want to transfer.
2. Click , then select
Tool window opens.
Send to Connected Handhelds. The Transfer
Using the Content Workspace 43

3. Click Start Transfer.
Note: To add additional files to the transfer list, click Add to Transfer
.
List
The selected files and folders are transferred to the handhelds.
Transferring a file from one handheld to another handheld
If multiple handhelds are connected, you can also send a folder or file
from a one handheld to a another handheld in the Connected Handhelds
list.
1. Select the handheld that contains the files you want to transfer. The
files on the handheld are listed in the content pane.
2. Select the folder or file you want to send.
3. Use your mouse to "drag and drop" the file to another handheld in
the Connected Handhelds list.
Note: You can also copy and paste a file from one handheld to another.
Managing files on a connected handheld
When working with files on connected handhelds in the Content
workspace, use the drop-down menu or the context menu to
manage files.
44 Using the Content Workspace

Option How it Works
Open Open a file on a connected handheld:
• Select the file you want to open.
• Select
Open. The document opens in the Documents
Workspace.
Save to
Computer
Save the selected file on your computer.
• Select the file you want to save.
• Select
Save to Computer. The Save Select File dialog
box opens.
• Navigate to the folder where you want to save the
file.
• Click Save.
Copy/Paste Create a copy of a file:
• Select the file you want to copy.
• Select Options > Copy to copy the file to the
clipboard.
• To paste the file in another location, navigate to the
new location, then select Options > Paste.
Note: If you don’t select a new location, the copied
file is pasted with a new name "Copy of ..."
Delete Delete a file on a connected handheld:
• Select the file you want to delete.
• Select Delete.
• Click
Yes when the Warning dialog opens. Click No
to cancel.
Refresh To refresh the list of files, select
Options > Refresh.
Rename To rename a file on a connected handheld:
• Select the file you want to rename.
• Select Rename
• Type the new name and press Enter.
Up a Level Go up a level. This option is available when you select a
file inside a folder.
Using the Content Workspace 45

Option How it Works
New Folder Create a new folder:
• Click
• Type a name for the new folder.
• Press
New Folder.
Enter.
Managing OS updates
When handhelds are connected, you can check for operating system
updates and install updates to connected handhand helds.
Checking for an OS update
1. In the Resources pane, click Connected Handhelds to list all
connected handhelds.
2. Select the handheld you want to check.
3. Right-click to open the context menu, then select Check for
Handheld OS Update
If the operating system is current, the Check for Handheld OS Update
dialog is displayed indicating that the operating system on the
handheld is current.
.
4. To turn off automatic notifications, deselect "Automatically check for
updates." By default, this option is turned on.
5. Click
OK to close the window.
Installing an OS update
Note: Updating the operating system does not replace or remove
documents.
1. Ensure you have downloaded the latest operating system file. Go to
education.ti.com to download the latest operating system files.
2. In the Resources pane, click Connected Handhelds to list all
handhelds currently connected.
46 Using the Content Workspace

3. Select the handheld you want to update.
4. Right-click to open the context menu, then select Install Handheld
. The Select Handheld OS File window opens.
OS
5. Select the operating system file.
• Select TI-Nspire.tco to upgrade a TI-Nspire™ CX Handheld
• Select TI-Nspire.tcc to upgrade a TI-Nspire™ CX CAS Handheld
• Select TI-Nspire.tno to upgrade a TI-Nspire™ Handheld
• Select TI-Nspire.tnc to upgrade a TI-Nspire™ CAS Handheld
6. Click
Install OS.
7. Click "Yes" to confirm you want to continue the update.
8. Wait while the software is downloaded to the selected handheld,
then follow prompts in dialog boxes to finish the OS update.
Using Identify Selected to locate handhelds
If you are using the TI-Nspire™ Docking Station or the TI-Nspire™ CX
Docking Station, use this feature to locate a handheld in the docking
station.
1. Be sure that the handhelds are turned on and that the docking
station is connected to your computer.
2. In the
3. Select the handheld you want to locate.
4. Right-click to open the context menu, then select
Resources pane, click Connected Handhelds to list all
connected handhelds.
Identify Select
Handheld.
Both LED lights under the slot where the handheld is located will
blink for 30 seconds.
Using the Content Workspace 47

Renaming handhelds
You can rename the handhelds that you store in the TI-Nspire™ Teacher
Software:
1. In the Connected Handhelds area, right-click on the handheld you
want to rename.
2. Select Rename.
3. Type a new name for the handheld.
4. Press
Enter to save the new name.
Using Screen Capture in the Content workspace
In the Content workspace, use the Screen Capture feature to capture
screens and documents on a connected handheld without switching
workplaces. You can save captured images as .jpg files for later use in
other applications or you can paste an image from the clipboard into
another application such as Microsoft® Word.
Capturing images on a handheld
1. Ensure the handheld is connected and that the screen or document
you want to capture is active.
2. In the Resources pane, click
handhelds.
3. Select that handheld that has the document or screen you want to
capture.
4. Click , then select Capture Selected Handheld.
--OR--
Right-click the handheld name, then select
Handheld
The image is copied to the clipboard and to the Ti-Nspire™ Screen
Capture window. The dialog opens in
the lower right corner of your desktop when the screen capture is
complete.
5. Click
also select Window > Screen Capture Window to open the
TI-Nspire™ Screen Capture window.
48 Using the Content Workspace
.
View it to open the TI-Nspire™ Screen Capture window. You can
¢ to expand the list of connected
Capture Selected

6. To capture another screen, display the document or screen on the
handheld, then click , then select
Capture Handheld Screen.
The image is copied to the TI-Nspire™ Screen Capture window and
replaces the image in the clipboard.
7. From the TI-Nspire™ Screen Capture window, you have the following
options for working with a captured image:
• Click to copy an image to the clipboard.
• Click to delete an image.
• Click to zoom in.
• Click to zoom out.
• Click and to toggle between Single Screen View and
Thumbnail View if there are multiple images captured.
• Click to add a border to a selected image.
• Click or to scroll through multiple captured images.
Saving captured images
You can save one image at a time, select multiple images to save, or save
all captured images. You can also copy images in the clipboard to other
applications such as Microsoft® Word.
Using the Content Workspace 49

1. In the TI-Nspire™ Screen Capture window, click to save the
selected image or images. To save all captured images, click
Save All Screens
. When you save multiple screen captures, the
File >
images are collected in a folder named with the current date.
2. When the Save As dialog box opens, navigate to the folder where you
want to save the .jpg file or folder containing multiple screen
captures. The default folder is named Screen Captures.
3. Type a name for the file or the folder containing multiple images.
4. Click
Save.
The file or folder is saved in the designated location.
50 Using the Content Workspace

Using the Documents Workspace
Use the tools in the Documents workspace to work with both TI-Nspire™
and PublishView™ documents. This chapter provides an overview for the
Documents Workspace in the following TI-Nspire™ software:
• TI-Nspire™ Teacher Software
• TI-Nspire™ Student Software
• TI-Nspire™ CAS Teacher Software
• TI-Nspire™ CAS Student Software
When there are differences between the software, those differences will
be described.
Exploring the Documents workspace
À
Á
Â
Ä
Ã
Å
Æ
Ç
À Title bar. Shows the name of the current document and the name of
the software. The minimize, maximize, and close buttons are located
in the right corner.
Á Menu bar. Contains tools for working with documents.
Using the Documents Workspace 51

 Content/Documents tabs. In the TI-Nspire™ Teacher software, use
these tabs to switch between the Documents workspace and the
Content workspace. (These tabs do not appear in the Student
Software.)
à Workspace tool bar. Shows frequently performed tasks.
Ä Documents Toolbox. Contains tools such as the Document Tools
menu, Page Sorter, Content Explorer, Utilities, and TI-SmartView™
emulator. Click each icon to access the available tools. When you are
working in a TI-Nspire™ document, the tools available are specific to
that document. When you are working in a PublishView™ document,
the tools are specific to that document type.
Å Toolbox pane. Options for the selected tool are displayed in this area.
For example, click the Document Tools icon to access tools needed to
work with the active application.
Note: In the TI-Nspire™ Teacher Software, the tool for configuring
questions opens in this space when you insert a question. For more
information, see the Using Question in the TI-Nspire™ Teacher
Software chapter.
Æ Workspace. Shows the current document and enables you to
perform calculations, add applications, and add pages and problems.
Only one document at a time is active (selected). Multiple documents
appear as tabs.
Ç Status bar. Shows the current problem number, enables you to access
document settings, toggle between computer mode and handheld
mode, and adjust the boldness or scaling of documents in the
workspace.
Exploring the menu bar and the tool bar
Using the menu bar
The menu bar contains all available options for working with documents.
The menu bar also provides access to options for managing your view
and accessing Help.
Click an option on the menu bar to open the drop-down menu that lists
options needed to perform tasks. If applicable, shortcut keys are also
listed on the drop-down menu.
52 Using the Documents Workspace

Using the tool bar
The tool bar provides quick access to options frequently used to work
with documents. These tasks are also accessible from the menu bar.
Note: Icons are grayed out when they are not available.
Using the File menu
Options available on the File menu are listed in the following table along
with their corresponding tool bar icon and shortcut key if applicable..
File Menu
Option
New
Document
Options Tool bar
Icon
Create a new TI-Nspire™
document.
Shortcut
Key
Windows®:
Ctrl+N
Macintosh®:
“+N
New
PublishView™
Document
Create a new PublishView™
document.
Windows®:
Ctrl+Shift+N
Macintosh®:
“+Shift+N
Open
Document
Open an existing document Windows®:
Ctrl+O
Macintosh®:
“+O
Close Close a document Windows®:
Ctrl+W
Macintosh®:
“+W
Save
Document
Save a document Windows®:
Ctrl+S
Macintosh®:
“+S
Save as... Save a document with a new
name
Save to
Handheld
Save the document to a
connected handheld
Using the Documents Workspace 53

File Menu
Options Tool bar
Option
Convert to • Convert a TI-Nspire™
(.tns) document to a
PublishView™ (.tnsp)
document
• Convert a PublishView™
document to a
TI-Nspire™ document
Export • Export to web page
• Copy HTML to clipboard
Print Print a document
Settings Access settings for changing
the language, document
settings, and TI-SmartView™
emulator options.
Icon
Shortcut
Key
Windows®:
Ctrl+P
Macintosh®:
“+P
Document
Properties
View and set document
properties such as copyright
and protection settings.
View copyright
Information
Recent
documents
If document has a copyright,
that information is displayed.
Access recently opened
documents.
Exit Exit or close the software,
with a prompt to save any
unsaved work.
54 Using the Documents Workspace
Windows®:
Alt+F4
Macintosh®:
“+Q

Using the Edit menu
Options available on the Edit menu are listed in the following table
along with their corresponding tool bar icon and shortcut key if
applicable.
Edit Menu
Available Tasks Tool bar
Option
Undo
Undo last action performed
Redo Click Redo to reverse the
Undo
Cut Cut text from a document
and copy it to the clipboard
Copy Copy text from a document
to the clipboard
Paste Paste text in the clipboard
into a document
Rename Give a file a new name
Delete Permanently delete a file
Page layout Select a page layout for the
current TI-Nspire™ or
PublishView™ document.
Icon
Shortcut Key
Windows®:
Ctrl+Z
Macintosh®:
“+Z
Windows®:
Ctrl+Y
Macintosh®:
“+Y
Windows®:
Ctrl+X
Macintosh®:
“+X
Windows®:
Ctrl+C
Macintosh®:
“+C
Windows®:
Ctrl+V
Macintosh®:
+ V
ì“
Windows®:
F2
Delete key
Using the Documents Workspace 55

Edit Menu
Option
Available Tasks Tool bar
Icon
Shortcut Key
Color Apply color to text and
highlight text background
with color.
• Fill color
•Line color
•Text color
Using the View menu
Options available on the View menu are listed in the following table
along with their corresponding tool bar icon and shortcut key if
applicable.
View Menu
Available Tasks Tool bar
Options
Computer
View document in
computer mode
Handheld View document in
handheld mode
Scaling Change the size of a
document view in
handheld mode
Previous page Return to a previous
page in document with
multiple pages
Next page Go to the next page in a
document with multiple
pages
PublishView™
Layout Options
When a PublishView™
document is active, you
can select to show or
hide problem breaks and
object borders.
Short-cut Key
Icon
Windows®:
Alt+Shift+C
Macintosh®:
option + Shift +
C
Windows®
Alt+Shift+H
Windows®:
Ctrl+left
Macintosh®:
option + !
Windows®:
Ctrl+right
Macintosh®:
option + "
56 Using the Documents Workspace

Using the Insert menu
Options available on the Insert menu are listed in the following table
along with their corresponding shortcut key if applicable.
Insert Menu
Options
Available Tasks Shortcut Key
Add a problem
Add pages to a document with one of
the following applications:
•
•
•
•
•
•
•
• (Teacher software only)
Insert an image into a document (not
active if application does not support
images)
Insert a new program editor, open or
view an existing program editor, or
import a program editor
Opens the sensor console on the bottom
of the active application to accept data
collection input.
Windows®:
Ctrl + I
Macintosh®:
ì“ + I
Windows®:
Ctrl + D
Macintosh®:
ì“ + D
Using the Documents Workspace 57

Using the Tools menu
Options available on the Tools menu are listed in the following table
along with their corresponding tool bar icon and shortcut key if
applicable.
Tools Menu
Available Tasks Tool
Options
Screen
Capture
• Capture Page
• Capture Selected
Handheld
Copies the active page
or handheld screen to
the clipboard and to the
TI-Nspire™ Screen
Capture window.
Transfer Tool Opens the Transfer Tool,
which is used to transfer
files and folders to
connected handhelds
Variables Create and store
variables in a problem
Refresh
Libraries
Install
Handheld OS
Refreshes the list of
stored libraries.
Update the operating
system on a connected
handheld
bar
Icon
Shortcut Key
Windows®: Ctrl + J
Macintosh®: ì“
+ J
Windows®: Ctrl + T
Macintosh®: ì“
+ T
Windows®: Ctrl + L
Macintosh®: ì“
+ L
Using the Window menu
Options available on the Window menu are listed in the following table
along with their corresponding shortcut key if applicable.
Window Menu
Options
Reset
workspace
layout
58 Using the Documents Workspace
Available Tasks Shortcut Key
Reset the workspace layout

Window Menu
Options
Available Tasks Shortcut Key
Content
Workspace
Documents
Workspace
Teacher software only: open the
Content Workspace
Teacher software only: Open the
Documents Workspace
Document Tools Opens the application menu for the
active application.
Page Sorter Show pages of multiple page
document in the Documents Toolbox
TI-Smartview™
Emulator
Opens the TI-Smartview™ emulator
in the Documents Toolbox. In the
teacher software, the emulator
works the same as the handheld.
Students can use TI-SmartView™
feature to emulate a keypad and use
the software as if using a handheld.
Windows®:
Ctrl + Alt + 1
Macintosh®:
ì“ + Alt + 1
Windows®:
Ctrl + Alt + 3
Macintosh®:
+ Alt + 3
ì“
Windows®:
Ctrl + Alt + M
Macintosh®:
+ Alt + M
ì“
Windows®:
Ctrl + Alt + P
Macintosh®:
ì“
+ Alt + P
Windows®:
Ctrl + Alt + E
Macintosh®:
+ Alt + E
ì“
Utilities Opens Utilities in the Documents
Toolbox
Content
Explorer
Autohide
Documents
Toolbox
Opens the Content Explorer in the
Documents Toolbox
Select this option to hide the
Documents Toolbox and make the
workspace area larger. When you
hide the Documents Toolbox, a tab is
placed vertically on the left side of
the window for accessing the tools.
Using the Documents Workspace 59
Windows®:
Ctrl + Alt + U
Macintosh®:
ì“ + Alt + U
Windows®:
Ctrl + Alt + O
Macintosh®:
+ Alt + O
ì“

Window Menu
Options
Available Tasks Shortcut Key
Show Document
in Tiles/Tabs
Toggle view to tiled view to show
thumbnails of open documents. If in
tiled view, toggle to show one
document in window with tabs
showing names of other documents
Screen Capture
Window
Opens the TI-Nspire™ Screen Capture
window
Document.tns Shows the name of open documents
Using the Help menu
Options available on the Help menu are listed in the following table
along with their shortcut key if applicable. See Getting Started with the
TI-Nspire™ Software for additional information about Help menu
options.
Help Menu Option What you can do Shortcut
Key
TI-Nspire™ Software Help Access help online help
Activate Activate the software
Register Register the software
Download latest
Guidebook
Download the latest
guidebook from the
Education Technology web
site
Visit education.ti.com Access the Education
Technology web site
F1
Visit Activities Exchange Go to the Activities Exchange
web site
Explore Online
Troubleshooting
Go to the Knowledge Base
where you can submit
questions
Run TI-Nspire™
Diagnostics
60 Using the Documents Workspace
Run diagnostics and send a
report to TI support

Help Menu Option What you can do Shortcut
Key
Check for Software
Updates
Check for Handheld OS
Update
About TI-Nspire™
Software
Welcome Screen Open the Welcome screen
Check for software updates
and download updated
software if needed
Check for handheld OS
updates and download
updated operating system
files if needed
Open the About window
Using the Documents Toolbox
The Documents Toolbox, located on the left side of the workspace,
contains tools needed for working with both TI-Nspire™ documents and
PublishView™ documents.
When you click a toolbox icon, the associated tools appear in the
workspace. Refer to the following table for information about each tool.
Icon What you can do
Opens the application menu.
Document Tools
In TI-Nspire™ documents, the Document Tools menu
contains tools available for working with an
application. The tools are specific to the active
application.
In PublishView™ documents, the Document Tools
menu contains tools needed to insert TI-Nspire™
applications and TI-Nspire™ documents, as well as
multimedia objects such as text boxes, images, and
links to web sites and files. See Working with
PublishView™ documents for more information
about these tools.
Using the Documents Workspace 61

Icon What you can do
• See the number of problems in your document
and where you are.
Page Sorter
• Move from one page to the other by clicking on
the page you want.
• Add, cut, copy, and paste pages and problems
within the same document or between
documents.
Note: When working in a PublishView™ document,
the Page Sorter is not available in the Documents
Toolbox.
Teachers can use TI-Smartview™ emulator to
demonstrate concepts on the handheld.
TI-SmartView™
TI-Smartview™ emulator works the same as the
handheld. Students can use the TI-Smartview™
feature to emulate a keypad to use the software as if
using a handheld.
Note: Content is displayed on the TI-Smartview™
small screen only when the document is in Handheld
view.
When working in a PublishView™ document,
TI-SmartView™ emulator is not available.
Provides access to the following utilities:
Utilities
•Math Templates
• Symbols
• Catalog
• Math Operators
• Unit Conversions
• Libraries
62 Using the Documents Workspace

Icon What you can do
• See a list of files on your computer
Content
Explorer
• See a list of files on any connected handheld
• Create and manage lesson bundles
• Update the OS on connected handhelds
Those using the TI-Nspire™ Teacher Software to work
with documents can use the Content Explorer tool to
send or collect documents between their computer
and connected handhelds without changing
workspaces.
Exploring Document Tools
In the following example, the Document Tools menu is open showing the
options for the Calculator application.
À
Á
Â
The Documents Toolbox menu.
À
Á Tools available for the Calculator application. Click ¢ to open
the sub-menu for each option.
Â
Click to close and click open Document Tools.
Using the Documents Workspace 63

Exploring the Page Sorter Pane
The following example shows the Documents Toolbox with the Page
Sorter open.
À
Á
Â
The Documents Toolbox menu.
À
Click the minus sign to collapse the view. Click the + sign to
Á
open the view and show pages in the document.
Scroll bar. The scroll bar is only active when there are too many
Â
pages to show in the pane.
Exploring the TI-SmartView™ pane or keypad pane
The TI-Smartview™ feature emulates how a handheld works. In the
teacher software, the emulated handheld facilitates classroom
presentations. In the student software, the emulated keypad gives
students the ability to drive the software as if using a handheld.
Note: The following illustration shows the TI-SmartView™ pane in the
teacher software. In the Student Software, only the keypad is shown. See
Using the TI-SmartView™ emulator chapter for more information.
64 Using the Documents Workspace

À
Á
Â
Ã
The Documents Toolbox menu.
À
Á Handheld Selector. Click the ¤ to select which handheld to
show in the pane:
• TI-Nspire™ CX
• TI-Nspire™ Touchpad
• TI-Nspire™ Clickpad
Then, select how to show the handheld:
• Normal
•High contrast
• Outline
Using the Documents Workspace 65

 View selector. In the teacher software, click ¤ to select the
handheld view:
• Handheld only
• Keypad plus sidescreen
• Handheld plus sidescreen
Note: You can also change these options in the
TI-SmartView™ Options window. Click
TI-Smartview™ Options
Note: The view selector is not available in the student
software.
When the Handheld Only display is selected, check Always in
Ã
to keep the display in front of all other open
Front
applications. (Teacher software only.)
to open the window.
Exploring the Content Explorer pane
Use the Content Explorer pane to:
• See a list of files on your computer
• See a list of files on any connected handheld
• Create and manage lesson bundles
• Update the OS on connected handhelds
• Transfer files between a computer and connected handhelds
Note: Teachers using TI-Nspire™ Teacher Software can use the Content
Explorer tool to transfer and copy documents between their computer
and connected handhelds without changing workspaces.
File> Settings >
66 Using the Documents Workspace

À
Á
Â
Å
Æ
Ã
Ä
The Documents Toolbox menu.
À
Shows files on your computer and the name of the folder where
Á
the files are located. Click
computer.
The list of folders and files within the folder named in the Look
Â
Ã
field. Right-click on a highlighted file or folder to open the
In:
context menu listing available actions for that file or folder.
Click to close the list of files. Click to open the list of files.
¤ to navigate to another folder on the
Using the Documents Workspace 67

Ä
Å
Æ
Options menu. Click ¤ to open the drop-down menu of
actions you can perform on a selected file:
• Open an existing file or folder
• Move (navigate) up one level in the folder hierarchy
• Create a new folder
• Create a new lesson bundle
• Rename a file or folder
• Copy selected file or folder
• Paste file or folder copied to clipboard
• Delete selected file or folder
• Select all files in a folder
• Package lesson bundles
• Refresh the view
• Install OS
Connected handhelds. Lists the connected handhelds. Multiple
handhelds are listed if more than one handheld is connected to
the computer or when using the TI-Nspire™ Docking Stations.
The name of the connected handheld. To display the folders and
files on a handheld, double-click the name.
Click ¤ to navigate to another folder on the handheld.
Exploring the Utilities pane
The Utilities pane provides access to the math templates and operators,
special symbols, catalog items, and libraries that you need when working
with documents. In the following example, the Math templates tab is
open.
68 Using the Documents Workspace

Á
Ã
À
Â
The Documents Toolbox menu.
À
Math Templates are open. Double-click a template to add it to
Á
a document. Click the Math Template tab to close the
template view.
To open the Symbols, Catalog, Math Operators, and Libraries,
click the tab.
Wizards On check box. Turn this option on to use a wizard to
Â
enter function arguments.
Tabs for opening views where you can select and add symbols,
Ã
catalog items, math operators, and library items to a
document. Click the tab to open the view.
Using the Documents Workspace 69

Using the workspace
The space on the right side of the window provides an area for creating
and working with TI-Nspire™ and PublishView™ documents. This space
provides a view of the document so that you can add pages, add
applications, and perform all work. Only one document at a time is
active.
You can view documents in one of two views: Computer mode or
Handheld mode. Either view will remember the last size and file location
you used.
•
Handheld mode. View documents as they appear on the handheld
screen. The screen size is limited as it would be on the handheld.
• Computer mode. This is the default view in the software as shown in
the following example.
Understanding the status bar
The status bar provides information about the current document,
enables you to toggle between Handheld and Computer modes, and
adjust the view of the document.
70 Using the Documents Workspace

À
ÁÂ Ã
Ä
À If in tabbed view, the name of the document is displayed. If unsaved,
the default name is "Document1." If in tiled view, open documents
are displayed as thumbnails in the workspace.
Á Problem and page number. References the current document.
 Settings. Current settings for Angle, Auto or Approximate, and Real
or Complex. Click here to view or change General or Graphs &
Geometry settings.
à Document View. Toggle between Handheld and Computer modes.
Click the appropriate icon to change views.
Ä Scale. When working with a document in computer mode, use the
Boldness scale to increase or decrease the boldness of the lines in a
document. Go to the left to decrease the boldness. Go to the right to
increase the boldness.
When working with a document in handheld mode, use the Scale
slider to control the size of the document in the workspace. Go left to
make the document smaller. Go right to make the document larger.
Viewing and changing document settings
Settings control how information is displayed in TI-Nspire™ and
PublishView™ documents.
• General settings control how all numbers, including elements or
matrices and lists, are displayed. You can change the default settings
at anytime and you can specify settings for a specific document.
• Graphs & Geometry settings control how information is displayed
in open problems and in subsequent new problems. When you
change the Graphs & Geometry settings, the selections become the
default settings for all work in these applications.
Changing General settings
Complete the following steps to customize the general settings that are
applied to your document.
1. Create a new document or open an existing document.
Using the Documents Workspace 71

2. From the status bar, double-click Settings or select
File > Settings > Document Settings to open the Document Settings
window.
When you open Document Settings the first time, the default General
Settings are displayed.
3. Press Tab or use your mouse to move through the list of settings. Click
¤ to open the drop-down list to view the available values for each
setting.
Field Value
Display Digits • Float
• Float1 - Float12
• Fix0 - Fix12
Angle • Radian
•Degree
•Gradian
Exponential Format • Normal
• Scientific
•Engineering
Real or Complex Format • Real
• Rectangular
•Polar
72 Using the Documents Workspace

Field Value
Calculation Mode • Auto
• CAS: Exact
• Approximate
Note: Auto mode displays an answer
that is not a whole number as a fraction
except when a decimal is used in the
problem. Exact mode (CAS) displays an
answer that is not a whole number as a
fraction or in symbolic form, except
when a decimal is used in the problem.
Vector Format • Rectangular
• Cylindrical
• Spherical
Base • Decimal
•Hex
•Binary
Unit System (CAS) • SI
•Eng/US
4. Use the mouse to click and select the desired setting.
5. Choose one of the following options:
• To apply the customized settings to ALL documents, click
Default
.
• To apply the settings to the open document only, click
• To restore default settings, click Restore.
• Click Cancel to close the window without making changes.
Make
OK.
Changing Graphs & Geometry settings
Complete the following steps to customize the application settings for
graphs and geometry.
1. Create a new document or open an existing document.
2. From the status bar, double-click
Document Settings
to open the Document Settings window.
3. Click Graphs & Geometry to view the current settings.
Settings or select File > Settings >
Using the Documents Workspace 73

4. Press Tab or use your mouse to move through the list of settings. Click
¤ to open the drop-down list to view the available values for each
setting.
Field Values
Display Digits • Auto
•Float
• Float1 - Float12
• Fix0 - Fix12
Graphing Angle • Auto
•Radian
•Degree
•Gradian
Geometry Angle • Auto
•Radian
•Degree
•Gradian
5. Use the mouse to select the desired setting.
6. Click a check box to enable or disable an option.
74 Using the Documents Workspace

Check box Operation when selected
Automatically hide plot
labels
Show axis end values A numeric label is displayed at the
Show tool tips for function
manipulation
Plot labels are displayed only when
selected, grabbed, or hovered.
least and greatest values visible on
an axis
Shows helpful information as you
manipulate function graphs
Automatically find a point
of interest
7. Choose one of the following options:
• To apply the customized settings to ALL documents, click Make
Default
• To apply the settings to the open document only, click OK.
• To restore default settings, click
• Click Cancel to close the window without making changes.
.
Shows zeros, minima, and maxima
for graphed functions and objects
while tracing function graphs.
Restore.
Sending files to a handheld
From the Documents workspace, complete the following steps to send a
TI-Nspire™ document (.tns file) to connected handhelds.
1. Open the Content Explorer, then navigate to the file on your
computer that you want to send to the handheld.
2. "Drag and drop" the file to the handheld. Click the file to select it,
then without releasing the mouse button, drag the file to the
handheld. Release the mouse button to copy the file to the selected
handheld.
Note: You can also select
your computer to a connected handheld.
File > Save to Handheld to send a file from
Working with Lesson Bundles
Many lessons or activities contain multiple files. For example, teachers
usually have a teacher version of a file, a student version, assessments,
and sometimes supporting files. A lesson bundle is a container that
enables teachers to group all files needed for a lesson together. In the
Documents workspace, you can view, edit, demonstrate, and save
updates to .tns files in a lesson bundle. You can use lesson bundles to:
Using the Documents Workspace 75

• Add any type of file (.tns, .tnsp, .doc, .pdf, .ppt) to a lesson bundle.
• Send lesson bundles to connected handhelds; however, only the .tns
files are sent to the handheld.
• View all the files in a lesson bundle using the TI-Nspire™ Software
• Group all files associated with one lesson in one place
• E-mail one lesson bundle file to teachers or students instead of
looking for and attaching multiple files.
In the Documents workspace, options for working with lesson bundles
are in the Content Explorer.
Creating a new lesson bundle
Complete the following steps to create a new lesson bundle.
1. From the Documents workspace, click in the Documents Toolbox
pane to open the Content Explorer.
2. Navigate to the folder where you want to save the lesson bundle file.
3. Click to open the drop-down menu, then select
Bundle.
The new lesson bundle file is created with a default name and placed
in your list of files.
4. Type a name for your lesson bundle and press
New Lesson
Enter to save the file.
Adding files to a lesson bundle
By default, lesson bundles are empty when created. Use any of the
following methods to add files to a lesson bundle:
• "Drag and drop" any file into a selected lesson bundle. This method
moves the file to the lesson bundle. If you delete the lesson bundle,
the file is deleted from your computer. You can recover the file from
the Recycle Bin.
• Copy and paste any file into a selected lesson bundle.
• Use the "Add files to lesson bundle" option. This method copies the
selected files into the lesson bundle. The file is not moved from its
original location.
Using the Add files to lesson bundle option
To add files to the bundle using the Add files to lesson bundle option:
76 Using the Documents Workspace

1. From the Content Explorer, double-click the lesson bundle file to
open the lesson bundle window. The window name reflects that
name of the lesson bundle.
2. Click Add Files to Lesson Bundle to open the Add window.
3. Use the file manager to navigate to and select the file you want to
add to the lesson bundle.
• You can select multiple files at one time if they are located in the
same folder.
• If files are located in different folders, you can add them one at a
time.
• You cannot create a folder within a lesson bundle or add a folder
to a lesson bundle.
4. Click
Add to add the file to the bundle.
The file is added to the bundle and is now listed in the lesson bundle
window.
5. Repeat this process until all needed files are added to the lesson
bundle.
Using the Documents Workspace 77

Opening a lesson bundle
To view and work with files within a lesson bundle, complete one of the
following steps to open the lesson bundle file.
f Double-click the lesson bundle name.
f Select the lesson bundle, then right-click and select
context menu.
Open from the
f Select the lesson bundle, click , then select
f Select the lesson bundle, then press Ctrl + O. (Macintosh®: “ + O).
When you open a lesson bundle, the files in the bundle are displayed in a
separate window.
Note: You cannot open a lesson bundle outside of the TI-Nspire™
software. For example, if you open the folder using the file manager on
your computer and double-click the lesson bundle name, it does not
automatically launch the software.
Open.
Opening files within a lesson bundle
You can open any file within a lesson bundle on your computer if you
have the program associated with the file type.
• When you open a .tns or .tnsp file, the file opens in the Documents
workspace in the TI-Nspire™ software.
• When you open another file type, it launches the application or
program associated with that file. For example, if you open a .doc
file, it opens in Microsoft® Word.
Use one of the following options to open a file within a lesson bundle:
f Double-click the lesson bundle, then double-click a file within the
lesson bundle.
f Within a lesson bundle, select the file, then click
file name and select
78 Using the Documents Workspace
Open from the context menu.
¢ or right-click the

Managing files in a lesson bundle
You can open, copy/paste, delete, and rename files in an existing lesson
bundle. To locate and work with files in an existing lesson bundle:
1. In the Documents Toolbox pane, open the Content Explorer.
2. Navigate to the folder where the lesson bundle is saved.
3. Click
4. Select the file you want to work with and click
5. Select the action you want to perform:
¢ or double-click the lesson bundle name to open the Lesson
Bundle window.
¢ to open the context
menu.
• Click
• Click
• Navigate to a folder on your computer or select a handheld, then
• Click Delete to delete a file from the lesson bundle. Use caution
• Click
• Click Add Files to Lesson Bundle to select and add additional files
Open to open the file. TI-Nspire™ and PublishView™
documents open in the Documents workspace. When you open
another file type, it launches the application or program
associated with that file.
Copy to place the file in the clipboard.
right-click and select Paste to place the copied file in a new
location.
when deleting a file from a lesson bundle. You should ensure files
contained in the bundle are backed up if you need the files for
future use.
Rename to give the file a new name. To cancel this action,
press the Esc key.
to the bundle.
Using the Documents Workspace 79

• Click Refresh to update the list of files in the bundle.
• Click Package Lesson Bundle to create a .tilb file
• Click Send to Connected Handhelds to open the Transfer Tool
and send the selected file to connected handhelds. You can only
send .tns files to handhelds.
6. When finished, click Close to close the window.
Packaging lesson bundles
Packaging lesson bundles creates a "package" folder with a .tilb file. This
file contains all contents of the lesson bundle. You must package the
lesson before you can e-mail the lesson bundle (.tilb file) to colleagues or
students. By default, the lesson bundle is saved in the following folder:
...\TI-Nspire\New Lesson Bundle1.tilb\package\...
To package a lesson from the Documents workspace:
1. Open the Content Explorer.
2. Navigate to the folder where the lesson bundle is saved.
3. Select the lesson bundle you want to package.
4. Right-click to open the context menu, then select Package Lesson.
A dialog box is displayed confirming that the .tilb file was created
and the lesson bundle was successfully packaged.
5. Click
Yes to open the folder where the lesson package is stored. Click
No to close the dialog box.
E-mailing a lesson bundle
After a lesson bundle is packaged, you can e-mail the .tilb file to other
teachers or students. To attach the lesson bundle to an e-mail:
1. In your e-mail client, select the option needed to attach a file, then
navigate to the .tilb folder.
2. Make sure you open the folder and select the .tilb file to attach to the
email. You cannot email the .tilb folder.
80 Using the Documents Workspace

Managing lesson bundles
Use the options menu or the context menu to copy, delete, rename, or
send a lesson bundle to connected handhelds. You cannot add a folder to
a lesson bundle.
1. In the Content Explorer, right-click the lesson bundle name or click
to open the context menu.
2. Select the action you want to perform. If an action is not available, it
is grayed out.
• Click Open to open the lesson bundle.
• Click
• You cannot add a folder to a lesson bundle. If you select
• Select New Lesson Bundle to create a new lesson bundle. The
• Click Rename to change the name of the lesson bundle. Press the
• Click
• Navigate to another folder, then click Paste to copy the lesson
• Click Delete to delete the lesson bundle. Use caution when
• Select All highlights all files in the open folder. This action does
Up One Level to navigate up one level in the folder
hierarchy.
Open
, a new folder is added to the folder where the lesson
Folder
bundle is stored.
new lesson bundle is not added to the existing lesson bundle—it is
created in the same folder as the existing lesson bundle.
Esc key to cancel this action.
Copy to copy the lesson bundle to the clipboard.
bundle in another location.
deleting a lesson bundle. You should ensure files contained in the
bundle are backed up if you need the files for future use.
not apply to lesson bundles.
Using the Documents Workspace 81

• Click Package Lesson to create a .tilb file.
• Click Refresh to update the list of files in the open folder.
Sending lesson bundles to connected handhelds
1. In the Content Explorer, select the lesson bundle you want to send.
2. Using your mouse, "drag and drop" the lesson bundle file to a
connected handheld. You can also copy the lesson bundle, then paste
it to a connected handheld.
The lesson bundle is transferred to handheld as a folder with the
same name. Only .tns files are transferred to the handheld.
Using Screen Capture
Use Screen Capture to copy an image of the active view on your
computer or handheld. Images are copied to the clipboard and to the
TI-Nspire™ Screen Capture window. Use options in the TI-Nspire™ Screen
Capture window to save the images as .jpg files, which can be inserted
into to TI-Nspire™ applications that allow images or inserted into
documents created using other application such as Microsoft® Word.
Capturing pages in a document
1. From an open document, click .
• To capture the current page on your computer, select Capture
.
Page
• To capture the current page on a connected handheld, ensure the
handheld is selected, then click Capture Selected Handheld.
The image is copied to the clipboard and to the TI-Nspire™ Screen
Capture window. The dialog opens in
the lower right corner of your desktop when the screen capture is
complete.
2. Click View it to open the TI-Nspire™ Screen Capture window.
You can also select Window > Screen Capture Window to open the
TI-Nspire™ Screen Capture window.
82 Using the Documents Workspace

3. To capture additional pages, move to the next page in the document,
then click to select the option required to add that page to the
TI-Nspire™ Screen Capture window.
For more information about using screen capture, see Working with
TI-Nspire™ documents.
Updating the handheld OS
To install or update the operating system on a connected handheld from
the Documents workspace.
1. Ensure the updated OS file is downloaded to your computer and that
all work on the handheld is saved.
Note: You can find the latest OS files on the Education Technology
web site (http://education.ti.com).
2. Open the Content Explorer to see Connected Handhelds.
3. Select the handheld you want to update.
4. Click , then select
from the menu bar. The Select Handheld OS File dialog box opens.
Install OS or select Tools > Install Handheld OS
Using the Documents Workspace 83

5. Navigate to the folder on your computer where the operating system
file is located.
6. Select the file name, then click Install OS.
• If you are upgrading a TI-Nspire™ CX handheld, select
TI-Nspire.tco
• If you are upgrading a TI-Nspire™ CX CAS handheld, select
TI-Nspire.tcc
• If you are upgrading a TI-Nspire™ handheld, select TI-Nspire.tno
• If you are upgrading a TI-Nspire™ CAS handheld. select
TI-Nspire.tnc
7. When the confirmation message is displayed, click
Yes. The Installing
OS dialog opens indicating the progress of the download.
84 Using the Documents Workspace

8. When the Information dialog opens indicating that the download is
complete, click
OK. The updated operating system is installed on the
handheld. When the update is complete, the handheld reboots.
9. On the handheld, follow the prompts on the handheld to:
• Choose a preferred language
• Select a preferred font size
10. On the handheld, click
OK when the Welcome Screen opens.
The Home screen is displayed.
Using the Documents Workspace 85

86 Using the Documents Workspace

Working with TI-Nspire™ documents
This section describes how to work with TI-Nspire™ documents using the
Documents workspace. Information in this chapter is for the following
TI-Nspire™ software:
• TI-Nspire™ Teacher Software
• TI-Nspire™ Student Software
• TI-Nspire™ CAS Teacher Software
• TI-Nspire™ CAS Student Software
• TI-Nspire™ Navigator™ Teacher Software
When there are differences between the software, those differences are
described.
About documents
All work that you create and save with the desktop software is stored as
a document, which you can share with others using TI-Nspire™ software
and with those using handhelds. There are two types of documents:
• TI-Nspire™ document (.tns file)
• PublishView™ document (.tnsp file)
TI-Nspire™ documents
A TI-Nspire™ document consists of one or more problems and each
problem contains one or more pages. A single page is displayed in the
workspace on your screen. All work occurs in the applications within
pages. Because the TI-Nspire™ software and the TI-Nspire™ handhelds
share the same functionality, you can use the software to create
TI-Nspire™ documents that can be transferred between the software and
a handheld.
PublishView™ documents
PublishView™ documents can be printed on a standard piece of paper or
published to a web site or blog. PublishView™ documents can include
formatted text, images, and hyperlinks as well as all TI-Nspire™
applications.
For more information about creating and using PublishView™
documents, see Working with PublishView™ documents
Working with TI-Nspire™ documents 87

Managing TI-Nspire™ documents
When you first open the desktop software, the Documents workspace
opens with a blank document containing one problem. You can add
applications and content to this problem to create a document.
Note: The Welcome Screen is displayed when you open the software if
the "always show this at startup" option is selected. Click an application
icon to add a problem with an active application to a new document.
Creating a new TI-Nspire™ document
To create a new TI-Nspire™ document, complete the following steps:
1. From the menu bar in the Documents workspace, select
File > New
TI-Nspire™ Document
TI-Nspire™ Document
The new document opens in the Documents workspace and you are
prompted to select an application. By default, new documents open
in your current view: computer or handheld. To change the view, use
View menu or click the appropriate icon in the status bar.
the
2. Select an application to add a problem to the document.
The problem is added to the document.
or click on the tool bar, then select New
.
Saving TI-Nspire™ documents
To save a new document:
88 Working with TI-Nspire™ documents
 Loading...