

Page 1
使用說明書
LED iDTV
型號 MODEL: T1918Ei
T2218Ei
T2418Ei
使用前請仔細閱讀本使用說明書
感謝您選用德律風根產品
請妥善保存,以方便查閱
Thank you for selecting TELEFUNKEN products.
Please read this manual carefully before use, and keep it properly for future reference.
Page 2
用戶指南
1
尊敬的用戶:
感謝您購買LED背光電視機。本手冊將會幫助您更好的使用此電視機的功能。請您在使用前仔細閱讀
本手冊中的所有安全注意和使用說明項,並請保留此手冊。
警 告
為防止火災或觸電危險,勿將
産品被雨淋濕或受潮。
勿將本產品放置在有液體滴濺
或盛滿液體物的附近。如花瓶,
不要放在電視機上。
注 意
有火災或觸電危險
請勿打開
此符號表示“危險電壓 "
本產品中表示有觸電
或人身傷害的危險。
注意:有火災或觸電危險,請勿打
開外殼(後蓋)。內部無用戶可用
部分,請提交給有資格的維修人員
進行維修服務。
此符號表示重要的提示
資訊。
重要的安全注意事項及維護保養
電能可以實現很多的有用功能,但非正常使用也會造成人身傷害和財産損失。本産品在設計和製造時
已將安全放在第一位。但非正常使用會導致潛在的觸電或火災事故。爲避免這些潛在危險,請在安裝、操
作和清潔本産品時遵守下列說明。爲了您的安全和延長電視機的使用壽命,請在使用本産品之前仔細閱讀
下列警示。
1. 閱讀這些說明 --- 操作本産品前必須閱讀和理解操作說明。
2. 保存這些說明 --- 這些安全和操作說明必須妥善保存以備以後參考。
3. 注意所有的警示 --- 必須嚴格遵守産品上和說明書中的所有警示。
4. 遵循所有的說明 --- 必須遵循所有的操作說明。
5. 附件 --- 只使用廠家提供的附件。不要使用非廠家推薦的附件,使用不合適的附件會導致事故。
6. 電源 --- 本産品的標簽上列明瞭規定的電源。如果您不能確定您家中的電源類型,請與銷售商或當地
的電力公司聯繫。爲了更好地保護本産品,請在雷雨天氣、外出或長時間不用時,請拔掉電源和天線。
7. 電源線保護 --- 避免踩踏電源線,過分擠壓電源插頭和産品上的電源線引出端。
8. 插頭 --- 請重視插座和接地型插頭的安全性。插頭有個較寬的插片和一個較短的插片。接地型插頭有
兩個插片和一個接地插片。那個較寬的插片和接地點能保證你的安全。如果提供的插頭不適合你的插
座,請電工更換適當的插座。此產品的後標牌上標明了適合的電壓。為了避免觸電事故,請插緊插頭。
9. 電源插頭作為斷開裝置,該斷開裝置應當保持能方便地操作。
10. 過載 --- 牆上的電源插座、接線插座等過載會導致火災或觸電危險。
Page 3
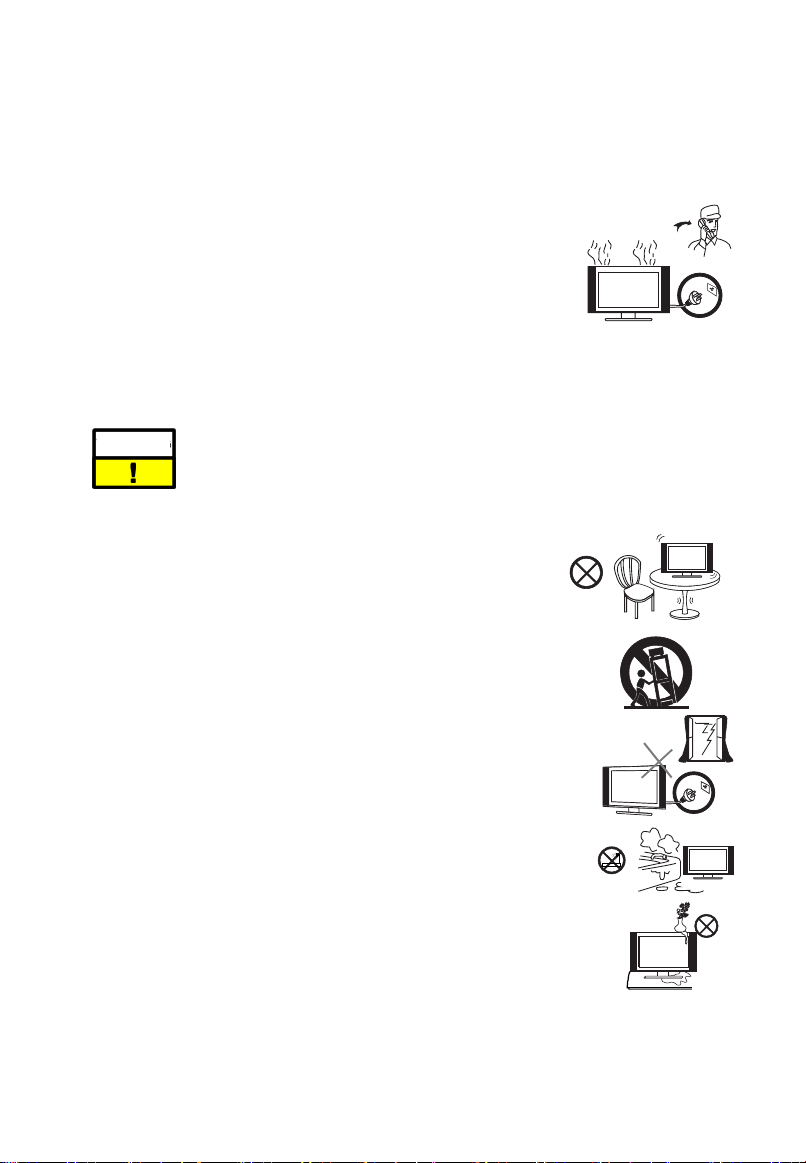
11. 異物和液體進入機內 --- 不要從散熱孔或其他開口處把物體插入或落入機內,本産品內部存在高壓,
2
落入的物體會造成觸電或引起內部器件短路。同樣的道理,避免水或液體濺到本産品上。
12. 維修服務 --- 如果有下列情形發生,請切斷電源,聯繫有資格的服務人員來維修。比如電源線或電源
插頭損壞、異物或液體落入産品內、産品被雨淋濕或受潮、無法正常使用,或著是被摔。
a. 電源線或電源插頭損壞。
b. 異物或液體落入産品內。
c. 産品被雨淋濕或受潮。
d. 産品無法按操作說明正常使用。
不要試圖進行操作說明介紹內容以外的調整,否則會損壞本産品,只有專業
的技術人員才能使用額外的調整。
e. 如果産品被摔或機殼受損。
f. 當産品不能正常顯示或性能出現異常變化。任何明顯的異常情況都預示産品需要維修服務。
警 告
13. 更換器件 --- 當産品需要更換器件時,請確認維修人員使用廠家提供的器件或性能和規格相同的器
件,使用未經認可的器件會導致火災、觸電等危險。
14. 安全檢查 --- 完成維修服務後,要求專業的技術人員進行安全檢查以確
保産品可以正常使用。
15. 懸挂 --- 當産品需要懸挂在牆上時,必須按照廠家推薦的方法安裝,使
用廠家推薦的器材,確保安全。
16. 臺式安裝 --- 只能使用廠家指定的或隨機配送的支架等,避免將產品放
置在不穩定的臺面上,否則會導致產品翻倒,引發人身傷害和產品損壞。
此部分只能聯繫被授權的有資格的服務人員來維修。任何用戶打開後蓋或其它嘗試都有
可能引起嚴重損壞或有觸電及引發火災的危險。
17. 小心搬移 --- 如果使用手推車,要提防産品翻倒引起傷害。急刹車、用力過猛
和地面不平會導致産品從手推車上翻倒。
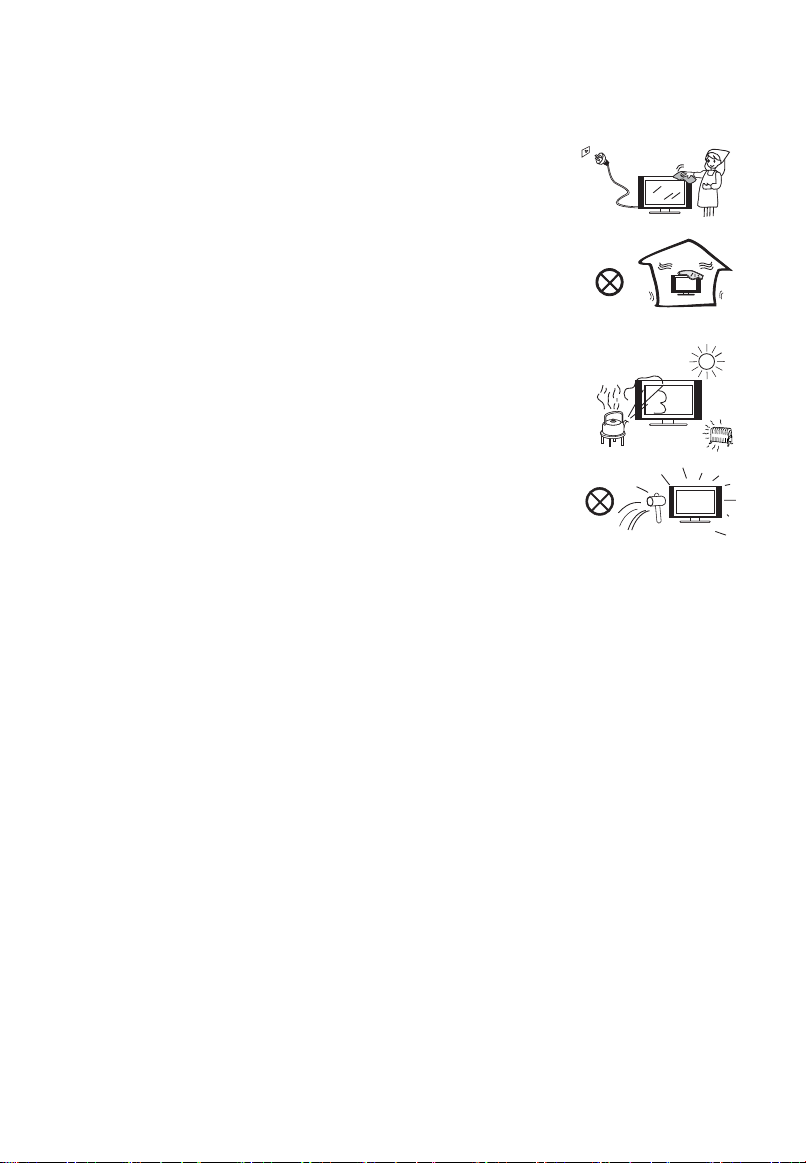
18. 閃電 --- 雷雨天氣或長時間不用時,請拔掉電源。爲了更好地保護本産品,請
在雷雨天氣、外出或長時間不用時,請拔掉電源和天綫,避免閃電和電源浪涌
電流損壞本産品。
19. 避免在水源附近使用本産品 --- 比如靠近浴缸、洗臉池、厨房水槽、洗衣池、游
泳池或潮濕的地下室等等。
本産品從低溫環境搬到高溫環境時,不要立即使用,因爲機內會結露,可能導致
火灾、觸電或其他危險。
Page 4
3
20. 請勿放置重物或者液體容器在電視機上面。請勿放置帶有明火的物體在電視機上面,例如蠟燭等,否
則有可能引起火灾或者是觸電事故。
21. 只能使用幹布擦拭 --- 擦拭之前請拔掉電源。不要使用液體或噴霧清潔劑。
22. 通風 --- 不要堵塞通風孔。請按照廠家說明安裝。機體上的開孔是用於通
風的,請不要覆蓋或堵塞這些通風孔,因爲通風不良會造成過熱,縮短産品
使用壽命。不要把産品放置在床上、沙發上、地毯或類似的物品上,這些物
品會堵塞通風孔。本産品不是爲嵌入式安裝設計的,不要將本産品放置在書
架或壁櫃等狹窄的空間裏,除非能夠提供良好的通風條件。
23. 熱源 --- 不要把本産品放置在熱源附近,比如電暖爐、熱風口、爐子或其他産
生熱量的設備(包括功放)。
24. 播放視頻信號方面的游戲或者附加的一些靜態圖片10秒或者以上,可能會讓這
些圖片在顯示器上面出現陰影。一些網絡或者節目LOGO,電話號碼,圖文和
4:3形式的圖片等靜止後,也會造成相似的損壞。而這個損壞是不屬于保修
範圍的。
25. 螢幕保護 --- 本産品的LED背光屏是玻璃製品,所以,本産品翻倒或被其他
體撞擊時,屏可能破裂。
物
當心不要被玻璃碎片劃傷。
26. 像素疵點 --- LED背光屏是尖端科技産品,可顯示精細的圖像。偶爾會有極少數的固定的像素會長亮,
但不會影響您的使用。
27. 本機使用時要求的環境溫度: 0℃~40℃
本機存放溫度: -20℃~50℃
28. 爲了預防火灾, 保持設備不要靠近蠟燭或者其他明火源。
29. 接地 --- 此設備應該連接到帶接地保護連接的電網電源輸出的插座上。
Page 5
遙控器使用
遙控器電池
4
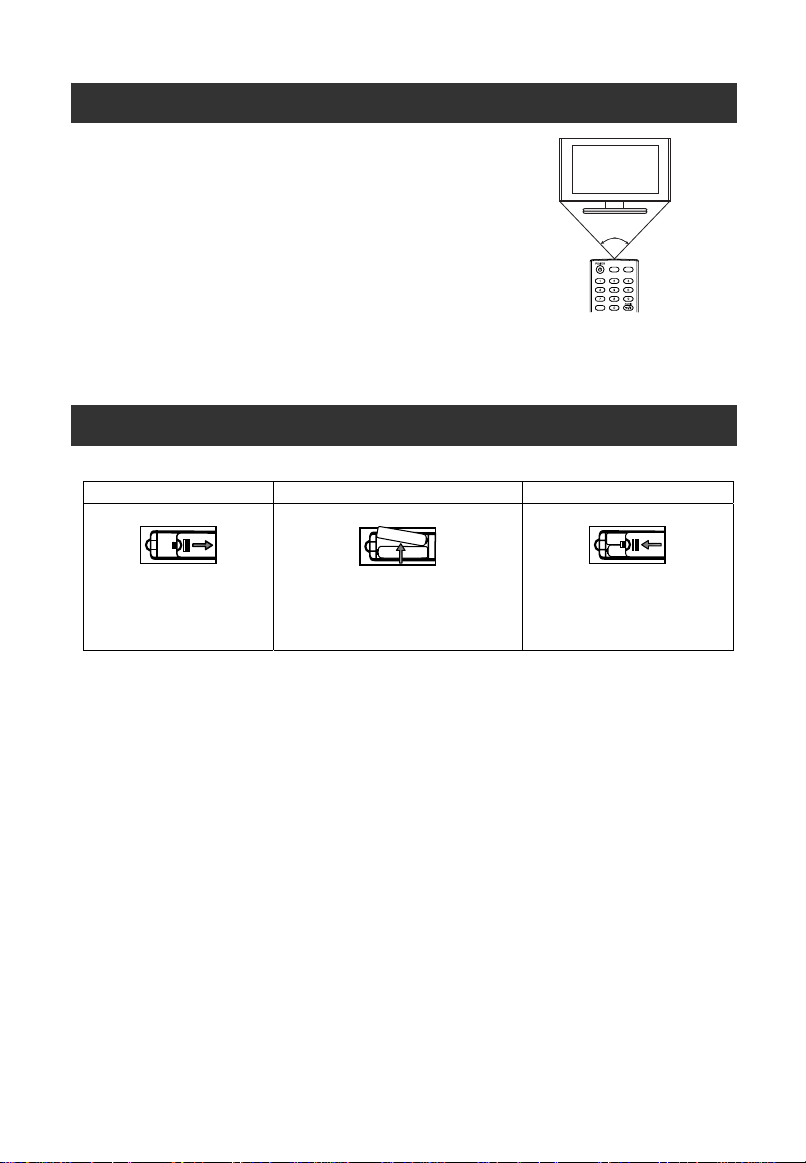
使用遙控器時,請對準電視機的遙控接收窗口。
遙控器和遙控接收窗口之間的障礙物可能會影響遙控功能。
注意:
示例僅供參考,不同型號電視機的遙控接收器位置可能不同。
DISP
遙控器使用注意事項
●不要重擊遙控器,避免遙控器進水,也不要放在潮濕的地方。
●避免陽光直接照射遙控器,遙控器受熱後可能變形。
●電視機遙控接收窗口受到陽光或強光直接照射時,遙控功能可能不正常,此時,請改換光線或電視機的
角度,或者靠近電視機操作遙控器。
MUTE
INPUT
如果遙控器不能遙控電視機,請更換遙控器裏面的電池。
1. 打開電池倉蓋。 2. 裝入兩節AAA電池。 3. 裝上倉蓋直到鎖緊。
●按照電池倉內的 (+) 、 (-)極標示正
確裝入電池。
電池使用警示
非正常使用電池會導致電池漏液或爆炸,務必遵守下列說明。
●按照 (+)、(–) 極標示正確裝入電池。
●不同規格的電池特性不一致,不要混用不同規格的電池。
●不要新舊電池混用,否則會縮短新電池的壽命或導致舊電池漏液。
●電池耗盡後請儘快更換。電池漏液會引起皮疹。如果發現漏液,請用布擦去。
●由於存儲環境的原因,隨電視機配送電池的使用壽命可能比預期壽命短。如果長時間不用遙控器,請取
出電池。
●電池(電池包或組合電池)不得暴露在諸如日照、火烤或類似過熱環境中。
注意:
本手冊中的圖片僅供參考,請以實物為准。
Page 6
安裝接線
5
安裝使用前請首先仔細閱讀“維修保養及安全注意事項"的有關內容。
1. 將電視機從包裝箱內取出,並放置在通風良好的平面上。
注意: 在接插電視機、電腦和其他設備前,要確認交流電源已斷開;拔電源和信號線時,手要握住插
頭(絕緣)部分,不可直接拉拔線體部分。
2. 可以將射頻信號線的輸出端,接到本機的射頻信號輸入端口。
3. 可以將 DVD 的 AV 輸出通過 AV 連接線連接到本機的 AV 端口。
4. 可以將 DVD 的 COMPONENT(YPbPr)信號的輸出通過 AV 端子連接線連接到本機的 COMPONENT
(YPbPr)輸入端口。
5. 把 VGA 連接線的一端接到電腦主機上的 VGA 接頭,另一端接到本機的 VGA 輸入端口,並以順時針方
向鎖緊 VGA 連接線上兩頭的螺釘。
注意: 連接時請對準 15 針 VGA 接頭,插入時請勿用力過度,以免損壞針腳。
6. 把 HDMI連接線的一端接到有 HDMI 信號輸出信號源的HDMI 接頭,另一端接到本機的 HDMI輸入端口。
注意: 連接時請對準 HDMI 接頭,插入時請勿用力過度,以免損壞針腳。
7. 檢查各種音視頻信號線均準確地插到對應的接口。
8. 將交流電源線插入 220V 交流電網。
9. 將交流電源線的另一端插入本機適配器的交流電源輸入插口。
警告:
本電視機的交流輸入電壓範圍為:220V/50Hz,禁止將超出此範圍的交流電壓輸入到本機適配
器的交流電源輸入端口。
當您拔掉電源線時,手要握在電源插頭的絕緣部分,不可直接接觸金屬線體。
Page 7
遙控器介紹
6
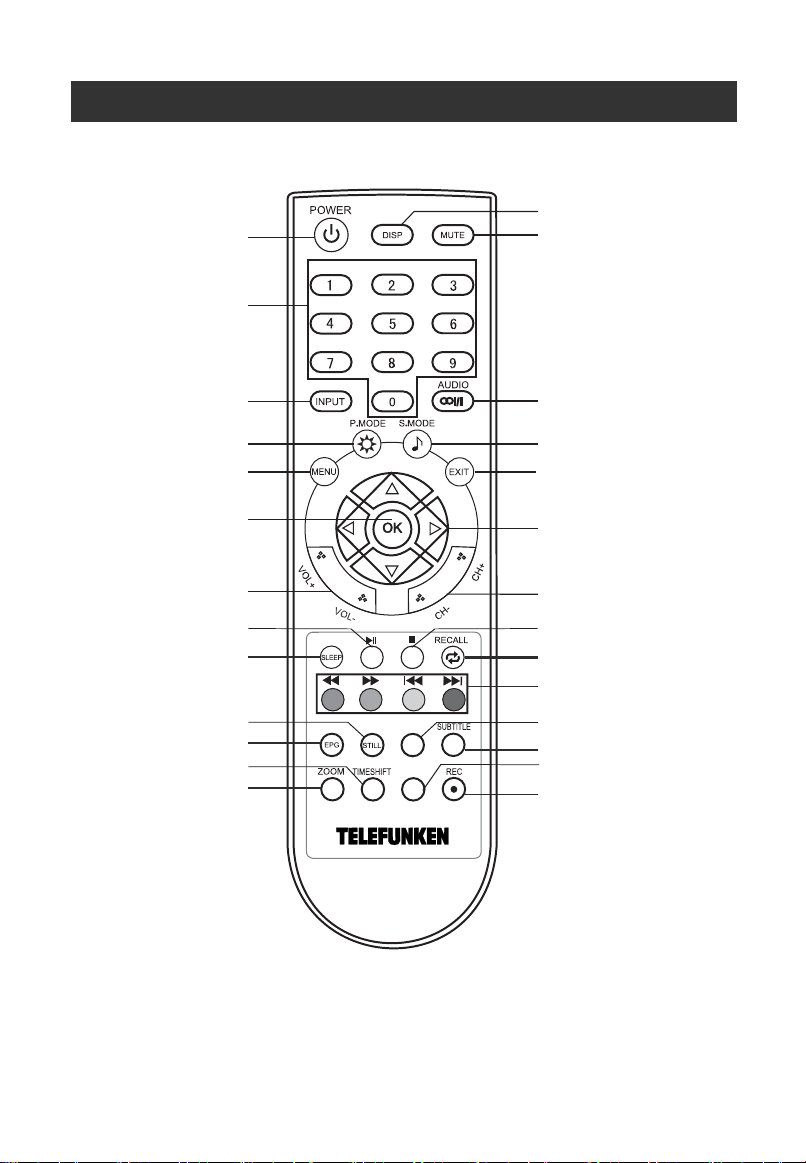
本機使用的原型遙控器型號,其按鍵示意圖如下:
進入或退出待機模式
數字鍵
顯示當前節目信息
禁音
選擇輸入信號通道
選擇圖像模式
菜單鍵
確認鍵
增加或減少音量
播放或暫停
設置睡眠時間
凍結或解凍畫面
打開或關閉 EPG 菜單
時間平移
選擇不同的畫面尺寸比例
PVR LIST
CH LIST
選擇不同的聲音設置
選擇聲音模式
退出
方向鍵
上下切換頻道
停止鍵
返回鍵
/
快退 / 快進 / 上一個檔
顏色鍵
下一個檔
已刻錄檔列表
選擇字幕語言
顯示頻道列表
快速刻錄數碼電視節目
注意:
操作時,請將遙控器對著電視機紅外接收窗口的方向。請勿重壓、弄濕、跌落或拆分遙控器。按
遙控器上按鍵的時間間隔為至少 1 秒。
/
Page 8
操作
7
開機/關機
1. 開機
1. 將電源適配器的一端同電視連接,另一端通過電源線接入交流電網,電視機進入待機狀態。
2. 在待機狀態下,按下遙控器上的 鍵開機。
2. 關機
1. 若需暫時關機,按下遙控器上的 鍵即可。
2. 若要完全關閉電源,請將交流電源線插頭從電源插座中拔出。
注意:電腦通道下無信號時約 16 秒后電視機將自動進入待機狀態,其他通道無信號輸入約 3 分鐘后自動
待機。當連接了電腦信號后電視將自動開機。
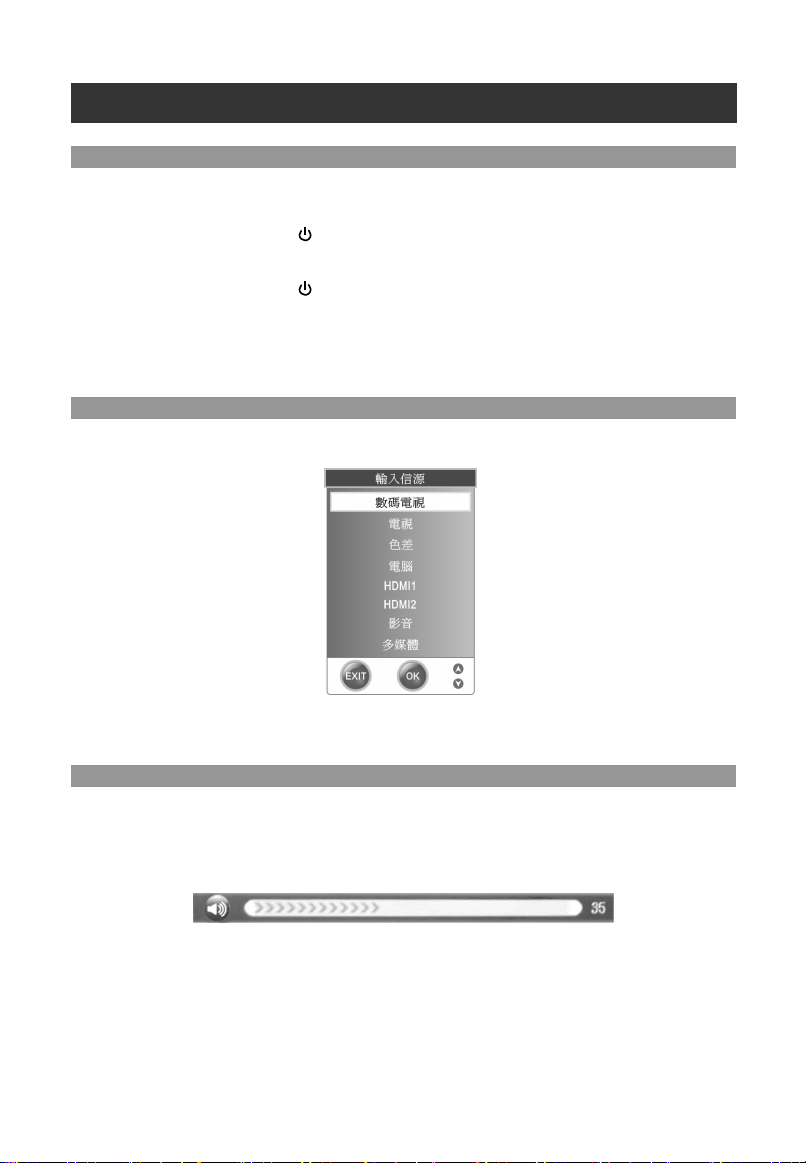
通道選擇
按 INPUT 鍵打開輸入信源菜單,按 ▲ / ▼ 鍵選擇你所需要的信號源,然後按下 OK 按鍵確認。
注意:
請確認你所切換的信號源是否有信號,或信號線是否連接到正確的端子。如果切換到的信號源沒有信號,
那麼請重啟電視機。
音量控制
按遙控器上的 VOL+/VOL- 按鍵可以調整音量。
按遙控器上的 MUTE 鍵可以暫時關閉聲音。可通過按 MUTE 鍵或調大音量退出靜音狀態。
Page 9
電視機基本操作
8
1. 按 MENU 鍵進入主功能表,按◄/►鍵選擇子功能表。
2. 按 OK 或▼鍵,進入子菜單。
3. 按▲/▼鍵選擇需要調整的子選項,按◄/►鍵對選中的子選項進行設置和調整。
4. 按 MENU 鍵返回到上一級菜單。
5. 按 EXIT 鍵退出菜單設置。
z 當菜單中的一些選項是灰色的時候,說明這個選項在當前的狀態中不可調或不能被設置。
z 菜單中的部份選項會根據不同的信號源或狀態自動顯示或隱藏。
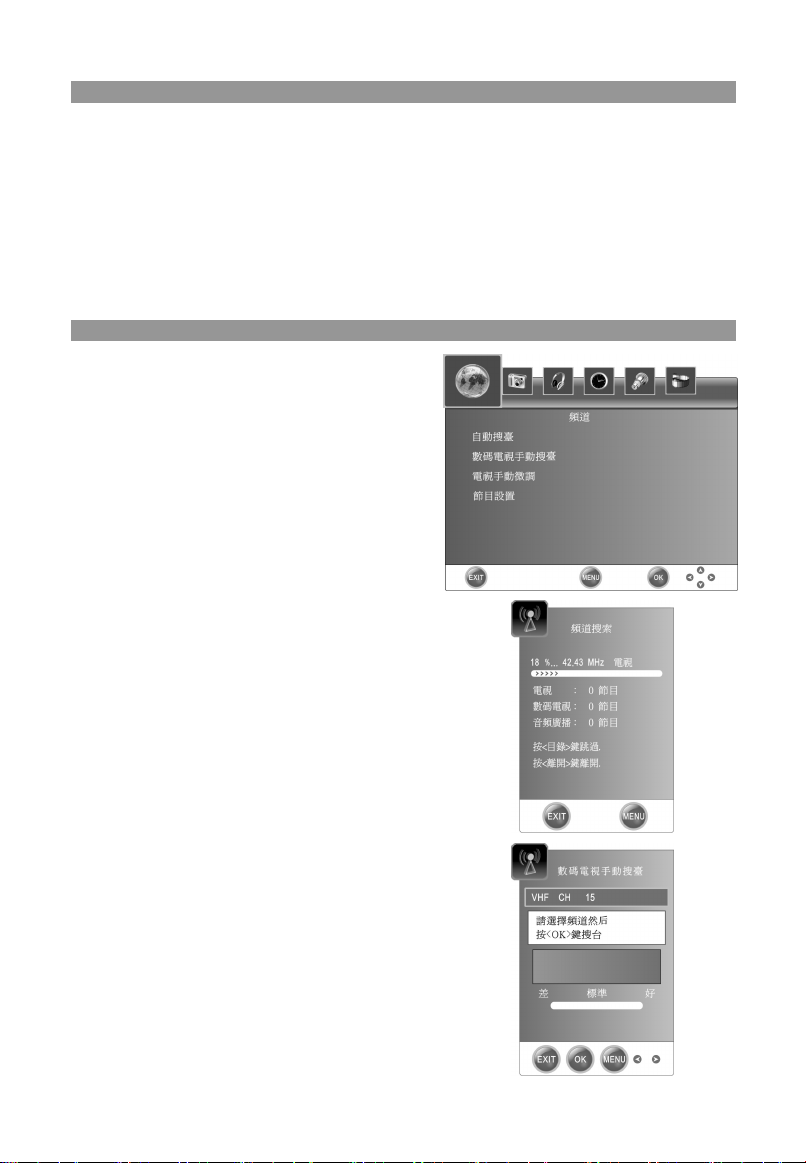
頻道設置菜單
按遙控器上的 MENU 鍵打開主菜單,按◄/►鍵選擇頻道
菜單。如圖所示:
自動搜臺
按 OK 鍵開始自動搜臺。在搜臺過程中,按MENU 鍵可跳過當前
搜索,按 EXIT 鍵可退出自動搜索。
數碼電視手動搜臺
按◄/►鍵選擇相應的頻道號,按 OK 鍵確認搜台。
Page 10
9
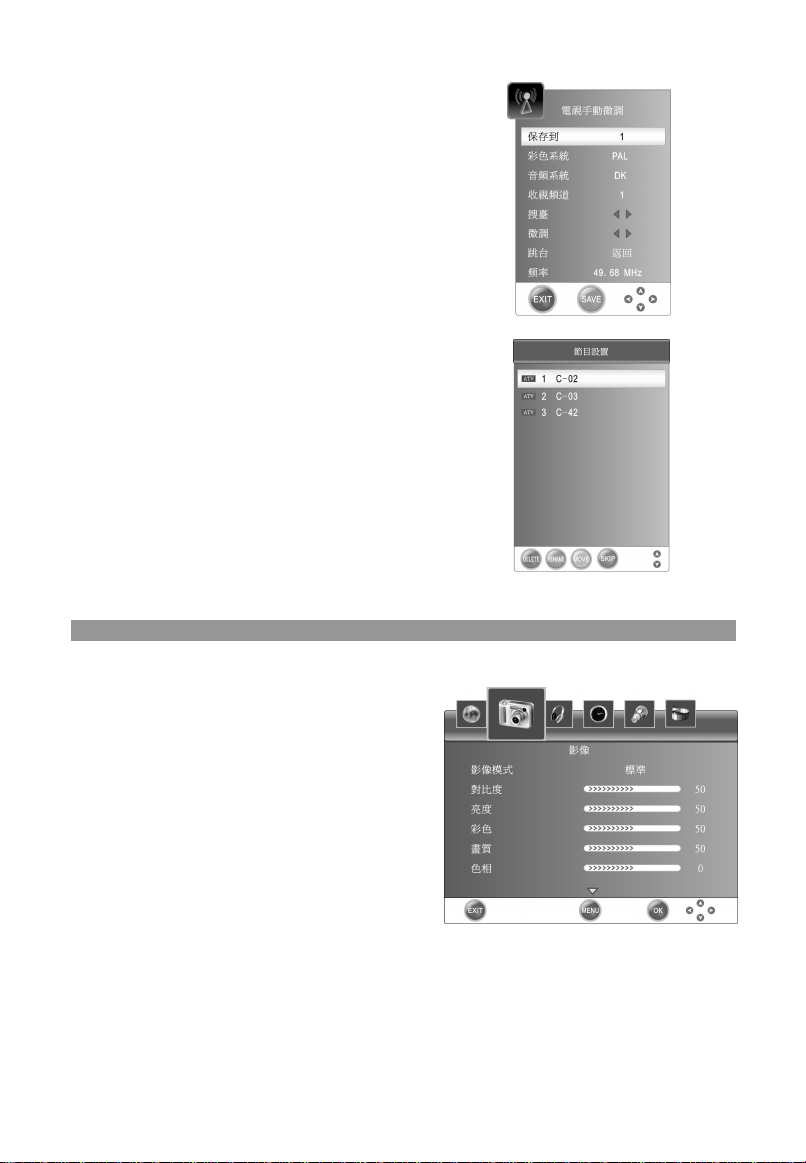
電視手動微調
按▲/▼鍵選擇子選項,按◄/►鍵設置和調整。
按紅色鍵保存。
節目設置
按紅色鍵刪除當前頻道。
按綠色鍵重命名當前頻道。(僅在電視模式下)
按黃色鍵移動當前頻道。
頻道移動功能只能在相同類型的頻道間進行。
按藍色鍵設置跳過當前頻道。
影像設置菜單
按遙控器上的 MENU 鍵打開主菜單,按◄/►鍵選擇影像
影像模式
用於選擇不
對比度
用於調整
亮度
用於調
彩色
用於調
畫質
用於調
色相
用於調
色溫
用於選
同的圖像模式。
圖像的對比度。
整圖像的亮度。
整圖像的飽和度。
整圖像的銳利度。
整圖像的色調,此功能僅在 NTSC 節目源時使用。
擇色溫模式。
菜單。如圖所示:
Page 11

螢屏
10
寬
像顯示比例。
可選擇圖
雜訊抑制
圖像降噪功
能,可以打開降噪功能和調節降噪的強度的
大小。
熒幕
通道下的圖像設置菜單中,選擇螢幕設置項進入:
在電腦
自動調整:對圖像的位置及顯示效果進行自動調整。
水平位置.,垂直位置.,大小,相位:
按◄/►鍵調整相應參數。
聲音設置菜單
按 ENU 鍵打開主菜單,按◄/►鍵選擇聲音菜單。如圖所示:
遙控器上的 M
聲音模式
用於選擇不
EQ
同的聲音模式。
當聲音模式設置爲自訂時,按 OK 鍵進入均衡器菜單,
你可以根據自己的喜好增强或减弱某些伴音效果。
平衡
用於調
整左右聲道的平衡。
自動音量調整
對音量進行自動
調整。
SPDIF 輸出 (僅在數碼電視下使用)
按◄/►鍵選
時間設置菜單
按 ENU 鍵打開主菜單,按◄/►鍵選擇時間菜單。如圖所示:
遙控器上的 M
擇同軸輸出的模式。
時鐘
設置當前時鐘,系
動獲取時間,此功能將無法進行時鐘調整。
從中自
睡眠關機
統如果搜索到一個數碼電視節目並且
設置睡眠關機時間。
自定開機畫
使用 U 盤上的圖
請將 想要設置 爲開機 畫面的 圖片命
面
片設置開機畫面。
名爲
USERLOGO
,
幷放置于 U 盤的根目錄下。 圖片文件的後輟名必須爲
.jpg。圖片大小需要小于 120K。
1080P 高清倍綫
打開或關閉 1080P 高清倍綫。
動態優化引擎
打開或關閉動態優化引擎。
軟體版本
顯示軟體版本號。
Page 12

選項設置菜單
11
按 鍵打開主菜單,按◄/►鍵選擇選項菜單。如圖所示:
遙控器上的 MENU
目錄語言
選擇菜單語言。
目錄消失時間
選擇菜單消失時間。
目錄透明度
選擇菜單的透明度。
軟體升級
用於電視機軟體升級。
工廠設定
執行該項操作,電視機將自動恢復到出廠設置的數據。
錄影設置
( 只限數碼電視訊號 )
按 OK 鍵進入錄影設置菜單。
選擇磁碟:選擇該磁盤作為錄影功能的磁盤。
檢測錄影文件系統:
啟動磁盤檔系統的檢查,並可設定
錄影檔系統的大小。
USB 磁碟:USB 磁盤是否啟動。
格式化:格式化 USB 磁盤,創建 PVR 檔系統。
時移空間設置: 做時移的時間。
U 盤速度:USB
顯示能
存儲設備的讀取和寫入速度。
數碼電視節目刻錄
連接好
USB 存儲設備, 選擇檢測錄影文件系統, 進行此操作之前,
資料丟失,如果 USB
存儲設備未被系統格式化過, 系統將自動將 USB 存儲設備格式化。
請備份好 USB 存儲設備的資料,以避免
警告:進行 PVR 功能操作前請確保 USB 存儲設備中的文件已備份。
1. PVR 檔佔用存儲設備大小可根據用戶決定 如果用戶選擇的容量越大,支援刻錄時間就越長。在 EPG
菜單中選擇你想要錄影的內容。按 REC 鍵打開記錄菜單,按 OK 鍵啟動刻錄功能,直到按
或 U 存儲設備容量空間滿結束錄影。
SB
2. 在錄影的過程中可以按 REC 鍵縮放錄影菜單。
錄影結束后,按 LIST 鍵,彈出當前
3. U 盤中已刻錄節目列表。已錄影的節目請到多媒體菜單中進
PVR
停止鍵
行播放。
間設置
時移空
1. 存儲設備的容量決定做時間平移的時間。
2. 按 TIMESH
IFT 鍵,啟動時間平移。
3. 按
鍵停止此功能。
4. 按鍵
播放或暫停。
Page 13

使用 PVR 錄功能注意事項
12
1
2. 如果啟動系統的格式化功能
刻
. USB 記憶體必須大於 1G。
USB 存儲設備中有病毒,可
,可能會將 USB 存儲設備的內容全部刪除,請格式化之前備份資料,如果
能會造成無法識別的情況。
3. PVR 功能只能在 DTV 下使用。
如果用戶的記憶體有多個分區,用戶可以根據需要選擇一
4. 個分區來進行格式化,將此分區做為 PVR 的
空間。
5. PVR 錄影系統單次最長刻錄時間為 6 小時。
USB 記憶
6. 體必須支援 USB2.0 高速規範。
7. PVR 錄影過程中,如遇到中途突然斷電,則無
法保存所刻錄的信息。
HDMI 滿屏
打開或關閉 HDMI 滿屏。
多媒體播放功能
進 模式
入與退出多媒體
接 USB 存儲設備。按 INPUT 鍵打開輸入信源菜單,然後按▲/▼鍵選擇多媒體通道,按OK 鍵進入。也
連
可通過輸入信源菜單退出
多媒體通道。
注意:對于特殊的 USB 設備,本機可能不兼容。
主操作介面
按
按▲/▼鍵選擇
按
◄/►鍵選擇圖片,音樂,電影,文本,按 OK 鍵進入。
文件或文件夾選項, 按 OK 鍵進入對應的文件夾或選中要播放的文件。
鍵播放。按 鍵可停止播放文件。
按▲/▼鍵選擇上級,按 OK 鍵返回上一級菜單。按 EXIT 鍵退出。
Page 14

持的格式支
13
機的多媒體功能可播放圖片,音樂,電影,文本文件。
本
圖片可播放 JPEG, BMP
格式文件。
音樂可播放 MP3,WMA 格式文件。
電影可播放 MPEG-1/MPEG-2/MPEG-4
, H264 格式文件。
文本可播放 TXT 格式文件。
注意:對於特殊編碼的文件可能不支持。
多
按
媒體菜單
遙控器上的 MENU 鍵打開主菜單,按◄/►鍵選擇多媒
體菜單。
圖片播放的速度
圖片時的速度。
調整播放
重複
選擇文件重複播放的模式。
件播放功能
文
.
1
播放或暫停
按 鍵可開始播放所選的文件。在播放音樂或電影文件時,按此鍵可暫停播放。
2. / 快退或快進
按 / 鍵快退或快進播放音樂或電影文件。在播放文本文件時按 / 鍵可進行翻頁。
3. / 前一個文件或後一個文件
選擇上一個文件播放,按
按 選擇下一個文件播放。
4. 停止
按 鍵可停止播放文件。
Page 15

特色按鍵
14
UBTITLE
S
按 SUBTITLE
鍵選擇當前頻道的字幕語言。(僅在數碼電視下使用)
CH LIST
按 CH LIST 鍵打開節目列表。
按 ▲/▼ 鍵選擇頻道。
按 OK 鍵進入相應頻道。
按 EXIT 鍵退出。
AUDIO
按 AUDIO 鍵選擇當前頻道的伴音類型。(僅在數碼電視下使用)
DISP
按 DISP 鍵可顯示當前頻道的信息。
EPG
EPG 僅在數碼電視下使用。按 EPG 鍵打開數字節目導航。
請根據菜單下面的提示進行相應的操作。
MHEG5 信息
當你看到有類似下面的信息出現時,表示有 MHEG5 信息。
請根據提示 按遙控上對應的顏色按鍵進入 MHEG5 信息菜單,按 EXIT 鍵退出。 ,
Page 16

簡單故障排除
15
在通知維修人員之前,請按下表檢查,看看能否找到故障原因。
現 象 可能原因 解決方法
無圖片,無
圖像異常,伴音異常
有雪花狀干擾
無圖像,無聲音,指示燈亮綠
燈
出現藍屏,顯示AV或S-Video
圖像模糊,抖動或有黑色水平
干擾線(PC模式下)
PC 圖像位置不居中
沒有聲音
VGA圖像顯示顏色嚴重偏色 將色溫調亂
HDMI 信號時,雪花狀佈滿全
屏或圖像異常,無聲音
遙控失靈 電池安裝不正確或電量耗盡
注意:
LED背光電視機是一種高科技產品,它由 多個薄膜晶體管組成,能使產生的畫面完美重現。但3,932,160
是在少數情況下
注意,這種情況的出現並不影響該產品的任何性能。
LED背光電視機的VGA顯示部分是按照典型、標準的VGA顯示適配器精心設計的,也考慮了適應市場上一
些低質顯示適配器。但若使用低質的顯示適配器顯示質量可能會受到一定的影響。
本手冊中所有圖片僅供參考,請以實物為准。
聲音,指示燈不亮
,幾個不活躍的象素可能會使屏幕上出現固定的藍點、綠點、紅點,或者黑點、白點。請
沒有插上交流電源插頭
1. 對比度,亮度,色度設置不正
確
2. 彩色制式設置不正常
3. 聲音制式設置不正常
該電視頻道信號差或者信號線質
量低劣。
對比度,亮度,色度以及音量被
設置為最小;或者處於靜音狀態
信號線沒有連接正確 連接好信號線
沒有視頻信號或者視頻
接或接錯
PC 圖像未調整好
沒有音頻信號或者音頻線沒有接
好
用戶
信號產生不標準 再插一次HDMI的信
信號線未
插上交流電源插頭
1. 調節對比度,亮度,
2. 將彩色制式設置正確
3. 將聲音制式設置正確
使用質量合格的信號線
調節對比度,亮度,色度以及音
量
將信號線準確接
進入“設置"菜單,選擇自動調
整項進行自動調整和調整相位解
決
接好
音頻信號線
重調用戶色溫,也
廠設定的標準色溫
檢查電池極性是否裝反,電池
極是否和彈簧接觸良好,更換新
電池
色度
好
可以選擇由工
號連接線
兩
Page 17

INSTRUCTION MANUAL
1
DEAR CUSTOMER:
Congratulations on your purchase of the LED(BACKLIGHTING) color television! This manual will help
you use the many exciting and useful features to make your LED(BACKLIGHTING) TV viewing more
enjoyable than ever before. Before operating, please read all these safety and operating instructions
completely and then retain this manual for future reference.
WAR NI NG
To reduce the risk of fire or
electric shock, do not expose
this product to rain or
moisture.
Apparatus shall not be
exposed to dripping or
splashing and no objects
filled with liquids, such as
vases, shall be placed on the
apparatus.
CAUTION
RISK OF ELECTRIC SHOCK.
DO NOT OPEN
This symbol indicates
“dangerous voltage”
inside the product that
presents a risk of electric
shock or personal injury.
Caution: To reduce the risk of
electric shock, do not remove
cover (or back). No user
serviceable parts inside. Refer
servicing to qualified service personnel.
This symbol
indicates important
instructions
accompanying product.
IMPORTANT SAFETY AND MAINTENANCE INSTRUCTIONS
Electrical energy can perform many useful functions, but it can also cause personal injuries and property
damage if improperly handled. This product has been engineered and manufactured with the highest
priority on safety. But IMPROPER USE CAN RESULT IN POTENTIAL ELECTRICAL SHOCK OR FIRE
HAZARD. In order to prevent potential danger, please observe the following instructions when installing,
operating and cleaning the product. To ensure your safety and prolong the service life of your
LED(BACKLIGHTING) TV product, please read the following precautions carefully before using the
product.
1. Read these instructions---All operating instructions must be read and understood before the
product is operated.
2. Keep these instructions --- These safety and operating instructions must be kept in a safe place for
future reference.
3. Heed all warnings --- All warnings on the product and in the instructions must be observed closely.
4. Follow all instructions --- All operating instructions must be followed.
5. Attachments --- Only use attachments/accessories specified by the manufacturer. Do not use
attachments not recommended by the manufacturer. Use of improper attachments can result in
accidents.
6. Power source --- This product is intended to be supplied by a listed power supply indicated on the
marking label. If you are not sure of the type of power supply to your home, consult with your product
dealer or local power company. For added protection for this product during a lightning storm, or
when it is left unattended and unused for long periods of time, unplug it from the wall outlet and
disconnect the cable system.
7. Power cable protection --- Protect the power cable from being walked on or pinched particularly at
plugs, convenience receptacles, and the point where they exit from the apparatus.
8. Power plug --- Do not defeat the safety purpose of the polarized or grounding-type plug. A polarized
plug has two blades with one wider than the other. A grounding type plug has two blades and a third
grounding prong. The wide blade or third prong is provided for your safety. If the provided plug does
not fit into your outlet, consult an electrician for replacement of the obsolete outlet. Refer to the
identification/rating label located on the back panel of your product for its proper operating voltage.
To prevent electric shock, match wide blade of plug to wide slot, fully insert.
9. The MAINS plug is used as the disconnect device, and the disconnect device shall remain readily
operable.
10. Overloading --- Do not overload wall outlets, extension cables, or convenience receptacles on other
equipment as this can result in a risk of fire or electric shock.
Page 18

11. Entering of objects and liquids --- Never insert an object into the product through vents or
2
openings. High voltage flows in the product, and inserting an object can cause electric shock and/or
short internal parts. For the same reason, do not spill water or liquid on the product.
12. Damage requiring service --- Refer all servicing to qualified service personnel. Servicing is
required when the apparatus has been damaged in any way, such as power-supply cord or plug is
damaged, liquid has been spilled or objects have fallen into the apparatus, the apparatus has been
exposed to rain or moisture, does not operate normally, or has been dropped.
a. When the power cable or plug is damaged.
b. When a liquid is spilled on the product or when objects have fallen into the
product.
c. When the product has been exposed to rain or water.
d. When the product does not operate properly as described in the operating
instructions.
Do not touch the controls other than those described in the operating
instructions. Improper adjustment of controls not described in the
instructions can cause damage, which often requires extensive
adjustment work by a qualified technician.
e. If the product has been dropped or the cabinet has been damaged in any way.
f. When the product displays an abnormal condition or exhibits a distinct change in performance. Any
noticeable abnormality in the product indicates that the product needs servicing.
This unit should only be serviced by an authorized and properly trained
technician. Opening the cover or other attempts by the user to service this unit
may result in serious injury or death from electrical shock, and may increase the
risk of fire.
13. Replacement parts --- In case the product needs replacement parts, make sure that the service
person uses replacement parts specified by the manufacturer, or those with the same characteristics
and performance as the original parts. Use of unauthorized parts can result in fire, electric shock
and/or other danger.
14. Safety checks --- Upon completion of service or repair work, request the service technician to
perform safety checks to ensure that the product is in proper operating condition.
15. Wall mounting --- When mounting the product on a wall, be sure to install the product according to
the method recommended by the manufacturer. This is a safety
feature.
ipod 16. Stand --- Do not place the product on an unstable trolley, stand, tr
or table. Placing the product on an unstable base can cause the
product to fall, resulting in serious personal injuries as well as damage
to the product. When mounting the product on a wall, be sure to follow
the manufacturer’s instructions. Use only the mounting hardware
recommended by the manufacturer.
17. Careful move --- Use only the cart, stand, tripod, bracket, or table
specified by the manufacturer, or sold with the apparatus. When a cart
is used, use caution when moving the cart/apparatus combination to avoid
injury from tip-over. Sudden stops, excessive force and uneven floor
surfaces can cause the product to fall from the trolley.
18. Lightning --- Unplug this apparatus during lightning storms or when unused
for long periods of time.
For added protection for this television equipment during a lightning storm, or
when it is left unattended and unused for long periods of time, unplug it
from the wall outlet and disconnect the antenna. This will prevent damage
to the equipment due to lightning and power-line surges.
19. Do not use this apparatus near water --- for example, near a bathtub,
washbowl, kitchen sink, or laundry tub, in a wet basement, or near a swimming
pool, and the like.
Do not use immediately after moving from a low temperature to high
temperature environment, as this causes condensation, which may result in fire,
electric shock, or other hazards.
Page 19

20. Do not place heavy foreign objects, liquid container on the product. Do not place naked flame
3
sources, such as lighted candles, should be placed on the apparatus, or else it may cause fire hazard
or electric shock.
21. Clean only with dry cloth --- Unplug this product from the wall outlet
before cleaning. Do not use liquid cleaners or aerosol cleaners. Use a
damp cloth for cleaning.
22. Ventilation --- Do not block any ventilation openings. Install in
accordance with the manufacturer instructions. The vents and other
openings in the cabinet are designed for ventilation. Do not cover or block
these vents and openings since insufficient ventilation can cause
overheating and/or shorten the life of the product. Do not place the product
on a bed, sofa, rug or other similar surface, since they can block ventilation
openings. This product is not designed for built-in installation; do not place the
product in an enclosed place such as a bookcase or rack, unless proper
ventilation is provided or the manufacturer’s instructions are followed.
23. Heat sources --- Do not install near any heat sources such as radiators, heat
registers, stoves, or other apparatus (including amplifiers) that produce heat.
24. Using video games or any external accessory with fixed images for 10
minutes can cause them to be permanently imprinted on the SCREEN.
ALSO, some network/program logos, phone numbers, teletext and images
in 4:3 form-at etc. may cause similar damage. This damage is not covered
by your warranty.
25. Panel protection --- The LED(BACKLIGHTING) panel used in this product is made of glass.
Therefore, it can break when the product is dropped or impacted upon by other objects. Be careful
not to be injured by broken glass pieces in case the LED(BACKLIGHTING) panel breaks.
26. Pixel defect --- The LED(BACKLIGHTING) panel is a very high technology product, giving you finely
detailed pictures. Occasionally, a few non-active pixels may appear on the screen as a fixed point of
blue, green or red. Please note that this does not affect the performance of your product.
27. Working condition of the product: Temperature: 0℃~40℃
Placing condition of the product: Temperature: -20℃~50℃
28. To prevent the spread of fire, keep candles or other open flames away from this product at all times.
29. Earthing connection --- The apparatus shall be connected to a MAINS socket outlet with a
protective earthing connection.
Page 20

USING THE REMOTE CONTROL
4
Use the remote control by pointing it towards the remote sensor window of the set.
Objects between the remote control and sensor window may prevent proper
operation.
NOTE: The illustration is for your reference only, the remote sensor may
locate differently with different model.
Cautions regarding use of remote control
● Do not expose the remote control to shock. In addition, do not expose the remote
control to liquids, and do not place in an area with high humidity.
● Do not install or place the remote control under direct sunlight. The heat may
cause deformation of the unit.
● The remote control may not work properly if the remote sensor window of the main unit is under direct
sunlight or strong lighting. In such a case, change the angle of the lighting or LED(BACKLIGHTING)
TV set, or operate the remote control closer to the remote sensor window.
DISP
MUTE
INPUT
BATTERIES FOR REMOTE CONTROL
If the remote control fails to operate the LED(BACKLIGHTING) TV functions, replace the batteries in the
remote control.
1. Open the battery cover. 2. Insert two size-AAA batteries. 3.Replace the cover until the lock snaps.
● Place the batteries with their terminals
corresponding to the (+) and (-)
indications in the battery compartment.
Precaution on battery use
Improper use of batteries can result in a leakage of chemicals and/or explosion. Be sure to follow the
instructions below.
● Place batteries with their terminals corresponding to the (+) and (–) indications.
● Different types of batteries have different characteristics. Do not mix batteries of different types.
● Do not mix old and new batteries. Mixing old and new batteries can shorten the life of new batteries
and/or cause old batteries to leak chemicals.
● Remove batteries as soon as they are non-operable. Chemicals that leak from batteries can cause a
rash. If chemical leakage is found, wipe with a cloth.
● The batteries supplied with the product may have a shorter life expectancy due to storage conditions. If
the remote control is not used for an extended period of time, remove the batteries from the remote
control.
● The batteries (battery pack or batteries installed) shall not be exposed to excessive heat such as
sunshine, fire or the like.
NOTE: All pictures in this manual are examples, only for reference, actual product may differ
from the pictures.
Page 21

CABLE INSTALLATION
5
Before the installation and use, please read carefully the relevant content in “Notice for Maintenance and
Safety”.
1. Take the TV from the wrapping package and put it in a drafty and flat place.
NOTE: When you plug or unplug the TV, computer or other equipments, you must make sure
2. The RF output terminal can be connected with the RF input port of the TV.
3. The output AV terminal of DVD can be connected with the AV input port of the TV through AV cable.
4. The output COMPONENT (YPbPr) terminal of DVD can be connected with the COMPONENT (YPbPr)
5. Connect one end of the VGA cable with the VGA port on computer, connect the other end of the VGA
cable with the VGA port on the TV, and tighten the bolts clockwise on the each end of VGA cable.
NOTE: While connecting the 15-pin VGA, please do not insert the plug overexertedly, for fear
6. Connect one end of the HDMI cable with HDMI output port, connect the other end of the HDMI cable
with the HDMI port on the TV.
NOTE: While connecting the HDMI, please aim at carefully, do not insert overexertedly, for
7. Check and make sure that all AV cables are connected with the corresponding ports correctly.
8. Connect the AC power cable with 220V AC power supply.
9. Connect the other end of the AC power cable with the AC power port on the adapter.
NOTE:
that the AC power has been already shut down;
When unplugging the power cable or signal cable, please hold the plug (the insulated
part), do not draw the body of the cable.
input port of the TV through AV cable.
the pin might be broken.
fear the pin might be broken.
The range of power input for the TV is 220V/50Hz, do not connect the adapter power
input port with the AC power out of the above range.
Please hold the insulated part of the plug when you are unplugging the power cable,
do not touch directly the metallic part of the cable.
Page 22

REMOTE CONTROL
6
The buttons of the original remote control are as following:
POWER
NUMBER BUTTONS
DISP
MUTE
INPUT
PICTURE MODE
MENU
OK
VOL+/-
PLAY/PAUSE
SLEEP
AUDIO
SOUND MODE
EXIT
ARROWS
CH+/-
STOP
RECALL
COLOR BUTTONS/Fast reverse/
Fast forward/Previous/Next
PVR LIST
SUBTITLE
CH LIST
REC
STILL
EPG
TIMESHIFT
ZOOM
PVR LIST
CH LIST
NOTE:
When in operation, please point your remote control directly to the infrared sensor. Do not subject
the remote control to impacts, water or disassembly. When pressing the buttons on the remote
control, allow interval of no less than one second between selections.
Page 23

TV OPERATION
7
Turning on and off the TV
1. Turning on
1. Connect one end of the adapter with the power port on TV, connect the other end of the adapter with
the AC input cable. Then connect the AC input cable to the AC power supply. At this time the TV enter
standby mode.
2. In standby mode, press the button on remote control to turn on the TV.
2. Turning off
1. When the temporary turning off is required, please press the button on remote control.
2. When a complete turning off is required, please unplug the power cable from the power socket.
NOTE: If there is no signal in three minutes
In PC-RGB mode, the TV set will automatically turn off in 16 seconds if no input signal. When
VGA cable is connected, the TV turns on automatically.
Switching the Signal Source
Press INPUT button on the remote control to enter the menu, press ▲ / ▼ button to cycle through the
input source. Press OK button to access the selected mode.
(except PC-RGB mode), the TV will turn off automatically.
NOTE:
Please make sure the connection for your choice is available. If the TV can't find any signal input, you
can try to restart the TV.
Adjusting Volume
The volume can be adjusted continuously by pressing VOL+/VOL- on the remote control.
Press MUTE button on the remote control to mute the sound. You can release mute by pressing MUTE
or increase the TV’s volume.
Page 24

Basic Function of the TV
8
1. Press MENU button to display the main menu. Press ◄/► button to cycle through the main menu.
2. Press OK/▼ enter into sub-menu.
3. Press ▲/▼ button to highlight the item to be adjusted. Press ◄/► button to set the selected item.
4. Press MENU to go back to the previous menu.
5. Press EXIT to quit the setting menu.
z When an item in MENU is displayed gray, it means that the item is not available or cannot be
adjusted.
z Some items in the menus may be hidden depending on modes or signal sources used.
CHANNEL MENU
Press MENU button to display the main menu. Press
◄/► button to select CHANNEL menu.
Shown as below:
Channel Tuning
Press OK button to start Channel Tuning. In program, you can
skip current operation by MENU button and exit auto program by
EXIT button.
DTV Manual Tuning
Press ◄/► button to select channel. Press OK button to search.
Page 25

9
ATV Manual Tuning
Press ▲/▼ button to select items. Press ◄/► button to adjust it.
Press the red button to save it.
Programme Edit
Press red button to delete the channel.
Press green button to rename the channel.
Press yellow button to move the channel.
The programs can only be moved if it is of the same type.
Press blue button to skip the channel.
(in TV mode)
PICTURE MENU
Press MENU button to display the main menu. Press ◄/► button to select PICTURE menu.
Shown as below:
Picture Mode
To select the picture mode.
Contrast
To adjust the picture’s contrast.
Brightness
To adjust the picture’s brightness.
Color
Adjusts intensity of all colors.
Sharpness
To adjust the picture’s sharpness.
Tint (Only in the NTSC mode)
To adjust the tint of the picture.
Color Temperature
To select the picture’s Color Temperature.
Aspect Ratio
To select the ratio of the screen.
Noise Reduction
Provide the picture with dynamic noise reduction treatment.
Page 26

10
Screen
In PC mode, Press OK button to enter the submenu:
Auto Adjust: Automatic position & effect adjustment of
the picture.
Horizontal Pos. / Vertical Pos. / Size/ Phase: Press
◄/► button to adjust it.
SOUND MENU
Press MENU button to display the main menu. Press ◄/► button to select SOUND menu.
Shown as below:
Sound Mode
To select the sound mode.
EQ
Can be adjusted when the sound mode is set to User.
Press OK button to enter into submenu, you can
strengthen or weaken some audio effect as you favor.
Balance
To adjust the audio output between left and right
speakers.
Auto Volume
Auto Volume is used to control the volume
automatically.
SPDIF Output (DTV ONLY)
Press ◄/► button to select SPDIF Output mode.
TIME MENU
Press MENU button to display the main menu. Press ◄/► button to select TIME menu.
Shown as below:
Clock
Display the System time gotten from DTV signal
stream or set the system time.
Sleep Timer
To select the Sleep Timer you want.
Update User Logo
Set Update User Logo from your U disk.
Please make sure the name of the Update User Logo
is USERLOGO. And store the picture into U disk root
directory. .jpg suffix is the only one type allowed. The
picture size must be less than 120K.
1080P Upscaling
Switch on or off the 1080P Upscaling.
Dynamic Enhancement
Switch on or off the Dynamic Enhancement.
Firmware Version
Display the software version of the TV.
Page 27

OPTION MENU
11
Press MENU button to display the main menu. Press ◄/► button to select OPTION menu.
Shown as below:
Language
OSD language selection.
OSD Time Out
Select On-Screen Menu displaying time.
OSD Transparency
Select menu transparency according to different
background pictures.
Software Update
Software update for the TV.
Restore Factory Default
This function will restore the default menu settings.
PVR File System (PVR only use for DTV source)
Press OK button to enter the PVR File System menu.
Select Disk:Select the disk used for PVR.
Check PVR File System:Check the file disk, and set
the size recording file system.
USB Disk:USB activated or not.
Format:Format USB disk, and create PVR file sy
Time Shif
t Size:Show the time to do TSR.
USB Disk Speed:Read and write speed of t
stem.
he
storage device.
Digital program recording
Insert a U disk, select setting
s menu under the PVR File System option, and before it you should copy
your information. In the USB, in case lose the information. Select check PVR File System option, if not
previously formatted USB disk, the system will automatically prompt U disk formatting.
Warning: Make sure you have a backup of your external memory data whic
h you use for
recording function.
1. If you choose the g
reater the capacity, then you can burn more of the time. Select recording program
channel in EPG. Press REC to enter the submenu,carve-recording begins when press OK button, and
it can recording all the time till press
Recording in use. Press REC button to zoom the record menu.
2.
3. After the completion of recording, press PVR LIST to enter the r
button or the memory is full.
ecorded list. Go to storage mode of
play.
T
ime Shift Size
1. Time shift time
according to storage capacity of USB device.
2. Press TIMESHIFT button to start time shift function.
3. Press button to stop.
4. Press button to play/ pause.
Page 28

12
NOTE:
1. USB disk at least the capacity with 1G.
2. When the format tons, notice thurns, will drop all contents deletie save important data,
please back up
the data before formatting. If USB disk in some virus meeting formats turn failure.
3. PVR function is only available in DTV.
4. If the usage contains many ambulation hard drives that divide area, can at PVR File System the menu
win election to choose PVR to in response to the disk sign.
5. Record time biggest can establish time as 6 hours.
6. USB memory must be support USB2.0 high-speed sepcification.
7. Recording in use. If there is an accident power off, you can not save the programs recorded.
HDMI 1 On 1
Switch on or off the HDMI 1 On 1.
MEDIA Operation
To Access/Quit media mode
Press the INPUT button to call up the signal source selection menu. Use the ▲/▼ to highlight Storage,
and the OK button to access the media mode. You may also use the signal source selection menu to exit
from the media mode.
NOTE: Special USB device may be not or well supported.
Main Operating Interface
Use the ◄/► to select PHOTO, MUSIC, MOVIE or TEXT. Press OK button enter into sub-menu.
Press the ▲/▼ to select a folder or file. Press OK to open the folder or select files.
to play the file. Press to stop the playing file.
Press
Press ▲/▼ to highlight Up Folder in the menu and press OK to return to the previous folder. Press EXIT
button to quit.
Page 29

The formats supported
13
The TV supports the following files including movie, music, photo and text.
For PHOTO, it supports file formats among JPEG, BMP.
For MUSIC, it supports MP3, WMA file format.
For MOVIE, it supports MPEG-1/MPEG-2/MPEG-4, H264 file format.
For TEXT, it supports TXT.
NOTE: Special algorithm documents may not be supported by the USB.
MEDIA MENU
Press MENU button to display the main menu. Press
◄/► button to select MEDIA menu.
Slide Show Speed
Select the interval between the display.
Repeat
To select the repeat play mode.
File Playback
1. Play/ Pause
Start playing the selected files of a folder. When play MUSIC and MOVIE files, press button to pause
the playing files.
2. / Fast Reverse/Fast Forward
When play MUSIC and MOVIE files, you can press / to skip fast reverse or forward.
When view the TEXT files, press / to change pages up and down.
3. / Previous/Next
Press button to play previous file and press button for next one.
4. Stop
Stop the playing files.
Page 30

Important Unique Buttons
14
SUBTITLE
Press SUBTITLE button to select subtitle of current channel. (DTV ONLY)
CH LIST
Press CH LIST button to display the channel list.
Press ▲/▼ button to select the items.
Press OK button to enter the channel.
Press EXIT button to exit.
AUDIO
Press AUDIO button to select audio source of current channel. (DTV ONLY)
DISP
Press DISP button to display the information of current channel.
EPG
It is only available by DTV source. Press EPG button to display the Electronic Programme Guide.
Please operate according to the prompt button.
MHEG5
When you see a similar to the following information, expressed MHEG5 information.
Press the prompt color button to display the MHEG5 menu. Press the EXIT button to exit the MHEG5
menu.
Page 31

TROUBLE SHOOTING
15
When you meet the following common problems, you might diagnose and get the solutions without
contacting with the technicians.
Symptoms Possible Reason Solutions
No picture, no sound, and no
indicator light on
Picture and sound with
abnormity
Picture is spotted or with snow
No picture, no sound and
indicator light is green/blue
Blue screen, AV or S-VIDEO is
displayed
Picture is unclear or shaking or
with black horizontal strips (in
PC mode)
PC picture is not centered
No sound
PC picture display with improper
color
HDMI source, with snow pixel of
full screen
The remote control does not
work
NOTE: LED(BACKLIGHTING) TV is the product of advanced technology, it is consisted of more than
3,932,160 film transistors, and it can bring you with the perfect and vivid picture, but in a very rare
condition, there might be several inactivated displayed on the screen fixedly as blue spot, green spot,
red spot or black spot and white spot, please notice, this phenomenon does not affect the any
performance of the product.
The PC display mode is designed delicately according to the standard model, also with the consideration
of the adapter in poor quality in the market, but the display quality might be affected by using such
adapter in poor quality. All pictures in this manual are examples, only for reference, actual product may
differ from the pictures.
The power cord is not plugged in Plug the power cord in
1.Contrast, sharpness, and color
are set improperly
2.Color system is set improperly
3.Sound system is set improperly
Signal source is low-grade or the
signal cord is in a lower quality
Contrast, brightness, color and
volume are all in the minimum
value or TV is in mute mode.
The signal cable is not correctly
connected.
There is no signal input or the video
cable is not connected or
incorrectly connected
PC picture is not correctly adjusted.
There is no audio signal input or
audio cable is not connected
correctly
The color temp is adjusted
incorrectly by user
The source generate is not
standard
Batteries are improperly installed or
exhausted
1.Adjust the value of Contrast,
sharpness, and color
2.Set the Color system to the
country broadcasting standard
3.Set the Sound system to the
country broadcasting standard
Use the qualified signal cord
Adjust the value of contrast,
brightness, color and volume
Connect the signal cable correctly
Connect the video cable correctly
Enter into “PC” menu, select “Auto
Adjust” item to perform automatic
calibration and adjust “Phase” to
solve the problem
Connect the audio cable correctly
Readjust the color temp, or select
the original color setting
Plug the HDMI cable again
1. Make sure the positive and the
negative polarities are correct.
2.Check if there is a loose contact
between the batteries and the
springs
3.Replace the batteries
Page 32

售後服務
AFTER-SALES SERVICE
1. 本機自售出日起,用戶需向德律風根客戶服務中心登記,
並保留購機發票及保用証以作保用証明。
2. 在保修期內,因本機質量引起的故障和損壞,本公司免
費修理,如有下列情況,須由用戶自行承擔修理費用:
1 用戶因搬運或使用不當;
2 自行拆卸產品,更換零部件;
3 異常電壓,火災等外部因素;
4 不按說明書及操作說明違規使用;
5 充當商用機,公共用機(如賓館,備用品)而引起
的故障。
3. 本公司備有配件,費用由用戶自理。
4. 保修期滿後,本公司將繼續根據用戶的要求進行有償
服務。
5. 有關具體維修事宜,請與德律風根客戶服務中心聯絡。
6. 本產品今後如有結構,性能參數變化,恕不另行通知。
1. The warranty period of this product will be started from the date
of purchase. The valid warranty card and purchase invoice must be
presented and verified at the TELEFUNKEN Service Center.
2. In the warranty period, service will be covered all damages which are
caused under normal operation and subject to our technicians’ judgment.
Any of the following circumstances, a service charge for repairing and
replacing parts will be paid by users:
1 Improper move, and/or improper use.
2
Disassemble the washing machine and replace parts or components.
3 External factors such as abnormal voltage and fire.
4 Operation does not follow the Instruction Manual.
5 Failures due to use for business or public service purpose. (such as
hotels or stores).
3. You may order Parts and Accessories at TELEFUNKEN Service Center.
4. After the expiration of the warranty, we will continue to provide the repair
service with charges.
5. For the specific maintenance issue, please contact TELEFUNKEN
Service Center.
6. Product structure and function will be changed without notice.
如果電源線損壞,為避免危險,必須由製造廠或其維修部或合資格的專職人員來更換
In order to avoid dangerous, please contact qualified technician for replacing power cords
客戶服務中心
Customer Service Center
香港新界葵涌葵喜街18-24號樂基工業大廈10樓
10/F, Lucky Industrial Building, 18-24 Kwai Hei Street, Kwai Chung, New Territories, H.K.
熱線
Hotline(852)3583 3768
電郵 Email: cs@supergainer.com
傳真 Fax: (852)3583 3038
網址 website: www.supergainer.com
 Loading...