

Page 1
DIGITRADIO 360 CD IR
DIGITRADIO 361 CD IR
Stereo Internet, DAB+/FM radio with MP3/CD player
Page 2

CONTENTS
ENGLISH ............................................................................................ 3-74
FRANÇAIS ....................................................................................75-146
ITALIANO ....................................................................................147-218
NEDERLANDS .........................................................................219-290
NORSK ....................................................................................... 291-362
DANSK .......................................................................................363-434
POLSKE .....................................................................................435-506
ČEŠTINA .....................................................................................507-578
SLOVENSKÉ .............................................................................579-650
2
Page 3
EN
Instruction Manual
DIGITRADIO 360 CD IR
DIGITRADIO 361 CD IR
Stereo Internet, DAB+/FM radio with MP3/CD player
FR
IT
NL
NW
DK
PL
CZ
SK
Page 4

1 Illustrations
Front operation:
1
2
3
4
5
6
7
1 ON/STANDBY
2 MODE
3 PLAY/PAUSE /INFO
4 DISPLAY
5 SELECT / SNOOZE / VOLUME
6 MENU / STOP
7 USB CONNECTION
4
8
9
10
11
12
13
14
15
8 PRESET
9 FORWARD / TUNING r/:
10 BACK / TUNING s/9
11 IR RECEIVER
12 AUDIO INPUT
13 EJECT/ open/close CD compartment
14 HEADPHONE CONNECTION
15 CD compartment
Page 5
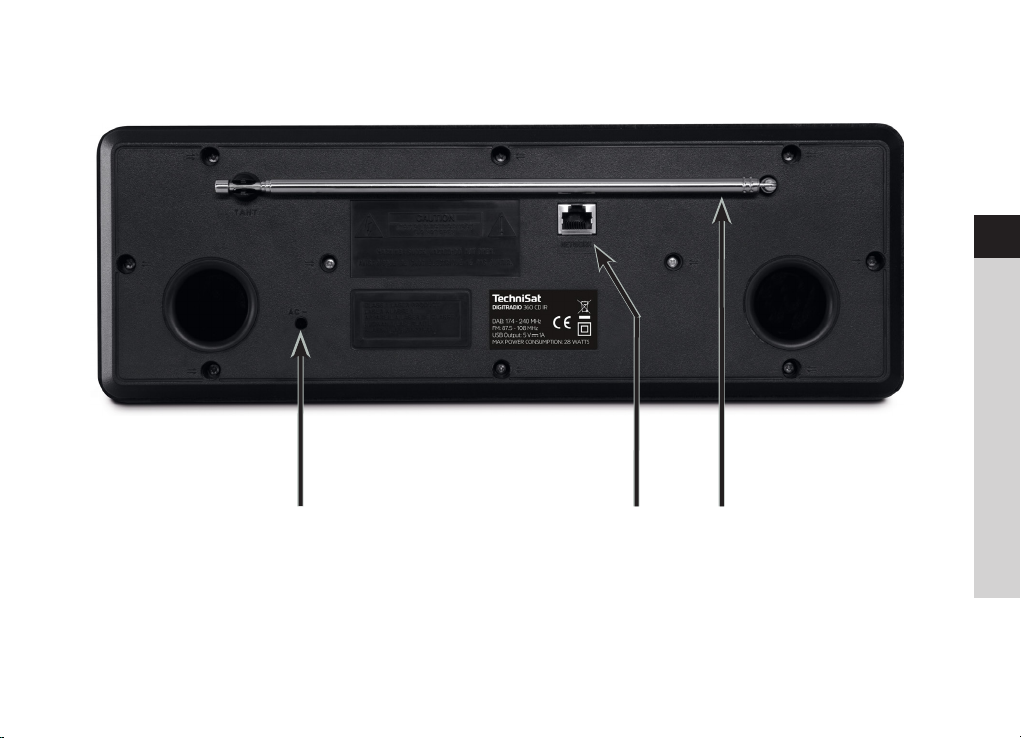
Rear:
EN
FR
IT
NL
NW
DK
PL
1
2
3
CZ
1 MAINS CABLE
2 LAN CONNECTION
3 TELESCOPIC ANTENNA
SK
5
Page 6

Remote control*:
1
2
3
4
5
6
7
8
9
10
11
12
13
14
15
16
17
18
19
20
21
22
23
24
25
26
27
28
29
30
31
32
33
34
35
36
1 ON/STANDBY Device on/off (Standby), Alarm off
2 0 - 9 Number buttons: track choice - CD, USB,
retrieve saved stations PRESETs,
press number button, hold down
and save station
3 REPEAT Repeat function for CD, USB
4 MENU Open, close menu
5 MONO/ST. Mono, stereo changeover
6 TUNING s FM: Set frequency/down
7 PRESET r Select DAB, FM TUNER: PRESET
8 VOL - Decrease volume
9 PRESET s Select DAB, FM TUNER: PRESET
10 FOLDER - MP3/USB: Album /folder selection
11 CD/USB CD/USB mode selection
12 FM/DAB FM/DAB mode selection
13 < Stop CD/USB playback
14 97 CD, USB: Track selection, scan
FM: Set frequency / back
15 SCAN automatic FM/DAB scan
16 SLEEP Switch on and select snooze
17 OPEN/CLOSE Open/close CD compartment
18 PRESET Programming function
19 CLOCK Set time
Display (station, track, artist etc.)
*Figure shows the remote control for the DIGITRADIO 361 CD IR.
6
Page 7

20 TIMER Setting the alarm time
21 INTRO CD, USB: Preview function, 10 s per track
22 RANDOM CD, USB: Random function
23 BACK Reset menu / step
24 EQ Equaliser sound seing
25 TUNING r FM: Set frequency/upwards
26 VOL + Increase volume
27 ENTER Select menu, confirm entry
28 FOLDER + CD/USB: Album/folder selection
29 INTERNET INTERNET mode selection
30 AUDIO IN AUDIO IN mode selection
31 4/; CD, USB: Start playback, pause
32 8: CD, USB: Track selection, scan
FM: Set frequency / forward
33 MUTE Mute function
34 INFO Display FM mode info
(Name, PTY, RT, frequency)
Display DAB mode info
(Station, track, artist etc.)
Display CD/USB mode info
(Track, artist etc.)
35 UNPAIR Disconnect Bluetooth connection (DIGITRADIO
361 CD IR only)
SPOTIFY SPOTIFY CONNECT selection (DIGITRADIO
360 CD IR only)
36 Bluetooth Activate Bluetooth connection
(DIGITRADIO 361 CD IR only)
EN
FR
IT
NL
NW
DK
PL
CZ
SK
7
Page 8

Contents
1 Illustrations .......................................................................................................................................................................4
2 Foreword ..........................................................................................................................................................................11
2.1 Target group for this instruction manual ...................................................................................................................................... 11
2.2 Important information ........................................................................................................................................................................... 11
3 Seing up the device .................................................................................................................................................. 20
3.1 Remote control ........................................................................................................................................................................................22
4 Description of the DIGITRADIO 360/361 CD IR ....................................................................................................22
4.1 Scope of delivery .....................................................................................................................................................................................22
4.2 The special features of the DIGITRADIO 360/361 CD IR .....................................................................................................22
4.3 Preparing the DIGITRADIO 360/361 CD IR for operation ................................................................................................... 24
4.4 General device functions ...................................................................................................................................................................26
4.5 Visual display ............................................................................................................................................................................................30
4.6 Switching o the device ......................................................................................................................................................................30
5 Menu operation .............................................................................................................................................................30
5.1 Main menu ..................................................................................................................................................................................................31
5.2 Source selection........................................................................................................................................................................................31
6 Internet radio .................................................................................................................................................................32
6.1 Last listened to .........................................................................................................................................................................................32
6.2 Station list ................................................................................................................................................................................................... 32
6.3 Saving stations to a memory slot .................................................................................................................................................... 33
6.4 Retrieving a station from a memory slot .....................................................................................................................................33
7 Playing music (UPnP & USB media) ........................................................................................................................34
7.1 Playing audio files ...................................................................................................................................................................................34
7.2 Providing music via the Windows media player ......................................................................................................................36
8
Page 9

8 Spotify Connect (DIGITRADIO 360 CD IR only) ............................................................................................................................................36
9 Bluetooth-Playback (DIGITRADIO 361 CD IR only) ................................................................................................................37
9.1 Activating the Bluetooth mode ........................................................................................................................................................37
9.2 Pairing .......................................................................................................................................................................................................... 38
9.3 Playing music ............................................................................................................................................................................................ 38
10 DAB radio .........................................................................................................................................................................39
10.1 Performing the station scan .............................................................................................................................................................39
10.2 Saving DAB stations to a memory slot ........................................................................................................................................ 40
10.3 Retrieving DAB stations from a memory slot ........................................................................................................................... 40
10.4 Signal intensity ......................................................................................................................................................................................... 41
10.5 Deleting inactive stations ................................................................................................................................................................... 41
10.6 Seing the volume adjustment (DRC) .......................................................................................................................................... 41
10.7 Sorting the stations ............................................................................................................................................................................... 42
10.8 Manual seing ......................................................................................................................................................................................... 42
11 FM mode ......................................................................................................................................................................... 42
11.1 Manual station scan ...............................................................................................................................................................................43
11.2 Automatic station scan ........................................................................................................................................................................43
11.3 Saving FM stations to a memory slot ............................................................................................................................................43
11.4 Retrieving FM stations from a memory slot .............................................................................................................................. 44
11.5 Audio seing (Mono/Stereo) ............................................................................................................................................................ 44
12 Audio input ....................................................................................................................................................................44
13 CD/MP3 player ...............................................................................................................................................................45
13.1 General information on CDs/MP3 CDs ..........................................................................................................................................45
13.2 Discs you can use ................................................................................................................................................................................... 46
13.3 Playing CDs ............................................................................................................................................................................................... 46
13.4 Seing the track ..................................................................................................................................................................................... 48
EN
FR
IT
NL
NW
DK
PL
CZ
SK
9
Page 10

13.5 Quick search ............................................................................................................................................................................................. 48
13.6 Repeat function ...................................................................................................................................................................................... 48
13.7 Random playback .................................................................................................................................................................................. 49
13.8 Track sampling ........................................................................................................................................................................................ 49
13.9 Programming function ........................................................................................................................................................................ 49
13.10 CD advice ................................................................................................................................................................................................... 50
14 Other functions .............................................................................................................................................................. 52
14.1 Sleep function ...........................................................................................................................................................................................52
14.2 Alarm ............................................................................................................................................................................................................52
15 System seings ..............................................................................................................................................................54
15.1 Equaliser ......................................................................................................................................................................................................54
15.2 Internet seings .......................................................................................................................................................................................55
15.3 Time seings .............................................................................................................................................................................................59
15.4 Language ................................................................................................................................................................................................... 60
15.5 Factory seing ......................................................................................................................................................................................... 60
15.6 Soware update ..................................................................................................................................................................................... 60
15.7 Set-up wizard .............................................................................................................................................................................................61
15.8 Display backlight .....................................................................................................................................................................................63
15.9 Multiroom (DIGITRADIO 360 CD IR only) ........................................................................................................................................................63
16 App operation ............................................................................................................................................................... 64
17 Using headphones ....................................................................................................................................................... 66
18 Cleaning ........................................................................................................................................................................... 67
19 Troubleshooting ........................................................................................................................................................... 68
20 Technical data ................................................................................................................................................................ 73
10
Page 11

2 Foreword
This instruction manual helps you to use your radio system properly and safely, hereinafter referred to as
DIGITRADIO or device.
2.1 Target group for this instruction manual
The instruction manual is intended for anyone who is installing, operating, cleaning or disposing of the device.
2.1.1 Intended use
The device has been developed for the reception of DAB+/FM radio programmes. The device has been
designed for private use and is not suitable for commercial purposes.
2.2 Important information
Please observe the following instructions to avoid any safety hazards, prevent damage to the TV, and help
protect the environment.
Please read all the safety information carefully and keep it for future reference. Always follow all the warnings
and instructions in this instruction manual and on the rear of the device.
Caution - This identifies important information that must be observed to prevent device defects, data
loss/misuse or undesired operation.
Tip - This identifies information relating to the described function, as well as to another related function
that may have to be taken into account, with reference to the corresponding section in the manual.
EN
FR
IT
NL
NW
DK
PL
CZ
SK
11
Page 12
2.2.1 Safety
For your own protection you should read the safety precautions carefully before using your new device. The
manufacturer accepts no liability for damage caused by inappropriate handling, or by non-compliance with the
safety precautions.
Never open the device!
Touching live parts poses a danger to life!
Any necessary repairs to the receiver should only be carried out by qualified personnel.
The device must only be operated in an appropriate climate.
In the event of extended transport in the cold and a subsequent change to warm rooms, do not switch on
immediately; wait for the temperature to equalise.
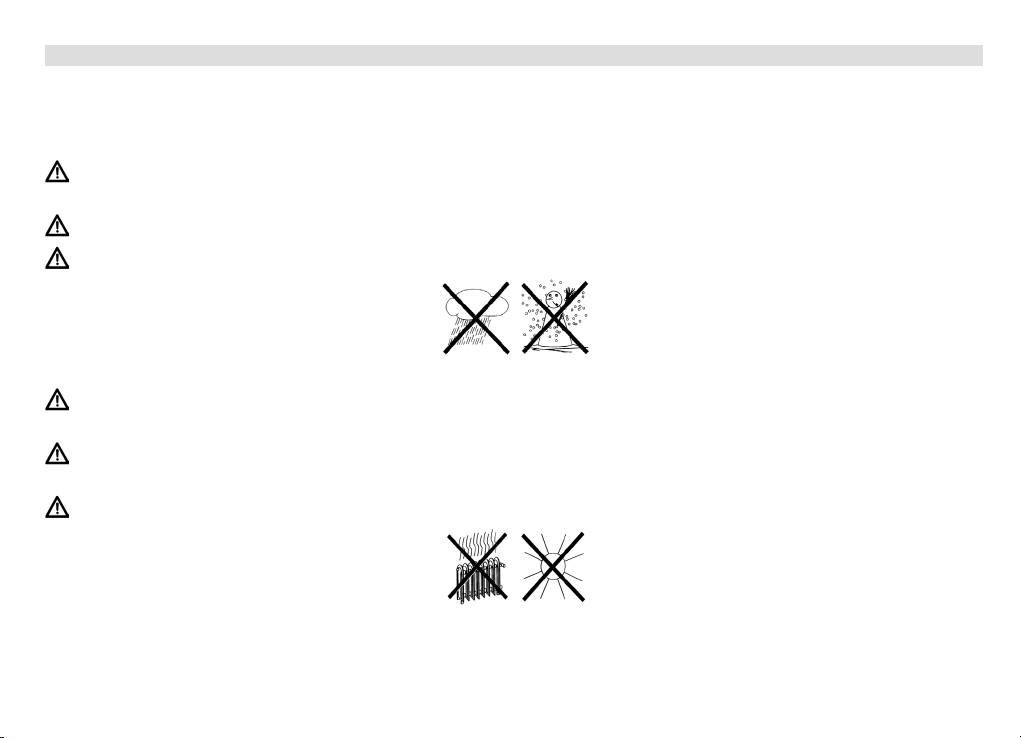
Do not expose the device to dripping or splashing water. If water has penetrated the device, switch it off
and inform the Service department.
Do not expose the device to heat sources that will heat it up more than normal use.
12
Page 13

In the event of a thunderstorm, disconnect the device from the mains. Overvoltage can damage the device.
In the event of an obvious fault with the device, emanation of odour or smoke, substantial malfunctions,
damage to the housing or fluid ingress, immediately switch off the device and contact the Service
department.
Only connect the device to a mains voltage of 100V-240V~, 50/60 Hz.
Never try to operate the device with another voltage.
Do not connect the mains voltage until the installation has been completed according to regulations.
If the device shows signs of damage, it may not be put into operation.
When removing the mains cable from the power outlet, pull on the plug, not the cable.
Do not put the device into operation in the vicinity of baths, swimming pools or splashing water.
Never try to repair a faulty device yourself. Always contact one of our customer service locations.
Foreign bodies, e.g. nails, coins, etc., must not be allowed to fall inside the device. Do not touch the
connection contacts with metal objects or fingers. This could lead to short-circuits.
Do not place any open flames such as burning candles on the device.
Never allow children to use the device unsupervised.
Even when switched off and on standby, the device is still connected to the mains power supply. If you
do not intend to use the device for a prolonged period, remove the mains plug from the power outlet.
Only pull on the plug, not on the cable.
Do not listen to music or the radio at high volume. Doing so can cause permanent hearing impairment.
EN
FR
IT
NL
NW
DK
PL
CZ
SK
13
Page 14
This device is not intended to be used by people (including children) with limited physical, sensory or
mental capacities or lackof experienceand/or knowledge,unless they are supervised by a person
responsible for their safety or they are instructed by them as to how to use the device.
Children must be supervised to ensure that they do not play with the device.
It is forbidden to carry out modifications to the device.
Damaged devices or damaged accessories must not continue to be used.
The CD player uses an invisible laser beam. If used incorrectly, this can injure your eyes. Never look directly
into the open CD compartment.
This devices has been classified as CLASS 1 LASER. The corresponding sticker (CLASS 1 LASER PRODUCT) is
on the rear of the device.
14
Page 15

Using the batteries
Ensure that the batteries are kept out of the reach of children. Children could put the batteries into their
mouths and swallow them. This could lead to serious injuries. Therefore ensure that the batteries and
remote control are out of reach of young children. Seek medical advice immediately if this occurs!
Normal batteries may not be charged, reactivated using other means, disassembled, heated or disposed
of in an open fire (explosion hazard!).
Promptly change batteries that are losing power.
Clean the battery contact and device contacts prior to inserting them.
There is an explosion hazard if a battery is inserted incorrectly.
Dispose of used batteries immediately. Only replace batteries with the correct type of batteries and the
correct model number.
Caution! Do not expose batteries to extreme conditions.
Do not place them on radiators, or expose them to direct sunlight.
Leaking or damaged batteries can cause burns if they come into contact with the skin. In this case use
suitable protective gloves. Clean the battery compartment using a dry cloth.
EN
FR
IT
NL
NW
DK
PL
CZ
SK
15
Page 16
2.2.2 Disposal
The device packaging is exclusively comprised of recyclable materials. Please sort the components appropriately,
and dispose of them in line with your local waste disposal regulations .
At the end of its service life, this device must not be disposed of with your regular household waste. It must be
taken to a recycling collection point for electrical and electronic equipment.
This is indicated by the symbol on the product, the instruction manual or the packaging.
The materials are recyclable according to their identification.
An important contribution is made to our environment by recycling, the recovery of materials or other kinds of
recycling for old devices.
Please ask local authorities for the location of the relevant disposal point. Please ensure that discharged batteries
and electronic waste are not disposed of with your regular household waste, but are correctly disposed of
(collection points in the retail trade, special waste)
16
Page 17
Batteries can contain poisonous substances which harm the environment. Batteries are subject to European
Directive 2006/66/EC. They must not be disposed of with normal domestic waste.
2.2.3 Legal notices
TechniSat herewith declares that the DIGITRADIO 360 CD IR and DIGITRADIO 361 CD IR radio system
model complies with Directive 2014/53/EU. The complete text of the EU declaration of conformity is
available at the following website:
DIGITRADIO 360 CD IR: hp://konf.tsat.de/?ID=11100
DIGITRADIO 361 CD IR: hp://konf.tsat.de/?ID=11630
TechniSat accepts no liability for product damage as a result of external influences, wear or improper
handling, unauthorised repairs, modifications or accidents.
EN
FR
IT
NL
NW
DK
PL
CZ
SK
17
Page 18

Changes and printingerrors reserved. Version 03/18.
Copy and reproduction are subject to the publisher's consent.
The respective current version of the instructions can be downloaded in pdf format in the download area
of the TechniSat homepage at www.technisat.de.
This device is intended for use in all countries of the European Union and in Switzerland, Norway,
Liechtenstein and Iceland. Operation within the frequency range 5150 MHz - 5350 MHz is only permitted
in enclosed spaces.
DIGITRADIO 360 CD IR, DIGITRADIO 361 CD IR and TechniSat are registered trademarks of:
TechniSat Digital GmbH
Julius-Saxler-Straße 3
54541 Daun, Germany
www.technisat.de
18
Page 19

2.2.4 Service instructions
This product is quality-tested and provided with the legal warranty period of 24 months as from the
date of purchase. Please keep your receipt as proof of purchase.
Caution!
If you encounter a problem with this equipment, please contact our Technical Hotline initially.
Mon. - Fri. 8:00 am - 8:00 pm
+49 (0)3925 9220 1800
If the device needs to be sent back, please use the following address only:
TechniSat Digital GmbH
Service-Center
Nordstr. 4a
39418 Staßfurt, Germany
The names of the companies, institutions or makes referred to are trademarks or registered trademarks
of the respective owners.
EN
FR
IT
NL
NW
DK
PL
CZ
SK
19
Page 20

3 Seing up the device
> Place the device on a firm, secure and horizontal base. Make sure the area is well ventilated.
Caution!
> Do not place the radio on so surfaces such as carpets and blankets or near to curtains and wall hangings.
These could obstruct the ventilation openings. The necessary flow of air could be interrupted as a result.
This could potentially lead to fire in the device.
> The ventilation slots at the rear and the sides must always be unobstructed. They must not be obstructed
by curtains, blankets or newspapers.
> Do not place the device near to sources of heat, such as radiators. Avoid direct sunlight and very dusty
environments.
> Do not select a location for the device with high air humidity, e.g. a kitchen or sauna, as the precipitation of
condensation water could damage the device. The device is intended for use in a dry environment and in a
moderate climate and must not be exposed to dripping or splashing water.
> Please note that the device footings could leave coloured marks on some types of furniture surfaces in
certain situations. Place a protective layer between your furniture and the device.
> You may only operate the device in a horizontal position. Do not use outdoors!
> Keep the DIGITRADIO away from devices which generate strong magnetic fields.
20
Page 21

> Do not place any heavy objects on the device.
> If you move the device from a cold environment to a hot environment, moisture could accumulate inside
the device. In such a case, wait approximately one hour before puing it into operation.
> Lay the mains cable in such a way that nobody can trip over it.
> Ensure that the mains plug for the device is always easily accessible so that the device can be quickly
disconnected from the power supply.
> The power outlet should be as close to the device as possible.
Insert the plug fully into the socket to ensure connection to the mains.
> Use a suitable, easy-to-access mains connection and avoid using multiple socket strips.
> Do not touch the mains plug with wet hands; electric shock hazard.
> In the event of a malfunction or the detection of smoke or odour from the housing, remove the plug
from the power outlet immediately.
> Remove the plug before a storm starts.
> Remove the plug if the device is not going to be used for a prolonged period, e.g. before going away on
a long trip.
> Excessive volume, in particular when using headphones, can damage hearing.
> Do not set up the unit in the vicinity of devices which emit intense magnetic fields (e.g. motors, speakers,
transformers). Even telephones or mobile phones can lead to malfunctions.
EN
FR
IT
NL
NW
DK
PL
CZ
SK
21
Page 22

3.1 Remote control
> If the device is not to be used for a long time, remove the baeries since they could leak and damage the
device.
4 Description of the DIGITRADIO 360/361 CD IR
4.1 Scope of delivery
Please ensure that all the following accessories are in the box:
1 x DIGITRADIO 360/361 CD IR
1 x remote control with battery
1 x instruction manual
4.2 The special features of the DIGITRADIO 360/361 CD IR
The DIGITRADIO 360/361 CD IR is comprised of a stereo Internet radio, UPnP media player, CD/MP3 player and
DAB+/FM receiver with timer function and AUX input.
The DIGITRADIO 360 CD IR also includes Spotify Connect and multi-room support. This enables you to receive
digital radio or to stream media.
- You can store up to 10 DAB+, FM and Internet stations respectively.
- The device has a time and date display.
- The device has 2 alarm functions available as well as a sleep function.
- You can choose whether you wish to be woken by Internet, DAB, FM radio, CD/MP3 player or buzzer.
- You can operate the device easily using the remote control.
22
Page 23

- In conjunction with the MyDigitRadio Pro app, the device offers multi-room support (DIGITRADIO 360 CD
IR only; you can find more information in the MyDigitRadio Pro app and on the website www.technisat.de)
- Spotify Connect support (DIGITRADIO 360 CD IR only).
- Audio playback of CD/MP3, CD-DA, CD-ROM, CD-R, CD-RW and USB media.
- USB devices version 1.1 and 2.0 are supported.
- The device supports USB media up to 32GB. The maximum folder number is limited to 99, the tracks to
999. 128 tracks can be stored per folder.
- The USB connection provides 5 V at 1A. Connected devices are charged when there is an existing mains
connection. Read the USB device manufacturer's instructions before using the USB connection.
- Bluetooth music streaming (DIGITRADIO 361 CD IR only)
EN
FR
IT
NL
NW
DK
PL
CZ
SK
23
Page 24

4.3 Preparing the DIGITRADIO 360/361 CD IR for operation
4.3.1 Connecting the device
> Connect the device to the power supply using the mains plug.
Ensure that the operating voltage of the radio coincides with the local mains voltage before you aach it
to the wall socket.
When you connect to the mains for the first time, "TechniSat" appears on the display.
When the device is not being used, remove the plug from the socket.
Remove the plug when there is a storm. Also remove the plug if the device is not to be used for a
prolonged period, e.g. before going on a long trip.
The heat generated during operation must be dissipated by sucient air circulation. Therefore the device
must not be covered or installed in a closed cupboard. Ensure there is free space of at least 10 cm around
the device.
24
Page 25

4.3.2 Improving the antenna reception
The number and quality of the stations to be received depend on the reception conditions at the installation
location. Excellent reception can be achieved with the telescopic antenna.
> Remove the telescopic antenna on the rear of the device from its holder, align it and extend it.
The exact alignment of the telescopic antenna is often important, in particular on the outskirts of the
respective broadcasting area. You can quickly find the location of the nearest transmission mast on the
Internet, at www.digitalradio.de.
Start the first scan at a window in the direction of the transmission mast.
In the event of bad weather it may be that DAB+ reception is only possible to a limited extent.
You can find the optimum antenna alignment using the signal intensity display (section 10.4) and hence
find the best installation location for DAB reception.
In the event of poor reception, change the antenna alignment or the radio location. The bar modulation
should increase.
EN
FR
IT
NL
NW
DK
PL
CZ
SK
25
Page 26
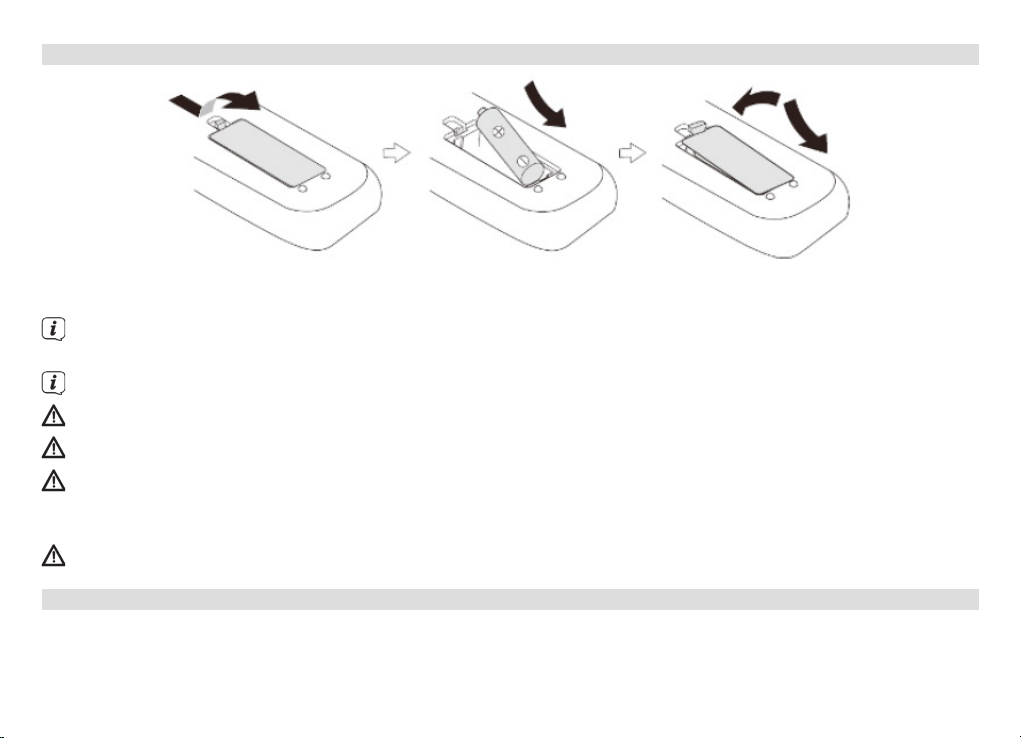
4.3.3 Inserting the baery
> Close the baery compartment lid carefully againto ensure that the lid retaining tabs engage in the
housing.
To operate the remote control, an alkaline battery (type mignon, 1.5 V, LR6/AA) is required. Ensure that the
polarity is correct when inserting.
Change a battery that is losing power promptly.
Leaking batteries can cause damage to the remote control.
If the device is not to be used over a prolonged period, remove the battery from the remote control.
Important information for disposal: batteries can contain poisonous substances which harm the
environment. Therefore, it is imperative to dispose of the batteries according to the legal provisions in
force. Never dispose of batteries in normal household waste.
Never leave the remote control on extremely hot or very wet surfaces.
4.4 General device functions
Settings can be carried out both using the buttons on the device and with the remote control. The description of
the operation refers to the buttons on the remote control.
26
Page 27

4.4.1 Switching on the device
> Using the On/Standby buon on the device (1) or on the remote control (1) you can switch on the
device or switch it back to standby.
After switching on for the first time, you can launch the set-up wizard (Section 15.7). Here you can set
the time format, time zone, summertime adjustment and the date and time updating (via DAB+, FM,
Internet or no update) using the r/s PRESET, VOL+, VOL- and ENTER buttons on the remote control
(7, 9, 8, 26, 27) or by rotating and pressing SELECT/VOLUME knob on the device (5).
The device will then attempt to find a connection to a network. To do so, select the corresponding
WLAN network or LAN [cable] and enter the WLAN password if required using the r/s PRESET, VOL+,
VOL- and ENTER buttons on the remote control (7, 9, 8, 26, 27) or by rotating and pressing the SELECT/
VOLUME knob on the device (5).
4.4.2 Operating the device with the remote control
With the infrared remote control you can operate the most important device functions from the comfort of
your armchair. When operating the device with the remote control, please take into account the following
points:
EN
FR
IT
NL
NW
> Point the remote control towards the front of the device.
> There must be a line of sight between the remote control and the radio.
> If the range of the remote control reduces, replace the battery with a new one.
The maximum range is approximately 4 metres from the front of the device.
DK
PL
CZ
SK
27
Page 28

4.4.3 Adjusting the volume
> Adjust the volume using the VOLUME -/+ buons (8, 26) on the remote control or by rotating the SELECT/
VOLUME knob (5) on the device. The set volume is shown on the display (4).
4.4.4 Switching to mute
> You can switch o the sound by pressing the MUTE buon (33) on the remote control.
This mode is indicated on the status bar by a corresponding symbol.
> The sound is switched back on by pressing the MUTE buon (33) again on the remote control.
4.4.5 Retrieving displays
> By repeatedly pressing the INFO buon (34) on the remote control or on the device (3) (in this case the
INFO buon must not be released for approx. 2 sec.) while a source is being played, you can display and
scroll through the following information:
DAB mode: FM mode:
DLS: continuous text with additional information, station RT radio text (if broadcast)
Genre PTY - Programme type
Ensemble/multiplex (group name) frequency, channel Frequency
Signal intensity Date
Signal error rate bit rate in kbps sound format
Date
Track, artist
28
Page 29

Internet radio: Play music (UPnP media):
Track, artist Track
Description Artist
Genre Album
Reliability Bit rate, sound format
Bit rate, codec, sampling rate Playback buffer
Playback buffer Duration
Today's date Date
CD/MP3 and USB playback: Spotify Connect*:
Track Track
Artist Artist
Album Album
Folder Bit and sampling rate
Path Playback buffer
Bit and sampling rate Duration
Playback buffer
Date
Duration
ID3 on/off (show text information if available)
*DIGITRADIO 360 CD IR only
EN
FR
IT
NL
NW
DK
PL
CZ
SK
29
Page 30
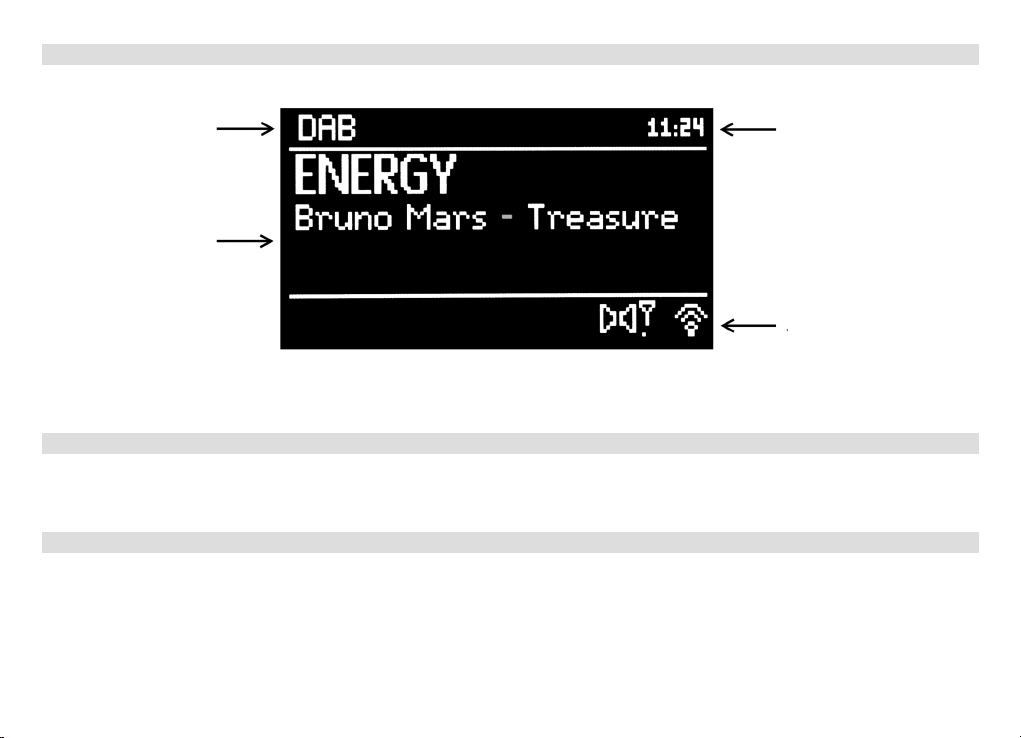
4.5 Visual display
Current
Time
source
Info area
Status bar
4.6 Switching o the device
> You can use the On/Standby buon (1) on the device or on the remote control (1) to switch the device to
standby mode; the time appears. Aer approx. 10 seconds the display brightness dims.
5 Menu operation
The menu is divided into the menu corresponding to the currently selected source, the main menu, plus the
respective submenus featured therein. Navigation in the different menus can be performed using both the
remote control and the device.
> By pressing the MENU buon on the remote control (4) or by holding it down (approx. 2 seconds) on the
device (6), you can retrieve the menu and exit it again.
30
Page 31

After approx. 20 seconds without operation, the menu is exited automatically.
> The highlight is moved by turning the SELECT/VOLUME knob (5) on the device or by pressing the r/s
PRESET or VOL-/VOL+ buttons on the remote control (7, 9, 8, 26).
> You can confirm the respectively highlighted item by pressing the ENTER button on the remote control
(27) or the SELECT/VOLUME knob (5) on the device to open or select it.
> By pressing the BACK buon (23) on the remote control, you can go one step back or reach the
respective superordinate menu.
A * highlights the current selection/setting.
5.1 Main menu
The main menu takes you to all the functions and settings for the DIGITRADIO 360/361 CD IR.
> Open the menu by pressing the MENU buon on the remote control(4) or by holding it down (approx. 2
seconds) on the device (6).
If you are currently in a playback source, you can use the MENU button to retrieve the menu for this
source.
> Highlight the Main menu item and confirm with the ENTER buon to switch to the main menu.
5.2 Source selection
EN
FR
IT
NL
NW
DK
PL
> Press the MODE buon (2) on the device as oen as required until the desired source is shown on the
display (4) or press the CD/USB (11), FM/DAB (12), AUDIO IN (30) or INTERNET (29) buons on the
remote control to select the sources directly.
Alternatively:
> Press the MENU buon.
CZ
SK
31
Page 32

> Now switch to the main menu if required by selecting the Main menu item.
> Select the desired playback source and confirm the selection by pressing the ENTER buon.
6 Internet radio
In order to receive Internet radio streaming, you need Internet access, which can be provided via WLAN
or LAN. This can be achieved using a conventional router.
> Select the Internet radio source as described in Section 5.2.
If you launch the Internet radio mode and no LAN/WLAN connection has been configured, the search
wizard appears. Now select the corresponding WLAN network or LAN [Cable], and enter the WLAN
password if required via the remote control (7, 9, 8, 26, 27) or the SELECT/VOLUME knob (5).
Alternatively, you can carry out the network settings as described in Section 15.2.
6.1 Last listened to
> Open the MENU and select Last listened to, to display the list with the last Internet streams played.
> Then select the Internet stream you wish to listen to.
6.2 Station list
Given the range of available Internet radio streams, they are shown divided into different categories/orders
(e.g. Stations > Local Germany > Selected Stations > ... or Stations > Countries > Europe > Spain > ...).
> Open the MENU, select Station list followed by the next category in each case until you are shown the
Internet radio streams.
32
Page 33

To add your own stations, register them on the following website: www.wifiradio-frontier.com. To do so,
you need to enter an access code, which you can obtain in the DIGITRADIO in MENU > Station list >
Help > Access code.
6.3 Saving stations to a memory slot
> As described above, select the Internet radio station you wish to store on a memory slot.
> During playback, press and hold the PRESET buon on the remote control (18) or on the device (8) until
the menu Save preset appears.
The list of the 10 available memory slots now appears.
> Using the r/s PRESET buons, select the desired memory slot and confirm it.
The process is finally confirmed on the display (4).
Alternatively, you can also hold down one of the number buttons to save a station.
EN
FR
IT
NL
6.4 Retrieving a station from a memory slot
> In order to retrieve a station that you have saved to a memory slot, press the PRESET buon on the
remote control (18) or on the device (8).
The list of the 10 available memory slots now appears.
> Using the r/s PRESET buons, select the memory slot with the desired Internet radio stream and
confirm your selection.
The selected Internet radio stream is now played.
Alternatively, you can also press one of the number buttons.
NW
DK
PL
CZ
SK
33
Page 34

7 Playing music (UPnP & USB media)
It is possible to play audio files stored on a UPnP server or USB data medium via the DIGITRADIO.
For playback from a UPnP server, a network connection is required in the same network where the desired
UPnP server is located, or the USB data medium to be used for playback must be connected to the USB
connection.
The device does not support the connection of USB media (hubs, etc.) via a USB extension cable.
Not suitable for direct connection to PCs.
Please observe the instructions in Section 15.2 for setting up a LAN/WLAN connection.
> As described in Section 5.2, select the Play music source.
7.1 Playing audio files
> Select Shared media for UPnP playback, or USB playback to play from a USB data storage device.
The look of the Categorisation/folder depends on the structure on your media server or USB medium. As
such, take note of the information on the display (4).
> If required, select the categorisation or folder and the subfolder it contains until you reach the track you
want in order to play it.
> By pressing the 4/;Play/Pause buon on the remote control (31) or on the device (3), you can pause
playback, or press it again to continue.
> You can use the 8: Forward or97 Back buons on the remote control (14, 32) or on the device (9, 10)
to skip to the next or previous track respectively.
> Keep the 8: Forward or 97Back buons pressed to quickly skip forward or back during a track for as
long as the buon is pressed.
34
Page 35

7.1.1 Random playback & repeat
The menu has random playback and repeat playback options available.
> In order to use the random playback and/or repeat function, switch these on in MENU > Random
playback: or MENU > Repeat: On, or, if you no longer wish to use them, switch them O again.
Alternatively:
> If, during playback, you press the RANDOM buon on the remote control (22), the random playback
symbol appears on the display (4).
To switch the function o again, press the RANDOM button (22) again.
EN
7.1.2 Playback list
You can use the playback list to organise different tracks and folders from different sources and play back
using these.
> To do so, select any folders or individual tracks from your USB data medium and/or from a UPnP server.
> Hold down the ENTER buon on the remote control (27) or SELECT/VOLUME on the device (5) to add
the track/folder to the playback list.
> Select MENU > Playback list and a track from the list to start the playback with this track.
7.1.3 Clearing the playback list
> You can use MENU > Clear playback list to remove all the entries in your playback list.
FR
IT
NL
NW
DK
PL
CZ
SK
35
Page 36

7.1.4 Remove server
Use this menu item to delete the list of UPnP media servers found.
If you then open the Shared media item, a search is performed for the available media servers in the
network.
7.2 Providing music via the Windows media player
As an alternative to an independent UPnP server, it is possible to provide music via the Windows Media Player as
from version 10. To do so, music sharing must be set up in the Windows Media Player.
> Ensure that the Windows PC and the DIGITRADIO are in the same network and switched on.
> Start the Media Player and enable media streaming sharing.
> If required, select the DIGITRADIO from the device overview which appears and select Allow.
Depending on the Windows Media Player version, the process may vary.
8 Spotify Connect (DIGITRADIO 360 CD IR only)
Join us in welcoming Spotify Premium
With Spotify Premium you can listen to millions of songs without adverts. Your favourite and up-and-coming
artists along with the latest hits - just for you! Simply press "Play" and you can hear any song you want in top
quality sound. Test Premium for 30 days free of charge at spotify.com/freetrial
Your new radio has Spotify Connect
With Spotify Connect you can use your mobile phone, tablet or PC to control the music playing on your radio.
You can make calls, play games and even switch o your mobile phone - the music will play on. Find out more at
spotify.com/connect
How to use Connect
You need Spotify Premium to be able to use Connect.
36
Page 37

1. With your new radio, establish a connection to the same WLAN network as your mobile phone, tablet
or PC.
2. Open the Spotify app on your mobile phone, tablet or PC and play a track.
3. If you are using the app on your mobile phone, tap on the image corresponding to the track at the
boom le of the screen. Go to step 4 if using a tablet or PC.
4. Tap the connect symbol.
5. Select your radio from the list. If it is not displayed, ensure that it is connected to the same WLAN
network as your mobile phone, tablet or PC.
And that's it! Have fun listening to your music!
The Spotify soware is subject to third-party licences that you can find here:
hp://www.spotify.com/connect/third-party-licenses
EN
FR
IT
9 Bluetooth playback (DIGITRADIO 361 CD IR only)
9.1 Activating the Bluetooth mode
> Press the MODE buon as oen as required until Bluetooth appears on the display, or press the
Bluetooth (36) buon.
Alternatively:
> Press the MENU buon and then select Main menu > Bluetooth.
In the status bar on the display, a flashing indicates the pairing mode.
If the DIGITRADIO 361 CD IR has already been paired with another device which is within range, the
connection is automatically established.
NL
NW
DK
PL
CZ
SK
37
Page 38

9.2 Pairing
> Activate Bluetooth on your music player, e.g. a smartphone or tablet.
If you activate Bluetooth on your music player, please consult the corresponding instruction manual for the
devices which you wish to pair with the DigitRadio.
Please note that only 1 device can be connected to the DIGITRADIO 361 CD IR at any time.
Ensure that you do not exceed the maximum Bluetooth range of 10 metres to guarantee excellent
playback quality.
> Select the list of Bluetooth devices found on your music player.
> In the list, search for the item DIGITRADIO 361 and select it. If the selection requires a PIN, enter 0000 (4
x zero).
> If the pairing has completed successfully, the Bluetooth symbol on the DIGITRADIO display stops
flashing.
9.3 Playing music
> Select a music track on your music player and play it.
> The sound is now played via the DIGITRADIO 361 CD IR.
You can use the playback buons on the remote control or on the device to control playback on your
music player (only with compatible devices).
Ensure that the volume on your music player is not too low, otherwise there could be background noise.
38
Page 39

10 DAB radio
DAB stands for "Digital Audio Broadcasting", i.e. the digital dissemination of audio signals via antenna. The "+"
stands for modern transmission in optimum sound quality which, moreover, also accommodates additional
programme information such as trac news, weather, track and artist, album cover or the current news
headlines (functional scope depends on the terminal). Info on DAB+, such as station areas, can be found at
www.dabplus.de or www.dabplus.ch.
> As described in Section 5.2, select the DAB Radio source.
If DAB radio is being started for the first time, a complete station scan is performed and a station list in
alphanumerical order is stored.
During the scan a progress bar is displayed.
After completing the scan the first station on the list is played.
EN
FR
IT
10.1 Performing the station scan
> You can use MENU > Complete scan or press the SCAN (15) buon on the remote control to launch the
automatic complete scan.
In doing so, the automatic scan scans all DAB Band III stations and thereby finds all stations being
broadcast within the reception range.
During the scan a progress bar is displayed.
If no station is found, check the antenna position and change the location of the radio if required (see
Section 4.3.2).
10.1.1 Next/previous DAB station
> Pressing the r/sTUNING buons on the remote control (6, 25) or on the device (9, 10) switches to the
respective next or previous station on the station list and immediately plays it.
NL
NW
DK
PL
CZ
SK
39
Page 40

10.1.2 Selecting DAB stations from the station list
> Open the station list via MENU > Station list or by pressing the r/s PRESET buons on the remote
control (7, 9).
> In the station list shown, select the desired station and confirm with the ENTER buon on the remote
control (27) to start playback.
10.2 Saving DAB stations to a memory slot
The programme memory can store up to 10 stations in the DAB range - these are not lost in the event of a
power cut.
> As described above, first select the DAB station that you wish to store on a memory slot.
> During playback, press and hold the PRESET buon on the remote control (18) or on the device (8) until
the menu Save preset appears. Alternatively, you can also use the number buons for saving directly.
The list of the 10 available memory slots now appears.
The memory slots which are still free are shown with [Not available].
> Select the desired memory slot and confirm.
The procedure is shown as confirmed on the display
10.3 Retrieving DAB stations from a memory slot
> In order to retrieve a station that you have saved to a memory slot, press the PRESET buon on the
remote control (18) or on the device (8).
The list of the 10 available memory slots now appears.
40
Page 41

> Select the memory slot with the DAB station you want and confirm your selection.
The selected DAB station will now be played.
If no station is saved on the selected programme slot, [Memory slot empty] appears.
10.4 Signal intensity
> Press the INFO buon (34) on the remote control or hold down the INFO buon on the device (3)
several times consecutively until the signal intensity is shown.
The bar modulation shows the level of the currently selected DAB station. The first field shows the
minimum signal intensity for fault-free reception.
Stations with a signal intensity below the required minimum signal intensity are not transmitting a strong
enough signal. If required, align the antenna as described in section 4.3.2.
EN
FR
IT
10.5 Deleting inactive stations
> By selecting MENU > Delete inactive stations, you can clear stations from the station list which are no
longer being broadcast or cannot be received.
> Select YES when prompted to start the process.
In order to receive a deleted station again (if it starts broadcasting again or can be received again), a
new scan is required as in Section 10.1.
10.6 Seing the volume adjustment (DRC)
The compression rate balances dynamic vibrations and thereby any volume variations that occur.
> Open the volume adjustment via MENU > Volume adjustment.
NL
NW
DK
PL
CZ
SK
41
Page 42

> Select the desired compression rate:
DRC high High compression
DRC low Low compression
DRC off Compression switched off.
10.7 Sorting the stations
> Via MENU > Station order you can sort the order of the stations.
You can choose between: Alphanumeric, Provider and Valid.
10.8 Manual seing
In this menu item you can select the reception channels individually and display their signal intensity. You can
adjust the telescopic antenna optimally for channels suffering from poor reception in the installation location. This
is how stations which have not been found during a scan up until now can be found and played.
To do this, see section 4.3.2.
> Open the channel list via MENU > Manual seing and select the channel to be displayed.
> You can change the channel to be displayed by pressing the r/sPRESET and ENTER buons on the
remote control (7 ,9 ,27) or by rotating and pressing SELECT/VOLUME on the device (5).
11 FM mode
> As described in section 5.2, select the FM Radio source.
When switching on for the first time, the frequency 87.5 MHz is set.
If you have already set or saved a station, the radio plays the station last set.
42
Page 43

The display (4) features the RDS information RT (Radio text), PS (Station name), PTY (Programme type),
provided that the selected station broadcasts these data.
Align the antenna to improve reception (section 4.3.2).
11.1 Manual station scan
> Press the TUNING r/s buons on the remote control (6, 25) or on the device (10, 9) as oen as
required until the frequency of the radio station you want is reached.
The frequency will be adjusted in 50 kHz steps. However, given that the display (4) shows the
broadcasting frequency in MHz, the display changes accordingly in steps of 0.05 MHz.
11.2 Automatic station scan
> Press SCAN (15) or hold the TUNING r/s buons for approx. 1 second on the remote control to start
the scan.
If a FM station with sufficient signal intensity is found, the scan stops and the station is played.
Via MENU > Scan setting, you can set whether the scan only stops at stations with a strong signal
(Strong stations only? > YES) or also at stations with a weaker signal (Strong stations only? > NO).
EN
FR
IT
NL
NW
DK
11.3 Saving FM stations to a memory slot
The programme memory can save up to 10 stations in the FM range. These are not lost even if there is a
power cut.
> As described above, select the FM station you wish to store on a memory slot.
> During playback, press and hold the PRESET buon on the remote control (18) or on the device (8) until
the list Save preset appears.
PL
CZ
SK
43
Page 44

The list of the 10 available memory slots now appears.
The memory slots which are still free are shown with [Not available].
> Select the desired memory slot and confirm.
The process is finally confirmed on the display (4).
11.4 Retrieving FM stations from a memory slot
> In order to retrieve a station that you have saved to a memory slot, press the PRESET buon on the
remote control (18) or on the device (8).
The list of the 10 available memory slots now appears.
> Select the memory slot with the FM station you want and confirm your choice.
The selected FM station is now played.
If no station is saved on the selected programme slot, [Memory slot empty] appears.
11.5 Audio seing (Mono/Stereo)
> With MENU > Audio seing, you can preselect whether you wish the sound to be emied in mono only
(Only mono? > YES).
Alternatively:
> Press the MONO/STEREO buon on the remote control (5).
With FM stations with poor reception, mono playback can lead to an audible reduction in static noise.
12 Audio input
You can play sound on an external device via the DIGITRADIO speaker.
44
Page 45

> Connect the external device to the AUDIO IN connection (3.5 mm jack)on the DIGITRADIO.
> Select the 5.2 AUX IN source as described in Section.
For optimum volume setting, use the volume control on the radio as well as the one on the connected
device.
Take into account that, when the volume setting is very low on the connected device and the volume
setting on the radio is higher, irritating noises/murmurs are amplified accordingly and can be heard
more clearly. It is recommended that the volume on the DIGITRADIO e.g. on a DAB+ or FM station, is set
and switched to audio input, and then the volume on the connected device is adjusted in such a way
that the overall volume of the audio input corresponds approximately to the volume of the DAB+/FM
station. In this way you can also avoid considerable volume differences when switching between the
functions on the DIGITRADIO.
13 CD/MP3 player
13.1 General information on CDs/MP3 CDs
The device is designed for music CDs that are played with audio data (CD-DA or MP3 for CD-R and CD-RW).
MP3 formats must be created with ISO 9660 Level 1 or Level 2. Multi-session CDs cannot be read. In MP3
mode, the terms "Folder" = Album and "Track" are critical. "Album" corresponds to the folder on the PC, "track"
to the PC file or a CD-DA track.
The device sorts the albums or the tracks on an album into alphabetical order by name. If you prefer a different
order, change the name of the track or album and place a number in front of the name.
When burning a CD-R and CD-RW with audio data, various problems can arise which could occasionally
compromise smooth playback. This is caused by faulty software and hardware settings or a blank disc being
used. Should such errors arise, you should contact your CD burner/burner software manufacturer or search for
the relevant information, e.g. on the Internet.
EN
FR
IT
NL
NW
DK
PL
CZ
SK
45
Page 46

If you create audio CDs, observe the legal requirements and do not breach third-party copyrights.
Always keep the CD compartment closed to prevent the accumulation of dust on the laser optics.
The device can play CDs with MP3 data and normal audio CDs (CD-DA). Do not use any other extensions
such as *.doc, *.txt, *.pdf, etc. if audio files are being converted to MP3. Music files ending in *.AAC, *.DLF, *.
M3U and *.PLS or *.WMA and some others cannot be played back.
Due do the range of different encoder software, it cannot be guaranteed that every MP3 file can be played
error-free.
In the event of tracks/files being faulty, playback will continue with the next track/file.
When burning the CD, it is worth doing so at low speed and creating the CD as a single session and
finalising.
13.2 Discs you can use
The CD player is compatible with CD, CD-R/RW and MP3 CD media. You can play all the discs referred to here
(disc size 12 cm/8 cm CDs, playing time 74 min. or 24 min. max.) with this device without an adapter.
If you are transporting the device, remove the disc from the drive. This prevents damage to the CD player
and the disc.
The playback quality with MP3 CDs depends on the bit rate setting and the burning software used.
13.3 Playing CDs
> Select the 5.2 CD source as described in Section.
> To insert CDs, press the EJECT buon on the device (13), or OPEN/CLOSE on the remote control (17). The
CD compartment (15) opens outwards. It should not be prevented from doing so.
46
Page 47

When the CD compartment is open, ensure that no foreign objects. The lens of the laser sensor must
not be touched under any circumstances.
Only open the CD compartment when the CD has stopped.
Insert the CD carefully with the printed side facing upwards. Ensure that the CD is not positioned at an
angle.
> Close the CD compartment using the EJECT (13) buon on the device or OPEN/CLOSE (17) on the
remote control. The CD is read and this is shown on the display (4).
After the reading process has finished the first track is played. The track number of the current track, as well as
the playing time, appear on the display (4). With MP3 CDs, the album number also appears.
If the CD is inserted incorrectly or if the CD appears to be faulty, "No CD" appears on the display (4).
Do not perform any operation until the CD content has been completely read, to ensure that all the
required information on the CD has been read. With MP3 CDs in particular, this process can take some
time.
To insert/remove the CD, please hold it by the edge.
> By pressing the Play/Pause buon on the device (3), or buon 4/;on the remote control (31),playback
can be paused (playback flashes on the display (4)), or continued by pressing it again.
> The playback can be stopped by pressing the STOP buon on the device (6) or the < buon on the
remote control (32). The total number of tracks appears on the display (4).
Always stop the playback prior to removing the CD.
If there is no playback, the DIGITRADIO changes to standby after 15 minutes.
EN
FR
IT
NL
NW
DK
PL
CZ
SK
47
Page 48

13.4 Seing the track
> If required, select the categorisation or folder and the subfolder it contains until you reach the track you
want in order to play it.
> Folders/Albums can be selected with the FOLDER- or FOLDER+ (10, 28) buons.
> You can use the TUNING r/8: and TUNING s/97(9, 10) buons on the device, or the 97or 8:
buons on the remote control (14, 32), to skip to the next or previous track respectively.
The display (4) shows the set track number.
13.5 Quick search
While the track is playing, you can perform a quick search forwards or backwards to find a specific section. There
is no playback during the search process.
> Hold down the TUNING s/97or TUNING r/8: on the device (9, 10) or the 97or 8: buons on
the remote control (14, 32), to perform a quick forwards and backwards search while the track is playing
for as long as the buons are kept pressed.
13.6 Repeat function
You can select whether a track, the entire folder/album (only for MP3 CDs) or all of the tracks on the CD are to
be repeated.
> To do so press the REPEAT button on your remote control (3) repeatedly. The selected mode is shown on
the display (4) (Rep. track, Rep. folder/album, Rep. all).
> To switch the function o again, press the REPEAT button as often as required until the repeat display is
no longer shown.
48
Page 49

13.7 Random playback
With the random generator, the CD tracks can be played back in a randomly mixed order.
> If, during playback, you press the RANDOM buon on the remote control (22), the random playback
symbol appears on the display (4).
> To switch the function o again, press the RANDOM button (22) again.
13.8 Track sampling
This function enables the first 10 seconds of the tracks to be sampled.
> Press the INTRO button (21) on your remote control to start/end the function. The selected mode is
shown on the display (4).
13.9 Programming function
With the programming function, you can play up to 32 tracks on a music CD or 64 tracks on an MP3/WMA-CD
in an order determined by you.
You can only carry out programming if there is a disc in the closed CD compartment and the device is in
stop mode.
> Access the stop function by pressing the < buon on the remote control (13) or on the device (6).
> Press the PRESET button on the remote control (18)
For a normal audio CD, the display (4) shows PRG; the track number "T01" flashes, as does the memory slot
P01.
> Use the TUNING r/8: and TUNING s/97(9, 10) buons on the device or the 97or 8: buons
on the remote control (14, 32) to select the first track to be programmed.
EN
FR
IT
NL
NW
DK
PL
CZ
SK
49
Page 50

> Save the track number you want using the ENTER buon on the remote control (27) or by pressing the
SELECT/VOLUME knob on the device (5). The track is now programmed on memory slot 01.
The display (4) shows the number of the next memory slot. Programme the desired sequence of tracks in the
same way. Use the PRESET button or the <button on the remote control (18, 13) to end the process.
> Press the 4/;(31) button on the remote control or the 4/;(6) button on the device to start playing the
selection. The display shows PRG, the current track number and the playing time.
> If you would like to interrupt the playback of the programmed selection, press button 4/;once.
> To end the programmed playback, press the < button on the remote control (13) or on the device (6).
If you open the CD compartment or activate another source, the programme memory is deleted. The
programming function is also ended by pressing the < button twice.
With MP3 CDs you also indicate the folder/album number.
> Aer starting the programming process using the PRESET buon, first of all an F flashes on the display
followed by the folder/album number. Select the folders/albums using the FOLDER- or FOLDER+ (10, 28)
buons on the remote control.
Track entry then takes place as with audio CDs.
13.10 CD advice
Always keep the CD in its cover and only hold it by the edges. The rainbow-coloured, shimmering surface must
never be touched and must always be kept clean. Do not stick paper or adhesive tape to the label side of the
disc. The CD should be kept away from sunlight and heat sources such as radiators.
Likewise, CDs must not be left in a parked car directly in the sun, since the interior temperature in the car can rise
considerably. Clean off fingerprints and dust on the silver side using a clean, dry cleaning cloth.
50
Page 51

To clean CDs, do not use record cleaning agents such as record spray, cleaning liquids, anti-static spray or
solvents such as petrol, thinner or other commercially available chemicals. Tough stains can sometimes be
removed using a moist chamois leather.
Wipe from the centre to the edge of the disc. Circular movements when cleaning
cause scratches. This can lead to errors during playback.
EN
FR
IT
NL
NW
DK
PL
CZ
SK
51
Page 52

14 Other functions
14.1 Sleep function
> You can set the sleep function using MENU > Main menu > Sleep.
> Using the r/s PRESET buons on the remote control (7, 9), or by rotating SELECT/VOLUME on the
device (5), you can set the period in steps of 15, 30, 45 and 60 minutes aer which the device switches to
standby, or you can switch the Sleep function o again by selecting Sleep o.
> Confirm your selection with the ENTER buon on the remote control (27) or by pressing the SELECT/
VOLUME knob on the device (5).
Alternatively:
> Press the SLEEP buon on the remote control (16) as oen as required until the desired value is shown on
the display (4).
When the sleep function is active, a clock symbol appears on the status bar on the display with the
remaining time until the DIGITRADIO switches to standby.
14.2 Alarm
> Using MENU > Main menu> Alarm you can retrieve the alarm seings.
Alternatively:
> Press the TIMER buon on the remote control (20), to access the alarm seings directly.
14.2.1 Seing the alarm time
The alarm function cannot be used until the correct time has been set. Depending on the set-up, this
either occurs automatically or has to be set manually.
52
Page 53

The time can either be set manually or automatically using DAB/FM or updated using the Internet. See
Section 15.3.2 for further information.
> Select one of the alarm time memories (Alarm 1 or Alarm 2) and set the desired values item by item
using the r/s PRESET (7, 9) and ENTER (27) buttons on the remote control, or by rotating and
pressing the SELECT/VOLUME knob on the device (5).
Repeat Choose between the repeat options of Daily, Once, Weekend, Working days.
Time Set the time at which you wish to be woken.
If the repeat option Once is selected, the date will also be requested.
Mode Select the source with which you wish to be woken. You have the choice of Buzzer,
Internet radio, DAB, FM, CD.
Programme Select whether playback is to be from the pre-set source (Last listened to or one of the
Station memories 1-10).
Volume Select the volume with which you wish to be woken.
The alarm settings are not accepted until selecting Save.
The alarm is active provided you have set the alarm repeat to Daily, Once, Weekend, or Working days.
An alarm symbol appears on the status bar with the corresponding number of the active alarm .
In the Off setting, the alarm is not active for the set time.
14.2.2 Switching o the alarm aer being woken
> Select the SELECT/VOLUME buon on the device (5) to switch on the snooze function.
By repeatedly pressing SELECT/VOLUME you can also select the length of the pause from 5, 10, 15 or 30
minutes.
EN
FR
IT
NL
NW
DK
PL
CZ
SK
53
Page 54

> Press the On/Standby buon on the remote control (1) or on the device (1) to switch o the alarm.
The display (4) shows the alarm symbol again if the alarm repeat is set to Daily, Weekend or Working
days.
14.2.3 Switching o/deactivating the alarm
> Select the Alarm 1 or Alarm 2 memory, depending on which you wish to switch o/deactivate.
> Open Repeat and set it to O to deactivate the alarm.
The alarm settings are not accepted until selecting Save.
The alarm settings are retained so that they can be easily switched on/activated again at a later date.
14.2.4 Switching on/activating the alarm
> Select the alarm memory (Alarm 1 or Alarm 2) you wish to switch on/activate.
> Open Repeat and set this to Daily, Once, Weekend, or Working days to activate the alarm with the
seings already available.
If required, you can adjust the other settings as described in Section 14.2.1.
The alarm settings are not accepted until selecting Save.
15 System seings
15.1 Equaliser
To adjust the sound of the DIGITRADIO, you can use the equaliser with the available preset tunings Middle,
Classic, Rock, Pop and Jazz.
> Via MENU > Main menu > System seings > Equaliser you can retrieve the equaliser seings.
54
Page 55

Alternatively:
> Press the EQUALISER buon (EQ) on the remote control (24) to access the equaliser seings directly.
Select the desired equaliser seing.
A * highlights the current selection/setting.
15.2 Internet seings
> You can use MENU > Main menu > System seings > Internet seings to retrieve network seings.
15.2.1 Connection via a network cable
To configure a network connection via a network cable, you can either use the network wizard or do so
manually.
15.2.1.1 Network wizard configuration
> Select the network wizard to start this.
The network wizard searches for all the WLAN networks within the range and displays them, as well as
the [Cable] option.
> In order to use the network connection via a network cable (LAN), select [Cable].
After confirmation, required settings such as IP address, gateway, subnet mask, are automatically
retrieved from your router, provided the DHCP function is activated in the router.
EN
FR
IT
NL
NW
DK
PL
CZ
SK
55
Page 56

15.2.1.2 Manual configuration
> Select Manual seings and then Cable to start manual configuration.
> Now select whether you wish to automatically retrieve the IP address, gateway etc. from your router
(DHCP active) or to enter it manually (DHCP inactive).
Please take into account that automatic retrieval of the IP address, gateway, subnet mask etc. only
works if the DHCP function is activated in your router.
> In sequence, enter the IP address, subnet mask, gateway address, primary DNS and secondary DNS (if
required), using the r/s PRESET, VOL+, VOL- buons on the remote control (7, 9, 8, 26).
15.2.2 Connection via WLAN
To configure the network connection via WLAN, you can either use the network wizard or configure this manually.
15.2.2.1 Network wizard configuration
> Select the network wizard to start this.
The network wizard now searches for all the WLAN networks within range and displays them.
> Then select your WLAN network.
You can now choose whether to use the WPS function or whether you prefer to enter your WLAN
password manually.
> If you would like to use the WPS function, launch it on your router as per its instruction manual and then
select Press buon in the network wizard.
Please observe the display overlays. The connection process is generally completed after a few seconds
and the WLAN connection can be used.
56
Page 57

> If you wish to enter your WLAN password manually, or if your router does not support the WPS function,
select Skip WPS.
> Enter your WLAN password using the r/s PRESET, VOL+, VOL- and ENTER buttons on the remote
control (7, 9, 8, 26, 27) or by rotating and pressing the SELECT/VOLUME knob on the device (5) and
confirm with OK.
The entered password is now verified. This process is generally completed after a few seconds and the
WLAN connection can now be used.
15.2.2.2 Configuration via the WPS function
This establishes a direct connection to the router. Selecting and/or entering a WLAN network (SSID) and
password is not required.
> Start the WPS function on your router as per the instruction manual.
> Then select PBC WLAN set-up to start the connection process.
Please observe the display overlays. The connection process is generally completed after a few seconds
and the WLAN connection can be used.
15.2.2.3 Manual configuration
> Select Manual seings followed by Wireless to start manual configuration.
> Now select whether you wish to automatically retrieve the IP address, gateway etc. on your router (DHCP
active) or to enter it manually (DHCP inactive).
Please take into account that automatic retrieval of the IP address, gateway, subnet mask etc. only
works if the DHCP function is activated in your router.
> In sequence, enter the IP address, subnet mask, gateway address, primary DNS and secondary DNS (if
required) using the r/s PRESET, VOL+, VOL- buttons.
EN
FR
IT
NL
NW
DK
PL
CZ
SK
57
Page 58

> Now enter the name (SSID) of your WLAN network with the r/s PRESET, VOL+, VOL- buttons and
confirm with OK.
> Select whether your WLAN network is Open, encrypted by WEP or by WPA/WPA2 and confirm the
following item.
> Now enter your WLAN password using the r/s PRESET, VOL+, VOL- buttons and confirm your selection
with OK to start the connection process.
In general, the WLAN connection can be used after a few seconds.
15.2.2.4 Display seings
> Select Display seings to display the current network seings.
15.2.2.5 NetRemote PIN setup
Under certain circumstances, it may be necessary to secure the connection to the DIGITRADIO with a PIN.
> Enter a 4-digit PIN in NetRemote PIN setup.
15.2.2.6 Delete network profile
Use this menu item to end an existing connection to a WLAN and to delete the settings made.
If you wish to connect the device to this network again, you must carry out all settings again.
15.2.2.7 Delete seings
Activate this setting to delete the access data to the set WLAN. All other settings are retained.
58
Page 59

15.2.3 WLAN/LAN connection on standby
> In Allow WLAN/LAN on Standby? select whether the WLAN/LAN connection is to be retained in
standby mode (YES) or not (NO).
Note that, for unrestricted and smooth multi-room mode and operation via the MyDigitRadio Pro app,
this function must remain switched on.*
*DIGITRADIO 360 CD IR only
15.3 Time seings
> You can retrieve the seings for the time and date via MENU > Main menu > System seings > Time
and date.
15.3.1 Time/date seing
> Select Time/date seing to set the time and date manually.
15.3.2 Update seings
> In Update seings, select whether the time and date update should take place automatically via DAB
(DAB update), via FM (FM Update) or via Internet (NET Update), or whether No update is required.
When selecting NET update, the menu items Set time zone and Summertime are also available.
15.3.3 Set format
> In Set format you can choose whether the time is to be shown in 12 or 24 hour format.
EN
FR
IT
NL
NW
DK
PL
CZ
SK
59
Page 60

15.3.4 Seing the time zone
for the NET update only
> In Time zone, select the time zone which corresponds to your location.
15.3.5 Summertime
for the NET update only
> In Summertime you can determine whether it is currently summertime (On) or wintertime (O).
15.4 Language
> Via MENU > Main menu > System seings > Language you can select the preferred menu language.
15.5 Factory seing
> Retrieve the MENU > Main menu > System seings > Factory seing to reset your DIGITRADIO to the
delivery status.
Please note that, in this case, all the settings performed by you (e.g. network connection or saved stations)
will be lost and must subsequently be set again to be able to use the radio as usual.
> If you actually wish to reset the radio, select the security prompt YES or abort the process with NO.
After completion of the factory settings, the radio switches to standby. When next switched on, the set-up
wizard is launched again (Section 15.7).
15.6 Soware update
From time to time software updates may be provided which could contain improvements or bug fixes. This
keeps the DIGITRADIO permanently up-to-date.
> Go to MENU > Main menu > System seings > Soware update.
> If the DIGITRADIO is to search periodically for new soware versions, go to Auto update and select > YES,
or NO if this is not to be carried out automatically.
> Select Check now, if you want to check immediately whether a new soware version is available.
60
Page 61

If a software update has been located, follow the instructions on the display (4).
In order to find and upload software updates, the radio must be connected to the Internet.
Do not switch the DIGITRADIO off during the update process.
15.7 Set-up wizard
> Go to MENU > Main menu > System seings > Set-up wizard to run the set-up wizard again.
When switching on for the first time, the set-up wizard starts automatically.
> As soon as Run now is shown on the display (4) select YES.
If you select No, the wizard closes and you must perform the required settings manually.
You will be taken through the settings in various steps.
> In Time format, you can choose whether the time is to be shown in 12 or 24 hour format.
> In the next step you can select the source via which the time is to be synchronised; DAB (DAB update),
FM (FM update) or Internet (NET update), or whether No update should take place. For more
information see Section 15.3.2.
If you have selected NET update, in the next steps you must select the Time zone where you are
located as well as whether it is currently Summertime (YES) or not (NO).
EN
FR
IT
NL
NW
DK
PL
If you select No update you must then set the time and date manually.
> Now select whether the network connection should remain active on standby (YES) or not (NO).
CZ
SK
61
Page 62

Note that, for unrestricted, smooth multi-room mode and operation via the MyDigitRadio Pro app, this
function must remain switched on.*
> Then select your WLAN network or [Cable], if you have connected the radio via LAN cable to your
network.
If you select your WLAN network, you can now select whether you wish to use the WPS function or enter
your WLAN password manually.
> If you would like to use the WPS function, launch it on your router as per its instruction manual and then
select Press buon in the network wizard.
> If you wish to enter your WLAN password manually, or if your router does not support the WPS function,
select Skip WPS.
> Enter your WLAN password using the r/sPRESET, VOL+, VOL- and ENTER buttons on the remote control
(7, 9, 8, 26, 27) or by rotating and pressing the SELECT/VOLUME knob on the device (5) and confirm with
OK.
> If the display (4) shows Set-up wizard closed, press the ENTER button on the remote control (27) or the
SELECT/VOLUME knob on the device (5).
*DIGITRADIO 360 CD IR only
15.7.1 Info
> In MENU > Main menu > System seings > Info you can display the SW version currently installed in the
device as well as, for example, the Spotify version*.
*DIGITRADIO 360 CD IR only
62
Page 63

15.8 Display backlight
> Via MENU > Main menu > System seings > Backlight you can retrieve the seings for the display
backlight.
> Select Operation or Standby to carry out the seing for operating mode or standby mode.
> You can now set the brightness during operation in three increments of High, Medium and Low, and for
standby in Standby level, at Medium, Low or O.
For standby mode, you can also set the duration after which the display backlight changes to the set
brightness under Display time.
15.9 Multi-room (DIGITRADIO 360 CD IR only)
In conjunction with the MyDigitRadio Pro app (available in the Apple App Store, Google Play store and
AppStock), the DIGITRADIO 360 CD IR offers multi-room support (for further information please see
MyDigitRadio Pro app and on the website www.technisat.de).
With the MyDigitRadio Pro app, it is possible to remotely control multi-room enabled devices or to combine
groups on which the same music can then be played synchronously. If a device in a group is removed/added,
all other devices in the same group are likewise removed/added.
The group set-up can also be undertaken in the Menu > Main menu > System settings > Multi-room.
Note that this function must remain switched on for unrestricted, smooth multi-room mode and
operation via the MyDigitRadio Pro app.
15.9.1 Displaying details
This menu shows the current grouping status.
Amongst other things, here you can determine whether the radio is connected as the Server or Client in
a group.
EN
FR
IT
NL
NW
DK
PL
CZ
SK
63
Page 64

15.9.2 Creating a new group
> First enter a group name.
> Then select the devices you wish to add to the group.
* identifies devices already added to the group.
15.9.3 Add to group
Use this menu to add more devices to an existing group.
In order to be able to add devices, a group must first of all have been created.
15.9.4 Show clients
This menu shows you all the devices belonging to the group (clients). It is also possible to remove clients from
the group.
> To do so, select devices from the list and remove by pressing the ENTER buon on the remote control (27)
or the SELECT/VOLUME knob on the device (5).
15.9.5 Exit group
Use this menu item to exit the current group.
15.9.6 Delete group
This menu item deletes the current group and releases all the devices added to the group again.
16 App operation
As an alternative to operation via the device or the remote control, the DIGITRADIO can also be operated using
the MyDigitRadioPro app on a mobile phone or tablet.
You can download the MyDigitRadioPro app free of charge at Google Play or in the Apple AppStore.
64
Page 65

> To enable operation of the DIGITRADIO using the app, both devices (smartphone/tablet with
MyDigitRadioPro and the DIGITRADIO) must be in the same network.
> Launch the MyDigitRadioPro app on your smartphone/tablet.
> The DIGITRADIO 360 CD IR or DIGITRADIO 361 CD IR item appears in the device overview in the app. Tap
it to select the DIGITRADIO.
EN
> In the next overview you can choose between the three tabs SOURCE, NOW RUNNING and SCROLL. Tap
the respective tab to open the view.
SOURCE:
In SOURCE, all of the DIGITRADIO's available sources are displayed. You can switch sources by tapping the
respective item.
NOW RUNNING:
Tap NOW RUNNING to display the current playback. Depending on the selected source, you can pause or
continue playback, change tracks or switch to the next/previous station. Tap the respective buon to do so. The
volume can be adjusted in the boom line.
BROWSE:
If you are in a source with a channel list, e.g. Internet radio or DAB, this list can be retrieved by selecting the
BROWSE tab.
FR
IT
NL
NW
DK
PL
CZ
SK
65
Page 66

> If you wish to switch the DIGITRADIO on or o using the app, tap the standby icon .
> To retrieve other seings, tap the gear wheel icon . This provides you with access to the device
functions of sleep timer, equaliser, date and time and factory seings.
17 Using headphones
Do not listen to music at a high volume when using headphones. Doing so can cause permanent hearing
impairment. Turn down the radio volume to the lowest volume before using headphones.
When you connect headphones (not included in the scope of delivery), the speakers are muted and sound
is only heard via the headphones.
> Only use headphones with a 3.5 mm jack plug.
> Insert the headphone connector into the headphone socket (14) on the device.
> If you would like to listen via the speakers again, remove the headphone connection from the headphone
socket on the device.
66
Page 67

18 Cleaning
To prevent the risk of an electric shock, you may not clean the device using a wet cloth or under running
water. Remove the mains plug prior to cleaning!
You may not use scouring pads, scouring powder and solvents such as alcohol, petrol, spirits, thinners,
etc.; they could damage the surface of the device.
Do not use any of the following substances: salt water, insecticides, chlorine or acid-based solvents
(ammonium chloride).
Clean the housing using a soft, moist cloth.
Only clean the display with a soft, cotton cloth. If required, use the cotton cloth with a reduced volume
of non-alkaline, diluted water-based soap solution.
Use the cotton cloth to gently rub the surface until it is completely dry.
EN
FR
IT
NL
NW
DK
PL
CZ
SK
67
Page 68

19 Troubleshooting
If the device does not operate as intended, check the following tables for information.
19.1 Problems with the device
Symptom Possible cause/remedy
The device is not being supplied with
power.
The device cannot be switched on.
Connect the mains plug correctly to the
mains outlet. If necessary, select another
power outlet.
Increase the volume. If necessary, the
No sound can be heard.
incorrect source has been selected.
Are headphones plugged in?
Switch off the device, disconnect from the
The display does not switch on.
mains.
Switch on the device.
In the vicinity of the device, a mobile
phone or other device is emitting
Interference can be heard.
disruptive radio waves.
Remove the mobile phone or the
device from the environment of the unit.
Electronic components in the device are
Other operational malfunctions,
loud noises or a malfunctioning
display are occurring.
faulty.
Remove the mains plug. Leave the device
disconnected from the power source
for approx. 10 seconds. Reconnect the
device.
68
Page 69

19.2 Problems with USB media
Symptom Possible cause/remedy
No playback possible.
The device is not in USB mode.
Switch to the respective source using
MODE.
Medium not inserted or empty.
Insert the medium correctly or provide it
with music data.
EN
19.3 Problems with the remote control
Symptom Possible cause/remedy
The remote control does not work.
Batteries are inserted incorrectly or are
low.
Check the polarity. Change the batteries.
IR connection interrupted.
Remove objects located between the
remote control and the device.
Distance too great.
Max. distance from the device is approx.
4 metres
FR
IT
NL
NW
DK
PL
CZ
SK
69
Page 70

19.4 Problems with the radio
Symptom Possible cause/remedy
70
No radio stations are being received.
No DAB signal is being received.
The sound is low or of poor quality.
The device is not in radio mode.
Press the MODE button.
Check whether DAB reception is possible
in the region.
Readjust the antenna. Try to receive other
stations.
Perform a station scan.
Other devices, e.g. televisions, are
interfering with reception.
Position the device further away from
such devices.
The antenna is not extended or correctly
orientated.
Extend the antenna.
Rotate the antenna to improve reception.
Page 71

19.5 Problems with the CD player
Symptom Possible cause/remedy
The CD is not playing or
skips during playback.
The device is not in CD mode. Faulty CD
inserted.
The CD compartment is not closed.
Close the CD compartment.
The CD is incorrectly inserted.
Insert the CD with the labelled side facing
upwards. The CD must be properly
centred in the CD compartment.
The CD is dirty or faulty.
Clean the CD, use another CD.
Moisture has penetrated the CD
compartment.
Remove the CD and leave the CD
compartment open for approx. 1 hour
to dry.
The CD playing time is more than 74
minutes.
EN
FR
IT
NL
NW
DK
PL
CZ
SK
71
Page 72

Symptom Possible cause/remedy
The volume is set too high.
Decrease the volume.
The sound is intermittent.
The CD is damaged or dirty.
Clean the CD or replace it.
The device is being exposed to vibration.
Install the device in a location with low
vibration levels.
19.6 Problems with the external input
Symptom Possible cause/remedy
Is the device connected correctly?
Has AUX been selected as the input
No sound from the external input (AUX).
source?
Has playback been started on the
external device and has the output
volume been set?
If the malfunction has not been resolved, even after performing the checks described, please contact the
Technical Hotline (for further information see Page 19).
72
Page 73

20 Technical data
Reception channels
Frequencies
Mains voltage AC Input: 110-240; 50Hz
USB supply DC 5V 1.0A
Output power Speaker 2 x 5W RMS
Power consumption 28W
Power consumption on standby <1W
AUX input 500mV
Headphones 47KW
Dimensions 350mm x 125mm x 215mm
Weight 2.6 kg
Operating conditions 5°C to 35°C, 5% to 90% air humidity
Subject to technical changes and errors. The dimensions are approximate values.
Internet, DAB/DAB+, FM, USB, CD/MP3 UPnP, AUX,
Bluetooth (DIGITRADIO 361 CD IR)
FM: 87.5-108MHz
DAB/DAB+: 174-240MHz
EN
FR
IT
NL
NW
DK
PL
CZ
SK
73
Page 74

74
Page 75
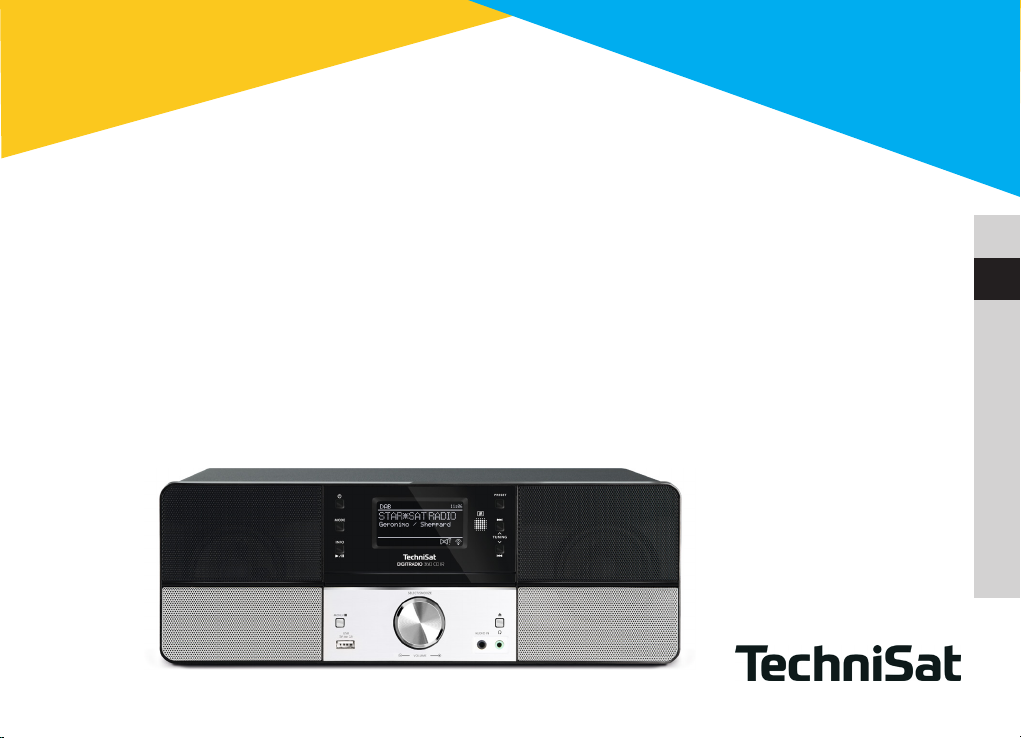
EN
Mode d'emploi
DIGITRADIO 360 CD IR
DIGITRADIO 361 CD IR
Radio FM/DAB+, Internet stéréo avec lecteur CD/MP3
FR
IT
NL
NW
DK
PL
CZ
SK
Page 76

1 Illustrations
Commande frontale :
76
1
2
3
4
5
6
7
1 ON/STAND-BY
2 MODE
3 PLAY/PAUSE / INFO
4 ÉCRAN
5 SELECT / SNOOZE / VOLUME
6 MENU / STOP
7 PORT USB
8
9
10
11
12
13
14
15
8 PRESET
9 AVANCE / TUNING r/:
10 RETOUR / TUNING s/9
11 RÉCEPTEUR IR
12 ENTRÉE AUDIO
13 EJECT/ Ouvrir/fermer le
compartiment à CD
14 PRISE CASQUE
15 Compartiment à CD
Page 77

Arrière :
EN
FR
IT
NL
NW
DK
PL
1
2
3
CZ
1 CÂBLE D'ALIMENTATION
2 PORT LAN
3 ANTENNE TÉLESCOPIQUE
SK
77
Page 78

Télécommande* :
1
2
3
4
5
6
7
8
9
10
11
12
13
14
15
16
17
18
19
20
21
22
23
24
25
26
27
28
29
30
31
32
33
34
35
36
1 ON/STAND-BY Mise en marche/arrêt de l'appareil (veille),
Arrêt de l'alarme
2 0 ... 9 Touches numériques : choix du titre CD, USB,
ouvrir les stations mémorisées PRESET,
appuyer sur la touche numérique, maintenir
la touche enfoncée et mémoriser la station
3 REPEAT Fonction de répétition CD, USB
4 MENU Ouvrir, fermer le menu
5 MONO/ST. Basculer entre mono, stéréo
6 TUNING s FM : réglage de la fréquence/retour
7 PRESET r DAB, TUNER FM : sélection des stations PRESET
8 VOL - Réduire le volume
9 PRESET s DAB, TUNER FM : sélection des stations PRESET
10 FOLDER – MP3/USB : choix de l'album/du dossier
11 CD/USB Sélection du mode CD/USB
12 FM/DAB Sélection du mode FM/DAB
13 < Arrêter la lecture CD/USB
14 97 CD, USB : choix du titre, recherche
FM : réglage de la fréquence/retour
15 SCAN Recherche automatique FM/DAB
16 SLEEP Mise en marche et sélection de la fonction
Snooze
17 OPEN/CLOSE Ouvrir/fermer le compartiment à CD
18 PRESET Fonction programmation
19 CLOCK Réglage de l'heure
(station, titre, interprète...)
78
*L'illustration montre la télécommande de la DIGITRADIO 361 CD IR.
Page 79

20 TIMER Réglage de l'alarme
21 INTRO CD, USB : fonction Préaffichage, 10 s. par titre
22 RANDOM CD, USB : lecture aléatoire
23 BACK Retour dans le menu/d'une étape
24 EQ Réglage du son égaliseur
25 TUNING r FM : réglage de la fréquence/avance
26 VOL + Augmenter le volume
27 ENTER Ouvrir le menu, valider la saisie
28 FOLDER + CD/USB : choix de l'album/du dossier
29 INTERNET Sélection du mode INTERNET
30 AUDIO IN Sélection du mode AUDIO IN
31 4/; CD, USB : démarrer la lecture, pause
32 8: CD, USB : choix du titre, recherche
FM : réglage de la fréquence/avance
33 MUTE MUTE (mise en sourdine)
34 INFO Afficher les infos du mode FM
(Nom, PTY, RT, fréquence)
Afficher les infos du mode DAB
(Station, titre, interprète...)
Afficher les infos du mode CD/USB
(Titre, interprète...)
35 UNPAIR Désactiver la connexion Bluetooth (uniquement
DIGITRADIO 361 CD IR)
SPOTIFY Sélection de SPOTIFY CONNECT (uniquement
DIGITRADIO 360 CD IR)
36 Bluetooth Activer la connexion Bluetooth (uniquement
DIGITRADIO 361 CD IR)
EN
FR
IT
NL
NW
DK
PL
CZ
SK
79
Page 80

Sommaire
1 Illustrations .....................................................................................................................................................................76
2 Avant-propos ..................................................................................................................................................................83
2.1 Groupe cible de ce mode d’emploi ................................................................................................................................................83
2.2 Consignes importantes ........................................................................................................................................................................83
3 Installation de l’appareil ............................................................................................................................................ 92
3.1 Télécommande ........................................................................................................................................................................................ 94
4 Description de la DIGITRADIO 360/361 CD IR .....................................................................................................94
4.1 Contenu de la livraison ........................................................................................................................................................................ 94
4.2 Caractéristiques spécifiques de la DIGITRADIO 360/361 CD IR ....................................................................................... 94
4.3 Préparation de la DIGITRADIO 360/361 CD IR au fonctionnement ............................................................................... 96
4.4 Fonctions générales de l’appareil ..................................................................................................................................................98
4.5 Achage à l'écran ............................................................................................................................................................................... 102
4.6 Arrêt de l’appareil ................................................................................................................................................................................ 102
5 Commande du menu ................................................................................................................................................. 102
5.1 Menu principal ........................................................................................................................................................................................103
5.2 Choix de la source ................................................................................................................................................................................103
6 Radio Internet ............................................................................................................................................................. 104
6.1 Dernière écoute .................................................................................................................................................................................... 104
6.2 Liste des stations ................................................................................................................................................................................. 104
6.3 Mémorisation d'une station sur un emplacement mémoire ............................................................................................105
6.4 Accès à une station à partir d’un emplacement mémoire ................................................................................................105
7 Lecture de musique (médias UPnP & USB) : ..................................................................................................... 106
7.1 Lecture de fichiers audio .................................................................................................................................................................. 106
7.2 Mise à disposition de musique via le lecteur Windows Media ...................................................................................... 108
80
Page 81

8 Spotify Connect (uniquement DIGITRADIO 360 CD IR) ......................................................................................................... 108
9 Bluetooth-Lecture Bluetooth (uniquement DIGITRADIO 361 CD IR) ................................................................................. 109
9.1 Activation du mode Bluetooth ...................................................................................................................................................... 109
9.2 Couplage ................................................................................................................................................................................................... 110
9.3 Lecture de musique ............................................................................................................................................................................. 110
10 Radio DAB ......................................................................................................................................................................111
10.1 Réalisation d'une recherche ............................................................................................................................................................ 111
10.2 Mémorisation d'une station DAB sur un emplacement mémoire ..................................................................................112
10.3 Accès à une station DAB à partir d’un emplacement mémoire ......................................................................................112
10.4 Puissance du signal ..............................................................................................................................................................................113
10.5 Suppression des stations inactives ..............................................................................................................................................113
10.6 Réglage de l'adaptation du volume (DRC) ................................................................................................................................113
10.7 Adaptation de l'ordre des stations ............................................................................................................................................... 114
10.8 Réglage manuel ..................................................................................................................................................................................... 114
11 Mode FM ........................................................................................................................................................................114
11.1 Recherche manuelle des stations ..................................................................................................................................................115
11.2 Recherche automatique des stations ..........................................................................................................................................115
11.3 Mémorisation d'une station FM sur un emplacement mémoire......................................................................................115
11.4 Accès à une station FM à partir d’un emplacement mémoire ........................................................................................ 116
11.5 Réglage audio (mono/stéréo) ......................................................................................................................................................... 116
12 Entrée audio ................................................................................................................................................................. 116
13 Lecteur CD/MP3 ........................................................................................................................................................... 117
13.1 Informations générales sur les CD/CD MP3 ..............................................................................................................................117
13.2 Disques compatibles ............................................................................................................................................................................118
13.3 Lecture de CD ..........................................................................................................................................................................................118
13.4 Réglage du titre .................................................................................................................................................................................... 120
EN
FR
IT
NL
NW
DK
PL
CZ
SK
81
Page 82

13.5 Recherche rapide ................................................................................................................................................................................. 120
13.6 Fonction Répétition .............................................................................................................................................................................120
13.7 Lecture aléatoire .................................................................................................................................................................................... 121
13.8 Écoute d'un extrait du titre ...............................................................................................................................................................121
13.9 Fonction programmation .................................................................................................................................................................. 121
13.10 Remarques sur les CD .........................................................................................................................................................................122
14 Fonctions étendues ....................................................................................................................................................124
14.1 Fonction de veille ................................................................................................................................................................................. 124
14.2 Réveil.......................................................................................................................................................................................................... 124
15 Réglages système .......................................................................................................................................................126
15.1 Égaliseur ................................................................................................................................................................................................... 126
15.2 Réglages Internet ..................................................................................................................................................................................127
15.3 Réglage de l'heure.................................................................................................................................................................................131
15.4 Langue ....................................................................................................................................................................................................... 132
15.5 Réglage d'usine ......................................................................................................................................................................................132
15.6 Mise à jour du logiciel .........................................................................................................................................................................132
15.7 Assistant d'installation ........................................................................................................................................................................ 133
15.8 Éclairage de l'écran ..............................................................................................................................................................................135
15.9 Multiroom (uniquement DIGITRADIO 360 CD IR) ........................................................................................................................................... 135
16 Commande via l'application .....................................................................................................................................136
17 Utilisation des écouteurs ..........................................................................................................................................138
18 Neoyage ......................................................................................................................................................................139
19 Dépannage ................................................................................................................................................................... 140
20 Données techniques ...................................................................................................................................................145
82
Page 83

2 Avant-propos
Ce mode d’emploi vous aide à utiliser votre système de radio, ci-après nommé DIGITRADIO ou appareil, de
manière sûre et conforme à sa destination.
2.1 Groupe cible de ce mode d’emploi
Ce mode d’emploi s’adresse à toutes les personnes qui installent, utilisent, nettoient ou mettent l’appareil au
rebut.
2.1.1 Utilisation conforme
L’appareil est conçu pour la réception de stations de radio FM/DAB+. L’appareil est conçu pour un usage privé
et ne convient pas à des fins commerciales.
2.2 Consignes importantes
Veuillez observer les indications ci-dessous afin de réduire tout risque en matière de sécurité, d’éviter toute
détérioration de l’appareil et de contribuer à la protection de l’environnement.
Lisez attentivement l'ensemble des consignes de sécurité et conservez-les pour toute question ultérieure.
Respectez toujours l'ensemble des avertissements et consignes de ce mode d'emploi, ainsi que ceux au dos de
l’appareil.
Attention - désigne une indication importante à lire attentivement, afin d’éviter toute perturbation de
l’appareil, toute perte/mauvaise utilisation des données ou tout fonctionnement indésirable.
Astuce - désigne une indication relative à la fonction présentée, ainsi qu’une autre fonction liée et
éventuellement à respecter, avec ses références dans le manuel.
EN
FR
IT
NL
NW
DK
PL
CZ
SK
83
Page 84

2.2.1 Sécurité
Pour votre sécurité, vous devez lire attentivement les consignes de sécurité avant de mettre en service votre
nouvel appareil. Le fabricant décline toute responsabilité pour les dommages résultant d’une utilisation
inappropriée de l’appareil et du non-respect des dispositions de sécurité.
N’ouvrez jamais l’appareil!
Tout contact avec des pièces conductrices de tension peut entraîner la mort!
Les interventions éventuellement nécessaires doivent être uniquement effectuées par du personnel
qualifié.
Cet appareil doit uniquement être utilisé dans des régions à climat tempéré.
Lors d’un transport prolongé dans le froid et d'un passage dans des locaux chauffés, ne pas le mettre en
marche immédiatement; attendre que les températures se rééquilibrent.
N’exposez pas l’appareil à des gouttes d’eau ou des éclaboussures. Si de l’eau pénètre dans l’appareil,
arrêtez-le et contactez l’assistance technique.
N'exposez pas l'appareil à des sources de chaleur qui peuvent faire chauffer l'appareil au-delà de son
utilisation normale.
84
Page 85

En cas d’orage, il est conseillé de débrancher l’appareil du secteur. Une surtension peut
endommager l’appareil.
Si l’appareil semble défectueux, s’il produit des odeurs ou fumées, s’il présente des dysfonctionnements
importants, si le boîtier est endommagé, si du liquide est entré en contact avec l'appareil, arrêtez
immédiatement l’appareil et contactez l’assistance technique.
L'appareil doit uniquement être raccordé à une tension de secteur de 100 V - 240 V~, 50/60 Hz.
N’essayez jamais de faire fonctionner l’appareil sous une autre tension.
La tension de secteur ne doit être branchée qu’une fois l’installation conforme aux prescriptions terminée.
Si l’appareil présente des défauts, il ne doit pas être mis en marche.
Lorsque vous débranchez le câble d’alimentation de la prise secteur, tirez sur la fiche et non sur le câble.
Ne mettez pas l’appareil en marche à proximité d’une baignoire, d'une piscine ou de projections d’eau.
N’essayez jamais de réparer vous-même un appareil défectueux. Adressez-vous toujours à l'un de nos
centres de service après-vente.
Aucun corps étranger, p. ex. des aiguilles, pièces de monnaie, etc., ne doit tomber à l'intérieur de
l'appareil. Les contacts de raccordement ne doivent pas entrer en contact avec des objets métalliques
ou avec les doigts. Cela peut entraîner des courts-circuits.
Aucune flamme nue, p. ex. une bougie allumée, ne doit être placée sur l’appareil.
Ne laissez jamais les enfants utiliser cet appareil sans surveillance.
L’appareil reste branché au réseau électrique même s'il est éteint/en veille. Débranchez la fiche de la
prise secteur si vous n’utilisez pas l’appareil pendant une longue période. Tirez seulement sur la fiche et
pas sur le câble.
N’écoutez pas la musique ou la radio à plein volume. Cela peut entraîner des lésions auditives
permanentes.
EN
FR
IT
NL
NW
DK
PL
CZ
SK
85
Page 86

Cet appareil n’est pas destiné à être utilisé par des personnes (y compris les enfants) dont les capacités
physiques, sensorielles ou mentales sont limitées ou manquant d’expérience et/ou de connaissances, sauf
si elles sont surveillées par une personne responsable de leur sécurité ou si elles ont reçu les instructions
nécessaires à l’utilisation de l’appareil.
Les enfants doivent être surveillés afin de s’assurer qu’ils ne jouent pas avec l’appareil.
Il est interdit de procéder à des transformations sur l’appareil.
Les appareils ou accessoires endommagés ne doivent plus être utilisés.
Le lecteur CD utilise un rayon laser invisible. Celui-ci peut blesser vos yeux en cas de mauvaise
manipulation. Ne regardez jamais dans le compartiment à CD ouvert.
Cet appareil a été classé comme appareil laser de classe 1 (CLASS 1 LASER). L'étiquette correspondante
(CLASS 1 LASER PRODUCT) est collée à l'arrière de l'appareil.
86
Page 87

Manipulation des piles
Veillez à ce que les piles ne tombent pas entre les mains des enfants. Les enfants peuvent les mettre
dans la bouche et les avaler, ce qui peut entraîner de graves problèmes de santé. Conservez de ce fait
les piles et la télécommande hors de portée des enfants en bas âge. Dans ce cas, contactez
immédiatement un médecin!
Les piles normales ne doivent pas être chargées, réactivées avec d’autres moyens, ni être démontées,
chauffées ou jetées au feu (risque d’explosion !).
Remplacez à temps les piles dont la charge devient faible.
Nettoyez les contacts de la pile et les contacts de l’appareil avant la mise en place.
Il y a un risque d’explosion si la pile n’est pas mise correctement en place!
Éliminez les piles usagées immédiatement. Ne remplacez les piles que par des piles de type correct
portant le bon numéro de modèle.
Attention! N’exposez pas les piles à des conditions extrêmes.
Ne les placez pas sur des radiateurs et ne les exposez pas au rayonnement direct du soleil!
Les piles ayant fui ou endommagées peuvent provoquer des brûlures en cas de contact avec la peau.
Dans ce cas, utilisez des gants de protection adaptés. Nettoyez le compartiment à piles avec un
chiffon sec.
EN
FR
IT
NL
NW
DK
PL
CZ
SK
87
Page 88

2.2.2 Élimination
L’emballage de votre appareil est exclusivement composé de matériaux recyclables. Merci de les remettre dans le
circuit du tri sélectif.
Une fois arrivé en fin de vie, ce produit ne doit pas être mis au rebut avec les déchets ménagers ordinaires. Il doit
être déposé dans un point de collecte pour le recyclage des appareils électriques et électroniques.
Le symbole figurant sur le produit, dans le manuel d’utilisation ou sur l’emballage l'indique.
Les matériaux peuvent être recyclés conformément à leur marquage.
Le recyclage, la réutilisation des matériaux et toute autre forme de réutilisation des appareils usagés
contribuent de manière importante à la protection de notre environnement.
Veuillez contacter votre municipalité pour connaître le lieu de mise au rebut adapté. Veillez à ce que les piles
vides ainsi que les déchets électroniques ne soient pas jetés avec les ordures ménagères, mais qu’ils soient
éliminés de façon adaptée (reprise par les détaillants spécialisés, déchets spéciaux).
88
Page 89

Les piles peuvent contenir des substances toxiques nocives pour la santé et l’environnement. Les piles sont
soumises à la directive européenne 2006/66/CE. Celles-ci ne doivent pas être éliminées avec les déchets
ménagers ordinaires.
2.2.3 Mentions légales
Par la présente, TechniSat déclare que l’installation radioélectrique DIGITRADIO 360 CD IR et DIGITRADIO
361 CD IR est conforme à la directive 2014/53/UE. Le texte intégral de la déclaration de conformité
européenne est disponible à l’adresse suivante:
DIGITRADIO 360 CD IR : hp://konf.tsat.de/?ID=11100
DIGITRADIO 361 CD IR : hp://konf.tsat.de/?ID=11630
EN
FR
IT
NL
NW
DK
PL
La société TechniSat ne peut être tenue pour responsable des dommages causés au produit dans le cas
d’influences extérieures, d’une usure, d’une utilisation inappropriée, d’une réparation non autorisée, de
modifications ou d’accidents.
CZ
SK
89
Page 90

Sous réserve de modifications et d’erreurs typographiques. Dernière mise à jour 03/18
Toutes copies et reproductions sont soumises à l’autorisation de l’éditeur.
Vous pouvez télécharger une version actuelle du manuel au format PDF dans l'espace de téléchargement
du site Internet TechniSat sur www.technisat.de.
Cet appareil est prévu pour une utilisation dans tous les pays de l'Union européenne ainsi qu'en Suisse, en
Norvège, au Liechtenstein et en Islande. Le fonctionnement dans une plage de fréquences de 5150 MHz à
5350 MHz est permis uniquement dans des pièces fermées.
DIGITRADIO 360 CD IR, DIGITRADIO 361 CD IR et TechniSat sont des marques déposées de :
TechniSat Digital GmbH
Julius-Saxler-Straße 3
54541 Daun, Allemagne
www.technisat.de
90
Page 91

2.2.4 Consignes d'entretien
La qualité de ce produit est contrôlée et garantie pendant la période de garantie légale de 24mois à
compter de la date d’achat. Veuillez conserver la facture comme preuve d'achat.
Attention !
Si cet appareil devait présenter des problèmes, veuillez contacter notre service d'assistance technique :
Du lundi au vendredi de 8h00 à 20h00 au
+49 (0) 39 25 92 20 18 00
En cas d'éventuel retour de l'appareil, merci d'adresser votre colis uniquement à l'adresse suivante :
TechniSat Digital GmbH
Service-Center
Nordstr. 4a
D-39418 Staßfurt
Les noms de sociétés, institutions ou marques citées sont des marques ou des marques déposées de
leurs propriétaires respectifs.
EN
FR
IT
NL
NW
DK
PL
CZ
SK
91
Page 92

3 Installation de l’appareil
> Posez l’appareil sur une surface solide, sûre et horizontale. Assurez une circulation d'air susante.
Attention ! :
> N’installez pas l’appareil sur des surfaces souples telles que des tapis, couvertures ou à proximité de
rideaux et de tentures, sous peine d’obstruer les orifices de ventilation. La circulation nécessaire de l’air
serait alors interrompue. Cela risque d’entraîner un incendie au niveau de l’appareil.
> Les fentes de ventilation à l'arrière et sur les côtés ne doivent jamais être obstruées. Elles ne doivent pas
être couvertes par des rideaux, des couvertures ou des journaux.
> N’installez pas l’appareil à proximité d’une source de chaleur comme un radiateur. Évitez les rayons directs
du soleil et les endroits avec énormément de poussière.
> L’emplacement ne doit pas se situer dans des locaux où règne une forte humidité de l’air, p. ex. dans la
cuisine ou un sauna, la condensation risquant d’entraîner la détérioration de l’appareil. L’appareil est prévu
pour une utilisation dans un environnement sec à climat tempéré et ne doit pas être exposé à des goues
ou projections d’eau.
> Tenez compte du fait que les pieds de l’appareil risquent de laisser des traces colorées sur certaines
surfaces de meubles. Utilisez une protection entre vos meubles et l’appareil.
> L'appareil ne doit être utilisé qu'en position horizontale. Ne pas utiliser en plein air !
> Tenez la DIGITRADIO éloignée des appareils produisant des champs magnétiques puissants.
92
Page 93

> Ne posez pas d'objets lourds sur l'appareil.
> Si vous passez l'appareil d'un environnement froid à un environnement chaud, de l'humidité peut se
former à l'intérieur de l'appareil. Dans ce cas, patientez env. une heure avant de le mere en marche.
> Placez le câble d'alimentation de manière à ce que personne ne puisse trébucher dessus.
> Assurez-vous que la fiche secteur de l'appareil soit toujours facilement accessible, de manière à pouvoir
débrancher l’appareil rapidement de l’alimentation électrique!
> La prise secteur doit se situer le plus près possible de l’appareil.
Introduisez entièrement la fiche dans la prise secteur.
> Utilisez une prise secteur adaptée facilement accessible et évitez d’utiliser des multiprises!
> Ne saisissez pas la fiche avec les mains mouillées, risque de décharge électrique!
> En cas de pannes ou de formation de fumée et d’odeur en provenance du boîtier, débranchez
immédiatement la fiche de la prise secteur !
> Débranchez la fiche secteur avant qu'un orage n'éclate.
> Lorsque l’appareil ne doit pas être utilisé pendant une période prolongée, p. ex. avant de partir en
voyage, débranchez la fiche.
> Un volume trop élevé, en particulier avec les écouteurs, peut entraîner des lésions auditives.
> Ne posez pas l'appareil à proximité d'appareils créant des champs magnétiques puissants (p. ex.
des moteurs, haut-parleurs, transformateurs). Les téléphones peuvent également provoquer des
perturbations.
EN
FR
IT
NL
NW
DK
PL
CZ
SK
93
Page 94

3.1 Télécommande
> Si l'appareil n'est pas utilisé pendant une période prolongée, retirez la pile, car celle-ci peut couler et
endommager l'appareil.
4 Description de la DIGITRADIO 360/361 CD IR
4.1 Contenu de la livraison
Veuillez vous assurer que tous les accessoires indiqués ci-après sont fournis :
1 x DIGITRADIO 360/361 CD IR
1 x télécommande avec pile
1 x mode d’emploi
4.2 Caractéristiques spécifiques de la DIGITRADIO 360/361 CD IR
La DIGITRADIO 360/361 CD IR est composée d'une radio Internet stéréo, d'un lecteur médias UPnP, d'un lecteur
CD/MP3 et d'un récepteur FM/DAB+ avec une fonction d'horloge et une entrée AUX.
La DIGITRADIO 360 CD IR prend également en charge Spotify Connect et le Multiroom. Vous pouvez ainsi recevoir
la radio numérique ou diffuser des médias en streaming.
- Vous pouvez mémoriser jusqu’à 10 stations FM/DAB+ et Internet.
- L’appareil est équipé d’un affichage de l’heure et de la date.
- L'appareil dispose de 2 fonctions de réveil et d'une fonction de mise en veille.
- Vous pouvez sélectionner si vous souhaitez être réveillé(e) par la radio FM, DAB ou Internet, par le lecteur
CD/MP3 ou par un buzzer.
- Vous pouvez commander l'appareil confortablement à l'aide de la télécommande.
94
Page 95

- Connecté à l'application MyDigitRadio-Pro, l'appareil permet une prise en charge du Multiroom
(uniquement la DIGITRADIO 360 CD IR, plus d'informations dans votre application MyDigitRadio-Pro et
sur le site Internet www.technisat.de).
- Prise en charge de Spotify Connect (uniquement DIGITRADIO 360 CD IR).
- Lecture audio de CD/MP3, CD-DA, CD-ROM, CD-R, CD-RW et médias USB.
- Les appareils des versions USB 1.1 et 2.0 sont pris en charge.
- L'appareil prend en charge les médias USB jusqu'à 32 Go. Le nombre maximal de dossiers est limité à
99, les titres à 999. Il est possible de stocker 128 titres par dossier.
- Le port USB offre 5 V pour 1A. Les appareils connectés sont rechargés via la connexion réseau
existante. Avant l'utilisation de la connexion USB, lisez le mode d'emploi du fabricant de l'appareil USB.
- Écoute en streaming de musique via le Bluetooth (uniquement DIGITRADIO 361 CD IR).
EN
FR
IT
NL
NW
DK
PL
CZ
SK
95
Page 96

4.3 Préparation de la DIGITRADIO 360/361 CD IR au fonctionnement
4.3.1 Branchement de l'appareil
> Branchez l'appareil avec la fiche secteur au réseau électrique.
Assurez-vous que la tension de fonctionnement de l'appareil corresponde à la tension réseau locale avant
de brancher la fiche dans la prise secteur murale.
Suite au premier branchement réseau, la mention «TechniSat » apparaît à l’écran.
En cas de non-utilisation, retirez la fiche de la prise secteur.
Retirez la fiche d'alimentation en cas d'orage. Lorsque l’appareil ne doit pas être utilisé pendant une
période prolongée, p. ex. avant de partir en voyage, débranchez également la fiche secteur.
La chaleur produite par le fonctionnement doit être évacuée par une circulation d'air susante. Pour cee
raison, l'appareil ne doit pas être couvert ou placé dans une armoire fermée. Veillez à laisser un espace
libre d'au moins 10 cm autour de l'appareil.
96
Page 97

4.3.2 Amélioration de la réception de l'antenne
Le nombre et la qualité des stations reçues dépendent des conditions de réception à l’endroit où est placé
l’appareil. L’antenne télescopique permet d’obtenir une excellente réception.
> Enlevez l'antenne télescopique à l'arrière de l'appareil de son support, orientez-la et dépliez-la.
L’orientation exacte de l’antenne télescopique est souvent importante, en particulier dans les zones de
réception périphériques de chaque région de diffusion. Sur Internet, par exemple sur "www.digitalradio.
de", il est possible de trouver rapidement la localisation du pylône émetteur le plus proche.
Lancez la première recherche près d’une fenêtre en direction du pylône émetteur.
En cas de mauvais temps, il peut arriver que la réception DAB+ soit limitée.
Au moyen de l'affichage de la puissance du signal (point 10.4), vous pouvez trouver l'orientation
optimale de l'antenne et le cas échéant, le meilleur lieu d'installation pour la réception DAB.
En cas de mauvaise réception, modifiez l'orientation de l'antenne ou déplacez la radio. Le niveau des
barres doit augmenter.
EN
FR
IT
NL
NW
DK
PL
CZ
SK
97
Page 98

4.3.3 Insertion de la pile
> Refermez avec précaution le couvercle du compartiment à piles de manière à ce que les paes de retenue
du couvercle s'enclenchent dans le boîtier.
Pour faire fonctionner la télécommande, vous avez besoin d'une pile alcaline, de type Mignon, 1,5 V, LR6/
AA. Veillez à respecter la polarité lors de l'insertion.
Remplacez à temps une pile dont la charge devient faible.
Des piles qui fuient peuvent endommager la télécommande.
Retirez la pile de la télécommande quand l'appareil n'est pas utilisé pendant une période prolongée.
Consigne importante relative à la mise au rebut: les piles peuvent contenir des substances toxiques pour
l'environnement. Vous devez donc les mettre au rebut conformément aux dispositions légales en vigueur.
Ne jetez jamais la pile avec les autres déchets ménagers.
Ne posez pas la télécommande sur des endroits extrêmement chauds ou très humides.
4.4 Fonctions générales de l’appareil
Vous pouvez entreprendre les réglages aussi bien à l'aide des touches de l'appareil que de celles de la
télécommande. La description de l'utilisation s'effectue au moyen des touches de la télécommande.
98
Page 99

4.4.1 Mise en marche de l’appareil
> Avec la touche On/Stand-by de l'appareil (1) ou de la télécommande (1), vous pouvez mere en marche,
puis mere en veille l'appareil.
Après la première mise en marche, vous pouvez démarrer l'assistant d'installation (point 15.7). Vous
pouvez paramétrer le format de l'heure, le fuseau horaire, l'heure d'été/d'hiver et la mise à jour de la
date et de l'heure (via FM, DAB+, Internet ou aucune actualisation) avec les touches r/s PRESET, VOL+,
VOL- et ENTER de la télécommande (7, 9, 8, 26, 27) ou en pressant et tournant le bouton SELECT/
VOLUME de l'appareil (5).
L'appareil essaie ensuite d'établir une connexion à un réseau. Pour ce faire, sélectionnez le réseau Wi-Fi
ou LAN [câble] correspondant et saisissez le cas échéant le mot de passe Wi-Fi avec les touches r/s
PRESET, VOL+, VOL- et ENTER de la télécommande (7, 9, 8, 26, 27) ou en pressant et tournant le
bouton SELECT/VOLUME de l'appareil (5).
EN
FR
IT
4.4.2 Commande de l'appareil avec la télécommande
Grâce à la télécommande à infrarouge, vous pouvez commander facilement les principales fonctions de
l'appareil depuis votre siège. En cas d'utilisation de l'appareil avec la télécommande, veuillez tenir compte des
points suivants :
> Orientez la télécommande vers l'avant de l'appareil.
> Un contact visuel entre la télécommande et la radio doit être garanti.
> Si la portée de la télécommande diminue, la pile doit être remplacée par une nouvelle.
La portée maximale est d'environ 4 mètres en face de l'avant de l'appareil.
NL
NW
DK
PL
CZ
SK
99
Page 100

4.4.3 Réglage du volume
> Réglez le volume avec les touches VOLUME -/+ de la télécommande (8, 26) ou en tournant le bouton
SELECT/VOLUME (5) de l'appareil. Le volume réglé est aché à l'écran (4).
4.4.4 Mise en sourdine
> Vous pouvez couper le son en appuyant sur la touche MUTE de la télécommande (33).
Ce mode est signalé dans la barre d'état par un symbole correspondant.
> Appuyez une nouvelle fois sur la touche MUTE de la télécommande (33) pour réactiver le son.
4.4.5 Ouverture de l’achage à l’écran
> En appuyant plusieurs fois sur la touche INFO de la télécommande (34) ou de l'appareil (3) (la touche INFO
doit ici être maintenue enfoncée pendant environ 2 secondes) pendant que vous lisez une source, vous
pouvez acher et parcourir les informations suivantes :
Mode DAB : Mode FM :
DLS : défilement de texte avec des informations supplémentaires, la station RT - Texte radio (si émis)
Genre PTY (type de programme)
Ensemble/multiplexe (nom de groupe) fréquence, canal Fréquence
Puissance du signal Date
Taux d'erreur du signal, débit binaire au format sonore kbps
Date
Titre, interprète
100
 Loading...