

Z
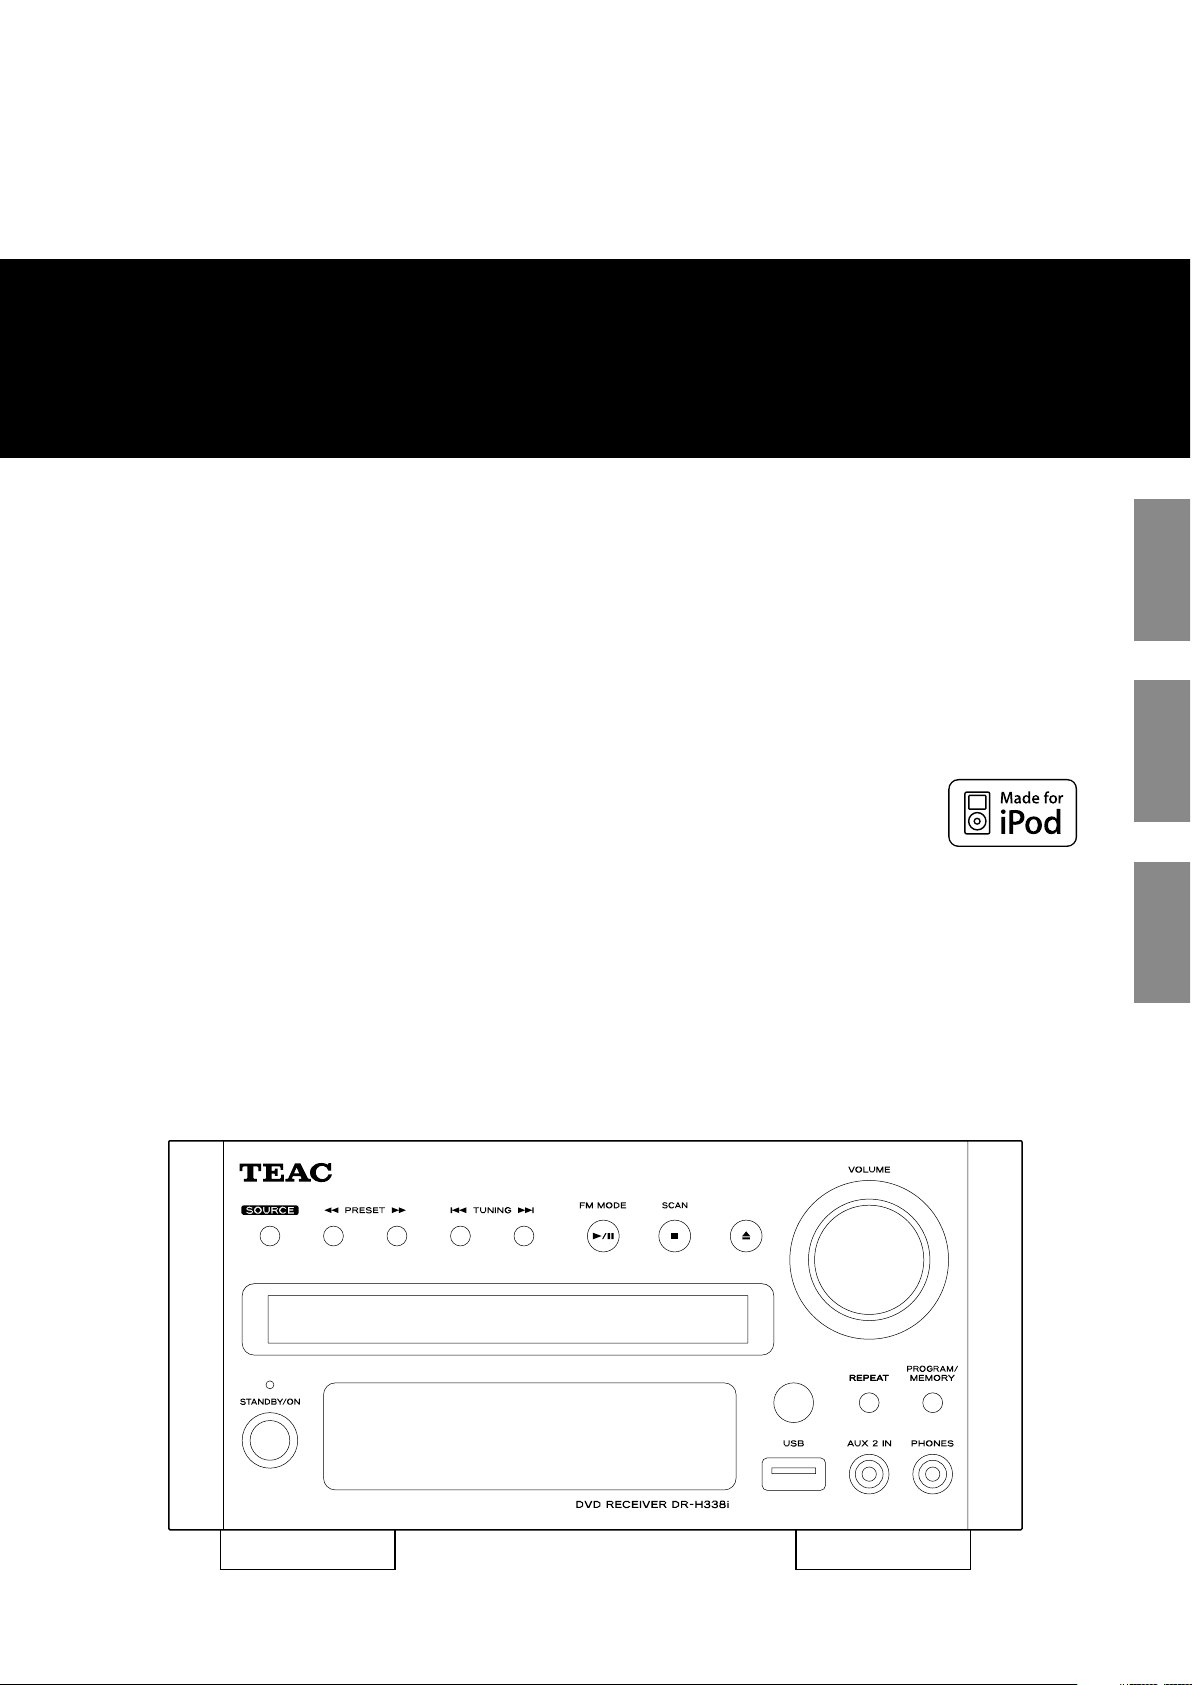
DR-H338i
DVD Receiver
OWNER’S MANUAL
MODE D’EMPLOI
MANUAL DEL USUARIO
ENGLISH FRANÇAIS
ESPAÑOL
410 087 65
2
11) Only use attachments/accessories specified by the manufacturer.
12) Use only with the cart, stand, tripod, bracket, or
table specified by the manufacturer, or sold with
the apparatus. When a cart is used, use caution
when moving the cart/apparatus combination to
avoid injury from tip-over.
13) Unplug this apparatus during lightning storms or when unused
for long periods of time.
14) Refer all servicing to qualified service personnel. Servicing is
required when the apparatus has been damaged in any way, such
as power-supply cord or plug is damaged, liquid has been spilled
or objects have fallen into the apparatus, the apparatus has been
exposed to rain or moisture, does not operate normally, or has
been dropped.
15) Grounding or Polarization – This product may be equipped with
a polarized alternating-current line plug (a plug having one blade
wider than the other). This plug will fit into the power outlet only
one way. This is a safety feature. If you are unable to insert the
plug fully into the outlet, try reversing the plug. If the plug should
still fail to fit, contact your electrician to replace your obsolete
outlet. Do not defeat the safety purpose of the polarized plug.
Alternate Warnings – This product is equipped with a three-wire
grounding-type plug, a plug having a third (grounding) pin. This
plug will only fit into a grounding-type power outlet. This is a
safety feature. If you are unable to insert the plug into the outlet,
contact your electrician to replace your obsolete outlet. Do not
defeat the safety purpose of the grounding-type plug.
16) Ventilation – Slots and openings in the cabinet are provided for
ventilation and to ensure reliable operation of the product and
to protect it from overheating, and these openings must not be
blocked or covered. The openings should never be blocked by
placing the product on a bed, sofa, rug, or other similar surface.
This product should not be placed in a built-in installation such
as a bookcase or rack unless proper ventilation is provided or the
manufacturer’s instructions have been adhered to.
17 ) The MAINS plug or an appliance coupler is used as the disconnect
device, the disconnect device shall remain readily operable.
18) Battery pack or battery installed shall not be exposed to excessive
heat such as sunshine, fire or the like.
19) Manufacture date is located on bottom of product.
20)
: CLASS II apparatus with double insulation, and no protective
earth provided.
CAUTION: TO REDUCE THE RISK OF ELECTRIC SHOCK, DO NOT
REMOVE COVER (OR BACK). NO USER-SERVICEABLE PARTS INSIDE.
REFER SERVICING TO QUALIFIED SERVICE PERSONNEL.
The lightning flash with arrowhead symbol, within an
equilateral triangle, is intended to alert the user to the
presence of uninsulated “dangerous voltage” within the
product’s enclosure that may be of sufficient magnitude to
constitute a risk of electric shock to persons.
The exclamation point within an equilateral triangle is
intended to alert the user to the presence of important
operating and maintenance (servicing) instructions in the
literature accompanying the appliance.
IMPORTANT SAFETY INSTRUCTIONS
1) Read these instructions.
2) Keep these instructions.
3) Heed all warnings.
4) Follow all instructions.
5) Do not use this apparatus near water.
6) Clean only with dry cloth.
7) Do not block any ventilation openings. Install in accordance with
the manufacturer’s instructions.
8) Do not install near any heat sources such as radiators, heat
registers, stoves, or other apparatus (including amplifiers) that
produce heat.
9) Do not defeat the safety purpose of the polarized or groundingtype plug. A polarized plug has two blades with one wider than
the other. A grounding type plug has two blades and a third
grounding prong. The wide blade or the third prong are provided
for your safety. If the provided plug does not fit into your outlet,
consult an electrician for replacement of the obsolete outlet.
10) Protec t the power cord from being walked on or pinched
particularly at plugs, convenience receptacles, and the point
where they exit from the apparatus.
< Do not expose this apparatus to drips or splashes.
< Do not place any objects filled with liquids, such as vases, on the
apparatus.
< Do not install this apparatus in a confined space such as a book
case or similar unit.
< The apparatus draws nominal non-operating power from the
AC outlet with its POWER or STANDBY/ON switch not in the ON
position.
< The apparatus should be located close enough to the AC outlet so
that you can easily grasp the power cord plug at any time.
< The appliance coupler is used as the disconnec t device,the
disconnect device shall remain readily operable.
CAUTION
< DO NOT REMOVE THE EXTERNAL CASES OR CABINETS TO EXPOSE
THE ELECTRONICS. NO USER SERVICEABLE PARTS ARE WITHIN.
< IF YOU ARE EXPERIENCING PROBLEMS WITH THIS PRODUCT,
CONTACT TEAC FOR A SERVICE REFERRAL. DO NOT USE THE
PRODUCT UNTIL IT HAS BEEN REPAIRED.
< USE OF CONTROLS OR ADJUSTMENTS OR PERFORMANCE OF
PROCEDURES OTHER THAN THOSE SPECIFIED HEREIN MAY RESULT
IN HAZARDOUS RADIATION EXPOSURE.
WARNING: TO PREVENT FIRE OR SHOCK HAZARD,
DO NOT EXPOSE THIS APPLIANCE TO RAIN OR
MOISTURE.
3
ENGLISH
is a trademark of DVD Format/Logo Licensing Corporation.
This product incorporates copyright protection technology that is
protected by U.S. patents and other intellectual property rights.
Use of this copyright protection technology must be authorized by
Macrovision, and is intended for home and other limited viewing uses
only unless otherwise authorized by Macrovision. Reverse engineering
or disassembly is prohibited.
Manufactured under license from Dolby Laboratories. Dolby, Pro Logic
and the double-D symbol are trademarks of Dolby Laboratories.
HDMI, the HDMI logo and High-Definition Multimedia Interface are
trademarks or registered trademarks of HDMI Licensing LLC in the
United States and other countries.
DivX and the associated DivX logos are registered trademarks of DivX,
Inc.
MPEG Layer-3 audio coding technology licensed from Fraunhofer IIS
and Thomson.
This product is licensed under the MPEG-4 Visual patent portfolio
license for the personal and non-commercial use of a consumer for
(i) encoding video in compliance with the MPEG-4 Visual Standard
("MPEG-4 Video") and/or (ii) decoding MPEG-4 Video that was
encoded by a consumer engaged in a personal and non-commercial
activity and/or was obtained from a video provider licensed by MPEG
LA to provide MPEG-4 Video. No license is granted or shall be implied
for any other use. Additional information including that relating to
promotional, internal and commercial uses and licensing may be
obtained from MPEG LA, LLC. See http://www.mpegla.com.
This product is protected by certain intellectual property rights of
Microsoft.
Use or distribution of such technology outside of this product is
prohibited without a license from Microsoft.
Windows Media is either a registered trademark or trademark of
Microsoft Corporation in the United States and/or other countries.
iPod is a trademark of Apple Inc., registered in the U.S. and other
countries.
“Made for iPod” means that an electronic accessory has been
designed to connect specifically to iPod and has been certified by the
developer to meet Apple performance standards.
Apple is not responsible for the operation of this device or its
compliance with safety and regulatory standards.
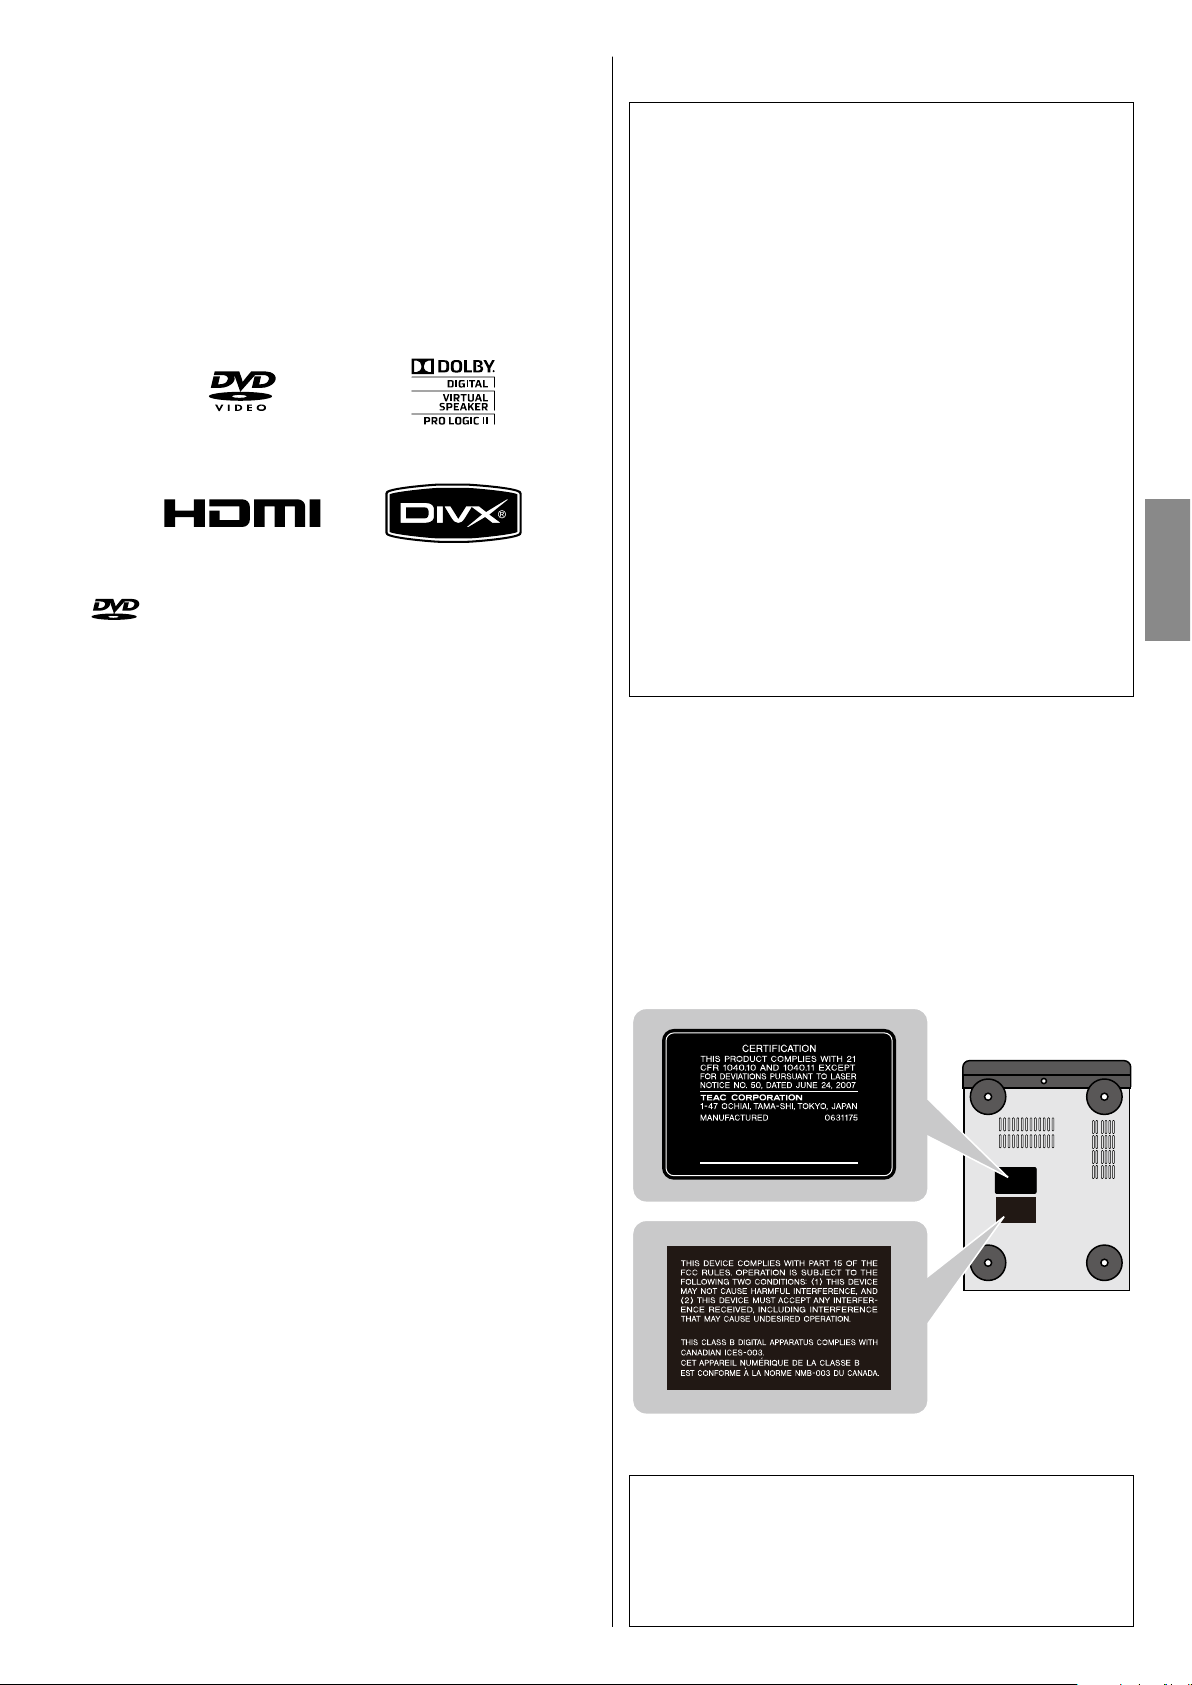
This equipment has been tested and found to comply with the
limits for a Class B digital device, pursuant to Part 15 of the FCC
Rules. These limits are designed to provide reasonable protection
against harmful interference in a residential installation. This
equipment generates, uses, and can radiate radio frequency energy
and, if not installed and used in accordance with the instructions,
may cause harmful interference to radio communications. However,
there is no guarantee that interference will not occur in a particular
installation. If this equipment does cause harmful interference to
radio or television reception, which can be determined by turning
the equipment off and on, the user is encouraged to try to correct
the interference by one or more of the following measures:
r Reorient or relocate the equipment and/or the receiving
antenna.
r Increase the separation between the equipment and receiver.
r Connect the equipment into an outlet on a circuit different
from that to which the receiver is connected.
r Consult the dealer or an experienced radio/TV technician for
help.
CAUTION
Changes or modifications to this equipment not expressly
approved by TEAC CORPORATION for compliance will void the
user’s warranty.
For U.S.A.
This product has been designed and manufactured according to
FDA regulations “title 21, CFR, chapter 1, subchapter J, based on the
Radiation Control for Health and Safety Act of 1968“, and is classified
as class 1 laser product. There is not hazardous invisible laser radiation
during operation because invisible laser radiation emitted inside of
this product is completely confined in the protective housings.
The label required in this regulation is as follows:
For U.S.A.
Bottom of the unit
Optical pickup
Typ e : KHS-313A
Manufacturer : Sony Electronics Inc.
Laser output : 7 mW (CD)
5 mW (DVD)
Wavelength : 655 +5, -10 nm / 790+10, -20 nm
< If the product uses batteries (including a battery pack or installed
batteries), they should not be exposed to sunshine, fire or excessive
heat.
< CAUTION for products that use replaceable lithium batteries: there
is danger of explosion if a battery is replaced with an incorrect type
of battery. Replace only with the same or equivalent type.
< Caution should be taken when using earphones or headphones
with the product because excessive sound pressure (volume) from
earphones or headphones can cause hearing loss.

4
Contents
Thank you for choosing TEAC. Read this manual carefully to get the best performance from this unit.
Before Use . . . . . . . . . . . . . . . . . . . . . . . . . . . . . . . . . . . . . . . . . . . . . . . . . . . . 5
Discs . . . . . . . . . . . . . . . . . . . . . . . . . . . . . . . . . . . . . . . . . . . . . . . . . . . . . . . . . 6
USB memory device compatibility . . . . . . . . . . . . . . . . . . . . . . . . . . . . . 8
Connecting Antennas (AM) . . . . . . . . . . . . . . . . . . . . . . . . . . . . . . . . . . . . 8
Connecting Antennas (FM) . . . . . . . . . . . . . . . . . . . . . . . . . . . . . . . . . . . . 9
Speaker Connection . . . . . . . . . . . . . . . . . . . . . . . . . . . . . . . . . . . . . . . . . 10
Connection to Audio Equipments etc. . . . . . . . . . . . . . . . . . . . . . . . . 11
Connection to a T V . . . . . . . . . . . . . . . . . . . . . . . . . . . . . . . . . . . . . . . . . . 12
Identifying the Parts (Main Unit) . . . . . . . . . . . . . . . . . . . . . . . . . . . . . . 14
Identifying the Parts (Remote Control Unit) . . . . . . . . . . . . . . . . . . . 16
Remote Control Unit . . . . . . . . . . . . . . . . . . . . . . . . . . . . . . . . . . . . . . . . . 18
Setting the Clock . . . . . . . . . . . . . . . . . . . . . . . . . . . . . . . . . . . . . . . . . . . . 19
Basic Operation . . . . . . . . . . . . . . . . . . . . . . . . . . . . . . . . . . . . . . . . . . . . . . 20
Getting Started with an iPod . . . . . . . . . . . . . . . . . . . . . . . . . . . . . . . . . 22
Listening to an iPod . . . . . . . . . . . . . . . . . . . . . . . . . . . . . . . . . . . . . . . . . . 23
Listening to a Disc . . . . . . . . . . . . . . . . . . . . . . . . . . . . . . . . . . . . . . . . . . . 25
Listening to an USB Memory Device . . . . . . . . . . . . . . . . . . . . . . . . . . 26
On-screen Menu . . . . . . . . . . . . . . . . . . . . . . . . . . . . . . . . . . . . . . . . . . . . . 26
Pausing Playback (Freezing a Picture) . . . . . . . . . . . . . . . . . . . . . . . . . 28
Stopping Playback (Resume Mode) . . . . . . . . . . . . . . . . . . . . . . . . . . . 28
Skipping Playback . . . . . . . . . . . . . . . . . . . . . . . . . . . . . . . . . . . . . . . . . . . . 29
Searching for a Part of a Chapter or Track . . . . . . . . . . . . . . . . . . . . . 29
Selecting a Chapter or Track . . . . . . . . . . . . . . . . . . . . . . . . . . . . . . . . . . 29
Selecting Audio . . . . . . . . . . . . . . . . . . . . . . . . . . . . . . . . . . . . . . . . . . . . . . 29
Selecting Subtitles . . . . . . . . . . . . . . . . . . . . . . . . . . . . . . . . . . . . . . . . . . . 30
Changing Camera Angle . . . . . . . . . . . . . . . . . . . . . . . . . . . . . . . . . . . . . 30
Picture Zoom . . . . . . . . . . . . . . . . . . . . . . . . . . . . . . . . . . . . . . . . . . . . . . . . 30
Slow Motion . . . . . . . . . . . . . . . . . . . . . . . . . . . . . . . . . . . . . . . . . . . . . . . . . 30
Repeat and Shuffle Playback . . . . . . . . . . . . . . . . . . . . . . . . . . . . . . . . . 31
A-B Repeat Playback . . . . . . . . . . . . . . . . . . . . . . . . . . . . . . . . . . . . . . . . . 32
Changing the Display Mode . . . . . . . . . . . . . . . . . . . . . . . . . . . . . . . . . . 32
Time Search (VCD/CD) . . . . . . . . . . . . . . . . . . . . . . . . . . . . . . . . . . . . . . . 33
Time Search (MP3/WMA) . . . . . . . . . . . . . . . . . . . . . . . . . . . . . . . . . . . . . 33
Chapter Search/Time Search (DVD) . . . . . . . . . . . . . . . . . . . . . . . . . . . 34
Chapter Search/Time Search (DivX) . . . . . . . . . . . . . . . . . . . . . . . . . . . 34
Programmed Playback (DVD, VCD, CD) . . . . . . . . . . . . . . . . . . . . . . . . 35
Programmed Playback (MP3, WMA, DIVX) . . . . . . . . . . . . . . . . . . . . . 36
Settings (Introduction) . . . . . . . . . . . . . . . . . . . . . . . . . . . . . . . . . . . . . . . 37
Settings (GENERAL SETUP) . . . . . . . . . . . . . . . . . . . . . . . . . . . . . . . . . . . . 38
Settings (AUDIO SETUP) . . . . . . . . . . . . . . . . . . . . . . . . . . . . . . . . . . . . . . 39
Settings (VIDEO SETUP) . . . . . . . . . . . . . . . . . . . . . . . . . . . . . . . . . . . . . . 40
Settings (PREFERENCE) . . . . . . . . . . . . . . . . . . . . . . . . . . . . . . . . . . . . . . . 41
Settings (PASSWORD SETUP) . . . . . . . . . . . . . . . . . . . . . . . . . . . . . . . . . 42
Listening to the Radio (FM/AM) . . . . . . . . . . . . . . . . . . . . . . . . . . . . . . . 43
Preset Tuning (FM/AM) . . . . . . . . . . . . . . . . . . . . . . . . . . . . . . . . . . . . . . . 44
Listening to an External Source . . . . . . . . . . . . . . . . . . . . . . . . . . . . . . . 45
Sleep Timer . . . . . . . . . . . . . . . . . . . . . . . . . . . . . . . . . . . . . . . . . . . . . . . . . . 46
Wake Up Timer . . . . . . . . . . . . . . . . . . . . . . . . . . . . . . . . . . . . . . . . . . . . . . 46
Tro ubl esho otin g . . . . . . . . . . . . . . . . . . . . . . . . . . . . . . . . . . . . . . . . . . . . . 48
Specifications . . . . . . . . . . . . . . . . . . . . . . . . . . . . . . . . . . . . . . . . . . . . . . . . 50
Conventions about this manual
< The types of functions and operations that can be used for a
particular disc vary depending on the features of that disc. In
some cases, these functions and operations may differ from
the descriptions given in this manual. In this event, follow the
instructions given on the screen. This manual only covers basic
disc operations.
< For some operations, the PROHIBIT icon “A” may appear on
the screen. This indicates that the operation described in this
manual is not permitted for the current disc.
5
ENGLISH
Before Use
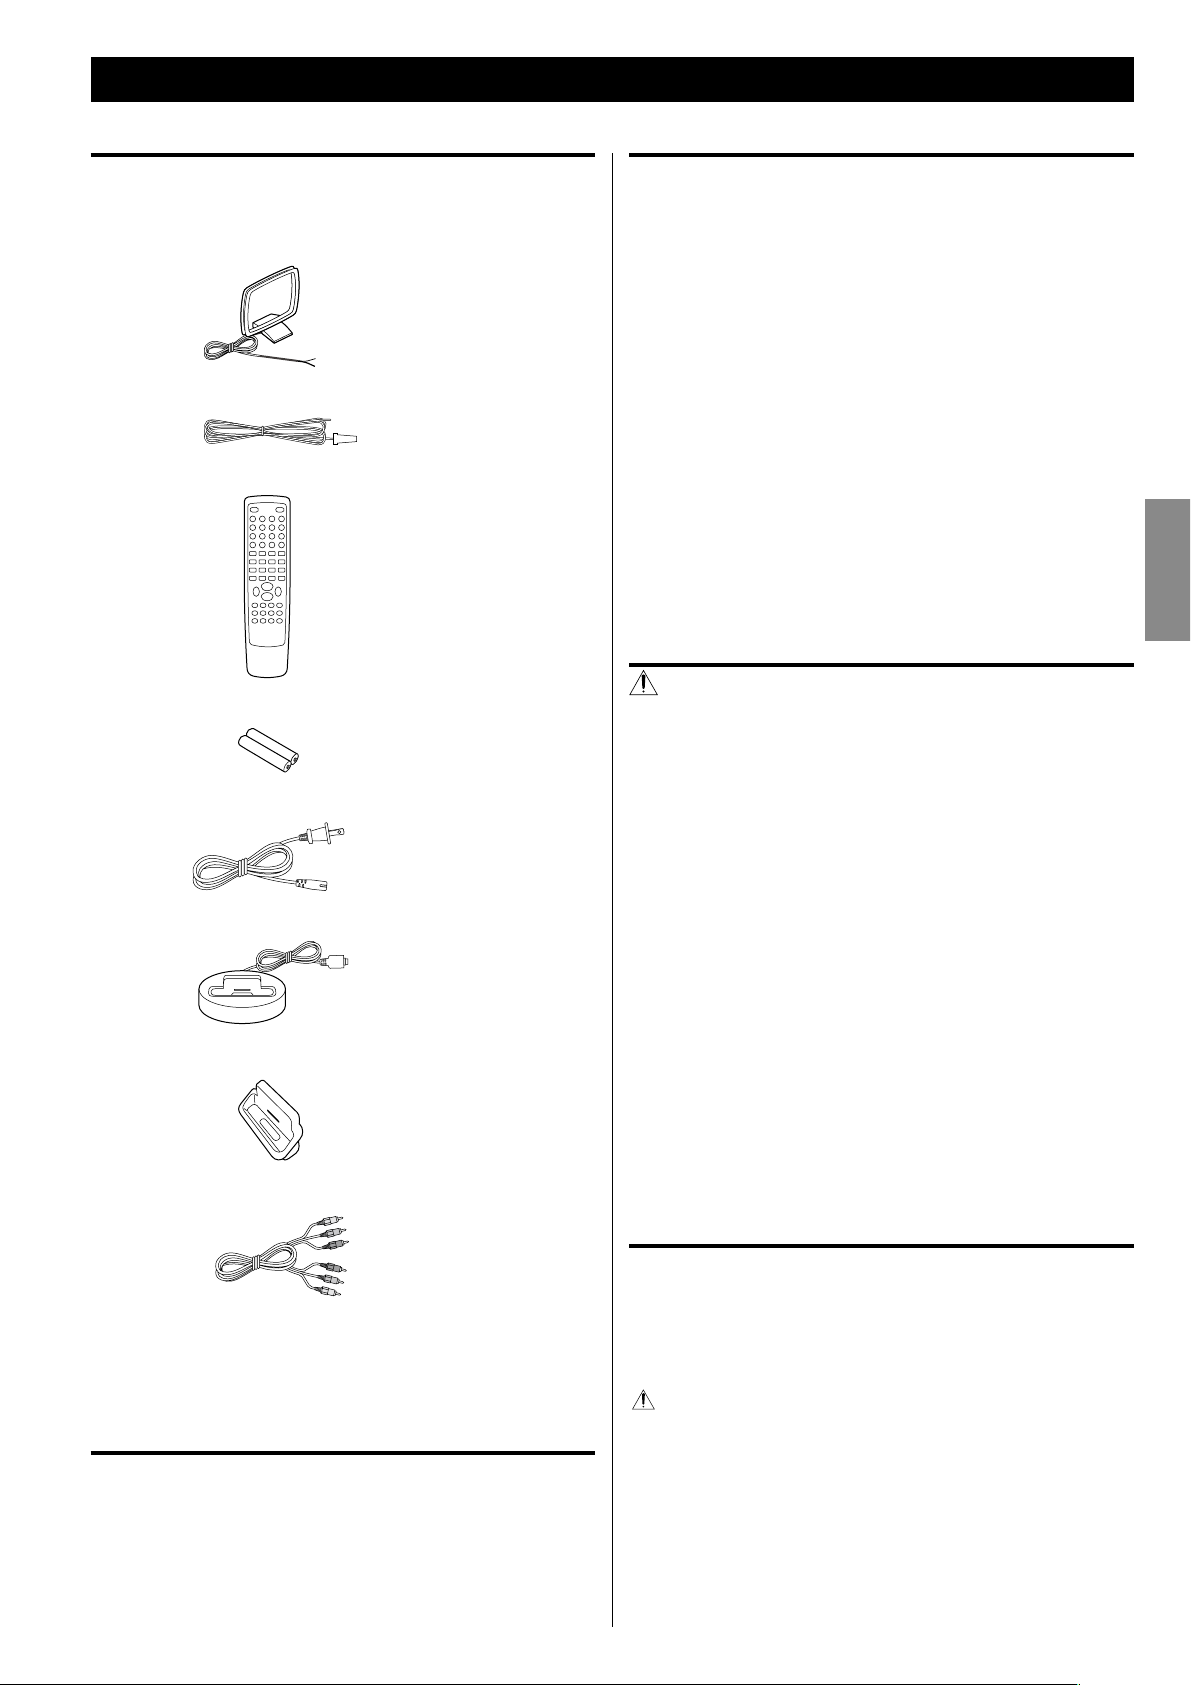
What’s in the box
Confirm the supplied standard accessories.
AM antenna x 1
FM antenna x 1
Remote control unit (RC-1240) x 1
Batteries (AAA, R03, UM-4) for remote control unit x 2
AC power cord x 1
iPod dock x 1
Dock adapter x 2
RCA AV cable x 1
Owner’s manual (this document) x 1
< Keep this manual in a safe place for future reference.
Warranty card x 1
Beware of condensation
When the unit is moved from a cold to a warm place, or used after a
sudden temperature change, there is a danger of condensation; vapor
in the air could condense on the internal mechanism, making correct
operation impossible. To prevent this, or if this occurs, leave the unit
turned on for one or two hours. Then the unit will stabilize at the
temperature of its surroundings.
Placement of the unit
< Choose the installation location of your unit carefully. Avoid placing
it in direct sunlight or close to a source of heat. Also avoid locations
subject to vibrations and excessive dust, heat, cold or moisture.
< As the unit may become warm during operation, always leave
sufficient space around the unit for ventilation.
Make sure there is at least 8” (20 cm) of space above and at least 2”
(5 cm) of space on each side of the unit. Do not place anything on
top of the unit.
< Do not place the unit on an amplifier or receiver or any other
device that generates heat.
< When the unit is turned on, switching on the TV may cause lines
to appear on the TV screen, depending on the condition of the
electric waves of the TV broadcast. This is not malfunction in the
unit or the TV. If you see such lines, keep this unit well away from
the TV set.
CAUTION
< Do not move the unit during disc playback.
During playback, the disc rotates at high speed. Do not lift or
move the unit during playback. Doing so may damage the disc
or the unit.
< The voltage supplied to the unit should match the voltage as
printed on the rear panel. If you are in any doubt regarding this
matter, consult an electrician.
< Do not open the cabinet as this might result in damage to the
circuitry or electrical shock. If a foreign object should get into the
unit, contact your dealer or service company.
< When removing the power plug from the wall outlet, always pull
directly on the plug, never yank on the cord.
< To keep the laser pickup clean, do not touch it and always close
the disc tray.
< Always remove the disc before relocating or moving this unit.
Moving the unit with a disc inside it could cause malfunction.
Maintenance
If the surface of the unit gets dirty, wipe it with a soft cloth or
use diluted mild liquid soap. Allow the surface of the unit to dry
completely before using.
For safety, disconnect the power cord from the socket before
cleaning.
< Never spray liquid directly on this unit.
< Do not use thinner, benzene or alcohol as they could damage the
surface of the unit.
6
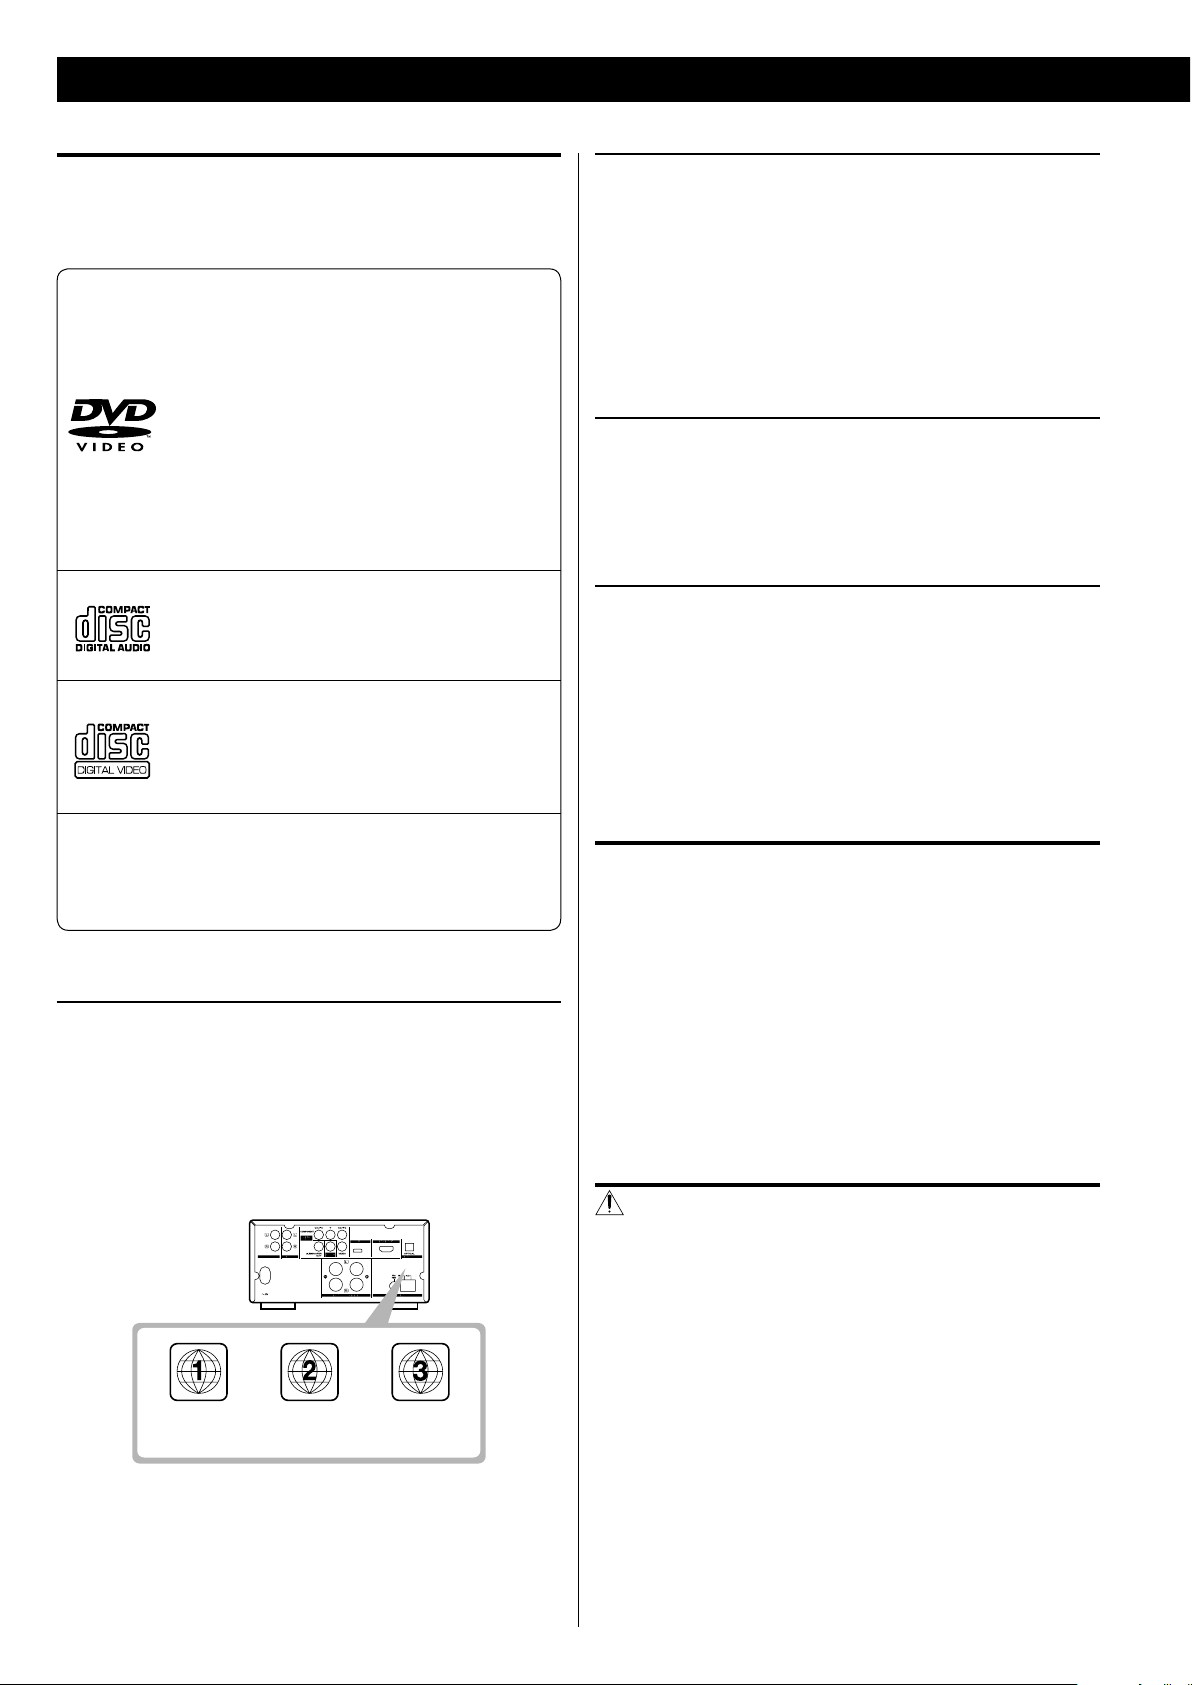
Type of discs that can be played on this unit
This player can playback discs bearing any of the following logos:
DVD Video
M Single-sided or double-sided discs
M Single layer or dual layer discs
M Dolby Digital, MPEG or Linear PCM digital audio
M MPEG-2 digital video
M This unit can play DVD-R discs recorded in DVD
video format.
M This unit can play DVD-RW discs recorded in
DVD video format or DVD video recording
format.
Discs are generally divided into one or more titles.
Titles may be further subdivided into chapters.
Audio CD
M 12cm or 8cm discs
M Linear PCM digital audio
Audio CDs are divided into tracks.
Video CD
M 12cm or 8cm discs
M MPEG-1 digital audio
M MPEG-1 digital video
Video CDs are divided into tracks.
SVCD
M 12 cm or 8 cm discs
M MPEG-1 Audio Layer2
M MPEG-2 digital video
Region Number of DVD Video discs
DVD players and discs are designed with region numbers that dictate
the regions in which a disc can be played. If the region number on
the disc you want to play does not match the region number of your
DVD player, you will not be able to play the disc. In that case, an error
message will appear on the screen.
The region number is printed on the rear panel of this unit.
U.S.A./Canada
model
Europe
model
Asia
model
About DVD-RW
< DVD-RW discs that were recorded with copy-once only permission
cannot be played.
< When playing a DVD-RW disc that was edited on a DVD recorder,
the screen may momentarily black out at the edited point.
< When playing a DVD-RW disc that was edited on a DVD recorder,
you may see scenes from just before the edited point.
About CD-R/CD-RW
CD-R/CD -RW discs recorded in Audio CD format and finalized
correctly are playable. But depending on the quality of the disc and/
or the condition of the recording, some CD-R/CD-RW discs may not
be playable.
CAUTION
< If you record a disc using a personal computer, even if it is recorded
in a compatible format, there are cases in which it may not play
because of the settings of the application software used to create
the disc. (Check with the software publisher for more detailed
information.)
< Unfinalized CD-R/CD-RW/DVD-R/RW discs cannot be played.
Discs cannot be played with this unit
< DVD-Audio, Super Audio CD, CD-G, Data part of CD-EXTRA, and
PHOTO CD discs
< discs recorded in a color system other than PAL or NTSC
< illegally produced discs
< scratched or damaged discs
< discs that are dusty, soiled or marked with fingerprints
CAUTION
If you attempt to play back such discs, there is a risk that sudden loud
noise can blast over the speakers at full volume and cause damage to
the speakers and your hearing.
Copy-protected discs, DualDiscs and other discs that do not conform
to the CD standard may not play back correctly in this player. If you
use such discs in this unit, TEAC Corporation and its subsidiaries
cannot be responsible for any consequences or guarantee the quality
of reproduction. If you experience problems with such non-standard
discs, you should contact the producers of the disc.
Discs
7
ENGLISH
Playable file format
This unit can play following files recorded on a CD-R, CD-RW, DVD-R,
DVD-RW or USB memory device:
M MP3 files
M Windows Media-formatted audio files
M JPEG files
M DivX video files
(DivX 5, DivX 4, DivX 3 and DivX VOD video content)
< File names should be alphanumeric characters. This unit cannot
display symbols and full-size or double-byte characters (such
as Japanese, Chinese, etc.) correctly. Also, be sure to use the file
extension. (‘.mp3’ for MP3 files, ‘.wma’ for WMA files, ‘.avi’ or ‘.divx’
for DivX video files, ‘.jpg or ‘.jpeg’ for JPEG files.)
< Files are played in alphabetical order.
< MP3 files must be monaural or stereo MPEG-1 Audio Layer 3
format. This unit can play MP3 files with sampling frequency
44.1 kHz or 48 kHz, bit-rate 320 kbps or less.
< This unit can play WMA files with sampling frequency 44.1 kHz, bit-
rate 192 kbps or less.
< This unit cannot display the bit-rate of VBR (variable bit rate) files
correctly.
< The disc must be finalized in order to play.
< This player is NOT compatible with multi-session discs.
< The CD-ROM must be ISO 9660 compatible.
< It may take time to display a progressive JPEG picture.
< Depending on the file size and compression rate, some JPEG
pictures cannot be displayed correctly.
Example of Icons used on DVD discs
Number of audio tracks recorded on the disc
Number of subtitles recorded on the disc
Screen aspect ratio
Disc recorded with multiple camera angles
Region code
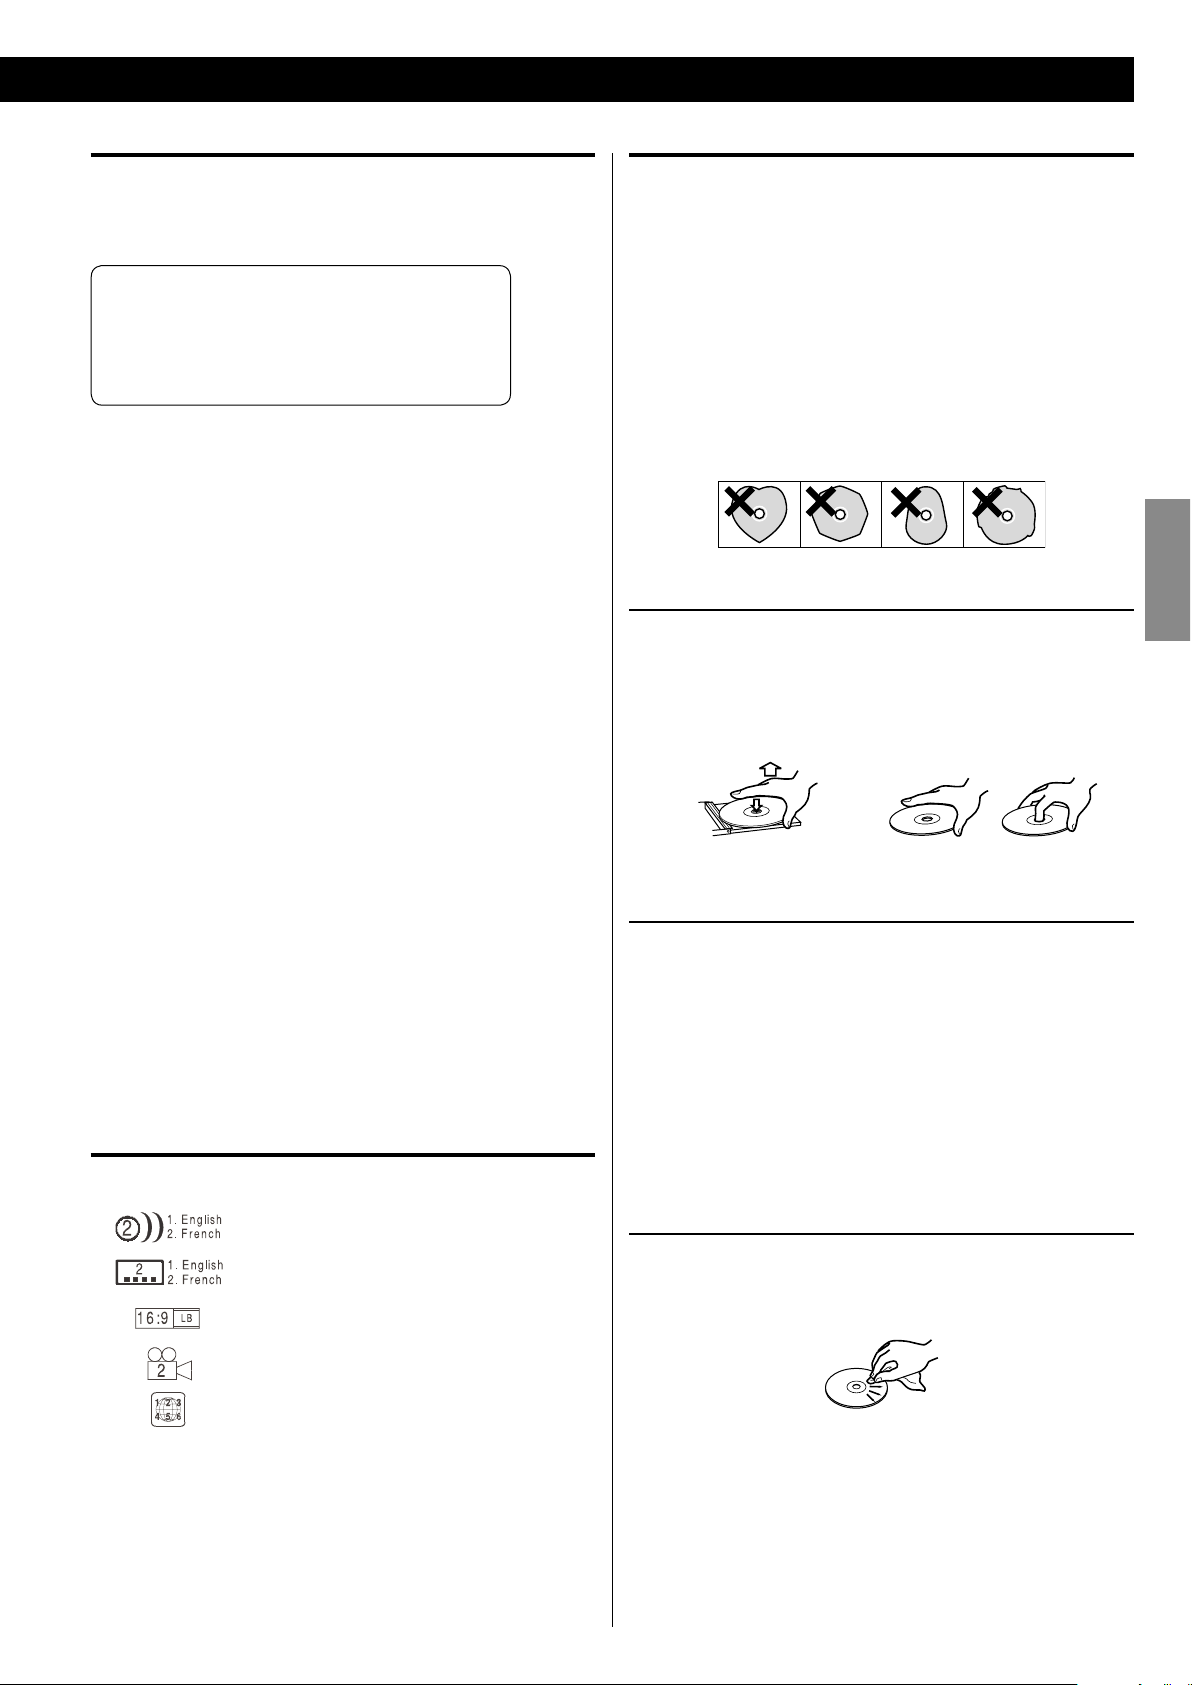
CAUTION
< Do not play any disc that is warped, deformed or damaged. Playing
such discs may cause irreparable harm to the playing mechanisms.
< Printable discs are not recommended, as the label side might be
sticky and damage the unit.
< Do not stick papers or protective sheets on the discs and do not
use any protective coating spray.
< Never use a stabilizer. Using commercially available CD stabilizers
with this unit will damage the mechanisms and cause them to
malfunction.
< Do not use irregular shape discs (octagonal, heart shaped, business
card size, etc.). Discs of this sort can damage the unit:
Handling precautions
< Always place the disc on the disc tray with the label side up.
Compact discs can be played or recorded only on one side.
< To remove a disc from its storage case, press down on the center of
the case and lift the disc out, holding it carefully by the edges.
How to remove the disc How to hold the disc
Storage precautions
< Discs should be returned to their cases after use to avoid dust and
scratches that could cause the laser pickup to “skip.”
< Do not expose discs to direct sunlight or high humidity and
temperature for extended periods. Long exposure to high
temperatures will warp the disc.
< CD-R and CD-RW discs are more sensitive to the effects of heat
and ultraviolet rays than ordinary CDs. It is important that they are
not stored in a location where direct sunlight will fall on them, and
away from sources of heat such as radiators or heat-generating
electrical devices.
Maintenance
< Should the disc become dirty, wipe the surface radially (from the
center hole outward towards the outer edge) with a soft, dry cloth.
< Never use such chemicals as record sprays, antistatic sprays or
fluid, benzine or thinner to clean the discs. Such chemicals will do
irreparable damage to the disc’s plastic surface.
If you are in any doubt as to the care and handling of a disc, read the
precautions supplied with the disc, or contact the disc manufacturer.
8
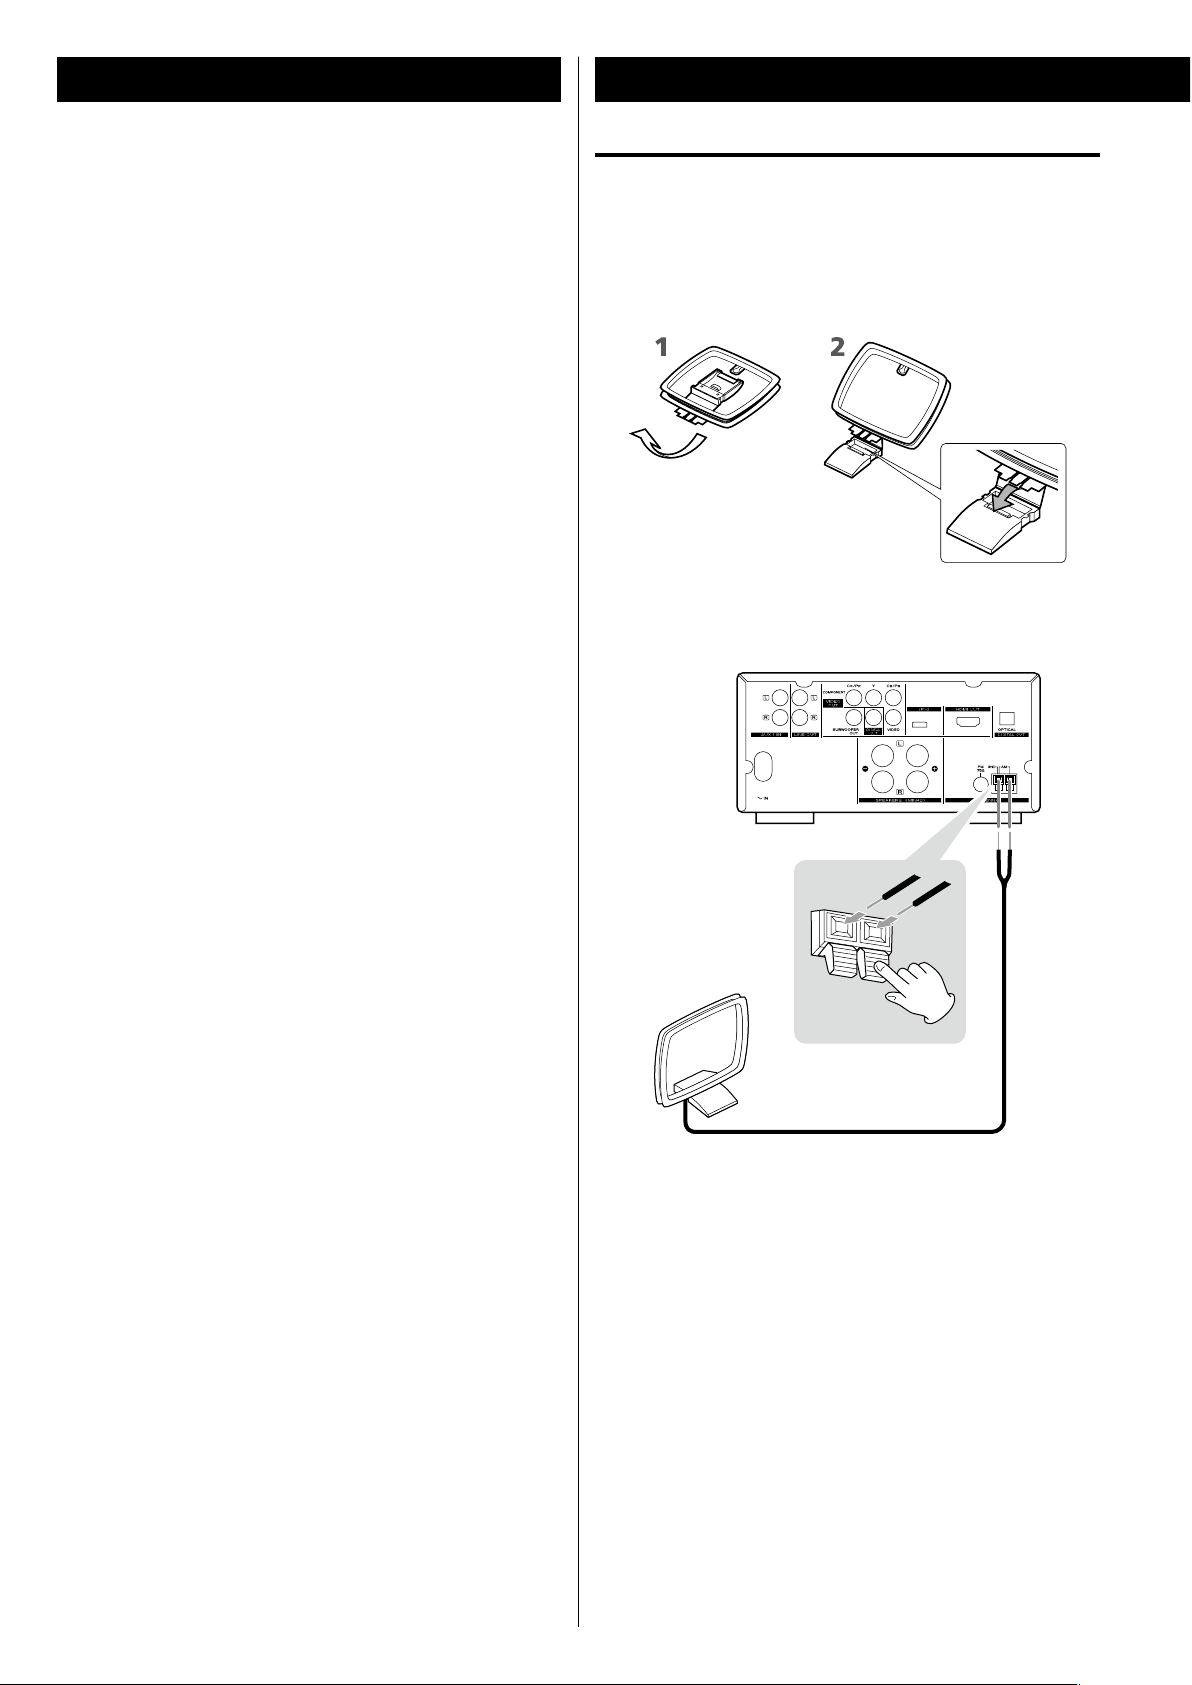
Connecting Antennas (AM)
AM indoor loop antenna
The suppliedhigh-performance AM loop antenna provided with
this unit is sufficient for good reception in most areas.
To stand the loop antenna on a surface, fix the claw to the slot in
the antenna base.
Connect the loop antenna‘s wires to the AM antenna terminals.
Press the lever, insert the end of the cord, then release the lever.
Make sure it is fastened securely by pulling the cord lightly. Make
sure only the bare, stripped wire is inserted in the jack and that no
plastic insulation is preventing contact between the antenna wire
and terminal.
Place the antenna on a shelf or hang it on a window frame, etc.,
in the direction which gives the best reception. Keep all other
wires such as power cords, speaker wires or interconnect wires as
far away as possible from the antenna.
< Only USB flash memory can be used. Do NOT use a high-capacity
USB hard disc with this unit.
< Some flash memor y players that charge from an USB terminal
cannot be played back.
< Hard disk drives, CD/DVD drives, and other devices than flash
memory connected via USB cannot be used.
< The DR-H338i cannot copy, move, or delete files.
< Playable format: FAT12, FAT16, FAT32
< NTFS, HFS, HFS+ cannot be used.
< Max. number of playable folders: 300
< Max. number of playable files: 650
USB memory device compatibility
9
ENGLISH
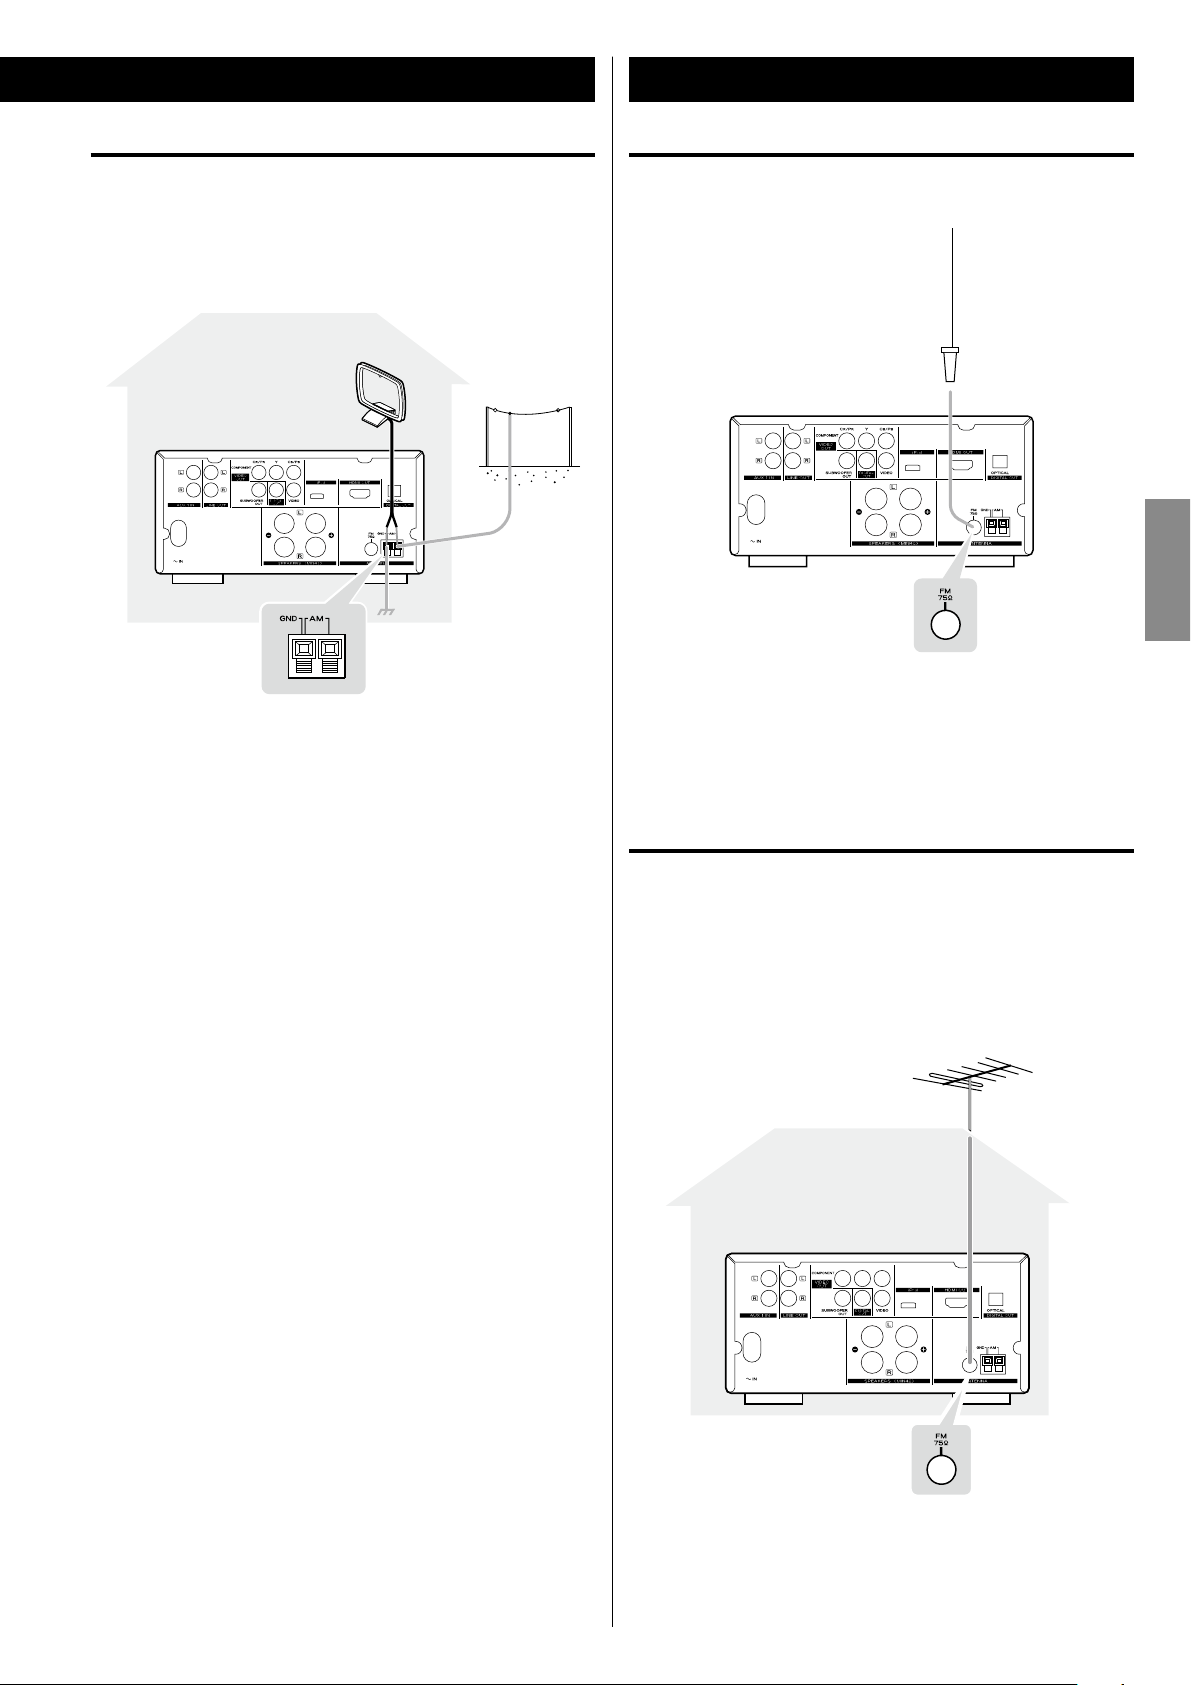
AM outdoor antenna
If the AM lo op antenna provide d do es not deliver sufficient
reception (often due to being too far from the transmitter or in a
concrete building, etc.), it may be necessary to use an outdoor AM
antenna.
Use either a high quality commercially available AM antenna or,
if not available, an insulated wire more than 16 ft (5 m) long, strip
one end, and connect this to the terminal as shown above.
The antenna wire should be strung outdoors or indoors near a
window. For better reception, connect the GND terminal to a
reliable ground.
< Even when using an outdoor AM antenna, do not disconnect the
AM loop antenna.
FM indoor antenna
Connect the supplied lead-type FM antenna to the FM 75Ω
socket and extend the lead.
Adjust the antenna in a suitable location like a window frame or
wall which gives the best reception and then fix the antenna in
that position with thumb tacks or the like.
FM outdoor antenna
In an area where FM signals are weak, it will be necessary to use a
75 Ω unbalanced-type outdoor FM antenna. Generally, a 3-element
antenna will be sufficient; if you live in an area where the FM signals
are particularly weak, it may be necessary to use one with 5 or more
elements.
< Disconnect the FM indoor antenna when using an FM outdoor
antenna.
Connecting Antennas (FM)
10
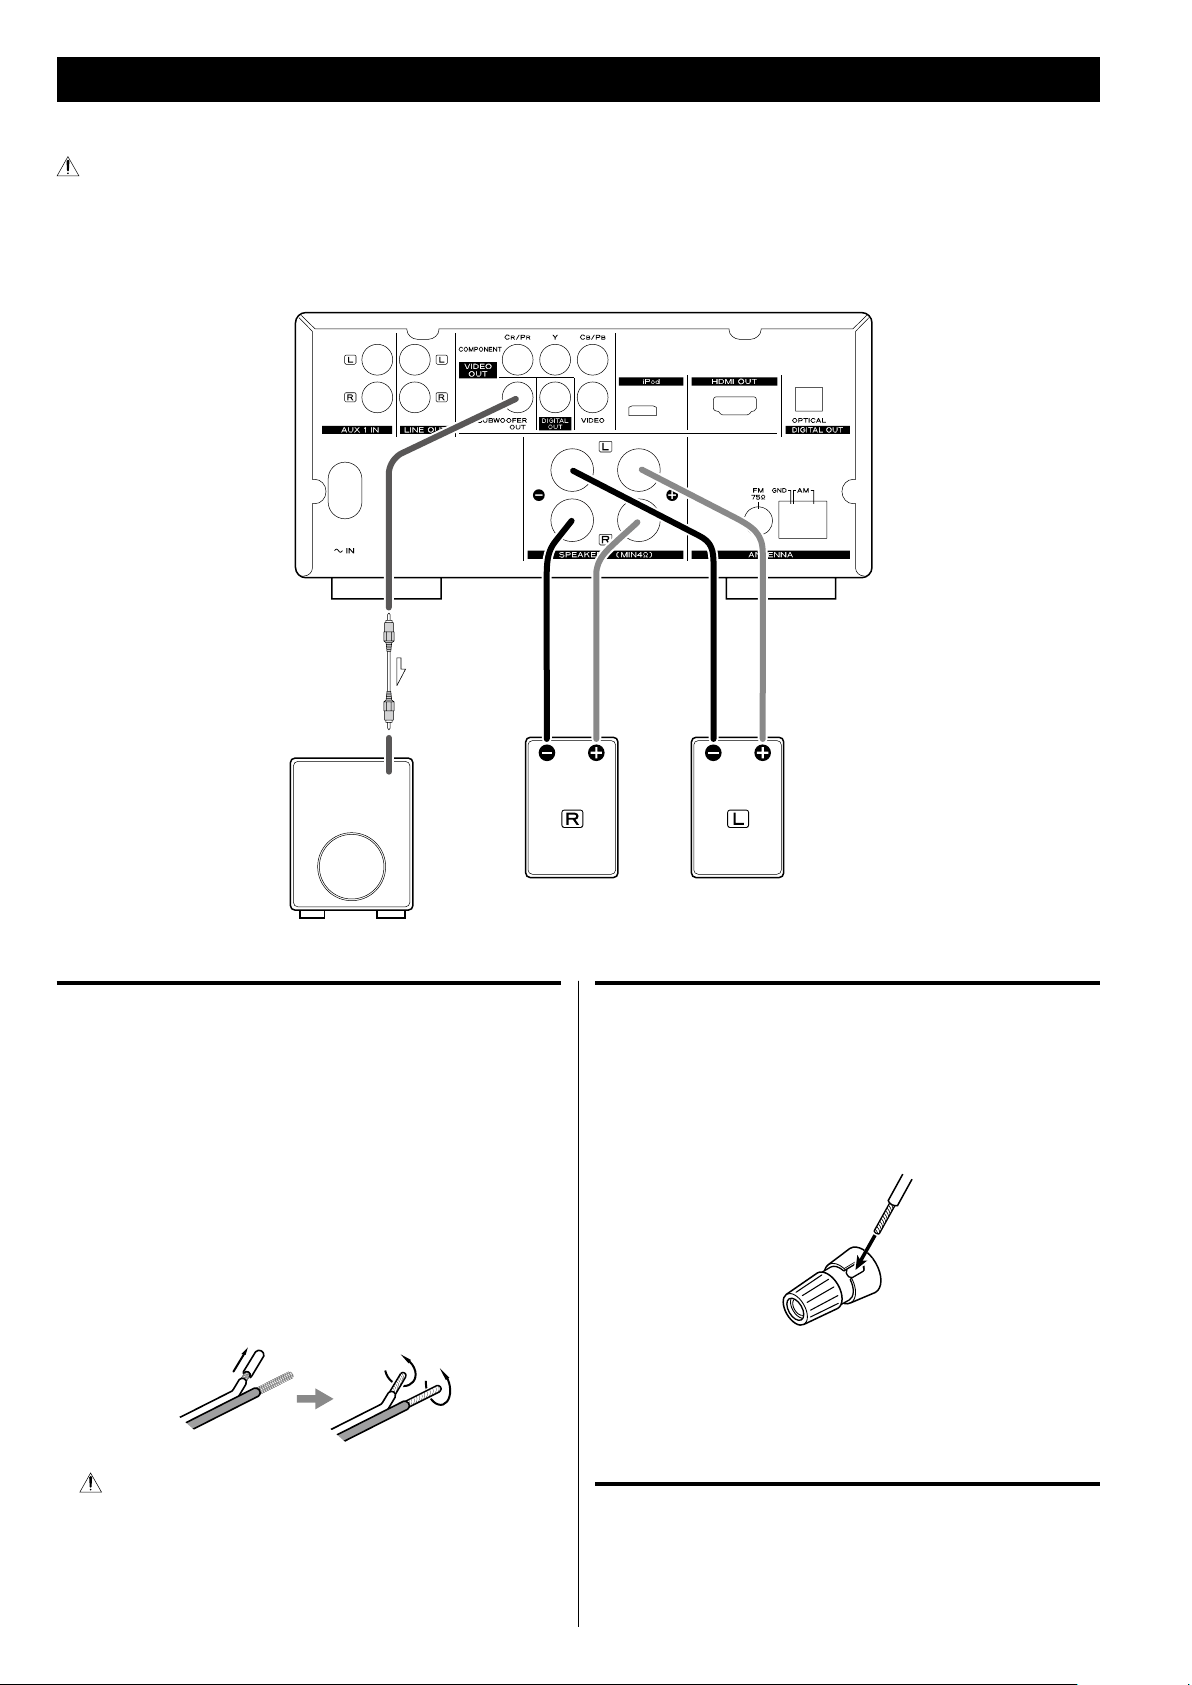
Speaker Connection
Before connection
Check the impedance of your speakers. Connect speaker with an
impedance of 4 Ω or more.
The black speaker terminals are “_” (negative).
Generally, the “+” side of the speaker cable is marked to make
it distinguishable from the “_” side of the cable. Connect this
marked side to the “+” terminal and the unmarked side to the
black “_” terminal.
Prepare the speaker cables for connec tion by stripping of f
approximately 3/8” (10 mm) or less of the outer insulation.
Twist the strands of the stripped wires tightly together:
CAUTION
The metal portions of the two separate wires should not touch or
an electrical short can occur. Removing too much insulation may
lead to a short circuit if the bared wired should come in contact
with each other. Shorted wires can create a fire hazard or induce a
failure in your equipment.
How to connect
1. Turn the terminal cap counterclockwise to loosen it. The speaker
terminal caps cannot be fully removed from the base.
2. Insert the wire into the terminal fully and turn the terminal cap
clockwise to securely connect it:
Make sure none of the wire insulation is under the terminal, only
the bare, stripped wire.
3. Make sure it is fastened firmly by pulling the cable lightly.
Subwoofer
Connect a subwoofer using a commercially-available RCA cable.
Use a subwoofer with built-in amplifier referred to as a “powered
subwoofer”.
Subwoofer
After all connections are complete, connect the power cord’s plug to the AC wall socket.
< Read the instructions of each component you intend to use with this unit.
< Be sure to connect each plug securely. To prevent hum and noise, do not bundle the connection cords.
11
ENGLISH
After all connections are complete, connect the power cord’s plug to the AC wall socket.
< Read the instructions of each component you intend to use with this unit.
< Be sure to connect each plug securely. To prevent hum and noise, do not bundle the connection cords.
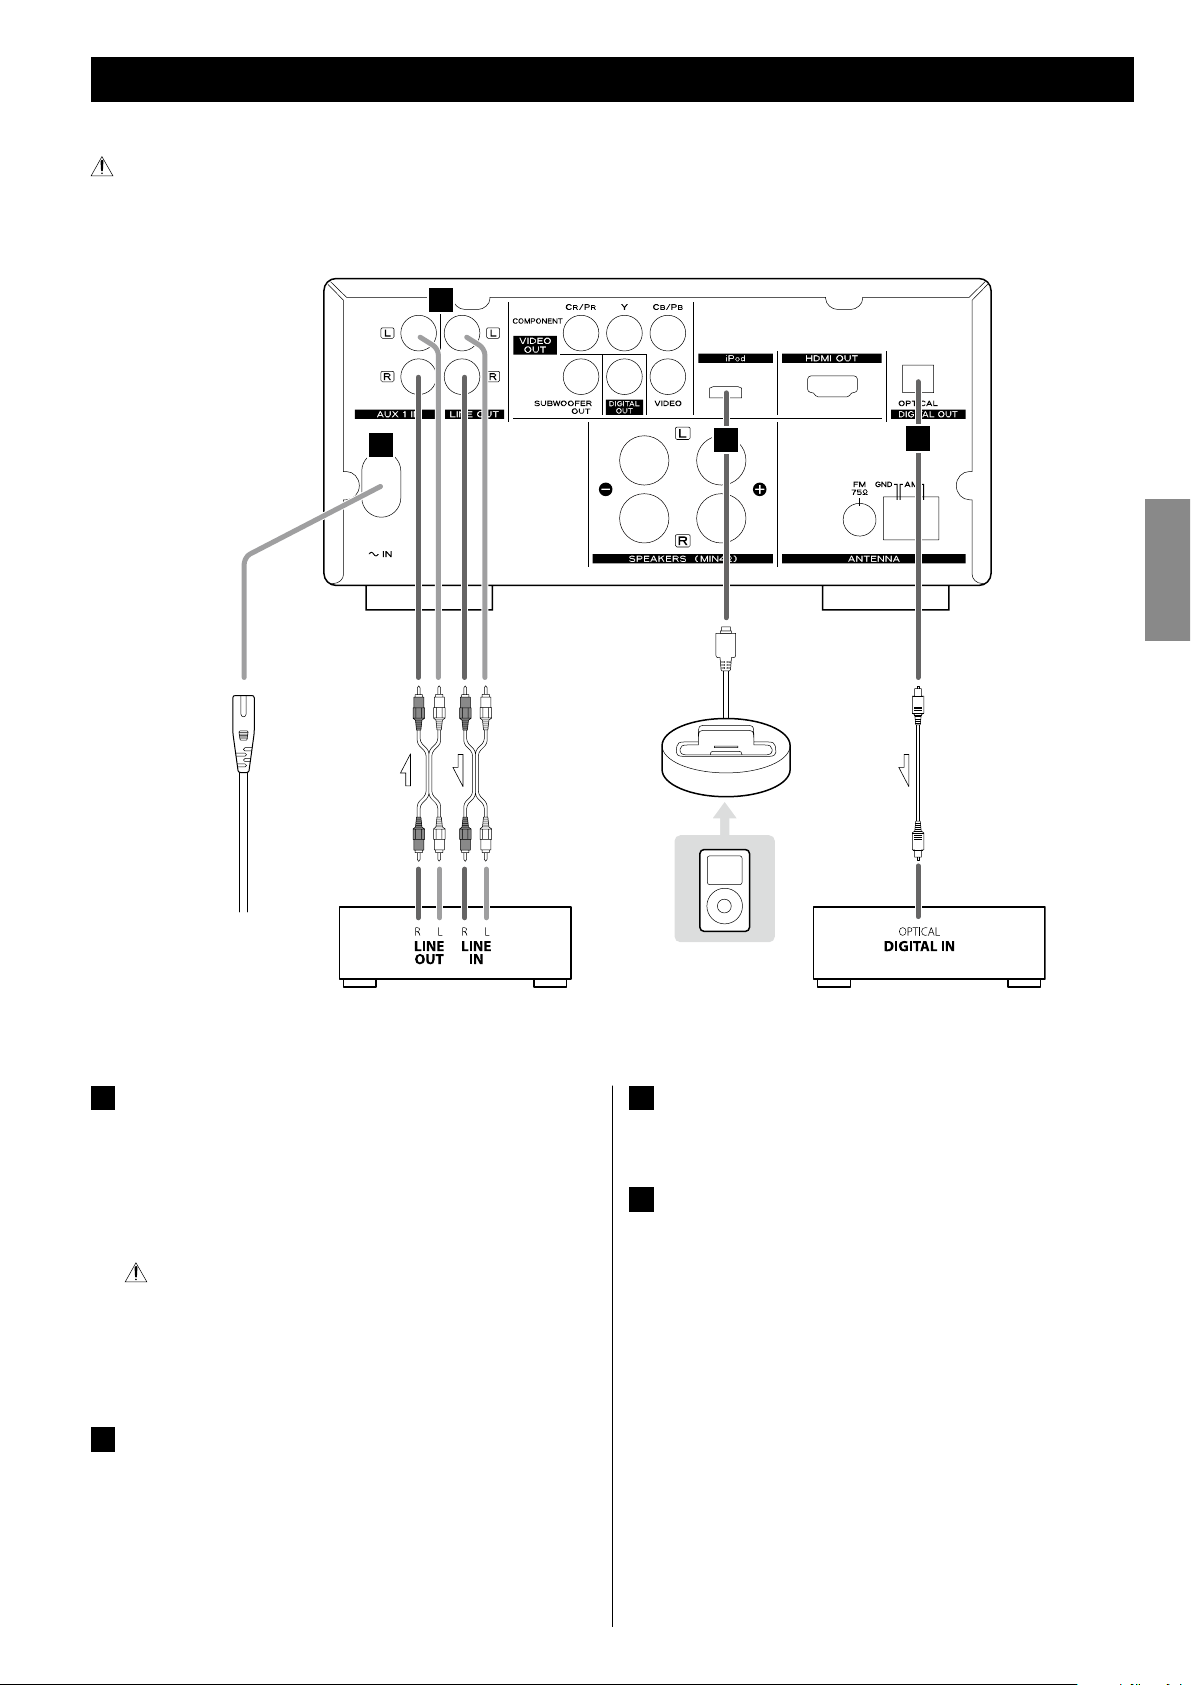
A
Power cord receptacle
After all other connections have been made, insert the supplied
AC power cord into this receptacle, then connect the other
end of the power cord into the wall socket. Ensure that your AC
voltage corresponds to the voltage marked on the rear panel of
the unit. Consult a qualified electrician if you are in doubt.
In order to avoid the risk of electric shock, fire, and so on, only
use the supplied power cord.
< If you are not going to use the unit for some time, disconnect the
power cord from the wall socket.
B
AUX 1/LINE OUT jacks
Analog 2-channel audio signal is input or output from these
jacks. Connect a cassette tape deck etc. to these jacks using
commercially-available RCA cables.
Make sure to connect:
White plug
e White jack (L: left channel)
Red plug
e Red jack (R: right channel)
Connection to Audio Equipments etc.
C
D
B
A
RCA cable
Optical digital cable
Cassette tape deck etc.
Wall socket
Digital audio device
(CD recorder, MD deck, etc.)
C
iPod port
Connect the iPod dock to this port.
D
Digital audio output terminal
Digital audio from DVD-Video, CD and video CD is output from
this terminal.
Connect an amplifiers including a decoder, or digital audio
devices such as CD recorders, etc. to this jack using commerciallyavailable optical digital audio cable (TOS).
< Select “ALL” or “PCM only” in the DIGITAL AUDIO SETUP (page 39).
12
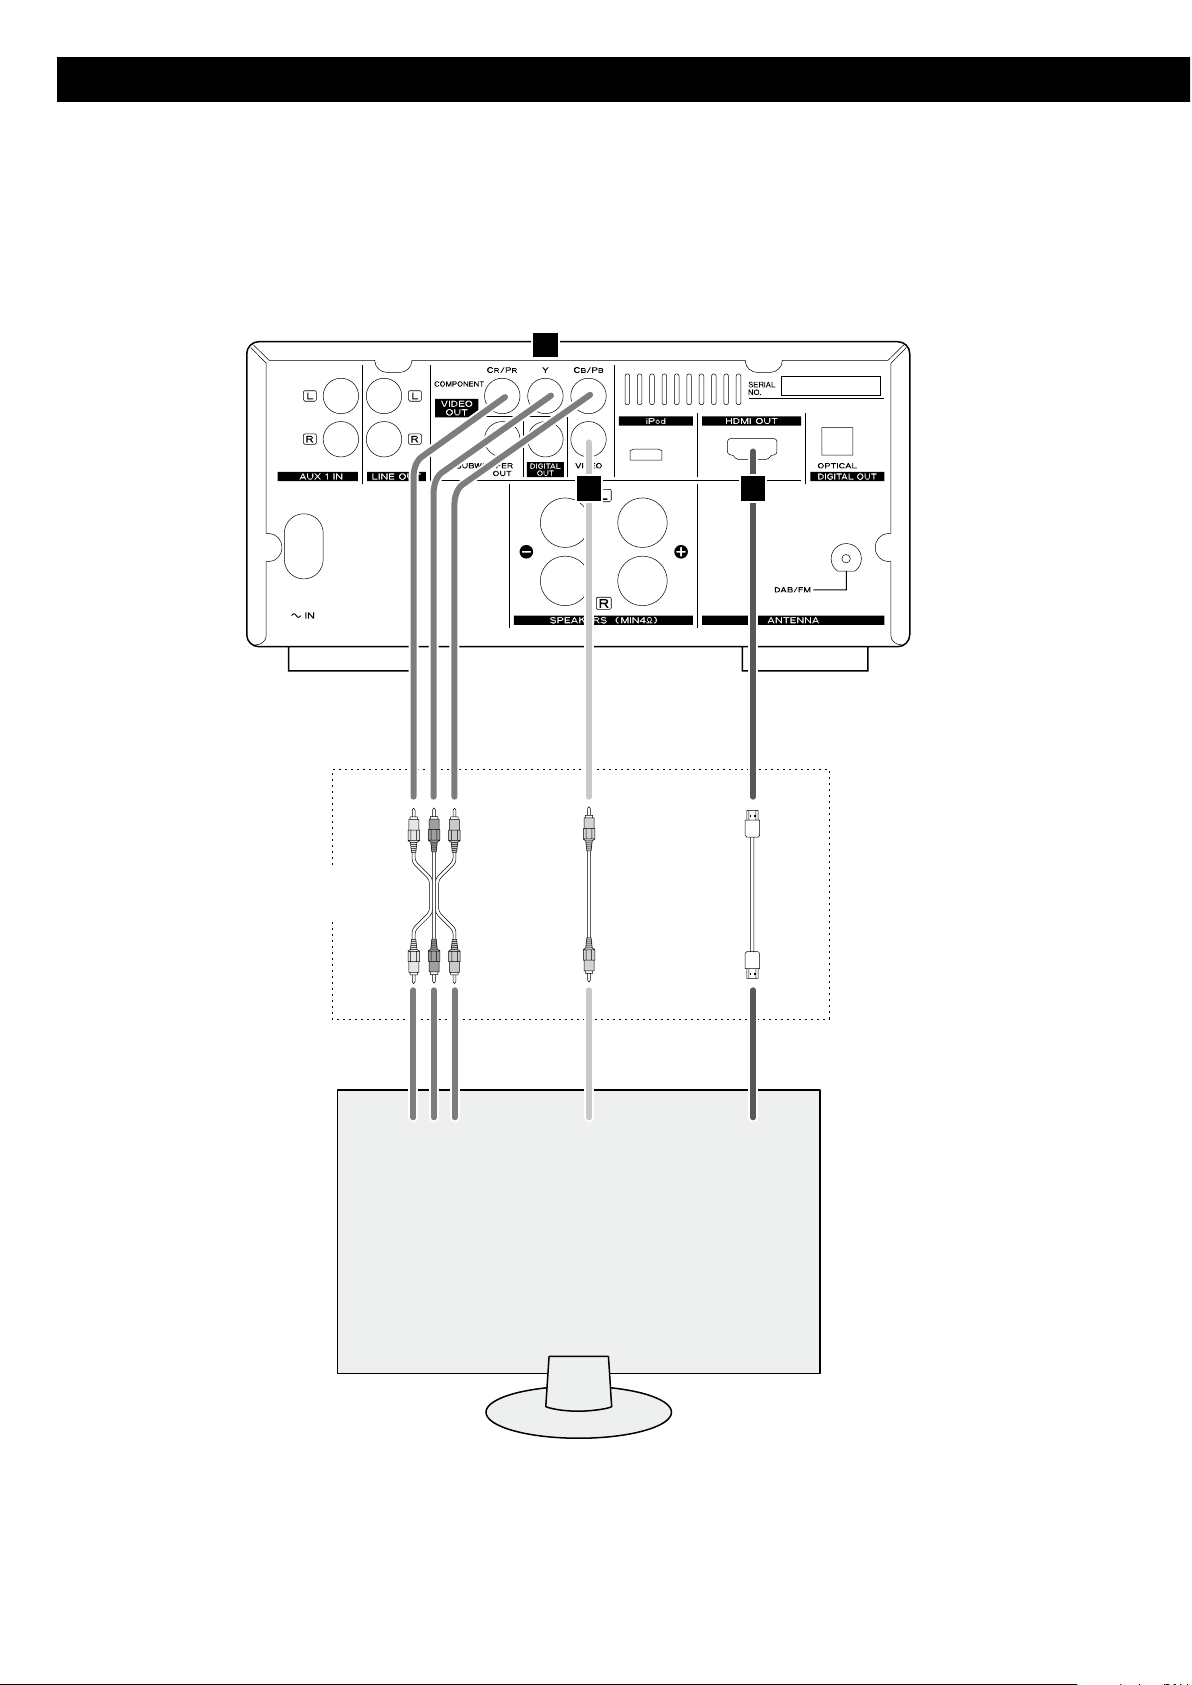
Connection to a TV
G
E
F
VIDEO
IN
TV (Monitor)
HDMI
IN
COMPONENT
VIDEO IN
C
BYCR
Connect one of
these cables.
Component video cable
RCA video cable
HDMI cable

13
ENGLISH
G
HDMI video/audio output terminal
Use a commercially available HDMI cable to connect the unit to a
HDMI compatible TV or monitor.
< If the TV or monitor is equipped only with a DVI terminal, a
suitable adaptor cable or adaptors should be used. Note that the
TV connected in this way must be HDCP compatible.
Also note that this connection outputs no sound.
< Make sure that you read and understand the documentation
provided with the HDMI component.
HDMI video output formats
< 480p (NTSC) or 576p (PAL)
< 720p
< 10 80i
< 108 0p
< See page 41 for further details on HDMI video output formats.
To output audio from the HDMI terminal
If the connected HDMI component is capable of inputting HDMI
audio, digital audio can be output from the HDMI terminal.
< Select “ALL” or “PCM only” in the DIGITAL AUDIO SETUP (page 39).
< To enjoy the digital surround audio from DVD-Video discs,
connect the HDMI terminal to a surround amplifier and set the
DIGITAL AUDIO SETUP to “ALL” (page 39).
< Adjust the video aspect ratio to match that of the TV (page 38).
< This unit adopts analog copy protection features. If the unit is
connected to a TV through a VCR (video cassette recorder), the
resulting playback may be affected. Connect the unit directly to
the TV.
< In all cases, use the highest quality cables for the best possible
picture.
< Select proper setting in the VIDEO OUTPUT setup (page 40).
E
Component video output terminals
Use commercially available component video cables to connect
the unit to the component video inputs of a suitably equipped
TV or monitor to enjoy a high-quality picture.
Use th ese terminals in p reference to comp osite vide o
connections.
< If the component video terminals are connected to a TV with
progressive scan capabilities, the output can be set to match this
(page 40).
< Note that these terminals cannot be connected to high definition
component terminals.
F
Composite video output terminal
Use a commercially available RCA (pin) video cable to connect
the unit to the composite video connector of a TV or monitor.
Use this connection only if no other video connection method is
available.
14
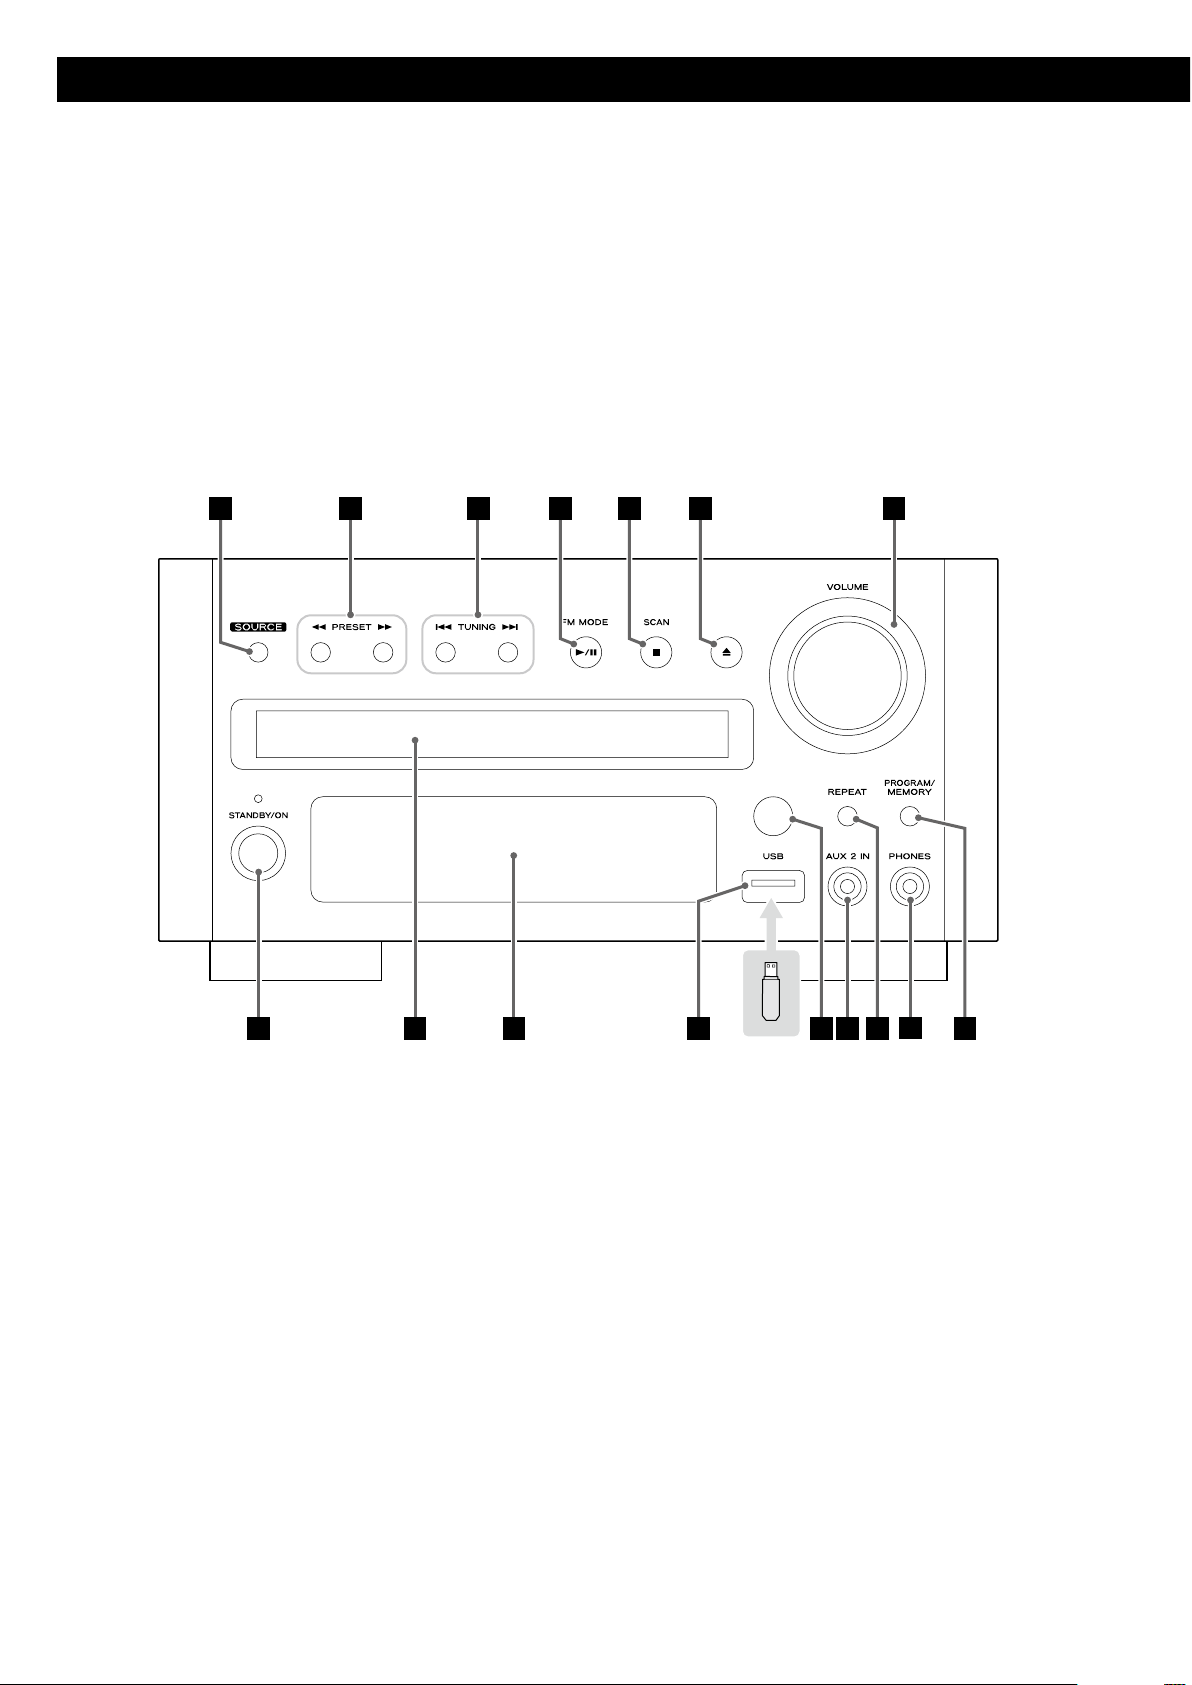
Identifying the Parts (Main Unit)
A
P
N
DC
B
E
G
F
H
I
J
K
L
M
O

15
ENGLISH
A
SOURCE
Use this button to select a source.
B
Search (m/,)/PRESET
In FM or AM mode, use these buttons to select a preset channel.
In DISC, USB or iPod mode, use these buttons to search for a part
of a track/file/song.
C
Skip (.//)/TUNING
In FM or AM mode, use these buttons to tune in a station.
In DISC, USB or iPod mode, use these buttons to skip tracks/files/
songs.
D
Play/Pause (G/J)/FM MODE
In FM mode, use this button to select stereo or monaural.
In DISC, USB or iPod mode, use this button to start or pause
playback.
E
Stop ( H)/SCAN
In FM or AM mode, use t his but ton to preset s tations
automatically.
In DISC or USB mode, use this button to stop playback.
F
Open/Close ( L)
Use this button to open and close the disc tray.
When the tray is opened during playback, it may take a few
seconds before the disc is “unloaded” and the tray opens.
G
VOLUME
Turn this knob to adjust the volume level.
H
PROGRAM/MEMORY
In FM or AM mode, use this button to preset stations.
In DISC or USB mode, use this button to programme tracks.
I
PHONES
To listen with headphones, first lower the volume level to the
minimum. Then, connect the headphones plug into the PHONES
jack, and adjust the volume by turning the VOLUME knob.
The speakers will make no sound when headphones are plugged
in.
CAUTION
Do not connect headphones with the PHONES jack while
wearing them. Moreover, do not disconnect headphones or turn
the unit on or off while wearing them. Very loud sound could be
output from the headphones.
AVOID DAMAGING YOUR HEARING
-
Do not put on headphones
until after plugging them in.
J
REPEAT
In DISC, USB or iPod mode, use this button for repeat playback.
K
AUX 2 IN
You can connect a portable audio player to this jack.
L
Remote control sensor
Receives signals from the remote control unit. Point the remote
control unit at this sensor when operating the remote control
unit.
M
USB connector
You can connect an USB memory device to this connector.
N
Display
O
Disc tray
P
STANDBY/ON
Use this button to turn the unit on and standby.
The indicator lights blue when the unit is turned on.
The indicator lights orange when the unit is in the standby mode.
16
Identifying the Parts (Remote Control Unit)
A
C
P
S
G
J
F
X
Y
D
B
I
E
K
M
L
N
O
H
Q
R
T
V
a
b
c
d
U
W
Z
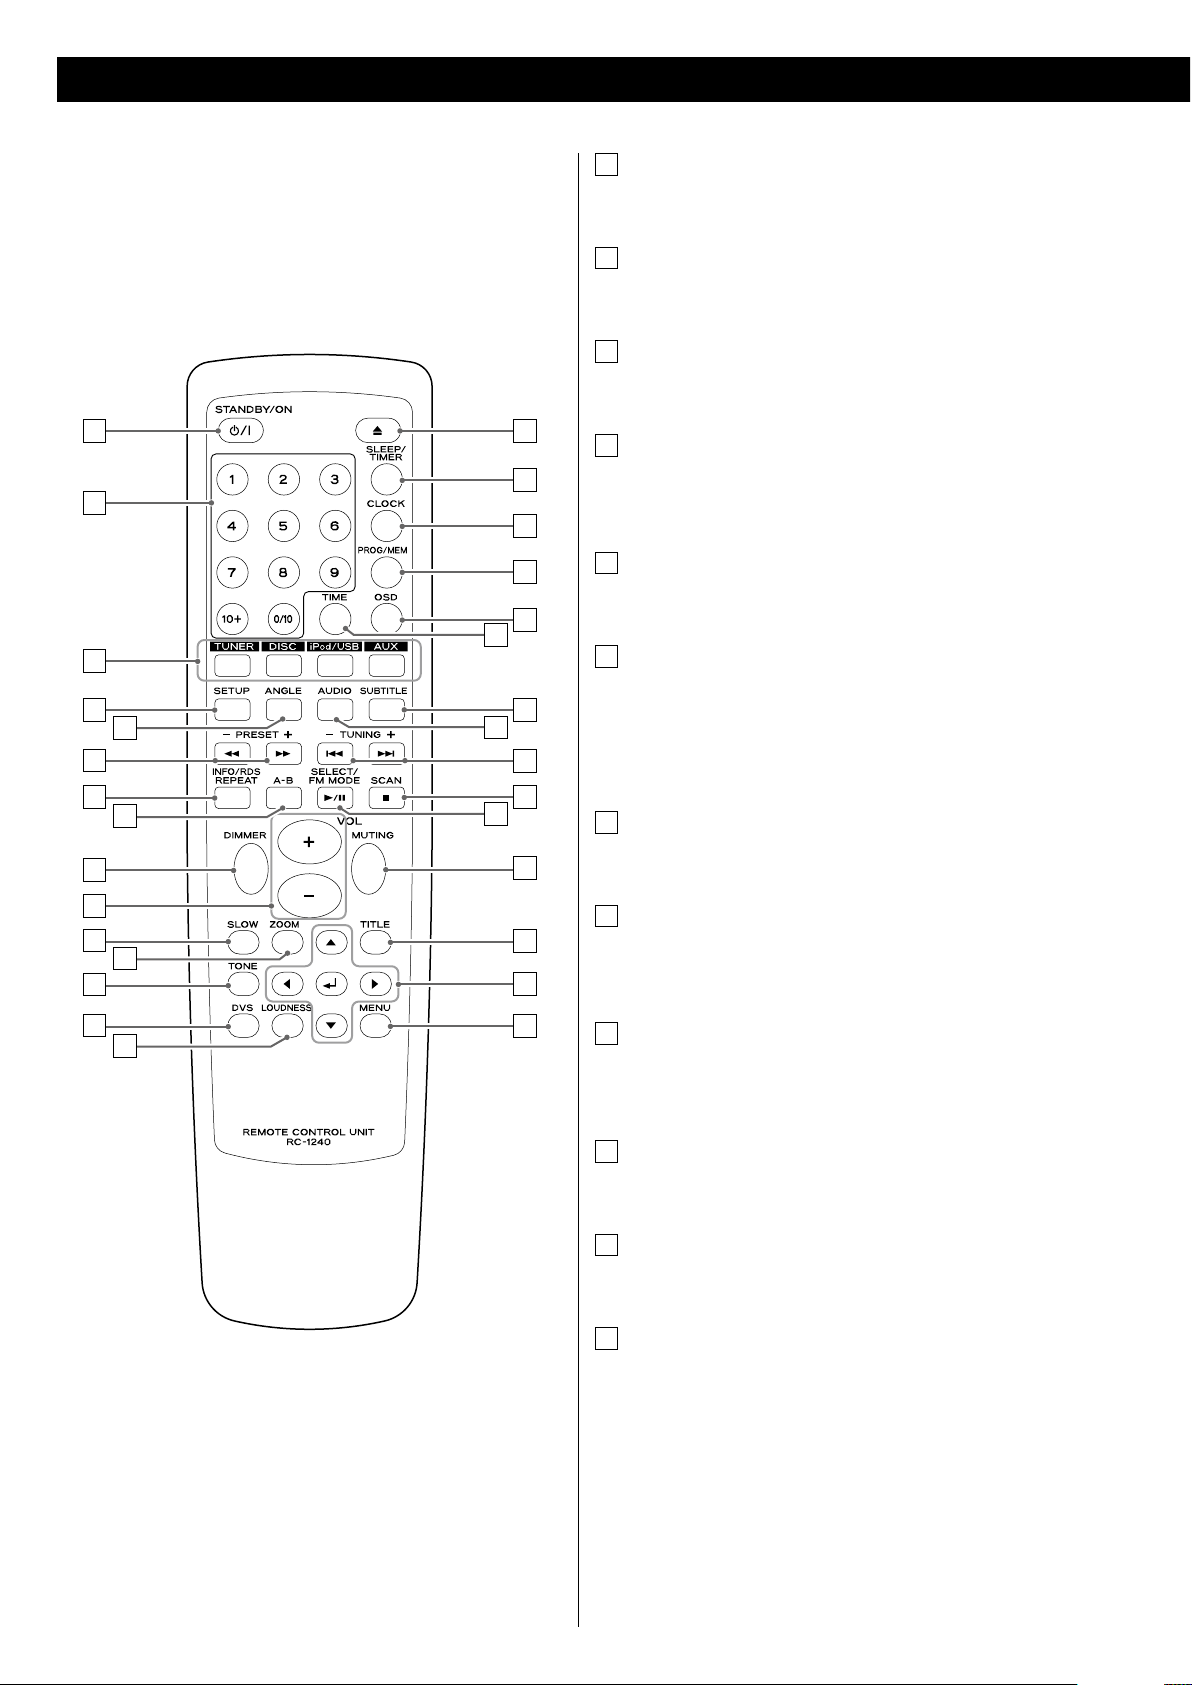
A
STANDBY/ON
Use this button to turn the unit on and standby.
B
Number buttons
Use these buttons to enter track numbers, passwords, etc.
C
Source
Use these buttons to select a source.
D
SETUP
Use this button to enter the setup menu where you can set up
the parameters of the unit.
E
ANGLE
Use this button to select camera angles during DVD playback.
F
Search (m/,)/PRESET (+/–)
In FM or AM mode, use these buttons to select a preset channel.
In DISC, USB or iPod mode, use these buttons to search for a part
of a track/file/song.
G
REPEAT/INFO/RDS
In DISC, USB or iPod mode, use this button for repeat playback.
H
A-B (Repeat)
In DISC or USB mode, use this button to specify a section and
play it repeatedly.
I
DIMMER
Use this button to change the brightness of the front panel
display.
J
VOL (+/–) (Volume)
Use these buttons to adjust the volume level.
K
SLOW
In DISC mode, use this button for slow motion video playback.
L
ZOOM
In DISC or USB mode, use this button to enlarge the image.

17
ENGLISH
M
TONE
Use this button to adjust bass and treble together with the
VOLUME buttons.
N
DVS (Dolby Virtual Speaker)
In DISC or USB mode, use this button to select the listening
mode.
O
LOUDNESS
Use this but ton to compensate for the loss of bass at low
volumes.
P
Open/Close ( L)
Use this button to open and close the disc tray.
When the tray is opened during playback, it may take a few
seconds before the disc is “unloaded” and the tray opens.
Q
SLEEP/TIMER
When the unit is on, use this button to set the sleep timer.
In the standby mode, use this button to set the wake up timer.
R
CLOCK
In the standby mode, use this button to adjust clock.
S
PROG/MEM (Program/Memory)
In FM or AM mode, use this button to preset stations.
In DISC or USB mode, use this button to programme tracks.
T
OSD (On Screen Displays)
Use this button to display information about the currently playing
disc.
U
TIME
Use this button to start time search.
V
SUBTITLE
Use this button to select the displayed subtitles during DVD
playback.
W
AUDIO
Use this button to select the audio for playback.
X
Skip (.//)/TUNING (+/–)
In FM or AM mode, use these buttons to tune in a station.
In DISC, USB or iPod mode, use these buttons to skip tracks/files/
songs.
Y
Stop ( H)/SCAN
In FM or AM mode, use t his but ton to preset s tations
automatically.
In DISC or USB mode, use this button to stop playback.
Z
Play/Pause (G/J)/SELECT/FM MODE
In FM mode, use this button to select stereo or monaural.
In DISC, USB or iPod mode, use this button to start or pause
playback.
a
MUTING
Use this button to mute the sound.
b
TITLE
During PBC playback, use this button to display a menu.
c
Cursor buttons (5/b/t/g) and Enter ( )
Use these Cursor buttons for navigation of on-screen menus and
the Enter button to confirm selections.
d
MENU
In DISC mode, use this button with menu-enabled DVD discs to
bring up the DVD menu.
During playback of MP3/WMA/JPEG files, use this button to
switch between the folder list and the file list.
In iPod mode, use this button to go back to previous menu of
iPod. This button is equivalent to the MENU button on your iPod.
When a video CD (version 2.0) is loaded, use this button to turn
the PBC function on or off.
Note:
To simplify explanations, instructions in this manual might refer to the
main unit or remote control only. In such cases, the same controls on
the remote control and main unit will operate similarly.
18
The provided Remote Control Unit allows the unit to be operated
from a distance.
When operating the remote control unit, point it towards the remote
sensor on the front panel of the unit.
< Even if the remote control unit is operated within the effective
range (16 ft/5 m), remote control operation may be impossible if
there are any obstacles between the unit and the remote control.
< If the remote control unit is operated near other products which
generate infrared rays, or if other remote control devices using
infrared rays are used near the unit, it may operate incorrectly.
Conversely, the other products may operate incorrectly.
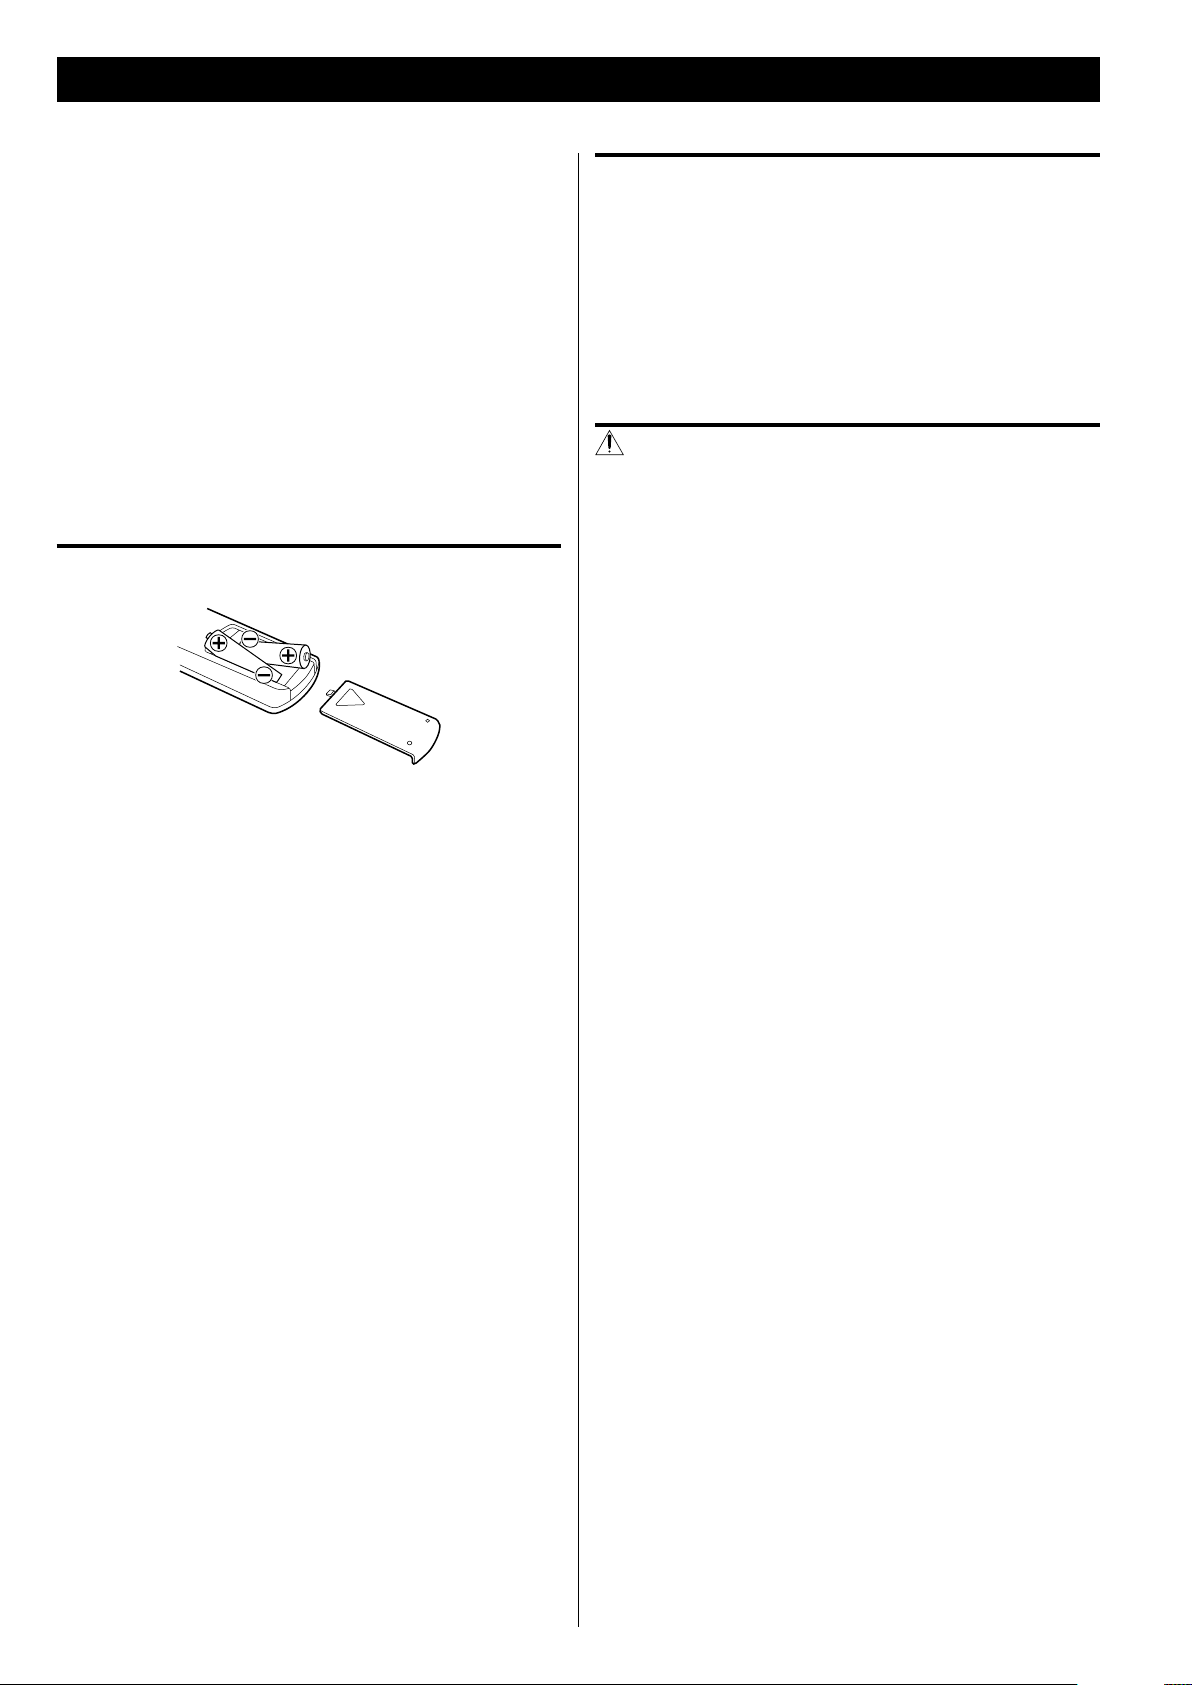
Battery installation
1. Remove the battery compartment cover.
2. Insert two “AAA” (R03 or UM-4) dry batteries. Make sure that the
batteries are inserted with their positive “+” and negative “_”
poles positioned correctly.
3. Close the cover.
Remote Control Unit
Battery replacement
If the distance required between the remote control unit and main
unit decreases, the batteries are exhausted. In this case replace the
batteries with new ones.
For more information about collection of batteries, please contact
your local municipality, your waste disposal service or the point of sale
where you purchased the items.
Precautions concerning batteries
Misuse of batteries could cause them to rupture or leak leading to fire,
injury or the staining of nearby things. Please read and observe the
following precautions carefully.
< Be sure to insert the batteries with correct positive (+) and
negative (_) orientations.
< Use batteries of the same type. Never use different types of
batteries together.
< Both rechargeable and non-rechargeable batteries can be used.
Refer to the precautions on their labels.
< If the remote control will not be used for a long time (more than a
month), remove the batteries to prevent them from leaking.
< If the batteries leak, wipe away the leakage inside the battery
compartment and replace the batteries with new ones.
< Do not use batteries of types other than those specified. Do not
mix new batteries with old ones or use different types of batteries
together.
< Do not heat or disassemble batteries. Never throw batteries into
fire or water.
< Do not carry or store batteries with other metallic objects. The
batteries could short circuit, leak or explode.
< Never recharge a b attery unless it is confirmed to b e a
rechargeable type.
19
ENGLISH
Setting the Clock
When you connect the power cord into the wall socket and turn on
the unit for the first time, set the clock.
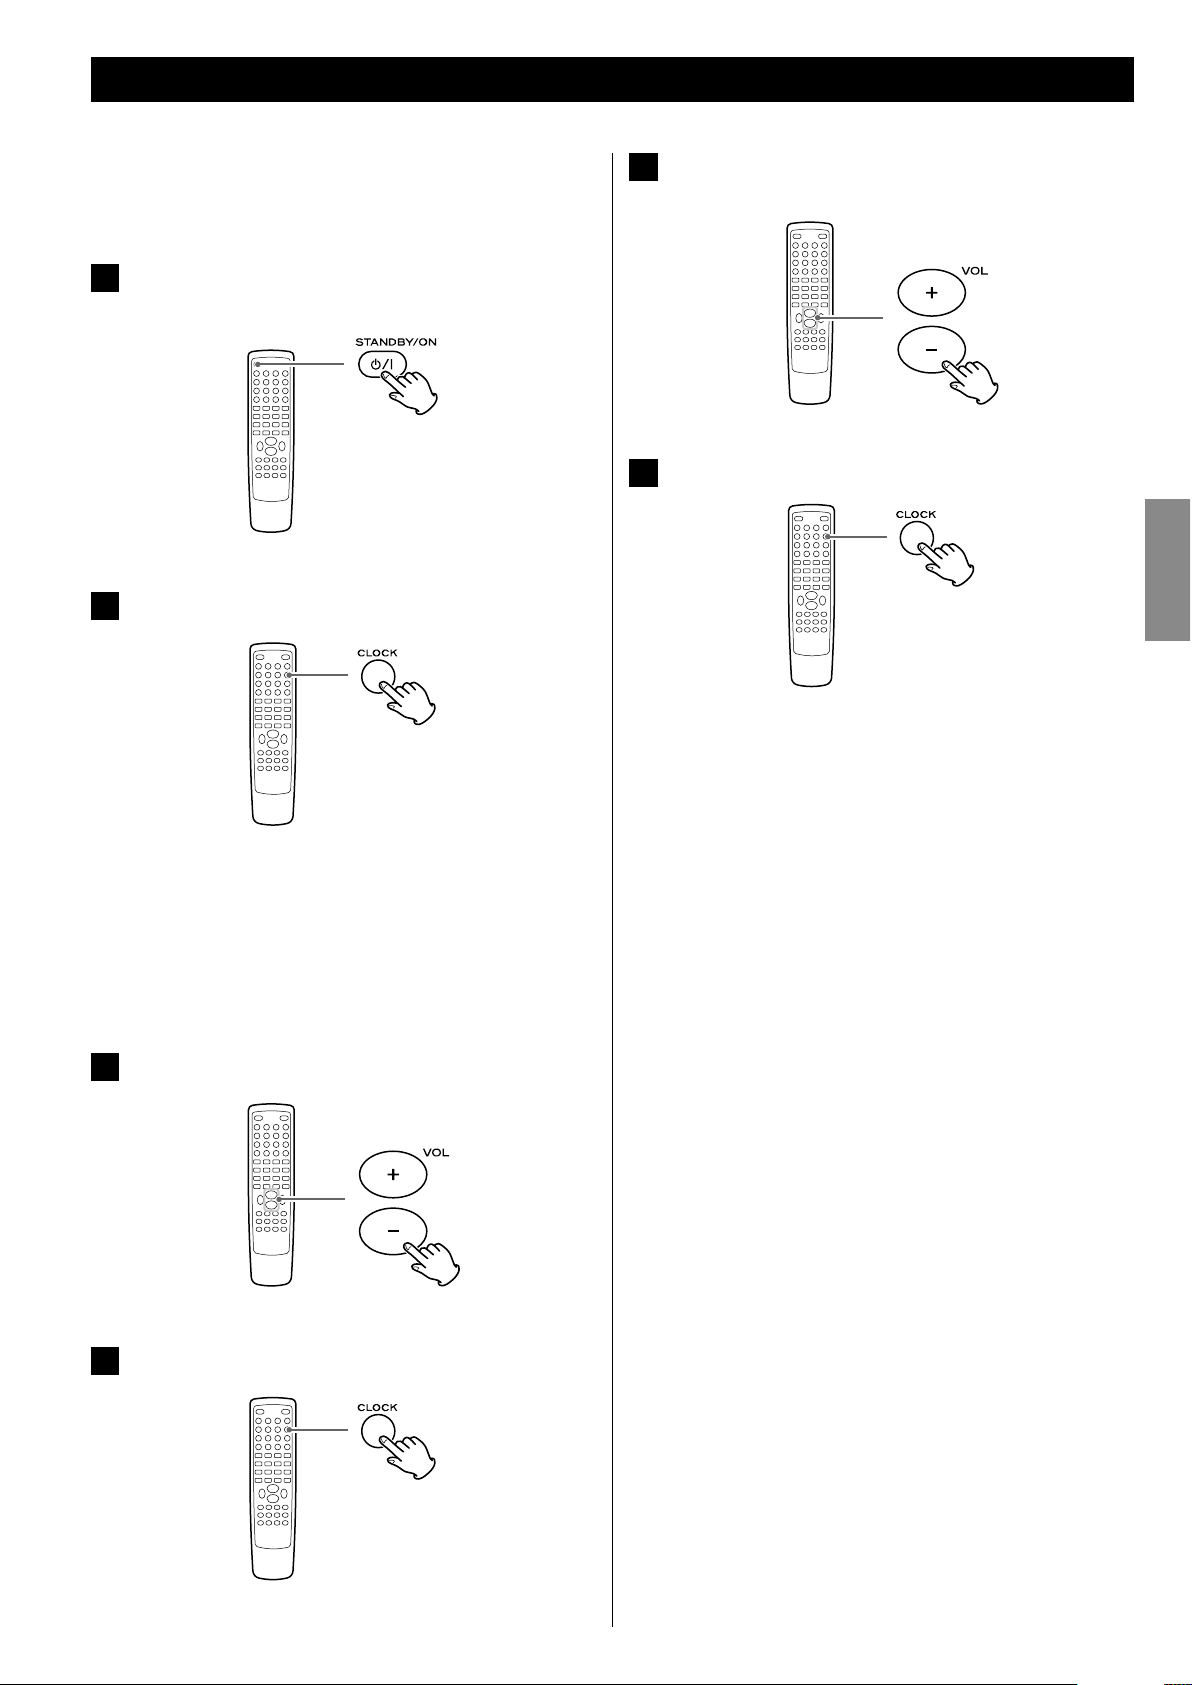
1
If the unit is on, press the STANDBY/ON button to turn it
standby.
2
Press the CLOCK button.
< If “- -:- -” blinks on the display, press the CLOCK button again.
“Clock Set” appears on the display, and the “hour” value starts
blinking.
< When no button is pressed for 30 seconds, the time setting
mode will be cancelled.
3
Press the Volume buttons (+ or –) to set the current hour.
4
Press the CLOCK button.
The “minute” value starts blinking.
5
Press the Volume buttons (+ or –) to set the current
minute.
6
Press the CLOCK button.
The clock starts.
After the clock is set, also set the settings of the unit using the
SETUP menu (page 37).
20
< You can also select FM or AM by pressing the TUNER button on
the remote control unit once or twice.
< You can also select iPod or USB by pressing the iPod/USB button
on the remote control unit once or twice.
< To listen to an external source connected to the AUX IN jack,
select AUX1 or AUX2.
< You can also select AUX1 or AUX2 by pressing the AUX button
on the remote control unit once or twice.
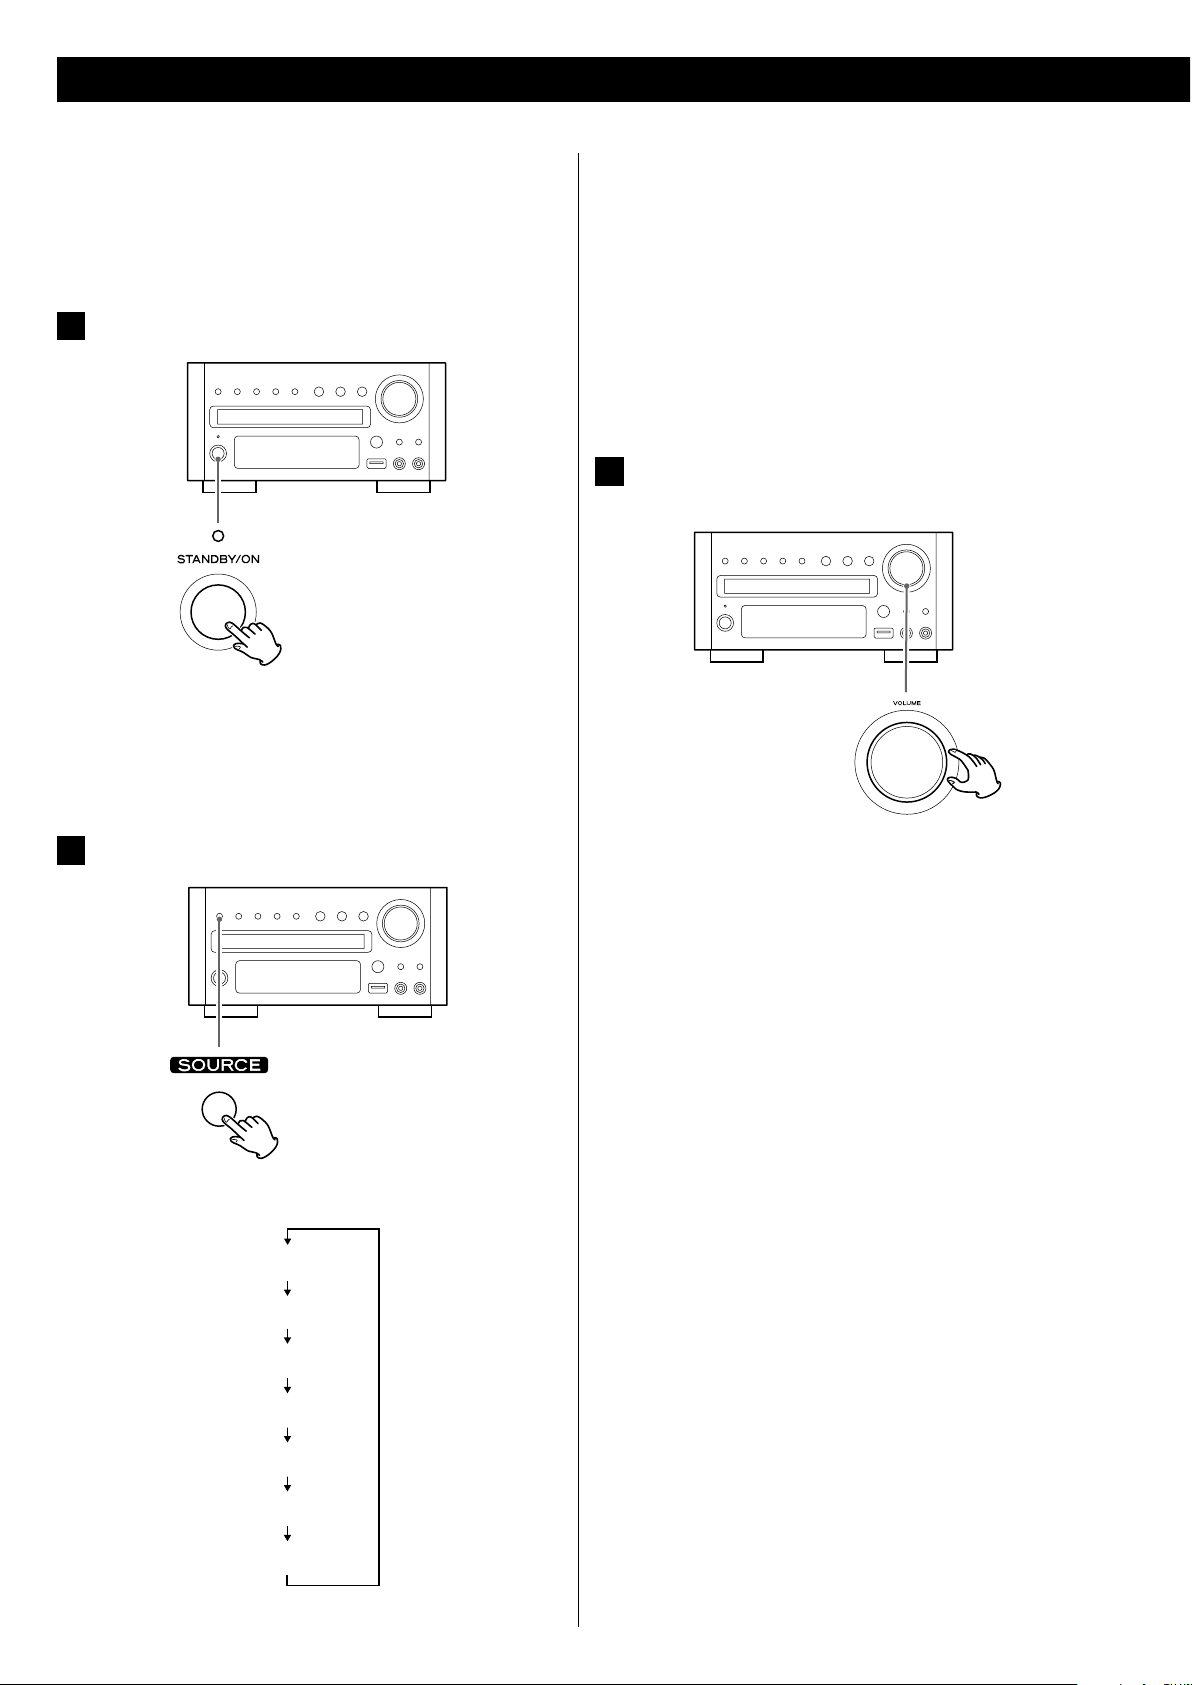
3
Play the source, and adjust the volume using the VOLUME
knob.
The volume is adjustable from MIN to MAX. You can hold down
the VOLUME – or + buttons on the remote control unit to reduce
or bring up the volume continuously.
< Press the STANDBY/ON button to put the unit in the standby
mode when it is not being used.
< If you press the STANDBY/ON button to put the unit in the
standby mode when SOURCE is set for AUX1 or AUX2, first, the
speaker sound stops and then after about 2 seconds the output
to the sub woofer stops.
This chapter describes the basic operation which is available in every
mode.
When you use the unit for the first time, set the clock and the setting
of the unit. (see previous page for “Setting the Clock”, page 37 for
“Settings”).
1
Press the STANDBY/ON button to turn the unit on.
< The unit turns on with the source that was last selected.
< You can also use the SOURCE button (or the TUNER, DISC, iPod/
USB or AUX button on the remote control unit) to turn the unit
on.
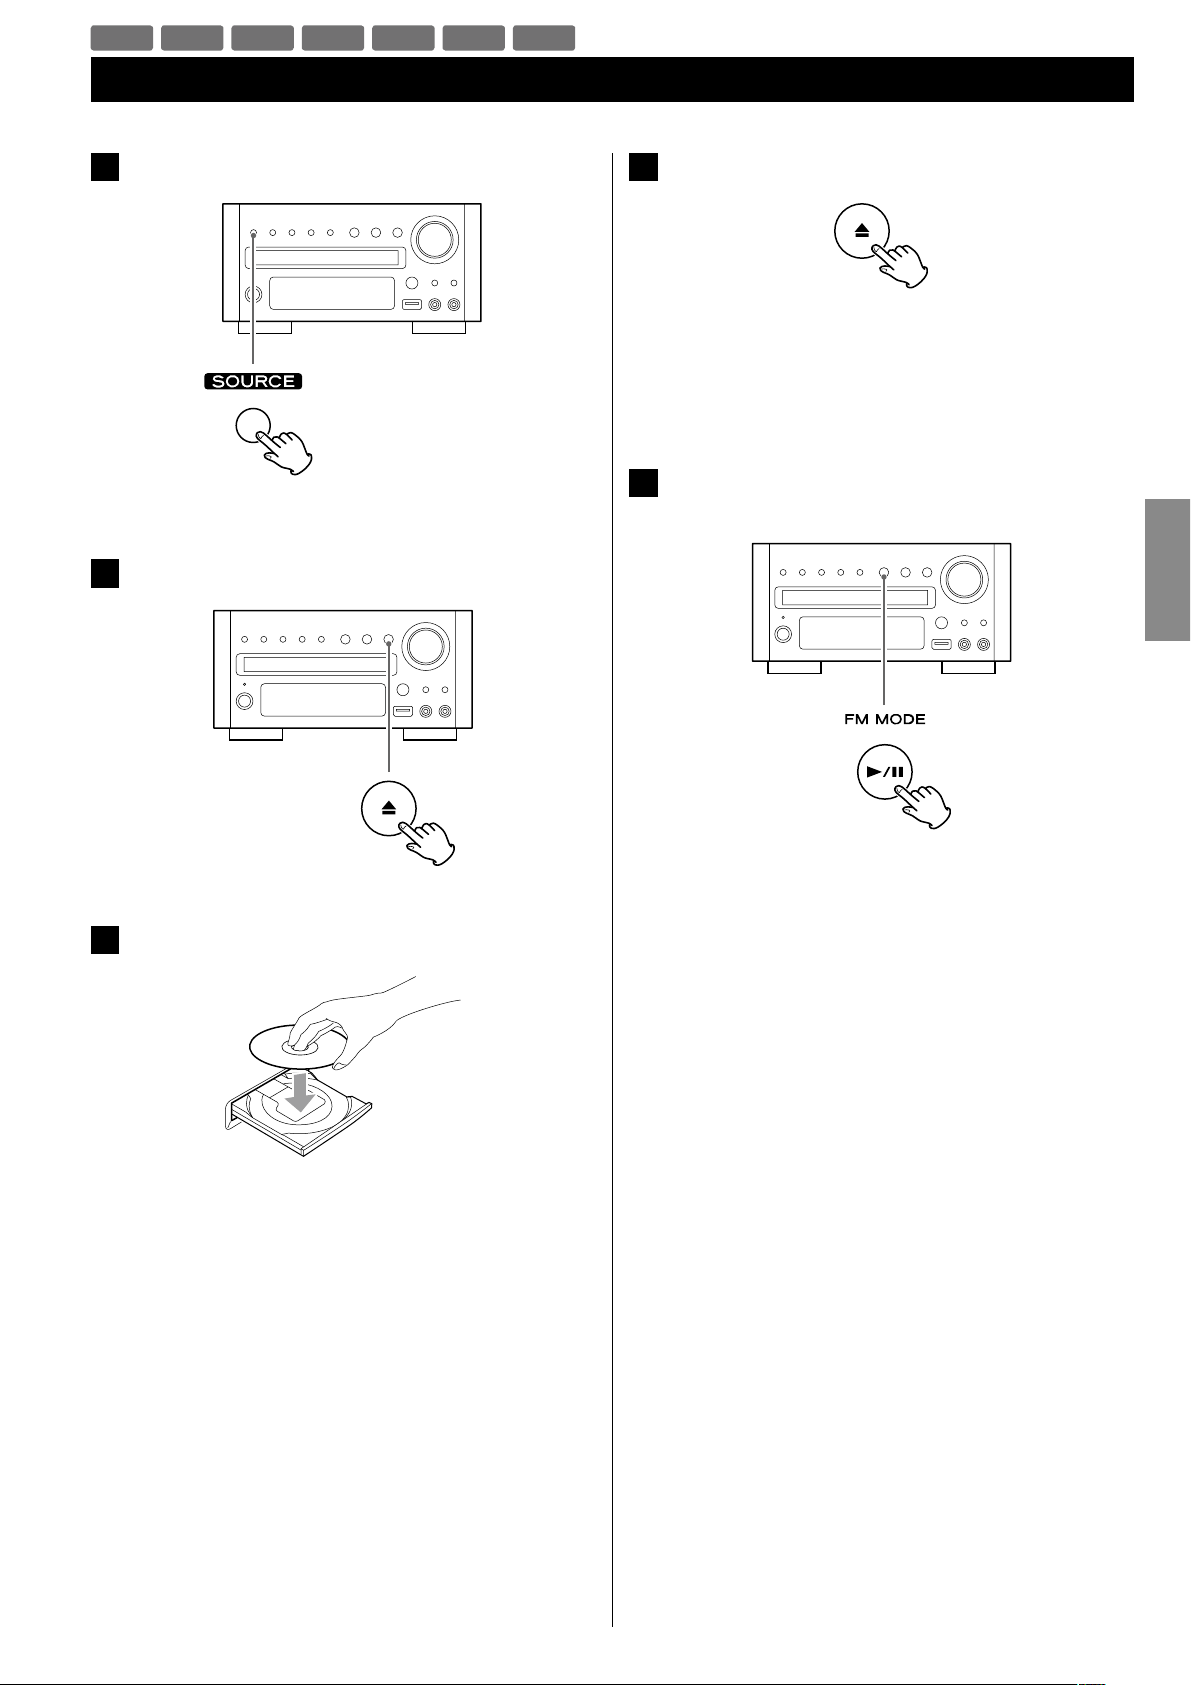
2
Press the SOURCE button to select a source.
Each time the SOURCE button is pressed, the source changes as
follows:
FM Radio
AM Radio
AUX1 Source
AUX2 Source
iPod
DISC Source
USB Source
The selected source is shown on the front panel’s display.
Basic Operation (1)
21
ENGLISH
Recording a source
You can record a source onto a CD or a cassette tape connected to
the DIGITAL OUT terminal or the LINE OUT jacks.
1. Select a source to be recorded by pressing the SOURCE button.
2. Start recording.
< The volume, and tone control (DVS, LOUDNESS and TONE) have no
effect on the recording signals.
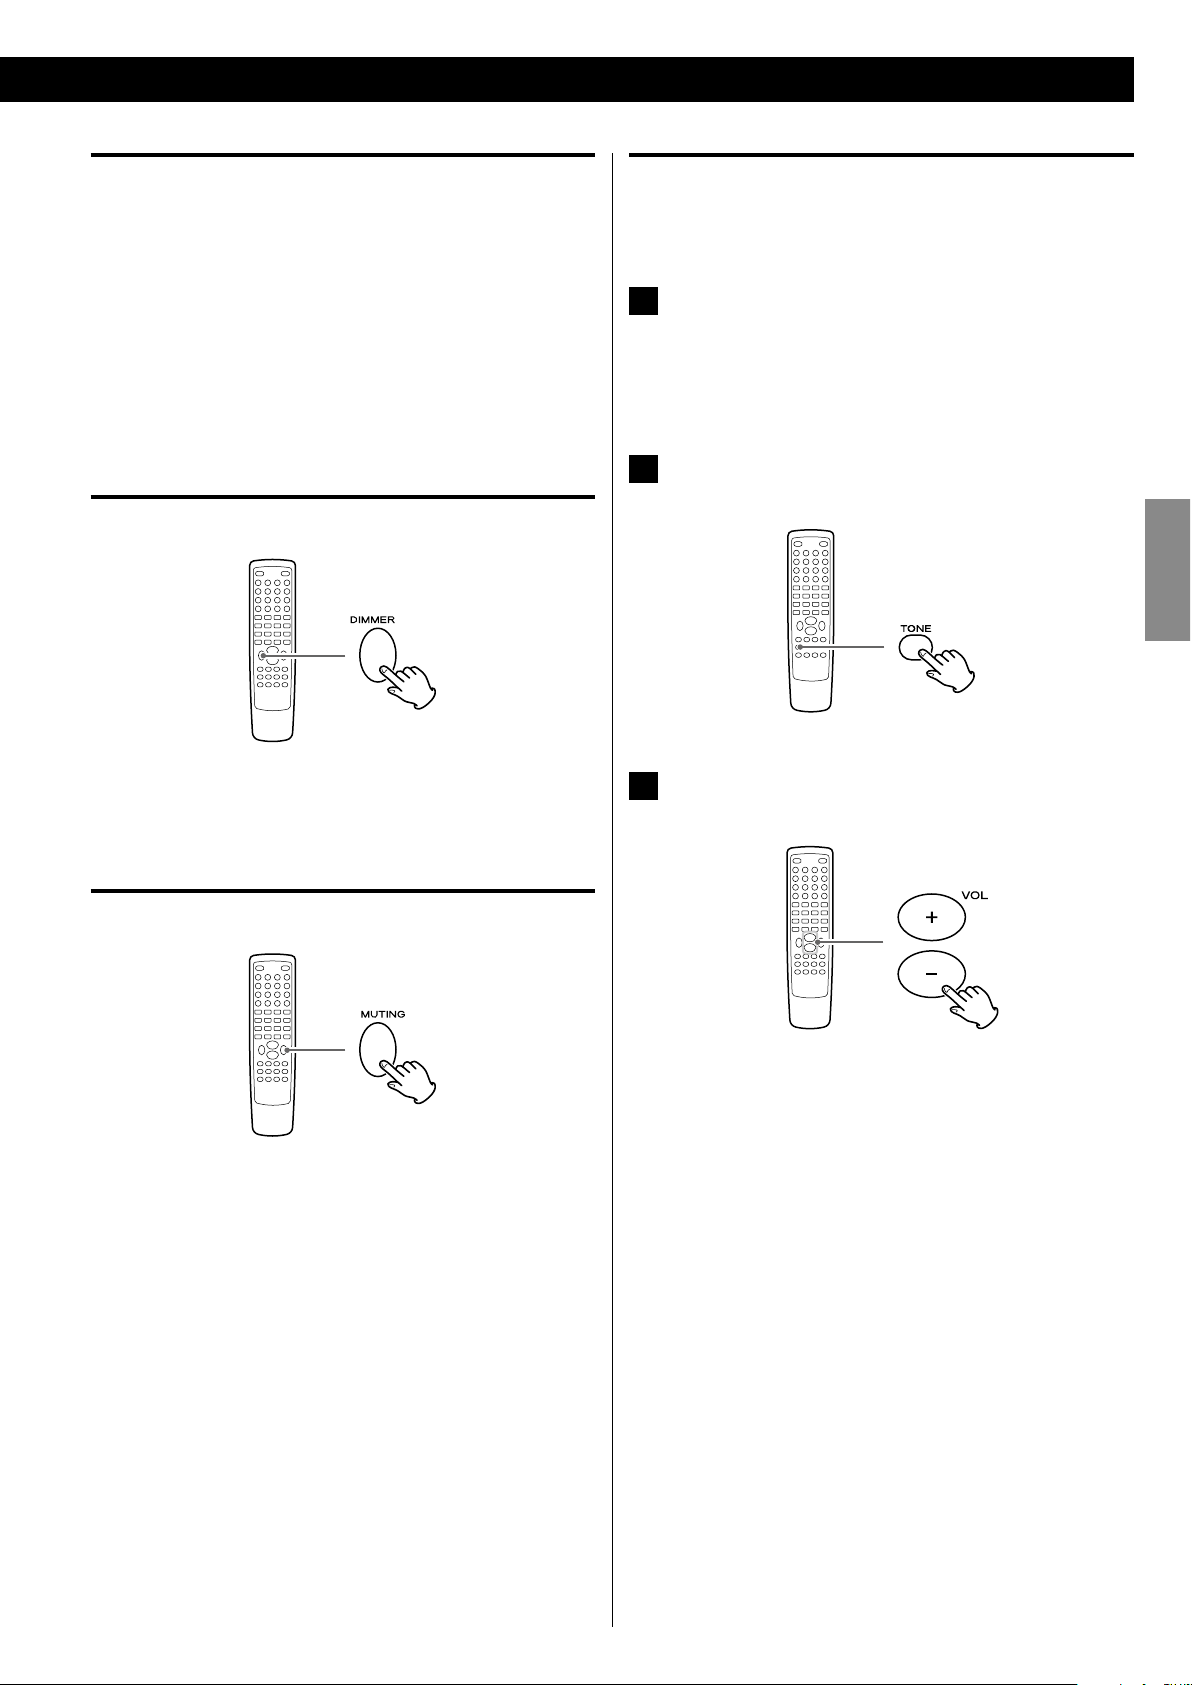
Dimmer
Press the DIMMER button to dim the display.
Press the button again to cancel the dimmer function.
Muting
To mute the sound temporarily, press the MUTING button. Press
the MUTING button again to restore the sound.
< “MUTING” blinks on the display while muting is engaged.
< If you change the volume when the sound is muted, it will be
unmuted.
Adjusting the bass and treble
You can change the bass and treble sound between “–5” to “+5”.
1
If the LOUDNESS function is on, press the LOUDNESS
button to turn it off.
< When the LOUDNESS function is on, the bass and treble sound
level automatically set to “0”.
2
Press the TONE button repeatedly to select Bass or
Tre bl e.
3
Press the VOLUME buttons to adjust the sound level
within 5 seconds.
The higher the treble number, the more the high frequencies
are emphasized.
The higher the bass number, the more the low frequencies are
emphasized.
22
Basic Operation (2) Getting Started with an iPod
To play your iPod through the DR-H338i, you must first insert the
adapter for your model of iPod.
1
Select the Dock Adapter that fits your iPod.
No.4 : 20 GB + U2
iPod with click wheel 20 GB,
iPod with click wheel U2 Special Edition 20 GB,
iPod with color display 20/30 GB,
iPod with color display U2 Special Edition 20 GB,
iPod with video 30 GB,
iPod with video U2 Special Edition 30 GB,
iPod Classic 80/120 GB
No.7 : 60GB(color) + Photo 40/60 GB
iPod with click wheel 40 GB,
iPod with color display (iPod photo) 40/60 GB,
iPod with color display 60 GB,
iPod with video 60/80 GB,
iPod Classic 160 GB
< Use the adapter that supplied with the iPod or a commercially
available one to use the other types of iPod.
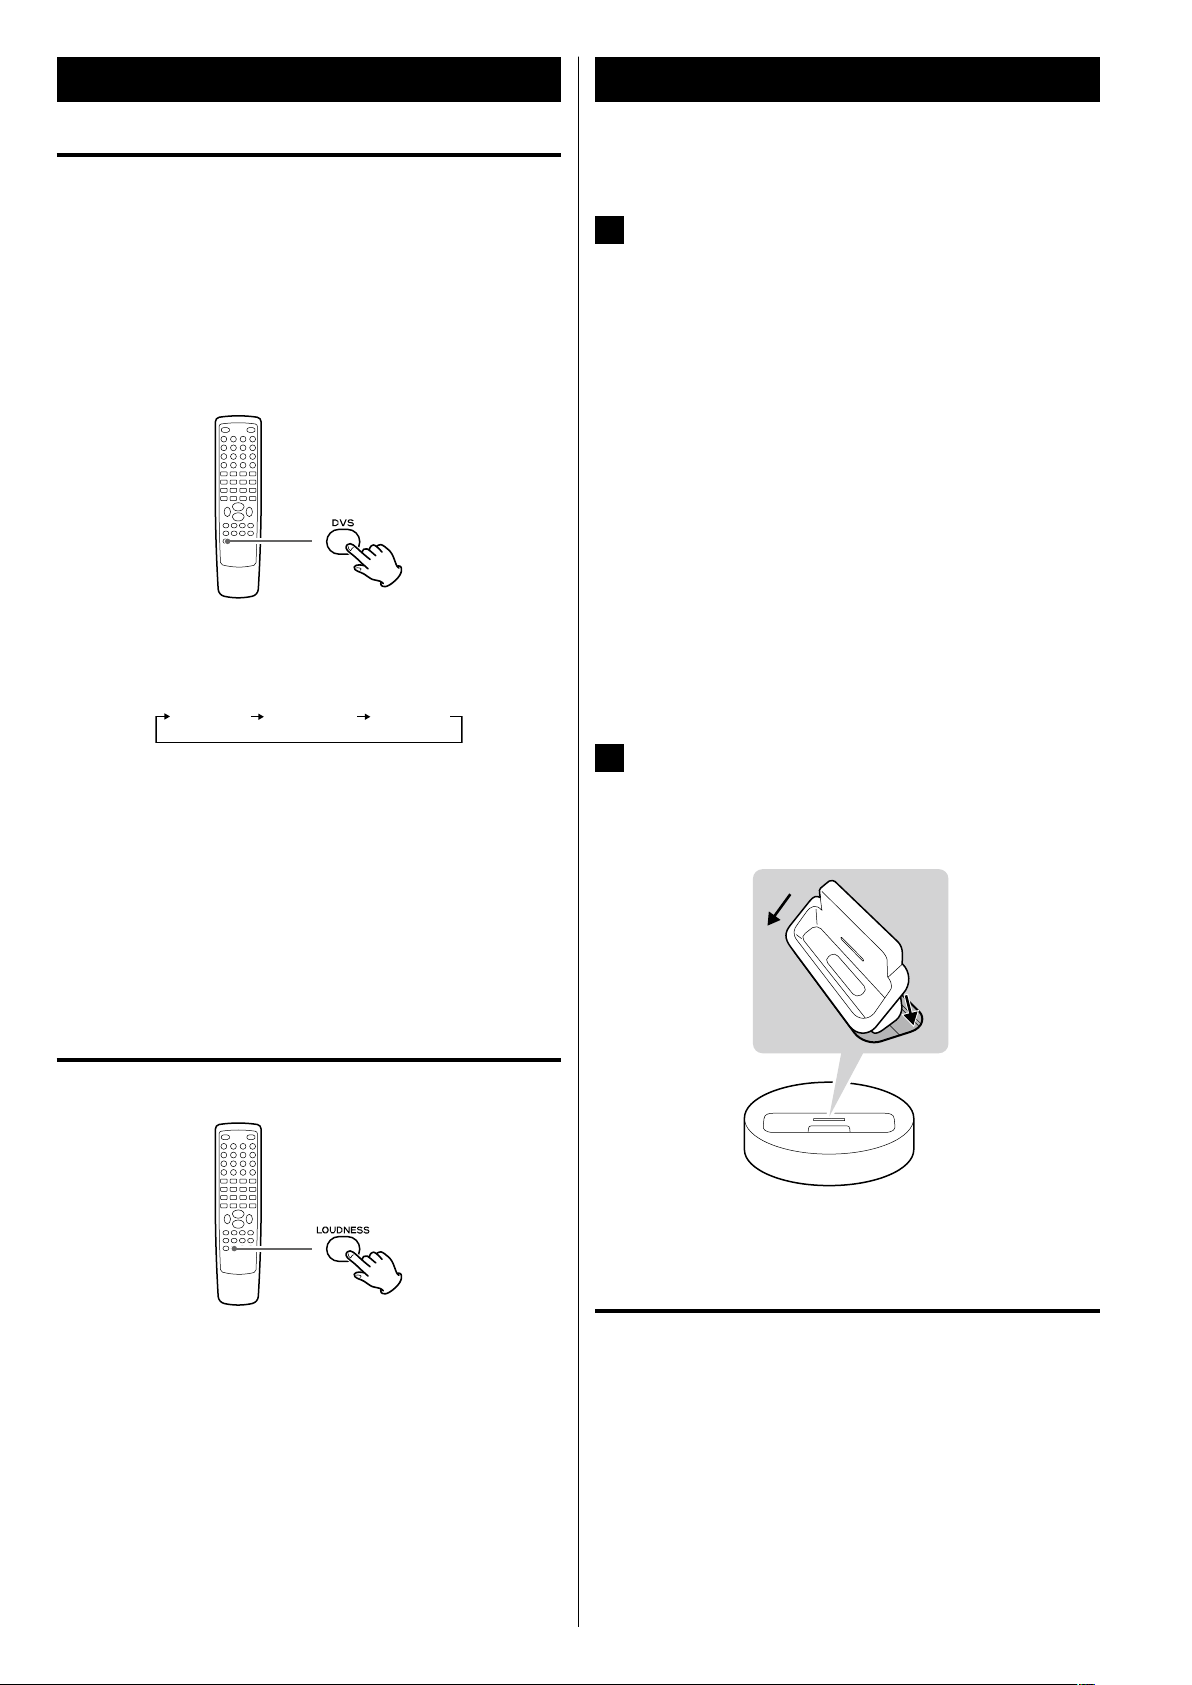
2
Insert the adapter into the DR-H338i dock.
Fit the front edge of the adapter into the Dock, and then press
the back edge of the adapter onto the Dock until a slight “click”
is heard indicating the adapter is inserted correctly.
1
2
< To remove the adapter, hold its left and right sides and gently
pull it up.
Compatible iPod software
If your iPod will not work with the DR-H338i or with the remote
control unit, software update might solve the problem.
DVS (Dolby Virtual Speaker)
(DISC/USB mode only)
Dolby Vir tual Speaker technology simulates a highly realistic
5.1-speaker surround sound listening environment from as few as two
speakers. Dolby Virtual Speaker technology also creates a wider twochannel environment during playback of stereo CDs and MP3 content,
and when combined with Dolby Pro Logic II processing, delivers a
virtual surround listening experience from any high-quality stereo
source.
Press DVS button repeatedly to select the listening mode.
Each time the DVS button is pressed, the mode changes as follows:
DVS Ref (Reference mode):
The width of the front sound image is defined by actual distance
between your two speakers.
DVS Wide (Wide mode):
The width of the image seems to extend beyond the speakers.
< The DVS and the LOUDNESS buttons do not work together.
LOUDNESS button
This button compensate for the loss of bass at low volumes.
Select off when listening at normal levels.
< When the LOUDNESS function is on, the bass and treble sound
level automatically set to “0”. If you want to change the bass and/or
treble sound level, turn the LOUDNESS function off.
23
ENGLISH
Pausing playback
During playback, press the Play/Pause button (G/J). Playback
stops at the current position.
< To resume playback, press the Play/Pause button (G/J) again.
Skipping playback
During playback, press the Skip buttons (.//) repeatedly
until the desired song is found.
< When the Skip button (.) is pressed during playback, the
current song will be played from the beginning. If you want to play
the previous songs, press the Skip button (.) twice or more.
Searching for a part of a song
Hold down
During playback, hold down the Search button (m or ,) and
release it when the part you want to listen to is found.
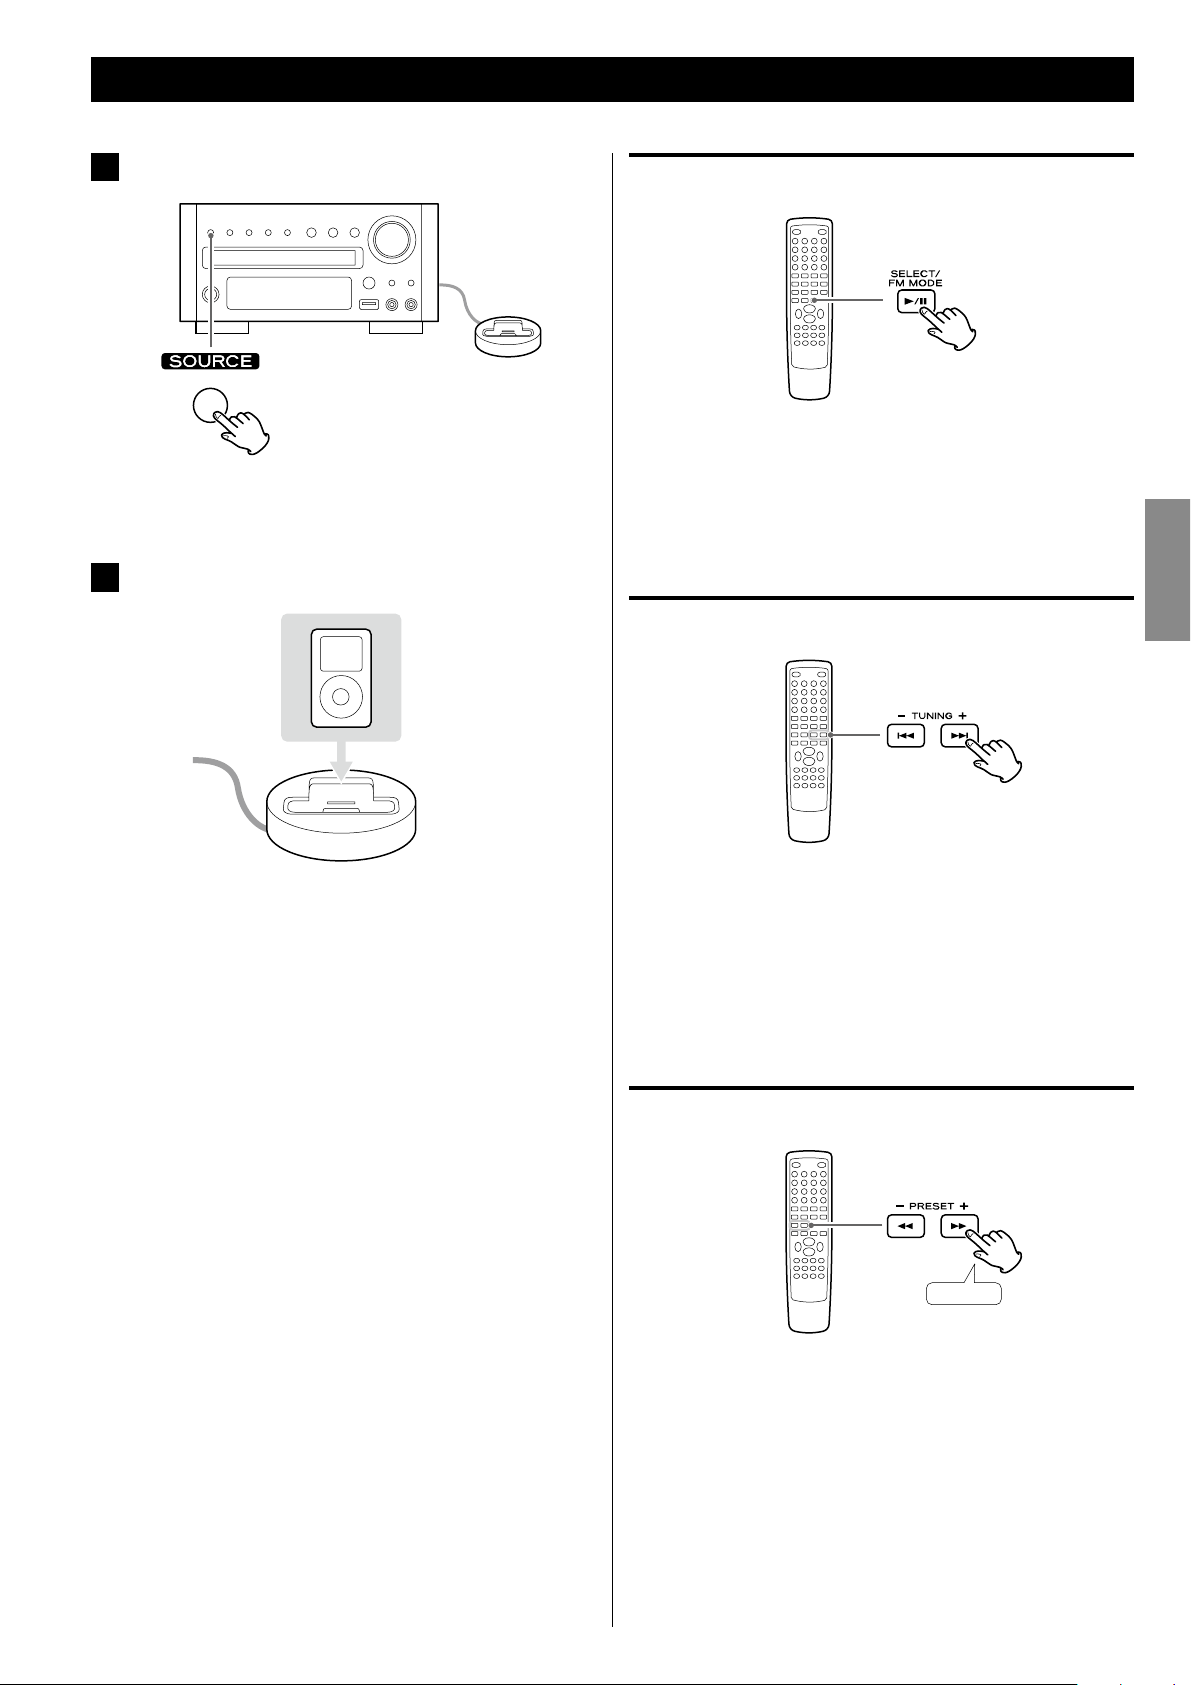
1
Press the SOURCE button to select “iPod”.
< You can also select iPod by pressing the iPod/USB button on the
remote control unit once or twice.
2
Insert the iPod into the dock.
The iPod automatically turns on and starts playback from the
iPod’s music list.
< When the iPod is inserted while a source other than iPod is
selected, the iPod will turn on and enter the pause mode.
< Make sure to use an appropriate dock adapter (see previous
page).
< The iPod is recharged when it is plugged into the dock and
the DR-H338i is on. While the unit is on standby, the iPod is not
recharged because the unit’s power consumption is minimized
to meet the regulation of IEA.
< When headphones are plugged into the iPod, sound comes
from both the speakers and the headphones.
< The video signal from a connected iPod is output only from the
video output terminals of DR-H338i.
Listening to an iPod (1)
24
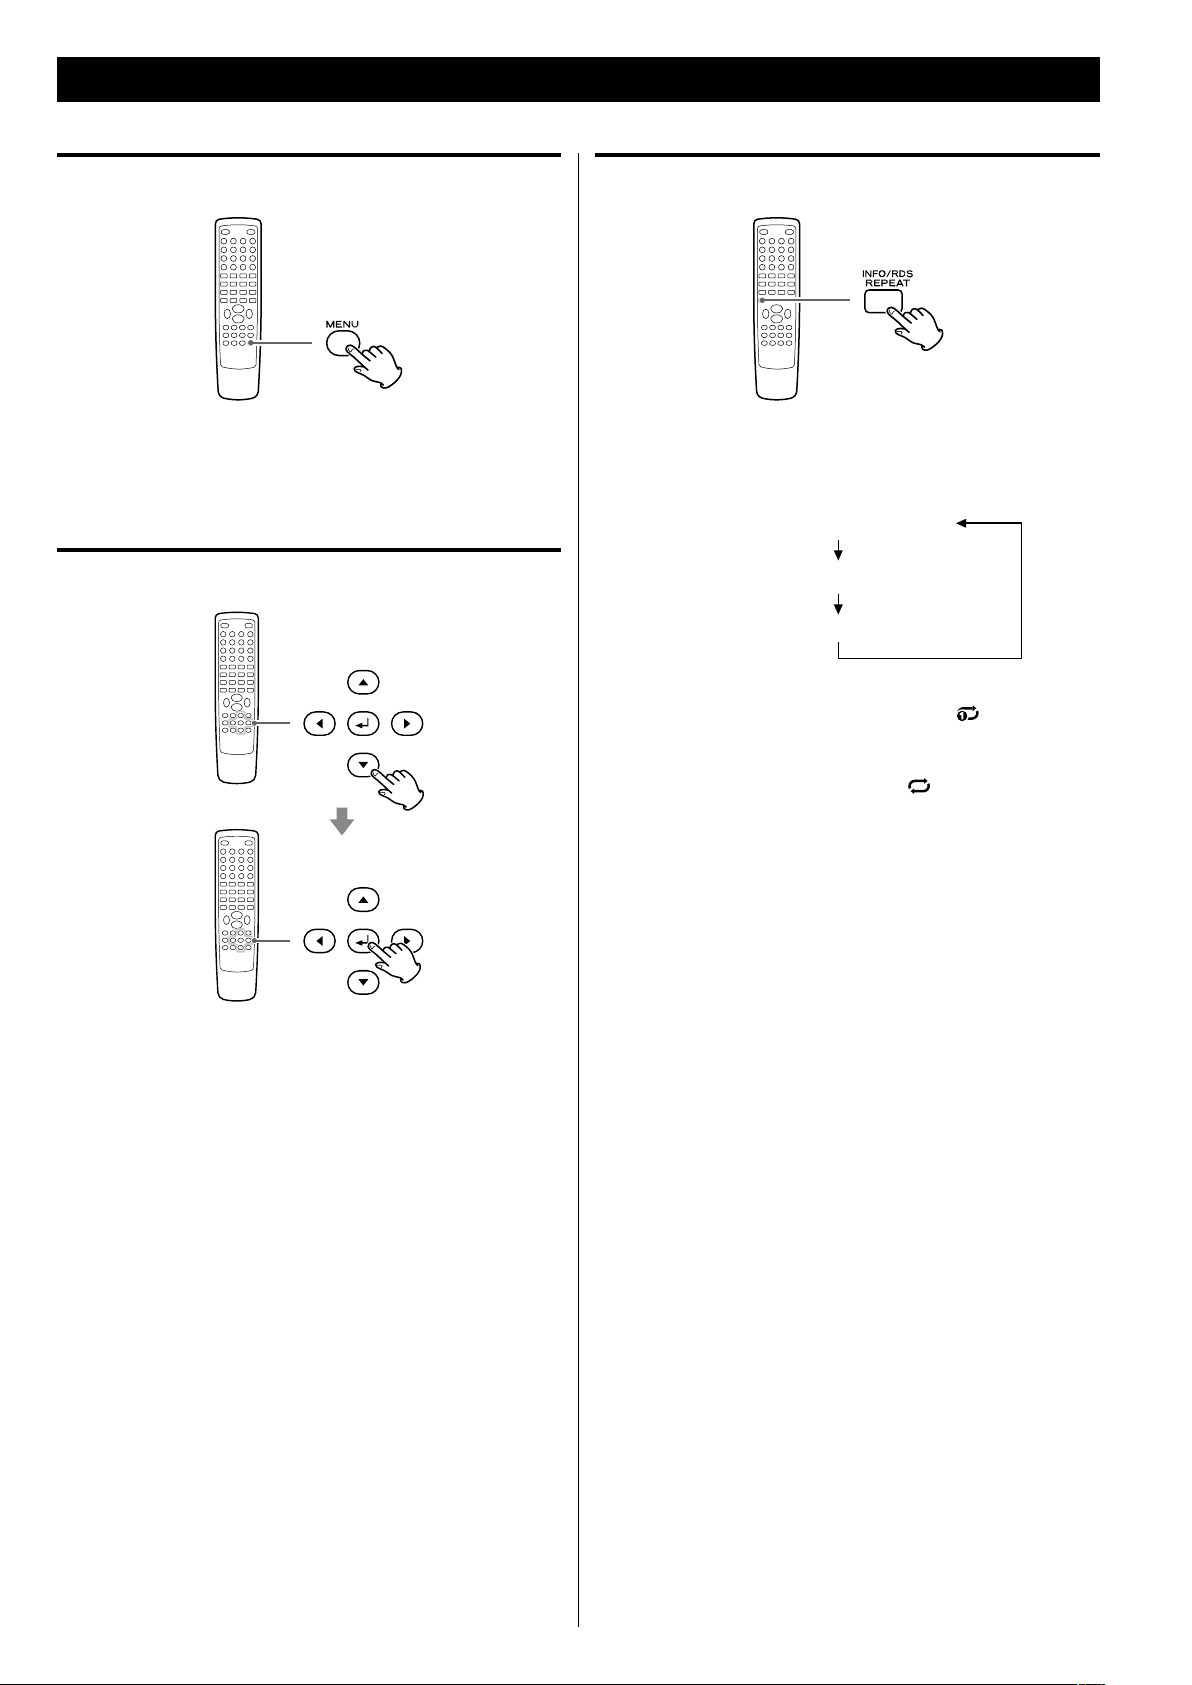
Going back to the previous menu
Press the MENU button.
This button has the same functions as its iPod counterpart.
Selecting the menu item
Press the b/5 buttons to scroll to the menu item you want, and
then press the Enter button.
Repeat playback
Each time the REPEAT button is pressed, the repeat mode of iPod
changes as follows:
< When you select “One”, the Repeat One icon ( ) appears on the
iPod’s display.
< When you select “All”, the Repeat icon ( ) appears on the iPod’s
display.
Listening to an iPod (2)
25
ENGLISH
DVD VCD CD MP3 WMA JPEG DIVX
Listening to a Disc
1
Press the SOURCE button to select “DISC Source”.
< When no disc is loaded in the disc tray, “NO DISC” is displayed.
2
Press the Open/Close button (L) to open the tray.
3
Insert the disc label side up.
< In the case of double-sided discs, the side to be played should
be face down.
< Make sure the disc is centered in the tray in order to avoid any
malfunction or jamming of the tray or damage to the disc.
4
Press the Open/Close button (L) again to close the tray.
The tray will close. Take care that you do not catch your fingers
in the tray.
It takes a few seconds for the unit to load the disc.
< Some discs may automatically start playback.
5
Press the Play/Pause button (y/J) to start playback if
playback has not started automatically.
If a menu is shown on screen (some DVD or video discs may
show such a menu), see “On-screen menu” on the next page.

26
An on-screen menu is shown when a DVD or video CD with playback
control (PBC) content is loaded.
The way in which the menu works may differ according to disc.
DVD menus
Use the Cursor buttons (5/b/t/g) to select the menu item from
a DVD, and confirm the selection using the Enter button.
Returning to the menu screen
Press either the MENU button or the TITLE button.
< Depending on the disc, pressing the MENU button during playback
may restart playback from the first chapter.
< This function is not available with a DVD-RW disc with VR content.
For about USB memory device compatibility, see page 8.
1
Press the SOURCE button to select “USB Source”.
2
Plug your USB memory device into the USB connector.
It takes a few seconds for the unit to load the USB memory
device. Some files may automatically start playback.
< You can reverse steps 1 and 2.
< Only USB flash memory can be used. Do NOT use a high-
capacity USB hard disc with this unit.
3
Press the Play/Pause button (y/J) to start playback if
playback has not started automatically.
Listening to an USB Memory Device On-screen Menu (1)
MP3 WMA JPEG DIVX
DVD VCD MP3 WMA JPEG
27
ENGLISH
MP3 and Windows Media-formatted audio files
When a disc or USB is loaded, a list of directories appears on the
screen.
< It may take 30 seconds or more to display the list of files depending
on the disc you are playing back.
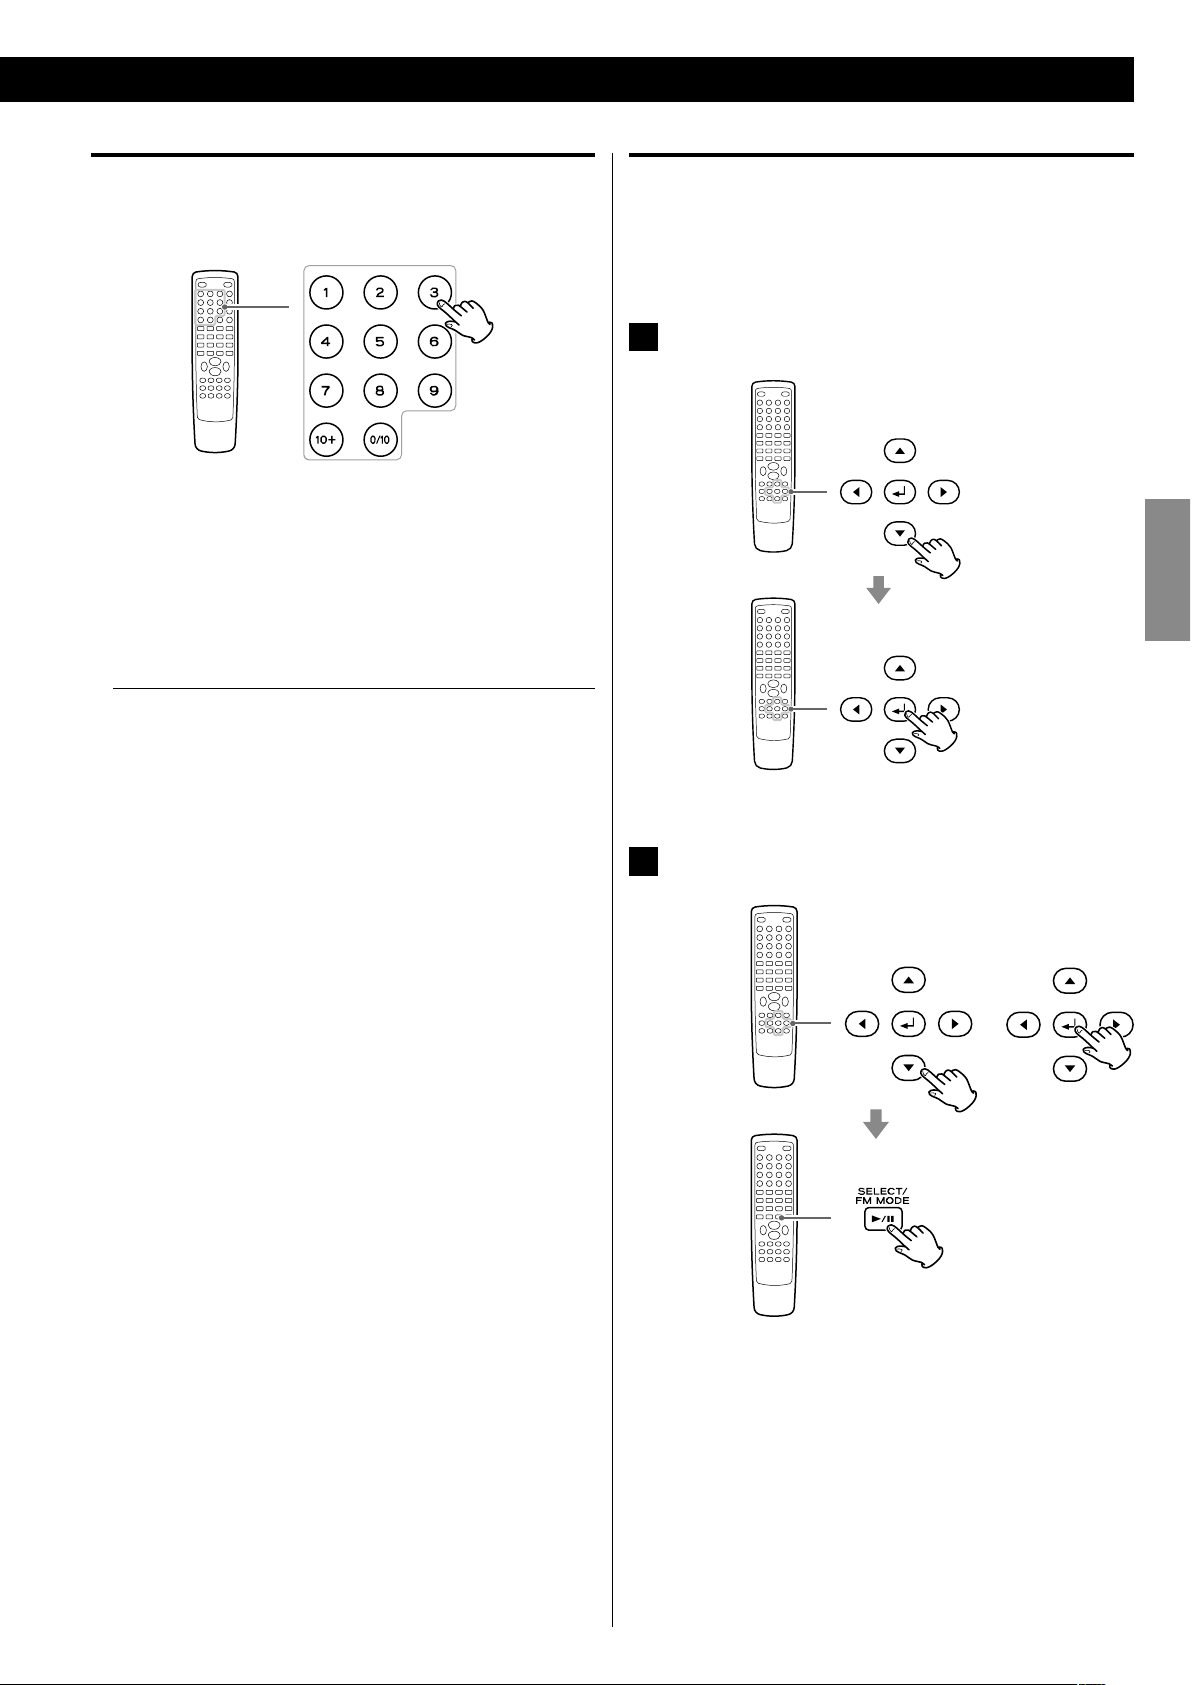
1
Select a directory by pressing the 5/b buttons and
press the Enter button.
File names will appear on the screen.
2
Select a file and press the Enter button or the Play/Pause
(y/J) button. Playback will start from the selected file.
< Press the MENU button to switch between the folder list and the
file list. When you select the file list, you can select a file without
selecting the folder.
< If you want to return to the parent folder, display the folder list
using the MENU button, select “.........” using the Cursor buttons and
press the Enter button.
< Depending on the disc, invisible folders such as “TRASH” might
be shown on the screen. Please disregard folders which do not
contain playable files.
< During playback, elapsed time of the current file is displayed on
the front panel display.
Video CDs with PBC
When a Video CD (Version 2.0) or Super Video CD with Playback
Control functions (PBC) is loaded, a menu will appear on the screen.
Select an item using the Number buttons to start playback.
< Press the / button to advance to the next page. Press the .
button to return to the previous page.
< If you press the TITLE button during playback, the menu will
appear on the screen.
Turning on or off the PBC function
Press the MENU button to turn the PBC function on or off.
When the PBC function is off:
If you press the Play/Pause button (y/J) in the stop mode,
playback will start from the first track.
When the PBC function is on:
If you press the Play/Pause button (y/J) in the stop mode, a
menu will appear on the screen.
Select an item using the Number buttons to start playback.
28
Press the Play/Pause button (y/J) to pause audio playback. Any
DVD or video CD image is frozen.
Press the Play/Pause button (y/J) again to restart playback.
CAUTION
Do not leave player in the pause mode for extended periods of
time. Damage to your TV or the player may occur.
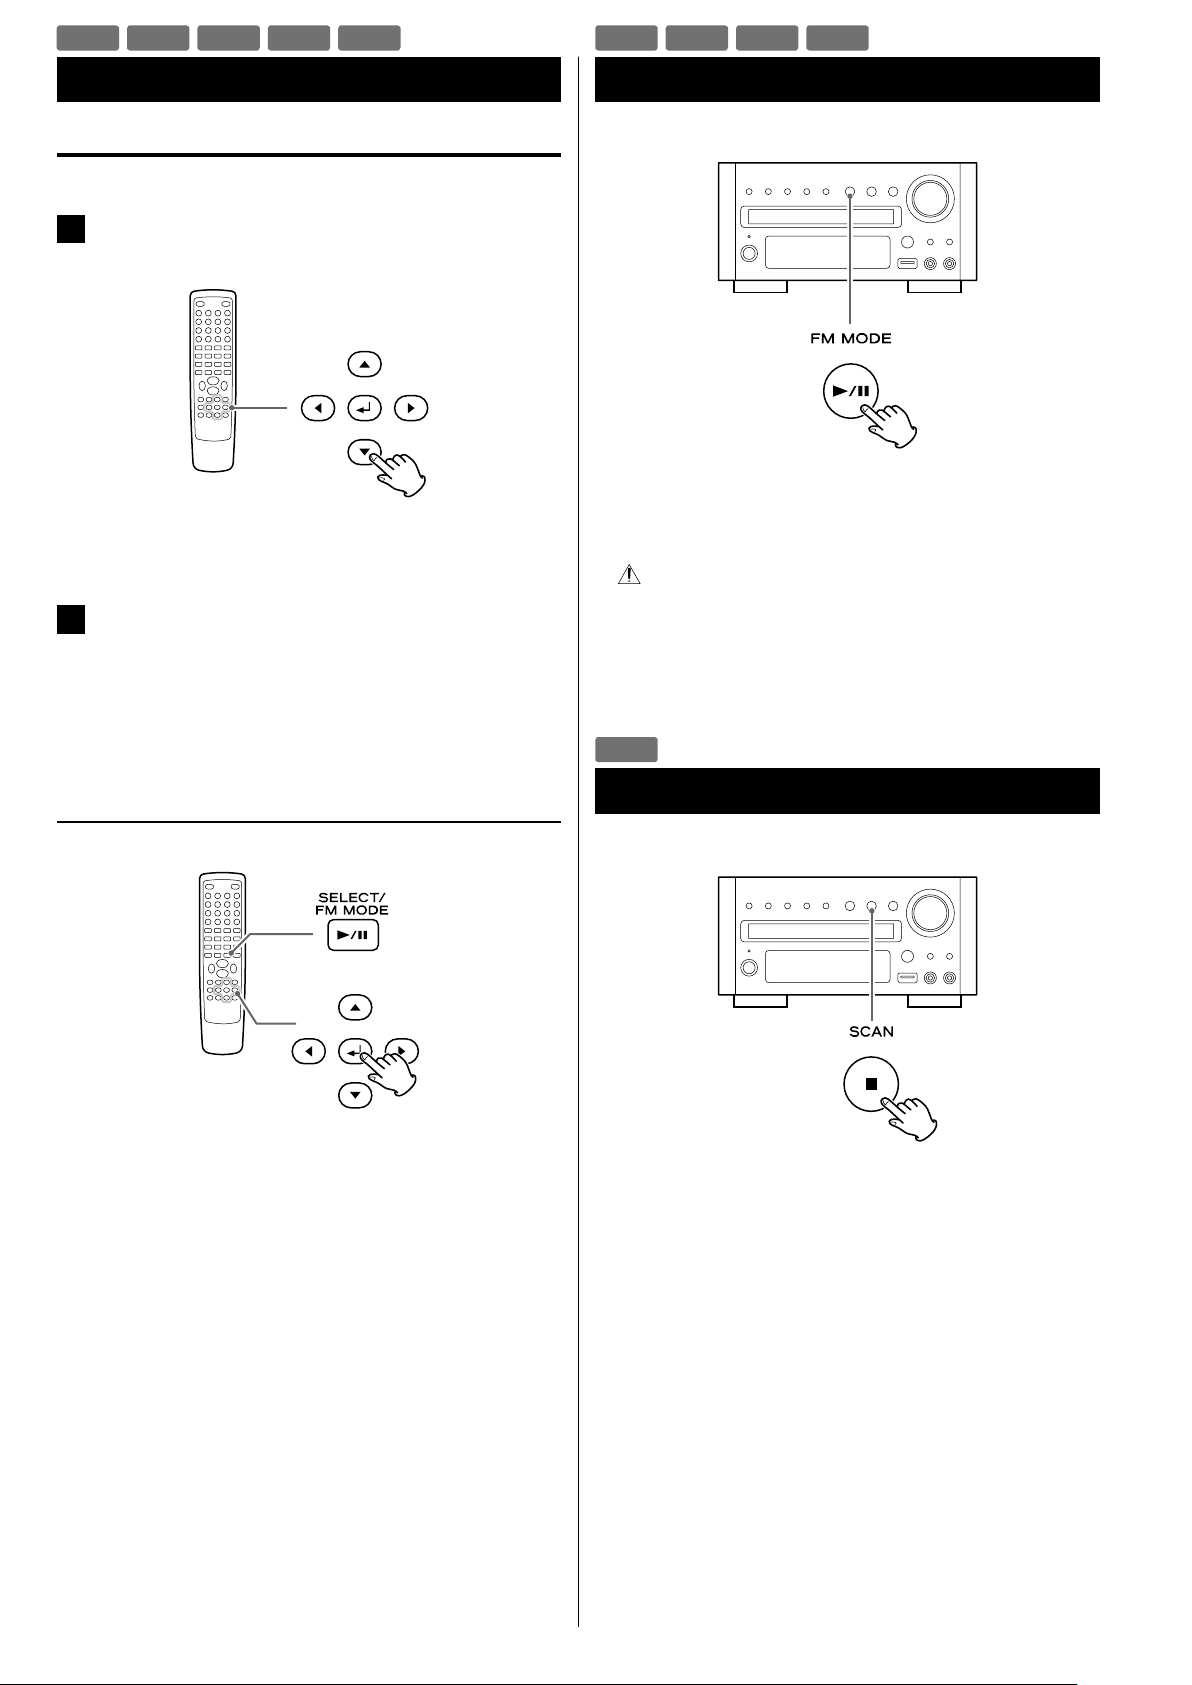
When the Stop button (H) is pressed, playback is stopped, and
the display shows “Press Play Key To Continue”. Pressing Play/
Pause (y/J) continues playback.
Pressing any of the following buttons cancels resume mode:
Stop (H) in the stop mode,
Open/Close (L), SOURCE, STANDBY/ON
JPEG files
1
Choose a picture in the directory list by pressing the 5/b
buttons.
After a short wait a thumbnail of the picture will appear on the
right.
2
Press the Cursor buttons to select a picture to large
view.
< Some photos may appear distorted due to the configuration or
characteristics of the disc. Larger photos may take a short while
to appear due to their larger data size.
Viewing the picture at full-screen size
or
Press the Enter or Play/Pause button (y/J).
< When viewing at full-screen size, press Skip buttons (.//) to
view a previous or next photo. You can also use the g /t buttons
to rotate the image.
< When viewing at full-screen size, press the Stop button (H ) to
display a number of thumbnails at a time on the screen. You can
use the Cursor buttons to select a particular photo and then press
the Enter button to view that image at full-screen size. You can also
select “Slide Show” to view all the photos in a series or “Menu” to
adjust settings. You can also select gPREV or NEXTt to move to
the previous or next screen of thumbnail images.
< Press the MENU button to exit thumbnail or full-screen views.
On-screen Menu (2)
DVD VCD MP3 WMA JPEG
Stopping Playback (Resume Mode)
Pausing Playback (Freezing a Picture)
DVD VCD JPEG DIVX
DVD
29
ENGLISH
Searching for a Part of a Chapter or Track
Skipping Playback
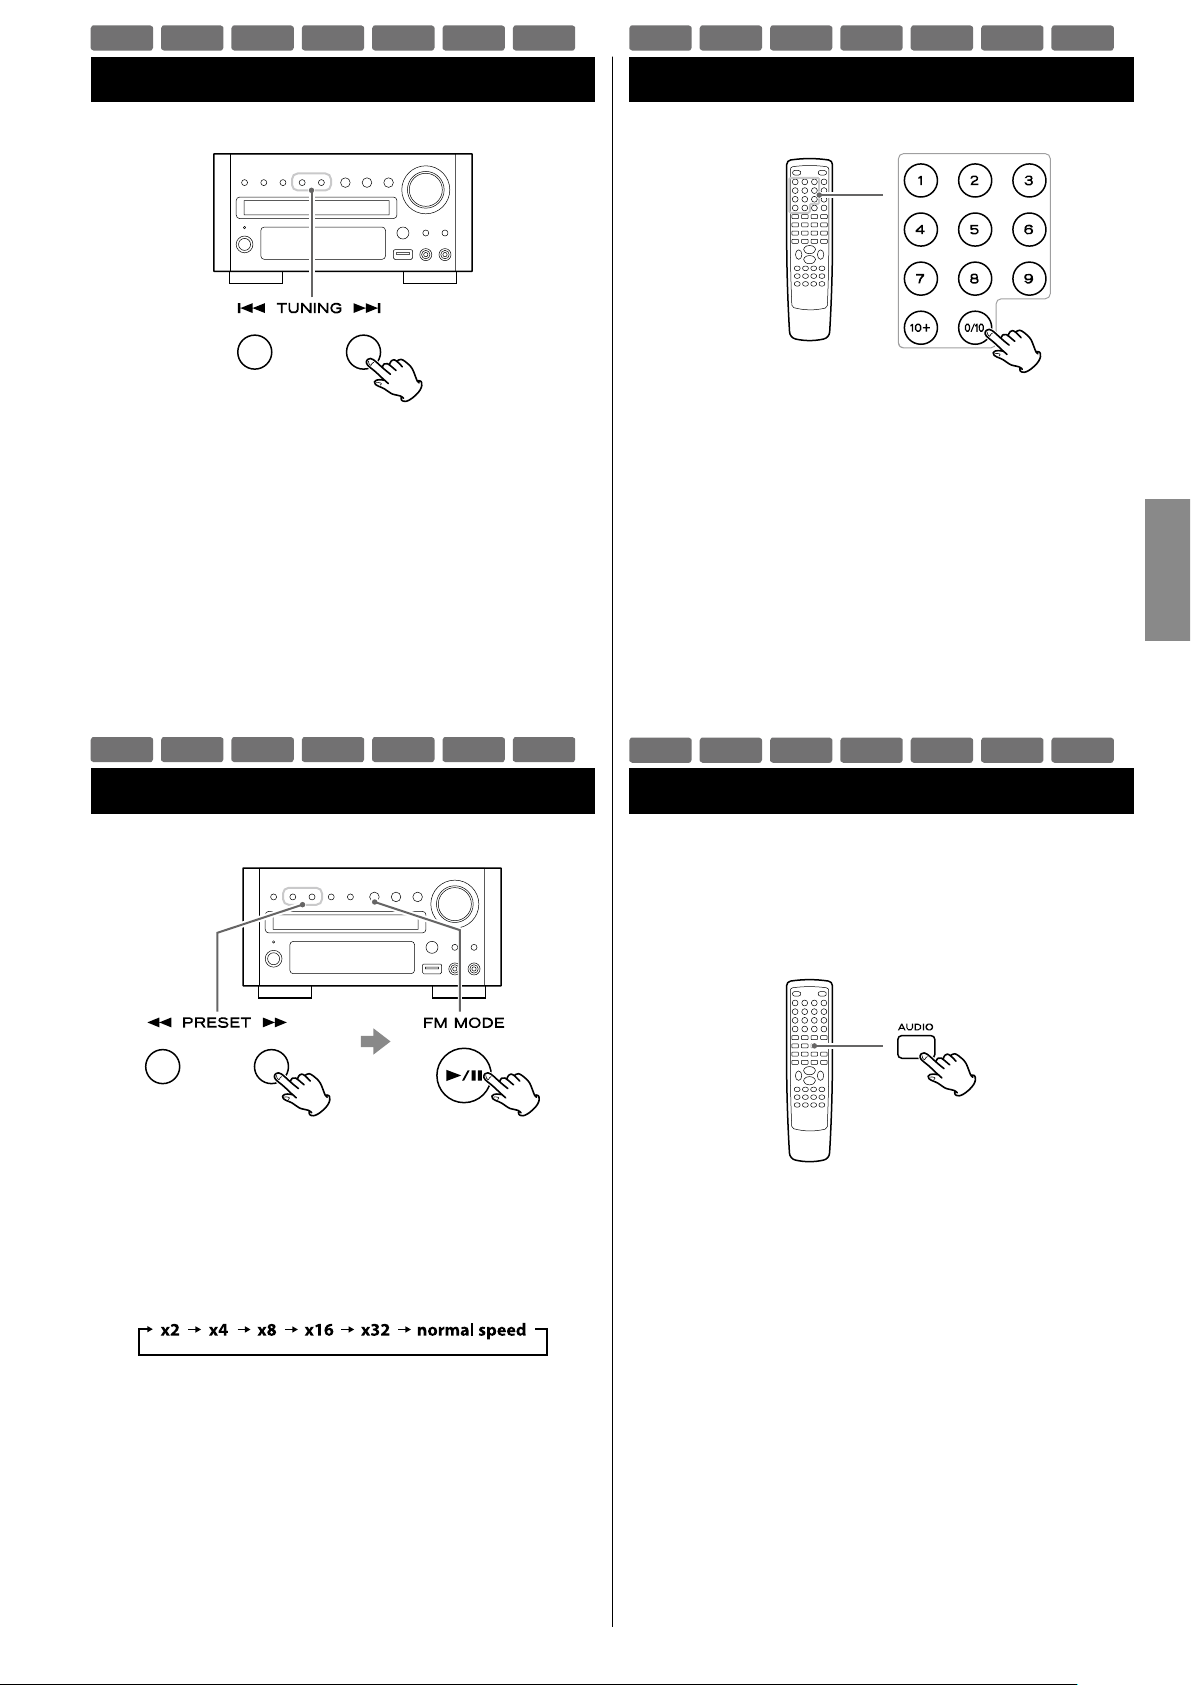
Press the Skip button (.//) repeatedly until the desired
chapter or track is found. The selected chapter or track will be
played from the beginning.
< When playing back video CDs with PBC, the . button is
disabled (page 27).
To Search quickly the disc in the forward or reverse direction,
press the Search buttons (m or ,) during playback.
Press the Play/Pause button (y/J) when the part you want to
listen to is found.
Each time the Search button (m or ,) is pressed, the search
speed changes as follows:
< CD/Video CD/MP3: When you forward fast to the end of a track
(or reverse to the beginning of a track), the scan function will be
cancelled and normal speed playback will continue.
< The sound is muted during fast search of DVD and video CD.
< This function may not work with some discs.
Selecting a Chapter or Track
DVD, Video CD and CD
Use the Number buttons to select tracks or chapters for playback.
For instance, to select track number 35, press “10”, “10”, “10” and “5”.
< The Number buttons do not work during PBC playback of video
CDs (page 27).
MP3, WMA, JPEG and DIVX
To select a file, enter 3 digit numbers. As an example, to select
number 5, press “0”, “0” and “5”. (Optionally, you may press just the
number “5” and then wait a few seconds.)
Selecting Audio
Many DVD discs include audio in different languages, as well as stereo
and multi-channel surround versions of the soundtrack.
CDs and video CDs allow the left, right or stereo channels to be
selected.
Pressing the AUDIO button changes between the different audio
tracks available, and the result is shown on screen.
< Sometimes the picture playback will appear to freeze momentarily
when the audio is changed.
< It may be necessary to change the audio on some discs using the
on-screen disc menu.
< Some discs cannot have their audio changed in the way described
here, as well as some discs which only have one audio stream. If
you attempt to select different audio with these discs, the prohibit
icon “A” is shown on screen.
DVD VCD CD MP3 WMA JPEG DIVX
DVD VCD CD MP3 WMA JPEG DIVX
DVD VCD CD MP3 WMA JPEG DIVX
DVD VCD CD MP3 WMA JPEG DIVX
30
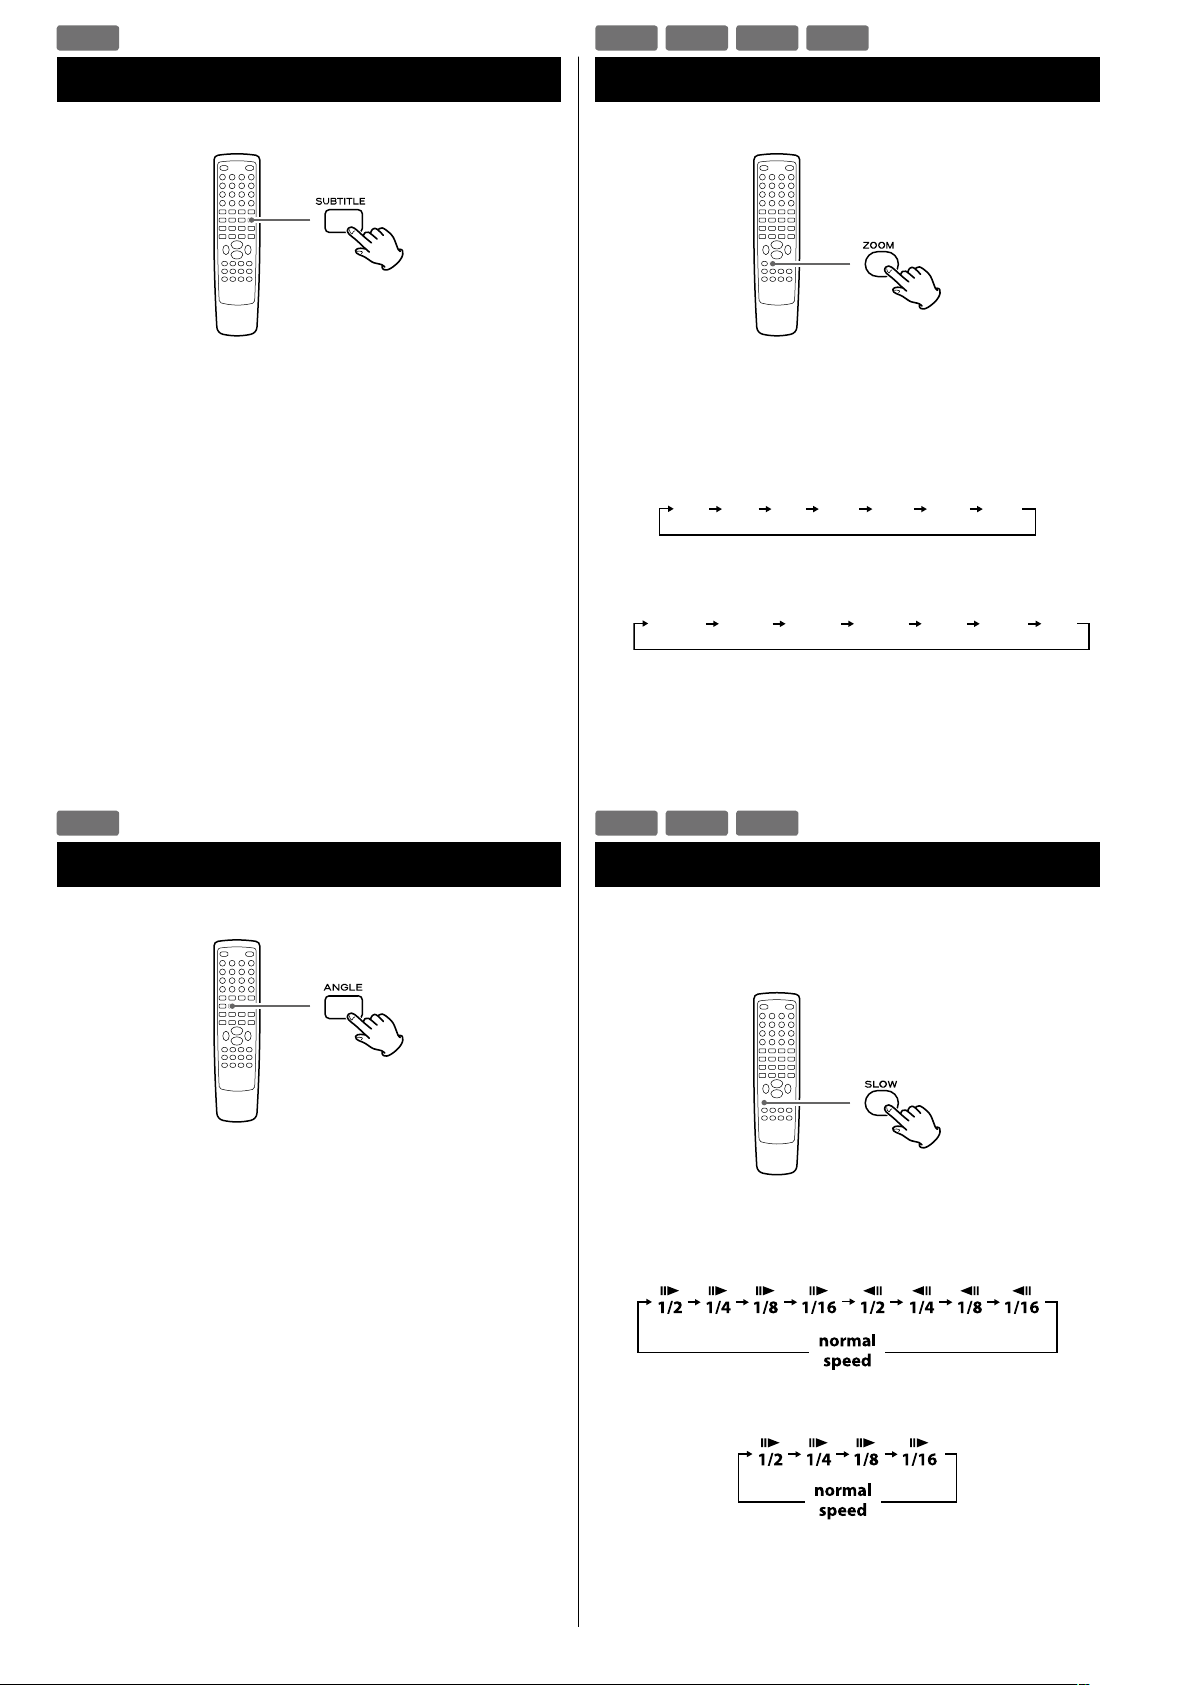
Selecting Subtitles
Repeated presses of the SUBTITLE button cycle through available
languages on a disc.
< Subtitles do not always appear immediately after the language has
been selected. It may take a few seconds until the subtitles appear.
< Some captions on some discs cannot be removed or changed
using this button. Some discs may have only one sub-caption
language, in which case, the choice is obviously restricted to one
subtitle or no subtitles.
< It may be necessary to change the subtitles on some discs using
the on-screen disc menu.
< Some discs cannot have their subtitles changed in the way
described here. If you attempt to select a different subtitle with
these discs, the prohibit icon “A” is shown on screen.
Picture Zoom
To zoom the picture, press the ZOOM button during playback.
Each time the ZOOM button is pressed, the magnification level
changes as follows:
DVD, DivX, Video CD:
2x 3x 4x 1/21/3 1/4 O
JPEG:
< You can shift the zoom point by pressing the Cursor buttons
during zoom playback.
< Zooming does not work on subtitles or menu screens.
DVD VCD JPEG DIVX
Slow Motion
For video discs only (DVD and video CD)
To play a disc in slow motion, press the SLOW button. Each time
the SLOW button is pressed, the speed changes as follows:
DVD:
Video CD/DivX:
To resume normal playback, press the Play/Pause button (y/J).
< The sound is muted during slow-motion playback.
DVD VCD DIVX
DVD
Changing Camera Angle
When a scene recorded with multiple angles is played, the angle
icon appears on the screen. Each time you press the ANGLE button
while the angle icon is displayed, the camera angle changes.
< If you attempt to select a different angle with a disc which no other
angle is recorded, the prohibit icon “A” will be displayed.
< The ANGLE button does not work during pause mode.
DVD

31
ENGLISH
Each time the REPEAT button is pressed, the mode changs:
< This feature is not available for some discs. The “prohibit” mark is
shown on screen in such cases.
< If one of the following buttons is pressed, repeat mode will be
canceled:
STANDBY/ON, Open/Close (L), SOURCE
Repeat and Shuffle Playback
DVD VCD CD MP3 WMA JPEG DIVX
DVD
Repeat Chapter Repeat Title Repeat All
O
Repeat Chapter
The currently selected chapter will be played repeatedly. If
another chapter is selected during repeat playback, the newlyselected chapter will repeat.
Repeat Title
The currently selected title will be played repeatedly.
Repeat All
All the contents in the disc will be played repeatedly.
Video CD
Repeat Track Repeat All
O
Repeat Track
The currently selected track will be played repeatedly. If another
track is selected during repeat playback, the newly-selected track
will repeat.
Repeat All
All the contents in the disc will be played repeatedly.
< The repeat function does not work during PBC playback of video
CDs. (page 27)
CD/MP3/WMA/JPEG/DivX
Rep One
The currently selected chapter/track/file will be played repeatedly.
If another chapter/track/file is selected during repeat playback,
the newly-selected chapter/track/file will repeat.
Rep All
CD
All the contents in the disc will be played repeatedly.
MP3/WMA/JPEG/DivX
All the files in the currently selected folder will be played
repeatedly.
Shuffle
CD
The whole contents of the disc will be played randomly.
MP3/WMA/JPEG/DivX
The whole files in the currently selected folder will be played
randomly.

32
Changing the Display Mode
Each time the OSD (On Screen Displays) button is pressed during
playback, following information appears on the screen.
DVD
CD/Video CD
DivX
DVD VCD CD DIVX
A-B Repeat Playback
You can Repeat Playback of a designated section.
1
Start playback and designate the point at which the A-B
repeat should start (point A) by pressing the A-B button.
“A” appears on the screen.
2
When the point at which repeat playback should end
(point B) is reached, press the A-B button again.
“AB” appears on the screen.
The designated section will be played repeatedly.
< The Search button (,) can be used to fast-forward to point B
after designating point A.
< There should be more than 1 second between point A and
point B.
< To cancel the A-B Repeat, press the A-B button again.
DVD VCD CD MP3 WMA DIVX

33
ENGLISH
Time Search (VCD/CD)
You can start playback from the specified hour/minute.
1
During playback, press the TIME button twice.
Press twice
“- - : - -” is highlighted on the screen.
2
Within 7 seconds, enter your desired hour and minute
using the Number buttons.
For example, if the length of the current file is 3 minutes, enter a
number smaller than 3 minutes.
Playback starts from the selected part.
You can start playback from the specified hour/minute.
1
During playback, press the TIME button.
To search within the entire disc
Press the TIME button once.
“DT: - - : - -” is highlighted on the screen.
To search within the current track
Press the TIME button twice.
“TT: - - : - -” is highlighted on the screen.
To search within a track of the disc
Press the TIME button 3 times.
“T: - - / - -” is highlighted on the screen.
Then, enter the track number using the Number buttons.
(For example, when you want to select track 2, press “2”.)
2
Within 7 seconds, enter your desired hour and minute
using the Number buttons.
For example, if the length of the current track is 3 minutes, enter
a number smaller than 3 minutes.
Playback starts from the selected part.
Time Search (MP3/WMA)
VCD CD MP3 WMA

34
Chapter Search/Time Search (DVD)
Chapter search
You can start playback from the beginning of the specified chapter.
1
During playback, press the TIME button.
2
Within 7 seconds, enter your desired chapter number
(2 digit) using the Number buttons.
Playback starts from the beginning of selected chapter.
Time search
You can start playback from the specified hour/minute/second.
1
During playback, press the TIME button twice.
Press twice
If you want to search within the current title, press the TIME
button twice.
If you want to search within the current chapter, press the TIME
button three times.
2
Within 7 seconds, enter your desired hour, minute and
second using the Number buttons.
Playback starts from the selected part.
Chapter search
You can start playback from the beginning of the specified chapter.
1
During playback, press the TIME button.
“SELECT - - -” appears on the screen.
2
Within 7 seconds, enter your desired file number (3 digit)
using the Number buttons.
Playback starts from the beginning of selected file.
Time search
You can start playback from the specified hour/minute/second.
1
During playback, press the TIME button twice.
Press twice
“GO TO -:- -:- -” appears on the screen.
2
Within 7 seconds, enter your desired hour, minute and
second using the Number buttons.
Playback starts from the selected part.
Chapter Search/Time Search (DivX)
DVD
DIVX

35
ENGLISH
Programmed Playback (DVD, VCD, CD)
Up to 20 chapters/tracks can be programmed in the desired order.
1
If another source is selected, press the DISC button to
select “DISC Source”.
< You can also select “DISC Source” by using the SOURCE button
on the main unit.
2
Press the PROGRAM button.
The programme list appears on the screen.
< To cancel the programme mode, press the PROGRAM button
again, or select “EXIT” using the Cursor buttons and press the
Enter button.
3
Enter your desired “title and chapter number” or “track
number” using the Number buttons.
For example, to enter number 5, press “5”.
Repeat this step to programme more chapters/tracks.
< If you made a mistake, move the cursor on the track number and
overwrite it using the Number buttons.
< To progr amm e mo re tha n 11 chap ters/t rac ks, p ress th e /
button to advance to the next programme page (or select “t
l
”
using the Cursor buttons and press the Enter button). Press the
. button to return to the previous page.
4
When t he selection of c hapter/ track n umbers is
completed, select “START” using the Cursor buttons and
press the Enter button to start programmed playback.
< During programmed playback, the Number buttons do not
work.
< When playback ends, the programme is cleared.
< If you press one of the following buttons, the programmed
contents will also be cleared.
Open/Close (L), STANDBY/ON, Stop (H)
SOURCE (AUX, iPod/USB, TUNER)
DVD VCD CD

36
Programmed Playback (MP3, WMA, DIVX)
1
If another source is selected, press the SOURCE button to
select “DISC Source” or “USB Source”.
or
< You can also select “DISC Source” or “USB Source” by using the
SOURCE button on the main unit.
2
Select a file using the Cursor buttons and press the
PROGRAM button.
The file is added to the programme list.
3
Press the ME NU button once or twice to display the
programme list.
4
Highlight the first file in the programme list using the
Cursor buttons.
5
Press the Enter button or the Play/Pause button (y/J) to
start programmed playback.
or
< If you press one of the following buttons, the programmed
contents will be cleared.
SOURCE (AUX, iPod/USB, TUNER)
Open/Close (L) (in DISC mode), STANDBY/ON
MP3 WMA DIVX

37
ENGLISH
Settings (Introduction)
3
Use the Cursor buttons to navigate the menus.
If no cursor is visible on the screen, use the lef t and right
buttons (g/t) to select a page.
Use the up and down buttons (5/b) to highlight menu items
within the selected page.
Press the left button (g) to return to the upper menu.
4
Enter the menu item with the right Cursor button (t).
5
Use the up and down Cursor buttons (5/b) to select the
options within the menu item, and press the Enter button
to confirm the entry.
Individual menu functions are described from the next page.
Repeat steps
3
through 5 as required.
6
Press the SETUP button to exit the setup mode.
This chapter describes how to use the SETUP menu. Most settings and
adjustments are required to be set when you first use the system.
Using the SETUP menu, you can adjust the picture size, set a preferred
language for audio, the OSD (On Screen Displays), and limit playback
by children, etc.
For the detail of each menu, see following pages.
1
Turn on the unit, and the connected TV or monitor.
< The SETUP menu is available only in the DISC Source mode or
the USB Source mode. If another source is selected, press the
SOURCE button to select the DISC Source or the USB Source.
2
Press the SETUP button.
The setup menu appears on the screen.
< To exit the setup mode, press the SETUP button again.
< Although it is possible to enter the setup menu while playback
is continuing (or in resume mode), not all menu functions will be
available. To expand the number of available functions, press the
Stop button (H) twice.

38
Settings (GENERAL SETUP)
TV DISPLAY
The shape of the TV or monitor may not match the shape of the
movie frame. To avoid distortion on older TVs, you may need to
change the way in which the image is displayed. TVs use a 4:3 aspect
ratio; high-definition TVs use 16:9 aspect ratio (as do movies).
Note:
You may need to read your TV’s manual in conjunction with this
section in order to achieve the best results. Some discs do not allow
the aspect ratio to be changed and you will therefore have to change
the aspect ratio on the TV.
Make this setting while playback is stopped; you cannot do
this while playing back a disc.
4:3 PAN SCAN
This mode is used with 4:3 TVs. 4:3 images are displayed normally.
When showing 16:9 programmes, the full height of the screen is
displayed, and the left and right part of the image are cut off.
4:3 picture 16: 9 pic ture
4:3 LETTER BOX
This mode is used with 4:3 TVs. 4:3 images are displayed normally.
16:9 images are visible at their full width, but there are blank area
at the top and bottom of the screen.
4:3 picture 16: 9 pic ture
16: 9
Use with a 16:9 wide T V.
4:3 picture 16: 9 pic ture
< Some wide-screen discs that do not permit the Pan Scan mode
playback are automatically played in Letter Box mode.
< Depending on the DVD, 4:3 Letter B ox may b e s elected
automatically instead of 4:3 Pan Scan and vice versa.
< If 16:9 (Wide) is selected and a normal TV is connected, 16:9
content will appear distorted during playback (objects look thin).
OSD (On Screen Display) LANGUAGE
Select the desired language for onscreen menus of DR-H338i from
the following:
ENGLISH (Default)
FRANÇAIS
DEUTSCH
ITALIANO
ESPAÑOL
NEDERLANDS
SCREEN SAVER
ON (Default)
The screen saver starts up if nothing is played back and no
operations are performed for 4 minutes.
OFF
The screen saver does not start up.
DIVX(R) CODE
In case you need the registration code to play DivX files, select this.
The registration code of the player will be displayed.

39
ENGLISH
DIGITAL AUDIO SETUP (DIGITAL OUTPUT)
OFF
Select this when you do not use the DIGITAL OUT.
No signal is output from these terminals.
ALL
Select this when the unit is connected to an audio component
equipped with a built-in Dolby Digital decoder via the DIGITAL
OUT or the HDMI out terminal.
PCM only (Default)
Select this when the unit is connected to an audio component
such as amplifier/receiver, CD recorder or MD deck via the DIGITAL
OUT or the HDMI out terminal.
DOLBY DIGITAL SETUP (DUAL MONO)
STEREO
Left channel is output from the left speaker, and right channel is
output from the right speaker.
L-MONO
Left channel is output from the front left and right speakers.
R-MONO
Right channel is output from the front left and right speakers.
3D PROCESSING
This setting provides following sound effects:
OFF
CONCERT
LIVING ROOM
HALL
BATHROOM
CAVE
ARENA
CHURCH
Settings (AUDIO SETUP)
NIGHT MODE
ON
Applies dynamic range control to Dolby Digital material, reducing
the volume of loud sounds, and increasing the volume of quiet
ones. This is useful for spoken word material, and nighttime
listening etc.
OFF (Default)
Turns off the audio dynamic compression.
< This function is effective only when playing back a DVD disc
recorded with Dolby Digital. This control has no effect on other
discs.
< The overall effect of this setting depends on the disc being played,
the amplifier, and the speakers used for reproduction.
AUDIO SYNC
This setting can cause delays in the sound signal in 10 ms increments
ranging from 0 ms to 200 ms (only for digital signals recorded on a
disc or stored in an USB device; unavailable for analog signals coming
from AUX 1 or 2).
Depending on the TV, it may take approximately 100 ms (0.1 sec.) for
an image to appear after video signals are input, causing the image
to appear after the sound coming from the DR-H338i is heard.
If this happens or audio and video synchronization creates a less
than optimal viewing experience, adjust the delay with the left
(decrease) or right (increase) Cursor buttons (g/t).

40
VIDEO OUTPUT
This setting is for selecting the output terminal of the video. Only
the “Y Cb/Pb Cr/Pr” (Component output) can be selected.
< When your TV is connected to the HDMI terminal, no signal is
output from the component video output terminals.
TV MODE
This setting allows the selec tion of interlaced (INTERLACE) or
progressive-scan (PROGRESSIVE) video from the component video
outputs.
Progressive-scan video provides a better, clearer picture. However, it
is not supported by every TV or monitor, and you should ensure that
this is supported fully before turning on this option.
< When your TV is not compatible with progressive scan,
never select “PROGRESSIVE”. No picture will be shown on the
monitor.
In case you select “PROGRESSIVE” by mistake, disconnect the
connection of the DR-H338i and the TV, and then connect in
again. And change the setting to “INTERLACE” in the Video Setup
menu.
Consumers should note that not all high definition TV sets
are fully compatible with this product and may cause artifacts
to be displayed in the picture. In case of 480 (525) or 576 (625)
progressive scan picture problems, it is recommended that the
user switch the connection to the ‘standard definition’ output. If
there are questions regarding our TV set compatibility with this
model 480p (525p) and 576p (625p) DVD player, please contact
our customer service center.
COLOR SETTING
You ca n a dju st som e pa ram ete rs of vide o p ic ture.
1
Highlight “COLOR SETTING” and press the right button.
2
Use the left and right buttons (g/t) to selec t the
parameter.
SHARPNESS
This adjusts the sharpness of the picture shown on the monitor.
Select HIGH, MEDIUM or LOW using the Cursor buttons, and
press the Enter button.
BRIGHTNESS
This adjusts the brightness of the picture.
Use the left and right buttons to change the value, and press the
Enter button.
CONTRAST
This adjusts the picture contrast.
Use the left and right buttons to change the value, and press the
Enter button.
GAMMA
This adjusts the gamma value of the picture.
Select HIGH, MEDIUM, LOW or NONE using the Cursor buttons,
and press the Enter button.
HUE
This adjusts the green/red balance of the picture (only for
progressive-scan output).
Use the left and right buttons to change the value, and press the
Enter button.
SATURATION
This adjusts the saturation level.
Use the left and right buttons to change the value, and press the
Enter button.
LUMA DELAY
This adjusts the luma delay.
Select 0T or 1T using the Cursor buttons, and press the Enter
button.
3
Press the left button (g) to return to the Video Setup
Page.
Settings (VIDEO SETUP)

41
ENGLISH
HDMI
AUTO (Default)
Select this to have the signal output when your TV or monitor is
connected to the HDMI out terminal.
OFF
Select this when you do not use the HDMI out terminal.
No signal is output from the HDMI out terminal.
RESOLUTION
This setting is available only when your TV is connected to the HDMI
terminal, and the HDMI setting is set to “AUTO”.
Select proper resolution for your TV or monitor.
480P 60Hz (Default)
720P 60Hz
108 0i 60Hz
108 0P 60Hz
576P 50Hz
720P 50Hz
108 0i 50Hz
108 0P 50Hz
Settings (PREFERENCE) (1)
TV TYPE
PAL
Select this when the unit is connected to a PAL TV.
AUTO
Select this when the unit is connected to a MULTI TV.
NTSC (Default)
Select this when the unit is connected to an NTSC TV.
AUDIO, SUBTITLE, DISC MENU
You can select a preferred language for audio, subtitle and disc menu.
< When you select a preferred language that is not recorded on the
DVD, one of the recorded languages is automatically selected.
< You can override the AUDIO setting in the SETUP menu by pressing
the AUDIO button on the remote control unit while a DVD disc is
playing.
< You can override the SUBTITLE setting in the SETUP menu by
pressing the SUBTITLE button on the remote control unit while a
DVD disc is playing.
< Select OFF to turn subtitles off.
Note that subtitles on some discs cannot be removed even when
you select OFF.

42
PASSWORD MODE
You can temporarily unlock discs for playback according to the level.
To change this setting, select ON or OFF, enter your password, and
press the Enter button.
ON
You need a password to change the level of parental control.
OFF
You can change the level of parental control without a password.
You cannot temporarily unlock discs for playback.
PASSWORD
You can set a new password for parental control.
The default password is 2580.
1
Select “CHANGE” and press the Enter button.
2
Enter 2580 (or your privacy password) using the Number
buttons.
3
Enter a new password.
4
Enter the same password again to confirm.
5
Press the Enter button.
Note that you will need your password to change the level of
control in the future as well as to temporarily unlock discs for
playback.
If you forget your password, use 2580.
Settings (PASSWORD SETUP)
PARENTAL (Parental control)
Playback of some DVD discs can be limited depending on the age of
the users. The parental control system allows the playback limitation
level to be set by the parent. The default setting is “8”.
Notes:
< The lower the level, the stricter the limitation.
< If the rating of the loaded DVD disc is higher than the level you set,
the system will require a password. Enter your password and press
the Enter button to start playback.
1
Select the desired parental control level from the menu,
then press Enter button.
2
You will be prompted to enter your password. Use the
Number buttons to enter 2580 (or your privacy password
if already established).
< No need to enter a password if “PASSWORD MODE” is set to OFF.
DEFAULT
All the items in the SETUP menu (except for the password and
parental control) will be reset to the default settings.
Settings (PREFERENCE) (2)

43
ENGLISH
Listening to the Radio (FM/AM)
1
Select “FM Radio” or “AM Radio” using the SOURCE
button.
< You can also select “FM Radio” or “AM Radio” by pressing the
TUNER button on the remote control unit once or twice.
2
Hold down the TUNING button (. or /) for more
than 1 seconds to select the station you want to listen to
(Auto selection).
Hold down
more than 1 sec.
The unit starts searching for a station.
When a station is tuned in, the tuning process will stop
automatically.
Repeat this step until the station you want to listen to is found.
< If you want to stop the tuning process, press the TUNING button.
Selecting stations which cannot be tuned automatically
(Manual selection)
When the TUNING button is pressed momentarily, the frequency
changes by a fixed step.
Press the TUNING button repeatedly until the station you want
to listen to is found.
FM MODE
Pressing this button alternates between Auto (Stereo) mode and
Mono mode.
Auto Mode
FM stereo broadcasts are received in stereo.
Mono Mode
To compensate for weak FM stereo reception, select this mode.
Reception will now be forced to monaural, reducing unwanted
noise.
If the reception is poor
For the best reception, rotate the FM antenna or AM antenna until
you get stations clearly.

44
Preset Tuning (FM/AM)
Manual memory presetting
1
Tune in a station you want to listen to (see previous
page).
2
Press the MEMORY button.
3
Select a preset channel to store the station using the
PRESET buttons, and then press the MEMORY button
again.
The station is stored.
How to select preset stations
In FM or AM mode, select a preset channel using the PRESET
buttons.
You can store up to 20 FM and 20 AM stations.
Automatic memory presetting
1
Select “FM Radio” or “AM Radio” using the SOURCE
button.
< You can also select “FM Radio” or “AM Radio” by pressing the
TUNER button on the remote control unit once or twice.
2
Press the SCAN button.
Up to 20 of the best received stations in your area will be stored
automatically.

45
ENGLISH
Listening to an External Source
1
Connect a cassette tape deck etc. to AUX 1 IN jack of the
DR-H338i using commercially-available RCA cables.
Or Connect the PHONES jack or audio output jack of a
portable aud io p layer to the AUX 2 I N jack of the
DR-H338i.
< When you connect the portable audio player to AUX 2 IN jack of
the DR-H338i, use the supplied stereo mini plug cable.
2
Press the SOURCE button to select “AUX1 Source” or
“AUX2 Source”.
< You can also select “AUX1 Source” or “AUX2 Source” by pressing
the AUX button on the remote control unit once or twice.
3
Play the source, and adjust the volume using the VOLUME
knob of the DR-H338i and of the audio player.
When using the PHONES jack of your mini player, you must
adjust the volume of the mini-player or you may hear no sound
from your DR-H338i.
< Turning the volume of the mini player up too high may cause
the sound from your DR-H338i to be distorted. If this is the
case, reduce the volume of the mini player until the distortion
stops and then adjust the volume level of the DR-H338i to a
comfortable listening level.

46
The unit can be programmed to turn on at a specified time.
< Adjust the clock before setting the timer (page 19) .
1
If the unit is on, press the STANDBY/ON button to turn it
off (standby).
2
Press the CLOCK button.
3
Press the TIMER button.
“Timer Set” appears on the display, and the “hour” value starts
blinking.
< When no button is pressed for 30 seconds, the timer setting
mode will be cancelled.
4
Press the Volume buttons to set the start time (hour), and
then press the TIMER button.
The “minutes” value starts blinking.
Sleep Timer Wake Up Timer
The power can be switched off after a specified amount of time.
Press the SLEEP button repeatedly until desired time appears on
the display.
SLEEP-10, 20, 30, 60 or 90
The power will be switched off 90 (60, 30, 20, or 10) minutes later.
SLEEP OFF
The sleep timer is off.
< If you want to check the remaining time, press the SLEEP button
once. The remaining time will be displayed for 3 seconds, and then
return to the normal display.

47
ENGLISH
7
Turn the unit on and prepare the source.
To play a disc, select “DISC Source” using the SOURCE button
and set a disc.
To play an USB memory device, select “USB Source” using the
SOURCE button and set an USB memory device.
To listen to the FM, select “FM Radio” using the SOURCE button
and tune in a station.
To listen to the AM, select “AM Radio” using the SOURCE button
and tune in a station.
8
Press the S TANDBY/ON button to turn the unit off
(standby).
The clock and the TIMER indicator (
) are displayed.
< The unit will turn on at the specified time every day.
< The unit turns on with the source that was last selected.
Do not forget to turn the unit off (standby), or the timer
will not work.
If the timer reaches the timer-on time, the unit is set to
“SLEEP-60” automatically and the power will be switched off
(standby) 60 minutes later.
If you want to listen continuously, press the SLEEP button
repeatedly to select “SLEEP OFF” after reaches the timer-on-time.
5
Press the Volume buttons to set the start time (minute),
and then press the TIMER button.
“Off” starts blinking.
6
Press the Volume buttons to turn On or Off the timer
function, and then press the TIMER button.
Select “On” to turn the timer function on.
The TIMER indicator (
) appears on the display.
When you do not use the timer, select “Off”. (The TIMER
indicator disappears from the display.)

48
If you have problems with your system, look through this chart and
see if you can solve the problem yourself before calling your dealer or
TEAC service center.
General
No power.
e Check the connection to the AC power supply. Check and make
sure the AC source is not a switched outlet and that, if it is, the
switch is turned on. Make sure there is power to the AC outlet by
plugging another item such as a lamp or fan.
e Press the STANDBY/ON button to turn the unit on.
Remote control does not work.
e Press the STANDBY/ON button to turn the unit on.
e If the batteries are dead, change the batteries.
e Use remote control unit within the range (16 ft/5 m) and point at
the front panel.
e Clear obstacles between the remote control unit and the main
unit.
e If a strong light is near the unit, turn it off.
Severe hum or noise is heard.
e Place the unit as far away from a TV as possible.
e Make sure the line cords and speaker cables are as far away from
the AC supply as possible.
DISC/USB
Will not play.
e Reload the disc with the label side UP.
e Use a playable disc (page 6).
e If the disc is dirty, clean the surface of the disc.
e A blank disc has been loaded. Load a prerecorded disc.
e Check the region code of the DVD (page 6).
e If the unit is condensed, leave the unit for one or two hours with
the power turned on (page 5).
PROHIBIT icon “A” appears on the screen.
e The operation is not permitted by the disc or the unit.
e Note that during playback of a title part (cautions, software
maker’s logo, etc.), most operations are prohibited by the disc.
e If another operation is still in process, wait a moment and try
again.
Cannot access some setup menu items.
e Although it is possible to enter the setup screen while playback
is continuing (or in resume mode), not all menu functions will be
available. Expand the number of available functions by pressing
the Stop button (H) twice.
Scanning stops.
e Scanning does not work within menus.
Sound skips.
e Place the unit on a stable place to avoid vibration and shock.
e If the disc is dirty, clean the surface of the disc.
e Do not use scratched, damaged or warped discs.
There is no sound or only a very low-level sound is heard.
e Adjust the volume.
e Check the connection to the speakers.
e Check the DIGITAL AUDIO SETUP (DIGITAL OUTPUT) (page 39).
e The sound is muted during pause, slow-motion, and fast forward/
reverse. Press the Play/Pause button (y/J) to resume normal
playback.
No digital audio output.
e
Check that the DIGITAL AUDIO SETUP (DIGITAL OUTPUT) is set to
“ALL” or “PCM only” (page
39
).
Digital audio recording is not possible on another device.
e
Check that the DIGITAL AUDIO SETUP (DIGITAL OUTPUT) setting is
set to “PCM only” (page
39).
e Copy-prohibit material cannot be copied digitally.
No picture/distorted picture
e Check the connection to the TV (monitor)
e Check the operating instructions for the TV (monitor) to make
sure that you have the right input selected, etc.
e If you are using a HDMI connection, make sure it is configured
correctly (page 41) .
e When your TV/monitor is not compatible with Progressive
scan, never set the T V MODE s etting to “PROGRESSIVE”
(page 40).
Picture noise.
e If video from this system has to go through your VCR to get to
your TV, the copy-protection applied to some DVD programmes
could affect picture quality. Please connect the unit directly to
your TV.
The image is distorted or monochromatic.
e Make sure that the PAL-NTSC setting matches the TV/monitor
(page 41).
e Adjust the aspect ratio to correspond to the TV/monitor in use
(page 38).
The aspect ratio of the screen cannot be changed.
e The aspect ratio might be fixed by the disc.
Picture and sound do not match up.
e With some TV sets there may be a short pause from when the
video signal is received until the image appears. If the sound from
the speaker does not match the TV image, minimize the volume
level of the DR-H338i and output the sound from the TV.
e Try to correct the picture and sound sync problem using the
procedure described on page 39 “AUDIO SYNC”.
FM/AM tuner
Cannot listen to any station, or signal is too weak.
e Tune in the station properly.
e Rotate the FM or AM antenna for the best reception position.
In FM mode, though the broadcast is stereo, it sounds
monaural.
e Press the FM MODE button.
Troubleshooting

49
ENGLISH
iPod player
Cannot insert the iPod.
e Check if appropriate adapter is inserted to the dock (page 22).
e Remove dust or obstacles from the dock and the iPod.
The iPod does not play.
e Remove the iPod from the dock, wait a few seconds, and insert it
again.
e Software update may solve the problem.
Cannot operate the iPod on the components.
e Select iPod as the source.
Cannot operate the iPod.
e Make sure the HOLD switch of the iPod is not set to HOLD.
If normal operation cannot be obtained, unplug the power
cord from the outlet and plug it again. This resets the internal
micro- computer which can be disturbed during electrical
storms, power interruptions, etc.
If unplugging the power cord does not solve the problem, try the
following procedure to reset the internal micro-computer.
1. Turn the unit on.
2. Press the Stop button (H) while holding down the Play/Pause
button (y/J).
Hold down
3. Release the Stop button (H) when “DR-H338i**” appears on the
display.
4. Release the Play/Pause button (y/J).
5. Press the Stop button (H).

50
Specifications
DVD player
Pickup . . . . . . . . . . . . Semiconductor laser, Wave length 650/790 nm
Signal system . . . . . . . . . . . . . . . . . . . . . . . . . . . . . . . . . . . . . . . . . NTSC/PAL
Video signal horizontal resolution . . . . . More than 480 lines (DVD)
Video signal-to noise ratio . . . . . . . . . . . . . . . . More than 50 dB (DVD)
Audio frequency response . . . . . . . . . . . 20 Hz to 20 kHz (+1 / –3 dB)
Audio signal-to-noise ratio . . . . . . . . . . . . . . . . . . . . . . . . . . . . . . . . 62 dB
Dynamic range . . . . . . . . . . . . . . . . . . . . . . . . . . . . . . . . . . . . . . . . . . . 80 dB
Video output
Output level . . . . . . . . . . . . . . . . . . . . . . . . . . . . . . . . . . . . 1 Vp-p (75 Ω)
Jacks . . . . . . . . . . . . . . . . . . . . . . . . . . . . . . . . . . . . . . . . . . . . . . . RCA jack
Component video output (Y, C
B/PB, CR /PR)
Y-Outp ut level . . . . . . . . . . . . . . . . . . . . . . . . . . . . . . . . 1. 0 Vp-p (75 Ω)
C
B/PB, CR /PR-output level . . . . . . . . . . . . . . . . . . . . . . 0.7 Vp-p (75 Ω)
Jacks . . . . . . . . . . . . . . . . . . . . . . . . . . . . . . . . . . . . . . . . . . . . . . RCA jacks
HDMI output
Jack . . . . . . . . . . . . . . . . . . . . . . . . . . . . . . . HDMI 19 pin (version 1.2a)
Amplifier
Output power
(Stereo, EIAJ, 20 Hz to 20 kHz, 4 Ω) . . . . . . . . . . . . . . . . . . . 50 W + 50 W
(Stereo, 1 % THD, 20 Hz to 20 kHz, 4 Ω) . . . . . . . . . . . . . 36 W + 36 W
Total harmonic distortion . . . . . . . . . . . . . . . 0.7 % (at 5 W, 1 kHz, 4 Ω)
Audio input sensitivity/impedance . . . . . . . . . . .LINE: 600 mV/47 kΩ
Output level/impedance (LINE OUT) . . . . . . . . . . . . . 1000 mV / 10 kΩ
Frequency response . . . . . . . . . . . . . . . . . .20 Hz to 20 kHz, +0 / –3 dB
Signal-to-noise ratio . . . . . . . . . . . . . . . . . . . . . . . . . . . . . . . 90 dB (IHF-A)
FM tuner section (without notes 100.1 MHz, 65 dBf)
Tun in g r an ge . . . . . . . . . . . . . .87.5 MHz to 108.0 MHz (100 kHz steps)
Total harmonic distortion (1 kHz) . . . . . . . . . . . . . . . . . . . . . .Mono: 1 %
Stereo: 1.5 %
Frequency response . . . . . . . . . . . . . . . . . . . . . . . . . . . . .40 Hz to 10 kHz
Stereo separation (1 kHz) . . . . . . . . . . . . . . . . . . . . . . . . . . . . . . . . . . 35 dB
Signal-to-noise ratio . . . . . . . . . . . . . . . . . . . . . . . . . . . . . . . .Mono: 55 dB
Stereo: 45 dB
AM Tuner Section
Tun in g r an ge . . . . . . . . . . . . . . . . . 530 kHz to 1,710 kHz (10 kHz steps)
Total harmonic distortion (1 kHz) . . . . . . . . . . . . . . 1.5 % at 100 dB/m
Usable sensitivity . . . . . . . . . . . . . . . . . . . . . . . . . . . . . . . . . . . . . 900 μV/m
Signal-to-noise ratio . . . . . . . . . . . . . . . . . . . . . . . . . . 40 dB at 100 dB/m
General
Power requirements . . . . . . . . . . . . . . . . . . . . . . . . . . . . . AC 120 V, 6 0 Hz
Power consumption . . . . . . . . . . . . . . . . . . . . . . . 50 W (STANDBY: 1 W)
Dimensions (W x H x D)
8 7/16” x 4 3/16” x 13 11/16” (214 x 106 x 347 mm)
Weight (net) . . . . . . . . . . . . . . . . . . . . . . . . . . . . . . . . . . . . .8 13/16 lb (4 kg)
Standard Accessories
AM antenna x 1
FM antenna x 1
Remote control unit (RC-1240) x 1
Batteries (AAA, R03, UM-4) x 2
AC power cord x 1
iPod dock x 1
Dock adapter x 2
RCA AV cable x 1
Owner’s manual (this document) x 1
Warranty card x 1
< Design and specifications are subject to change without notice.
< Weight and dimensions are approximate.
< Illustrations may differ slightly from production models.

51

52
Sommaire
Nous vous remercions d’avoir choisi TEAC. Lisez ce manuel avec attention pour tirer les meilleures performances de cet appareil.
Avant l’utilisation . . . . . . . . . . . . . . . . . . . . . . . . . . . . . . . . . . . . . . . . . . . . . 53
Disques . . . . . . . . . . . . . . . . . . . . . . . . . . . . . . . . . . . . . . . . . . . . . . . . . . . . . . 54
Compatibilité des dispositifs USB . . . . . . . . . . . . . . . . . . . . . . . . . . . . . 56
Raccordement des antennes (AM) . . . . . . . . . . . . . . . . . . . . . . . . . . . . 56
Raccordement des antennes (FM). . . . . . . . . . . . . . . . . . . . . . . . . . . . . 57
Raccordement des enceintes . . . . . . . . . . . . . . . . . . . . . . . . . . . . . . . . . 58
Raccordement à des équipements audio, etc. . . . . . . . . . . . . . . . . . 59
Raccordement à un téléviseur . . . . . . . . . . . . . . . . . . . . . . . . . . . . . . . . 60
Identification des parties (unité principale) . . . . . . . . . . . . . . . . . . . . 62
Identification des parties (télécommande) . . . . . . . . . . . . . . . . . . . . 64
Boîtier de télécommande . . . . . . . . . . . . . . . . . . . . . . . . . . . . . . . . . . . . 66
Réglage de l'horloge . . . . . . . . . . . . . . . . . . . . . . . . . . . . . . . . . . . . . . . . . 67
Fonctionnement de base . . . . . . . . . . . . . . . . . . . . . . . . . . . . . . . . . . . . 68
Prise en main avec un iPod . . . . . . . . . . . . . . . . . . . . . . . . . . . . . . . . . . . 70
Écoute d’iPod . . . . . . . . . . . . . . . . . . . . . . . . . . . . . . . . . . . . . . . . . . . . . . . . 71
Écoute d'un disque . . . . . . . . . . . . . . . . . . . . . . . . . . . . . . . . . . . . . . . . . . . 73
Écoute d'un dispositif mémoire USB . . . . . . . . . . . . . . . . . . . . . . . . . . 74
Menu à l'écran . . . . . . . . . . . . . . . . . . . . . . . . . . . . . . . . . . . . . . . . . . . . . . . 74
Pause de lecture (Gel d'image) . . . . . . . . . . . . . . . . . . . . . . . . . . . . . . . 76
Arrêt de la lecture (Mode de reprise) . . . . . . . . . . . . . . . . . . . . . . . . . . 76
Saut de lecture . . . . . . . . . . . . . . . . . . . . . . . . . . . . . . . . . . . . . . . . . . . . . . 77
Recherche d'un passage de chapitre ou de piste . . . . . . . . . . . . . . 77
Sélection d'un chapitre ou d'une piste . . . . . . . . . . . . . . . . . . . . . . . . 77
Sélection de l'audio . . . . . . . . . . . . . . . . . . . . . . . . . . . . . . . . . . . . . . . . . . 77
Sélection du sous-titrage . . . . . . . . . . . . . . . . . . . . . . . . . . . . . . . . . . . . . 78
Changement d'angle de caméra . . . . . . . . . . . . . . . . . . . . . . . . . . . . . . 78
Zoom sur l'image . . . . . . . . . . . . . . . . . . . . . . . . . . . . . . . . . . . . . . . . . . . . 78
Ralenti . . . . . . . . . . . . . . . . . . . . . . . . . . . . . . . . . . . . . . . . . . . . . . . . . . . . . . . 78
Lecture en boucle et lecture aléatoire . . . . . . . . . . . . . . . . . . . . . . . . 79
Lecture en boucle A-B . . . . . . . . . . . . . . . . . . . . . . . . . . . . . . . . . . . . . . . 80
Changement du mode d'affichage . . . . . . . . . . . . . . . . . . . . . . . . . . . 80
Recherche temporelle (VCD/CD) . . . . . . . . . . . . . . . . . . . . . . . . . . . . . . 81
Recherche temporelle (MP3/WMA) . . . . . . . . . . . . . . . . . . . . . . . . . . . 81
Recherche de chapitre/Recherche temporelle (DVD) . . . . . . . . . . 82
Recherche de chapitre/Recherche temporelle (DivX) . . . . . . . . . . 82
Lecture programmée (DVD, VCD, CD) . . . . . . . . . . . . . . . . . . . . . . . . . 83
Lecture programmée (MP3, WMA, DIVX) . . . . . . . . . . . . . . . . . . . . . . 84
Réglages (Introduction) . . . . . . . . . . . . . . . . . . . . . . . . . . . . . . . . . . . . . . 85
Réglages (RÉGLAGES GÉNÉRAUX/GENERAL SETUP) . . . . . . . . . . . . 86
Réglages (RÉGLAGES AUDIO/AUDIO SETUP) . . . . . . . . . . . . . . . . . . . 87
Réglages (RÉGLAGES VIDÉO/VIDEO SETUP) . . . . . . . . . . . . . . . . . . . . 88
Réglages (PRÉFÉRENCES/PREFERENCE) . . . . . . . . . . . . . . . . . . . . . . . . 89
Réglages (RÉGLAGES MOT DE PASSE/PASSWORD SETUP) . . . . . . 90
Écoute de la radio (FM/AM) . . . . . . . . . . . . . . . . . . . . . . . . . . . . . . . . . . . 91
Syntonisation préréglée ou preset (FM/AM) . . . . . . . . . . . . . . . . . . . 92
Écoute d'une source externe . . . . . . . . . . . . . . . . . . . . . . . . . . . . . . . . . 93
Minuterie d'extinction . . . . . . . . . . . . . . . . . . . . . . . . . . . . . . . . . . . . . . . . 94
Réveil . . . . . . . . . . . . . . . . . . . . . . . . . . . . . . . . . . . . . . . . . . . . . . . . . . . . . . . . 94
Guide de dépannage. . . . . . . . . . . . . . . . . . . . . . . . . . . . . . . . . . . . . . . . .96
Caractéristiques techniques . . . . . . . . . . . . . . . . . . . . . . . . . . . . . . . . . . 98
Conventions concernant ce mode d'emploi
< Les t ypes de fonctions et les opérations pouvant être
employés pour un disque particulier varient en fonction des
caractéristiques de ce disque. Dans certains cas, ces fonctions et
opérations peuvent différer des descriptions effectuées dans ce
mode d'emploi. Si c'est le cas, suivez les instructions données à
l'écran. Ce mode d'emploi ne couvre que les opérations de base
sur les disques.
< Pour certaines opérations, l'icône d'INTERDICTION “A” peut
s'afficher. Cela signifie que l'opération décrite dans ce mode
d'emploi n'est pas permise pour le disque employé.
AT TEN TI ON
< N’exposez p as cet app areil a u ru issell ement ni au x
éclaboussures.
< Ne placez aucun objet contenant du liquide, tel qu’un vase, sur
l’appareil.
< N’installez pas cet appareil dans un espace confiné comme une
bibliothèque ou similaire.
< L’appareil tire un courant nominal de veille de la prise secteur
quand son interrupteur POWER ou STANDBY/ON n’est pas en
position ON.
< L’appareil doit être placé assez près de la prise de courant pour
que vous puissiez à tout moment attraper facilement la fiche du
cordon d’alimentation.
< La fiche secteur est utilisée comme dispositif de déconnexion
et doit donc toujours rester disponible.
< Si le produit utilise des piles/batteries (y compris un pack de
batteries ou des piles installées), elles ne doivent pas être
exposées au soleil, au feu ou à une chaleur excessive.
< PRÉCAUTION pour les produits qui utilisent des bat teries
remplaçables au lithium : remplacer une batterie par un
modèle incorrect entraîne un risque d'explosion. Le modèle de
remplacement doit être le même ou l'équivalent.
< Des précautions doivent être prises en cas d'utilisation
d'écouteurs ou d'un casque avec le produit car une pression
sonore excessive (volume trop fort) dans les écouteurs ou dans
le casque peut causer une perte auditive.

FRANÇAIS
53
Avant l’utilisation
Contenu de l'emballage
Vérifiez la présence des accessoires fournis en standard.
Antenne AM x 1
Antenne FM x 1
Télécommande (RC-1240) x 1
Piles (AAA, R03, UM-4) pour la télécommande x 2
Cordon d'alimentation x 1
Dock iPod x 1
Adaptateur de dock x 2
Câble AV RCA x 1
Mode d’emploi (ce document) x 1
< Conservez ce livret dans un endroit sûr pour référence ultérieure.
Carte de garantie x 1
Attention à la condensation
Si l’appareil est déplacé d’un endroit froid à un endroit chaud, ou
utilisé après un changement soudain de température, il existe un
danger de condensation ; la vapeur de l’air peut se condenser sur
le mécanisme interne, empêchant un bon fonctionnement. Pour
empêcher cela, ou si cela se produit, laissez l'appareil allumé une
heure ou deux. Il se stabilisera alors à la température ambiante.
Emplacement de l'appareil
< Choisissez soigneusement l’emplacement de votre appareil. Évitez
de l’exposer directement aux rayons solaires ou à une source
de chaleur. Évitez aussi les endroits sujets aux vibrations, à une
poussière excessive, à la chaleur, au froid et à l’humidité.
< Il est possible que l’appareil devienne chaud durant l’utilisation,
laissez donc toujours un espace suffisant autour de lui pour la
ventilation. Assurez-vous qu’il y ait un espace d’au moins 20 cm au
dessus de l’appareil et d’au moins 5 cm de chaque côté. Ne placez
rien sur l’appareil.
< Ne placez pas l'appareil sur un amplificateur, un récepteur ou tout
autre dispositif générant de la chaleur.
< Quand l’appareil est allumé, mettre en service un téléviseur peut
entraîner l’apparition de lignes sur l’écran de celui-ci, en fonction
des ondes électriques de la diffusion TV. Ce n’est pas un mauvais
fonctionnement de l’appareil ni du téléviseur. Si vous voyez de
telles lignes, éloignez l'appareil du téléviseur.
ATTE NTION
< Ne déplacez pas l'appareil durant la lecture d'un disque.
Durant la lecture, le disque tourne à haute vitesse. Ne soulevez et
ne déplacez pas l'appareil durant la lecture. Cela endommagerait
le disque ou l'appareil.
< La tension d’alimentation doit correspondre à la tension imprimée
sur le panneau arrière. Si vous avez des doutes à ce sujet, consultez
un électricien.
< N’ouvrez pas le boîtier car cela peut endommager le circuit ou
causer un choc électrique. Si un objet étranger pénètre dans
l’appareil, consultez votre revendeur ou le service après-vente.
< Quand vous débranchez le cordon d'alimentation de la prise
secteur, tirez toujours sur la prise, jamais sur le cordon.
< Pour garder propre le capteur laser, ne le touchez pas et fermez
toujours le tiroir de disque.
< Retirez toujours le disque avant de déplacer ou de transporter cet
appareil. Le déplacer avec un disque à l'intérieur peut entraîner un
mauvais fonctionnement.
Entretien
Si la surface de l’unité est sale, essuyez-la avec un chiffon doux ou
utilisez un savon liquide neutre dilué. Laissez la surface de l'appareil
sécher complètement avant utilisation.
Par sécurité, débranchez le cordon d'alimentation de la prise
secteur avant tout nettoyage.
< Ne vaporisez jamais du liquide directement sur cet appareil.
< N’utilisez pas de diluant, benzène ou alcool car ils peuvent
endommager la surface de l’appareil.

54
Types de disque lisibles par cet appareil
Ce lecteur peut reproduire les disques portant n'importe lequel des
logos suivants :
DVD vidéo
M Disques simple ou double face
M Disques simple ou double couche
M Audio numérique Dolby Digital, MPEG ou PCM
linéaire
M Vidéo numérique MPEG-2
M Cet appareil peut lire les DVD-R enregistrés au
format DVD vidéo.
M Cet appareil peut lire les DVD-RW enregistrés
au f o r mat DVD vidéo ou au format VR
d'enregistrement vidéo DVD.
Les disques sont généralement composés d'un ou
de plusieurs titres. Les titres peuvent ensuite être
eux-mêmes divisés en chapitres.
CD audio
M Disques de 12 cm ou 8 cm
M Audio numérique PCM linéaire
Les CD audio sont divisés en pistes.
CD vidéo
M Disques de 12 cm ou 8 cm
M Audio numérique MPEG-1
M Vidéo numérique MPEG-1
Les CD vidéo sont divisés en pistes.
SVCD
M Disques de 12 cm ou 8 cm
M Audio MPEG-1 Layer 2
M Vidéo numérique MPEG-2
Numéro de région des DVD vidéo
Les lecteurs de DVD et les disques sont conçus avec des numéros de
région qui déterminent les régions dans lesquelles un disque peut
être lu. Si le numéro de région du disque que vous voulez lire ne
correspond pas à celui de votre lecteur de DVD, vous ne pourrez pas
lire le disque. Dans ce cas, un message d'erreur s'affichera.
Le numéro de région est imprimé en face arrière de cet appareil.
Modèle
U.S.A./Canada
Modèle
Europe
Modèle
Asie
À propos des DVD-RW
< Les DVD-RW enregistrés avec une autorisation limitée à une copie
ne peuvent pas être lus.
< Lors de la lecture d'un DVD-RW ayant été édité sur un enregistreur
de DVD, l'écran peut momentanément passer au noir au point de
montage.
< Lors de la lecture d'un DVD-RW ayant été édité sur un enregistreur
de DVD, vous pouvez voir des scènes situées juste avant le point
de montage.
À propos des CD-R et CD-RW
Les CD-R et CD-RW enregistrés au format CD audio et correctement
finalisés sont lisibles. Mais selon la qualité du disque et/ou les
conditions de l'enregistrement, certains CD-R ou CD-RW peuvent ne
pas être lisibles.
AT TEN TI ON
< Si vous enregistrez un disque à l'aide d'un ordinateur, même s'il est
enregistré à un format compatible, il existe des cas où il ne pourra
pas être lu à cause des réglages du logiciel ayant servi à créer le
disque (voyez avec l'éditeur du logiciel pour des informations plus
détaillées).
< Les CD-R/CD-RW/DVD-R/RW non finalisés ne peuvent pas être lus.
Disques non lisibles par cet appareil
< DVD audio, Super Audio CD, CD-G, partie données des CD-EXTRA,
et PHOTO CD
< Disques enregistrés dans un système couleur autre que PAL ou
NTSC
< Disques produits illégalement
< Disques rayés ou endommagés
< Disques poussiéreux, sales ou portant des empreintes de doigt
ATTE NTION
Si vous essayez de lire de tels disques, vous risquez qu'un bruit fort et
soudain se propage par les enceintes à plein volume et endommage
les haut-parleurs et votre audition.
Les disques protégés contre la copie, les DualDiscs et les disques ne se
conformant pas à la norme CD peuvent ne pas être correctement lus
par cet appareil. Si vous utilisez de tels disques dans cette unité, TEAC
Corporation et ses filiales ne pourront être tenues pour responsables
des conséquences quelles qu'elles soient, ni garantir la qualité de
reproduction. Si vous rencontrez des problèmes avec de tels disques
non standard, vous devez contacter les producteurs du disque.
Disques

FRANÇAIS
55
Formats de fichier lisibles
Cet appareil peut lire les fichiers suivants enregistrés sur CD-R, CD-RW,
DVD-R, DVD-RW ou dispositif mémoire USB :
M Fichiers MP3
M Fichiers audio formatés Windows Media
M Fichiers JPEG
M Fichiers vidéo DivX
(DivX 5, DivX 4, DivX 3 et contenu VOD DivX)
< Les noms de fichier doivent être comp osés de caractères
alphanumériques. Cet appareil ne peut pas correctement afficher
les symboles ni les caractères à double octet (Japonais, Chinois,
etc.). Veillez bien aussi à utiliser l'extension de fichier (".mp3" pour
les fichiers MP3, ".wma" pour les fichiers WMA, ".avi" ou ".divx" pour
les fichiers vidéo DivX, ".jpg" ou ".jpeg" pour les fichiers JPEG).
< Les fichiers sont lus dans l'ordre alphabétique.
< Les fichiers MP3 doivent être au format MPEG-1 Audio Layer 3
mono ou stéréo. Cet appareil peut lire les fichiers MP3 ayant une
fréquence d'échantillonnage de 44,1 kHz ou 48 kHz, un débit
binaire de 320 kb/s ou moins.
< Cet appareil peut lire les fichiers WMA ayant une fréquence
d'échantillonnage de 44,1 kHz, un débit binaire de 192 kb/s ou
moins.
< Cet appareil ne peut pas correctement afficher le débit binaire de
fichiers à débit binaire variable (VBR).
< Le disque doit être finalisé pour pouvoir être lu.
< Ce lecteur n'est PAS compatible avec les disques multi-sessions.
< Le CD-ROM doit être compatible ISO 9660.
< Il peut falloir un peu de temps pour afficher une image JPEG
progressive.
< Selon la taille et le taux de compression du fichier, certaines images
JPEG peuvent ne pas correctement s'afficher.
Exemples d'icônes utilisées sur les DVD
Nombre de pistes audio enregistrées sur le
disque
Nombre de sous-titrages enregistrés sur le
disque
Rapport d'aspect d'écran
Disque enregistré avec de multiples angles de
caméra
Code de région
ATTE NTION
< Ne faites pas lire de disque gondolé, déformé ou endommagé.
Faire lire de tels disques pourrait causer des dommages irréparables
aux mécanismes de lecture.
< Les disques imprimables ne sont pas recommandés, car le côté
étiquette peut être collant et risque d'endommager l'appareil.
< Ne collez pas de papiers ou de feuillets protecteurs sur les disques
et n'utilisez aucun aérosol de revêtement protecteur.
< N'utilisez jamais de stabilisateurs. L’utilisation de stabilisateurs
pour CD disponibles dans le commerce pourrait endommager les
mécanismes de cet appareil et provoquer son dysfonctionnement.
< N'utilisez pas de disques ayant une forme irrégulière (octogonale,
en forme de cœur, de la taille d'une carte de visite, etc.). De tels CD
peuvent endommager l'appareil :
Précautions de manipulation
<
Placez toujours le disque sur le tiroir, face sérigraphiée vers le haut. Les
disques compacts ne peuvent être lus ou enregistrés que d'un côté.
<
Pour sortir un disque de son boîtier, appuyez sur le centre du boîtier
et soulevez le disque, en le tenant soigneusement par la tranche.
Comment sortir le disque Comment tenir le disque
Précautions de rangement
< Les disques doivent être rangés dans leurs boîtiers après utilisation
afin d’éviter la poussière et les rayures qui pourraient provoquer
des "sauts" du capteur laser.
<
N'exposez pas les disques directement au soleil, à une température
ou à une humidité élevées de façon prolongée. Une exposition
prolongée à des hautes températures fera gondoler le disque.
< Les CD-R et CD-RW sont plus sensibles aux effets de la chaleur et
des rayons ultraviolets que les CD ordinaires. Il est important de ne
pas les conserver à un endroit directement exposé au soleil, et de
toujours les garder à distance de sources de chaleur telles que des
radiateurs ou chauffages électriques.
Entretien
< Si un disque est sale, essuyez sa surface d'un mouvement radial (du
trou central vers le bord externe) avec un chiffon sec et doux.
<
Ne nettoyez jamais les disques avec des produits chimiques tels que
des aérosols pour disque, des aérosols ou liquides antistatiques, de
la benzine ou du diluant. Ces produits chimiques provoqueraient
des dégâts irréparables à la surface en plastique du disque.
En cas de doute quant à l'entretien et à la manipulation d'un disque, lisez
les précautions accompagnant le disque ou contactez son fabricant.

56
Raccordement des antennes (AM)
Antenne cadre AM intérieure
L’antenne cadre AM à hautes performances fournie avec cet appareil
est suffisante pour une bonne réception dans la plupart des régions.
Pour faire tenir l’antenne droite, fixez la griffe sur la fente à la base
de l’antenne.
Branchez les fils de l’antenne cadre aux prises d’antenne AM.
Pressez le levier, insérez l'extrémité du fil, puis relâchez le levier.
Assurez-vous que le câble est fixé solidement en tirant légèrement
dessus. Veillez à ce que seule la partie dénudée du fil soit insérée
dans le bornier et qu'aucun isolant plastique n'empêche le contact
entre le fil d'antenne et le bornier.
Placez l’antenne sur une étagère ou suspendez-la dans un
encadrement de fenêtre, etc. et orientez-la dans la direction
qui donne la meilleure réception. Éloignez autant que possible
de l’antenne tous les fils tels que les cordons secteur, les câbles
d’enceinte ou d’interconnexion.
< Seule une mémoire flash USB peut être utilisée. N'employez PAS de
disque dur USB haute capacité avec cet appareil.
< Certains lecteurs à mémoire flash alimentés par le port USB ne
peuvent pas servir de source.
< Les disques durs, lecteurs de CD/DVD et appareils autres que les
mémoires flash connectés via USB ne peuvent pas être employés.
< Le DR-H338i ne peut pas copier, déplacer ou supprimer des
fichiers.
< Formats lisibles : FAT12, FAT16, FAT32
< Les formats NTFS, HFS, HFS+ ne peuvent pas être utilisés.
< Nombre maximal de dossiers lisibles : 300
< Nombre maximal de fichiers lisibles : 650
Compatibilité des dispositifs USB

FRANÇAIS
57
Antenne AM extérieure
Si l’antenne cadre AM fournie ne permet pas une réception
satisfaisante (souvent en raison de l’éloignement de l’émetteur, ou
dans un immeuble en béton, etc.), il peut être nécessaire d'utiliser
une antenne AM extérieure.
Utilisez une antenne AM de haute qualité du commerce, ou sinon
un fil isolé de plus de 5 m de long dénudé à une extrémité et
raccordé au bornier comme indiqué ci-dessus.
L’antenne filaire doit être tendue à l’extérieur ou à l’intérieur près
d’une fenêtre. Pour une meilleure réception, raccordez la borne
GND à une terre fiable.
< Même quand vous utilisez une antenne AM extérieure, ne
déconnectez pas l’antenne cadre.
Antenne FM intérieure
Connectez l’antenne FM filaire fournie à la prise FM 75Ω et
déployez-la.
Positionne z l ’anten n e à u n endroit a p p roprié tel qu ’un
encadrement de fenêtre ou mur qui offre la meilleure réception
puis f ixez-la en utilisant des punaises ou d es accessoires
similaires.
Antenne FM extérieure
Dans les zones où les signaux FM sont faibles, il sera nécessaire
d’utiliser une antenne FM extérieure de type 75 Ω asymétrique. En
général une antenne à 3 éléments suffira ; si vous résidez à un endroit
où les signaux FM sont particulièrement faibles, il peut être nécessaire
d’utiliser une antenne à 5 éléments ou plus.
< Débranchez l’antenne FM intérieure lorsque vous utilisez une
antenne FM extérieure.
Raccordement des antennes (FM)

58
Raccordement des enceintes
Avant raccordement
Vérifiez l’impédance de vos enceintes. Branchez des enceintes
ayant une impédance d'au moins 4 Ω.
Les borniers d'enceinte noirs sont les borniers “_” (négatifs).
Généralement, le côté “+” du câble de l’enceinte est marqué pour
le distinguer du côté “_” du câble. Branchez le côté marqué au
bornier “+”, et le côté non marqué au bornier noir “_”.
Préparez les câbles d'enceinte au raccordement en les dénudant
(en enlevant leur gaine extérieure) sur un maximum de 10 mm.
Épissez les fils dénudés (torsadez ensemble les brins épars) :
AT TE NTI ON
Les parties métalliques de deux fils différents ne doivent jamais
se toucher pour éviter tout risque de court-circuit. Retirer trop
d'isolant peut entraîner un court-circuit si les fils dénudés entrent
en contact l'un avec l'autre. Des fils court-circuités peuvent créer
un risque d’incendie ou entraîner une panne de votre équipement.
Comment brancher
1. Dévissez le capuchon du bornier en le tournant dans le sens
antihoraire. Il n’est pas possible de le retirer complètement.
2. Insérez le fil dans le bornier et revissez-ce dernier en tournant
dans le sens horaire afin que le fil soit bien branché :
Assurez-vous qu’aucune partie de l’isolant n’est insérée dans le
bornier, seulement la partie de fil dénudée.
3. Assurez- vous que le câble est fixé s olidement en tirant
légèrement dessus.
Caisson de graves
Raccordez un caisson de graves à l'aide d'un câble RCA du commerce.
Utilisez un caisson de graves avec amplificateur intégré dit “caisson de
graves amplifié”.
Caisson
de graves
Une fois tous les branchements terminés, raccordez le cordon d'alimentation à une prise secteur.
< Lisez les modes d'emploi de tous les éléments que vous comptez employer avec cet appareil.
< Assurez-vous que chaque fiche est bien enfoncée. Pour éviter tout ronflement ou bruit parasite, ne regroupez pas les câbles de connexion.

FRANÇAIS
59
Une fois tous les branchements terminés, raccordez le cordon d'alimentation à une prise secteur.
< Lisez les modes d'emploi de tous les éléments que vous comptez employer avec cet appareil.
< Assurez-vous que chaque fiche est bien enfoncée. Pour éviter tout ronflement ou bruit parasite, ne regroupez pas les câbles de connexion.
A
Embase de cordon d’alimentation
Une fois tous les autres branchements faits, insérez le cordon
d'alimentation secteur fourni dans cette embase et branchez son
autre extrémité dans la prise secteur. Vérifiez que la tension du
secteur correspond à celle marquée en face arrière de l'appareil.
Consultez un électricien qualifié en cas de doute.
Pour éviter les risques d'électrocution, d'incendie et autres,
n'utilisez que le cordon d'alimentation fourni.
< Si l'appareil doit rester inutilisé un certain temps, débranchez son
cordon d'alimentation de la prise secteur.
B
Prises AUX 1/LINE OUT
Ces prises reçoivent ou produisent un signal audio analogique à
2 canaux. Raccordez-y une platine cassette etc. à l'aide de câbles
RCA du commerce.
Veillez à bien connecter :
Fiche blanche
e Prise blanche (L (left) : canal gauche)
Fiche rouge
e Prise rouge (R (right) : canal droit)
Raccordement à des équipements audio, etc.
C
D
B
A
Câble RCA
Câble numérique optique
Platine cassette etc.
SORTIE
LIGNE
ENTRÉE
LIGNE
OPTIQUE
ENTRÉE NUMÉRIQUE
Prise secteur
Appareil audio numérique
(enregistreur de CD, platine MD, etc.)
C
Port pour iPod
Connectez le dock iPod à ce port.
D
Prise de sortie audio numérique
L'audio numérique des DVD vidéo, CD et CD vidéo sort par cette
prise.
Branchez-y un amplificateur avec décodeur, ou un appareil audio
numérique tel qu'un enregistreur de CD, etc. à l'aide d'un câble
audio numérique optique (TOS) du commerce.
< Sélectionnez “TOUS (ALL)” ou “MIC seulement (PCM only)” dans
RÉGL. AUDIO NUMÉRIQUE (DIGITAL AUDIO SETUP) (page 87).

60
Raccordement à un téléviseur
G
E
F
ENTRÉE
VIDÉO
Téléviseur (moniteur)
ENTRÉE
HDMI
ENTRÉE VIDÉO
COMPOSANTES
C
BYCR
Branchez un de
ces câbles.
Câble vidéo composantes
Câble vidéo RCA
Câble HDMI

FRANÇAIS
61
G
Prise de sortie audio/vidéo HDMI
Utilisez un câble HDMI du commerce pour relier l'appareil à un
téléviseur ou moniteur compatible HDMI.
< Si le téléviseur ou moniteur n'est équipé que d'une prise DVI, un
câble adaptateur ou un adaptateur doit être employé. Notez que
le téléviseur branché de cette façon doit être compatible HDCP.
Notez aussi que ce mode de branchement ne produit pas de son.
< Veillez à lire et bien comprendre la documentation fournie avec
l'appareil HDMI.
Formats de sortie vidéo HDMI
< 480p (NTSC) ou 576p (PAL)
< 720p
< 10 80i
< 108 0p
< Voir page 89 pour plus de détails sur les formats de sortie vidéo
HDMI.
Pour sortir l'audio par la prise HDMI
Si l'appareil HDMI branché peut recevoir l'audio HDMI, la prise
HDMI peut produire cet audio numérique.
< Sélectionnez “TOUS (ALL)” ou “MIC seulement (PCM only)” dans
RÉGL. AUDIO NUMÉRIQUE (DIGITAL AUDIO SETUP) (page 87).
< Pour bénéficier de l'audio surround numérique des DVD vidéo,
reliez la prise HDMI à un amplificateur surround et réglez RÉGL.
AUDIO NUMÉRIQUE (DIGITAL AUDIO SETUP) sur “TOUS (ALL)”
(page 87).
< Réglez le rapport d'aspect vidéo en fonction du téléviseur
(page 86).
< Cet appareil possède un dispositif de protection contre la copie
analogique. S'il est raccordé à un téléviseur au travers d'un
magnétoscope, le résultat de la lecture peut en être affecté.
Branchez directement l'appareil au téléviseur.
< Dans tous les cas, utilisez des câbles de la plus haute qualité pour la
meilleure image possible.
< Sélectionnez le bon réglage dans la configuration SORTIE VIDÉO
(VIDEO OUTPUT) (page 88).
E
Prises de sortie vidéo composantes
Utilisez des câbles vidéo composantes du commerce pour
raccorder l'appareil aux entrées vidéo composantes d'un
téléviseur ou moniteur ainsi équipé afin de bénéficier d'une
image de haute qualité.
Utilisez ces prises de préférence à la connexion vidéo composite.
< Si les prises vidéo composantes sont raccordées à un téléviseur à
balayage progressif, la sortie peut être réglée pour y correspondre
(page 88).
< Notez que ces prises ne peuvent pas être reliées à des prises
composantes haute définition.
F
Prise de sortie vidéo composite
Utilisez un câble vidéo RCA (cinch) du commerce pour relier
l'appareil au connecteur vidéo composite d'un téléviseur ou d'un
moniteur.
N'utilisez cette connexion que si aucune autre méthode de
raccordement n'est disponible.

62
Identification des parties (unité principale)
A
P
N
DC
B
E
G
F
H
I
J
K
L
M
O

FRANÇAIS
63
A
SOURCE
Utilisez cette touche pour sélectionner une source.
B
Recherche (m/,)/PRESET
En mode FM ou AM, utilisez ces touches pour sélectionner un
canal préréglé (preset).
En mode DISC, USB ou iPod, utilisez ces touches pour rechercher
un passage de piste/fichier/morceau.
C
Saut (.//)/TUNING
En mode FM ou AM, utilisez ces touches pour rechercher une
station.
En mode DISC, USB ou iPod, utilisez ces touches pour sauter entre
pistes/fichiers/morceaux.
D
Lecture/Pause (G/J)/FM MODE
En mode FM, utilisez cette touche pour sélectionner stéréo ou
mono.
En mode DISC, USB ou iPod, utilisez cette touche pour lancer la
lecture ou la mettre en pause.
E
Stop ( H)/SCAN
En mode FM ou AM, utilisez cette touche pour prérégler
automatiquement des stations.
En mode DISC ou USB, utilisez cette touche pour arrêter la
lecture.
F
Ouvrir/Fermer ( L)
Utilisez cette touche pour ouvrir et fermer le tiroir de disque.
Si le tiroir doit être ouvert durant la lecture, il faut quelques
secondes avant que le disque ne soit “déchargé” et que le tiroir
s'ouvre.
G
VOLUME
Tournez ce bouton pour régler le niveau de volume.
H
PROGRAM/MEMORY
En mode FM ou AM, utilisez cette touche pour prérégler des
stations.
En mode DISC ou USB, utilisez cette touche pour programmer
des pistes.
I
PHONES
Pour écouter au casque, baissez d'abord au minimum le niveau
de volume. Puis insérez la fiche d’un casque dans la prise PHONES
et réglez le volume en tournant le bouton VOLUME.
Les enceintes ne produiront aucun son si un casque est branché.
AT TE NTI ON
Ne branchez pas un casque à la prise PHONES pendant que vous
le portez sur la tête. Ne le débranchez pas non plus et n'allumez/
n'éteignez pas l'appareil quand vous le portez. Un son très fort
peut être produit par le casque.
ÉVITEZ D'ENDOMMAGER VOTRE AUDITION
-
Ne mettez le casque
qu'après l'avoir branché.
J
REPEAT
En mode DISC, USB ou iPod, utilisez cette touche pour lancer la
lecture en boucle.
K
AUX 2 IN
Vous pouvez brancher un lecteur audio portable à cette prise.
L
Capteur de télécommande
Reçoit les signaux de la télécommande. Quand vous utilisez la
télécommande, pointez-la vers ce capteur.
M
Connecteur USB
Vous pouvez brancher un disp ositif m émoire USB à ce
connecteur.
N
Afficheur
O
Tiroir de disque
P
STANDBY/ON
Utilisez cette touche pour allumer et mettre en veille l’appareil.
Le témoin s'allume en bleu quand l'appareil est en service.
Le témoin s'allume en orange quand l’appareil est en veille.

64
Identification des parties (télécommande)
A
C
P
S
G
J
F
X
Y
D
B
I
E
K
M
L
N
O
H
Q
R
T
V
a
b
c
d
U
W
Z
A
STANDBY/ON
Utilisez cette touche pour allumer et mettre en veille l’appareil.
B
Touches numériques
Utilisez ces touches pour saisir les numéros de piste, les mots de
passe, etc.
C
Source
Utilisez ces touches pour sélectionner une source.
D
SETUP
Utilisez cette touche pour passer au menu des réglages dans
lequel vous pouvez régler les paramètres de l'appareil.
E
ANGLE
Utilisez cette touche pour sélectionner un angle de caméra
durant la lecture d'un DVD le permettant.
F
Recherche (m/,)/PRESET (+/–)
En mode FM ou AM, utilisez ces touches pour sélectionner un
canal préréglé (preset).
En mode DISC, USB ou iPod, utilisez ces touches pour rechercher
un passage de piste/fichier/morceau.
G
REPEAT/INFO/RDS
En mode DISC, USB ou iPod, utilisez cette touche pour lancer la
lecture en boucle.
H
A-B (Lecture en boucle)
En mode DISC ou USB, utilisez cette touche pour spécifier une
section et la lire en boucle.
I
DIMMER
Utilisez cette touche pour changer la luminosité de l'afficheur de
la face avant.
J
VOL (+/–) (Volume)
Utilisez ces touches pour régler le niveau de volume.
K
SLOW
En mode DISC, utilisez cette touche pour une lecture vidéo au
ralenti.
L
ZOOM
En mode DISC ou USB, utilisez cette touche pour grossir l'image.

FRANÇAIS
65
M
TONE
Utilisez cette touche pour régler à la fois les graves et les aigus
avec les touches VOLUME.
N
DVS (Dolby Virtual Speaker)
En mode DISC ou USB, utilisez cette touche pour sélectionner le
mode d'écoute.
O
LOUDNESS
Utilisez cette touche pour compenser la perte des graves à faible
volume.
P
Ouvrir/Fermer ( L)
Utilisez cette touche pour ouvrir et fermer le tiroir de disque.
Si le tiroir doit être ouvert durant la lecture, il faut quelques
secondes avant que le disque ne soit “déchargé” et que le tiroir
s'ouvre.
Q
SLEEP/TIMER
Quand l'appareil est allumé, utilisez cette touche pour régler la
minuterie d'extinction.
En mode de veille, utilisez cette touche pour régler le réveil.
R
CLOCK
En mode de veille, utilisez cette touche pour régler l'horloge.
S
PROG/MEM (Program/Memory)
En mode FM ou AM, utilisez cette touche pour prérégler des
stations.
En mode DISC ou USB, utilisez cette touche pour programmer
des pistes.
T
OSD (Affichage à l'écran)
Utilisez cette touche pour afficher à l'écran des informations sur
le disque actuellement lu.
U
TIME
Utilisez cette touche pour lancer une recherche temporelle.
V
SUBTITLE
Utilisez cette touche pour sélectionner les sous-titres à afficher
durant la lecture d'un DVD le permettant.
W
AUDIO
Utilisez cette touche pour sélectionner l'audio à reproduire.
X
Saut (.//)/TUNING (+/–)
En mode FM ou AM, utilisez ces touches pour rechercher une
station.
En mode DISC, USB ou iPod, utilisez ces touches pour sauter entre
pistes/fichiers/morceaux.
Y
Stop ( H)/SCAN
En mode FM ou AM, utilisez cette touche pour prérégler
automatiquement des stations.
En mode DISC ou USB, utilisez cette touche pour arrêter la
lecture.
Z
Lecture/Pause (G/J)/SELECT/FM MODE
En mode FM, utilisez cette touche pour sélectionner stéréo ou
mono.
En mode DISC, USB ou iPod, utilisez cette touche pour lancer la
lecture ou la mettre en pause.
a
MUTING
Utilisez cette touche pour couper le son.
b
TITLE
Durant la lecture avec contrôle de lecture (PBC), utilisez cette
touche pour afficher un menu.
c
Touches de curseur (5/b/t/g) et Entrée ( )
Utilisez ces touches de curseur pour naviguer dans les menus
af fichés à l'écran et la touche Entrée pour confirmer vos
sélections.
d
MENU
En mode DISC, utilisez cette touche avec un DVD à menu pour
afficher ce menu.
Durant la lecture de fichiers MP3/WMA/JPEG, utilisez cette touche
pour alterner entre liste des dossiers et liste des fichiers.
En mode iPod, utilisez cet te touche pour revenir au menu
précédent de l'iPod. Cette touche est équivalente à la touche
MENU de votre iPod.
Quand un CD vidéo (version 2.0) est chargé, utilisez cette touche
pour activer ou désactiver le contrôle de lecture (PBC).
Remarque :
Pour simplifier les explications, les instructions de ce manuel
peuvent ne se référer qu'à l'appareil ou à la télécommande. Les
mêmes commandes fonctionnent alors de façon similaire sur la
télécommande et sur l'appareil lui-même.

66
Le boîtier de télécommande fourni permet la commande à distance
de l’appareil.
Pour utiliser le boîtier de télécommande, pointez-le vers le capteur de
télécommande du panneau avant de l’appareil.
< Même si le boîtier de télécommande est employé à por tée
de fonctionnement (5 m), la commande à distance p eut
être impossible s’il y a des obstacles entre l'appareil et la
télécommande.
< Si le boîtier de télécommande est employé à proximité d’autres
appareils gén érant des rayons infrarouges, ou si d’autres
télécommandes utilisant des rayons infrarouges sont utilisées
près de l'appareil, ce dernier peut ne pas bien fonctionner. Dans
la situation inverse, les autres appareils peuvent ne pas bien
fonctionner.
Mise en place des piles
1. Retirez le couvercle du compartiment des piles.
2. Insérez deux piles “AAA” (R03 ou UM-4). Assurez-vous que les piles
sont correctement insérées et respectent les polarités plus “+” et
moins “_”.
3. Refermez le couvercle.
Boîtier de télécommande
Remplacement des piles
Si vous remarquez que la distance de fonctionnement entre le boîtier
de télécommande et l'appareil se réduit, c'est que les piles sont usées.
Dans ce cas, remplacez-les par des neuves.
Pour plus d’informations sur la collecte des piles usagées, veuillez
contacter votre mairie, votre service d’ordures ménagères ou le point
de vente dans lequel vous avez acheté les articles.
Précautions concernant les piles
Un mauvais emploi des piles peut entraîner leur rupture ou leur fuite,
avec pour conséquence un incendie, des blessures ou la salissure des
objets proches. Veuillez lire et suivre attentivement les précautions
suivantes.
< Veillez à insérer les piles avec leurs pôles positif (+) et négatif (_)
correctement orientés.
< Utilisez des piles du même type. N’utilisez jamais des types de pile
différents ensemble.
< Des piles ou des batteries rechargeables peuvent être utilisées.
Référez-vous aux précautions inscrites sur leurs étiquettes.
< Si la télécommande ne doit pas être utilisée durant une période
prolongée (plus d’un mois), retirez ses piles pour éviter qu’elles ne
coulent.
< Si les piles coulent, essuyez le liquide dans le compartiment des
piles et remplacez les piles par des neuves.
< N'utilisez pas de piles d'un type autre que ceux spécifiés. Ne
mélangez pas des piles neuves avec des anciennes et n’utilisez
pas ensemble des types de pile différents.
< Ne chauffez pas et ne démontez pas les piles. Ne jetez jamais les
piles dans un feu ou dans de l’eau.
< Ne conservez et ne transportez pas les piles avec d’autres objets
métalliques. Les piles pourraient entrer en court-circuit, couler ou
exploser.
< Ne rechargez jamais une batterie sans avoir vérifié qu’elle peut
l’être.

FRANÇAIS
67
Réglage de l'horloge
Quand vous branchez le cordon d'alimentation dans la prise secteur
et allumez l'appareil pour la première fois, réglez l'horloge.
1
Si l'appar eil est en ser vice, appuye z sur la touc he
STANDBY/ON pour le mettre en veille.
2
Appuyez sur la touche CLOCK.
< Si “- -:- -” clignote dans l'afficheur, appuyez à nouveau sur la
touche CLOCK.
“Clock Set” (réglage de l'heure) s'affiche, et la valeur des “heures”
commence à clignoter.
< Si aucune touche n'est pressée durant 30 secondes, le mode de
réglage d'horloge est abandonné.
3
Appuyez sur les touches Volume (+ ou –) pour régler les
heures.
4
Appuyez sur la touche CLOCK.
La valeur des “minutes” commence à clignoter.
5
Appuyez sur les touches Volume (+ ou –) pour régler les
minutes.
6
Appuyez sur la touche CLOCK.
L'horloge démarre.
Une fois l'horloge réglée, faites aussi les réglages de l'appareil
avec le menu RÉGLAGES/SETUP (page 85).

68
La source sélectionnée apparaît dans l'afficheur de la face avant.
< Vous pouvez aussi sélectionner FM ou AM en appuyant une ou
deux fois sur la touche TUNER de la télécommande.
< Vous pouvez aussi sélectionner iPod ou USB en appuyant une ou
deux fois sur la touche iPod/USB de la télécommande.
< Pour écouter une source externe branchée à la prise AUX IN,
sélectionnez AUX1 ou AUX2.
< Vous pouvez aussi sélectionner AUX1 ou AUX2 en appuyant une
ou deux fois sur la touche AUX de la télécommande.
3
Faites jouer la source, et réglez le volume avec le bouton
VOLUME.
Le volume se règle de MIN à MAX. Vous pouvez maintenir
pressées les touches VOLUME – ou + de la télécommande pour
réduire ou augmenter le volume de façon continue.
< Appuyez sur la touche STANDBY/ON pour faire passer l'appareil
en mode de veille s'il n'est pas employé.
< Si vous appuyez sur la touche STANDBY/ON pour faire passer
l'appareil en mode de veille quand SOURCE est réglée sur AUX1
ou AUX2, le son des enceintes se coupe en premier, suivi après 2
secondes par la sortie pour caisson de graves.
Ce chapitre décrit le fonctionnement de base valable dans tous les
modes.
Si vous utilisez l'appareil pour la première fois, réglez l'horloge et les
paramètres de l'appareil (voir page précédente pour “Réglage de
l'horloge”, page 85 pour “Réglages”).
1
Appuyez sur la touche STANDBY/ON pour allumer l’appareil.
< L'appareil s'allume avec comme source la dernière ayant été
sélectionnée.
< Vous pouvez aussi utiliser la touche SOURCE (ou la touche
TUNER, DISC, iPod/USB ou AUX de la télécommande) pour
allumer l'appareil.
2
Appuyez sur la touche SOURCE pour choisir une source.
Chaque fois que vous appuyez sur la touche SOURCE, la source
change comme suit :
FM Radio (radio FM)
AM Radio (radio AM)
AUX1 Source (source AUX1)
AUX2 Source (source AUX2)
iPod
DISC Source (source disque)
USB Source (source USB)
Fonctionnement de base (1)

FRANÇAIS
69
Enregistrement d'une source
Vous pouvez enregistrer une source sur un enregistreur de CD ou
cassette branché à la prise DIGITAL OUT ou aux prises LINE OUT.
1. Sélectionnez la source à enregistrer en appuyant sur la touche
SOURCE.
2. Lancez l'enregistrement.
< Les commandes de volume et de tonalité (DVS, LOUDNESS et
TONE) n'agissent pas sur les signaux enregistrés.
Atténuateur de luminosité (Dimmer)
Appuyez sur la touche DIMMER pour atténuer l'affichage.
Appuyez à nouveau sur la touche pour annuler la fonction
d'atténuation.
Coupure du son (Muting)
Pour couper temporairement le son, appuyez sur la touche
MUTING. Appuyez à nouveau sur la touche MUTING pour rétablir
le son.
< “MUTING” clignote à l'écran quand le son est coupé.
< Si vous changez le volume alors que le son est coupé, le son
revient.
Réglage des graves et des aigus
Vous pouvez régler les graves et les aigus entre “-5” et “+5”.
1
Si la fonction LOUDNESS est activée, appuyez sur la
touche LOUDNESS pour la désactiver.
< Si la fonction LOUDNESS est activée, la correction des graves et
des aigus est automatiquement ramenée à “0”.
2
Ap puyez répéti tivement sur la touche TONE po ur
sélectionner Bass (graves) ou Treble (aigus).
3
Avec les touches VOLUME, réglez dans les 5 secondes
suivantes le niveau voulu.
Plus haute est la valeur des aigus, plus les hautes fréquences
sont accentuées.
Plus haute est la valeur des graves, plus les basses fréquences
sont accentuées.

70
Fonctionnement de base (2) Prise en main avec un iPod
Pour faire jouer votre iPod au travers du DR-H338i, vous devez d'abord
insérer l'adaptateur correspondant à votre modèle d'iPod.
1
Sélectionnez l'adaptateur de dock qui convient à votre
iPod.
N°4 : 20 Go + U2
iPod à molette cliquable 20 Go,
iPod à molette cliquable édition spéciale U2 20 Go,
iPod à écran couleur 20/30 Go,
iPod à écran couleur édition spéciale U2 20 Go,
iPod avec vidéo 30 Go,
iPod avec vidéo édition spéciale U2 30 Go,
iPod Classic 80/120 Go
N°7 : 60 Go (couleur) + Photo 40/60 Go
iPod à molette cliquable 40 Go,
iPod à écran couleur (iPod photo) 40/60 Go,
iPod à écran couleur 60 Go,
iPod avec vidéo 60/80 Go,
iPod Classic 160 Go
< Utilisez l'adaptateur fourni avec l'iPod ou un modèle du
commerce pour l'emploi des autres types d'iPod.
2
Insérez l'adaptateur dans le dock du DR-H338i.
Faites entrer le bord avant de l'adaptateur dans le dock, puis
poussez le bord arrière de l'adaptateur dans le dock jusqu'à ce
qu'un léger “clic” se fasse entendre, indiquant que l'adaptateur
est correctement inséré.
1
2
< Pour retirer l'adaptateur, saisissez-le par ses bords gauche et droit
et tirez-le délicatement.
Logiciel iPod compatible
Si votre iPod ne fonctionne pas avec le DR-H338i ou avec la
télécommande, mettre à jour son logiciel peut résoudre le problème.
DVS (Dolby Virtual Speaker)
(mode DISC/USB uniquement)
La technologie Dolby Virtual Speaker simule un environnement
d'écoute surround 5.1 hautement réaliste avec seulement deux
enceintes. La technologie Dolby Virtual Speaker crée aussi un
environnement à deux canaux plus large durant la lecture du contenu
stéréo de CD et fichiers MP3, et combiné avec le traitement Dolby Pro
Logic II, procure une expérience d'écoute en surround virtuel à partir
de n'importe quelle source stéréo de haute qualité.
Appuyez répétitivement sur la touche DVS pour sélectionner le
mode d'écoute.
Chaque fois que vous appuyez sur la touche DVS, le mode change
comme suit :
DVS Ref DVS Wide DVS désactivé
DVS Ref (Mode de référence) :
La largeur de l'image sonore avant est définie par la distance réelle
entre vos deux enceintes.
DVS Wide (Mode large) :
La largeur de l'image semble s'étendre au-delà des enceintes.
< Les touches DVS et LOUDNESS ne fonctionnent pas ensemble.
Touche LOUDNESS
Cette touche compense la perte des graves à faible volume.
N'activez pas cette fonction pour écouter à des niveaux normaux.
< Si la fonction LOUDNESS est activée, la correction des graves et des
aigus est automatiquement ramenée à “0”. Si vous voulez changez
le niveau des graves et/ou des aigus, désactivez la fonction
LOUDNESS.

FRANÇAIS
71
Mise en pause de la lecture
Pendant la lecture, appuyez sur la touche Lecture/Pause (G/J). La
lecture s'arrête à la position actuelle.
< Pour reprendre la lecture, appuyez de nouveau sur la touche
Lecture/Pause (G/J).
Saut de lecture
Pendant la lecture, appuyez répétitivement sur les touches de saut
(.//) jusqu’à ce que le morceau souhaité soit trouvé.
< Quand vous appuyez sur la touche de saut (.) pendant la
lecture, le morceau en cours reprend à son début. Si vous souhaitez
lire les morceaux précédents, appuyez deux fois ou plus sur la
touche de saut (.).
Recherche d'un passage de morceau
Tenir enfoncée
Pendant la lecture, maintenez pressée la touche de recherche m
ou ,) puis relâchez-la lorsque vous avez atteint le passage que
vous souhaitez écouter.
1
Appuyez sur la touche SOURCE pour sélectionner “iPod”.
< Vous pouvez aussi sélectionner iPod en appuyant une ou deux
fois sur la touche iPod/USB de la télécommande.
2
Insérez l’iPod dans le dock.
L’iPod se met automatiquement sous tension et démarre la
lecture à partir de sa liste de titres.
< Si l’iPod est inséré pendant qu’une autre source est sélectionnée,
il se met sous tension et entre en mode de pause.
< Veillez à utiliser l'adaptateur de dock approprié (voir page
précédente).
< L'iPod se recharge quand il est inséré dans le dock alors que le
DR-H338i est allumé. Pendant que l’appareil est en veille, l’iPod
n’est pas rechargé car la consommation de l’appareil est réduite
pour se conformer aux consignes de l’AIE.
< Quand un casque est branché à l'iPod, le son sort à la fois par les
enceintes et par le casque.
< Le signal vidéo de l'iPod connecté n'est produit que par les
prises de sortie vidéo du DR-H338i.
Écoute d’iPod (1)

72
Retour au menu précédent
Appuyez sur la touche MENU.
Cette touche a les mêmes fonctions que son homologue sur l'iPod.
Sélection de l'option de menu
Avec les touches b/5, faites défiler le menu jusqu'à l'option
voulue puis appuyez sur la touche Entrée.
Lecture en boucle
Chaque fois que vous appuyez sur la touche REPEAT, le mode de
lecture en boucle de l'iPod change comme suit :
< Quand vous sélectionnez “1”, l’icône de lecture en boucle d’une
seule piste (
) apparaît sur l’écran de l’iPod.
< Quand vous sélectionnez “All”, l’icône de lecture en boucle (
)
apparaît sur l’écran de l’iPod.
Écoute d’iPod (2)

FRANÇAIS
73
Écoute d'un disque
1
Appuyez sur la touche SOURCE pour sélectionner “DISC
Source”.
< S'il n'y a pas de disque chargé dans le tiroir de disque, “NO DISC”
est affiché.
2
Appuyez sur la touche Ouvrir/Fermer (L) pour ouvrir le
tiroir.
3
Insérez le disque avec sa face sérigraphiée vers le haut.
< Dans le cas d'un disque double-face, la face à lire doit être
tournée vers le bas.
< Veillez à ce que le disque soit centré dans le tiroir afin d'éviter
tout mauvais fonctionnement, blocage du tiroir ou dommage
pour le disque.
4
Appuyez à nouveau sur la touche Ouvrir/Fermer (L) pour
fermer le tiroir.
Le tiroir se fermera. Faites attention à ne pas vous pincer les
doigts dans le tiroir.
Il faut quelques secondes à l'appareil pour charger le disque.
< La lecture de certains disques peut automatiquement démarrer.
5
Appuyez sur la touche Lecture/Pause (y/J) pour lancer
la lecture si cela n'a pas été automatique.
Si un menu s'affiche à l'écran (certains DVD ou disques vidéo
peuvent afficher un tel menu), voir “Menu à l'écran” en page
suivante.
DVD VCD CD MP3 WMA JPEG DIVX

74
Un menu s'affiche à l'écran quand un DVD ou CD vidéo avec contenu
à contrôle de lecture (PBC) est chargé.
Le mode de fonctionnement du menu peut varier avec le disque.
Menus de DVD
Utilisez les touches de curseur (5/b/t/g) pour sélectionner une
option de menu dans un DVD, et confirmez la sélection avec la
touche Entrée.
Retour à l'écran menu
Appuyez sur la touche MENU ou sur la touche TITLE.
< Selon le disque, appuyer sur la touche MENU durant la lecture peut
faire redémarrer la lecture depuis le premier chapitre.
< Cette fonction n'est pas disponible pour un DVD -RW avec
enregistrement vidéo (VR).
Pour la compatibilité des dispositifs mémoire USB, voir page 56.
1
Appuyez sur la touche SOURCE pour sélectionner “USB
Source”.
2
Branchez votre d ispositi f mémoi re USB dans l e
connecteur USB.
Il f aut quelques secondes à l'ap pareil p our charger le
dispositif mémoire USB. La lecture de certains fichiers peut
automatiquement démarrer.
< Vous pouvez inverser les étapes
1
et 2.
< Seule une mémoire flash USB peut être utilisée. N'employez PAS
de disque dur USB haute capacité avec cet appareil.
3
Appuyez sur la touche Lecture/Pause (y/J) pour lancer
la lecture si cela n'a pas été automatique.
Écoute d'un dispositif mémoire USB Menu à l'écran (1)
MP3 WMA JPEG DIVX
DVD VCD MP3 WMA JPEG

FRANÇAIS
75
Fichiers audio formatés MP3 et Windows Media
Quand un disque ou support USB est chargé, une liste de répertoires
(dossiers) apparaît à l'écran.
< Il peut falloir 30 secondes ou plus pour afficher la liste de fichiers
selon le disque que vous lisez.
1
Sélectionnez un répertoire avec les touches 5/b et
appuyez sur la touche Entrée .
Les noms de fichier apparaîtront à l'écran.
2
Sélectionnez un fichier et appuyez sur la touche Entrée
ou sur la touche Lecture/Pause (y/J). L a lectu re
démarrera à partir du fichier sélectionné.
<
Appuyez sur la touche MENU pour alterner entre liste des dossiers et
liste des fichiers. Quand vous sélectionnez la liste des fichiers, vous
pouvez sélectionner un fichier sans avoir à sélectionner son dossier.
< Pour revenir au dossier parent, affichez la liste des dossiers avec la
touche MENU, sélectionnez “.........” avec les touches de curseur et
appuyez sur la touche Entrée.
< Selon le disque, des dossiers invisibles tels que “TRASH” (corbeille)
peuvent s'afficher à l'écran. Veuillez ignorer les dossiers qui ne
contiennent pas de fichiers lisibles.
< Durant la lecture, le temps écoulé sur le fichier en cours apparaît
dans l'afficheur de la face avant.
CD vidéo avec contrôle de lecture (PBC)
Quand un CD vidéo (version 2.0) ou un Super Vidéo CD (SVCD) avec
fonctions de contrôle de lecture (PBC) est chargé, un menu s'affiche
à l'écran.
Sélectionnez une option avec les touches numériques pour lancer
la lecture.
< Appuyez sur la touche / pour passer à la page suivante.
Appuyez sur la touche . pour revenir à la page précédente.
< Si vous appuyez sur la touche TITLE durant la lecture, le menu
apparaîtra à l'écran.
Activation/désactivation de la fonction PBC
Appuyez sur la touche MENU pour activer ou désactiver la fonction
PBC.
Quand la fonction PBC est désactivée :
Si vous appuyez sur la touche Lecture/Pause (y/J) en mode
d'arrêt, la lecture démarre de la première piste.
Quand la fonction PBC est activée :
Si vous appuyez sur la touche Lecture/Pause (y/J) en mode
d'arrêt, un menu apparaît à l'écran.
Sélectionnez une option avec les touches numériques pour
lancer la lecture.

76
Appuyez sur la touche Lecture/Pause (y/J) pour mettre en pause
la lecture audio. Toute image de DVD ou CD vidéo se fige alors.
Appuyez à nouveau sur la touche Lecture/Pause (y/J) pour
relancer la lecture.
AT TE NTI ON
Ne laissez pas le lecteur en pause de façon prolongée. Cela pourrait
endommager votre téléviseur ou le lecteur.
Quand on appuie sur la touche Stop (H), la lecture s'arrête et
l'écran affiche “Press Play Key To Continue”. Appuyer sur Lecture/
pause (y/J) relance la lecture.
Appuyer sur n'importe laquelle des touches suivantes annule le
mode de reprise :
Stop (H) en mode d'arrêt,
Ouvrir/Fermer (L), SOURCE, STANDBY/ON
Fichiers JPEG
1
Choisissez une image dans la liste des répertoires à l'aide
des touches 5/b.
Après une courte attente, une vignette de l'image apparaît sur
la droite.
2
Avec les touches de curseur, sélectionnez l'image à
agrandir.
< Certaines photos peuvent être déformées en raison de la
configuration ou des caractéristiques du disque. L'affichage des
photos plus grandes peut nécessiter un peu de temps en raison
de la taille plus importante de leurs données.
Visualisation de l'image en plein écran
ou
Appuyez sur la touche Entrée ou sur la touche Lecture/Pause
(y/J).
< En affichage plein écran, utilisez les touches de saut (.//)
pour visualiser la photo précédente ou suivante. Vous pouvez aussi
utiliser les touches g/t pour tourner l'image.
< En affichage plein écran, appuyez sur la touche Stop (H) pour
afficher plusieurs vignettes à la fois sur l'écran. Vous pouvez utiliser
les touches de curseur pour sélectionner une photo particulière
puis appuyer sur la touche Entrée pour visualiser cette image en
plein écran. Vous pouvez aussi sélectionner “Slide Show” pour
visualiser toutes les photos à la suite ou “Menu” pour choisir les
réglages. Vous pouvez aussi sélectionner gPREV ou NEXTt pour
passer à l'écran de vignettes précédent ou suivant.
< Appuyez sur la touche MENU pour quitter l'affichage en vignettes
ou en plein écran.
Menu à l'écran (2)
Arrêt de la lecture (Mode de reprise)
Pause de lecture (Gel d'image)
DVD
DVD VCD MP3 WMA JPEG
DVD VCD JPEG DIVX

FRANÇAIS
77
Recherche d'un passage de chapitre ou de piste
Saut de lecture
Appuyez sur une touche de saut (.//) autant de fois que
nécessaire pour trouver la piste ou le chapitre désiré. La piste ou le
chapitre sélectionné sera lu depuis son début.
< Lors de la lecture de CD vidéo avec contrôle de lecture (PBC), la
touche . est désactivée (page 75).
Pour une recherche rapide en avant ou en arrière dans le disque,
utilisez les touches de recherche (m ou ,) durant la lecture.
Appuyez sur la touche Lecture/Pause (y/J) quand vous avez
trouvé le passage à écouter.
Chaque fois que l'on appuie sur une touche de recherche (m ou
,), la vitesse de recherche change comme suit :
x2 x4 x8 x16 x32 vitesse normale
< CD/CD vidéo/MP3 : quand la recherche en avant atteint la fin de la
piste (ou la recherche en arrière le début de la piste), la fonction de
balayage est annulée et la lecture à vitesse normale reprend.
< Le son est coupé durant la recherche rapide dans un DVD ou CD
vidéo.
< Certains disques ne permettent pas cette fonction.
Sélection d'un chapitre ou d'une piste
DVD, CD vidéo et CD
Utilisez les touches numériques pour sélectionner les pistes ou
chapitres à lire. Par exemple, pour sélectionner le numéro de piste
35, appuyez sur “10”, “10”, “10” et “5”.
< Les touches numériques ne fonctionnent pas durant la lecture
avec PBC de CD vidéo (page 75).
MP3, WMA, JPEG et DIVX
Pour sélectionner un fichier, saisissez 3 chiffres. Par exemple, pour
sélectionner le numéro 5, appuyez sur “0”, “0”, et “5” (sinon, vous
pouvez juste appuyer sur “5” et attendre quelques secondes).
Sélection de l'audio
De nombreux DVD possèdent l'audio pour différentes langues, ainsi
que des versions stéréo et surround multicanal de la bande son.
Les CD et CD vidéo permettent de sélectionner les canaux gauche,
droite ou stéréo.
Appuyer sur la touche AUDIO passe en revue les différentes pistes
audio disponibles, et le résultat s'affiche à l'écran.
< Parfois, l'image se fige momentanément lors du changement de
l'audio.
< Certains disques nécessitent de passer par leur menu à l'écran pour
changer l'audio.
< L'audio de certains disques ne peut pas être changé de la façon
décrite ici, de même pour d'autres disques qui n'ont qu'un seul
flux audio. Si vous essayez de changer l'audio avec de tels disques,
l'icône d'interdiction “A” s'affiche à l'écran.
DVD VCD CD MP3 WMA JPEG DIVX
DVD VCD CD MP3 WMA JPEG DIVX
DVD VCD CD MP3 WMA JPEG DIVX
DVD VCD CD MP3 WMA JPEG DIVX

78
Sélection du sous-titrage
Appuyer répétitivement sur la touche SUBTITLE passe en revue les
langues disponibles sur le disque.
< Les sous-titres n'apparaissent pas toujours juste après que la langue
ait été sélectionnée. Il peut leur falloir quelques secondes.
<
Cer tains sous-titres de certains disques ne peuvent pas être
supprimés ni changés avec cette touche. Certains disques peuvent
n'avoir des sous-titres qu'en une langue, auquel cas le choix se
restreint bien entendu à cette langue ou à l'absence de sous-titrage.
< Certains disques nécessitent de passer par leur menu à l'écran pour
changer le sous-titrage.
< Le sous-titrage de certains disques ne peut pas être changé de la
façon décrite ici. Si vous essayez de changer le sous-titrage avec de
tels disques, l'icône d'interdiction “A” s'affiche à l'écran.
Zoom sur l'image
Pour zoomer sur l'image, appuyez sur la touche ZOOM durant la
lecture. Chaque fois que vous appuyez sur la touche ZOOM, le
niveau de grossissement change comme suit :
DVD, DivX, CD vidéo :
2x 3x 4x 1/21/3 1/4 O
JPEG :
< Vous pouvez déplacer le point de zoom à l'aide des touches de
curseur durant la lecture avec zoom.
< Le zoom n'agit pas sur les sous-titres ni sur les écrans de menu.
Ralenti
Pour les disques vidéo uniquement (DVD et CD vidéo)
Pour lire un disque au ralenti, appuyez sur la touche SLOW. À
chaque fois, la vitesse change comme suit :
DVD :
vitesse
normale
CD vidéo/DivX :
vitesse
normale
Pour reprendre la lecture normale, appuyez sur la touche Lecture/
Pause (y/J).
< Le son est coupé durant la lecture au ralenti.
Changement d'angle de caméra
Quand une scène enregistrée selon plusieurs angles est lue, l'icône
d'angle apparaît à l'écran. Chaque fois que vous appuyez sur la
touche ANGLE alors que l'icône d'angle est affichée, l'angle de la
caméra change.
< Si vous essayez de sélectionner un autre angle avec un disque dans
lequel aucun autre angle n'a été enregistré, l'icône d'interdiction
“A” s'affiche.
< La touche ANGLE ne fonctionne pas durant le mode de pause.
DVD VCD JPEG DIVX
DVD
DVD VCD DIVX
DVD

FRANÇAIS
79
Chaque fois que l'on appuie sur la touche REPEAT, le mode change :
< Certains disques ne permettent pas cette fonc tion. Dans ce cas, l'icône
“interdiction” s'affiche à l'écran.
< Si l'on appuie sur l'une des touches suivantes, le mode de lecture en boucle est
annulé :
STANDBY/ON, Ouvrir/Fermer (L), SOURCE
Lecture en boucle et lecture aléatoire
DVD
Repeat Chapter Repeat Title Repeat All
Pas de lecture en boucle
Repeat Chapter
Le chapitre actuellement sélectionné sera lu en boucle. Si un
autre chapitre est sélectionné durant la lecture en boucle, c'est
lui qui sera lu en boucle.
Repeat Title
Le titre actuellement sélectionné sera lu en boucle.
Repeat All
Tout le contenu du disque sera lu en boucle.
CD vidéo
Repeat Track Repeat All
Pas de lecture en boucle
Repeat Track
La piste actuellement sélectionnée sera lue en boucle. Si une
autre piste est sélectionnée durant la lecture en boucle, c'est elle
qui sera lu en boucle.
Repeat All
Tout le contenu du disque sera lu en boucle.
< La lecture en boucle ne fonctionne pas durant la lecture avec
PBC de CD vidéo (page 75).
CD/MP3/WMA/JPEG/DivX
Rep One
Le chapitre/piste/fichier actuellement sélectionné sera lu en
boucle. Si un autre chapitre/piste/fichier est sélectionné durant la
lecture en boucle, c'est lui qui sera lu en boucle.
Repeat All
CD
Tout le contenu du disque sera lu en boucle.
MP3/WMA/JPEG/DivX
Tous les fichiers du dossier actuellement sélectionné seront lus
en boucle.
Shuffle
CD
Tout le contenu du disque sera lu en ordre aléatoire.
MP3/WMA/JPEG/DivX
Tous les fichiers du dossier actuellement sélectionné seront lus
en ordre aléatoire.
DVD VCD CD MP3 WMA JPEG DIVX
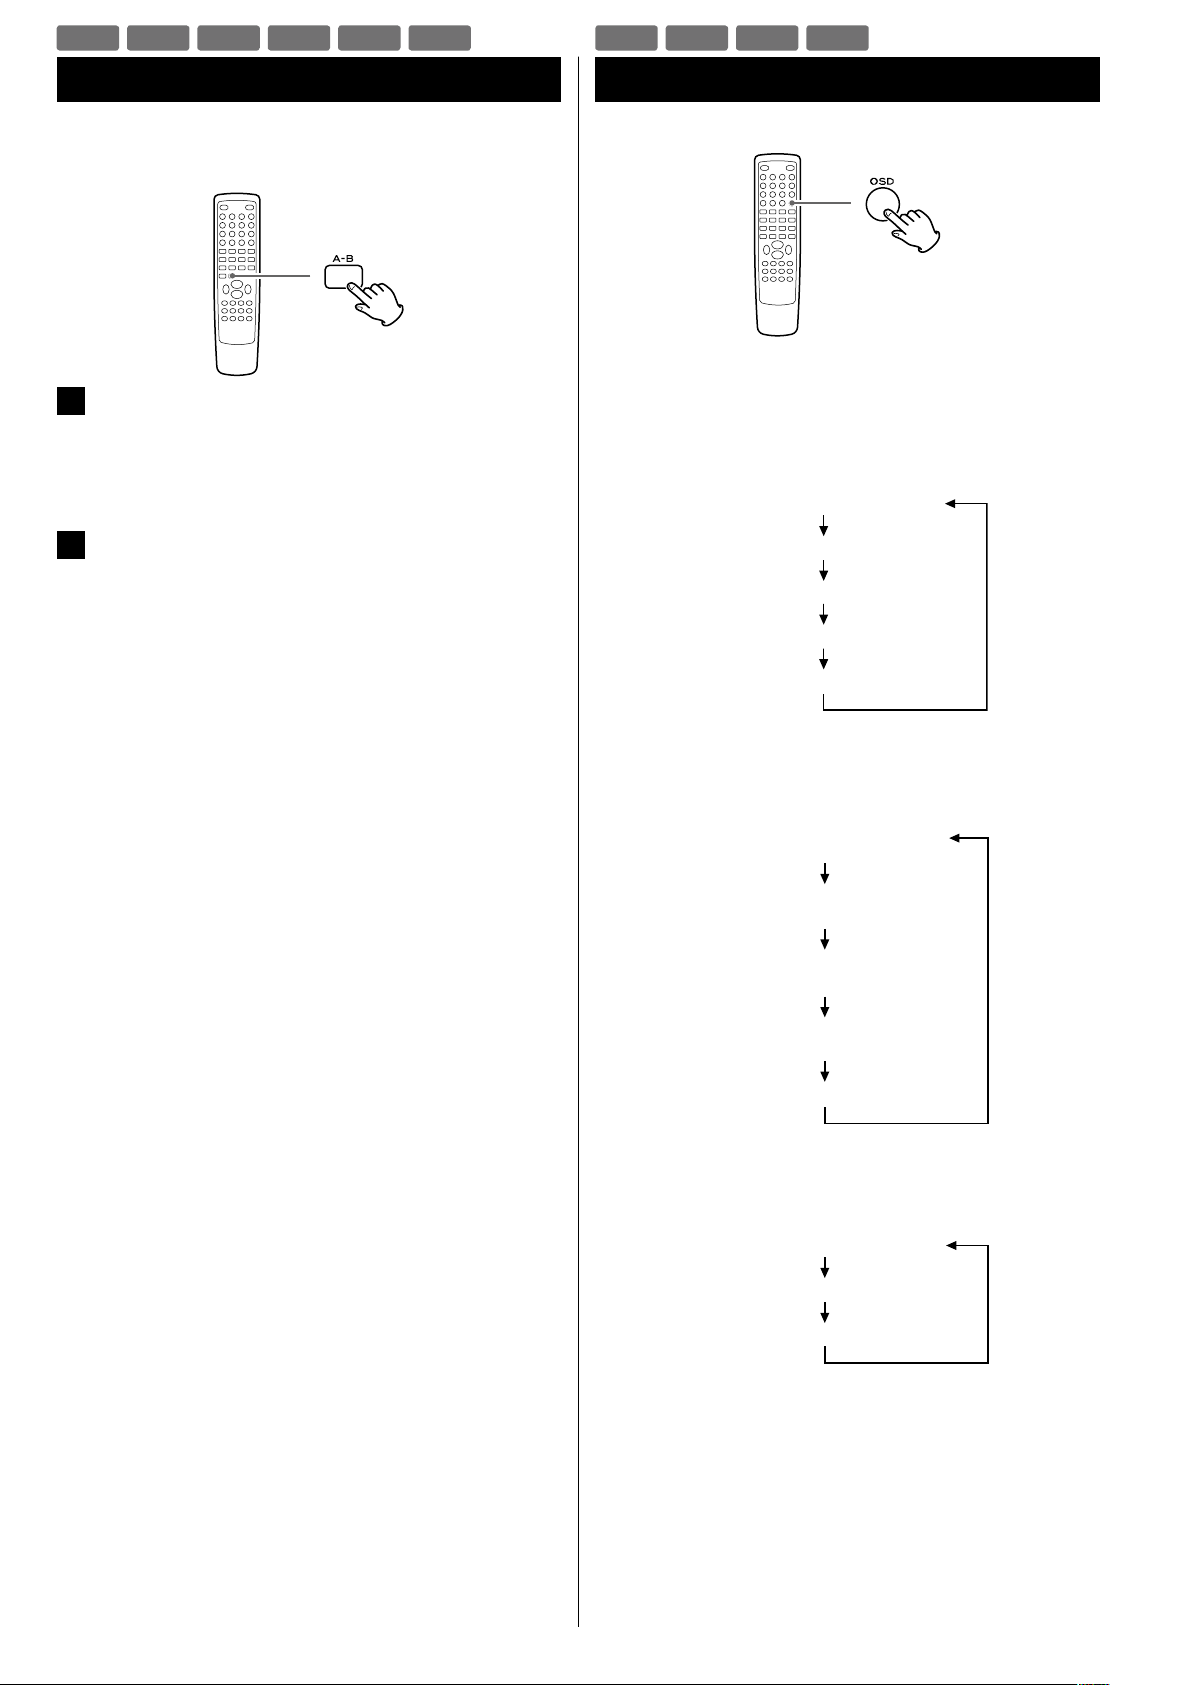
80
Changement du mode d'affichage
Chaque fois que l'on appuie sur la touche OSD (Affichage à l'écran)
durant la lecture, les informations suivantes se succèdent à l'écran.
DVD
CD/CD vidéo
DivX
Lecture en boucle A-B
Vous pouvez lire en boucle une section déterminée.
1
Lancez la lecture et déterminez le point auquel la lecture
en boucle A-B doit commencer (point A) en appuyant sur
la touche A-B.
“A” s'affiche à l'écran.
2
Quand le point auquel doit se terminer la lecture en
boucle (point B) est atteint, appuyez à nouveau sur la
touche A-B.
“AB” s'affiche à l'écran.
La section ainsi déterminée sera lue en boucle.
< La touche de recherche (,) permet d'avancer rapidement au
point B après avoir désigné le point A.
< Il doit y avoir plus d'une seconde entre le point A et le point B.
< Pour annuler la lecture en boucle A-B, appuyez à nouveau sur la
touche A-B.
DVD VCD CD DIVX
DVD VCD CD MP3 WMA DIVX

FRANÇAIS
81
Recherche temporelle (VCD/CD)
Vous pouvez lancer la lecture depuis l'heure/minute spécifiées.
1
Durant la lecture, appuyez deux fois sur la touche TIME.
Appuyez deux fois
“- - : - -” est surligné à l'écran.
2
Dans les 7 secondes, sais issez l'heure et la m inute
désirées à l'aide des touches numériques.
Par exemple, si la durée du fichier actuel est de 3 minutes,
saisissez une valeur inférieure à 3 minutes.
La lecture démarre du passage sélectionné.
Vous pouvez lancer la lecture depuis l'heure/minute spécifiées.
1
Durant la lecture, appuyez sur la touche TIME.
Pour rechercher dans la totalité du disque
Appuyez une fois sur la touche TIME.
“DT: - - : - -” est surligné à l'écran.
Pour rechercher dans la piste actuelle
Appuyez deux fois sur la touche TIME.
“TT: - - : - -” est surligné à l'écran.
Pour rechercher dans une piste du disque
Appuyez trois fois sur la touche TIME.
“T: - - / - -” est surligné à l'écran.
Puis saisissez le numéro de piste avec les touches numériques
(par exemple, pour sélectionner la piste 2, appuyez sur “2”).
2
Dans les 7 secondes, sais issez l'heure et la m inute
désirées à l'aide des touches numériques.
Par exemple, si la durée de la piste actuelle est de 3 minutes,
saisissez une valeur inférieure à 3 minutes.
La lecture démarre du passage sélectionné.
Recherche temporelle (MP3/WMA)
VCD CD MP3 WMA

82
Recherche de chapitre/Recherche temporelle (DVD)
Recherche de chapitre
Vous pouvez lancer la lecture depuis le début du chapitre spécifié.
1
Durant la lecture, appuyez sur la touche TIME.
2
Dans les 7 secondes, saisissez le numéro de chapitre
désiré (2 chiffres) avec les touches numériques.
La lecture démarre du début du chapitre sélectionné.
Recherche temporelle
Vous pouvez lancer la lecture depuis l'heure/minute/seconde spécifiées.
1
Durant la lecture, appuyez deux fois sur la touche TIME.
Appuyez deux fois
Si vous voulez faire une recherche dans le titre en cours, appuyez
deux fois sur la touche TIME.
Si vous voulez faire une recherche dans le chapitre en cours,
appuyez trois fois sur la touche TIME.
2
Dans les 7 secondes, saisissez l'heure, la minute et la
seconde désirées avec les touches numériques.
La lecture démarre du passage sélectionné.
Recherche de chapitre
Vous pouvez lancer la lecture depuis le début du chapitre spécifié.
1
Durant la lecture, appuyez sur la touche TIME.
“SELECT - - -” s'affiche à l'écran.
2
Dans les 7 secondes, saisissez le numéro de fichier désiré
(3 chiffres) avec les touches numériques.
La lecture démarre du début du fichier sélectionné.
Recherche temporelle
Vous pouvez lancer la lecture depuis l'heure/minute/seconde spécifiées.
1
Durant la lecture, appuyez deux fois sur la touche TIME.
Appuyez deux fois
“GO TO -:- -:- -” s'affiche à l'écran.
2
Dans les 7 secondes, saisissez l'heure, la minute et la
seconde désirées avec les touches numériques.
La lecture démarre du passage sélectionné.
Recherche de chapitre/Recherche temporelle (DivX)
DVD
DIVX

FRANÇAIS
83
Lecture programmée (DVD, VCD, CD)
20 chapitres/pistes peuvent être programmés dans l'ordre désiré.
1
Si une autre source est sélectionnée, appuyez sur la
touche DISC pour sélectionner “DISC Source”.
< Vous pouvez aussi utiliser la touche SOURCE de l'appareil pour
sélectionner “DISC Source”.
2
Appuyez sur la touche PROGRAM.
La liste programmée apparaît à l'écran.
< Pour annuler le mode programme, appuyez à nouveau sur la
touche PROGRAM, ou sélectionnez “EXIT” avec les touches de
curseur et appuyez sur la touche Entrée.
3
Saisissez le “titre et numéro de chapitre” ou “numéro de
piste” désiré avec les touches numériques.
Par exemple, pour saisir le numéro 5, appuyez sur “5”.
Répétez cette étape pour programmer d'autres chapitres/pistes.
< Si vous vous êtes trompé, amenez le curseur sur le numéro de
piste programmé et changez-le avec les touches numériques.
< Pour programmer plus de 11 chapitres/pistes, appuyez sur la
touche / afin de passer à la page de programme suivante
(ou sélectionnez “tl” avec les touches de curseur et appuyez
sur la touche Entrée). Appuyez sur la touche . pour revenir à
la page précédente.
4
Une fois la sélection des numéros de chapitre/piste
terminée, sélectionnez “START” avec les touches de
curseur et appuyez sur la touche Entrée pour lancer la
lecture programmée.
< Durant la lecture programmée, les touches numériques ne
fonctionnent pas.
< Une fois la lecture terminée, le programme s'efface.
< Si v o u s appuyez su r u n e d e s t o u ches s u i vantes, l a
programmation est aussi effacée.
Ouvrir/Fermer (L), STANDBY/ON, Stop (H)
SOURCE (AUX, iPod/USB, TUNER)
DVD VCD CD

84
Lecture programmée (MP3, WMA, DIVX)
1
Si une autre source est sélectionnée, appuyez sur la
touche SOURCE pour sélectionner “DISC Source” ou “USB
Source”.
ou
< Vous pouvez aussi utiliser la touche SOURCE de l'appareil pour
sélectionner “DISC Source” ou “USB Source”.
2
Sélectionnez un fichier avec les touches de curseur et
appuyez sur la touche PROGRAM.
Le fichier est ajouté au programme.
3
Appuyez une ou deux fois sur la touche MENU pour
afficher le programme.
4
Surlignez le premier fichier du programme avec les
touches de curseur.
5
Appuyez sur la touche Entrée ou sur la touche Lecture/
Pause (y/J) pour lancer la lecture programmée.
ou
< Si v o u s appuyez su r u n e d e s t o u ches s u i vantes, l a
programmation est effacée.
SOURCE (AUX, iPod/USB, TUNER)
Ouvrir/Fermer (L) (en mode DISC), STANDBY/ON
MP3 WMA DIVX

FRANÇAIS
85
Réglages (Introduction)
3
Utilisez les touches de curseur pour naviguer dans les
menus.
Si aucun curseur n'est visible à l'écran, utilisez les touches gauche
et droite (g/t) pour sélectionner une page.
Utilisez les touches haut et bas (5/b) pour surligner les options
de menu dans la page sélectionnée.
Appuyez sur la touche gauche (g) pour revenir au menu
supérieur.
4
Accédez à l'option de menu avec la touche de curseur
droite (t).
5
Utilisez les touches de curseur haut et bas (5/b) pour
sélectionner un des choix offerts par l'option de menu,
puis appuyez sur la touche Entrée pour confirmer votre
choix.
Les fonctions individuelles de menu sont décrites à partir de la
page suivante.
Répétez les étapes
3
à 5 en fonction des besoins.
6
Appuyez sur la touche SETUP pour quitter le mode de
réglage.
Ce chapitre décrit comment utiliser le menu RÉGLAGES/SETUP. La
plupart des réglages doivent être faits avant votre première utilisation
du système.
Avec le menu RÉGLAGES/SETUP, vous pouvez régler la taille de
l'image, choisir votre langue préférée pour l'audio et l'affichage à
l'écran (OSD), restreindre la lecture par les enfants, etc.
Pour le détail de chaque menu, voir les pages suivantes.
1
Allumez l'appareil et le téléviseur ou moniteur qui lui est
raccordé.
< Le menu RÉGLAGES/SETUP n'est disponible qu'en mode DISC
Source ou USB Source. Si une autre source est sélectionnée,
appuyez sur la touche SOURCE pour sélectionner “DISC Source”
ou “USB Source”.
2
Appuyez sur la touche SETUP.
Le menu des réglages apparaît à l'écran.
< Pour quitter le mode des réglages, appuyez à nouveau sur la
touche SETUP.
< Bien qu'il soit possible d'accéder au menu des réglages pendant
la lecture (ou en mode de reprise), toutes les fonctions du menu
ne sont alors pas disponibles. Pour accroître le nombre de
fonctions disponibles, appuyez deux fois sur la touche Stop (H).

86
Réglages (RÉGLAGES GÉNÉRAUX/GENERAL SETUP)
AFFICHAGE TV/TV DISPLAY
Le format du téléviseur ou moniteur peut ne pas correspondre à celui
du film. Pour éviter une déformation sur les téléviseurs plus anciens,
vous pouvez avoir à changer la façon dont l'image est affichée. Les
téléviseurs ordinaires utilisent un rapport d'aspect 4:3 ; les téléviseurs
haute définition utilisent un rapport d'aspect 16:9 (comme les films).
Remarque :
Vous pouvez avoir à consulter le mode d'emploi de votre téléviseur
en conjonction avec cette section pour obtenir les meilleurs résultats.
Certains disques ne permettent pas de changer le rapport d'aspect et
vous devrez donc le changer sur le téléviseur.
Faites ce réglage avec la lecture à l'arrêt ; vous ne pouvez pas
le faire pendant qu'un disque est lu.
4:3 PAN SCAN
Ce mode s'emploie avec les téléviseurs 4:3. Les images 4:3 sont
affichées normalement. Avec des programmes 16:9, l'image
s'affiche sur toute la hauteur de l'écran et ses parties gauche et
droite sont rognées.
Image 4:3 Image 16:9
4:3 LETTER BOX
Ce mode s'emploie avec les téléviseurs 4:3. Les images 4:3 sont
affichées normalement. Les images 16:9 sont visibles dans toute
leur largeur, mais il existe des bandes vierges en haut et en bas de
l'écran.
Image 4:3 Image 16:9
16: 9
S'emploie avec un téléviseur à écran large 16:9.
Image 4:3 Image 16:9
< Certains disques pour écran large ne permettant pas la lecture en
mode Pan Scan sont automatiquement lus en mode Letter Box.
< Selon le DVD, le 4:3 Letter Box peut être automatiquement choisi à
la place du 4:3 Pan Scan et vice versa.
< Si 16:9 (écran large) est sélectionné alors qu'un téléviseur ordinaire
est connecté, le contenu en 16:9 sera déformé à la lecture (il
semblera étiré).
LANGUE OSD
/OSD (On Screen Display) LANGUAGE
Sélectionnez ici la langue désirée pour les menus à l'écran du
DR-H338i parmi les suivantes :
ENGLISH (par défaut)
FRANÇAIS
DEUTSCH
ITALIANO
ESPAÑOL
NEDERLANDS
ÉCONOM. ÉCRAN/SCREEN SAVER
OUI (ON) (par défaut)
L'économiseur d'écran démarre si rien n'est lu et si aucune action
n'a été accomplie durant 4 minutes.
NON (OFF)
L'économiseur d'écran ne démarre pas.
DIVX(R) CODE
Au cas où vous auriez besoin d’un code d’enregistrement pour lire les
fichiers DivX, sélectionnez cette option.
Le code d’enregistrement du lecteur est affiché.

FRANÇAIS
87
RÉGL. AUDIO NUMÉRIQUE (SORTIE NUMÉR.)
/DIGITAL AUDIO SETUP
NON (OFF)
Sélectionnez cette option si vous n'utilisez pas la sortie numérique
DIGITAL OUT.
Aucun signal n'est produit par cette prise.
TOUS (ALL)
Sélectionnez cette option si l'appareil est branché à un élément
audio équipé d'un décodeur Dolby Digital intégré via la sortie
DIGITAL OUT ou HDMI.
MIC seulement (PCM only) (par défaut)
Sélectionnez cette option si l'appareil est branché à un élément
audio tel qu'un amplificateur/récepteur ou platine MD via la sortie
DIGITAL OUT ou HDMI.
RÉGLAGES DOLBY DIGITAL (DUAL MONO)
/DOLBY DIGITAL SETUP
STÉRÉO
Le canal gauche est produit par l'enceinte gauche et le canal droit
par l'enceinte droite.
L-MONO
Le canal gauche est produit par les enceintes gauche et droite.
R-MONO
Le canal droit est produit par les enceintes gauche et droite.
TRAITEMENT 3D (MODE RÉVERB.)
/3D PROCESSING
Ce réglage produit les effets sonores suivants :
NON (OFF)
CONCERT
SÉJOUR (LIVING ROOM)
SALLE (HALL)
SALLE DE BAIN (BATHROOM)
GROTTE (CAVE)
STADE (ARENA)
ÉGLISE (CHURCH)
Réglages (RÉGLAGES AUDIO/AUDIO SETUP)
DRC (Dynamic Range Compression)
/NIGHT MODE
OUI (ON)
Applique aux données Dolby Digital un contrôle de leur plage
dynamique, réduisant le volume des sons forts et augmentant celui
des sons faibles. C'est utile pour les dialogues, l'écoute nocturne
etc.
NON (OFF) (par défaut)
Désactive la compression dynamique de l'audio.
< Cette fonction n'agit que si le DVD lu a été enregistré en Dolby
Digital. Ce contrôle n'affecte pas les autres disques.
< L'effet global de ce réglage dépend du disque lu, de l'amplificateur
et des enceintes servant à la reproduction.
AUDIO SYNC
Ce réglage permet de retarder le signal sonore par paliers de 10 ms,
de 0 à 200 ms (uniquement pour les signaux numériques enregistrés
sur un disque ou stockés sur un dispositif USB ; indisponible pour les
signaux analogiques venant d'AUX 1 ou 2).
Selon le téléviseur, il peut falloir approximativement 100 ms (0,1 s) à
une image pour apparaître après l'entrée des signaux vidéo, ce qui
entraîne un retard de l'image par rapport au son sortant du DR-H338i.
Dans ce cas ou si la synchronisation audio et vidéo laisse à désirer,
réglez le retard avec les touches de curseur gauche (diminuer) ou
droite (augmenter) (g/t).

88
SORTIE VIDÉO/VIDEO OUTPUT
Ce réglage sert à sélectionner la prise de sortie de la vidéo. Seul “Y Cb/
Pb Cr/Pr” (sorties composantes) peut être sélectionné.
< Si votre téléviseur est raccordé à la prise HDMI, aucun signal n'est
produit par les prises de sortie vidéo composantes.
MODE TV/TV MODE
Ce réglage perme t la sélec tion d'u ne vidéo entrelacée
(ENTRELACEMENT/INTERLACE) ou à balayage progressif (PROGRESSIF/
PROGRESSIVE) pour les sorties vidéo composantes.
La vidéo à balayage progressif donne une meilleure image, plus nette.
Toutefois, elle n'est pas prise en charge par tous les téléviseurs ou
moniteurs, et vous devez vous assurer qu'elle est pleinement acceptée
avant d'activer cette option.
< Si votre téléviseur n'est pas compatible avec le balayage
pro gr ess if, ne sé lec ti on ne z jam ais “P ROG RE SSI F
(PROGRESSIVE)”. Aucune image ne s'afficherait sur le moniteur.
Au cas où vous auriez sélectionné “PROGRESSIF (PROGRESSIVE)” par
erreur, débranchez le DR-H338i et le téléviseur, puis rebranchez-les.
Et changez le réglage en “ENTRELACEMENT (INTERLACE)” dans le
menu RÉGLAGES VIDÉO - MODE TV.
Les consommateurs doivent savoir que tous les téléviseurs
haute définition ne sont pas entièrement compatibles avec ce
produit et peuvent causer des artefacts d'affichage d'image.
Dans le cas de problèmes avec les images à balayage progressif
480 (525) ou 576 (625), il est recommandé à l'utilisateur de
changer la connexion pour une sortie à "définition standard". En
cas de questions concernant la compatibilité de votre téléviseur
avec ce lecteur de DVD en mode 480p (525p) et 576p (625p),
veuillez contacter notre service après-vente.
RÉGLAGES COUL. (RÉGLAGES QUALITÉ VIDÉO)
/COLOR SETTING
Vous pouvez régler certains paramètres de l'image vidéo.
1
Surlig nez “RÉGLAGES COUL . (CO LOR S ETTI NG)” et
appuyez sur la touche droite.
2
Utilisez les touches gauche et droite (g/t) po ur
sélectionner le paramètre.
NETTETÉ (SHARPNESS)
Cela règle la netteté de l'image affichée sur le moniteur.
Sélectionnez HAUT (HIGH), MOY (MEDIUM) ou BAS (LOW) avec
les touches de curseur et appuyez sur la touche Entrée.
LUMINEUX (BRIGHTNESS)
Règle la luminosité de l'image.
Utilisez les touches gauche et droite pour changer la valeur, et
appuyez sur la touche Entrée.
CONTRASTE (CONTRAST)
Règle le contraste de l'image.
Utilisez les touches gauche et droite pour changer la valeur, et
appuyez sur la touche Entrée.
GAMME (GAMMA)
Règle le gamma de l'image.
Sélectionnez HAUT (HIGH), MOY (MEDIUM), BAS (LOW) ou AUC
(NONE) avec les touches de curseur et appuyez sur la touche
Entrée.
TEINTE (HUE)
Règle la balance vert/rouge de l'image (seulement pour le
balayage progressif).
Utilisez les touches gauche et droite pour changer la valeur, et
appuyez sur la touche Entrée.
SATURATION
Règle le niveau de saturation.
Utilisez les touches gauche et droite pour changer la valeur, et
appuyez sur la touche Entrée.
DÉLAI LUMA (LUMA DELAY)
Règle le retard de luma.
Sélectionnez 0T ou 1T avec les touches de curseur et appuyez
sur la touche Entrée.
3
Appuyez sur la touche gauche (g) pour revenir à la page
RÉGLAGES VIDÉO (VIDEO SETUP).
Réglages (RÉGLAGES VIDÉO/VIDEO SETUP)

FRANÇAIS
89
HDMI SETUP
AUTO (par défaut)
Sélectionnez cette option pour que le signal soit produit quand
votre téléviseur ou moniteur est connecté à la prise de sortie
HDMI.
NON (OFF)
Sélectionnez cette option si vous n'utilisez pas la sortie HDMI.
Aucun signal n'est produit par la prise de sortie HDMI.
RESOLUTION
Ce réglage n’est disponible que si votre téléviseur est raccordé à la
prise HDMI, et si le paramètre HDMI est réglé sur “AUTO”.
Sélec tionnez la bonne résolution pour votre téléviseur ou
moniteur.
480P 60Hz (par défaut)
720P 60Hz
108 0i 60Hz
108 0P 60Hz
576P 50Hz
720P 50Hz
108 0i 50Hz
108 0P 50Hz
Réglages (PRÉFÉRENCES/PREFERENCE) (1)
TYPE TV/TV TYPE
PAL
Sélec tionnez cette option quand l'appareil est raccordé à un
téléviseur PAL.
AUTO
Sélec tionnez cette option quand l'appareil est raccordé à un
téléviseur multistandard.
NTSC (par défaut)
Sélec tionnez cette option quand l'appareil est raccordé à un
téléviseur NTSC.
DOUBLAGE/AUDIO,
SOUS-TITRES/SUBTITLE,
MENU DISQUE/DISC MENU
Vous pouvez sélectionner votre langue préférée pour l'audio, les soustitres et le menu du disque.
< Si la langue que vous avez choisie comme préférée n'est
pas enregistrée sur le DVD, une des langues enregistrées est
automatiquement sélectionnée.
< Vous pouvez supplanter le réglage DOUBLAGE (AUDIO) du
menu RÉGLAGES/SETUP en appuyant sur la touche AUDIO de la
télécommande pendant qu'un DVD est lu.
< Vous pouvez supplanter le réglage SOUS-TITRES (SUBTITLE) du
menu RÉGLAGES/SETUP en appuyant sur la touche SUBTITLE de la
télécommande pendant qu'un DVD est lu.
< Sélectionnez NON (OFF) pour désactiver le sous-titrage.
Sachez que les sous-titres de certains disques ne peuvent pas être
supprimés, même en sélectionnant NON (OFF).

90
MODE DE MOT PASS./PASSWORD MODE
Vous pouvez temporairement supprimer la restriction de lecture de
disques par niveau (contrôle parental).
Pour changer ce réglage, sélectionnez ON ou OFF, saisissez votre
mot de passe, et appuyez sur la touche Entrée.
OUI (ON)
Il vous faut un mot de passe pour changer le niveau du contrôle
parental.
NON (OFF)
Vous pouvez changer le niveau du contrôle parental sans mot de
passe.
Vous ne pouvez pas temporairement supprimer la restriction de
lecture de disques (contrôle parental).
MOT DE PASSE/PASSWORD
Vous pouvez définir un nouveau mot de passe pour le contrôle
parental.
Le mot de passe par défaut est 2580.
1
Sélectionnez “CHANGER (CHANGE)” et appuyez sur la
touche Entrée.
2
Saisissez 2580 (ou votre mot de passe personnel) avec les
touches numériques.
3
Saisissez un nouveau mot de passe.
4
Sa isis sez à nouve au le même mot de passe p our
confirmer.
5
Appuyez sur la touche Entrée.
Notez qu'il vous faudra votre mot de passe pour changer le
niveau de contrôle dans le futur ainsi que pour temporairement
supprimer la restriction de lecture de disques (contrôle parental).
Si vous avez oublié votre mot de passe, utilisez 2580.
Réglages (RÉGLAGES MOT DE PASSE/PASSWORD SETUP)
PARENTAL (Contrôle parental)
La lecture de certains DVD peut être restreinte en fonction de l'âge
des utilisateurs. Le système de contrôle parental permet aux parents
de fixer le niveau de limitation de lecture. Le réglage par défaut est “8”.
Remarques :
< Plus bas est le niveau, plus stricte est la limitation.
< Si la classification du DVD chargé est supérieure au niveau choisi, le
système demandera un mot de passe. Saisissez votre mot de passe
et appuyez sur la touche Entrée pour lancer la lecture.
1
Sélectionnez dans le menu le niveau de contrôle parental
désiré, puis appuyez sur la touche Entrée.
2
Il vous sera demandé de saisir votre mot de passe. Utilisez
les touches numériques pour saisir 2580 (ou votre mot de
passe personnel si vous l'avez déjà fixé).
< Pas besoin de saisir de mot de passe si “MODE DE MOT PASS.
(PASSWORD MODE)” est réglé sur NON (OFF).
RÉGL. PAR DÉFAUT/DEFAULT
Toutes les options du menu RÉGLAGES/SETUP (sauf le mot de passe et
le contrôle parental) seront ramenées à leur réglage par défaut.
Réglages (PRÉFÉRENCES/PREFERENCE) (2)

FRANÇAIS
91
Écoute de la radio (FM/AM)
1
Sélectionnez “FM Radio” ou “AM Radio” avec la touche
SOURCE.
< Vous pouvez aussi sélec tionner “FM Radio” ou “AM Radio”
en appuyant une ou deux fois sur la touche TUNER de la
télécommande.
2
Maintenez la touche TUNING (. ou /) enfoncée plus
d'1 seconde pour sélectionner la station que vous voulez
écouter (auto-sélection).
Tenir enfoncée
plus d’1 seconde
L'appareil commence sa recherche d'une station.
Quand une station est trouvée, le processus de syntonisation
s'arrête automatiquement.
Répétez cette étape jusqu’à ce que vous ayez trouvé la station
souhaitée.
< Si vous voulez arrêter le processus de syntonisation, appuyez sur
la touche TUNING.
Sélection de stations qui ne peuvent pas être trouvées
automatiquement (sélection manuelle)
Quand on appuie momentanément sur la touche TUNING, la
fréquence change par paliers fixes.
Appuyez répétitivement sur la touche TUNING jusqu'à ce que
vous ayez trouvé la station que vous souhaitez écouter.
FM MODE
Appuyer sur cette touche fait alterner entre les modes Auto
(Stéréo) et Mono.
Mode Auto
Les émissions FM stéréo sont reçues en stéréo.
Mode Mono
Pour compenser une faible réception FM stéréo, sélectionnez ce
mode. La réception est alors forcée en mono, ce qui réduit les
parasites indésirables.
Si la réception est mauvaise
Pour la meilleure réception, tournez l'antenne FM ou AM jusqu'à ce
que vous obteniez proprement les stations.

92
Syntonisation préréglée ou preset (FM/AM)
Préréglage manuel des mémoires
1
Réglez une station que vous voulez écouter (voir page
précédente).
2
Appuyez sur la touche MEMORY.
3
Sélectionnez une mémoire de préréglage (preset) où
mémoriser la station avec les touches PRESET, puis
appuyez à nouveau sur la touche MEMORY.
La station est mémorisée.
Comment sélectionner des stations
préréglées (presets)
En mode FM ou AM, sélectionnez une mémoire de préréglage
(preset) avec les touches PRESET.
Vous pouvez mémoriser un maximum de 20 stations FM et de 20
stations AM.
Préréglage automatique des mémoires
1
Sélectionnez “FM Radio” ou “AM Radio” avec la touche
SOURCE.
< Vous pouvez aussi sélec tionner “FM Radio” ou “AM Radio”
en appuyant une ou deux fois sur la touche TUNER de la
télécommande.
2
Appuyez sur la touche SCAN.
Un maximum de 20 stations parmi les mieux captées de votre
région sont mémorisées automatiquement.

FRANÇAIS
93
Écoute d'une source externe
1
Branchez une platine cassette etc. à la prise AUX 1 IN du
DR-H338i à l'aide de câbles RCA du commerce.
Ou reliez la prise PHONES (casque) ou la prise de sortie
audio d'un lecteur audio portable à la prise AUX 2 IN du
DR-H338i.
< Quand vous branchez un lecteur audio portable à la prise AUX 2
IN du DR-H338i, utilisez le câble à fiche mini-jack stéréo fourni.
2
Appuyez sur la touche SOURCE pour sélectionner “AUX1
Source” ou “AUX2 Source”.
< Vous pouvez aussi sélec tionner “AUX1 Source” ou “AUX2
Source” en appuyant une ou deux fois sur la touche AUX de la
télécommande.
3
Faites jouer la source, et réglez le volume avec le bouton
VOLUME du DR-H338i et celui du lecteur audio.
Si vous utilisez la prise PHONES (casque) de votre mini-lecteur,
vous devez régler le volume de ce dernier ou vous risquez de ne
pas entendre de son par votre DR-H338i.
< Trop monter le volume du mini-lecteur peut entraîner une
distorsion du son produit par votre DR-H338i. Si c'est le cas,
réduisez le volume du mini-lecteur jusqu'à ce que la distorsion
disparaisse puis réglez le volume du DR-H338i à un niveau
d'écoute confortable.

94
L'appareil peut être programmé p our s'allumer à une heure
déterminée.
< Réglez l'horloge avant de régler le réveil (page 67).
1
Si l'appar eil est en ser vice, appuye z sur la touc he
STANDBY/ON pour le mettre en veille.
2
Appuyez sur la touche CLOCK.
3
Appuyez sur la touche TIMER.
“Timer Set” (réglage du réveil) s'affiche, et la valeur des “heures”
commence à clignoter.
< Si aucune touche n'est pressée durant 30 secondes, le mode de
réglage de réveil est abandonné.
4
Utilisez les touches Volume pour régler le réveil (heure),
puis appuyez sur la touche TIMER.
Minuterie d'extinction Réveil
L'alimentation peut être coupée après un temps défini.
Appuyez répétitivement sur la touche SLEEP jusqu'à ce que le
temps désiré s'affiche.
SLEEP-10, 20, 30, 60 ou 90
L'alimentation sera coupée 90 (60, 30, 20, ou 10) minutes plus tard.
SLEEP OFF
La minuterie d'extinction est désactivée.
< Si vous voulez contrôler le temps restant, appuyez une fois sur la
touche SLEEP. Le temps restant s'affichera durant 3 secondes puis
l'affichage normal reviendra.

FRANÇAIS
95
7
Allumez l'appareil et préparez la source.
Pour lire un disque, sélectionnez “DISC Source” avec la touche
SOURCE et installez un disque.
Pour lire un dispositif mémoire USB, sélectionnez “USB Source”
avec la touche SOURCE et installez un dispositif mémoire USB.
Pour écouter la modulation de fréquence (FM), sélectionnez “FM
Radio” avec la touche SOURCE et calez-vous sur une station.
Pour écouter la modulation d'amplitude (AM), sélectionnez “AM
Radio” avec la touche SOURCE et calez-vous sur une station.
8
Appuyez sur la touche STAND BY/ON pour éteindre
l’appareil.
L'horloge et l'indicateur de réveil (
) s'affichent.
< L'appareil s'allumera chaque jour à l'heure spécifiée.
< L'appareil s'allume avec comme source la dernière ayant été
sélectionnée.
N'oubliez pas de remettre l'appareil en veille ou le réveil
ne fonctionnera pas.
Si l'heure de réveil est atteinte, l'appareil passe automatiquement
en mode “SLEEP-60” et repasse donc en veille 60 minutes plus
tard.
Si vous désirez une écoute continue, appuyez répétitivement sur
la touche SLEEP pour sélectionner “SLEEP OFF” après que l'heure
de réveil ait été atteinte.
La valeur des “minutes” commence à clignoter.
5
Utilisez les touches Volume pour régler le réveil (minute),
puis appuyez sur la touche TIMER.
“Off” commence à clignoter.
6
Avec les touches Volume, activez (On) ou désactivez (Off)
la fonction réveil, puis appuyez sur la touche TIMER.
Sélectionnez “On” pour activer le réveil.
L'indicateur de réveil (
) s'allume dans l'afficheur.
Si vous n'ut ilisez pas le réveil, sélec tio nnez “Off”
(l'indicateur de réveil disparaît de l'afficheur).

96
Si vous avez des problèmes avec cet appareil, veuillez consulter cette
liste et essayez de voir si vous pouvez résoudre vous-même le problème
avant d'appeler votre revendeur ou un service après-vente TEAC.
Général
Pas d’alimentation.
e Vérifiez le branchement à l'alimentation secteur. Vérifiez et
assurez-vous que la source d’alimentation n’est pas une prise
commutée, et si c’est le cas, qu'elle est en service. Vérifiez que la
prise délivre bien du courant en y branchant un autre appareil tel
qu'une lampe ou un ventilateur.
e Appuyez sur la touche STANDBY/ON pour allumer l'appareil.
La télécommande ne fonctionne pas.
e Appuyez sur la touche STANDBY/ON pour allumer l'appareil.
e Si les piles sont épuisées, changez-les.
e Utilisez la télécommande dans les limites de sa portée (5 m) et
pointez-la vers la face avant de l’appareil.
e Retirez les obstacles entre la télécommande et l’appareil.
e S’il y a un fort éclairage près de l’appareil, éteignez-le.
Un ronflement ou bruit sévère se fait entendre.
e Placez l'appareil aussi loin que possible d'un téléviseur.
e
Assurez-vous que les cordons de modulation et les câbles d'enceinte
sont aussi éloignés que possible de l'alimentation secteur.
DISQUE/USB
Pas de lecture.
e Rechargez le disque avec sa face sérigraphiée vers le HAUT.
e Utilisez un disque lisible (page 54).
e Si le disque est sale, nettoyez sa surface.
e Un disque vierge a été chargé. Chargez un disque déjà enregistré.
e Vérifiez le code de région du DVD (page 54).
e Si de la condensation s'est formée sur l'appareil, laissez ce dernier
allumé une ou deux heures (page 53).
L'icône INTERDICTION “A” s'affiche à l'écran.
e L'opération n'est pas permise par le disque ou par l'appareil.
e Notez que durant la lecture de certains passages de titre
(avertissements, logo du développeur du logiciel, etc.), la plupart
des opérations sont interdites par le disque.
e Si une autre opération est toujours en cours, attendez un
moment et réessayez.
Impossible d'accéder à ce rta ins éléments du menu des
réglages.
<
Bien qu'il soit possible d'accéder à l'écran des réglages pendant
la lecture (ou en mode de reprise), toutes les fonctions du menu
ne sont alors pas disponibles. Augmentez le nombre de fonctions
disponibles en appuyant deux fois sur la touche Stop (H).
Le balayage rapide s'arrête.
e Le balayage rapide ne fonctionne pas dans les menus.
Le son saute.
e Placez l'appareil sur une surface stable pour éviter les vibrations
et les chocs.
e Si le disque est sale, nettoyez sa surface.
e N'utilisez pas de disques rayés, endommagés ou gondolés.
Il n'y a pas de son ou seul un son de très faible niveau se fait
entendre.
e Réglez le volume.
e Vérifiez le branchement des enceintes.
e Vérifiez RÉGL. AUDIO NUMÉRIQUE/SORTIE NUMÉR. (DIGITAL
AUDIO SETUP) (page 87).
e Le son est coupé en pause, durant le ralenti et en avance et
retour rapides. Appuyez sur la touche Lecture/Pause (y/J) pour
reprendre la lecture normale.
Aucune sortie audio numérique.
e
Vérifiez que
RÉGL. AUDIO NUMÉRIQUE/SORTIE NUMÉR. (DIGITAL
AUDIO SETUP)
est réglé sur
“TOUS (ALL)” ou “MIC seulement (PCM
only)”
(page
87
).
L'enregistrement audio numérique n'est pas possible sur un
autre appareil.
e
Vérifiez que RÉGL. AUDIO NUMÉRIQUE/SORTIE NUMÉR. (DIGITAL
AUDIO SETUP) est réglé sur “MIC seulement (PCM only)” (page
87
).
e Les données protégées contre la copie ne peuvent pas être
copiées numériquement.
Pas d'image/Image déformée.
e Vérifiez le branchement au téléviseur (moniteur).
e Vérifiez les instructions d'emploi du téléviseur (moniteur) afin
d'être sûr que vous avez sélectionné la bonne entrée, etc.
e Si vous utilisez une liaison HDMI, assurez-vous qu'elle est
correctement configurée (page 89).
e Si votre téléviseur/moniteur n'est pas compatible avec le balayage
progressif, ne sélectionnez jamais “PROGRESSIF (PROGRESSIVE)”
(page 88).
Parasites d'image.
e Si la vidéo venant de ce système passe par votre magnétoscope
pour aller à votre téléviseur, la protection anti-copie appliquée
à certains programmes de DVD peut altérer la qualité d'image.
Veuillez brancher directement l'appareil au téléviseur.
L'image est déformée ou monochrome.
e Assurez-vous que le réglage PAL-NTSC convient au téléviseur/
moniteur (page 89).
e Réglez le rapport d'aspect pour le téléviseur/moniteur employé
(page 86).
Le rapport d'aspect de l'écran ne peut pas être changé.
e Le rapport d'aspect peut être fixé par le disque.
L'image et le son ne correspondent pas.
e
Sur certains téléviseurs, il peut y avoir une courte pause entre le
moment où le signal vidéo est reçu et celui où l'image apparaît. Si
le son des enceintes n'est pas calé sur l'image du téléviseur, baissez
le volume du DR-H338i et faites sortir le son par le téléviseur.
e Essayez de corriger les problèmes de synchronisation de l'image
et du son à l'aide du réglage "AUDIO SYNC" décrit en page 87.
Guide de dépannage

FRANÇAIS
97
Tuner FM/AM
Aucune station ne peut être captée, ou signal trop faible.
e Réglez correctement la station.
e Tournez l'antenne FM ou AM pour la meilleure réception possible.
En mode FM, bien que l’émission soit en stéréo, le son est en
mono.
e Appuyez sur la touche FM MODE.
Lecteur iPod
Impossible d’insérer l’iPod.
e Vérifiez si l’adaptateur approprié est inséré dans le dock (page 70).
e Retirez la poussière ou les obstacles du dock et de l’iPod.
La lecture de l’iPod ne fonctionne pas.
e Retirez l’iPod du dock, attendez quelques secondes et insérez-le
de nouveau.
e Une mise à jour du logiciel peut résoudre le problème.
Impossible de commander l’iPod à partir de l’appareil.
e Sélectionnez l’iPod comme source.
Impossible de commander l’iPod.
e Assurez-vous que le commutateur HOLD de l’iPod n’est pas réglé
sur HOLD.
Si vous ne parvenez pas à obtenir un fonctionnement normal,
débranchez le cordon d’alimentation et rebranchez-le. Cela
réinitialise le micro-ordinateur interne qui a pu être perturbé
par des orages électriques, des coupures de courant etc.
Si débrancher le cordon d'alimentation ne résout pas le problème,
essayez la procédure suivante pour réinitialiser le micro-ordinateur
interne.
1. Mettez l'appareil sous tension.
2. Appuyez sur la touche Stop (H) tout en maintenant pressée la
touche Lecture/Pause (y/J).
Tenir enfoncées
3. Relâchez la touche Stop (H) quand “DR-H338i**” apparaît dans
l'afficheur.
4. Relâchez la touche Lecture/Pause (y/J).
5. Appuyez sur la touche Stop (H).

98
Caractéristiques techniques
Lecteur de DVD
Capteur . . . Laser à semiconducteur, longueur d'onde 650/790 nm
Système de signal . . . . . . . . . . . . . . . . . . . . . . . . . . . . . . . . . . . . . NTSC/PAL
Résolution horizontale du signal vidéo . . . Plus de 480 lignes (DVD)
Rapport signal/bruit vidéo . . . . . . . . . . . . . . . . . . .Plus de 50 dB (DVD)
Réponse en fréquence audio . . . . . . . . . . . 20 Hz à 20 kHz (+1/–3 dB)
Rapport signal/bruit audio . . . . . . . . . . . . . . . . . . . . . . . . . . . . . . . . 62 dB
Plage dynamique . . . . . . . . . . . . . . . . . . . . . . . . . . . . . . . . . . . . . . . . . 80 dB
Sortie vidéo
Niveau de sortie . . . . . . . . . . . . . . . . . . . . . . . . . . . . . . . . .1 Vc-c (75 Ω)
Prise . . . . . . . . . . . . . . . . . . . . . . . . . . . . . . . . . . . . . . . . . . . . . . . . . . . . . RCA
Sortie vidéo composantes (Y, C
B/PB, CR /PR)
Niveau de sortie Y . . . . . . . . . . . . . . . . . . . . . . . . . . . . . . 1,0 Vc-c (75 Ω)
Niveau de sortie C
B/PB, CR /PR . . . . . . . . . . . . . . . . . . . 0,7 Vc-c (75 Ω)
Prises . . . . . . . . . . . . . . . . . . . . . . . . . . . . . . . . . . . . . . . . . . . . . . . . . . . . RCA
Sortie HDMI
Prise . . . . . . . . . . . . . . . . . . . . . . . . . . . HDMI 19 broches (version 1.2a)
Amplificateur
Puissance de sortie
(Stéréo, EIAJ, 20 Hz à 20 kHz, 4 Ω) . . . . . . . . . . . . . . . . . . . . 50 W + 50 W
(Stéréo, DHT 1%, 20 Hz à 20 kHz, 4 Ω) . . . . . . . . . . . . . . . 36 W + 36 W
Distorsion harmonique totale . . . . . . . . . . . .0,7 % (à 5 W, 1 kHz, 4 Ω)
Sensibilité/impédance d'entrée audio . . . . . . Ligne : 600 mV/47 kΩ
Niveau/impédance de sortie (LINE OUT) . . . . . . . . . 1 000 mV/10 kΩ
Réponse en fréquence . . . . . . . . . . . . . . . . . . 20 Hz à 20 kHz, +0/-3 dB
Rapport signal/bruit . . . . . . . . . . . . . . . . . . . . . . . . . . . . . . . 90 dB (IHF-A)
Section tuner FM (sans notes 100,1 MHz, 65 dBf)
Plage de syntonisation . . . . . . 87,5 à 108,0 MHz (paliers de 100 kHz)
Distorsion harmonique totale (1 kHz) . . . . . . . . . . . . . . . . . Mono : 1 %
Stéréo : 1,5 %
Réponse en fréquence . . . . . . . . . . . . . . . . . . . . . . . . . . . .40 Hz à 10 kHz
Séparation stéréo (1 kHz) . . . . . . . . . . . . . . . . . . . . . . . . . . . . . . . . . . 35 dB
Rapport signal/bruit . . . . . . . . . . . . . . . . . . . . . . . . . . . . . . . Mono : 55 dB
Stéréo : 45 dB
Section tuner AM
Plage de syntonisation . . . . . . . . 530 à 1 710 kHz (paliers de 10 kHz)
Distorsion harmonique totale (1 kHz) . . . . . . . . . . . 1, 5 % à 100 dB/m
Sensibilité utile . . . . . . . . . . . . . . . . . . . . . . . . . . . . . . . . . . . . . . . . 900 μV/m
Rapport signal/bruit . . . . . . . . . . . . . . . . . . . . . . . . . . .40 dB à 100 dB/m
Générales
Alimentation . . . . . . . . . . . . . . . . . . . . . . . . . . . . . . . . . . . . . CA 120 V, 60 Hz
Consommation électrique. . . . . . . . . . . . . . . . . . . . . 50 W (Veille : 1 W)
Dimensions (L x H x P) . . . . . . . . . . . . . . . . . . . . . . . . 214 x 106 x 347 mm
Poids (net) . . . . . . . . . . . . . . . . . . . . . . . . . . . . . . . . . . . . . . . . . . . . . . . . . . 4 kg
Accessoires standard
Antenne AM x 1
Antenne FM x 1
Tél éco mma nde (R C-1240) x 1
Piles (AAA, R03, UM-4) x 2
Cordon d'alimentation x 1
Dock iPod x 1
Adaptateur de dock x 2
Câble AV RCA x 1
Mode d’emploi (ce document) x 1
Carte de garantie x 1
< Conception et c aractéristiques techniques sujettes à des
changements sans préavis.
< Poids et dimensions sont approximatifs.
< Les illustrations peuvent être légèrement différentes des modèles
de production.

99

100
Contenido
Gracias por elegir TEAC. Lea este manual atentamente para obtener el mejor rendimiento de esta unidad.
Antes de su utilización . . . . . . . . . . . . . . . . . . . . . . . . . . . . . . . . . . . . . . 101
Discos . . . . . . . . . . . . . . . . . . . . . . . . . . . . . . . . . . . . . . . . . . . . . . . . . . . . . . 102
Compatibilidad con memorias USB . . . . . . . . . . . . . . . . . . . . . . . . . . 104
Conexión de antenas (AM) . . . . . . . . . . . . . . . . . . . . . . . . . . . . . . . . . .104
Conexión de antenas (FM) . . . . . . . . . . . . . . . . . . . . . . . . . . . . . . . . . . . 105
Conexión de los altavoces . . . . . . . . . . . . . . . . . . . . . . . . . . . . . . . . . . . 106
Conexión a equipos de audio, etc. . . . . . . . . . . . . . . . . . . . . . . . . . . . 107
Conexión a una televisión . . . . . . . . . . . . . . . . . . . . . . . . . . . . . . . . . . . 10 8
Identificación de las partes (unidad principal) . . . . . . . . . . . . . . . . 110
Identificación de las partes (mando a distancia) . . . . . . . . . . . . . . 112
Mando a distancia . . . . . . . . . . . . . . . . . . . . . . . . . . . . . . . . . . . . . . . . . . 114
Ajuste del reloj . . . . . . . . . . . . . . . . . . . . . . . . . . . . . . . . . . . . . . . . . . . . . . 11 5
Funcionamiento básico . . . . . . . . . . . . . . . . . . . . . . . . . . . . . . . . . . . . . 11 6
Pasos iniciales con un iPod . . . . . . . . . . . . . . . . . . . . . . . . . . . . . . . . . . 118
Escuchar un iPod. . . . . . . . . . . . . . . . . . . . . . . . . . . . . . . . . . . . . . . . . . . . 11 9
Escuchar un disco . . . . . . . . . . . . . . . . . . . . . . . . . . . . . . . . . . . . . . . . . . . 121
Escuchar una memoria USB . . . . . . . . . . . . . . . . . . . . . . . . . . . . . . . . . 122
Menú en la pantalla de TV . . . . . . . . . . . . . . . . . . . . . . . . . . . . . . . . . . . 12 2
Poner la reproducción en pausa (congelar una imagen) . . . . . . 124
Detener la reproducción (modo de reanudación) . . . . . . . . . . . . 124
Saltar la reproducción . . . . . . . . . . . . . . . . . . . . . . . . . . . . . . . . . . . . . . . 12 5
Búsqueda de una parte de un capítulo o de una pista . . . . . . . . 12 5
Selección de un capítulo o una pista . . . . . . . . . . . . . . . . . . . . . . . . . 12 5
Selección de audio . . . . . . . . . . . . . . . . . . . . . . . . . . . . . . . . . . . . . . . . . . 12 5
Selección de subtítulos . . . . . . . . . . . . . . . . . . . . . . . . . . . . . . . . . . . . . . 12 6
Cambiar el ángulo de la cámara . . . . . . . . . . . . . . . . . . . . . . . . . . . . . 126
Zoom de la imagen . . . . . . . . . . . . . . . . . . . . . . . . . . . . . . . . . . . . . . . . . 126
Movimiento a cámara lenta . . . . . . . . . . . . . . . . . . . . . . . . . . . . . . . . . . 126
Reproducción repetida y aleatoria . . . . . . . . . . . . . . . . . . . . . . . . . . . 12 7
Reproducción repetida A-B . . . . . . . . . . . . . . . . . . . . . . . . . . . . . . . . . . 12 8
Cambiar el modo de pantalla de la unidad . . . . . . . . . . . . . . . . . . . 12 8
Búsqueda por tiempo (VCD/CD) . . . . . . . . . . . . . . . . . . . . . . . . . . . . . 129
Búsqueda por tiempo (MP3/WMA) . . . . . . . . . . . . . . . . . . . . . . . . . . 129
Búsqueda por capítulo/Búsqueda por tiempo (DVD) . . . . . . . . . 130
Búsqueda por capítulo/Búsqueda por tiempo (DivX) . . . . . . . . . 130
Reproducción programada (DVD, VCD, CD) . . . . . . . . . . . . . . . . . . 131
Reproducción programada (MP3, WMA, DIVX) . . . . . . . . . . . . . . . 132
Ajustes (Introducción) . . . . . . . . . . . . . . . . . . . . . . . . . . . . . . . . . . . . . . . 133
Ajustes (CONFIG. GENERAL/GENERAL SETUP) . . . . . . . . . . . . . . . . . 13 4
Ajustes (CONFIG. AUDIO/AUDIO SETUP) . . . . . . . . . . . . . . . . . . . . . . 135
Ajustes (CONFIG. VÍDEO/VIDEO SETUP) . . . . . . . . . . . . . . . . . . . . . . . 13 6
Ajustes (PREFERENCIAS/PREFERENCE) . . . . . . . . . . . . . . . . . . . . . . . . 137
Ajustes (CONFIG. CONTRASEÑA/PASSWORD SETUP) . . . . . . . . . . 13 8
Escuchar la radio (FM/AM) . . . . . . . . . . . . . . . . . . . . . . . . . . . . . . . . . . . 13 9
Sintonizar presintonías (FM/AM) . . . . . . . . . . . . . . . . . . . . . . . . . . . . . 140
Escuchar una fuente externa . . . . . . . . . . . . . . . . . . . . . . . . . . . . . . . . 141
Tem por izado r d e a pag ado . . . . . . . . . . . . . . . . . . . . . . . . . . . . . . . . . . 142
Tem por izado r d esp er tad or . . . . . . . . . . . . . . . . . . . . . . . . . . . . . . . . . . 142
Solución de posibles fallos . . . . . . . . . . . . . . . . . . . . . . . . . . . . . . . . . . 14 4
Especificaciones . . . . . . . . . . . . . . . . . . . . . . . . . . . . . . . . . . . . . . . . . . . . 146
Convenciones sobre este manual
< Los tipos de funciones y operaciones que se pueden utilizar con
un disco en particular varían dependiendo de las características
de ese disco. En algunos casos, estas funciones y operaciones
pueden diferir de las descripciones dadas en este manual. En
tal caso, siga las instrucciones que aparezcan en la pantalla. Este
manual solamente cubre las operaciones de disco básicas.
< Para algunas operaciones, el icono de PROHIBIDO “A” puede
aparecer en la pantalla. Esto indica que la operación descrita en
este manual no está permitida para ese disco.
PRECAUCIÓN
< No exponga este aparato a salpicaduras ni goteras.
< No coloque objetos que contengan líquidos, como por ejemplo
vasos, sobre el aparato.
< No instale este aparato en lugares cerrados tales como
estanterías o similares.
< Este aparato libera corriente nominal no válida para el
funcionamiento a través de la toma de corriente, aún cuando el
interruptor de encendido y activación (POWER o STANDBY/ON)
no esté en la posición de encendido (ON).
< Este aparato debe situarse lo suficientemente cerca de una
toma de electricidad como para poder alcanzar fácilmente el
cable de corriente en cualquier momento.
< El enchufe que se conecta a la red es el dispositivo de
desconexión, por lo que deberá permanecer siempre en
prefecto estado de uso.
< Si el producto utiliza pilas (ésto incluye las baterías incorporadas
y los "packs", se evitará su exposición directa al sol, al fuego o a
cualquier otra fuente de calor excesivo.
< PRECAUCIÓN con los productos que emplean baterías de
litio reemplazables: existe peligro de explosión si la batería se
reemplaza por otra de tipo incorrecto. Reemplácela sólo por
otra igual o de tipo equivalente.
< Deberá llevar cuidado si utiliza auriculares con este producto, ya
que una excesiva presión sonora (volumen) procedente de los
mismos puede causar perdidas de audición.
 Loading...