

Page 1

TASCAM CD-R624M
Packing List
The following items should be present in your CD-R624M bundle:
- TEAC 6x24 external CDR drive (CD-R56S/614)
- SCSI Cable
- SCSI Terminator
- CD-R624M software CD-ROM
- CD Stomper w/ CD Stomper CD-ROM and CD Labels
- (2) Blank TEAC CDR media
- TEAC 6x24 Installation Guide
- CD-R624 QuickStart Guide (That’d be this book.)
Installing the CD-R624M Bundle
A hardware installation booklet has been included with this package;
look to it for installation of the CD-Recorder. Also, if you are new to
installing software on your Mac, be aware that you will probably have
to restart the computer in between each installation.
To install the software, make sure your CD-Recorder is connected.
Insert the CD-R624W disc into your CD-ROM or CDR drive.
There are several programs you will need to install:
Adaptec Toast - Data CD Authoring
Adaptec Jam - Audio CD Authoring
The CD-R56S driver file MUST
be placed in the same folder as
the Jam application. This file is
on the CD-R624M software CD.
BIAS Peak LE - Audio Recording/Editing
BIAS SFX Machine Lite - Effect Processing
SFX Machine Lite must be placed in the Plug-ins folder
inside the BIAS Peak LE Folder. Otherwise, Peak LE will
not add SFX Machine to its list.
Xing Technologies AudioCatalyst - MP3 Encoding
Apple QuickTime 4.0 - Offers support for more advanced
multimedia, including playback of MP3 files.
The QuickTime installer may ask for your type of internet
connection. The install is on your CD-R624M CD, so an
internet connection is not necessary.
Adobe Acrobat 3.0 - Reading PDF files
Be sure attention is paid to the placement of the files as mentioned
above for Jam and BIAS Peak LE/SFX Machine Lite. If these files are
not placed as specified, the programs will lose some functions.
CDR Introductory Tutorial
CDR (Compact Disc Recordable) media can store up to 74 minutes of
stereo audio, or up to 650 megabytes of data. CDR media can only
be written to once, so the CDR authoring software allows you to
design your CD completely before you burn it. Since the CD must
contain a directory of what is on it, and since that directory is on the
write-once only media also, all of the information must be burned to
the CD at the same time. Recording the information to a CD is done
in a Session.
While audio CD players will only recognize the first session on the
CD, many CD-ROMs will read multiple sessions. A CD with more than
one session is called a Multi-Session CD. So, if the first session only
contained 200 megabytes of data, you could record another session
behind it up to approximately 450 megabytes. (It won’t be quite that
big because of the extra space taken by the new directory.)
Remember though, older CD-ROMs may not search for those extra
sessions.
When you get ready to design the session, you will first need to
determine the format of the CD. Some of the common CD formats
you can create with Adaptec Toast and Jam are listed below:
Audio CD - This is the standard CD format you can use in your
Audio CD player. You can have up to 99 tracks of audio, with
adjustable silence breaks in between each track. The audio tracks
Page 2
must be recorded in stereo at the CD standard of 16 bit/44.1kHz.
Remember, multiple sessions will not be recognized by an audio CD
player. If you do not have the audio in the computer yet, you may
need to use Peak LE to record and prepare your audio.
Recording Audio
BIAS Peak LE & SFX Machine Lite
Mac Volume - Use this format if you want to make the CD a bootable
CD. That is, it can be a Mac Startup Disk. This is great when you are
making a troubleshooting CD, or if you just need a different system
set-up occasionally.
ISO-9660 - Originally specified for DOS CD-ROM use, the ISO9660 now has multiple improved variations for DOS, Windows 95,
and Macintosh. This format has good back-up capabilities for
Macintosh when used as a multisession CD. Also, since most
Macintosh computers are able to read Windows CDs, this is a great
method to store cross platform material such as JPEGs, HTML, or
even basic word processing and graphic files.
For more information on the various types of CD formats, check the
Adaptec Toast manual. (It is in PDF format on the CD-R624M CDROM.)
Note: For Peak LE to record full CD quality audio, you must be
running Peak LE on a PowerPC or a G3. 68030 and 68040
machines will require an additional sound card.
If you don’t already have your audio recorded on your computer,
you’ll need to record it into an audio file. We have included Peak LE
for you to do this.
In Peak LE, go to the File menu, and pull down to New. A sub-menu
will appear to the right; drag to Stereo Document. (For those who like
keystrokes, you can simply hit APPLE-SHIFT-N to do this.)
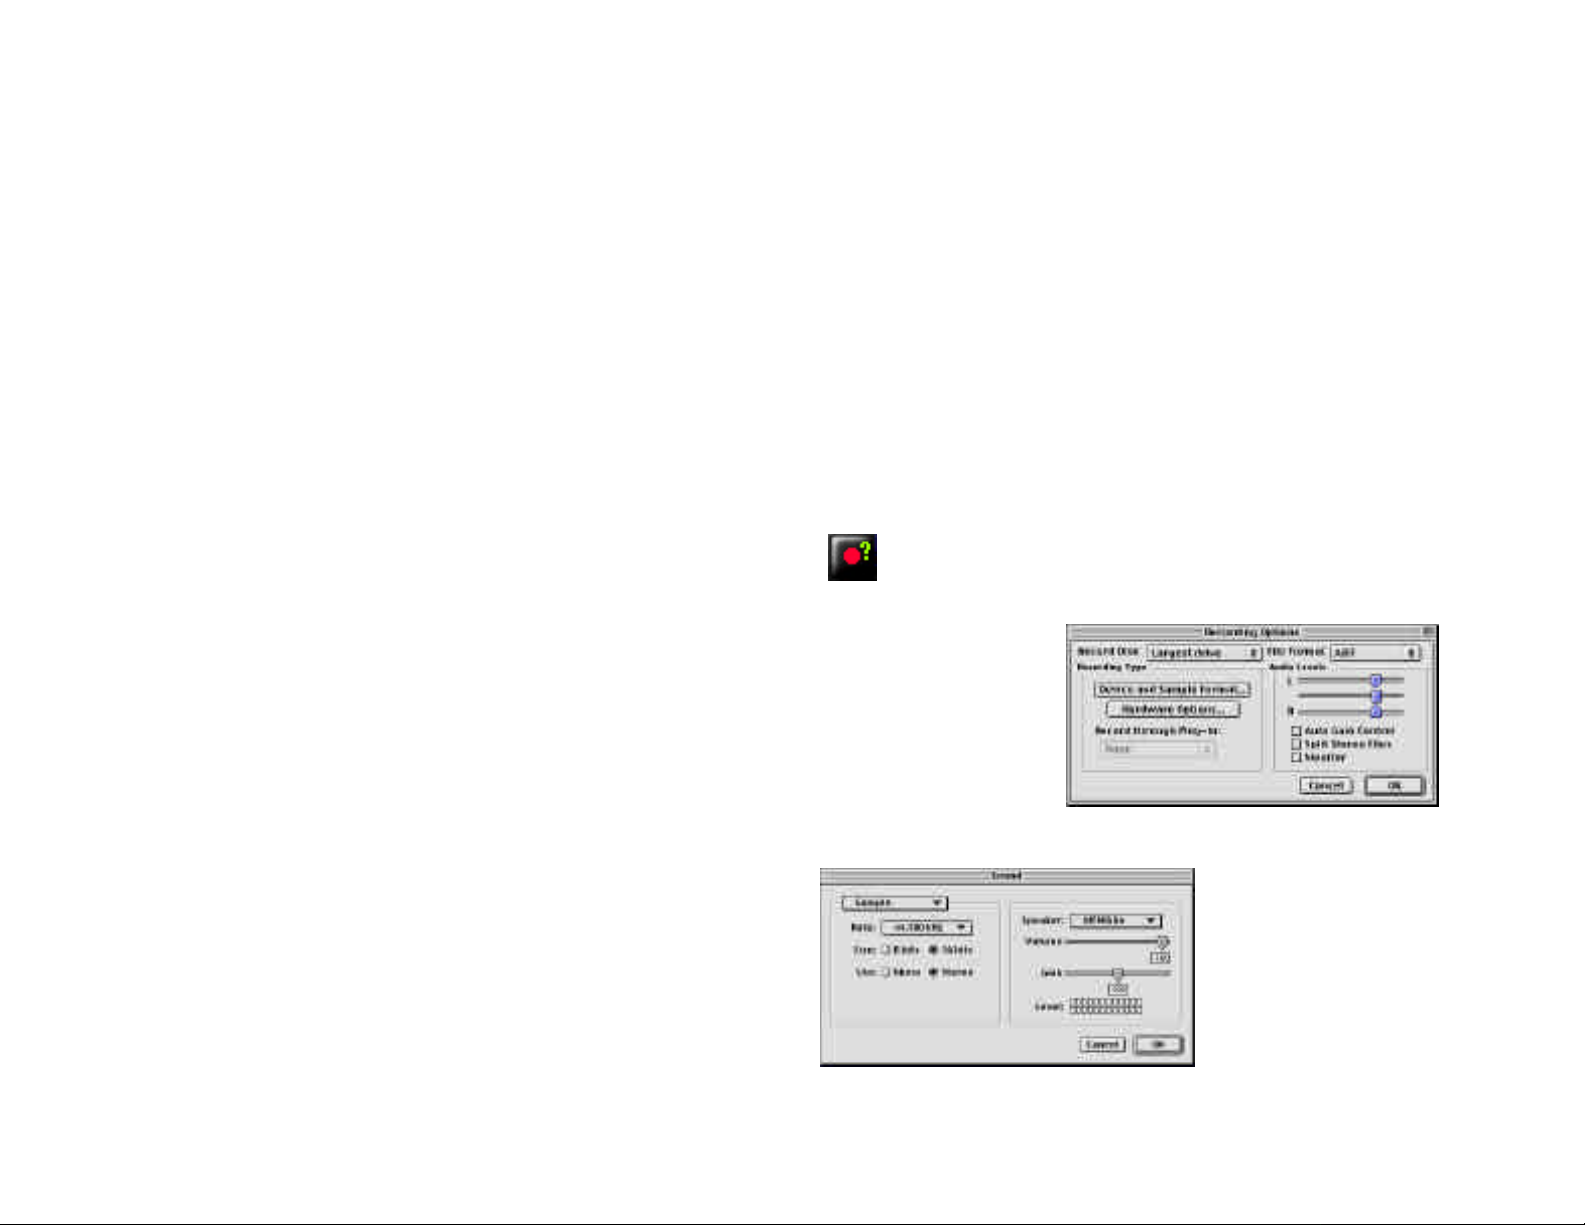
Then, click on the “Record Settings” button. A window will
appear with numerous options.
The initial settings
screen shows you which
drive the audio is going
to be recorded on. (The
pop-up menu allows you
to select a specific drive,
or to automatically select
the largest drive.) Click
on the Device and
Sample Format Button to make sure you are properly set-up for
recording 44.1kHz, 16 bit
audio.
To navigate the various
settings screens, click on
the pop-up menu in the
upper left. Make sure
your settings will follow
these parameters:
Page 3
Compression: None
Source: Mic (This assumes you are plugging in to your mic inputs. If
you have a separate sound card, i.e. IF-PCI16, AudioMedia III, Paris
System, etc. then select the appropriate input source.)
Ch: Stereo
Bit: 16
Rate: 44.1kHz
Once you’ve got all the settings properly set, click on OK. You’ll pop
back into the primary Recording Options Screen. You may want to
enable the monitoring of the input in Peak LE by clicking in the
Monitor box just under the level meters. This will allow the signal
going in to be heard through the speaker outputs. Then, click OK to
leave the screen.
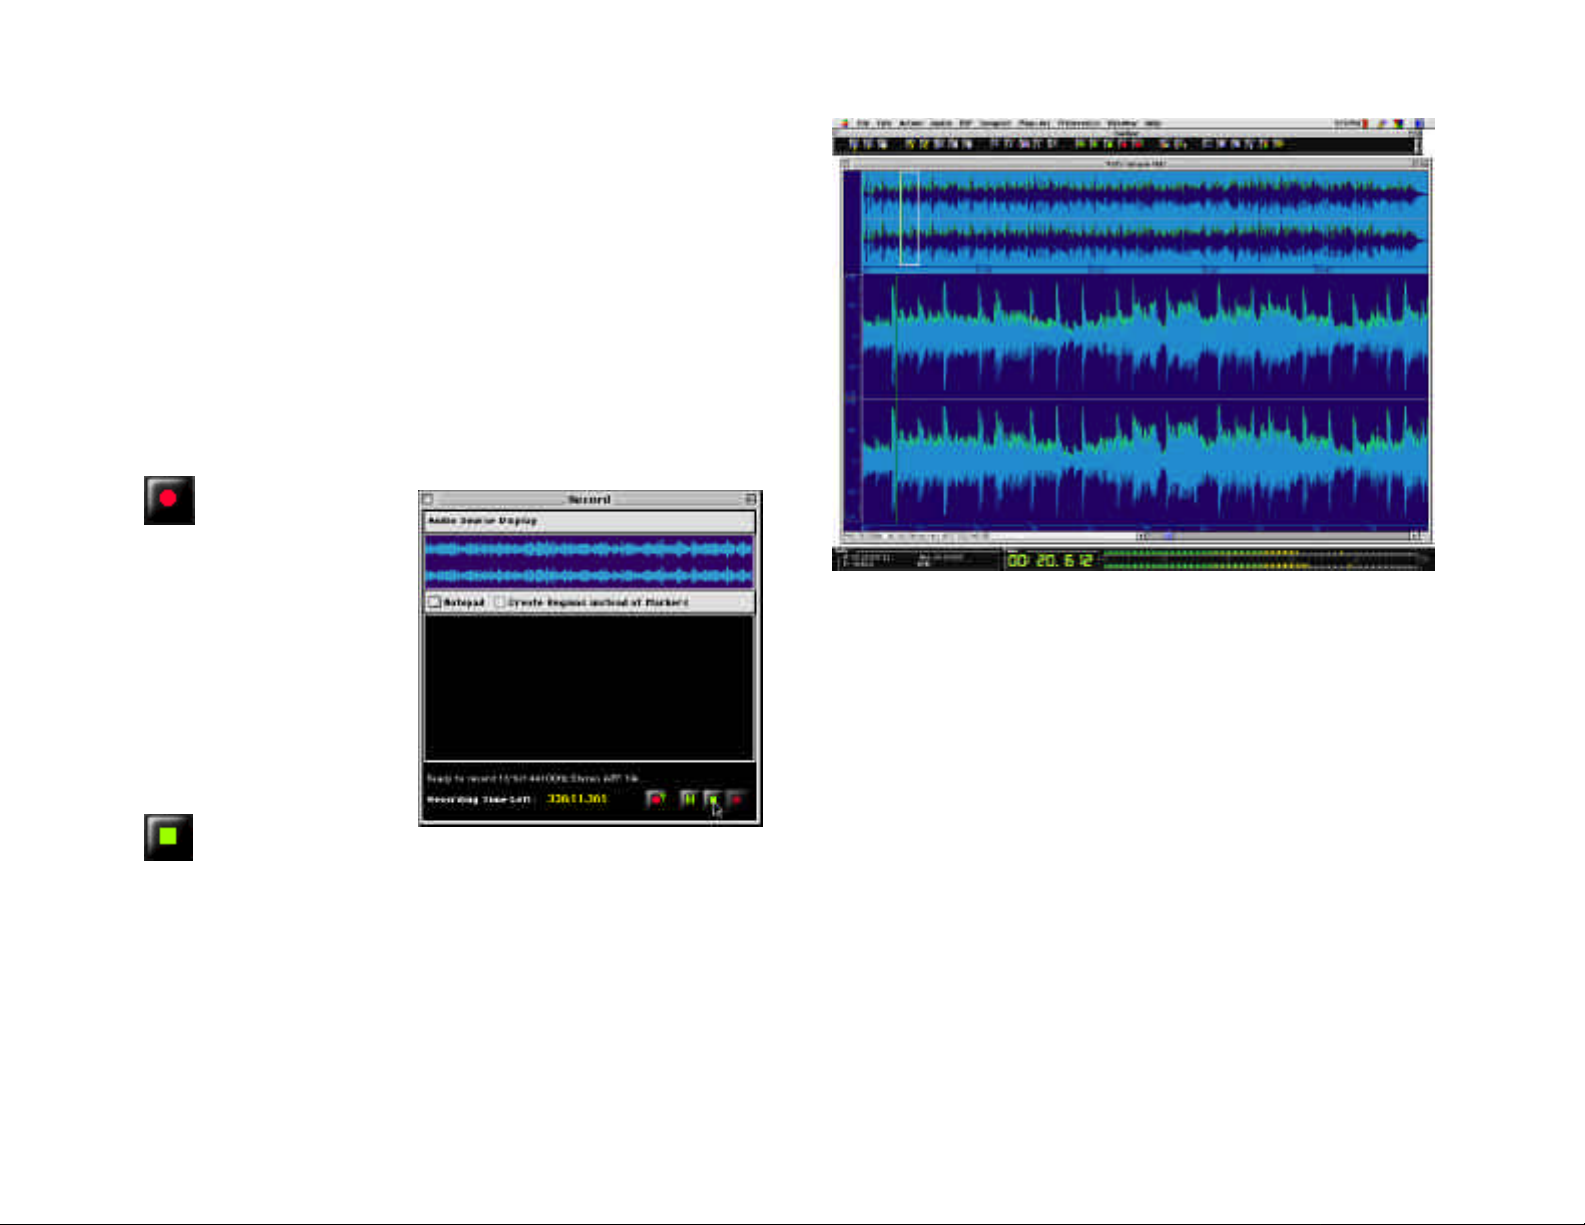
Click on the Record
button to get the
record screen. Once you’ve
got the levels set right,
(watch the levels at the
bottom of meter at the
bottom of the screen,) go
ahead and click on the
Record button in the Record
screen and start playing your
audio. As the recording
goes along, the waveform
will appear in the screen.
While Peak LE is a very capable editor with advanced features, we’ll
just cover the basics here:
Tight Leadering - To delete the dead space before and after the
audio, click and drag across the unwanted audio. You can audition
the audio by pressing the space bar. To move the edges of the
selection, hold shift, and drag across to your new selection point. To
remove the selected area, press delete.
When you’re done,
click on the Stop key. Peak LE will prompt you to name the
file. If you want to re-record the file, just cancel out of that screen,
and record again. If you like what you recorded, save it and Peak LE
will take you into the waveform screen where the audio is displayed.
The top two waveforms show the entire sound file, with a box around
the area that is represented in the bottom screen. The bottom
(larger) waveforms are where you will do your editing. You can zoom
in and out by pressing APPLE “[“ and APPLE “]”.
Fade - To add a fade to the beginning or end of a file, simply select
the portion of the file to be faded, go to the DSP menu, and select
Fade In or Fade Out.
Page 4

EQ - If you’d like to process EQ on your song, select the part you’d
like to affect. (To EQ the whole song, just hit Apple “A” to select the
whole region.) Go to the Plug-Ins menu and drag down to Premiere;
when the side menu appears drag to SFX Machine Lite. Click on
Simple Graphic EQ in the second column of the processing screen.
Audition your EQ settings by pressing “Preview.” Preview will play a
couple seconds of audio with your EQ curve. Once you like what you
hear, click on “Process” and Peak will apply the EQ to the entire area
you selected.
Assembling Audio CDs
To start assembling your CD, boot up Jam and simply drag and drop
all the song files into the Jam window.
The songs you have selected for this CD will appear in the window,
along with pause between tracks, time the track starts, and the track
length. You can change the order simply by dragging the song files
around.
Normalization - If you recorded the audio too quietly, you can
digitally boost the volume of the recording. Again, select the area
you want to affect, and then select the DSP menu and drag down to
Normalize. Peak LE will allow you to select what you want the
maximum volume to reach. (Because some consumer audio players
distort signals that approach the maximum volume, we recommend
keeping the maximum down around 80% to 95% depending on what
the average volume is.
Once you’ve finished all of this, save your file. You’ve just mastered
your song!
There are some powerful real-time (non-destructive) processing
features in Jam that make assembly of professional sounding CDs a
snap. You’ll notice there is a column for Gain on each song. If your
songs are playing back at different volumes because of varied levels
during recording, you can make fine adjustments here.
Also, if you are trying to have continued play from one track to
another, such as with live recordings, you can do a crossfade in the
Xfade column. For this, this pause between tracks has to be set to
zero. There are different gain curves that you can experiment with to
make the transition as smooth as possible. (The crossfades are
represented by two curves; each curve represents channel levels
over the length of the crossfade.)
Page 5

Again, there are far more advanced features included with this
package, but we’ll leave that to the Jam manual.
Assembling Data CDs
Once you’ve got your CD assembled, click on Check Speed in the
upper right corner. For the first few CDs you make, we highly
recommend doing test burns first. Depending on what your source
data is coming from, the source drive may not be fast enough to
support 6x burns. This can be even further complicated if your drive
is “fragmented,” meaning the data is not in a continuous block on the
drive. (This happens frequently when the drive is nearing capacity.)
So just to be safe, run the test before burning so you are sure the
system will run properly. If your system is having trouble keeping up
with the drive, read the “Troubleshooting Underruns” section at the
end of this Guide.
Once the test has successfully been completed, go ahead and click
on Write Disc. You will get a screen that gives you the option of Write
Session or Write Disc.
Write Session means you will go ahead and burn a disc, but you do
not close it off. An application like Adaptec Toast will still be able to
write data information in another Session behind it.
Write Disc means the disc is
closed off, and no further
sessions can be recorded
behind it. If you are making a
CD that is going to a
duplication house, you will
want to use Write Disc. Also,
if you have no intention of recording anything else after the CD, you
can close it off.
Open Adaptec Toast, and go to the Format
menu to select the type of CD you wish to
record. For introductory purposes, if you are
simply trying to back up select files from your
computer, use Mac Files & Folders. If you
are trying to distribute data to both Mac and
PC users alike, use the ISO-9660 format.
(Both PCs and Macs can read those.)
The files can be selected by dragging and
dropping the files and folders on the Toast
window. To see the hierarchy of the disc you
are assembling, click on the Data button.
Once you’ve clicked on your option, the CD will start recording.
When it’s finished, you’re on CD!
You can move files from one folder to another, create new folders, or
remove files from this screen. To rename the disc, double click on
the CD icon and name it whatever you like. When you are through
assembling the CD, click Done.
Page 6

Once you’ve got your CD assembled, click on Check Speed in the
bottom. As we mentioned in the Jam burning process, it is wise to try
a test burn to get a feel for the performance of your computer. If your
system is having trouble keeping up with the CDR drive, read the
“Troubleshooting Underruns” section at the end of this Guide.
AudioCatalyst Tutorial
What is MP3?
MP3 has created quite a buzz, but what is it really? MP3 is a
compression format for storing audio with excellent fidelity, yet only
taking approximately 9% of the data space. MP3 is short for MPEG
(Moving Picture Expert Group) type 1, layer 3. If you’re curious about
other types of MPEG compression, you can find their web site at:
http://drogo.cselt.stet.it/mpeg/
What MP3 offers is a way to distribute your music much easier.
Currently, the main uses for MP3 are for personal players (walkmantype units) and for internet distribution of audio. You can use MP3 to
put a clip of your band on the internet, or even to exchange musical
ideas with someone else via email.
AudioCatalyst is an MP3 encoder/player. It can encode regular WAV
files to MP3. If you already burned your audio to a CD, you can also
use AudioCatalyst to encode files directly from the audio CD.
Once the test has successfully been completed, go ahead and click
on Write Disc. You will get a screen that gives you the option of Write
Session or Write Disc.
Write Session means you will go
ahead and burn a disc, but you
do not close it off. Toast will still
be able to write data information
in another Session behind it.
Write Disc means the disc is
closed off, and no further
sessions can be recorded.
Once you’ve clicked on your option, the CD will start recording.
When it’s finished, you’ve recorded your CD!
Encoding Options
There are a good deal of options when creating MP3 files. There are
different data rates, CBR vs VBR, and mono vs stereo. For your first
time, try doing 128kbps, CBR and stereo. That is the typical layout,
and the most compatible. For reference, the terms are defined
below.
data rate - Data rate simply defines how much throughput the MP3
file will take. The data rate most people use is 128kbps (kilobits per
second), but it can vary from 32kbps up to 320kbps. The higher the
data rate, the higher the quality.
CBR vs VBR - In order to capture different sounds with true clarity,
some sounds can take less space... other sounds are more
demanding. CBR (Constant Bit Rate) was the original spec designed
for MP3, and is compatible with virtually all MP3 players. VBR
Page 7

(Variable Bit Rate) basically adjusts the amount of data used to
encode the sound according to what is needed. VBR typically
sounds better, but older MP3 players may not be able to use it.
mono vs stereo - This is pretty self explanatory, but it is important
to realize that a stereo signal does not necessarily take twice as much
space as a mono signal. (Ain’t compression skwewy?)
Encoding MP3 Files
To encode audio to MP3, start up AudioCatalyst. At the bottom of
the window, you can select files to encode from either an audio file
(such as AIFF) or from a CD. Add From File chooses audio files,
and Add From CD chooses tracks from a CD. The songs will be
shown in the list in the left side of the window.
Playing MP3 Files
Playing MP3 files is as easy as selecting the file to play. This player is
the QuickTime 4 Movie Player.
Select an MP3 file by clilcking on the File menu and dragging to New
Movie. You will have the familiar browsing windows. When playing
files, remember that the volume on the front of this player is further
adjusted by the master volume for the computer in the Sound
Control Panel.
To encode the files, press encode. AudioCatalyst will prompt you for
a location to save the files to. Once you determine the location,
AudioCatalyst will begin encoding.
The player button in the AudioCatalyst window is a convenience
feature allowing you to launch an MP3 player from AudioCatalyst. We
have included QuickTime 4 in this package which
comes with a player, but you may use any player
you wish. To select which player you’d like to come
up, go to the Player menu and select Set Player.
To get the balance, bass and treble controls, click on the
:: button.
Page 8

Troubleshooting
Underruns
Let’s start with a basic understanding of what’s involved. Here are
some basic terms you will need to understand to navigate the world
of data transfer:
So, one suggestion may be to optimize your source drive. That will
put each file in one continuous data stream. You can do this with a
multitude of applications, such as Norton Utilities.
Another solution is to create a disc image, which will write (in one
continuous stream) all of the information for the CD to a disk drive,
including the directories. This is sometimes necessary for slower
hard disks to operate with faster CD burn speeds.
Access Time - How long does it take from the time the computer
asks a drive for data until the drive starts spitting it out? This is usually
measured in ms (milliseconds).
Throughput (aka Transfer Rate) - Once the drive finds the
information, how fast can it transmit the data? This is usually
measured in MB/sec (megabytes per second).
Fragmented or Optimized - Is the information on the drive
written in one continuous data stream, or is it broken up into several
pieces around the drive? If the data is in one continuous stream, it is
optimized. If it is broken up, it is fragmented.
Once you understand the previous terms, then we’re ready to
troubleshoot! Let’s first understand the relationship between all of
these.
Think of a disk drive as a book. If you are reading a book from page
one to the end, you can read a certain number of words per minute.
When you read a newspaper, and the story on page B1 is continued
on page B14, you are spending time looking for the continuation of
the story. Suddenly, it takes longer for you to read the same amount
of words. Even worse is a Choose-Your-Own-Adventure book. With
these, you can only read a few paragraphs before you have to find
the next part. This slows you down considerably.
Of course, one other solution is just to reduce the recording speed
of the CD-Recorder. Some source disks may just be too slow for
higher speed recording (ie Zip, old 44 meg SyQuest, etc). Also, if
you’re just making one quick CD, it may be faster to simply record the
CD at 2x or even 1x, instead of defraging the drive, then burning the
CD at 4x.
Other problems
Jam cannot identify the CD-Recorder -
There is a file labeled TEAC CD-R56S. This file
must be in the same folder as the Jam application
at boot-up. When Jam starts up, it looks for
these driver files and adds them to their list. This
file MUST REMAIN in the same folder as Jam.
I cannot extract audio from my CD-ROM. - If you are trying to
extract audio from an audio CD or trying to copy from CD to CD,
your CD-ROM must be capable of these functions. (Not all CDROMs can do that.) If necessary, the 6x24 drive is capable of most
of these types of functions, so you may use the CDR drive to
extract to your hard drive, then burn back to the CD.
The drive is not recording to the blank CDs. - There could
be several causes for this:
So it is with hard drives. If everything is streamlined, then the data will
flow quickly. If the drive has to search for all the parts continuously,
the data flow suffers.
1) Make sure the disc you are using is a regular CDR media. CDRW discs are not compatible with this drive. “For Music Only”
CDs may also cause problems, as they are designed for use
with consumer component CD-Recorders.
Page 9

2) Make sure the CDR media is on the list of approved media of
this drive. We have tested many types of CDR media, and the
results are posted on our web site at http://www.tascam.com.
The list is kept on the site so it may be kept as up to date as
possible. For convenience, we have
included the list on your CD-R624M
software CD. Keep in mind that it will
be updated from time to time on our
web site.
3) While the CD-Recorder is recording, make sure the CDR drive
is not agitated. (If you write as vigorously as I do, even writing
the jewel case insert on the same table as the CD-Recorder is
on could shake the unit enough.) CD Recording requires
much more stability than reading. When reading a CD, players
can take several passes at the data stream if the tracking is lost.
However, CD-Recorders do not have this luxury. They are
recording the information on the CD, and need to do so
precisely the first time.
The system is testing too slow for 6x recording speeds. -
Chances are there is more processing going on than just your CD
authoring software.
1) If your computer has a lot of applications running in the
background, this can substantially slow the efficiency of your
system. (Common culprits are likely to be anti-virus software,
screen savers, or advanced network applications.) These can
be temporarily disabled to dedicate more processing
horsepower to the CD authoring software.
SFX Machine doesn’t show up in Peak LE. - The Plug-Ins
folder of Peak LE is probably not set-up properly.
1) Make sure you installed SFX Machine Lite. (SFX Machine Lite
has its own installer.)
2) Make sure SFX Machine Lite is in the Plug-Ins folder inside the
application for Peak LE. Also, be sure you do not have multiple
copies of Peak LE on your computer. SFX Machine Lite must
be in the Plug-Ins folder that is in the same folder as the current
Peak LE application.
3) Peak LE can only support up to 3 plug-ins at a time. If there are
more than 3 plug-ins in the Plug-Ins folder, then some of the
others must be removed, and Peak LE must be restarted.
Technical Support
If you are still experiencing problems with the unit after reading the
previous troubleshooting section, you can check for more up to date
FAQ documents at TASCAM’s web site at:
http://www.tascam.com
or contact TASCAM Technical Support at:
2) In recent years, large disk drives have become more and more
affordable, but often the drives many stores advertise are quite
slow. If the drive is too slow, then you’ll have to try optimizing
your drive.
(323) 726-0303
custser@teac.com
 Loading...