

Operation Manual
EN
Version 1.2
Manuale di Istruzione
IT

ENGLISH
Operation Manual
NUMA ORGAN 2 by Studiologic® 3
EN
Safety Instructions
Important Safety Instructions
Please read the entire manual. It contains all the information you
need to use this unit.
Please follow the instructions in the manual. The warranty
will be void if unauthorized work is carried out on the instrument. Only accessories specied by the manufacturer should
be used with this unit. Use the unit only as specied in this
manual.
DANGER!
Risk of electric shock.
Do not open the chassis. There are no user serviceable parts inside.
The unit should only be serviced by qualied service sta.
Mains
Before connecting the unit to the main power supply, please check
if the power supply is suitable for the instrument. The unit can be
powered with 100 – 240VAC. The unit is secured by a 250V-500mA F
type fuse. Replace the fuse with one of the same type and value. The
position of the fuse can be found at page 10.
This unit must be earthed.
Do not use a damaged power cord.
Humidity
To reduce the risk of re or electric shock, do not expose the unit
to rain or moisture. Never place containers with liquid on the unit.
Do not use the unit near water, eg swimming pool, bathtub or wet
basement.
If the unit is moved from a cold place to a warm room, condensation
may occur inside. To avoid any damage please allow the unit to reach
the room temperature before switching on.
Installation
Always use a stable rack/stand to place the keyboard on. Please be
aware of its size and weight.
Cleaning / Maintenance
Never use any abrasive detergent, which may damage the
surface. We recommend a slightly moist micro-bre cloth.
Packaging
Please keep all packaging and use it to protect the instrument during
transportation, eg if service is required.
NUMA ORGAN 2 by Studiologic®
4

Table of contents
Safety Instructions
Your new Numa Organ 2
What‘s behind Numa Organ 2
Tone Wheel Organ Models
Acoustic & Electronic Organ Sounds
External Rotary Speaker and amplier
Connection / Back view
Control panel
Volume
How functions are shown in this manual
Operation / Drawbars
Drawbars
How the manual and drawbars are related
Extension with other manuals
Operation
Pitch Wheel
Rotary / Modulation Wheel
Chorus / Vibrato
Split
Split point
Transpose
Edit functions
Percussion
Eects (Reverb, Drive, Key Click, Leakage)
EQ / Volume
Dynamic TOUCH / MIDI
Preset Selection
Preset Store
Sound Selection
Preset Upload & Download
External Rotary Speaker Cabinet
System Update
4
6
6
6
8
9
10
11
11
11
12
12
13
13
14
14
14
14
15
15
15
15
16
16
16
17
17
18
18
19
19
19
MIDI
MIDI connection
Keyboard extension
Control the Numa Organ 2 via MIDI
Use the Numa Organ 2 as MIDI masterkeyboard
MIDI parameters recording
Troubleshooting
Declarations
Appendix
MIDI Implementation Chart
Specications / dimensions
20
20
20
21
21
21
EN
22
23
47
48
49
NUMA ORGAN 2 by Studiologic® 5
Your new Numa Organ 2
Thank you very much for choosing the Numa Organ 2. You have obtained a state-of-the-art
instrument made by the renowned manufacturer Studiologic.
Get inspired by the new Numa Organ 2! Its Physical Modelling synthesis is the most authentic
revival of the sound of an electromechanical tone wheel organ. But the Numa Organ 2 is much more. We
recommend you to read the entire manual carefully to take full advantage of all the functions of your new
instrument.
An overview of the features of the Numa Organ 2:
What‘s behind Numa Organ 2
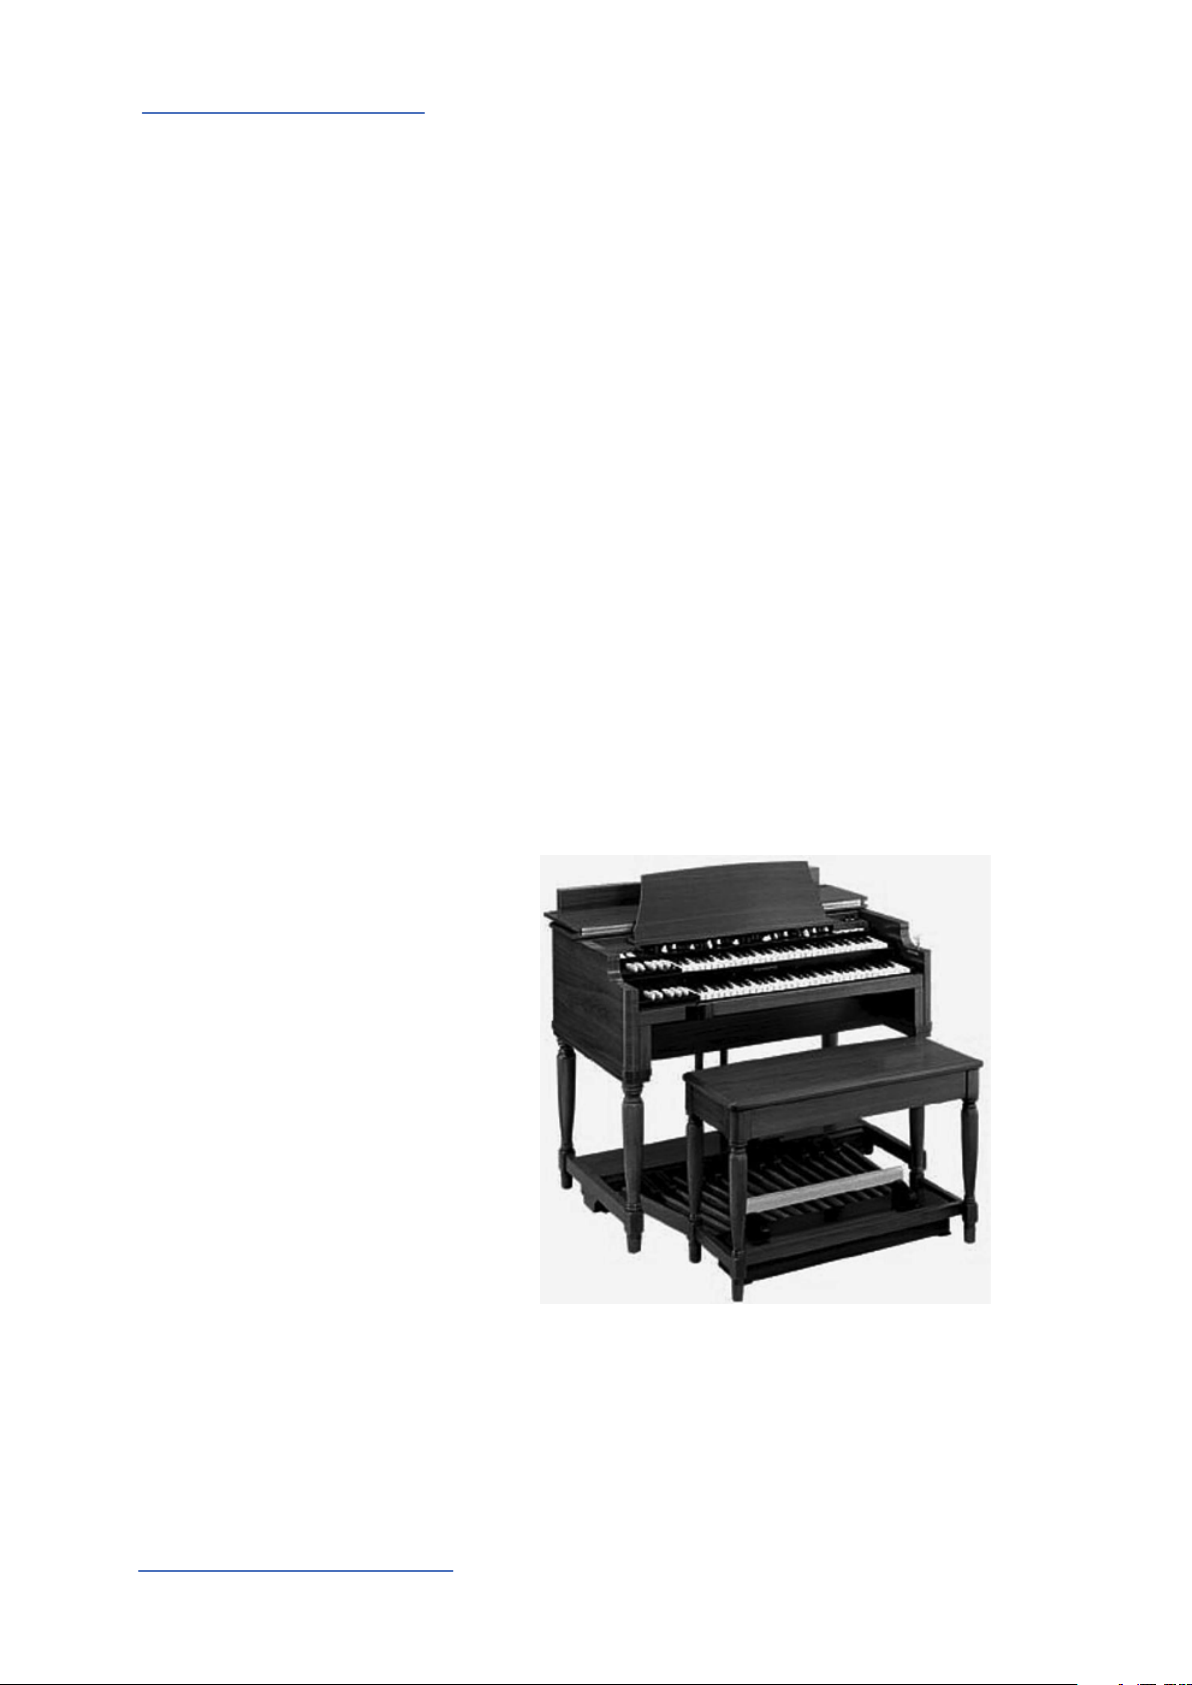
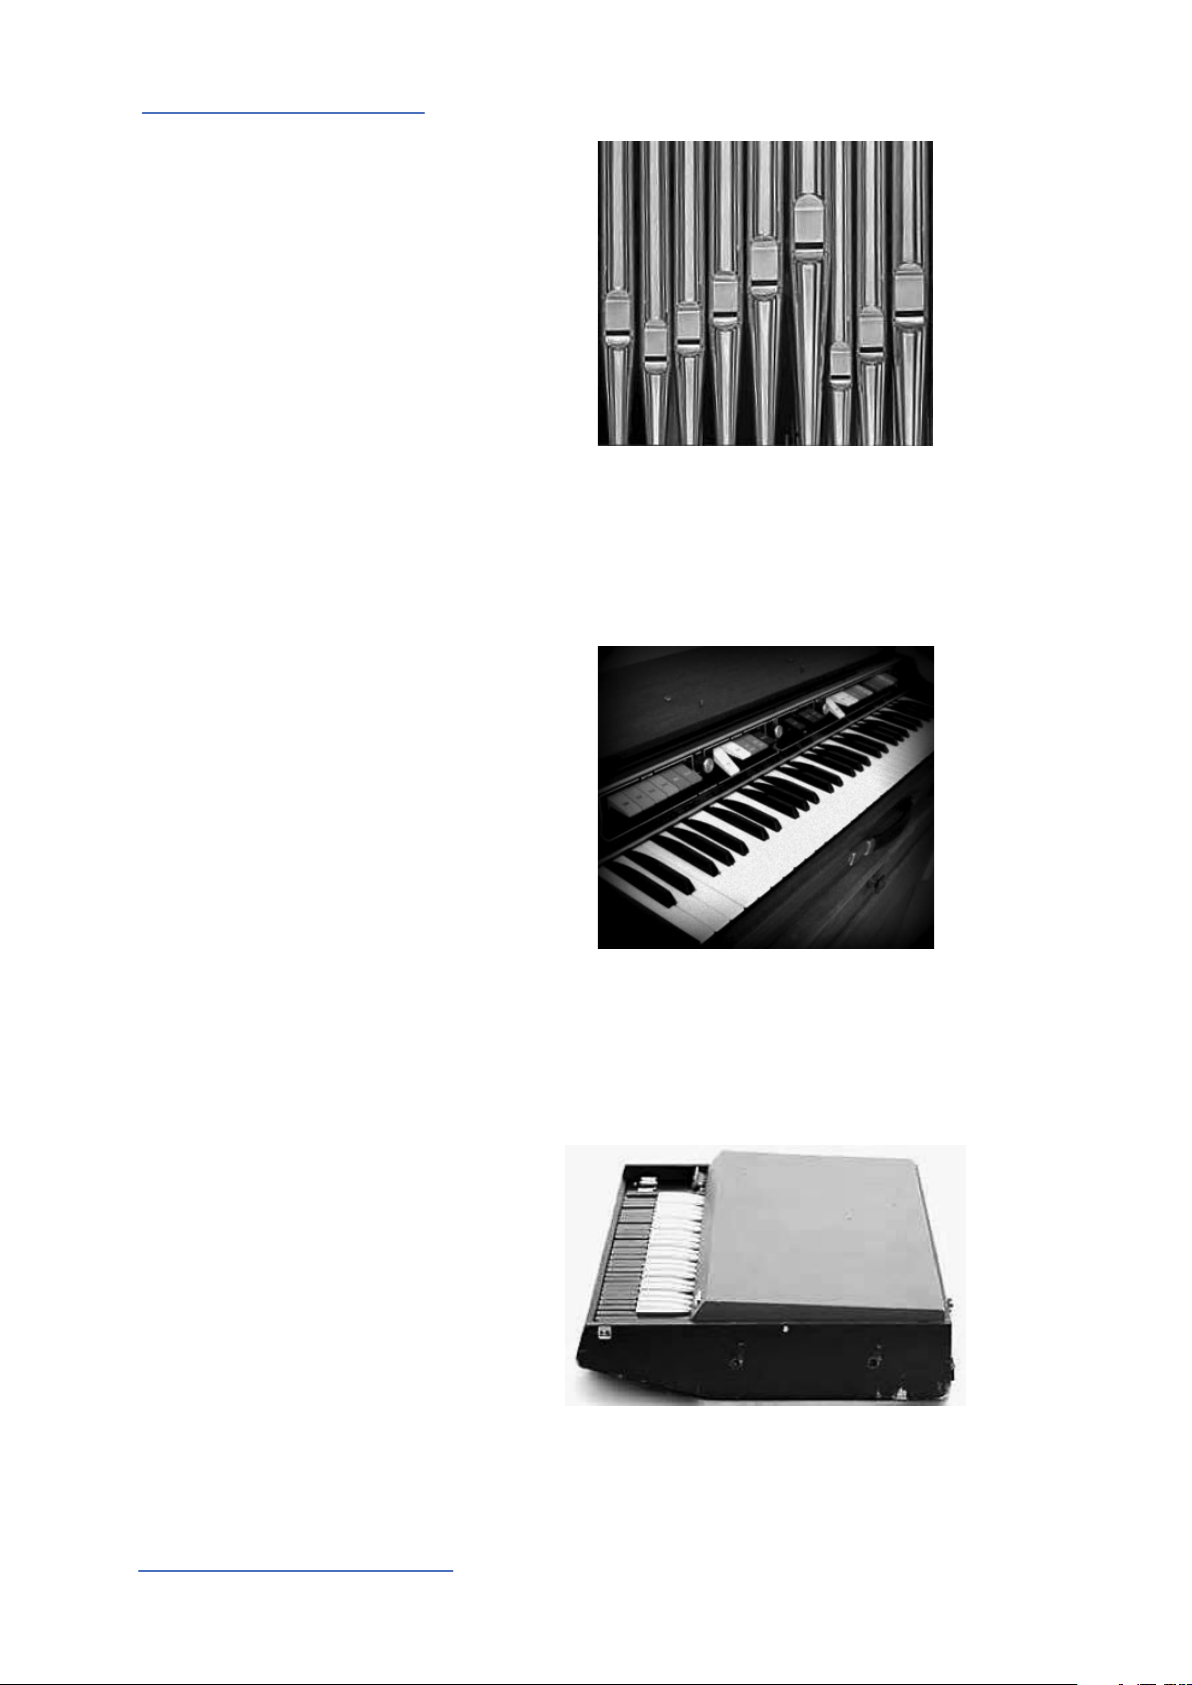
Tone Wheel Organ Models
Model B
The Numa Organ 2 sound models have been designed to give a
wide variety of sounds, derived from the analysis of the main characters of some of the most popular organ sounds, allowing to build
combinations using the drawbars and all the available post processing eects (Vibrato, Chorus, Rotary, Reverb, Drive, Click, Leakage).
The Numa Organ 2 performs as a clone of some Tone Wheel Organs,
and captures some characters of old Acoustic & Electronic-Analogue Organs by keeping the full exibility of using any customized
mixing, editing functions and controls.
(To select and store the Sound Models, please refer to pag. 18)
These 3 dierent models (selected by the G/A/B keys of the Preset
octave) are referred to 3 dierent kind of original instrument’s levels
and tone balance; the sound was slightly (or noticeable) dierent
not only from one model to another but also considering the year
of construction, the age of the circuitry and some subtle changes
in the analogue components of the original vintage instruments.
NUMA ORGAN 2 by Studiologic®
6
Model B is considered the most popular reference, with a very balanced sound, rich bass and clean treble texture, ideal for Jazz Music
and all kind of applications, where the overall balance is needed.
While the C and A models are theoretically identical, excluding the
building period, age and maintenance status, dierences could be
found also in the instruments and this B model is free of too particular deviations from the original factory set up and original sound
specications.

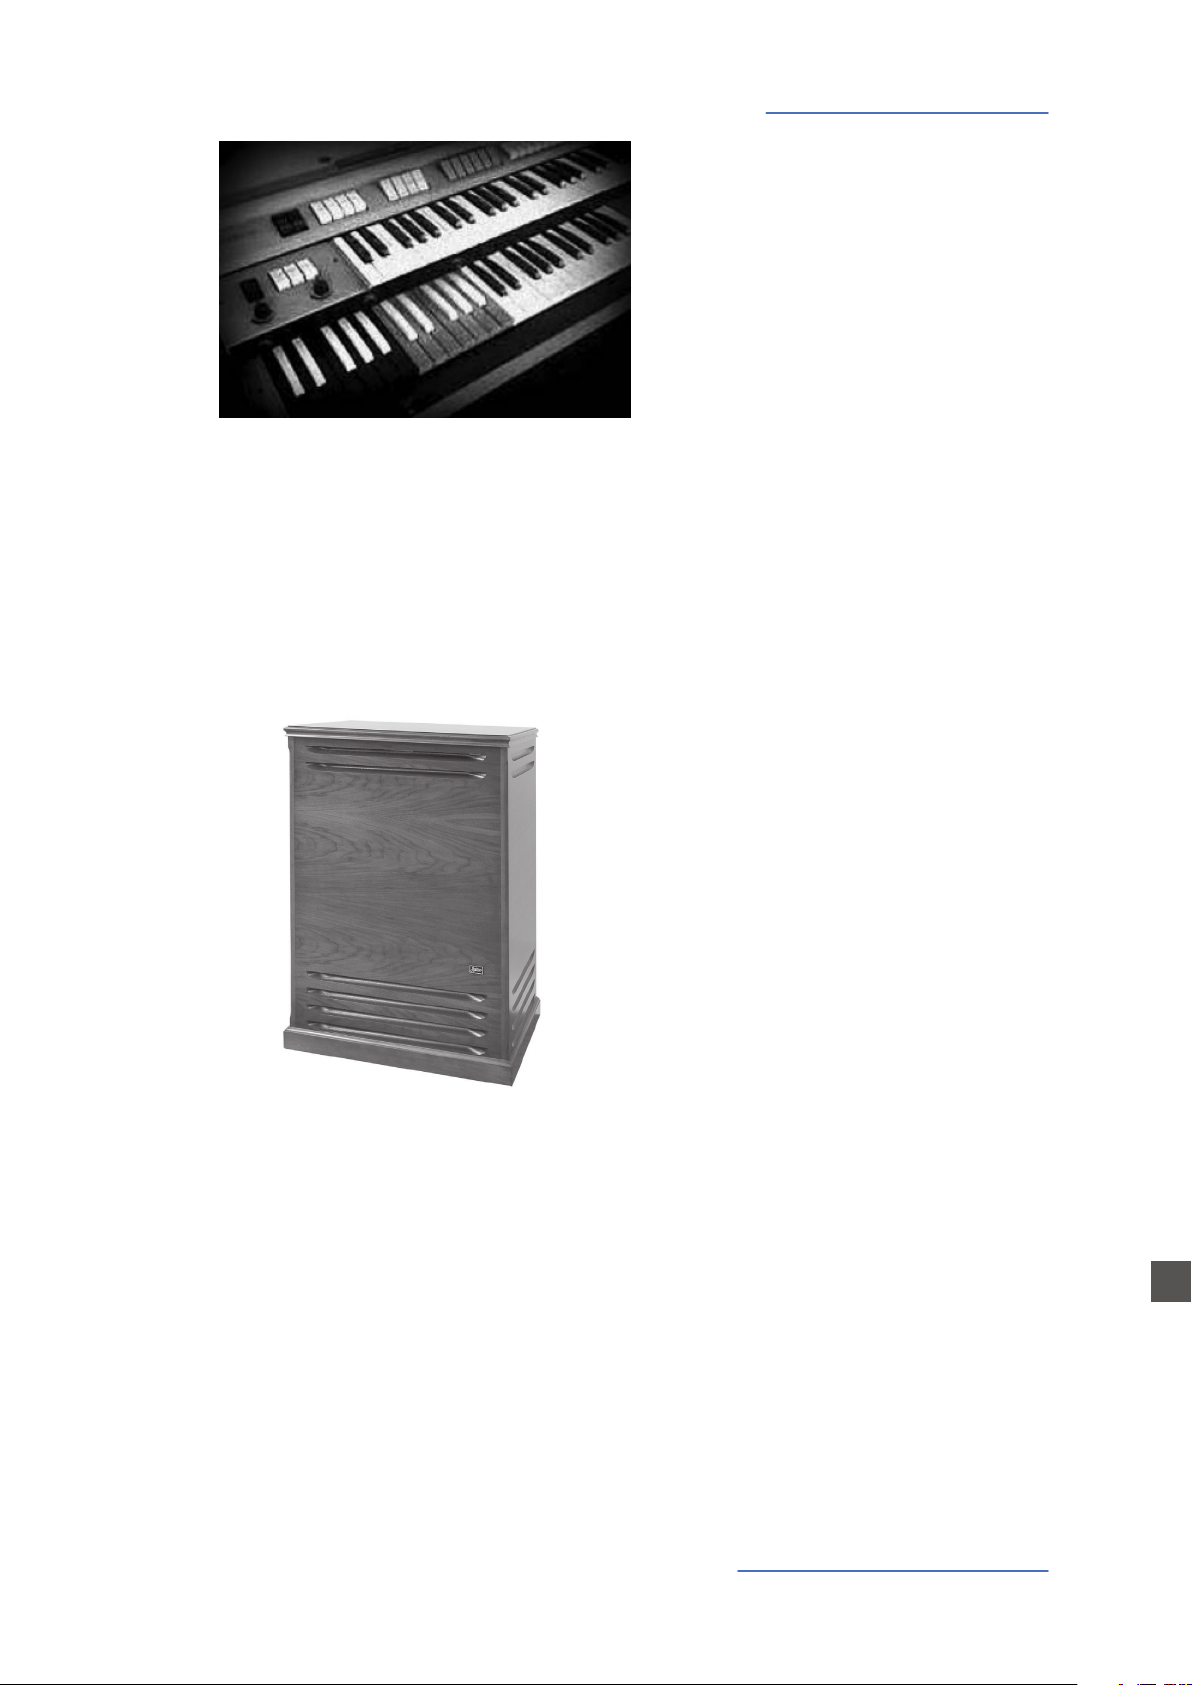
Model A is another popular reference, with the same tone generator of Model B, but with a built in amplication system and some
changes in the circuitry that could make its sound warmer than
other instruments of the same kind (a built in Reverb was also
available). The balance of the Numa Organ model A is dierent
from the model B and C and it has a natural loudness, less middle
frequencies.
Tone Wheel Organ Models
Model A
Model C/G, as most of tone wheel big organs, originally shared the
same kind of tone generator; models not very popular are the G series instruments, also designed with a Classical approach and layout.
The Numa Organ 2 A/B/C Sound Models have been selected to give
alternative timbres to create an innite variety of tone wheel sounds,
further made dierent by the post-processor controls stored in each
Preset. Some other internal parameters are slightly dierent in the
various models, like the Vibrato/Chorus eect and other subtle nuances, giving a total exibility when creating sounds for any kind of
Music.
Model C/G
EN
NUMA ORGAN 2 by Studiologic® 7
Acoustic & Electronic Organ Sounds
Classic Organ Diapason
Electronic Analog
Organ Model D
This sound model allows to create sounds with a classical timbre,
thanks to its harmonic spectrum that emulates the typical timbre of
the main Principal-diapason pipes; the option to store all the eects
in each Preset allows to adapt these controls to this sound, that normally is associated with a noticeable Reverb and zero Drive/Click/
Leakage levels.
Electronic Analog
Organ Model V
Many sounds of vintage Electronic Organs were based on simple
tone generators creating Square waves (with odd harmonics only)
summed and ltered in various ways; this model creates a mellow
square wave with a very typical clarinet-like sound, smoothed to be
summed in any drawbars settings.
This model recreates the typical sound of the most famous vintage
electronic organ, played by leading bands, that was controlled by
drawbars almost like the tone wheel organs (with a dierent setup).
NUMA ORGAN 2 by Studiologic®
8
Many electronic organs had tabs (instead of drawbars) with various sounds on dierent pitches, to be mixed in combinations. This
F model recreates one of their most rich sound, a kind of smooth
“sawtooh synthesized” harmonic spectrum, dierent and complementary to the other models, that could generate thousands of
combinations with the drawbars and all available eects, including
Rotary, Vibrato & Chorus, and all other controls storable in any Preset.
Acoustic & Electronic Organ Sounds
Electronic Organ
Model F
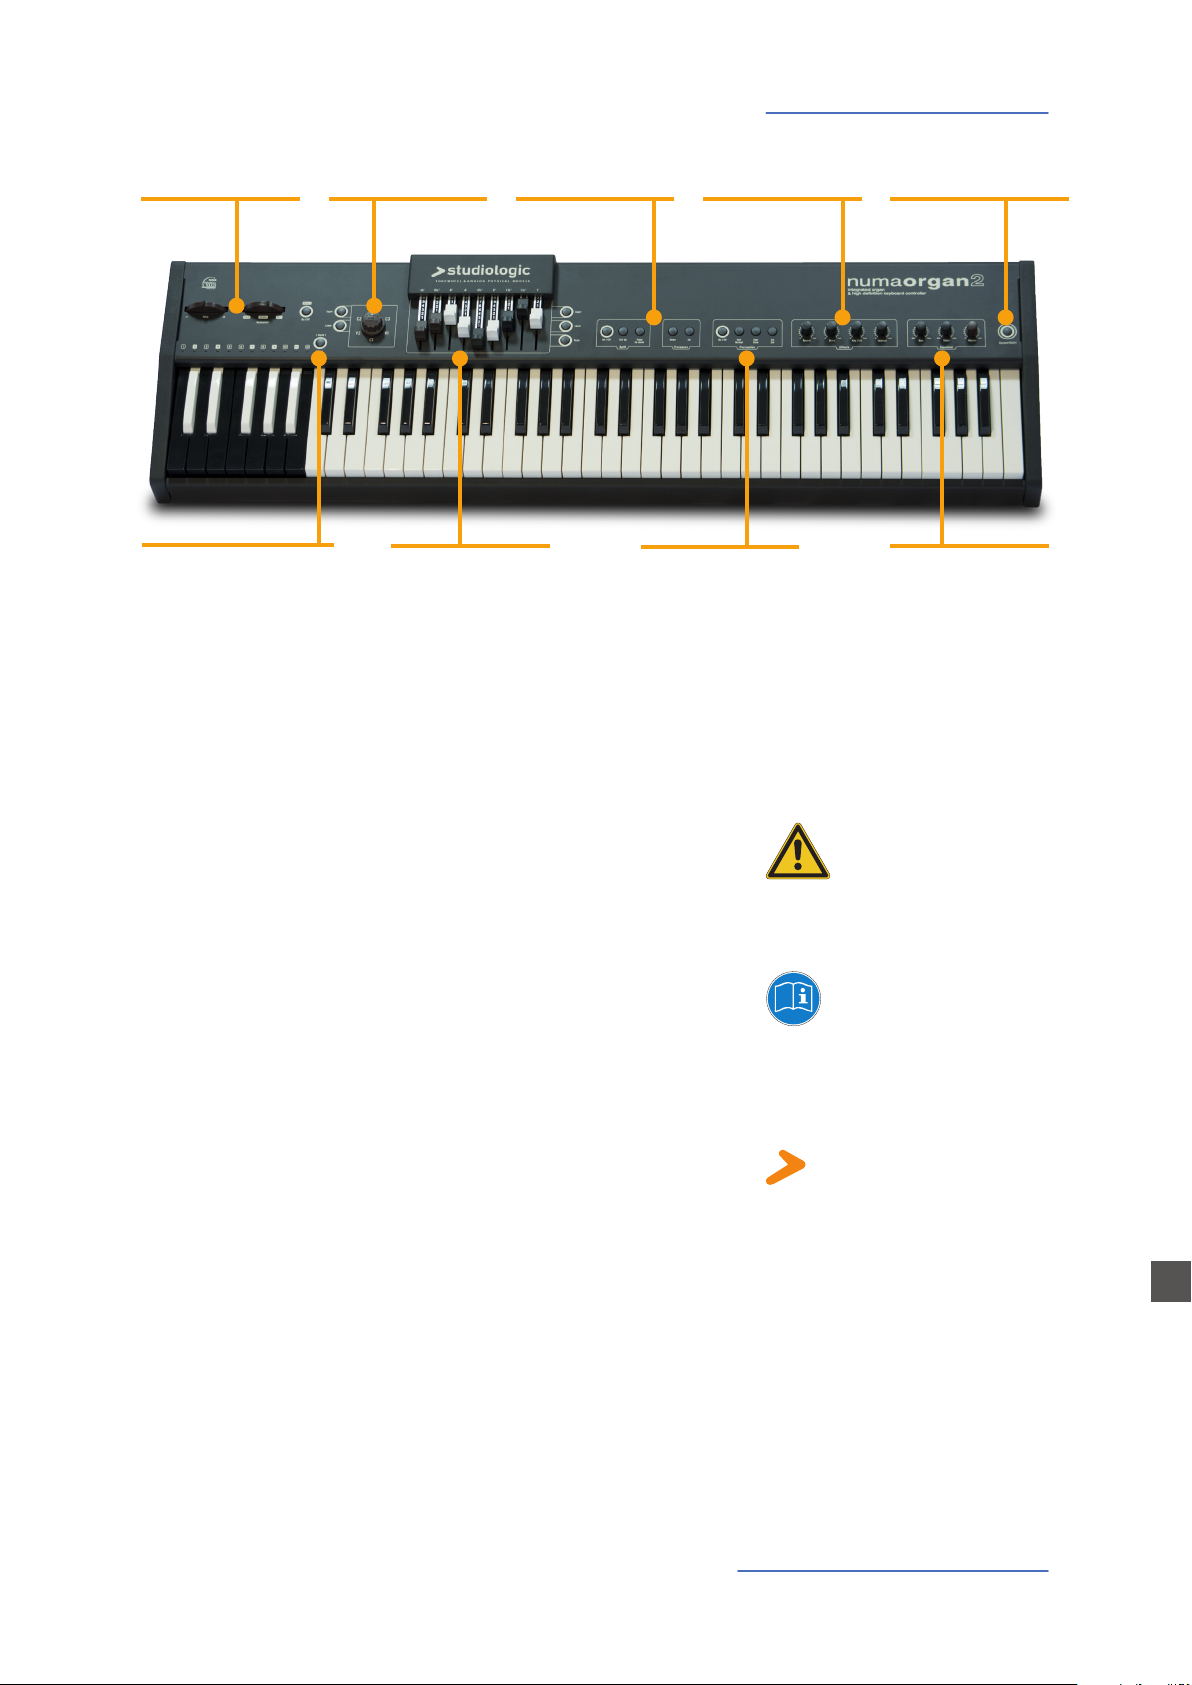
You can also connect an external Rotary Speaker cabinet to your
Numa Organ 2. Use the buttons of the Numa Organ 2 to switch the
external Rotary Speaker on and o, and control the rotary speed
with the modulation wheel.
Additionally you can use a separate direct out to play the Numa
Organ 2 over other ampliers.
External Rotary Speaker and
amplier
EN
NUMA ORGAN 2 by Studiologic® 9

Connection / Back view
Rotary Speaker
Cabinet, Page 19
Direct-out
Page 10
Power connection
Sustain / Expression pedals
Audio out L/R
Audio out L/R
Page 10
Stereo audio in • Level
Page 10
Hold • Expression
Page 10
Headphone out 1/2
Page 10
USB 1 • Mini USB 2
Page 10
MIDI In•Out•Thru
Page 20
Fuse
Page 4, 10
Mains • Power
Page 4, 10
Use the power cord supplied with the device to connect the Numa
Organ 2 to the power socket. Switch the unit on by using the power
button next to the power socket.
Connect the optional sustain / hold Studiologic pedals VFP1 or
PS100 at the socket labelled Hold.
Connect the optional volume / expression Studiologic pedals FP50
or VP25 at the socket labelled Expression.
Note: If you would like to use other pedals, please refer to the required
specications on page 49.
Connect the audio outputs Left and Right with the inputs of your
mixing desk or amplier, etc.
Direct out
Headphones
Stereo audio in / Level
USB 1
Mini USB 2
MIDI
Rotary Speaker Cabinet
Use the separate direct out to play the Numa Organ 2 over other
ampliers. The direct output does not oer the Leslie® simulation
sound (direct sound including Chorus and Vibrato).
Plug in your headphone(s) to one of the headphone outputs. You
can use up to two headphones at the same time.
You can plug in external audio devices, such as mp3-players for
playback or MIDI sound modules, at the audio input. The Level
knob near the jack on the back of the Numa Organ 2 is for adjusting
the input level.
For MIDI data transmission via USB, connect the Numa Organ 2 to
your computer with a USB cable. The rst time you switch the Numa
Organ 2 on, it will be recognised by your computer automatically as
a MIDI device and the appropriate driver will be installed by the OS
(class compliant).
This USB port is also dedicated to panel function updates.
The mini USB connector is dedicated to update the rmware of the
Sound Engine and to load new sound models into the insrtument.
Please refer to page 20.
Please refer to page 19.
NUMA ORGAN 2 by Studiologic®
10
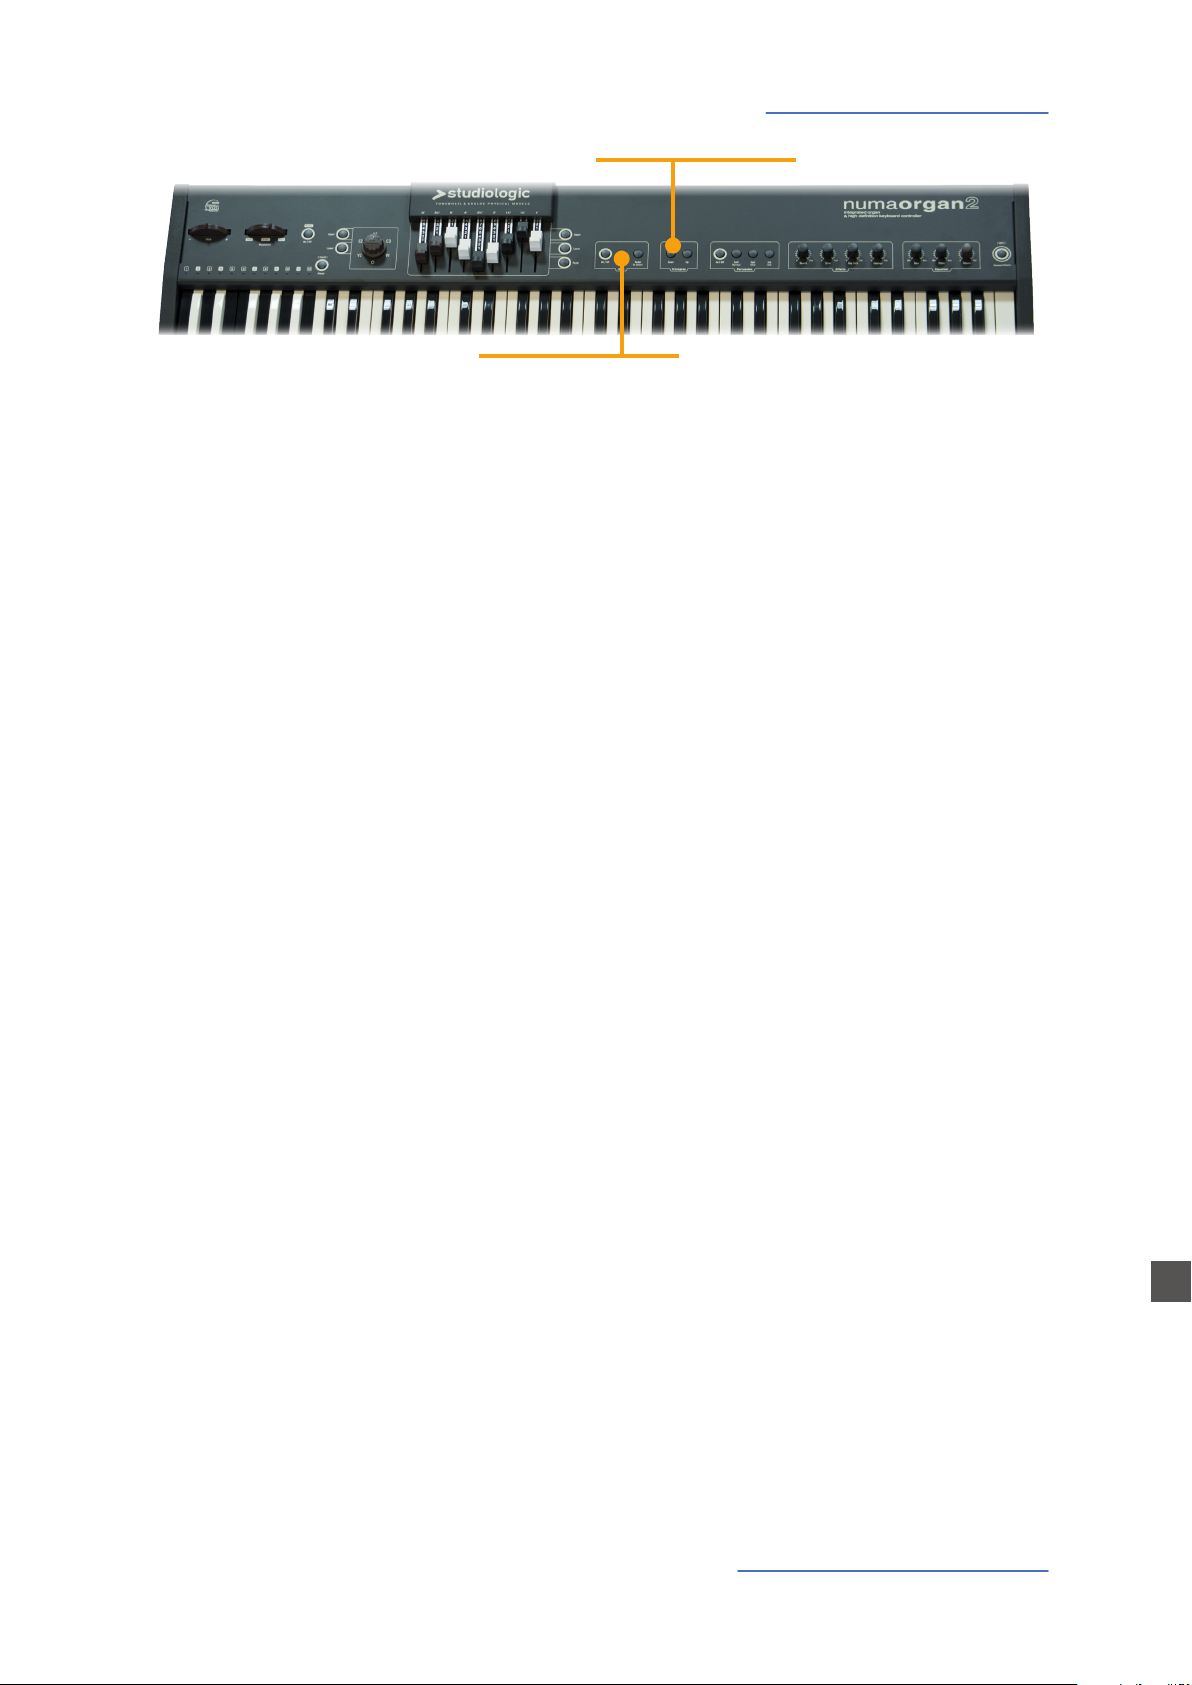
Control panel
Pitch / Modulation /
Rotary
Page 14
Presets/ Sound Models
Recall / store / Sound
Page 17,18
Chorus • Vibrato
2 x 3 variations
Page 14
Drawbars
for Upper, Lower, Pedal
Page 12,13
Split • Transpose •Tune
Keyboard functions
Page 15
Percussion
Page 16
When you use the Numa Organ 2 for the rst time, we recommend
you to turn the Volume knob on the Output section to not more
than half way between 0 and Full. While you are playing you can
adjust the volume as you choose. Adjusting the Volume knob
eects all audio and headphone outputs at the same time.
Eects
Reverb, Drive, Click,
Leakage, Page 16
Volume
dynamic TOUCH/[MIDI]
Page 17
EQ / Volume
Output section
Page 16
CAUTION:
To prevent hearing damage you should – as with all audio devices
– avoid using the Numa Organ 2 at high volume for long periods.
All operation buttons are marked in bold italics in this manual
(eg Leakage).
In classic organs, the keyboard is called a manual. We will use that
term for the Numa Organ 2 too. The Numa Organ 2 can be played
with three manuals:
Upper manual (Upper)
Lower manual (Lower)
Bass-Pedalboard (Pedal)
You will nd tips and further information in text passages marked by the
Studiologic logo.
How functions are shown in this
manual
EN
NUMA ORGAN 2 by Studiologic® 11
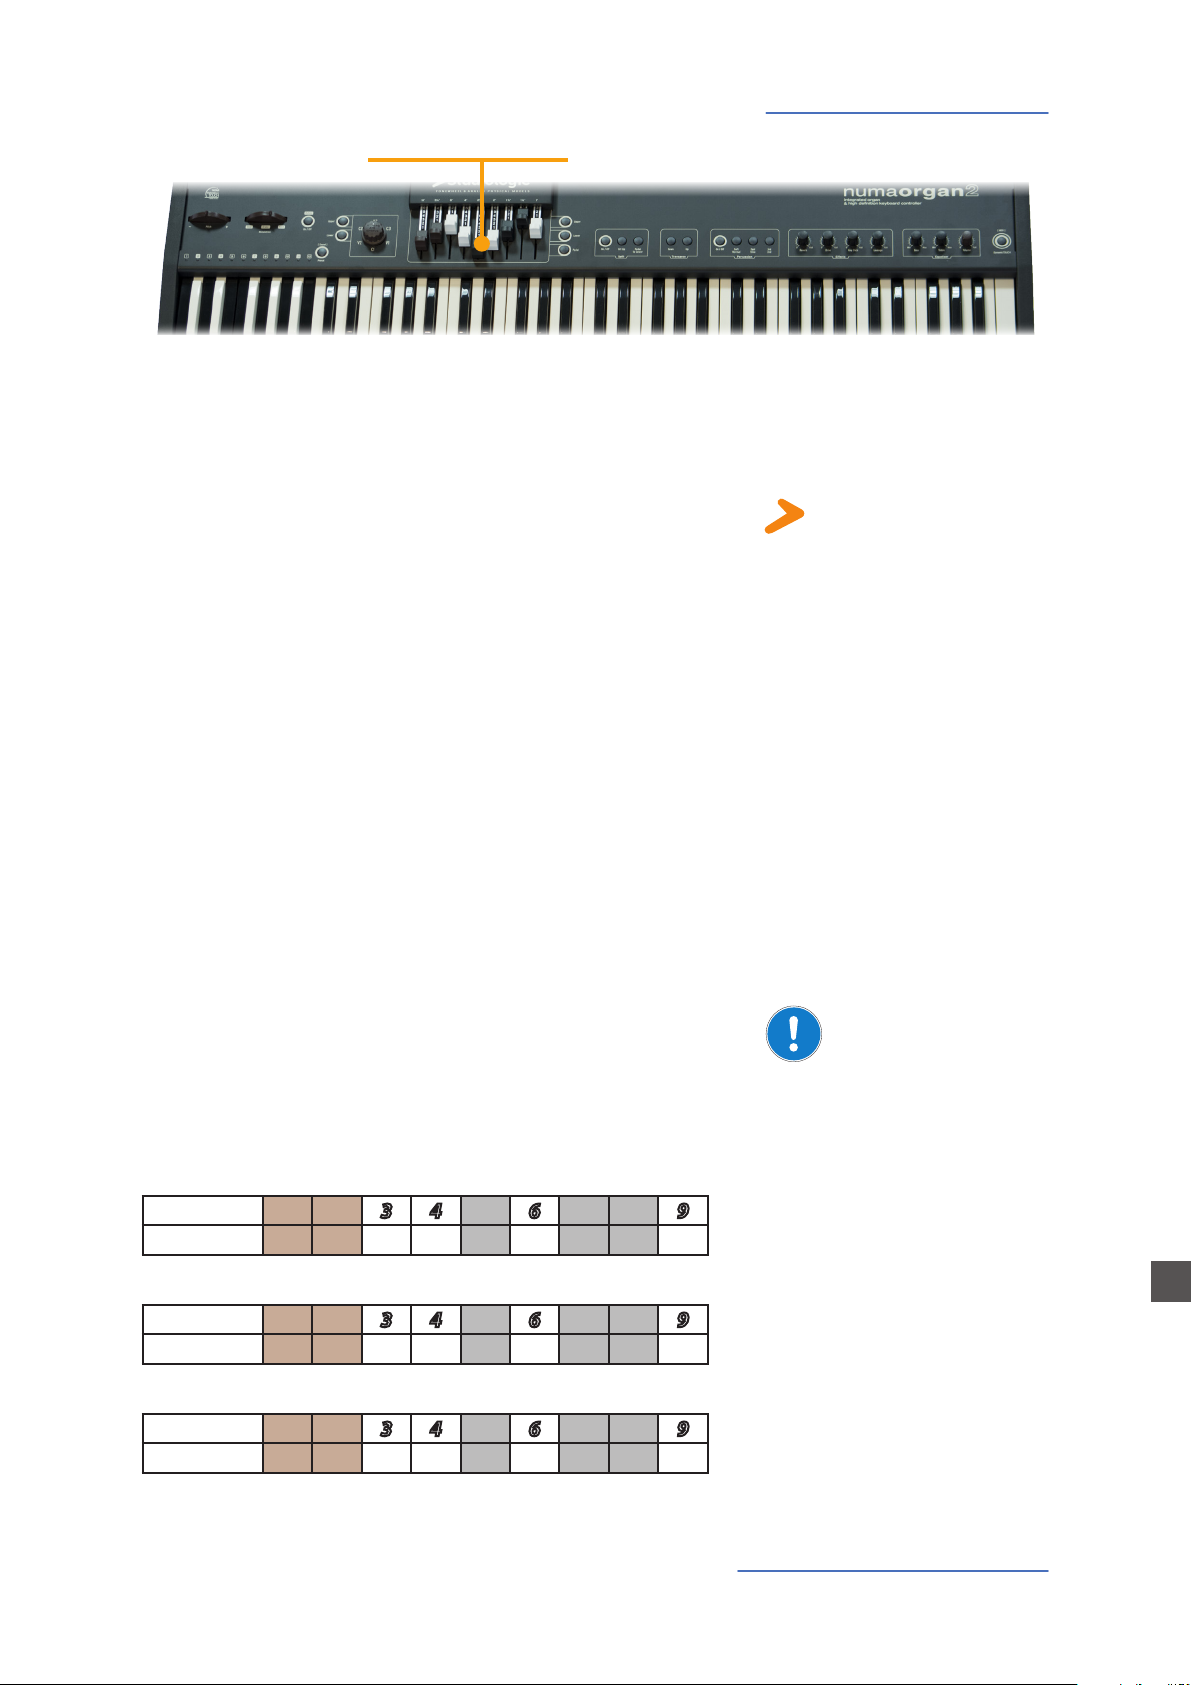
Operation / Drawbars
• Drawbars
Drawbars
Drawbars are a characteristic control of a tone wheel organ.
In the text the drawbars of the Numa Organ 2 are indicated by coloured highlighted digits as shown below.
• Upper
• Lower
• Pedal
1 2 3 4 5 6 7 8 9
The drawbars can be used to create a wide range of sounds of the
Numa Organ 2.
Each drawbar represents a dierent harmonic related to the 8‘ stop
of a pipe organ (the 3rd drawbar) which is also called “native pitch“.
Drawbar
Feet
Harmonic
related to 8‘
Harmonic
related to 16‘
1 2 3 4 5 6 7 8 9
1/3
16‘ 5
- - 1. 2. 3. 4. 5. 6. 8.
1. 3. - - - - - - -
‘ 8‘ 4‘ 2
2/3
‘ 2‘ 1
3/5
‘ 1
1/3
‘ 1‘
NUMA ORGAN 2 by Studiologic®
12
Note: The labelling of the drawbars in feet derives from pipe organs, where
it represents the length of the pipes. For the 8‘ stop of a pipe organ the pipe
of the note C is exactly 8 feet long (=2,4m).
The colouring of the drawbars is very intuituive:
Brown drawbars add frequencies below the native pitch. They are
also used to adjust the timbre for Pedal. White drawbars are related
in octaves to each other, where the 3rd drawbar (native pitch) represents the fundamental. Finally the black drawbars add fths and
a major third to the timbre.
When a drawbar is pushed all the way in (until you can‘t
see any digit), its harmonic is absent from the timbre. The
maximum volume for the drawbar is achieved, when you
see the digit 8. There are seven more volume positions in
between to add the harmonics of each drawbar to the timbre.
• Drawbars
Operation / Drawbars
At each push of a key all nine harmonics of this particular key are
generated. The drawbars simply adjust the levels among them. Thus
you can change the timbre while keys are pressed.
Note: Located under every single key of an original tone wheel organ were
nine contacts, which were all closed at the same time by pressing the key.
A bus system then regulated the volume for each contact via each of the
nine drawbars.
With your Numa Organ 2 you can play three dierent sections at
the same time. To do this you may connect another MIDI keyboard
and a MIDI pedal board to the Numa Organ 2 (refer to page XX), or
split the manual of the Numa Organ 2 into two zones (refer to Split
on page XX).
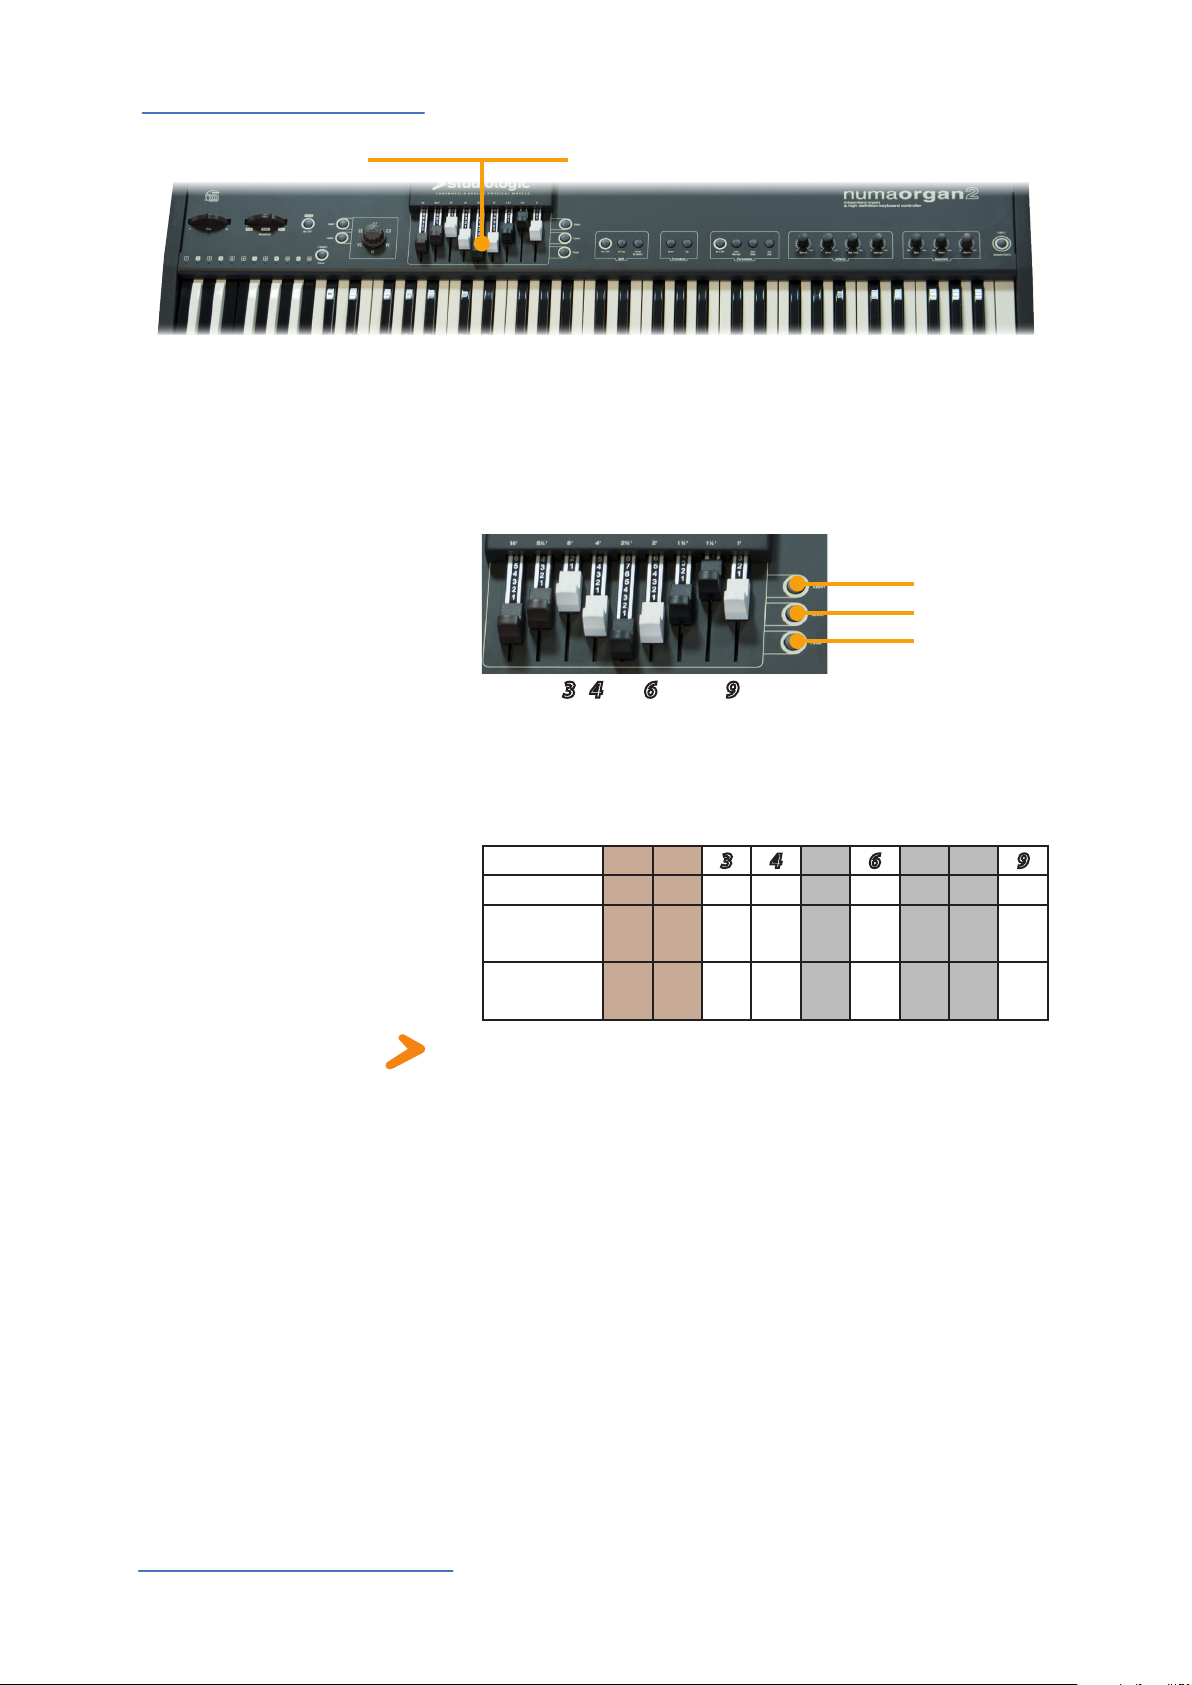
Use the buttons Upper, Lower and Pedal to assign the drawbars
control to each section. The active button will light up.
Upper: The drawbars control the sound of the whole manual or, in
Split mode, of the upper manual.
Lower: The drawbars control the sound of an optional additional
keyboard or, in Split mode, of the lower manual.
Pedal: The drawbars control the sound of an optional additional
bass pedal board or, in Split mode, of the lower manual, if Pedal to
Lower is activated.
Special Drawbar setting for Pedal:
To adjust the timbre for Pedal you can only use the drawbars
1 and 2.
Drawbar 1 controls a special sound based on the 16‘ harmonic, while
drawbar 2 now adjusts the 8‘ harmonic!
For Upper and Lower all nine drawbars are accessible as
previously described.
How the manual and drawbars
are related
Extension with other
manuals / keyboards
Upper
Drawbar
Feet
Lower
Drawbar
Feet
Pedal
Drawbar
Feet
1 2 3 4 5 6 7 8 9
16‘ 5
1/3
‘ 8‘ 4‘ 2
2/3
‘ 2‘ 1
3/5
‘ 1
1/3
‘ 1‘
1 2 3 4 5 6 7 8 9
16‘ 5
1/3
‘ 8‘ 4‘ 2
2/3
‘ 2‘ 1
3/5
‘ 1
1/3
‘ 1‘
1 2 3 4 5 6 7 8 9
16‘ 8‘ - - - - - - -
EN
NUMA ORGAN 2 by Studiologic® 13

Operation
• Pitch • Rotary / Modulation
• Chorus / Vibrato
Pitch Wheel
Rotary / Modulation Wheel
(Rotary Speaker Simulation)
To vary the pitch while playing by ±2 semitones, use the Pitch
wheel on the left. The wheel is self centering and it will go back to
its center position after being released.
Press the On/O button next to the Modulation / Rotary wheel
to switch the internal Rotary Speaker eect on. The On/O button
lights up.
Use the Modulation / Rotary wheel to adjust the speed of the
rotor. There are three states available: At the leftmost position
of the Modulation / Rotary wheel, the rotor runs slow. At the
centre position the rotor slows down and stops, but the sound is still
played back by the Rotary Speaker simulation. This state is called
“Brake“. By turning the Modulation / Rotary wheel to the right, the
simulated rotor spins fast.
If you would like to switch o the Rotary Speaker simulation, press
On/O again. The lit button will turn o.
You can also change the Rotary Speaker speed with an attached
Sustain pedal.
If the Rotary wheel is set to the positions Slow or Fast, you alter
the Rotary speed with the Sustain pedal from slow to fast and vice
verse. If the Rotary wheel‘s position is Brake, the Sustain pedal
alters the Rotary speed from Brake to Fast.
Chorus / Vibrato
NUMA ORGAN 2 by Studiologic®
14
Note: You can also use the Modulation / Rotary wheel, the On/O
button and an attached Sustain pedal to control an external Rotary-
Cabinet. Please refer to page XX.
With the big Vibrato And Chorus knob you can choose from 3 Vibrato or 3 Chorus eect settings.
To assign the eect to a manual, press Upper and/or Lower. You
can assign the eect to the upper and lower manual at the same
time or just to one manual. The button(s) will light up. Press Upper
and/or Lower again, to deactivate the eect for the particular
manual.
Note: You can connect a second keyboard and an additional bass pedal
board to the Numa Organ 2, or use the Split function, to play two manuals
at the same time with the Numa Organ 2 keyboard. Please refer to pages
XX and XX respectively.
• Split • Split point
Operation
• Transpose •Edit
Press Split to activate this function. The Split button will light up
and the manual is splitted in two zones. Press Upper to adjust the
sound of the upper zone. Press Lower to assign the drawbars to the
lower zone.
In addition, you can also assign to the left zone of the keyboard the
pedal manual, by pressing Pedal to Lower. The button will light up.
To control the sound press Pedal in the drawbar section.
Use the Oct Up button to transpose the lower keyboard zone by
one octave up. The Oct Up button will light up.
To deactivate one of the functions above, just press the corresponding button again.
To adjust the split point, press and hold the On/O button of the
split section for a few seconds. Using the keyboard (or Value +/-),
select the highest note of the lower split zone.
If you have to play in a demanding key, you can simplify this task by
transposing the keyboard (eg from F sharp by minus one semitone
to F).
To transpose in steps of a semi-tone, press Transpose+/-. If any
transposition is activated either Transpose+ or Transpose- will
light up.
The Transposition setting will be kept until the main power is switched o.
Split
Playing two sounds in dierent keyboard zones is called split
Split point
Transpose
To enter the Edit functions press and hold both buttons Transpose+
and Transpose- for a few seconds; both buttons will start to blink.
Tune: you can tune your Numa Organ 2 with values from -99 to +99
cents. The tuning can be adjusted using Drawbar 1 for values from
-99 to 0 cents and Drawbar 2 for values from 0 to +99 cents.
Percussion Decay and Level: drawbar 8 controls the Decay and
Drawbar 9 controls the level.
Hum: Drawbar 7 controls the quantity of hum noise that reproduces a typical eect of vintage tonewheels instruments.
Press either Transpose+ or Transpose- again to keep the
adjustment and quit the tuning mode. The tune setting will be kept
until Numa Organ 2‘s power is switched o.
Edit functions
EN
NUMA ORGAN 2 by Studiologic® 15

Operation
Percussion
• Percussion
• Eects
• EQ / Volume
To add more rhythmic elements to your performance you can
switch on the Percussion. The Percussion eects the notes played
staccato and fades away when playing legato, as in the original vintage tone wheel organs.
Press On/O to activate the Percussion. With the 2nd/3rd button
you can decide whether the Percussion is generated by the second
harmonic (button does not light up) or by the third harmonic
(button lights up).
Slow/Fast denes the decay of the Percussion. Press Slow/Fast to
shorten the decay from 1 second (button does not light up) to approx. 200 milliseconds (button lights up).
You can also change the level of the Percussion. Press Soft to decrease the volume of Percussion. The button lights up.
Eects
Note: For the Percussion the 1‘ contact of the Upper manual is used. Thus
drawbar 9 is without function when the Percussion is activated.
Reverb
Some of the vintage tone wheel organs were equipped by spring
reverbs and also this eect is simulated by the Numa Organ 2. Use
the Reverb knob to adjust the intensity of the spring reverb and
add depth to your music.
Drive
With the Drive knob you control the intensity of a simulated tube
amplier‘s typical distorsion. The higher you set Drive, the more
distortion you get. This typical tube sound can be turned up to an
ecstatic “yelling“ sound.
Key Click
The parameter Key Click adds the typical noise associated with the
tone wheels vintage organ‘s technology that became part of their
sound.
With the related potentiometer you can control the level of the noise according to your taste.
Leakage
You can also add to the sound of the Numa Organ 2 the Leakage, a
parameter that simulates the “cross-talk“ between tone wheels and
within the cables.
EQ / Volume
NUMA ORGAN 2 by Studiologic®
16
Note: All Eects settings are memorized in each Preset.
To equalize the sound of the Numa Organ 2, you can cut
or boost low and high frequencies using the Bass and
Treble knobs in the Output section.
Set the sound level with the Volume knob.

Operation
• Preset recall / store
You can use your Numa Organ 2 as a master keyboard, controlling
external MIDI devices with full parameters. By pressing Dynamic
TOUCH / [MIDI] button, you can get the following combinations:
- Light OFF: Local ON, MIDI OFF.
The keyboard plays the internal sounds. The MIDI output is o.
- Light ON: Local OFF, MIDI ON.
The keyboard sends the MIDI notes with the related velocity through
the MIDI output and the USB. The internal sound engine is o.
- Light blincking: Local ON, MIDI ON.
The keyboard sends the MIDI notes with the related velocity through
the MIDI output and the USB, while the internal sound engine is on.
During the performance you can go through dierent sound Presets by following the procedure below:
- Press the Preset/[Sound] button on the panel, to switch it on (LED
status: ON);
• dynamic TOUCH/[MIDI]
Dynamic TOUCH / [MIDI]
Preset Selection
- Select one of the Presets 1-12 from the reversed octave keys.
A rst set of factory Demo Preset is stored in the instrument and it
represents a variety of sounds with all the available sound models.
A dedicated software will be published in our site to allow the user
to save and recall various Preset banks.
Demo Presets
Preset 1 (C): Classic Organ Principal-Diapason (16’)
Preset 2 (C#): Classic Organ Mellow Combination
Preset 3 (D): Classic Full Organ Sound
Preset 4 (D#): Electronic Organ Triangle Wave model V (V model)
Preset 5 (E): Electronic Organ Square Wave (Model D)
Preset 6 (F): Electronic Organ Synthesis Sound (Smooth Saw tooth)
Preset 7 (F#): C3 Organ Sound (C-G Model)
Preset 8 (G): C3 Pop Organ Sound (C-G Model)
Preset 9 (G#): A100 Organ Sound
Preset 10 (A): A100 Jazz Organ Sound (Model A)
Preset 11 (A#): B3 Jazz Organ Sound (Model B)
Preset 12 (B): Panel Direct Control - no Presets (Model B as default sound)
EN
NUMA ORGAN 2 by Studiologic® 17

Operation
Preset Store
Sound Selection
To create your favourite sound, you can move through all the parameters on the control panel. Once you nd the right combination,
you can store the obtained sound in one of the 11 keys of the reversed octave, by following the procedure below:
- Press the Preset/[Sound] button on the panel, to switch it on (LED
status: ON);
- Keep pressing for a few seconds the Preset key in the reversed
octave, where you want to store the current sound and panel setup;
- Wait until the related LED ashes, conrming that the sound is stored in the selected Preset.
Note: the B key is a Panel control and the related location is not storable
as preset, but it keeps the Sound (Model) B as a default sound and it is set
to the actual conguration of all controls (drawbars and all other panel’s
switches and potentiometers).
Note: the instrument stores all eect controls and settings in any Preset.
The Numa Organ 2 can reproduce sounds of dierent vintage organs. The technology of the sound engine can emulate dierent
sound models as explained in the Introduction at pages 7,8.
To select the dierent sound models, follow the procedure below:
- Keep pressing the Preset/[Sound] button until it ashes (LED status: FLASH);
- Select the Sound Model from the list below:
Sound 1 (C): Classic Organ Principal (Diapason Pipe Partials)
Sound 2 (C#): empty
Sound 3 (D): Electronic Organ Model V (Mellow Triangle)
Sound 4 (D#): empty
Sound 5 (E): Electronic Organ Model V (Sweet Square)
Sound 6 (F): Electronic Organ Model F (Smooth Sawtooth)
Sound 7 (F#): empty
Sound 8 (G): Tone wheel Organ Model C (C3-G)
Sound 9 (G#): empty
Sound 10 (A): Tone wheel Organ Model A (A100-A122)
Sound 11 (A#): empty
Sound 12 (B): Tone wheel Organ Model B (B3)
Note: this list could be updated with future sound implementations.l
- To escape the Sound Selection function press again the Preset/
[Sound] button (LED status: ON/OFF).
Note: during the Sound Selection procedure it’s always possible to use the
Drawbars and any other eect and/or control; if you want to store the selected Sound together with the current panel setup, follow the Preset Store
Procedure above.
NUMA ORGAN 2 by Studiologic®
18

Preset Up/Download / External Rotary S. / Update
You can save your complete Preset bank by uploading it on your
computer. To enter the function activate the Edit mode by pressing at the same time both Transpose+ and Transpose- for a few
seconds; both buttons will start to blink. Pressing the Preset button
the complete bank will be sent to your computer as a le (MIDI le)
that you can name as you prefer to have a reference.
During the save the Preset button LED will blink until the data
transfer will be completed.
To recall (Dowload) a Preset bank, activate the Edit function and
simply “play“ the le you want to install with the computer‘s MIDI
player; the Preset button LED will blink until the data transfer will
be completed.
Note: both Upload & Download functions are available by connecting the
instrument to your computer via USB.
You can connect your Numa Organ 2 to an external Rotary Speaker
cabinet via a standard 11-Pin connector.
The rotor speed, as well as the Start/Stop (Brake), is also controllable with the Rotary wheel and the Sustain pedal. This function is
identical to the internal Rotary Speaker simulation (page XX).
Connect the 11-pin socket on the back of the Numa Organ 2 to
the Rotary Speaker cabinet, by using a suitable cable. You can then
use all outputs simultaneously, namely an external Rotary, the
analogue audio outputs with the internal Rotary simulation, and
the “clean” direct outs, as well as both headphone outputs of the
Numa Organ 2.
For further Rotary Speaker connection/control information, please
also refer to the operation manual of the external speaker system.
Preset Upload & Download
External Rotary Speaker
Cabinet
Pin Function
1 Audio (Rotary)
2 Audio (Stationary)
3 Audio (Aux 1)
4 Ground
5 Control Supply
6 Control Circuit
7 Fast
8 Slow
9 Speed Adjust
10 Audio (Aux 2)
11 +29 VDC
6
5
9
8
7
10
11
1
2
4
3
To update your instrument, connect it to your computer using the
propper USB port (mini or standard) according to the instructions
you will nd on the Studiologic website, with the Organ Loader
software and related les, when published.
Press and hold Upper while switching on the Numa Organ 2. If the
connection to the computer is correct and the appropriate software installed, the Upper button will blink slowly. If the connection
cannot be established, it will blink fast.
Now you can transfer data to the Numa Organ 2 using the computer software.
System Update
EN
NUMA ORGAN 2 by Studiologic® 19

MIDI
MIDI connection
Keyboard extension
MIDI (Musical Instruments Digital Interface) is a standard for
data transmission between sound modules, electronic musical instruments and computers. Please note: the MIDI
Out of a device is connected with the MIDI In of another
device. Incoming data arriving at the MIDI In are duplicated at the
MIDI Thru socket.
The Numa Organ 2 sends MIDI data from the MIDI Out and at the
same time via the USB port. MIDI data are received via MIDI In.
You can extend the manual of your Numa Organ 2 by attaching an
optional second MIDI keyboard and/or a MIDI bass-pedalboard.
Connect the MIDI output of the second device to the MIDI input of
the Numa Organ 2.
Please be aware of the following:
Drawbar settings for Upper are always related to MIDI channel 1.
Drawbar settings for Lower are always related to MIDI channel 2.
Drawbar settings for Pedal are always related to MIDI channel 3.
If you want to use the second keyboard as Lower manual, it must
send its data on MIDI channel 2. If you want to use a MIDI bass pedal, make sure it sends its data on MIDI channel 3.
Note: To connect an additional MIDI keyboard and also a MIDI bass pedal
board to the Numa Organ 2 at the same time, please use a MIDI merger.
MIDI channel 3
MIDI channel 2
VMK 161
plus
Organ MP 117
NUMA ORGAN 2 by Studiologic®
20

MIDI
You can play and control the sounds of the Numa Organ 2 with
other MIDI devices or with your computer.
In the Appendix section of this manual you can nd the MIDI implementation chart which shows all MIDI Control Change messages
that the Numa Organ 2 supports.
Note: MIDI data sent on ch.1 are related to the Upper manual; MIDI ch.2 and
3 control the Lower manual and the Bass section.
To use your Numa Organ 2 as MIDI masterkeyboard, switch on the
Dynamic TOUCH / [MIDI] function; when activated, a Sustain pe-
dal sends the MIDI sustain message (CC 64), while it always controls
the internal Rotary speed!
The Numa Organ 2 sends on MIDI channels 1, 2 and 3 all parameters
and adjustments and this also allows to continuously record also
the Drawbars settings in a MIDI recorder/sequencer.
Control the Numa Organ 2 via
MIDI
Use the Numa Organ 2 as MIDI
masterkeyboard
MIDI parameters recording
NUMA ORGAN 2 by Studiologic® 21
EN

Troubleshooting
Troubleshooting
Problem Possible cause Solution
Numa Organ 2 does not
turn on.
Numa Organ 2 cannot
be controlled via MIDI.
No sound is heard. Dynamic TOUCH /
Only one sound is
heard in split mode.
No sound from the
audio input is heard.
The Sustain pedal just
changes the Rotary
speed from Brake to
fast, but not Slow to
Fast.
Sustain pedal does not
hold notes if pressed.
Sustain pedal holds
notes if it is not pressed,
but cuts notes if
pressed.
Adjustments e.g. of the
drawbars cannot be
recorded with a
sequencer program.
No power is supplied.
Defective power
cable. Fuse is blown
inside the Numa
Organ 2.
MIDI data are not
being sent on MIDI
channel 1, 2 or 3.
[MIDI] is activated.
All drawbars are
pushed all the way in.
Volume is set to 0.
Defective connecting
cable / headphone.
A sustain pedal is
connected to Expression pedal input.
All drawbars of the
lower zone are
pushed all the way in.
Level of Audio In is
set to minimum.
External sound device is not playing.
Defective cable connection.
The Rotary wheel is
set to Brake.
Dynamic TOUCH /
[MIDI] is deactivated.
The contact of the
attached sustain
pedal is closed at rest.
Dynamic TOUCH /
[MIDI] is deactivated.
The MIDI Input of
the sequencer is not
set to MIDI channels
1, 2 and 3 or to “all
inputs”.
Please make sure that
power is available and
switched on. Check
the power cable and
the internal fuse and
replace it if needed,
with a fuse as specied
on page XX..
Please send MIDI data
only on MIDI channel
1, 2 and/or 3.
Deactivate Dynamic
TOUCH / [MIDI].
Pull at least one drawbar down.
Set the Volume to a
higher level.
Change the cable /
headphone.
Unplug the sustain
pedal from Expression
pedal in.
Pull at least one drawbar down for the silent
zone.
Adjust Stereo Audio In
Level.
Check if the external sound device is
sending audio signal.
Change the connection cable.
Set the position of the
Rotary wheel to Fast
or Slow. Please also
refer to page 12.
Activate Dynamic
TOUCH / [MIDI], if
you want to use the
foot switch as sustain
pedal.
Plug in a sustain pedal
where contact is open
at rest.
Activate Dynamic
TOUCH / [MIDI].
Set the input of the
sequencer to MIDI
channel 1, 2, 3 or to “all
inputs”.
NUMA ORGAN 2 by Studiologic®
22

Declarations
Every product from Studiologic by Fatar has been carefully manufactured, calibrated and tested, and carries a two year warranty. Please
register your product to get full support. Damage caused by incorrect
transport, mounting or handling is not covered by this warranty. For any
further informations please refer exlusively to your dealer and/or local
distributor.
This product complies with the European Directives:
2006/95/EC Low Voltage Directive
EN 60065 Safety requirements for audio, video and
audio-visual apparatus for professional use
2004/108/EC Electromagnetic Compatibility Directive - EMC
EN 55103-1/E1 Product standard - Emission Audio, video and
audio-visual apparatus for professional use.
EN 55103-2/E1 Product standard - Immunity Audio, video and
audio-visual apparatus for professional use
Recanati, 05. 05. 2014 Marco Ragni, Chief Executive Ocer
This equipment has been tested and found to comply with the limits for a
Class B digital device, pursuant to Part 15 of the FCC Rules. These limits are
designed to provide reasonable protection against harmful interference in a
residential installation.
This equipment generates, uses, and can radiate radio frequency energy and, if not installed and used in accordance with the instructions, may
cause harmful interference to radio communications. However, there is no
guarantee that interference will not occur in a particular installation. If this
equipment does cause harmful interference to radio or television reception,
which can be determined by turning the equipment o and on, the user is
encouraged to try to correct the interference by one or more of the following
measures:
• Reorient or relocate the receiving antenna.
• Increase the separation between the equipment and receiver.
• Connect the equipment into an outlet on a circuit dierent from that to
which the receiver is connected.
• Consult the dealer or an experienced radio/TV technician for help.
Unauthorized changes or modication to this system can void the user’s
authority to operate this equipment.
This declaration becomes invalid if the device is modied without approval.
This product is manufactured according to the 2002/95/EC directive.
The purpose of this EG Directive 2003/108/EG is, as a rst priority, the
prevention of waste electrical and electronic equipment (WEEE), and
in addition, the reuse, recycling and other forms of recovery of such
wastes so as to reduce the disposal of waste. Please help to keep our
environment clean.
Warranty
CE-Conformity
FCC-Regulation
RoHS-Conformity
RoHS
compliant
2002/95/EC
Disposal / WEEE
To ensure maximum quality all Studiologic by Fatar devices are always
engineered to be state-of-the-art products, therefore updates, modications and improvements are made without prior notice. Technical
specication and product appearance may vary from this manual.
All trademarks used in this manual belong to their respective owners.
No part of this manual may be reproduced or transmitted in any form
or by any means without prior consent of the copyright owner:
FATAR Srl
Zona Ind.le Squartabue
62019 Recanati, Italia
State of the art
EN
Trademarks
Copyright
NUMA ORGAN 2 by Studiologic® 23


ITALIANO
Manuale di Istruzione
NUMA ORGAN 2 by Studiologic® 25
IT

Informazioni di sicurezza
Importanti informazioni di sicurezza
Leggere attentamente il manuale. Esso contiene tutte le informazioni
necessarie per utilizzare questo strumento.
Seguire le istruzioni nel manuale.
La garanzia verrà annullata qualora venissero eettuati interventi
non autorizzati nel Numa Organ 2.
Possono essere utilizzati solo accessori specicati dal costruttore.
Usare lo strumento solo come indicato in questo manuale.
PERICOLO!
Rischio di scossa elettrica.
Non aprire lo chassis. Non ci sono parti riparabili dall‘utente all‘interno.
Lo strumento può essere aperto solo da riparatori qualicati.
Informazioni principali
Prima di connettere lo strumento all‘alimentazione di rete, vericare
l‘impostazione del voltaggio del Numa Organ 2. Lo strumento può
essere alimentato con un voltaggio da 100 a 240 VAC. L‘unità è protetta da un fusibile di tipo F da 250V - 500mA che può essere sostituito
solo da un nuovo fusibile dello stesso tipo e con gli stessi valori. La
posizione del fusibile si trova a pagina XX.
Lo strumento ha bisogno della presa a terra.
Non utilizzare un cavo di alimentazione rovinato.
Umidità
Al ne di ridurre rischi di incendio o di scossa elettrica, non esporre
lo strumento alla pioggia o all‘umidità. Non lasciare mai contenitori
con liquidi sullo strumento. Non usare lo strumento vicino all‘acqua,
piscina, vasca, posti bagnati.
Se lo strumento viene spostato da un posto freddo ad una stanza calda, si potrebbe formare della condensa all‘interno. Per evitare danni,
attendere che lo strumento raggiunga la temperature della stanza
prima di accenderlo.
Istallazione
Usare sempre un supporto stabile per posizionarci la tastiera, facendo attenzione al suo peso e alle sue dimensioni.
Pulizia / Manutenzione
Non usare mai detergenti abrasivi che potrebbero danneggiare la
supercie. Raccomandiamo l‘uso di un panno in microbra, leggermente umido.
Imballo
Conservare tutti gli elementi dell‘imballo ed usarli per trasportare lo
strumento (es. al centro di assistenza).
NUMA ORGAN 2 by Studiologic®
26

Informazioni di sicurezza
Indice
Il tuo nuovo Numa Organ 2
Tecnologia del Numa Organ 2
Tone Wheel Organ Models
Acoustic & Electronic Organ Sounds
Rotary Speaker & Amplicazione
Connessioni / Vista posteriore
Pannello di controllo
Volume
Indicazione delle funzioni nel manuale
Operatività / Drawbars
Drawbars
Come sono relazionati manuale e drawbars
Estensioni con altri manuali
Operatività
Pitch Wheel
Rotary / Modulation Wheel
Chorus / Vibrato
Split
Split point
Transpose
Edit functions
Percussion
Eetti (Reverb, Drive, Key Click, Leakage)
EQ / Volume
Dynamic TOUCH / MIDI
Selezione Preset
Memorizzazione Preset
28
28
28
30
31
32
33
33
33
34
34
35
35
36
36
36
36
37
37
37
37
38
38
38
39
39
40
Selezione Sounds
Preset Upload & Download
Rotary Speaker Cabinet esterno
System Update
MIDI
Connessioni MIDI
Estensione tastiera
Controllare Numa Organ 2 via MIDI
Usare Numa Organ 2 come MIDI masterkeyboard
Registrazione parametri MIDI
Risoluzione dei Problemi
Dichiarazioni
Appendiice
MIDI Implementation Chart
Speciche / dimensioni
40
41
41
41
42
42
42
43
43
43
44
45
47
48
49
NUMA ORGAN 2 by Studiologic® 27
IT

Il tuo nuovo Numa Organ 2
Grazie per aver scelto Numa Organ 2, uno strumento allo stato dell‘arte, concepito dai musicisti Studiologic
per gli appassionati di musica vintage.
Prendi l‘ispirazione dal nuovo Numa Organ 2! La sua sintesi per modelli sici è la rivisitazione più autentica
dell‘organo elettromagnetico a ruote foniche. Ma il Numa Organ 2 è molto di più!
Ti raccomandiamo di leggere attentamente l‘intero manuale per poter usufruire dei vantaggi di tutte le funzioni del tuo nuovo Numa Organ 2.
Funzioni generali di Numa Organ 2:
Tecnologia del Numa Organ 2
Tone Wheel Organ Models
Model B
I Sound Models del Numa Organ 2 sono stati realizzati per fornire
una vasta gamma di sonorità, derivate dall’analisi di alcuni tra più
popolari suoni di Organo, non solo con l’intento di riprodurli, ma di
individuarne alcune caratteristiche timbriche peculiari e generare
timbri sempre utilizzabili con i Drawbars e tutti gli eetti disponibili
(Vibrato, Chorus, Rotary, Reverb, Drive, Click, Leakage). Il numa Organ 2 clona alcuni dei più famosi organi elettromeccanici e riproduce i timbri caratteristici acustici ed elettronici, sempre mantenendo
la essibilità di utilizzare tutti i controlli disponibili. (Per selezionare
e memorizzare i Sound Models, vedi pag. 40)
Questi 3 diversi Sounds (associati ai tasti G=Sol / A=La / B=Si
dell’ottava Preset) sono riferiti ad altrettante tipologie di suoni e
bilanciamenti dei rispettivi modelli; in origine il suono si dierenziava non tanto per il modello, quanto per il periodo di costruzione
e per le normali variabili circuitali, anche determinate dall’età degli
strumenti, oltre a lievi dierenze legate alle varie congurazioni e
componenti analogici utilizzati nei diversi periodi costruttivi.
NUMA ORGAN 2 by Studiologic®
28
Model B è considerato il riferimento più famoso, con un suono molto bilanciato, bassi profondi ed acuti brillanti, ideale per musica
Jazz ed ogni applicazione dove il bilanciamento sia un aspetto importante. Mentre i modelli C e A sono di fatto quasi identici, escludendo il periodo di costruzione e lo stato di manutenzione, alcune
dierenze si potevano riscontare anche tra strumenti dello stesso
modello e questo Model B è perciò privo di particolari deviazioni da
equilibri e speciche originali.

Model A è un altro riferimento molto popolare, con la stessa generazione di base del modello B, amplicazione incorporata ed alcune varianti circuitali che potevano forse determinare un suono
più caldo rispetto ad altri strumenti dello stesso tipo (un Reverbero
incorporato era anche disponibile). Il Model A è perciò diverso dal
modello B e C, con un Loudness caldo e naturale e frequenze medie
meno evidenti.
Tone Wheel Organ Models
Model A
Model C/G, come quasi tutti gli strumenti di uguale tipo e dimensione, avevano un generatore simile, incluso il modello C altrettanto
famoso dei precedenti ed una serie G forse meno conosciuta, anche
disegnata con una congurazione più Classica
Model C/G
I Numa Organ 2 A/B/C Sound Models sono stati messi a punto per fornire timbri tra loro alternativi e permettere un’innita varietà di suoni, personalizzabili anche tramite i controlli e gli eetti memorizzabili
nei singoli Preset. Altri parametri interni sono lievemente diversi tra i
vari modelli, come il Vibrato/Chorus e altre lievi dierenze, fornendo
una grande essibilità nel creare suoni per ogni tipo di Musica.
IT
NUMA ORGAN 2 by Studiologic® 29

Acoustic & Electronic Organ
Classic Organ Diapason
Electronic Analog
Organ Model D
Questo suono dal contenuto armonico ispirato ai Principali
d‘Organo permette di creare timbri molto “Classici”; la possibilità
di memorizzare eetti e controlli nei Preset permette di adattarli
a questo suono, normalmente associato con una certa quantità di
Reverb, senza eetti come Drive/Click/Leakeage (comunque utilizzabili).
Electronic Organ
Model V
Electronic Analog Organ Model D: molti suoni degli organi elettronici vintage erano basati su generazioni di forme d’onda molto semplici, spesso onde Quadre (Square waves, con armoniche
dispari) sommate e ltrate in vario modo; questo modello ricrea
un’onda Quadra opportunamente ltrata ed un timbro tipico e clarineggante, sempre adatto ad essere sommato in qualsiasi congurazione di Drawbars .
Electronic Analog Organ Model V: questo modello ricrea un suono tipico di uno degli strumenti di riferimento, con forma d’onda
triangolare, suonato da complessi famosissimi, che era controllato
da Drawbars quasi come gli organi Tone Wheel (con un set up e
miscelazioni diverse).
NUMA ORGAN 2 by Studiologic®
30

Electronic Organ Model F: molti organi elettronici avevano dei registri ssi (invece di Drawbars) con vari suoni su altezze uguali o
diverse, adatti ad essere usati in combinazione. Questo modello F
ricrea uno di quei suoni tra quelli i più ricchi di armoniche, una specie di Sawtooth (Dente di Sega) addolcito opportunamente, diverso e complementare ai suoni degli altri modelli del Numa Organ 2,
che può generare migliaia di combinazioni con tutti i Drawbars ed
eetti, inclusi Rotary, Vibrato & Chorus, tutti eetti e controlli memorizzabili in ogni Preset.
Acoustic & Electronic Organ Sounds
Electronic Organ
Model F
Il Numa Organ 2 può essere anche collegato anche ad un Rotary
Speaker esterno tramite l‘apposita connessione. Il pulsante di controllo On/O del Rotary agirà anche sul sistema esterno, così come
il controllo di velocità tramite la modulation wheel.
In aggiunta si può anche continuare ad utilizzare un segnale diretto
dalle relative uscite Audio Out collegate ad un impianto di amplicazione.
External Rotary Speaker and
amplier
NUMA ORGAN 2 by Studiologic® 31
IT

Connessioni / Vista posteriore
Rotary Speaker
Cabinet, Page 41
Direct-out
Page 32
Stereo audio in • Level
Page 32
Connessione alimentazione
Pedali Sustain / Expression
Uscite Audio L/R
Audio out L/R
Page 32
Hold • Expression
Page 32
Headphone out 1/2
Page 32
USB 1 • Mini USB 2
Page 32
MIDI In•Out•Thru
Page 42
Fuse
Page 26, 32
Mains • Power
Page 26, 32
Usa il cavo di alimentazione in dotazione con Numa Organ 2 per
connettere lo strumento alla presa di corrente. Accendi lo strumento con il pulsante posto vicino la connessione di alimentazione.
Connetti il pedale opzionale volume/espressione FP-50 o VP-25
all‘ingresso con l‘etichetta Expression.
All‘ingresso Hold, puoi connettere il pedale Studiologic VFP1 o
PS100, disponibili come opzional.
Nota: Se vuoi collegare altri tipi di pedali, fai riferimento alle speciche a
pagina 49.
Connetti le uscite audio Left e Right con gli ingressi del tuo mixer o
del tuo amplicatore.
Direct out
Cue
Stereo audio in / Level
USB 1
Mini USB 2
MIDI
Rotary Speaker Cabinet
Usa le uscite separate dirette per suonare il Numa Organ 2 con altri
amplicatori
L‘uscita diretta non contempla la simulazione del Leslie®, ma solo il
suono base compresi Chorus e Riverbero
Collega le cue ad una delle due uscite dedicate. Si possono
collegare no a due coppie di cue contemporaneamente.
Poi collegare strumenti esterni, come lettori MP3 o moduli sonori
all‘ingresso audio. Usa la manopola Level, posta nel retro, vicino
all‘ingresso, per regolarne il volume.
Per la trasmissione dati via USB, collega il Numa Organ 2 al computer
con un cavo USB. Il Numa Organ 2, sarà riconosciuto automaticamente dal tuo computer appena acceso e il driver sarà installato dal
sistena operativo (class compliant).
Il connettore mini USB è dedicato a futuri aggiornamenti del rmware e per caricare nuovi modelli sici nel Numa Organ 2.
Vedi pagina 42.
Vedi pagina 41.
NUMA ORGAN 2 by Studiologic®
32

Pannello di controllo
Pitch / Modulation /
Rotary
Pag 36
Presets/ Sound Models
Recall / store / Sounds
Pag 39,40
Chorus • Vibrato
2 x 3 variazioni
Pag 36
Drawbars
per Upper, Lower, Pedal
Pag 34,35
Split • Transpose •Tune
Funzioni tastiera
Pag 37
Percussion
Pag 38
Quando usi il Numa Organ 2 per la prima volta, ti raccomandiamo di impostare il cursore del Volume della sezione Output ad un
valore non superiore alla metà della sua corsa. Mentre suoni potrai
regolare il volume come desideri. La regolazione del Volume ha
eetto sia sulle uscite audio che sulle cue.
Eects
Reverb, Drive, Click,
Leakage, Pag 38
Volume
dynamic TOUCH/[MIDI]
Pag 39
EQ / Volume
Pag 38
AVVERTENZA:
Per prevenire danni all‘udito, evita di usare Numa Organ 2 (e tutti gli
altri strumenti) a volume sostenuto per lungo tempo.
In questo manuale, tutti i pulsanti operativi sono indicati in
grassetto e corsivo (es Leakage).
Negli organi classici, la tastiera è chiamata manuale e useremo
questo termine anche per il Numa Organ 2. Il Numa Organ 2 può
essere suonato con tre manuali:
Manuale superiore (Upper)
Manuale inferiore (Lower)
Pedaliera dei bassi (Pedal)
Nota: Troverai suggermenti ed ulteriori informazioni testuali indicate dal
logo Studiologic.
Come le funzioni sono indicate
nel manuale
NUMA ORGAN 2 by Studiologic® 33
IT

Operatività / Drawbars
• Drawbars
Drawbars
I Drawbars sono un tratto caratteristico degli organi a ruote foniche.
Per questo andremo ad esplorarli per primi.
Nel testo, i drawbar del Numa Organ 2 sono indicati da numeri
colorati ed evidenziati come segue.
• Upper
• Lower
• Pedal
1 2 3 4 5 6 7 8 9
Usa i drawbars per impostare il timbro del Numa Organ 2. Un suono
può comprendere no a 9 onde sinusoidali.
Ogni drawbar rappresenta un‘armonica della scala degli armonici
relativa all‘8 piedi di una canna d‘organo o rispettivamente il
drawbar 3, chiamato anche “native pitch“.
Drawbar
Piedi
Armonico in
relazione a 8‘
Armonico in
relaz. a 16‘
1 2 3 4 5 6 7 8 9
1/3
16‘ 5
- - 1. 2. 3. 4. 5. 6. 8.
1. 3. - - - - - - -
‘ 8‘ 4‘ 2
2/3
‘ 2‘ 1
3/5
‘ 1
1/3
‘ 1‘
NUMA ORGAN 2 by Studiologic®
34
Nota: L‘indicazione dei drawbars in piedi deriva dall‘organo a canne, dove
rappresenta la lunghezza delle canne. Per l‘ 8‘ piedi di una canna d‘organo,
la canna della nota Do è lunga esattamente 8 piedi (=2,4m). L‘altezza è
riferita ai corrispondenti tasti del pianoforte Per questo l‘8‘ piedi è
chiamato anche altezza nativa o unisono.
La colorazione dei drawbars è molto intuitiva:
I drawbars marroni aggiungono frequenze sotto l‘altezza nativa e sono anche usati per regolare il timbro del Pedal. I drawbars
bianchi sono in relazione di ottava, dove il drawbar 3 (native pitch)
rappresenta la fondamentale. Inne i drawbars neri aggiungono le
quinte ed una terza maggiore al timbro.
Quando un drawbar è premuto no in fondo (no a che non si
vede nessun numero) i suoi armonici sono assenti dal timbro. Il
massimo volume di un drawbar lo si ottiene quando si vede il
numero 8. Ci sono sette posizioni di volume per aggiungere
armonici di ogni drawbar al timbro.

• Drawbars
Operatività / Drawbars
Ad ogni pressione di un tasto vengono generati tutti e nove gli
armonici. I drawbars ne regolano semplicemente il livello. Perciò
puoi cambiare il timbro mentre i tasti sono premuti.
Nota: Negli organi elettromeccanici, sotto ad ogni singolo tasto erano
posizionati nove contatti che si chiudevano contemporaneamente alla
pressione del tasto stesso. Un sistema di circuiti regolava poi il volume di
cia-scuno dei nove drawbars.
Con il Numa Organ 2 puoi suonare tre timbri diversi contemporaneamente. Per far questo puoi collegare una tastiera ed una pedaliera
MIDI, o dividere il manuale del Numa Organ 2 in due zone (vedi
Split a pagina XX).
Usa i pulsanti Upper, Lower e Pedal per assegnare i drawbars. Il
pulsante attivo sarà illuminato.
Upper: I drawbars formano il timbro di tutto il manuale del Numa
Organ 2 o, in modo Split, per il manuale superiore.
Lower: I drawbars formano il timbro di una tastiera addizionale
MIDI o, in modo Split, per la parte di tastiera a sinistra dello Split.
Pedal: I drawbars formano il timbro di una pedaliera opzionale o, in
modo Split, se è attivato Pedal to Lower.
Settaggi speciali dei Drawbars per Pedal:
Per regolare il timbro di Pedal puoi usare solo i drawbar 1 e 2. Il
drawbar 1 rappresenta un timbro particolare basato sull‘armonico
16‘, mentre il drawbar 2 regola l‘armonico 8‘.
Per le zone Upper e Lower tutti e nove i drawbar sono accessibili
come descritto in precedenza.
Relazioni tra manuale e
drawbar
Estensioni con altri
manuali / tastiere
Upper
Drawbar
Piede
Lower
Drawbar
Piede
Pedal
Drawbar
Piede
1 2 3 4 5 6 7 8 9
16‘ 5
1/3
‘ 8‘ 4‘ 2
2/3
‘ 2‘ 1
3/5
‘ 1
1/3
‘ 1‘
1 2 3 4 5 6 7 8 9
16‘ 5
1/3
‘ 8‘ 4‘ 2
2/3
‘ 2‘ 1
3/5
‘ 1
1/3
‘ 1‘
1 2 3 4 5 6 7 8 9
16‘ 8‘ - - - - - - -
IT
NUMA ORGAN 2 by Studiologic® 35

Operatività
• Pitch • Rotary / Modulation
• Chorus / Vibrato
Pitch Wheel
Rotary / Modulation Wheel
(Simulazione del Rotary Speaker)
Chorus/Vibrato
Per variare in modo continuo l‘altezza del suono di ±2 semitoni, usa
la ruota Pitch posta sulla sinistra. La ruota si riposiziona al centro
automaticamente al suo rilascio.
Premi il bottone On/O dopo la ruota Modulation/Rotary per
attivare il simulatore del Rotary Speaker. Il bottone On/O si
accenderà.
Usa la ruota Modulation/Rotary per variare la velocità virtuale del Rotary Speaker. Ci sono tre stati disponibili: alla posizione più a sinistra
della ruota Modulation/Rotary, il rotore del Rotary Speaker ruota
lentamente. Nella posizione centrale rallenta no a fermarsi, ma
nel suono è ancora attivato il simulatore di Rotary Speaker. Questo
stato è chiamato “Brake“. Spostando la ruota Modulation / Rotary a
destra, il rotore del Rotary Speaker ruoterà velocemente.
Se preferisci spegnere la simulazione del Rotary Speaker, premi di
nuovo On/O. La luce del pulsante si spegnerà.
Puoi anche variare la velocità del rotore del Rotary Speaker da
veloce a lenta e viceversa collegando un pedale Sustain.
Nota: Puoi anche usare la ruota Modulation / Rotary, il pulsante On/O
e il pedale del Sustain per controllare un amplicatore Rotary Speaker
esterno. Vedi pagina XX.
Con il selettore rotativo Vibrato And Chorus puoi scegliere tra 3
settaggi di eetti di Vibrato e 3 di Chorus.
Per assegnare l‘eetto al manuale, premi Upper e/o Lower. Puoi
assegnare l‘eetto contemporaneamente e indipendentemente
ai due manuali. Il bottone si accenderà. Premi di nuovo Upper
e/o Lower, per disattivare l‘eetto alla sezione.
NUMA ORGAN 2 by Studiologic®
36
Nota: Puoi collegare una seconda tastiera o una pedaliera MIDI al Numa
Organ 2, o usare la funzione Split per suonare due manuali contemporaneamente con la tastiera del Numa Organ 2. Fai riferimento rispettivamente
alle pagine XX e XX.

• Split • Split point
Operatività
• Transpose •Edit
Premi Split per attivare questa funzione. Il pulsante Split si illumina
ed il manuale si divide in due zone. Premi Upper nella sezione
drawbar per regolare il timbro della zona relativa. Premi Lower per
assegnare i drawbars alla zona lower.
In alternativa puoi assegnare alla zona Lower una sezione Pedal.
Per far questo, premi Pedal to Lower. Il pulsante si illuminerà. Per
controllare i drawbars, premi il tastino Pedal nella relativa sezione.
Usa il pulsante Oct Up per trasporre la zona di tastiera Lower
un‘ottava sopra. Il pulsante Oct Up si illuminerà.
Per disattivare una delle funzioni suddette, basta premere di nuovo
il pulsante relativo.
Per impostare il punto di split, tieni premuto il pulsante On/O
nella sezione split per pochi secondi. Con la tastiera (o con
Value +/-), seleziona la nota più alta per la zona di split lower.
Se devi suonare in una diversa tonalità, puoi semplicemente
trasporre la tastiera (es. da Fa diesis maggiore ad un semitono sotto
in Fa maggiore).
Per trasporre in passi da un semitono, premi Transpose+/-. In caso
di trasposizione attivata, Transpose+ o Transpose- si illuminano.
L‘impostazione di trasposizione è mantenuta attiva no a che il
Numa Organ 2 non viene spento.
Split
Split point
Transpose
Per attivare la funzione Edit premere contemporaneamente i pulsanti Transpose+ per alcuni secondi; entrambi i pulsanti inizieranno a lampeggiare indicando che la funzione è attiva.
Puoi accordare il Numa Organ 2 con altri strumenti. Sono disponibili valori da -99 a +99 centesimi (di un semitono).
Tieni premuti i pulsanti Transpose+ e Transpose- per pochi secondi.
Entrambi i pulsanti inizieranno a lampeggiare. L‘intonazione può
essere ora regolata usando Drawbar 1 per valori da -99 a 0 centesimi
e Drawbar 2 per valori da 0 a +99 centesimi.
Percussione Decay e Level: il drawbar 8 controlla il Decay (lunghezza del decadimento) and il drawbar 9 controlla il livello (volume)
della percussione.
Hum: il drawbar 7 controlla la quantità di hum noise (rumore a bassa frequenza) tipico degli organi tone wheels.
Premi di nuovo Transpose+ o Transpose- per mantenere le regola-
zioni ed uscire dal modo Edit.
Edit functions
IT
NUMA ORGAN 2 by Studiologic® 37

Operatività
• EQ / Volume• Percussion
• Eects
Percussione
Eetti
Per aggiungere più elementi ritmici alla performance, puoi usare la
Percussione. Questo eetto particolare si ottiene suonando “staccato“ esattamente come negli organi elettromagnetici d‘epoca.
Premi On/O per attivare la Percussione. Con i pulsanti 2nd/3rd puoi
decidere su che piede viene generata la Percussione: dalla seconda
armonica=4‘ (il pulsante non è acceso), o dalla terza armonica=2 2/3‘
(il pulsante si accende).
Slow/Fast denisce la durata della Percussione. Premi Slow/Fast
per accorciare il decadimento da 1 secondo (il pulsante non è acceso) a 200 millisecondi (il pulsante si accende).
Puoi anche variare il livello della Percussione. Premi Soft per abbassare il volume di Percussion. Il pulsante si accende.
Nota: Per Percussion viene usato il 1‘ contatto del manuale Upper. Perciò il
relativo drawbar è senza funzione quando la Percussione è attiva.
Riverbero
Alcuni organi a ruote foniche erano dotati di riverberi a molla e
anche questo eetto è simulato dal Numa Organ 2. Usa il cursore Reverb per regolare l‘intensità e aggiungere profondità alla tua
musica.
Drive
Il cursore Drive controlla la simulazione della tipica distorsione di
un amplicatore a valvole ed agisce in base al volume generale del
Numa Organ 2. Più alto si imposta il Drive, più distorsione si ottiene
EQ / Volume
NUMA ORGAN 2 by Studiologic®
38
Key Click
Il parametro Key Click permette al Numa Organ 2 di simulare anche
il rumore di attacco tipico degli organi elettromeccanici, decidendone la quantità in base al gusto personale ed al modello utilizzato.
Leakage
Questo parametro simula l‘interferenza elettromagnetica (diafonia)
tra ruote foniche adiacenti e/o cablaggi relativi a segnali di frequenze diverse, permettendo di dosare questo eetto particolare.
Nota: Tutte le regolazioni degli Eetti sono memorizzabili nei Preset.
Per regolare il suono del Numa Organ 2, puoi ridurre o incrementare le frequenze alte e basse tramite i cursori Bass e
Treble nella sezione Output. Imposta il livello del suono col cursore
Volume.

Operatività
• Preset recall / store • dynamic TOUCH/[MIDI]
Numa Organ 2 può essere utilizzato come una master keyboard per
controllare unità MIDI esterne tramite parametri MIDI completi. Premendo il tasto Dynamic TOUCH / [MIDI], si possono avere le seguenti combinazioni:
- LED OFF: Local ON, MIDI OFF.
La tastiera controlla i suoni interni, l‘uscita MIDI out è disattivata.
- LED ON: Local OFF, MIDI ON.
La tastiera invia dal MIDI out le note con relativa dinamica, i suoni
interni sono disattivati.
- LED lampeggiante: Local ON, MIDI ON.
La tastiera invia dal MIDI out le note con relativa dinamica e contemporaneamente i suoni interni sono attivati.
Durante l‘esecuzione si possono richiamare istantaneamente diversi Preset con la seguente procedura:
- Premere il tastino Preset/[Sound] per attivare la funzione (LED
ON);
- Selezionare il Preset desiderato nella relativa ottava invertita.
Un primo banco di Demo Preset è memorizzato nello strumento
e rappresenta alcuni esempi di sonorità ottenibili dai vari Sound
Models. Un‘apposito software sarà pubblicato nel nostro sito per
permettere di salvare e ricaricare vari banchi di Preset.
Dynamic TOUCH / [MIDI]
Selezione Preset
Demo Presets
Preset 1 (C): Classic Organ Principal-Diapason (16’)
Preset 2 (C#): Classic Organ Mellow Combination
Preset 3 (D): Classic Full Organ Sound
Preset 4 (D#): Electronic Organ Triangle Wave model V (V model)
Preset 5 (E): Electronic Organ Square Wave (Model D)
Preset 6 (F): Electronic Organ Synthesis Sound (Smooth Saw tooth)
Preset 7 (F#): C3 Organ Sound (C-G Model)
Preset 8 (G): C3 Pop Organ Sound (C-G Model)
Preset 9 (G#): A100 Organ Sound
Preset 10 (A): A100 Jazz Organ Sound (Model A)
Preset 11 (A#): B3 Jazz Organ Sound (Model B)
Preset 12 (B): Panel Direct Control - no Presets (Model B as default sound)
IT
NUMA ORGAN 2 by Studiologic® 39

Operatività
Memorizzazione Preset
Selezione dei Sound Models
Per creare una serie di suoni preferiti, si possono utilizzare tutti i
parametri del Pannello di Controllo. Una volta trovata una combinazione da salvare, si può memorizzarla in uno dei 11 tasti dell‘ottava
invertita attraverso la seguente procedura:
- Premere Preset/[Sound] sul pannello, per attivare la funzione (LED
ON);
- Tenere premuto per alcuni secondi il tasto, nell‘ottava invertita dei
Preset, dove si desidera memorizzare la congurazione corrente di
suoni ed eetti;
- Attendere no a quando il lampeggio del LED conferma l‘avvenuta
memorizzazione.
Nota: il tasto B (Si) attiva il Pannello di Controllo e non è memorizzabile
come Preset. Inoltre mantiene sempre attivo il Sound (Model) B, considerato come standard e riporta sempre tutte le regolazioni degli eetti alla
posizione sica dei relativi potenziometri.
Nota: lo strumento memorizza anche tutte le regolazioni degli Eetti in
ogni Preset.
Il Numa Organ 2 può emulare suoni di diversi tipi di organo vintage,
come spiegato ampiamente nell‘introduzione a pagina 29.
Per selezionare i diversi modelli di suoni seguire la procedura riassunta di seguito:
- Tenere premuto Preset/[Sound] per abilitare la funzione (LED lampeggiante);
- Selezionare il Sound Model in base alla lista sotto riportata:
Sound 1 (C): Classic Organ Principal (Diapason Pipe Partials)
Sound 2 (C#): empty
Sound 3 (D): Electronic Organ Model V (Mellow Triangle)
Sound 4 (D#): empty
Sound 5 (E): Electronic Organ Model V (Sweet Square)
Sound 6 (F): Electronic Organ Model F (Smooth Sawtooth)
Sound 7 (F#): empty
Sound 8 (G): Tone wheel Organ Model C (C3-G)
Sound 9 (G#): empty
Sound 10 (A): Tone wheel Organ Model A (A100-A122)
Sound 11 (A#): empty
Sound 12 (B): Tone wheel Organ Model B (B3)
Nota: la lista potrà avere futuri aggiornamenti.l
- Per uscire dalla funzione Sound Selection premere di nuovo Pre-
set/[Sound] (LED ON/OFF).
Nota: durante la selezione dei suoni è sempre possibile usare i drawbars e
ogni altro eetto o controllo; per memorizzare il Sound Model selezionato
è necessario memorizzare un Preset seguendo la relativa procedura.
NUMA ORGAN 2 by Studiologic®
40

Preset Up/Download / Rotary esterno / Aggiornamento
Si possono salvare o caricare banchi di Preset sul vostro computer.
Per attivare la funzione è necessario entrare in modo Edit premendo contemporaneamente Transpose+ e Transpose- per alcuni se-
condi no a quando i relativi LED lampeggiano.
Premendo il tastino Preset il relativo banco memorizzato sullo strumento sarà inviato al computer come le (MIDI le) che può essere
liberamente nominato per avere un riferimento.
Durante la procedura di salvataggio dei Preset il relativo LED lampeggia no a completamento del trasferimento.
Per trasferire dal computer allo strumento (Dowload) un banco di
Preset, attivare la funzione Edit e semplicemente eseguire un “play“
del le (MIDI le) che si vuole installare; il LED del tastino Preset no
a trasferimento completato.
Nota: entrambe le funzioni Upload & Download necessitano naturalmente
di connettere lo strumento al computer tramite cavo USB.
Puoi amplicare il Numa Organ 2 con un amplicatore Rotary
Speaker esterno tramite il connettore ad 11 Pin.
La velocità del rotore, così come lo Start/Stop (Brake) sono controllabili con la ruota Rotary ed il pedale Sustain. Il funzionamento è
identico al simulatore Rotary Speaker interno (pagina XX).
Connetti la presa ad 11 pin sul retro del Numa Organ 2 con il Rotary
Speaker tramite il suo cavo. Puoi usare tutte le uscite contemporaneamente: il Rotary Speaker esterno, le uscite analogiche con la
simulazione del Rotary Speaker, le uscite dirette, così come le uscite
cue del Numa Organ 2.
Per ulteriori informazioni sulle connessioni ed il controllo del Rotary
Speaker fai riferimento al manuale Rotary Speaker.
Preset Upload & Download
Rotary Speaker Cabinet esterno
Pin Function
1 Audio (Rotary)
2 Audio (Stationary)
3 Audio (Aux 1)
4 Ground
5 Control Supply
6 Control Circuit
7 Fast
8 Slow
9 Speed Adjust
10 Audio (Aux 2)
11 +29 VDC
6
5
9
8
7
10
11
1
2
4
3
Per aggiornare il Numa Organ 2, connetti la porta USB o mini USB
(in accordo alle istruzioni allegate al software) con un computer in
cui sia stato installato il software scaricato dal nostro sito web.
Tieni premuto Upper mentre accendi il Numa Organ 2. Se la connessione al computer è corretta ed il software è istallato, il pulsante
Upper lampeggerà lentamente. A connessione stabilita, lampeggierà velocemente.
Ora potrai trasferire i dati al Numa Organ 2 usando il software del PC
e le relative istruzioni che saranno pubblicate insieme al software.
Aggiornamento di sistema
IT
NUMA ORGAN 2 by Studiologic® 41

MIDI
Connessioni MIDI
Keyboard extension
MIDI (Musical Instruments Digital Interface) è uno standard per la
trasmissione dei dati tra tastiere elettroniche, moduli sonori, sintetizzatori e computer. Il MIDI Out di una periferica si collega al MIDI
In di un‘altra. I dati che arrivano al MIDI In vengono duplicati e trasmessi dalla porta MIDI Thru.
Il Numa Organ 2 invia i dati MIDI data dal MIDI Out e contemporaneamente dalla porta USB 1. I dati MIDI vengono ricevuti nel MIDI
In.
Puoi estendere il manuale del Numa Organ 2 con una seconda tastiera
MIDI opzionale e/o una pedaliera MIDI.
Connetti l‘uscita MIDI della seconda tastiera all‘ingresso MIDI del
Numa Organ 2.
Nota che:
-impostazioni Drawbar per Upper sono sempre nel canale MIDI 1.
-impostazioni Drawbar per Lower sono sempre nel canale MIDI 2.
-impostazioni Drawbar per Pedal sono sempre nel canale MIDI 3.
Se vuoi usare una seconda tastiera come manuale Lower, deve
essere impostata per trasmettere sul canale MIDI 2. Se vuoi usare
una pedaliera MIDI assicurati che trasmetta sul canale MIDI 3.
Nota: Per collegare una tastiera MIDI aggiuntiva ed una pedaliera MIDI al
Numa Organ 2 contemporaneamente, usa un MIDI merger.
MIDI channel 3
MIDI channel 2
VMK 161
plus
Organ MP 117
NUMA ORGAN 2 by Studiologic®
42

MIDI
Puoi suonare e controllare i suoni del Numa Organ 2 con un‘altra
tastiera MIDI o con il computer.
La tabelle riportata nell‘appendice (pag 48) mostra i messaggi Control Change MIDI che agiscono sui parametri del Numa Organ 2.
Nota: tutti i dati MIDI inviati al canale MIDI 1 del Numa Organ 2 agiscono sui
parametri generali o sui settaggi del manuale Upper. I dati inviati al canale
MIDI 2 controllano il manuale Lower. Con il canale MIDI 3 si controllano tutti
i parametri della pedaliera.
Se la funzione Dynamic TOUCH / [MIDI] è attiva, un pedale sustain
invierà il relativo controllo (MIDI CC 64) mentre per la generazione
interna continuerà a gestire le velocità del Rotary.
Il Numa Organ 2 invia ai canali MIDI 1 2 e 3 tutti i parametri e le
regolazioni fatte. In questo modo si possono ad esempio registrare
tutte le regolazioni dei Drawbars in un sequencer MIDI.
Controllare Numa Organ 2 via
MIDI
Usare Numa Organ 2 come MIDI
masterkeyboard
Registrazione parametri MIDI
NUMA ORGAN 2 by Studiologic® 43
IT

Risoluzione dei Problemi
Risoluzione dei problemi
Problema Possibili cause Soluzioni
Il Numa Organ 2 non si
accende.
Numa Organ 2 non può
esser controllato MIDI.
Numa Organ 2 suona
ed invia solo ad una
dinamica ssa
Non si sente nessun
suono.
Nel modo Split / Layer
si sente solo un suono.
Non si sente il suono
dell‘ingresso audio
Il pedale Sustain cambia solo da Fast a Brake
e non da Slow a Brake.
Il pedale del Sustain
non prolunga le note se
premuto.
Il pedale del Sustain
funziona al contrario
(note lunghe senza
pressione e viceversa).
Le regolazioni (es. dei
drawbar) non vengono
registrate dal sequencer
esterno.
Non c‘è alimentazione. Cavo di alimentazione difettoso.
Fusibile bruciato nel
Numa Organ 2.
I dati MIDI non sono
inviati ai canali MIDI
1, 2 or 3.
Il Fatar dynamic
TOUCH è disattivato.
Tutti i drawbars sono
azzerati.
Il volume è impostato a 0. Connessioni
cavo/cua difettose.
Un pedale Sustain è
collegato alla porta
Expression.
Tutti i drawbars
della zona lower sono
disattivati.
Il livello di Audio In è
al minimo.
La periferica esterna
non sta suonando.
Connessione cavo
difettosa
La ruota Modulation/
Rotary è impostata su
Brake
dynamic TOUCH/
[MIDI] è disattivato.
La polarità del pedale
usato è invertita
L‘ingresso MIDI del
sequencer non è
impostato sui canali
MIDI 1, 2 e 3 o su
”tutti“.
Assicurati che ci sia
corrente. Controla il
cavo di alimentazione
ed il fusibile (sostituiscilo se necessario con
uno dello stesso tipo
cf. pagina 65)
Invia i dati MIDI solo
sui canali 1, 2 e/o 3.
Attiva il Fatar dynamic
TOUCH.
Attiva almeno un
drawbar.
Imposta Volume ad un
livello più alto.
Cambia cavo/cua.
Scollega il pedale Sustain dalla connessione
Expression.
Attiva almeno un
drawbar nella zona
interessata.
Regola il Level.
Verica che la periferica stia trasmettendo
un segnale audio.
Cambia il cavo
Imposta la ruota Modulation/Rotary su Fast
o Slow. Vedi pag. 36
Attiva il dynamic
TOUCH/[MIDI], se vuoi
usare il pedale come
sustain. se il dynamic
TOUCH non è attivo,
controllerà la rotazione
del Leslie®.
Usa un pedale con
polarità corretta..
Imposta l‘ingresso del
sequencer sui canali
MIDI 1, 2, 3 o su “tutti”.
NUMA ORGAN 2 by Studiologic®
44

Dichiarazioni
Tuti i prodotti Studiologic by Fatar sono costruiti attentamente, calibrati, testati, e sono soggetti a garanzia di due anni. Registra il tuo NUMA
Organ per avere pieno supporto. Danni causati da trasporto o montaggio non conforme o da errata manutenzione non sono coperti da questa
garanzia. Rimborsi di importo superire al valore dello strumento sono
esclusi. Tutto questo è basato su termini e condizioni del distributore /
FATAR srl, Italy.
Si dichiara che questo prodotto è conforme alle Direttive Europee:
2006/95/EC Low Voltage Directive
EN 60065 Safety requirements for audio, video and
audio-visual apparatus for professional use
2004/108/EC Electromagnetic Compatibility Directive - EMC
EN 55103-1/E1 Product standard - Emission
Audio, video and audio-visual apparatus for
professional use
EN 55103-2/E1 Product standard - Immunity
Audio, video and audio-visual apparatus for
professional use
Recanati, 05. 05. 2014 Marco Ragni, Chief Executive Ocer
Questa dichiarazione diventa non valida nel caso di modiche non
autorizzate.
Garanzia
Conformità CE
Questo prodotto è costruito secondo le direttive 2002/95/EC.
L‘adozione delle direttive EG 2003/108/EG è volta a prevenire e limitare il usso di riuti di apparecchiature destinati alle discariche,
attraverso politiche di riuso e riciclaggio degli apparecchi e dei loro
component (WEEE). Aiutaci a mantenere il mondo pulito.
Per garantire il massimo della qualità, i prodotti Studiologic by Fatar
sono sempre progettati allo „stato dell‘arte“, per questo sono consentiti, senza preavviso: modiche, migliorie variazioni. Speciche tecniche
e di aspetto possono essere diverse da quanto indicato in questo manuale.
Tutti i marchi usati in questo manuale appartengono ai rispettivi proprietari.
Nessuna parte di questo manuale può esser riprodotta o trasmessa in
ogni forma senza il consenso del proprietrio del Copyright:
FATAR Srl
Zona Ind.le Squartabue
62019 Recanati, Italia
Conformità RoHS
RoHS
compliant
2002/95/EC
Disposizioni / WEEE
Stato dell‘arte
Marchi ®
Copyright
IT
NUMA ORGAN 2 by Studiologic® 45


Appendix
Appendix
NUMA ORGAN 2 by Studiologic® 47

Appendix
MIDI Implementation Chart
Parameter MIDI CC Value MIDI Ch.
Pitch-Bend Pitch 0 - 127 1
Expression - Volume 11 0 - 127 1
Rotary Speed 68 0 - 127 1
Vibrato/Chorus On Upper 95 127 / 0 1
Vibrato/Chorus On Lower 95 127 / 0 2, 3
Vibrato/Chorus V1 93 18 1
Vibrato/Chorus C1 93 79 1
Vibrato/Chorus V2 93 36 1
Vibrato/Chorus C2 93 100 1
Vibrato/Chorus V3 93 58 1
Vibrato/Chorus C3 93 122 1
Drawbar 1 16‘
Drawbar 2 5
Drawbar 3 8‘
Drawbar 4 4‘
Drawbar 5 2
Drawbar 6 2‘
Drawbar 7 1
Drawbar 8 1
Drawbar 9 1‘
1/3
‘
2/3
‘
3/5
‘
1/3
‘
12 0 - 127 1, 2, 3
13 0 - 127 1, 2
14 0 - 127 1, 2, 3
15 0 - 127 1, 2
16 0 - 127 1, 2
17 0 - 127 1, 2
18 0 - 127 1, 2
19 0 - 127 1, 2
20 0 - 127 1, 2
Percussion On/O 73 127 / 0 1
Percussion Normal/Soft 71 127 / 0 1
Percussion Slow/Fast 70 127 / 0 1
Percussion 2nd/3rd 72 127 / 0 1
Reverb 9 0 - 127 1
Drive 91 0 - 127 1
Key Click 89 0 - 127 1
Leakage 90 0 - 127 1
Volume (Main Volume) 7 0 - 127 1
Bass 103 0 - 127 1
Treble 104 0 - 127 1
NUMA ORGAN 2 by Studiologic®
48
Nota: tutti i dati MIDI inviati al canale MIDI 1 del Numa Organ 2 agiscono sui
parametri generali o sui settaggi del manuale Upper. I dati inviati al canale
MIDI 2 controllano il manuale Lower. Con il canale MIDI 3 si controllano tutti
i parametri della pedaliera.
Se la funzione Dynamic TOUCH / [MIDI] è attiva, un pedale sustain
invierà il relativo controllo (MIDI CC 64) mentre per la generazione
interna continuerà a gestire le velocità del Rotary.
Il Numa Organ 2 invia ai canali MIDI 1 2 e 3 tutti i parametri e le
regolazioni fatte. In questo modo si possono ad esempio registrare
tutte le regolazioni dei Drawbars in un sequencer MIDI.

Appendix
Studiologic NUMA ORGAN 2
Keyboard Number of Keys 73
Type Semi-weighted action
(TP8 ORGAN Waterfall)
Sound Engine Polyphony 128 (max)
Type Physical Modeling
Sounds 7 Organ Sound Models
Controls 9 Drawbars, Pitch wheel, Rotary/Modulation wheel,
Chorus/Vibrato knob, Presets/Sounds, Split, Transpose/
Tune, Percussion, Eect (Reverb, Drive, KeyClick, Leakage), Output Volume /EQ, Dynamic TOUCH/[MIDI]
Connections Audio Out Left/Right, 6.3mm phone jack
Audio In 1x Stereo In, 3.5mm mini jack
Headphones 2x 6,3mm stereo phone jack
MIDI In - Out - Thru
USB USB (MIDI), MiniUSB (DSP)
Hold Pedal 6,3mm mono jack
Expression Pedal 6,3mm stereo jack
Power Supply AC 100 - 240 V
Weight 12 kg | 14.1lbs
Speciche Tecniche
Specications
Sustain Pedal (Studiologic PS100 / VFP1/10)
Single momentary switch, normaly open.
Volume / Expression Pedal (Studiologic FP-50 or VP27)
Linear continuous controller (potentiometer).
1055mm | 41.55”
Pedals Specications
Speciche dei pedali
Dimensions
Dimensioni
300mm
11.80”
100mm
3.94”
NUMA ORGAN 2 by Studiologic® 49

RM. 06.2014 v0
 Loading...