


STIHL BR 500, 550, 600
Instruction Manual


Contents
English
1 Introduction
2 Guide to Using this Manual
. . . . . . . . . . . . . . . . . . . . . . . . . . . . . . . . . . . . . . . . .
. . . . . . . . . . . . . . . . . . . . . . . . . .
2.1 Symbols used with warnings in the text
2.2 Symbols in Text
3 Overview
3.1 Blower
3.2 Icons
4 Safety Precautions
Translation of Original Instruction
Manual
4.1 Warning Symbols
4.2 Intended Use
. . . . . . . . . . . . . . . . . . . . . . . . . . . . . . . . . . . . . . . . . . . . . .
. . . . . . . . . . . . . . . . . . . . . . . . . . . . . . . . . . . . . . . . . . . . . . . .
. . . . . . . . . . . . . . . . . . . . . . . . . . . . . . . . . . . . .
. . . . . . . . . . . . . . . . . . . . . . . . . . . . . . . . . . . . . . . . . . . .
. . . . . . . . . . . . . . . . . . . . . . . . . . . . . . . . . .
. . . . . . . . . . . . . . . . . . . . . . . . . . . . . . . . . . .
. . . . . . . . . . . . . . . . . . . . . . . . . . . . . . . . . . . . . . . .
4.3 Requirements concerning the user
4.4 Clothing and equipment
. . . . . . . . . . . . . . . . . . . . . . . . . . . . .
4.5 Working Area and Surroundings
4.6 Safe condition
4.7 Fuel Mixture and Refueling
4.8 Working
4.9 Transport
4.10 Storage
. . . . . . . . . . . . . . . . . . . . . . . . . . . . . . . . . . . . . . .
. . . . . . . . . . . . . . . . . . . . . . . . . .
. . . . . . . . . . . . . . . . . . . . . . . . . . . . . . . . . . . . . . . . . . . . .
. . . . . . . . . . . . . . . . . . . . . . . . . . . . . . . . . . . . . . . . . . .
. . . . . . . . . . . . . . . . . . . . . . . . . . . . . . . . . . . . . . . . . . . . .
4.11 Cleaning, Maintenance and Repair
5 Preparing the Blower for Operation
5.1 Preparing the Blower for Operation
6 Assembling the Blower
6.1 Mounting the Control Handle
Printed on chlorine-free paper
Printing inks contain vegetable oils, paper can be recycled.
6.2 Mounting the Blower Tube
6.3 Attaching the Nozzle
7 Adjusting Blower for User
. . . . . . . . . . . . . . . . . . . . . . . . . . . . .
. . . . . . . . . . . . . . . . . . . . . . . . . .
. . . . . . . . . . . . . . . . . . . . . . . . . . . . . . .
. . . . . . . . . . . . . . . . . . . . . . . . . .
7.1 Fitting and Adjusting the Carrying System
7.2 Taking off the carrying system
7.3 Adjusting the Control Handle
7.4 Adjusting the Blower Tube
. . . . . . . . . . . . . . . . . . . . . . . . . .
8 Mixing the fuel and refuelling the blower
8.1 Mixing fuel
8.2 Refuelling the blower
. . . . . . . . . . . . . . . . . . . . . . . . . . . . . . . . . . . . . . . . .
. . . . . . . . . . . . . . . . . . . . . . . . . . . . . . .
. . . . . . . . . . . . . .
. . . . . . . . . . . . . . . . . .
. . . . . . . . . . . . . . . . . . . . .
. . . . . . . . . . . . . . . . .
. . . . . . . . . . . . . . . . .
. . . . . . . . . . . . . . . . .
. . . . . . . . . . . . . . . . . . . . . . .
. . . . . . . . . .
. . . . . . . . . . . . . . . . . . . . . .
. . . . . . . . . . . . . . . . . . . . . . .
. . . . . . . . . . . .
9 Starting and Stopping the Engine
2
9.1 Selecting the correct starting procedure
2
9.2 Preparing the engine for start
2
9.3 Starting the engine
3
9.4 Shut off the engine
3
10 Checking the Blower
3
10.1 Checking the controls
4
10.2 Checking the nozzle
5
11 Operating the Blower
5
11.1 Holding and Guiding the Blower
5
11.2 Blowing
5
11.3 Setting to winter mode
6
12 After Finishing Work
6
12.1 When Work is Finished
7
7
13 Transporting
8
13.1 Transporting the blower
9
14 Storing
9
14.1 Storing the blower
10
15 Cleaning
10
15.1 Cleaning the blower
10
15.2 Cleaning the Spark Plug
10
16 Maintenance
10
16.1 Maintenance intervals
11
16.2 Adjusting the Throttle Cable
11
17 Repairing
12
17.1 Repairing the Blower
12
18 Troubleshooting
12
18.1 Troubleshooting the Blower
13
18.2 Replacing air filter
13
18.3 Adjust idle speed
13
19 Specifications
13
19.1 Blower STIHL BR 500
13
. . . . . . . . . . . . . . . . . . . . . . . . . . . . . . . . . . . . . . . . . . . .
. . . . . . . . . . . . . . . . . . . . . . . . . . . . . . . . . . . . . . . . . . . . .
. . . . . . . . . . . . . . . . . . . . . . . . . . . . . . . . . . . . . . . . . . .
. . . . . . . . . . . . . . . . . . . . . . . . . . . . . . . . . . . . . . . . . .
. . . . . . . . . . . . . . . . . . . . . . . . . . . . . . . . .
. . . . . . . . . . . . . . . . . . . . . . . . . . . . . . . . .
. . . . . . . . . . . . . . . . . . . . . . . . . . . . . . .
. . . . . . . . . . . . . . . . . . . . . . . . . . . . . .
. . . . . . . . . . . . . . . . . . . . . . . . . . . . . . .
. . . . . . . . . . . . . . . . . . . . . . . . . . . . . . .
. . . . . . . . . . . . . . . . . . . . . . . . . . . . .
. . . . . . . . . . . . . . . . . . . . . . . . . . . . . . .
. . . . . . . . . . . . . . . . . . . . . . . . . . . .
. . . . . . . . . . . . . . . . . . . . . . . . . . . . . . . . . . . . . . .
. . . . . . . . . . . . . . . . . . . . . . . . . . . . . . . . .
. . . . . . . . . . . . . . . . . . . . . . . . . . . . . . . .
. . . . . . . . . . . . . . . . . . . . . . . . . . . . . . . . . . . . . . .
. . . . . . . . . . . . . . . . . . . . . . . . . . . . . .
. . . . . . . . . . . . . . . . . . . . . . . . . . . . . . .
. . . . . . . . . . . . . . . . . . . . . . . . . . . . . . . . . . . .
. . . . . . . . . . . . . . . . . . . . . . . . . . . . . . . . .
. . . . . . . . . . . . . . . . . . . . . . . . . . . . . . . . . .
. . . . . . . . . . . . . . . . . . . . . . . . . . . . . . . . . . . . . .
. . . . . . . . . . . . . . . . . . . . . . . . . . . . . .
. . . . . . . . . . . . . . . . . .
. . . . . . . . . . . .
. . . . . . . . . . . . . . . . . . . . . .
. . . . . . . . . . . . . . . . . . . .
. . . . . . . . . . . . . . . . . . . . . . . . . . . .
. . . . . . . . . . . . . . . . . . . . . . . . . . .
. . . . . . . . . . . . . . . . . . . . . . . .
. . . . . . . . . . . . . . . . . . . . . . . .
14
14
14
15
16
16
16
16
16
16
17
17
17
17
17
17
18
18
18
18
18
19
19
19
19
19
20
20
21
21
21
21
© ANDREAS STIHL AG & Co. KG 2021
0458-452-0121-I. VA0.H21.
0000009368_002_GB
0458-452-0121-I
This instruction manual is protected by copyright. All rights reserved, especially the rights to reproduce, translate and process
with electronic systems.
1

English
1 Introduction
19.2 Blower STIHL BR 550
19.3 Blower STIHL BR 600
19.4 Sound Values and Vibration Values
19.5 REACH
19.6 Exhaust Emissions
20 Spare Parts and Accessories
20.1 Spare parts and accessories
21 Disposal
21.1 Disposing of Blower
22 EC Declaration of Conformity
22.1 Blower STIHL BR 500, 550, 600
23 UKCA Declaration of Conformity
23.1 Blower STIHL BR 500, 550, 600
. . . . . . . . . . . . . . . . . . . . . . . . . . . . . . . . . . . . . . . . . . . .
. . . . . . . . . . . . . . . . . . . . . . . . . . . . . . . . . . . . . . . . . . .
. . . . . . . . . . . . . . . . . . . . . . . . . . . . . .
. . . . . . . . . . . . . . . . . . . . . . . . . . . . . .
. . . . . . . . . . . . . . . . . . . . . . . . . . . . . . . . .
. . . . . . . . . . . . . . . . . . . . . . .
. . . . . . . . . . . . . . . . . . . . . . .
. . . . . . . . . . . . . . . . . . . . . . . . . . . . . . . .
. . . . . . . . . . . . . . . . . . . . . . .
. . . . . . . . . . . . . . . . . . .
. . . . . . . . . . . . . . . . . . .
. . . . . . . . . . . . . . . . . . .
. . . . . . . . . . . . . . . .
22
1 Introduction
22
22
23
Dear Customer,
23
Thank you for choosing STIHL. We develop and
23
manufacture our quality products to meet our customers’
requirements. The products are designed for reliability even
23
under extreme conditions.
23
STIHL also stands for premium service quality. Our dealers
23
guarantee competent advice and instruction as well as
23
comprehensive service support.
23
STIHL expressly commit themselves to a sustainable and
24
responsible handling of natural resources. This user manual
24
is intended to help you use your STIHL product safely and in
an environmentally friendly manner over a long service life.
We thank you for your confidence in us and hope you will
enjoy working with your STIHL product.
Dr. Nikolas Stihl
IMPORTANT! READ BEFORE USING AND KEEP IN A
SAFE PLACE FOR REFERENCE.
2 Guide to Using this Manual
2.1 Symbols used with warnings in the text
WARNING
This symbol indicates dangers that can cause serious
injuries or death.
► The measures indicated can avoid serious injuries or
death.
2
0458-452-0121-I

3 Overview
English
NOTICE
This symbol indicates dangers that can cause damage to
property.
► The measures indicated can avoid damage to property.
2.2 Symbols in Text
This symbol refers to a chapter in this instruction
manual.
3Overview
3.1 Blower
13
12
20
19
1
11
10
9
14
8
15
16
BR 550 /BR 600
2
3
4
5
6
#
7
0458-452-0121-I
BR 500
17
18
0000097079_002
3

English
A
3 Overview
1 Master control lever
The Master Control Lever is used to operate and stop the
engine. The Master Control Lever is used to lock the
throttle.
2Spark plug
Ignites the fuel-air mixture in the engine.
3 Spark plug boot
Connects the ignition lead to the spark plug.
4 Muffler
The muffler reduces the sound emission of the blower.
5 Choke lever
The Choke Lever is used to set the start procedure.
6 Starter grip
Serves to crank the engine.
7 Manual fuel pump
The manual fuel pump eases engine starts.
8 Air filter
The air filter filters the air entering the engine.
9 Fuel Tank Cap
Closes the fuel tank.
10 Filter cover
Covers the air filter.
11 Carburetor adjusting screws
For tuning the carburetor.
12 Shield
The shield protects the user from moving parts inside the
blower.
13 Handle
The handle serves to carry the blower.
14 Carrying strap
The carrying strap distributes the weight of the blower
over shoulders and back.
15 Control handle
The control handle is used to operate and guide the
blower.
16 Throttle trigger
Controls the engine speed.
17 Blower tube
The blower tube directs the air stream.
18 Nozzle
The nozzle directs and controls the air stream.
19 Throttle cable
Connects the throttle trigger to the engine.
20 Throttle cable retainer
The throttle cable retainer secures the throttle cable in
position.
# Rating plate with machine number
3.2 Icons
Meanings of symbols that may be on the blower:
Guaranteed sound power level in accordance
L
W
with Directive 2000/14/EC in dB(A) for the
purpose of comparing the sound emissions of
products.
This icon denotes the fuel tank.
This symbol denotes the manual fuel pump.
Engine is operated with the slide control in this
position.
Engine is stopped when the slide control is in
this position.
The engine is started in this position of the gearshift
lever.
In this position of the gearshift lever, the engine is
prepared for starting.
4
0458-452-0121-I

4 Safety Precautions
English
Shutter is in winter mode in this position.
Shutter is in summer mode in this position.
Do not dispose of the product with domestic waste.
4 Safety Precautions
4.1 Warning Symbols
Meanings of warning symbols on the blower:
Observe safety notices and take the necessary
precautions.
Read, understand and keep the User Manual.
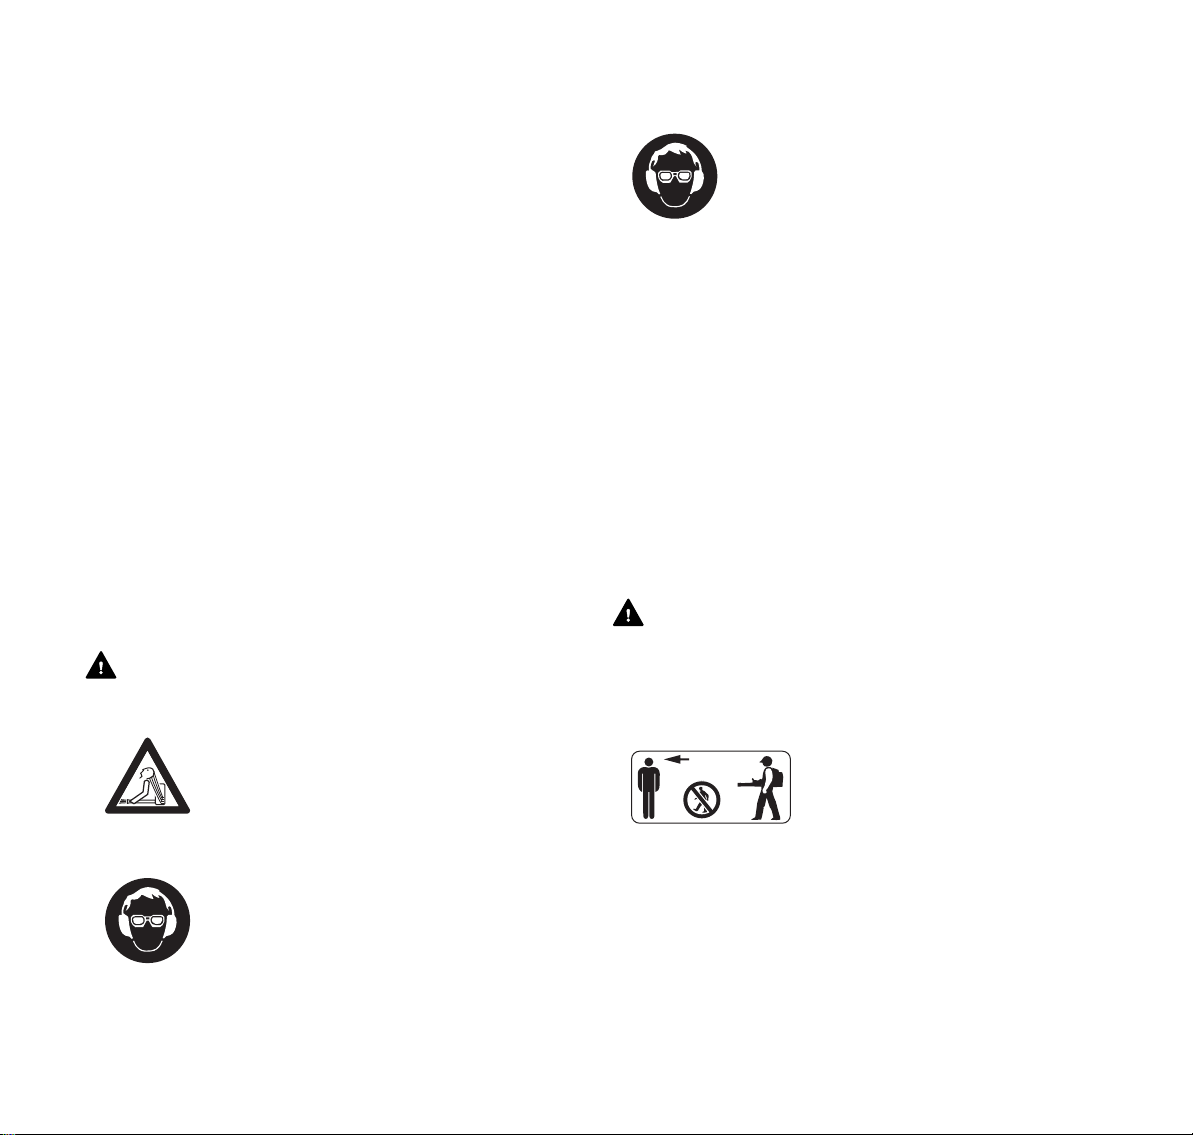
Wear goggles and hearing protection.
Observe the safety advice concerning flying
objects and associated measures.
Avoid inhaling exhaust gas.
Tie back long hair and confine it so that it cannot
be pulled into the blower.
15m (50ft)
Maintain a safety distance.
4.2 Intended Use
The blower STIHL BR 500, BR 550 and BR 600 is designed
for blowing leaves, grass, paper and similar materials.
WARNING
■ Using the blower for purposes for which it is not designed
may result in serious or fatal injuries and damage to
property.
► Always use the blower as described in this Instruction
Manual.
4.3 Requirements concerning the user
WARNING
■ Users who have had no instruction cannot recognize or
assess the risks involved in using the blower. The user or
other persons may sustain serious or fatal injuries.
► Read, understand and keep the User
Manual.
► If you pass the blower on to another person: Always
give them the instruction manual.
► Make sure that the user meets the following conditions:
– The user is rested.
– The user must be in good physical condition and
mental health to operate and work with the blower. If
the user is able to operate the equipment but has
physical, sensory or mental restrictions, the user may
0458-452-0121-I
5
English
15m (50ft)
4 Safety Precautions
only work with the equipment under the supervision of
or after receiving instruction from a responsible
person.
– The user is able to recognize and assess the risks
involved in using the blower.
– The user is an adult, or is being trained in an
occupation under supervision according to national
regulations.
– The user has received instruction from a STIHL
servicing dealer or other expert before operating the
blower for the first time.
– The user is not under the influence of alcohol,
medicines or drugs.
► If you have any doubts, be sure to consult a STIHL
dealer.
■ The blower's ignition system produces an electromagnetic
field. This field may interfere with some pacemakers. This
may result in serious or fatal injury to the user.
► If the user has a pacemaker: Make sure the pacemaker
is not affected.
4.4 Clothing and equipment
WARNING
■ Long hair may be pulled into the blower while working.
This may result in serious injury to the user.
► Tie up and confine long hair above your
shoulders so that it cannot be pulled into the
blower.
■ Noise is generated during operation. Noise can damage
your hearing.
► Wear ear protection.
■ Dust can be whipped up during operation. Whipped up
dust can damage the respiratory passages and cause
allergic reactions.
► If dust is generated: Wear a dust respirator mask.
■ Unsuitable clothing can snag on wood or scrub and may
become caught in the blower. Users not wearing suitable
clothing are at risk of serious injury.
► Wear close-fitting clothing.
► Remove scarves and jewelry.
■ Wearing unsuitable footwear may cause the user to slip.
This may result in injury to the user.
► Wear sturdy, closed-toed footwear with high-grip soles.
4.5 Working Area and Surroundings
WARNING
■ Bystanders, children and animals are not aware of the
dangers of the blower and objects being thrown into the air
and cannot assess them. This may result in serious injury
to bystanders, children and animals and damage to
property.
► Do not allow bystanders, children
or animals within 15 meters of the
work area.
■ Objects can be thrown at high speed during operation.
This may result in injury to the user.
► Wear close-fitting safety glasses. Suitable
safety glasses tested to standard EN 166 or
national standards and bearing the
corresponding mark are available to buy.
► Wear long trousers.
6
► Maintain a clearance of 15 meters from objects.
► Do not leave the blower unattended.
► Ensure that children cannot play with the blower.
0458-452-0121-I

4 Safety Precautions
English
■ Hot exhaust gas is emitted through the muffler while the
engine is running. Hot exhaust gas can ignite easily
flammable materials and cause a fire.
► Keep exhaust gas well away from easily flammable
materials.
4.6 Safe condition
The blower is in a safe condition if the following conditions
are fulfilled:
– The blower is undamaged.
– The blower is clean.
– There is no fuel leaking from the blower.
– The fuel tank cap is closed.
– The controls function properly and have not been
modified.
– The wear limits are not exceeded.
– Original STIHL accessories are fitted.
– The accessories are correctly attached.
WARNING
■ If not in safe condition, components may no longer
operate correctly, safety devices may be disabled and fuel
leakage may occur. This may result in serous or fatal
injury to people.
► Never use a damaged blower.
► If fuel is leaking from the blower: Do not use the blower
and contact a STIHL dealer for assistance.
► Close the fuel tank cap.
► If the blower is dirty: Clean the blower.
► If the controls do not function properly: Do not work with
the blower.
► Fit original STIHL accessories designed for this blower
model.
► Attach accessories as described in this User Manual or
in the User Manual for the accessories.
► Do not insert objects into the openings in the blower.
► Replace worn or damaged labels.
► If you have any doubts, be sure to consult a STIHL
dealer.
4.7 Fuel Mixture and Refueling
WARNING
■ This blower requires a fuel mixture of gasoline and two-
stroke engine oil. Fuel mixture and gasoline are extremely
flammable. If fuel mixture or gasoline make contact with
open fire or hot objects, they can cause a fire or
explosions. Persons may be seriously or fatally injured
and property may be damaged.
► Protect fuel mixture and gasoline from heat and fire.
► Do not spill fuel mixture and gasoline.
► If fuel has been spilled: Wipe up fuel with a cloth and do
not attempt to start engine until all parts of the blower
are dry.
► Do not smoke.
► Never refuel near a fire.
► Shut off the engine and allow it to cool down before
refueling.
► Start the engine at least 3 meters from the fueling spot,
outdoors only.
■ Inhaling fuel fumes and gasoline fumes can have toxic
effects.
► Avoid inhaling fuel fumes or gasoline fumes.
► Refuel in a well-ventilated location.
0458-452-0121-I
7

English
4 Safety Precautions
■ The blower becomes hot during operation. The fuel
expands and excess pressure can build up in the tank.
Fuel can escape as a spray when the fuel tank cap is
opened. The escaping fuel can ignite. This may result in
serious injury to the user.
► Allow the blower to cool down first and then open the
tank cap carefully.
■ Clothing that has been in contact with fuel or gasoline is
more easily flammable. Persons may be seriously or
fatally injured and property may be damaged.
► If your clothing comes into contact with fuel or gasoline:
Change your clothing.
■ Fuel mix, gasoline and two-stroke engine oil can harm the
environment.
► Do not spill fuel, gasoline or two-stroke engine oil.
► Dispose of fuel mix, gasoline and two-stroke engine oil
in accordance with local regulations and environmental
requirements.
■ Fuel, gasoline or two-stroke engine oil can cause irritation
if they come into direct contact with the skin or eyes.
► Avoid contact with fuel, gasoline and two-stroke engine
oil.
► If skin contact occurs: Wash affected areas of skin with
plenty of water and soap.
► If eye contact occurs: Flush eyes with plenty of water for
at least 15 minutes and consult a doctor.
■ The blower's ignition system produces sparks.
Unconfined sparks may cause a fire or an explosion in an
easily combustible or explosive environment. Persons
may be seriously or fatally injured and property may be
damaged.
► Use the spark plugs described in this instruction
manual.
► Insert and tighten down the spark plug.
► Connect the spark plug boot and press it down firmly.
■ The blower can be damaged if it is run on a fuel mixture
consisting of unsuitable gasoline or an unsuitable twost roke engine oil or if an i n c o r r e c t m i x ratio of gasoline and
two-stroke engine oil is used.
► Mix the fuel as described in this instruction manual.
■ The mixture of gasoline and two-stroke engine oil can
separate if it is stored for a long period. The blower can be
damaged if it is used with a fuel mix that has separated.
► Before refueling the blower: Thoroughly mix the fuel.
► Use a mixture of gasoline and two-stroke engine oil that
is not older than 30 days (STIHL MotoMix: 2 years).
4.8 Working
WARNING
■ If the engine is not started properly, the user may lose
control of the blower. This may result in serious injury to
the user.
► Start the engine as described in this instruction manual.
■ In certain situations, the user may no longer be able to
concentrate on their work. This may result in the user
stumbling, falling and suffering serious injury.
► Keep calm and plan your work.
► If light and visibility are poor: Do not work with the
blower.
► Do not use the blower on your own.
► Do not work above shoulder height.
► Watch out for obstacles.
► Work standing on the ground and keep your balance. If
you have to work at a height: Use a mobile elevating
work platform or secure scaffolding.
► If you start feeling fatigue: Take a break.If you start
feeling fatigue: Take a break.
► Blow in direction of the wind.
8
0458-452-0121-I

4 Safety Precautions
English
■ Exhaust gas is produced when the engine is running.
Breathing in exhaust gas can have toxic effects.Breathing
in exhaust gas can have toxic effects.
► Avoid inhaling exhaust gas.
► Operate the blower in a well ventilated location.
► In the event of nausea, headache, visual disturbances,
problems with hearing or dizziness: Stop work and seek
medical advice.
■ Objects can be thrown at high speed during operation.
This can result in injuries to persons and animals and
damage to property.
► Do not direct air blast towards persons, pets
and objects.
■ The user’s ability to hear and assess noises is restricted
when wearing hearing protection with the engine running.
► Keep calm and plan your work.
■ If the blower starts behaving differently or in an unusual
way while operating, the blower may be in an unsafe
condition. This may result in serious injury to people and
damage to property.
► Stop work and consult a STIHL servicing dealer.
■ The blower may cause vibrations in operation.
► Take breaks.
► If signs of a circulatory disturbance occur: Consult a
doctor.
■ The dust whipped up may cause the blower to be
electrostatically charged. In certain conditions (e.g. dry
environment) the blower may discharge suddenly and
emit sparks. Sparks may cause fires and explosions in
highly flammable or explosive environments. Persons
may be seriously or fatally injured and property may be
damaged.
► Do not work in a highly flammable or explosive
environment.
■ In an emergency, the user may start to panic and forget to
take off the carrying system. This may result in serious
injury to the user.
► Practice taking off the carrying system.
4.9 Transport
WARNING
■ The blower may topple over or move during transport.
Persons may be injured or property damaged.
► Shut off the engine.
► Secure the blower with lashing straps, belts or a net to
prevent it turning over and moving.
■ The muffler and engine may be hot after a period of
operation. There is a risk of burn injuries.
► Carry the blower on your back.
4.10 Storage
WARNING
■ Children are not aware of and cannot assess the dangers
of a blower Children may be seriously injured.
► Shut off the engine.
► Store the blower out of the reach of children.
■ Moisture may cause the electrical contacts on the blower
and metal components to corrode. The blower may be
damaged.
► Store the blower in a clean, dry state.
0458-452-0121-I
9

English
5
1
3
2
4
0000098510_001
5 Preparing the Blower for Operation
4.11 Cleaning, Maintenance and Repair
WARNING
■ The blower can start up unintentionally if the engine is
running during cleaning, maintenance or repair
operations. This may result in serious injury to people and
damage to property.
► Shut off the engine.
► Pull off spark plug boot.
■ The muffler and engine may be hot after a period of
operation. This can result in burn injuries.
► Wait until the muffler and engine cool down.
■ Harsh detergents, cleaning with a water jet or sharp
objects can damage the blower. If the blower is not
cleaned as described in this instruction manual,
components may no longer function properly or safety
devices may be rendered inoperative. They may cause
serious injury to persons.
► Clean the blower as described in this instruction
manual.
■ If the blower is not maintained as described in this user
manual, components may no longer function properly or
safety devices may be rendered inoperative. This may
result in serous or fatal injury to people.
► Do not attempt to service or repair the blower.
► If the blower needs to be serviced or repaired: Contact
your STIHL servicing dealer for assistance.
5 Preparing the Blower for Operation
► Mount the control handle, @ 6.1.
► Attach nozzle, @ 6.3.
► Refuel blower, @ 8.2.
► Fit the backpack, @ 7.1.
► Adjust the control handle, @ 7.3.
► Adjust the blower tube, @ 7.4.
► Check the controls, @ 10.1.
► If it is not possible to carry out these steps: do not use the
blower. Consult a STIHL servicing dealer.
6 Assembling the Blower
6.1 Mounting the Control Handle
► Push the control handle (1) onto the blower tube (3).
► Insert and tighten down the screw (2) firmly.
► Press the bushing (4) into the throttle cable holder (5).
The bushing engages with an audible click.
5.1 Preparing the Blower for Operation
The following steps must be performed before commencing
work:
► Make sure the blower is in a safe condition, @ 4.6.
► Clean blower, @ 15.1.
► Mount the blower tube, @ 6.2.
10
0458-452-0121-I

6 Assembling the Blower
English
6.2 Mounting the Blower Tube
1
2
4
5
3
► Slide "clamp with throttle cable holder" (2) onto the
manifold (1).
► Push the pleated hose (3) onto the elbow (1).
The corrugated hose (3) is flush with the manifold (1).
► Push the "clamp with throttle cable holder (2) onto the
pleated hose (3) as far as it will go and align it so that the
screw eye (5) points downwards.
► Insert and tighten down the screw (4) firmly.
10
3
8
6
9
7
► Push clamp (6) onto the blower tube (7).
► Push the blower tube (7) into the corrugated hose (3) as
far as it will go.
► Align the blower tube (7) so that the handle (10) points
upwards.
► Push the clamp (6) onto the pleated hose (3) as far as it
will go and align it so that the screw eye (9) points
downwards.
► Insert and tighten down the screw (8) firmly.
BR 500
12 11
00000098493_002
14
13
BR 550 / BR 600
14
► Align the peg (13) with the slot (12).
► Push blower tube (11) into required position on blower
tube (14).
► Rotate blower tube (11) until it engages.
13
12
6.3 Attaching the Nozzle
► Shut off the engine.
0000098512_001
11
0000097563_001
0458-452-0121-I
11

English
3
1
2
4
0000097048_001
1
0000-GXX-7843-A0
7 Adjusting Blower for User
► Line up the hole (4) and the lug (3).
► Push the nozzle (1) onto the blower tube (2).
The nozzle (1) engages.
The nozzle need not be removed again.
► Close buckle (1) on the waist belt.
7 Adjusting Blower for User
7.1 Fitting and Adjusting the Carrying System
► Put the blower on your back.
0000098511_001
► Tighten the straps until the waist belt fits snugly on your
hips and the back padding is against your back.
1
7.2 Taking off the carrying system
► Shut off the engine.
► Loosen the straps.
► If available: Open the buckle on the waist belt.
► Take the blower off your back.
0000-GXX-B943-A0
► Adjust straps (1) until back padding is against your back.
Fitting and Adjusting the Waist Belt
The waist belt is included in the scope of delivery depending
on the market.
► Put the blower on your back.
12
0458-452-0121-I

8 Mixing the fuel and refuelling the blower
English
7.3 Adjusting the Control Handle
2
1
► Loosen the screw (1).
► Slide the control handle (2) to the required position.
► Tighten screw (1) so that the control handle (2) can no
longer be turned around the blower tube.
7.4 Adjusting the Blower Tube
The blower can be adjusted in 3 positions depending on the
height of the user and the work situation. The positions are
marked on the blower tube.
► Shut off the engine.
8 Mixing the fuel and refuelling the
blower
8.1 Mixing fuel
The fuel required for this blower is a mixture of two-stroke
engine oil and gasoline in a mixing ratio of 1:50.
STIHL recommends you use STIHL MotoMix.
If you mix the fuel yourself, use only STIHL two-stroke
engine oil or another high-performance engine oil in
accordance with JASO FB, JASO FC, JASO FD, ISO-L-
0000098484_001
EGB, ISO-L-EGC or ISO-L-EGD.
STIHL specifies STIHL HP Ultra two-stroke engine oil or an
equivalent high-performance engine oil in order to maintain
emission limits over the machine’s service life.
► Make sure that the octane number of the gasoline is at
least 90 RON and the ethanol content is not more than
10%.
► Make sure the two-stroke engine oil you are using meets
the requirements.
► Depending on the desired amount of fuel, determine the
correct amounts of two-stroke engine oil and gasoline in a
mixing ratio of 1:50. Examples for fuel mixes:
– 20 ml Two-stroke engine oil, 1 l gasoline
– 60 ml Two-stroke engine oil, 3 l gasoline
– 100 ml Two-stroke engine oil, 5 l gasoline
► Pour two-stroke engine oil into a clean approved fuel
canister first and then add gasoline.
► Stir the fuel before topping up.
► Adjust blower tube to the desired position.
0458-452-0121-I
8.2 Refuelling the blower
► Shut off the engine.
0000097565_001
► Place the blower on a level surface so that the fuel tank
cap faces up.
► Use a damp cloth to clean the fuel tank cap and the area
around it.
13

English
0000-GXX-B944-A0
► Turn the tank cap counterclockwise until it can be
removed.
► Remove the fuel tank cap.
9 Starting and Stopping the Engine
► Turn the tank cap clockwise and tighten it down firmly by
hand.
The fuel tank is closed.
9 Starting and Stopping the Engine
9.1 Selecting the correct starting procedure
When must the engine be prepared for starting?
The engine must be prepared for starting if the following
condition is met:
– The engine is at ambient temperature.
NOTICE
Exposure to light, solar irradiation and extreme
temperatures, fuel may accelerate fuel decomposition. The
blower can be damaged if it is used with a fuel mix that has
become separated.
► Stir the fuel before topping up.
► Do not top up with fuel stored for more than 30 days.
► When topping up, ensure that no fuel is spilled and that
the fuel level remains at least 15 mm under the edge of the
tank.
► Fit the fuel tank cap on the tank opening.
► Prepare engine for start-up, @ 9.2 and then start the
engine, @ 9.3.
When can the engine be started without preparation?
The engine can be started directly if the following condition
is met:
– The engine can be started without preparation if it has
been running for at least 1 minute and only shut down for
a short work break.
– The engine stopped when accelerated for the first time.
– The engine stopped because the fuel tank was empty.
► Starting the engine, @ 9.3.
9.2 Preparing the engine for start
► Select the correct starting procedure.
► Stand the blower on a level surface.
0000-GXX-B945-A0
14
0458-452-0121-I

9 Starting and Stopping the Engine
3
1
2
0000-GXX-B948-A0
1
2
► Move the Master Control Lever (1) to position .
► Depress the manual fuel pump (2) at least 6 times.
English
0000-GXX-B946-A0
► Move the Master Control Lever (1) to position .
► Depress the manual fuel pump (3) at least 6 times.
3
► Move the choke lever (3) to position .
► Press the blower onto the ground with the left hand on the
motor and step onto the base plate with the right foot.
► Pull the starter grip slowly with your right hand until you
feel it engage.
► Pull the starter grip quickly and allow the starter rope to
rewind several times until the engine fires and stops.
9.3 Starting the engine
► Select the correct starting procedure.
► Place the blower on a level surface and place the blowpipe
on the floor.
0458-452-0121-I
4
0000-GXX-B947-A0
► Move the choke lever (4) to position .
► Press the blower onto the ground with the left hand on the
motor and step onto the base plate with the right foot.
► Pull the starter grip slowly with your right hand until you
feel it engage.
► Pull the starter grip quickly and allow the starter rope to
rewind several times until the engine runs.
► Blip the throttle trigger (2).
The choke lever (4) springs to position . The engine runs
at idling speed.
0000096691_001
15

English
10 Checking the Blower
9.4 Shut off the engine
1
► Move the Master Control Lever (1) to position .
The engine stops and the Master Control lever (1) springs
back to position .
If the engine does not stop:
► Move the choke lever to position .
The engine stops.
► Do not use the blower. Consult a STIHL servicing
dealer.
The Master Control lever is defective.
10 Checking the Blower
10.2 Checking the nozzle
► Shut off the engine.
0000-GXX-B950-A0
0000098496_0010000-GXX-B951-A0
► Check whether the wear mark on the blower tube is
visible.
► If there is no visible wear mark on the blower tube: Do not
use the blower and contact your STIHL dealer for
assistance.
► If you have any doubts, be sure to consult a STIHL dealer.
11 Operating the Blower
11.1 Holding and Guiding the Blower
10.1 Checking the controls
Shut off the engine
► Start the engine.
► Move the Master Control Lever to position .
The engine stops.
► If the engine does not stop:
► Move the choke lever to position .
The engine stops.
► Do not use the blower. Consult a STIHL servicing
dealer.
The Master Control lever is defective.
16
► Carry the blower on your back.
► Hold the blower unit by the operating handle with your
right hand so that your thumb encloses the control handle.
0458-452-0121-I

12 After Finishing Work
3
2
4
1
0000-GXX-B953-A1
English
11.2 Blowing
► Point the nozzle at the ground.
► Move forward slowly in a controlled manner.
11.3 Setting to winter mode
The carburetor may ice up if the engine is operated at
temperatures below + 10 °C. The shutter must be set to the
winter mode so that carburetor is additionally heated by
warm air from around the engine.
NOTICE
The engine may overheat if is operated in winter mode at
temperatures above + 10 °C.
► Change setting to summer mode .
► Shut off the engine.
► Remove filter cover (2) and air filter (3).
► Clean the area around the air filter (3) with a damp cloth
or a soft brush.
► Loosen the screw (4).
2
5
0000-GXX-B952-A0
► Set the flap (5) to the winter mode position .
► Fully tighten the screw (4).
► Insert the air filter (3) and put on the filter cover (2).
► Insert screws (1) and tighten.
1
4
12 After Finishing Work
12.1 When Work is Finished
► Shut off the engine.
► Allow the blower to cool down.
► If the blower is wet: Allow the blower to dry.
► Clean blower.
3
0000-GXX-B954-A1
13 Transporting
13.1 Transporting the blower
► Unscrew the screws (1).
0458-452-0121-I
► Shut off the engine.
17

English
14 Storing
Carrying the blower
► Carry the blower on your back and hold the blower by the
operating handle with your right hand or carry it by the
handle.
Transporting the blower in a vehicle
► Attach the blower to the handle of the back plate using the
Velcro strap.
► Secure the blower in an upright position so that the blower
cannot tip over or move.
14 Storing
► Attach the blower to the handle of the back plate using the
Velcro strap.
► The blower should be stored in such a way that the
following conditions are fulfilled:
– Blower must be out of the reach of children.
– Blower must be clean and dry.
If you store the blower for more than 3 months:
► Open the fuel tank cap.
► Drain the fuel tank.
► Seal fuel tank.
► Have the fuel tank cleaned by a STIHL dealer.
► Start the engine and run it at idling speed until it stops.
15 Cleaning
0000-GXX-B955-A00000-GXX-B955-A0
15.1 Cleaning the blower
► Shut off the engine.
► Allow the blower to cool down.
► Clean blower with a damp cloth.
► Clean vents with a paintbrush.
► Clean the shield with a paintbrush or soft brush.
14.1 Storing the blower
► Shut off the engine.
18
15.2 Cleaning the Spark Plug
► Shut off the engine.
► Allow the blower to cool down.
0458-452-0121-I

16 Maintenance
1
2
► Pull off the spark plug boot (1).
► If the area around the spark plug (2) is soiled: Clean the
spark plug (2) with a cloth.
► Unscrew the spark plug (2).
► Clean the spark plug (2) with a cloth.
► If the spark plug (2) is corroded: Install a new spark plug
(2).
► Fit the spark plug (2) and tighten it down firmly.
► Press the spark plug boot (1) firmly home.
16 Maintenance
16.1 Maintenance intervals
Maintenance intervals depend on the ambient conditions
and the operating conditions. STIHL recommends the
following maintenance intervals:
Monthly
► Have the fuel tank cleaned by a STIHL dealer.
► Have the pickup body in the fuel tank cleaned by a STIHL
dealer.
Annually
► Have the blower checked by a STIHL servicing dealer.
► Have the pickup body in the fuel tank replaced by a STIHL
dealer.
0000-GXX-B956-A0
16.2 Adjusting the Throttle Cable
2
1
► Press the throttle trigger (1) and keep pressed.
► Turn screw (2) clockwise until resistance is felt.
► Turn the screw (2) clockwise through another half-turn.
17 Repairing
English
0000096699_002
If engine is low on power or cranking effort is very high
► Have valve clearance checked and, if necessary, adjusted
by a STIHL specialist dealer.
After every 100 hours of operation
► Replace the spark plug.
After every 150 hours of operation
► Have the combustion chamber cleaned by a STIHL
specialist dealer.
0458-452-0121-I
17.1 Repairing the Blower
The blower cannot be repaired by the user.
► If the blower is damaged: Do not use the blower and
contact your STIHL dealer for assistance.
19

English
18 Troubleshooting
18.1 Troubleshooting the Blower
Most problems can be attributed to the same cause.
► Carry out the following measures:
► Replace the air filter.
► Clean or replace the spark plug.
► Adjust saw for winter or summer operation.
► Adjust the idle speed.
► If the problem continues: Carry out the measured listed below.
Fault Cause Remedy
The engine does not start. There is not enough fuel in
the fuel tank.
The carburetor is too hot. ► Allow the blower to cool down.
The carburetor has iced
up.
The engine idles
erratically.
The engine stops while
idling.
The engine does not reach
maximum speed.
The carburetor has iced
up.
The carburetor has iced
up.
Throttle cable adjustment
is not correct.
► Mix the fuel and refuel the blower.
► Depress the manual fuel pump at least 10 times before starting the
engine.
► Allow the blower to warm up to + 10 °C.
► Allow the blower to warm up to + 10 °C.
► Allow the blower to warm up to + 10 °C.
► Adjust the throttle cable.
18 Troubleshooting
20
0458-452-0121-I

19 Specifications
0000097086_001
18.2 Replacing air filter
The air filter cannot be cleaned. The air filter must be
replaced if it is damaged or there is a loss of engine power.
► Shut off the engine.
English
2
1
3
► Take out the screws (1).
► Remove filter cover (2).
► Clean the area around the air filter (3) with a damp cloth
or a soft brush.
► Take out the air filter (3).
► Insert new air filter (3) and replace filter cover (2).
► Insert screws (1) and tighten.
2
1
3
18.3 Adjust idle speed
► Start the engine.
► Warm up the engine by opening and closing the throttle for
about 1 minute.
The engine runs unsteadily at idle or stalls
► Turn the idle speed screw LA slowly clockwise until the
engine runs smoothly.
0000-GXX-C456-A1
19 Specifications
19.1 Blower STIHL BR 500
– Displacement: 64.8 cm³
– Engine power to ISO 8893: 2 kW (2.7 bhp) at 5,300 rpm
– Idle speed to ISO 11681: 2,500 rpm
– Approved spark plug:
– NGK CMR6H from STIHL
– Bosch USR 4AC from STIHL
– Electrode gap of the spark plug: 0.5 mm
– Blowing force: 22 N
– Maximum air velocity: 93 m/s
– Average air velocity: 77 m/s
– Air flow rate: 925 m³/h
– Maximum air flow rate (without blower tube assembly):
1380 m³/h
– Dry weight: 10.4 kg
– Max. fuel tank capacity: 1400 cc (1.4 l)
0458-452-0121-I
21

English
19 Specifications
19.2 Blower STIHL BR 550
– Displacement: 64.8 cm³
– Engine power to ISO 8893: 2.5 kW (3.4 bhp) at 6,000 rpm
– Idle speed to ISO 11681: 2,500 rpm
– Approved spark plug:
– NGK CMR6H from STIHL
– Bosch USR 4AC from STIHL
– Electrode gap of the spark plug: 0.5 mm
– Blowing force: 27 N
– Maximum air velocity: 113 m/s
– Average air velocity: 94 m/s
– Air flow rate: 930 m³/h
– Maximum air flow rate (without blower tube assembly):
1490 m³/h
– Dry weight: 10.1 kg
– Max. fuel tank capacity: 1400 cc (1.4 l)
19.3 Blower STIHL BR 600
– Displacement: 64.8 cm³
– Engine power to ISO 8893: 2.8 kW (3.8 bhp) at 7,200 rpm
– Idle speed to ISO 11681: 2,500 rpm
– Approved spark plug:
– NGK CMR6H from STIHL
– Bosch USR 4AC from STIHL
– Electrode gap of the spark plug: 0.5 mm
– Blowing force: 32 N
– Maximum air velocity: 106 m/s
– Average air velocity: 89 m/s
– Air flow rate: 1150 m³/h
– Maximum air flow rate (without blower tube assembly):
1720 m³/h
– Dry weight: 10.3 kg
– Max. fuel tank capacity: 1400 cc (1.4 l)
19.4 Sound Values and Vibration Values
The K-value for sound pressure levels is 2 dB(A). K-value for
sound power level is 2 dB(A). K-value for vibration level is
2m/s².
STIHL recommends wearing ear defenders.
BR 500
– Sound pressure level L
ISO 22868: 90 dB(A).
– Sound power level L
ISO 22868: 100 dB(A).
– Vibration level ahv, eq measured according to DIN EN ISO
22867
– Standard version: Control handle: 1.4 m/s².
– Version with bike handle: Control handle: 1.6 m/s².
– Version with Bike Handle: Left handle: 1.9 m/s².
BR 550
– Sound pressure level L
ISO 22868: 98 dB(A).
– Sound power level L
ISO 22868: 108 dB(A).
– Vibration level ahv, eq measured according to DIN EN ISO
22867
– Standard version: Control handle: 1.6 m/s².
– Version with bike handle: Control handle: 1.4 m/s².
– Version with Bike Handle: Left handle: 2.1 m/s².
BR 600
– Sound pressure level L
ISO 22868: 100 dB(A)
– Sound power level L
ISO 22868: 108 dB(A)
– Vibration level ahv, eq measured according to DIN EN ISO
22867
measured according to DIN
peq
measured according to DIN EN
weq
measured according to DIN
peq
measured according to DIN EN
weq
measured according to DIN
peq
measured according to DIN EN
weq
22
0458-452-0121-I

20 Spare Parts and Accessories
English
– Standard version: Control handle: 1.8 m/s².
– Version with bike handle: Control handle: 2.5 m/s².
– Version with Bike Handle: Left handle: 2.1 m/s².
For information on compliance with Employers' Vibration
Directive 2002/44/EC see www.stihl.com/vib.
19.5 REACH
REACH is an EC regulation and stands for the Registration,
Evaluation, Authorisation and Restriction of Chemical
substances.
For information on compliance with the REACH regulation
see www.stihl.com/reach.
19.6 Exhaust Emissions
The CO2value measured in the EU type approval procedure
is specified at www.stihl.com/co2.
The measured CO
representative engine in accordance with a standardized
test procedure under laboratory conditions and does not
represent either an explicit or implied guarantee of the
performance of a specific engine.
The applicable exhaust emission requirements are fulfilled
by the intended usage and maintenance described in this
instruction manual. The type approval expires if the engine
is modified in any way.
value was determined on a
2
20 Spare Parts and Accessories
20.1 Spare parts and accessories
These symbols indicate original STIHL spare
parts and original STIHL accessories.
STIHL recommends the use of original STIHL spare parts
and accessories.
Despite ongoing market observation, STIHL is unable to
judge the reliability, safety and suitability of other
manufacturers' spare parts and accessories; accordingly,
STIHL cannot warrant for the use of those parts.
Original STIHL spare parts and original STIHL accessories
are available from STIHL dealers.
21 Disposal
21.1 Disposing of Blower
Contact the local authorities or your STIHL dealer for
information on disposal.
Improper disposal can be harmful to health and pollute the
environment.
► Take STIHL products including packaging to a suitable
collection point for recycling in accordance with local
regulations.
► Do not dispose with domestic waste.
22 EC Declaration of Conformity
22.1 Blower STIHL BR 500, 550, 600
ANDREAS STIHL AG & Co. KG
Badstraße 115
D-71336 Waiblingen
Germany
declares under our sole responsibility that
– Type: blower
– Manufacturer's brand: STIHL
– Series: BR 500, BR 550, BR 600
– Serial number: 4282
conforms to the relevant provisions of Directives
2011/65/EU, 2006/42/EC, 2014/30/EU and 2000/14/EC and
has been developed and manufactured in compliance with
0458-452-0121-I
23

English
23 UKCA Declaration of Conformity
the following standards in the versions valid on the date of
production: EN ISO 12100, EN 15503, EN 55012, EN
61000-6-1.
The measured and guaranteed equivalent sound power
level has been determined in accordance with Directive
2000/14/EC, Annex V.
BR 500
– Measured sound power level: 100 dB(A)
– Guaranteed sound power level: 102 dB(A)
BR 550, BR 600
– Measured sound power level: 108 dB(A)
– Guaranteed sound power level: 110 dB(A)
The technical documents are stored at
ANDREAS STIHL AG & Co. KG Produktzulassung.
The year of construction, the country of manufacture and the
machine number are shown on the blower.
Waiblingen, 15.07.2021
ANDREAS STIHL AG & Co. KG
pp
Dr. Jürgen Hoffmann, Director Product Certification &
Regulatory Affairs
23 UKCA Declaration of Conformity
23.1 Blower STIHL BR 500, 550, 600
ANDREAS STIHL AG & Co. KG
Badstraße 115
D-71336 Waiblingen
Germany
declares under our sole responsibility that
– Type: blower
– Manufacturer's brand: STIHL
– Series: BR 500, BR 550, BR 600
– Serial identification number: 4282
conforms to the relevant provisions of UK regulations The
Restriction of the Use of Certain Hazardous Substances in
Electrical and Electronic Equipment Regulations 2012,
Supply of Machinery (Safety) Regulations 2008, Supply of
Machinery (Safety) Regulations 2008 and Noise Emission in
the Environment by Equipment for use Outdoors
Regulations 2001 and has been manufactured in
compliance with the following standards in the versions valid
on the date of production: EN ISO 12100, EN 15503, EN
55012, EN 61000-6-1.
The measured and the guaranteed sound power level have
been determined in accordance with UK regulation Noise
Emission in the Environment by Equipment for use Outdoors
Regulations 2001, Schedule 8.
BR 500
– Measured sound power level: 100 dB(A)
24
0458-452-0121-I

23 UKCA Declaration of Conformity
– Guaranteed sound power level: 102 dB(A)
BR 550, BR 600
– Measured sound power level: 108 dB(A)
– Guaranteed sound power level: 110 dB(A)
The technical documents are stored at ANDREAS
STIHL AG & Co. KG.
The year of construction, the country of manufacture and the
machine number are shown on the blower.
Waiblingen, 15.07.2021
ANDREAS STIHL AG & Co. KG
pp
Dr. Jürgen Hoffmann, Director Product Certification &
Regulatory Affairs
English
0458-452-0121-I
25

0458-452-0121-I
englisch
G
www.stihl.com
*04584520121I*
0458-452-0121-I
 Loading...