

Page 1
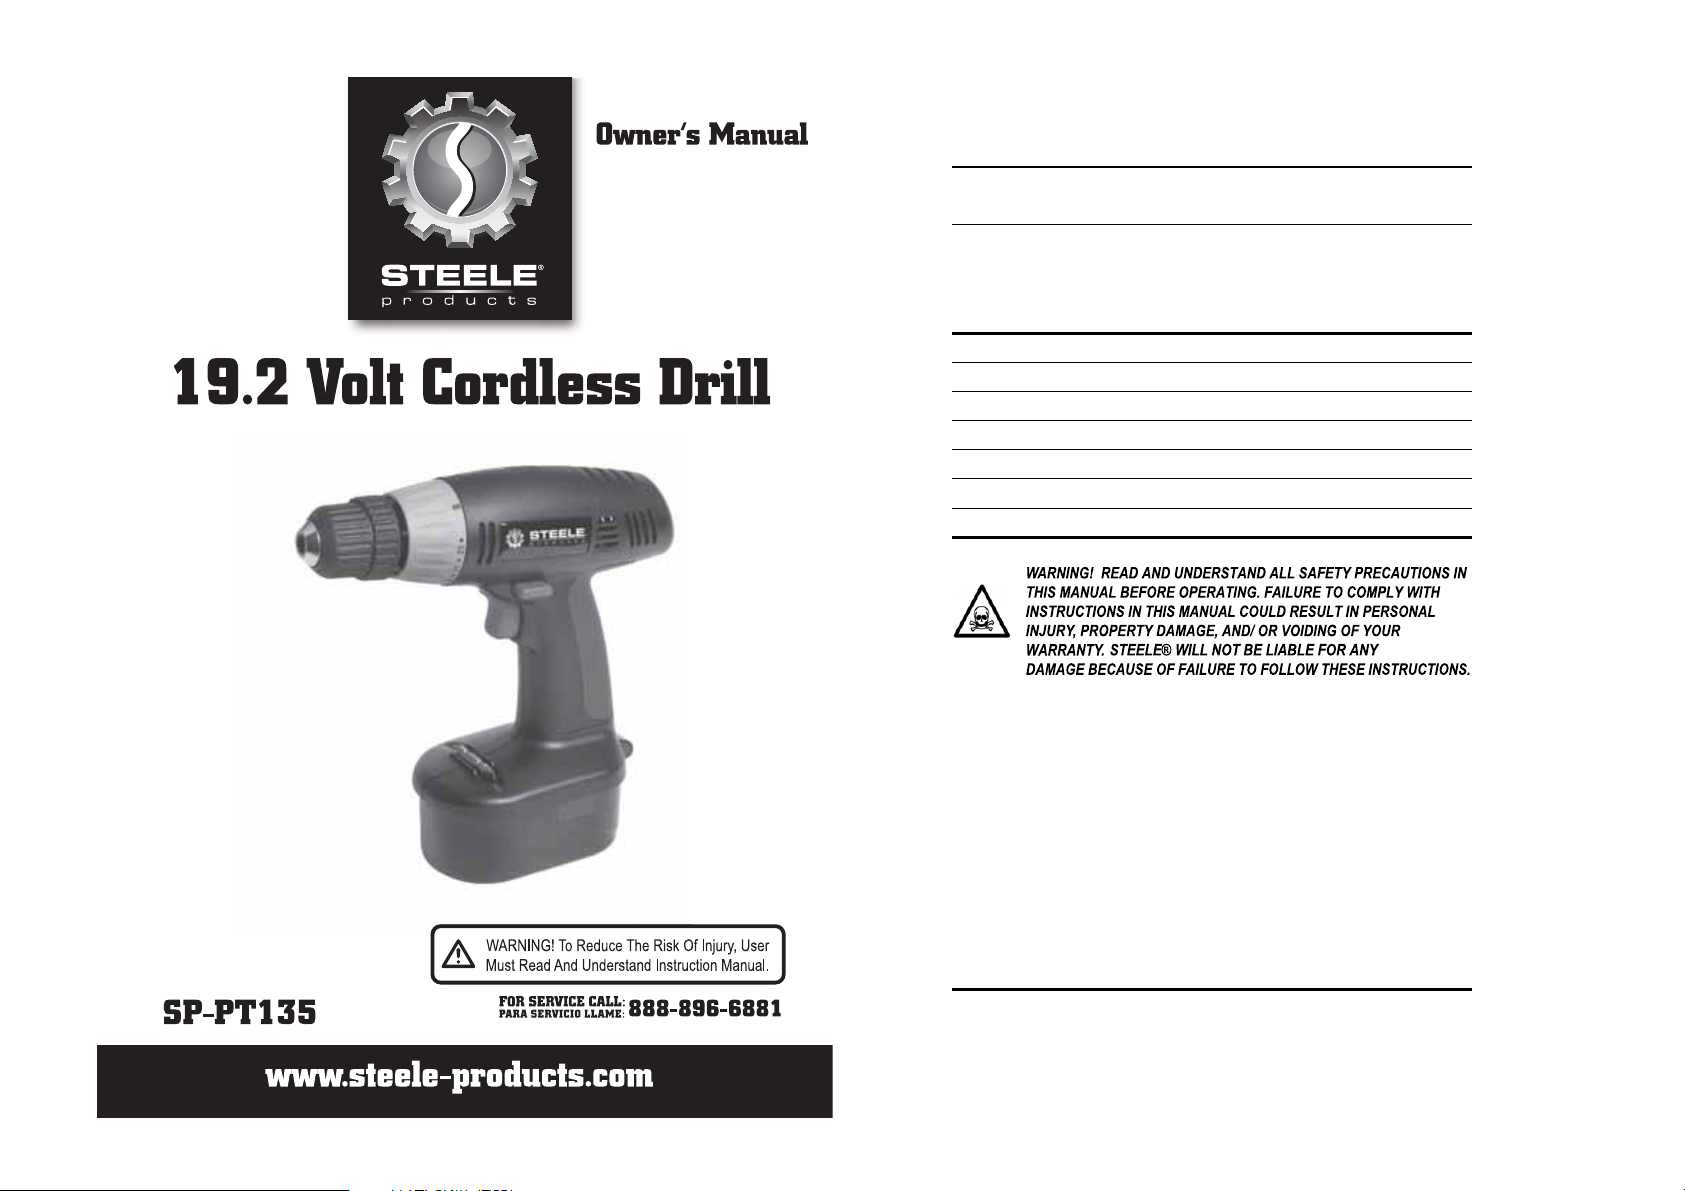
19.2V Cordless Drill
Table Of Contents
Topic Page
Safety Guidelines - Definitions 3
General Precautions 4
Additional Warnings 7
Battery Charger & Plug 9
Drill 11
Maintenance 15
Limited Warranty 16
2
Page 2
Owner’s Manual
4
General Precautions
Verify that the power supply in your area is compatible with the voltage listed
on the tool's label.
Check the tool, cord, and plug for damage before each use.
Make sure the tool is turned off before connecting the electrical cord.
Always start the tool before setting it against the piece you are working on.
Watch for and avoid potential electrocution hazards. Avoid bodily contact with
grounded objects such as metal pipes, radiators, cooking ranges, refrigerators,
and so forth when using the tool. Never work on any item that is connected to a
live electrical circuit. Always disconnect electrical items before working on
them.
Large temperature variations cause condensation, which can increase the hazard
of electrocution and/or internal corrosion. Allow the tool to adjust to the
temperature of the work area for several minutes before each use.
Do not use this tool, its charger, or any accessory for any purpose other than
those for which they have been specifically designed.
Secure all items you are working on. Use clamps, vices, or other securing
devices as needed.
Never wear jewelry or loose clothing that can become entangled in moving
parts. Tie or otherwise secure long hair away from the tool and work area.
Always wear fitted clothing and any protective items that may be necesary such
as gloves, goggles, etc.
Always wear protective goggles when using this tool.
If working around dust, splinters, or shavings, wear a protective mask to avoid
inhalation hazards.
Always wear ear protection
.
WARNING! FAILURE TO FOLLOW THESE INSTRUCTIONS
CAN RESULT IN SEVERE INJURY OR DEATH.
CAUTION: FAILURE TO FOLLOW THESE INSTRUCTIONS CAN
ALSO RESULT IN DAMAGE TO THE TOOL AND/OR THE ITEM
YOU ARE WORKING ON.
19.2V Cordless Drill
Safety Guidelines - Definitions
This manual contains important information that you need to know and understand
in order to protect YOUR SAFETY and to PREVENT EQUIPMENT
PROBLEMS. The following symbols help you recognize this information. Please
read the manual and pay attention to these sections.
Save These Important Safety
Instructions!
Read and understand all of these safety instructions. Be sure to
retain them for future use.
WARNING! WARNINGS INDICATE A CERTAINTY OR
STRONG POSSIBILITY OF PERSONAL INJURY OR DEATH IF
INSTRUCTIONS ARE NOT FOLLOWED.
CAUTION: CAUTIONS INDICATE A POSSIBILITY OF EQUIPMENT
DAMAGE IF INSTRUCTIONS ARE NOT FOLLOWED.
Note: Notes give helpful information.
WARNING! IMPROPER OPERATION OR MAINTENANCE OF
THIS PRODUCT COULD RESULT IN SERIOUS INJURY AND
PROPERTY DAMAGE. READ AND UNDERSTAND ALL
WARNINGS AND OPERATING INSTRUCTIONS BEFORE
USING THIS EQUIPMENT. WHEN USING POWER TOOLS,
BASIC SAFETY PRECAUTIONS SHOULD ALWAYS BE
FOLLOWED TO REDUCE THE RISK OF PERSONAL INJURY.
3
Page 3

Owner’s Manual
6
General Precautions (cont’d)
Keep cutting tools sharp and clean.
Follow all instructions for lubrication and changing accessories.
Before using the power tool, check it carefully to ensure that it will operate
properly and perform its intended function.
Check that all moving parts are correctly aligned and free from binding.
Check for broken or missing parts and have them replaced or repaired at an
authorized service center.
If the power tool requires mounting make sure it is securely attached to a
suitable work bench.
Check any other condition that may affect the operation of the power tool.
Any damaged guard or any other damaged part of the power tool should be
properly repaired or replaced by an authorized service center unless otherwise
indicated in this instruction manual.
Any switch that does not operate correctly must be replaced by an authorized
service center. Do not use the power tool if the ON/OFF switch does not turn
the power tool ON and OFF.
Do not attempt to modify the power tool in any way. The use of any attachment
or accessory other than those recommended in this instruction manual could
result in damage to the power tool and injury to the operator.
This electric power tool complies with national and international standards and
safety requirements. Repairs should only be carried out by qualified persons
using original spare parts. Failure to do so may result in considerable danger to
the user.
If using the power tool inside your house, protect furnishings and floors with a
suitable dust sheet.
Always observe general fire safety precautions when using certain power tools
inside your house or workshop. It is recommended that you have an appropriate
fire extinguisher available at all times while working.
19.2V Cordless Drill
General Precautions (cont’d)
Where there is a risk of heavy objects damaging feet or if there is a risk of
slipping on wet or slippery floors, suitable non-slip safety footwear should be
worn.
Where there is a risk of falling objects or hitting your head on protruding or low
level obstructions, a hard hat should be worn.
Be sure you always have sure footing, especially when working on ladders and
scaffolding.
Keep electric tools away from humidity and rain. Do not immerse.
When working outdoors, only use tools and extension cables designed and
approved for outdoor use.
Do not use the equipment in any areas any danger of fire or explosion exists.
Keep batteries away from heat and allow to cool if warm.
If the tool requires repair, be sure to have all work performed by a qualified
technician.
WARNING! CONSUMING ALCOHOL, MEDICATION, OR
DRUGS, OR HEALTH PROBLEMS SUCH AS ILLNESS,
FEVER, OR FATIGUE, AFFECT YOUR ABILITY TO PLAN
AND REACT. NEVER USE ANY ELECTRICAL EQUIPMENT
WHILE UNDER THE INFLUENCE OF ALCOHOL, DRUGS,
HEALTH PROBLEMS, OR FATIGUE.
Keep all electric tools away from children.
Store electric tools in the original box in a clean dry location out of the reach of
children.
Always unplug the power cable when the tool is not in use or when you are
taking breaks or changing accessories.
Never carry the tool by the cable. Never unplug the tool by pulling on the cable.
When working, do not allow the motor to stall under the load.
Keep your work place tidy. Untidiness can cause accidents!
Avoid abnormal body postures while working.
Make sure not to start the tool unintentionally.
Do not leave keys, spanners, adjusting tools, etc. inserted in the tool.
5
Page 4

Owner’s Manual
8
Additional Warnings (cont’d)
Battery Charger (cont’d)
When the battery fails to charge or maintain its charge, its usable life is
exhausted. The battery should be disposed of in an environmentally friendly
manner. Do not dispose of the battery in the household disposal system. Take
the battery to a recycling or specialized center for disposal.
Drill
Keep drills, drivers and other cutters sharp and in good condition to improve
cutting and ensure tool and accessory life.
Use only manufacturer-recommended bits, drivers, and cutters.
Do not attempt to modify the tool or its accessories in any way.
Do not force the tool. Let it do the work, This reduces wear and increases
efficiency and operating life.
Use approved safety glasses or goggles, face mask, and ear protection.
When using the tool above your head height, wear an approved safety helmet,
safety glasses or goggles, and an approved face mask.
Beware of high torque when drilling, especially when drilling masonry.
When drilling masonry, do not force the drill. Let the drill and hammer action
do the work
Do not change any selector switches while the motor is running.
Always remove the battery pack when the drill is not being used.
Do not carry the drill with your finger on the trigger. Always turn the rotation
lever to neutral to prevent accidental starting.
WARNING! DO NOT DISPOSE OF THE BATTERY BY
INCINERATION AS THE BATTERY WILL EXPLODE.
19.2V Cordless Drill
Additional Warnings
Battery Charger
WARNING! THIS CHARGER AND BATTERY PACK ARE
SPECIFICALLY DESIGNED TO WORK TOGETHER. DO NOT
ATTEMPT TO CHARGE ANY OTHER BRAND OF CORDLESS
TOOL OR BATTERY PACK WITH THIS CHARGER.
This 120V~60Hz charger is double insulated and therefore does not require a
grounding connection. It is a sealed unit fitted with an internal fuse which
cannot be replaced.
There are no user serviceable parts inside this charger. Never remove any part
of the casing unless qualified to do so. If in doubt, consult a qualified
electrician.
WARNING! THIS UNIT CONTAINS DANGEROUS VOLTAGES.
For your protection, do not expose this charger to rain or use in damp locations.
Do not place the charger on damp or wet surfaces; use a workbench if available.
For added protection use a suitable Residual Current Device (RCD) at the wall
outlet.
This charger unit is intended for use with this specific tool only and must not be
used for any other use. Do not use any other charger for charging these
batteries.
WARNING! NEVER USE THE CHARGER IN YOUR HOME,
ALWAYS CHARGE BATTERIES ON A BENCH IN YOUR
WORKSHOP.
Never exceed the charging time specified in the manual as this could damage
both the battery and the charger.
7
Page 5
19.2V Cordless Drill
Owner’s Manual
10
Battery Charger & Plug (cont’d)
Additional or replacement batteries
Additional or replacement batteries specifically designed to work with this tool and
charger are available from your service center. (888-896-6881)
Discharging the battery
Use the tool until it loses all effective power before recharging the battery.
Recharging partially used batteries may eventually cause a memory effect that will
prevent batteries from accepting their full capacity. Making sure to charge batteries
completely before use and discharge them completely before recharging will help
them preserve their full capacity.
Battery Charger & Plug (cont’d)
Inserting the battery
Insert the battery pack into the tool handle.
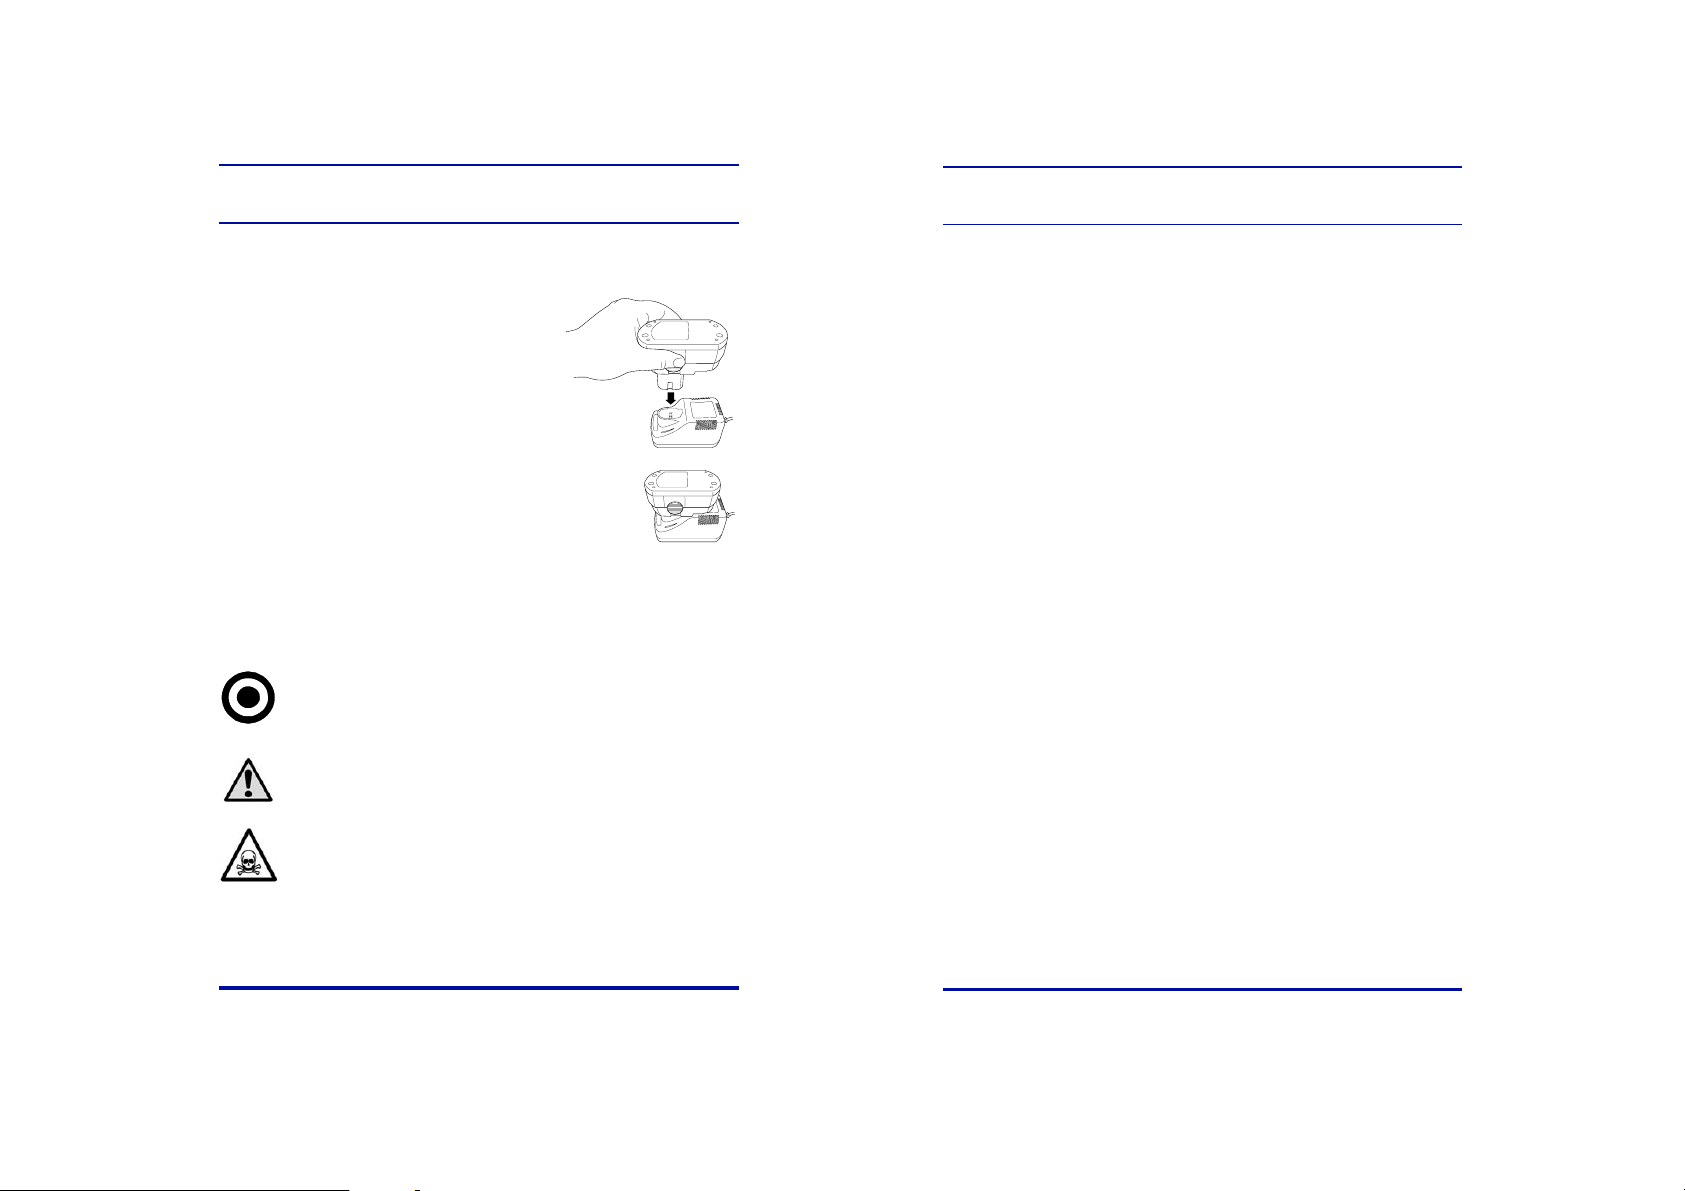
Charging the battery
The battery supplied with this power tool contains a
test charge only and must be fully charged before use.
Be sure to read all safety instructions before charging
the battery.
The battery will become warm during charging. This
is normal.
1
Plug the charger into a standard 110-120V~60Hz
outlet, being sure not to knot or kink the cord.
2
The battery has a keyway to ensure proper
alignment. Insert the battery into the charger unit.
3
Time the charge for 3-5 hours only.
4
Unplug the charger when not in use and store it in a suitable storage cabinet.
Note: Avoid charging your battery in freezing conditions as charging
power will not be sufficient.
CAUTION: WHEN CHARGING MORE THAN ONE BATTERY PACK
IN SUCCESSION, ALLOW AT LEAST 30 MINUTES FOR THE
CHARGER TO COOL DOWN BEFORE CHARGING THE
ADDITIONAL BATTERY.
WARNING! ALWAYS REMOVE THE BATTERY PACK AND
STORE IT SAFELY WHEN THE TOOL IS NOT IN USE.
9
Page 6
19.2V Cordless Drill
Owner’s Manual
12
Drill (cont’d)
Specifications
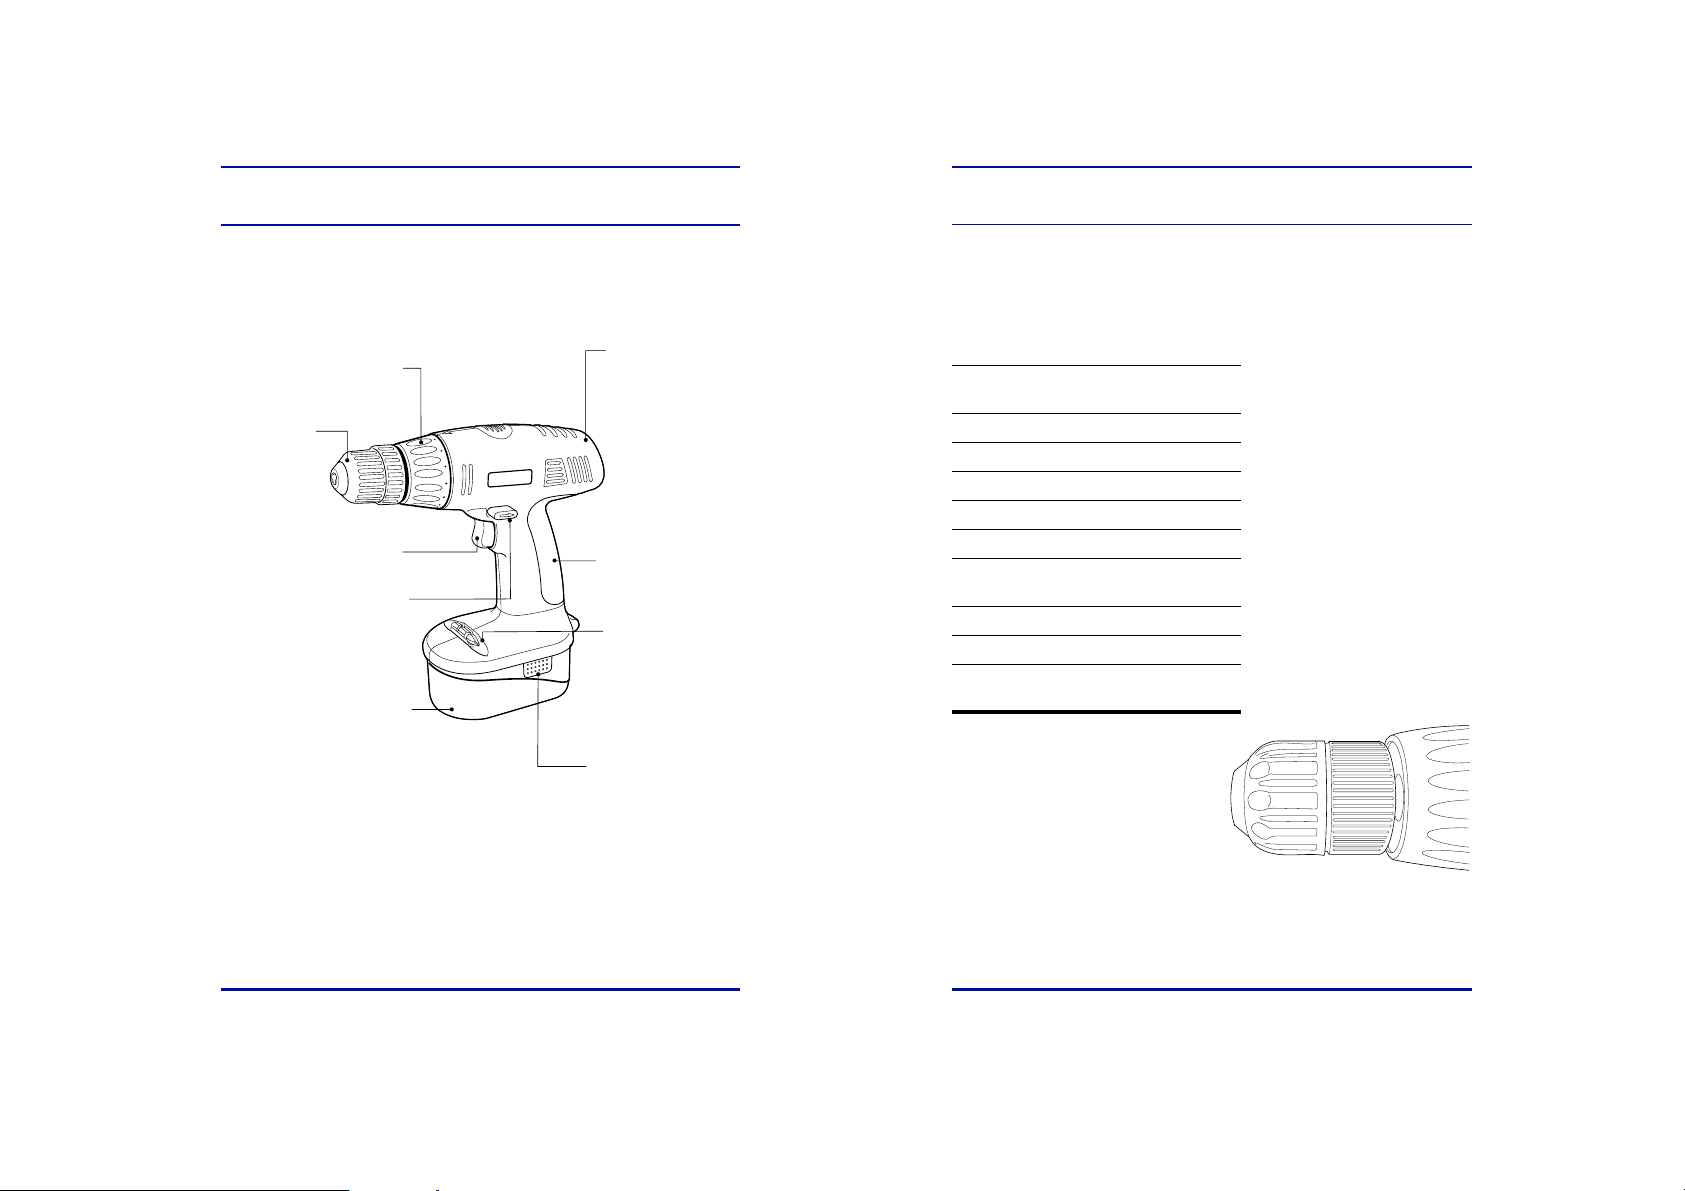
Keyless chuck
operation
The keyless chuck on your drill/driver
allows for easy installation, removal, and
locking of bits and drills. The chuck has
two rotating grips.
To open or close the chuck:
1
Hold grip B.
2
With your free hand, rotate grip A.
Do not use unnecessary force when tightening the chuck.
Item Value
Main voltage 110-
120V~60Hz
Output voltage 19.2V
Battery voltage 19.2V
Battery charge time 3-5 hours
Torque settings 24+1
Chuck size 1-10mm 3/8 Inch
No-load speed 0-550 RPM
Drilling depth (wood) 25mm
Drilling depth (steel) 10mm
Drilling depth
(masonry)
10mm
A
B
Drill
rot
euq
hc
kcu
Your new cordless drill has been engineered and manufactured to the highest
possible standards by
operator safety. Properly cared for, it will give you years of rugged, trouble-free
performance. Every care has been taken to ensure that it reaches you in perfect
condition. However, in the unlikely event that you should experience a problem, or
if we can offer any assistance or advice, please do not hesitate to contact our
customer care department at the address or telephone number listed at the back of
this manual.
tnemtsujda
girt
reg
lortnoclanoitcerid
yrettab
STEELE® for dependability, ease of operation, and
11
bllird
ydo
pirg
egarotstib
esaeleryrettab
Page 7
19.2V Cordless Drill
Owner’s Manual
14
Drill (cont’d)
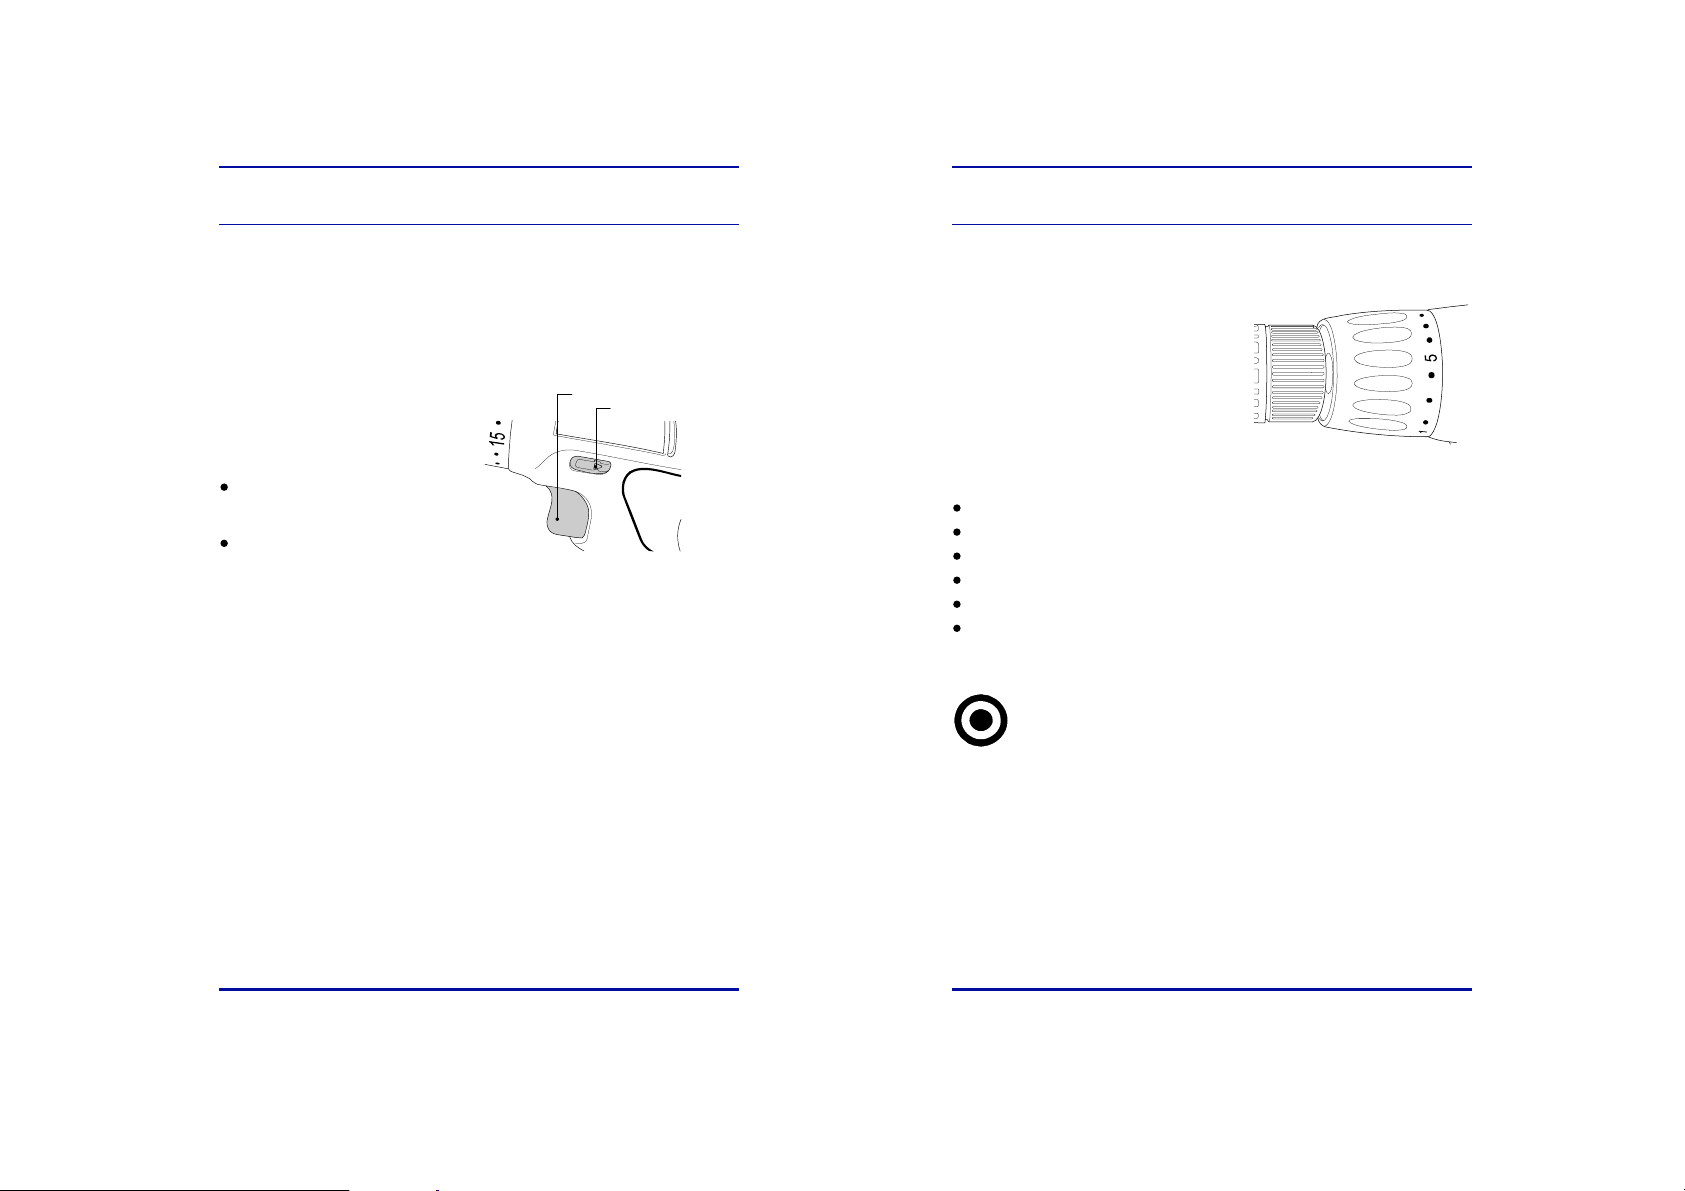
Torque adjustments
This feature allows you to set the torque
(tightening power) of your drill/driver
depending on your specific application and
amount of driving power required. Driving
large-diameter screws requires greater torque
power to properly seat the screw.
The chuck stops rotating when the selected
torque is reached.
There are 24 torque settings:
1-4:
For driving small screws.
4-8:
For driving screws into soft materials or plastics
9-12:
For driving screws into soft woods.
13-16:
For driving screws into medium/hard woods.
16-20:
For driving screws into hard woods.
21-24
: For powerful screw driving or drilling metal or using spade (hole) bits.
Note: Always start on the lowest setting. The drill symbol gives the
highest torque setting and is used when drilling larger holes and/or for
driving larger screws.
Drill (cont’d)
Variable speed control
Apply light pressure to the trigger to start the drill at a slow speed. Increasing
pressure on the switch increases the speed of the drill.
Forward and
reverse switch
Control the drill’s direction using the
slide switch located above the trigger.
Reverse:
rotation, push the button all the way
in on the left side.
Forward:
rotation, push the button all the way
in on the right side.
Place the directional control switch in the middle (neutral) position to prevent
accidental starting while carrying the drill. Never carry the drill with your finger on
the trigger.
To reverse the drill
To return to forward
trigger
directional control
13
Page 8

19.2V Cordless Drill
Owner’s Manual
16
Limited Warranty
STEELE®
warrants to the original purchaser who uses the product in a
consumer application (personal, residential or household usage) that all products
covered under this warranty are free from defects in material and workmanship for
two years from the date of purchase. All products covered by this limited warranty
which are used in commercial applications (i.e. income producing) are warranted to
be free of defects in material and workmanship for 90 days from the date of original
purchase. Products covered under this warranty include air compressors, air tools,
service parts, pressure washers, and generators.
STEELE®
will repair or replace, at All-Power America’s sole option,
products or components which have failed within the warranty period. Service will
be scheduled according to the normal work flow and business hours at the service
center location, and the availability of replacement parts. All decisions of
STEELE®
with regard to this limited warranty shall be final.
This warranty gives you specific legal rights, and you may also have other rights
whichvaryfromstatetostate.
RESPONSIBILITY OF ORIGINAL PURCHASER (initial User):
To process a warranty claim on this product, DO NOT return item to the
retailer. The product must be evaluated by an Authorized Warranty Service
Center. For the location of the nearest Authorized Warranty Service Center
contact the retailer or place of purchase.
Retain original cash register sales receipt as proof of purchase for warranty
work.
Use reasonable care in the operation and maintenance of the product as
described in the Owners Manual(s).
Deliver or ship the product to the nearest Authorized Warranty Service Center.
Freight costs, if any, must be paid by the purchaser.
Air compressors with 60 and 80 gallon tanks will be inspected at the site of
installation. Contact the nearest Authorized Warranty Service Center that
provides on-site service calls for service call arrangements.
If the purchaser does not receive satisfactory results from the Authorized
Warranty Service Center, the purchaser should contact
STEELE®.
Maintenance
Clean the tool with a rag dampened with clean water. Do not use chemicals or
soap. Do not allow water to get inside the tool.
Make sure the vent passages remain clear of dust and debris to avoid
overheating the tool.
Store the tool in a clean dry place.
All repairs must be performed by a qualified electrician.
Opening the tool voids the warranty.
15
Page 9

19.2V Cordless Drill
Limited Warranty (cont’d)
THIS WARRANTY DOES NOT COVER:
Merchandise sold as reconditioned, used as rental equipment, or floor or
display models.
Merchandise that has become damaged or inoperative because of ordinary
wear, misuse, cold, heat, rain, excessive humidity, freeze damage, use of
improper chemicals, negligence, accident, failure to operate the product in
accordance with the instructions provided in the Owners Manual(s) supplied
with the product, improper maintenance, the use of accessories or attachments
not recommended by
Repair and transportation costs of merchandise determined not to be defective.
Costs associated with assembly, required oil, adjustments or other installation
and start-up costs.
Expendable parts or accessories supplied with the product which are expected
to become inoperative or unusable after a reasonable period of use.
Merchandise sold by
identified as the product of another company, such as gasoline engines. The
product manufacturer’s warranty, if any, will apply.
ANY INCIDENTAL, INDIRECT OR CONSEQUENTIAL LOSS, DAMAGE,
OR EXPENSE THAT MAY RESULT FROM ANY DEFECTS, FAILURE OR
MALFUNCTION OF THE PRODUCT IS NOT COVERED BY THIS
WARRANTY. Some states do not allow the exclusion, so it may not apply to
you.
IMPLIED WARRANTIES, INCLUDING THOSE OF MERCHANTABILITY
OR FITNESS FOR A PARTICULAR PURPOSE, ARE LIMITED TO ONE
YEAR FROM THE DATE OF ORIGINAL PURCHASE. Some states do not
allow limitations on how long an implied warranty lasts, so the above
limitations may not apply to you.
STEELE®,
STEELE®
or unauthorized repair or alterations.
which has been manufactured by and
17
 Loading...