Ports: Standard parallel & A serial interface (optional)
Print Modes: Draft and Near Letter Quality (NLQ)
Print Pitches: Proportional and Pica: 136 characters per line Elite: 163 characters per line Condensed Pica: 233 characters per line
Feeds: Sprocket-feed, Single Sheet (Manual) Feed
Print Head: 9- Pin Head
Dimension: approx. First 2 values in inches other than 5.5 which is kept constant: 11 inches by 15.5 inches
Weight: 8.5 pounds approx.
Operating Environment: Relative temperature range of 40% − 80%. Humidity between 10° C – 40° C (50° F and 104° F)
Power Consumption: 120V, 6OHz AC
Ribbon Cartridge: Auto load threading ribbon cartridge.
Self-test Function: Printer self diagnostic test built inside
Enhanced Features: Making Block Graphics Character Set, Defining Print Commands, Using International Character Sets
Frequently Asked Questions
Q: What kind of interface does those NX-15 printers has?
A: That is because it involves a Nx-15 printer interface that consists of a serial comparate and a parallel interface specification that is standardised.
Q: Is it possible to utilise the NX15 printer which will be able to support both draft as well as near letter quality printing at the same time?
A: Completely, this model offers Draft and NLQ (Near Letter Quality) printer modes.
Q: How do I go about the installation process for the ribbon cartridge for NX-15?
A: The ribbon cartridge can be installed after turning off the printer, removing the cover and moving the print head towards the center. After moving the print head to the center, it is required to press the cartridge down so that the holder springs lock the cartridge in place.
Q: Which papers types do you think would be compatible with NX-15 printer?
A: The NX-15 printer can work with various types of paper. Some of the common types are sprocket-feed papers, single sheets, envelopes and multipart business forms.
Q: Is international character sets applicable to the NX-15 printer?
A: The NX-15 does offer international character sets to be used for printing purposes.
Q: Can you list the steps on how i can conduct a self test on the NX-15 printer?
A: To self test the printer it is essential to keep the printer on while holding down the paper feed button to test NT-15. If you wish to conduct a long self test then hold the On Line button till its a short test.
User Manual
Page 1
USERS MANUAL
Page 2
FederalCommunicationsCommission
RadioFr uencyInterference
This equipment generates and uses radio frequency energy and if not installed and used
properly,that is, in strict accordance with the manufacturer’s instructions, maycause interference to radio and television reception. It has been type tested and foundto comply
with the limits for a Class B computing device in accordance with the specifications in
Subpart J ofPart 15of FCCRules, which are designed to provide reasonable protection
against such interference in a residential installation. However, there is no guarantee
that interference willnot occur in a particular installation. If this equipment does cause
interference to radio or television reception, which can be determined by turning the
equipment offand on, the user is encouraged to try to correct the interference byone or
more of the followingmeasures:
. Reorient the receiving antenna
. Relocate the computer with respect to the receiver
. Move the computer away from the receiver
●Plug the computer into a different outlet so that computer and receiver are on dif-
ferent branch circuits.
If necessary the user should consult the dealer or an experienced radio/televisiontechnician for additional suggestions. The user may find the followingbooklet, prepared by
the Federal CommunicationsCommissionhelpful: “Howto Identify and Resolve RadioTV Interference Problems.” This booklet is available from the U.S. Government
Printing Office, Washington, D.C., 20402, Stock No. 004-000-00345-4.
For com~liance with Federal Noise Interference Standard, this equipment requires a
shielded cable.
Thisstitement will be appliedonlyfbr tb printers mrtited in L%S.A.
Radio interferences regarding this equipment has been eliminated according to Vfg
1046/1984announced by the DBP.
DBP has been informed about the introduction of this special equipment and has been
conceded the right to examine the whole series.
It isupon the responsibilityof the user to assume that his ownassembled system is in accordance with the technical regulations under Vfg 1046/1984.
To observe FTZ-regulations it is necessary, to establish all connections to the printer
with shielded cable.
The equipment may only be opened by qualified service representatives.
Thisshtement will bea#lied onlyfor the~n”ntersmarketedin West@many.
%tatement
Self Declaration
TrademarkAcknowledgement
NX-15: Star Micronics Co., Ltd.
Apple II:Apple Computer Inc.
EasyWriterII:Information Unlimited Software, Inc.
FX-85: Seiko Epson Corp.
IBM PC, IBM GraphicsPrinter:International Business
Lotus1-2-3: Lotus Development Corp.
MicrosoftBASIC:Microsoft Cornoration
WordStar:MicroPro International Corporation
NOTICE
.All rights reserved. Reproduction of any part of this manual in any form what-
soever, without STAR’Sexpress permission is forbidden.
. The contents of this manual are subject to change without notice.
QAllefforts have been made to ensure the accuracy of the contents ofthis manual at
the time of going to press. However, should any errQrs be detected, STAR would
be greatly appreciate being informed of them.
●The above notwithstiding, STAR can assume no responsibility for any errors in
this manual.
@COPWi~ht1986 Star
Micronics CO., Ltd.
Machines
Corp.
Page 3
Table
of Contents
Chapter1
Chapter2
Setting
Locating
Check the carton contents
Removing the printer cover
Removing the packing tube
Installing the ribbon cartridge
Installing the interface board
Gettingto KnowYour Printer
Controls and parts of the printer
Parts of the printer
Controls and indicators
Extra functions
Other controls
Selecting and loading paper
Loading single sheets
Loading sprocket-feed paper
Adjusting the print head
Testing the printer
Connecting the printer
UpYour Printer
the printer
1
7
Page 4
—
Chapter3
Usingthe PrinterwithCommercial 21
Software
Using commercial software
Word processing with the printer
General concepts
The escape code
The master reset code
Using Near Letter Quality (NLQ)
Getting the most from your print choices
Using the printer with EasyWriter II
Redefining pitch settings and print control
codes
A sample printout with EasyWriter II
Redefining your own print pitches
Redefining your own print control keys
Using the printer with WordStar
User-defind print commands
Using the printer with Lotus 1-2-3
Using the panel modes
Advanced panel functions
Setting print start position
Setting the top of form
Setting the left and right margins
Chapter4
PrintingwithBASIC
Some basics of BASIC
First steps
ASCII codes and the CHR$ function
Control codes
The escape codes
A note on command syntax
Selecting the right software mode
Some special kinds of text
Near Letter Quality characters
Italic printing
Underlining
Superscripts and subscripts
Changing the print pitch
Expanded print
Condensed print
Proportional printing
Making words stand out
Mixing print modes
37
Page 5
Chapter5
FormattingText
Lines and line spacing
Starting a new line
Reverse line feeds
Changing the line spacing
Moving down the page without a carriage
return
Page control
Form feed
Reverse form feed
Changing the page length
Top and bottom margins
Setting left and right margins
Horizontal and vertical tabs
Resetting the printer
Taking the printer off line
Printing the bottom of the sheet
Backspace, delete, and cancel text
Printing zeroes
Immediate-print
Adjusting the width of space between
characters
Uni-directional printing
The seven bit dilemma
Block graphics characters and special
symbols
International character sets
Printing characters in the control code area
Printing BIG characters
The optional sheet feeder
The macro control code
Reading a hex dump
Page 6
I
Chapter7
Chapter8
AppendixA
AppendixB
AppendixC
DownloadCharactersand Dot
Graphics
Dot matrix printing
Designing your own characters
Defining proportional characters
Designing your own NLQ characters
User-designed Dot Graphics
Higher resolution graphics
More graphics programming tips
Redefining alternate graphics codes
9-pin graphics mode
Caringfor Your Printer
Cleaning the printer
Replacing the ribbon
Replacing the print head
DIP SwitchSettings
Switch functions
ASCII Codesand Conversion
Chart
FunctionCodes
Commands to control print style
Font style controls
Font pitch controls
Special print modes
Controlling the vertical print position
Line feed and reverse line feed
Form feed and related commands
Top/bottom margins and vertical tabs
Controlling the horizontal print position
Download character commands
Dot graphics commands
Macro instruction commands
Other commands
97
115
121
125
133
AppendixD
AppendixE
AppendixF
CommandSummaryin Numeric
Order
TechnicalSpecifications183
The ParallelInterface
Functions of the Connector Signals
179
187
—
—
Page 7
AppendixGSerialInterfaceSpecifications
Configuring the serial interface
The serial protocols
Serial busy protocols
XON/XOFF protocol
ACK protocol
Index
191
196
Page 8
Page 9
CHAPTER 1
SETTING UP YOUR
PRINTER
Subjectscoveredin Chapter1 include–
● Choosinga suitableplacefor yourprinter
● Unpacking
. Settingup
LOCATING THE PRINTER
Give some thought to the best place to put the printer. Both
the printer and computer should be used in normal office surroundings. For best performance, we recommend:
●
Use the printer on a flat surface.
●
Keep it out of direct sunlight and away from heatproducing appliances.
●
Use it only in temperatures where you are comfortable.
●
Avoid locations with dust, grease, or high humidity.
●
Supply it “clean”
same circuit used by large, noise-producing appliances
(such as refrigerators).
●
Make sure the line voltage is within 10?ZOof the voltage
specified on the identification plate.
electricity. Don’t connect it to the
CHECK THE CARTON CONTENTS
Open the carton and check each item in the box against
Figure 1-1to make sure that you have everything (there should
be four items).
Page 10
-–—
1
Figure 1-1.
2)paper
Checkto makesureyouhaveallfouritems:1)printer,
guide, 3) ribbon cartridge,and 4)User’s manual.
You should also have a parallel interface board to connect
your computer to the printer. Also available are a parallel interface board with extra buffer memory and a serial interface
board, both optional. (More on interfaces later.)
■ Removing the printer cover
The printer’s cover is important for two reasons – it keeps
dust and dirt away from the printer’s delicate mechanism, and it
absorbs nearly all of the printer’s operating sounds. Don’t take
off the cover unless you have to change the ribbon or make an
adjustment.
To remove the cover, lift up the back of the cover to
disengage the three tabs at the front, then lift it off the rest of
the way. To replace the cover, slide the tabs in at the front and
lower it into place. Figure 1-2 shows the proper position and
movement for both removing and replacing the cover.
Page 11
I
—
3
r
I
Figure 1-2.
■ Removing the packing tube
The printer is shipped with a protective spiral tube to keep
the print head from being damaged during shipping. This tube
must be removed before use. First, take off the printer cover.
The protective tube is split along its bottom side to allow easy
removal. Grasp one end of the spiral tube and firmly pull it upward and away from the carriage rail.
Remo;e the printer coverby liftingcarefully.
-1
—~
I
~igure 1-3.
Removethe protectivetube fromthe carriagerail.
Page 12
4
slips down into its proper place between the print head
■ Installing the ribbon cartridge
This printer uses a neat, easy-to-change ribbon cartridge with
automatic threading. To fit or change the ribbon cartridge:
1.Turn o~~the power and remove the printer cover.
2.Slide the print head gently to the center of the printer.
Warning:The print head gets hot during operation,
so let it cool off before you touch it.
3.Set the release lever to either single sheet (~) or
sprocket-feed paper (h).
4.With the ribbon facing away from you, use the guide
holders as a fulcrum, and lightly press the cartridge
down until the two holder springs snap shut to hold the
cartridge firmly in place. See Figure-1-4.
I
Figure 1-4.Press the cartridgeintoplaceuntilthe holdingsprings
.—...—
snapintoplace.
,5.Check that the cartridge fits so that the drive pins
engage the cartridge teeth, by turning the ribbon advance knob. Advance the ribbon to take up any slack.
6.Gently slide the print head carriage manually all the
way to your right or left until the ribbon automatically
Page 13
~—-..-.–.
print
head
!3
]
,
guide
ibbon
1
L———....—.
Figure 1-5.To thread the ribbon, slide the print head carriage
manually to the right or left, and the ribbon will slip down by itself into
its proper position.
7.Replace the printer cover. (A switch on the printer
prevents the printer from operating when the cover is
off.)
9 Installing the interface board
A parallel interface board comes standard with your printer.
In addition, there are two optional interface (1/F)boards: a serial
interface board that lets you connect to a serial (RS-232C)computer port; and the other board contains extra buffer memory
for parallel output. All three boards are installed the same way.
To install or change an I/F board, turn off the power and turn
the printer around. Notice the snap-on cover at the left end.
Take it off by sliding it upwards.
Fit the I/F board into the side slots and slide it all the way
down (don’t force it). Make sure that the board connector is
seated snugly in its socket. Put the cover back on and connect
the cable from your computer – you’re ready to go.
J
Page 14
6
I
terface board
~
~igure 1-6.
Slidethe I/F board into the slot.
Page 15
CHAPTER 2
GETTING TO KNOW
YOUR PRINTER
Subjectscoveredin Chapter2 include–
● Partsof theprinter—whatthey’reforandhow
to use them
. Paperselectionandloading
. Adjustment
● Testingprinteroperation
CONTROLS AND PARTS OF THE PRINTER
H Parts of the printer
PRINTERCOVER – This protects the ribbon and the print
head from dust and dirt, and cuts down the sound of the printer.
‘PAPER GUIDE – This flat plastic molding guide has two
functions, depending on what kind of paper you are using. If you
are using single sheets, the guide is propped up on top of the
printer, and serves as a guide. If you are using sprocket-feed
paper, the guide is reversed and laid flat on top of the printer,
and serves as a paper separator.
POWERCORD– This cord connects the printer to its power
source, usually a wall outlet. It’s located at the left rear of the
printer.
PRINT HEAD – This is the device that does the actual printing. Like the strike lever in a typewriter, tiny pins in the print
head hit the paper through a ribbon.
TRACTORFEED UNIT – The drive gear and sprockets of
the tractor feed unit move sprocket-feed paper through the
printer.
PLATEN– This is the rubber cylinder that carries paper to
the print head.
Page 16
8
1
I
!
I
Power switch
_.J
Figu;e2-1.
Front and rear viewsof the printer.
INTERFACE COVER – On the back of the printer, this
cover conceals and protects the interface board. The cover is
cut away to expose the external connector to which you attach
your computer cable.
Page 17
1-
——
9 Controls and indicators
Now let’s go over the controls and indicators of the printer,
starting with the control panel on the right. There are nine indicators and five keys on the control panel.
,,------
I
L... .—.–-.. ......---- ....----..4
Figure 2-2.The control panel.
POWERINDICATOR– Glowsgreen when the power is on.
PE INDICATOR– Stands for “Paper Empty”, and glows red
when the printer runs out of paper and when certain printer
malfunctions occur.
MODE INDICATORS–Either DRAFT or NLQ glows
green to indicate the mode (set by the Mode key or the DIP
switch).
MODE KEY – Changes the print mode every time it is pressed when the On Line indicator is off.
PITCH INDICATORS— Shows the character pitch currently set: Proportional (PROP), Pica (136 characters/line), Elite
(163 characters/line), or Pica condensed (233 characters/line).
PRINTPITCHKEY – Selects one of the four available
character pitches when the On Line indicator is off.
TOF KEY – Ejects the current sheet, feeds a new sheet, and
moves the print head to the left margin when the On Line indicator is off.
PAPERFEED KEY – .Advances the paper one line at a time
when the On Line indicator is off. If you hold the key down, you
get consecutive line feeds.
ON LINE KEY and INDICATOR– Glows green when the
printer is ready to receive data from your computer (on line).
When the printer is offline, it sends a signal to the computer indicating that it cannot accept data. Pressing the On Line key
switches the printer between on line and off line. When you turn
the power switch on, the printer is placed on line automatically.
9
!
I
Page 18
I
10
■ Extra functions
Thereare eleven more functions that are not directly
specified on the control panel. You can access six of them by
pressing one particular key when you turn on the power; five
others are activated by pressing two control keys at once.
For details, please refer to the end of next chapter.
■ Other controls
There are other controls, not connected to the control panel.
Some of the more important ones are:
POWER SWITCH – The switch that turns the printer on
and off is at the back, on the left side.
PLATENKNOB– This knob is at the middle of the right
side and lets you turn the platen by hand, like a typewriter.
Caution:Turn the platen knob only with the Power switch oJJ.
Turning the knob with the power on could damage the
drive gears.
RELEASELEVER–The release lever is on top of the
printer, near the left rear corner. It controls how strongly the
paper is held against the platen. The release lever has four positions: the top setting is used for inserting paper, the next is for
single sheets, the third is for sprocket-feed paper, and the
bottom one is used when adjusting the paper.
PAPERBAIL – The bail is the movable bar that holds the
paper against the platen. Its position depends on the setting of
the release lever.
DIP SWITCHES– There are one set of ten switches and one
set of six switches that are used in interfacing the printer to
your particular computer. There are also switches to set page
length, line spacing, and perforation skipping. See Appendix A
for a complete list and explanation.
SELECTINGAND LOADING PAPER
. .
Your printer handles two basic types of paper – single sheets
(stationery, envelopes, multipart business forms, etc.) and con-
tinuous paper (fan-fold perforated paper).
The release lever controls the pressure of the paper against
the platen. It has four settings:
~–The top setting is used when you want to load paper in
the printer.
Page 19
11
h – The second setting is for normal single sheets.
& – The third is for sprocket-feed paper.
# – The bottom one is used when you want to release the
paper completely to adjust it.
The paper bail holds the paper against the platen according to
‘the setting of the release lever. The bail is opened when the
release lever is in the top position, closed when the lever is in
the second or third positions, and opened by the printer when
the lever is in the bottom position.
~-———.
I
~
Figure 2-3.Use frictionfeed for singlesheetsand tractor feed for
—.
Release lever
\
Paper bail
‘--”’1
...2
continuouspaper.
■ Loading single sheets
Instead of feeding the paper in
manudyby turning the platen
knob, you can use the release lever for automatic feeding (the
printer must be turned on). Single sheets from 6 to 14.5 inches
wide can be used and the paper guide must be fitted:
I
I
1.Flip theclamp leversbackwardhnd move the
sprockets and sheet guides on the tractor feed unit all
the way to the ends.
2.With the ribs of the paper guide toward you and the
sliding adjuster at the bottom left, insert the guide into
the slot at the back of the printer cover.
Page 20
1 ,>
Slidingadjuster
Figure 2-4.Raise the paper guidefor load~ngsin~lesheets.
Insert the guide stand in the notches provided for it
3.
Paper guide
Sheet guide
and prop up the paper guide.
Position the adjuster at the triangle marked on the
4.
guide for standard margins, or set it according to your
own requirements.
Set the release lever for single sheets – the second
5.
position from the top.
‘1
J
1
L
Figure 2-5.
the notches providedfor it.
Prop up the paper guide by insertingthe guide stand in
Page 21
~----
!
~
Align a sheet of paper on the guide along the adjuster.
6.
Turn on the power switch. (The Paper Empty in-
7.
dicator will glow because there is no paper.)
Now set the release lever to the auto-feed setting – the
8.
top position. The printerwill advance the paper
automatically.
When the paper stops, set the release lever for single
To align paperthatis not in straight–“ Set the release lever to the adjustment setting.
● Straighten the paper and adjust it for the margins you
want.
.Move the release lever back to its original setting.
Remember, you can also use the optional automatic sheet
feeder for single sheets.
■ Loading sprocket-feed paper
This is standard computer paper, with the holes along the
sides and perforations between the sheets, It is also called
sprocket, punched, fan-fold, or just plain “computer paper.” It
can be as narrow as 4 inches, and up to 15.5 inches wide.
Page 22
14
1.Turn on the printer and set the release lever for
sprocket-feed paper.
2.If the paper guide is installed, remove it, and put it
aside for a moment.
3.Place a stack of fan-fold paper behind the printer.
4.Open the sprocket covers, on the right and left
sprocket units, as shown in Figure 2-7.
r-
1
—
L.
Figure 2-7.
Flip the clamp levers backward. This allows the two
5.
sprocket units to move freely right and left so you can
align them with the holes in the paper.
Feed the end of the paper into the slot next to the
6.
platen cover plate.
Fit the holes in the paper over the sprocket pins so the
7.
paper is even, and clamp the sprocket units in place.
Check that the paper is still positioned correctly, and
8.
close the sprocket covers (Figure 2-8).
Set the release lever to the auto-feed setting. The
9.
printer will advance the paper automatically.
When the paper stops, set the release lever for
10.
sprocket-feed paper again.
Install the paper guide on the printer. See Figure 2-9
11.
for details. When used with sprocket-feed paper, the
guide is turned around and laid flat on top of the
printer as a paper separator. Make sure that the tabs
on the guide fit into their receivers.
The distance between the print head and the platen must be
adjusted to accommodate papers of different thicknesses. To
make this adjustment, move the adjustment lever, which is
under the printer cover and immediately in front of the release
Release lever
\
Adjustment lever
\4
F
0
&
-“—
$
-—
Figure 2-10.
of paper.
—..
The adjustmentlever allows for differentthicknesses
.
Figure 2-11.
The self-testsshow you what the printercan print.
Page 25
17
lever (Figure 2-10). Pulling the adjustment lever towards you
wicle~ tkiegap; pushingit awayfromyou will narrowthe
will.
,--.--,
,%a.$l.
‘~~ereare four positions;you can feel the leverclickinginto
the variousnotches.The first step (shown)is the one most com-
mordy used for single sheets of paper.
Try different positions until you get the best printing results.
TESTING THE PRINTER
your prln~er has two built-in
programs that l?rintout SaMPle
lines of letters, numbers, and other characters – to show you
that everything’s in good working order. Self-test 1 is the long
version, and self-test 2 is the short one. You can use either one
to show the characters available in the printer, to check the installation of the ribbon and paper, and to check the adjustment
of the head-to-platen gap.
.,,~’::,.-,.– ., ?-m,... , :
,
Page 26
18
You can print the self-test without hooking up the printer to
your computer. Simply:
1.Plug in the printer (don’t turn it on yet).
2.Insert a sheet of paper (or sprocket paper, either one).
‘3.While holding down one of the following keys, turn on
the power switch:
Paper Feed key – Self-test 1 (long)
On Line key – Self-test 2 (short)
When you want to terminate the long self-test function, turn
off the power switch.
CONNECTING THE PRINTER
Now that you’veassembled and tested your printer, allthat re-
mains is to connect it to your computer as follows:
~--””‘---”—--”-””-
L...__..
Figure 2-12.Connectthe cablelikethis.
—1
Page 27
1.Make sure that both your computer and printer are
turned off.
2.Connect the printer end of the interface cable to the
connector socket at the right rear of the printer as
shown in Figure 2-12.
3.Connect the other end of the cable to your computer as
described in the computer manual.
19
Page 28
I
20
MEMO
—
Page 29
CHAPTER 3
USING THEPRINTER
WITHCOMMERCIAL
SOFTWARE
Subjectscoveredin Chapter3 include–
● Usingcommercialsoftware
● Controllingthe printerwiththe Panelmode
USING COMMERCIAL SOFTWARE
Many of you purchased this printer to use with commercial
software. You made a good choice because this printer is compatible with most commercial programs, from word processing
programs to spreadsheet programs to accounting programs.
Many of these programs have a routine for describing your
printer. These routines are often in “installation programs”.
They typically give you”a choice of printers or printer types to
pick from. Some typical descriptions that you might pick for
this printer are:
matrix printer”, “Centronics-type printer”, “Dot matrix
printer” or “Epson FX series”. This printer should work fine
with any of these descriptions.
Some printer lists are ,not very clear, and may not include
anything that you think describes this printer. If you can’t
decide which description best fits this printer, we recommend
that you narrow the list to two or three choices (you can quickly
eliminate all the daisy-wheel printer types) and then experiment. You won’t hurt anything if you guess wrong; it just won’t
work correctly. This should quickly tell you if your guess is
right. If all else fails, though, your printer dealer will be happy
to give you some advice.
Some programs don’t ask you what kind of printer you have,
but instead ask some questions about what your printer can do.
The answers to the “most asked” questions are: Yes – this
printer
ware form feed”.
can do a “backspace”, and this printer can do a “hard-
“TTY type printer with backspace”, “IBM-dot
ASCII
Page 30
22
With these questions answered, you are ready to start print-
ing. Read the manual that came with your commercial software
and the next Chapter to see how to make it send information for
this printer to print. This is all you need to know to use this
printer as a regular printer. But this printer isn’t just a regular
printer. This printer has many capabilities that your commercial
software isn’t aware of. We willsee what it takes to use some of
the printer’s advanced features with commercial software in the
next section.
WORD PROCESSINGWITH THE PRINTER
Not many word processing programs directly support all of
the advanced features of printers. They usually provide a
method for using a few of the more common print features such
as boldface and underlining. But as you are probably beginning
to see from this manual, this printer can do much more than
that.
As a result, most word processing programs provide a way of
sending special codes to a printer. The actual codes used (as
well as the method of entering them) will vary different software. The theory behind these methods, however, is basically
the same.
This section discusses two word processing programs and one
spreadsheet program most used by printer owners. The programs also pro~-ide a variety of ways to enter the codes
necessary to use the advanced features of this printer. These
concepts can be applied to many other programs besides those
detailed here. The programs are:
EasyWriter II
WordStar
Lotus 1-2-3
If your software program is not included in this Chapter, you
should still study the different techniques used. Then, with the
help of your program manual and the supporting chapters in this
manual, you should be able to figure out how yours works.
GENERALCONCEPTS
Each word processing program has a way to get out of the
Page 31
standard text entry mode in order to accept the special printer
function codes. WordStar uses the CONTROL key in different
ways to define the print function codes.
EasyWriterII has a system function which allows you to
define print pitches and special print functions for use with the
ALT key.
Your word processing User Manual (if it supports this pro-
cess)will have a section describing how to get out of the standard program. You will probably have to figure out on your own
which codes are used. The general concepts and details of the
two sample programs should be enough to help you be successful.
■ The escape code
Most of the special print functions start with a code called the
escape code. It can be entered in decimal or hexadecimal values,
by an ASCII character, or by using the control keys on your
keyboard, depending on which program and which computer
you are using.
The escape code telis the printer to interpret the values (or
characters) following it as printer functions. The codes used to
describe the functions are also entered in the same way as the
escape code. In this section, we will show ycmthe format each
word processor uses as well as the general rules to correctly
‘entering the function codes.
The next chapter covers how to convert the different forms of
ASCII codes. You should review Chapter 4, if you have not
already done so, before working with the function codes.
23
■ The master reset code
There is one function code which turns off all the print func-
tions currently being used by the printer. It is called the master
reset code and resets the printer to its DIP switch settings.
These print characteristics are the same as the ones used by the
printer when it is first turned on.
The code sequence for master reset is (ESC) “@”. By check-
ing the ASCII equivalents in Appendix C, you can see that the
decimal expression is 2764. You’ll see these numbers several
times in this section.
Technically speaking, initializing the printer clears the print
buffer, and the form length, character pitch, character set, line
feed pitch and international character set are all reset to the
Page 32
24
values defined by their respective DIP switch settings.
We suggest you get in the habit of using the master reset code
in any document where you use function codes. If you do not,
the printer will keep the most recently defined characteristics,
and print any following documents the same way.
YOUcould turn your printer off each time (which also resets
the default settings) but that
cuits. Also, you’ll save time
automatically reset with this
tion on DIP switch settings
would be hard on the printer cir-
and paper by letting the printer
code. (If you need more informafor your printer, please refer to
Appendix A.)
■ Using Near Letter Quality (NLQ)
With near letter quality, the printer prints more dots for each
character than with the draft printing. This process results in a
higher quality look to your text. Draft quality characters print
much faster, so use them for your first drafts and use near letter
quality for a professional looking finished manuscript.
The escape code sequence to turn the NLQ set on is (ESC)
“x” 1and the code sequence to select draft quality is (lZ.SC)“x”
0. The decimal equivalents are 271201 and 271200, respectively.
■ Getting the most from your print choices
Aftek working with the printer for a while, you may find that
you want to add or change some of the print functions we hznw
described in this chapter.
We suggest you do three things. First, you should review
Chapter 4 and Appendix C to become as familiar as possible
with ASCII codes and the function codes.
Second, read Chapter 4 which describes them in greater detail
and shows examples of how they are used in BASIC programming. The functions will, for the most part, act the same in your
word processing program. Understanding what’s available and
how they perform will help you use them correctly in your
documents.
And third, follow the procedures in this chapter and your program User’s Manual.
You may want to experiment with expanded text in combination with other print types. You can create some great-looking
results with these functions. If you are unsure of any functions,
review them first, then try some of your own samples.
Page 33
25
USING THE PRINTERWITH EASYWRITER II
(Note: If you have not read the “General Concepts” section in
this chapter, you should do so before continuing.)
This printer can be used with most of the standard print functions available with your EasyWriterII word processing program. These functions require no special adjustments to the
printer or your program. They include:
1. Printing from the Print List Form screen.
2. Setting margins, tabs and lines per inch in the ruler line of
your document. (The pitch settings, however, should be
adjusted to obtain maximum use. They will be discussed
later in this chapter.)
3. Print settings in the System Parameter function which
are either default or new settings edited by you.
You can also redefine the print functions of EasyWriter II to
take advantage of many of the printing capabilities of your
printer. You may already be familiar with reconfiguring the
printer driver from Appendix B of your EasyWriter II IJser’s
Manual. If not, don’t be nervous; it’s not as hard as it sounds.
We will show you how to make changes in your program
specifically to help you print with this printer.
changingthe pitch settings, you can use the document
By
ruler line to print pica, elite and condensed width pitches. In ad-
dition, you can use a similar method to print in near letter quali-
ty.
The print control codes can be redefined to enhance the final
product of your document. The boldface, underline, superscript
and subscript functions require only a slight “recoding” of infor-
mation in the printer driver. And we have some suggestions for
changing the characteristics of the other print control codes to
use italic, expanded, emphasized and italic-underline print.
With these options, you will have even more flexibility printing
with this printer.
■ Redefining pitch settings and print control codes
In order to change the settings used in the document ruler line
and the print control codes, it is necessary to edit ASCII code
decimal values in the System Functions portion of your
EasyWriter II program. (For more details about ASCII codes,
please refer to Chapter 4.)
Your printeris considereda TypeB printerby the
Page 34
EasyWriterII program. Before making any changes in the
printer driver, you should first check to be sure the printer selection is set for printer Type B (Option 7 on the System Functions
menu.)
Thenfollow theinstructionsin AppendixB of your
EasyWriter II User’s Manual to reconfigure Type B printers.
To become more familiar with the reconfiguration process and
its terms and to make the instructions in this section easier to
understand, we suggest you read through Appendix B first.
In these few paragraphs, we’ll show you the ASCII decimal
values we feel provide good flexibility in printing with this
printer. You should follow the instructions hands-on with your
own EasyWriter II program.
The changes you willmake are for pitch settings and print control codes (also called font support). However, all the screens involved will be explained as you see them displayed.
From the System Functions Menu, choose Option 9 (Reconfigure Printer Type B) and the printer name will be displayed.
Type over the present printer name as follows:
1.PrinterName [ Dotflatrix~rinter]
Press RETURN and the Edit Global Sequences screen willbe
displayed. These codes control the print functions for form
feed, line feed, margin settings and automatic justification. We
do not recommend that you edit any of these codes.
Press RETURN and the Edit Pitch Table screen will be
displayed. On this screen, you will enter the ASCII decimal
values to define the print pitches. The first two fields in each
line define the pitch range (which in this case are both the same
number). They should be assigned as follows:
On this screen, the column labeled “Sequence” is used to
define the print functions in their ASCII decimal values. For
these print pitches, we will use a combination of codes to turn
near letter quality on and off and to choose the function code for
each pitch. (For more details on function codes, please refer to
Appendix C.)
Follow the sample and enter the (italic)codes for lines 17-22.
Page 35
17.
18.
19.
20.
21.
22.
23.
24.
25.
26.
[10 ] [10]
[12 ] [12 ]
(17 ] [17 ]
[1 ] [1 ]
[2 ]
[3 ] [3 ]
[120][120]
[120][120]
[120][120]
[10 ]
[120] [120]
[ 182780
[ 182777
[ 15
[ 27 1201
[ 27 1200
[ 2764
[
[
[
Thecodes 120inlines 23through 26canbe changedtoreflect
more pitch settings. We recommend that until you are more
familiar with using special function codes, you usejust the six
we have defined.
When you have finished, press RETURN.You will be
transferred to the Edit Line Spacing screen. Do not change
these codes. They define how many lines per inch the printer
uses. Press RETURN to transfer to the Edit Font Support
screen.
Change all of the entry fields to Option 2 (Control Code Support) on the Edit Font Support screen. Also, make changes in
the other fields to look like the figure shown below. Enter the
(italic) codes for lines 41-50.
27
Bold/ShadowFace Support
41.
Single UnderlineSupport
42.
43. Double Underline Support
44. overstrikeSupport
45. Special (Color)Support
Sub/SuperscriptSupport
46.
Wili underlineretain font (Y) or be normal font (N)?
47.
[N]
Star-tdouble underline [
49.
After double underline [
50.
[2]
[2]Using Character [95 ]
[2]Using Character [0 ]
[2]Using Characterfrom
[2]
[2]
System Parameters
1
1
When you have finished, press RETURN and the Edit Font
Sequences screen will be displayed. Here you will define print
control codes for use in your documents. As with the pitch settings, ASCII decimal values are used that correspond to the
Page 36
28
print function assigned to each control key. Table 3-1 shows the
current control function, the print function we will assign to it
and the keyboard keys used.
Table 3-1
EasyWriterII control keys
—
EasyWriter II Function‘
Boldface
Shadow
Underline
Double
Overstrike
Special
Subscript
Superscript
New functionKeys used
BoldfaceALT & B
Italic
UnderlineALT & —
ExpandedALT & =
EmphasizedALT & O
ItalicUnderlineALT & *
Subscript
SuperscriptALT & U
- when you have finished, press RETURN. You’re done! You
will be transferred out of the Reconfigure Type B Printer function and back to the System Functions Menu.
■ A sample printout with EasyWriter II
Let’s look at a short example to demonstrate how pitch set-
tings and print control keys can be used in a document. The ex-
Page 37
1-
29
ample below shows the use of expanded and italic prints used in
combination with condensed and pica pitch settings. Use your
EasyWriter II program hands-on and type the example below.
‘SUBJECT: ORDERING STATIONERY SUPPLIES
I would like to place an order for stationerysupplies
from your mail order catalog.Enclosed is my order form
and a check for $247.67.Please process this order as
soon as possible.Thank you.
With the cursor under the “S” in “SUBJECT”, set the print
pitch in the ruler line to condensed width pitch. Name the ruler
line “condensd” (without the quotes) and change the character
pitch to 17 and the line spacing to 6.To make the subject title expanded, use the ALT and = keys (in the line mode) to highlight
the line.
Now, change the pitch setting in the next line to pica by setting a new ruler line: Ruler Name - pica; Character Pitch – 10.
Use the print control key S (for italic) to highlight the second
sentence in the paragraph. Move the cursor to the “E” in
“Enclosed” and (in the sentence mode) use the ALT and S keys
to highlight the sentence. (You’llhave to press S twice to get the
.67.)
At the end of the document, reinitialize the printer to its
default settings with a new ruler line using the Master Reset
code. Ruler Name — reset; Character Pitch —3.
Print the document. Your printout should look like this:
SUB.! ECT :ORDER I NG STAT 10NERYSUPPL I ES
The subject title will print in expanded condensed characters
which are twice the width as standard condensed characters.
The sentence in the paragraph is printed in italic pica print. The
last ruler line will reinitialize the printer. (See the general concepts section for more details on master reset.) This is just one
Page 38
I
30
example; you should be able to apply most of the function codes
to the setup used here.
■ Redefining your own print pitches
If you want to define a new print pitch (Edit Pitch Table),
enter your function code to choose the print you want.
For example, if you find yourself frequently using italic print
for large blocks of text in pica pitch, you can combine italic and
pica pitch to define italic pica and use it in the ruler line of your
document. The ASCII code sequence would be 27802752to
print italic pica pitch.
■ Redefining your own print control keys
The ASCII codes to redefine the print control keys (Edit Font
Sequences) are pretty straightforward.There are individual
ASCII decimal values to turn on and off different prints. You
want to affect that aspect but not the print pitch itself. Leave
that for your document ruler line. Remember, ali the codes can
be found in Appendix C of this manual.
Also, keep in mind that print control keys can be combined in
your document such as boldface and underline. EasyWriter II
uses three methods of highlighting on the display screen. It
highlight, underlines and shows reverse image characters. You
cannot combine print control functions that use the same
method of highlighting.
For example, in our definitions, underline and expanded
printsare bothdisplayedas underlinedon the screen.
Whichever function you use last will cancel out any previous
modes.
USING THE PRINTERWITH WORDSTAR
(Note: If you have not read the “General Concepts” section in
this chapter, you should do so before continuing.)
This printer supports many of the standard WordStar print-
ing capabilities without requiring any changes. You can:
Print documents from the No-File Menu.
1.
2.
Use dot commands except for lines per inch and
characters per inch.
Printboldface,underline,double-strike,strikeout,
3.
superscript and subscript characters as well as use print
pause.
Page 39
31
4. Select and print variable information for merge letters,
etc.
■ User-defined print commands
ThereareseveralCONTROL-P(-P)commandsthat
‘automatically work with this printer and require no changes.
They include:
‘PS Underscore
‘PD Double-strike
IPT Superscript
‘PB Boldface
‘PX Strikeout
‘PV Subscript
PC Print Pause
It is also possible to define the ‘PA (alternate pitch) command
to change the print pitch of your document. The WordStar
User’s Manual fully describes the use of these ‘P functions.
You should refer to your manual if you need help with them.
There are four alternate ‘P codes that can be defined during
the installation of your WordStar program to perform other
printer functions. They are ‘PQ, ‘PW, ‘PE, and ‘F’R.The prOcess of defining ‘ P commands is called “patching” and is a fairlycomplicated process. Once you have successfully defin~d these
codes, they are inserted in your text exactly like otherP commands. If you wish to use them, refer to the WordStar User’s
Manual for instructions or contact your dealer for assistance.
Perhaps the most useful user-defined “P command is “PE. If
you define this as an escape (ASCII code 27), you can then access nearly all of the advanced features of this printer. Without
this patch; you cannot place an escape in the WordStar document and subsequently, you are limited to using WordStar’s
repertoire of print functions. A shame when you have a powerful printer!
USING THE PRINTERWITH LOTUS 1-2-3
Lotus is one of the intergrated software packages that include
a spreadsheet, a database manager and graphics. We willlook at
how to print Lotus 1-2-3 spreadsheet.
Lotus 1-2-3 uses the /Print command to print spreadsheets.
When you enter
/P, a menu appears that presents you with a
number of choices. Lotus 1-2-3 gives you a lot of flexibility in
printing spreadsheets through this menu, but you haveto define
the range to print. All the other items have default values that
make getting started easy.
Page 40
I
If you do change several of the things listed in the /Print
menu, Lotus 1-2-3 will remember the selections that you have
made and use them each time you print the spreadsheet. They
are even saved with the spreadsheet so that they will be the
same the next time that you use the spreadsheet.
You can specify the range to print in all the normal ways: by
pointing, by typing the cell addresses of the endpoints, by entering a range name, or by using the F3 key to point to a range
name.
After you have specified a range to print, and changing any of
the other options that you wish, start printing the spreadsheet
by selecting the Go option. Lotus 1-2-3will split the spreadsheet
into sections to fit onto pages if it won’t all fit on one page.
Let’s look at some of the other options on the
see how they add to the flexibility of printing spreadsheets.
The Line option advances the paper one line. Use this to put
space between different sections of your spreadsheets when you
print them. The Page option advances the paper to the top of a
new page. Use this option to start on a new page.
Selecting the Align option tells Lotus 1-2-3that you have mov-
ed the paper to the top of a new page. Use this option after using
the Paper Feed key to move the paper or after inserting a new
single sheet of paper.
The Ckar option allows you to clear any or all of the other options that you have selected. The
command and returns you to Ready Mode.
Selecting O@bns from the /Print menu presents you with
some additional page format selections.
You can add Headersor Footers to each page of your output. A
header is a line that prints at the,top of each page, while a footer
is a line that prints at the bottom of each page.
Lotus 1-2-3 has three characters that perform special functions when they are included in a header or a footer. You can include sequential page numbers on each page by including the #
character where you want the page number to print (For example, Page #).
The current date will be printed if you include the @
character in a header or footer. (For example: AS of @.)
You can direct sections of headers and footers to the left,
right, or center by using the [ character. Each header or footer
is divided into three sections; Left, center, and right. The I
character shows the limits ofthese sections. So to print a header
Quitoption ends the /Print
/Print menu, and
Page 41
33
with the date to the left, a title in the center, and a page number
to the right, the header might look like this:
And, on August 12, 1986, the results might look like this:
12-.41J13-86
Spreadsheet.Tit le
Page 1
Another of the selections under options is Setup. This selection allows you to create a setup string that will be sent to the
printer before each section of the spreadsheet is printed. You
can include non-printing codes in the setup string by using a
backslash (\) followed by a three digit number that consists of
the decimal ASCII value for the code that you wish to send (with
leading zeros if required). For example, to print a worksheet in
condensed print, use the setup string \O15. This sends ASCII
15which is the code for condensed printing. The following table
shows how many character columns will fit with different printing width, and the setup string to get each width.
At the end of this chapter, we’ll explain about the “Panel”
mode, which is powerful function of the printer. Some commer-
cialsoftware does not support defining to define your own selections. In this case, use the “Panel” modes.
Page 42
34
Selection of any of the Panel Modes at power-on ensures that
your choices remain in effect until you turn the power off. This
means that the printer will ignore any codes sent by the software that you are using. The Panel Modes allow selection of the
following printing attributes:
—
Key
Mode
Print pitch
TOF
Print quality
panel modePrint pitch
I-._.
Figure 3-1.
I
L=-..-...
I
I p~i~tquaiitya print ~
I pitch panel mode
1
The Panel Modes – hold down keys whileturning
Type of Panel mode
Print quality (draft or NLQ)
Print pitch
Italic printing
‘1
~ Italicpanelmode
I
panel mode
~
poweron.
If you want to set only one attribute, for example, the Print
Pitch Panel Mode, press the PRINT PITCH key on the control
panel when you turn on the power. After a second, you willhear
a beep, and the ON LINE indicator will glow. To change the
pitch to another, press the ON LINE key, select the desired
pitch, and press the ON LINE key again. The Print Pitch Panel
Mode is now set to the pitch of your choice.
Similarly with Draft and NLQ – turn on the power while
holding the MODE key, and wait for the ON LINE indicator
glow. If you want to change the character, press the ON LINE
key, press the MODE key once again to make your choice, and
press the ON LINE key again. Remember that you may select
which print mode is the standard one by setting DIP switch 1-2.
To select the Italic Panel Mode, press the TOF key while turning on the power.
Page 43
I—
35
More than one attribute may be set in this way. For example,
ifyou wish to set both print pitch and print quality, press BOTH
the PRINT PITCH and
power, and after the ON
MODE keys when turning on the
LINE indicator glows, make further
selections as necessary.
ADVANCED PANEL FUNCTIONS
The printer has the capability to do some basic formatting
from the control panel, as well as move the platen by precise
amounts. The following formatting and platen movements may
be performed from the control panel.
Key
On Line & Paper Feed
On Line & TOF
Print Pitch & TOF
Mode & TOF
Mode & Paper Feed
~---
Reverse micro-feed –—
Top of form set
I
**
Functions
Forward micro-feed
Reverse micro-feed
Top of form setting
Setting of left margin
Setting of right margin
When you want to align the print start position, you can set it
by the micro-feed operation with the control panel, instead of
turning the platen knob manually.
Page 44
1.Set the Off Line mode by pressing the On Line key.
2.While holding down the On Line key, press oneof the
following keys.
3.When you can set the print start position, release the
Paper Feed key or the TOF key first, then release the
On Line key.
■ Setting the top of form
When you turn on the printer, the top of form is automatically
set to the current position. If you want to change the position,
you can reset it by the following procedures.
1.Set the Off Line mode by pressing the On Line key.
2.While holding the Print Pitch key, press the TOF key.
Your printer acknowledges the new top of form with
the sound of beep.
■ Setting the left and right margins
As you’ll learn in Chapter 5, you can set the left and right
margins with the control codes. In addition, you can set them
manually just like a typewriter by the following procedures.
1.Set the Off Line mode by pressing the On Line key.
2.While holding the Mode key, press one of the following keys.
TOF key – Left margin set
Paper Feed key – Right margin set
3.While holding the two keys, the print head moves
across the page step-by-step.
4.When the print head goes to the position where you
want to set margin, release the two keys. So the
printer acknowledges the margin with the sound of
beep.
To show you how to control your printer from a program, we
have chosen BASIC because it is easy to learn and easy to use.
Also, more personal computer users program in BASIC than in
any other language.
The rest of this manual will show you a little BASIC – just
enough for you to use your printer. We’re not going to try to
make you an expert programmer, though, only get you started.
There are many excellent books that will teach you BASIC, so if
you discover that you like to program you should have no trouble learning more about it.
SOME BASICS OF BASIC
N First steps
The first things that a beginner learns to do are to list a pro-
gram and to print a character string. Certainly these are the
Page 46
38
easiest operations one can do, but even they may depend on
what computer you have. In Microsoft BASIC, we can list all
the steps in a program by entering LIST. This lists them on the
CRT screen; if we want to print them on a printer, we prefix the
command with an L (enter LLIST).
Th’eMicrosoft BASIC command for outputting information is
PRINT. Like the LIST command, this displays the information
on the CRT screen so we have to add an L (+ LPRINT) if we
want to use the printer. Just put whatever you want to print between quotes and after LPRINT (anything enclosed in quotes is
called a character string). For example, we would use LPRINT
“Hello!”to output “Hello!” to the printer. We’ll see later how to
LPRINT more than just character strings.
We started with Microsoft BASIC because it is the most widelyused.version of BASIC. The programs in this manual are written in Microsoft BASIC so they should run on most computers.
But if strange things happen when you try to run a program,
check the BASIC manual that came with your computer.
Let’s consider Apple II computers for a minute. These
popular computers use their own brand of BASIC. To use an
Apple II, enter the following–
F’R#1PR7#1
L 1S?’
PR#OPR#(l
PRINT
“Hel 10!“
The PR#l tells the Apple to send everything to the printer,
the LIST or PRINT command sends it, and the PR#Oreturns
output to the screen.
Now that we know how to address the printer, let’s try listing
a BASIC program. We will load a program into memory ready
to program printer operation – just as soon as we learn a little
bit about the ASCII codes.
■ ASCII codes and the CHR$ function
You can talk to your computer in BASIC, but your computer
and your printer talk to each other in what are known as ASCII
codes. In the ASCII code, each number from Oto 255 has a particular meaning – 36, for example, makes the printer print a
dollar sign. Some numbers cause the printer to do other things,
too. For instance, sending a 7 sounds the printer’s bell.
Page 47
39
Taken together, these numbers and their meanings make up
the ASCII code (pronounced ask-key), which stands for the
American Standard Codefor Information Interchange.There are
ASCII codes for all the letters of the alphabet (upper case and
lower case), Oto 9, most punctuation marks, and some (but not
all) of the functions of the printer.
There are a number of different ways to represent an ASCII
code, depending on how you are using it. For example, the
ASCII codes for the upper-case letter “A” are 65 (decimal) or
&H41 (hexadecimal). Or you can just call it “A”. Appendix B
shows all of the ASCII codes.
BASIC usestheCHR$ functiontorepresentASCII
characters and many functions. To print the letter “A” we
would enter LPRINT CHR$(65). To make the printer’s bell
sound, we would enter LPRINT CHR$(7).In general, we print a
character by entering LPRINTCHR$(ASCII code) to the
printer.
We can also use hex ASCII codes. Although we use only
decimal ASCII codes in this manual, in some applications it will
help ifyou understand what a hex code is. “Hex” is short for hexadecimal and refers to a base-16 number (the numbers we use in
everyday life are base 10).Since the hex system needs 16 digits,
it uses the numerals Othrough 9 and also the letters A through
F. In BASIC programs, you can always tell that a number is in
hexadecimal by the “&H” immediately preceding it. The ASCII
code for the letter “A” (65 in decimal) is &H41 in hex.
■ Control codes
ASCII codes with values of 32 or less do not correspond to
keys on the keyboard. These codes control many ofthe printer’s
functions, so we call them control codes. To enter a control code
from the keyboard, we have to press two keys at the same time
—
the “control” key and one other. The other key determines
what code is sent – pressing the control (CTRL) key and A
sends ASCII code 1, CTRL B sends ASCII code 2, and so on.
Your printer has a lot of control codes to let you do some
useful things. Let’s try one that we’ve mentioned several times
already:
10 ‘ Demoof ASCII
code
20 LPRINTCHR$(7)
30 END
RUN
Page 48
40
That’s the printer’s bell (we call it that even though it sounds
like a buzzer). We’ll learn more about it in later – we just
wanted to show you a control code that would get your attention
right away!
There are four common ways of referring to a control code:
the name of the code or its abbreviation, the decimal ASCII
value, the hexadecimal ASCII value, and the “CTRL-” value.
For example, the ASCII code that causes the printer to advance
the paper one line is decimal 10. This code may be referred to
by any of the following:
line feed– the name of the code
(LF)– its abbreviation
ASCII 10– its decimal value
ASCII &HOA– its hexadecimal value (the &H signifies
hex)
CHR$(1O)– the way it’s used in BASIC
CTRL-J
– the way you send it from a keyboard
Of course, most of the time we don’t need to bother with
these. The computer is smart enough to know that when we
press the “A” key we want to print the letter “A” – it takes
care of all the intermediate steps.
Appendix B is a table that shows the various names for each
code so you can convert back and forth. The microcomputer
world is not very consistent in describing ASCII codes, so it’s
important that you have a basic knowledge of them.
H The escape codes
Back when the ASCII system was set up, computer equipment was relatively simple and thirty-three control codes were
considered sufficient at the time. The American Standards people realized that eventually more control codes would be needed, so they included the escape (ESC) code to allow almost any
number of additional codes to be defined when they became
necessary.
ESC allows us to “escape” from the ordinary set of control
codes so we can specify additional functions and other information needed for a printer function. In this manual, we’llwrite the
ESC code inside broken brackets, like this – (ESC).
(ESC) – decimal 27 – is always followed by at least one
other number; it is never used alone. The whole series of related
Page 49
1-
41
numbers is called an escape sequence.
■ A note on command syntax
Because the readers of this manual will be running such a
wide variety of applications on so many different computers, we
can’t show the exact way of sending codes to the printer for
each one ofthem. Instead, as we introduce you to each new command, we will show the commands as in this example:
(ESC) “W” 1
This command turns on expanded printing. (ESC), as we
mentioned earlier, is the escape code (which is ASCII code 27).
A letter or number in quotes (such as the “W” above) means that
the character should be sent to the printer, but without the
quotes. In our example, you should send a capital W following
the escape code. In BASIC, you could do this in a couple of
ways: by sending the character itself (e.g. LPRINT “W’’;),or by
using the CHR$ function to send the ASCII code for the
character (e.g. LPRINT CHR$(87);).
Many of printer commands end with a 1 or O.When shown as
in the above example (i.e., no quotes and no “CHR$”), you can
use either ASCII code 1 (i.e., CHR$(l)) or the character “l”
(which is ASCII code 49). The same principle applies to commands ending with O.
So for our example above, any of these BASIC statements will
Even though there are many commands that require the use
ofASCII code O(the (NUL) character), the number “O”(zero or
ASCII code 48)cannot be substituted. In these cases, instead of
an unadorned Owe will show CHR$(0) each time these com-
mands are referenced.
That’s it for the basics. You are now ready to learn how to use
the many features of your printer.
■ Selecting the right software mode
For this printer to correctly respond to control codes, you
Page 50
42
must make sure that you’ve set the DIP switches properly.
The rest of this manual discuss the various control codes to
control this printer. You’ll find that many features have different codes for either the Standard mode or the IBM mode.
The Standard Mode emulates the Epson FX-85 printer. The
IBM’Mode emulates the IBM Graphics printer. You can select
one of these modes by setting DIP switch 2-5. (For details,
please refer to Appendix A.)
SOME SPECIAL KINDS OF TEXT
If you looked carefully at your printer’s self test, you probably
noticed that it can print in italics. But that’s not all!Your printer
can underline characters, print superscripts and subscripts, and
perhaps most exciting, print near letter quality characters.
■ Near Letter Quality characters
This printer’s Near Letter Quality (sometimes abbreviated as
NLQ)character set is ideal for correspondence and other important printing, as it produces very high quality characters. Normally, your printer prints draft quality characters. This is adequate for most work and has the fastest printing speed. For the
final pi-intout,try NLQ. The program below shows an example.
In this program, line 20 selects NLQ characters with (ESC)
“x” 1 command. Line 30 prints a sample before line 40 switches
printer back to draft printing with an (ESC) “x” O.When you
run the program you should get this:
1ineshowsNEAR LETTER QUALITY!
I“”iE? +l””iI:2k!S
1.1.
::i’1::/Jl”i (j ;:,17t:
I p 1“”i. 1“-1t. ,,
turn off the power switch. After you turn on the power
Page 51
switch while holding the Mode key down on the control panel,
set the NLQ mode with the Mode key while in the Off Line
mode. Then run the program again. You should get like this:
This1i neshowsNEAR LETTER QUALITY!
This1ineshowsstandardprint.
As you can see,
now the printoutonly contains NLQ
characters. This is because we set the printer to the “Print Quali-
ty Panel” mode at power on, so the printer ignored the control
codes to set or cancel NLQ characters. This is a very useful way
to print NLQ characters if you are using a packaged software
which does not support the NLQ character mode.
Table 4-1
Near letter quality commands
FunctionControl code
Near letter qualityON
(ESC)
“X” 1
Nearletter quality OFF(ESC) “X”O
■ Italic printing
italic letters are letters that are slanted to the right. Your
printer can print all of its letters in italic as well as the reman
(standard) letters you are accustomed to. Italics can be used to
give extra emphasis to certain words. The commands to turn
italic on and off are shown in Table 4-2.
Table 4-2
Italic commands
FunctionControl code
ItalicON(ESC) “4”
ItalicOFF
(ESC) “5”
Use this program to see italic characters:
10 ‘
Demo
20 LPRINT
30 LPRINT
40 LPRINT
50 LPRINT
of ita 1ic and
CHR$(27); “4”;
“This1ine is
CHR$(27) ; “5”;
“Tt~is 1ine is
reman
in ITALIC characters.”
in ROMANcharacters.”
Page 52
AA
Here is what you should get:
In this program, line 20 turns italic on with (ESC) “4”, and
line 40 turns italic off with (ESC) “5”.
Now, set the “Italic Panel” mode, as described in Chapter 3,
then run the program again. You should get like this:
As you can see, this time the printer ignored the control codes
to set or cancel italic characters.
H Underlining
Not only can your printer print all styles of printing in both
reman and italic, but it can underline them too. The control
codes are shown in Table 4-3.
Table 4-3
Underline commands
It’s that simple. Let’s try it with this program:
10 ‘ Demo
20 LPRINT
30 LF’RINT
40 LPRINT
50 LPRINT
It should
of under 1in ing
CHR$(27) ;“-l”;
“This phraseis
CHR$(27) ;“-O”;
“ thisis not.”
come out like this:
UNDERLINED;“;
Page 53
45
In this program underline is turned on in line 20with (ESC)
<<
–“ 1, and then off in line 40 with (ESC) “-”O.There’s a new
aspect to this program, though. The semicolons at the end of the
first three lines told BASIC that those lines were to be continued. Therefore, BASIC didn’t send a carriage return and line
feed at the end of those lines. We just did this to illustrate that
all these control codes can be used in the middle of a line. It’s
easy to underline or italicizeonly part of a line.
■ Superscripts and subscripts
Your printer can print in two different heights of characters.
The smaller characters are called superscriptsand subscrifltsand
are half the height of normal characters. Superscriptsprint even-
ly with the tops of regular printing while subscriptsprint evenly
with the bottom of regular printing. They are frequently used to
reference footnotes, and in mathematical formulas.
Table 4-4 has the codes for using superscripts and subscripts.
Table 4-4
Superscripts and subscripts commands
Try this program to see them work:
10 ‘ Demo
20 LPRINT
30 LPRINT
40 LPRINT
50 LPRINT
60 LPRINT
70 LPRINT
80 LPRINT
90 LPRINT
of superscriptsand subscripts
“Look! “;
CHR$(27) ; “SO”;
“SUPERSCRIPTS“;
CHR$(27) ;“T”;
!,& ,,;
CHR$(27) ;“S1”;
“SUBSCRIPTS“;
CHR$(27); “T”;
Page 54
46
Here line 30 turns on superscripts with (ESC) “S” O.It’s turned off in line 50 with (ESC) “T”. Then between printing text,
subscripts are turned on in line 70 with (ESC) “S” 1, and finally
off in line 90. Again, everything prints on one line because ofthe
semicolons.
CHANGING THE PRINT PITCH
In “printer talk,” the number of characters that can be printed
in one inch is called the print pitch or character pitch. Normally,
your printer is set for 10 characters per inch, which is calledpica
(and is the same as the pica pitch on most typewriters). This
works out to 136 characters per line.
You can also print 12 character per inch (elite ~itch). This
gives you 163 characters per line.
You can set these pitches by using the Mode key on the con-
trol panel manually, or by software as shown in the table below.
—
Table 4-5
Print pitch commands
Pitch
Pica
Elite
Characters/inch
10(ESC) “P”
12(ESC) “M”
Control code
Try this program to see how these two pitches work. Be sure
to set the printer to draft mode.
10 ‘ Demoof picaand e
ite p:t.ches
20 LPRINTCHR$(27) ; “M”;
30 LPRINT“This1ine is
ELITE pitch. ”
40 LPRINTCHR.$(27) ;“P”;
50 LPRINT“This1ine is
PICA pitch(normal ) .”
When you run this program you should get this:
Th 1s 11 ne is. EL 11“”Ep ~tr:h.
‘“l”l’”i1.s:. :1.1,I“”iPi ‘3 1’:”[ (l[\pi.
t (:::h
Line 20 turns on elite pitch with
Page 55
1-
47
the line at 12 characters per inch. The (ESC) “P” in line 40
resets the printer to pica pitch and line 50 prints the line in pica
pitch.
~ Expanded print
Each of the print pitches can be enlarged to twice its normal
width. This is called expanded print. Try this program to see
how it works:
Expanded print set with CHR$(14) is automatically cancelled
at the end of the line. This is convenient in many applications,
such as for one line titles. Note that you didn’t need to put an
(ESC) in front of the CHR$(14), although (ESC) CHR$(14)
works just the same.
You can also cancel one line expanded print beforea carriage
return with CHR$(20), as done in line 50.
Sometimes you may wish to stay in expanded print for more
than one line. Change your program to this:
When you turn on expanded print with (ESC) “W” 1 it stays
on until you turn it off with (ESC) “W” O.
Table 4-6
Expanded print commands
Function
OnelineexpandedON
OnelineexpandedOFF
ExpandedON
ExpandedOFF
Control code
CHR$(14)or (ESC)CHR$(14)
CHR$(20)
(ESC) “W” 1
(ESC) “W”O
■ Condensed print
Each of the print pitches also can be condensed to its normal
width. This is called condensed print. Try this program to see
how it works:
10 ‘ Demo
20 LPRINT
30 LPRINT
40 LPRINT
50 LPRINT
f;O LPRINT
~(+(~)(::)rj
of condensedprint
“Demonstrdt. ion of “;
CHR$(15) ;
“CONDENSED”;
CHR$(18) ;
“ print ing. ”
:;~’1::,,’- .{(j!:,j (:jf’j~:]+:
CONDENSEDp r’ ~ nt i nij,,
Condensed print set with CHR$(15) stays on until you turn it
off with CHR$(18). Note that you don’t need to put an (ESC) in
front of the CHR$(15), although (ESC) CHR$(15) works just
the same.
Page 57
Table 4-7
Condensed print commands
49
Function
CondensedON
CondensedOFF
Control code
CHR$(15)or (ESC) CHR$(15)
CHR$(18)
By combining expanded print and condensed print with the
two pitches, this printer has eight different character widths
available.
Enter this program to see how the print pitches, expanded
print and condensed print can be combined:
Have you ever looked closely at the printinginbooks and
magazines? Doesn’t it look nice? The main reason is that each
character is givenan amount of space proportional to its actual
width. A typewriter (and most printers), on the other hand, give
every character the same amount of space, no matter how wide
it is. (Pica pitch, for example, gives a “w” and an “i” 1/10 of an
inch each. Looking at these letters you see that a “w” is two or
three times as wide as an “i”.)
Well, you too can enjoy professional-looking proportional
printing. You can turn proportional printing on and off with the
following commands.
Table 4-8
Proportional commands
Function
ProportionalON
ProportionalOFF
Control code
(ESC) “p” 1
(ESC) “p”O
Try this program to see how the proportional spacing works.
“This1ine is NORMALELITl?print ing. ”
CHR$(27);“pi”;
“This1ine is PROPORTIONALELITE.“
CHR$(27) ;“p” .
“’This linei;PROPORTIONALPICA.”
CHR$(27) ; “po’”;
“This 1ine is NORMAL
PICA printing.“
100 END
Page 59
51
When you run this
program you should get this:
Line 20 selects the elite pitch and line 40 turns on the proportional printing with (ESC) “p” 1. Line 50 prints a line with proportional elite pitch. Then, line 60 selects the pica pitch, so that
line 70 prints a line with proportional pica pitch. Finally, line 80
resets the proportional printing and line 90 prints a line in normal pica pitch.
NOTE: When you set the “Print Pitch Panel” mode by the
Print Pitch key on the control panel at power-on, these control
codes related print pitches except expand print mode is ignored.
MAKING WORDS STAND OUT
Your printer has good print density when it’s just printing normally. But sometimes you may want something to stand out
from the rest of the page. This printer provides two ways to do
‘this:boldface and emphasized print. Both of these go over the
characters twice, but they use slightly different methods to
darken the characters. Let’s try them and see what the difference is.
The following table shows the control codes for getting into
Run this program. The results will look like this:
—
Line 20 turns onboldfacewith(ESC)’’G’’ and line 3Oprints a
line oftext. In line40emphasizedis turned onwith(ESC)’’E”.
Line 50 prints alineoftextinboldface andemphasized. Line60
then turns boldface offwith (ESC)’’H’’ sothat line 70 canprint
in emphasized only. Finally, line 80 turns emphasized off, so
your printer is set for normal printing.
Loakcloseiy at the different lines of printing. Inthelineof
boldface printing each character has been printed twice, andthe
paper was moved upslightly the second time theywere printed.
In emphasizedprinting, the characters are moved slightly tothe
right the second time the printer prints. The second line combined both of these so that each character was printed 4 times.
MIXING PRINT MODES
We have learned how to use the various print modes individually and together. Now we’ll see how to combine them
more efficiently.
You have at your disposal a unique command that lets you
choose any valid combination of print modes and pitch. This is
the Master Print mode command. It looks like this:
(ESC) “!” n
Page 61
I
—
Here, the value of n defines the print style to be selected. The
value of n can range from Oto 255, which is the range of values
that can be stored in one eight-bit byte. If you look at each bit in
this byte, you’ll find that each one represents a printing style
variation. Adding the binary values of the selected bits gives the
value of n for a particular combination of print styles.
Table 4-10 shows the decimal values of the bits in the Master
Print byte. To calculate the value n for a particular combination
of printing styles, just add the decimal values of the features
that you want to combine.
Table 4-10
Values of mixing print styles for Master Print
Bit
1
2
3
4
5
6
7
8
print, you would calculate the value of n like this:
CHR$(27);’’!’’;CHR$(49)
that each mode except pica (pica is the default) has a separate
switch that can turned on and off via software. Once the switch
is on, it stays on until turned off. However, when two modes
that conflict are turned on at the same time, the printer must
choose which one to use.
modes. These cannot combine, so the printer must make a
choice; in this case, the printer chooses Elite.
For example, if you want to select elite expanded boldface
Elite
Boldface
Expanded32
n=
The command would look like this:
To better understand the way the print modes work, consider
For example, suppose you turn on both Elite and Emphasized
1
16
49
Decimal value
1
2
4
8
16
32
64
128
Page 62
Summa-y notes
1)Pica is the default pitch and is active when Elite is turned
off.
2) When two modes conflict, the one of lesser priority bitwise is cancelled. For example, Condensed and Emphasiz-
ed can not be printed at the same time, printing is Em-
phasized.
3) Elite cancels Emphasized.
4) Underline, Expanded and Italics modes combine with any
print modes.
5) Emphasized will not mix with Elite or Condensed.
Page 63
CHAPTER 5
FORMATTINGTEXT
Subjectscoveredin Chapter5 include–
● The carriage return and line feed
Q The amount of space between lines
c Moving to the next page
. The numberof lines on a printed page
. Horizontaland vertical tabs
● Setting margins— left, right, top and bottom
● Centeringand aligning
Chapter 4 showed us the basic techniques for using the
printer. Now we’re ready for the more advanced ones. We’llconcentrate on changing the appearance of the page to suit our
needs.
LINESAND LINE SPACING
■ Starting a new line
Up until now the only time we have thought about printing on
a new !ine is when we didn‘twant it to happen. We learned that
putting a semicolon (;)at the end of a BASIC line will notend the
line of printing. So somehow, the computer tells the printer
when to end one line and start another.
There are two codes that are used to end one line and start
another. They are carriage return (CHR$(13)) and line feed
(CHR$(1O)).Like the escape codes, they have been given abbreviations which you’ll find many texts (including this one):
(CR) and <LF). The codes are simple, but their action is a little
confusing (especially with BASIC). Let’s begin with the carriage
return. Each time the printer receives a CHR$(13)it returns the
print head to the left margin. It does not advance the paper (if
DIP switch 1-8 is on; see below).
Page 64
56
Line feed is more complicated. Each time the printer receives
a CHR$(1O)it both advances the paper one line and returns the
print head to the left margin, ready to start a new line.
Now to add a ittle confusion – most (but not all) versions of
BASIC add a line feed (CHR$(1O))to every carriage return
‘(CHR$(13))they receive. If your version of BASIC doesn’t do
this, then you should turn DIP switch 1-8off so that your printer
willadd the line feed for you. When you have DIP switch 1-8off
the printer will do the same thing when it receives a carriage
return as it does when it receives a line feed.
If you find that your printer double spaces when it should
single space, then you probably need to turn DIP switch 1-8on.
9 Reverse line feeds
Your.printer can move the paper up or down. The unique tractor design allows the paper to be fed in either direction without
jamming. This allows you to move around the page at will. You
can use this feature to print several columns of text side by side,
or to print a graph and then move back up and insert descriptive
legends. As you experiment you’re bound to come up with more
uses!
The simplest form of reverse paper feeding is a reverse line
feed. The code is (ESC) (LF), which causes the paper to move
down (in effect, moving the printing I.@)one line. A “line” used
in a reverse line feed is the same size as a line in a regular line
feed (this is normally 1/6 inch). When you change the line spac-
ing (which you’llread about next), both forward and reverse line
feeds change.
Table 5-1
Line feed commands
FunctionControl code
Returnprint head to left margin
Advancepaper one line
CHR$(13)
CHR$(1O)
Reversepaperoneline(ESG) CHR$(1O)
■ Changing the line spacing
When you turn your printer on, the line spacing is set to 6
lines per inch. This is fine for most printing applications, but
when you want something different, the printer makes it easy to
set the line spacing to whatever you want.
Try this program to see how easy it is to change the line spacing:
Page 65
1
57
NEW
10
‘ Demo of line spacing
20
FOR 1=1 TO 25
30
IF 1=13
40
LPRINT CHR$(27);’’A’’;CHR$(I);
LPRINT “THIS LINE SPACING IS SET TO”;I
50
60
NEXT I
70
LPRINT “LINE SPACING IS SET TO 1/6 INCH
(NORMAL).”
80
LPRINT CHR$(27);”2”
90
END
This is whatyouwill.get:
THEN 60
Page 66
Line 40 changes the line spacing. The command (ESC) “A”
CHR$(n) changes the line spacing to n/72 of an inch. The loop
that is started in line 20 increases the value of n (the variable I in
this program) each time it is executed. So the line spacing increases as the program continues. Line 30 just shortcuts the
loop’when I = 13, since BASIC won’t let us send CHR$(13)
without adding an unwanted CHR$(1O)to it. Finally, the (ESC)
“2” in line 80 resets the line spacing to 6 lines per inch. This is a
shortcut that is the same as (ESC) “A” CHR$(12).
If you run this program with DIP switch 2-5 off (IBM mode),
you cannot get the printout as shown above.
The (ESC) “A” CHR$(n) command in the IBM mode only
defines the line spacing as n/72 of an inch; the (ESC) “2” command “changes the line spacing to the amount defined by the
previous (ESC) “A”.
For the IBM mode, you need to change the following lines in
the previous program as shown below:
4(I LFRINTCtiR$(27);“A”;CHR$(I);CHR$(27);“2”;
80 LPRINT CHR$(27);“A”;CHR$(12);CHR$(27);“2”
You may wonder why 1/72 of an inch was chosen as the incre-
ment for the line spacing command. There’s a good reason: the
dots that the printer makes are 1/72 inch apart. So this means
that you can vary the line spacing in increments as fine as one
dot – unless you want finer spacing, in which case you may use
one third dot spacing.
The (ESC) “3” CHR$(n) command sets the line spacing in in-
crements of 1/216 inch. Change line 40 in your program to this:
40 LI’RINTCHR$(27);“3”;CHR$(I);
and run the program again. Now the results willlook like this:
Page 67
.:,.
+m
.
..;.
--,.+,
..-; ..“,.
::...,:?.
,.::!
. ,.
-.
.,”
..,
,,,
..,,.
. ,. ,,,
.,
“.
“’\
..-,
,,2
!w:
.,
.,
III
..,7
..., .
L,.:[I’dli.
1...,:[i.1~
$[::,(+(:
The program works just the same as before, but the line spac-
ings are just one-third what they were. This is because (ESC)
“3” CHR$(n) sets the line spacing to n/216 inch.
Table 5-2 shows all the line spacing commands, including
several “shortcut” commands for commonly used line spacings.
Set linespacingto n/216inch
One-timelinefeed
One-timereverse linefeed
of n1216inch
■ Moving down the page without a carriage return
So far, all the commands that move the paper also move the
print head back to the left margin. Normally this is what you
want. Sometimes, though, you may wish to move down the page
without moving the printhead back to the left margin. The
following commands do just that.
The (ESC) “J” CHR$(n) command causes the printer to make
one line feed of n/216 inch, but does not changethe setting of the
line spacing. Try this program to see how it works:
NEW
10 ‘ Demo of one–time 1ine feeds
20 LPRINT “LINE NUMBER 1.“
ofn1216inch (ESC) “J” CHR$(n)
Control code
(ESC)“O”
(ESC)“l”
(ESC) “A”CHR$(n)
(ESC) “3”CHR$(n)
(ESC) “j” CHR$(n)
Page 68
60
30 LPRINT “LINE NUMBER 2.“;
40 ‘ One-time line feed
!50LPRINT CHR$(27);“J”;CHR$(1O(J);
60 LPRl
70 LPRINT “L1NE NUMBER 4.“
80 END
NT “LINENUMBER s .“
Here is what your printer will produce:
The (ESC)
“J”CHR$(1OO)in line 50 changes the spacing to
100/216inches for one line only without moving the printhead.
The rest of the lines printed with the normal line spacing.
Notice that both line 30 and line 50 end with semicolons. This
prevents the normal line feed from occurring.
The (ESC) “j” CHR$(n) command works the same way except that the paper moves in the opposite direction. Try this simple change to your program to see the difference.
40 ‘ One-time reverse 1irw feed
50 LPRINT CHR.$(27);“j”;CHR$(100);
. .
PAGECONTROL
Now that we have seen how to control line spacing, we can go
onto page control —positioning the printing on the page and ad-
justing the paper length.
Page 69
61
■ Form feed
The simplest forms control code is the@wz feed. Form feed
(or (FF)) is CHR$(12)and causes the printer to move the paper
to the top of the next sheet. Try it by changing lines 40 and 50 to
this:
40‘
50 LPRINT (;HR$(Iz);
the paper so that the top of the sheet is even with the top of the
ribbon guide on the print head, then turn the printer back on. If
you don’t remember how to do this, review Chapter 2. When
you run the program, the results will look like this:
form feed
Before you run the program, turn your printer off and adjust
w
.——
0
——————
1...I NE NUMHER ‘1..
L INE NIJI”’IBER2.
——.—.——
(-)I
L – – . – – – – – – ––
——
—
~L INE NUMBER3.
n
The form feed (CHR$(12)) in line 50 caused the printer to
move to the top of a new page before printing the last two lines.
❑ Reverse form feed
Just as your printer can perform a reverse line feed, it can do a
reverse form feed. This code moves the paper so that the printhead is positioned at the top of the current page. This can be
used, for example, to print text in a multi-column magazine for-
mat; print the first column, then reverse form feed back to the
top of the page to start the second column. The code for reverse
You may have some computer forms that are not 11 inches
high. That’s no problem, because you can tell your printer how
high the forms are that you are using. There are two commands
for doing this, shown in this table.
Table 5-4
Form length control
Function
Setthepagelengthton lines
Setthepagelengthto
n inches (ESC) “C”CHR$(0)CHR$(n)
Control code
(ESC)“C”CHR$(n)
Let’s set up a 7 inch high form length, which is typical of
many computer checks. The following program will do it.
NEW
Demo of variable form lengths
10 ‘
20 LPRINT CHR$(27);“C”;CHR$(0);CHR$(7);
30 LPRINT “PAY TO THE ORDER OF:“
40 LPRINT CHR$(12);
5(1LPRINT “PAY TO THE ORDER OF:“
6(1END
This program should print “PAY TO THE ORDER OF:”
twice, and they should be 7 inches apart. Line 20 sets the form
length to 7 inches. After line 30 prints, line 40 sends a form feed
advance the paper to the top of the next form. Line 50 then
prints its message.
After you have run this program, turn off the printer and ad-
just the top of form position. When you turn the printer back on
the page length will reset to its normal setting (usually 11
inches).
Page 71
63
TOP AND BOTTOM MARGINS
Some programs don’t keep track of where they are printing
on the page. This causes problems when you get to the bottom
of a page because these programs just keep on printing, right
‘over the perforation. This makes it very hard to read, especially
if a line happens to fall right on the perforation.
The printer has a solution to this predicament. This printer
can keep track of the position on the page, and advance the
paper so that you won’t print too near the perforation. There are
two commands to do this. One controls the space at the top of
the page (top margin) and the other controls the space at the bottom ofthe page (bottom margin). The control codes are given in
the following table:
In both cases the value of n tells your printer how many lines
to skip, although there is a slight difference in the usage. When
you set the top margin with (ESC) “r” CHR$(n), the value of n
tells the printer what line to start printing on. When you set the
bottom margin with (ESC) “N” CHR$(n), the value of n tells
the printer how many blank lines should be left at the bottom of
the page.
Let’s try a simple application to see how these margins work.
Enter this program, which will print 150 lines without top and
bottom margins.
10 ‘Demo of top :indbot tom marg ins
60 LPRINT
70 FOR I=1 ‘TO15(j
/30LF’RINT“’THISIS LINE”;I
90 NEXT I
1.10LF’RINT CHR$(12):‘ form feed
120 END
CHR$(12);:‘ form feed
Page 72
I
64
When you run this program it will print 150 lines right down
the page and across the perforations. When it’s done line 110
sends a form feed to advance to the top of the next page.
Now add the following lines to your program. (Don’t forget
the semicolons or you won’t get quite the same results that we
did.)
20 ‘ Leave 6 blank1ines at the bottom of page
30 LPRINT CHR$(27);“N”;CHR$(6);
40 ‘ Start top of page at 1ine
50 LPRINTCHR$(27);“r” ;CHR$(6);
100 LPRINTCHR$(27);“O”;‘ cleartop and bottom
ins
marg
Now when you run the program, your printer skip the first six
lines and the last six lines on each page. Always send a form
feed after setting the top margin, or it will not work on the first
page printed. That’s because the top margin only takes effect
after a form feed.
Line 50 sets the top margin, line 30 sets the bottom margin,
and line 100 clears both margins when we are done.
6
Page 73
I —
o
--------—------
—-
0
0
TH19 1S LINE 1
THIS IS LINE 2
0
THIS 1S LINE 7
Tkl1S 1S 1.I NE ‘1
THIS IS L [NE 5
0
THIS IS 1-INE 6
THIS IS LINE 7
1141S 1S LINE 8
0
TFI1s IS L 1NE 7
T
[
; THIS IS L I NE 50
0[ ;:;:;: ::;:::
[ TN] S I S L I NE 57
0, Tt+IS 1S LINE 54
I THI 9 I S LINE 55
o!
I
o!
---7------ —-- ——-----
. .
0;
I
o!
i 1HI S 1S L 1NE 56
0[ T}ll S IS LINE 57
, THIS IS LINE 58
i TNIS I S L I NE !5’7
oI THIS 1S LINE 60
I TH1 S I S L I NE 61
65
b-
THIS IS LINE 1;4
TNIS IS LINE 105
THIS IS LINE 106
0
THIS IS LINE 107
THIS IS LINE 10S
TNIS IS
0
THIS 1S
LINE 109
LINE 110
0
0
------------- --
-0
0
THIS IS LINE
THIS IS LINE
0
THIS IS LINE
TH19 IS LINE
THIS IS LINE
0
THIS IS LINE
Tli19 15 LINE
THIS 19 LINE
0
THIS IS LINE
THIS IS LINE
~
Q
111
112
113
114
115
116
117
110
119
-%-=--
Page 74
66
SETTING LEFTAND RIGHT MARGINS
The left and right margins of this printer work just like a
typewriter – once they are set all printing is done between
them. You can set margins either by using the keys on the control panel, as described in Chapter 3, or by escape commands.
The commands to set the margins are given in the following
table:
The first thing that this program does is to branch to the
subroutine that starts in line 70.This subroutine prints 80 X’s in
a row. The first time that the subroutine is used, all the X’s fit in
one line. Then line 30 sets the left margin to 10, and line 40 sets
the right margin to 70. Once again the subroutine is used, but
this time the X’s won’t all fit on one line since there is now only
room for 60 characters between the margins.
Run the program. The results will look like this:
I
J
xx xx xx x Xxxxx xx xx Xxxxx x xx xxx x XxxxxxxxxxXxxxxxxxxxx Xxxxxxx Kxx x Xxxxx x xx Xx.xxxxxxxx xx
When you want to reset the margins to the default values, you
have two choices. You can either turn the printer off and back
on, or you can set margin values equal to the default values.
This means that you should set a left margin of O and right
margin of 136 in pica pitch.
If you change the pitch of your printing after you set your
margins, the margins will not change. They stay at the same
place on the page. So if you set the margins to give you 65 columns of printing when you are using pica type, and you change
to elite type, you will have room for more than 65 columns of
elite printing between the margins.
HORIZONTAL AND VERTICAL TABS
Suppose you need to move across the page to a certain position several times in a document. It’s not much fun to type in
space after space. You don’t have to —you can “tab” your way
across the page.
Your printer’s tabs are like those on a typewriter, but much
more powerful. You have both horizontal and vertical tabs
which can be used for both text and graphics —and they’re real-
ly handy for indenting paragraphs and making tables.
■ Horizontal tabs
Horizontal tabs are set automatically every eight positions. To
move the print head to the next tab position, send CHR$(9).
Try this program to see how the default tabs work.
Demo of horizontaltabbing
10 ‘
20 LPRINT “ONE”;CHR$(9);“TWO”;CHR$(9);“THREE”;
CHR$(9);“FOUR”
Here’s what you should get–
Even though the words are different length, they are spaced
out evenly by the horizontal tabs.
Now add the following line to your program to set different
horizontal tabs:
Page 76
68
15 LPRINT CHR$(27);“D”;CHR$(7);CHR$(14);CHR$(21):
CHR$(O)
(ESC) “D” isthe command to begin setting horizontal tabs. It
must be followed by characters representingthe positions
where you want the tabs set. In our program we are setting tabs
in columns 7, 14, and 21. The final CHR$(0) ends the string of
tabs. In fact, any character that is not greater than the previous
one willstop setting tabs. This means that you must put all your
tab values in order, from least to greatest, or they won’t all get
set.
When you run the program now it produces this:
The words are now closer together, but still evenly spaced.
To reset the default tabs, use the following program:
LPRINTCHR$(27);“eO”;CHR$(8)
This command sets the horizontal
tabs to every eight col-
umns.,
Table 5-7
Horizontal tab commands
Function
Advance
Settabsatnl,n2,etc.
tonexttabposition
Set tabs every n columns
Control code
.CHR$(9)
(ESC)“D”CHR$(nl)CHR$(nL’).....
CHR$(0)
(ESC) “e”OCHR$(n)
■ One-time horizontal tabs
Suppose you need to move to a position across the page, but
you only need to do it once. It doesn’t make much sense to set
up a tab to use only one time. There is an easier way.
The solution is called a one-timetab. Table 5-8 show the three
commands.
The first command in Table 5-8 moves the print head n columns to the right. It has the same effect as sending n spaces to
the printer.
The absolute horizontal tab command moves the print head to
a specified position on the page. The position that you want the
print head to move to (measured from the left margin) is
specified by the values of nl and n2 using the formula nl + n2
x 256. The units by which the print head actually moves vary
with the print pitch you are using, as shown in Table 5-9.
Try this program to see how this works.
In this program, the print head is positioned before the “H” in
“Horizontal” is printed.
‘t..;,).1:::!,,
‘1::..:;1.1::1,,
‘t.21::)s,
“!:.al:],,
,!~]+.11-1+
..7.,...
.I.I--IF+
..J
I’””li::il’”i ::!c,r)“1:.A :1. “[:.;(L.!3,!
Hc)l ”” 1.;; i::)l”i‘!:.A 1. ‘t..::31:2ii
The relative horizontal tab command can move the print head
right from the current position. The formula for calculating how
much the print head moves is the same as in the absolute
horizontal tab command. However, the units by which the print
head actually moves vary with the print pitch you are using as
shown in Table 5-9.
Vertical tabs have the same kinds of uses that horizontal tabs
do – they just work in the other direction. Horizontal tabs allow
you to reach a specific column on the page no matter where you
start from. Vertical tabs are the same. If you have a vertical tab
set at line 20, a vetiical tab (or (VT)) will move you to line 20
whether you start from line 5 or line 19.
-Vertical tabs are not set at the power-on default. If you send a
CHR$(l 1)which is the ASCII code for (VT) before we have set
up tabs, the command advances the paper only one line. Enter
this program to see how this works.
10 ‘ Demo ofv~rt. ica 1 tabs
4(J LFRINT CI{R$( 11) ;
“FIRST TAB.“
Page 79
71
!j(’)LP~I.x’rCHR$(n);’’SFXNNDTAJ3.”
(>ol.[)[<JN7’(;t-jR$ (I I); ’’THIRDTU3.“’
7[!LFy/lNT[}HR$(I I); ’’F’OI.IRTHTAI3.“
Now, let’s set some vertical tabs of our own. Add these lines
(ESC) “B” is the command to set vertical tabs. Like the
horizontal tab setting command, tab positions must be defined
in ascending order. Our example sets vertical tabs at lines 10,
15, 25 and 30. Then the
CHR$(ll) ineach of the following lines
advances the paper to the next vertical tab. The printout is
shown below.
[::(:j{,j~rpl‘r~~.
Add one more line to the program to demonstrate one more
feature of vertical tabs.
Page 80
80 LPRINTCHR$(ll) ;“F’IFTHTAB.”
Now when you run the program the first page looks just like
before, but line 80 sends one more (VT) than there are tabs.
This doesn’t confuse the printer – it advances the paper to the
nexttab position, which happens to be the first tab position on
the next page.
There’s a one-time vertical tab command that works just like
the one-time horizontal tab command. Try this program to see
In this program, line 30 sends a one-time vertical tab with
(ESC) “f’ 1 command. Line 50 sends a one-time horizontal tab
with {ESC) “f” Ocommand. Finally, line 70 and line 80 send
one-time vertical tab and one-time horizontal tab, so the line 90
prints text at the specified position.
Page 81
73
Table 5-10
Vertical tab commands
FunctionControl code
Advancepapertonexttabposition
Set verticaltabs at nl, n2, etc.
CHR$(ll)
(ESC)“B”CHR$(nl)CHR$(n2).....
CHR$(0)
Set verticaltabs every n lines(ESC) “e” 1 CHR$(n)
One-timeverticaltab
(ESC) ‘<f>’1 CHR$(n)
H Vertical tab channels
Vertical tab channels are especially hefpful in two situations.
The first occurs when you are writing a program to accompany
a preprinted form that can accommodate verious types of
responses. The second occurs when you create a multipage
form or report with different vertical tabs on each page.
Table 5-11
Vertical tab channel commands
Function
Set verticaltabs at nl, n2,etc. as
channelnO
SelectverticalchannelnO
Control code
(ESC) “b”CHR$(nO)CHR$(nO
CHR$(n2)..... CHR$(0)
<ESC)“/” CHR$(nO)
You can store up to eight channels of tab stops. They are
‘numbered from Oto 7. If you have already stored a set using
(ESC) “B” command, your printer has labelled it as channel O.
Try this program how to see the vertical tab channels work.
60 FOR1=1 TO 3
70 IPRI NT “TOP OF FORM”
80 LPRINTCHR$(27);“/” ;CHR$(I) ;
90 i.PRINTCHR$(11) ;
1(]0 LPRINT“1ST TABOF CHANNEL”;I
L1O[-PRINTCHR$(] 1) ;
120 LPR1NT “2NDTAB(>FCliANNEI”II
Page 82
74
130 LPRINTCHR$(12);
140 NEXTI
150 LPRINTCHR$(27);”@”
160 END
When you run this program the printout should look like this.
rDF OF FORM
1ST T613 OF CH6NNEL 1
2ND TRB OF CHANNEL 1
TOF OF FIIFOI
1ST T(AB OF CHANNEL 2
2ND TAB OF CH6NNEL 2
TOF OF FOWI
1ST T(W3 OF CHGNNEL 3
2ND TAR OF CHANNEL 3
I
InthisprogramwesettabsatlOand20inchannellinline
20. In line 30 we set tabs 15 and 25 in channel 2, and in line 40
we set tabs 17 and 28 in channel 3.
Because the channels are stored, you must make the printer to
recall one before you use it, so we used (ESC) “/” CHR$(nO)in
line 80.
CENTERINGAND ALIGNING TEXT
Text can be arranged in any of three formats: left aligned or
left-justified (normal printing with “ragged” right margin),
centered between the margins, or right aligned (right-justified).
These are selected by the following commands:
When you run this program, you should get like this:
Page 84
76
MEMO
Page 85
CHAPTER 6
SPECIALFEATURES OF
THE PRINTER
Subjectscoveredin Chapter6 inckde-
●
Printer’sbell
●
Masterreset
●
Uni-directionalprinting
●
Internationalcharactersets
●
PrintingBIGcharacters
●
The optionalsheetfeeder
●
Macroinstruction
●
Readinga hex dump
In the previous chapters we have learned about several
groups of control codes. In this chapter we willlookat more control codes. These codes don’t fit neatly into any of the groupings
that we have looked at so far, but they add a lot of useful
features to your printer.
■ Now hear this
You may have heard the printer’s bellif you have ever run out
of paper. And you may have wondered why it’s called a bell
when it beepsinstead of ringing! It’s a long story that goes back
to the early days of computers, when teletype machines were
used for computer terminals. These mechanical marvels were
equipped with a bell that could be heard for blocks. This bell
was used to signal the operator that something needed attention. The code that the computer sent to the teletype machine to
ring the bell was, reasonably enough, called a bell code.The
name bellcodeis still with us, even if the bell has changed to a
beeper, and a lot of people still call the beeper a bell, even if it
doesn’t sound like one.
The code to sound the “bell” is CHR$(7),which is
ASCII code
7 or (BEL). Any time your printer receives this code it will
sound the bell for a quarter of a second. This can be used to re-
Page 86
i
78
mind the operator to change the paper or to make other adjustments to the printer.
You can try this by typing:
LPRINTCHR$(7)
■ Resetting the printer
Up to now when we wanted to reset the printer to the power
on condition we have had to either turn the printer off and on
again, or to send the specific codes that reset the particular
features. There is an easier way. The control code (ESC) “@”
will reset all of the printer’s features to the power on condition
(as determined by the DIP switches), with two exceptions. The
exceptions are that (ESC) “@” will not erase any characters
that you have stored in the printer’s RAM memory (Chapter 7
tells you how to create your own characters), and it won’t erase
a macro if you have one stored in the printer’s RAM (this
chapter will tell you how to create a macro).
In addition, if you set the “Panel” modes by the control panel
settings at power on, these functions will remain with this control code.
■ Taking the printer off line
You know how to put your printer o~~line with the On Line
key on the control panel. The printer has another OIJline state
that can be controlled from the computer. When you turn the
printer
offZincfrom the computer, the printer will ignore
anything that you send it, except for the code to go onlineagain.
CHR$(19) is the code to turn the printer off line; CHR$(17)
turns the printer back to on line status.
■ Printing the bottom of the sheet
Sometimes when you are using individual sheets of paper you
may want to print near the bottom of a sheet. The paper-out
detector usually stops the printer when you are about 1 inch
from the bottom of the sheet. This is notify you if you are running out of continuous paper.
Your printer has the ability to print right to the bottom of the
sheet. You can disable the paper-out detector so that it doesn’t
stop the printer. This will allow you to print to the end of the
sheet, and even beyond if you are not careful. The codes to con-
Page 87
79
trol the paper-out detector, along with the other codes that we
have just looked at are in the following table.
Table 6-1
Some miscellaneous commands
Function
Soundbell
Masterrest
Offline
Online
Paper-outdetector off
Paper-outdetectoron
Moveprint head back onespace
Deletelast character sent
Canceltext in print buffer
Print “slashzero”
Print “normalzero”
Immediate-printon
Immediate-printoff
Backspace (CHR$(8)) “backs up” the print head so that you
can print two characters right on top of each other. Each time
your printer receives a backspace it moves the print head one
character to the left, instead of to the right. You can strike over
multiple letters by sending more than one backspace code.
Delete (CHR$(127))also “backs up” one character, but then it
“erases” the previous character (it’s erased from your printer’s
buffer, not from the paper).
Cancel text (CHR$(24))deletes all the text in the print buffer;
that is, in the line before the delete text command. Since your
printer prints one line of text at a time, only that line will be
deleted.
The following program shows how these codes works.
The backspace codes in line 20 move the print head a total of
three spaces to the left so that the first part of line 30 will overprint the word “NOT”. The delete codes in line 50 “erase” the
three letters in the word “NOT” so that it doesn’t even print.
In lrne 80, CHR$(24) deletes the words in line 70. The
semicolon at the end of line 70 prevents a line feed from causing
that line to print before the printer receives the CHR$(24) code.
The text in line 90 prints as it normally would because it is after
CHR$(24).
■ Printing zeroes
There are two types of zeroes. There is the one we use every
day – O– and this is what your printer will print as its default.
The other type is used almost exclusively in computers and
engineering. It is called the “slash zero” and is written like this
–0. Theline throughthe numberpreventsyou from
misreading it as the letter “O”. Before high-quality printers
were available, this was a good idea but there is no special need
for it today (although you may want to use the slash zero for a
special effect).
■ Immediate-print
This printer can print at the quick rate of 120 characters per
second. But it will also print more slowly at the speed of your
typing. In the immediate-printmode, the print head prints one
character at a time, as you send it. The printer also moves the
paper up so that you can see the current line and then down to
continue printing.
You can turn the immediate-print mode on with (ESC) “i” 1.
Before looking at it, let’s review the normal operation of the
print buffer. Enter this program.
Now type several characters,and after each press the
RETURN key. The printer simply puts the characters into its
buffer while it waits for a carriage return code. (In this program
the RETURN key doesn’t send a carriage return code.) To end
this program and print the contents of the buffer, press
RETURN alone.
Now add this line:
10 LF’RINTCHR$(27);“il” ;
And RUN the program. Your printer will now respond to your
typing – immediately.
When you are finished, press RETURN alone.
■ Adjusting the width of space between characters
This printer provides a command that adjusts the space between all the characters that it prints when the DIP switch 2-5is
set on. The (ESC) CHR$(32) CHR$(n) command adds blank
space between the characters. The units of space that are added
vary in l/240-inch units.
Try this program to see how this works.
10 ‘
Demo ofadjustingspaces
20 LPRINTCHR$(27);“xl”;
30 FOR1=10 TO 1 STEP -2
40 LPRINT
50 LPRINT “This1ineis added”; I ; “spaces. ”
60 NEXT I
70 LPRINT “This1ine is Norma1 space. ”
80 END
CHR$(27) ; “ “ ; CHR.$( I ) ;
Page 90
Th i S
lineis
Thislineis
added10spaces.
added8spaces.
Thislineisadded6spaces.
Thislineisadded4spaces.
Thislineisadded2 spaces.
ThislineisNormalspace.
This command can be used to produce micro-justification,
which is amethod ofjustifying linesby increasing the space between each character.
■ Uni-directional printing
Uni-directional printing means printing inone directionon~.
Your printer normally prints when the print head is movingin
bothdirections. Butoncein awhile youmayhaveanapplication
such as making tables where you are more concerned with how
the vertical lines align than with how fast it prints. The printer
lets you make this choice. The table below shows the commands
for controlling how the printer prints.
Table 6-2
Printing direction commands
Function
Print in one direction
Print in both directions
Onetime print in onedirection
Control code
(ESC) “U” 1
(ESC) “U” O
(ESC) “(”
Try this program to see the difference that printing in one
direction makes.
10 ‘ Demo of uni–directionalprint ing
20 LPRINT CHR$(27) ; “l”;
30 FOR 1=1 TO 10
40 LPRINT “ ! “
50 NEXT I
60 LPRINT : LPRINT
70 LPRINT CHR$(27) ; “U1” ;
80 FOR 1=1 TO 10
90 LPRINT “ 1“
100 NEXTI
110 LPRINT CHR$(12) ;CHR$(27) ; “@”
Page 91
Here is what you willget. The top lineis printed bi-directionally, and the bottom is printed uni-directionally. You will have to
look hard because there isn’t much difference, but the bottom
vertical lines are perfectly aligned.
I
I
1
Let’s analyze the program. Line 20 defines the line spacing to
7/72of an inch so that the characters that we print will touch top
to bottom. Lines 30-
50 print 10 vertical line characters. Then
line 70 sets uni-directional printing and the vertical lines are
printed again. Finally line 110 sends a form feed to advance the
paper to the top of a new page, and then uses the master reset to
restore the printer to the power on condition.
You can also set the printer to print in one direction for one
line only by using the (ESC) “(” command. This command immediately moves the print head to the left margin and then
prints the remainder of the line from left to right.
83
■ The seven bit dilemma
Some computers (not the IBM-PC fortunately!) don’t have the
capability to send eight bits on their parallel interface, but can
only send seven bits. This would make it impossible for these
computers to use this printer’s block graphics characters and
special symbols if our engineers hadn’t thought of a solution.
(All of these characters have ASCII codes greater than 127
which means that the eighth bit must be on to use them.) The
solution lies in the three control codes given in the following
table:
Page 92
I
84
Table 6-3
Eighth bit controls
Function
Turn the eighthbit ON
Turn the eighthbit OFF
Acceptthe eighthbit “as is” from
Control code
(ESC) “)”
(ESC) “=”
~Esc) “#,,
the comrmter
■ Block graphics characters and special symbols
Besides the upper and lower case letters and symbols that we
are by now familiar with, your printer has a whole different set
of characters that are for special uses. These characters include
block graphics for drawing forms and graphs, and special symbols for mathematical, engineering and professional uses. The
special characters are included in two character sets. The
character set you normally use with the IBM mode is called
character set #1. The special characters are printed out when
you send ASCII codes 160 - 255 to the printer.
Your printer also offers character set #2 which is almost the
same as character set #1 except for the addition of ASCII codes
3
- 6, 21, and 128 -
159. Character set #2 is selected with
(ESC) “6”; to go back to character set #1, use (ESC) “7”.
You can also specify the power-on default character set by setting DIP switch 1-7 on for character set #1 and off for character
set #2while the DIP switch 2-5 is set off. The following program
will print out all of the graphics characters available:
10 LPRINT
20 LPRINT CHR$(27) ; “6”;
30 FOR 1=3 TO 6
40 LPRINT “
50 NEXTJ
60 LPRINT “21 “ “,CHR$(21 )
70 LPRINT
80 FOR J=128 TO 254 STEP 5
.90 FOR I=J TO J+4
95 IF I >254 THEN110
100 LPRINT I ;CHR$(I ) ;CHR$(9) ;
NEXTI
110
CHR$(27) ;“O”;
“ ;J ;CHR$(J ) :CHRS(9) ;
120 LPRINT : LPRINT
130 NEXTJ
Page 93
1
85
Figure 6-1 shows what this program will print. If your chart
doesn’t look like this because it has regular letters and numbers
instead of the special symbols, then your computer is onlyusing
seven bits (unless you have set DIP switch 2-5 on by mistake).
You can get the correct printout by changing line 100 to this:
LPRINT I ; CHR$(27) ; “ >“ ; CHR$( I ) ;CHR$(27) ; “=”;
1()(-I
(:;HR$(!)) ;
r
I
I
1’
I
I
Figure 6-1.
Characterset #2
Page 94
86
So how are all of these characters used? Here is a program
that demonstrate how the graphics characters can be combined
to create a figure: the 5 of clubs.
The characters that change are shown beneath their ASCII
code in Table 6-5.
Page 96
88
Table 6-5
International character sets
Country
U.S.A
France
Germany
England
DemarktypeI
Sweden
Italy
Spain
Japan#
Norway
DenmarktypeII
35 36
#
#
#
S
#
#
*
R
#
#
64 91 92 93 94 96
!$@[\]“
$a“Gs“
$sAou“
$@[\]-
$@E0A*
?3 ExoAu
$@0\4“
$@iNL“
$@[Y]“
!3EE0Au
$EE0Au
123 124 125 12(
‘{:}‘~u&‘“
‘aouR
‘{:}“
‘E@a“
‘6aoau
u& ~&~
“““Pi}“
‘{!}“
6zg&u
6z$au
■ Printing characters in the control code area
When you refer the Appendix B, you’ll find many characters
are printed in the control code area. (Remember that the loworder control codes are the ASCII codes Othrough 31 plus 127,
and the high-order control codes are 128 through 159 plus 255.)
These codes don’t normally print symbols on paper, rather
they cause the printer to change modes. To make them print as
normal symbols requires an extra command. For example, the
command to “normalize” the high-order control codes is (ESC)
“6”. Try this program with the DIP switch 2-5 on.
10 ‘ Demo of charactersin the high–controlcode
area
20 LPRINT CHR$(27) ;“6”;
FOR1=128 TO 159
30
40 LPRINTCHR$(I);
50 NEXTI
60 LPRINTCHR$(27);“7”
70 END
When you run this program you’ll get like this:
Page 97
89
That’s where the italic international characters have been
stored. So the (ESC) “6” command without the (ESC) “R”
gives you access to the international characters. The (ESC) “7”
turns these characters back into control codes.
The low-order control codes can also be defined, but not all of
‘them can be printed easily. The (ESC) “I” 1 command makes
them printable, and the (ESC) “I” Oreturns them to normal.
Just as the higher control codes hide the italic international
characters, the lower control codes hide the reman international
characters.
Let’s see how these commands work with the following program:
Demo ofcharactersin ti~e controlcodeared
10 ‘
2-0 LPRINT CHR$(27) ; “I 1“ ;
30 FOR I=0 TO 6
40 LPRINT CHR.$(I ) ;
50 NEXT I
60 LPRINT CHR$(16) ;CHR$(17) :
70 FOR 1=21 TO 31
80 LPRINT CHR$(l ) ;
90 NEXT I
100 LPRINT
110 FOR 1=128 TO 134
.120 LPRINT CHR$(I ) ;
130 NEXT I
140 LPRINT CHR$(144) ;CHR$(145) ;
1.50 FOR 1=149 TO 159
160 LPRINT CHR$(I ) ;
170 NEXT I
180 LPRINT CHR$(27) ; “IO”
190 END
When you run this program you should get like this:
The automatic sheet feeder is a handy option that feeds single
cut sheets automatically. Work done on cut sheets looks better
that done on computer paper, and you don’t have to tear the
“perforations” off each sheet as you must with fan-fold paper.
The automatic sheet feeder feeds a new sheet automatically
every time the printer receives or generates a form feed. Any
time you wish, you can turn the auto-feed unit on and off by
using control codes.
When the automatic sheet feeder is installed, you must set
DIP switch 1-5 on to detect the paper-out condition.
In addition, the following functions are ignored when the
automatic sheet feeder is installed:
Setting of the page len~h
Top and bottom margins
Vertical tab settings
■ The macro control code
The last of our group of miscellaneous codes is definitely not
the least. It is a user-definedcontrol code, called a mucrocontrol
code. The term
mucro is from the jargonese mucro-instruction
which refers to an instruction that “calls,” or uses a group of normal instructions. In computer programming macro-instructions
(which are similar to subroutines) save programmers a lot of
time and effort. Your printer’s macro can save you a lot of time
and effort also.
Loading...
+ hidden pages
You need points to download manuals.
1 point = 1 manual.
You can buy points or you can get point for every manual you upload.


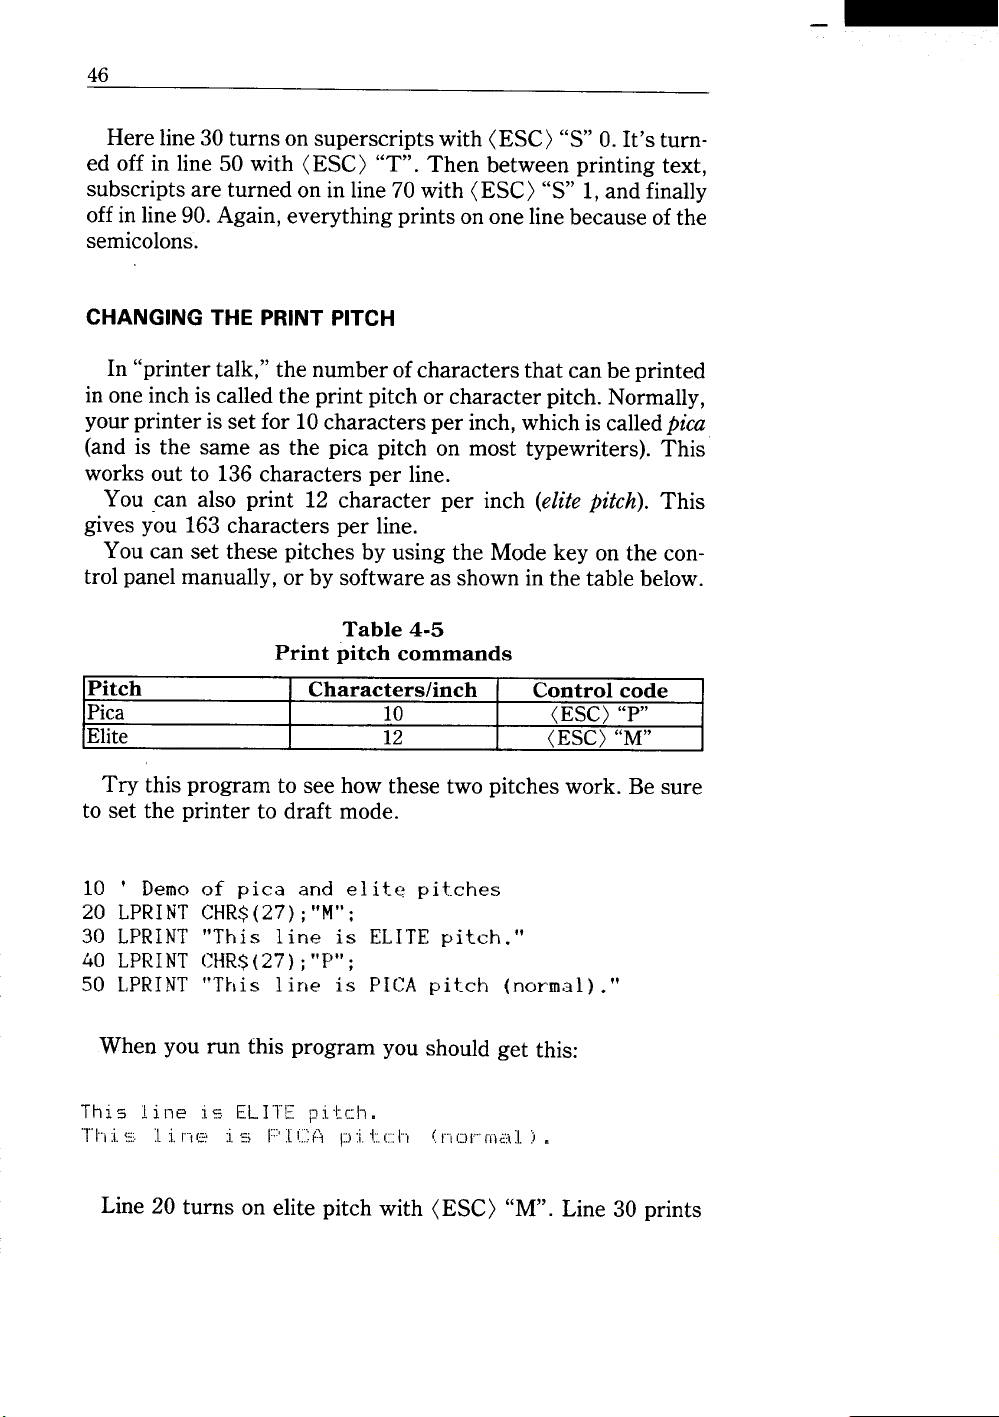


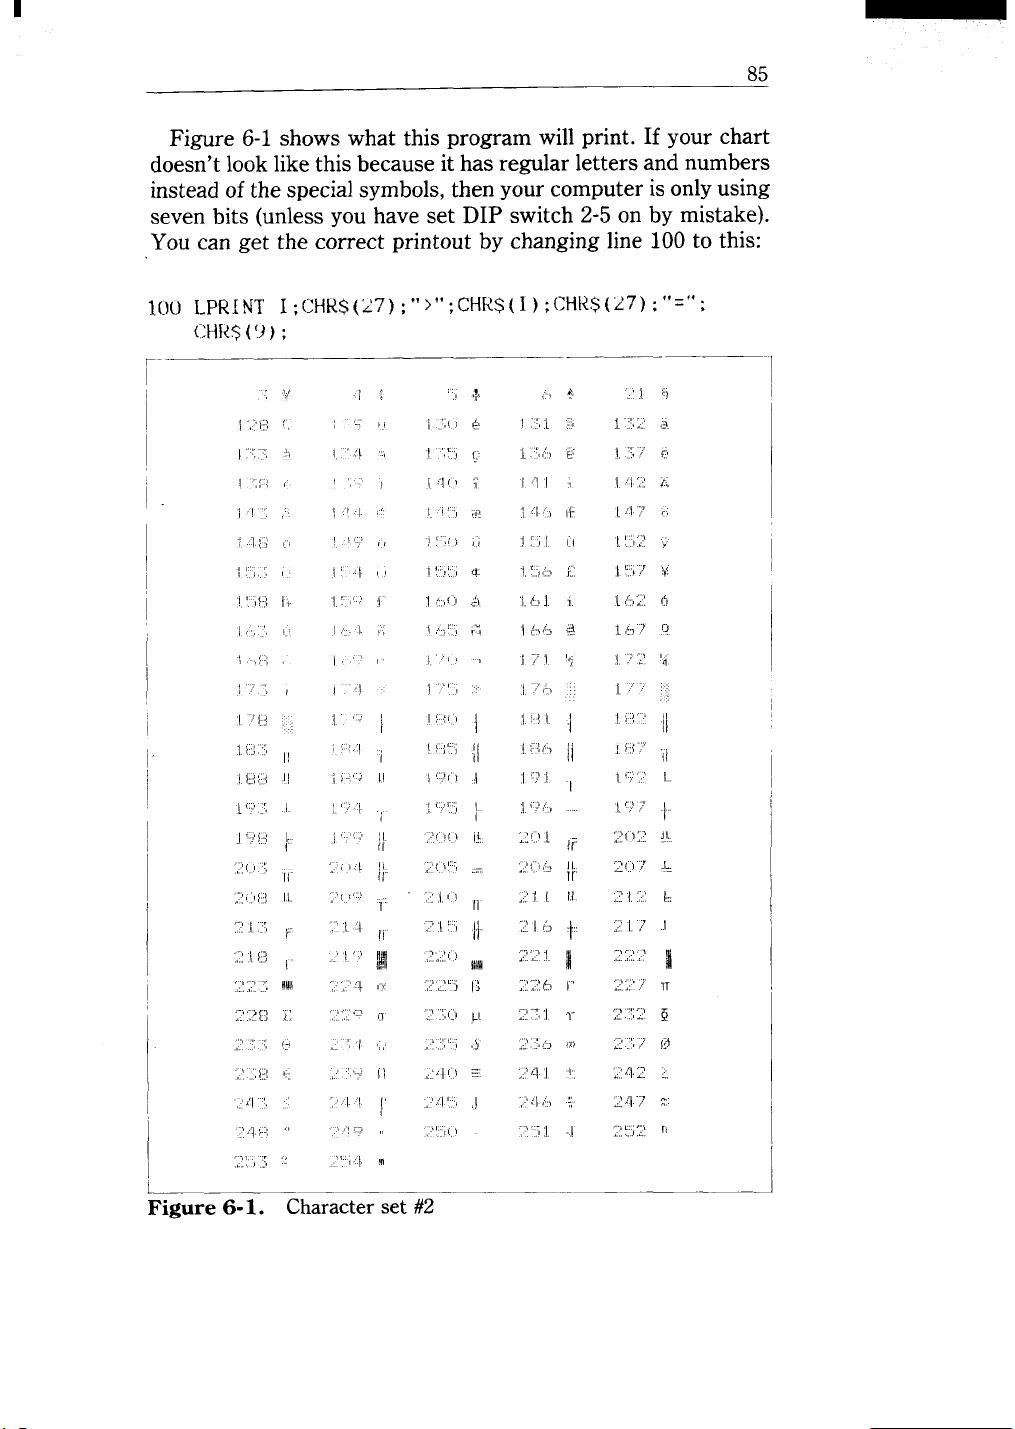


 Loading...