

Page 1
IntelliChlor
Flow-Temperature Switch
Replacement Kit
®
Installation Guide
IntelliChlor Flow-Temperature Switch Replacement Kit Installation Guide
Page 2

Technical Support
Sanford, North Carolina (8 A.M. to 5 P.M.)
Moorpark, California (8 A.M. to 5 P.M.)
Phone: (800) 831-7133
Fax: (800) 284-4151
Web site: visit www.pentairpool.com
Related IntelliChlor Manuals
IntelliChlor User’s Guide (P/N 520589)
© 2008 Pentair Water Pool and Spa, Inc. All rights reserved
This document is subject to change without notice
1620 Hawkins Ave., Sanford, NC 27330 • (800) 831-7133
10951 West Los Angeles Ave., Moorpark, CA 93021 • (805) 553-5000
Trademarks and disclaimers: IntelliChlor, and the Pentair Water Pool and Spa are
registered trademarks and trademarks of Pentair Water Pool and Spa, Inc. Other
trademarks and trade names may be used in this document to refer to either the entities
claiming the marks and names or their products. Pentair Water Pool and Spa, Inc. disclaims
proprietary interest in marks and names of others.
P/N 520737 - Rev C - 10-21-08
IntelliChlor Flow-Temperature Switch Replacement Kit Installation Guide
Page 3
IntelliChlor Flow-Temperature Switch Replacement Kit
Contents
Replacement kit contents:
• Flow-Temperature switch assembly
• Two pair-at-a-time splicer
Step 1: Switch OFF power to the pool pump and the
IntelliChlor cell before starting.
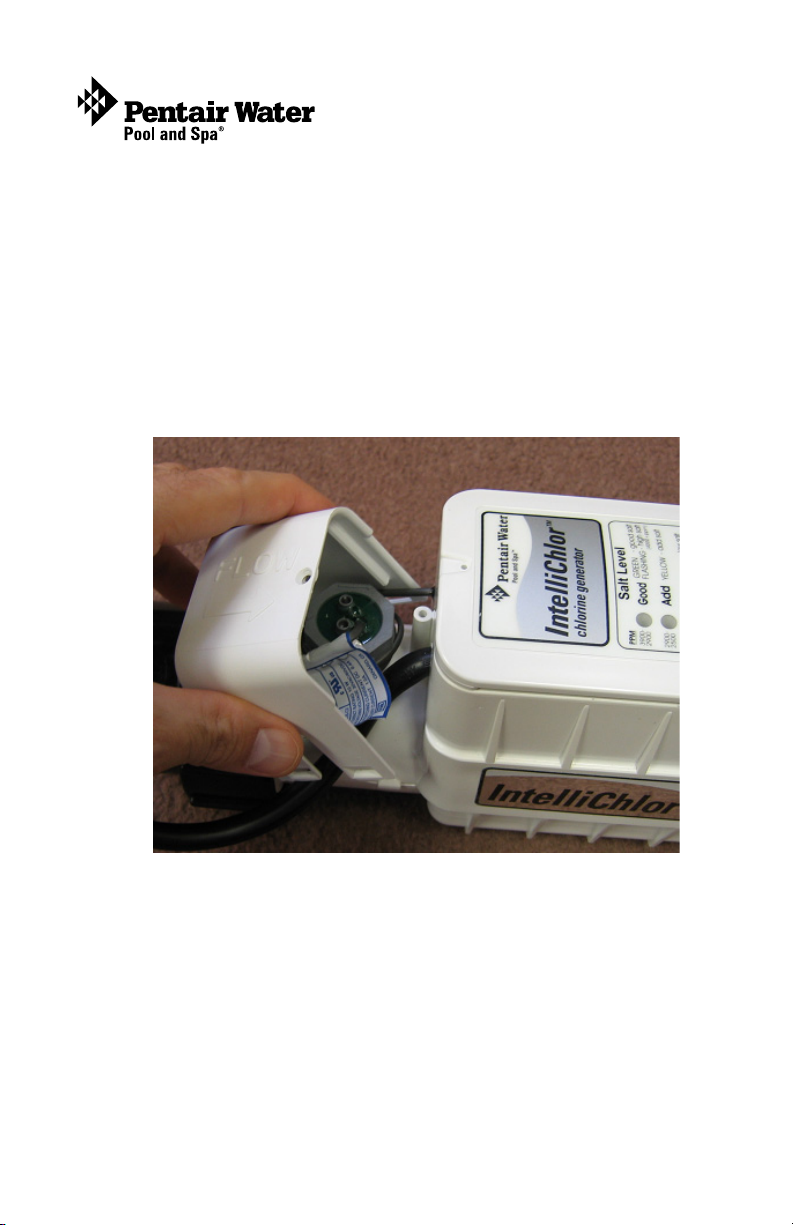
Step 2: Remove the flow-temperature switch from the
IntelliChlor cell.
To remove the flow-temperature switch from the IntelliChlor cell:
1. Using a small Phillips screwdriver, remove the flow-temperature
switch cover screw, then remove the cover from the cell.
1
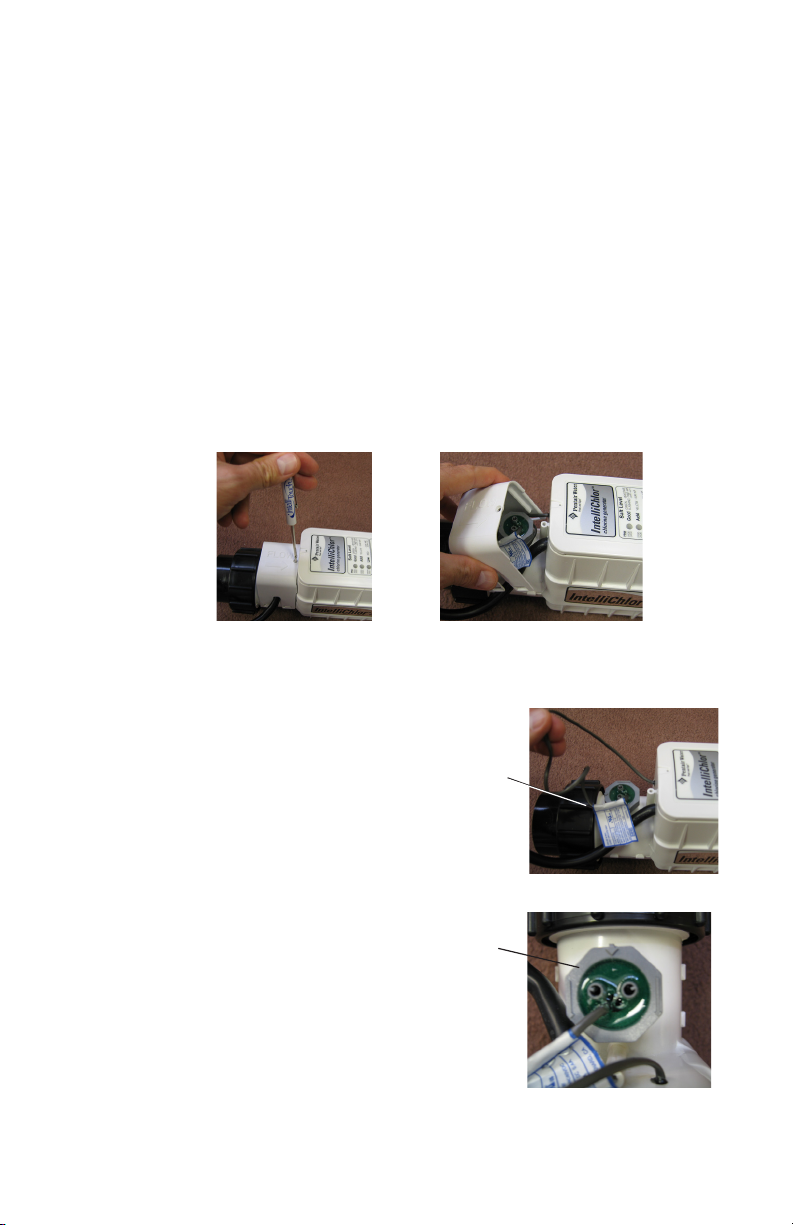
2. Loosen the flow-temperature switch cable that is wrapped
around the switch nut. Note the direction of the arrows on top of
the switch nut.
3. Cut the cable close to the switch
to allow enough wire for the
new switch cable to be
Cut wire
connected to.
4. Using a flat 1/2” (30 mm)
wrench carefully
unscrew the flowtemperature switch
assembly until the
switch can be remove
Unscrew nut
counterclockwise to
remove flow-
temperature switch
assembly
from the cell. Be
careful not to damage
the cell plastic
coupling with the
edge of the wrench.
IntelliChlor Flow-Temperature Switch Replacement Kit Installation Guide
Page 4

2
Step 3: Install the replacement flow-temperature switch
To replace the flow-temperature switch:
1. Insert the flow-temperature switch into threaded hole in the cell and
hand tighten the switch as much as possible.
2. Using a flat 1/2” (30 mm) wrench carefully tighten the flowtemperature switch assembly until the switch thread nearly bottoms out.
3. Tighten the switch nut until the arrows on the top of the switch nut are
pointing in the flow direction and the center arrow is aligned in the
center position as shown below.
Center arrow
arrow
direction
4. Strip back the two wires on the replacement flow-temperature
switch cable and the switch wire that was cut.
IntelliChlor Flow-Temperature Switch Replacement Kit Installation Guide
arrow
direction
Page 5

5. Insert the red and black wires from the switch into one end of the
water-tight (pair-at-a-time) connector and crimp using pliers. Then
insert the red and black wire going into the cell into the other end of
the water tight connector and crimp using pliers. atch the red wire
from the flow-temperature switch to the red wire going into the
cell. Insert both of these wires into the water-tight connector and
crimp using pliers. Repeat for black wire. Wrap the excess wire
around the flow-temperature switch nut.
3
3
Green and White
wires from switch
Green and
White going
into cell
Red and Black
wires from switch
Red and Black
going into cell
6. If replacing a regular flow switch (red and black wires only), insert
green and white wires from new flow-temperature switch into one end
of the second water-tight connector and crimp using pliers. This will
provide electrical insulation for the floating leads.
For regular flow switch
replacement, floating leads
will be covered with the
second splicer
IntelliChlor Flow-Temperature Switch Replacement Kit Installation Guide
Page 6

7. Wrap the excess wire around the flow switch.
8. Replace the switch cover and secure it with the small Phillips screws.
9. The IntelliChlor is now ready for operation.
10. Switch the power on to the pool pump and the IntelliChlor cell.
IntelliChlor Flow-Temperature Switch Replacement Kit Installation Guide
Page 7

Notes
IntelliChlor Flow-Temperature Switch Replacement Kit Installation Guide
Page 8

P/N 520737 - Rev C
IntelliChlor Flow-Temperature Switch Replacement Kit Installation Guide
 Loading...