

Page 1
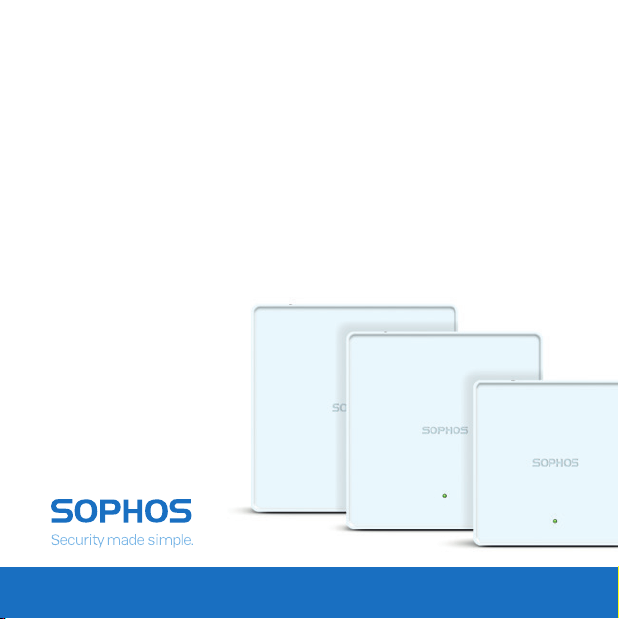
Quick Start Guide
APX Series Access Points
Page 2
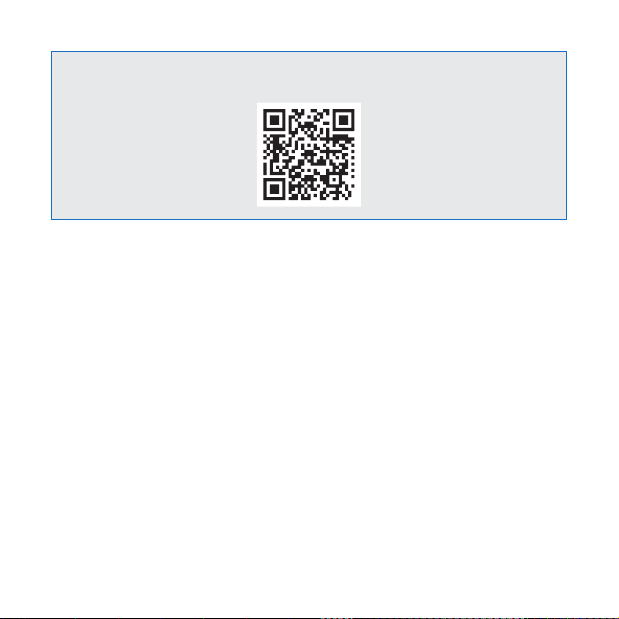
For more information about your device, scan the QR code or visit
www.sophos.com/get-started-ap
1. Before Deploying
Congratulations on the purchase of your Sophos APX Series access point. This Quick
Start Guide provides you with instructions to connect the access point and do the initial
configuration.
Before you begin, please make sure that you have access to one of the following
products which include the Sophos wireless controller needed to manage your Sophos
access point:
Ì Sophos Wireless (Sophos Central managed)
Ì Sophos SG UTM
Ì Sophos XG Firewall
Please ensure you have a valid license for one of the above products.
To power and connect your access point you will need to have either a PoE injector
(available as an accessory from your Sophos partner) or a PoE switch plus an RJ45
Ethernet cable.
* Please check https://community.sophos.com/kb/en-us/124444#Sophos Access Points for availablity
1
*
*
Quick Start Guide APX Series Access Points
Page 3

What is included in the box
Access Point This Quick Start Guide
2 screws
2 wall anchors for wall-mount
and Security Notes
4 screws to attach
bracket to back of AP
Device Images*: Front and Back
LAN (PoE) Port
ETH1 Port
* Supports 15/16", 9/16", 3/8" ceiling tracks
** The displayed image is of APX 740 device. Other APX models may vary slightly.
LED
Mounting bracket for
wall and ceiling (T-bar)
Console (RJ45) Port
Reset button
*
2Quick Start Guide APX Series Access Points
Page 4
2. Mounting and Connection
For instructions on how to mount your access point, please see the Operating
Instructions under www.sophos.com/get-started-ap
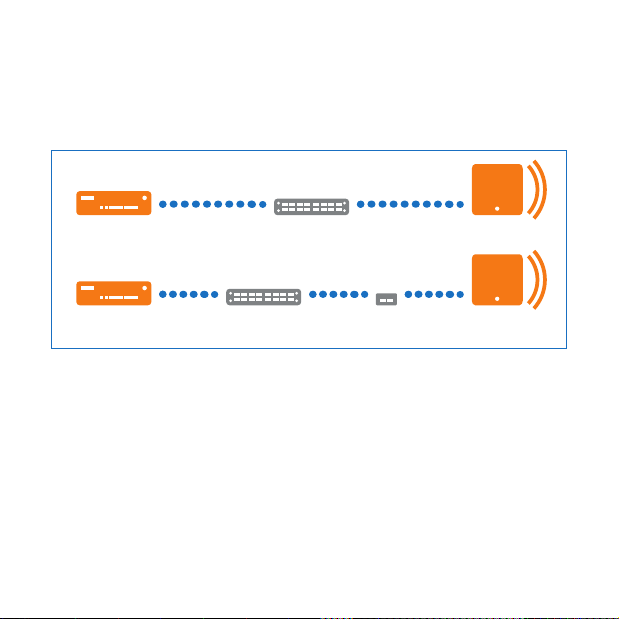
Connect the LAN (PoE) port of the access point to a PoE switch or PoE injector using an
RJ45 Ethernet cable.
or Router
or Router
PoE SwitchSophos Firewall
SwitchSophos Firewall
Injector
Access Point
Access PointPoE
The access point will now boot and try to receive an IP address via DHCP (either from the
Sophos firewall/UTM or another DHCP server in your network).
After successfully receiving an IP address, the access point attempts to communicate
with either the Sophos firewall/UTM or Sophos Central. In order to do so, the firewall
needs to either be the default gateway of the access points or be on the default route
(most likely your route to the internet).
Whilst waiting for DHCP and searching for the wireless controller, the access point status
LED will show its current state (please see the following table).
3
Quick Start Guide APX Series Access Points
Page 5

3. Configuration
After successful connection to the wireless controller the status LED turns to solid green.
The access point is now ready to be managed.
Please refer to the documentation of your Sophos firewall/UTM or the Sophos Central
online help to start the configuration of your access point.
4. LED Status
Off
Off AP is off or reboot started
Green
Solid Normal operation
Flashing AP is booting & connecting to wireless controller
Red
Solid Error, no wireless controller found. AP will
reboot (if not yet claimed by a controller).
Check network connection if error persists.
If reset button pressed: AP preparing
configuration reset
Flashing slowly Configuration reset in progress
Flashing fast Firmware update in progress
Note: Do not disconnect from power
* Your AP should recover from this state after a maximum of 5 minutes.
Quick Start Guide APX Series Access Points
*
*
*
4
Page 6

5. Access Point Reboot & Reset
Reboot with current image and configuration
1. Press reset button
2. Release reset button
3. AP reboots (LED will go off, then will turn to solid green)
Reboot with current image and clear configuration
1. Press and hold reset button
2. AP reboots (LED will go off and then switch to green briefly)
3. LED will turn solid red for 5 sec. You can still cancel the configuration clearance
process by releasing the reset button before the LED starts blinking
4. LED will blink red (configuration will be cleared)
5. Release reset button
6. AP reboots with factory default settings
Reset
Button
Status
LED
Released
Pressed
Off
Reboot Reboot clear config
5 Sec
Solid Solid Blinking
6. Support and Documentation
For more information and technical support, please visit
www.sophos.com/en-us/support or contact your local Sophos reseller.
5
Quick Start Guide APX Series Access Points
Page 7

Für weitere Informationen zu Ihrer Appliance scannen Sie den QR-Code oder gehen Sie
auf www.sophos.com/get-started-ap
1. Vorbereitung
Herzlichen Glückwunsch zum Kauf Ihres Sophos APX Access Points. In dieser
Schnellstartanleitung erhalten Sie Anweisungen dazu, wie Sie den Access Point
anschließen und die Anfangskonfiguration vornehmen.
Bevor Sie beginnen, stellen Sie bitte sicher, dass Sie Zugriff auf eines der folgenden
Produkte mit Sophos Wireless Controller haben. Der Controller ist für die Verwaltung
Ihres Sophos Access Points erforderlich:
Ì Sophos Wireless (Verwaltung über Sophos Central)
Ì Sophos SG UTM
Ì Sophos XG Firewall
Bitte stellen Sie zudem sicher, dass Sie über eine gültige Lizenz für eines der oben
genannten Produkte verfügen.
Für die Stromversorgung und den Anschluss Ihres Access Points benötigen Sie entweder
einen PoE-Injektor (als Zubehörteil bei Ihrem Sophos Partner erhältlich) oder einen PoESwitch und ein RJ45-Ethernet-Kabel.
* Auf der Seite https://community.sophos.com/kb/en-us/124444#Sophos Access Points finden Sie Informa-
tionen zur Verfügbarkeit der Access Points
Kurzanleitung APX Serie
*
*
6
Page 8

Im Paket inbegriffen
Access Point Diese Kurzanleitung und
2 Wandanker für die Wandmontage
2 Schrauben
Sicherheitshinweise
Halterung auf der Rückseite des AP
4 Schrauben zur Fixierung der
Halterung für Decken
(T-bar)- und Wandmontage
Abbildungen der Appliance*: Vorder- und Rückseite
LAN (PoE) Port
ETH1 Port
* Für Deckenschienen mit 15/16", 9/16", 3/8"
** Das Bild zeigt einen APX 740. Andere APX-Modelle können leicht abweichen.
LED
7
Console (RJ45) Port
*
Resetknopf
Kurzanleitung APX Serie
Page 9

2. Montage und Anschluss
Informationen zur Montage Ihres Access Points finden Sie in der Betriebsanleitung unter
www.sophos.com/get-started-ap
Verbinden Sie den LAN-Anschluss (PoE) Ihres Access Points über ein RJ45-EthernetKabel mit einem PoE-Switch oder PoE-Injektor.
oder Router
oder Router
PoE-SwitchSophos Firewall
SwitchSophos Firewall
Injektor
Access Point
Access PointPoE-
Der Access Point fährt hoch und versucht, eine IP-Adresse über DHCP zu erhalten
(entweder von der Sophos Firewall/UTM oder einem anderen DHCP-Server in Ihrem
Netzwerk).
Nach erfolgreichem Erhalt einer IP-Adresse startet der Access Point einen
Kommunikationsversuch mit entweder der Sophos Firewall/UTM oder Sophos Central.
Hierfür muss die Firewall entweder der Standard-Gateway der Access Points sein
oder sich auf der Standard-Route befinden (sehr wahrscheinlich Ihre Verbindung zum
Internet).
Während der Access Point auf die Antwort des DHCP-Server wartet und nach dem
Wireless Controller sucht, zeigt die Status-LED des Access Points seinen aktuellen
Zustand an (siehe nachfolgende Tabelle).
Kurzanleitung APX Serie
8
Page 10

3. Konfiguration
Nach erfolgreicher Verbindung mit dem Wireless Controller leuchtet die Status-LED
konstant grün auf. Der Access Point kann nun verwaltet werden.
Bitte lesen Sie die Dokumentation Ihrer Sophos Firewall/UTM oder die Online-Hilfe für
Sophos Central, um Ihren Access Point zu konfigurieren.
4. LED Status
Aus
Aus AP ist aus oder fährt hoch
Grün
Konstant Normaler Betrieb
Blinkt AP fährt hoch und stellt Verbindung
zum Wireless Controller her
Rot
Konstant Fehler, kein Wireless Controller gefunden.
AP wird neu gestartet (falls er noch
nicht einem Controller zugeordnet ist).
Überprüfen Sie die Netzwerkverbindung,
wenn der Fehler weiterhin besteht.
Bei Drücken des Resetknopfs: AP bereitet
das Zurücksetzen der Konfiguration vor
Blinkt langsam Konfiguration wird zurückgesetzt
Blinkt schnell Firmware-Update wird durchgeführt
Hinweis: Nicht vom Strom nehmen
* Der AP sollte maximal 5 Minuten in diesem Zustand verbleiben.
9
*
*
*
Kurzanleitung APX Serie
Page 11

5. Neustart und Zurücksetzen des Access Points
Neustart mit und aktueller Konfiguration
1. Resetknopf drücken
2. Resetknopf loslassen
3. AP startet neu (LED schaltet sich ab und leuchtet anschließend konstant grün auf)
Neustart mit gelöschter Konfiguration
1. Resetknopf drücken und gedrückt halten
2. AP startet neu (LED schaltet sich ab und leuchtet dann kurz grün auf)
3. LED leuchtet für 5 Sek. konstant rot auf. Um das Löschen der Konfiguration vorzeitig
abzubrechen, lassen Sie den Resetknopf los, bevor die LED zu blinken beginnt.
4. LED blinkt rot auf (Konfiguration wird gelöscht)
5. Resetknopf los lassen
6. AP startet neu mit den Werkseinstellungen
Resetknopf
Status LED
Losgelassen
Gedrückt
Aus
Neustart Neustart gelöschte Konfig
5 Sec
Konstant Konstant Blinkend
6. Support und Dokumentation
Weitere Informationen und technischen Support erhalten Sie unter
www.sophos.com/de-de/support. Oder kontaktieren Sie Ihren Sophos Vertriebspartner
vor Ort.
Kurzanleitung APX Serie
10
Page 12

Quick Start Guide APX Series Access Points
Sales DACH
(Deutschland, Österreich, Schweiz)
Tel.: +49 (0) 611 585 8-0
Tel.: +49 (0) 721 255 16-0
E-Mail: sales@sophos.de
49RNAQ02.001
Japan Sales
Tel.: +81 3 3568 7550
Email: sales@sophos.co.jp
United Kingdom Sales
Tel.: +44 (0)8447 671131
Email: sales@sophos.com
© Copyright 2016-17. Sophos Ltd. All rights reserved.
Registered in England and Wales No. 2096520,
The Pentagon, Abingdon Science Park, Abingdon, OX14 3YP, UK
Sophos is the registered trademark of Sophos Ltd. All other product and
company names mentioned are trademarks or registered trademarks of
their respective owners.
17-04-24 QSG (DD-2602)
China Sales
Tel.: +86-10-6567 5820
Email: sales@sophos.co.jp
North American Sales
Toll Free: 1-866-866-2802
Email: nasales@sophos.com
Shanghai Sales
Tel.: +86-21-32517160
Email: sales@sophos.co.jp
Australia and New Zealand Sales
Tel.: +61 2 9409 9100
Email: sales@sophos.com.au
 Loading...