


Media Manager
Organize your media
July 2007

Getting started Media Manager
Contents
Introduction ............................................................................................... 2
Overview ................................................................................................ 2
Installing Media Manager .......................................................................... 2
System requirements ............................................................................. 2
Installing from the PC Suite CD ............................................................. 3
Downloading from the Web and installing ............................................. 3
Connecting the USB cable ........................................................................ 4
Sony Ericsson Media Manager .................................................................. 5
Starting Sony Ericsson Media Manager ................................................ 6
The Sony Ericsson Media Manager window ......................................... 6
Music mode ............................................................................................... 7
Audio CD mode ....................................................................................... 10
SensMe™ music analysis .................................................................... 11
Photo mode ............................................................................................. 12
Video mode ............................................................................................. 12
Web feed (RSS media) mode .................................................................. 13
Synchronization ....................................................................................... 14
Backup mode .......................................................................................... 15
Troubleshooting ....................................................................................... 16
Trademarks and acknowledgements ...................................................... 17
1 July 2007

Getting started Media Manager
Introduction
Instruction symbols
The following instruction symbols may appear in this Getting started guide:
Indicates an important tip.
Indicates an important note.
> Use the the navigation key or select options on the screen to scroll and select.
Overview
You can use Sony Ericsson Media Manager to transfer photos, music, video, and Web feeds (RSS media)
between your computer and phone. The software also has the ability to extract audio tracks from CDs and
transfer them to your phone. In addition, you can transfer files from your phone to your computer.
Installing Media Manager
The Media Manager software enables you to transfer music from CDs or a computer to your phone.
You can also download Media Manager from www.sonyericsson.com/support.
System requirements
The system requirements are:
• At least 200 MB free hard disk space
• Microsoft® Windows® XP (SP2 or later)
•512 MB RAM
• 1 GHz processor
• A Microsoft® Windows® compatible sound card
• A CD-ROM drive
• A USB 2.0 cable and port
• QuickTime™ 7.0 (available on the CD)
• Internet connection (for Gracenote™ CD identification and software activation)
• Microsoft .NET Framework 2.0 (available on the CD)
• Microsoft® Windows® Explorer 5.0 or later (available on the CD)
2 July 2007

Getting started Media Manager
Installing from the PC Suite CD
Before you install Media Manager you should install the Sony Ericsson PC Suite software on
your computer.
To install Media Manager from the PC Suite CD
1. Insert the CD that came with the phone. The CD should start automatically, if not: click Start/Run...
and type in D:/start.exe and click OK (D: is the CD drive letter on the system).
2. Select a language.
3. Click Install in the Media Manager section.
4. If needed, follow the instructions to install .NET Framework 2.0 from the CD.
5. In the installation wizard: Click Next to continue the installation.
6. Read and accept the licence agreement, then click Next.
7. Click Next to install to the default folder.
8. Click Install to begin the installation.
9. Click Finish to exit the wizard.
Downloading from the Web and installing
Before you install Media Manager you should install the Sony Ericsson PC Suite software on
your computer.
To download the latest version of Media Manager
1. In your Internet browser, go to www.sonyericsson.com/support.
2. Select a region and country.
3. Select a phone from the list or enter your phone model in the text field.
4. Select Software downloads.
5. Select Media Manager Setup X.X.X.X for your preferred language under Applications.
6. Select Download and save the file to your computer.
To install Media Manager from the downloaded file
1. Double-click the downloaded Media Manager file.
2. If needed, follow the instructions to download and install .NET Framework 2.0 from the Internet.
3. In the installation wizard: Click Next to continue the installation.
4. Read and accept the licence agreement, then click Next.
5. Click Next to install to the default folder.
6. Click Install to begin the installation.
7. Click Finish to exit the wizard.
3 July 2007
Getting started Media Manager
Connecting the USB cable
The Sony Ericsson USB cable that comes with your phone can be used to connect the computer and
the phone.
Your phone can be either on or off when you connect the USB cable. If the phone is on, select File transfer in
the pop-up that appears on the phone.
To change the mass storage default settings on your phone, select Menu > Settings > the Connectivity
tab > USB > USB mode > Mass storage before connecting your phone and computer.
To connect your phone to a computer with the USB cable
1. Connect the USB cable to your phone and computer.
2. Computer: If the Found New Hardware Wizard appears, click Cancel to exit the wizard.
3. Phone: Select Mass storage.
4. The phone will shut down in this mode but will restart when it is disconnected from the USB cable.
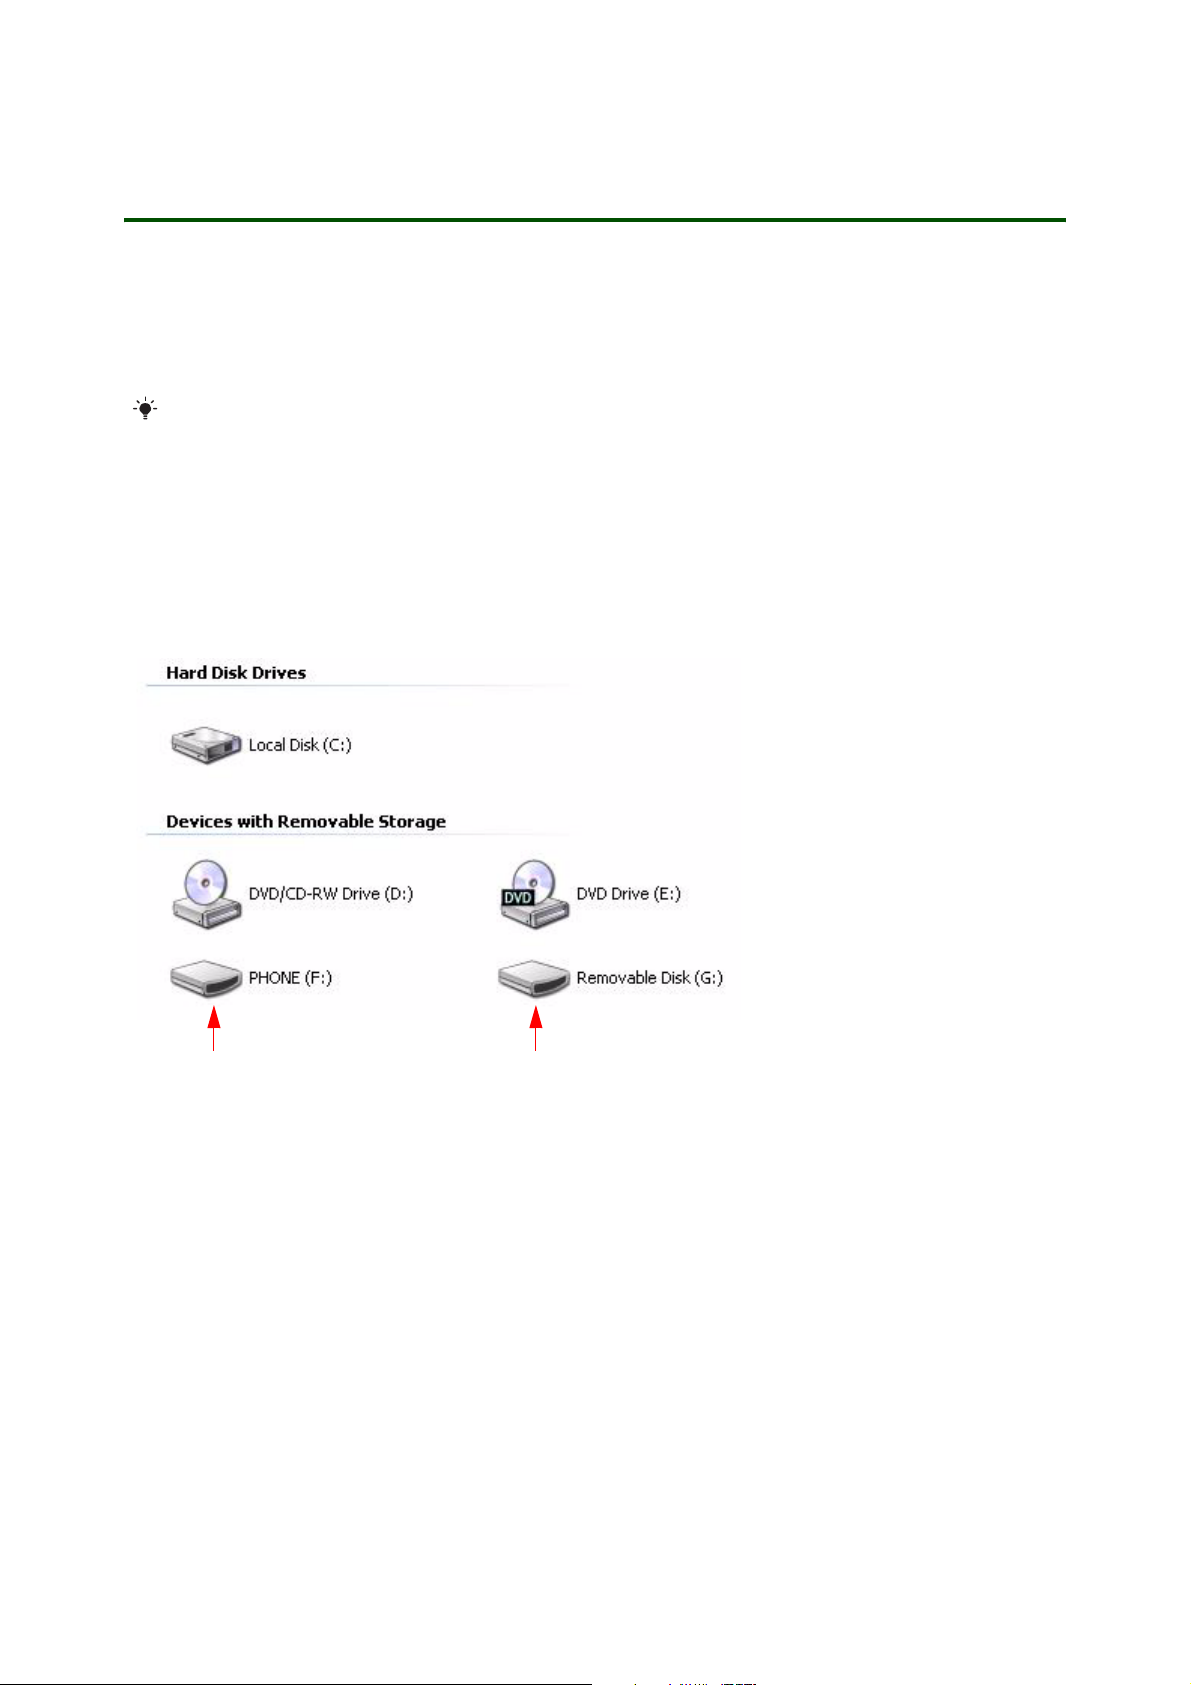
5. Computer: Your phone memory and memory card are added as removable disks in Windows®
Explorer.
Phone memory Memory card
4 July 2007
Getting started Media Manager
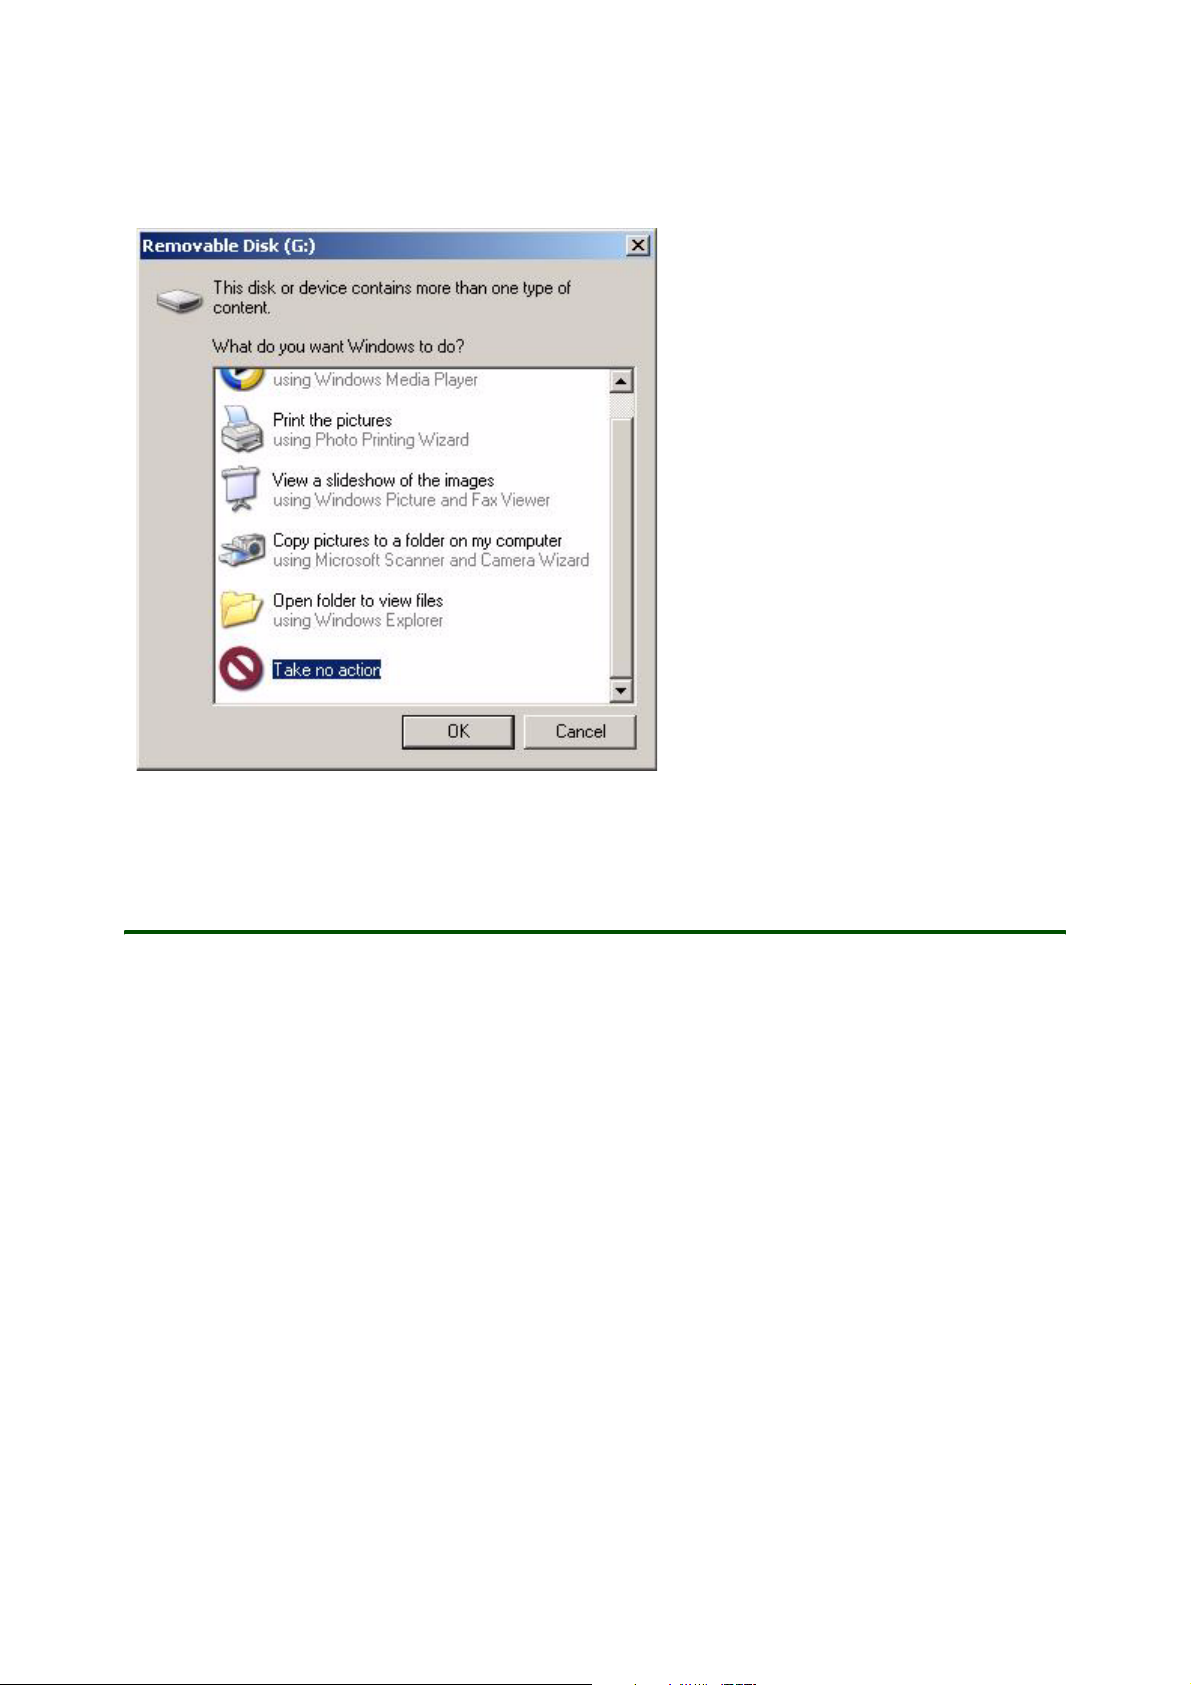
6. Computer: If a dialogue box asks what you want to do with the files on the removable disks (the
phone memory and memory card), select Ta k e no actio n .
7. Transfer music with Media Manager.
Sony Ericsson Media Manager
Key features
• Transfer photos, music (in MP3 and AAC format), videos, and Web feeds (RSS media) feeds to and
from your phone.
• Extract music from CDs and transfer them to your phone with Gracenote® MusicID™ albumidentification technology.
• Shuffle a mix of audio tracks to play on your phone.
• Add SensMe™ metadata to enhance music tracks with additional metadata such as mood (happy,
sad), beats per minute, or chords. This enables the possibility to browse and listen to music in your
phone where SensMe™ provides a navigation window based on two axes, having moods on one, and
beats per minute on the other.
• Subscribe to Web feeds.
5 July 2007

Getting started Media Manager
Starting Sony Ericsson Media Manager
To start Sony Ericsson Media Manager
• Double-click the Sony Ericsson Media Manager icon on the desktop (or click Start/Programs/
Sony Ericsson/Sony Ericsson Media Manager/Sony Ericsson Media Manager).
You can reset Sony Ericsson Media Manager completely during a start-up. Press and hold down Ctrl
+ Shift when you start Sony Ericsson Media Manager. This is useful if the listed computer folders or
the list of connected phones and memory cards are no longer valid.
The Sony Ericsson Media Manager window
The Sony Ericsson Media Manager window is divided into two main areas: the PC pane on the top and the
Phone pane on the bottom. Each pane is divided into two views: the tree view on the left and the list view
on the right.
The top half of the Sony Ericsson Media Manager window allows you to select the source media—music,
CD tracks, photos, videos, and Web feeds (RSS media)—that you want to transfer from your computer to
your phone. Click one of the mode buttons to choose the type of media you want to transfer.
The tree view, located on the left, displays the hard drive(s), CD drives, and any virtual drives, depending
on your selection. Any media found on the drive or network is displayed in the list view, located on
the right.
To refresh the display, click a pane to give it focus, and then press F5.
6 July 2007

Getting started Media Manager
The status bar between the PC and Phone panes displays the name of the selected phone or memory
card and the available space. The progress indicator in the target pane displays the progress of encoding
and transferring files. Sony Ericsson Media Manager keeps track of each phone and memory card that
you have used with the application, so you can choose the device you want to view by choosing it from
the Selected Device drop-down list between the PC and Phone panes:
The bottom half of the Sony Ericsson Media Manager window displays the contents of your phone (or the
selected memory card). You can perform any of the following tasks using this pane:
• Browse the contents of your phone.
• View information about each file.
• Click a column heading to sort your files in ascending or descending order.
• Select files and click the Delete button to remove them from your phone. If you have selected files
on a memory card that is not available, the files are added to a queue and will be deleted the next
time you connect your phone.
• Select a media file and click the Preview button to preview it in the Sony Ericsson Media Manager window.
In the Phone pane, files that have already been transferred are displayed in bright text; files that have not
been transferred are dimmed:
The panes and list views can be sized to your preference by dragging the dividers between them.
Music mode
Browsing your computer for music
In Music mode, the left side of the PC pane displays the folders where you tell the software to look for
music. You can navigate folders and subfolders in the tree view. The right side of the window displays
the contents of the selected folder.
Sony Ericsson Media Manager helps you find music in your My Music folder or another location on your
hard drive. You can click the Add Shortcut button to add folders to the PC pane. The list view of the PC
pane displays the music from the location you specified.
7 July 2007

Getting started Media Manager
Once you have located your music files, you can preview and transfer them to your phone.
When you select a music file, information about the selected track is displayed at the top of the PC pane:
Tips when browsing your computer
• To add files to your phone quickly, drag files from the Windows® Explorer to the Phone pane in the
Sony Ericsson Media Manager window. The transfer will begin when you drop the files.
• If album art is not available, a disc icon is displayed. You can click the disc icon to open your Web
browser and perform an image search. To update the album artwork for all files in the current folder,
drop a graphic file or URL on the image.
• Playlists (.m3u and .wpl exported from Windows® Media Player®) are included in the tree view in the
PC pane. When you select a playlist, its contents are displayed in the list view, and you can transfer
the media files to your phone. If a playlist contains files that are not supported by Sony Ericsson Media
Manager, those files are not displayed.
• If you have media files that are supported by your phone but that the software cannot read, the files
are not displayed until you connect your phone. These files are displayed with a crossed over icon and
are transferred without re-encoding.
• To locate a file on your hard drive, right-click it in the PC pane and choose Explore Containing Folder
from the shortcut menu.
Previewing your music
Using Sony Ericsson Media Manager, you can preview any audio tracks on your computer before you
transfer them to your phone.
To preview your music
1. Click the Music Mode button at the top of the Sony Ericsson Media Manager window.
2. On the right side of the PC pane, select the song you would like to preview.
3. Click the Preview button or double-click the track to preview it in the lower half of the Sony Ericsson
Media Manager window (if Sony Ericsson Media Manager cannot play the file, it will attempt to start
the player associated with the file type).
You can use the transport controls at the bottom of the window to pause, resume, stop playback, skip to
the previous or next track, and adjust the playback volume.
Press and hold down Ctrl and double-click a song to preview it using the application associated with
its file extension.
Transferring music to your phone
After adding folders and previewing your music, you are ready to transfer the files to your phone.
Depending on your phone model, music is transferred to your phone in MP3 or AAC format. Other
formats are automatically re-encoded before transferring. You can choose the encoding setting from
the Target drop-down list.
8 July 2007

Getting started Media Manager
Use the Music page in Settings mode to choose whether you want to encode to MP3 or AAC format and
whether you want to transfer other supported audio formats without re-encoding.
If your audio files contain metadata, the files are transferred to your phone using the artist and album
metadata. For example, d:\my music\The Dorothy Heralds\100 Unnamed Things\05 Synergy.mp3 would
appear on your phone system in Music\The Dorothy Heralds\100 Unnamed Things\Synergy.
If your audio files do not contain metadata (such as artist and album information), the files are transferred
to your phone using the album folder and file name from your PC. For example, d:\my music\Desktop\
05 Gracie.mp3 would appear on your phone in Music\Desktop\05 Gracie — if the file does not contain
metadata, there’s no way to determine the album or track title, so the folder and file name are used instead.
To transfer music to your phone
1. Click the Music Mode button at the top of the Sony Ericsson Media Manager window.
2. On the left side of the PC pane, choose the folder that contains the tracks you want to transfer by
expanding and collapsing folders as necessary. Playlists (.m3u and .wpl) are included in the tree view
in the PC pane.
3. On the right side of the PC pane, select the tracks you would like to transfer. Press and hold down Ctrl
or Shift to select multiple tracks.
4. From the Target drop-down list, choose the bit rate for transferred tracks, or choose Automatic to
allow the software to determine the appropriate bit rate. When you choose Automatic, the software
chooses the standard bit rate that most closely matches the original file’s bit rate. Choosing a lower bit
rate allows you to fit more tracks on your phone by reducing the quality of the transferred files.
Sony Ericsson Media Manager re-encodes the tracks for the transfer.
5. Click the Transfer to Phone button to begin transferring the tracks.
The original audio track on your hard drive will be unaffected by the re-encoding process. Not all
formats are supported by all phones. If your phone is unable to play transferred audio, try using
a different Target setting.
Do not disconnect the USB cable during file transfer as this may harm the phone memory or the
memory card.
Prior to transferring tracks from an audio CD, the files are saved to your hard drive in the computer folder
\My Documents\My Music\<Artist Name>\<Album Name>. You can choose a different folder on the CD
Extract page in Settings mode.
The status bar between the PC and Phone panes displays the space available on selected phone or
memory card and the file size of the selected audio tracks. The status bar adjusts according to the bit
rate you choose, so it is helpful to monitor this information when making your selection:
The selected files are encoded if necessary and transferred to the phone. If your phone is not connected
— or if you have selected a memory card that is not available — the music is added to a queue and will be
transferred the next time you connect your phone.
9 July 2007

Getting started Media Manager
If there is not enough free space available for the selected tracks, a warning message is displayed
indicating that not all files may be transferred. Click the OK button to proceed and transfer the tracks that
will fit on your phone. The remaining files are preserved in the transfer queue and will be transferred the
next time you connect your phone (if you delete files to make room for them). You can also click the
Cancel button.
Shuffle tracks to fill your phone
You can choose to have Sony Ericsson Media Manager select a random collection of tracks from your
music library, shuffle their order, and display them in a Shuffle Results folder. You can then edit the
contents of the Shuffle Results folder before transferring the tracks to your phone or memory card.
Use the Reserve space control on the General Settings page in Settings mode to specify how much of
your phone’s memory you want to make available for saving media files. For example, if you choose 10%
from the Reserve space drop-down list, Sony Ericsson Media Manager can fill all but 10% of the memory
in your phone.
To shuffle tracks to fill your phone
1. Click the Music Mode button at the top of the Sony Ericsson Media Manager window.
2. On the left side of the PC pane, select a folder. Music in the selected folder (and all subfolders) will be
used to shuffle tracks.
3. Click the Shuffle button and choose a command from the menu. Sony Ericsson Media Manager
shuffles and adds a random collection of songs from the selected location to the Shuffle Results
playlist at the bottom of the folder list in the PC pane.
4. Once the tracks are displayed in the Shuffle Results folder, you can sort the list or delete tracks as
desired before transferring them to your phone or memory card.
5. Once you are satisfied with the included tracks, click the Transf er button to begin transferring the
tracks. The selected files are encoded if necessary and transferred to the phone.
The Shuffle button is not available if your phone’s memory is full or if your phone is not connected via
USB.
Audio CD mode
Extracting audio from CD
Sony Ericsson Media Manager allows you to extract tracks from your audio CDs and transfer them to
your phone. The files are saved to your hard drive in the computer folder ..\My Documents\My Music\
<Artist Name>\<Album Name> folder (or ..\Users\<Username>\Music\<Artist Name>\<Album Name> on
Windows® Vista®). You can change the destination folder on the CD Extract page in Settings mode.
Sony Ericsson Media Manager software is not intended and should not be used for illegal or
infringing purposes, such as the illegal copying or sharing of copyrighted materials. Using
Sony Ericsson Media Manager software for such purposes is, among other things, against United
States and international copyright laws and contrary to the terms and conditions of the End User
License Agreement. Such activity may be punishable by law and may also subject you to the breach
remedies set forth in the End User License Agreement.
10 July 2007

Getting started Media Manager
To extract audio from a CD and transfer to your phone
1. Click the CD Mode button at the top of the Sony Ericsson Media Manager window.
2. Insert an audio CD in your drive. Media Manager automatically displays the list of tracks.
3. If you want to manually refresh CD information, click the Look Up MusicID button at the top of the
PC pane.
4. Select the tracks you want to extract. Press and hold down Ctrl or Shift to select multiple tracks.
Tracks that have already been extracted are displayed in bright text; tracks that have not been
extracted are dimmed:
5. From the Target drop-down list, specify your desired audio bit rate.
6. Click the Transfer to Phone button. The selected files are extracted from CD, converted to MP3 or AAC
format, and transferred to your phone.
To change the file type used for CD extraction, use the File Type drop-down list on the CD Extract
page in Settings mode.
To create a smaller file for your phone, you can use a lower bit rate. Higher bit rates allow for betterquality music, but also create larger file sizes, so you will fit fewer tracks on your phone. The Size
column displays the approximate size of each track when encoded using the selected bit rate.
To extract audio from a CD when your phone is not connected
1. Click the Extract Music Tracks button at the top of the CD Audio tab.
2. The selected files are extracted from CD, converted to MP3 or AAC format, and added to a queue for
transferring the next time you connect your phone.
SensMe™ music analysis
SensMe™ is a new technology that enhances music tracks with additional metadata such as mood
(happy, sad), beats per minute, or chords. This enables the possibility to browse and listen to music in
your phone where SensMe™ provides a navigation window based on two axes, having moods on one,
and beats per minute on the other.
SensMe™ information is always added to tracks that you extract from CD.
To perform SensMe™ music analysis when music is encoded during a transfer
1. Click the Settings button at the top of the Sony Ericsson Media Manager window.
2. Click the Music button on the left side of the window.
3. Select the check box Perform SensMe music analysis when music is encoded.
To analyze the MP3 music files in your music folders
1. Click the Settings button at the top of the Sony Ericsson Media Manager window.
2. Click the Music button on the left side of the window.
3. Click the SensMe Music Analysis button to analyze the MP3 music files in your music folders and add
SensMe™ metadata to the files.
11 July 2007

Getting started Media Manager
Photo mode
This mode allows you to manage photos on your computer and phone.
To view photos on the computer
1. Click the Photo Mode button at the top of the Sony Ericsson Media Manager window.
2. On the left side of the PC pane, select the folder that contains the photos you would like to preview.
The contents of the selected folder are displayed on the right side of the PC pane.
3. Click the Preview button or double-click a photo to preview it in the lower half of the Sony Ericsson
Media Manager window (if Sony Ericsson Media Manager cannot play the file, it will attempt to start
the player associated with the file type).
4. If you selected multiple photos, they will be displayed sequentially in a slideshow. You can adjust the
slideshow speed on the Photo page in Settings mode.
5. Press and hold down Ctrl and double-click a photo to preview it using the application associated with
its file extension.
To view photos on your phone or memory card
1. Click the Photo Mode button at the top of the Sony Ericsson Media Manager window.
2. Click Photos in the Phone pane. The photos currently on your phone are displayed on the right side of
the Phone pane.
Video mode
This mode allows you to manage videos on your computer and phone.
To view videos on the computer
1. Click the Video Mode button at the top of the Sony Ericsson Media Manager window.
2. On the left side of the PC pane, select the folder that contains the videos you would like to preview.
The contents of the selected folder are displayed on the right side of the PC pane.
3. Click the Preview button or double-click a video to preview it in the lower half of the Sony Ericsson
Media Manager window (if Sony Ericsson Media Manager cannot play the file, it will attempt to start
the player associated with the file type).
4. You can use the transport controls at the bottom of the window to pause, resume, stop playback,
skip to the previous or next video, adjust the playback volume, and toggle full-screen playback.
5. Press and hold down Ctrl and double-click a video to preview it using the application associated with
its file extension.
To view videos on your phone or memory card
1. Click the Video Mode button at the top of the Sony Ericsson Media Manager window.
2. Click Videos in the Video pane. The videos currently on your phone are displayed on the right side of
the Phone pane.
12 July 2007

Getting started Media Manager
Web feed (RSS media) mode
This mode allows you to subscribe to RSS 2.0 media feeds (podcasts, video blogs, etc) with enclosures
and download files that you can transfer to your phone. RSS stands for Really Simple Syndication, and it
is a method of publishing files on the Web. It is also known as Web feeds. An RSS media feed is an XML
document that can contain text and media enclosures (also called episodes).
When you subscribe to a feed, you can choose to download the latest episodes automatically or manually,
and you can then play the episodes on your computer or on your phone. The left side of the RSS Media
Feeds window displays the feeds to which you have subscribed. The top of the window displays
information about the selected feed. When you select a feed on the left side of the window, the right side
of the window displays the media enclosures (episodes) in the feed.
Subscribing to Web feeds (RSS media)
You can subscribe to feeds from a number of places: you can use the feeds directory in the Sony Ericsson
Media Manager window (a quick list of feeds you can choose from), you can add feeds that you find on
the Web, or you can add files from an existing RSS aggregator.
To subscribe to a feed from the Sony Ericsson Media Manager feed directory
1. Click the RSS Feed Mode button at the top of the Sony Ericsson Media Manager window.
2. Click the Directory button at the top of the PC pane. The available feeds are displayed on the right side
of the PC pane.
3. Navigate the feed directory and select a feed. Information about the selected feed is displayed.
4. Click the Subscribe button. The feed is added to the My Feeds folder in the tree view.
To subscribe to a feed using a specific URL
1. Click the RSS Feed Mode button at the top of the Sony Ericsson Media Manager window.
2. Click the Add Feed button and choose Add Feed from the menu. The Add Feed dialog is displayed.
3. In the Enter the Feed’s URL box, type the location of the feed.
4. You can also drag a link from a browser window to the My Feeds list in the Sony Ericsson Media
Manager window.
5. Click the OK button to subscribe.
Downloading and transferring feeds to your phone
When you click the Refresh button, Sony Ericsson Media Manager will check for new episodes, download
them, and transfer them to your phone. If your phone is not connected — or if you have selected a memory
card that is not available — the episodes are added to a queue and will be transferred the next time you
connect your phone.
To refresh Web feeds (RSS feeds)
1. Click the RSS Feed Mode button at the top of the Sony Ericsson Media Manager window.
2. In the PC pane, select the feed you want to refresh, or select the My Feeds folder to refresh all
subscribed feeds.
3. Click the Refresh button. The latest episodes are downloaded and transferred to your phone if it is
connected to your computer.
If your phone is not connected — or if you have selected a memory card that is not available — the
episodes are added to a queue and will be transferred the next time you connect your phone.
Depending on the type of content, the media will appear in a folder under Music, Photos, or Videos in the
Phone pane.
13 July 2007

Getting started Media Manager
To manually transfer episodes to your phone
1. Click the RSS Feed Mode button at the top of the Sony Ericsson Media Manager window.
2. Select a feed from the Subscribed feeds list.
3. In the list view, select the episodes you would like to transfer. Press and hold down Ctrl or Shift to
select multiple feeds.
4. Click the Transfer to Phone button. The latest episodes are downloaded and transferred to your phone.
Episodes that have already been downloaded are displayed in bright text; episodes that have not been
downloaded are dimmed:
Depending on the type of content, the media will appear in a folder under Music, Photos, or Videos in the
Phone pane.
Synchronization
Sony Ericsson Media Manager keeps track of each memory card that you have used with the application
and synchronizes its files with a folder on your hard drive. Now you can prepare files for transfer even
when you don’t have your phone connected to your computer.
Just choose a phone or memory card from the drop-down list, and you can use the Phone pane to add
or remove photos, music, videos, or feeds. The next time you connect your phone, the memory card will
be updated.
How synchronization works
The synchronization feature keeps track of the contents of each phone or memory card. With
Sony Ericsson Media Manager taking care of your media files, you have a great deal of flexibility in
managing your media.
You can queue media file for transfer to a phone or memory card even if the device is not currently available.
• In the target pane, choose the device where you want to transfer your media.
• If the phone or memory card is not currently available, the file is added to a queue so it can be
transferred the next time you connect your phone with that memory card.
• If you use a separate memory card for your music and videos, for example, you can add or remove
files from each memory card even if your phone is not connected to your computer. Media files will be
encoded as needed, and the contents of each memory card will be updated when you connect your
phone with the memory card.
• If you delete files from a memory card that is not currently available, the files will be removed the next
time you connect your phone.
• If you transfer more content than you can fit on the selected device, only the files that will fit will be
transferred. The remaining files are preserved in the transfer queue and will be transferred the next
time you connect your phone (if you delete files to make room for them).
To synchronize a phone
1. Connect your phone to synchronize.
2. The memory card is synchronized automatically when you start the software or place your phone in
File Transfer mode.
3. The Sync button in the Phone pane will flash when files are ready to be synchronized.
14 July 2007

Getting started Media Manager
Backup mode
This mode allows you to back up the files on your phone to a folder on your computer or restore
previously backed-up files to your phone.
Media files that contain digital-rights-management (DRM) protection may not play after being
backed up to your computer and restored to your phone. Before deleting DRM-protected media
from your phone, check with the media provider and verify that you can back up and restore the
media.
Backing up files from your phone
In Backup mode, the PC pane displays backup versions of the files from the phone memory.
Backup files are stored on your computer in a backup location specific to the current memory card:
..\My Documents\Phone Backup\<memory card volume name> (or ..\Users\<Username>\Documents\
Phone Backup\<memory card volume name> in Windows® Vista®). You can change the destination
folder on the General page of the Settings panel.
To back up individual files
1. Click the Backup Mode button at the top of the Sony Ericsson Media Manager window.
2. On the left side of the Phone pane, navigate to the desired location in the phone memory by
expanding and collapsing folders as necessary.
3. On the right side of the Phone pane, select the file(s) you would like to back up. Press and hold down
Ctrl or Shift to select multiple files.
4. Click the Transfer t o P C button between the Phone and PC panes. The selected files are transferred to
your computer and can be viewed in the PC pane.
You can also drag files from the Phone pane to the PC pane.
To back up all files on your phone
1. Click the Backup Mode button at the top of the Sony Ericsson Media Manager window.
2. Click the Back Up All button in the PC pane. All files from your phone are transferred to your computer
and can be viewed in the PC pane.
Restoring backup files
If you accidentally delete a file from your phone or want to revert to an earlier version of a file, you can
restore the backup file from your computer.
To restore individual backup files to your phone
1. Click the Backup Mode button at the top of the Sony Ericsson Media Manager window.
2. On the left side of the PC pane, navigate to the desired location by expanding and collapsing folders
as necessary.
3. On the right side of the PC pane, select the file(s) you would like to restore. Press and hold down Ctrl
or Shift to select multiple files.
4. Click the Transfer to Phone button between the Phone and PC panes. The selected files are
transferred to your phone, overwriting any existing versions. You can view the restored files in the
Phone pane.
You can also drag files from the PC pane to the Phone pane.
15 July 2007

Getting started Media Manager
To restore all backup files to your phone
1. Click the Backup Mode button at the top of the Sony Ericsson Media Manager window.
2. Click the Restore All button in the PC pane. All backup files for the current volume are transferred to
your phone, overwriting any existing versions. You can view the restored files in the Phone pane.
Troubleshooting
This information may be helpful if you experience a problem using Sony Ericsson Media Manager.
The list of connected phones or memory cards is incorrect
Reset Sony Ericsson Media Manager completely. Press and hold down Ctrl + Shift when you start
Sony Ericsson Media Manager.
The listed music folders on the computer is incorrect
Reset Sony Ericsson Media Manager completely. Press and hold down Ctrl + Shift when you start
Sony Ericsson Media Manager.
SensMe™ information is not added to music tracks
SensMe™ analysis may not work on all music file types. Try analysing a different music file type.
SensMe™ information is not presented in the phone
SensMe™ technology is available only if your phone supports it.
The phone cannot play a transferred music track
Not all formats are supported by all phones. If your phone is unable to play transferred audio, try using
a different Target setting.
16 July 2007

Getting started Media Manager
Trademarks and acknowledgements
The Liquid Identity logo and SensMe are trademarks or registered trademarks of Sony Ericsson Mobile
Communications AB.
Ericsson is a trademark or registered trademark of Telefonaktiebolaget LM Ericsson.
Gracenote and Gracenote Mobile MusicID are trademarks of Gracenote, Inc.
Microsoft Windows, Windows Vista, Microsoft Media Player are either registered trademarks or
trademarks of Microsoft Corporation in the United States and/or other countries.
QuickTime is a trademark or a registered trademark of Apple Computer, Inc., used under license
therefrom.
Other product and company names mentioned herein may be the trademarks of their respective owners.
Any rights not expressly granted herein are reserved.
This Getting started guide is published by:
Sony Ericsson Mobile Communications AB,
SE-221 88 Lund, Sweden
Phone: +46 46 19 40 00
Fax: +46 46 19 41 00
www.sonyericsson.com
© Sony Ericsson Mobile Communications AB,
2007. All rights reserved. You are hereby granted
a license to download and/or print a copy of this
document.
Any rights not expressly granted herein are
reserved.
First edition (July 2007)
Publication number: 1202-4491.1
This document is published by Sony Ericsson
Mobile Communications AB, without any
warranty*. Improvements and changes to this text
necessitated by typographical errors, inaccuracies
of current information or improvements to
programs and/or equipment, may be made by
Sony Ericsson Mobile Communications AB at any
time and without notice. Such changes will,
however, be incorporated into new editions of this
document. Printed versions are to be regarded as
temporary reference copies only.
*All implied warranties, including without limitation
the implied warranties of merchantability or fitness
for a particular purpose, are excluded. In no event
shall Sony Ericsson or its licensors be liable for
incidental or consequential damages of any
nature, including but not limited to lost profits or
commercial loss, arising out of the use of the
information in this document.
17 July 2007
 Loading...