

Page 1

Sony Tablet Help guide SGPT21 Series
Read This First
Turning On Your Tablet Device
Shutting Down Your Tablet Device
Turning On/Off the Screen
Notes on Using the AC Adapter
Charging the Battery
Notes on Using the Battery
Installing/Removing a Battery Pack
How to Use the Touch Screen
Notes on the Screen
Handling the Touch Screen
Starting Wi-Fi Communications
Notes on Using the Wi-Fi Function
About the Bluetooth(R) Function
Communicating with Another Bluetooth(R) Device
Stopping Bluetooth(R) Communications
Notes on Using the Bluetooth(R) Function
About Bluetooth(R) Security
How to Connect to the AT&T Mobile Broadband Network
Adjusting Connection Settings
About the GPS Function
Enabling the Location Information
Disabling the Location Information
Removing/Inserting a microSD Memory Card
Notes on Using microSD Memory Cards
Notes on microSD Memory cards
Notes on Connecting Your Tablet Device and a Computer with a USB Cable
Parts and Controls
Checking the Supplied Items
Caring for Your Tablet Device
Online Support Websites
Notes on Holding Your Tablet Device
About Sample Data
Saving the Battery Consumption
Notes on Using Voice Communications Apps
Page 2

Notes on Geomagnetic Sensor
Using the Built-in Camera
Notes on the Built-in Camera
Enjoying Games
Enjoying Video Content
Enjoying Music Content
Enjoying Digital Books
Viewing Apps Recommended by Sony
Searching for Apps
Enjoying Video, Music or Photo Content on Other Devices
Sharing Exciting Experiences via Social Network
About the Home Screen
Customizing the Home Screen
Favorites
Widgets
Application Launcher
About the Notification Panel
Rotating the Screen
Quick Search
Locking the Screen
Displaying Recent Apps
Entering Text
Using the On-screen Keyboard
Cutting and Pasting Text
Google Account
Changing the Settings
Before Use
List of Apps
Email
Browser
Camera
Calculator
Calendar
Contacts
Desk clock
Music player
Video player
What You Can Do Over the Home Network
About DLNA
Preparing the Home Network
Playing Back Content Stored on Another Device (Server)
Playing Content on other Devices by Sending (Throwing) it
Social Feed Reader
Registering a Twitter or Facebook account
Switching the Posts (Article) Displayed
Page 3

Reading and Writing the Post (Article)
Searching for Posts (Articles) or Friends
Select App
Gallery
Video Unlimited
Music Unlimited
Reader
Evernote
HD Games
Foursquare
About Backup
Wi- Fi checker
Copying Data on a Computer to Your Tablet Device
Supported Formats
Using Media Go
About PS Store
Playing Back Music Content on Multiple Devices (PARTY STREAMING)
Trademarks
Specifications
Support for PlayStation(R) in general
The tablet device does not turn on.
The tablet device starts up slowly.
The battery does not charge.
The charge indicator does not light.
The battery consumption increases.
The charge indicator blinks.
Heat builds up in the tablet device, the battery, and the AC adapter while the tablet device is in use or being
charged.
The screen is dark.
There is a point that is not displayed properly on the screen.
A Bluetooth(R) device was not found.
Your tablet device gets slow/is not performing as expected.
Your tablet device does not work.
To reset your tablet device.
The sound from the speaker is distorted.
The screen brightness is not stable.
The screen brightness cannot be adjusted.
Automatic adjustment of the screen brightness does not work as expected.
The brightness of the upper and lower screen is different.
The color of the upper and lower screen is different.
The screen disappears/darkens unexpectedly.
The touch screen does not work as expected.
The date and time are reset.
To erase the tap sound (operation sound).
The screen does not rotate when you turn your tablet device.
To turn off screen rotation.
To deactivate the lock function/to use your tablet device without locking the screen.
You cannot insert/remove a SIM Card.
Page 4

The file cannot be displayed/be played back.
The video is interrupted/is jumpy/is not synchronized with the audio.
Your tablet device cannot receive GPS signals or takes a long time for the positioning.
The results of GPS positioning may be different from the actual location.
The photos and movies taken with the camera are blurry.
You cannot send (Throw) content to another device and play it back with DLNA apps.
Some applications are not displayed in the selected language.
Some applications cannot be uninstalled.
A website for mobile phones or smartphones is displayed.
You cannot use Internet telephone or voice chat.
Your tablet device cannot connect to a Wi-Fi network.
Page 5

Read This First
Congratulations on your purchase of a Sony tablet device.
This help guide explains how to operate your tablet device and apps. Before you start using your tablet device,
read the supplied Important Information (safety instructions).
Charging the battery
The battery charge level may be low when you purchase your tablet device. Charge the battery before you start
using your tablet device [Details].
Related Topic
Online Support Websites
Google Account
Page 6
Turning On Your Tablet Device
Note
Before turning on, see “Notes on Using the AC Adapter” [Details].
1. Install the battery pack on your tablet device, and then connect to an AC outlet (wall socket) [Details].
2. Lift the touch screen lid.
3. Press and hold the power button for three seconds.
Your tablet device will turn on, and the Google Android operating system will subsequently launch. When
you turn on your tablet device for the first time, see “Before Use” [Details].
Note
Do not use your tablet device without installing the battery pack as doing so may cause the tablet device to
malfunction.
If you press the power button with the touch screen lid closed, your tablet device will not turn on.
Related Topic
Shutting Down Your Tablet Device
Turning On/Off the Screen
Notes on Using the AC Adapter
Charging the Battery
Notes on Using the Battery
Installing/Removing a Battery Pack
Saving the Battery Consumption
Page 7

Shutting Down Your Tablet Device
Note
Before shutting down your tablet device, see “Notes on Using the AC Adapter” [Details].
1. Press and hold the power button until a list appears.
2. Tap [OK].
The tablet device will automatically turn off in a few seconds.
Note
To avoid losing unsaved data or causing your tablet device to malfunction, be sure to shut down your tablet
device properly as described above.
If you cannot shut down your tablet device as described above, press and hold the power button for about 10
seconds to force it to shut down.
Related Topic
Turning On Your Tablet Device
Turning On/Off the Screen
Notes on Using the AC Adapter
Charging the Battery
Notes on Using the Battery
Installing/Removing a Battery Pack
Saving the Battery Consumption
Page 8

Turning On/Off the Screen
You can turn off the screen when you are not using your tablet device.
1. Press the power button.
The screen is turned off. To turn on the screen, press the power button again.
Hint
You can set the time until the screen automatically turns off when the tablet device has not been operated for
a given amount of time. Tap [
interval before turn-off.
You can also make settings to lock the screen when it is turned on [Details].
Related Topic
Turning On Your Tablet Device
Shutting Down Your Tablet Device
Notes on Using the AC Adapter
Apps] - [ Settings] - [ Screen] - [Timeout], and select the desired time
Charging the Battery
Notes on Using the Battery
Installing/Removing a Battery Pack
Saving the Battery Consumption
Page 9

Notes on Using the AC Adapter
Use the AC adapter supplied with your tablet device or a genuine Sony AC adapter. Do not use any other AC
adapter as it may cause malfunctions.
Do not connect the AC adapter to a power conversion device such as a travel power converter. Doing so may
cause overheating or a malfunction.
If the AC adapter cable becomes damaged or broken, do not use it.
Related Topic
Turning On Your Tablet Device
Shutting Down Your Tablet Device
Turning On/Off the Screen
Charging the Battery
Notes on Using the Battery
Installing/Removing a Battery Pack
Saving the Battery Consumption
Page 10

Charging the Battery
The battery is charged when your tablet device is plugged in. The charging time will vary depending on your
usage.
1. Install the battery pack into your tablet device [Details].
2. Plug the AC power cord (mains lead) into the AC adapter.
3. Plug the AC power cord (mains lead) into an AC outlet (wall socket).
4. Plug the AC adapter into the charge connector of your tablet device.
The charge indicator is lit according to the battery charging condition of your tablet device.
On the charge indicator
The charge indicator lights up in different colors, depending on the remaining battery level.
Red: The battery needs to be charged.
Yellow (orange): Insufficiently charged.
Green: Sufficiently charged.
Note
The charge indicator blinks in red when the remaining battery is getting low during operation.
Related Topic
Turning On Your Tablet Device
Shutting Down Your Tablet Device
Turning On/Off the Screen
Notes on Using the AC Adapter
Notes on Using the Battery
Installing/Removing a Battery Pack
Saving the Battery Consumption
Page 11

Notes on Using the Battery
About the battery pack
The supplied battery pack is designed specifically for your tablet device.
For your safety, use only the supplied battery pack or an optional battery pack specified by Sony.
Depending on the ambient temperature or how to use your tablet device, the battery may not be charged, or it
may take a long time to charge the battery.
Do not charge the battery near fire or in direct sunlight.
While your tablet device is plugged in and has a battery pack installed, it runs on AC power.
The supplied battery pack is not fully charged when shipped.
Heat builds up in the battery while it is in use or being charged. This is normal and is not cause of concern. If
your tablet device or the AC adapter becomes abnormally hot, shut down your tablet device and unplug the
AC power cord (mains lead) from the AC adapter.
Do not use your tablet device without the battery pack inserted.
About battery discharge
After charging, the battery gradually loses its charge even if it is not used. If it is left unused for a long time,
the battery charge may be depleted. We recommend recharging the battery before use.
If you do not use your tablet device for an extended period of time, fully charge the battery every six months.
About battery life
Battery life varies depending on usage, settings, and temperatures.
About battery deterioration and replacement
The capacity of the battery pack gradually declines through repeated recharging and discharging. As a result,
the battery life may become short or the battery pack may not perform optimally even when fully charged. If
the battery life has become short, replace it with a new battery pack specified by Sony.
If the battery pack quickly runs out of power after being fully charged or will no longer accept a charge,
replace it with a new one.
Related Topic
Turning On Your Tablet Device
Shutting Down Your Tablet Device
Turning On/Off the Screen
Notes on Using the AC Adapter
Charging the Battery
Installing/Removing a Battery Pack
Page 12

Saving the Battery Consumption
Page 13
Installing/Removing a Battery Pack
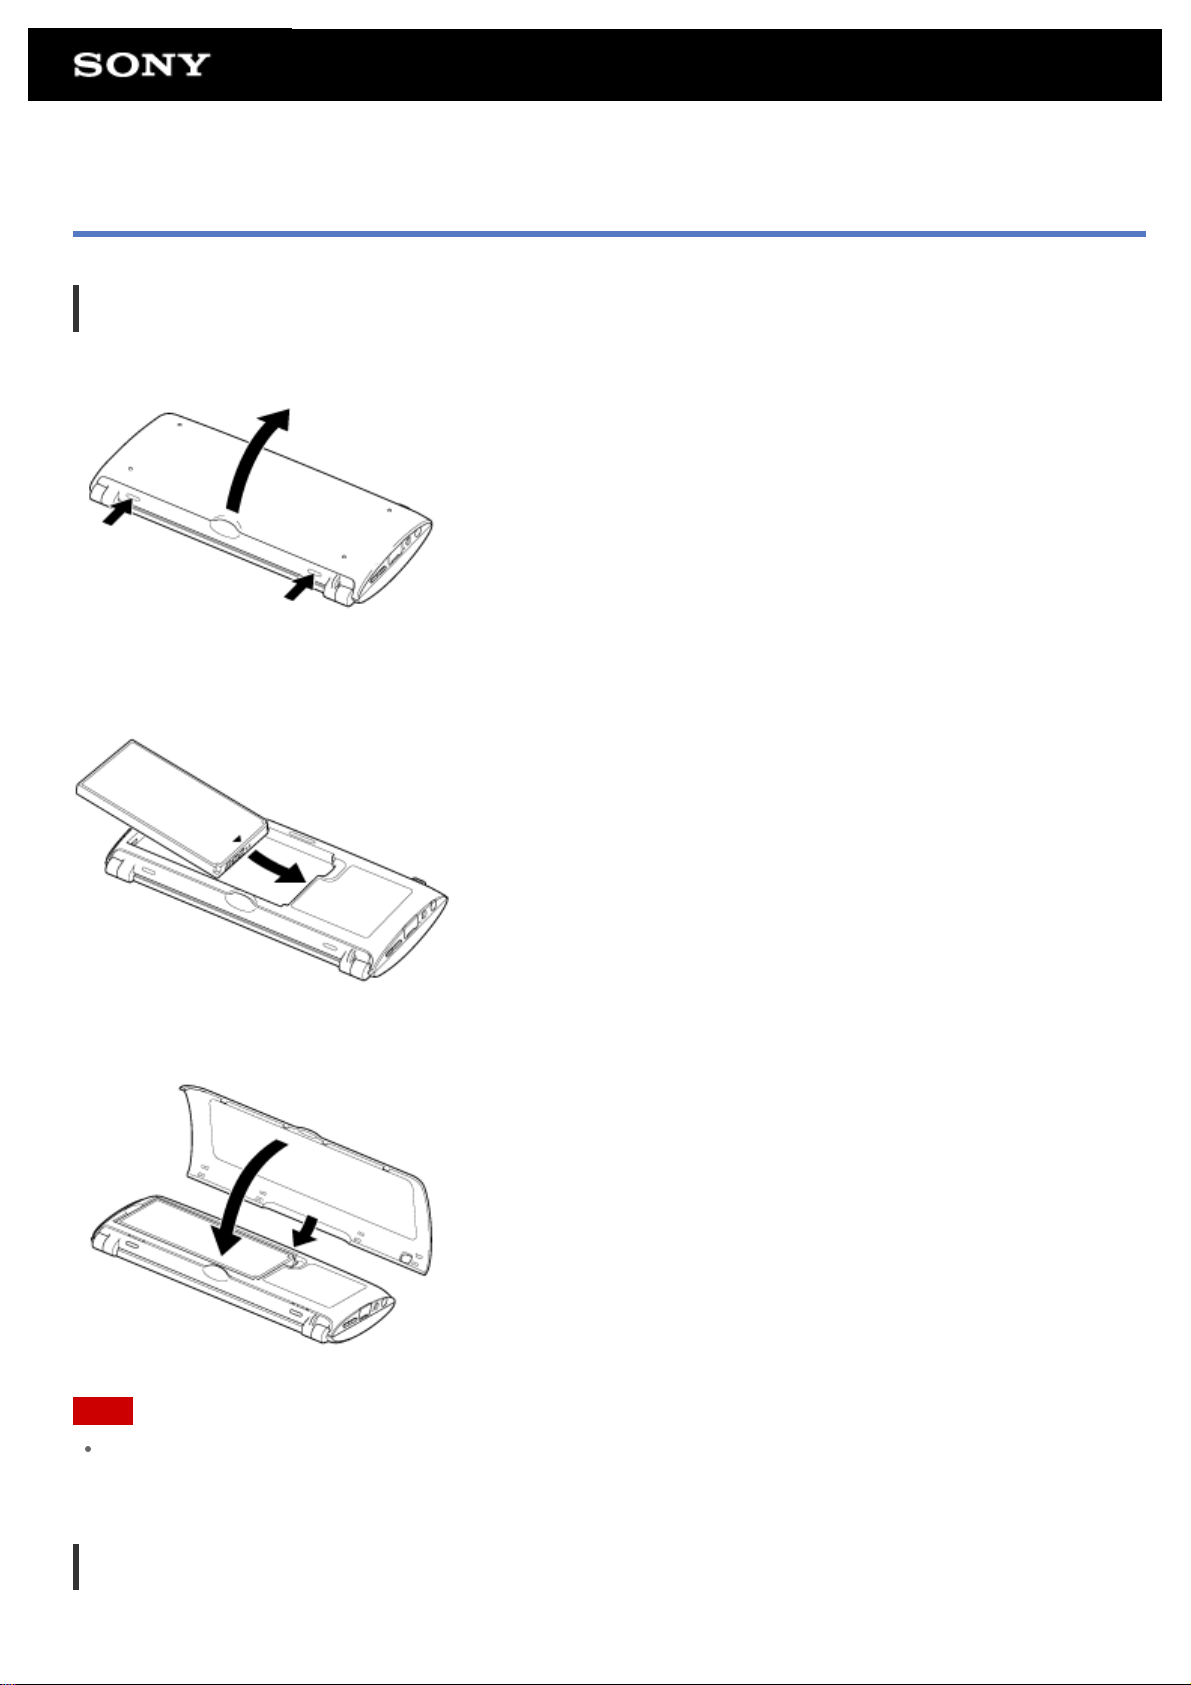
To install a battery pack
1. Press the two buttons to open the bottom cover.
2. Orient the contacts as shown, and then insert the battery pack.
3. Close the bottom cover.
Note
If you insert the battery pack into your tablet device with the touch screen lid opened, the backlight of the LCD
screen may be lit for a few seconds, and then go out. This does not indicate a malfunction.
To remove a battery pack
1. Press the two buttons to open the bottom cover.
Page 14
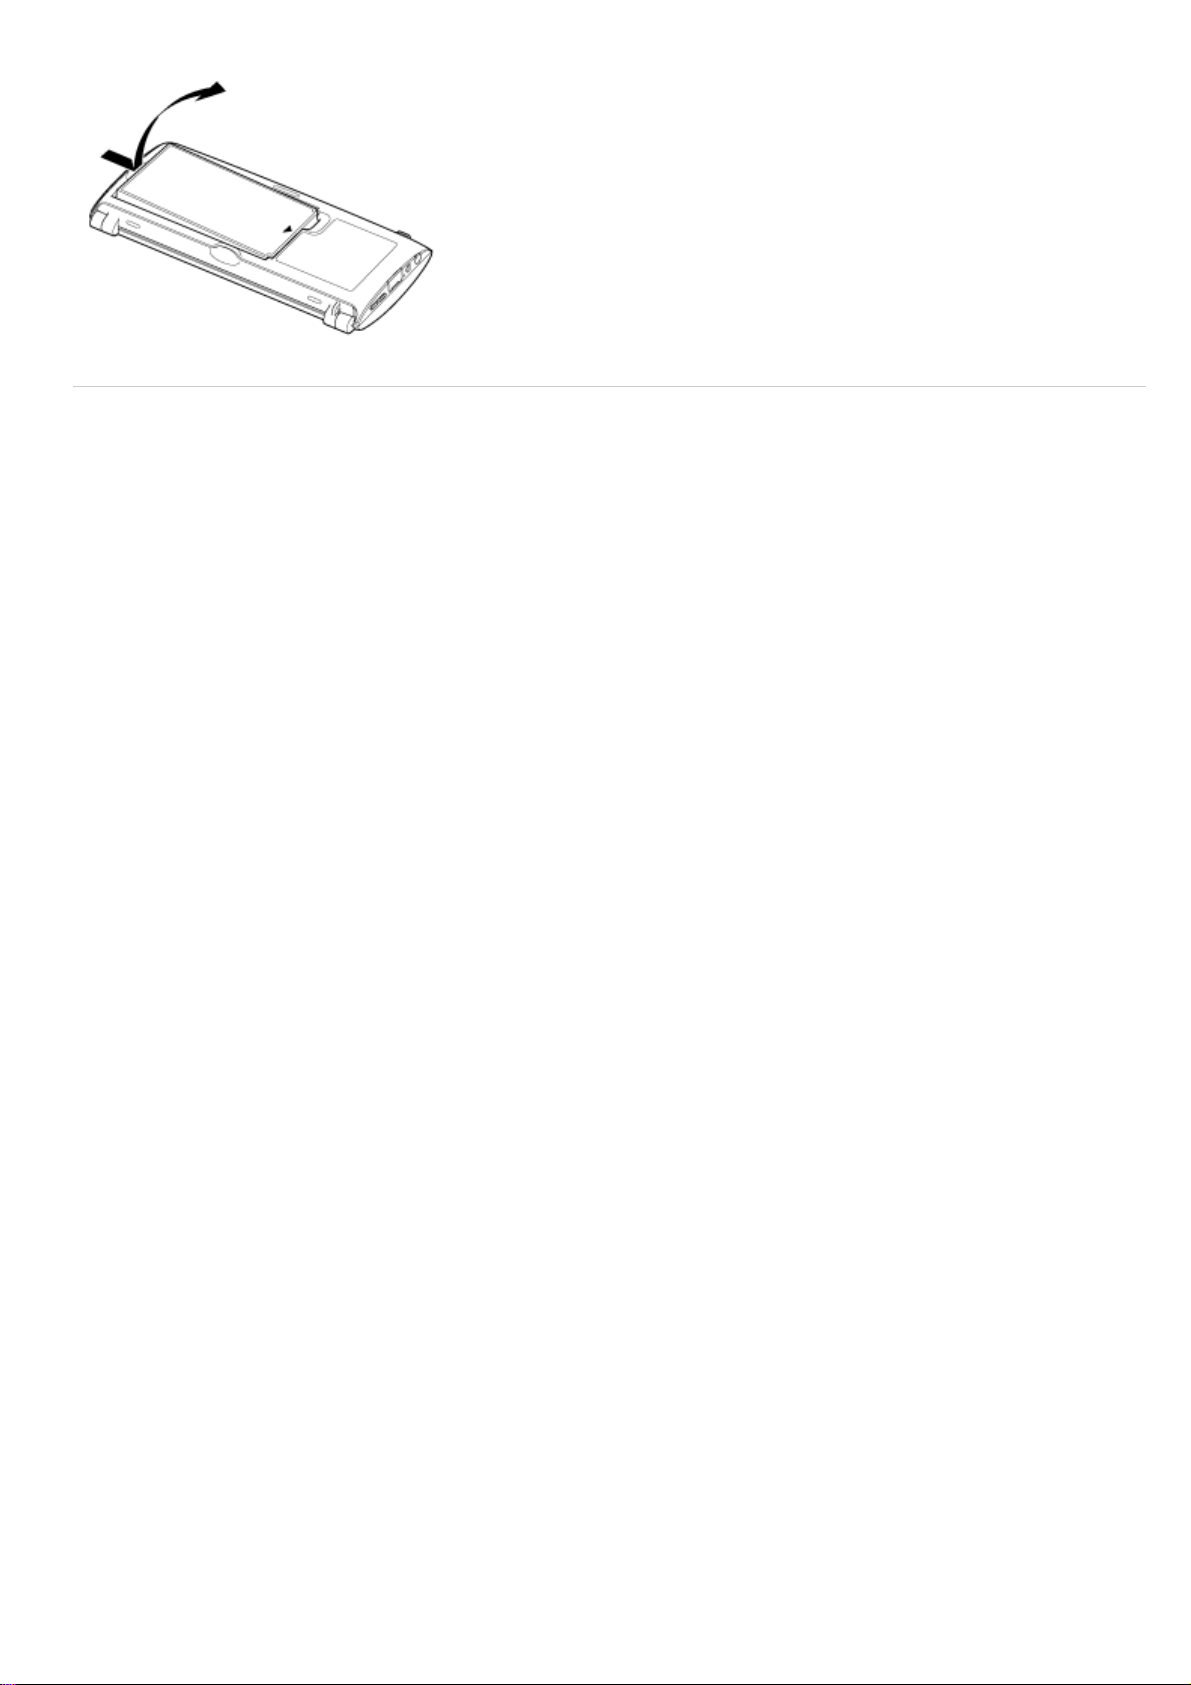
2. Remove the battery pack.
Related Topic
Turning On Your Tablet Device
Shutting Down Your Tablet Device
Turning On/Off the Screen
Notes on Using the AC Adapter
Charging the Battery
Notes on Using the Battery
Saving the Battery Consumption
Page 15

How to Use the Touch Screen
Tap
Selects an icon or option.
Tapping twice quickly allows you to zoom in or out images or other screen items.
Tap & hold
Opens an option menu.
Drag
Moves an item or scrolls a page slowly.
Flick
Scrolls a page quickly.
Pinch
Zooms in or out.
Page 16

Related Topic
Notes on the Screen
Handling the Touch Screen
Page 17

Notes on the Screen
Notes on handling the touch screen and LCD screen are explained here.
Notes on the touch screen
Your tablet device uses a capacitive touch screen. Tap the screen directly with your fingertip. Do not scratch it
or tap it with sharp objects such as a needle, pen, or fingernails. You cannot operate the touch screen with a
stylus.
If you tap the touch screen with gloved fingers, the touch screen may operate incorrectly or may not operate
at all.
Do not operate your tablet device with objects on the touch screen.
If the touch screen is touched by objects other than your fingertip, it may not react correctly.
Do not put the touch screen close to other electrical devices. Electrostatic discharges can make the touch
screen malfunction.
If there are water droplets on the touch screen, or if you touch it with wet fingertips, the touch screen may not
react correctly.
Do not put the touch screen close to water. The touch screen may malfunction in humid conditions or when
exposed to water.
The touch screen may not react correctly due to noise from the AC power cord (mains lead) during charging
the battery. Disconnect the AC power cord (mains lead), and operate your tablet device on the battery only.
Notes on the LCD screen
Do not leave the LCD screen facing the sun. Be sure to block direct sunlight when using your tablet device
near a window.
Using your tablet device in low temperature conditions may produce a residual image on the LCD screen.
This does not indicate a malfunction. The screen will return to normal when the tablet device returns to normal
temperature.
The LCD screen becomes warm during operation. This is normal and does not indicate a malfunction.
The LCD screen is manufactured using high-precision technology. You may, however, see tiny black points
and/or bright points (red, blue, or green) on the LCD screen. This is a normal result of the manufacturing
process and does not indicate a malfunction.
The LCD screen is made of glass. If the glass is damaged (crack, etc.), do not touch the touch screen nor try
to repair it by yourself. Handle the LCD screen carefully as it is vulnerable to dropping or mechanical shock.
We cannot guarantee any damages caused by customers due to wrong handling.
Do not exert excessive pressure on the LCD screen lid with the lid closed as doing so may scratch or dirty
the LCD screen.
You may see a difference in color or brightness between upper and lower LCD screens. This is a normal
result of the manufacturing process and does not indicate a malfunction.
Related Topic
How to Use the Touch Screen
Handling the Touch Screen
Page 18

Handling the Touch Screen
Use a soft, dry or slightly moistened cloth to wipe the surface of the touch screen. Rubbing the surface hard
with a dry cloth may damage the screen.
Do not use chemicals or detergents.
Related Topic
How to Use the Touch Screen
Notes on the Screen
Page 19

Starting Wi-Fi Communications
You first need to establish Wi-Fi communications between your tablet device and an access point. Make sure an
access point is set up. See the operating instructions supplied with your access point for more information. After
setting up Wi-Fi communications, follow the steps below to turn on the Wi-Fi setting on your tablet device.
1. Tap [
Note
To save the battery consumption, turn off the Wi-Fi power when not in use.
The Wi-Fi antenna is built in to your tablet device. If you cover the antenna with your hands or other objects
while connecting to the Internet using the Wi-Fi function, the communications quality may deteriorate [Details].
Apps] - [ Settings] - [ Wireless & networks] - [Wi-Fi].
To stop Wi-Fi communications
1. Perform step 1 above again to turn off the Wi-Fi setting on your tablet device.
To find networks in range of your device
1. Tap [ Apps] - [ Settings] - [ Wireless & networks] - [Wi-Fi settings].
2. Tap [Wi-Fi] to turn on and scan for networks. If [Wi-Fi] is already on, tap
A list of the networks found within range is displayed.
Hint
- [Scan].
To check the MAC address of your tablet device or other Wi-Fi details, tap - [Advanced].
3. Tap a desired network.
4. When needed, enter a password or make settings.
Hint
When you are in range and [Wi-Fi] is on, your tablet device will automatically reconnect to available networks
which have been connected before.
Related Topic
Notes on Using the Wi-Fi Function
Wi-Fi checker
Page 20

Notes on Using the Wi-Fi Function
Use of Wi-Fi products may be restricted by local regulations in some countries or regions.
Wi-Fi devices work on the 2.4 GHz band, which is used by a variety of devices. Wi-Fi devices use technology
to minimize radio interference from other devices that use the same band. However, radio interference may
still cause slower data transfer speeds, reduce communications range or cause communications failure.
If both the Bluetooth function and the 2.4 GHz Wi-Fi function of your tablet device are enabled, interference
may occur and cause slower data transfer speeds or other problems.
To communicate via Wi- Fi while traveling, you may need to contract with a Wi-Fi connection service provider.
Data transfer speed and communications range may vary depending on the following conditions:
Distance between devices
Presence of obstacles between devices
Device configuration
Signal conditions
Surrounding environment (wall material, etc.)
Software in use
Communications may be cut off depending on signal conditions.
The data transfer rate specified in the specification is the theoretical maximum, and may not reflect actual
data transfer rate.
Actual data transfer speed may not be as fast as the speed displayed on your tablet device.
Communications is not available between the 2.4 GHz and 5 GHz Wi-Fi frequency bands.
The data transfer rate for IEEE 802.11g and IEEE 802.11n (2.4 GHz) devices may be affected by interference
when used with IEEE 802.11b products. Also, products using IEEE 802.11g and IEEE 802.11n automatically
lower the transfer rate to maintain compatibility with IEEE 802.11b products.
When the data transfer speed is not as fast as expected, changing the wireless channel on the access point
may increase the speed.
Related Topic
Starting Wi-Fi Communications
Wi-Fi checker
Page 21
About the Bluetooth(R) Function
You can establish wireless communications between your tablet device and other Bluetooth devices such as a
computer, mobile phone, headset, Bluetooth headphone or wireless keyboard. You can transfer data between
these devices without cables at a range of up to 33 feet / 10 meters in an open area. One Bluetooth device can
connect with up to seven devices via wireless network to exchange data.
When a device requires connection to another device, it sends out an inquiry to neighboring Bluetooth devices. If
any device responds to the inquiry, the two devices can connect with each other.
Related Topic
Communicating with Another Bluetooth(R) Device
Stopping Bluetooth(R) Communications
Notes on Using the Bluetooth(R) Function
About Bluetooth(R) Security
Page 22

Communicating with Another Bluetooth(R) Device
You can connect Bluetooth devices to your tablet device. Depending on the device, the procedure to establish
connection may vary. Refer to the operating instructions of the Bluetooth device. For details on Bluetooth
communication, see “About the Bluetooth(R) Function” [Details].
To turn on the Bluetooth feature
1. Tap [ Apps] - [ Settings] - [ Wireless & networks] - [Bluetooth].
Note
To reduce the battery consumption, turn off the Bluetooth power when not in use.
The Bluetooth antenna is built in to your tablet device. If you cover the antenna with your hands or other
objects while using the Bluetooth function, the communications quality may deteriorate [Details].
To make your tablet device discoverable
You can allow a Bluetooth device to discover your tablet device when Bluetooth is turned on.
1. Tap [
2. Tap [Discoverable].
Apps] - [ Settings] - [ Wireless & networks] - [Bluetooth settings].
To pair with another Bluetooth device
To connect with a new Bluetooth device, you need to pair with it when Bluetooth is turned on. You only need to
do this once for your tablet device and the new Bluetooth device to connect again. Just turn on the device the
next time.
1. Make sure the Bluetooth device you are pairing with is in discoverable mode.
Note
Refer to the operating instructions supplied with the Bluetooth devices for details.
2. Tap [
3. Tap [Find nearby devices].
The found devices list is displayed.
4. Tap a device to connect.
Apps] - [ Settings] - [ Wireless & networks] - [Bluetooth settings].
5. Tap [Pair], or enter the device passkey (e.g. 0000) if necessary to connect to the Bluetooth device.
When the device is connected, the Bluetooth indicator appears in a window on your tablet device.
To reconnect devices
To reconnect your tablet device with the paired device, tap the device name in the paired devices list.
Related Topic
Page 23

About the Bluetooth(R) Function
Stopping Bluetooth(R) Communications
Notes on Using the Bluetooth(R) Function
About Bluetooth(R) Security
Page 24

Stopping Bluetooth(R) Communications
1. Tap the name of a paired device in the devices list you want to disconnect your tablet device from.
2. Tap
Hint
To save the battery consumption, turn off the Bluetooth power when not in use.
Related Topic
About the Bluetooth(R) Function
Communicating with Another Bluetooth(R) Device
Notes on Using the Bluetooth(R) Function
About Bluetooth(R) Security
(Settings) - [Unpair].
Page 25

Notes on Using the Bluetooth(R) Function
Use of Bluetooth function may be restricted by local regulations in some countries or regions.
The Bluetooth function may not work with some devices, depending on the manufacturer or the software
version employed by the manufacturer. Check the system requirements of the Bluetooth device before
purchasing.
For information on Bluetooth devices supported by Sony tablet devices, visit the support website.
Some Bluetooth devices require authentication (pairing) before establishing a connection with another device.
Perform the authentication process before connecting to such a device.
Bluetooth devices work on the 2.4 GHz band, which is used by a variety of devices. Bluetooth devices use
technology to minimize radio interference from other devices that use the same band. However, radio
interference may still cause slower data transfer speeds, reduce communications range or cause
communications failure.
Data transfer speed and communications range may vary depending on the following conditions:
Distance between communicating devices
Presence of obstacles between devices
Surrounding environment that includes presence of walls and materials of such walls
Device configuration
Software in use
Signal conditions
Communications may be cut off depending on signal conditions.
Interference may occur if both the Bluetooth function and the 2.4 GHz Wi-Fi function are enabled. That will
result in slower data transfer speeds or other problems.
Large files may occasionally be corrupted during continuous transfer due to limitations of the Bluetooth
standard and ambient electromagnetic interference.
Connecting multiple Bluetooth devices to your tablet device may cause channel congestion, resulting in poor
device performance. This is normal with Bluetooth technology and does not indicate a malfunction.
Video and audio may not be synchronized if you play videos on your tablet device with audio output from a
connected Bluetooth device. This is a frequent occurrence with Bluetooth technology and does not indicate a
malfunction.
All Bluetooth devices must be certified through procedures stipulated by Bluetooth SIG to ensure that they
comply with the Bluetooth standard. Even if the Bluetooth standard is complied with, individual device
performance, specifications, and operation procedures can vary.
Output sound may not be switched between a Bluetooth audio device and the built-in speaker when you
connect or disconnect the device while an app such as game is running. If that occurs, exit the app and
restart the device. Or switch the sound before starting the app.
Sound of apps such as games may be delayed when heard from Bluetooth audio devices connected to your
tablet device. If that occurs, output sound from the built-in speaker or connect an audio device to the
headphone jack of your tablet device to hear the sound.
If you turn off a Bluetooth audio device connected to your tablet device while an app such as a game is
running, the app may no-longer work properly. If that occurs, exit the app and restart your tablet device.
To exchange files with Bluetooth devices, you need to download applications other than those that are preinstalled.
Related Topic
Page 26

About the Bluetooth(R) Function
Communicating with Another Bluetooth(R) Device
Stopping Bluetooth(R) Communications
About Bluetooth(R) Security
Page 27

About Bluetooth(R) Security
Bluetooth wireless technology has an authentication function that allows you to determine with whom you choose
to communicate. With the authentication function, you can prevent any anonymous Bluetooth devices from
accessing your tablet device. The first time two Bluetooth devices communicate, a common passkey (a password
required for authentication) should be determined for both devices to be registered. Once a device is registered,
there is no need to re-enter the passkey.
Your tablet device will be detected by other Bluetooth devices, only when it is set to allow detection by other
Bluetooth devices. You can set the time to accept the detection, or whether or not to allow reception after both
devices are connected.
Related Topic
About the Bluetooth(R) Function
Communicating with Another Bluetooth(R) Device
Stopping Bluetooth(R) Communications
Notes on Using the Bluetooth(R) Function
Page 28
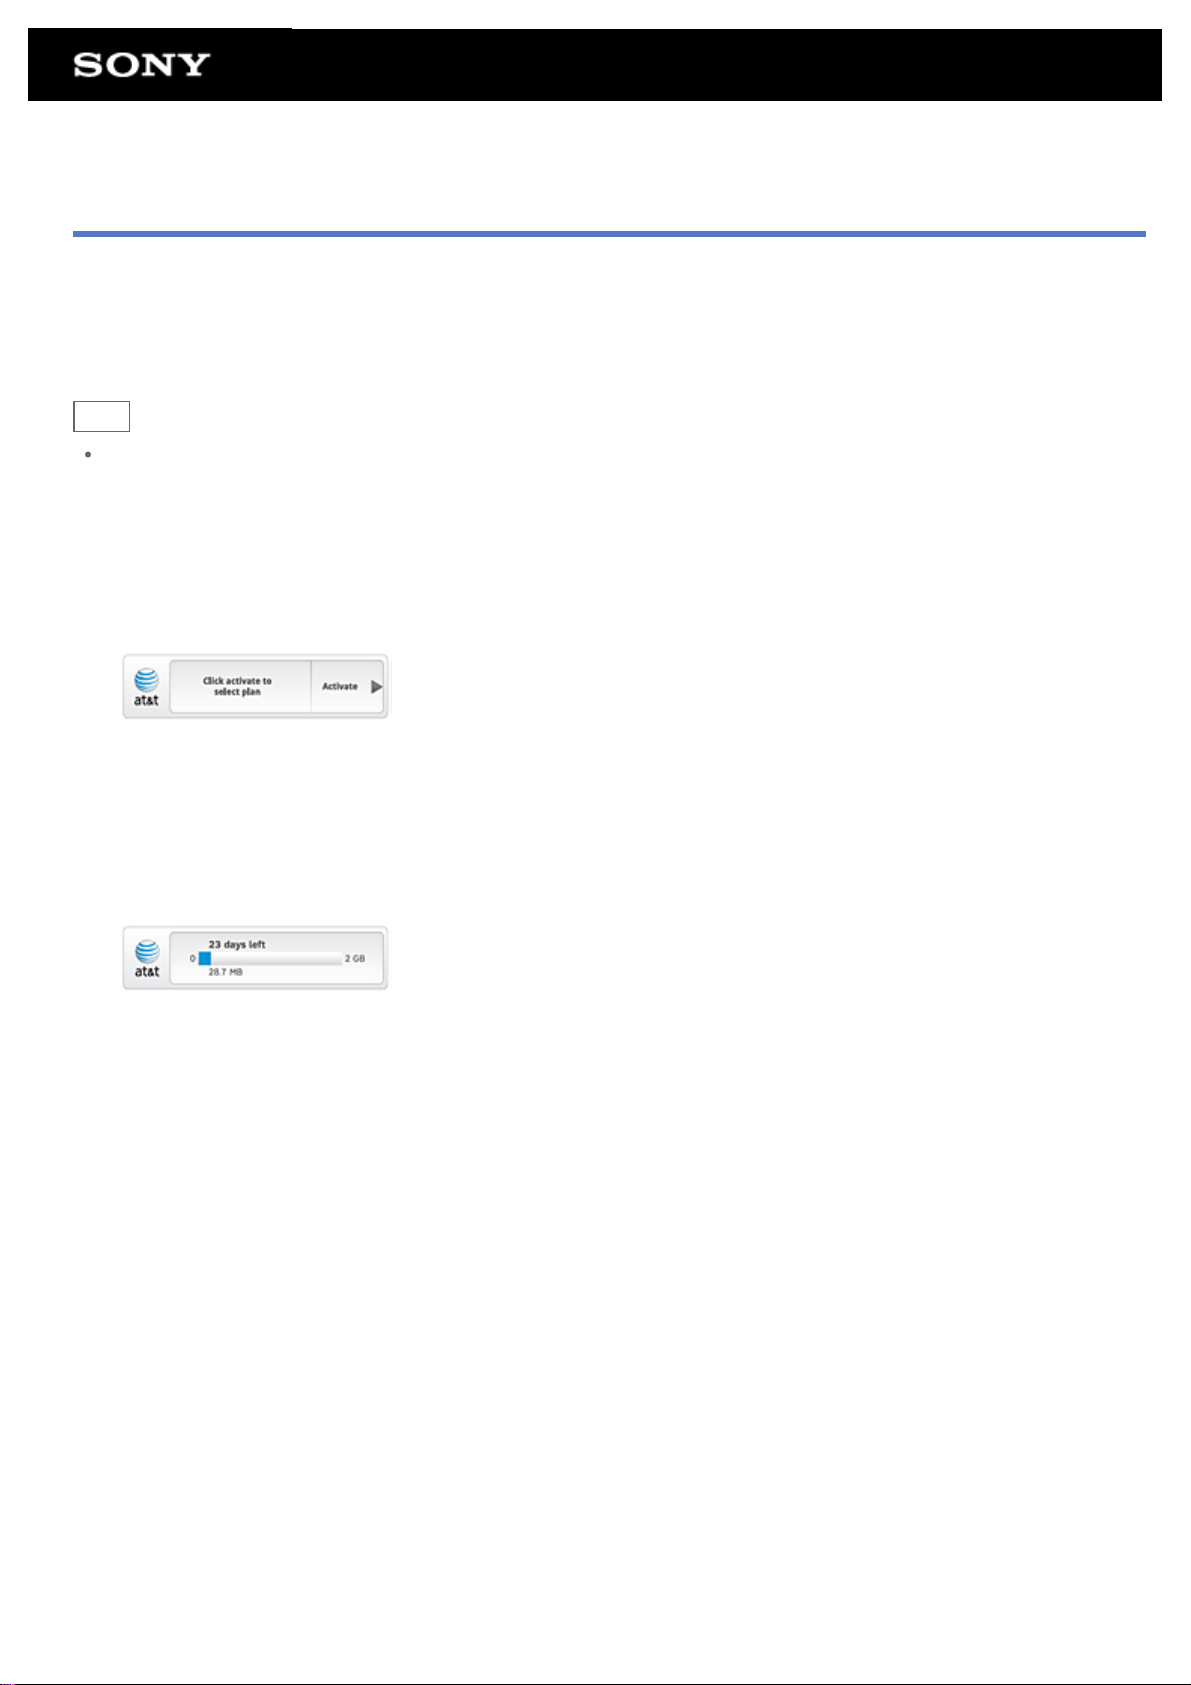
How to Connect to the AT&T Mobile Broadband Network
If your AT&T Mobile Broadband service was activated when you bought your tablet device, you’ll enjoy network
connectivity as soon as you turn your tablet device on. If your AT&T service was not activated at the time of
purchase, follow the instructions below to connect.
Hint
Your tablet device includes unlimited Wi-Fi usage on the AT&T Wi-Fi Hotspot network. Free Wi-Fi hotspot
access requires an active, unexpired DataConnect Plan for Tablets. Access includes AT&T Wi-Fi Basic. Wi-Fi
enabled device required. Other restrictions apply. See www.attwifi.com for details and locations.
1. To select and activate your DataConnect Pass Plan for Tablets, tap Activate in the AT&T widget on your
home screen.
2. Once connected to the website, select your preferred DataConnect Pass Plan for Tablets and activate your
service. You will need a debit or credit card to activate service.
3. You will receive a text message or email confirming your service has started. The time/data plan you
purchased starts counting down immediately after activation. 30 day plans automatically renew unless
canceled.
Page 29
Adjusting Connection Settings
1. Open the Application menu and tap [ Apps] - [ Settings] - [ Wireless & networks] to manage your
connection settings.
Mobile Internet settings
1. Tap [ Apps] - [ Settings] - [ Wireless & networks] - [Mobile networks] to adjust your network
settings.
You can turn data connection on or off when roaming, specify a network operator and define access point
names.
Disable data when roaming
You can prevent your tablet device from transmitting data over other carriers’ mobile networks when you are
traveling and leave an area that is covered by your carrier’s networks. This is useful for controlling expenses if
your mobile data contract doesn’t include data roaming.
1. Tap [
2. Tap Data roaming to disable it (remove the green tick).
Apps] - [ Settings] - [ Wireless & networks] - [Mobile networks].
Page 30

About the GPS Function
The GPS (Global Positioning System) function provides location information by receiving signals from GPS
satellites. You can see the location where you are, where you are going, or directions to a destination on Google
Maps with your tablet device by using the GPS function.
Note
When other electronic devices are near your tablet device, electromagnetic waves or magnetic interference
from those may prevent your tablet device from providing accurate location information. Keep electronic
devices away from your tablet device.
When your tablet device is in an area with poor reception of GPS signals, you may encounter positioning
errors. To receive more accurate information, avoid using your tablet device in the following locations.
Inside buildings or vehicles
In tunnels or underground
Under elevated tracks
Between tall buildings
In dense trees
In valleys
The GPS antenna is built in to your tablet device. If you cover the antenna with your hands or other objects
while using the GPS function, the positioning accuracy may deteriorate [Details].
Related Topic
Enabling the Location Information
Disabling the Location Information
Page 31

Enabling the Location Information
You can set whether to receive location information via GPS satellites or wireless networks.
1. Tap [
2. To enable reception of location information via wireless networks, tap [Use wireless networks].
To enable reception of location information via GPS satellites, tap [Use GPS satellites].
A check mark is put in the box for that setting.
Note
Move your tablet device as little as possible in an area with a clear view of the sky until the present location is
displayed by the GPS function. The present location can be displayed quicker when stationary than while
moving. If the present location is not displayed or if the wrong location is displayed, move to an area with a
clear view of the sky.
Related Topic
About the GPS Function
Disabling the Location Information
Apps] - [ Settings] - [ Location & security].
Page 32

Disabling the Location Information
1. Tap [ Apps] - [ Settings] - [ Location & security].
2. Tap [Use wireless networks] or [Use GPS satellites], whichever is selected, to deactivate that method.
The check mark is removed from the box for that setting.
Related Topic
About the GPS Function
Enabling the Location Information
Page 33

Removing/Inserting a microSD Memory Card
Your tablet device is equipped with a microSD memory card slot. A microSD memory card is inserted into the
microSD memory card slot by default. When you replace a microSD memory card with a new one, follow the
procedure below.
To remove a microSD memory card
1. Make sure files are not being transferred and then turn off your tablet device.
2. Press the two buttons to open the bottom cover.
3. Remove the battery pack.
4. Locate the microSD memory card slot.
5. Push in the microSD memory card all the way and release.
The microSD memory card ejects.
6. Hold the microSD memory card by the both sides, and pull it out of the slot.
Page 34

To insert a microSD memory card
1. Open the bottom cover and remove the battery pack.
2. Locate the microSD memory card slot.
3. Hold the microSD memory card with the contacts facing down and the arrow pointing toward the microSD
memory card slot.
4. Carefully slide the microSD memory card into the slot until it clicks into place.
Note
Be careful not to insert a microSD memory card at the wrong orientation. If you force it into the slot upside
down, the slot may be damaged. For details, refer to the manual of the microSD memory card.
Related Topic
Notes on Using microSD Memory Cards
Notes on microSD Memory cards
Page 35

Notes on Using microSD Memory Cards
Keep away from children. Swallowing microSD memory cards is harmful.
Do not touch the contacts with fingers or metal objects.
Delicate electronic components are included in microSD memory cards. Do not subject cards to excessive
force, bend or drop them.
Do not disassemble or modify.
Avoid moisture.
Do not use or store in the following locations:
Places with high temperature, such as inside an enclosed car in the sunshine
Places exposed to direct sunlight
Humid or corrosive environments
Excessively dusty places
Be sure to use microSD memory cards that are compliant with the standards supported by your tablet device.
A wrong-size card may become jammed in the slot, causing damage to your tablet device.
It is recommended that you make a backup copy of important data.
To avoid losing stored data, keep microSD memory cards away from static electricity or electrical noise that
may interfere with the card.
When carrying microSD memory cards, be sure to put them in their case to avoid static electricity damage.
Before using a microSD memory card with a device other than a tablet device, such as a digital camera or a
portable audio, format (initialize) the microSD memory card using the device. Some devices may not support
the file format for tablet devices and show you a message that recommends you to format the card. In this
case, copy data from the card to your tablet device (or to other devices via the network) and format the card
using the device. Note that formatting a card will delete all current data contained in it. For more details, refer
to the manual of the device.
Do not insert foreign objects into the microSD memory card slot.
The microSD memory card slot can be used for reading/writing supported cards only, and it cannot be used
for other purposes.
Removing the microSD memory card while your tablet device is turned on may cause unexpected situations
such as loss of data or rebooting of the tablet device.
Related Topic
Removing/Inserting a microSD Memory Card
Notes on microSD Memory cards
Page 36

Notes on microSD Memory cards
microSD memory cards (up to 2 GB) and microSDHC memory cards (up to 32 GB) available as of September
2011 have been tested and found compatible with your tablet device. However, this does not guarantee that all
microSD memory cards or microSDHC memory cards will be compatible with your tablet device.
Related Topic
Removing/Inserting a microSD Memory Card
Notes on Using microSD Memory Cards
Page 37

Notes on Connecting Your Tablet Device and a Computer with a
USB Cable
Do not turn off your tablet device while reading and writing data via USB.
Do not unplug the USB cable from your tablet device while reading and writing data via USB. Doing so may
cause loss of your data.
Use a commercially available Micro- USB cable to connect your tablet device and a computer.
Charging the battery via USB is not supported when your tablet device is connected to a computer or a
charger.
Page 38

Parts and Controls
Front
1. Front camera lens
2.
3. Notification LED
4. Touch screen (Lower screen)
5. Touch screen (Upper screen)
6. Ambient light sensor
(Headphone) jack
Top & side
1. Rear camera lens
2. VOL + / - (Volume) button
3. USB Micro -B connector
4. Charge indicator [Details]
5. Charge connector
6.
7. SIM card slot
(Power) button
Page 39

Bottom (the bottom cover opened)
1. Battery pack
2. microSD memory card slot
3. Buttons for opening the bottom cover
Related Topic
About the Home Screen
Page 40

Checking the Supplied Items
AC adapter
AC power cord (mains lead)
microSD memory card (2GB) (trial sample)
Rechargeable lithium-ion battery pack
Quick Start Guide
Important Information
SIM card
Page 41

Caring for Your Tablet Device
Tablet device
Make sure you remove the battery pack before cleaning your tablet device.
Make sure you close the upper, bottom, and any connector covers and keep them secure.
Clean the cabinet with a soft, dry or slightly moistened cloth with a mild detergent solution. Do not use a
detergent solution for cleaning the touch screen. Do not use an abrasive pad, scouring powder, or solvent
such as alcohol or benzine, as these may damage the finish of your tablet device.
If your tablet device is exposed to moisture such as rain or extreme humidity, wipe your tablet device with a
soft dry cloth, but do not dry with an oven or dryer.
Built-in camera
Clean the lens protection cover of the built-in camera with a blower brush or a soft brush. If the cover is
extremely dirty, wipe it off with a soft dry cloth. Do not rub the cover, as it is sensitive to pressure.
Related Topic
Notes on Holding Your Tablet Device
Page 42

Online Support Websites
If you need more information about your tablet device, see http://esupport.sony.com/model/SGPT211USS/US
Page 43

Notes on Holding Your Tablet Device
In landscape orientation, hold your tablet device so the front camera lens is at the upper side.
In portrait orientation, hold your tablet device so the front camera lens is at the lower side. Be careful not to
hold the ambient light sensor.
Some applications may not support screen rotation.
Be careful not to hold or cover the antenna shown in the figure below while using the Wi-Fi, Bluetooth, GPS,
or WAN functions.
1. Wi-Fi / Bluetooth
2. GPS
3. WAN
4. Ambient light sensor
Related Topic
Caring for Your Tablet Device
Page 44

About Sample Data
Sample data is installed on your tablet device at the factory for a trial of music, videos, photos, or books. Once
you delete the sample data, you cannot restore it. Please note that Sony will not provide replacement sample
data if deleted.
Page 45

Saving the Battery Consumption
Using your tablet device as described below will save the battery consumption.
Reduce the screen brightness (Tap [ Apps] - [ Settings] - [ Screen] - [Brightness]).
Set a short time -out period for turning off the screen automatically (Tap [ Apps] - [ Settings] - [
Screen] - [Timeout]).
Press the power button lightly to turn off the screen when you do not use your tablet device.
Shut down your tablet device when you do not use it for a long time [Details].
Turn off each feature when you do not use WI-Fi, Bluetooth, GPS, or Wireless WAN.
Related Topic
Turning On Your Tablet Device
Shutting Down Your Tablet Device
Turning On/Off the Screen
Notes on Using the AC Adapter
Charging the Battery
Notes on Using the Battery
Installing/Removing a Battery Pack
Page 46

Notes on Using Voice Communications Apps
When you use voice communications apps such as voice chat in the following cases, both parties cannot talk
simultaneously. Take turns speaking.
A headphone without microphone function is connected to the headphone jack.
Nothing is connected to the headphone jack.
You can talk simultaneously when a headset is connected to the headphone jack.
You cannot use voice chat over the AT&T mobile broadband network. Please use Wi-Fi for this function.
Page 47

Notes on Geomagnetic Sensor
Direction may not be measured correctly due to effects of the surrounding environment.
Page 48

Using the Built-in Camera
You can take photos and record videos using the built-in camera on your tablet device [Details].
Related Topic
Notes on the Built- in Camera
Camera
Page 49

Notes on the Built-in Camera
Do not touch the lenses of the built-in camera. If the lenses become soiled or scratched, image quality may be
affected.
Do not let direct sunlight enter the lenses of the built-in camera regardless of power state of your tablet
device. Doing so may cause the camera to malfunction.
Related Topic
Using the Built-in Camera
Camera
Page 50

Enjoying Games
As a PlayStation(TM) Certified device, your tablet device allows you to enjoy titles such as classic first-generation
PlayStation games. You can purchase PlayStation games from the PlayStation(R) Store.
Game titles from a variety of companies all over the world in addition to Sony can also be downloaded from the
Android Market.
Related Topic
Support for PlayStation(R) in general
Page 51

Enjoying Video Content
Video Unlimited
Various content such releases from major Hollywood studios or popular TV programs can be delivered to your
1
tablet device with high quality video*
content without worrying about late fees or monthly membership fees. The content you rent or purchase is
downloaded directly to your tablet device via the Internet*
Video Unlimited is a video service available on Sony Entertainment Network.
*1 TV programs may not be provided in some countries/regions.
*2 Some content may be limited to either rental or purchase only.
*3 A Wi-Fi Internet connection is required to download content.
Video Unlimited. Watch movies and television shows anytime, anywhere.
. Since you can select to rent or purchase*2 content, you can acquire
3
, allowing you to enjoy that content anytime as you like.
Download movies from across major studios.
Enjoy a variety of blockbusters and all -time classics.
No trips to the store, late fees, or monthly subscriptions.
Instant access. One account.
Convenience: No need to drive or walk to a video kiosk, or wait for discs in the mail.
Buy/Rent: Get films & TV episodes on your Sony Tablets, PSP (R), BRAVIA (R) TVs, PS3 (TM) consoles, and
more.
Previews: Watch movie trailers or previews free before you make a purchase decision.
Note
This app or service may not be available in some countries/regions.
Support information
http://www.sonyentertainmentnetwork.com/support
Related Topic
Video Unlimited
Video player
Supported Formats
Page 52

Enjoying Music Content
Music Unlimited
Listen to the music you want, when you want it. Upload your personal library for access anytime, anywhere or
discover new favorites with automatic recommendations based on your unique listening habits.
Music Unlimited is a music service available on Sony Entertainment Network.
Note
This app or service may not be available in some countries/regions.
Related Topic
Music Unlimited
Page 53

Enjoying Digital Books
Reader
Carry your favorite digital books on your tablet device. Your tablet device is an ideal tool for bookmarking,
highlighting, adjusting the font size, and on-the-go reading. Bookmarking and highlighting can be synchronized
with other compatible devices. And you can purchase eBooks easily on-line from the Reader(TM) Store.
Note
Reader(TM) Store may not be available in some countries/regions.
Related Topic
Reader
Page 54

Viewing Apps Recommended by Sony
Select App
A stylish app recommendation site that provides you with a continually updated list of interesting and useful
applications to enhance your tablet device experience. Select App provides tablet device owners easy access to a
variety of apps specifically chosen by Sony.
Related Topic
Select App
Page 55

Searching for Apps
Market
Apps such as convenient tools and games can be downloaded to your tablet device from the Android Market
provided by Google.
Tap [
launcher.
Apps] at the top right of the Home screen, followed by [ Market] on the displayed application
Page 56

Enjoying Video, Music or Photo Content on Other Devices
DLNA
If you connect your tablet device to the home network, you can enjoy videos, music or photos by linking other
devices as follows.
Note
For details on the playable format on the playback device, refer to the operating instructions supplied with the
playback device.
A: Playing back content stored on another device (server)
You can play back on your tablet device content stored on a server such as a computer or audio device.
B: Sending content stored on your tablet device to another device (playback device) and playing it back
(Throwing playback)
You can send content stored on your tablet to another device such as a TV and play it back on that device.
C: Sending (Throwing) content stored on one device (server) to another device (playback device) and
playing it back
Using your tablet device, you can send content stored on a server such as a computer or audio device to another
device such as a TV for playback on that device.
Page 57

A: Sending music content stored on your tablet device to other devices (playback devices) and playing it
back (Throwing playback)
You can send music content stored on your tablet device and play back the content at the same time via your
home network on devices with a PARTY STREAMING function.
B: Sending (Throwing) music content stored on one device (server) to other devices (playback devices)
and playing it back
You can send music content stored on the home network and play back the content at the same time via your
home network on devices with a PARTY STREAMING function.
Related Topic
What You Can Do Over the Home Network
About DLNA
Preparing the Home Network
Playing Back Content Stored on Another Device (Server)
Playing Content on other Devices by Sending (Throwing) it
Page 58

Sharing Exciting Experiences via Social Network
Social Feed Reader
You can manage and browse multiple network services like Twitter or Facebook all with Social Feed Reader.
Day-to-day operations such as posting, replying, clicking the “Like” button or retweeting can be performed with the
same ease of use. Also enjoy communicating more than ever with a screen display just right for viewing videos
and photos.
Related Topic
Social Feed Reader
Registering a Twitter or Facebook account
Switching the Posts (Article) Displayed
Reading and Writing the Post (Article)
Searching for Posts (Articles) or Friends
Page 59

About the Home Screen
App shortcuts, status bars, widgets, and more are displayed on the Home screen. The Home screen consists of
five pages, and you can flick left/right to scroll the pages.
A: Quick search box/Quick launcher
Quick search box
Tap the box to easily search with Google [Details].
Quick launcher
Tap icons in the Quick launcher to start apps. Since the Quick launcher is displayed on every page of the
Home screen, registering apps you often use gives you quick access to them.
Hint
Tap and hold icons to sort them in the Quick launcher or move them in and out of the Quick launcher.
B: Favorites/Application launcher/Home screen customize
Favorites
Tap this to start Favorites [Details].
Apps
Tap this to start the application launcher [Details].
Tap this to customize the Home screen [Details].
C: Widget
Widgets are located on the Home screen [Details].
D: Digital clock
Tap this to display the notification panel [Details].
E: Basic operation buttons
(Back): Tap this to return to the previous screen.
(Home): Tap this to display the Home screen.
(Recent Apps): Tap this to display the apps used recently [Details].
Related Topic
Customizing the Home Screen
Favorites
Page 60

Widgets
Application Launcher
About the Notification Panel
Rotating the Screen
Quick Search
Locking the Screen
Displaying Recent Apps
Page 61

Customizing the Home Screen
Adding icons on the Home screen allows you to start apps easily.
Customizing the Home screen
1. On the Home screen, tap [ ] at the top right of the screen.
The screen for customizing the Home screen is displayed.
2. Select the item to be customized.
Select the item you want to add on the Home screen from [Apps], [Widgets], [Wallpapers], or [More], and
display its icon.
3. Tap [
4. Tap the icon that you want to add to the Home screen.
An icon is added to the selected page.
Hint
To add an another icon to the same page, repeat step 4.
In step 3, you can drag and drop the icon directly to add an icon or widget to the page.
You can also add an icon directly by taping and holding the icon in the application launcher that you want to
add to the Home screen and then dragging and dropping it to [+ Add to Home screen].
To delete an icon from the Home screen
Tap and hold the icon and drag and drop it to
Related Topic
About the Home Screen
Favorites
Widgets
] for the page that you want to add an icon to.
(Remove).
Application Launcher
About the Notification Panel
Rotating the Screen
Quick Search
Locking the Screen
Displaying Recent Apps
Page 62

Favorites
In Favorites, thumbnails for websites you frequently visit, and content such as videos, photos, music, books, or
games you have registered as favorites are displayed. As you can see all registered content items at once, you
can start the desired content with one tap, without starting/ending apps repeatedly.
1. Tap [
Favorites is displayed.
2. Tap your favorite content displayed on the lower screen.
Detailed information is displayed on the upper screen.
3. Tap the content to use.
The corresponding app starts to play back the content.
Hint
Tapping the content selected in step 2 again allows you to start playback of the content.
Favorites] on the Home Screen.
Customizing the displayed items
1. In Favorites, tap at the top right of the lower screen.
2. Customize as follows.
To add items:
Select the desired item from the list on the upper screen, and tap it.
To delete an item:
Tap
Drag and drop the thumbnail on the lower screen.
3. When you finished customizing, tap
Related Topic
About the Home Screen
Customizing the Home Screen
Widgets
Application Launcher
About the Notification Panel
Rotating the Screen
Quick Search
on the thumbnail on the lower screen. Or select the item to delete from the list on the upper
screen, and tap it.
To move an item:
at the top right of the lower screen.
Locking the Screen
Displaying Recent Apps
Page 63

Widgets
A widget is a mini-application you can place on the Home screen. If an app is supplied with a widget, place the
widget on the Home screen so that you can operate the app from the Home screen easily.
Adding a widget to the Home screen
1. Tap [ ] at the top right of the Home screen.
The screen to customize the Home screen is displayed.
2. Tap the [
3. Tap [Widgets] tab, followed by the widget to be added.
The widget is added to the selected page.
Hint
To add more widgets on the same page, repeat step 3.
You can drag/drop a widget directly to the page in step 2 instead.
To delete a widget
Tapping and holding the widget on the Home screen, drag/drop the widget to
Related Topic
About the Home Screen
Customizing the Home Screen
Favorites
Application Launcher
] of the page you want to add a widget.
(Remove).
About the Notification Panel
Rotating the Screen
Quick Search
Locking the Screen
Displaying Recent Apps
Page 64

Application Launcher
The application launcher displays the icons of all available apps, allowing you to tap those to start the app. You
can scroll the screen up and down by flicking it. You can also sort the order of icons.
1. Tap [
The application launcher starts.
Apps] on the Home screen.
Customizing the application launcher
To uninstall an application
1. In the application launcher, tap and hold the icon of the app you want to uninstall.
2. Drag and drop the icon to [
To sort the icons
1. In the application launcher, tap one of the following icons at the top right of the screen:
[A to Z] : Sort by name.
[Newest first] : Sort by date of update.
[Custom] : Rearrange the order as you like.
To customize the order of icons
1. In the application launcher, tap [Custom] at the top right of the screen then
2. Drag and drop the icons where you want them to go.
Uninstall].
.
3. When finished moving the icons, tap
Hint
You can use the separator line to organize the icons visible in the application launcher. Drag and drop [
Separator] at the top right of the screen to add a new line in step 2.
Related Topic
About the Home Screen
Customizing the Home Screen
Favorites
Widgets
About the Notification Panel
Rotating the Screen
Quick Search
Locking the Screen
at the top right of the screen.
Displaying Recent Apps
Page 65

About the Notification Panel
The notification panel is displayed when you tap the digital clock on the bottom right of the screen. Tap the icon
on the notification panel or the panel itself to check the status or messages. When you tap the digital clock while
displaying the notification panel, the control panel appears. You can control the following items on the control
panel.
Airplane mode: Turns on/off the airplane mode.
Wi-Fi: Displays the Wi-Fi setting screen.
Auto-rotate screen: Locks the screen so it does not rotate automatically.
Luminance: Adjusts the screen luminance.
Notifications: Turns on/off the notifications.
Settings: Displays the setting screen.
Related Topic
About the Home Screen
Customizing the Home Screen
Favorites
Widgets
Application Launcher
Rotating the Screen
Quick Search
Locking the Screen
Displaying Recent Apps
Page 66

Rotating the Screen
The screen rotates when you turn your tablet device sideways shown below.
Note
Depending on the application, the screen may rotate regardless of the direction of your tablet device.
Some apps may not support screen rotation.
Setting the screen to not rotate
1. Tap [ Apps] - [ Settings] - [ Screen] - [Auto-rotate screen] in that order to remove the check mark.
To set the screen to rotate again
Tap [Auto-rotate screen] again to add a check mark.
Related Topic
About the Home Screen
Customizing the Home Screen
Favorites
Widgets
Application Launcher
About the Notification Panel
Quick Search
Locking the Screen
Displaying Recent Apps
Page 67

Quick Search
The quick search box appears on the top left of the Home screen. You can search easily by text or voice using
quick search.
To search by text
Tap the box, enter keywords, and then tap
To search by voice
Tap
Related Topic
About the Home Screen
Customizing the Home Screen
Favorites
Widgets
Application Launcher
About the Notification Panel
Rotating the Screen
Locking the Screen
Displaying Recent Apps
and speak keywords when prompted.
.
Page 68

Locking the Screen
You can lock the screen of your tablet device to prevent accidental touching of the screen from activating
operations. If you activate the lock function, the screen is locked when the screen is turned off. You can also
select how to deactivate locking.
To configure the lock function
1. Tap [ Apps] - [ Settings] - [ Location & security] - [Configure lock screen] in that order.
2. Tap the desired setting.
3. Follow the on-screen instructions.
Related Topic
About the Home Screen
Customizing the Home Screen
Favorites
Widgets
Application Launcher
About the Notification Panel
Rotating the Screen
Quick Search
Displaying Recent Apps
Page 69

Displaying Recent Apps
When you tap (Recent Apps) on the bottom left of the screen, recent apps are displayed in the order that
they were used.
Related Topic
About the Home Screen
Customizing the Home Screen
Favorites
Widgets
Application Launcher
About the Notification Panel
Rotating the Screen
Quick Search
Locking the Screen
Page 70

Entering Text
When you want to enter texts, tap the text area to display the on-screen keyboard [Details].
Related Topic
Using the On-screen Keyboard
Cutting and Pasting Text
Page 71

Using the On-screen Keyboard
The on-screen keyboard changes each time you tap the two keys below the left-side [Tab] key.
Hint
Bars on these keys show the status of current keyboard. When you tap the keys, the bars also change.
To set the input language
Tap [
[Standard keyboard], tap [Settings] then [Input languages] and then put a check mark on the languages to use.
To switch the input language
When you select multiple languages to use for input, you can switch languages by tapping the language switching
key at the bottom left of the on-screen keyboard.
Related Topic
Entering Text
Cutting and Pasting Text
Apps] - [ Settings] - [ Language & input] - [Configure input methods] in that order. Under
Page 72

Cutting and Pasting Text
To cut or copy text
1. Tap and hold the text to cut or copy.
The selected text is highlighted.
2. Tap [ Copy] or [ Cut].
Note
You cannot cut or copy text while entering.
Hint
If you drag and drop the cursor that appears in step 1, you can change the range of text selected.
To paste text
1. Tap and hold the location to paste the text, and then tap [ Paste].
Hint
If you drag and drop the cursor that appears in step 1, you can change the location to paste the text.
Related Topic
Entering Text
Using the On-screen Keyboard
Page 73

Google Account
You are required to sign up for a Google account to use services provided by Google, such as Gmail, Calendar,
and Android Market. Those services are provided free of charge. Using the Google account, you can sync apps,
such as Gmail, Calendar, and Contacts, on your tablet device with those of their respective Google services.
Using your current Google account
You can use the Google account you have already have with a computer or smartphone. Input your account
name and password in the log in screen displayed for Google service apps.
Note
Make sure that your tablet device is connected to the Internet when you sign up for a new Google account or
log-in.
Signing up for a new Google account on your tablet device
You can sign up for a Google account when you use your tablet device for the first time or start a Google service
app for the first time.
Hint
You do not have to sign up for another Google account when you have already have one for your computer,
etc.
You can sign up for a Google account by tapping [ Apps] - [ Settings] - [ Accounts & sync] - [+ Add
account] (at the top right of the screen) - [Google Account] in that order.
You can also sign up for a Google account by accessing Google (https://www.google.com/accounts/) directly.
Related Topic
Before Use
Page 74

Changing the Settings
Various settings of your tablet device can be changed in the settings menu.
1. Tap [
2. Tap the individual menu items to change settings.
The menu items are as follows:
Apps] - [ Settings] and the desired items.
Wireless & networks
Sound
Screen
Location & security
Applications
Accounts & sync
Privacy
Storage
Language & input
Accessibility
Date & time
About tablet
Page 75

Before Use
When you use your tablet device for the first time, you can connect your tablet device to the Internet and sign in
to your Google account.
Hint
You may connect your tablet device to the Internet and sign in to your Google account later.
1. After turning on your tablet device, select a language.
2. Connect your tablet device to the Internet via Wi-Fi [Details] or 3G.
3. Follow the displayed instructions to sign in to your Google account.
Related Topic
Google Account
Page 76

List of Apps
When you first purchase your tablet device, the following apps are preinstalled on it. You can start each app by
tapping its icon.
Hint
When appears at the top right of the screen, you can tap it to display the option menu.
Calendar
Manage your schedule and synchronizing the schedule with Google Calendar [Details]
Browser
Browse Internet websites [Details]
Camera
Shoot photos or movies [Details]
Contacts
Manage contacts for your friends or colleagues [Details]
Desk clock
Display the current time [Details]
Email
Send or receive PC e -mail messages [Details]
Video player
Play back movie files [Details]
Music player
Play back music files [Details]
Page 77

Gallery
Browse photos or play them back as a slide show [Details]
DLNA
Exchange videos, music, and photos with other devices via the home network and play them back [Details]
Social Feed Reader
Access Social Networking Services such as Twitter or Facebook [Details]
Wi -Fi checker
Check the Wi-Fi connection of your tablet device [Details]
Reader
Purchase and browse eBooks content [Details]
Help guide
Display this Help guide via the network
Select App
Access websites that introduce Sony-recommended apps [Details]
Video Unlimited
Access Sony’s premium video delivery service [Details]
Music Unlimited
Access Sony’s cloud music delivery service [Details]
PS Store
You can purchase and download PlayStation games from the PlayStation(R) Store [Details].
Crash Bandicoot(R)
Play this classic game for the first generation PlayStation
Page 78

Pinball Heroes
Play this classic pinball game for the first generation PlayStation
Settings
Change various settings of your tablet device [Details]
Messaging
Send or receive SMS (short messages)
Note
Additional per message charges may apply.
Music
Play back music
Calculator
Make basic calculations [Details]
Gmail
Send or receive Gmail
Google Search
Make Google searches [Details]
Maps
Find your location and search destinations/routes (Google Maps)
Places
Use this information service for shops and places
Navigation
Use this Internet-aided GPS navigation system that includes a voice guidance function
Latitude
Check a friend’s current position on a map
Page 79

Market
Download or purchase new apps
Voice Search
Make Google searches by voice [Details]
Downloads
Use the download manager to display or manage Internet content downloads
Foursquare
Share with friends and acquaintances information on shops and places you visit, or get money- saving information
[Details].
Evernote
Store memos, photos and voice messages on the cloud, and browse them from your computer and tablet device
at any time [Details].
HD Games
Download high quality games to your Android tablet from the Top HD Games at Gameloft's online store [Details].
Page 80

Email
You can compose, send and receive e-mail messages in the same format as used on computers. You can
register multiple e-mail accounts. Your contacts list can be used to add the recipient address when composing a
new e-mail message. You can also search or sort received e-mail messages.
If using Microsoft Exchange Server, you can send and receive e -mails by connecting to Microsoft Exchange
Server.
Note
Ask your network administrator, etc. about how to connect to Microsoft Exchange Server.
1. Tap
Before setting an account: The screen to set an account is displayed.
After an account has been set: The e-mail list screen is displayed. Tap the desired e -mail to display it.
Hint
If you cannot find the icon to start the app, look for it in the application launcher displayed by tapping [
Apps] at the top right of the Home screen.
to start the Email app.
Setting an e-mail account
1. Start the Email app.
The screen to set an account is displayed.
2. Input your e-mail address and password, and tap [Next].
3. Following the instructions on the screen, set the e- mail account.
When setting is complete, the e-mail list screen is displayed.
To change settings
On the option menu of the e- mail list screen, tap [Account settings] - (the e-mail account to be changed) - (The
item to be changed) in that order.
To add an e-mail account
On the option menu of the e- mail list screen, tap [Account settings] followed by [
to step 3.
To remove an e-mail account
On the option menu of the e- mail list screen, tap [Account settings] - (the e-mail account to be removed) [Remove account] in that order.
Add account], then proceed
Composing/Sending an e-mail
1. On the e-mail list screen, tap at the top right of the screen.
Page 81

The e-mail composing screen is displayed.
2. Input the recipient’s e-mail address at [To].
3. Input the subject at [Subject].
4. Input the message at [Compose Mail].
5. Tap [
The e-mail you composed is sent.
Hint
Tapping in step 2 allows you to input the address from those in the Contacts app.
Tapping in step 3 allows you to attach a file to your e-mail.
Tapping [Save draft] while composing allows you to save the draft.
Send].
Receiving e-mails
1. On the e-mail list screen, tap at the top right of the screen.
New e-mails are displayed in the inbox. Tap on the e-mails to open them.
To display the e-mail on the full-screen
On the e-mail list screen, tap
Hint
. To return to the original size, tap .
You can set for each account the number of received e-mails to be put in a folder in [Account settings] in the
option menu of the e-mail list screen.
To reply to an e-mail
Display the e-mail you want to reply to, tap
Send].
To forward an e-mail
Display the e-mail you want to forward, tap
(Reply) or (Reply to all), compose your message, and tap [
(Forward), compose your forwarding message, and tap [ Send].
Deleting an e-mail
1. Tap the e-mail you want to delete on the e-mail list screen.
The selected e-mail is displayed.
2. Tap
The e-mail is deleted.
at the top right of the screen, followed by [OK].
Sorting e-mails
1. Tap [Show sort buttons] in the option menu of the e-mail list screen
The sort buttons are displayed.
2. Tap the desired sorting key among the keys displayed.
The e-mails are sorted according to the selected sorting key.
Searching for an e-mail
Page 82

1. Tap [Open search] on option menu on the e-mail list screen.
The search box is displayed.
2. Tap
Hint
Tapping [Results from device] shows the search results for the e- mails saved on your tablet device.
Tapping [Results from server] shows the search results for the e-mails saved on the server.
to select the where to search, input the keyword, and then tap .
Making changes to multiple e-mails
You can select multiple e-mails to move them to another folder or delete them together.
1. On the e-mail list screen or on an e-mail screen, tap the check box of the desired e-mail to put a check in.
The e-mails having a check mark are selected.
2. When finished selecting e- mails, make changes to them such as moving them to another folder or deleting
them.
Page 83

Browser
The Browser app lets you access and browse websites on the Internet. You can display/switch between multiple
websites by using tabs.
1. Tap
Hint
If you cannot find the icon to start the app, look for it in the application launcher displayed by tapping [
Apps] at the top right of the Home screen.
Certain websites may not be displayed, because the browser does not support the photo/movie format or
plug-in.
to start the Browser app.
Browsing Websites
1. Tap the address bar on the browser.
The on-screen keyboard is displayed.
2. Input the address (URL) of the desired website, and tap the ENTER key.
Note
If the content does not appear correctly, tap [Settings] followed by [Advanced] in the option menu, then tap
[Enable Quick view] to remove the check.
Hint
You can search the Internet by inputting a keyword or phrase instead of the address (URL) in step 2.
If the address bar is not displayed at the top of the screen, tap the tab.
To add a tab, tap at the right end of the tabs list.
To delete a tab, tap at the right end inside the tab.
To view/delete the access history
To view the websites you accessed previously, tap
To delete the history, tap
followed by [Clear history] after displaying the history.
followed by [History] at the top left of the screen.
Using Bookmarks
The bookmark function allows you to record addresses (URLs) of websites you visit frequently to allow you to
access those sites quickly. You can also make shortcuts on the Home screen for addresses (URLs).
To add a bookmark for an address (URL)
Tap
To make a shortcut on the Home screen for an address (URL)
at the right of the address bar to check the detailed information, and then tap [OK].
Tap
at the right of the address bar, select [ Home screen] as the destination, and then tap [OK].
Page 84

To access a website from its bookmark
Tap to call up the list of registered bookmarks. Tap the desired website from the list.
Page 85

Camera
You can shoot photos and movies using the built-in front and rear cameras. Various shooting settings such as
image size are also available. Location information also can be added to photos.
1. Tap
Note
Make sure that a microSD memory card is inserted before using the camera.
All photos and movies are stored on the microSD memory card.
Hint
If you cannot find the icon to start the app, look for it in the application launcher displayed by tapping [
Apps] at the top right of the Home screen.
In order to add location information to the photos, GPS must be enabled or your tablet device must be
connected to the network when you take photos.
You can view the photos and movies you recorded from Gallery app also.
to start the Camera app.
Shooting Photos/Movies
1. Start the Camera app.
Tap or at the top left of the screen to select photo or movie.
2. Aim the camera to your subject, and tap
For photos: A photo is shot.
For movies: Movie recording starts. Tapping
Hint
The rear camera is equipped with an auto-focus function. After you tap , a photo is shot when the subject
comes into focus.
You can switch between the front camera and the rear camera by tapping or at the top left of the lower
screen.
or .
again stops recording.
Finishing the Camera app
Tap displayed on the status bar at the bottom left of the screen. If the status bar is not displayed, tap the
bottom left of the screen once.
Note
Copyright and portrait rights
The recorded images and sounds on your tablet device may be copyrighted. Unauthorized use of such
materials other than for personal use may violate copyright laws. Using or modifying images or names of other
Page 86

people without their permission may violate portrait rights. You should thus take into account copyright and
portrait rights when putting recorded images on Internet websites. Some performances, shows and displays
may restrict recordings for even personal use. Unauthorized recording of such materials may be contrary to
copyright laws.
Related Topic
Using the Built-in Camera
Notes on the Built- in Camera
Page 87

Calculator
You can use your tablet device as a calculator. In addition to four arithmetic operation of addition, subtraction,
multiplication and division, trigonometric function, exponent function, logarithm, etc. are available.
1. Tap
Hint
If you cannot find the icon to start the app, look for it in the application launcher displayed by tapping [
Apps] at the top right of the Home screen.
to start the Calculator app.
Page 88

Calendar
You can manage your schedule on your tablet device. By registering your Google account, you can sync your
Google Calendar and your schedule data, making your schedule even more handy.
If using Microsoft Exchange Server, you can manage your schedule by connecting to Microsoft Exchange Server.
Note
Ask your network administrator, etc. about how to connect to Microsoft Exchange Server.
1. Tap
The calendar is displayed.
Tapping the icons at the top right of the screen allows you to do the following operations.
[
[Month]: Display the calendar by month
[Week]: Display the calendar by week
[Day]: Display the schedule for one day
Hint
If you cannot find the icon to start the app, look for it in the application launcher displayed by tapping [
Apps] at the top right of the Home screen.
You can change the month or date and time by flicking up/down/right/left on the schedule or mini -calendar.
to start the Calendar app.
: Add schedules
: Set a date to be displayed
: Search for a schedule
: Make detailed settings of the Calendar app
Today]: Display today’s schedule
Adding a schedule
1. Tap and hold the date and time you want to add a schedule for.
2. Input the starting date and time and details of the schedule, and tap [
Hint
You can have your tablet device notify you when close to the scheduled date and time.
Done] at the top right of the screen.
Changing a schedule
1. Tap the schedule you want to change.
2. Tap [Details].
3. Tap [
of the screen.
Edit] at the top right of the screen, input the item to be changed, and tap [ Done] at the top right
Page 89

Deleting a schedule
1. Tap the schedule you want to delete.
2. Tap [Delete] followed by [OK].
Note
When you share the schedule on Google calendar, choose the people with whom you share it very carefully
to prevent your schedule from being disclosed to undesired users.
If your calendar is not synced with Google calendar automatically, tap [ Settings] followed by [
Accounts & sync], and check whether [Auto-sync] is enabled or not.
If your calendar is set to sync with Google calendar automatically and you change the schedule on a
computer or other devices, your tablet device will connect with Google calendar automatically. This may
cause unexpected communications charge.
Page 90

Contacts
You can register names, phone numbers, addresses, etc. as frequently used contacts. By registering your Google
account, you can sync Contacts with your Google Contacts, making them even more handy.
If using Microsoft Exchange Server, you can integrate your connecting work contacts by connecting to Microsoft
Exchange Server.
If your contacts are not synced with Google Contacts automatically, tap [
& sync], and check whether [Auto-sync] is enabled or not.
Note
Ask your network administrator, etc. about how to connect to Microsoft Exchange Server.
1. Tap
Hint
If you cannot find the icon to start the app, look for it in the application launcher displayed by tapping [
Apps] at the top right of the Home screen.
to start Contacts app.
Settings] followed by [ Accounts
Registering contacts
1. Start the Contacts app.
2. Tap [
3. Input the data, and tap [
New].
Done].
The contact is registered.
Hint
If you use multiple accounts on your tablet device, tap [ New] followed by (account to which you want to
add new contacts) in step 2, then proceed to step 3.
To edit contacts
Tap the contact you want to edit and
To delete contacts
Tap the contact you want to delete, and [Delete contact] on the option menu.
at the top right of the displayed screen.
Joining contacts
You can join the contact of a person who has two or more e-mail address, etc. and has been registered to
separate contacts.
1. Start Contacts app.
Page 91

2. Tap one of his/her contacts, and at the top right of the displayed screen.
3. Tap [Join] on the option menu.
4. Tap the contact you wish to join with.
The contact selected in step 2 is joined with the contact selected in step 4.
Page 92

Desk clock
The clock is easy- to-see even from a distance and has a background that changes according to the time.
1. Tap
The digital clock is displayed.
Tapping the icons allows you to do the following operations.
Hint
If you cannot find the icon to start the app, look for it in the application launcher displayed by tapping [
Apps] at the top right of the Home screen.
The time set for the alarm is displayed on the screen.
to start the Desk clock app.
: Set the alarm
: Start the Gallery app and slide show
: Play back music
: Return to the Home screen
: Change the screen brightness between two levels
Page 93

Music player
The Music player app allows you to play back music content stored on your tablet device or the home network.
You can also send music content to another DLNA certified device and play it back on that device.
The detailed information of the current album or song can be searched or displayed, and you can add cover art
or lyrics to the content. Applying 12 TONE ANALYSIS to the music content gives you more ways to enjoy that
content. You can also adjust sound processing settings for playback by means such as the equalizer.
1. Tap
The browsing screen appears.
Hint
If you cannot find the icon to start the app, look for it in the application launcher displayed by tapping [
Apps] at the top right of the Home screen.
to start the Music player app.
Playing back music content on your tablet device
1. Tap list items, folders, or albums to select the album, song, or playlist that you want to play back.
Playback starts.
Hint
A playback icon is displayed at the bottom right of the screen during playback.
If you flick left or right the cover art on the playback screen displayed by tapping the cover art on the top left
of the browsing screen, information on the content currently playing and a song list are displayed.
If you remove the headphones during playback, playback is paused automatically to prevent sudden loud
sound from being emitted from the tablet device.
Changing the display
Tap the list on the left side of the lower screen when the browsing screen is displayed.
[ Cover art view]: Displays the cover art of all albums.
[ SensMe(TM) channels]: Categorizes the music content into channels according to the music type
automatically. You can select the channel according to the time of the day or your mood.
[ Library]: Displays the music content by song, album, artist, etc.
Playing back music content on other devices by sending (Throwing) it from your tablet
device
Using your tablet device, you can send music content to another DLNA certified device via the home network and
play back the music content on that device [Details].
Note
If you display another screen by means such as tapping , while you are controlling another device
Page 94

(playback device) using your tablet device, return to the control screen via the notification panel.
Hint
While you are sending content to another device, you can play back other content on your tablet device.
Searching for related information
You can easily search for information related to the currently playing music content.
1. Tap the cover art at the top left of the browsing screen.
The playback screen is displayed.
2. Flick the cover art left twice.
3. Tap the song title, artist name or album name that you want to search for.
4. Select and tap from the list displayed the app that you want to use for the search.
The search starts using the selected app.
Adding cover art to an album or a song
You can add a photo or image you want to use as cover art to an album or a song.
1. Tap the cover art at the top left of the browsing screen.
The playback screen is displayed.
2. Tap the option menu.
3. Tap [Add cover art].
4. Follow the on-screen instructions to specify the photo or image to use as cover art.
Hint
When adding cover art to an album, tapping and holding the album in the album list or the cover art view
allows you to proceed to step 3.
To delete cover art
In step 3, tap [Delete cover art].
Adding lyrics to a song
You can add or edit song lyrics in plain text. Your tablet device supports .lrc and .txt file formats.
1. Tap the cover art at the top left of the browsing screen.
The playback screen is displayed.
2. Tap the option menu.
3. Tap [Add lyrics].
4. Follow the on-screen instructions to input or select the lyrics.
To delete lyrics
In step 3, tap [Delete lyrics].
Analyzing music content
When you start SensMe(TM) channels or the visualizer, notification will tell you if songs have not been analyzed.
Page 95

That notification can be turned off from the settings of 12 TONE ANALYSIS.
Hint
Songs are analyzed using Sony 12 TONE ANALYSIS technology. The results of the analysis are applied to
the SensMe(TM) channels, and the visualizer will move graphics according to the beat of the song.
Related Topic
Enjoying Music Content
Supported Formats
About Sample Data
Playing Back Music Content on Multiple Devices (PARTY STREAMING)
Page 96

Video player
The Video player app allows you to play back videos. You can also send ([Throw]) videos to another DLNA
certified device and play them back on that device. Scene searches can also be performed. Detailed information
of the current video can also be displayed, and you can even delete the video content.
1. Tap
Hint
If you cannot find the icon to start the app, look for it in the application launcher displayed by tapping [
Apps] at the top right of the Home screen.
You can copy video files to your tablet device by methods such as the following:
Connect your tablet device to a computer via a Micro-USB cable to drag and drop video files.
Remove the microSD memory card from your tablet device before copying video files, and then reinsert the
microSD memory card to the tablet after copying.
Purchase or rent the video files from Video Unlimited*
*1 Video Unlimited is a video service available on Sony Entertainment Network.
to start the Video player app.
1
.
Playing back video content on your tablet device
1. Tap folders or thumbnails to select the video you want to play back.
Playback then starts, and the playback screen appears.
Hint
You can play back video content purchased on Video Unlimited*1.
Using the option menu on the playback screen, you can switch subtitles and sounds. You can also perform
actions such as zooming in or out.
Tapping (fast-forward) will play back the video at about 1.5 times faster. You can adjust the playback
speed to 10 times, 30 times, or 100 times (max) faster by tapping it further.
If you remove the headphones during playback, playback is paused automatically to prevent sudden loud
sound from being emitted from the tablet device.
*1 Video Unlimited is a video service available on Sony Entertainment Network.
Playing back video content on other devices by sending (Throwing) it from your tablet
device
Using your tablet device, you can send video content to another DLNA certified device via the home network and
play back the video content on that device [Details].
Note
If you display another screen by means such as tapping , while you are controlling another device
(playback device) using your tablet device, return to the control screen via the notification panel.
You cannot send to and play back on another device (playback device) video content purchased on Video
Page 97

Unlimited*1.
Hint
While you are sending content to another device, you can play back other content on your tablet device.
*1 Video Unlimited is a video service available on Sony Entertainment Network.
Displaying detailed information about video content
1. On the playback screen, tap the option menu.
2. Tap [Details].
Detailed information of the current video is displayed.
Hint
On the video list screen, tap and hold the video that you want to display information for, and then proceed to
step 2.
When you tap the video title on the detailed information screen, you can search for information related to the
currently playing video.
Deleting video content
1. On the playback screen, tap the option menu.
2. Tap [Delete].
The video content is deleted.
Hint
On the video list screen, tap and hold the video that you want to delete, and then proceed to step 2.
Searching scenes
You can search for scenes in the video that is currently playing back.
1. On the playback screen, tap
The scene search screen is displayed.
2. Flick the screen left/right to select the scene that you want to start, and then tap the scene.
Playback starts from the scene that you select.
.
Hint
When you tap the button at the center of the screen, you can change the length of scenes.
Related Topic
Enjoying Video Content
Supported Formats
About Sample Data
Page 98

What You Can Do Over the Home Network
You can do things like those shown below by connecting your tablet device to the home network.
Playing back content stored on another device (server)
If you connect your tablet device to a DLNA certified server (such as a computer) [Details], you can play back on
the tablet device video, photo, music, or other content stored on the media server.
Sending (Throwing) content to another device and playing it back
You can send video, photo or music content stored on your tablet device to another device (playback device) and
play back the content on that device.
Hint
Using your tablet device, you can also send content stored on a server via the home network to another
device (playback device) and play it back on that device.
Sending (Throwing) music content to other devices and playing it back (PARTY STREAMING)
Page 99

You can send (Throw) music content stored on your tablet device or the home network and play back the content
at the same time via your home network on devices with a PARTY STREAMING function.
Related Topic
Enjoying Video, Music or Photo Content on Other Devices
About DLNA
Preparing the Home Network
Playing Back Content Stored on Another Device (Server)
Playing Content on other Devices by Sending (Throwing) it
Playing Back Music Content on Multiple Devices (PARTY STREAMING)
Page 100

About DLNA
You must connect DLNA certified devices to your home network to play back on your tablet device content stored
on another device (server) or play back on other device (playback device) content stored on your tablet device.
Devices that can act as a server
DLNA certified computer, DLNA certified audio device, etc.
Devices that can act as a playback device
DLNA certified TV, DLNA certified computer, etc.
Hint
DLNA is an abbreviation for Digital Living Network Alliance. The word DLNA indicates the organization, which
is developing guidelines for transferring digital content such as music or images via the home network, and
the embodying system itself.
Related Topic
Enjoying Video, Music or Photo Content on Other Devices
What You Can Do Over the Home Network
Preparing the Home Network
Playing Back Content Stored on Another Device (Server)
Playing Content on other Devices by Sending (Throwing) it
Playing Back Music Content on Multiple Devices (PARTY STREAMING)
 Loading...