

Page 1

2-588-610-11(1)
Integrated Remote
Commander
Operating Instructions
Bruksanvisning
RM-AV2500T
© 2005 Sony Corporation
GB
SE
Page 2

GB
2
Page 3

Features
The RM-AV2500T Remote Commander
provides centralized control of all your
AV components from a single remote
commander and saves the trouble of
operating different AV components with
different remote control devices. The
following are its main features.
Centralized control of Sony AV
components with this one remote
commander
This Commander is preset at the factory
to operate Sony brand components, so
you can use it out of the box as a control
centre for your Sony AV components.
Remote control signals for non-Sony
components are also preset
This Commander is preset for most major
brands components including Sony. You
can remote control your components by
setting their code numbers (page 8).
Learning function for programming
other remote control signals you
need
This Commander has a learning function,
to learn remote control signals to operate
non-preset components or functions
(page 15).
In addition, the Commander can learn
remote control signals (infrared signals
only) of non-Audio Visual components
such as air-conditioners, lights, etc. (some
specific appliances or functions may not
be available) (page 35).
Setting a maximum of 24 macro
commands of a maximum of 32
successive steps
A maximum of 24 macro commands
which provide a maximum of 32
successive steps by pressing a single
button can be set (12 system control
macros and 12 component macros).
Macro execution speed is changeable. All
power on/off macro commands for Sony
components are preset at the factory.
Multi component in one screen
When you operate a lot of equipment all
together, you need not change the screen.
When watching a DVD, the DVD run
system key, the Power key for TV and
Receiver or the input change key can be
displayed on one screen, and it can be
operated, without switching the screen.
Alias function
Keys memorized on other screen can be
link, it is not necessary to learning again.
For example, it is useful to display the
Power key for TV or the input change
key on the CABLE screen (page 43).
Channel macro function allows you
to select a channel with a single key
Up to 4 key steps can be programmed on
macro keys. If you set the key operations
for entering a channel number on a
macro key, you can select the channel by
pressing that macro key (page 41).
Easy-to-operate touch key LCD with
blue back light
This Commander has a touch key LCD
that changes the key display according to
the selected component. The Commander
is easy to operate as only the keys
necessary to operate the selected
component are displayed. The display
backlight allows operation even in the
dark.
GB
3
Page 4

Table of Contents
Getting Started
Installing the Batteries ......................................................................................................... 6
When to replace the batteries.............................................................................................. 6
Location and Function of Controls ....................................................................................... 7
Basic Operations
Setting the Code for Preset Audio and Visual Components ................................................. 8
Setting a component code ................................................................................................... 8
Checking if the code number works ................................................................................ 10
Finding a component code with the Search function.................................................... 11
Operating Your Components with the Remote Commander .............................................. 13
To control the volume ........................................................................................................ 14
Notes on operating your components ............................................................................. 14
Using Non-Preset Remote Control Operations — Learning Function ................................ 15
For accurate learning ......................................................................................................... 19
Changing or erasing the function of a taught key or button ....................................... 19
Advanced Features
Controlling the Volume of Visual Components Connected to an Audio System ................. 21
Executing a Series of Commands — System Control Functions ......................................... 22
Programming a series of commands to the SYSTEM CONTROL buttons ................ 23
Notes on System Control Operations .............................................................................. 27
Programming a series of commands to the Component Select buttons..................... 27
Changing the interval between operation steps ............................................................ 29
Adding an Extra Function to the Component Select Buttons ............................................. 30
Programming the Power-On command of the selected component
(for Sony components only) ........................................................................................... 30
Adding a command that is required when selecting a component ............................ 32
Copying the settings of a Component Select button to another button ........................... 34
Programming a Frequently Used Key Operation for SYSTEM CONTROL Buttons ............... 35
Notes on learning the signals of an air-conditioner ...................................................... 37
Transferring Data between Remote Commanders .............................................................. 37
Transferring data ................................................................................................................ 37
Receiving the data ..............................................................................................................40
Selecting a Channel with a Single Key Press — Channel Macro Function ......................... 41
Creating an Alias Component key (ALIAS).......................................................................... 43
GB
4
Page 5

Using Other Functions
Locking the Controls — Hold Function ............................................................................... 46
Protecting your settings — Preset Lock Function .............................................................. 46
Changing the Auto Power-Off Time of the Commander ..................................................... 47
Adjusting the Backlight of the Display Window ................................................................. 48
Setting the Key-Touch Beep ................................................................................................ 50
Adjusting the beam interval to avoid key misoperation .................................................... 51
Additional Information
Precautions ......................................................................................................................... 54
Maintenance ....................................................................................................................... 54
Specifications ...................................................................................................................... 54
Troubleshooting .................................................................................................................. 55
Appendix
Table of Preset Functions.................................................................................................... 59
TV.......................................................................................................................................... 59
SAT........................................................................................................................................ 60
VCR....................................................................................................................................... 61
DVD ...................................................................................................................................... 61
CBL (Analog Cable box) .................................................................................................... 62
AMP ...................................................................................................................................... 63
CD ......................................................................................................................................... 64
MD ........................................................................................................................................ 65
TAPE..................................................................................................................................... 65
Quick Reference of Operations ........................................................................................... 66
Index ................................................................................................................................... 68
GB
5
Page 6
Getting Started
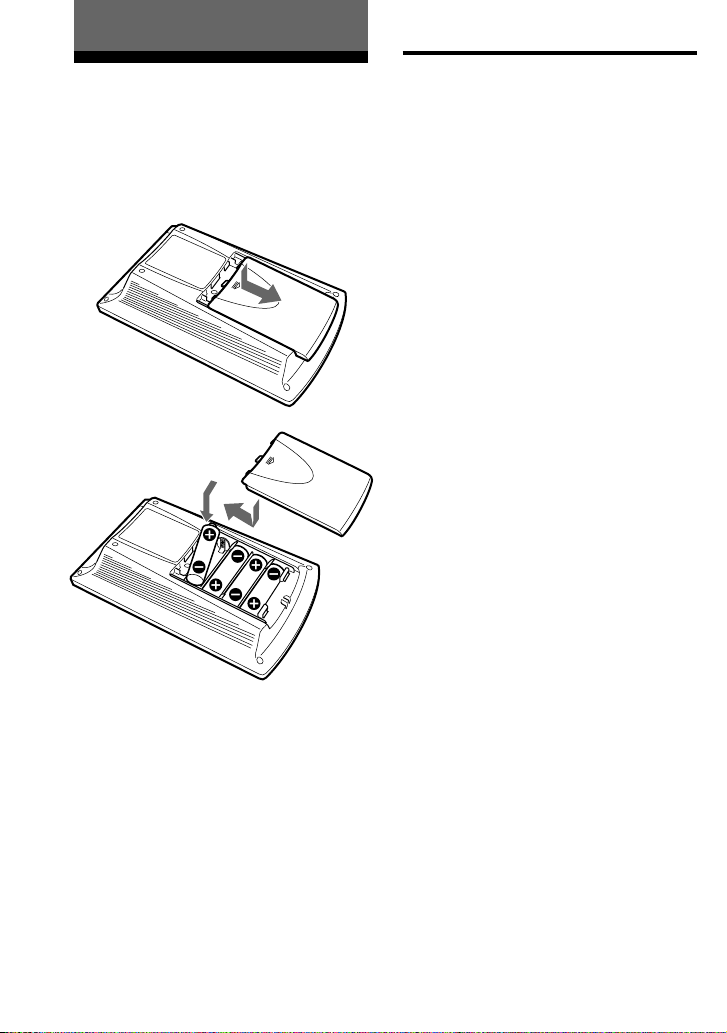
Installing the Batteries
Slide open the battery compartment lid
and insert four R6 (size AA) batteries (not
supplied). Be sure to line up the + and –
on the batteries with the + and – on the
battery compartment.
When to replace the batteries
Batteries for remote control
operation and backlight (four R6
(size AA) batteries)
Under normal conditions, alkaline
batteries will last up to 5 months. If the
Commander does not operate properly,
batteries might be worn out and E is
displayed on the LCD touch panel. When
the display dims or the backlight for the
touch keys grows dim, replace the
alkaline batteries with new ones.
Note
Do not take more than one day to replace the
batteries; otherwise, your setting of the code
numbers (page 8) and learned remote control
signals (page 15) will be erased.
Notes on batteries
• Do not mix old batteries with new ones or
mix different types of batteries together.
• If the electrolyte inside the battery should
leak, wipe the contaminated area of the
battery compartment with a cloth and replace
the old batteries with new ones. To prevent
the electrolyte from leaking, remove the
batteries when you plan not to use the
Commander for a long period of time.
GB
6
Page 7

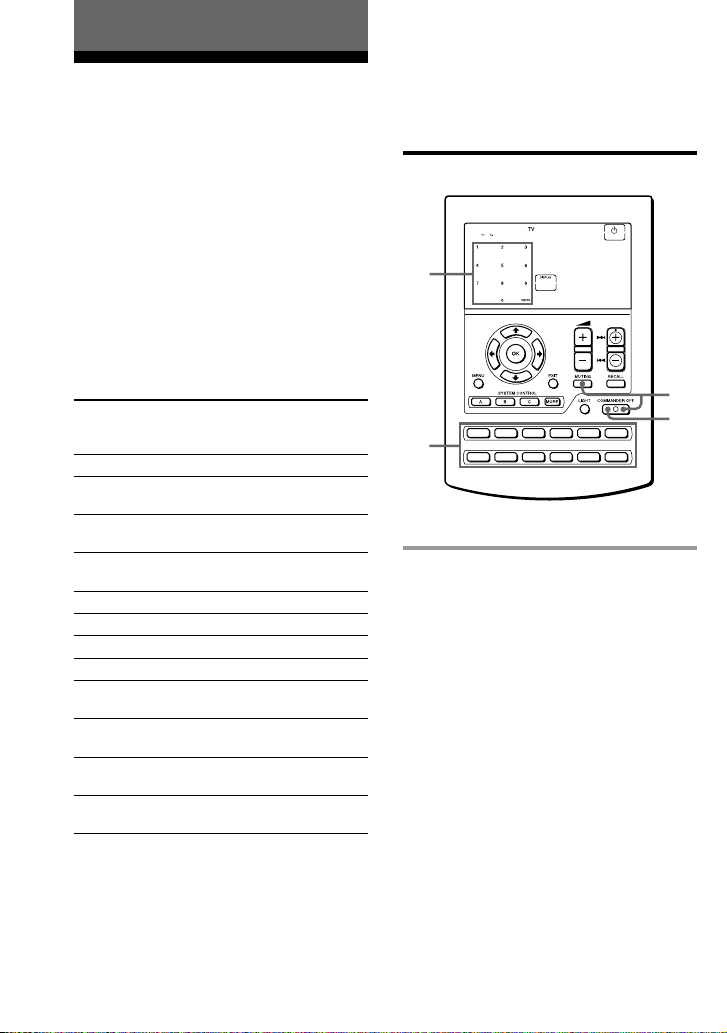
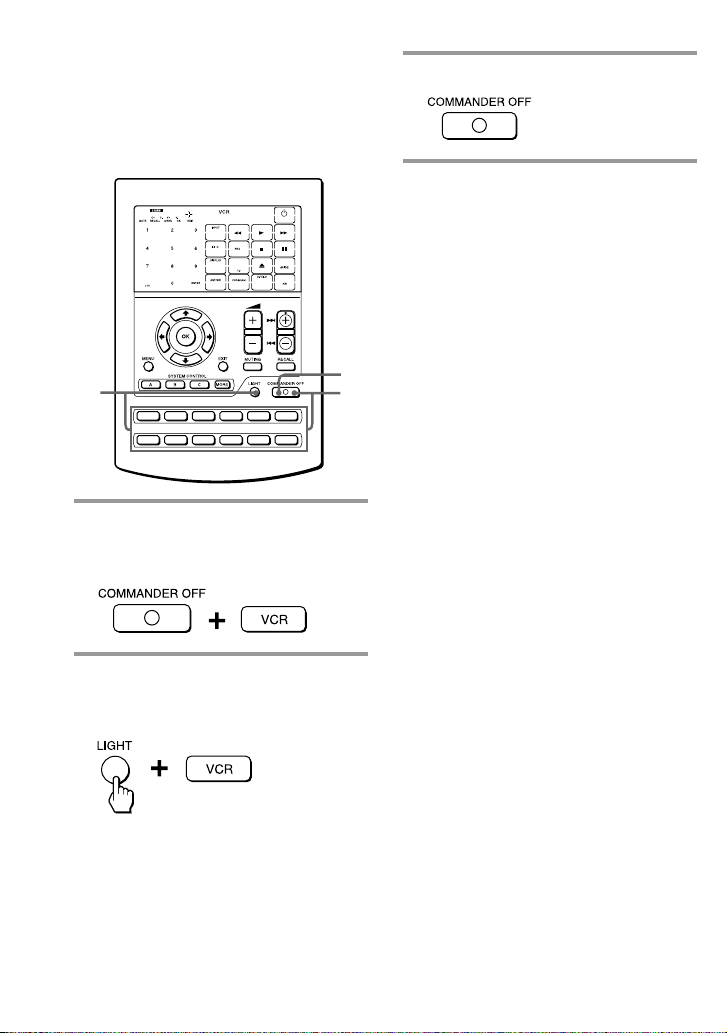
Location and Function
of Controls
PROGRAM
OK
MENU EXIT
SYSTEM CONTROL
ABC
TV
SAT VCR
CD MD
1 Component display area
Displays the name of the component
selected.
2 LCD touch key display (page 9)
The keys used for operating each
component are displayed.
Note
Do not press the touch keys using sharp
objects such as pins or ball-point pens.
3 w +/– buttons* (page 14, 22)
Adjusts the volume.
4 PROGRAM +/– buttons
Selects the programme.
5 RECALL button (page 44)
6 MUTING button* (page 14, 22)
Mutes the audio. Press the button
once again to resume at the previous
volume.
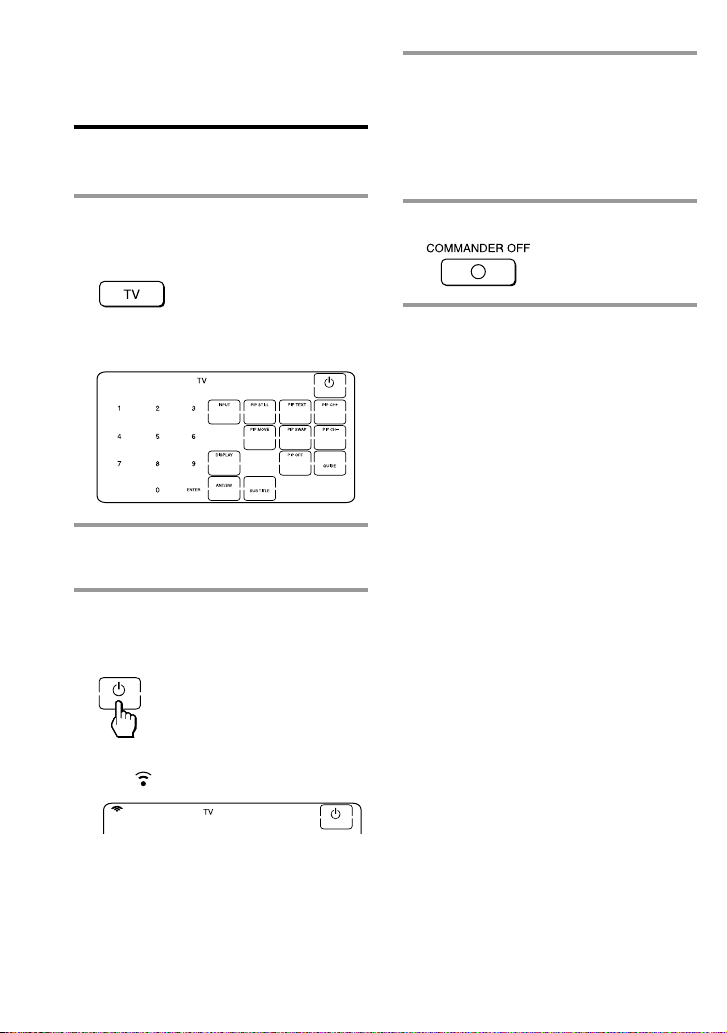
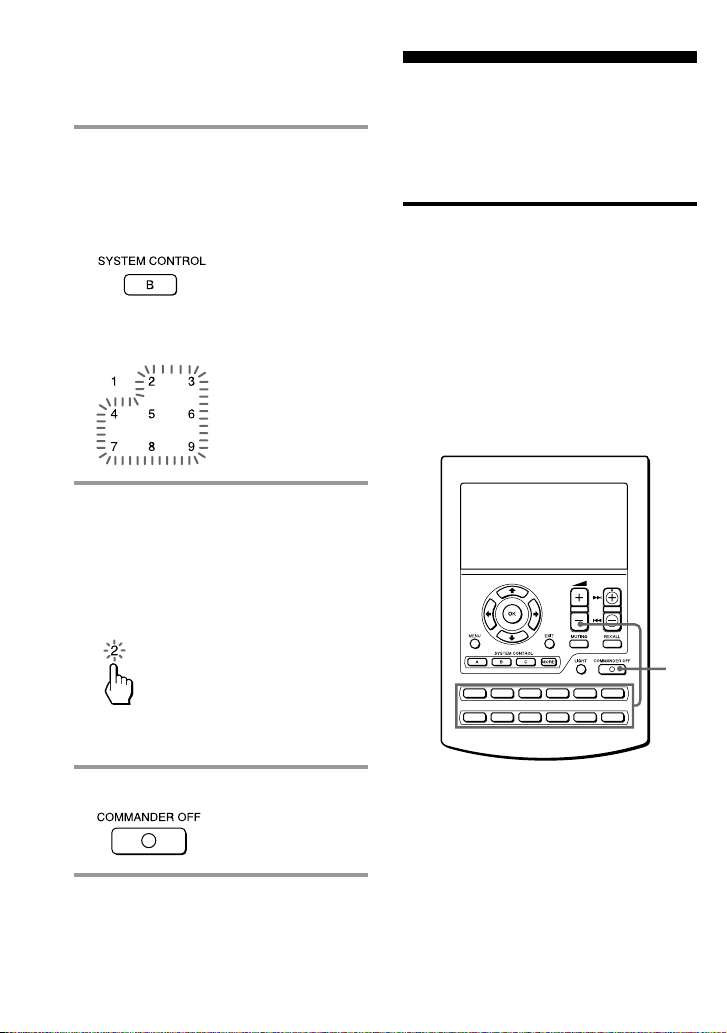
7 COMMANDER OFF button
Turns the power of the Commander
off.
MORE
TAPE
MUTING
LIGHT COMMANDER OFF
DVDM1CBLM2AMP
RECALL
M3
8 LIGHT button (page 49)
Used to light up the LCD display in
the dark. Press the button once to turn
on the light, and once again to turn it
off. You can also set the backlight to
go off automatically after a certain
period of time.
9 Component Select buttons
Selects the component to control.
0 MORE button (page 23)
Displays the SYSTEM CONTROL
buttons and number keys.
qa SYSTEM CONTROL buttons (page
22, 23)
You can programme up to 32
consecutive key operations to each of
the three SYSTEM CONTROL
buttons. You can automatically carry
out the entire programme by pressing
one button.
qs MENU button
Calls up the menu display of the
buttons or keys that have menu
function.
qd OK button and Cursor Control
buttons (page 15)
qf EXIT button
Used to exit the setting menu.
* Note on the VOLUME +/– and
MUTING buttons
The Commander controls or mutes the TV’s
volume when you select a visual component.
The Commander controls or mutes the
amplifier’s volume when you select an audio
component.
You can change this setting also (page 21).
Note on the power on and off of the
Remote Commander
To turn on, press any button except the
COMMANDER OFF button or touch the screen.
To turn off, press COMMANDER OFF, or if
you do not use the Commander, it
automatically turns off after 10 minutes. This
interval can also be changed (page 47).
GB
7
Page 8
Basic Operations
Setting the Code for
Preset Audio and Visual
Components
The Commander is preset at the factory
to operate Sony brand AV components
(see the table below). If you are using the
Commander with a factory-set Sony
components, skip the following
procedures.
You can use the Commander with other
preset AV components also. To use with
other AV components, you need to follow
the procedures to set the correct codes for
each component.
Component Select
Button
TV
SAT
VCR
DVD
CBL
AMP
CD
MD
TAPE
M1
M2
M3
* Analog audio compact cassette deck
Preset
component(s)
TV
Satellite tuner
VCR
DVD player
Cable box
Amplifier
CD player
MD deck
Cassette deck*
TV/VCR
TV/DVD
TV/SAT
Factory setting
Sony TV
Sony satellite
tuner
Sony VHS VCR
(VTR3)
Sony DVD
player
Sony amplifier
Sony CD player
Sony MD deck
Sony cassette
deck
Sony TV/Sony
VHS VCR
Sony TV/Sony
DVD player
Sony TV/Sony
satellite tuner
See “Table of Preset Functions” (page 59)
for the functions of keys and buttons as
for each component.
Setting a component code
4
PROGRAM
2
TV
SAT VCR
3
CD MD
TAPE
DVDM1CBLM2AMP
M3
Example: To set up a Philips TV
6
1 See the tables in the supplied
“Component Code Numbers,”
and find the four-digit code
number for the desired
component.
If more than one code number is
listed, use the number that is listed
first.
For example, to set up a Philips TV,
you would use the code number 8086.
The first digit of the component code
number means the component
category (TV, VCR, etc.). For further
details, see the tables in the supplied
“Component Code Numbers.”
GB
8
Page 9

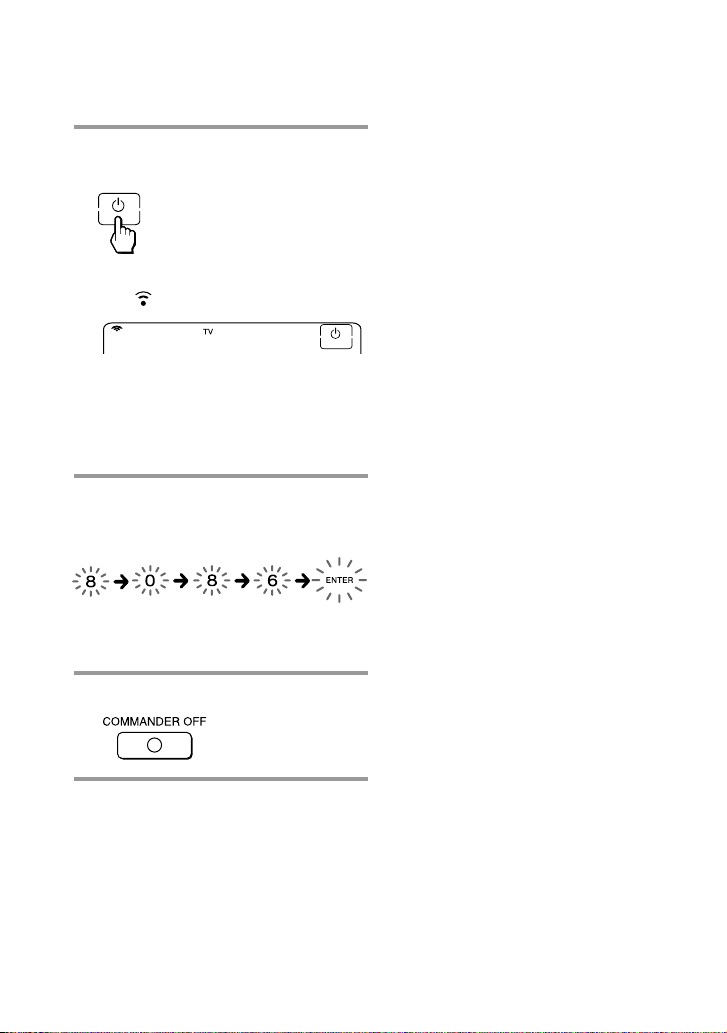
2 While pressing COMMANDER
OFF, press MUTING.
All the component names in the
display flash.
3 Press the Component Select
button for the desired component.
The selected component remains
displayed, and the 0 – 9, ENTER and
DISPLAY keys flash.
4 Press the four-digit component
code number followed by the
ENTER key on the touch-key
display.
5 If you want to set a code for
another component, repeat Steps
3 and 4.
6 Press COMMANDER OFF.
Notes
• If you press a component code number that is
not on the table in the supplied “Component
Code Numbers,” the Commander beeps and
“NG” flashes after you press the ENTER key.
If this happens, check the component code
number, and try setting again.
• If you do not input anything into the
Commander for over two minutes between
each step, the setup procedure will be
canceled. To set the code, you must press
MUTING again while pressing
COMMANDER OFF.
• The first digit of the component code number
means the component category (TV, VCR,
etc.). The component corresponding to the
four-digit component code number is preset
in Step 4.
To check which code number is
set
Press the DISPLAY key in Step 3 to 5. The
code number and “ENTER” appear
twice.
A beep sounds, and the code number
and “ENTER” appear twice.
Continued
GB
9
Page 10
Setting the Code for Preset Audio
and Visual Components
(continued)
Checking if the code number
works
4 If you have succeeded, check that
the Commander is operating the
other functions of your
component, such as channel and
volume control.
See page 13 for details.
1 Press the corresponding
Component Select button for the
component you have set up.
The Commander turns on and the
touch-keys appear on the display.
2 Power on the component with its
power switch.
3 Aim the Commander at the
component and press the 1 key
in the touch-key display.
When the remote control signal is
sent, is shown on the display.
The component should power off.
5 Press COMMANDER OFF.
If the Commander does not seem to
be working
Try repeating these setup procedures using the
other codes listed for your components (page
8).
Notes on keys which have
“learned” a remote control
signal already
If another signal has already been
programmed on that key or button by the
learning function (page 15), that
“learned” signal will work even after you
set the component code number. To use it
as a preset component key or button, first
erase its learned signal (page 19).
Note on the touch-key display
When you set a component code number,
only the keys that have been preset with
the signals for the desired component
will be displayed. Preset signal of each
key varies depending on the brand.
By using the learning function, you can
programme remote control signals to
both the displayed keys and keys that are
not displayed (page 15).
10
GB
Page 11

Finding a component code
with the Search function
You can find a code number available for
a component that does not have one in
the supplied “Component Code
Numbers.”
Before starting the Search
function
Set each component to the following
status to enable the Search function.
TV: Power-on
VCR, DVD, SAT, CBL, AMP: Power-off
CD, MD, TAPE: Power-on with a
playback source (disc, cassette tape, etc.)
PROGRAM
3
1
TV
SAT VCR
2
CD MD
TAPE
DVDM1CBLM2AMP
M3
6
2 Press the Component Select
button for the desired component.
3 Press PROGRAM + or
PROGRAM – to search
component code numbers in the
same category (in this case, code
numbers which begin with “8”).
Press PROGRAM + to go to the next
code number.
Press PROGRAM – to go back to the
previous code number.
PROGRAM
1 While pressing COMMANDER
OFF, press MUTING.
All the component names on the
display flash.
Note
To search component code numbers in
another category, return to Step 3, or input
a four-digit component code number of
another category (for example, a code
number which begins with “3”, “4”, etc.)
before Step 4.
Continued
11
GB
Page 12
Setting the Code for Preset Audio
and Visual Components
(continued)
4 Aim the Commander at the
component and press the 1 key.
When the remote control signal is
sent, is shown on the display.
If it successfully works (power-off for
TV, power-on for VCR, DVD, SAT,
CBL, AMP, and playback for CD, MD,
TAPE), go to Step 5.
If it does not, repeat Steps 3 and 4.
5 Press the ENTER key.
A beep sounds, and the code number
and “ENTER” appear twice.
Note
It is recommended to write down the code
number.
To check which code number is
set
Press the DISPLAY key in Step 2 and 5.
The code number and “ENTER” appear
twice.
Be sure to press the DISPLAY key after
you have pressed the ENTER key to set
the code number. If you press the
DISPLAY key before the code number is
set, it returns back to the first number at
which you started searching.
6 Press COMMANDER OFF.
GB
12
Page 13

Operating Your
Components with the
Remote Commander
When you operate a non-Sony
component, make sure you set the
component code first (page 8).
PROGRAM
TV
SAT VCR
1
CD MD
TAPE
DVDM1CBLM2AMP
M3
2 Press the desired key in the
touch-key display.
When the remote control signal is
sent, is shown on the display.
You may also use the w +/– buttons,
the MUTING button and the
PROGRAM +/– buttons if necessary.
2
See “Table of Preset Functions” (page
59) for the functions of keys and
buttons for each component.
3 When you are done using the
Commander, press
COMMANDER OFF to power off
3
the Commander.
Example: To play a CD player
1 Press the desired Component
Select button.
The Commander comes on and the
keys for operating the selected
component are displayed.
Note
The remote control signals may be different for
some components or functions. In this case,
programme the remote control signals with the
learning function (page 15). Note, however,
that components and functions that do not
support the remote control of infrared signals
will not work with this Commander.
Continued
13
GB
Page 14

Operating Your Components with
the Remote Commander
(continued)
Notes on operating your
components
To control the volume
Press the w +/– buttons to control the
volume, and the MUTING button to
mute. When you select a visual
component, the TV’s volume will be
controlled, and when you select an audio
component, the amplifier’s volume will
be controlled. You can change this setting
also (page 21).
Notes
• If you have programmed any signal for the
w or MUTING button for any component
using the learning function (page 15), that
signal will be transmitted instead of
controlling the volume of the TV or amplifier
once you select that component.
• If you have programmed any signal for the
w or MUTING button of TV or AMP using
the learning function, that signal will be
transmitted only after you select TV or AMP.
When you select another components, the
preset volume control signals for TV or AMP
will be transmitted at that time.
• If you have assigned another component to
the TV or AMP button, the volume of the TV
or amplifier cannot be controlled even when
you select other components.
About the input select of a TV
The component code “8132” is the preset
code number for the input select of a
Sony TV. You can set this code number
for an infrequently used Component
Select button.
Follow the procedure on page 8 for the
input select setting.
“0” : TV tuner
“1” : VIDEO1
“2” : VIDEO2
“3” : VIDEO3
“4” : VIDEO4
“5” : VIDEO5
“6” : VIDEO6
“7” : HD1
“8” : HD2
“9” : HD3
This setting can be used for
programming the SYSTEM CONTROL
buttons (page 41).
14
GB
Page 15

Using Non-Preset
Remote Control
Operations
— Learning Function
To operate non-preset components or
functions, use the following “learning”
procedure to “teach” any of the
programmable buttons and keys to
operate the functions of another remote
control. You can also use the learning
function to change the signal of
individual keys and buttons after setting
the component code number (page 8).
It is useful if you make a memo of the
learned key functions in the LCD touch
key display table (page 68).
Note
Some specific remote control signals may not
be learned.
PROGRAM
Example: To programme the N
(Play) signal of your component
to the VCR N (Play) key of the
Commander
1 Place the RM-AV2500T head to
head with your component’s
remote control.
Remote control for
your component
about 2 – 4 inches
(5 – 10 cm) away
2 While pressing COMMANDER
OFF, press the Component Select
button for the component whose
signals are to be learned.
3
“LEARN” appears and all the
learnable keys flash.
RM-AV2500T
6
TV
CD MD
SAT VCR
TAPE
DVDM1CBLM2AMP
M3
2
Display for CHANNEL, VOLUME, MUTING,
RECALL, MENU, OK, EXIT and cursor
buttons
Continued
15
GB
Page 16

Using Non-Preset Remote Control
Operations
— Learning Function (continued)
The “C+ C- V+ V- MUTE RECALL
MENU OK EXIT R r T t” display
indicates if PROGRAM +/–, w +/–,
MUTING, RECALL, MENU, OK,
EXIT and cursor (T t R r) buttons
are learnable or not.
Note on the flashing display
The keys or buttons that are already preset
for the component flash twice while those
that are not preset flash once.
3 Press the key or button on the
Commander you want to “teach.”
“LEARN” flashes and the only
pressed key remains on the dislplay.
To teach on the PROGRAM +/–,
w +/– , MUTING, RECALL, MENU,
OK, EXIT and cursor buttons
Press the corresponding button. “LEARN”
flashes, and only the pressed button
remains indicated on the display (“C+,”
“C–,” “V+,” “V–,” “MUTE,” “RECALL,”
“MENU,” “OK,” “EXIT,” or “R r T t” ).
Example: When pressing the w + button
4 Press and hold down the button
on the other remote control until
you hear a beep.
(If you release the button before you
hear a beep, the signal may not be
learned correctly.)
“LEARN” stops flashing and stays lit.
When the command has been learned
successfully, the learned keys stay lit
and the other learnable keys flash.
If “NG” flashes on the display
Learning did not succeed. Try Steps 3 and 4
again.
5 Repeat Steps 3 and 4 to teach
functions to other keys or
buttons.
To learn another component’s
remote control signal
After positioning the two remote
commanders as in Step 1 on page 15, press
the corresponding Component Select
button, and then follow Steps 3 and 4 on
the left to perform learning.
6 Press COMMANDER OFF.
16
To change the function display of
the key
Follow the procedure on page 18.
GB
Page 17

Notes
• If you do not perform learning steps within
two minutes, learning mode ends.
• If you do not perform Step 4 within 10
seconds after Step 3, the display turns back to
the display in Step 2. (All the learnable keys
flash.) In this case, perform Step 3 again
while the display is flashing.
• If “NG” appears while learning, the memory
is full. To free memory, clear learned
functions from keys that you do not use often
(page 19). Then continue the learning steps.
• If you touch a key by mistake in step 4, while
pressing the LIGHT button, press the
mistaken key. Then repeat from Step 3 to
continue learning.
If the Commander does not seem to
be working
If the learned key or button does not operate
properly, teach once again. (For example, if the
volume becomes very loud after pressing the
w + button only once, noise may have
interfered during the learning procedure.)
If you set a component code after
learning a signal
If you have programmed any signal for a key
or button using the learning function, that
signal will remain assigned to that key or
button even after you set a component code.
When you teach signals to the
w or MUTING buttons
•If you have programmed any signal on
the w or MUTING button for
components other than TV and AMP
using the learning function, that signal
will be transmitted only when you
select that component.
•If you have programmed any signal on
the w or MUTING button for TV or
AMP using the learning function, that
signal will be transmitted only when
you select TV or AMP. When you select
other components, the preset volume
control signals for TV or AMP will be
transmitted (for the difference between
visual components and audio
components, see page 21). To use the
learned signal, you need to programme
the w or MUTING button for each
component using the learning function.
When you teach the signals of an
air-conditioner
See the notes on page 37.
Continued
17
GB
Page 18

Using Non-Preset Remote Control
Operations
— Learning Function (continued)
To display only the frequently
used keys
You can hide keys you do not use. This
makes operations even easier to
understand, when the components have
many keys.
After Step 2 (page 15), while pressing the
LIGHT button, press the key you want to
hide (flashing). The pressed key changes
to slower flashing and will no longer be
displayed during remote control
operations.
To display it again, perform the same
procedure again.
Note
You can not hide a key which has “learned”
any signal.
To change the function display of
a key
When you programme a signal for a key,
you can select the most suitable function
display among all the displays the key
has, and set it to the key.
1 After Step 2 (page 15), while
pressing the Component Select
button (VCR), press the key you
want to teach repeatedly.
Each time the key is pressed, the
display is changed in order.
2 When the desired display
appears, release the Component
Select button.
3 Then follow Steps 4 to 6 (page
16).
Notes
•You can change the display of a key only
when you programme it using the learning
function. If you want to change the display of
the key that has learned a signal, clear the
signal first (page 19). Then teach the key
again using the above procedure to change its
display.
• If you do not change the display of a key, the
default display is used.
•You cannot change the display of the keys
that are not framed with
keys 0 to 9, +10 and ENTER).
(the number
18
GB
Page 19

For accurate learning
•Do not move the remote units during
the learning procedure.
•Be sure to keep holding down the
button of the other remote control until
you hear the confirmation beep.
•Use fresh batteries in both remote
control units.
•Avoid learning in places under direct
sunlight or a strong fluorescent light.
•The remote control detector area may
differ depending on each remote unit. If
learning does not work, try changing
the positions of the two remote control
units.
•When you teach signals of an
interactive signal exchange system
remote control unit (supplied with
some of Sony’s receivers and
amplifiers) to the Commander, the
response signal of the main unit may
interfere with the learning of the
Commander. In such a case, move to a
place where the signals will not reach
the main unit (e.g. other rooms, etc.).
IMPORTANT
Be sure to place the Commander out
of the reach of small children or pets.
Also set the Hold function to lock the
all buttons on the Commander (page
46) when it is not used. Components
such as air conditioners, heaters,
electric appliances, and electric
shutters or curtains receiving an
infrared signal can be dangerous if
misused.
Changing or erasing the
function of a taught key or
button
To change the learned function, clear it
first and perform learning again.
To clear the learned function of a
single key or button
1 After Step 2 (page 15), while
pressing the LIGHT button, press
the key or button you want to
erase.
The cleared key flashes together with
other learnable keys.
2 Press COMMANDER OFF.
To clear all the learned keys at once
While pressing the LIGHT button, press the
Component Select button.
Continued
19
GB
Page 20
Using Non-Preset Remote Control
Operations
— Learning Function (continued)
To clear all signals learned for a
specific component
PROGRAM
3 Press COMMANDER OFF.
2
TV
SAT VCR
DVDM1CBLM2AMP
CD MD
TAPE
M3
1
1 While pressing COMMANDER
3
OFF, press the corresponding
Component Select button.
2 While pressing the LIGHT button,
press that Component Select
button again.
The learned contents are cleared. The
keys for the component return to their
original states before learning.
20
GB
Page 21

Advanced Features
Controlling the Volume
of Visual Components
Connected to an Audio
System
The Commander is factory preset based
on the assumption that you hear the
sound of your visual components from
your TV speakers, and that you hear
sound of your audio components from
the loudspeakers connected to your
amplifier.
This feature enables you to control the
volume of your TV or amplifier without
having to select TV or AMP each time
you want to control the volume.
For example, to control the volume while
using a VCR, you do not need to press
the TV button to control the TV volume.
However, if your visual components are
connected to an audio system, you
probably hear TV or VCR sound from the
loudspeakers via your amplifier, not
from your TV speakers. In this case, you
need to change the factory preset so that
you can control the volume of your
visual components without first having
to switch to the amplifier.
To change the Factory Preset of
the Volume Control
PROGRAM
1
The following table shows the factory
setting of which volume would be
controlled for each component.
Component
Select button
TV
SAT
VCR
DVD
CBL
M1
M2
M3
AMP
CD
MD
TAPE
Controls the volume of
TV
TV
TV
TV
TV
TV
TV
TV
amplifier
amplifier
amplifier
amplifier
TV
CD MD
SAT VCR
TAPE
DVDM1CBLM2AMP
M3
Continued
21
GB
Page 22

Controlling the Volume of Visual
Components Connected to an
Audio System (continued)
1 While pressing COMMANDER
OFF, press w + and w –.
The volume control setting of visual
components (TV, VCR, CBL, SAT, and
DVD) changes to the displayed
component.
When set to
amplifier volume
When set to
TV volume
Notes
• If you have already programmed the w or
MUTING button of each component any
signals by “learning,” the procedure above
will not change the function of the w and
MUTING buttons.
• If you have programmed volume control
signals on w or MUTING buttons of TV or
AMP, you can only use that signal when you
select TV or AMP. For other component, the
preset volume control signals for TV or AMP
(depending on the above setting procedure)
will be transmitted. To use the new signals,
you need to programme each button for each
component by the learning procedure (page
15).
Executing a Series of
Commands
— System Control Functions
With the System Control function, you
can programme a series of operating
commands, and execute them by
pressing just one button.
For example, when you watch a video, a
series of operations like the ones below
are necessary.
Example:
1 Power on the TV.
2 Power on the video (VCR).
3 Power on the amplifier.
4 Set the input selector of the amplifier
to VIDEO 1.
5 Set the input mode of the TV to VIDEO
1.
6 Start video playback.
You can programme up to 32 consecutive
operation steps to each of the SYSTEM
CONTROL buttons (A – C).
If you have set the System Control
function for a Component Select button
(page 27), the execution of the
programmed commands begins when
you press the Component Select button
for more than 2 seconds.
While executing the programmed
commands, at the same time that each
remote control signal is transmitted, the
corresponding key is displayed.
22
GB
Page 23

Preset programs for the SYSTEM
CONTROL A and C buttons
The SYSTEM CONTROL A and C
buttons are preset at the factory to
execute each programme as follows.
SYSTEM CONTROL A button:
Turn off all the Sony components that
could receive the signal from the
Commander at the same time.
SYSTEM CONTROL C button:
Turn on all the Sony components that
could receive the signal from the
Commander at the same time.
Programming a series of
commands to the SYSTEM
CONTROL buttons
2
PROGRAM
Example: To programme the
procedure above to the SYSTEM
CONTROL B button
1 While pressing COMMANDER
OFF, press the MORE button.
The SYSTEM CONTROL keys (A – C)
and number keys (1 – 9) flash while
the preset buttons stay lit.
2 Select the system number by
pressing the SYSTEM CONTROL
4
button (in this case, SYSTEM
CONTROL B) or the number key.
6
TV
SAT VCR
3
CD MD
TAPE
DVDM1CBLM2AMP
M3
1
All the component names flash.
Continued
23
GB
Page 24

Executing a Series of Commands
— System Control Functions
(continued)
To programme a new series of
operations for buttons which have
already been set
SYSTEM CONTROL A or C button:
Erase the factory preset programme
(page 26).
Other buttons:
Erase the programme (page 25).
3 Press the Component Select
buttton (in the case, TV) for the
component to operate.
The keys for the selected component
flash.
If the component has the poweron and power-off signals
Both the OFF and ON keys are displayed
and you can select either of them to
program.
4 Press key(s) or button(s) for the
desired operation.
If you want to power on the TV, press
the 1 key.
5 Repeat Steps 3 and 4 and
programme the buttons and keys
for the series of operations.
In this example, press the following
buttons and keys.
6 When you have programmed all
the keys, press COMMANDER
OFF.
24
It is useful to set the exact command for
power-on or power-off and operate the
component regardless of its status (on/off).
GB
Page 25

Notes
• If you interrupt the procedure at any point
for over two minutes, the setting mode ends
and the series of commands will be
programmed to that point. In this case, clear
the programme (page 25) and start again
from Step 1 to set the entire programme from
the beginning. You cannot continue from
where you let off.
• If a SYSTEM CONTROL button has already
“learned” a remote control signal (page 35),
“NG” flashes and you cannot programme on
this button. Clear the learned contents first
(page 36).
• If you change the component code number
(page 8) or programme a new signal by
learning (page 15) on a key or button that has
been programmed in the series of commands
of the System Control function, the new
signal will be transmitted when you press the
corresponding SYSTEM CONTROL button.
• During Setting mode, you cannot clear any
operation step you have programmed. If you
have programmed an incorrect operation by
mistake, start again from Step 1.
• If you try to programme more than 32 steps,
the System Control setting finishes, and the
32 steps you have programmed are
registered. If you want to programme again,
clear the programme (page 25) and start
again from Step 1.
Tips for programming the
System Control functions
The following information helps you to
programme a consecutive operation
steps.
About the interval between
operation steps
You can change the interval between operation
steps (page 29).
About the order of operation steps
• Some of the components may not accept
consecutive remote control signals. For
example, a TV generally does not react to
next signal right after the Power-on signal.
So, a series of commands such as TV Poweron and input select may not work properly.
In this case, insert other signals like the
example below;
TV Power-on t VCR Power-on
t VCR play back t TV input select
• After the series of input commands is
executed, the Commander displays the
touch-keys of the component of the final step.
By programming an often-used component’s
command as the final step, you can save the
step of pressing a Component Select button
when you start operating that component. (In
the example on page 24, the touch-keys of
VCR are displayed.)
To clear programmed commands
1 While pressing COMMANDER
OFF, press the MORE button.
The SYSTEM CONTROL keys (A – C)
and number keys (1 – 9) flash while
the preset buttons stay lit.
Continued
25
GB
Page 26

Executing a Series of Commands
— System Control Functions
(continued)
2 While pressing the LIGHT button,
press the SYSTEM CONTROL
button (A, B or C) or the number
key (1 – 9) of which programmed
commands you want to erase.
The programme for the selected
button is erased.
When you want to set a new
programme to this SYSTEM
CONTROL button, follow Steps 2 to 6
on pages 23 and 24.
To erase the SYSTEM CONTROL A
or C button
At the factory, the SYSTEM CONTROL A
button is preset with a series of power-off
commands for Sony components and the
SYSTEM CONTROL C button with a
series of power-on commands for Sony
components. To erase the programmed
commands for each button, follow the
steps below.
1 While pressing COMMANDER OFF,
press the MORE button.
2 While pressing the LIGHT button,
press the SYSTEM CONTROL button
(A or C).
The programme for the selected button
is erased.
To set the SYSTEM CONTROL A or
C button back to the factory
setting
To reset them to the factory settings,
follow the steps below.
1 While pressing COMMANDER OFF,
press the MORE button.
2 While pressing the LIGHT button,
press the SYSTEM CONTROL button
(A or C).
Note
The interval setting (page 29) is not reset to the
factory setting, even if you perform these steps.
26
GB
Page 27

Notes on System Control
Operations
•If the remote control detectors of the
components are too far apart, or if
something is blocking them, some of
the components may not operate
consecutively even after you press the
SYSTEM CONTROL button.
•If some of the components did not
operate correctly because of the above
or for any other reason, always set all
the components back to the states they
were in before you pressed the SYSTEM
CONTROL button. Failure to do this
can result in incorrect operation when
you press the SYSTEM CONTROL
button again.
•Some components may not always be
powered on by the System Control
function. This is because the power of
the component gets on and off
alternatively when receiving the power
on/off signal. In this case, check the
operating component’s power on/off
state before using the system control
function.
•If the system control function does not
work correctly, see also “Tips for
programming the System Control
functions” on page 25.
Programming a series of
commands to the Component
Select buttons
As with the SYSTEM CONTROL buttons,
you can also programme a series of
operating commands for the Component
Select buttons (up to 32 steps).
To execute the commands programmed
on a Component Select button by the
System Control function, press the button
for more than 2 seconds.
Notes
• The programmed commands are executed
when you press a Component Select button
for more than 2 seconds. When you press the
button for less than 2 seconds, it works as the
normal Component Select button, and the
corresponding touch-keys are displayed.
• See also “Tips for programming the System
Control functions” on page 25 and “Notes on
System Control Operations” on page 27.
PROGRAM
TV
CD MD
SAT VCR
TAPE
DVDM1CBLM2AMP
M3
Continued
1
GB
27
Page 28

Executing a Series of Commands
— System Control Functions
(continued)
Example: To programme the
procedure on page 22 for the
VCR button
1 While pressing COMMANDER
OFF, press w + and VCR.
The selected component name stays
lit, while other component names
flash.
If a series of commands is already
programmed for that button
The programmed operations are displayed
in order. To programme a new series of
operations, clear the programme first (page
25).
2 Follow Steps 3 to 6 on page 24.
Notes
•You can programme the System Control
functions for a Component Select button on
which the Power-On function (page 30) has
been programmed. In this case, the Power-On
function is overwritten and cannot be used. If
you clear the System Control functions for
the button, the Power-On function is
resumed, and you can use it again.
•You cannot programme the System Control
functions for a Component Select button for
which a signal has been programmed by
“learning” (page 32). (“NG” flashes on the
display.)
•You can programme a signal for a
Component Select button by “learning” (page
32) for which the System Control functions
have been programmed. In this case, the
System Control function is overwritten and
cannot be used. If you clear the “learned”
signal on the button, the System Control
function is resumed and you can use it again.
•You can programme the Power-On function
(page 30) for a Component Select button for
which a System Control function has been
programmed, but the Power-On function
cannot be used. If you clear the System
Control function from the button, you can
use the Power-On function.
• If you interrupt the procedure at any point
for over two minutes, the setting mode ends
and the series of commands will be
programmed to that point. In this case, clear
the programme and start again from Step 1 to
set the entire programme from the beginning.
You can not continue from where you let off.
• If you change the component code number
(page 8) or programme a new signal by
learning (page 15) for a key or button that has
been programmed with the series of
commands of a System Control function, the
new signal will be transmitted when you
press the corresponding Component Select
button.
28
GB
Page 29

To clear a System Control
function programmed for a
Components Select button
1 While pressing COMMANDER
OFF, press w + and VCR.
Changing the interval
between operation steps
You can control the interval from 100 –
900 ms in units of 100 ms steps.
3
2 While pressing the LIGHT button,
press VCR.
The programme for the selected
button is erased.
When you want to set a new
programme to this Component Select
button, follow Steps 1 to 2 on page 28.
PROGRAM
2
TV
SAT VCR
DVDM1CBLM2AMP
CD MD
TAPE
M3
1 While pressing COMMANDER
OFF, press PROGRAM + and
PROGRAM –.
PROGRAM PROGRAM
Learnable SYSTEM CONTROL keys
and number keys flash in the display
panel.
1
4
Continued
29
GB
Page 30
Executing a Series of Commands
— System Control Functions
(continued)
2 Press one of the SYSTEM
CONTROL buttons (A, B, or C),
number keys or the Component
Select button whose interval you
want to change.
The number of the current setting
stays lit and other numbers flash.
3 Press one of the number keys (1 –
9) to select the interval.
1: approx. 100 ms (factory setting)
2: approx. 200 ms
...
9: approx. 900 ms
(ms: 1/1000 second)
Adding an Extra
Function to the
Component Select
Buttons
Programming the Power-On
command of the selected
component (for Sony
components only)
When using Sony components, you can
programme the Power-on signal for each
component on a Component Select
button. You can select the desired
component and turn it on by just
pressing that Component Select button.
PROGRAM
The selected number stays lit and
other numbers flash.
4 Press COMMANDER OFF.
GB
30
TV
CD MD
SAT VCR
TAPE
DVDM1CBLM2AMP
1
M3
Page 31

Example: To programme the TV
button
1 While pressing COMMANDER
OFF, press w – and the desired
Component Select button.
TV
When the Power-on command is
programmed, you will hear a beep
and “1 ON” appears on the display.
(The display goes off when you
release the buttons.)
To clear the Power-on command
Repeat the procedure above.
The following display appears.
Notes
• If the component code of a non-Sony product
has been set for a Component Select button,
you cannot programme the Power-On
function for it.
• Even if you have programmed a signal by
“learning” (See “Adding a command that is
required when selecting a component” on
page 32.) or a System Control function (page
27) for a Component Select button, you can
programme the Power-On function for that
button, but it cannot be used. If you clear a
“learned” signal or the System Control
function from the button, you can use the
Power-On function.
•You can programme a signal by “learning”
(page 32) or a System Control function (page
27) for a Component Select button for which
the Power-On function has been
programmed. In this case, the Power-On
function is overwritten and cannot be used. If
you clear the “learned” signal or the System
Control function from the button, the PowerOn function is resumed, and you can use it
again. If you have programmed both a signal
by “learning” and a System Control function
for the button, the “learned” signal will have
overwritten the System Control function.
Continued
31
GB
Page 32

Adding an Extra Function to the
Component Select Buttons
(continued)
Example: To programme the
input select signal of your
amplifier to the CD button
Adding a command that is
required when selecting a
component
In addition to the original function of
selecting the operating keys and buttons
of the desired component, the
Component Select button can have
another remote control signal by
“learning.”
For example, if you always have to
change input select of the amplifier to CD
when listening to the CD player,
programme the signal of “changing the
amplifier’s input select” to the CD button
of this Commander. Then whenever you
press the CD button, it automatically
works as the original CD Component
Select button and changes also the
amplifier input select to CD. (In this case,
the amplifier should be turned on first.)
Note
Some specific remote control signals may not
be learned.
1 Place the RM-AV2500T head to
head with your component’s
remote control.
Remote control of
your component
about 2 – 4 inches
(5 – 10 cm) away
RM-AV2500T
2 While pressing COMMANDER
OFF, press PROGRAM + and
w +.
PROGRAM
Learnable SYSTEM CONTROL keys
and number keys flash in the display
panel.
32
GB
PROGRAM
TV
SAT VCR
3
CD MD
TAPE
DVDM1CBLM2AMP
M3
2
5
Note
The name of a Component Select button for
which a signal has already been learned
stays lit. If you want to programme a new
signal for that button by learning, clear the
learned signal first (page 33).
Page 33

3 Press the desired Component
Select button.
The selected component name stays
lit and “LEARN” flashes.
4 Press and hold down the button
on the component’s remote
control (amplifier in this example)
until you hear a beep.
(If you release the button before
you hear a beep, the signal may
not be learned correctly.)
“LEARN” stops flashing and stays lit.
If “NG” flashes on the display
Learning did not succeed. Try Steps 3 and 4
again.
5 Press COMMANDER OFF.
To clear the learned function of
the Component Select button
1 While pressing COMMANDER OFF,
press PROGRAM + and w +.
2 While pressing the LIGHT button,
press the Component Select button
which you want to clear.
Notes
•You can programme a signal by “learning”
for a Component Select button for which a
System Control function (page 27) or the
Power-On function (page 30) has been
programmed. In this case, the System Control
function or the Power-On function is
overwritten and cannot be used. If you clear
the “learned” signal from the button, the
System Control function or the Power-On
function is resumed, and you can use it again.
•You cannot programme a System Control
function (page 27) for a Component Select
button for which a signal has been
programmed by “learning.”
•You can programme the Power-On function
for a Component Select button for which a
signal has been programmed by “learning,”
but then the Power-On function cannot be
used. If you clear a “learned” signal from the
button, you can use the Power-On function.
33
GB
Page 34

Copying the settings of
a Component Select
button to another
button
You can copy the entire settings of a
Component Select button to another
Component Select button. The settings of
the component code (page 8), the channel
macro function (page 41), and the learned
functions (page 15) are copied to a new
button.
Note
You cannot copy the settings to a Component
Select button for which any learning function
or channel macro function has been
programmed. (“NG” flashes.)
PROGRAM
Example: To copy the settings of
the CD button to the VCR button
1 While pressing COMMANDER
OFF, press VCR.
The keys for that component (VCR)
flash.
2 While pressing VCR, press CD.
The keys for CD flash.
34
GB
3
TV
SAT VCR
2
CD MD
TAPE
DVDM1CBLM2AMP
M3
1
3 Press COMMANDER OFF.
Page 35

Programming a
Frequently Used Key
Operation for SYSTEM
CONTROL Buttons
In addition to their original System
Control functions (page 22), SYSTEM
CONTROL 1 – 9, A, B or C buttons can be
programmed to “learn” any remote
control signal.
As they operate independently from
other buttons, SYSTEM CONTROL 1 – 9,
A, B or C buttons can work as one-touch
buttons without any preceding operation
such as pressing a Component Select
button to select a component.
This is useful if you prefer having the
SYSTEM CONTROL button as a “onetouch” button for a single operation
rather than executing a series of
commands.
Note
Some specific remote control signals may not
be learned. Refer to the operating instructions
supplied to the specific remote control as well.
Example: To store the On/Off
signal of an air-conditioner to
the SYSTEM CONTROL B button
1 Place the Commander head to
head with the remote control of
the air-conditioner.
Remote control of
your air-conditioner
about 2 – 4 inches
(5 – 10 cm) away
RM-AV2500T
2 While pressing COMMANDER
OFF, press PROGRAM + and
w +.
PROGRAM
Learnable SYSTEM CONTROL keys
and number keys flash in the display
panel.
3
PROGRAM
2
If a signal has been learned on that
button, the display stays lit. If you
5
TV
CD MD
SAT VCR
TAPE
DVDM1CBLM2AMP
M3
want to programme on that button,
clear the signal first (page 36).
Continued
35
GB
Page 36

Programming a Frequently Used
Key Operation for SYSTEM
CONTROL Buttons (continued)
3 Press the SYSTEM CONTROL
button you want to teach.
“LEARN” flashes and the display for
the pressed SYSTEM CONTROL key
stays lit.
4 Press and hold down the button
of the remote control until you
hear a beep.
(If you release the button before you
hear a beep, the signal may not be
learned correctly.)
“LEARN” display stops flashing and
stays lit.
If “NG” flashes on the display
Learning did not succeed. Try Steps 3 and 4
again.
Note
You can programme a remote control signal for
a SYSTEM CONTROL button by “learning” for
which the System Control functions have been
programmed. In this case, the System Control
functions are overwritten and cannot be used.
If you clear the “learned” signal from the
button, the System Control function, are
restored, and you can use them again.
To clear the learned remote
control signal
1 While pressing COMMANDER OFF,
press PROGRAM + and w +.
2 While pressing the LIGHT button,
press the SYSTEM CONTROL button
(1 – 9, A, B, or C).
3 Press COMMANDER OFF.
The display for that button flashes.
If you want to programme a new signal
for that button, follow Steps 3 to 5.
5 Press COMMANDER OFF.
GB
36
Page 37

Notes on learning the signals
of an air-conditioner
About seasonal adjustments
If you change the settings of the airconditioner for the season, you have to
programme the remote control signals of
the new settings on the Commander.
If the power-on/off operation
does not work correctly
The air-conditioner may not be turned on
or off properly with the button of this
Commander, for which you have
programmed its power-on/off signal.
If the Commander can operate only
“ON” with one button and “OFF” with
another, while your air-conditioner’s
remote control can operate “ON/OFF”
with a single button, programme the
signal on two buttons of the Commander
as follows.
1 Clear the learned power-on/off signal.
(In the example on page 36, clear the
learned signal from the SYSTEM
CONTROL B button.)
2 Program the signal (transmitted from
the power-on/off button of the airconditioner’s remote control) for the
SYSTEM CONTROL B button again.
3 Program the signal from the same
button of the remote control for
another button (for example, the
SYSTEM CONTROL C button).
The two buttons of the Commander have
been programmed with the power-on
signal and the power-off signal of the airconditioner, respectively so that you can
operate the air-conditioner with the
Commander.
Transferring Data
between Remote
Commanders
You can transfer data, such as learned
signals and component code settings,
between this Commander and another
Sony RM-AV2500T.
Transferring data
You can transfer the all data of this
Commander or the data of a Component
Select button on this Commander to
another Sony RM-AV2500T.
To transfer the all data of the
Commander
4
6
3
TV
SAT VCR
CD MD
TAPE
PROGRAM
DVDM1CBLM2AMP
M3
2
Continued
37
GB
Page 38

Transferring Data between Remote
Commanders (continued)
1 Place the RM-AV2500T head to
head with another remote
commander.
Another remote commander
about 2 – 4 inches
(5 – 10 cm) away
RM-AV2500T
2 While pressing COMMANDER
OFF, press PROGRAM – and
w –.
PROGRAM
4 Press the 1 key.
1: All data of the Commander
2: Data of a Component Select button
5 Confirm that the receiving remote
commander is ready for data.
(To set the receiving commander,
follow the procedure on page 40.)
6 Press the “ENTER” key.
As the data is transferred, the
corresponding component name goes
off. If the all data has been
successfully transferred, the backlight
of the display turns off.
Note
If “NG” appears while sending the data, go
back to Step 5 and continue the operation
or press COMMANDER OFF to stop the
operation.
3 Press the R button.
R: Transfer data
r: Receive data
GB
38
Note
Be sure that the receiving remote commander is
ready to receive data.
Page 39

To transfer the data of a
Component Select button
The data of a Component Select button
on this Commander (the settings and
learned signals programmed on the keys
and buttons) can be transferred to a
Component Select button on another
Sony RM-AV2500T.
1~3 Perform Steps 1 to 3 on page
38.
4 Press the 2 key.
5 Press the Component Select
button whose data you want to
send.
6 Confirm that the receiving remote
commander is ready to accept
data.
(To set the receiving commander,
follow the procedure on page 40.)
7 Press the “ENTER” key.
When the data has been transferred,
“TV” and “R” go off. If the data have
been successfully transferred, the
backlight of the display turns off.
Note
If “NG” appears while sending the data, go
back to Step 6 and continue the operation
or press COMMANDER OFF to stop the
operation.
Notes
• The data of the “learned” signal and the
System Control function programmed for a
Component Select button cannot be
transferred.
You can use the learning function (page 32) to
programme the “learned” signal and the
System Control functions programmed for a
Component Select button on another remote
commander.
• Be sure that the receiving remote commander
is ready to receive data.
Continued
39
GB
Page 40

Transferring Data between Remote
Commanders (continued)
Receiving the data
This Commander can receive the data of
another Sony RM-AV2500T.
To receive the all data from
another remote commander
3
2 Press the r button.
R: Transfer data
r: Receive data
3 Press the 1 key.
4
PROGRAM
2
TV
SAT VCR
DVDM1CBLM2AMP
CD MD
TAPE
M3
1 While pressing COMMANDER
OFF, press PROGRAM – and
w –.
PROGRAM
1: All data of the Commander
2: Data of a Component Select button
4 Press the ENTER key.
1
As the data is received, the
corresponding component name stays
lit. If the all data have been
successfully received, the backlight of
the display turns off.
Notes
• If the Commander is not ready for
receiving the data, press CLEAR key, then
OK key to clear the learned signal on all
or one of the Component Select buttons.
• If “NG” appears during data transfer, go
back to Step 3 and continue the operation
or press COMMANDER OFF to stop the
operation. If you continue the operation,
you have to set the sending remote
commander again to send data.
40
GB
Page 41

To receive the data of a
Component Select button from
another remote commander
1~2 Perform Steps 1 and 2 on page
40.
3 Press the 2 key.
Selecting a Channel
with a Single Key Press
— Channel Macro Function
You can programme the Channel Macro
function for the keys listed below (macro
keys).
If you programme the operation of
entering the 1, 2, 3 and ENTER keys for a
macro key, you can select the channel 123
by pressing that single key.
4 Press the Component Select
button to which want to assign
the data.
5 Press the ENTER key.
When the data have been received,
“TV” and “r” go off. If the data have
been successfully received, the
backlight of the display turns off.
Notes
• If the Commander is not ready for
receiving the data, press CLEAR key, then
OK key to clear the learned signal on all
or one of the Component Select buttons.
• If “NG” appears during data transfer, go
back to Step 3 and continue the operation
or press COMMANDER OFF to stop the
operation. If you continue the operation,
you have to set the sending remote
commander again to send data.
Component Macro key
TV: PIP STILL, PIP TEXT, PIP
CH+, PIP MOVE, PIP
SWAP, PIP CH-
CBL: m, N, M, REC*, x, X
SAT: m, N, M, REC*, x, X
* You can programme this function for REC
key alone (not on the REC + B key for a
double-key operation).
2
TV
SAT VCR
CD MD
TAPE
PROGRAM
DVDM1CBLM2AMP
M3
1
5
Continued
41
GB
Page 42

Selecting a Channel with a Single
Key Press (continued)
Example: To programme TV
channel 123 for the PIP TEXT key
1 While pressing COMMANDER
OFF, press MUTING.
2 While pressing PROGRAM +,
press the Component Select
button (TV).
PROGRAM
3 Press the macro key (in this case,
PIP TEXT).
The selected macro key lights. The
number keys and “ENTER” flash.
4 Press the keys for the operation in
order (1t 2 t 3 t ENTER).
Note
If you enter more than four keys, the
last four keys are programmed for the
macro key.
5 Press the EXIT button to confirm
the Channel Macro.
“1,” “2,” “3,” and “ENTER” appear
twice.
Note
If you enter more than four keys, the
last four keys are programmed for the
macro key.
6 Press COMMANDER OFF.
Notes
•You cannot programme the Channel Macro
function for a macro key that has “learned” a
signal. Try again with another macro key, or
clear the “learned” signal (page 19) from the
button and programme the Channel Macro
function on it.
• If you change the component code for a key
that has been programmed with the Channel
Macro function, the new signal is transmitted
when you press the corresponding macro
key.
42
GB
Page 43

To clear the Channel Macro
function
1 While pressing COMMANDER OFF,
press MUTING.
2 While pressing PROGRAM +, press
the Component Select button (TV).
3 While pressing the LIGHT button,
press the macro key.
Note
The procedure above can clear only the
Channel Macro function from the key. It does
not clear the learned signals from that key.
Creating an Alias
Component key (ALIAS)
The Alias Component key to be created
in this section is a Component key that
refers to the setting contents of another
Component key and work the same as
the reference key. If you create an Alias
Component key, function keys (Alias
function keys) that have the same
function as the function keys in the
reference component are also created.
Using this Alias Component function,
you can assign the function keys of
various AV components (alias keys) to
one Component display. A Component
key that has this kind of function is called
a Multi Component key.
The M1 button is a preset multicomponent button for TV and VCR, the
M2 button is for TV and DVD, and the
M3 button is for TV and SAT.
PROGRAM
6
TV
CD MD
SAT VCR
TAPE
DVDM1CBLM2AMP
M3
1
Continued
43
GB
Page 44

Creating an Alias Component key
(ALIAS) (continued)
1 While pressing COMMANDER
OFF, press RECALL and the
component (button) for which
you want to create alias key.
The keys for the selected component
flash.
3 Press the component button to be
referred to.
4 Press the key you want to be
referred to.
Note
You cannot select an already set alias key.
2 Press the key you want to set.
Note on the flashing display
The keys or buttons that are already preset
for the component flash twice while those
that are not preset flash once.
GB
44
5 Repeat Steps 2 and 4 to create
other alias keys.
6 Press the COMMANDER OFF
button.
To change the function display of
a key
When you programme a signal for a key,
you can select the most suitable function
display among all the displays the key
has, and set it to the key.
Page 45

1 After Step 1 (page 44), while
pressing the Component Select
button (VCR), press the key you
want to teach repeatedly.
Each time the key is pressed, the
display is changed in order.
2 When the desired display
appears, release the Component
Select button.
3 Then follow Steps 3 to 6 (page
44).
Notes
• If you do not change the display of a key, the
default display is used.
•You cannot change the display of the keys
that are not framed with
keys 0 to 9, +10 and ENTER).
(the number
To clear an alias key and button
1 After Step 1 (page 44), while
pressing the LIGHT button, press
the key or button you want to
erase.
The cleared key flashes together with
other settable alias keys.
2 Press COMMANDER OFF.
To clear all the alias keys at once
While pressing the LIGHT button, press
the Component Select button.
Note
The M1, M2 and M3 buttons are factory
set with alias keys. If you clear all the
alias keys, the M1, M2 and M3 button
alias keys are also cleared.
To restore the factory setting
1 While pressing COMMANDER OFF,
press the M1, M2 or M3 button.
2 Press the M1, M2 or M3 button twice
while pressing the LIGHT button.
45
GB
Page 46

Using Other Functions
Locking the Controls
— Hold Function
To prevent accidental operation, you can
lock all the buttons with the Hold
function.
1
PROGRAM
TV
SAT VCR
DVDM1CBLM2AMP
CD MD
TAPE
1 While pressing COMMANDER
OFF, press the display panel.
“OFF” is displayed.
M3
Protecting your
settings
— Preset Lock Function
You can lock the Commander so that you
can not change, add, or clear any of your
component code settings (page 8).
2
PROGRAM
1
TV
SAT VCR
DVDM1CBLM2AMP
CD MD
TAPE
M3
1 While pressing COMMANDER
OFF, press MUTING.
3
To unlock the control
Repeat the procedure above.
“OFF” disappears from the display.
GB
46
The component keys flash and “OFF”
appears (Alias component keys-M1,
M2 and M3 stay lit).
Page 47

2 Press the OFF key.
Changing the Auto
Power-Off Time of the
Commander
All the component names stop
flashing and stay lit, and “ON”
flashes.
3 Press COMMANDER OFF.
When the preset lock is on
If you try to set a component code
number (page 8) or perform learning for
the Component Select buttons (page 32),
“NG” will flash on the display.
To unlock the preset lock
To unlock the preset lock, follow the
same procedure as the above and press
the 1 ON key in Step 2. “1 OFF”
appears on the display.
The Commander is preset at the factory
to switch the power off automatically
after 10 minutes if left unused (Auto
Power-Off). To change this time, perform
the following procedure.
You can set the Auto Power-Off time up
to 90 minutes, in units of 10 minutes, or
disable the Auto Power-Off function.
Note
The Auto Power-Off function only turns off the
power of the Commander, but not of the
component.
2
PROGRAM
3
TV
CD MD
SAT VCR
TAPE
DVDM1CBLM2AMP
M3
1
Continued
47
GB
Page 48

Changing the Auto Power-Off Time
of the Commander (continued)
1 While pressing COMMANDER
OFF, press PROGRAM + and
w –.
PROGRAM
The number which shows the current
Power-Off time of the Commander
stays lit, and other numbers flash.
2 Press one of the 1 – 9 keys to
select the Auto Power-Off time, or
press the 0 key to disable the
Auto Power-off function.
For example, to set the Auto PowerOff time to 20 minutes, press the 2
key.
Adjusting the Backlight
of the Display Window
The Commander is preset at the factory to
bright backlight, and to switch off the
backlight automatically if you do not operate
for more than 10 seconds. To change this
setting, perform the following procedure.
You can adjust the backlight Automatic-Off
time (from 10 seconds to 90 seconds in the
units of 10 seconds) and the brightness
(bright or dim).
2
PROGRAM
3
4
TV
CD MD
SAT VCR
TAPE
DVDM1CBLM2AMP
M3
1
“2” stops flashing and stays lit.
3 Press COMMANDER OFF.
GB
48
Page 49

1 While pressing COMMANDER
OFF, press LIGHT.
4 Press the 1 key.
The number which shows current
Automatic-Off time and the arrow
indicating the current brightness of
the backlight stay lit. Other numbers
and the opposite arrow will flash.
2 Press one of the 1 – 9 keys to
select the Off time.
For example, to set the Automatic-Off
time to 20 seconds, press the 2 key.
“2 “ stops flashing and stays lit.
3 Press the R or r button, to select
the brightness.
To brighten, press R, to dim, press r.
1: The backlight will only light when you
press the LIGHT button
2: The backlight will light when you press
any buttons except the w +/–,
MUTING, PROGRAM +/–, RECALL
and COMMANDER OFF buttons.
5 Press COMMANDER OFF.
The chosen arrow stays lit.
49
GB
Page 50

Setting the Key-Touch
Beep
You can turn on or off the key-touch
confirmation beep.
3 Press COMMANDER OFF.
To turn off the key-touch beep
In Step 2, while pressing MUTING, press
w –.
“OFF” appears on the display.
2
TV
SAT VCR
CD MD
TAPE
PROGRAM
DVDM1CBLM2AMP
M3
To turn on the key-touch beep
1 While pressing COMMANDER
OFF, press MUTING.
2 While pressing MUTING, press
w +.
“ON” appears on the display.
1
3
50
GB
Page 51

Adjusting the beam
interval to avoid key
misoperation
You can control the beam interval of the
commander. This prevents an
unexpected action caused by
mistouching a commander key. The
factory setting is 0 seconds.
To adjust the keys of each
Component button
PROGRAM
3
TV
CD MD
SAT VCR
TAPE
DVDM1CBLM2AMP
M3
1
The keys of the selected component
appear as set at the factory.
0 second: Stays lit
1 second: Flashes
2 seconds: Flashes slowly
2 Press the key you want to adjust.
The beaming time is changed with
each press of the key (from 0 to 2
seconds).
3 Press the COMMANDER OFF
button.
1 While pressing COMMANDER
OFF, press PROGRAM – and the
component button.
PROGRAM
Continued
51
GB
Page 52

Adjusting the beam interval to
avoid key misoperation
(continued)
To adjust the SYSTEM CONTROL
buttons
PROGRAM
2
3
TV
CD MD
SAT VCR
TAPE
DVDM1CBLM2AMP
M3
1 While pressing COMMANDER
OFF, press PROGRAM + and
MORE.
PROGRAM
2 Press the key or button you want
to adjust.
The beaming time is changed with
each press of the key (from 0 to 2
seconds).
0 second: Stays lit
1 second: Flashes
2 seconds: Flashes slowly
3 Press the COMMANDER OFF
1
button.
52
All the SYSTEM CONTROL keys stay
lit.
GB
Page 53

To adjust the component buttons
PROGRAM
2
TV
CD MD
SAT VCR
TAPE
DVDM1CBLM2AMP
M3
1 While pressing COMMANDER
OFF, press PROGRAM + and the
component button.
PROGRAM
The keys of the selected component
appear as set at the factory.
0 second: Stays lit
1 second: Flashes
2 seconds: Flashes slowly
2 Press the COMMANDER OFF
button.
1
53
GB
Page 54

Additional Information
Precautions
•Do not drop the unit or give a shock to
the unit, or it may cause a malfunction.
•Do not leave the unit in a location hear
heat sources, or in a place subject to
direct sunlight, excessive dust or sand,
moisture, rain or mechanical shock.
•Do not put foreign objects into the unit.
Should any liquid or solid object fall
into the unit, have it checked by
qualified personnel before operating
the unit any further.
•Do not expose the remote control
detectors of your components to direct
sunlight or other strong illumination.
Too much light there can interfere with
remote control operations.
•Be sure to place the Commander out of
the reach of small children or pets.
Components such as air conditioners,
heaters, electric appliances, and electric
shutters or curtains receiving an
infrared signal can be dangerous if
misused.
Maintenance
Specifications
Operating distance
Approx. 32.8 ft. (10 meters) (varies depending
on components of different manufacturers)
Power requirements
Remote control and backlight: Four R6 (size
AA) batteries
Battery life
Approx. 5 months (varies depending on
frequency of use)
Dimensions
Approx. 4 1/2 × 7 × 1 1/2 in. (w × h × d)
(112 × 177 × 38 mm)
Mass
8.64 oz. (245 g) (not including batteries)
Design and specifications are subject to change
without notice.
The CE mark on the unit is
valid only for products
marketed in the European
Union.
Clean the surface with a soft cloth sightly
moistened with water or a mild detergent
solution. Do not use any type of solvent
such as alcohol, benzine or thinner as
they may damage the finish of the
surface.
GB
54
Page 55

Troubleshooting
If you have problems setting up or using the Remote Commander, first check the
batteries (page 6), then check the items below.
Symptom
You cannot operate the
components.
Remedy
• Go closer to the component. The maximum operating distance is
approximately 32.8 ft. (10 m).
• Check that you are aiming the Commander directly at the compoent,
and that there are no obstructions between the Commander and the
component.
• Turn on the components first, if necessary.
• Check that the component has infrared remote capability. For example,
if your component did not come with a remote commander, it probably
is not capable of being controlled by a remote commander.
• You have assigned a different component to the Component Select
button. Check the component assigned to that button and the
component code.
• If you do not use the commander for a long time, LCD panel response
may become erratic. In this case, follow the procedure below:
1 While pressing COMMANDER OFF, press MENU and EXIT.
A bullet mark will appear in the bottom left of the LCD panel.
2 Press the next target that appears in the top right of the LCD panel.
3 Press the square that appears in the centre of the LCD panel.
A beep sounds to confirm the setting.
Continued
55
GB
Page 56

Troubleshooting (continued)
Symptom
You cannot operate the
components even after
setting the component
code numbers.
You cannot control the
volume.
The Commander fails to
learn the remote control
signals.
You cannot operate a
component even after
you programmed the
remote control signals
with the “learning”
function.
Remedy
• Set the component code correctly. If the code that is listed first for your
component does not work, try all the codes for your component in the
order in which they are listed in the supplied “Component Code
Numbers.”
• Some features may not be preset. If some or all of the keys do not
function correctly even after you have set the component codes, then
use the learning function to programme the remote control signals for
the component (page 15).
• The component may be operated with a code number that is not listed
in the “Component Code Numbers.” See “Finding a component code
with the Search function” (page 11) and try setting a code number
again.
• If your visual components are connected to an audio system, make sure
you have set up the Commander as described in “Controlling the
Volume of Visual Components Connected to an Audio System” (page
21).
• You have assigned another component to the TV or AMP button (page
32). In this case, the volume cannot be controlled when you select a
component other than TV or AMP.
• When you teach signals of an interactive signal exchange system remote
control unit (supplied with some of Sony’s receivers and amplifiers) to
the Commander, the response signal of the main unit may interfere with
the learning of the Commander. In such a case, move to a place where
the signals will not reach the main unit (e.g. other rooms, etc.).
• Make sure that the Remote Commander has learned the correct signals.
If not, see “For accurate learning” (page 19) and try the learning
procedure again (page 15).
56
GB
Page 57

Symptom
You hear beeps (“pip,
pip”) and “NG” flashes.
You hear beeps (“pip,
pip, pip, pip, pip”) and
“NG” flashes.
“NG” appears during
learning.
Remedy
• The Preset Lock function is on. Unlock the Preset Lock function (page
46), and try the component code setting or the learning function.
• Signals have been programmed for that Component Select or SYSTEM
CONTROL button using the learning function. Clear the learned signals
(pages 25 and 43) and try programming the System Control function
again.
• Signal has been programmed for that key using the learning function.
Clear the signal(s) (pages 19 and 20) and try programming the function
or the display for the same key again, or try with another Component
Select button.
• Signals have been programmed for that macro key using the learning
function. Clear the learned signals (page 19) and try programming the
Channel Macro function for the same key again, or try with another
macro key.
• There are some keys, on which signals have been programmed, on the
display for the Component Select button of the Commander when the
commander receives the data from another Commander. Clear the
signals (pages 20, 21 and “Notes” on page 43) and try receiving the data
again.
• Learning has not succeeded. See “For accurate learning” (page 19) and
try the learning procedure again (page 15).
• The component codes cannot be set. See the supplied “Component
Code Numbers” and try setting the component codes again (page 8).
• The data have not been transferred. See “Transferring data” (page 37)
and try transferring the data again.
• The data have not been received. See “Receiving the data” (page 40) and
try receiving the data again.
• Clear infrequently used learned keys (page 19), then carry out learning
operations.
Continued
57
GB
Page 58

Troubleshooting (continued)
Symptom
A system control
programme does not
function correctly.
The power of the
Commander turns off by
itself.
The power of the
Commander does not
turn on when you press a
button.
Your Commander does
not work as expected
after data transfer.
Remedy
• Make sure that you have programmed the commands in the correct
order (page 22).
• Try changing the orientation of the Commander. If that does not help,
try placing the components as close to each other as possible.
• Check the status of the components and make sure that you have set the
components properly to receive commands (page 27).
• The component codes are changed or a new signals have been learned
for a key or button that has been programmed with a series of
commands. In this case, the new signals are transmitted when the series
of commands is executed.
• The interval may be too short. See “Changing the interval between
operation steps” (page 29) and set a longer interval.
• This Commander is preset at the factory to switch the power off
automatically after 10 minutes if left unused. (Auto Power-Off, page 47)
You can change the power-off time from 10 to 90 minutes, or set the
Commander not to power off automatically.
• The Hold function is on (“OFF” appears on the display). Unlock the
Hold function (page 46).
• Data transfer to/from a single button cannot transfer System Control
functions that are learned by Component Select buttons. Either set up
the learned Commander from the start, or perform whole data transfer.
58
GB
Page 59

Appendix
Table of Preset
Functions
Note
There may be some components or functions
that cannot be operated with this Commander.
TV
KEY DISPLAY
1
1 – 9, 0, 1-,
-/--, ENTER
INPUT
DISPLAY
MENU
R
r
t
T
OK
PIP ON/OFF
PIP OFF
PIP CH+/–
PIP TEXT
PIP MOVE
PIP STILL
PIP SWAP
FUNCTION
To turn the power on/off
To change the channel
For example, to change to
channel 5, press 0 and 5 (or,
press 5 and ENTER)
To change the input mode
To display the current
channel on TV
To call up the MENU display
To move the cursor upward
To move the cursor
downward
To move the cursor to the
right
To move the cursor to the left
To enter the selection of the
MENU display
To turn on/off the “window”
picture
To turn off the “window”
picture
To change the TV channel in
the “window” picture
To switch to teletext in the
“window” picture
To move the location of the
“window” picture
To freeze the “window”
picture
To swap the “window”
picture
KEY DISPLAY
PROGRAM +/–
RECALL
w +/–
MUTING
ANT/SW
16 : 9
TELETEXT
TV
RED, GREEN,
YELLOW,
BLUE
EXIT
Using Fastext
With Fastext you can access pages with one key
stroke.
When a Fastext pages with is broadcast, a
colour-coded menu will appear at the bottom
of the screen.
The colours of this menu correspond to the red,
green, yellow, and blue keys on the Remote
Commander.
Press the key which corresponds to the colourcoded menu.
The page will be displayed after some seconds.
FUNCTION
Channel up: +
Channel down: –
To operate JUMP,
FLASHBACK or CHANNEL
RETURN function on the TV
depending on the setting of
the TV’s manufacturer
Volume up: +
Volume down: –
To mute the volume on the
TV. Press again to turn
muting off.
To switch the multiplex
antenna input
To switch to WIDE
To switch to teletext
To turn on
To return from teletext to TV
Fastext buttons
To exit the mode
Continued
59
GB
Page 60

Table of Preset Functions
(continued)
SAT
KEY DISPLAY
1
1 – 9, 0, 1-, -/--,
ENTER
INPUT
RECALL
GUIDE
EXIT
MENU
R
r
t
T
OK
PROGRAM +/–
FUNCTION
To turn the power on/off
To change the channel
For example, to change to
channel 5, press 0 and 5 ( or,
press 5 and ENTER)
To switch the output of the
SAT receiver to the TV (When
you connect a TV cable or
anntenna to the receiver, the
output switches between a
TV and SAT program)
To use the “FAVORITE”
function
To bring up Master Guide
To exit the mode
To call up the MENU display
To move the cursor upward
To move the cursor
downward
To move the cursor to the
right
To move the cursor to the left
To bring up the Station Index
when a programme guide is
not displayed
To select the channel that is
highlighted
Channel up : +
Channel down : –
KEY DISPLAY
INFO
TELETEXT
EPG
RED, GREEN,
YELLOW,
BLUE
Using Fastext
With Fastext you can access pages with one key
stroke.
When a Fastext pages with is broadcast, a
colour-coded menu will appear at the bottom
of the screen.
The colours of this menu correspond to the red,
green, yellow, and blue keys on the Remote
Commander.
Press the key which corresponds to the colourcoded menu.
The page will be displayed after some seconds.
FUNCTION
To display programme
information
To switch to teletext
To show or hide the EPG
display
Fastext buttons
60
GB
Page 61

VCR
KEY DISPLAY
1
1 – 9, 0, 1-, -/--,
2-, ENTER
INPUT
DISPLAY
ANT/SW
MENU
R
r
t
T
OK
m
N
M
REC*
x
X
Z
PROGRAM +/–
EXIT
* To avoid accidental recording, the REC key
does not work unless pressed for more than
1 second (factory setting). To change this
setting, see ”Adjusting the beam interval to
avoid key misoperation” on page 51.
FUNCTION
To turn the power on/off
To change the channel
For example, to change to
channel 5, press 0 and 5 (or,
press 5 and ENTER)
To change the input mode
To activate the on-screen
display
To switch the antenna output
To call the MENU display
To move the cursor upward
To move the cursor
downward
To move the cursor to the
right
To move the cursor to the left
To enter the selection of the
MENU display
To rewind
To play
To fast-forward
To record
To stop
To pause
To eject a cassette
Channel up: +
Channel down: –
To exit the mode
DVD
KEY DISPLAY
1
1 – 9, 0
+10
ENTER
AUDIO
DISPLAY
CLEAR
REPEAT
TITLE
SUB TITLE
MENU
R
r
t
T
OK
m
N
M
x
X
Z
REC*
MODE
FUNCTION
To turn the power on/off
Number keys: To set items
selected from the screen
To select numbers 10 and
above
To enter a setting or to set
items selected from the screen
To change the sound
To show the current play
status on the screen
To clear the selected
characters from the screen
To go into the repeat mode
To display the title menu
To switch the subtitle
To display the DVD menu
To move the cursor upward
To move the cursor
downward
To move the cursor to the
right
To move the cursor to the left
To execute items selected
from the screen
To rewind
To play
To fast-forward
To stop
To pause
To eject a cassette
To record
To change the playback mode
Continued
61
GB
Page 62

Table of Preset Functions
(continued)
KEY DISPLAY
>
(PROGRAM +)
.
(PROGRAM –)
A/B
* To avoid accidental recording, the REC key
does not work unless pressed for more than
1 second (factory setting). To change this
setting, see ”Adjusting the beam interval to
avoid key misoperation” on page 51.
FUNCTION
To proceed to the next
location or song
Channel up
To proceed to the previous
location or song
Channel down
To decide the distance
between A and B
To select the deck
CBL (Analog Cable box)
KEY DISPLAY
1
1 – 9, 0, ENTER
PROGRAM +/–
RECALL
FUNCTION
To turn the power on/off
To change the channel
For example, to change to
channel 5, press 0 and 5 (or ,
press 5 and ENTER)
Channel up : +
Channel down : –
To operate JUMP,
FLASHBACK or CHANNEL
RETURN function
62
GB
Page 63

AMP
KEY DISPLAY
1
INPUT
VIDEO 1
VIDEO 2
VIDEO 3
AUX
DVD
TV
CD
MD/DAT
TUNER
TAPE
PHONO
5.1 INPUT
MENU
R
r
t
T
OK
FUNCTION
To turn the power on/off
To select the input source:
VIDEO 1
To select the input source:
VIDEO 2
To select the input source:
VIDEO 3
To select the input source:
AUX
To select the input source: DVD
To select the input source: TV
To select the input source: CD
To select the input source: MD
To select the input source:
TUNER
To select the input source:
TAPE
To select the input source:
PHONO
To change the multi-channel of
5.1ch and above
To call up the MENU display,
or return to the previous
MENU
To move the cursor upward
To move the cursor downward
To move the cursor to the right
To move the cursor to the left
To enter the selection of the
MENU display
KEY DISPLAY
RECALL
EXIT
PROGRAM
+/–
w +/–
MUTING
S.FIELD
MODE
T.TONE
CENTER
CENTER
REAR
REAR
SUB
WOOFER
SUB
WOOFER
FRONT BAL
REAR BAL
EFFECT
FUNCTION
To shift band or preset select
To return to the basic MENU
Presetting or tuning frequency
to a higher: +
Presetting or tuning frequency
to a lower: –
Volume up: +
Volume down: –
To mute the volume on the
AMP
Press again to turn muting off
To turn on/off the sound field
To select a sound field mode
To output a test tone
To adjust the centre speaker
level: +
To adjust the centre speaker
level: –
To adjust the rear speaker level:
+
To adjust the rear speaker level:
–
To adjust the subwoofer level: +
To adjust the subwoofer level: –
To control the front speaker
balance
To control the rear speaker
balance
To control the effect
Continued
63
GB
Page 64

Table of Preset Functions
(continued)
CD
KEY DISPLAY
1
1 – 9, 0
+10
ENTER
RECALL
REPEAT
CONTINUE
SHUFFLE
PROGRAM
DISPLAY
MODE
A/B
CLEAR
m
N
M
x
X
Z
>
.
FUNCTION
To turn the power on/off
To select the track number (0
selects track 10)
To select track numbers
above 10, see the descriptions
on the +10 button below.
To select numbers 10 and
above
To enter the setting
To select the next disc
To select repeat play mode
To select continuous play
mode
To play in random order
To use for programme play
To switch the display of the
CD player to on/off
To toggle the recording mode
To select the deck
To clear the setting
To rewind
To play
To fast-forward
To stop
To pause
To open/close
To select the next track
To select the previous track
MD
KEY DISPLAY
1
1 – 9, 0
+10
ENTER
RECALL
DISPLAY
CONTINUE
SHUFFLE
PROGRAM
CLEAR
REPEAT
m
N
M
REC*
x
X
Z
>
.
MODE
A/B
* To avoid accidental recording, the REC key
does not work unless pressed for more than
1 second (factory setting). To change this
setting, see ”Adjusting the beam interval to
avoid key misoperation” on page 51.
FUNCTION
To turn the power on/off
To select the track number (0
selects track 10)
To select track numbers
above 10, see the descriptions
on the +10 button below.
To select numbers 10 and
above
To enter the setting.
To select the next disc
To switch the display mode
To select continuous play
mode
To play in random order
To use for programme play
To clear the setting
To select repeat play mode
To rewind
To play
To fast-forward
To record
To stop
To pause
To open/close
To select the next track
To select the previous track
To toggle the recording mode
To select the deck
64
GB
Page 65

TAPE
KEY DISPLAY
1
m*
1
N*
1
M*
REC*1 *
1
x*
1
X*
A/B
PROGRAM +*
2
T*
2
R*
2
t*
MENU*2 *
2
r*
2
EXIT*
PROGRAM –*
*1Tape operation buttons. For dual cassette
decks, operation buttons for Deck A (for
Sony-brand dual cassette deck, buttons for
Deck B).
2
Operation buttons for Deck B (for Sony-
*
brand dual cassette deck, buttons for Deck
A).
3
To avoid accidental recording, the REC key
*
does not work unless pressed for more than
1 second (factory setting). To change this
setting, see ”Adjusting the beam interval to
avoid key misoperation” on page 51.
FUNCTION
To rewind
To play
To fast-forward
3
To record
To stop
To pause
To select the tape deck : Deck
A or B (dual cassette deck
only)
1
To reverse
To rewind
To play
To fast-forward
3
To record
To stop
To pause
2
To reverse
65
GB
Page 66

Quick Reference of Operations
To
Set a component code
Program to the keys
or buttons on a
component (learning
function)
Change the volume
control setting
Assign the System
Control function to
the SYSTEM
CONTROL buttons
Program the PowerOn command to the
Component Select
buttons
Program a command
to the SYSTEM
CONTROL buttons
or Component Select
buttons
Copy the settings of
one Component
Select button to
another
Program a System
Control functions for
Component Select
buttons
Set the interval of the
System Control
functions
Transfer data
Press
COMMANDER OFF + MUTING
COMMANDER OFF + Component Select
COMMANDER OFF + w+ + w–
COMMANDER OFF + MORE
COMMANDER OFF + w– + Component Select
COMMANDER OFF + PROGRAM+ + w+
COMMANDER OFF + (copy to) Component Select
x
(copy to) Component Select + (copy from) Component Select
COMMANDER OFF + w+ + Component Select
COMMANDER OFF + PROGRAM+ + PROGRAM–
COMMANDER OFF + PROGRAM– + w–
For
details,
see
page 8
page 15
page 22
page 23
page 31
page
32, 36
page 34
page 28
page 29
page 38
66
GB
Page 67

To
Program a Channel
Macro function
Turn the key-touch
beep on/off
Set the Auto PowerOff time
Set the Auto-Off time/
brightness of the
Backlight
Lock the Remote
Commander
Protect the settings
Create an Alias
Component key
Adjust the beam
interval (keys in each
Component button)
Adjust the beam
interval (SYSTEM
CONTROL buttons)
Adjust the beam
interval (Component
buttons)
Press
COMMANDER OFF + MUTING
x
PROGRAM+ + Component Select
COMMANDER OFF + MUTING
x
(ON) MUTING + w+
(OFF) MUTING + w–
COMMANDER OFF + PROGRAM+ + w–
COMMANDER OFF + LIGHT
COMMANDER OFF + Display Panel
COMMANDER OFF + MUTING
COMMANDER OFF + RECALL + Component Select
COMMANDER OFF + PROGRAM– + Component Select
COMMANDER OFF + PROGRAM+ + MORE
COMMANDER OFF + PROGRAM+ + Component Select
For
details,
see
page 42
page 50
page 48
page 49
page 46
page 46
page 44
page 51
page 52
page 53
67
GB
Page 68

Index
A
Adjusting the beam interval
51
Alias Component key 43
Auto Power-Off
of the Commander 47
of the backlight 48
B
Backlight
adjusting 48
Auto Power-Off 47
batteries 6
Batteries 6
C, D
Changing
function display of keys
18
interval of the System
Control function 29
time of Auto Power-off
47
Channel Macro function 41
Clearing/Changing
Channel Macro function
43
learned signal 19, 33, 36
System Control function
25, 29
Code number 8
Component Select buttons
copying settings 34
programming a signal
30
programming System
Control function 27
receiving data 40
setting Power-On
function 30
transferring data 37
COMMANDER OFF button
7
Copying
data to another
commander 37
settings of Component
Select buttons 35
E
Erasing
See “Clearing/
Changing”
F, G
Factory setting 8, 21, 26
H
Hold Function 46
I, J
Input select 14
K
Key touch beep 50
L
LCD
Auto-Off time 47
brightness 48
touch keys 68
Learning Function 15, 33,
35
LIGHT button 7, 48
Locking
control of Commander
46
settings on Commander
46
M, N, O
MUTING button 7, 11, 17,
22
P, Q
PROGRAM button 7
Power-On function
setting 30
SYSTEM CONTROL C
button 26
Power-Off function
See “Auto Power-off”
Preset components 8
Preset Lock Function 46
R
Receiving data 40
S
SYSTEM CONTROL
buttons
programming a signal
35
programming System
control function 22
System Control function
changing interval 29
clearing 26, 29
programming 23, 27
SYSTEM CONTROL A
button 26
T, U
Transferring data 37
Troubleshooting 55
V, W, X, Y, Z
w (VOLUME) buttons 7,
11, 17, 22
Volume Control 14, 21
68
GB
Page 69

69
GB
Page 70

2
SE
Page 71

Egenskaper
Fjärrkontrollen RM-AV2500T ger
möjlighet till central styrning av samtliga
AV-komponenter från en enda
fjärrkontroll och man kan undvika
besväret att behöva manövrera olika AVkomponenter med olika fjärrkontroller.
Denna fjärrkontrolls huvudsakliga
egenskaper är följande.
Central styrning av Sony AVkomponenter med denna enda
fjärrkontroll
Denna fjärrkontroll är förinställd på
fabriken att styra komponenter av
märket Sony, så den är färdig att
direktanvändas som ett kontrollcenter för
dina Sony AV-komponenter.
Fjärrstyrsignaler för icke-Sonykomponenter är också förinställda
Denna fjärrkontroll är förinställd för
komponenter av de flesta kända märkena
inklusive Sony. Du kan fjärrstyra dina
komponenter genom att ställa in
kodnumret för dem (sidan 8).
Inlärningsfunktion för att
programmera in andra
fjärrstyrsignaler som behövs
Denna fjärrkontroll har en
inlärningsfunktion vilket innebär att den
kan lära sig fjärrstyrsignaler för att
fjärrstyra komponenter eller funktioner
som inte är förinställda (sidan 15).
Dessutom kan fjärrkontrollen lära sig
fjärrstyrsignaler (endast infraröda
signaler) för produkter som inte är ljud/
bildkomponenter som till exempel
luftkonditionerare, lampor, etc. (det är
möjligt att det inte fungerar med vissa
bestämda apparater eller funktioner)
(sidan 35).
Ställa in upp till 24
makrokommandon med högst 32 på
varandra följande steg
Du kan ställa in upp till 24
makrokommandon med maximalt 32
efterföljande steg genom att trycka på en
enskild knapp (12 systemkontrollmakron
och 12 komponentmakron). Du kan
ändra hastigheten som makrona utförs
med. Alla makrokommandon för på/avfunktioner för Sony-komponenter har
förinställts innan leverans från fabriken.
Flera komponenter på en skärm
Om du använder många enheter
tillsammans behöver du inte ändra
skärmen.
När du tittar på DVD-filmer kan
tangenten för att starta DVD-systemet,
strömbrytaren för TV:n och mottagaren
samt tangenten för ändring av
ingångskälla visas på en och samma
skärm och användas, utan att du behöver
växla skärm.
Aliasfunktion
Knappar som du har minneslagrat på en
annan skärm kan länkas och behöver inte
läras in igen. Det kan t.ex. vara praktiskt
att visa strömbrytaren för TV:n eller
tangenten för val av ingångskälla på
CABLE-skärmen (sidan 43).
Med ett kanalmakro kan du ställa in
en kanal med en enda tangent
Upp till 4 tangenttryckningar kan
programmeras på makrotangenter. Om
du lagrar de tangentåtgärder du gör för
att ange ett kanalnummer på en
makrotangent, kan du sedan välja
kanalen genom att trycka på samma
makrotangent (sidan 41).
Lättanvänd LCD-display med
touchtangenter med blå
bakgrundsbelysning
Denna fjärrkontroll har en LCD med
touchtangenter som ändrar
tangentuppsättningen i enlighet med
vald komponent. Fjärrkontrollen är lätt
att manövrera eftersom endast de
tangenter som behövs för att styra vald
komponent visas. Bakgrundsbelysningen
möjliggör användning även i mörker.
SE
3
SE
Page 72

Innehållsförteckning
Förberedelser
Isättning av batterier ............................................................................................................ 6
Byte av batterier .................................................................................................................... 6
Knapparnas placering och funktion ...................................................................................... 7
Grundläggande tillvägagångssätt
Att ställa in koden för förinställda audio- och bildkomponenter ........................................ 8
Att ställa in en komponentkod ........................................................................................... 8
Att kontrollera om kodnumret fungerar......................................................................... 10
Att finna en komponentkod med sökfunktionen .......................................................... 11
Styrning av komponenter med fjärrkontrollen................................................................... 13
Styrning av volymen .......................................................................................................... 14
Angående styrning av komponenter ............................................................................... 14
Att använda icke-förinställda fjärrkontrollmanvövrer — Inlärningsfunktionen ................ 15
För riktig inlärning ............................................................................................................. 19
Att ändra eller radera en inlärd funktion för en tangent eller knapp......................... 19
Avancerade egenskaper
Styrning av volymen för bild-komponenter som anslutits till ett audiosystem ................. 21
Att exekvera en serie kommandon — Funktioner för systemkontroll ............................... 22
Att programmera en serie kommandon till SYSTEM CONTROL-knapparna.......... 23
Angående systemkontroll-manövrer............................................................................... 27
Att programmera en serie kommandon till komponentval-knapparna .................... 27
Att ändra intervallet mellan manöversteg ...................................................................... 29
Att lägga till en extra funktion till komponentval-knapparna ........................................... 30
Att programmera kommandot för strömpåslag för vald komponent (gäller endast
Sony-komponenter) ......................................................................................................... 30
Att lägga till ett kommando som behövs när en komponent väljs ............................. 32
Att kopiera inställningarna för en komponentval-knapp till en annan knapp................... 34
Att programmera en ofta använd tangentmanöver för SYSTEM CONTROL-knapparna..... 35
Angående inlärning av signaler för en luftkonditionerare .......................................... 37
Överföring av data mellan fjärrkontroller .......................................................................... 37
Att överföra data ................................................................................................................ 37
Att ta emot data .................................................................................................................. 40
Välja en kanal med en enda knapptryckning — Kanalmakrofunktion............................... 41
Skapa en aliaskomponenttangent (ALIAS) ......................................................................... 43
4
SE
Page 73

Att använda övriga funktioner
Låsning av reglagen — Låsfunktion ................................................................................... 46
Att skydda inställningarna — Låsfunktion för inställningar .............................................. 46
Ändring av tiden för automatiskt strömavslag av fjärrkontrollen ..................................... 47
Inställning av bakgrundsbelysningen för display-rutan ..................................................... 48
Inställning av touchtangenternas pipljud........................................................................... 50
Ställa in sändningsintervallet för att undvika felaktiga manövrer .................................... 51
Tekniska detaljer
Att observera ...................................................................................................................... 54
Underhåll ............................................................................................................................ 54
Tekniska data ...................................................................................................................... 54
Felsökning ........................................................................................................................... 55
Tillägg
Tabell över förinställda funktioner..................................................................................... 59
TV.......................................................................................................................................... 59
SAT........................................................................................................................................ 60
Videobandspelare ............................................................................................................... 61
DVD ...................................................................................................................................... 61
CBL (analog kabel-TV-box) ............................................................................................... 62
AMP ...................................................................................................................................... 63
CD ......................................................................................................................................... 64
MD ........................................................................................................................................ 64
TAPE..................................................................................................................................... 65
Snabbreferens över olika manövrer ................................................................................... 66
Index ................................................................................................................................... 68
5
SE
Page 74

Förberedelser
Isättning av batterier
Skjut upp luckan till batterifacket och sätt
i fyra R6-batterier (storlek AA) (medföljer
ej). Se till att + och – på batterierna är
riktade åt samma håll som + och – inne i
batterifacket.
Byte av batterier
Batterier för fjärrstyrning och
bakgrundsbelysning (fyra R6batterier (storlek AA))
Vid normal användning räcker alkaliska
batterier upp till 5 månader. Om
fjärrkontrollen inte fungerar som den ska
kan det bero på att batterierna håller på
att ta slut och att E visas på LCDpekskärmen. När skärmen blir suddig
eller bakgrundsbelysningen på
touchknapparna börjar bli svag är det
dags att byta ut de alkaliska batterierna
mot nya.
OBS!
Byte av batterier får inte ta längre än en dag;
annars kommer inställningar av kodnummer
(sidan 8) och inlärda fjärrstyrsignaler (sidan 15)
att raderas.
Angående batterier
• Använd inte gamla batterier tillsammans
med nya. Olika typer av batterier får inte
användas tillsammans.
• Om elektrolyt inne i batterierna skulle läcka
ut, måste den smutsiga ytan i batterifacket
torkas ren med en trasa och de gamla
batterierna bytas ut mot nya. Ta ur
batterierna när du planerar att inte använda
fjärrkontrollen under en längre tid, för att
undvika batteriläckage.
6
SE
Page 75

Knapparnas placering
och funktion
PROGRAM
OK
MENU EXIT
SYSTEM CONTROL
ABC
TV
SAT VCR
CD MD
1 Område för visning av komponent
Här visas namnet på vald komponent.
2 LCD-ruta med touchtangenter
(sidan 9)
Tangenterna som används för att
manövrera varje komponent visas här.
OBS!
Tryck inte på touchtangenterna med något
vasst föremål som t.ex. en nål eller en
kulspetspenna.
3 w +/–-knappar* (sidan 14, 22)
För att reglera volymnivån.
4 PROGRAM +/–-knappar
För val av program.
5 RECALL-knapp (sidan 44)
6 MUTING-knapp* (sidan 14, 22)
Dämpar ljudet. Tryck på knappen en
gång till för att återgå till föregående
volymnivå.
7 COMMANDER OFF-knapp
Stänger av strömmen för
fjärrkontrollen.
MORE
TAPE
MUTING
LIGHT COMMANDER OFF
DVDM1CBLM2AMP
RECALL
M3
8 LIGHT-knapp (sidan 49)
Används för att tända LCD-rutan i
mörker. Tryck på knappen en gång för
slå på ljuset, och en gång till för att slå
av det. Det är även möjligt att ställa in
så att bakgrundsbelysningen släcks
automatiskt efter en viss tid.
9 Komponentvalknappar
Väljer den komponent som skall
manövreras.
0 MORE-knapp (sidan 23)
Visar SYSTEM CONTROL-knapparna
och sifferknapparna.
qa SYSTEM CONTROL-knappar (sidan
22, 23)
Upp till 32 tangenttryckningar i följd
kan programmeras för var och en av
de tre SYSTEM CONTROLknapparna. Hela programmet kan
utföras automatiskt genom att trycka
på en enda tangent.
qs MENU-knapp
Öppnar menyskärmen för de knappar
och tangenter som har menyfunktion.
qd OK-knapp och knappar för
markörstyrning (sidan 15)
qf EXIT-knapp
Används för att gå ur
inställningsmenyn.
* Angående knapparna VOLUME +/–
och MUTING
Fjärrkontrollen reglerar eller dämpar TV:ns
volymnivå när du väljer en bildkomponent.
Fjärrkontrollen reglerar eller dämpar
förstärkarens volymnivå när du väljer en
audiokomponent.
Det är möjligt att ändra denna inställning också
(sidan 21).
Angående på/avslagning av
strömmen för fjärrkontrollen
För att slå på fjärrkontrollen kan du trycka på
en valfri knapp, förutom COMMANDER OFF,
eller peka på skärmen.
Du slår av fjärrkontrollen genom att trycka på
COMMANDER OFF. Om du inte använder
fjärrkontrollen slås den automatiskt av efter 10
minuter. Den här fördröjningen kan du ändra
om du vill (sidan 47).
7
SE
Page 76

Grundläggande tillvägagångssätt
Att ställa in koden för
förinställda audio- och
bildkomponenter
Se ”Tabell över förinställda funktioner”
(sidan 59) angående tangenternas och
knapparnas funktioner för varje
komponent.
Fjärrkontrollen är förinställd på fabriken
att styra AV-komponenter av märket
Sony (se nedanstående tabell). Hoppa
över följande anvisningar om du
använder fjärrkontrollen med
fabriksinställda Sony-komponenter.
Fjärrkontrollen kan också användas
tillsammans med andra förinställda AVkomponenter. För att använda den med
andra AV-komponenter, måste du följa
anvisningarna för att ställa i korrekt kod
för varje komponent.
Komponentvalknapp
TV
SAT
VCR
DVD
CBL
AMP
CD
MD
TAPE
M1
M2
M3
* Kassettdäck för analogt ljud
8
SE
Förinställd
komponent(er)
TV
Satellitmottagare
Videobandspelare
DVD-spelare
Kabelbox
Förstärkare
CD-spelare
MD-spelare
Kassettbandspelare*
TV/
videobandspelare
TV/DVD
TV/
Satellitmottagare
Fabriksinställning
Sony TV
Sony
satellitmottagare
Sony VHS
videobandspelare
(VTR3)
Sony DVDspelare
Sony
förstärkare
Sony CDspelare
Sony MDspelare
Sony
bandspelare
Sony VHS
videobandspelare/
Sony TV
Sony
bandspelare
Sony TV/Sony
satellitmottagare
Att ställa in en komponentkod
4
PROGRAM
2
TV
SAT VCR
3
CD MD
TAPE
DVDM1CBLM2AMP
M3
Exempel: Att ställa in en PhilipsTV
6
1 Se tabellerna i den medföljande
”Komponentkodnummer” och
sök efter den önskade
komponentens fyrsiffriga
kodnummer.
Om mer än ett kodnummer listas,
använd då det nummer som listas
först.
Till exempel, för att ställa in en
Philips-TV använder du kodnumret
”8086”.
Den första siffran i
komponentkodnumret står för
komponentkategori (TV,
videobandspelare osv.). Mer
information finns i tabellerna i den
medföljande
”Komponentkodnummer”.
Page 77

2 Medan COMMANDER OFF hålls
intryckt, tryck på MUTING.
Samtliga komponentnamn på
displayen blinkar.
3 Tryck på komponentvalknappen
för önskad komponent.
Vald komponent fortsätter att visas
och tangenterna 0 – 9, ENTER och
DISPLAY blinkar.
5 Om du vill ställa in en kod för en
annan komponent, upprepa då
punkt 3 och 4.
6 Tryck på COMMANDER OFF.
OBS!
• Om du matar in ett komponentkodnummer
som inte finns listat i tabellen i den
medföljande ”Komponentkodnummer”, hörs
ett pip från fjärrkontrollen och ”NG” (no
good; ogiltigt) blinkar efter att du tryckt på
ENTER-tangenten. Om detta skulle inträffa,
kontrollera då kodnumret och försök att
ställa in koden igen.
• Om inget matas in i fjärrkontrollen under
mer än två minuter, kommer
inställningsproceduren av avbrytas. För att
ange koden måste du trycka en gång till på
MUTING samtidigt som du trycker på
COMMANDER OFF.
• Den första siffran i komponentkodnumret
står för komponentkategori (TV,
videobandspelare osv.). Komponenten som
motsvarar den fyrsiffriga komponentkoden
förinställs i steg 4.
4 På pekskärmen anger du den
fyrsiffriga komponentkoden och
trycker sedan på ENTER.
Ett pip hörs och kodnumret och
”ENTER” visas två gånger.
Att kontrollera vilket
kodnummer som är inställt
Tryck på DISPLAY-tangenten i någon av
punkterna 3 till 5. Kodnumret och
”ENTER” visas två gånger.
forts.
9
SE
Page 78

Att ställa in koden för förinställda
audio- och bildkomponenter
(forts.)
Att kontrollera om
kodnumret fungerar
4 Om det lyckades, kontrollera då
att fjärrkontrollen kan styra
övriga funktioner i komponenten,
som till exempel styrning av
program eller volymnivå.
Se sidan 13 angående detaljer.
1 Tryck på motsvarande
komponentvalknapp för den
komponent som har ställts in.
Fjärrkontrollen sätts på och
touchtangenterna visas på displayen.
2 Slå på strömmen till
komponenten med dess
strömbrytare.
3 Rikta fjärrkontrollen mot
komponenten och tryck på 1-
tangenten på touch-rutan.
När fjärrstyrsignalen sänds visas i
teckenfönstret.
Komponenten torde stängas av.
5 Tryck på COMMANDER OFF.
Om fjärrkontrollen inte tycks fungera
Försök på nytt genom att upprepa dessa
inställningsprocedurer och använd andra
koder som finns listade för dina komponenter
(sidan 8).
Angående tangenter som redan
har ”lärt sig” en fjärrstyrsignal
Om en annan signal redan har
programmerats för denna tangent eller
knapp med hjälp av
inlärningsfunktionen (sidan 15), kommer
denna ”inlärda” signal att fortsätta att
fungera även efter att
komponentkodnumret har ställts in. För
att använda den som en förinställd
komponenttangent eller -knapp, radera
då först dess inlärda signal (sidan 19).
Angående visningen av
touchtangenter
När ett komponentkodnummer ställs in,
visas endast de tangenter som har
förinställts med signalerna för önskad
komponent. De förinställda signalerna
för de olika tangenterna varierar mellan
olika märken.
Genom att använda
inlärningsfunktionen, kan du
programmera fjärrstyrsignaler för både
tangenter som visas och för tangenter
som inte visas (sidan 15).
10
SE
Page 79

Att finna en komponentkod
med sökfunktionen
Det är möjligt att finna en komponentkod
som finns tillgänglig för en komponent
som saknar kod i den medföljande
”Komponentkodnummer”.
Innan sökningen påbörjas
Ställ varje komponent i följande läge för
att möjliggöra sökning.
TV: strömmen påslagen
VCR, DVD, SAT, CBL, AMP: strömmen
avslagen
CD, MD, TAPE: strömmen påslagen med
isatt uppspelningskälla (skiva,
kassettband, etc.)
PROGRAM
3
1
TV
SAT VCR
2
CD MD
TAPE
DVDM1CBLM2AMP
M3
6
2 Tryck på komponentvalknappen
för önskad komponent.
3 Sök efter komponentkodnummer
i samma kategori genom att
trycka på PROGRAM + eller
PROGRAM – (i det här fallet
kodnummer som börjar med ”8”).
Gå till nästa kodnummer genom att
trycka på PROGRAM +.
Gå till föregående kodnummer genom
att trycka på PROGRAM –.
PROGRAM
1 Medan COMMANDER OFF hålls
intryckt, tryck på MUTING.
Samtliga komponentnamn på
displayen blinkar.
Obs!
För att söka efter komponentkodnummer i en
annan kategori återgår du till steg 3, eller anger
en komponentkod för en annan kategori (t.ex.
ett kodnummer som börjar med ”3” ”4” osv.)
innan steg 4.
forts.
11
SE
Page 80

Att ställa in koden för förinställda
audio- och bildkomponenter
(forts.)
4 Rikta fjärrkontrollen mot
komponenten och tryck på 1-
tangenten på touch-rutan.
När fjärrstyrsignalen sänds visas i
teckenfönstret.
Om det fungerar som det ska
(strömmen av för TV:n, strömmen på
för VCR, DVD, SAT, CBL, AMP, och
uppspelning för CD, MD, TAPE), gå
vidare till punkt 5.
Om det inte fungerar, upprepa
punkterna 3 och 4.
5 Tryck på ENTER-tangenten.
Ett pip hörs och kodnumret och
”ENTER” visas två gånger.
Att kontrollera vilket
kodnummer som är inställt
Tryck på DISPLAY-tangenten i punkt 2
och 5. Kodnumret och ”ENTER” visas
två gånger.
Se noga till att du trycker på DISPLAYtangenten efter att ha tryckt på ENTERtangenten för att ställa in kodnumret. Om
du trycker på DISPLAY-tangenten innan
kodnumret har ställts in, återgår allt till
det första numret där sökningen
påbörjades.
OBS!
Det är bäst att skriva upp kodnumret.
6 Tryck på COMMANDER OFF.
12
SE
Page 81

Styrning av
komponenter med
fjärrkontrollen
Se till att ställa in komponentkoden först,
när en icke-Sony-komponent skall
manövreras (sidan 8).
2
PROGRAM
TV
SAT VCR
1
CD MD
TAPE
DVDM1CBLM2AMP
M3
3
2 Tryck på önskad tangent på rutan
med touchtangenter.
När fjärrstyrsignalen sänds, visas
på displayen.
Knapparna w +/–, knappen
MUTING och knapparna PROGRAM
+/– kan också användas vid behov.
Se ”Tabell över förinställda
funktioner” (sidan 59) angående
tangenternas och knapparnas
funktioner för varje komponent.
3 När fjärrkontrollen inte skall
användas mer, tryck på
COMMANDER OFF för att
stänga av fjärrkontrollen.
Exempel: Uppspelning på en CDspelare
1 Tryck på önskad komponentval-
knapp.
Fjärrkontrollen slås på och
tangenterna för manövrering av den
valda komponenten visas.
OBS!
Fjärrstyrsignalerna för vissa komponenter eller
funktioner kan vara annorlunda. I detta fall,
programmera in fjärrstyrsignalerna med hjälp
av inlärningsfunktionen (sidan 15). Observera
emellertid att komponenter och funktioner som
inte är gjorda att styras med infraröda signaler
inte kommer att fungera tillsammans med
denna fjärrkontroll.
forts.
13
SE
Page 82

Styrning av komponenter med
fjärrkontrollen (forts.)
Styrning av volymen
Tryck på knapparna MUTING +/– för att
styra volymen och knappen % för att
dämpa ljudet.
När du väljer en bildkomponent, styrs
TV:ns volym, och när du väljer en
audiokomponent styrs förstärkarens
volym.
Det är möjligt att ändra denna inställning
också (sidan 21).
OBS!
• Om inlärningsfunktionen (sidan 15) har
använts för att programmera in en signal för
knappen w eller MUTING för någon
komponent, kommer den signalen att sändas
istället för att styra volymen för TV:n eller
förstärkaren när den komponenten väljs.
• Om inlärningsfunktionen har använts för att
programmera in en signal för knappen w
eller MUTING för TV eller AMP, kommer
den signalen att sändas endast efter val av
TV eller AMP. När du väljer en annan
komponent kommer den förinställda
signalen för stryrning av volymen för TV
eller AMP att sändas vid det tillfället.
• Om en annan komponent har tilldelats TVeller AMP-knappen, går det inte att styra
volymen för TV:n eller förstärkaren även om
andra komponenter väljs.
Angående styrning av
komponenter
Info om ingångsval för en TV
Komponentkoden ”8132” är det
förinställda komponentkodnumret för
valet av ingången för en Sony TV. Du kan
ställa in det här kodnumret för en
komponentvalsknapp som inte används
så ofta.
Följ proceduren på sidan 8 för inställning
av ingångsval.
”0” : TV-mottagare
”1” : VIDEO1
”2” : VIDEO2
”3” : VIDEO3
”4” : VIDEO4
”5” : VIDEO5
”6” : VIDEO6
”7” : HD1
”8” : HD2
”9” : HD3
Den här inställningen kan användas för
programmering av SYSTEM CONTROLknapparna (sidan 41).
14
SE
Page 83

Att använda ickeförinställda
fjärrkontrollmanvövrer
— Inlärningsfunktionen
För att manövrera icke-förinställda
komponenter eller funktioner, använd
följande ”inlärnings”-procedur för att
”lära” någon av de programmeringsbara
knapparna eller tangenterna att
manövrera funktioner för en annan
fjärrkontroll. Inlärningsfunktionen kan
också användas för att ändra signalen för
individuella tangenter och knappar efter
att ha ställt in komponentkodnumret
(sidan 8). Det är lämpligt att göra
minnesanteckningar angående de inlärda
tangentfunktionerna i tabellen över LCDrutans touchtangenter (sidan 68).
OBS!
Vissa bestämda fjärrstyrsignaler kan inte läras
in.
Exempel: Att programmera N
(uppspelningsstart) signalen för
en komponent till VCR N
(uppspelningsstart) tangenten
på fjärrkontrollen
1 Placera sänddelen av denna
RM-AV2500T mittemot sänddelen
på fjärrkontrollen för
komponenten.
Fjärrkontrollen för
komponenten
ca. 5 – 10 cm
RM-AV2500T
2 Medan COMMANDER OFF hålls
intryckt, tryck på komponentvalknappen för den komponent vars
signaler skall läras in.
3
”LEARN” visas på displayen och
samtliga tangenter som kan läras
PROGRAM
6
TV
CD MD
SAT VCR
TAPE
DVDM1CBLM2AMP
M3
2
blinkar.
Teckenfönster för visning av knapparna
CHANNEL, VOLUME, MUTING, RECALL,
MENU, OK, EXIT samt markörknapparna.
forts.
15
SE
Page 84

Att använda icke-förinställda
fjärrkontrollmanvövrer
— Inlärningsfunktionen (forts.)
Teckenfönstret ”C+ C– V+ V- MUTE
RECALL MENU OK EXIT R r T t”
visar om knapparna PROGRAM +/–,
w +/–, MUTING, RECALL, MENU,
OK, EXIT och markörknapparna (T
t R r) är inlärningsbara eller ej.
Angående den blinkande
displayen
Tangenter eller knappar som redan är
förinställda för komponenten blinkar två
gånger medan de som inte är förinställda
blinkar en gång.
3 Tryck på den tangent eller knapp
på denna fjärrkontroll som ska
”läras”.
”LEARN” blinkar och endast den
tangent som trycktes in finns kvar på
displayen.
4 Tryck på knappen på den andra
fjärrkontrollen. Håll knappen
intryckt tills ett pip hörs.
(Om knappen släpps upp före pipet
kan det hända att signalen inte lärs in
korrekt.)
”LEARN” slutar blinkar och övergår
till att lysa konstant. När inlärningen
av kommandot har lyckats, lyser den
lärda tangenten konstant och övriga
tangenter som kan läras blinkar.
Om ”NG” blinkar på displayen
Inlärningen lyckades inte. Gör om
punkterna 3 och 4.
5 Upprepa punkterna 3 och 4 för att
lära in funktioner till andra
tangenter eller knappar.
Att lära in en annan komponents
fjärrstyrsignaler
Efter att ha placerat de två fjärrkontrollerna
som i punkt 1 på sidan 15, tryck på
motsvarande komponentvalknapp och följ
punkterna 3 och 4 här till vänster för att
utföra inlärningen.
Inlärning av knapparna PROGRAM
+/–, w +/– , MUTING, RECALL,
MENU, OK, EXIT samt
markörknapparna
Tryck på motsvarande knapp. ”LEARN”
blinkar och endast den knapp som trycktes
in fortsätter att visas på displayen (”C+”,
”C–”, ”V+”, ”V–”, ”MUTE”, ”RECALL”,
”MENU”, ”OK”, ”EXIT” eller ”R r T t” ).
Exempel: När knappen w + trycks in.
Att ändra funktionsvisningen för
tangenten
Följ anvisningarna på sidan 18.
16
SE
6 Tryck på COMMANDER OFF.
Page 85

OBS!
• Om inget inlärningssteg utförs inom två
minuter, avbryts läget för inlärning.
• Om punkt 4 inte utförs inom 10 sekunder
efter punkt 3, återgår displayen till visningen
i punkt 2. (Alla tangenter som kan läras
blinkar.) Utför i så fall punkt 3 igen medan
displayen blinkar.
• Om ”NG” visas under pågående inlärning,
betyder det att minnet är fyllt. För att frigöra
minne, radera inlärda funktioner från
tangenter som inte används så ofta (sidan 19).
Fortsätt därefter med inlärningsstegen.
• Om du av misstag trycker på fel tangent i
steg 4, trycker du på den felaktiga tangenten
igen, samtidigt som du håller knappen
LIGHT nedtryckt. Fortsätt sedan inlärningen
genom att börja om från steg 3.
Om fjärrkontrollen inte tycks fungera
Om den tangent eller knapp som lärts inte
fungerar korrekt, gör då om inlärningen. (Till
exempel, om volymnivån höjs väldigt mycket
efter att ha tryckt på knappen w + bara en
gång, kan det hända störningar påverkade
inlärningsproceduren.)
Om en komponentkod ställs in efter
att en signal lärts in
Om en signal har programmerats in för en
tangent eller knapp med hjälp av
inlärningsfunktionen, kommer den signalen att
fortsätta gälla för den tangenten eller knappen
även om en komponentkod ställs in.
När signaler lärs in för
knapparna w eller MUTING
•Om en signal har programmerats in på
knappen w eller MUTING för någon
annan komponent än TV eller AMP
med hjälp av inlärningsfunktionen,
kommer den signalen att sändas endast
när du väljer den komponenten.
•Om en signal har programmerats in på
knappen w eller MUTING för TV eller
AMP med hjälp av
inlärningsfunktionen, kommer den
signalen att sändas endast när du väljer
TV eller AMP. När du väljer andra
komponenter, kommer styrsignalen för
förinställd volymnivå för TV eller AMP
att sändas (angående olikheter mellan
bildkomponenter och
audiokomponenter, se sidan 21). För att
kunna använda den inlärda signalen,
måste du programmera knappen w
eller MUTING för varje komponent
med hjälp av inlärningsfunktionen.
När signalerna för en
luftkonditionerare lärs in
Se info på sidan 37.
forts.
17
SE
Page 86

Att använda icke-förinställda
fjärrkontrollmanvövrer
— Inlärningsfunktionen (forts.)
Att visa endast de tangenter
som används ofta
Det är möjligt att gömma tangenter som
inte används. Detta gör fjärrstyrningen
ännu enklare att förstå, när
komponenterna har många tangenter.
Efter steg 2 (sidan 15) trycker du på den
tangent som du inte vill ska visas
(blinkar), samtidigt som du håller
knappen LIGHT nedtryckt.
Den tangent som trycktes in övergår till
att blinka långsammare och kommer inte
att visas mer när fjärrkontrollen används.
Utför samma procedur igen för att visa
den igen.
OBS!
Det går inte att gömma en tangent som har
”lärt” sig en signal.
Att ändra funktionsvisningen för
en tangent
När en signal programmeras in för en
tangent, kan man välja den lämpligaste
funktionsvisningen bland alla de
visningar som gäller för den tangenten
och sedan ställa in denna för tangenten.
1 Efter punkt 2 (sidan 15): medan
komponentvalknappen (VCR)
hålls intryckt, tryck upprepade
gånger på den tangent som skall
läras.
För varje tryckning på tangenten,
ändras visningen i följd.
2 När önskat alternativ visas, släpp
upp komponentval-knappen.
3 Följ punkterna 4 till 6 (sidan 16).
OBS!
• Du kan ändra visningen för en tangent
endast när håller på att programmera den
med hjälp av inlärningsfunktionen. Om du
vill ändra visningen för en tangent som redan
har lärt sig en signal, måste signalen raderas
först (sidan 19). Gör sedan om inlärningen
och följ samtidigt ovanstående anvisningar
för att ändra tangentens visning.
• Om du inte ändrar visningen för en tangent,
används den visning som gäller som
grundinställning.
• Du kan inte ändra visningen för tangenter
som inte är inramade med
(sifferknapparna 0 till 9, +10 och ENTER).
18
SE
Page 87

För riktig inlärning
•Flytta inte på fjärrkontrollenheterna
under pågående inlärning.
•Se till att knappen på den andra
fjärrkontrollen hålls intryckt ända tills
du hör ett pip som bekräftar att det är
klart.
•Använd färska batterier i båda
fjärrkontrollenheterna.
•Undvik att utföra inlärningen i direkt
solsken eller i stark lysrörsbelysning.
•Fjärrkontrollens detektorområde kan
skilja sig för varje modell. Om
inlärningen inte fungerar, försök då att
ändra positionen för de två
fjärrkontrollenheterna.
•Vid inlärning av signaler för en
fjärrkontrollenhet med interaktivt
signalutbytessystem (medföljer vissa av
Sonys receivrar och förstärkare) till
denna fjärrkontroll, kan det hända att
svarssignalen från huvudenheten (dvs.
receivern el. förstärkaren) stör
inlärningen av denna fjärrkontroll.
Flytta i så fall till en plats där signalerna
inte når huvudenheten (t.ex. ett annat
rum, etc.).
VIKTIGT
Se till att fjärrkontrollen förvaras
utom räckhåll för små barn eller
sällskapsdjur. Använd även
låsfunktionen för att låsa alla
knapparna på fjärrkontrollen (sidan
46) när den inte används. Elartiklar
som till exempel luftkonditionerare,
el-element, elektriska apparater och
eldrivna persienner eller draperier
som sätts igång med en infraröd
signal kan vara farliga om de inte
används rätt.
Att ändra eller radera en
inlärd funktion för en
tangent eller knapp
För att ändra den inlärda funktionen,
radera den först och utför inlärningen på
nytt.
Att radera den inlärda
funktionen för en enstaka
tangent eller knapp
1 Efter steg 2 (sidan 15) trycker du
på den tangent eller knapp du vill
radera, samtidigt som du håller
knappen LIGHT nedtryckt.
Den raderade tangenten blinkar
tillsammans med andra tangenter
som kan läras.
2 Tryck på COMMANDER OFF.
Att radera alla inlärda tangenter på
en gång
Samtidigt som du håller LIGHT nedtryckt,
trycker du på komponentvalsknappen.
forts.
19
SE
Page 88

Att använda icke-förinställda
fjärrkontrollmanvövrer
— Inlärningsfunktionen (forts.)
Att radera samtliga signaler som
lärts in för en bestämd
komponent
PROGRAM
3 Tryck på COMMANDER OFF.
2
TV
SAT VCR
DVDM1CBLM2AMP
CD MD
TAPE
M3
1 Medan COMMANDER OFF hålls
intryckt, tryck på motsvarande
komponentvalknapp.
2 Tryck en gång till på
komponentvalsknappen
samtidigt som du håller knappen
LIGHT nedtryckt.
Det inlärda innehållet raderas.
Tangenterna för komponenten återgår
till vad som fanns ursprungligen före
inlärningen.
20
SE
3
1
Page 89

Avancerade egenskaper
Styrning av volymen
för bildkomponenter
som anslutits till ett
audiosystem
De inställningar för fjärrkontrollen som
gjorts på fabriken grundar sig på
antagandet att ljudet från dina bildkomponenter återges via TV:ns högtalare
och att ljudet från dina
audiokomponenter återges via
högtalarna som är anslutna till
förstärkaren.
Denna egenskap gör det möjligt att styra
volymen för TV:n eller förstärkaren utan
att behöva välja TV eller AMP varje gång
du vill styra volymen.
För att till exempel styra volymen medan
videon används, behöver du inte trycka
på TV-knappen för att styra volymen för
TV:n.
I nedanstående tabell visas
fabriksinställningarna för vilken volym
det är som styrs efter val av en viss
komponent.
Om dina bildkomponenter skulle vara
anslutna till ett audiosystem, återges
troligtvis TV:ns och videons ljud via
förstärkarens högtalare, inte från TV:ns
högtalare. I så fall behöver du ändra på
fabriksinställningen så att du kan styra
volymen för dina bildkomponenter utan
att först behöva koppla över till
förstärkaren.
Att ändra på fabriksinställningen
för volymkontrollen
PROGRAM
1
TV
SAT VCR
DVDM1CBLM2AMP
CD MD
TAPE
M3
Komponentvalknapp
TV
SAT
VCR
DVD
CBL
M1
M2
M3
AMP
CD
MD
TAPE
Styr volymen för en
TV
TV
TV
TV
TV
TV
TV
TV
förstärkare
förstärkare
förstärkare
förstärkare
21
SE
Page 90

Styrning av volymen för bildkomponenter som anslutits till ett
audiosystem (forts.)
1 Medan COMMANDER OFF
hålls intryckt, tryck på w + och
w –.
Volymkontrollinställningen för
bildkomponenter (TV, VCR, CBL, SAT
och DVD ändras till den komponent
som visas.
När förstärkarens
volym valts
När TV:ns
volym valts
OBS!
• Om någon slags signal redan har
programmerats in på knappen w eller
MUTING för varje komponent genom
”inlärning”, kommer ovanstående procedur
inte att ändra på funktionen för knapparna
w och MUTING.
• Om egna volymkontrollsignaler har
programmerats in på knapparna w eller
MUTING för TV eller AMP, kan den signalen
endast användas när TV eller AMP väljs. När
det gäller andra komponenter, sänds de
förinställda volymkontrollsignalerna för TV
eller AMP (allt beroende på vilken inställning
som gjorts enligt ovan). För att använda de
nya signalerna måste varje knapp för varje
komponent programmeras med hjälp av
inlärningsfunktionen (sidan 15).
Att exekvera en serie
kommandon
— Funktioner för systemkontroll
Med hjälp av funktionen för
systemkontroll kan du programmera en
serie av styrkommandon och exekvera
dem genom att trycka på en tangent.
När man till exempel tittar på en
videofilm, är en serie av manövrer som
de här nedan av nöd.
Exempel:
1 Slå på TV:n.
2 Slå på videon (VCR).
3 Slå på förstärkaren.
4 Ställa ingångsvalet för förstärkaren till
VIDEO 1.
5
Ställa ingångsläget för TV:n till VIDEO 1.
6 Starta uppspelningen av videon.
Det är möjligt att programmera in upp
till 32 på varandra följande manöversteg
på var och en av knapparna SYSTEM
CONTROL (A-C).
Om funktionen för systemkontroll har
ställts in för en komponentvalknapp
(sidan 27), exekveras de programmerade
kommandona när komponentvalknappen hålls intryckt i mer än 2
sekunder.
Medan de programmerade kommandona
exekveras, visas – samtidigt som varje
fjärrstyrsignal sänds – motsvarande
tangent på displayen.
22
SE
Page 91

Förinställda program för
knapparna SYSTEM CONTROL A
och C.
Knapparna SYSTEM CONTROL A och C
är fabriksinställda att utföra sina olika
program på följande sätt.
SYSTEM CONTROL A:
Slå av alla Sony-komponenter som
samtidigt kan ta emot signalerna från
fjärrkontrollen.
SYSTEM CONTROL C:
Slå på alla Sony-komponenter som
samtidigt kan ta emot signalerna från
fjärrkontrollen.
Att programmera en serie
kommandon till SYSTEM
CONTROL-knapparna
Exempel: Att programmera
ovanstående procedur till
SYSTEM CONTROL B-knappen
1 Samtidigt som du håller
COMMANDER OFF nedtryckt
trycker du på MORE.
SYSTEM CONTROL-knapparna (A –
C) och siffertangenterna (1 – 9)
blinkar, samtidigt som
snabbvalsknapparna fortsätter lysa.
2
PROGRAM
2 Välj systemnummer genom att
4
trycka på SYSTEM CONTROLknappen (i det här fallet SYSTEM
CONTROL B) eller
siffertangenten.
6
TV
SAT VCR
3
CD MD
TAPE
DVDM1CBLM2AMP
M3
1
Alla komponentnamn blinkar.
forts.
23
SE
Page 92

Att exekvera en serie kommandon
— Funktioner för systemkontroll
(forts.)
Att programmera en ny serie med
funktioner för knappar som redan
har ställts in
SYSTEM CONTROL A eller C:
Radera det fabriksinställda
programmet (sidan 26).
Övriga knappar:
Radera programmet (sidan 25).
3 Tryck på komponentvalsknappen
(i det här fallet TV) för den
komponent som du vill styra.
Tangenterna för vald komponent
blinkar.
Om komponenten har signaler för
på/avslag av strömmen
Både OFF- och ON-tangenten visas och
endera av dem kan väljas för
programmering.
4 Tryck på tangenten/tangenterna
eller knappen/knapparna för
önskad styrning.
Om du vill slå på strömmen till TV:n,
tryck på tangenten 1.
5 Upprepa punkterna 3 och 4 och
programmera knapparna för
serien av manövrer.
I detta exempel ska man trycka på
följande knappar och tangenter.
6 När du har programmerat alla
tangenter, tryck på
COMMANDER OFF.
Det är lämpligt att ställa in det exakta
kommandot för på/avslag av strömmen
och fjärrstyra komponenten oavsett om
strömmen till den är påslagen (on) eller
avslagen (off).
24
SE
Page 93

OBS!
• Om du avbryter proceduren i något moment
i mer än två minuter, avslutas
inställningsläget och den serie kommandon
som har programmerats fram till det
momentet lagras. Radera i så fall programmet
(sidan 25) och starta om från punkt 1 för att
lagra hela programmet från början. Det går
inte att fortsätta därifrån programmeringen
avbröts.
• Om en SYSTEM CONTROL-knapp redan har
”lärt sig” en fjärrstyrsignal (sidan 35), blinkar
”NG” på displayen och det går inte att
programmera någonting på den knappen.
Radera först det inlärda innehållet (sidan 36).
• Om du ändrar komponentkodnumret (sidan
8) eller programmerar en ny signal genom
inlärning (sidan 15) för en tangent eller
knapp som har programmerats med en serie
kommandon för en funktion för
systemkontroll, kommer den nya signalen att
sändas när du trycker på motsvarande
SYSTEM CONTROL-knapp.
•I inställningsläget kan du inte radera några
manöversteg som du har programmerat. Om
du programmerat in en funktion av misstag
får du börja om från steg 1.
• Om du försöker programmera fler än 32 steg
avslutas inställningen av systemkontrollen
och de 32 steg du har programmerat lagras i
minnet. Om du vill fortsätta programmera
måste du först radera programmet (sidan 25)
och börja om från steg 1.
Tips för programmering av
funktioner för systemkontroll
Följande information hjälper dig att
programmera på varandra följande
manöversteg.
Info om intervallet mellan
manöversteg
Det går att ändra intervallet mellan
manöversteg (sidan 29).
Info om manöverstegens
ordningsföljd
• Det kan hända att vissa av komponenter inte
accepterar på varandra följande
fjärrstyrsignaler. En TV till exempel reagerar
inte på nästa signal efter signalen för påslag
av strömmen. Därför kan det vara så att en
serie kommandon som t.ex. signal för
strömpåslag av TV:n och ingångsval inte
fungerar ordentligt. Lägg i så fall in andra
signaler såsom nedanstående exempel:
Strömpåslag av TV t strömpåslag av video
t uppspelning av video t ingångsval för
TV
• Efter att en serie inmatningskommandon har
exekverats, visar fjärrkontrollen
touchtangenterna för den komponent som
ligger sist i programmet. Genom att
programmera ett ofta använt kommando för
en komponent som sista steg, kan man
bespara sig besväret att trycka på en
komponentvalknapp, när man börjar
manövrera den komponenten. (I exemplet på
sidan 24, visas touchtangenterna för VCR.)
Att radera programmerade
kommandon
1 Samtidigt som du håller
COMMANDER OFF nedtryckt
trycker du på MORE.
SYSTEM CONTROL-knapparna (A –
C) och siffertangenterna (1 – 9) blinkar
samtidigt som snabbvalsknapparna
fortsätter lysa.
forts.
25
SE
Page 94

Att exekvera en serie kommandon
— Funktioner för systemkontroll
(forts.)
2 Samtidigt som du håller LIGHT
nedtryckt, trycker du på SYSTEM
CONTROL (A, B eller C) eller den
siffertangent (1 – 9) som du vill ta
bort de programmerade
kommandona från.
Programinnehållet för den valda
knappen raderas.
Om du vill göra ett nytt program för
denna SYSTEM CONTROL-knapp,
följer du punkterna 2 till 6 på sidorna
23 och 24.
Att radera knappen SYSTEM
CONTROL A eller C
Vid leverans från fabrik är knappen
SYSTEM CONTROL A förinställd med en
serie av kommandon för att slå av
strömmen på Sony-komponenter och
knappen SYSTEM CONTROL C med en
serie av kommandon för att slå på
strömmen på Sony-komponenter. Följ
nedanstående steg om du vill radera
kommandona från respektive knapp.
1 Samtidigt som du håller
COMMANDER OFF nedtryckt,
trycker du på MORE.
2 Samtidigt som du håller LIGHT
nedtryckt, trycker du på SYSTEM
CONTROL-knappen (A eller C).
Programmet för den valda knappen
raderas.
Att återställa SYSTEM CONTROLknappen A eller C till
fabriksinställningen
Så här gör du om du vill få tillbaka
fabriksinställningarna.
1 Samtidigt som du håller
COMMANDER OFF nedtryckt,
trycker du på MORE.
2 Samtidigt som du håller knappen
LIGHT nedtryckt, trycker du på
SYSTEM CONTROL-knappen (A eller
C).
Obs!
Intervallinställningen (sidan 29) återställs inte
till det fabriksinställda värdet när du utför de
här stegen.
26
SE
Page 95

Angående systemkontrollmanövrer
•Om det är för långt mellan de olika
fjärrstyrningsgivarna på
komponenterna, eller om det finns
något föremål i vägen, kan det hända
att vissa av komponenterna inte kan
fjärrstyras trots att du har tryckt på
SYSTEM CONTROL-knappen.
•Om några av komponenterna inte kan
fjärrstyras korrekt på grund av
ovanstående eller någon annan orsak,
måste samtliga komponenter återställas
till vad som gällde innan du tryckte på
SYSTEM CONTROL-knappen. Om
detta inte görs kan det resultera i
inkorrekt fjärrstyrning när du trycker
på SYSTEM CONTROL-knappen igen.
•Det kan hända att visa komponenter
inte slås på genom funktionen för
systemkontroll. Detta beror på att
strömmen till komponenten slås på och
av växelvis när den mottar signal för
på/avslag av strömmen. Kontrollera i
så fall om strömmen till komponenten
är påslagen eller avslagen innan du
använder funktionen för
systemkontroll.
•Om funktionen för systemkontroll inte
fungerar korrekt, se även ”Tips för
programmering av funktioner för
systemkontroll” på sidan 25.
Att programmera en serie
kommandon till
komponentvalknapparna
Liksom med SYSTEM CONTROLknapparna kan du också programmera
en serie styrkommandon för
komponentvalknapparna (upp till 32
manöversteg).
För att exekvera de kommandona som
programmerats på en komponentvalknapp genom funktionen för
systemkontroll, håll knappen intryckt i
mer än 2 sekunder.
OBS!
• De programmerade kommandona exekveras
när du håller en komponentvalknapp
intryckt i mer än 2 sekunder. När du trycker
på knappen kortare tid än 2 sekunder,
fungerar den som den normala
komponentvalknappen och motsvarande
touchtangenter visas.
• Se även ”Tips för programmering av
funktioner för systemkontroll” på sidan 25
och ”Angående systemkontrollmanövrer” på
sidan 27.
PROGRAM
TV
CD MD
SAT VCR
TAPE
DVDM1CBLM2AMP
1
M3
forts.
27
SE
Page 96

Att exekvera en serie kommandon
— Funktioner för systemkontroll
(forts.)
Exempel: Att programmera
proceduren på sidan 22 för VCRknappen
1 Medan COMMANDER OFF hålls
intryckt, tryck på w + och VCR.
Det komponentnamn som du har valt
lyser med ett stadigt sken samtidigt
som andra komponentnamn blinkar.
Om en serie kommandon redan
har programmerats för den
knappen
De programmerade tangenttryckningarna
visas i följd. För att programmera en ny
serie manövrer, radera först programmet
(sidan 25).
2 Följ punkterna 3 till 6 på sidan 24.
OBS!
• Det är möjligt att programmera funktioner
för systemkontroll för en komponentvalknapp på vilken funktionen för strömpåslag
(sidan 30) redan finns programmerad. I det
fallet kommer funktionen för strömpåslag att
skrivas över och kan inte längre användas.
Om funktioner för systemkontroll för den
knappen raderas, återställs funktionen för
strömpåslag och det går att använda den
igen.
• Det går inte att programmera funktioner för
systemkontroll för en komponentvalknapp
för vilken en signal redan har programmerats
genom ”inlärning” (sidan 32). (”NG” blinkar
på displayen.)
• Det går att programmera en signal för en
komponentvalknapp genom ”inlärning”
(sidan 32) för vilken funktioner för
systemkontroll har programmerats. I det
fallet kommer funktionen för systemkontroll
att skrivas över och kan inte längre användas.
Om den ”inlärda” signalen raderas från
knappen, återställs funktionen för
systemkontroll och det går att använda den
igen.
• Det är möjligt att programmera funktionen
för strömpåslag (sidan 30) för en
komponentvalknapp för vilken en funktion
för systemkontroll har programmerats, men
det går inte att använda funktionen för
strömpåslag. Om funktionen för
systemkontroll raderas från den knappen, går
det att använda funktionen för strömpåslag.
• Om du avbryter proceduren i något moment
i mer än två minuter, avslutas
inställningsläget och den serie kommandon
som har programmerats fram till det
momentet lagras. Radera i så fall programmet
och starta om från punkt 1 för att lagra hela
programmet från början. Det går inte att
fortsätta därifrån programmeringen avbröts.
• Om du ändrar komponentkodnumret (sidan
8) eller programmerar en ny signal genom
inlärning (sidan 15) för en tangent eller
knapp som har programmerats med en serie
kommandon för en funktion för
systemkontroll, kommer den nya signalen att
sändas när du trycker på motsvarande
komponentvalknapp.
28
SE
Page 97

Att radera en funktion för
systemkontroll som
programmerats för en
komponentvalknapp
1 Medan COMMANDER OFF hålls
intryckt, tryck på w + och VCR.
Att ändra intervallet mellan
manöversteg
Du kan använda intervallet 100 – 900 ms
i steg om 100 ms.
3
2 Samtidigt som du håller LIGHT
nedtryckt, trycker du på VCR.
Programmet för den valda knappen
raderas.
Om du vill göra ett nytt program för
denna komponentvalknapp, följ då
punkterna 1 till 2 på sidan 28.
PROGRAM
1
2
TV
SAT VCR
DVDM1CBLM2AMP
CD MD
TAPE
M3
4
1 Medan COMMANDER OFF hålls
intryckt, tryck på PROGRAM +
och PROGRAM –.
PROGRAM PROGRAM
Inlärningsbara SYSTEM CONTROLknappar och siffertangenter blinkar i
teckenfönstret.
forts.
29
SE
Page 98

Att exekvera en serie kommandon
— Funktioner för systemkontroll
(forts.)
2 Tryck på en av SYSTEM
CONTROL-knapparna (A, B eller
C), någon av siffertangenterna
eller den komponentvalsknapp
vars intervall du vill ändra.
Siffran för gällande inställning lyser
konstant och övriga siffror blinkar.
3 Tryck på en av siffertangenterna
(1 – 9) för att välja intervall.
1: ca 100 ms (fabriksinställning)
2: ca 200 ms
...
9: ca 900 ms
(ms: 1/1000 sekund)
Att lägga till en extra
funktion till
komponentvalknapparna
Att programmera
kommandot för strömpåslag
för vald komponent (gäller
endast Sony-komponenter)
När Sony-komponenter används, kan
signalen för strömpåslag för varje
komponent programmeras på en
komponentvalknapp. Du kan välja
önskad komponent och slå på strömmen
genom att enkelt trycka på den
komponentvalknappen.
PROGRAM
Siffran som valts lyser konstant och
övriga siffror blinkar.
4 Tryck på COMMANDER OFF.
30
SE
TV
CD MD
SAT VCR
TAPE
DVDM1CBLM2AMP
1
M3
Page 99

Exempel: Att programmera TVknappen
1 Medan COMMANDER OFF hålls
intryckt, tryck på w – och
önskad komponentvalknapp.
TV
När kommandot för strömpåslag har
programmerats, hörs ett pip och ”1
ON” visas på displayen. (Visningen
tas bort när du släpper upp
tangenterna.)
Att radera kommandot för
strömpåslag
Upprepa ovanstående procedur.
Följande visas på displayen.
OBS!
• Om en komponentkod för en ickeSonyprodukt har ställts in för komponentvalknappen, går det inte att programmera
funktionen för strömpåslag för den knappen.
• Även om du har programmerat en signal
genom ”inlärning” (Se ”Att lägga till ett
kommando som behövs när en komponent
väljs” sidan 32.) eller en funktion för
systemkontroll (sidan 27) för en
komponentvalknapp, kan du programmera
funktionen för strömpåslag för den knappen,
men det går inte att använda den. Om du
raderar en ”inlärd” signal eller funktionen för
systemkontroll från knappen, kan du
använda funktionen för strömpåslag.
• Det går att programmera en signal knapp
genom ”inlärning” (sidan 32) eller en
funktion för systemkontroll (sidan 27) för en
komponentvalknapp för vilken funktionen
för strömpåslag har programmerats. I det
fallet kommer funktionen för strömpåslag att
skrivas över och kan inte längre användas.
Om den ”inlärda” signalen eller funktionen
för systemkontroll raderas från den knappen,
återställs funktionen för strömpåslag och det
går att använda den igen. Om du har
programmerat både en signal genom
”inlärning” och en funktion för
systemkontroll för knappen, har den
”inlärda” signalen skrivits över funktionen
för systemkontroll.
forts.
31
SE
Page 100

Att lägga till en extra funktion till
komponentval-knapparna (forts.)
Exempel: Att programmera
ingångsvalssignalen för
förstärkaren till CD-knappen
Att lägga till ett kommando
som behövs när en
komponent väljs
Förutom komponentvalknappens
ursprungliga funktion att välja
styrtangenter och styrknappar för önskad
komponent, kan en annan fjärrstyrsignal
läggas till den genom ”inlärning”.
Om du till exempel alltid måste ändra
ingångsvalet för förstärkaren till CD när
du använder CD-spelaren, kan du
programmera signalen för ”ändring av
förstärkarens ingångsval” till CDknappen på denna fjärrkontroll. När CDknappen sedan trycks in, fungerar den
automatiskt som den ursprungliga CDkomponentvalknappen och ändrar även
förstärkarens ingångsval till CD. (I detta
fall måste förstärkaren slås på först.)
OBS!
Vissa bestämda fjärrstyrsignaler kan inte läras
in.
1 Placera sänddelen av denna
RM-AV2500T mittemot sänddelen
på fjärrkontrollen för
komponenten.
Fjärrkontrollen för
komponenten
ca. 5 – 10 cm
RM-AV2500T
2 Medan COMMANDER OFF hålls
intryckt, tryck på PROGRAM +
och w +.
PROGRAM
Inlärningsbara SYSTEM CONTROLknappar och siffertangenter blinkar i
teckenfönstret.
32
PROGRAM
2
OBS!
TV
SAT VCR
3
SE
CD MD
TAPE
DVDM1CBLM2AMP
M3
5
Namnet på en komponentvalknapp för
vilken en signal redan har lärts in lyser
konstant. Om du vill programmera en ny
signal för den knappen genom inlärning,
radera då först den inlärda signalen (sidan
33).
 Loading...