

Sony PlayStation 3 Controller Owner's Manual
WARNING: PHOTOSENSITIVITY/EPILEPSY/SEIZURES
A very small percentage of individuals may experience epileptic seizures or blackouts when exposed
to certain light patterns or flashing lights. Exposure to certain patterns or backgrounds on a television
screen or when playing video games may trigger epileptic seizures or blackouts in these individuals.
These conditions may trigger previously undetected epileptic symptoms or seizures in persons who
have no history of prior seizures or epilepsy. If you, or anyone in your family, has an epileptic
condition or has had seizures of any kind, consult your physician before playing. IMMEDIATELY
DISCONTINUE use and consult your physician before resuming gameplay if you or your child
experience any of the following health problems or symptoms:
• dizziness • eye or muscle twitches • disorientation • any involuntary movement
• altered vision • loss of awareness • seizures or convulsion.
RESUME GAMEPLAY ONLY ON APPROVAL OF YOUR PHYSICIAN.
______________________________________________________________________________
Use and handling of video games to reduce the likelihood of a seizure
• Use in a well-lit area and keep as far away as possible from the television screen.
• Avoid large screen televisions. Use the smallest television screen available.
• Avoid prolonged use of the PlayStation
®
3 system. Take a 15-minute break during each hour of play.
• Avoid playing when you are tired or need sleep.
______________________________________________________________________________
Stop using the system immediately if you experience any of the following symptoms: lightheadedness,
nausea, or a sensation similar to motion sickness; discomfort or pain in the eyes, ears, hands, arms,
or any other part of the body. If the condition persists, consult a doctor.
NOTICE:
Use caution when using the DUALSHOCK
®
3 wireless controller motion sensor function. When using the
DUALSHOCK
®
3 wireless controller motion sensor function, be cautious of the following points. If the
controller hits a person or object, this may cause accidental injury or damage. Before using, check
that there is plenty of space around you. When using the controller, grip it firmly to make sure it
cannot slip out of your hand. If using a controller that is connected to the PS3™ system with a USB
cable, make sure there is enough space for the cable so that the cable will not hit a person or object.
Also, take care to avoid pulling the cable out of the PS3™ system while using the controller.
WARNING TO OWNERS OF PROJECTION TELEVISIONS:
Do not connect your PS3™ system to a projection TV without first consulting the user manual for your
projection TV, unless it is of the LCD type. Otherwise, it may permanently damage your TV screen.
HANDLING YOUR PS3™ FORMAT DISC:
• Do not bend it, crush it or submerge it in liquids. • Do not leave it in direct sunlight or near a radiator
or other source of heat. • Be sure to take an occasional rest break during extended play. • Keep this
disc clean. Always hold the disc by the edges and keep it in its protective case when not in use. Clean
the
disc with a lint-free, soft, dry cloth, wiping in straight lines from center to outer edge. Never use
solvents or abrasive cleaners.
getting started ....................................................... 2
introduction ............................................................ 3
Playstation®3 controller ................................. 3
controls—neW! .......................................................4
the game screen .....................................................18
suPersta r selection ............................................18
main menu ................................................................. 19
WWe universe ......................................................... 19
limb target system—neW! ...................................21
extreme rules controls ....................................23
tlc controls ...........................................................24
steel cage match controls .............................27
hell in a cell match controls .......................28
elimination chamber controls ......................29
tag team controls .............................................. 30
inferno match ........................................................32
royal rumble controls ..................................... 33
Playstation®netWork ........................................34
suPerstar abilities...............................................36
did you knoW…? .....................................................38
limited Warranty .................................................39
All WWE programming, talent names, images, likenesses, slogans, wrestling moves, trademarks, logos and copyrights are the exclusive property of WWE and its subsidiaries. All other
trademarks, logos and copyrights are the property of their respective owners. © 2011 WWE. All Rights Reserved.
© 2011 THQ Inc. Used under exclusive license by THQ Inc. Developed by YUKE’S Co., Ltd. YUKE’S Co., Ltd. and its logo are trademarks and/or registered trademarks of YUKE’S Co., Ltd.
Uses Bink Video. Copyright © 1997-2011 by RAD Game Tools, Inc. Wwise ©2006-2011 Audiokinetic Inc. All rights reserved. THQ and the THQ logo are trademarks and/or registered
trademarks of THQ Inc. All rights reserved. All other trademarks, logos and copyrights are property of their respective owners.
Lua 5.1 Copyright © 1994-2008 Lua.org, PUC-Rio.
Permission is hereby granted, free of charge, to any person obtaining a copy of this software and associated documentation files (the “Software”), to deal in the Software without
restriction, including without limitation the rights to use, copy, modify, merge, publish, distribute, sublicense, and/or sell copies of the Software, and to permit persons to whom the
Software is furnished to do so, subject to the following conditions:
THE SOFTWARE IS PROVIDED “AS IS”, WITHOUT WARRANTY OF ANY KIND, EXPRESS OR IMPLIED, INCLUDING BUT NOT LIMITED TO THE WARRANTIES OF MERCHANTABILITY, FITNESS
FOR A PARTICULAR PURPOSE AND NONINFRINGEMENT. IN NO EVENT SHALL THE AUTHORS OR COPYRIGHT HOLDERS BE LIABLE FOR ANY CLAIM, DAMAGES OR OTHER LIABILITY,
WHETHER IN AN ACTION OF CONTRACT, TORT OR OTHERWISE, ARISING FROM, OUT OF OR IN CONNECTION WITH THE SOFTWARE OR THE USE OR OTHER DEALINGS IN THE SOFTWARE.
Table of ConTenT s
NOTICES:
Video output in HD requires cables and an HD-compatible display, both sold separately.
Voice chat requires a headset, sold separately. Compatible with most Bluetooth and USB
wired headsets. Some limitations apply.
Playstation®3 system
Starting a game: Before use, carefully read the instructions supplied with the PS3™ computer
entertainment system. The documentation contains information on setting up and using your
system as well as important safety information.
Check that the MAIN POWER switch (located on the system rear) is turned on. Insert the
WWE ’12 disc with the label facing up into the disc slot. Select the icon for the software title
under [Game] in the PS3™ system’s home menu, and then press the
≈
button. Refer to this
manual for information on using the software.
Quitting a game: During gameplay, press and hold down the PS button on the wireless
controller for at least 2 seconds. Then select “Quit Game” from the screen that is displayed.
To remove a disc, touch the eject button after quitting the game.
Trophies: Earn, compare and share trophies that you earn by making specific in-game
accomplishments. Trophies access requires a PlayStation®Network account.
saved data for Ps3™ format softWare
Saved data for PS3™ format software is saved on the system’s hard disk.
The data is displayed under “Saved Game Utility” in the Game menu.
WWE ’12 has all the bone-crushing, high-flying, showboating, slobberknocking action you’ve
come to expect—plus a whole lot more.
Use the completely revamped Limb Targeting system to pick apart an opponent and find his
breaking point. Or, add insult to injury with a Wake-Up Taunt before putting him down for the
count and making him wish he’d never stepped into the ring with you. And speaking of the ring,
the all-new Arena Creator lets you customize every aspect of the ring, right down to the logo on
the apron.
You’ve never had this much control over creating the ultimate WWE experience, or so many
ways to bring the pain. So what are you waiting for? Lace up your boots and hit the entrance
ramp—your journey to WWE immortality begins now!
Note: These are the commands for Control Type A, the default control type. Control Type B
is available in the game options and reverses the commands for the directional buttons and
the left stick.
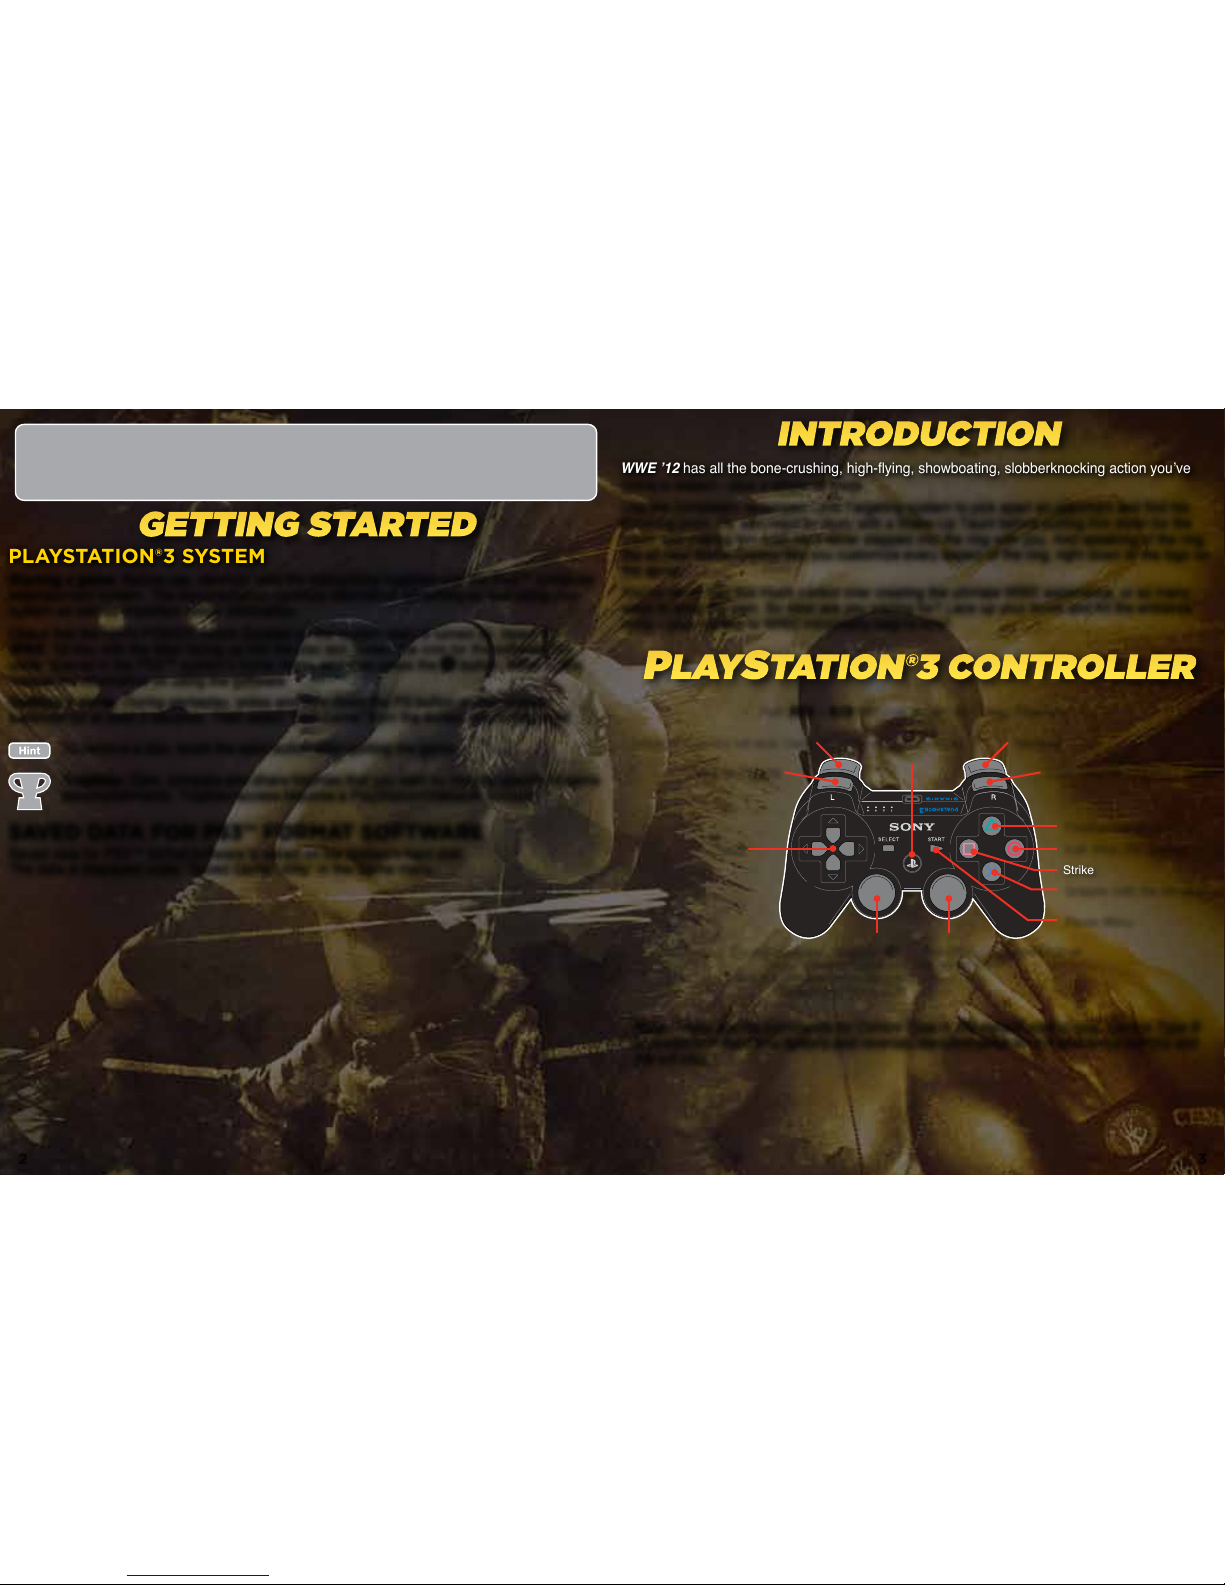
InTroduCTIon
Play sTaTIon®3 ConTroller
geTTIng s TarTed
Taunt
(Hold) +
push the left stick: Dash
Hold ß + ƒ and push the left stick: Drag Opponent
Pick up Objects
Grapple (with the left stick)
Pause Menu
Strike
Finisher/Signature Move
Limb Targeting System - NEW!
Reversal
PlayStation® Menu
Irish Whip, Pin Attempt
Control Superstar, Grapple (≈),
Target Different Opponent
(click the left stick) when Manual
Targeting is Turned ON
Reposition Opponent/Change
Grappled State
2 3
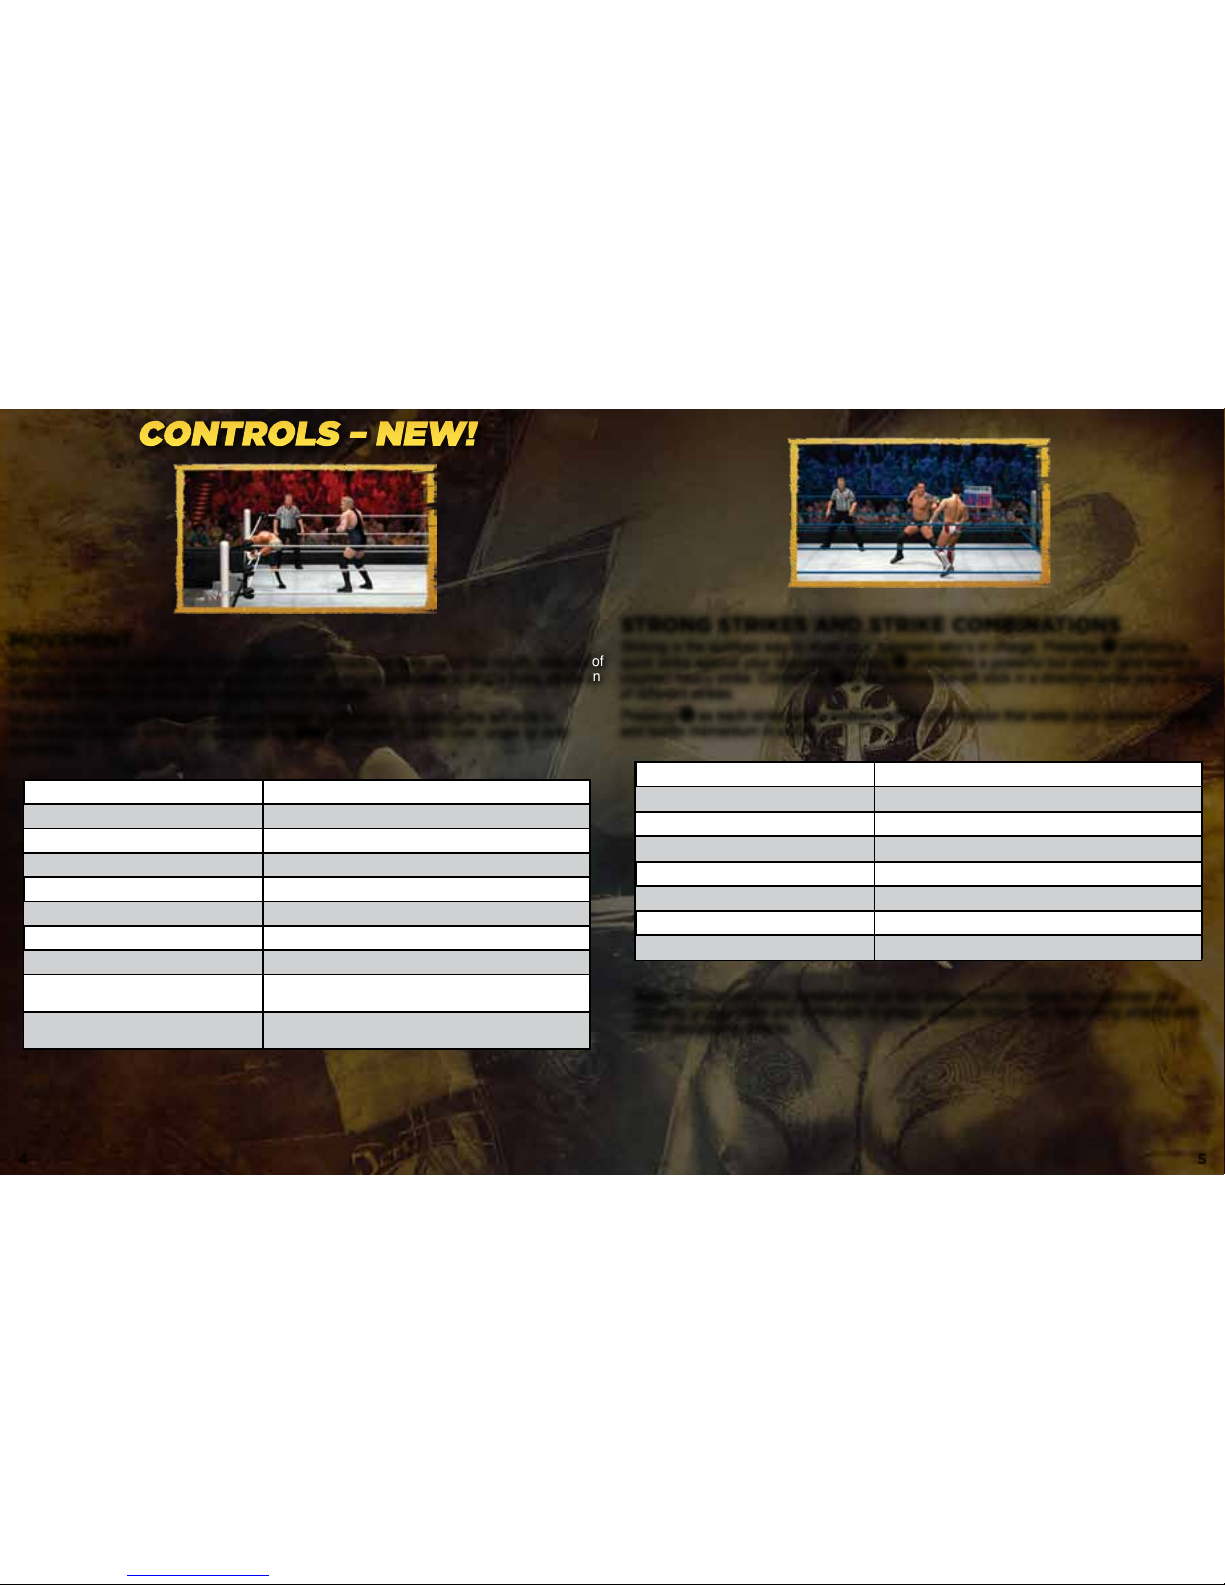
movement
Whether you want to walk up to your opponent and smack the taste out of his mouth, slide out of
the ring to settle things on the arena floor or climb up onto a turnbuckle to drop a flying elbow on
a helpless victim, it all starts with knowing how to navigate.
Most of the time, moving around the environment is as simple as pushing the left stick in
the direction that you want to go and pressing
å
if you need to climb over, under or onto
something.
ConTrols – new!
Move Superstar Push the left stick
Go to apron from ring Push the left stick toward outside of ring + tap
å
Go outside of ring from inside ring Push the left stick toward outside of ring + hold
å
Descend from apron to outside of ring Push the left stick toward outside of ring + press
å
Ascend to apron from outside of ring Push the left stick toward ring + tap
å
Enter ring from outside of ring Push the left stick toward ring + hold
å
Enter ring from apron Push the left stick toward ring + press
å
Dash Hold ß + push the left stick
Climb turnbuckle
Hold
å
+ push the left stick toward corner post or run
toward corner post
Climb corner from outside of ring
Hold
å
+ push the left stick toward steep post from
outside of ring
strong strikes and strike combinations
Striking is the quickest way to show your opponent who’s in charge. Pressing √ performs a
quick strike against your opponent. Holding
√
unleashes a powerful but slower (and easier to
counter) heavy strike. Combining
√
while pushing the left stick in a direction gives you a variety
of different strikes.
Pressing
√
as each strike lands creates a strike combination that sends your opponent reeling
and builds momentum in a hurry.
Strike Attack Press
√
Alternate Strike Attacks
Press
√
+ the left stick ∫/ ñ/µ/≤/˙/
∆
Strong Strike Hold
√
Alternate Strong Strike
Hold
√
+ the left stick ∫/ ñ/µ/
≤
2-hit Combo
√
during Strike Attack
3-hit Combo
√
during 2nd combo hit
4-hit Combo
√
during 3rd combo hit
Gut Kick
√
+ the left stick ˙or
˚
Note: A successful strike combination (all four strikes connect) leaves the opponent in a
standing groggy state and vulnerable to groggy grapple moves, top rope diving attacks and
other devastating attacks.
4 5
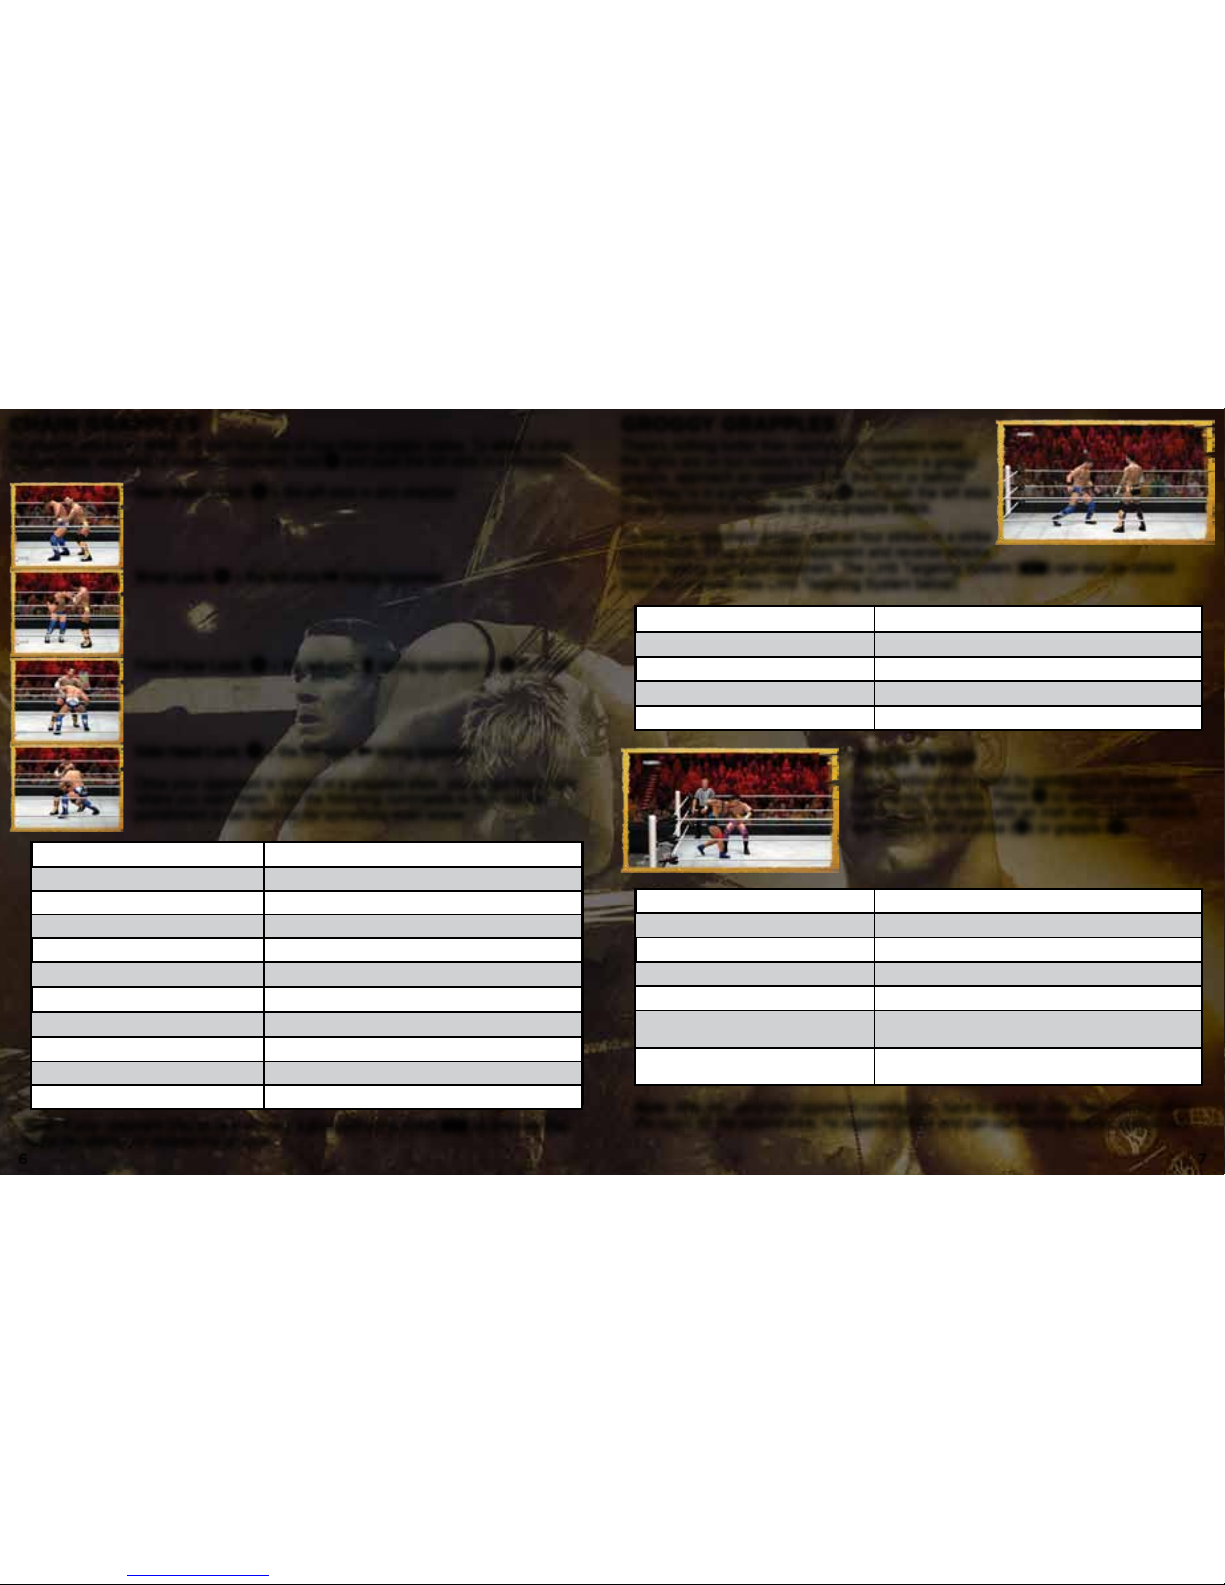
chain graPPles
All grapple attacks in WWE ’12 start from one of four chain grapple states. To enter a chain
grapple state, approach a standing opponent, hold
≈
and push the left stick in a direction.
Rear Waist Lock: ≈ + the left stick in any direction
Wrist Lock: ≈ + the left stick ñ facing opponent
Front Face Lock: ≈ + the left stick µ facing opponent or ≈ by itself
Side Head Lock: ≈ + the left stick ∫ facing opponent
Once your opponent is locked in a grappled state, you’ve got them right
where you want them. Use the following commands to dish out the
punishment or set them up for something even worse:
groggy graPPles
There’s nothing better than catching an opponent when
the lights are on but nobody’s home. To perform a groggy
grapple, approach an opponent from the front or behind
while they’re in a groggy state, tap
≈
and push the left stick
in any direction to execute a strong grapple attack.
To make an opponent groggy, land all four strikes in a strike
combination, lift up a downed opponent and reverse attacks
from a heavily damaged opponent. The Limb Targeting System (
∂
) can also be utilized
(read up on the all-new Limb Targeting System below).
irish WhiP
Take control of the match by sending your opponent
running out of control. Press
Ω
to send your opponent
running into the ropes with an Irish whip. Catch them on
the rebound with a strike (
√
) or grapple (≈).
Grapple Attack (4 different kinds)
≈
+ the left stick ∫/ ñ/µ/
≤
Breaking Point Submission Hold
≈
Strike Press
√
Strong Strike Hold
√
Irish Whip
Ω
Transition to Front Face Lock
Right stick
µ
Transition to Wrist Lock
Right stick
ñ
Transition to Rear Waist Lock
Right stick
≤
Transition to Side Head Lock
Right stick
∫
Walk Opponent Around the Ring Hold ß + ƒ and push the left stick
Release Chain Grapple Hold
∂
Front Grapple Attack (4 different kinds)
≈
+ the left stick
∫/ ñ/µ/≤
facing opponent
Rear Grapple Attack (4 different kinds)
≈
+ the left stick
∫/ ñ/µ/≤
behind standing opponent
Front Breaking Point Submission Hold
≈
facing opponent
Rear Breaking Point Submission Hold
≈
behind standing opponent
Switch to Front Face Lock/Drag Hold
ß
and
ƒ
Irish Whip Opponent
Ω
Counter Strike
√
when opponent is running at you
Counter Grapple
≈
when opponent is running at you
Alternate Counter Grapple Hold
≈
when opponent is running at you
Duck or Leap Frog Running Opponent
å
when opponent is running at you
Pull Back Grapple
Press
≈
in the midst of performing an Irish whip (before
opponent is released)
Pull Back Strike
Press
√
in the midst of performing an Irish Whip
(before opponent is released)
Note: If your opponent tries to lock you into a grappled state, press ƒ as soon as they
make the attempt to reverse the grapple.
Note: After you send your opponent running, you have to act fast. After they bounce off of
the ropes for the second time, he regains control and can use running attacks against you.
6 7
reversals
Just because some jobber throws a punch at you, that doesn’t mean you have to stand there
and take it! Press
ƒ
as soon as the opponent’s strike is about to land or grapple attack to
reverse it.
If you reverse a punch or a kick, you grab hold of your opponent’s arm or leg and have a short
window of opportunity to counterattack!
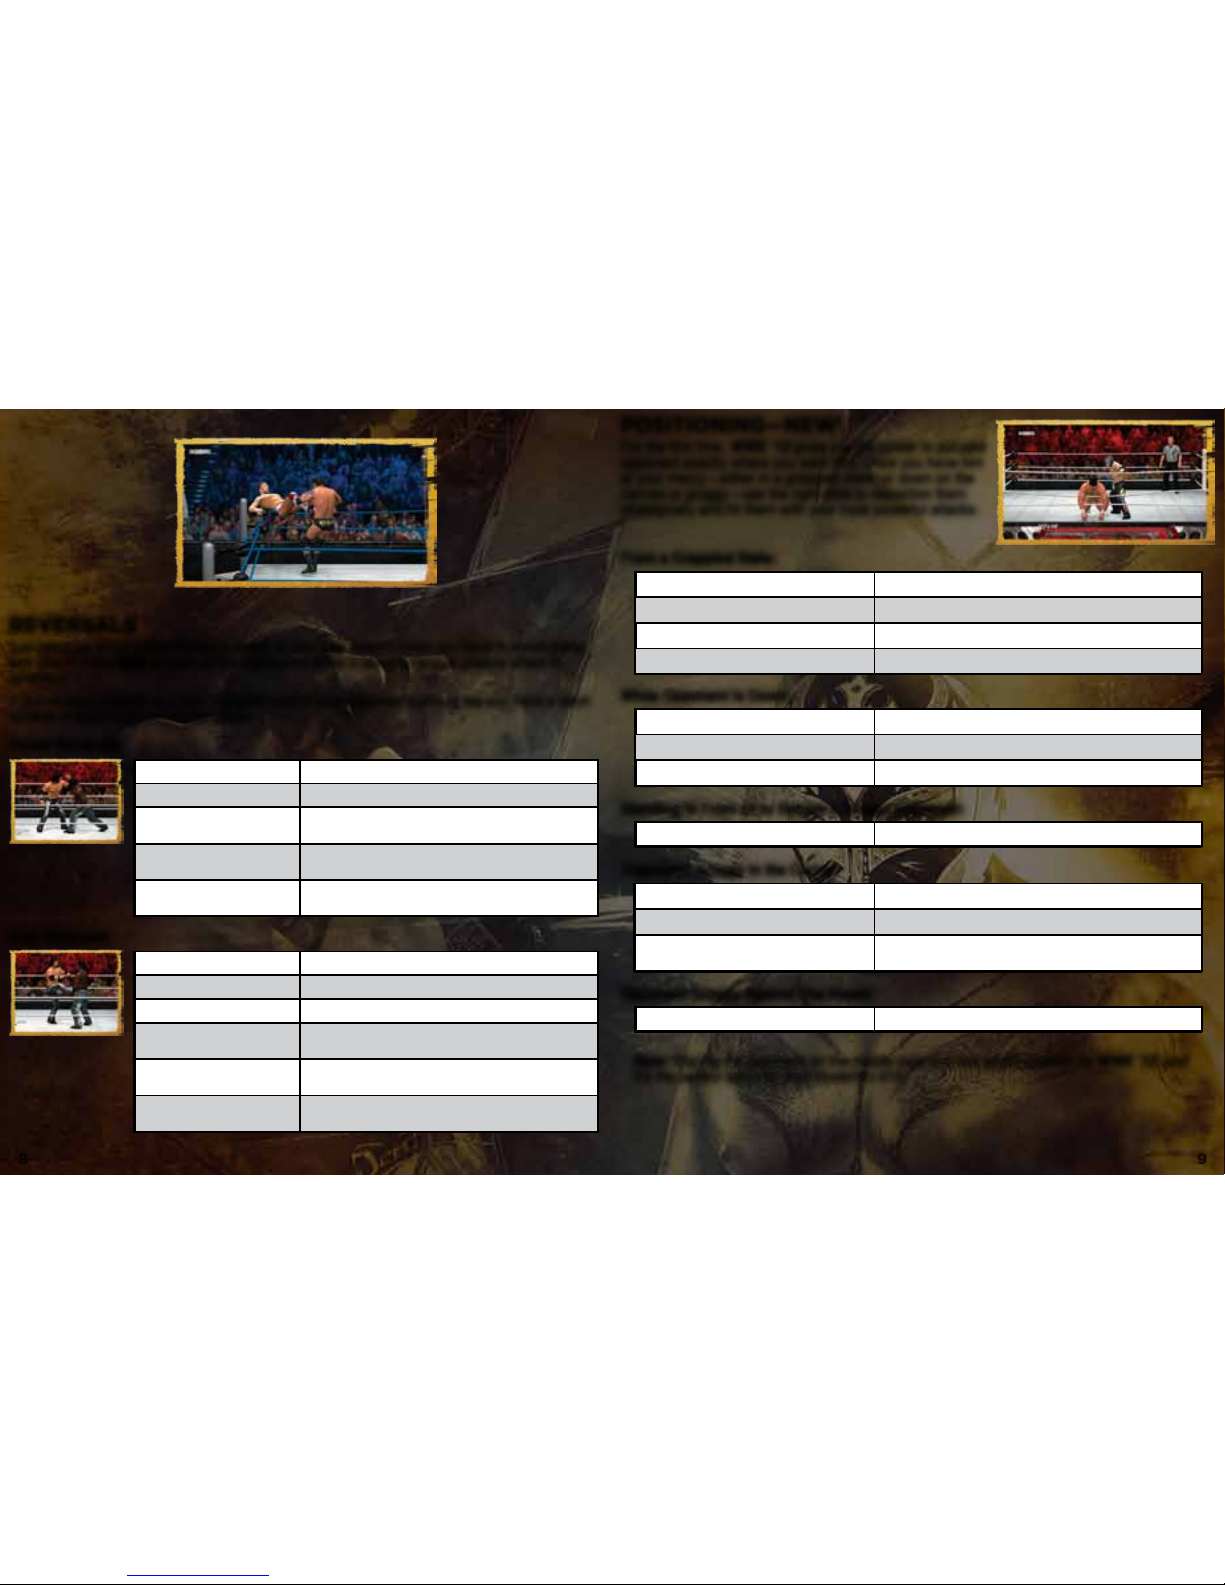
Positioning—neW!
For the first time, WWE ’12 gives you the power to put your
opponent exactly where you want him. Once you have him
at your mercy—either in a grappled state, or down on the
canvas or groggy—use the right stick to reposition them
strategically and hit them with your most powerful attacks.
From a Grappled State:
While Opponent Is Down:
Opponent Groggy In the Corner:
Standing In Front Of or Behind a Groggy Opponent:
Opponent Groggy Against The Ropes:
Front Facelock
Right stick
µ
Side Headlock
Right stick
∫
Waist Lock
Right stick
≤
Wrist Lock
Right stick
ñ
Lift Opponent
Right stick
µ
Turn Opponent Over
Right stick
∫/ ñ
Lift Opponent and Get Behind Him
Right stick
≤
Turn Opponent Around
Right stick
∫/ ñ
Lift to Top Of Turnbuckle
Right stick
µ
Place In Tree Of Woe (Hanging Upside
Down In Corner)
Right stick
≤
Turn Opponent Around
Right stick
∫/ ñ/µ/≤
Place Opponent On Middle Rope
Right stick
∫/ ñ/µ/≤
Note: Placing the opponent on the middle rope is a new attack position for WWE ’12, and
it’s the perfect setup for Rey Mysterio’s 619.
Punch Reversals
Kick Reversals
Strike
√
Chain Grapple
≈
or the right stick
Finishing Move
ç
, if you have a Finishing Move Icon and your
Superstar has a front or rear finisher
Breaking Point
Submission
Hold
≈
Reverse the Reversal
ƒ
as soon as your opponent attempts to reverse
your attack
Strike
√
Chain Grapple Right stick
Kick Reversal Grapple
≈
Finishing Move
ç
, if you have a Finishing Move Icon and your
Superstar has a front or rear finisher
Breaking Point
Submission
Hold
≈
Reverse the Reversal
ƒ
as soon as your opponent attempts to reverse
your attack
8 9
location-sPecific attacks
When your opponent is at your mercy in different places around the arena, you’ve got new
attacks that you can hit him with. Generally speaking,
√
is always a strike and ≈ is always
a grapple, but be sure to check out some of these special situational attacks and add them to
your arsenal.
Grounded Opponent
Facing Opponent Groggy (Standing) In Corner
Facing Opponent Down (Sitting) In Corner
Behind Opponent Groggy (Standing) In Corner
Opponent Groggy Against The Ropes
Pinfall Attempt
Ω
Ground Strike
√
Dash Ground Strike
√
while running toward downed opponent
Drag Opponent
Hold
ß
+ ƒ and push the left stick
Release Dragged
Opponent
Let go of
ß
+
ƒ
Lift Up
Right stick
µ
Lift Up and Stand Behind
Right stick
≤
Turn Opponent Over
Right stick
∫/ ñ
Breaking Point
Submission
Hold
≈
Ground Grapple
≈
Corner Front Strike
√
Running Corner Front
Strike
√
while running toward corner
Transition Opponent Into a
Seated Corner Position
Hit with Gut Kick the left stick
˙/ ˚
+
√
Lift Opponent Into Top
Rope Groggy Position
Right stick
µ
Place Opponent In Tree
of Woe
Right stick
≤
Corner Front Grapple
≈
Alternate Corner Front
Grapple
Left stick +
≈
Irish Whip
Ω
Turn Opponent Around
Right stick
∫/ ñ
Corner Rear Strike
√
Running Corner Rear
Strike
√
while running toward corner
Lift Opponent Into Top
Rope Groggy Position
Right stick
µ
Place Opponent In Tree
of Woe
Right stick
≤
Corner Rear Grapple
≈
Alternate Corner Rear
Grapple
Left stick +
≈
Irish Whip
Ω
Turn Opponent Around
Right stick
∫/ ñ
Front Down Corner Strike
√
Running Front Down
Corner Strike
√
while running toward corner
Front Down Corner
Grapple
≈
Grab Opponent
≈
Irish Whip
Ω
Note: You get different ground grapples depending on if the opponent is face up or face
down, as well as if you’re standing next to their head, side or legs.
10 11
 Loading...