

Sony PCNA-MR10A Installation Manual

INSTALLATION GUIDE FOR THE SONY NETWORK MEDIA RECEIVER
Welcome to the Sony Home Server world!
This guide to installing the Network Media Receiver aims to clearly and effectively
explain how to create your Home Network, letting you share the multimedia content
stored on your Personal Computer with other products from the vast world of Sony.
This will allow you to experience technology in a way that suits your needs best,
anywhere in the house you want to do it, and above all with no wires restricting position
or movement.
Your VAIO computer is provided with all the accessories you need to enjoy this
extraordinary experience:
The Network Media Receiver (PCNA-MR10A) makes it possible to share PC data
content with audio/video devices in other parts of your home.
The Wireless LAN Converter (PCWA-DE30), together with the Wireless LAN PC Card
(PCWA-C300S), makes it possible to use the Network Media Receiver without any
cables hampering you and restricting you, really bringing multimedia into your daily life.
Notes:
This guide does not substitute the printed documentation in the computer package. Therefore, to get
the most out of the product, we recommend you read the documentation on the provided Network
Media Receiver CD-ROM.
This installation procedure applies to a computer that has just been purchased, therefore without any
additional software applications installed by the end user.
If you have any problems after purchase, contact VAIO-Link support (www.vaio-link.com
or phone 0870 240 2408.
)
Getting Started
1. Open the Wireless LAN package
2. Connect the Network Media Receiver to the power mains (220V)
Connect the AC adapter (PCGA-AC10V) to the DC port of the Network Media
Receiver.
Connect the power cable to the AC adapter and then to the wall socket.
The Network Media Receiver can be positioned either vertically or horizontally.
• For vertical installation: insert the table support (supplied) into the
Network Media Receiver.
• For horizontal installation: attach the four adhesive spacers (supplied),
one at each corner.
3. Set up the remote control
Put the 2 AA batteries into their compartments.
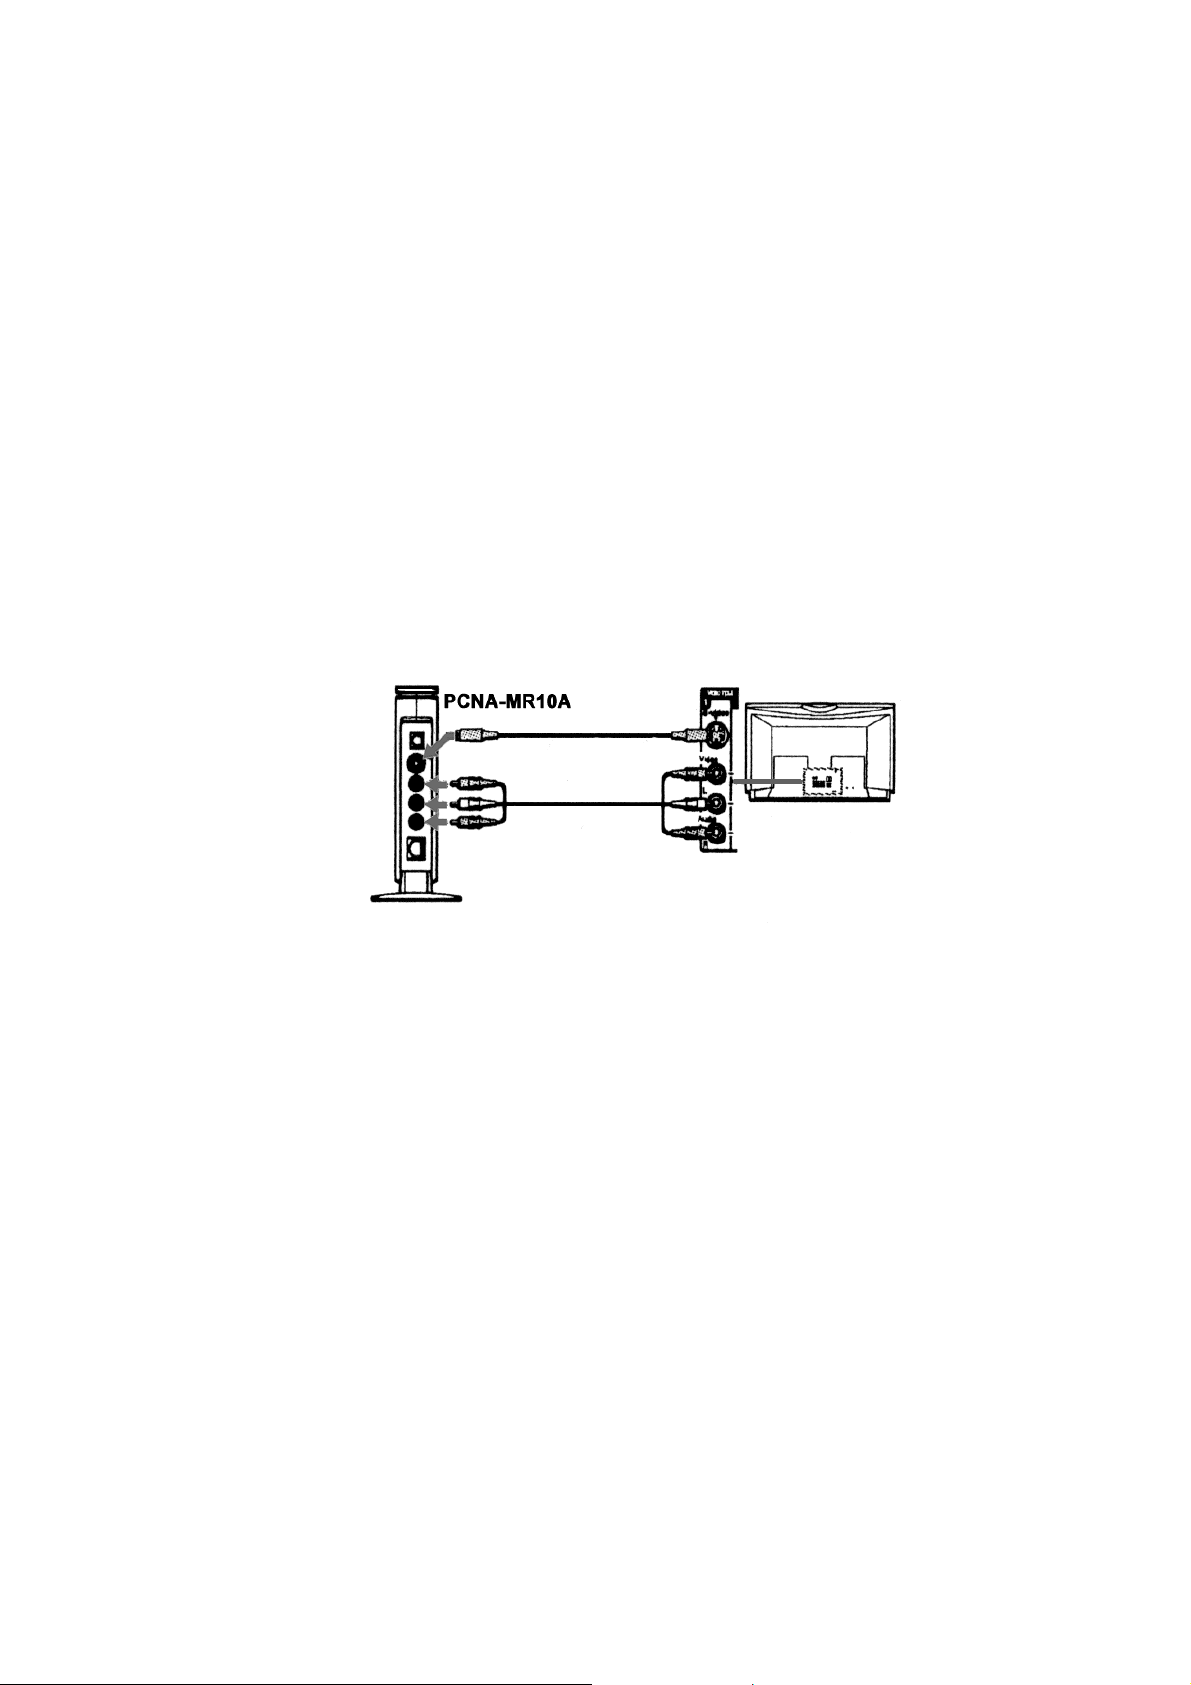
4. Connect the Network Media Receiver to your television or VCR
Connect the A/V cable to the sockets on your TV or VCR.
5. Configure your Network environment
• To use the connection to the Network Media Receiver in wireless mode (without cables) with the
VAIO: Go to WIRELESS SETUP - create your Wireless environment.
• To connect the Network Media Receiver in Wired mode (with cable connected to the VAIO
Ethernet port): Connect the Network Media Receiver as described in WIRED SETUP - direct
connection (by cable).
WIRELESS SETUP - create your wireless environment
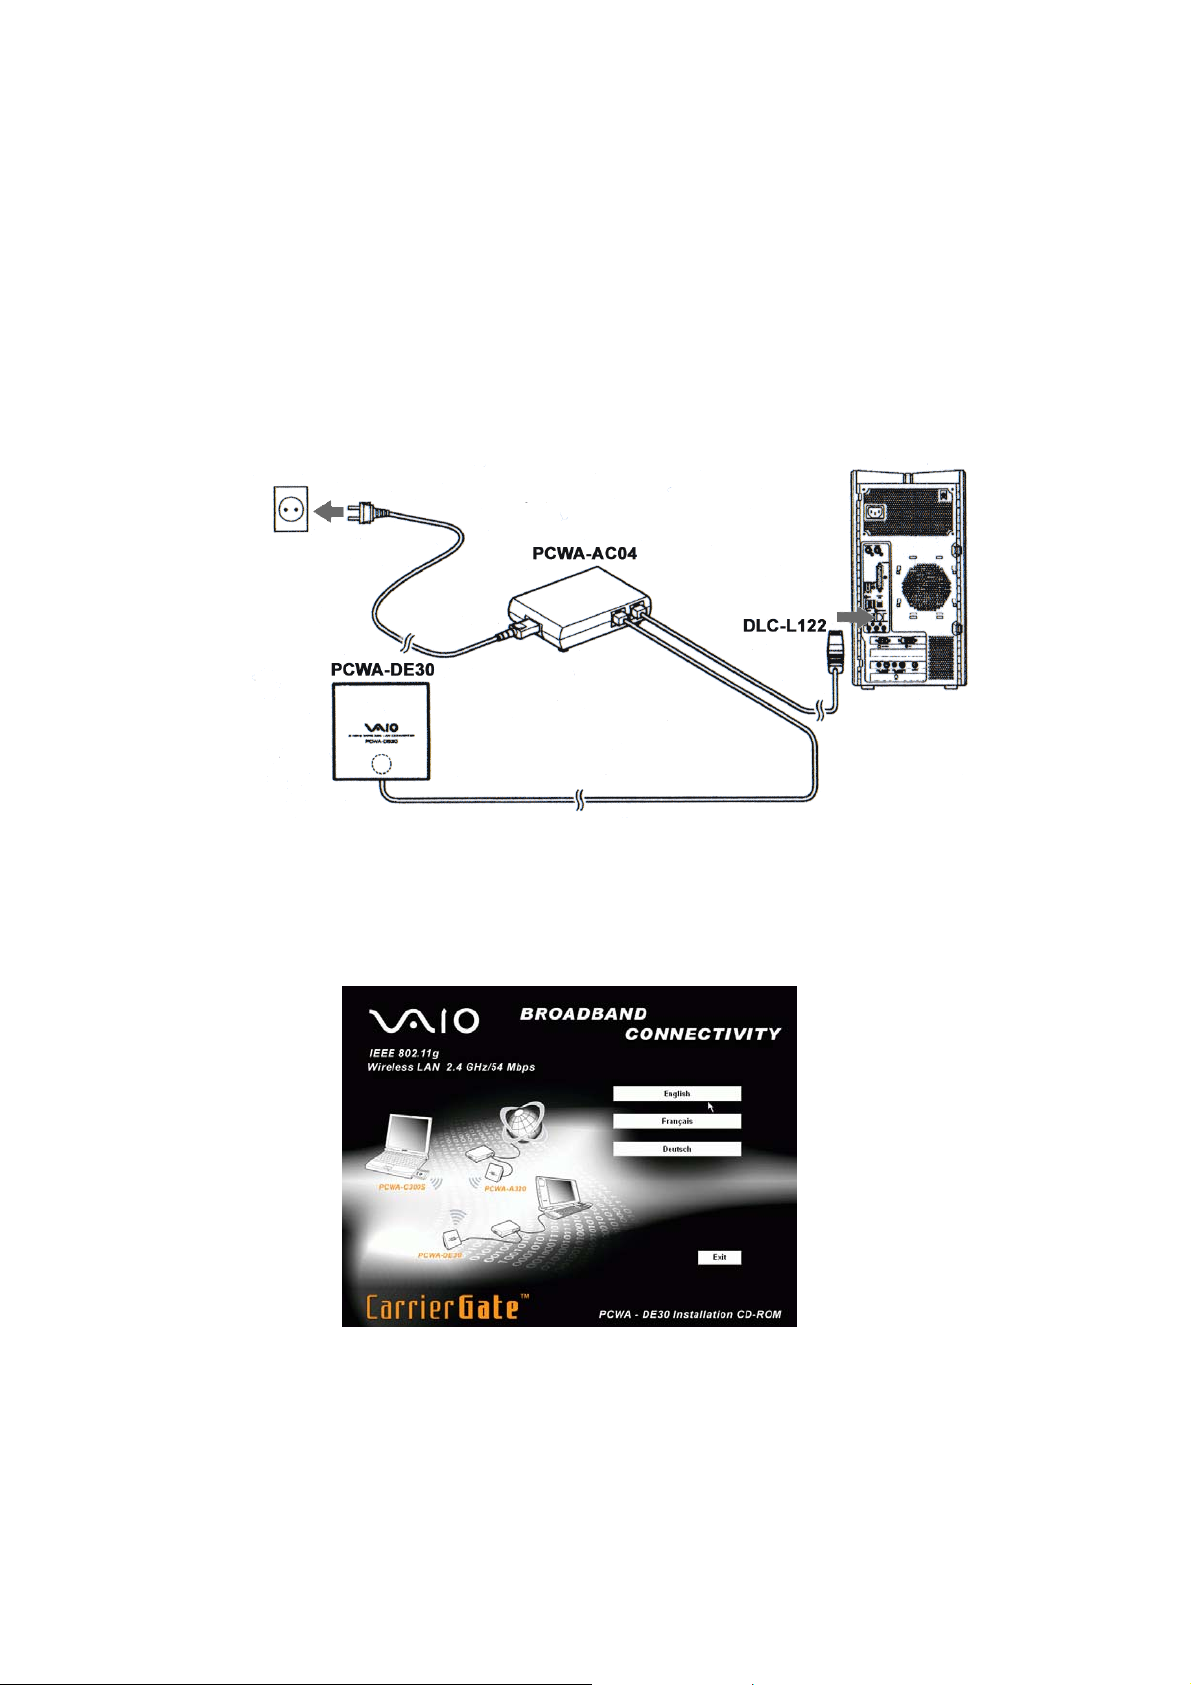
1. Setting up the LAN converter PCWA-DE30
a) Connect the Wireless converter to the power unit (PCWA-AC04) with the
cable supplied.
b) Plug into the power socket (220V). Then use the network cable or the
crossover cable (supplied with the PCNA-MR10A) to connect the unit to the
Ethernet (Network) port of your VAIO.
2. Configuring the LAN converter PCWA-DE30
a) Install the Wireless LAN converter driver from the CD-ROM supplied with the
PCWA-DE30. Start the program, select the language and wait for a few seconds
for it to run.
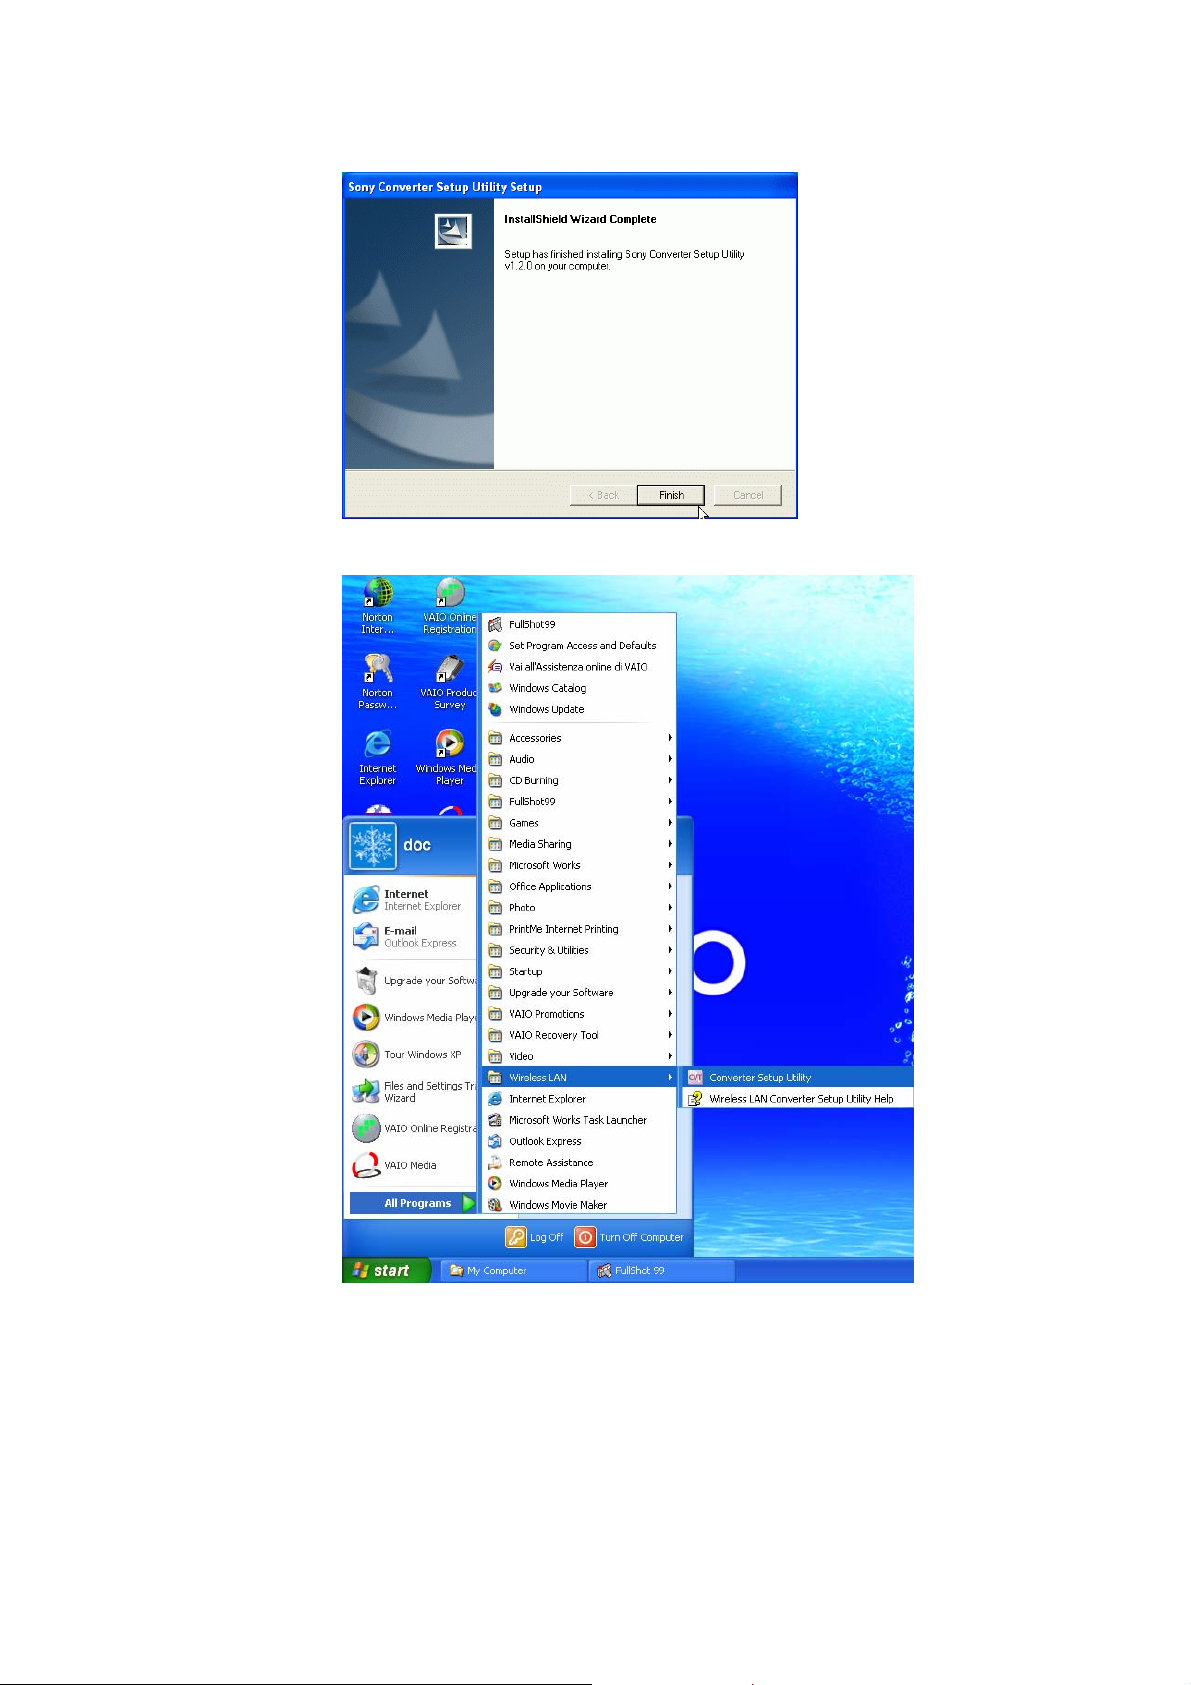
The system installs the software automatically. Click Finish at the end.
b) After confirming you want to quit the program (Exit), from Start, All Programs,
Wireless LAN, select the Converter Setup Utility program.
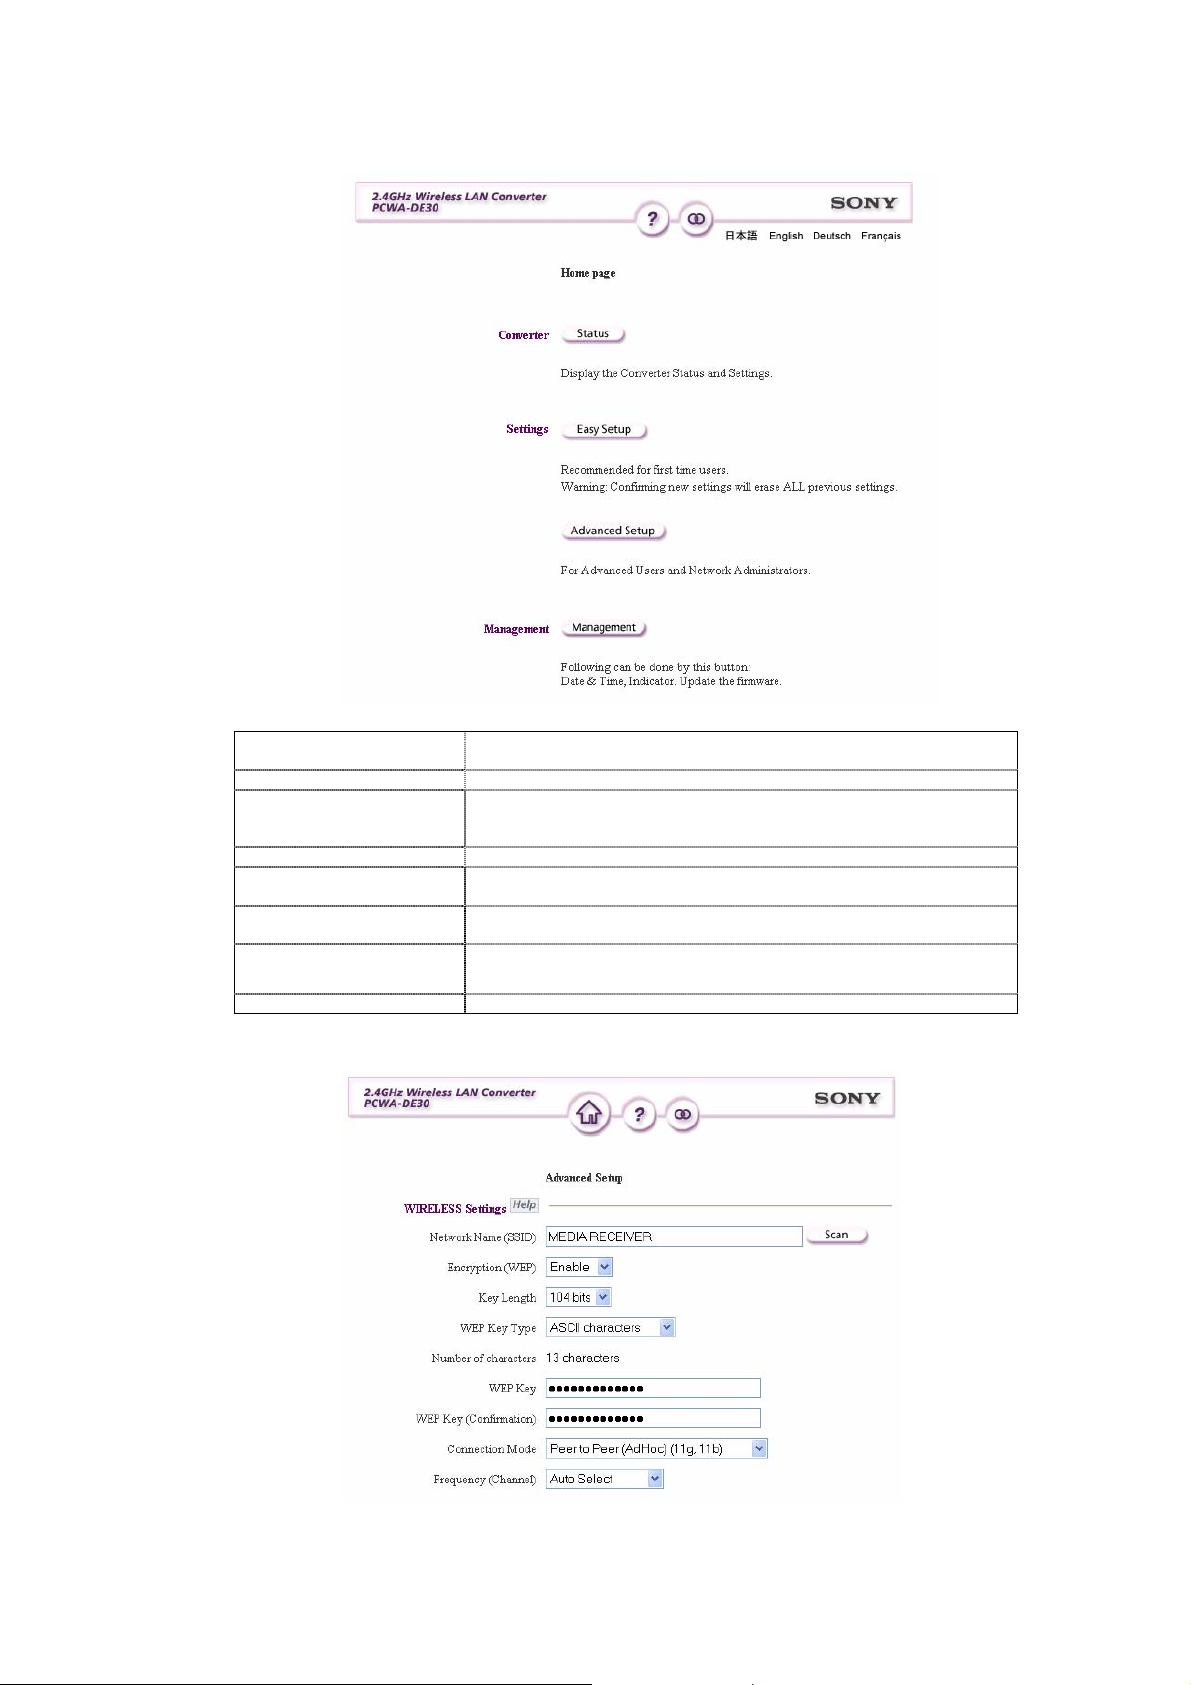
The converter home page opens. Click Advanced Setup.
Network name (SSID)
Encryption (WEP) Select Enable.
Key length
Wep key Type Select ASCII characters to enter an alphanumeric password.
Wep key
Wep key
(confirmation)
Enter a name for the Wireless LAN connection.
E.g. MEDIA RECEIVER
You can choose a length of 40-104 bits for the key. With 40
bits you can enter a password of 5 letters; if you select 104 bits
you can enter a password of 13 letters.
Enter a password of 5 or 13 characters, as required on the
previous line
Key in the password entered on the previous line again.
Connection mode
Frequency (channel) Select Auto select.
Select Peer to peer (ad hoc) (11g, 11b).
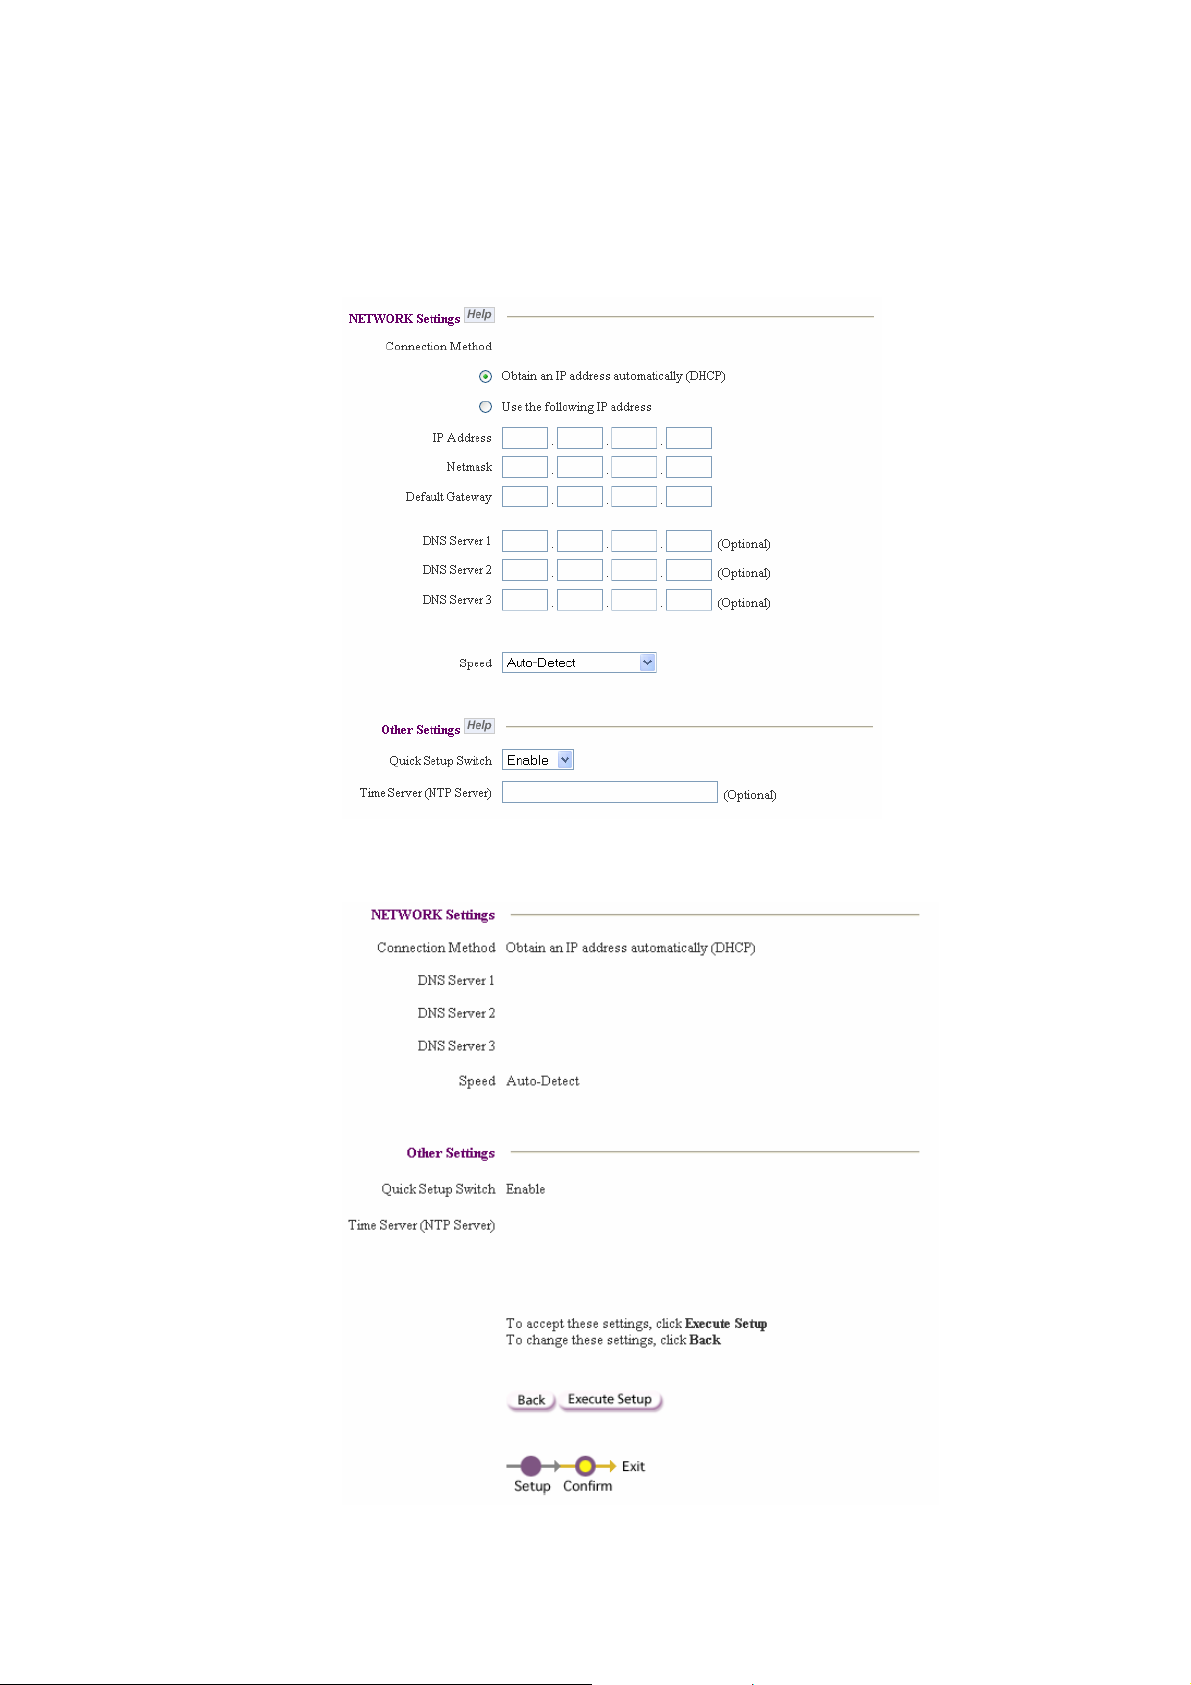
Leave the following settings as they are:
• Network Setting: Obtain an IP address automatically (DHCP)
• Speed: Auto-Detect
• Quick Setup Switch: Enable
c) Click Next.
d) You come to a window where all the set parameters are summarized.
Click Execute Setup.
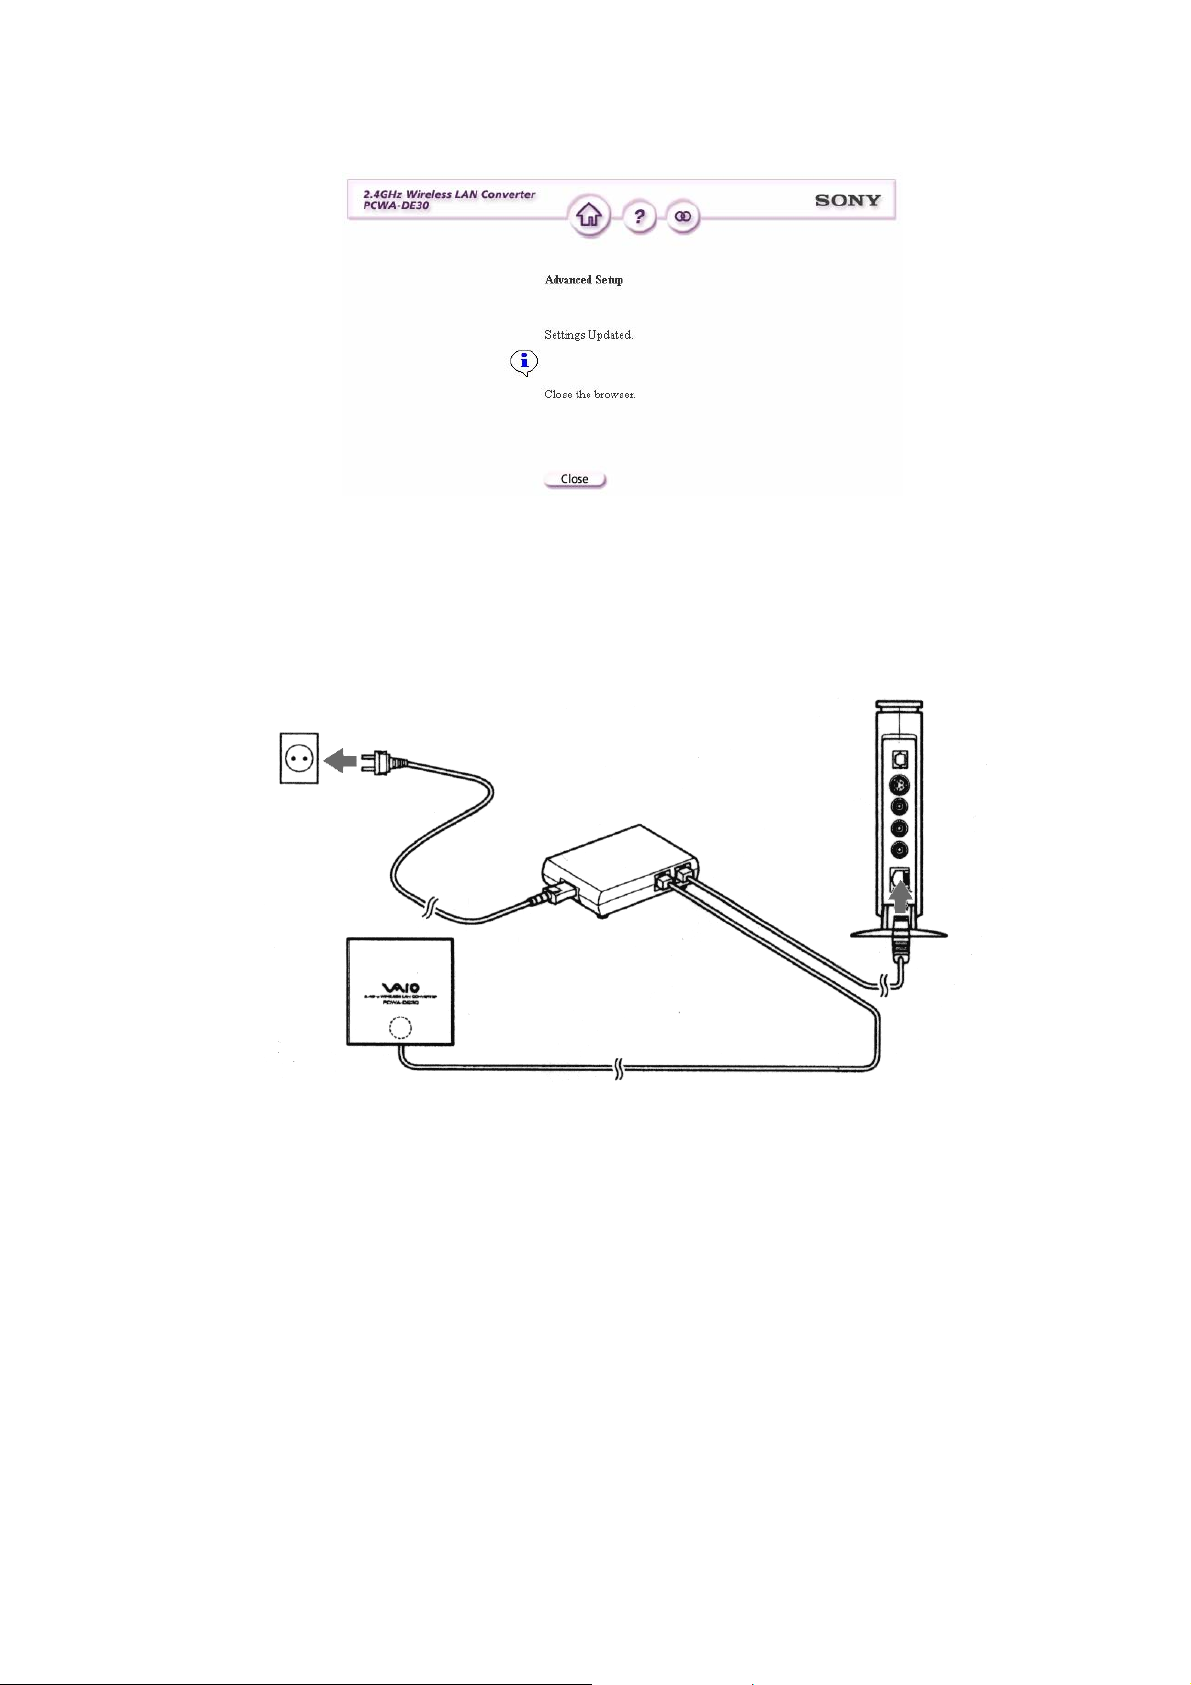
e) Click Close.
3. Configuring the Network Media Receiver (PCNA-MR10A)
a) Connect the Network Media Receiver to the TV as described in Getting Started.
b) Disconnect the Ethernet cable from the LAN port of the VAIO PC and plug it into
the LAN port of the Network Media Receiver.
c) Turn on the television and switch to the channel where the Network Media
Receiver is tuned in.
d) Using the remote control of the Network Media Receiver (RM-NM10E) turn on
the unit (press the POWER button)
A main menu appears (MAIN MENU), which gives the following options:
• TV - Watch and record TV programs
• VIDEO - Watch video clips
• MUSIC - Listen to music
• PHOTO - View photos
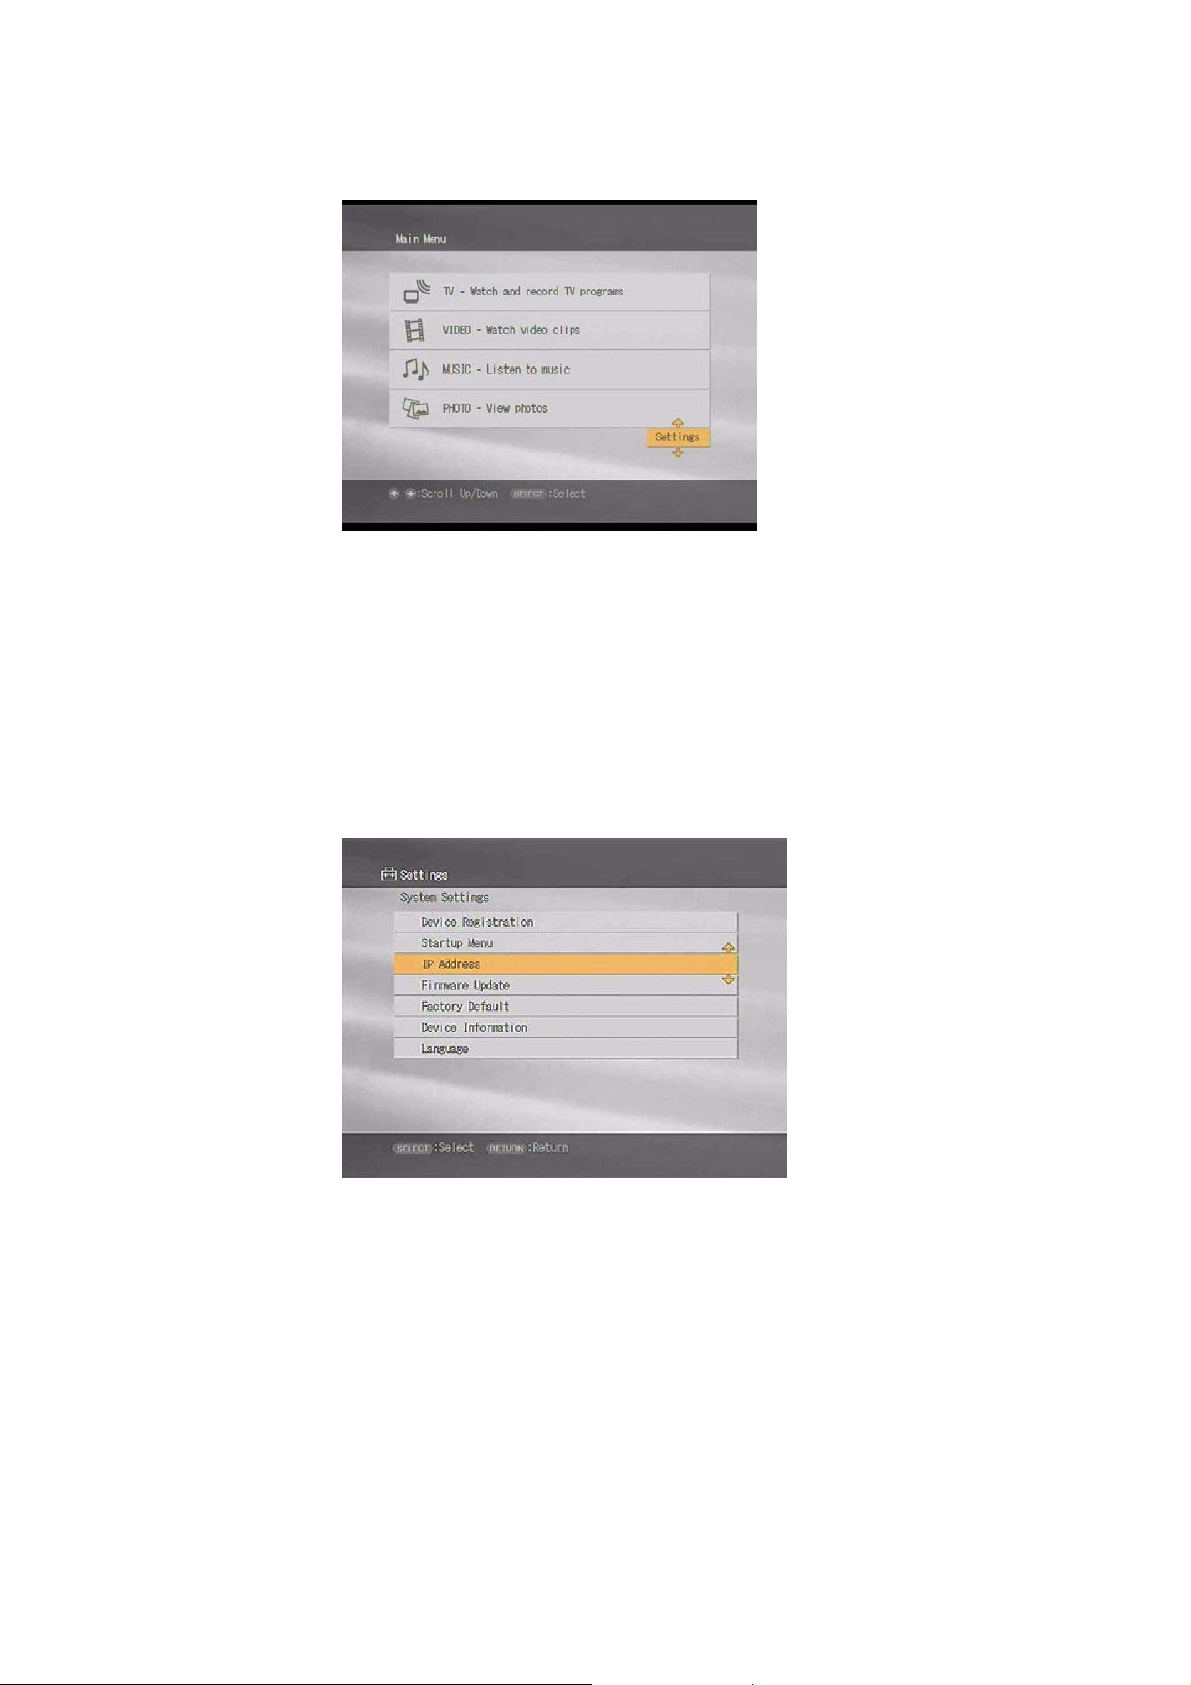
e) Using the direction keys, select Settings and confirm with the SELECT
button of the remote control.
A list of options appears:
• Device Registration
• Startup Menu
• IP Address
• Firmware Update
• Factory Default
• Device Information
• Language
f) Select IP Address, confirming with the SELECT button.
g) Select Obtain an IP address automatically (not using router). Confirm with OK
(pressing the SELECT button).

h) To activate the changes, switch the Network Media Receiver unit off and back
on again, pressing the POWER button on your remote control.
4. Configuring the Wireless LAN PC Card (PCWA-C300S)
a) Install the driver and the software from the CD-ROM supplied with the
PCWA-C300S unit.
Wait a few seconds for it to run.
The system asks whether you are using an internal (built-in) or external CD-ROM
drive.
b) Choose Built-in.
After inserting the CD-ROM, and choosing the language, the Main Menu
appears.
 Loading...