

Sony MHS-FS3, MHS-FS3 B Handbook

contents
Search
Search
Table of
Operation
Menu/Settings
Handbook
Mobile HD Snap Camera
Index
MHS-FS3/FS3K
© 2011 Sony Corporation 4-276-890-11(1)
GB
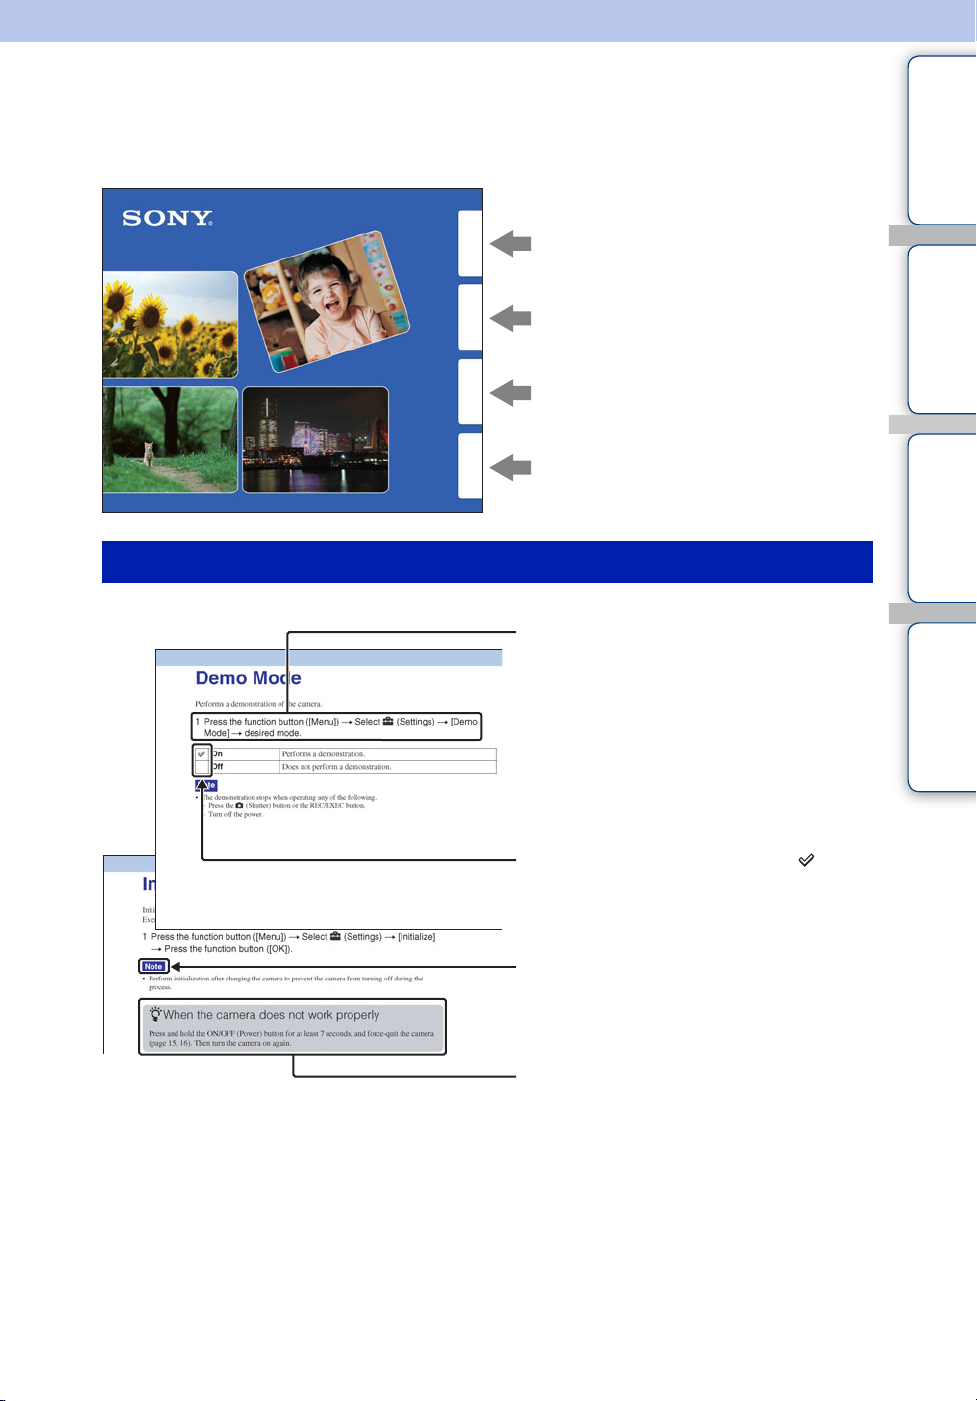
How to use this handbook
Click on a button on the right to jump to the corresponding page.
This is convenient when searching for a function you want to view.
contents
Table of
Search for information by function.
Operation
Search
Menu/Settings
Search
Search for information by operation.
Search for information in a listing of
menu/setting items.
contents
Search
Table of
Operation
Index
Search for information by keyword.
Marks and notations used in this handbook
In this handbook, the sequence of
operations is shown by arrows (t).
Operate the camera in the order indicated.
Marks are shown as they appear in the
camera’s default setting.
The default setting is indicated by .
Indicates cautions and limitations relevant
to the correct operation of the camera.
Menu/Settings
Search
Index
z Indicates information that is useful to
know.
GB
2
Notes on using the camera
contents
Table of
Internal memory back up
Be sure to make a backup copy to protect your
data.
Notes on recording/playback and
connection
• Before you start recording, make a trial
recording to make sure that the camera is
working correctly.
• The camera is neither dust-proof, nor splashproof, nor water-proof. Read “Precautions”
(page 76) before operating the camera.
• Avoid exposing the camera to water. If water
enters inside the camera, a malfunction may
occur. In some cases, the camera cannot be
repaired.
• Do not aim the camera at the sun or other bright
light.
• Do not use the camera near a location that
generates strong radio waves or emits radiation.
Otherwise, the camera may not properly record
or play back images.
• Using the camera in sandy or dusty locations
may cause malfunctions.
• If moisture condensation occurs, remove it
before using the camera (page 76).
• Do not shake or strike the camera. It may cause
a malfunction and you may not be able to record
images. Furthermore, the recording media may
become unusable or image data may be
damaged.
• When connecting your camera to another device
with a cable, be sure to insert the connector plug
in the correct way. Pushing the plug forcibly
into the terminal will damage the terminal and
may result in a malfunction of your camera.
• Playback of movies other than those shot, edited
or composed on this camera is not guaranteed.
On camera’s temperature
The camera may get warm due to continuous use,
but it is not a malfunction.
On the overheat protection
Depending on the camera and battery temperature,
you may be unable to record movies or the power
may turn off automatically to protect the camera.
A message will be displayed on the LCD screen
before the power turns off or you can no longer
record movies.
Notes on the battery pack
• The battery pack is built into the camera. Charge
the camera before using for the first time.
• You can charge the battery pack even if it is not
completely discharged. In addition, even if the
battery pack is not fully charged, you can use the
partially charged capacity of the battery pack as
is.
• For details on the usable battery pack, see page
75.
Notes on the LCD screen and lens
• The LCD screen is manufactured using
extremely high-precision technology so over
99.99% of the pixels are operational for
effective use. However, some tiny black and/or
bright dots (white, red, blue or green) may
appear on the LCD screen. These dots are a
normal result of the manufacturing process and
do not affect the recording.
Black, white, red, blue or
green dots
• Exposing the LCD screen or the lens to direct
sunlight for long periods may cause
malfunctions. Be careful when placing the
camera near a window or outdoors.
• Do not press against the LCD screen. The screen
may be discolored and that may cause a
malfunction.
• Images may trail across on the LCD screen in a
cold location. This is not a malfunction.
On viewing 3D image
When you view 3D images shot with this camera
on a 3D-compliant monitors, you may experience
discomfort in the form of eye strain, fatigue, or
nausea. To prevent these symptoms, we
recommend that you take regular breaks.
However, you need to determine for yourself the
length and frequency of breaks you require, as they
vary according to the individual. If you experience
any type of discomfort, stop viewing the 3D
images until you feel better, and consult a
physician as necessary. Also, refer to the operating
instructions supplied with the device or software
you have connected or are using with this camera.
Note that a child’s eyesight is still at the
development stage (particularly children below the
age of 6). Consult a pediatrician or
ophthalmologist before letting your child view 3D
Continued r
Operation
Search
Menu/Settings
Search
Index
GB
3

images, and make sure he/she observes the above
precautions when viewing such images.
The view of a 3D movie differs according to the
individual’s eyesight.
On image data compatibility
• This camera supports “MP4 format” as movie
file format. Therefore, movies recorded by this
camera cannot be played on devices that do not
support “MP4 format”.
• This camera does not support “AVCHD format”
and therefore is not compatible with the
playback and recording of movies in “AVCHD
format” like a Digital HD Video camera
recorder.
• The camera conforms with DCF (Design rule
for Camera File system) universal standard
established by JEITA (Japan Electronics and
Information Technology Industries
Association).
• Sony does not guarantee that the camera will
play back images recorded or edited with other
equipment, or that other equipment will play
back images recorded with the camera.
Warning on copyright
Television programs, films, videotapes, and other
materials may be copyrighted. Unauthorized
recording of such materials may be contrary to the
provisions of the copyright laws.
contents
Search
Search
Table of
Operation
Menu/Settings
Index
No compensation for damaged
content or recording failure
Sony cannot compensate for failure to record or
loss or damage of recorded content due to a
malfunction of the camera or recording media, etc.
The images used in this handbook
• The images used as examples in this handbook
are reproduced images, and are not actual
images shot using the camera.
• Design and specifications are subject to change
without notice.
Notes on playing back movies on
other devices
The camera is compatible with MPEG-4 AVC/
H.264 Main Profile. Therefore, you cannot play
back images on the camera with the devices which
are not compatible with the MPEG-4 AVC/H.264.
GB
4

Life with “Bloggie”
Capture your life
At a party
Record still images at maximum 5M (2592 ×
1944) and movies at maximum 1920 × 1080
30p full high-vision (page 48, 50). Also, you
can record still images during movie
recording (page 32).
contents
Search
Search
Table of
Operation
Menu/Settings
During a walk
Take compact “Bloggie” with you anywhere,
anytime. Take it out, and record casually.
On a trip
Attach the 360 Video Lens to “Bloggie” and
shoot exciting 360-degree panoramic images
of the world around you. Enjoy 360-degree
panoramic images by playing back with the
Bloggie Software pre-loaded on the internal
memory (page 36). (MHS-FS3K only)
Index
Continued r
GB
5
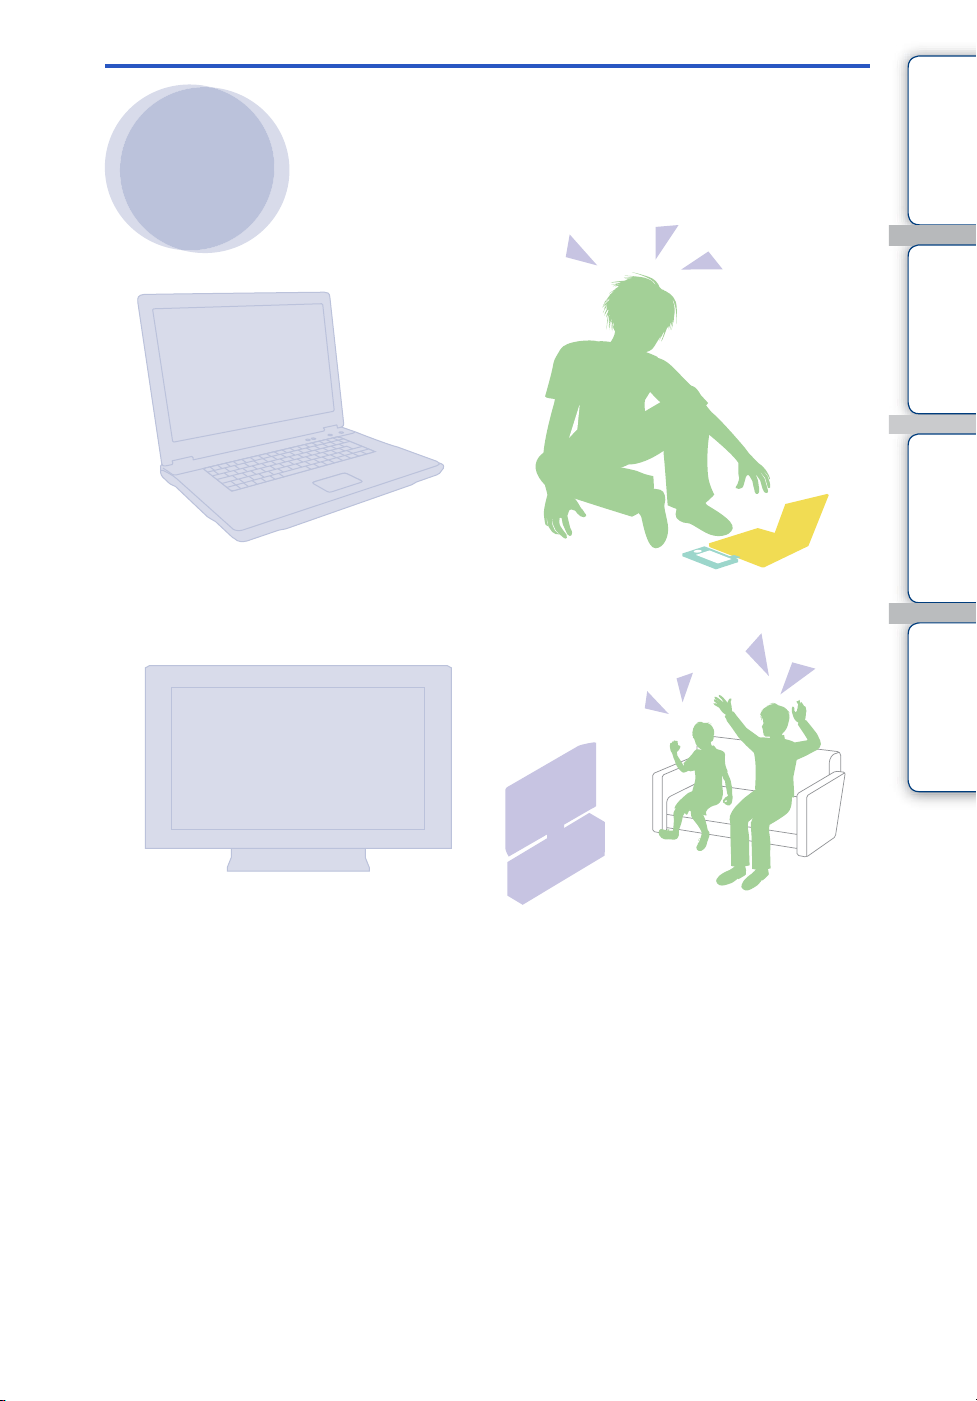
Share your life
Import and upload captured
moments
You can upload images easily and intuitively,
using the Bloggie Software pre-loaded on the
internal memory (page 25, 47).
You can also choose the images and the
sharing site to upload in advance (Share it
Later) (page 53).
contents
Search
Search
Table of
Operation
Menu/Settings
Connect to TV
Connect your “Bloggie” to a TV with an
HDMI cable (sold separately), and enjoy
images on the big screen (page 65).
You can still enjoy 2D movies with a TV that
does not support 3D.
Index
Continued r
GB
6
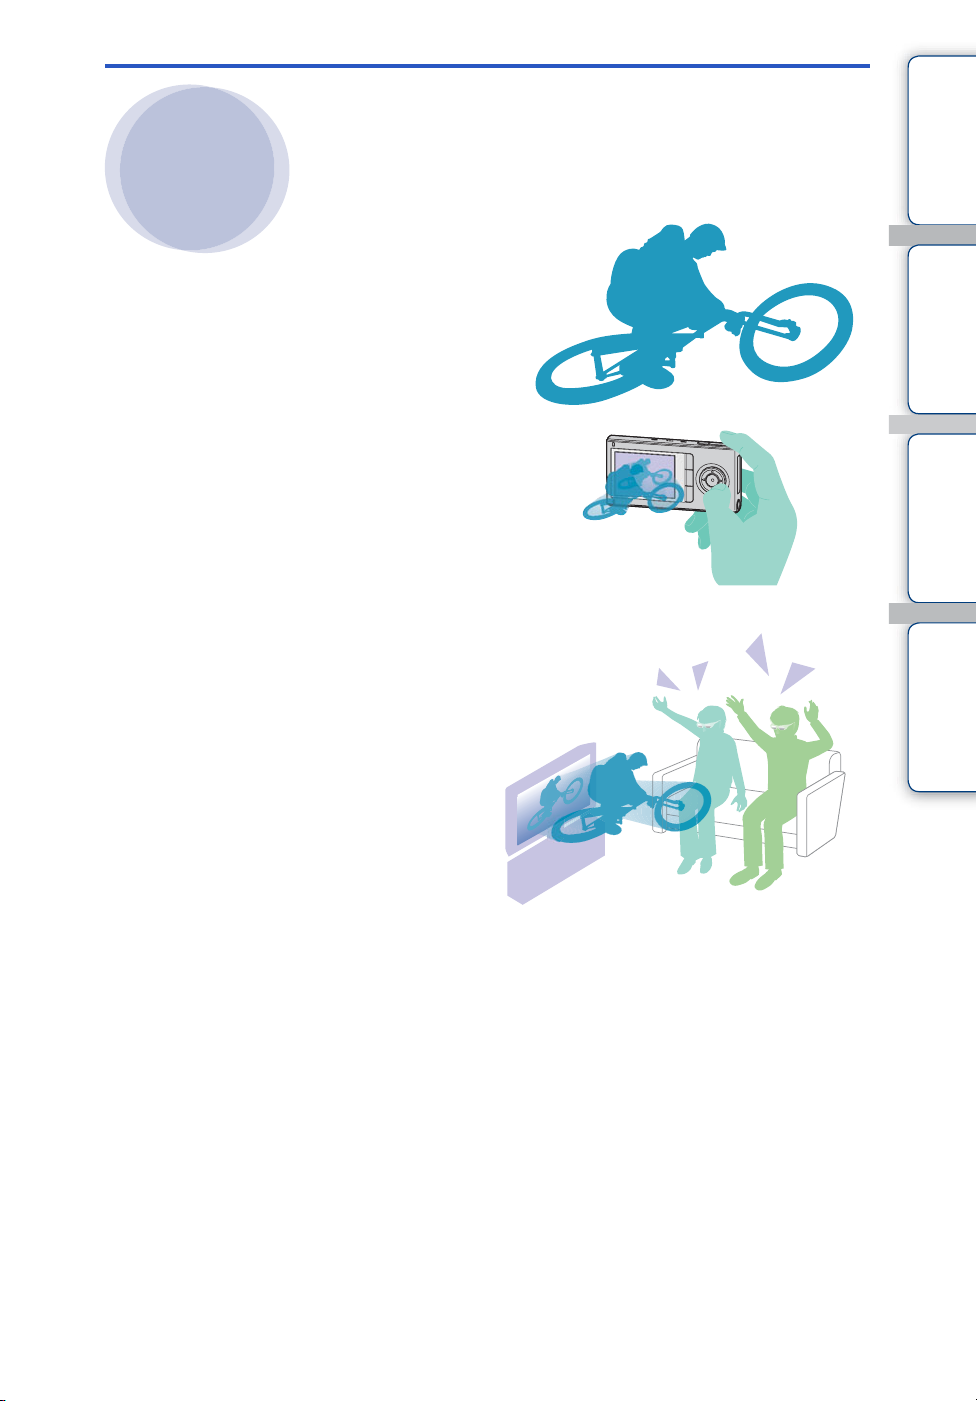
Enjoy 3D images
Shoot in 3D
You can shoot still images and movies in 3D
with this camera.
This camera allows you to record any scene in
3D, recreating the feeling of really being
there.
See page 29, 31 about the way to shoot.
contents
Search
Search
Table of
Operation
Menu/Settings
View in 3D
You can view the images shot in 3D on a TV
which supports 3D by connecting an HDMI
cable (sold separately).
The images allow you to enjoy the feeling of
really being there.
See page 39 about the way to view.
Index
GB
7

Table of contents
Notes on using the camera
How to use this handbook····································· 2
Notes on using the camera ··································· 3
Life with “Bloggie”·················································· 5
Operation Search················································ 11
About operation buttons of the camera··············· 12
Menu/Settings Search········································· 13
Identifying parts··················································· 16
List of icons displayed on the screen ·················· 17
How to hold the camera ······································ 19
Getting started
contents
Search
Search
Table of
Operation
Menu/Settings
Shooting
Checking the accessories supplied····················· 21
Charging the camera··········································· 22
Installing the software ········································· 25
Setting the language and clock ··························· 28
3D shooting (Still images) ··································· 29
3D shooting (Movies) ·········································· 31
Zoom ··································································· 33
Light ···································································· 34
Self-Timer···························································· 35
Shooting 360 Video images
(MHS-FS3K only) ················································ 36
Index
GB
8

Viewing
Computer
Settings
Viewing································································ 39
Playback zoom···················································· 41
Volume control ···················································· 42
Recommended computer environment··············· 43
Using the Bloggie Software································· 45
Importing images to a computer·························· 46
Uploading images to a media service ················· 47
Menu items·························································· 13
Setting items ······················································· 14
contents
Search
Search
Table of
Operation
Menu/Settings
Index
TV
Viewing images on a TV ····································· 65
Troubleshooting
Troubleshooting ·················································· 68
Warning indicators and messages ······················ 72
GB
9

Others
Index
Number of still images and recordable time of
movies································································· 74
Built-in battery pack············································· 75
Precautions ························································· 76
Specifications ······················································ 77
contents
Search
Table of
Operation
Index ··································································· 79
Menu/Settings
Search
Index
10
GB

Operation Search
contents
Table of
Shooting still images
Shooting movies
Changing image size
Deleting images
Displaying enlarged
images
Changing clock
settings
Initializing settings
Shooting (Still images)······································· 29
Shooting (Movies) ··············································· 31
Photo Size ····························································· 48
Movie Size ····························································· 50
Delete······································································ 51
Format ···································································· 62
Playback zoom····················································· 41
Date & Time ·························································· 63
Daylight Savings ·················································· 64
Initialize··································································· 59
Search
Search
Operation
Menu/Settings
Index
Viewing on TVs
Marking the images to
upload
Shooting a 360-degree
view (MHS-FS3K only)
Connecting with an HDMI cable
(sold separately) ·················································· 65
Share it Later ························································ 53
360 Video Lens···················································· 36
11
GB
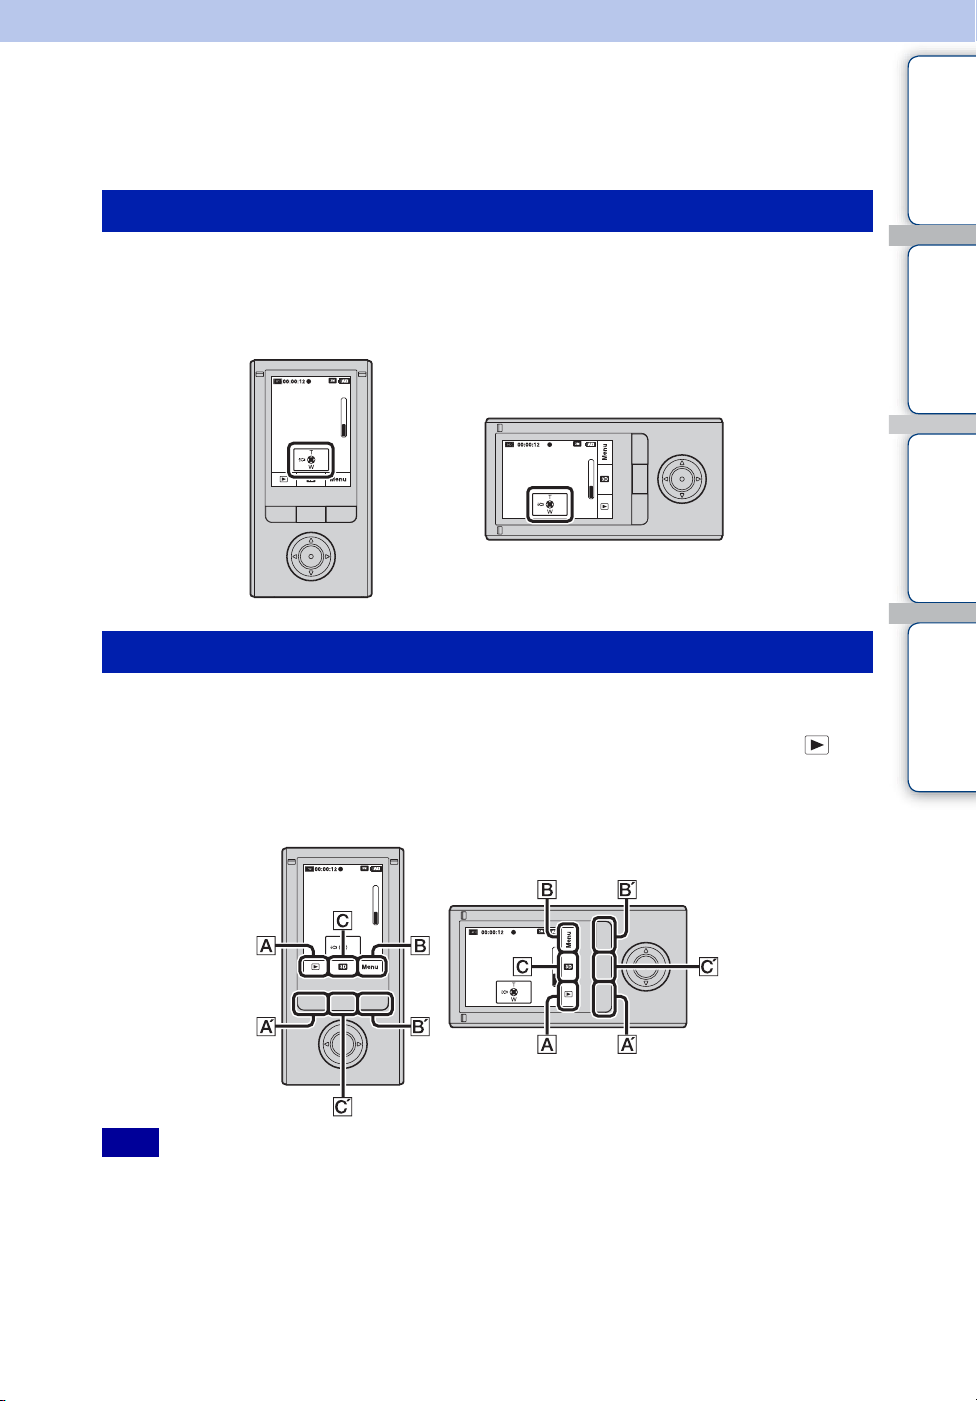
About operation buttons of the camera
Multi-selector buttons
contents
Table of
You can use the multi-selector buttons (v/V/b/B) to activate functions such as zooming when
shooting or playing back images.
The function that is allocated to each multi-selector button is displayed on the LCD screen of the
camera. The display changes according to how the camera is held (vertically or horizontally).
Function buttons
Button function varies depending on when shooting or playing back images. The function that is
allocated to a function button is displayed on the LCD screen of the camera.
As illustrated below, press the A’ function button when you want to use the A function , or
press the B’ function button for the B function [Menu].
In this handbook, the phrase “Press the function button ([Menu])” is used to explain a [Menu]
function.
Search
Search
Operation
Menu/Settings
Index
Note
• Press the C’ 3D/2D button to select 3D shooting or 2D shooting.
12
GB
Menu/Settings Search
Menu items
In the table below, indicates settings that can be changed, while – indicates settings that
cannot be changed.
Click an item to jump to the corresponding page.
Items Shooting mode Playback mode
Photo Size
Movie Size
Delete
Protect
Share it Later
3D Adjust
1 Press the ON/OFF (Power) button.
–
–
–
–
–
–
contents
Search
Search
Table of
Operation
Menu/Settings
2 Press the function button ([Menu]) to display the
menu screen.
Index
ON/OFF (Power) button
Continued r
13
GB
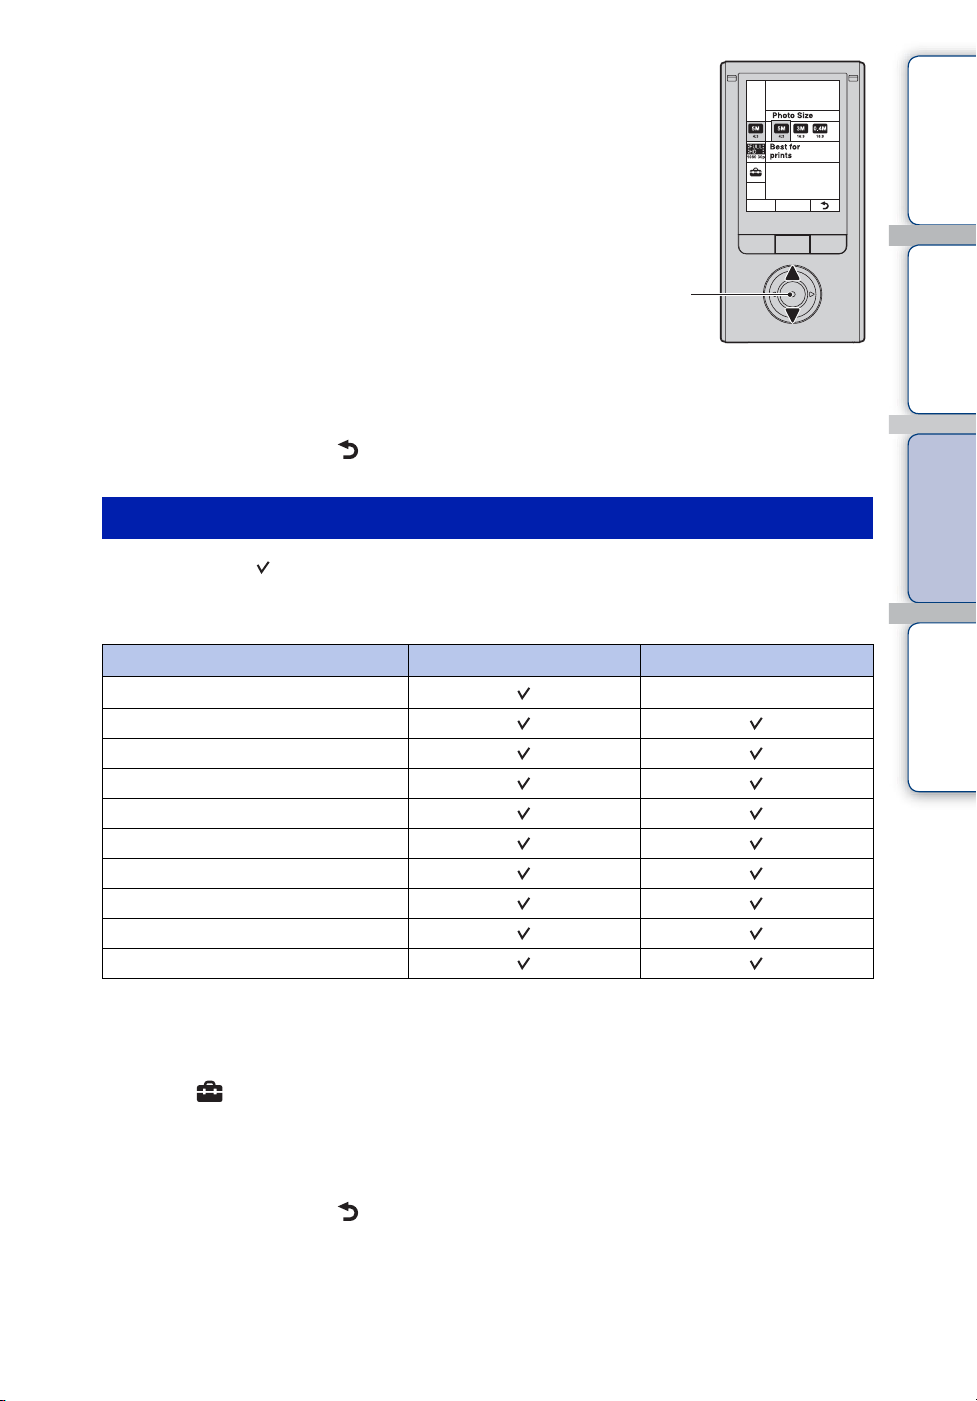
3 Select the desired menu item by using
v/V to set.
MOVIE/ENTER
button
4 Select the desired setting item by using b/B, then press the MOVIE/
ENTER button.
Press the function button ( ) to exit the menu screen.
Setting items
In the table below, indicates settings that can be changed, while – indicates settings that
cannot be changed.
Click an item to jump to the corresponding page.
contents
Search
Search
Table of
Operation
Menu/Settings
Items Shooting mode Playback mode
Flicker Reduction
Beep
Language Setting
Demo Mode
Initialize
LUN Setting
HDMI Output
Format
Date & Time
Daylight Savings
–
1 Press the ON/OFF (Power) button.
2 Press the function button ([Menu]) to display the menu screen.
3 Select (Settings) by using v/V, then press the MOVIE/ENTER button.
4 Select the desired setting item by using v/V, then press the MOVIE/
ENTER button.
The selected item will be highlighted.
Press the function button ( ) to exit the setting screen.
Press b repeatedly to go back to the menu screen from the setting screen.
Index
Continued r
14
GB

zTo cancel changing settings
Select [Cancel], then press the MOVIE/ENTER button. If [Cancel] does not appear on the
screen, directly set back to the previous setting.
• Selected settings are retained even if the power is turned off.
contents
Search
Search
Table of
Operation
Menu/Settings
Index
15
GB
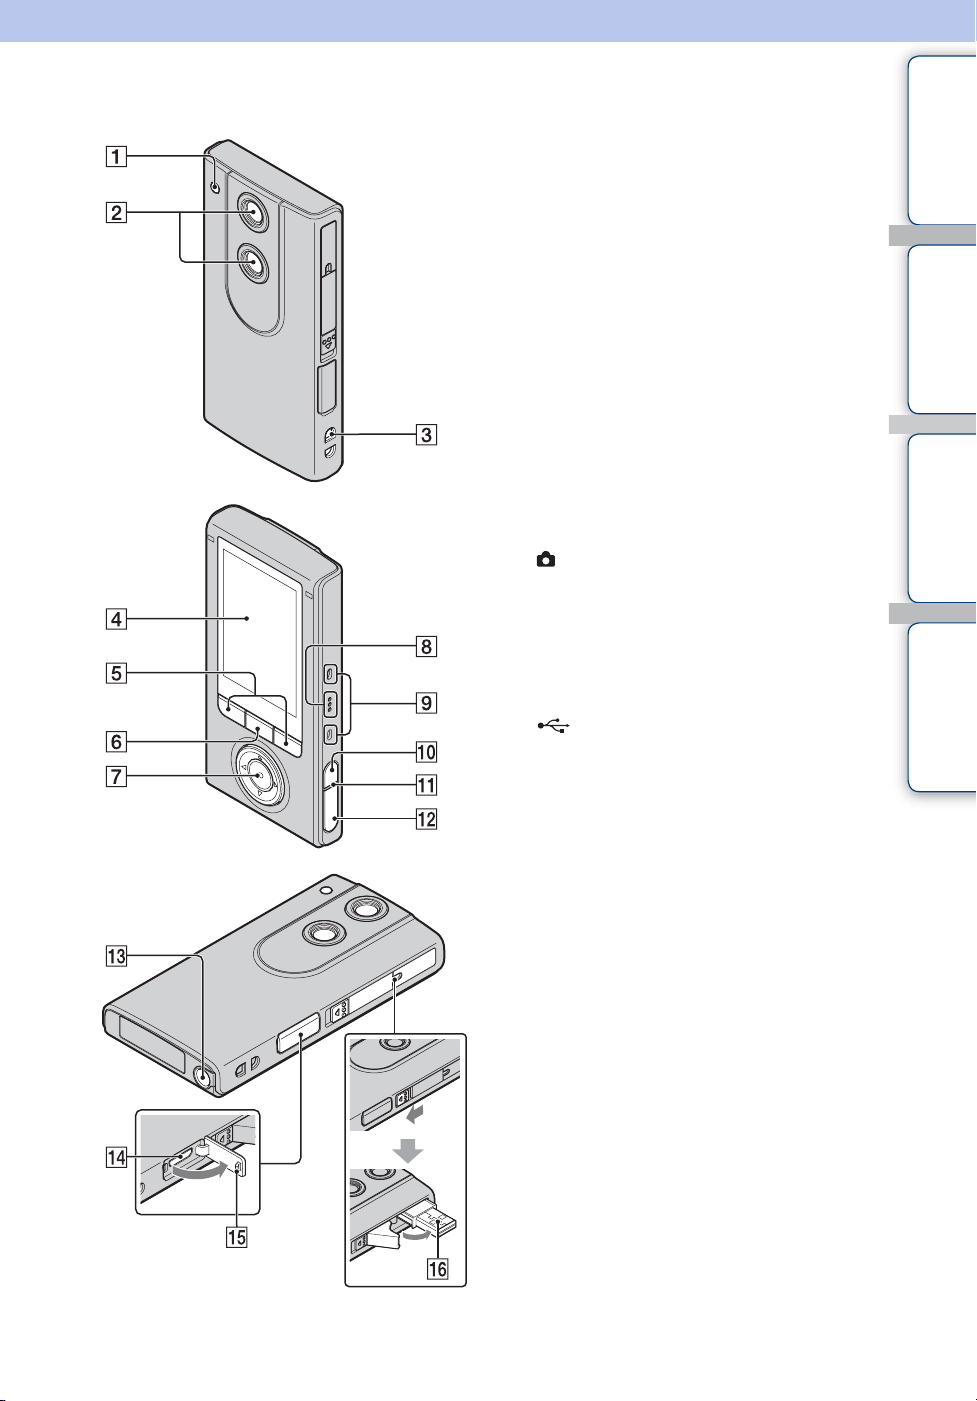
Identifying parts
A Light
B Lens
C Hook for wrist strap
D LCD screen
E Function buttons
F 3D/2D button
G MOVIE/ENTER button
Multi-selector buttons (v/V/b/B)
H Speaker
I Stereo microphone
J ON/OFF (Power) button
• Press and hold the ON/OFF (Power) button
for at least 7 seconds to force-quit the
camera.
K Charge lamp
L (Shutter) button
M Tripod receptacle
• Do not hold the camera when attaching the
tripod.
N HDMI OUT jack (65)
O Jack cover
P (USB) jack
contents
Search
Search
Table of
Operation
Menu/Settings
Index
16
GB
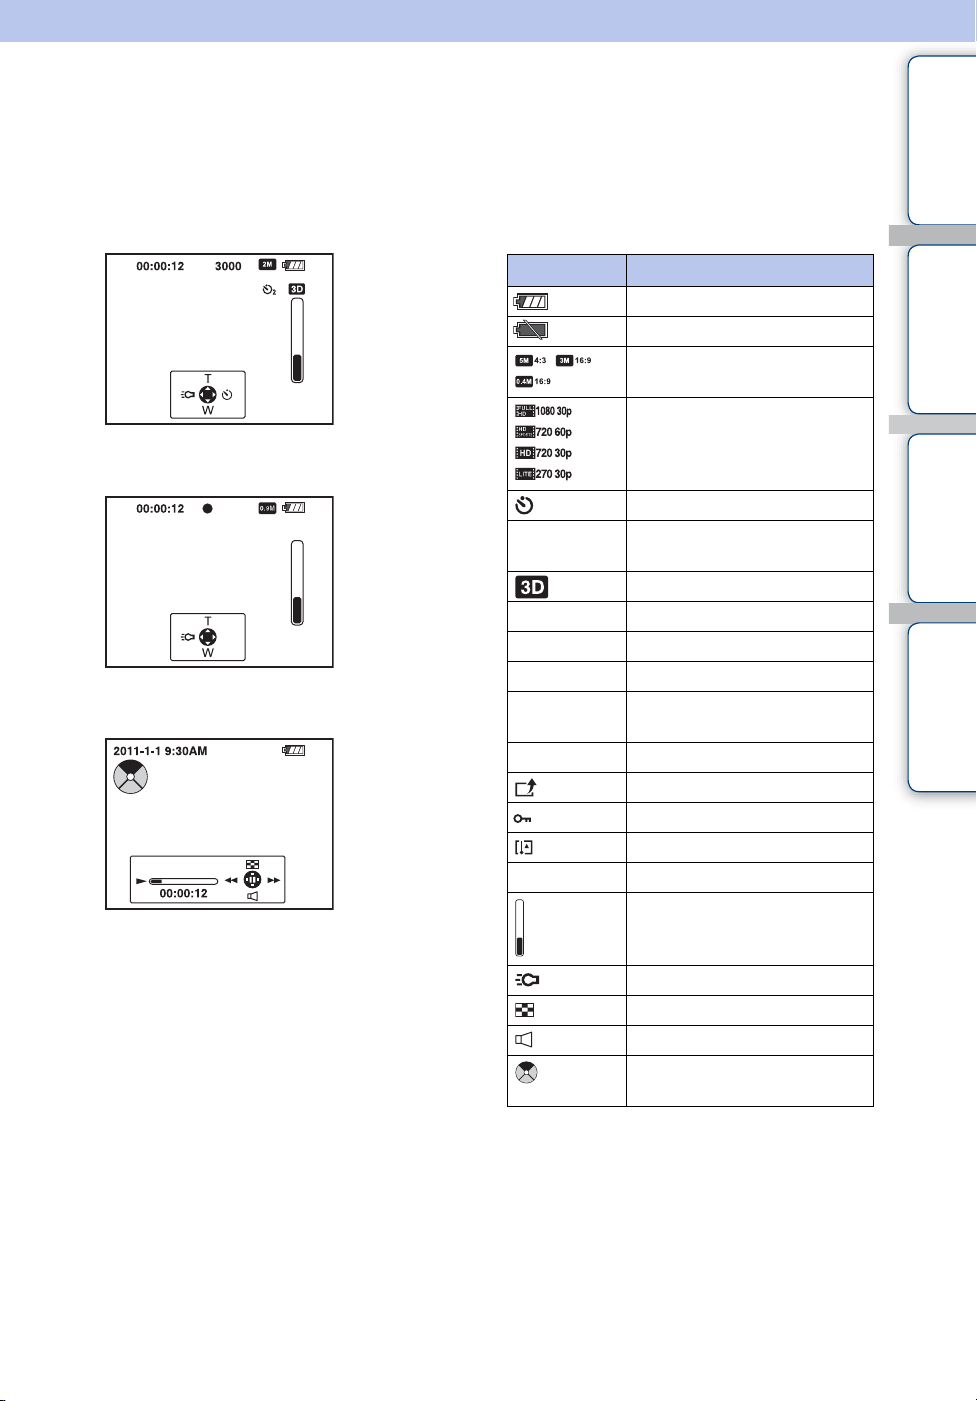
List of icons displayed on the screen
Icons are displayed on the screen to indicate the camera status.
contents
Table of
When in standby for shooting
When shooting movies
When playing back
Icons
Display Indication
Battery remaining
Low battery warning
Photo Size (aspect ratio/
resolution)
Movie Size (resolution vertical
shooting/frame rate)
Self-timer
3000
z (green)
00:00:12
0:12
2011-1-1
9:30 AM
z (red)
00:00:12
Number of recordable still
images
3D mode
AE/AF lock
Recordable time
Recording time (m:s)
Recorded date/time of the
playback image
During movie recording
Share it Later
Protect
Overheating warning
Counter
Zoom scaling
Search
Search
Operation
Menu/Settings
Index
Light
Index
Adjusting volume
Portion of 360 Video image
during playback
Continued r
17
GB
Notes
• Indicators and their positions are approximate
and differ from what you actually see.
• The screen display shifts both horizontally and
vertically depending on the camera aspect.
• The screen display disappears automatically
after about 5 seconds.
contents
Search
Search
Table of
Operation
Menu/Settings
Index
18
GB
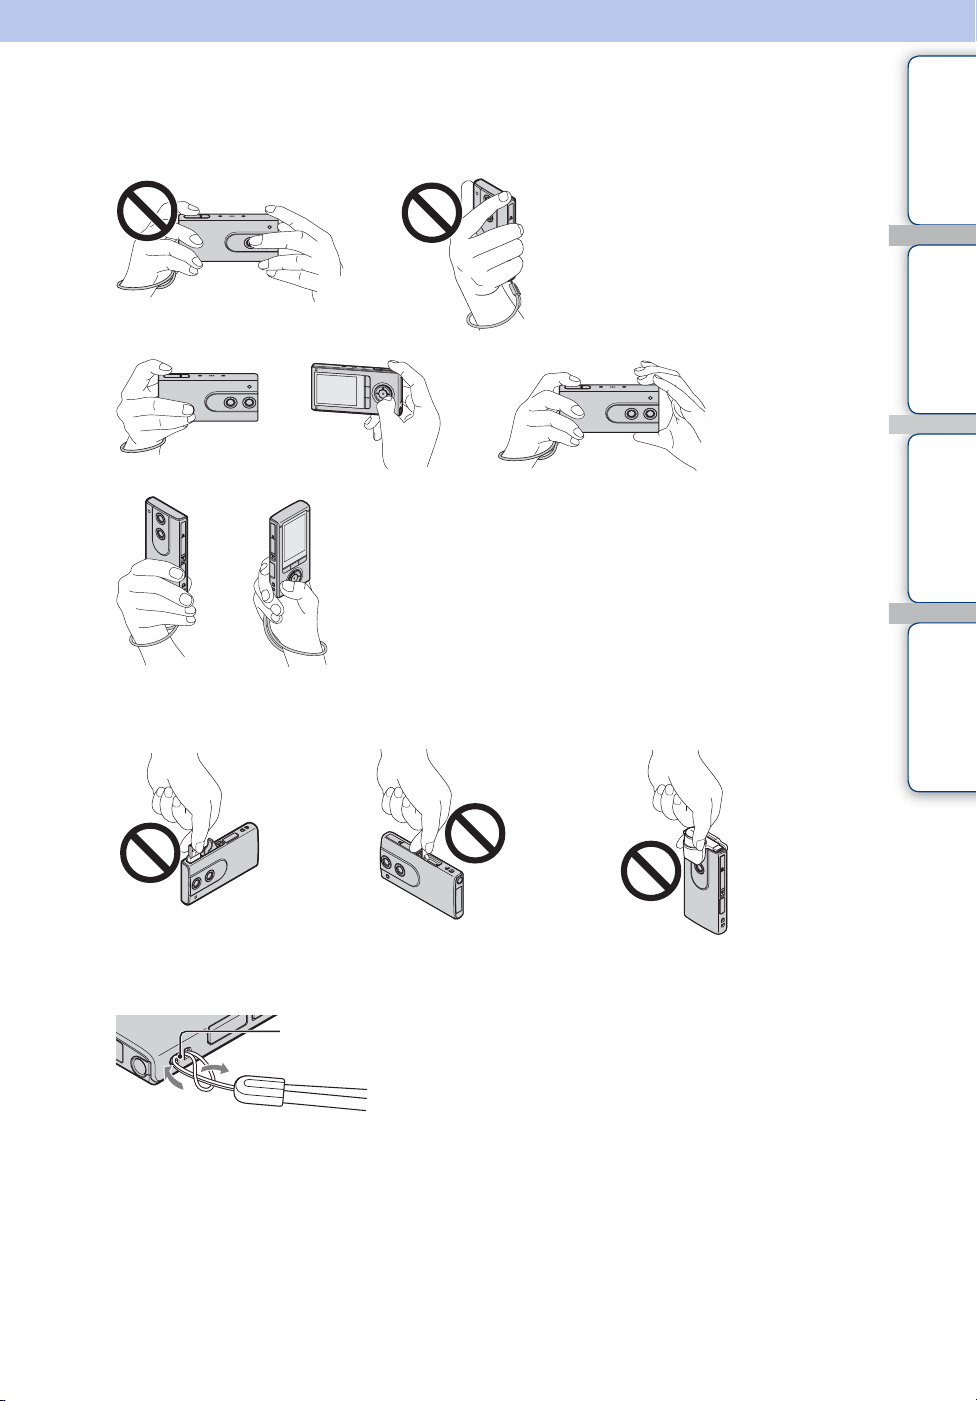
How to hold the camera
• Be careful not to block the lens or microphone with your finger when shooting.
contents
Search
Search
Table of
Operation
Menu/Settings
• Do not hold the USB jack or HDMI OUT jack cover. Also, do not hold the 360 Video Lens
when it is attached to the camera.
• Attach the strap and place your hand through its loop to prevent the camera from damage by
being dropped.
Hook
Index
Continued r
19
GB
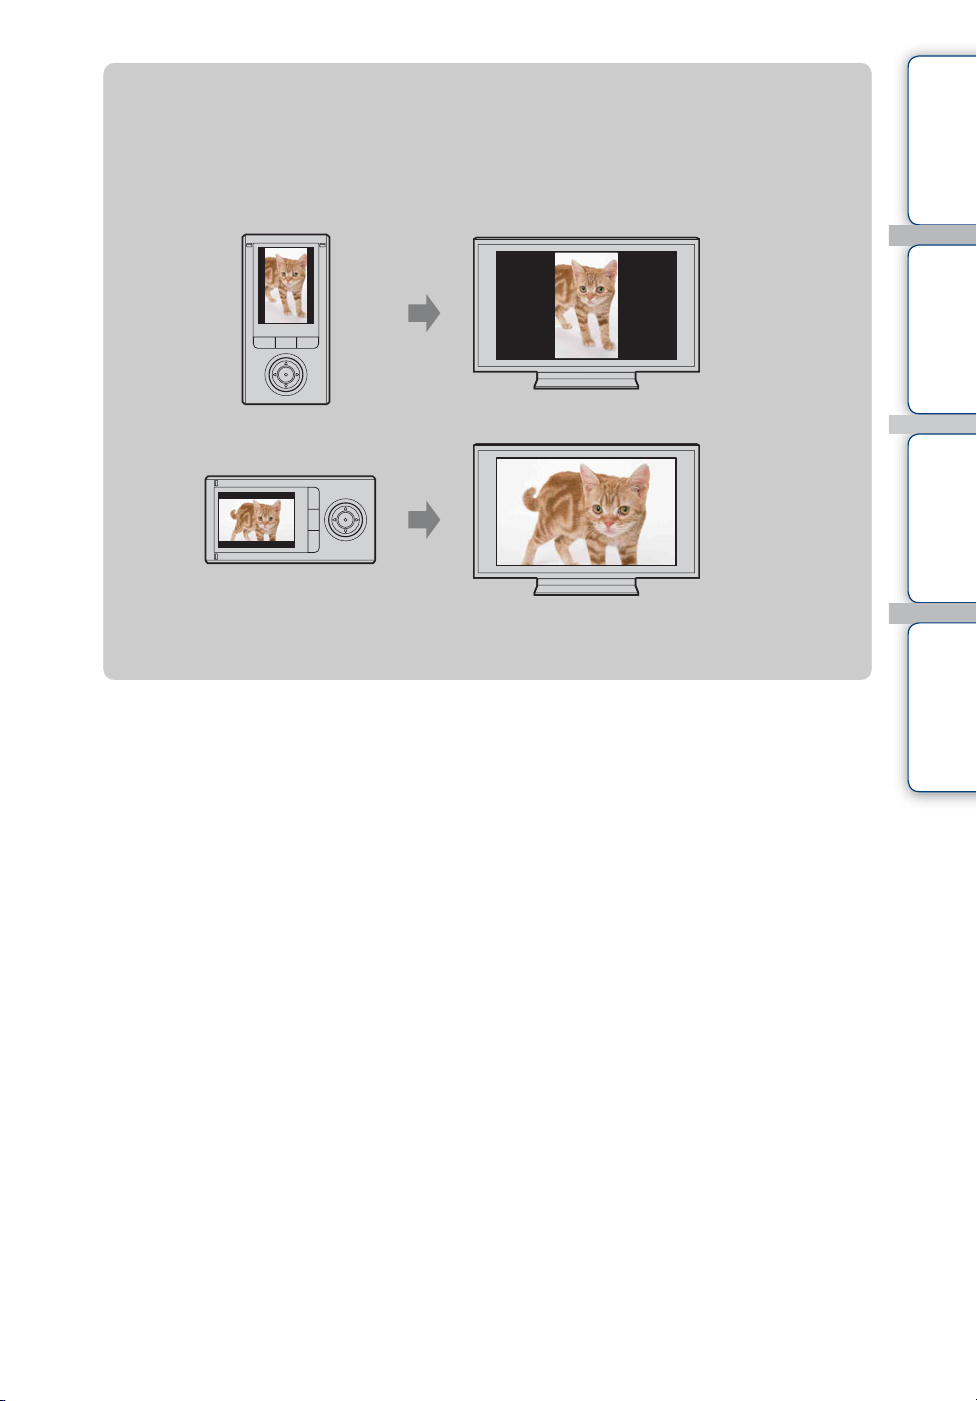
zHolding the camera vertically when you shoot
movies
Portrait images are recorded. Black bands appear on the left and right of the screen during
playback on TV or computer. This is useful when shooting portrait objects.
Hold the camera horizontally when you shoot in 3D.
Holding the camera horizontally is recommended to record more extended sound.
contents
Search
Search
Table of
Operation
Menu/Settings
Index
20
GB

Checking the accessories supplied
• USB connection support cable (1)
Use this if the USB jack of the camera cannot be connected to the computer (page 22).
• 360 Video Lens VCL-BPP3 (1) / 360 Video Lens case (1)
(only for MHS-FS3K)
contents
Search
Table of
Operation
• Wrist strap (1)
• Software (page 25, 45)
The following contents are included on the internal memory of this camera.
– Bloggie Software (application software)
– Bloggie Handbook (this manual)
• Instruction Manual (1)
• Important Notice (1)
Menu/Settings
Search
Index
21
GB

Charging the camera
The camera’s battery is continuously charged whenever the camera is connected to a running
computer.
1 Press the ON/OFF (Power) button to turn off
the camera.
contents
Search
Table of
Operation
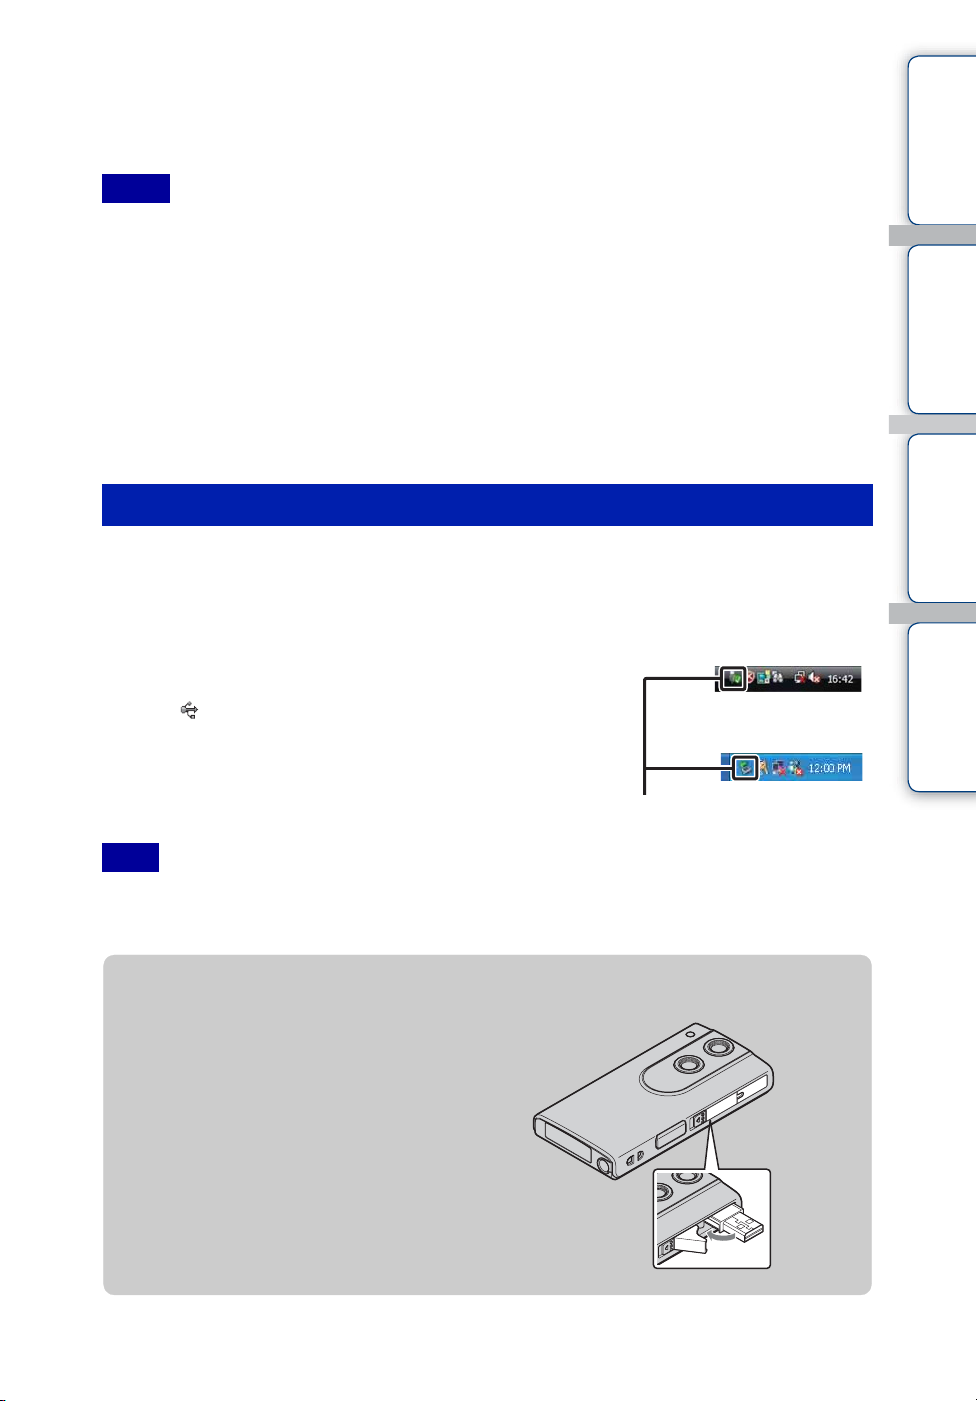
2 Slide the slide lever at the side of the camera.
The USB jack comes out as shown in the illustration.
3 Connect the camera to the computer that is
turned on.
The charge lamp lights up in orange, and charging starts.
When the charge lamp turns off, charging is finished.
• The charge lamp may turn off when the temperature is outside
of the recommended operating temperature (10°C to 30°C
(50°F to 86°F)).
ON/OFF (Power)
button
USB jackSlide lever
Menu/Settings
Search
Index
Charge lamp
Continued r
22
GB
4 When charging is finished, disconnect the USB connection between the
camera and computer (page 23).
Install Bloggie Software (pre-loaded on the internal memory) after completing the procedure
above.
Notes
• While the camera is connected to a computer, you cannot operate the camera. Be sure to disconnect the
camera before operation.
• Do not apply force to the camera, when you connect the camera to a computer. This may cause damage to
the camera or the computer.
• When you connect the camera to a notebook computer that is not connected to an AC power source, the
battery of the notebook computer may be depleted rapidly. Do not leave the camera connected to the
computer for a long time.
• Charging the battery or the connection with customized or hand-built computers is not guaranteed.
Depending on the type of the USB device used, charging may not function properly.
• If you do not intend to use the camera for an extended period, charge the camera once every 6 to 12
months to maintain battery performance.
Disconnecting the USB connection
Perform the procedures from step 1 to 3 below before:
• Disconnecting the USB connection support cable.
• Turning off the camera.
contents
Search
Search
Table of
Operation
Menu/Settings
1 Double-click the disconnect icon on the
Windows Vista
tasktray.
2 Click (USB Mass Storage Device) t [Stop].
3 Confirm the device on the confirmation
Windows XP
window, then click [OK].
Disconnect icon
Note
• Drag and drop the drive icon to the “Trash” icon beforehand when you use a Macintosh computer, and
the camera is disconnected from the computer.
zTo retract the USB jack
Push the USB jack back in the direction
of the arrow until it clicks.
Index
Continued r
23
GB
zHow long does it take to charge the camera?
Charging time
Full charge time
Approx. 200 min.
• Time required to charge a fully depleted battery at a temperature of 25°C (77°F). Charging may take
longer under certain circumstances or conditions.
zHow long can I record or play back images?
Standard battery life
Recording time*
Continuous recording time*
Typical recording time*
Playback time
Approx. 120 min.
*1Recording time is the time when shooting movies in 3D.
2
Continuous recording time shows the approximate time available of a fully charged battery pack.
*
Continuous recording of movies is possible for approximately 29 minutes. Also, recording stops
automatically to prevent the file size from exceeding 2 GB.
3
Typical recording time shows the approximate time available of a fully charged battery pack when
*
you repeatedly execute operations, such as setting to shooting mode, turning on/off the power, or
zooming.
2
3
1
Approx. 60 min.
Approx. 40 min.
contents
Search
Search
Table of
Operation
Menu/Settings
Index
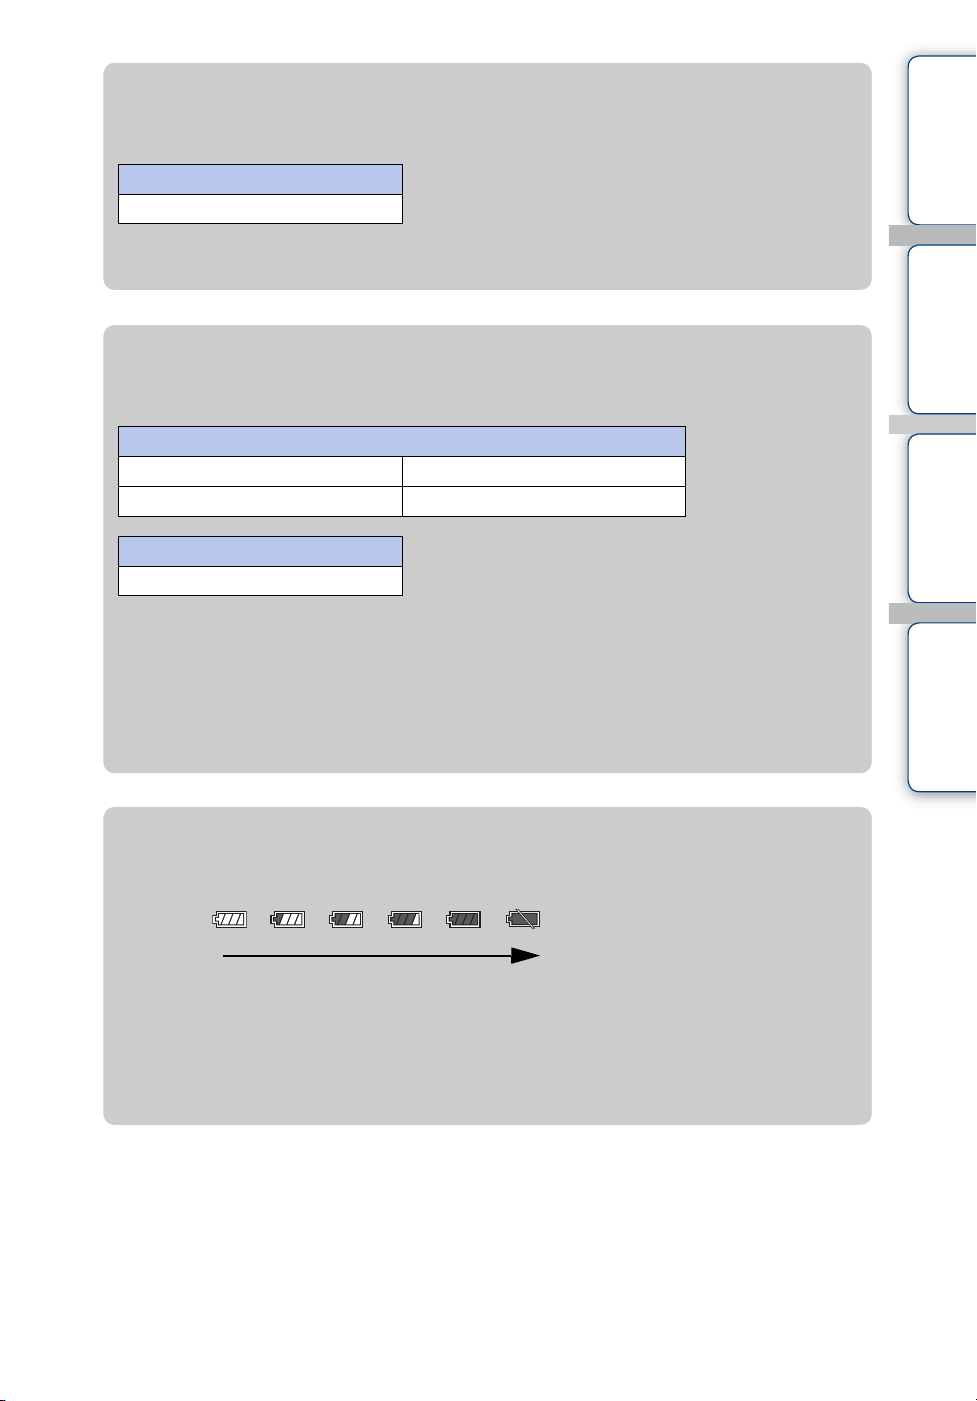
zChecking the remaining battery charge
A remaining charge indicator appears on the upper right of the LCD screen.
High Low
• The displayed battery remaining indicator may not be correct under certain circumstances.
• If the camera is running on battery power and you do not operate the camera for about 5 minutes,
the camera turns off automatically to prevent wearing down the battery (Auto power off function).
• The Language/Clock Setting screen appears when the camera is turned on for the first time
(page 28).
• It takes about one minute until the correct battery remaining indicator appears.
24
GB
 Loading...