

Sony KDL-46R473A, KDL-40R474A, KDL-40R473A, KDL-40R471A, KDL-40R470A User Manual
...
4-458-514-11(1)
LCD TV
Operating Instructions
Start-up Guide
Watching TV
Using Optional Equipment
Using MENU Functions
Network Set-up
Additional Information
KDL-46R473A / 46R470A
KDL-40R474A / 40R473A / 40R471A / 40R470A
KDL-32R424A / 32R423A / 32R421A / 32R420A

NOTICE FOR
CUSTOMERS IN
THE UNITED
KINGDOM
A moulded plug complying with
BS1363 is fitted to this equipment for
your safety and convenience.
Should the fuse in the plug supplied
need to be replaced with the same
rating of fuse approved by ASTA or
BSI to BS 1362 (i.e., m arked with or
) must be used.
If the plug supplied with this
equipment has a detachable fuse
cover, be sure to attach the fuse cover
after you change the fuse. Never use
the plug without the fuse cover. If you
should lose the fuse cover, please
contact your nearest Sony service
station.
FUSE
FUSE
How to replace the fuse
Open the fuse compartment with a
blade screwdriver, and replace the
fuse.
Please refer to the illustration that
actually equipped with the product.
How to re-tune
programmes that you
receive through your TV
aerial:
1 Press HOME on the
remote.
2 Press F/f to select
“Settings”, then press .
3 Press
4 Press
5 Press to select “Digital
F/f to select
“Channel Set-up”, then
press .
F/f to select “Digital
Set-up”, then press .
Tuning”.
6 Press to select “Digital
Auto Tuning”.
7 Press
G
to select “OK”,
then press .
8 Press to select
“Antenna”.
9 Follow the on-screen
instructions.
Introduction
Thank you for choosing this Sony
product.
Before operating the TV, please read
this manual thoroughly and retain it for
future reference.
Notice for Digital TV
function
• Any functions related to Digital TV
( ) will only work in countries or
areas where DVB-T/DVB-T2*
(MPEG-2 and H.264/MPEG-4 AVC)
digital terrestrial signals are
broadcast or wher e you have access
to a compatible DVB-C (MPEG-2
and H.264/MPEG-4 AVC) cable
service. Please confirm with your
local dealer if you can receive a
DVB-T/DVB-T2* signal where you
live or ask your cable provider if their
DVB-C cable service is suitable for
integrated operation with this TV.
• Your cable provider may charge a
fee for their services, or require you
to agree to its terms and conditions
of business.
• This TV set complies with DVB-T/
DVB-T2* and DVB-C specifications,
but compatibility with future DVB-T/
DVB-T2* digital terrestrial and DVBC digital cable broadcasts are not
guaranteed.
• Some Digital TV functions may not
be available in some countries/areas
and DVB-C cable may not operate
correctly with some providers.
This product has been
manufactured by or on behalf of
Sony Corporation, 1-7-1 Konan
Minato-ku Tokyo, 108-0075
Japan. Inquiries related to
product compliance based on
European Union legislation shall
be addressed to the authorized
representative, Sony
Deutschland GmbH, Hedelfinger
Strasse 61, 70327 Stuttgart,
Germany. For any service or
guarantee matters, please refer
to the addresses provided in the
separate service or guarantee
documents.
~
• The illustrations used in this
manual are of the KDL40R474A unless otherwise
state.
* DVB-T2 is not available for TV
model series KDL-46R470A /
40R471A / 40R470A / 32R421A
/ 32R420A.
DVB-T2 is available for TV
model series KDL-46R473A /
40R474A / 40R473A / 32R424A
/ 32R423A.
Trademark information
• is a registered trademark of
the DVB Project.
• HDMI, the HDMI Logo, and High-
Definition Multimedia Interface are
trademarks or regist ered trademarks
of HDMI Licensing, LLC in the United
States and other countries.
• Manufactured under license from
Dolby Laboratories.
• “BRAVIA” and are
trademarks of Sony Corporation.
• MHL, Mobile High-Definition Link
and the MHL Logo are trademarks or
registered trademarks of MHL
Licensing, LLC.
• Manufactured under license from
DTS Licensing Limited. For U.S. and
worldwide patent and trademark
information, see www.dts.com/
patents/legacy.aspx.
© DTS Licensing Limited and DTS,
Inc. 2012.
GB
2

Location of the
identification label
Labels for Model No., Production Date
(month/year) and Power Supply rating
(in accordance with applicable safety
regulation) are located on the rear of
the TV or package.
It is recommended that
you set “Auto Service
Update” to “On”, so as
to allow new digital
services to be added
automatically as they
become available.
Select “Settings” t “Channel Set-up”
t “Digital Set-up” t “Technical Set-
up” t “Auto Service Update”.
z
• If set “Auto Service Update” to
“Off”, new digital services will
be notified by an on-screen
message and the services will
not be automatically added.
The availability of this function
depends on your region/
country. If unavailable, perform
“Digital Auto Tuning” to add
new services.
Download a more detailed operation manual from the Web!
• Select your country.
• You can download a more detailed operation manual from the
Support page.
~The Web page may change without notice.
http://www.sony-europe.com/myproduct/
GB
3
Table of Contents
Start-up Guide
Safety Information...........................................................................................................10
Precautions......................................................................................................................11
Overview of the remote ..................................................................................................13
Overview of the TV buttons and indicators ..................................................................15
Watching TV
Watching TV ....................................................................................................................16
Using the Digital Electronic Programme Guide (EPG) .......................................18
Using the Digital Programme List ........................................................................19
Using Optional Equipment
Connecting optional equipment ....................................................................................20
Viewing pictures from connected equipment ..............................................................21
Photo Frame ....................................................................................................................22
Using MENU Functions
Navigating through TV Menu .........................................................................................24
Network Set-up
Preparing a Network .......................................................................................................25
Setting up the Internet Connection ...............................................................................25
Additional Information
Installing the accessories (Wall-Mount Bracket) .........................................................26
Specifications ..................................................................................................................27
Troubleshooting..............................................................................................................29
: for digital channels only
• Before operating the TV, please read “Safety Information” (page 10). Retain this manual for future reference.
GB
4

Start-up Guide
1: Checking the
accessories
Table-Top Stand (1)
Fixing screws for Table-Top Stand (M5
× 16) (2)
Attachment parts for Wall-Mount
Bracket (2)
(KDL-46R473A/46R470A only)
Fixing screws for Attachment parts (M4
× 8) (2)
(KDL-46R473A/46R470A only)
Remote RM-ED054 (1)
Size AAA batteries (2)
x To insert batteries into the remote
Push to
open
2: Attaching the
stand
~
• For best picture quality, do not expose the screen
to direct illumination or sunlight.
Follow the assembling steps required to place
on a TV stand.
1 Refer to the supplied Table-Top Stand
instruction leaflet for proper attachment
for some TV models.
2 Place the TV with its screen facing down
on a level and stable surface covered
with a thick and soft cloth.
3 Fix the TV to the Table-Top Stand using
the supplied screws.
Thick and soft cloth
Start-up Guide
~
• Observe the correct polarity when inserting
batteries.
• Do not use different types of batteries together or
mix old and new batteries.
• Dispose of batteries in an environmentally friendly
way. Certain regions may regulate the disposal of
batteries. Please consult your local authority.
• Handle the remote with care. Do not drop or step
on it, or spill liquid of any kind onto it.
• Do not place the remote in a location near a heat
source, a place subject to direct sunlight, or a
damp room.
~
• Be careful not to hit the Table-Top Stand against
the edge of the surface when attaching it.
~
• Hold the Table-Top Stand with one hand to avoid it
dropping when attaching.
~
• Do not put stress on the LCD panel or the frame
around the screen.
• This TV is very heavy, so two or more people
should place the TV onto thick and soft cloth.
(Continued)
GB
5
• If using an electric screwdriver, set the tightening
torque at approximately 1.5 N·m {15 kgf·cm}.
• Be sure to securely tighten the three supplied
screws, otherwise the TV may fall down.
• Use an appropriate screwdriver to attach the
screws tightly without damaging the screw head.
• Please ensure the AC power cord is away from the
stand installation location when you attach the
Table-Top Stand.
• When detaching the Table-Top Stand, reverse the
attaching procedure. Do not remove any screws
other than those used when attaching the TableTop Stand. Do not power on the TV with its LCD
panel facing down to avoid uneven picture
uniformity.
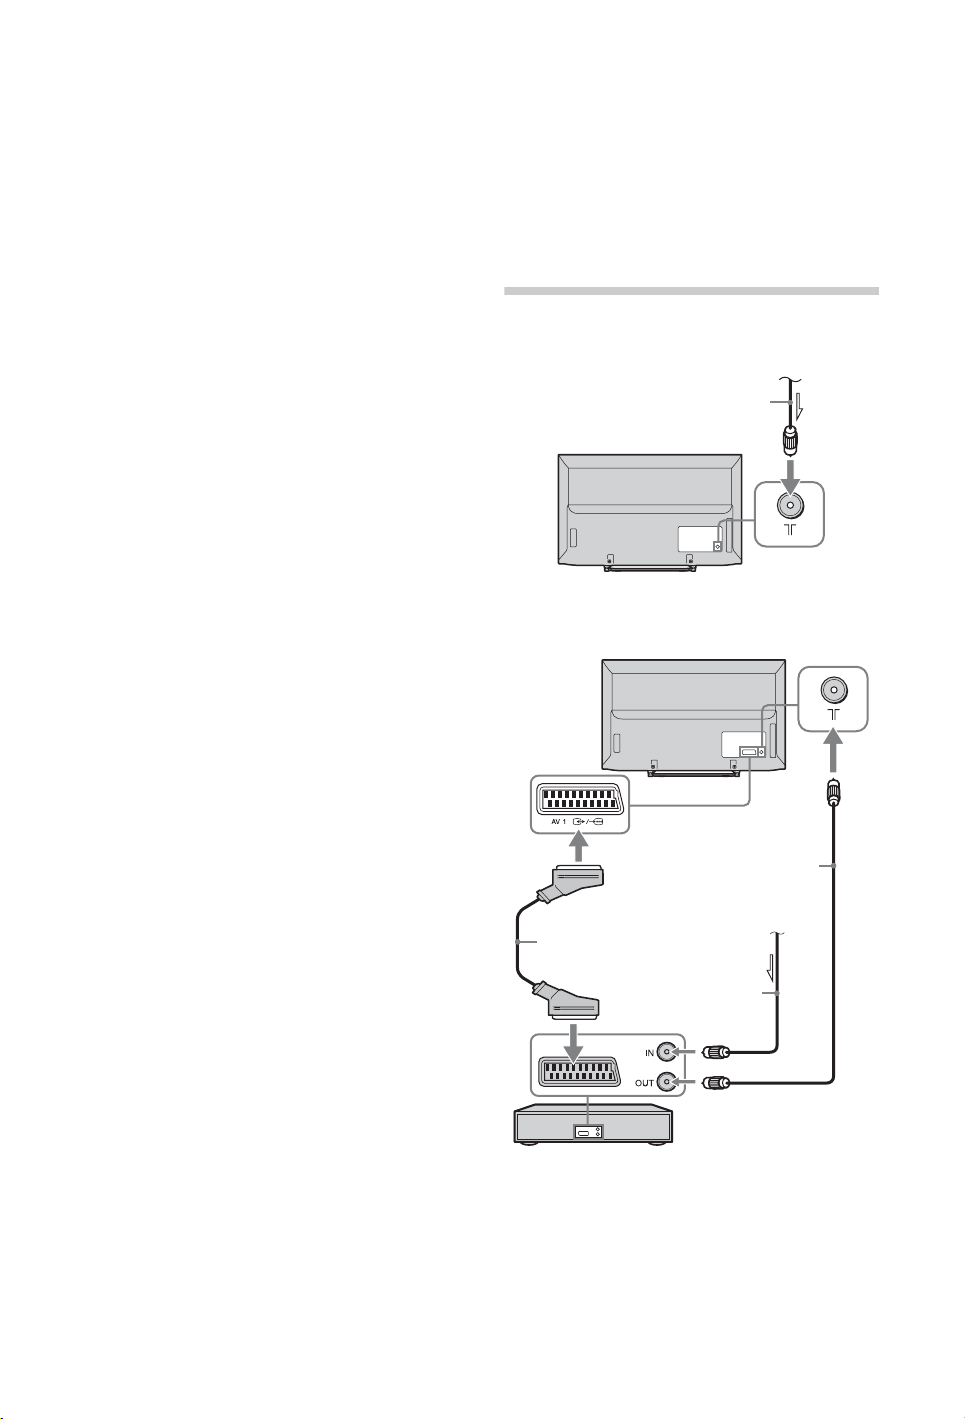
3: Connecting an
aerial/cable/
VCR/DVD
recorder
Connecting an aerial/cable only
Terrestrial signal
or cable
Coaxial cable
Connecting an aerial/cable/VCR/DVD
recorder with SCART
Coaxial cable
Terrestrial
signal or cable
Scart lead
Coaxial cable
VCR/DVD recorder
GB
6
Connecting an aerial/cable/VCR/DVD
recorder with HDMI
Coaxial
cable
Terrestrial
signal or
cable
HDMI cable
Coaxial cable
VCR/DVD recorder
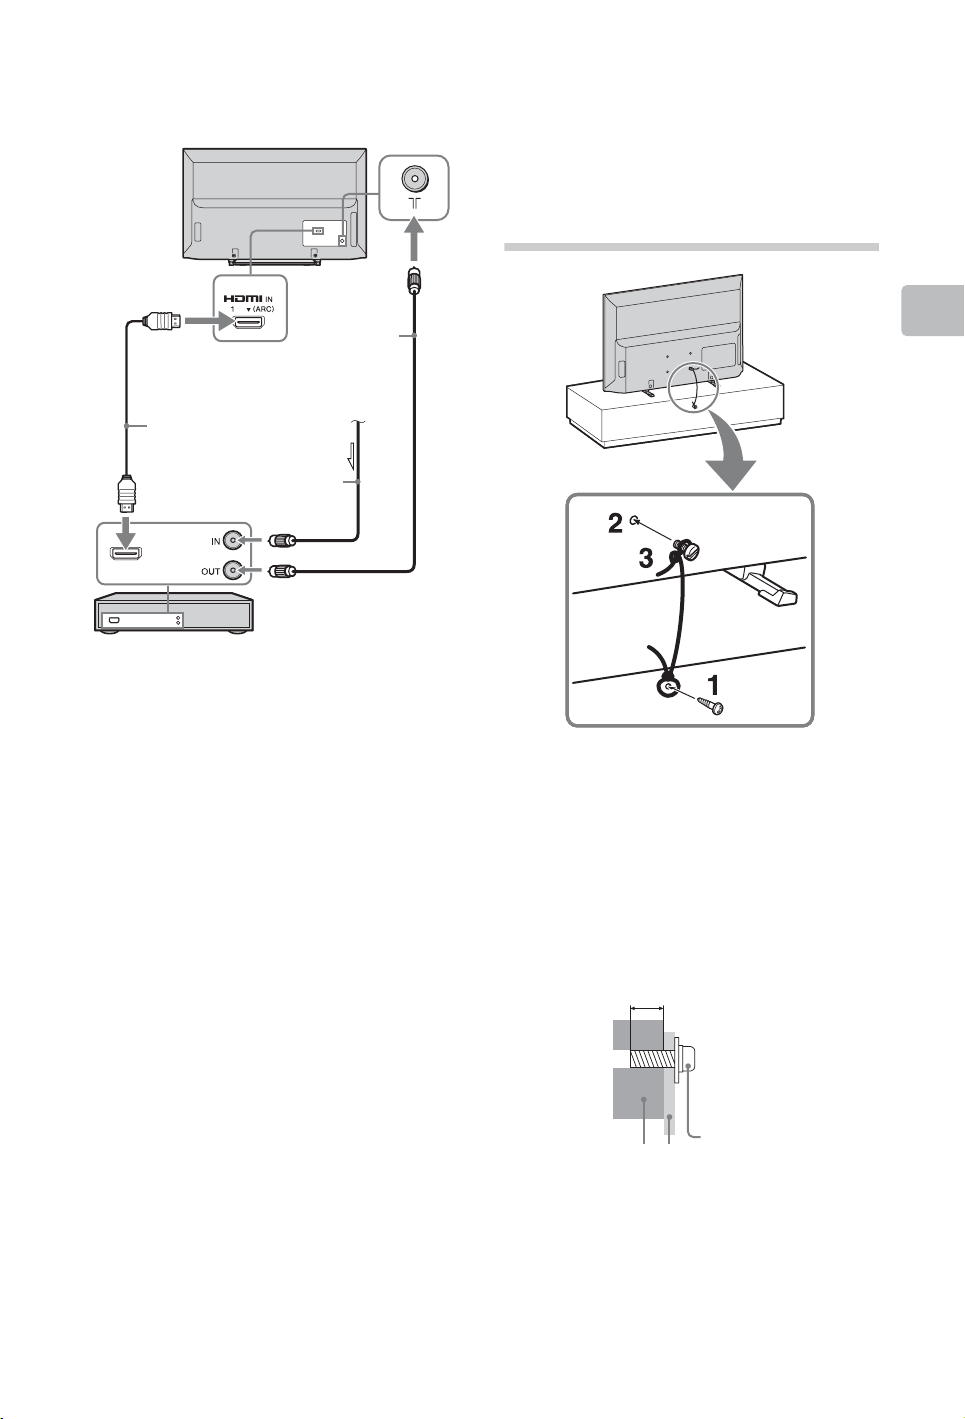
4: Preventing the
TV from
toppling over
Start-up Guide
1 Install a wood screw (4 mm in diameter,
not supplied) in the TV stand.
2 Install a machine screw (M4, not
supplied) into the screw hole of the TV.
3 Tie the wood screw and the machine
screw with a strong cord (not supplied).
The length of the M4 machine screw differs
depending on the cord diameter. Please
refer to below illustration.
6-8 mm
TV
z
• An optional Sony support belt kit is used to secure
the TV. Contact your nearest Sony Service Centre
to purchase a kit. Have your TV model name ready
for reference.
Screw M4
Rope or chain
GB
7
5:
Selecting the
language,
country/region
and location
3 Press F/f to select the language
displayed on the menu screens, then
press .
4 Follow the on-screen instructions to
select the country/region in which you will
operate the TV.
If the country/region which you want to use
on the TV does not appear in the list, select
“-” instead of a country/region.
5 Follow the on-screen instructions to set
the PIN code.
z
• Any PIN code can be used, except 0000.
6 Follow the on-screen instructions to
select the location type in which you will
operate the TV.
This option selects the initial picture mode
appropriate for the typical lighting condition
in these environments.
In Shop mode, some settings will be
periodically reset for Shop usage.
3,4,5,6
1 Connect the TV to your mains socket
(220-240V AC, 50Hz).
2 Press "/1 on the side of the TV.
When the TV is in standby mode (the "/1
(power/standby) indicator on the TV front
panel is red), press "/1 on the remote to
turn on the TV.
When you turn on the TV for the first time,
the Language menu appears on the
screen.
~
• When you turn on the TV, the power indicator
lights up in green.
GB
8
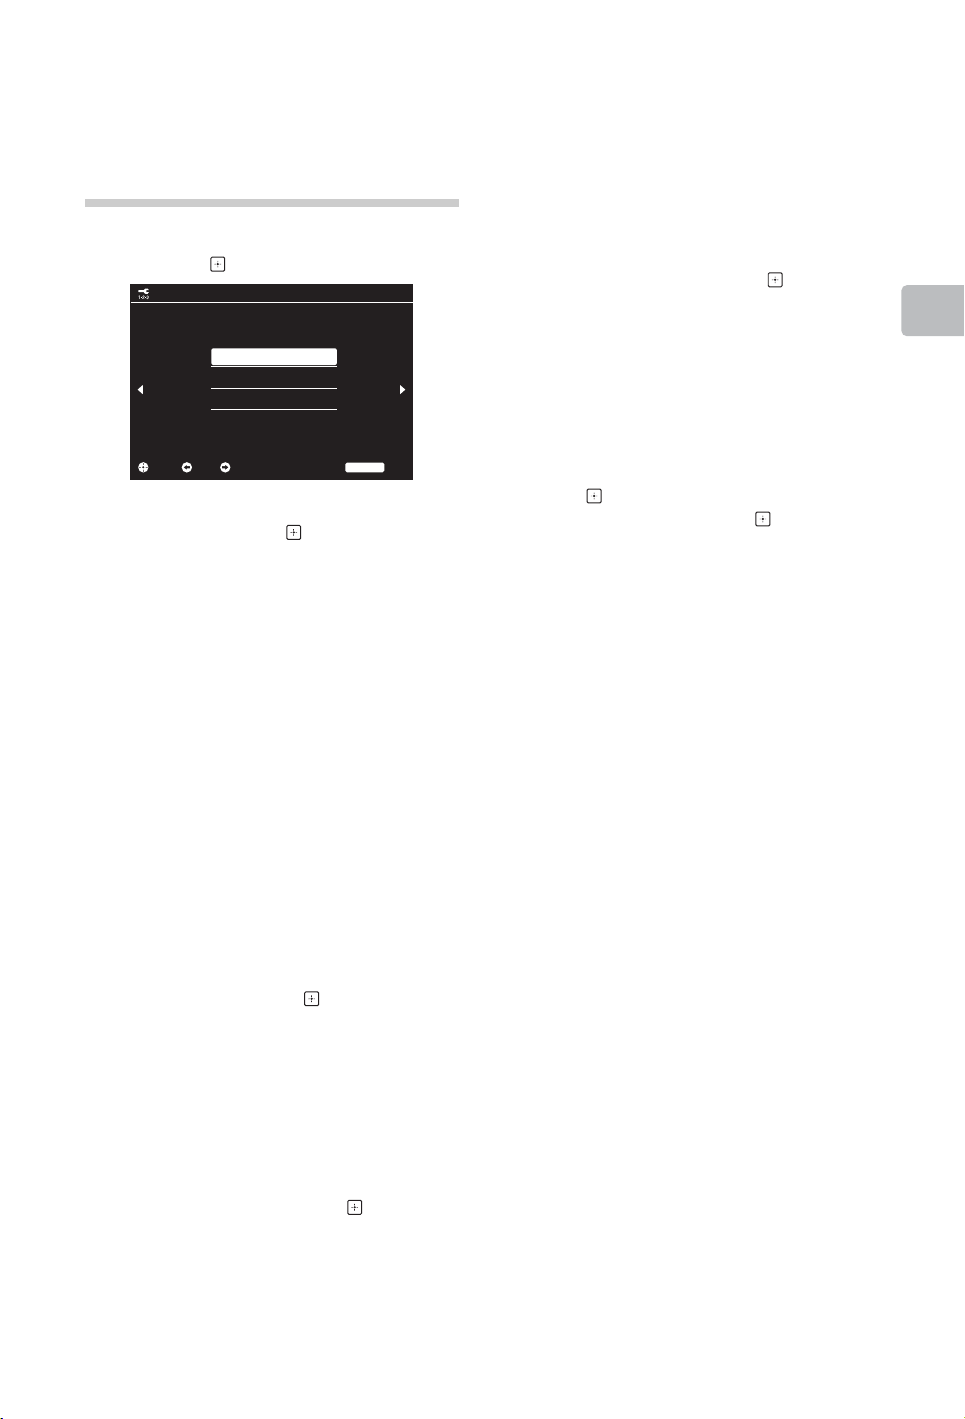
6: Auto-tuning
the TV
1 Press F/f to select the broadcast type,
then press .
Auto Tuning
Select the broadcast type to automatically search for services
Digital and Analogue
Digital
Analogue
Skip
~
• This step may not appear if only the digital
channel is found.
4 Set the current day and time.
~
• This step will appear only if clock has not been
obtained from digital broadcasting.
The message “Set-up complete.” will
appear on the screen. Press .
The TV has now tuned in all the available
channels.
z
• USB System Update
You can update the TV system using USB memory.
Obtain information from the website below.
http://support.sony-europe.com/TV/
Start-up Guide
Select Back Next
RETURN
Back
2 Press F/f to select “Antenna” or
“Cable”, then press .
Select “Antenna” to receive terrestrial TV
broadcasting by an external antenna.
Select “Cable” if you are a Cable TV
subscriber not using an external set-top
box.
If you select “Cable”, the screen for
selecting the scan type appears. See “To
tune the TV for Cable connection” (page 9).
The TV then starts searching for all
available digital channels, followed by all
available analogue channels. This may take
some time, so do not press any buttons on
the TV or remote while proceeding.
~
• In some countries, you may select “Antenna”
instead of “Cable” to receive Cable TV
programmes.
If a message appears for you to confirm
the aerial connection
No digital or analogue channels were
found. Check all the aerial/cable
connections and press to start autotuning again.
3 Programme Sorting: Changes the order
in which the channels are stored on the
TV.
1 Press F/f to select the channel you
want to move to a new position, then
press
g.
2 Press
If you do not change the order in which the
channels are stored on the TV, press
HOME to go to next step.
F/f to select the new position for
your channel, then press .
x To tune the TV for Cable connection
1 Press and F/f to select “Quick Scan”
or “Full Scan”, then press .
“Quick Scan” : channels are tuned
according to the cable operator information
within the broadcast signal.
Recommended setting for “Frequency” and
“Network ID” is “Auto”.
This option is recommended for fast tuning
when supported by your cable operator.
If the “Quick Scan” does not tune, please
use the “Full Scan” method below.
“Full Scan” : All available channels are
tuned and stored. This procedure may take
some time.
This option is recommended when “Quick
Scan” is not supported by your cable
provider.
2 Press f to select “Start”.
The TV starts searching for channels. Do
not press any buttons on the TV or remote.
~
• Some cable providers do not support “Quick
Scan”. If no channels are detected using “Quick
Scan”, perform “Full Scan”.
GB
9
Safety Information
– Do not install the TV set as shown
below.
Air circulation is blocked.
Installation/Set-up
Install and use the TV set in
accordance with the instructions
below in order to avoid any risk of fire,
electrical shock or damage and/or
injuries.
Installation
• The TV set should be installed near
an easily accessible mains socket.
• Place the TV set on a stable, level
surface.
• Only qualified service personnel
should carry out wall installations.
• For safety reasons, it is strongly
recommended that you use Sony
accessories.
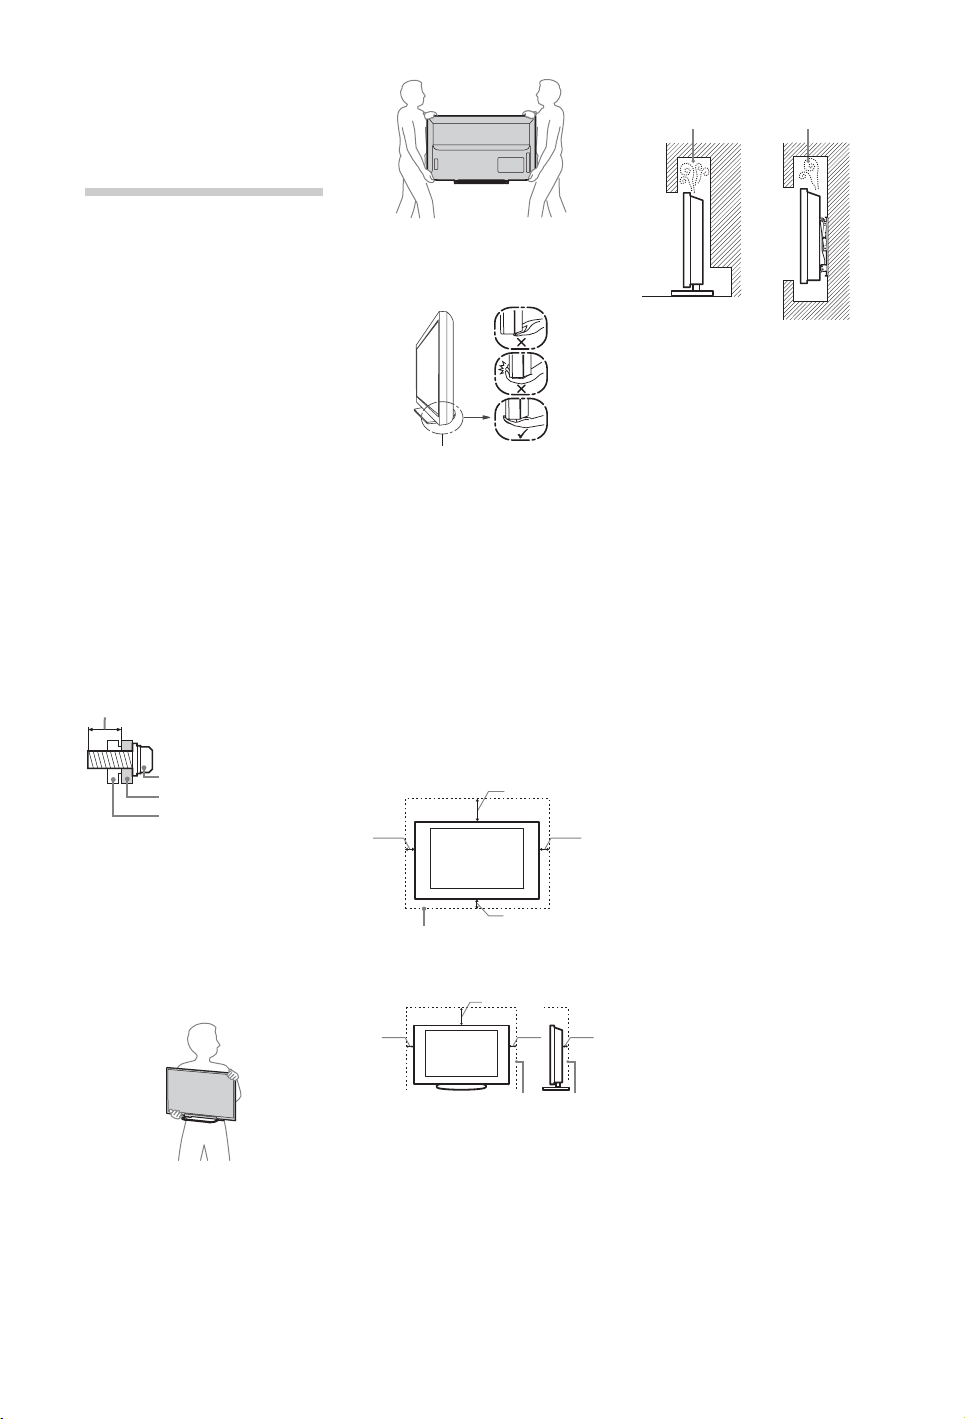
• Be sure to use the screws supplied
with the Wall-mount bracket when
attaching the mounting hooks to the
TV set. The supplied screws are
designed as indicated by illustration
when measured from the attaching
surface of the mounting hook. The
diameter and length of the screws
differ depending on the Wall-mount
bracket model. Use of screws other
than those supplied may result in
internal damage to the TV set or
cause it to fall, etc.
32, 40 TV: 6.5mm ~ 10mm
46 TV: 8mm ~ 12mm
Screw
32, 40 TV: M4
46 TV: M6
Mounting Hook
Hook attachment on rear
of TV set
Transporting
• Before transporting the TV set,
disconnect all cables.
• Two or three people are needed to
transport a large TV set.
• When transporting the TV set by
hand, hold it as shown in the
illustration. Do not put stress on the
LCD panel and the frame around the
screen.
KDL-46R473A/46R470A/40R474A/
40R473A/40R471A/40R470A
• When lifting or moving the TV set,
hold it firmly from the bottom.
Be sure to hold the bottom of
the panel, not the front part.
• When transporting the TV set, do not
subject it to jolts or excessive
vibration.
• When transporting the TV set for
repairs or when moving, pack it
using the original carton and
packing material.
Ventilation
• Never cover the ventilation holes or
insert anything in the cabinet.
• Leave space around the TV set as
shown below.
• It is strongly recommended that you
use a Sony wall-mount bracket in
order to provide adequate aircirculation.
Installed on the wall
30 cm
10 cm 10 cm
Leave at least this space around
the set.
10 cm
Installed with stand
30 cm
10 cm
10 cm
6 cm
Wall Wall
Mains lead
Handle the mains lead and socket as
follows in order to avoid any risk of fire,
electrical shock or damage and/or
injuries:
– Use only mains leads supplied by
Sony, not other suppliers.
– Insert the plug fully into the mains
socket.
– Operate the TV set on a 220–240 V
AC supply only.
– When wiring cables, be sure to
unplug the mains lead for your
safety and take care not to catch
your feet on the cables.
– Disconnect the mains lead from
the mains socket before working
on or moving the TV set.
– Keep the mains lead away from
heat sources.
– Unplug the mains plug and clean it
regularly. If the plug is covered
with dust and it picks up moisture,
its insulation may deteriorate,
which could result in a fire.
Notes
• Do not use the supplied mains lead
on any other equipment.
• Do not pinch, bend, or twist the
mains lead excessively. The core
conductors may be exposed or
broken.
• Do not modify the mains lead.
• Do not put anything heavy on the
mains lead.
• Do not pull on the mains lead itself
when disconnecting the mains lead.
• Do not connect too many ap pliances
to the same mains socket.
• Do not use a poor fitting mains
socket.
KDL-32R424A/32R423A/32R421A/
32R420A
GB
10
Leave at least this space around
the set.
• To ensure proper ventilation and
prevent the collection of dirt or dust:
– Do not lay the TV set flat, install
upside down, backwards, or
sideways.
– Do not place the TV set on a
shelf, rug, bed or in a closet.
– Do not cover the TV set with a
cloth, such as curtains, or items
such as newspapers, etc.
Prohibited Usage
Do not install/use the TV set in
locations, environments or situations
such as those listed below, or the TV
set may malfunction and cause a fire,
electrical shock, damage and/or
injuries.
Location:
• Outdoors (in direct sunlight), at the
seashore, on a ship or other vessel,
inside a vehicle, in medical
institutions, unstable locations, near
water, rain, moisture or smoke.
• If the TV is placed in the changing
room of a public bath or hot spring,
the TV may be damaged by airborne
sulfur, etc.
 Loading...