

Sony DVX-11A Users guide [es, en]

3-255-981-23 (1)
Mobile DVD Player
Operating Instructions
Manual de instrucciones
For installation and connections, se e the supplied installation/connec tions manual.
Para obtener información sobre la instalación y las conexiones, consulte el man ual
de instalación/conexiones suministrado.
GB
ES
CT
DVX-11A
© 2003 Sony Corporation
Warning
To prevent fire or shock hazard, do not
expose the unit to rain or moisture.
T o avoid electrical shock, do not open the
cabinet. Refer servicing to qualified
personnel only.
CAUTION
The use of optical instruments with this product
will increase eye hazard. As the laser beam used
in this CD/DVD player is harmful to eyes, do not
attempt to disass em ble the cabinet.
Refer servicing to qualified personnel only.
This label is located on the bottom of the
chassis.
CAUTION INVISIBLE
VIEW DIRECTLY WITH OPTICAL INSTRUMENTS
This label is located on the drive unit’s internal
chassis.
LASER RADIATIONWHEN OPEN
DO NOT STARE INTO BEAM OR
2

Table of Contents
Welcome! . . . . . . . . . . . . . . . . . . . . . . . . . . . 4
Precautions . . . . . . . . . . . . . . . . . . . . . . . . . . 5
Playable discs . . . . . . . . . . . . . . . . . . . . . . . . 5
Location of controls. . . . . . . . . . . . . . . . . . . . 8
Menu displays . . . . . . . . . . . . . . . . . . . . . . . 10
Resetting the unit. . . . . . . . . . . . . . . . . . . . . 12
Player
Playing discs . . . . . . . . . . . . . . . . . . . . . . . . 12
Resuming playback
— Resume play. . . . . . . . . . . . . . . . . . . . 14
Checking the running time
— Time information. . . . . . . . . . . . . . . . 15
Searching a specific point on a disc
— Scan/Slow-motion play/List . . . . . . . 16
Using the menus on DVDs . . . . . . . . . . . . . 17
Using PBC functions
— PBC (Playback control). . . . . . . . . . . 18
Playing in various modes
— Repeat play/Search play. . . . . . . . . . . 18
Sound Adjustments
Changing the audio channels. . . . . . . . . . . . 20
Picture adjustments
Changing the angles . . . . . . . . . . . . . . . . . . 21
Displaying the subtitles . . . . . . . . . . . . . . . . 22
Magnifying pictures. . . . . . . . . . . . . . . . . . . 22
Other Function
Locking discs
— Parental control . . . . . . . . . . . . . . . . . 23
Settings and Adjustments
Using the Setup menu . . . . . . . . . . . . . . . . . 26
Setting the display language or sound track
— Language setup . . . . . . . . . . . . . . . . . 27
Setting the screen
— Screen setup. . . . . . . . . . . . . . . . . . . . 27
Custom settings
— Custom setup . . . . . . . . . . . . . . . . . . . 28
Audio settings
— Audio setup . . . . . . . . . . . . . . . . . . . . 29
Additional Information
Maintenance . . . . . . . . . . . . . . . . . . . . . . . . 29
Notes on discs. . . . . . . . . . . . . . . . . . . . . . . 30
Notes on MP3 files . . . . . . . . . . . . . . . . . . . 31
Specifications . . . . . . . . . . . . . . . . . . . . . . . 32
Troubleshooting . . . . . . . . . . . . . . . . . . . . . 33
Error displays . . . . . . . . . . . . . . . . . . . . . . . 35
Glossary . . . . . . . . . . . . . . . . . . . . . . . . . . . 35
Language code list . . . . . . . . . . . . . . . . . . . 37
Index . . . . . . . . . . . . . . . . . . . . . . . . . . . . . . 38
3

Welcome!
Thank you for purchasing this Sony Mobile
DVD Player. Before operating this unit, read this
manual thoroughly and retain it for future
reference.
FEATURING:
• DVD video/DVD-R/RW, CD/CD-R/-RW, VCD
playback compatibility
• 2 A/V outputs (front and rear) and 1 digital
output provided
• DIN size for easy system set with any
monitor(s)
About this manual
• Instructions in this manual describe the
controls on the card remote commander. You
can also use the controls on the unit if they have
the same or similar names as those on the card
remote commander.
• In this manual, “DVD” is used as the general
term for DVD VIDEO, DVD-R, and DVD-RW.
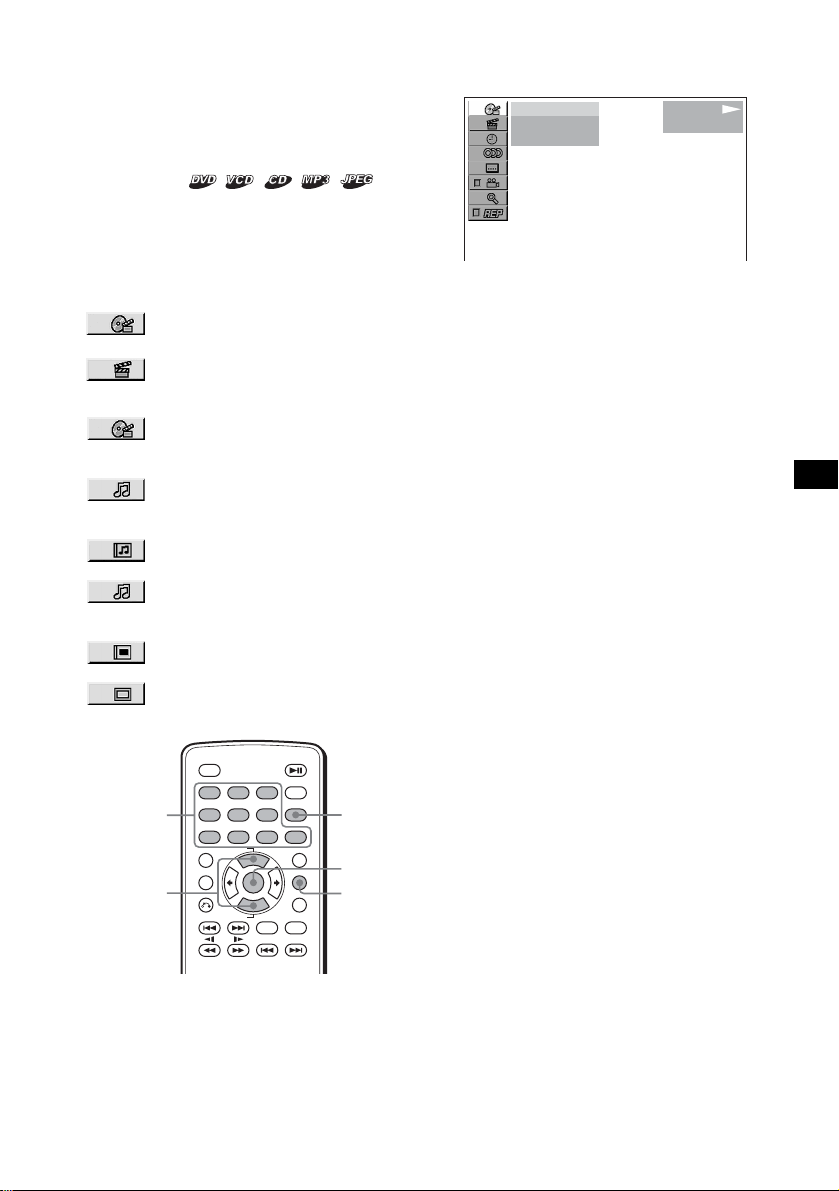
• The meaning of the icons used in this manual is
described below:
Icon Meaning
Functions available for DVD
VIDEOs or DVD-Rs/DVD-RWs
in video mode
Functions available for Video
CDs or CD-Rs/CD-RWs in video
CD format
Functions available for music
CDs or CD-Rs/CD-RWs in
music CD format
Functions available for files in
MP3 format stored on CDROMs/CD-Rs/CD-RWs
Functions available for files in
JPEG format stored on CDROMs/CD-Rs/CD-RWs
4
Precautions
Playable discs
If you have any questions or problems
concerning your unit that are not covered in this
manual, please consult your nearest Sony dealer.
For drivers
• Do not use the custom functions while driving,
or perform any other function which could
divert your attention from the road.
• If your car was parked in direct sunlight, allow
the unit to cool off before operating it.
On safety
• Comply with the Traffic Laws in your country.
• For your safety, the monitor connected to the
FRONT VIDEO OUT turns off automatically
when the parking brake is not applied.
Preventing an accident
The pictures appear only after you park the car
and set the parking brake.
When the car starts moving, the pictures
coming from the FRONT VIDEO OUT
automatically disappear after displaying the
following caution.
The monitor connected to the REAR VIDEO
OUT is available while the car is in motion.
The pictures on the screen are turned off, but
CD/MP3 sound can be heard.
For your safety,
the video is blocked.
Do not operate the unit or watch the monitor
while driving.
Moisture condensation
On a rainy day or in a very damp area, moisture
condensation may occur inside the lenses and
display of the unit. Should this occur, the unit
will not operate properly. In such a case, remove
the disc and wait for about an hour until the
moisture has evaporated.
To maintain high sound quality
Be careful not to splash juice or other soft drinks
onto the unit or discs.
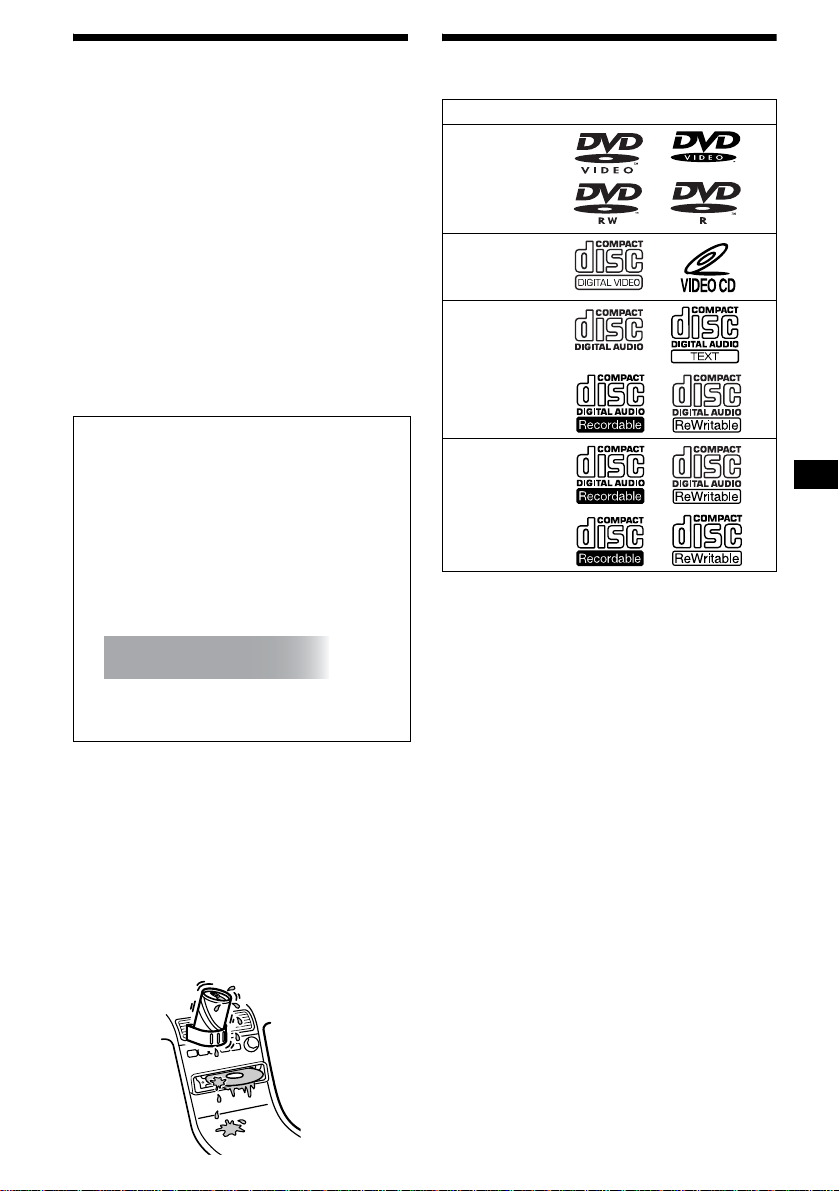
Format of discs
DVD
Video CD
Audio CD/
CD-R/CD-RW
CD-R/CD-RW
(MP3/JPEG)
“DVD VIDEO,” “DVD-R” and “DVD-RW” are
trademarks.
DVD
A DVD contains both audio and visual data. A 12
cm disc can hold 7 times the amount of data
contained in a CD-ROM, which equals to 4
consecutive hours of playing time (8 hours for
double-sided discs). DVDs are divided into 4
types: single sided single layer, single sided
double layer, double sided single layer, and
double sided double layer.
Video CD (VCD)
A Video CD can contain both audio and visual
data on a disc the same size as a regular Audio
CD. The playing time is 74 minutes for a
standard 12 cm CD.
Audio CD
An Audio CD containing audio data. The playing
time is 74 minutes for a standard 12 cm CD.
CD-Recordable (CD-R)
With a CD-R, you can edit audio data. You can
write information on a CD-R only once.
CD-Rewritable (CD-RW)
With a CD-RW, you can edit audio data. You can
write information on a CD-RW again and again.
continue to next page t
5
CD-Extra
A CD-Extra has two sections (sessions) for audio
and data respectively. You can only play the
section of audio on this unit.
Notes
• For customers in the region code 3 areas
This unit conforms to the PAL colour system. A disc
recorded in a colour system other than P A L, such as
NTSC or SECAM, cannot be played.
• For customers in the region code 4 areas
This unit conforms to the NTSC colour system. A
disc recorded in a colour system other than NTSC,
such as PAL or SECAM, cannot be played.
• You can play DVD-Rs/DVD-RWs and CD-Rs/CDRWs designed f o r audio with this unit. Howe ver,
depending on the recorded conditions, you cannot
play some discs.
• The discs listed below cannot be played on this unit:
– 8 cm discs
– CD-ROM (the data other than the MP3 or JPEG
files)
– CD-G
–Photo-CD
– VSD (Video single disc)
–DVD-ROM
– DVD-RAM
–DVD-Audio
– Active-Audio (Data)
– CD-Extra (Data)
– Mixed CD
– SVCD (Super Video CD)
– DVD-RW recorded in VR mode
Note on transparent discs
12 cm discs containing of only an inner 8 cm
data portion (the rest is transparent) cannot be
played on this unit.
Music discs encoded with copyright
protection
This unit is designed to play back discs that
conform to the Compact Disc (CD) standard.
Recently, various music discs encoded with
copyright protection are marketed by some
record companies. Please be aware that among
those discs, there are some that do not conform to
the CD standard and may not be playable and
recordable by this product.
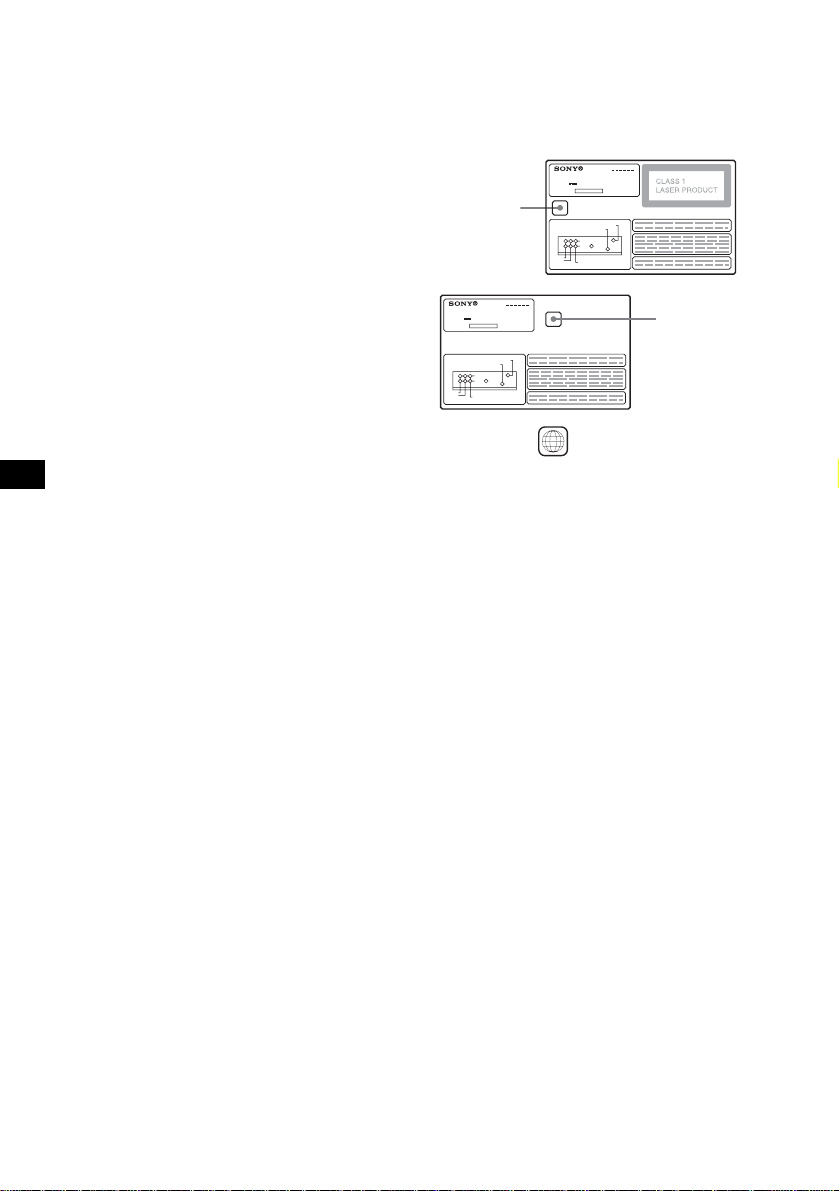
Region code
This system is used to protect software
copyrights.
The region code is located on the bottom of the
unit, and only DVDs labelled the identical region
code can be played on this unit.
MODEL NO.
DVD PLAYER
DC : 12V
N E G A T I V E G R O U N D
Region code
DIGITAL OUT
REMOTE SIGNAL IN
TOP
FRONT
REAR
BOTTOM
R
L
VIDEO OUT
AUDIO OUT
MODEL NO.
DVD PLAYER
DC : 12V
N E G A T I V E G R O U N D
DIGITAL OUT
REMOTE SIGNAL IN
TOP
FRONT
REAR
BOTTOM
R
L
VIDEO OUT
AUDIO OUT
DVDs labelled can be also played on this
ALL
Region code
unit.
If you try to play any other DVD, the message
“Cannot play this disc.” will appear on the
monitor screen. Depending on the DVD, no
region code may be labelled even though playing
the DVD is prohibited by area restrictions.
Note on playback operations of DVDs
and VCDs
Some playback operations of DVDs and VCDs
may be intentionally set by software producers.
Since this unit plays DVDs and VCDs according
to the disc contents the software producers
designed, some playback features may not be
available. Also, refer to the instructions supplied
with the DVDs or VCDs.
6

Copyrights
This product incorporates copyright protection
technology that is protected by method claims of
certain U.S. patents, other intellectual property
rights owned by Macrovision Corporation, and
other rights owners. Use of this copyright
protection technology must be authorized by
Macrovision Corporation, and is intended for
home and other limited viewing uses only unless
otherwise authorized by Macrovision
Corporation. Reverse engineering or disassembly
is prohibited.
Manufactured under license from Dolby
Laboratories.
“Dolby” and the double-D symbol are
trademarks of Dolby Laboratories.
Confidential unpublished works. Copyright
1992-1997 Dolby Laboratories. All rights
reserved.
“DTS,” “DTS Digital Surround” and “DTS
Digital Out” are trademarks of Digital Theater
Systems, Inc.
7
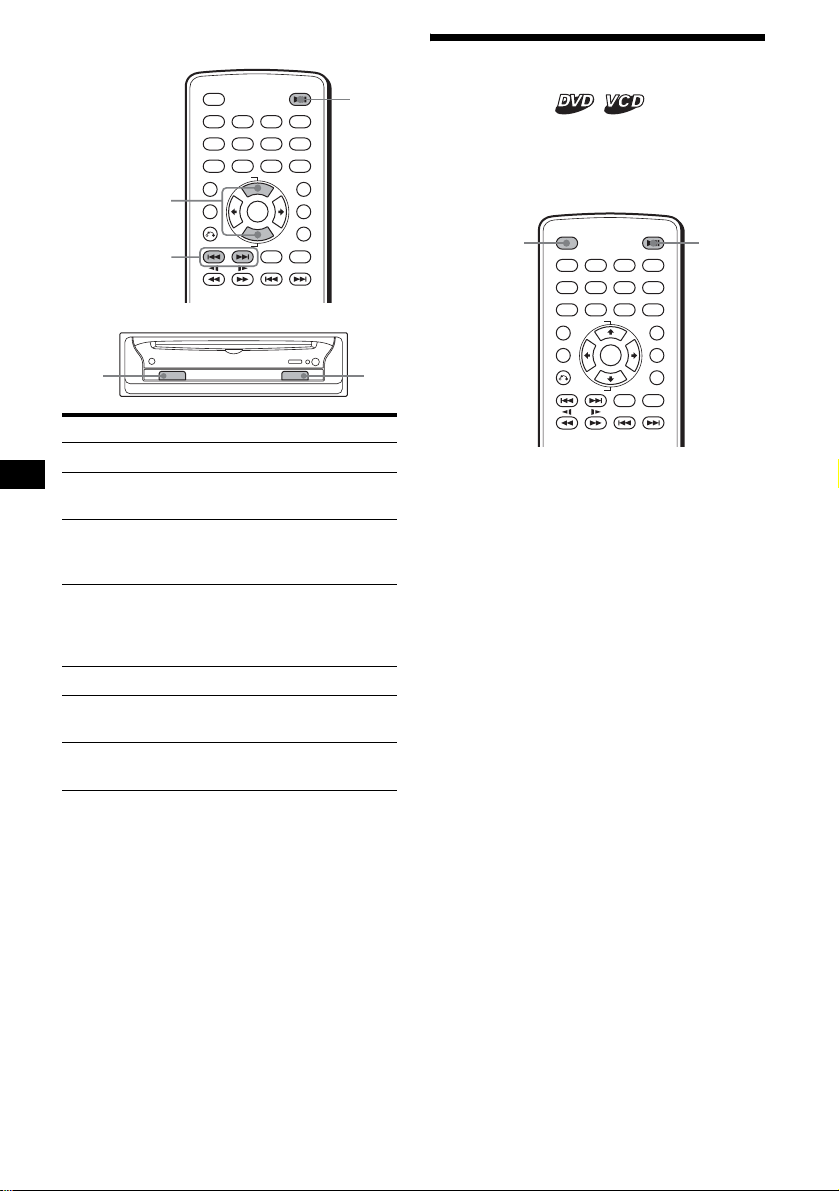
Location of controls
Front panel
DISC IN
OFF
DVX-11A
a Receptor for the card remote
commander
b Disc slot
c DISC IN indicator
Lights up in blue when a disc is stored.
d Reset button
e u (play/pause) button*
1
f PAL/NTSC select switch
(Located on the bottom of the unit)
See “PAL/NTSC select switch” in the
Installation/Connections manual.
Region code 4 model only:
Signal select switch
(Located on the bottom of the unit)
See the Installation/Connections manual for
details.
g Z (eject) button
h OFF button*
*1 Use the tactile dot as a reference when operating
the unit.
*2 Warning when installing in a car without the
ACC (accessory) position on the ignition key
switch
Be sure to press and hold (OFF) on the unit until
the key illuminations in blue go off.
Otherwise, the unit does not turn off and this
causes battery drain.
2
Note
If the unit is turned off by pressing (OFF) for 2
seconds, press u on the unit to turn on the unit first.
In this case, the card remote commander is not
available to turn on the unit.
Tip
You can eject the disc any time whethe r the unit is
turned on or not, but you can insert the disc only when
the unit is turned on.
8
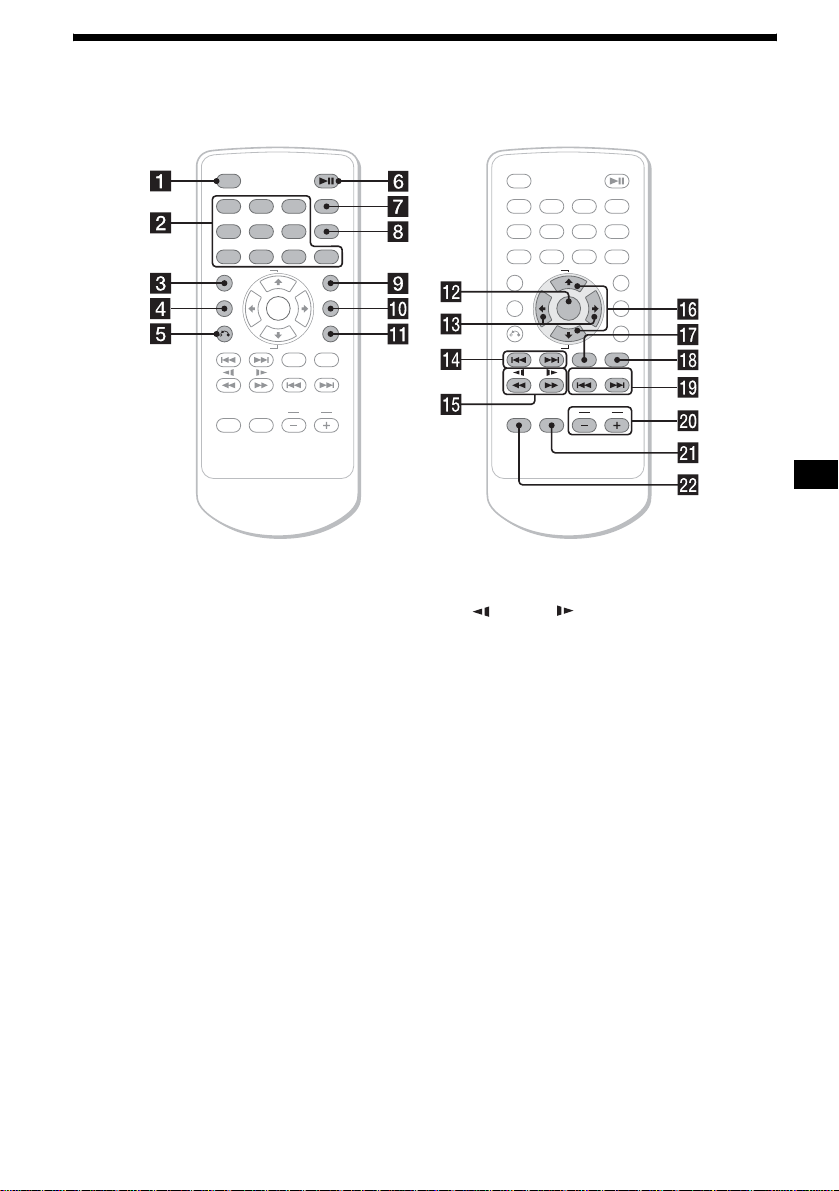
Card remote commander RM-X129
+
–
ENTER
AUDIO
SEEK
–
DISPLAY
CLEAR
0
LIST
SETUP
ANGLE
SUBTITLE
SEEK
123
456
789
TOP MENU
ALBUM
MENU
ALBUM
SOURCE
MODE
For the unit operations:
a OFF button
b Number buttons
c TOP MENU button
Displays the top menu on a DVD.
d MENU button
Displays the menu on a disc.
e O (return) button
Returns to the previous display, or previous
operation.
f u (play/pause) button
g DISPLAY button
Displays current playback status and text
information.
h CLEAR button
Cancels the numbers entered.
i LIST button
Displays the list of playback items.
j SETUP button
Displays the Setup menu and Play mode
menu.
k ANGLE button
Changes the viewing angle.
l ENTER button
Applies a setting.
m </, buttons
Move the cursor, or turn the pages.
OFFOFF
1
456
7 890
TOP MEN U
ALBUM
MENU
ALBUM–
+
SOURCE
MODE
23
+
ENTER
AUDIO
SEEK–SEEK
VOLVOL
DISPLAY
CLEAR
LIST
SETUP
ANGLE
SUBTITLE
+
n ./> (previous/next) buttons
o m/M (search/slow) buttons
p M ALBUM+/m ALBUM– buttons
Move the cursor, or select the album.
q AUDIO button
Changes the audio output.
r SUBTITLE button
Changes the subtitle language.
For the Media center/receiver XAV-77
operations:
These buttons control the optional Media center/
receiver XAV-77 which is connected to this unit.
s .SEEK–/>SEEK+ buttons
t VOL +/– buttons
u MODE button
v SOURCE button
Note
If the unit is turned off by pressing (OFF) for 2
seconds, press u on the unit to turn on the unit first.
In this case, the card remote commander is not
available to turn on the unit.
Tip
Refer to “Replacing the lithium battery” for details on
how to replace the batteries (page 30).
9

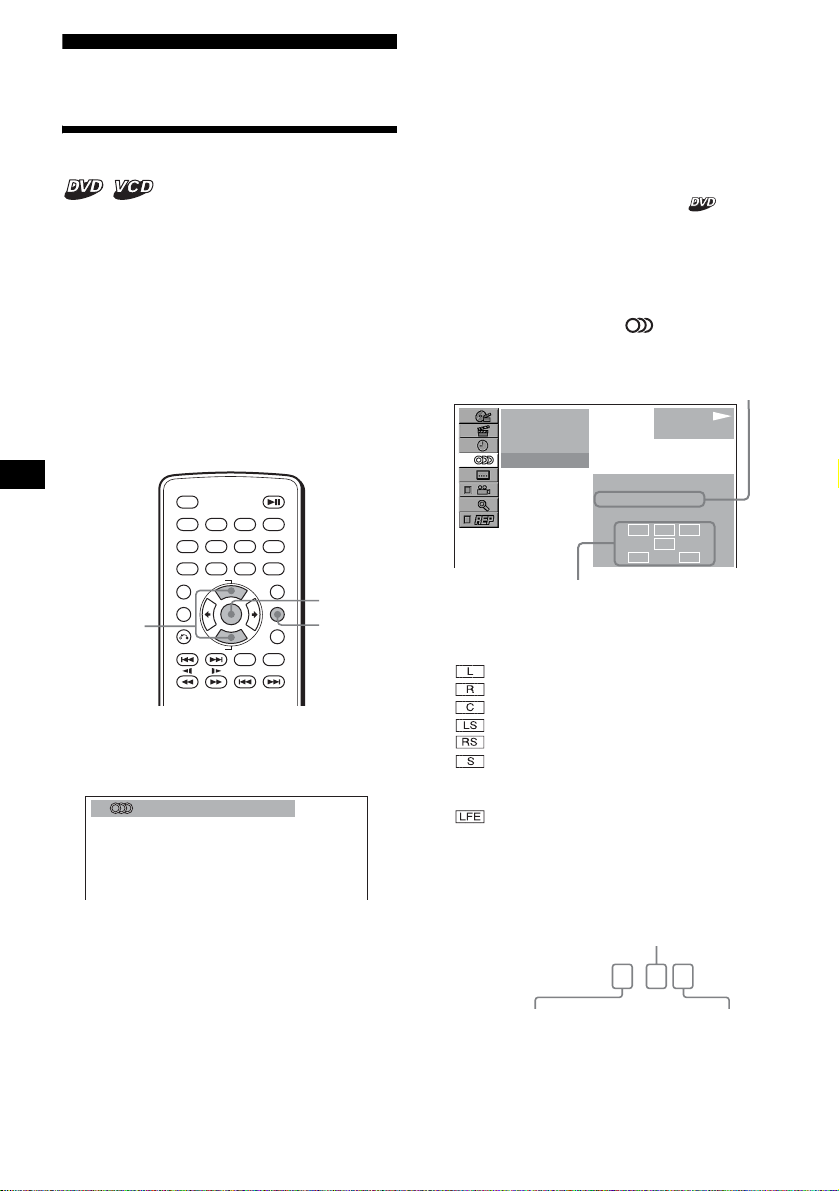
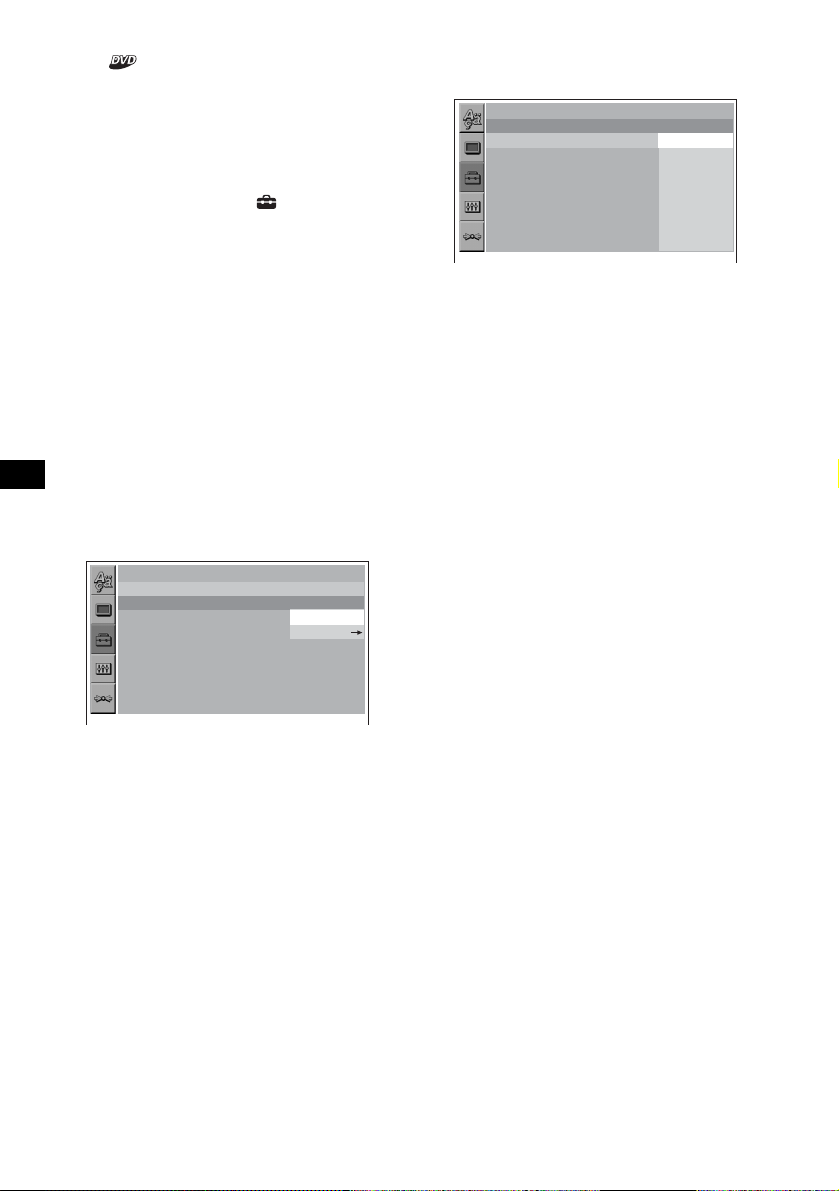
Menu displays
Use the menus of this unit to adjust the various functions and settings for playback.
The displaying menu differs depending on the status of the unit.
Setup menu
Appears when pressing (SETUP) while
playback is stopped.
To select the item
Press </M/m/,, then press (ENTER).
To turn off the Setup menu
Press (SETUP).
Example: When “LANGUAGE SETUP” is
selected.
LANGUAGE SETUP
OSD:
MENU:
AUDIO:
SUBTITLE:
To set, press , then
ENTER SETUP
. To quit, press
ENGLISH
JAPANESE
ENGLISH
ENGLISH
A Setup items
B Selected item
C Setting items
D Options
E Current setting
Play mode menu
Appears when pressing (SETUP) during
playback.
To select the item
Press </M/m/,, then press (ENTER).
To turn off the Play mode menu
Press (SETUP).
Note
The items on the menu, and the operation procedures
differ depending on the disc.
Example: When playing a DVD
)
12(67
018(034
T 1:35:55
1:ENGLISH
1:ENGLISH
2:FRENCH
3:SPANISH
SUBTITLE
Select :
)
ENTER
PLAY
DVDV IDE O
A Play mode items
B Selected item
C Title number*
D Chapter number*2/Total chapter number*
1
/Total title number*
1
2
E Elapsed playback time
F Playback status (NPLAY, XPAUSE, etc.)/
Disc format
G Current setting
H Options
*1 Displays the track number for VCDs/CDs, album
number for MP3/JPEG files. When playing VCD
with the PBC function on, no indication is
displayed.
*2 Displays the track number for MP3/JPEG files.
10

Operation message
Menu operations differ depending on the item
selected, and the buttons to be used appear on the
bottom of the menu display to assist your
operations.
To set, press , then
ENTER SETUP
. To quit, press
Selected item name and/or
operation massages appear.
Tip
“Operation not possible” appears when the function is
not available.
Setup items
LANGUAGE SETUP (page 27)
Switches the languages.
SCREEN SETUP (page 27)
Selects the screen modes.
CUSTOM SETUP (page 28)
Sets the playback operations.
AUDIO SETUP (page 29)
Adjusts the output sound.
RESET (page 26)
Resets all setup items.
Play mode items
TITLE, TRACK (page 19)
Selects the title, or track to be played.
CHAPTER (page 19)
Selects the chapter to be played.
ALBUM (MP3) (page 19)
Selects the album to be displayed.
ALBUM (JPEG) (page 19)
Selects the image album to be
displayed.
TRACK (page 19)
Selects the track to be played.
IMAGE (page 19)
Selects the image to be displayed.
TIME (page 15)
Checks the elapsed time and the
remaining playback time.
AUDIO (page 20)
Changes the audio setting.
SUBTITLE (page 22)
Displays the subtitles.
Changes the subtitle language.
ANGLE (page 21)
Changes the angle.
CENTER ZOOM (page 22)
Magnifies the picture.
REPEAT (page 18)
Plays the entire disc (all titles/all tracks/
all albums) repeatedly, or one chapter/
track/album repeatedly.
Tip
When “REPEAT” is activ ated, or “ANGLE” is a vailable,
its check-box lights up in green
(e.g. ).
t
11

Resetting the unit
Before operating the unit for the first time, or
after replacing the car battery or changing the
connections, you must reset the unit. Press the
reset button with a pointed object, such as a
ballpoint pen.
Player
Playing discs
DISC IN
OFF
Reset button
Notes
• Pressing the reset button will erase some stored
settings.
• The unit performs initial setting for about 10 seconds
after you press the reset button. During this period,
do not insert a disc, otherwise the unit may not be
reset.
Depending on the disc, some operations may be
different or restricted.
Refer to the operating instructions supplied with
your disc.
OFF
1
23
456
789
+
TOP MENU
ALBUM
ENTER
–
ALBUM
AUDIO
SEEK
–
DISPLAY
CLEAR
0
LIST
SETUPMENU
ANGLE
SUBTITLE
SEEK
uOFF
</,
+
1 Turn on your monitor, then select the
input source on your monitor
corresponding to this unit.
When using audio equipment:
Turn on the audio equipment, and select the
appropriate channel for this unit.
2 Insert a disc.
Playback side down
12
Playback starts automatically (Depending on
the disc, press u to start playback).
A menu may appear on the screen when a
DVD or VCD is inserted.
For details on these menus, see page 17 for
DVDs, and page 18 for VCDs.

When “MP3/JPEG” on “CUSTOM SETUP”
is set to “JPEG,” a slide show starts
automatically when JPEG files are on the disc
(page 28).
Each time you press </,, the image
rotates every 90º.
Notes
• If a large-size image is rotated, it may take longer to
display.
• A JPEG file is designed to be optimally displayed at
640 × 480 pixels. If displayed in another size, picture
shift (to the left or right) may occur.
When the disc is inserted
Press u to start playback.
To stop playback/to turn off the unit
Press (OFF).
Tip
You cannot insert a disc while the unit is turned off.
Display items on the CD/MP3 playback
The playback order of MP3 files
The playback order of albums and tracks (MP3
files) recorded on a disc is as follows:
Structure of disc contents
Tree 1 Tree 2 Tree 3 Tree 4 Tree 5
ROOT
Album
Tra ck
123
123
:
ALBUM NAME
:
TRACK NAME
:
ID3 INFORMATION
REP 160K
001
001
PLAY
MP3120:42
A Album number*2/Track number/
Elapsed playback time
B Playback status (NPLAY, XPAUSE, etc.)/
Disc format
C Disc name*
ID3 tag information (ver.1 only)*
D Playback mode/Bit rate*2*
*1 “NO DISC NAME” or “NO TRACK NAME” appears
when the disc or track has no name.
*2 Appears only when MP3 files are played.
*3 No indication when VBR (Variable bit rate) is
applied.
1
/Album name*2/Track name/
2
3
To scroll the text information
Press (DISPLAY).
Note
“
*” appears in place of the letters other than the
alphabet and numbers.
Notes on DVDs with a DTS sound track
The DTS audio signal is being output at all times, a
loud noise may come out from the speakers if you
connect the unit to the audio equipment without a DTS
decoder. This may cause damage to the speakers, or
affect your ears.
When the disc stored MP3 files is inserted, the
tracks are played sequentially from
1 through 7
as numbered. Any sub-albums/tracks contained
within a currently selected album take priority
over the next album in the same tree. (Example:
C contains D so
4 is played before 5.)
In the MP3 albums list that appears when you
press (LIST), the albums are arranged in the
following order: A t B t C t D t F
t G. Albums that do not contain tracks (such
as album E) do not appear in the list.
Notes
• The playback order may differ depending on the
writing software.
• The playback order may not be applicable if a total
number of albums and tracks on the disc are over
512.
• The unit can play up to 256 albums. Albums more
than first 256 albums cannot be recognized on this
unit.
Tips
• If you add numbers (01, 02, 03, etc.) to the front of
the track file names, the tracks will be played in that
order.
• Since a disc with many trees takes longer to start
playback, it is recommended that you create albums
of no more than two tree levels.
continue to next page t
13
Additional operations
OFF
1
23
456
789
+
TOP MENU
ALBUM
M/m
./>
ALBUM
ENTER
–
AUDIO
SEEK
SUBTITLE
–
DISC IN
To Operation
DISPLAY
CLEAR
SEEK
0
LIST
SETUPMENU
ANGLE
u
+
OFF
Zu
Pause Press u
Resume play after
Press u
pause
Go to the next chapter,
Press >
track, or scene in
continuous play mode
Go back to the
Press .
previous chapter,
track, or scene in
continuous play mode
Go to the next album Press M*
Go to the previous
Press m*
album
Stop play and remove
Press Z
the disc
* Available only when MP3 or JPEG files are played.
Resuming playback
— Resume play
The unit stores the point where you stopped
playback for up to 20 discs, and starts resuming
playback even after the unit is turned off, or the
disc being played is ejected.
OFF
1
23
456
789
+
TOP MENU
ALBUM
ENTER
–
ALBUM
AUDIO
SEEK
–
1 During playback, press (OFF) to stop.
2 Press u to resume playback.
Playback starts from the point stopped in
step 1.
To play from the beginning
After setting “MULTI-DISC RESUME” in
“CUSTOM SETUP” to “OFF” (page 28), press
Z to eject the disc, then insert the disc again.
Select the desired chapter on the DVD menu or
the Top menu depending on the disc.
Notes
• MP3 playback will start from the beginning of the last
track that was played.
• To use the resume playback, make sure that
“MULTI-DISC RESUME” in “CUSTOM SETUP” is
set to “ON” (page 28).
• When storing a resume point for the 21st disc, the
stored resume point for the 1st disc is cleared
automatically.
• The resume playback is canceled when the setting
for the parental controls is changed.
• Depending on the disc or scene, you cannot use the
resume playback.
• If parental control is applied, the resume playback
function dose not work. In this case, payback starts
from the begnning of the disc when you insert the
disc.
Tip
When CD, MP3 files, or JPEG files are played, the unit
tentatively stor es the resume point for the disc being
played. Once the unit is turned off or the disc is
ejected, the stored resume point for the disc is
cleared.
DISPLAY
CLEAR
0
LIST
SETUPMENU
ANGLE
SUBTITLE
SEEK
uOFF
+
14
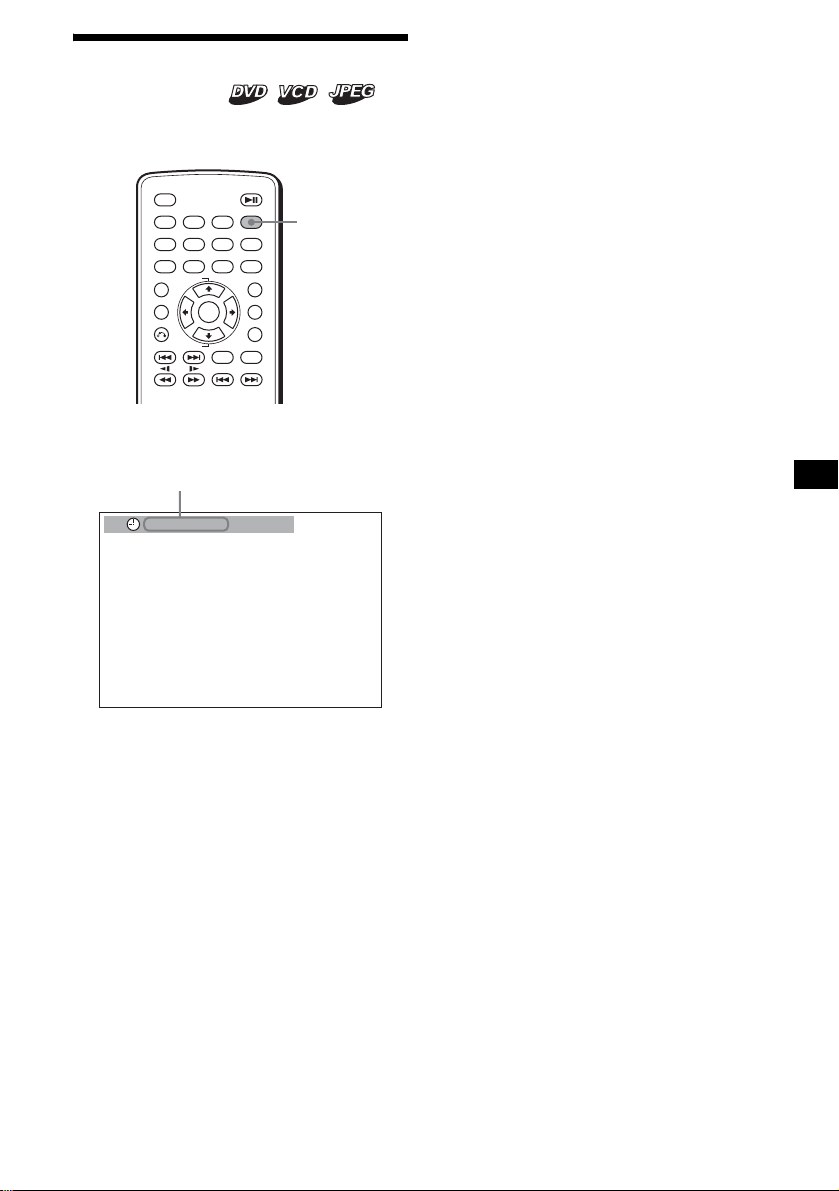
Checking the running time
— Time information
You can check the playing time and remaining
time of the current title, chapter, or track.
OFF
1
456
789
TOP MENU
ALBUM
ALBUM
1 During playback, press (DISPLAY).
The current playback information appears.
Time information
T 1:01:57
23
+
ENTER
–
AUDIO
SEEK
–
DISPLAY
CLEAR
0
LIST
SETUPMENU
ANGLE
SUBTITLE
SEEK
DISPLAY
+
2 Press (DSPL) repeatedly to switch the
time information.
Time information differs depending on the
disc as follows:
DVD:
“T **:**:**” - Elapsed playing time of
the current title
“T-
**:**:**
current title
“C
**:**:**
the current chapter
“C-
**:**:**
current chapter
VCD (without PBC functions):
“T **:**” - Elapsed playing time of the
current track
“T-
**:**
track
“D
**:**
current disc
“D-
**:**
disc
JPEG:
Album number
Image number
” - Remaining time of the
” - Elapsed playing time of
” - Remaining time of the
” - Remaining time of the current
” - Elapsed playing time of the
” - Remaining time of the current
BRAHMS SYMPHONY
15

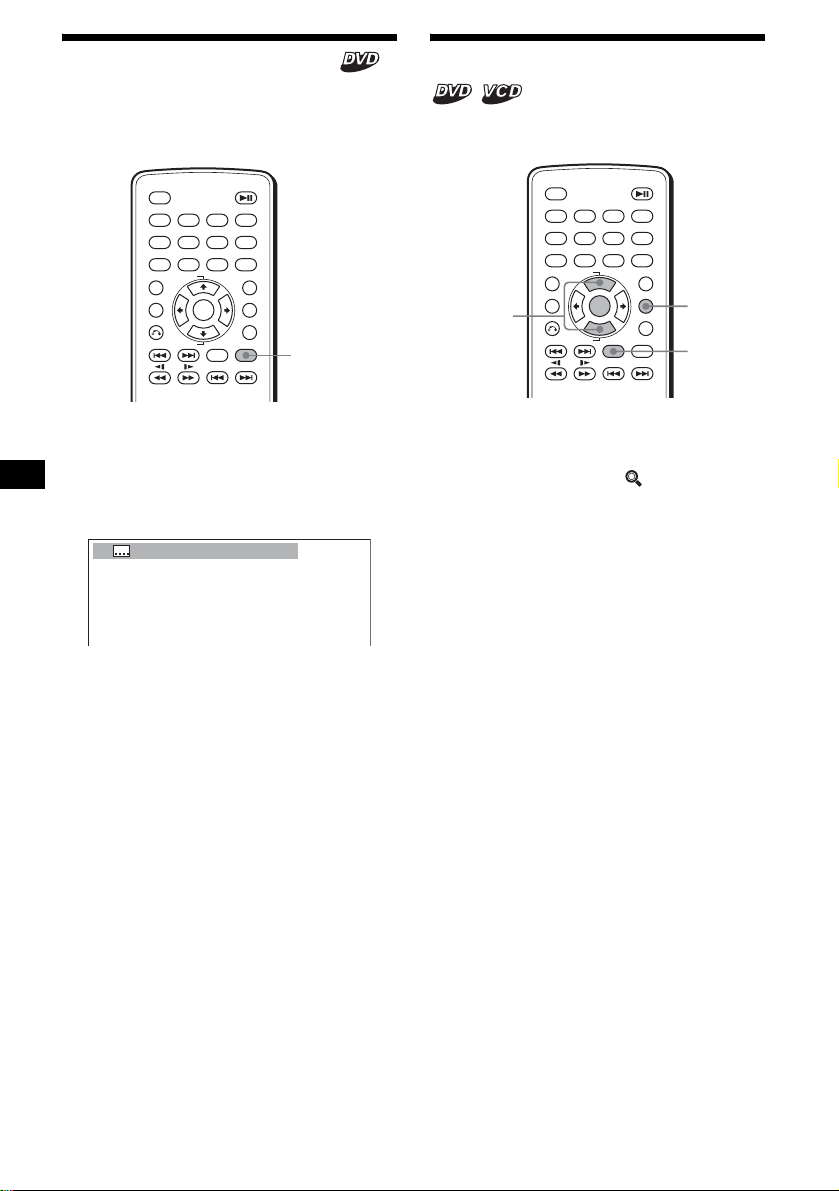
Searching a specific point on
a disc
— Scan/Slow-motion play/List
You can quickly locate a specific point on a disc
by monitoring the picture, playing back slowly,
or selecting from the list.
OFF
1
23
456
789
+
TOP MENU
ALBUM
M/m
/
Note
Depending on the DVD/VCD, you may not be able to
perform some of the operations described.
ALBUM
–
ENTER
AUDIO
SEEK
–
Locating a point quickly
— Scan
During playback, press and hold m or
M , and release at the desired point.
If you press and hold the button, searching speed
increases.
Note
You cannot hear audio while searching.
DISPLAY
CLEAR
0
LIST
SETUPMENU
ANGLE
SUBTITLE
SEEK
u
LIST
ENTER
+
Playing at slow speed
— Slow-motion play
You can play a disc at various slow speeds.
1 Press u to pause playback.
2 Press and hold m* or M .
Slow playback starts.
* Available only when a DVD is played.
To return to normal playback
Press u.
Notes
• You cannot hear audio during slow-motion play.
• Depending one the disc, pictures may be distorted
during slow-motion play.
Selecting an album and track
— List
You can locate the desired contents on the list of
albums, and tracks/images.
1 During playback, press (LIST)
repeatedly to display the desired list.
Each time you press (LIST), the list changes
as follows:
Album list* t Track/Image list t
Normal play mode tAlbum list*
* Appears only when MP3/JPEG files are played.
2 Press M/m to select the desired item
(Album, Track, Image), then press
(ENTER).
Playback starts. When the album is selected,
playback of the 1st track/image on the album
selected starts.
16

Display items on the list
Using the menus on DVDs
333:
Select :
333:
331:
TRACK NAME
332:
TRACK NAME
333:
TRACK NAME
334:
TRACK NAME
335:
TRACK NAME
336:
TRACK NAME
ALBUM NAME
TRACK NAME
ENTER
001
002
003
004
005
006
003
003
A Current track/album*1/image*2 number and
name
B The track/album*
*1 Appears only when a MP3 file is played.
*2 Appears only when a JPEG file is played.
Note
“
*” appears on the list in place of characters other
than alphabet and numbers.
1
/image*2 names
With some DVDs you can use the original menu,
such as Top menu and DVD menu.
If the DVD contains several titles of tracks and
scenes, you can use the Top menu to select the
desired title, and start playing.
If the DVD contains more comprehensive Menu
items such as the audio languages, subtitle
languages, titles, and chapters, etc., you can use
the DVD menu to select the desired item, and
start playing.
TOP MENU
MENU
M/m
OFF
1
456
789
TOP MENU
ALBUM
ALBUM
23
+
ENTER
–
AUDIO
SEEK
–
DISPLAY
CLEAR
0
LIST
SETUPMENU
ANGLE
SUBTITLE
SEEK
ENTER
</,
+
1 During a DVD playback, press
(TOP MENU) or (MENU).
The DVD menu or Top menu appears.
The contents of the menu differ depending on
the disc.
2 Press </M/m/,, or the number
buttons to select the desired item,
then press (ENTER).
Note
The items on the menu, and the operation procedures
differ depending on the disc.
17
Using PBC functions
Playing in various modes
— PBC (Playback control)
The PBC menu assists your operation
interactively while a PBC compatible VCD is
played.
Number
buttons
O
OFF
1
456
789
TOP MENU
ALBUM
ALBUM
23
+
ENTER
–
AUDIO
SEEK
–
DISPLAY
CLEAR
0
LIST
SETUPMENU
ANGLE
SUBTITLE
SEEK
ENTER
+
1 Start playing a PBC compatible VCD.
The PBC menu appears.
2 Press the number buttons to select the
desired item, then press (ENTER).
3 Follow the instructions in the menu for
interactive operations.
To return to the previous display
Press O.
Playing without the PBC function
1 During playback, press (OFF).
2 Press the number buttons to select the
desired item, then press (ENTER).
“Play without PBC” appears and playback
starts.
The PBC menu does not appear during
playback.
Notes
• The items on the menu, and the operation
procedures differ depending on the disc.
• During PBC playback, the track number, playback
time, etc., are not displayed in the Play mode menu.
Tip
To resume PBC playback, eject the disc once, and
insert again. PBC playback starts.
— Repeat play/Search play
You can set the following play modes:
• Repeat Play (page 18)
• Search Play (page 19)
Notes
• The selected play mode is canceled when the disc
being played is ejected or the unit is turned off.
• Wh en pl aying VCD with the PBC fun cti on on,
Repeat play is not available.
Playing repeatedly
— Repeat play
The unit can repeat a title, chapter, or track when
the item being played reaches the end.
The following repeat options are available:
• TITLE (Title Repeat) - to repeat the current
title.
• CHAPTER (Chapter Repeat) - to repeat the
current chapter.
• TRACK (Track Repeat) - to repeat the current
track/image.
• ALBUM (Album Repeat) - to repeat the tracks/
images in the current album.
M/m
OFF
1
456
789
TOP MENU
ALBUM
ALBUM
23
+
ENTER
–
AUDIO
SEEK
–
DISPLAY
CLEAR
0
LIST
SETUPMENU
ANGLE
SUBTITLE
SEEK
ENTER
SETUP
+
1 During playback, press (SETUP).
The Play mode menu appears.
2 Press M/m to select “REP,” then press
(ENTER).
The Play mode options appear.
3 Press M/m to select the desired option,
then press (ENTER).
Repeat play starts.
To return to normal play
Select “OFF” in step 3.
18
To turn off the Play mode menu
Press (SETUP).
Tip
The repeat options differ depending on the disc.
Starting playback from the point
selected
— Search play
You can quickly locate a desired point by
specifying the title, chapter, track.
The following search options are available
depending on the disc:
DVD:
• TITLE starts playing from the
selected title.
• CHAPTER starts playing from the
selected chapter.
VCD:
• TRACK starts playing from the
selected track.
CD:
• TRACK starts playing from the
selected track.
MP3:
• ALBUM starts playing from the
selected album.
• TRACK starts playing from the
selected track.
JPEG:
• ALBUM starts playing from the
selected album.
• IMAGE starts playing from the
selected image.
2 Press M/m to select the desired search
item, then press (ENTER).
The search items differ depending on the disc.
)
12(67
018(034
T 1:35:55
)
PLAY
DVDV IDE O
The number in parentheses indicates the total
number of items selected.
3 Press the number buttons to enter title
number, chapter number, track
number, or the elapsed time of the
title, or track.
To clear the numbers already input, press
(CLEAR).
4 Press (ENTER).
Playback starts from the selected point.
To turn off the Play mode menu
Press (SETUP).
Number
buttons
M/m
OFF
1
456
789
TOP MENU
ALBUM
ALBUM
23
+
ENTER
–
AUDIO
SEEK
–
DISPLAY
CLEAR
0
LIST
SETUPMENU
ANGLE
SUBTITLE
SEEK
+
1 During playback, press (SETUP).
The Play mode menu appears.
CLEAR
ENTER
SETUP
19
Sound Adjustments
Changing the audio channels
When playing a DVD recorded in multiple audio
formats (PCM, Dolby Digital, or DTS), you can
change the audio format. If the DVD is recorded
with multilingual tracks, you can also change the
language.
With VCDs, you can select the sound from the
right or left channel and listen to the sound of the
selected channel through both the right and left
speakers. For example, when playing a disc
containing a song with the vocals on the right
channel and the instruments on the left channel,
you can hear the instruments from both speakers
by selecting the left channel.
OFF
1
456
789
TOP MENU
ALBUM
M/m
ALBUM
During playback, press (AUDIO)
repeatedly to select the desired audio
channels.
1:ENGLISH DolbyD
23
+
ENTER
–
AUDIO
SEEK
–
DISPLAY
CLEAR
0
LIST
SETUPMENU
ANGLE
SUBTITLE
SEEK
ENTER
SETUP
+
VCD:
STEREO*: Standard stereo sound
1/L: Left channel sound (monaural)
2/R: Right channel sound (monaural)
* The default setting
Tip
You can also change the settings by selecting
“AUDIO” in the Play mode menu (page 10).
Checking the program format
You can check the number of channels and
component position on the DVD being played.
1 During playback, press (SETUP).
The Play mode menu appears.
2 Press
then press (ENTER).
The program format appears.
The letters in the program format display
represent the following sound components
and its positions:
to select “ ” (AUDIO),
M/m
Current audio format*
)
12(67
)
018(034
T 01:35:55
1:ENGLISH
PROGRAM FORMAT
DOLBY DIGITAL
Current program format*
PLAY
DVDV IDE O
3 / 2. 1
L C
LFE
LSRRS
2
:Front (left)
:Front (right)
:Centre
:Rear (left)
:Rear (right)
:Rear (monaural): The rear component
of the Dolby Surround processed signal
and the Dolby Digital signal
:Low Frequency Effect signal
1
Audio sound settings differ depending on the
disc as follows:
DVD:
The audio language switches among the
available languages.
When 4 digits appear, input the language code
corresponding the desired language
(page 37).
When the same language is displayed two or
more times, the DVD is recorded in multiple
audio formats.
20
When “DOLBY DIGITAL” is applied, the
program format name and channel numbers
appear as follows:
Example: Dolby Digital 5.1 ch
Rear component×2
DOLBY DIGITAL
Front component×2 +
Center component×1
3 / 2 . 1
LFE component×1

*1 “PCM,” “DTS,” or “DOLBY DIGITAL” appears
depending on the disc.
*2 Appears only when the “DOLBY DIGITAL” format is
applied.
To turn off the Play mode menu
Press (SETUP).
Tip
For Dolby Digital and DTS, “LFE” is always enclosed
in a solid line regardless of the LFE signal component
being output.
Picture adjustments
Changing the angles
You can change the viewing angle if various
angles (multi-angles) for a scene are recorded on
a DVD.
OFF
1
456
789
TOP MENU
ALBUM
ALBUM
23
+
ENTER
–
AUDIO
SEEK
–
DISPLAY
CLEAR
0
LIST
SETUPMENU
ANGLE
SUBTITLE
SEEK
ANGLE
+
Press (ANGLE) repeatedly to select the
desired angle number.
)
2(2
The angle changes.
Tip
You can also change the viewing angle by selecting
“ANGLE” in the Play mode menu (page 10).
Note
Depending on the DVD, you cannot change the angles
even if multi-angles are recorded.
21
Displaying the subtitles
You can turn on or off the subtile, or change the
subtitle language if subtitles in one or more
language are recorded on the DVD.
Magnifying pictures
You can magnify pictures.
OFF
1
456
789
TOP MENU
ALBUM
ALBUM
23
+
ENTER
–
AUDIO
SEEK
–
DISPLAY
CLEAR
0
LIST
SETUPMENU
ANGLE
SUBTITLE
SEEK
+
SUBTITLE
1 During playback, press (SUBTITLE).
The subtitle language appears.
2 Press (SUBTITLE) repeatedly to select
the desired language, then press
(ENTER).
01:ENGLISH
The available languages differ depending on
the disc.
When 4 digits appear, input the language code
corresponding to the desired language
(page 37).
To turn off the subtile
Press (SUBTITLE) repeatedly to select “OFF.”
Tip
You can also change the subtitle language by
selecting “SUBTITLE” on the Play mode menu
(page 10) or the DVD menu (page 17).
Note
Depending on the DVD, you cannot change (or turn
off) the subtitles even if multilingual subtitles are
recorded.
M/m
OFF
1
456
789
TOP MENU
ALBUM
ALBUM
23
+
ENTER
–
AUDIO
SEEK
–
DISPLAY
CLEAR
0
LIST
SETUPMENU
ANGLE
SUBTITLE
SEEK
SETUP
AUDIO
+
1 During playback, press (SETUP).
The Play mode menu appears.
2 Press M/m to select “ ” (CENTER
ZOOM), then press (ENTER).
The current option appears.
3 Press M/m to select the desired option
(ZOOM×1, ×1.5, ×2*, ×3*), then press
(ENTER).
The picture is magnified.
* The picture become grainy.
To shift the frame position
After magnifying the picture, press </M/m/,.
To restore the original scale
Select “ZOOM×1” in step 3.
To turn off the Play mode menu
Press (SETUP).
Notes
• Depending on the DVD, you may not be able to
change the magnification .
• Resume Play (page 14) restores the last
magnification, but the last frame position is cleared.
• In the Play mode menu, a picture is always
displayed in normal size. The picture can be
magnified when the Play mode menu is turned off.
22
Other Function
4 Press M/m to select “ON t,” t h en
press (ENTER).
The password setting display appears.
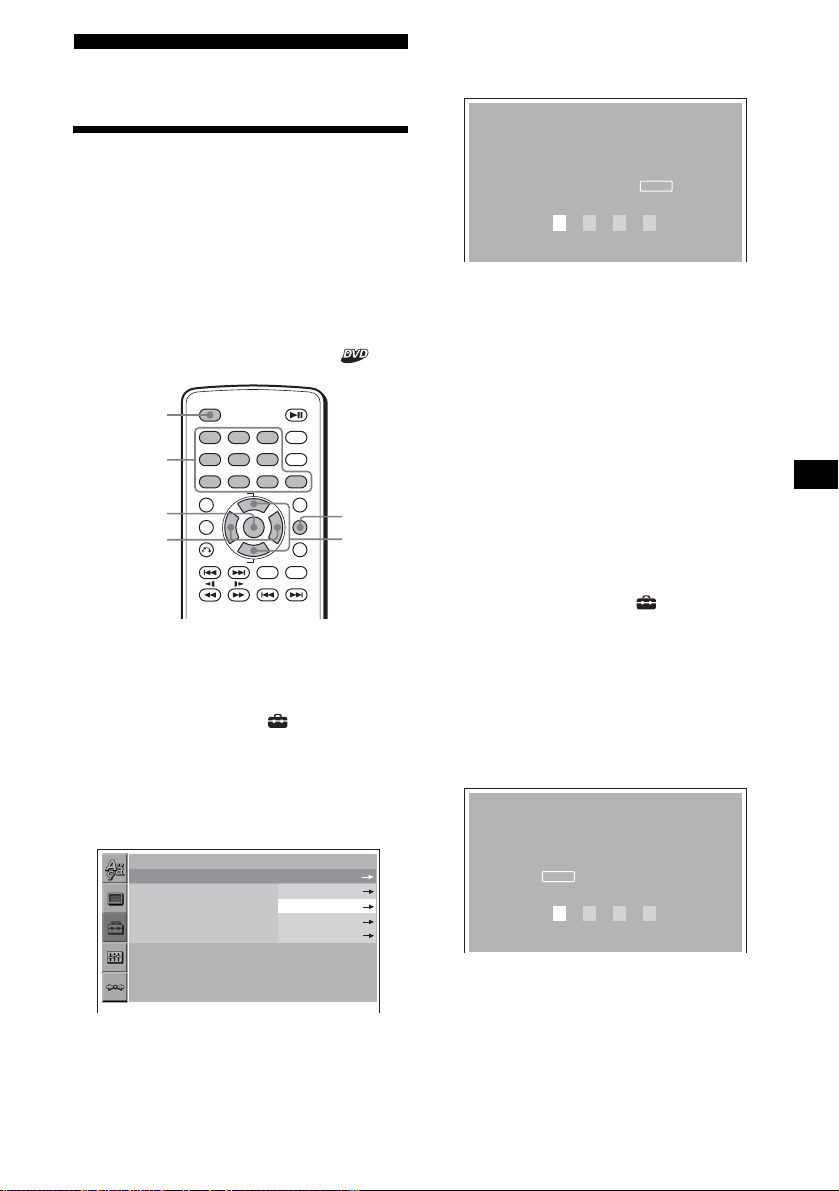
Locking discs
— Parental control
You can lock the desired disc, or set playback
restrictions according to a predetermined level
such as viewer age. Restricted playback scenes
are blocked or replaced with different scenes
when a parental control compatible DVD is
played.
Setting the parental control on
OFF
Number
buttons
ENTER
</,
1 Press (SETUP) while playback is being
stopped.
The set up menu appears.
2 Press M/m to select “ ” (CUSTOM
SETUP), then press (ENTER).
The setting items appear.
3 Press M/m to select “PARENTAL
CONTROL,” then press (ENTER).
The parental control options appear.
CUSTOM SETUP
PARENTAL CONTROL:
MULTI-DISC RESUME:
BEEP:
MP3/JPEG:
SLIDE SHOW TIME:
OFF
1
23
456
789
+
TOP MENU
ALBUM
ENTER
–
ALBUM
DISPLAY
CLEAR
0
LIST
SETUPMENU
ANGLE
SUBTITLE
AUDIO
SEEK
+
SEEK
–
PLAYER
PASSWORD
SETUP
M/m
OFF
ON
OFF
PARENTAL CONTROL
Enter a new 4-digit
password, then press .
ENTER
5 Press the number buttons to enter
your password, then press (ENTER).
The conformation display appears.
6 To confirm, press the number buttons
to enter your password again, then
press (ENTER).
Parental control is set.
To turn off the Setup menu
Press (SETUP).
To set the parental control off
1 Press (SETUP) while playback is being
stopped.
The set up menu appears.
2 Press M/m to select “ ” (CUSTOM
SETUP), then press (ENTER).
The setting items appear.
3 Press M/m to select “PARENTAL
CONTROL,” then press (ENTER).
The parental control options appear.
4 Press M/m to select “OFF t,” t h en
press (ENTER).
The display to enter your password appears.
PARENTAL CONTROL
Enter password, then
ENTER
press .
5 Press the number buttons to enter
your password, then press (ENTER).
“Parental control is canceled” appears.
If a wrong number is entered, press < to
move the cursor and enter the number again.
continue to next page t
23
Changing the area and its movie rating
level
You can set the restriction levels depending on
the area and its movie ratings.
1 Press (SETUP) while playback is being
stopped.
The set up menu appears.
2 Press M/m to select “ ” (CUSTOM
SETUP), then press (ENTER).
The setting items appear.
3 Press M/m to select “PARENTAL
CONTROL,” then press (ENTER).
The parental control options appear.
4 Press M/m to select “PLAYER t,” t he n
press (ENTER).
When the parental control is already set to on,
the display to enter your password appears.
To change the settings, enter your password
number, then press (ENTER).
If a wrong number is entered, press < to
move the cursor and enter the number again.
5 Press M/m to select “STANDARD,”
then press (ENTER).
The standard options appear.
CUSTOM SETUP
LEVEL:
STANDARD:
8:
USA
USA
OTHERS
7 Press M/m to select “LEVEL,” then
press (ENTER).
The rating options appear.
CUSTOM SETUP
LEVEL:
STANDARD:
8:
8:
NC17
7:
R
6:
5:
PG13
4:
PG
3:
2:
G
1:
The lower the number, the stricter the
restriction level.
8 Press M/m to select the desired rating,
then press (ENTER).
Parental control setting is complete.
To turn off the Setup menu
Press (SETUP).
Note
When you play discs which do not have the parental
control, playback cannot be restricted on this unit.
6 Press M/m to select the desired area to
apply its movie ratings, then press
(ENTER).
The area is selected.
When you want to select the standard on the
“Area code list” (page 25), select “OTHERS
t,” then enter its code number using the
number buttons.
24

Area code list Changing the password
Standard Code number
Argentina 2044
Australia 2047
Austria 2046
Belgium 2057
Brazil 2070
Canada 2079
Chile 2090
China 2092
Denmark 2115
Finland 2165
France 2174
Germany 2109
India 2248
Indonesia 2238
Italy 2254
Japan 2276
Korea 2304
Malaysia 2363
Mexico 2362
Netherlands 2376
New Zealand 2390
Norway 2379
Pakistan 2427
Philippines 2424
Portugal 2436
Russia 2489
Singapore 2501
Spain 2149
Sweden 2499
Switzerland 2086
Thailand 2528
United Kingdom 2184
1 Press (SETUP) while playback is being
stopped.
The Setup menu appear.
2 Press M/m to select “ ” (CUSTOM
SETUP), then press (ENTER).
The setting items appear.
3 Press M/m to select “PARENTAL
CONTROL,” then press (ENTER).
The parental control options appear.
4 Press M/m to select “PASSWORD t,”
then press (ENTER).
The display to enter your password appears.
5 Press the number buttons to enter
your 4-digit password, then press
(ENTER).
When a wrong number is entered, press < to
move the cursor and enter the number again.
6 Press the number buttons to enter a
new 4-digit password, then press
(ENTER).
7 To confirm, press the number button
to enter your new 4-digit password
again, then press (ENTER).
To return to the previous display
Press O.
To turn off the Setup menu
Press (SETUP).
25
Settings and Adjustment s
Using the Setup menu
By using the Setup menu, you can make various
adjustments to items, such as picture and sound.
You can also set a language for the subtitle and
the on-screen display, among other things. For
details on each setup items, see pages from 27 to
29.
Note
Playback settings stored in the disc take priority over
the Setup menu settings and not all the functions
described may work.
OFF
1
456
789
TOP MENU
ALBUM
M/m
O
ALBUM
Basic operation
Example: When you want to change the aspect
ratio (“MONITOR TYPE”) to “4:3 PAN SCAN.”
1 Press (SETUP).
The Setup menu appears.
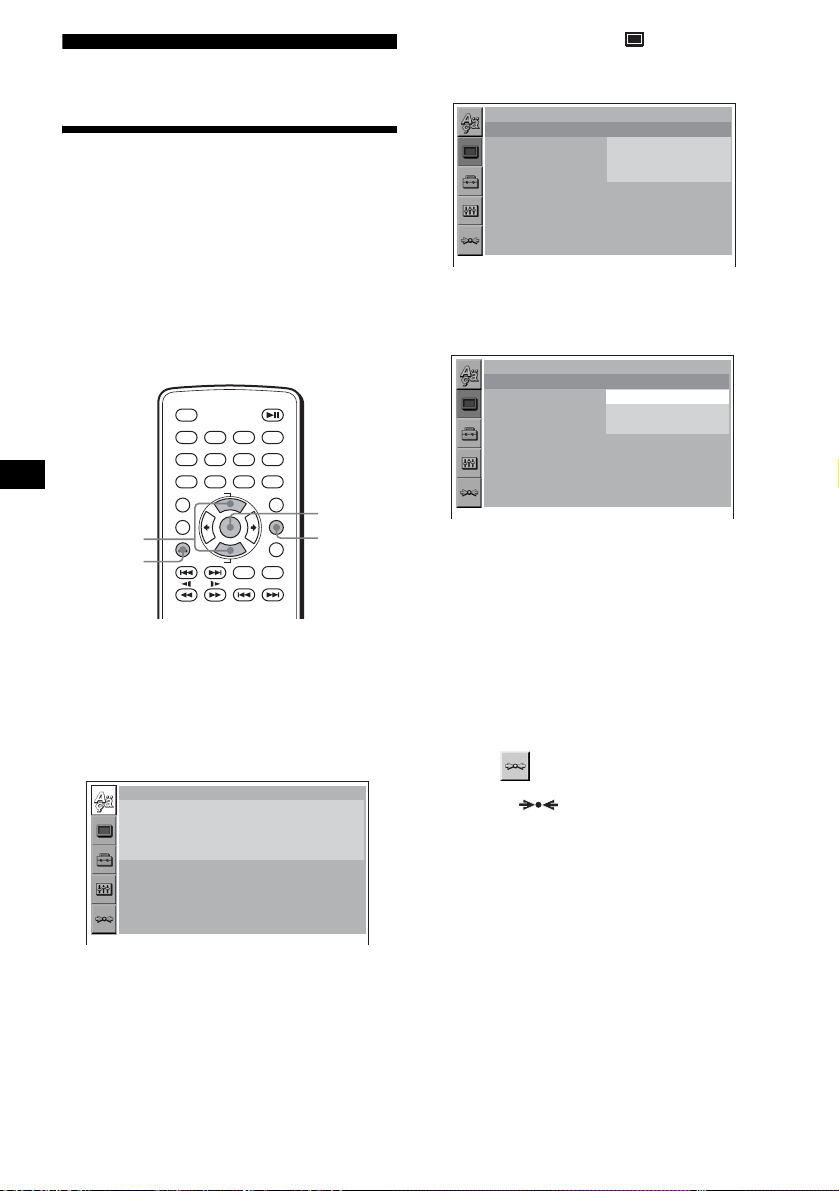
LANGUAGE SETUP
OSD:
MENU:
AUDIO:
SUBTITLE:
23
+
ENTER
–
AUDIO
SEEK
–
AUDIO FOLLOW
DISPLAY
CLEAR
0
LIST
SETUPMENU
ANGLE
SUBTITLE
SEEK
+
ENTER
SETUP
ENGLISH
ENGLISH
ORIGINAL
2 Press M/m to select “ ” (SCREEN
SETUP), then press (ENTER).
The setup display appears.
SCREEN SETUP
MONITOR TYPE:
4:3 LETTER BOX
4:3 PAN SCAN
16:9
16:9
3 Press M/m to select “MONITOR TYPE,”
then press (ENTER).
The monitor type options appear.
SCREEN SETUP
MONITOR TYPE:
4:3 LETTER BOX
4:3 PAN SCAN
16:9
16:9
4 Press M/m to select “4:3 PAN SCAN,”
then press (ENTER).
The setting becomes effective and setup is
complete.
To return to the previous display
Press O.
To turn off the Setup menu
Press (SETUP).
To reset all the setting items
— Reset
1 Select “ ” (RESET) in step 2, then
press (ENTER).
2 Press M/m to select “YES,” then press
(ENTER).
All the settings on the Setup menu return to
the default settings.
To cancel resetting
Select “NO” in step 2.
Note
Do not turn off the unit while resetting the Setup menu
item as it takes a few seconds to complete.
26
Setting the display language
or sound track
— Language setup
“LANGUAGE SETUP” allows you to set the
desired language for the on-screen display or
sound track accordingly.
Select “ ” (LANGUAGE SETUP) in the
Setup menu, then select the desired setting item.
For details on the setup procedures, see “Using
the Setup menu” (page 26).
OSD (On-Screen Display)
Switches the display language on the screen.
MENU
Switches the language for the menu on the disc.
AUDIO
Switches the language of the sound track.
When you select “ORIGINAL,” the language
given priority in the disc is selected.
SUBTITLE
Switches the language of the subtitle recorded on
the disc.
When you select “AUDIO FOLLOW,” the
language for the subtitles changes according to
the language you selected for the sound track.
Tip
If you select “OTHERS
and “AUDIO,” select and enter a language code from
“Language code list” (page 37) using the number
buttons.
Note
When you select a language in “MENU,” “SUBTITLE,”
or “AUDIO” that is not recorded on the disc, one of the
recorded languages will be automatically selected.
t
” in “MENU,” “SUBTITLE,”
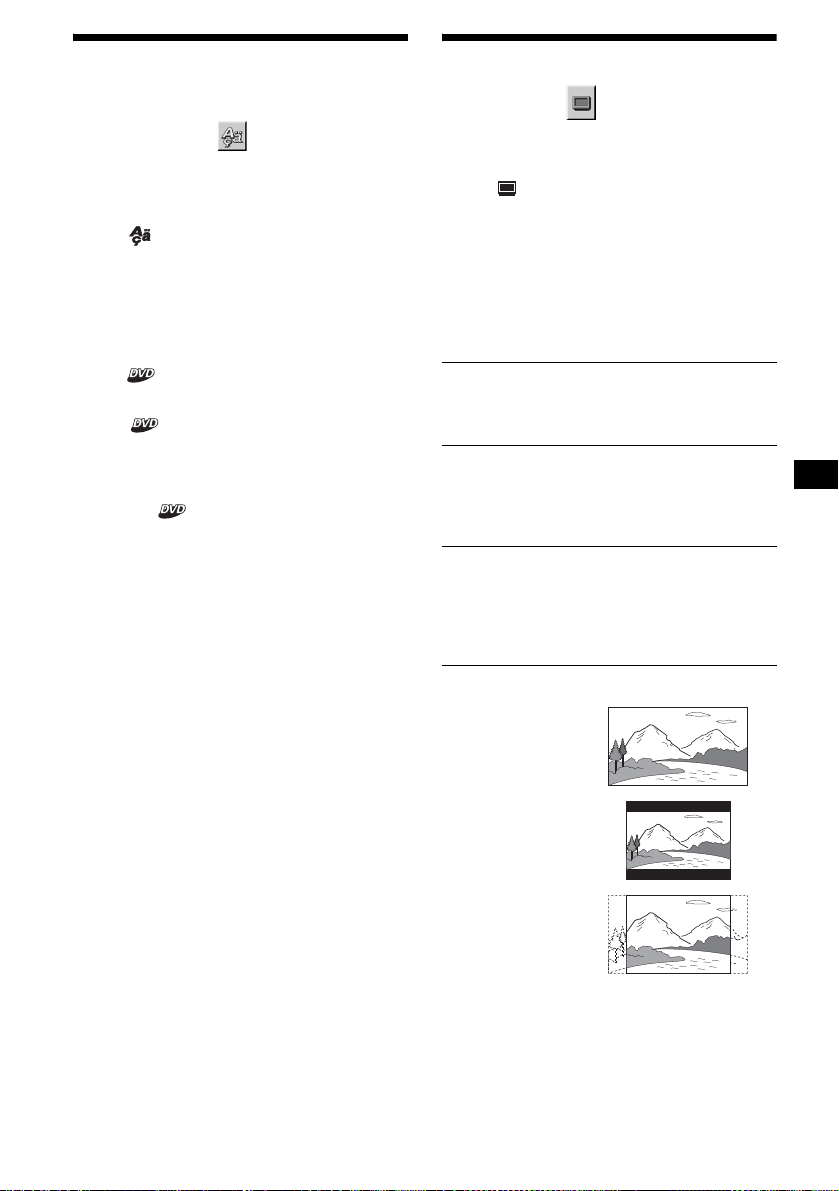
Setting the screen
— Screen setup
“SCREEN SETUP” allows you to adjust the
setting for the connected monitor.
Select “ ” (SCREEN SETUP) in the Setup
menu, then select the desired setting item.
For details on the setup procedures, see “Using
the Setup menu” (page 26).
The setting items with “*” in the tables below are
the default settings.
MONITOR TYPE
Selects the aspect ratio of the connected monitor
(4:3 standard or wide).
16:9* Displays the wide picture.
4:3
LETTER
BOX
4:3
PAN SCAN
16:9
Select this when you connect a
wide-screen monitor or a monitor
with a wide mode function.
Displays a wide picture with
bands on the upper and lower
portions of the screen.
Select this when you connect a
4:3 screen monitor.
Displays a wide picture on the
entire screen and automatically
cuts off the portions that do not
fit.
Select this when you connect a
4:3 screen monitor.
4:3 LETTER BOX
4:3 PAN SCAN
Note
Depending on the DVD, “4:3 LETTER BOX” may be
selected automatically instead of “4:3 PAN SCAN,”
and vice versa.
27

Custom settings
— Custom setup
“CUSTOM SETUP” allows you to set the
playback conditions of this unit.
Select “ ” (CUSTOM SETUP) in the Setup
menu, then select the desired setting item.
For details on the setup procedures, see “Using
the Setup menu” (page 26).
The setting items with “*” in the tables below are
the default settings.
PARENTAL CONTROL
Sets the playback restrictions so that the unit will
not play inappropriate discs or scenes (page 23).
ON t Sets the parental control on.
OFF t* Sets the parental control off.
PLAYER t Sets the restriction standard
and its level.
PA SS WO RD t Sets a new 4-digit password.
MULTI-DISC RESUME
Stores resume playback points for up to 20
different discs.
ON* Stores the resume settings in
memory for up to 20 discs. (The
settings remain in memory even
if you select “OFF.”)
OFF Cancels storing the resume
settings in memory. Playback
restarts at the resume point only
for the current disc in the unit.
MP3/JPEG
Sets the priority when MP3 files and JPEG files
are on the same disc.
MP3* Takes priority over JPEG files when
playing.
JPEG Takes priority over MP3 files when
playing.
SLIDE SHOW TIME
Sets the time for displaying images on the disc.
5sec Switches the images every 5
seconds.
10sec* Switches the images every 10
seconds.
20sec Switches the images every 20
seconds.
40sec Switches the images every 40
seconds.
60sec Switches the images every 60
seconds.
FIXED Cancels switching the images.
Note
If parental control is applied, the resume playback
function dose not work. In this case, payback starts
from the begnning of the disc when you insert the disc.
BEEP
Switches the beep setting on or off.
ON* Turns the beep on.
OFF Turns the beep off.
28

Audio settings
— Audio setup
“AUDIO SETUP” allows you to adjust the sound
according to playback conditions and connected
equipment.
Additional Information
Maintenance
Select “ ” (AUDIO SETUP) in the Setup
menu, then select the desired setting item.
For details on the setup procedures, see “Using
the Setup menu” (page 26).
The setting items with “*” in the tables below are
the default settings.
AUDIO ATT (attenuation)
Reduces the audio output level if the playback
sound is distorted.
This setting affects the outputs of FRONT/REAR
AUDIO OUT.
OFF* Normally, select this position.
ON Reduces the audio output level.
Select this if the playback sound from
the speakers is distorted.
AUDIO DRC (Dynamic Range Control)
Makes the sound clear when the volume is turned
down when playing a DVD that conforms to
“AUDIO DRC.”
This setting affects the outputs of FRONT/REAR
AUDIO OUT.
STANDARD*
WIDE
RANGE
DOWNMIX
Switches the method for mixing down to 2
channels when you play a DVD which has rear
sound elements (channels) or is recorded in
Dolby Digital format. For details on the rear
signal components, see “Checking the program
format” (page 20). This setting affects the output
of FRONT/REAR AUDIO OUT.
SURROUND*
NORMAL Select this when the unit is
Normally select this position.
Gives you the feeling of being at
a live performance.
Select this when the unit is
connected to an audio
component that conforms to
Dolby Surround (Pro Logic).
connected to an audio
component that does not
conform to Dolby Surround
(Pro Logic).
Fuse replacement
When replacing the fuse, be sure to use one
matching the amperage rating stated on the
original fuse. If the fuse blows, check the power
connection and replace the fuse. If the fuse blows
again after replacement, there may be an internal
malfunction. In such a case, consult your nearest
Sony dealer.
Fuse
Warning
Never use a fuse with an amperage rating
exceeding the one supplied with the unit, as this
could damage the unit.
continue to next page t
29

Replacing the lithium battery
Under normal conditions, batteries will last
approximately 1 year. (The service life may be
shorter, depending on the conditions of use.)
When the battery becomes weak, the range of the
card remote commander becomes shorter.
Replace the battery with a new CR2025 lithium
battery. Use of any other battery may present a
risk of fire or explosion.
x
+ side up
Notes on discs
• To keep the disc clean, do not touch the surface.
Handle the disc by its edge.
• Keep your discs in their cases or disc
magazines when not in use.
Do not subject the discs to heat/high
temperature. Avoid leaving them in parked cars
or on dashboards/rear trays.
• Do not attach labels, or use discs with sticky
ink/residue. Such discs may stop spinning
when used, causing a malfunction, or may ruin
the disc.
Notes on lithium battery
• Keep the lithium battery out of the reach of
children. Should the battery be swallowed,
immediately consult a doctor.
• Wipe the battery with a dry cloth to assure a
good contact.
• Be sure to observe the correct polarity when
installing the battery.
• Do not hold the battery with metallic tweezers,
otherwise a short-circuit may occur.
WARNING
Battery may explode if mistreated.
Do not recharge, disassemble, or dispose of
in fire.
30
• Do not use any discs with labels or stickers
attached as this may cause inability to read data
correctly (e.g., playback skipping, or no
playback) due to heat shrinking of a sticker or
label causing a disc to warp.
• Discs with non-standard shapes (e.g., heart,
square, star) cannot be played on this unit.
Attempting to do so may damage the unit. Do
not use such discs.
• Before playing, clean discs with a
commercially available cleaning cloth. Wipe
each disc from the center out. Do not use
solvents such as benzine, thinner, commercially
available cleaners, or antistatic spray intended
for analog discs.
 Loading...