

Sony DSC-F707 / 717, DSC-F717, DSC-F707 User Manual

5/7/2005
1
Manual for Camera Housing - Model DSC- F707 / 717 (Sony)
User Manual
Contents: 1. Introduction
2. Specification
3. Set up Instructions
4. Use & Care of Housing
5. Service
6. Warranty
1. Introduction
10 BAR Underwater Housings are small, light and rugged enough to be used on
every dive. Use of a clear polycarbonate allows for visual inspection of camera
condition and the O-ring seal. 10 BAR Housings are designed for the ever-
increasing variety of mode ls of digital still and video cameras. Advanced computer
aided design and CNC manufacturing technologies ensure precise dimensions. Each
housing body is first injection molded, and then machined to configure to individual
camera model. A range of lens ports and controls are fitted, to tailor the housing to
your camera model.
5/7/2005
2
2. Specification
Test Pressure 10 Bar (300 ft.) Housings are individually tested
Closure Design Air Lock
Body Material Polycarbonate
Overall Size 188 x 125 x 172 mm
Total Weight Approximately 1.1 Kg (Housing only)
Buoyancy (with camera) Approximately neutral in salt water
Additional Features Visible main O-ring for final pre-dive check
Double O-ring design on all controls
Combined handle/accessory arm bracket
Accessories Spare main O-ring (included)
Universal tool (included)
Silicone O-ring grease (included)
Carry bag (included)
Red filter (optional)
Extension arm for strobe or video light (o ptional)
Video light VL035(o ptional)
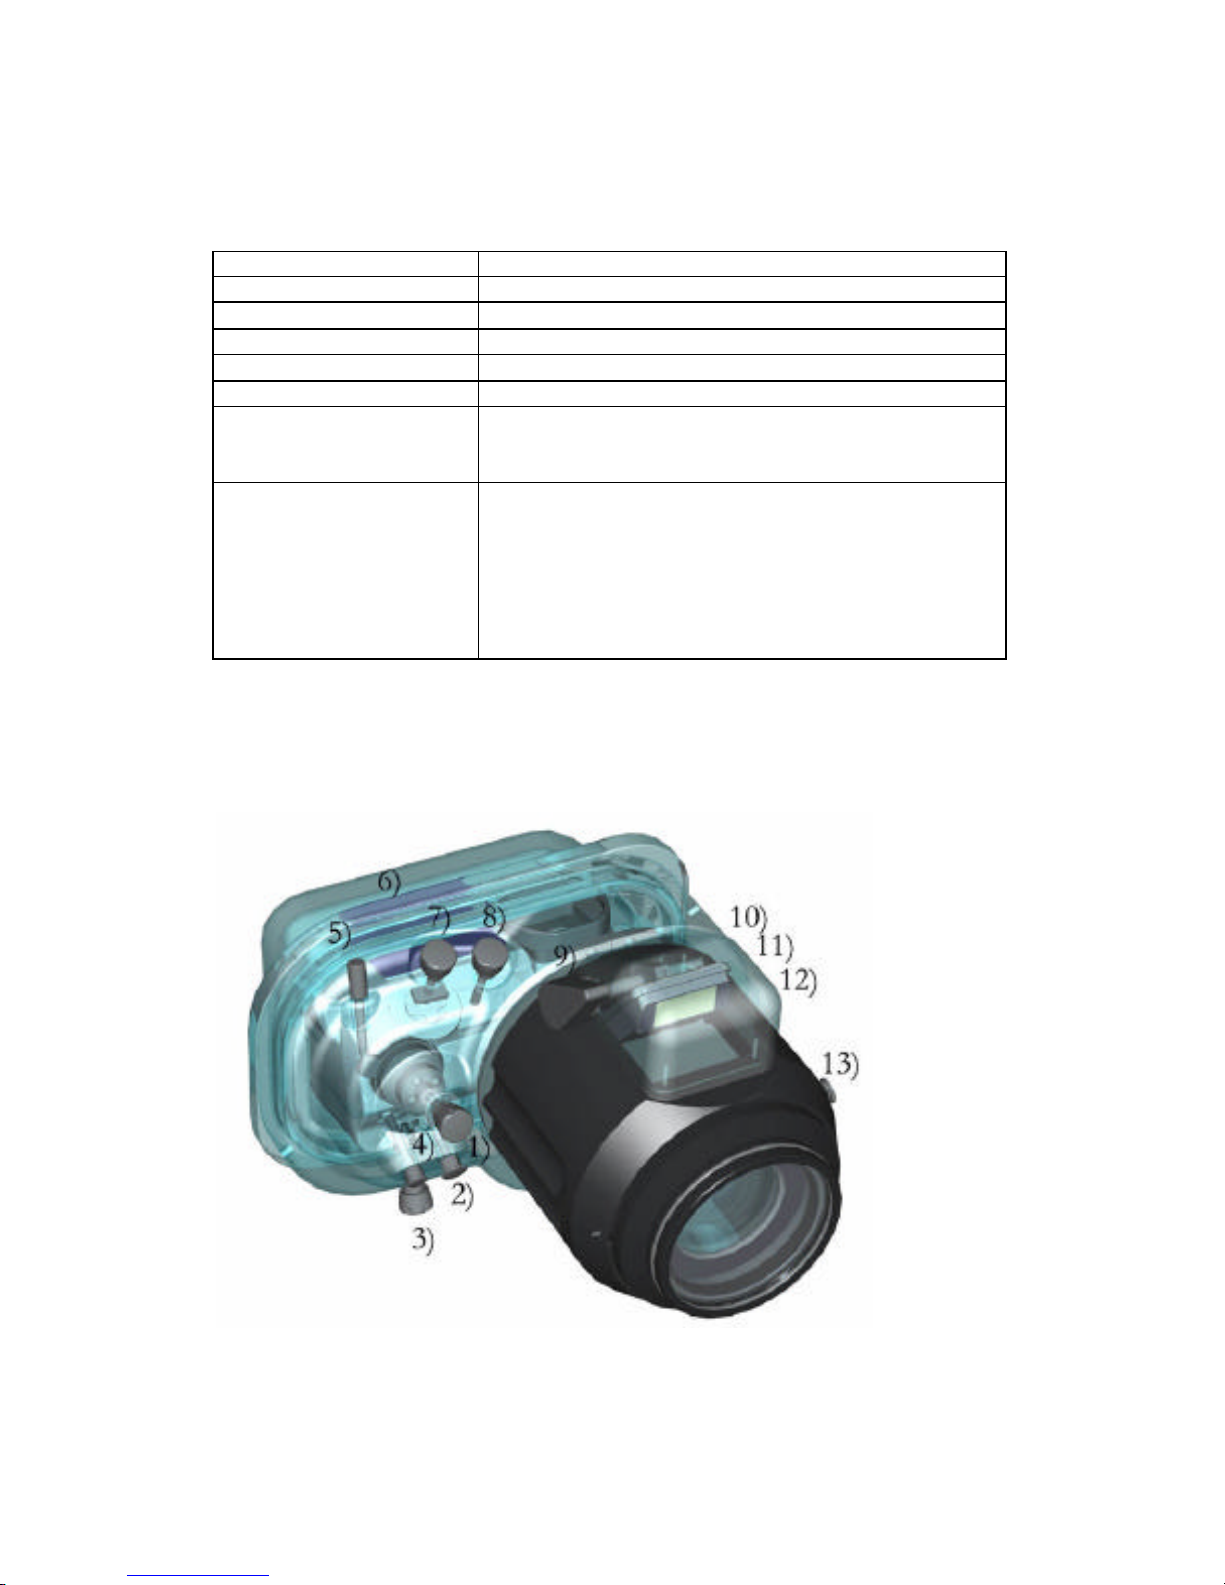
1. Dial Mode 5. Power Switch 9. Strobe Close 13. Zoom Button
2. Shutter 6. LCD Screen 10. White Balance
3. Jog Dial 7. Control Button 11. One Push W/B
4. Exposure Button 8. Menu Button 12. Metering Mode
5/7/2005
3
3. Set up Instructions
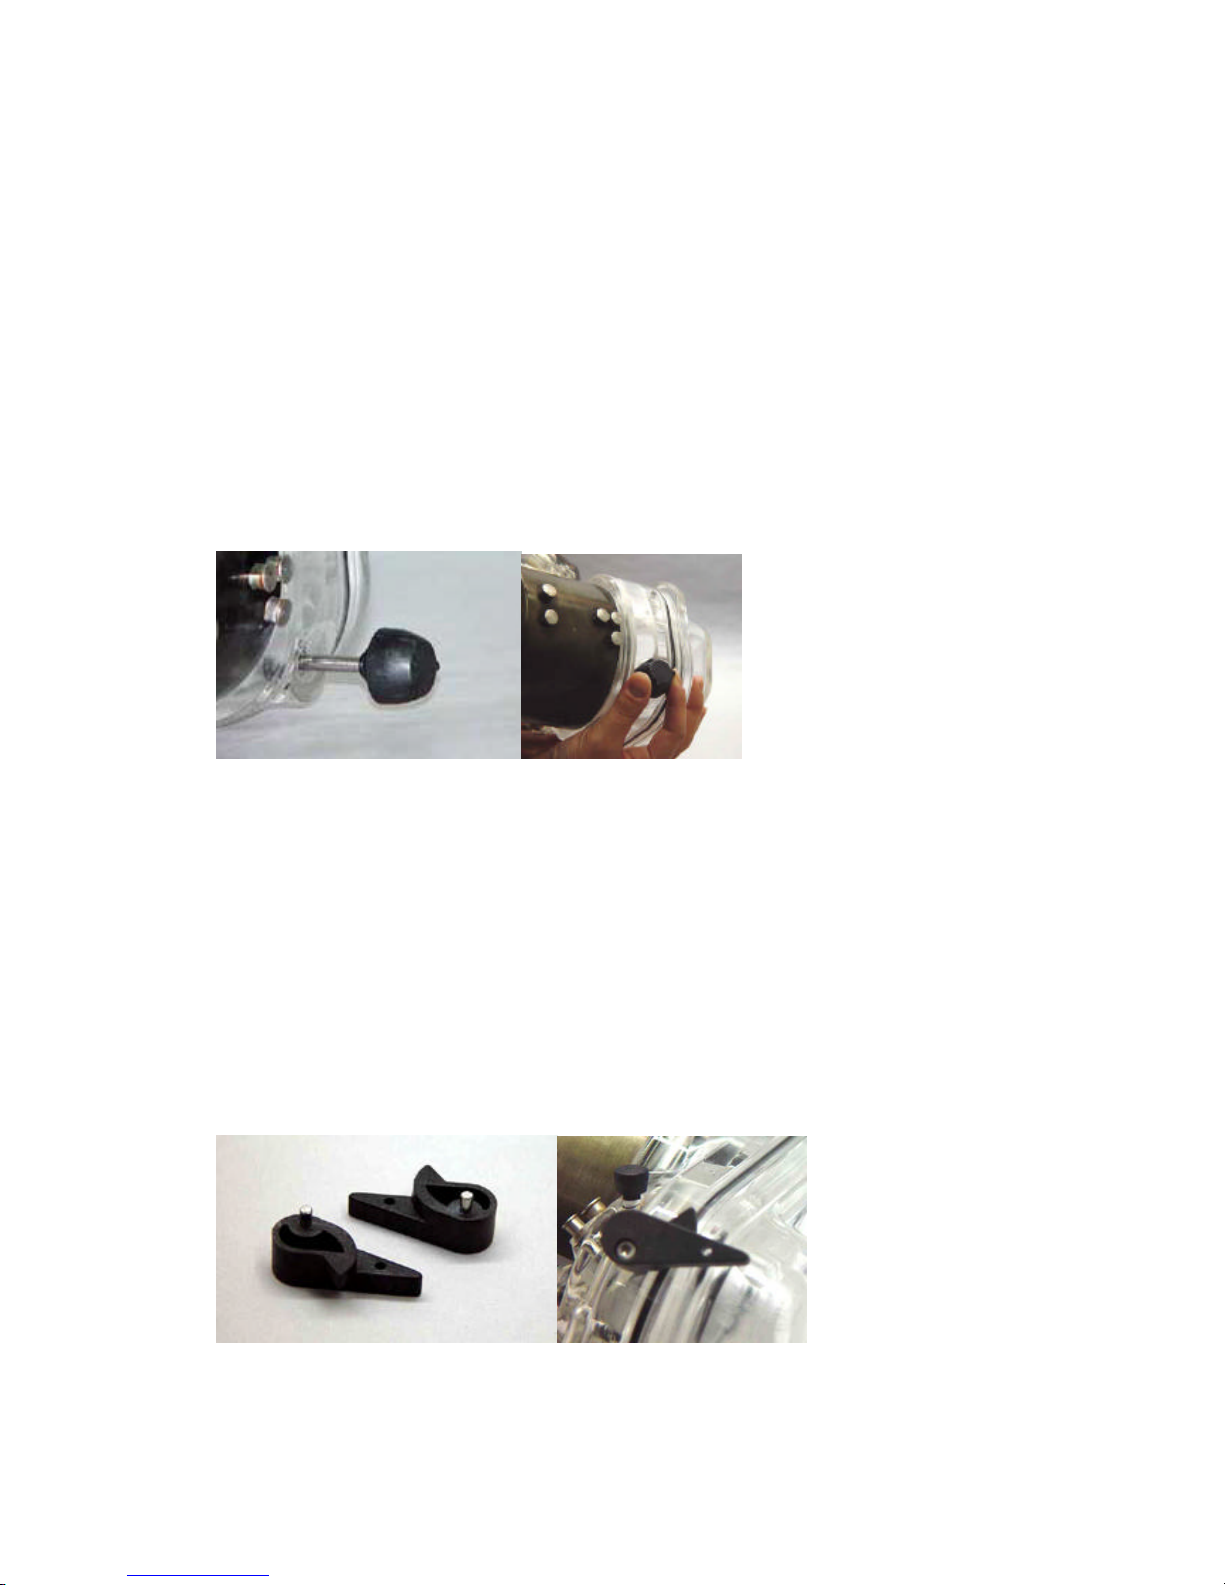
3.1 Pressure release plug: The body and lid are designed with a “no clip” closure
arrangement. Testing has shown that this arrangement allow the water to exert an even
pressure on the O-ring, increasing the reliability of the watertight seal. To open the
housing, the pressure release plug must be first unscrewed and then pulled out all the way.
This provides a passage for the air to pass though and eliminate the pressure different
between the inside of the housing and the ambient.
The plug consists of an internal double O -ring seal on the stainless steel slide shaft. These
internal O-rings form the watertight seal. There is also a large outer O-ring under the
knob. This O-ring serves to prevent contamin ation of the slide shaft, with dirt, salt etc.,
and is not required for watertight integrity. If this O-ring should become detached, it can
simply be pushed back in place.
Important! Before diving, make sure the pressure release plug is pushed
closed, and then screwed home, do not over tighten this plug (finger
tight only).
The universal tool can be used for loosening this plug, in case it was over tightened.
3. 2 Opening levers: After unscrewing and pulling out the pressure rel ease plug, the lid can be opened. To
overcome the friction of opening, two levers are used to push against the lid with a cam action. On some
models these opening levers are bolted to the body. On the other models, they are detachable levers, be sure
they are inserted all the way flat to the housing before turning to avoid damaging the protrusions on the lid.
The body has two holes on opposite corner edges for opening. Gently lever off the lid with the supplied
cams taking care not to twist the lid excessively. The lid should be opened keeping it approximately
paralleled to the body at all times. If using a single lever, turn first one side a little, then the other a little,
and repeat again until the lid is opened. Remember to unscrew and pull out the pressure release plug all the
way first, otherwise the air pressure will resist attempts at opening. Lay the lid on a flat stable surface after
opening.
 Loading...