

Page 1
Computer
Applications Guide
3-087-936-13(1)
Digital Video Camera Recorder
© 2004 Sony Corporation
Page 2

Read this first
• For camera operations, read the separate
Camera Operations Guide supplied with
your camcorder.
The supplied CD-ROM includes the following
software.
For Windows computer : Picture Package
For Macintosh com puter : ImageMixer V C D 2
System requirement
For Windows users
When viewing pictures recorded on a
tape on a computer
• OS: Microsoft Windows 98SE, Windows
2000 Professiona l, Windows Millennium
Edition, Windows XP Home Edition or
Windows XP Professional
Standard i n stallation is requir e d.
Operation is not assured if the above OS has
been upgraded.
You cannot hear sound if your computer is
running Windows 98. You can only transfer
and view still images.
• CPU: Intel Pentium III 500 MHz or faster
(800 MHz or faster recommended)
• Application: DirectX 9.0b or later (Thi s
product is based on Dir ectX technology. It is
necessary to hav e D i rectX installed. )
Windows Media Player 7.0 or later
Macromedia Flash Player 6.0 or later
• Sound system: 1 6 bit stereo sound card and
stereo speaker s
• Memory: 64 MB or more
• Hard disk:
Available memory required for installation:
200 MB or more
Available free hard disk space recommended:
6 GB or more (depending on the size of the
image files edited)
• Display: 4 MB VRAM video card, Minimum
800 × 600 dots, High col or (16 bit color,
65 000 colors), DirectDraw display driver
capability (this product will not operate
correctly at 800 × 600 dots or less, and 256
colors or less.)
• Others: USB port (this must be provided as
standard), DV Interface (IEEE1394, i.LINK)
(to connect via an i.LINK cable), disc drive
(You need a CD-R d rive to cr eate a Vi deo CD.
For the compatible drive, visit the following
URL:http://www.ppackage.com/)
When playing pictures recorded on a
“Memory Stick” on a computer (only the
models with a Memory Stick slot)
• OS: Microsoft Windows 98, Windows 98SE,
Windows 2000 Professional, Windows
Millennium Edition, Windows XP Home
Edition or Windows XP Professional
Standard installation is required.
Operation is not assured if the above OS has
been upgraded.
• CPU: MMX Pentium 200 MHz or faster
• Application: Windows Media Player (this
must be installed to play back movies.)
• Others: USB port (this must be provided as
standard), disc drive
For Macintosh users
b Note
• When you connect your camcorder to a Macintosh
computer using a USB cable, you cannot copy
pictures recorded on a tape to the computer. To copy
pictures, connect your camcorder to the compute r
with an i.LINK cable and use the standard software
in the OS.
When using ImageMixer VCD2
• OS: Mac OS X (v10.1.5 or later)
Standard installation is required.
• Application: QuickTime 4.0 or later (this
must be installed to play back movies.)
• Others: USB port (this must be provided as
standard), DV Interface (IEEE1394, i.LINK)
(to connect via an i.LINK cable), disc drive
When only copying pictur es recorded
on a “Memory Stick” on a computer
(only the models with a Memory Stick
slot)
• OS: Mac OS 9.1/9.2 or M ac OS X (v 10.0/v
10.1/v 10.2/v 10.3)
• Applications: Qui ckTime 3.0 or later (th i s
must be installed to play back movies.)
• Others: USB port (this must be provided as
standard), disc drive
2
Page 3

About this manual
• The name of the power switch on the
camcorder var ie s de pending on the model.
To record on a tape : CAMERA-TAPE or
CAMERA
To play : PLAY/EDIT, PLAYER or VCR
CAMERA-TAPE an d PLAY/EDIT are used
in this manual. Refer to the separate Camera
Operations Guide supplied with y our
camcorder for details.
• The screens shown in this manual are from a
Windows XP computer. The screens may vary
depending on the OS.
On copyrights
Music works, sound recording or other third
party musical contents you may acq uire from
CDs, the Internet or other sources (the “Music
Contents”) are the copyrighted work of the
respective owner s thereof and are protec te d by
copyright laws and other applicable laws of
each country/region. Except to the extent
expressly permitted by applic able laws, you ar e
not permitted to use (including, without
limitation, copying, modifying, reproducing,
uploading, transmitting or placing to the
external networ k accessible to the publ ic ,
transferring, distributing, lending, licensing,
selling and publis hi ng) any of the Music
Contents without obta i ni ng authorization or
approval of the respective owners thereof.
License of Picture Package by Sony
Corporation woul d not be construed as
conferring to you by implication, estoppel or
otherwise any license or right to use the Music
Contents.
• Roxio is a register ed trademark of Rox io , Inc.
• Toast is a trademark of Roxio, Inc.
• Macromedia and Macromedia Fla sh P l ayer
are trademarks or registered trademarks of
Macromedia, Inc. in the United States and / or
other countries.
• Pentium is a trademark or registered
trademark of Inte l Corporation.
All other product names mentioned herein may
be the trademark s or registered trademarks of
their respective comp anies. Furthermore, “
and “
” are not mentioned in each case in th is
manual.
”
On trademarks
• Picture Pack age is a trademark of Sony
Corporation.
• “Memory St ic k” and are registered
trademarks of Sony Corporation.
• Microsoft, Windows, and Windows Media are
either register ed trademarks or trademarks of
Microsoft Corporation in the United States
and/or other countries.
• Macintosh, iMac, Mac OS, iBook and Power
Mac are trademarks of Apple Compute r I nc.
• QuickTime and the QuickTime logo are
trademarks of A pple Computer, Inc.
3
Page 4

Table of Contents
Read this first............................................................................................. 2
Connecting to a Windows computer
Introduction to editing pictures on a computer ........................................... 6
Features ......................................................................................................................6
Overview of the preparation .................................... ............ ............. ............ ............. ..7
Step 1: Installing the software on a computer............................................ 8
Step 2: Connecting your camcorder to a computer.................................. 10
Using the USB cable (supplied) when viewing pictures on a tape ............................11
Using the USB cable (supplied) when copying pictures on a “Memory Stick” ...........13
Using the i.LINK cable (optional) ...............................................................................15
Managing pictures on a Wi ndows computer
Copying, viewing and creating pictures.................................................... 17
Viewing video and pictures on your computer
– Picture Package Viewer ...................................................................................17
Creating an original video
– Picture Package Auto Video ............................................................................18
Creating an original slide show
– Picture Package Auto Slide ..............................................................................21
Saving the images on CD-R
– Picture Package CD Backup ............................................................................23
Creating a Video CD (Direct Access to Video CD Burn)
– Picture Package VCD Maker ...........................................................................24
Copying images for MEMORY MIX to a “Memory Stick” (only the models
with a Memory Stick slot) .................................................................................... 26
Connecting to a Macintosh c omputer
Connecting your camcorder to a computer.............................................. 28
Copying pictures recorded on a “Memory Stick”
(only the models with a Memory Stick slot)......................................... 29
Installing software on a computer ............................................................ 29
Other functions
Creating a DVD (Direct Access to “Click to DVD”)................................... 30
Connecting an analog VCR to the computer via your camcorder
— Digital convert function ................................................................... 33
4
Page 5

Additional information
Troubleshooting ....................................................................................... 35
Index ........................................................................................................ 41
5
Page 6
Connecting to a Windows computer
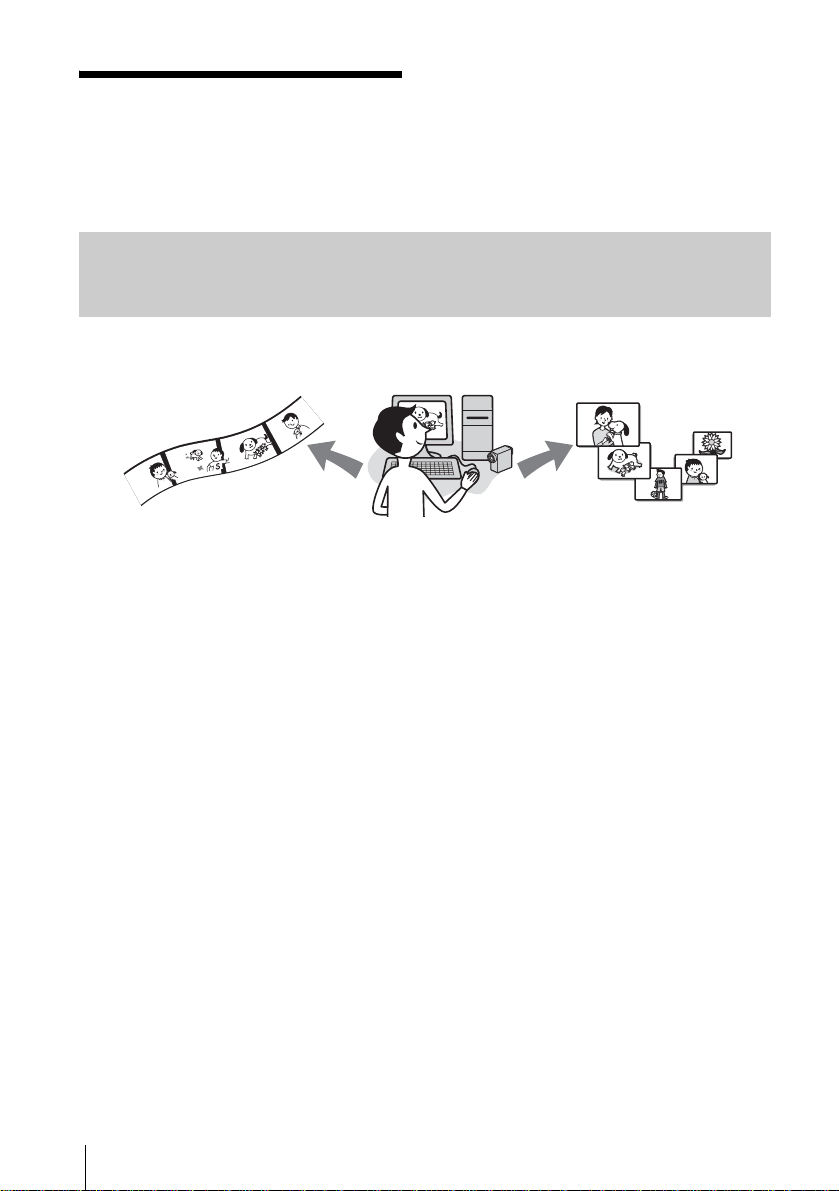
Introduction to editing pictures on a computer
Features
When installing the Picture Packag e f rom the supplied CD-ROM, you can mana ge still images and
movies recorded on your camcorder as digital data on your computer along w ith several features.
Copying pictures from a “Memory Stick” automatically
You can easily transfer pictures recorded on a “Memory Stick” just by connecting your camcorder to
the computer.
Creating your own original video
You can easily create original videos w ith added music and eff ect s using pictures recor ded on a tape
as materials. Yo u can also create video CDs.
Creating your own slide show
You can select your favorites from pict ures imported from a “M emory Stick” and easi ly create your
original slide show with added mus i c and effects.
Saving the images on CD-R
You can save pictures copied onto a com puter on a CD-R.
Connecting to a Windows computer
6
Page 7
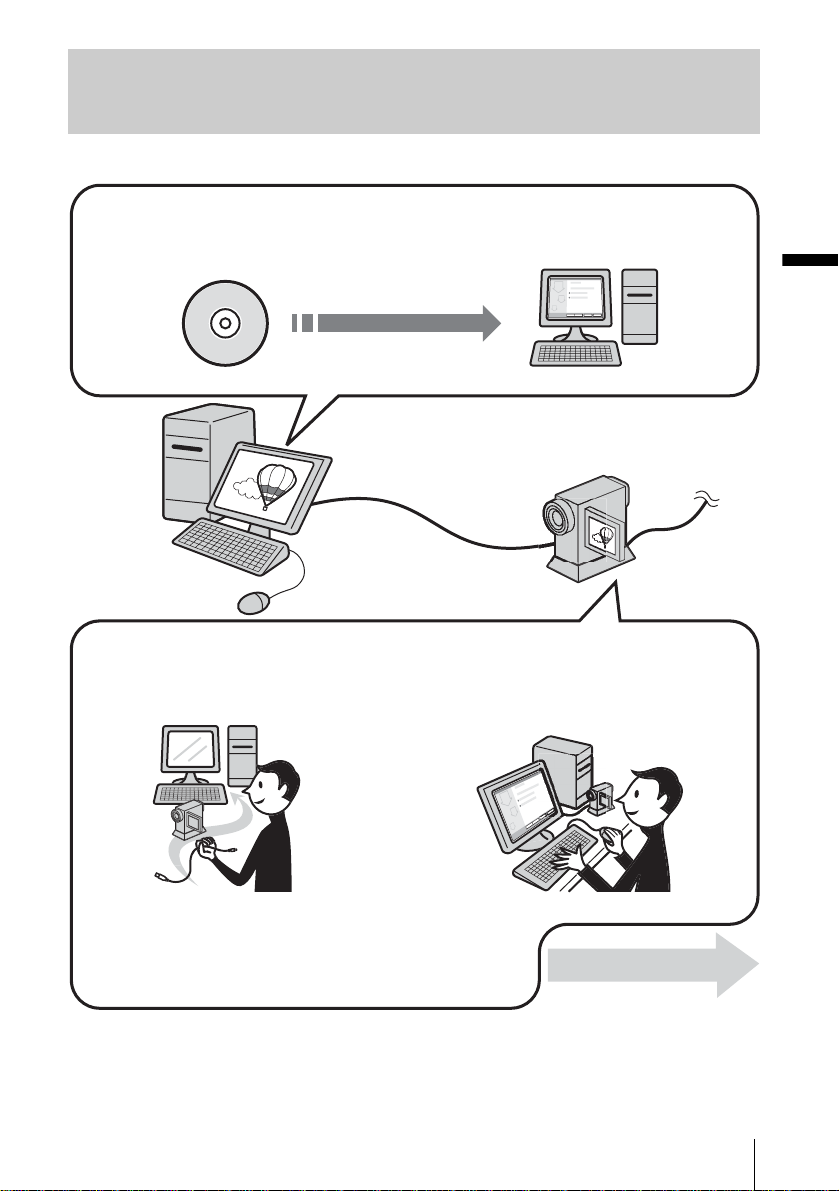
Overview of the preparation
Follow the steps below to complete the preparation.
On your computer (for the first time only)
Step 1: Installing th e software on a computer
CD-ROM (supplied)
Connecting to a Windows computer
On your camcorder
Step 2: Connecting your camcorder to a comput er
There are two ways to connect your camcord er to a com put er.
• Connecting wit h a USB cabl e (supplied)
• Connecting with an i.LINK cable (optional)
See “Step 2: Connecting your camcor de r to a computer” (p. 10) for details.
* These il lustrations are of models with a Handycam Station.
For models with a Handycam Station, place your camcorder on the Handycam Station, then connect the
Handycam Station to a computer. You canno t dir e ctly c onne c t your camcorder to the computer.
Connecting to a Windows computer
Now, start from Step1 !
7
Page 8
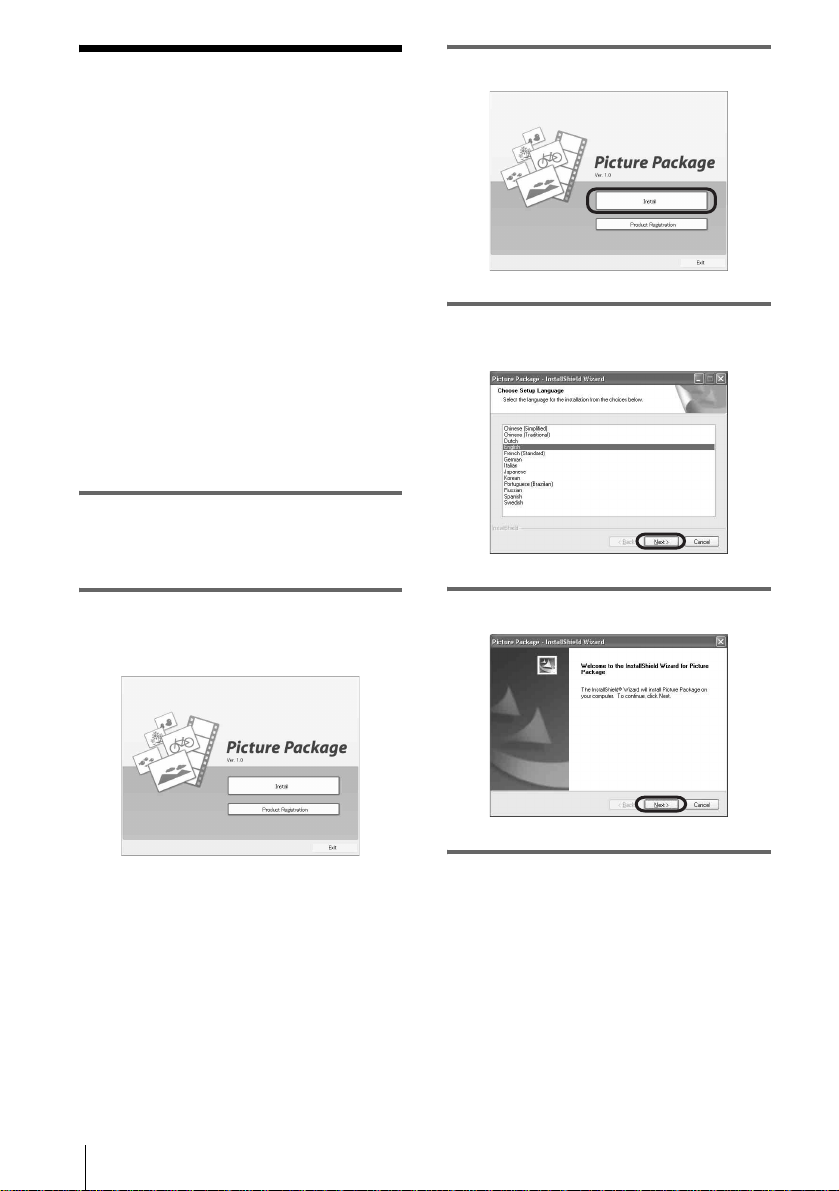
Step 1: Installing the software on a computer
You need to install the software to your
computer to have fun with your recorded still
images and mo v i es . The install ation is
required only for the first time. From the
second time on, you onl y need to connect
your camcorder and the computer.
For Windows 2000/Windows XP
Log on as Administrators for installation.
b Note
• Do not connect the USB cable (supplied) before
installing the software.
1 Turn on the co mputer.
Close down all applications runnin g on the
computer before installing the software.
3 Click [Install].
4 Sel ect the language for installation,
then click [Next].
2 Place the supplied CD-ROM in the
disc drive of your com puter.
The installation screen appears.
If the screen does not appear
1 Double- cl ic k [ My Computer].
2 Double-click [PICTUREPACKAGE]
(Disc drive)*.
* Drive names (such as (E:)) may vary
dependin g on the computer.
Connecting to a Windows computer
8
5 Click [Next].
6 Rea d [License Agreement], check [I
accept the terms of the license
Page 9
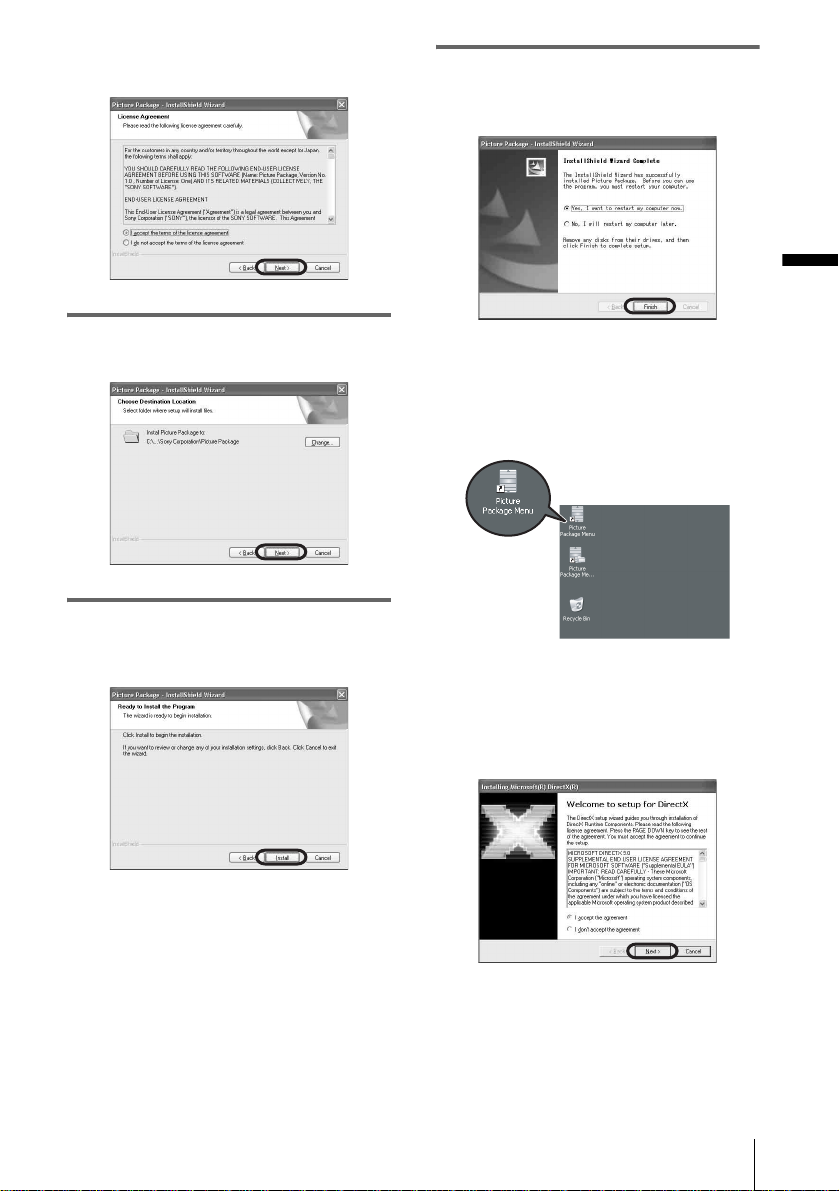
agreement] when you agree, then click
[Next].
7 Select where to save the software, then
click [Next].
8 Click [Install] on the [Ready to Install
the Program] screen.
The installat ion starts.
9 Make sure [Yes, I want to restart my
computer now.] is checked, then click
[Finish].
Connecting to a Windows computer
The computer turns off once, then starts up
again automatically (Restart). The short-cut
icons for [Picture Package Menu] and
[Picture Package Menu destination Folder]
appear on the deskt op.
When DirectX 9.0b or later is not
installed on the computer, follow the
steps below to install DirectX 9.0b.
1 Read [License Agreement], then click
[Next].
,continued
Connecting to a Windows computer
9
Page 10
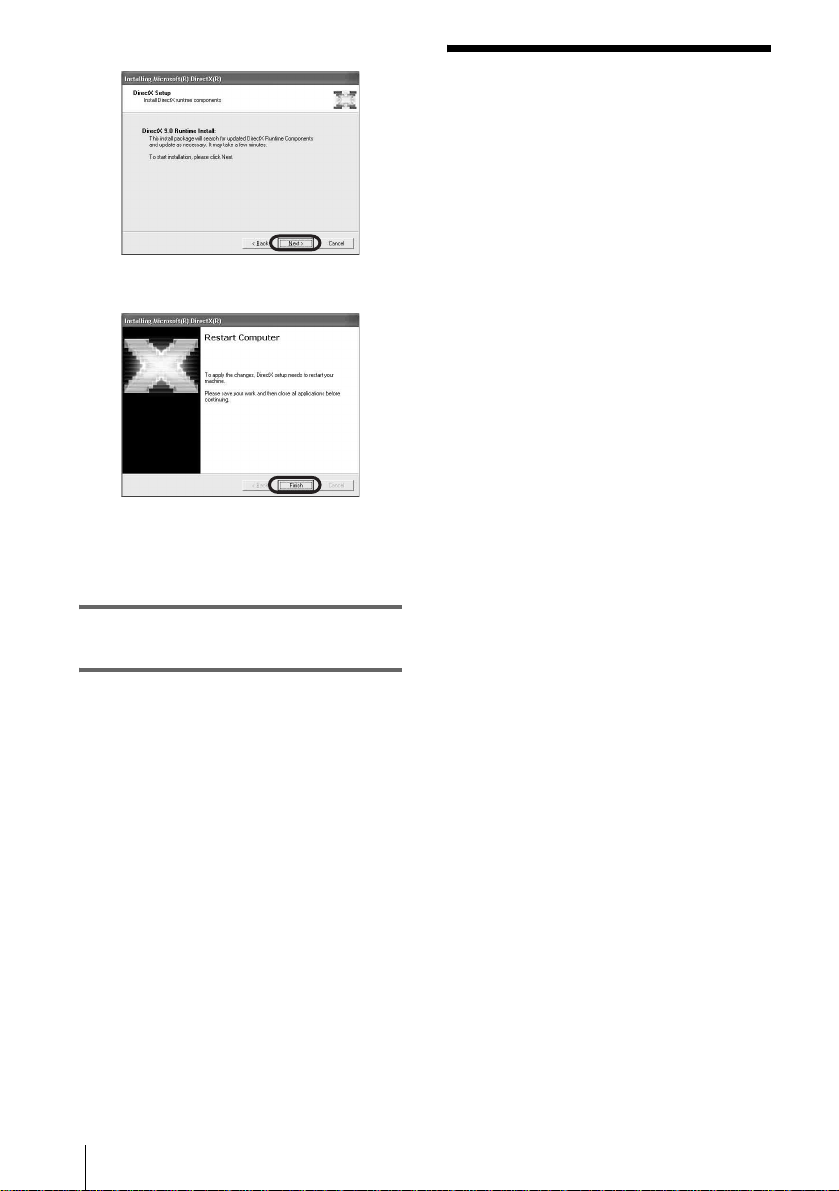
2 Click [Next].
3 Click [Finish].
The computer restarts auto matically, t hen a
short-cut icon for [Picture Package Menu]
appears on the desktop.
10Remove the CD-ROM from the disc
drive of your computer.
Step 2: Connecting your camcorder to a computer
About connection
There are two ways to connect your camcorder
to a computer:
– USB cable (supplied)
– i.LINK cable (optional)
Connecting with the USB cable
(supplied)
This method is good for copying pictures and
sound recorded on a tape to the computer,
copying files fr om a “Memory Stick” to a
computer, and co pying files to a “Memo ry
Stick.”
• When connecting the camcorder to a computer
with a USB ca ble (suppli ed), the computer an d
camcorder must be recognized beforehand.
Follow the steps below.
– Using the USB cable (s upplied) when
viewing pictures on a tape (p. 11)
– Using the USB cable (s upplied) when
copying pictures on a “Memory Stick”
(p. 13)
If you have any questions about Picture
Package
For details, refer to the operating instructions
supplied on the CD-ROM supplied with your
camcorder, or on- line help.
Connecting to a Windows computer
10
Connecting with an i.LINK cable
(optional)
• This method is good for copying pictures and
sound recorded on a tape.
Image data is transferred with more precision
than with a USB cable.
b Notes
• When you are using a USB cable or an i.LINK cable
to connect your camcorder to a computer, make sure
you insert the connector in the corre c t direction. If
you insert the connector forcib ly, it ma y be
damaged, and causes a malfunction of your
camcorder.
• You cannot copy pictures from a “Memory Stick” to
a computer with an i.LINK cable.
• You cannot connect with an i.LINK cable when you
use Windows 98/Windows 98SE.
Page 11
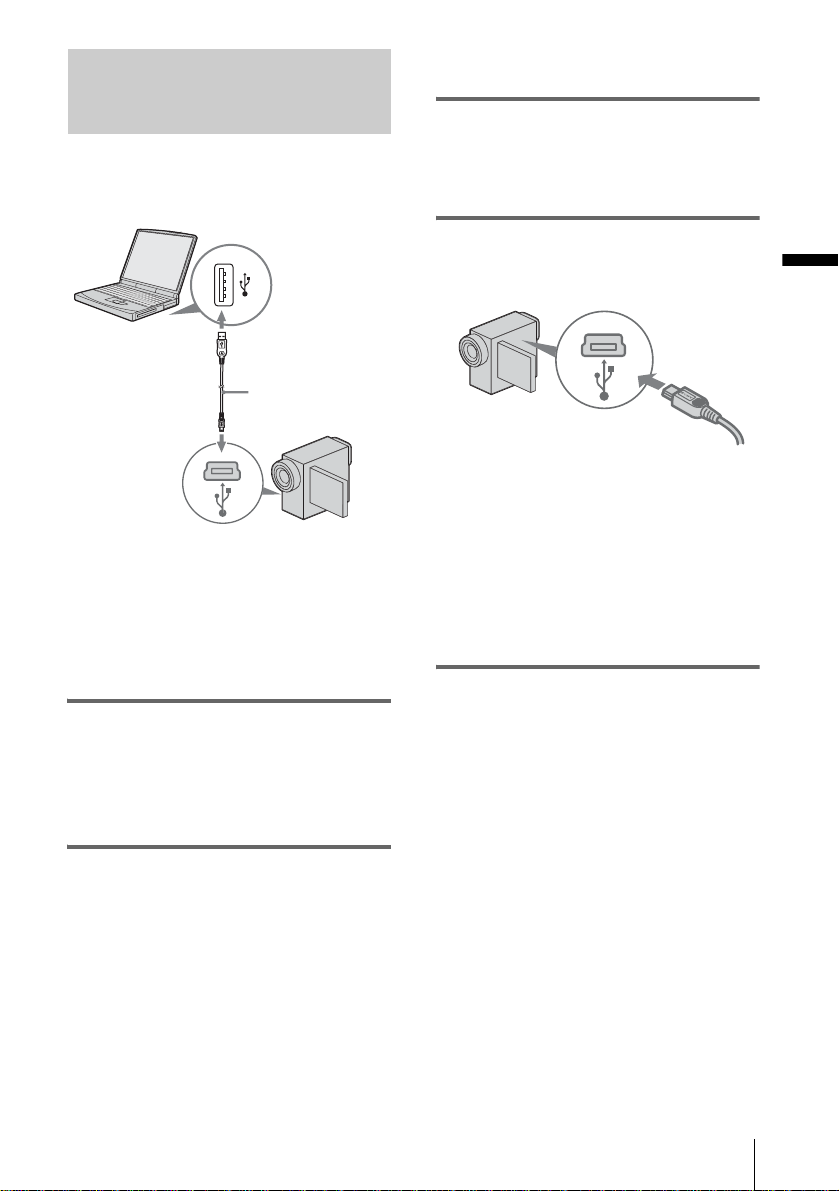
Using the USB cable (supplied) when viewing pictures on a tape
Before followin g t he pr ocedures below, ma ke
sure you have installed Picture Package on your
computer (p. 8).
to USB jack
USB cable
(supplied)
to USB jack
b Notes
• Do not connect your camcorder to the computer
at this point.
• The computer may not recognize the camcorder
if you connect them wit h the USB cab le (supplied)
before turning on your camcorder.
1 Turn on the computer.
Close down all applications running on the
computer.
For Windows 2000/Windows XP
Log on as Administrators.
2 Prepare the power source for your
camcorder, then slide the POWER
switch to select the PLAY/EDIT mode.
Use the supplied AC Adaptor as the power
source.
The name of the power switch on the
camcorder vari es depending on the model.
pictures that your camcorder is seeing on the
computer - USB Streaming.
3 Set [USB STREAM] in the menu
settings of your camcorder to on.
The procedure of the m enu settings varies
depending on the model.
4 Connect the USB cable (supplied) to
the USB jack on the camcorder.
Connecting to a Windows computer
Fully insert.
The location of the USB j ack varies
depending on the m odel. Refer to the
separate Camera Opera ti ons Guide
supplied with your camcorder for the
location.
For the model that is supplied with the
Handycam Station, connect the USB cable
to the USB jack on the H andycam Station,
then set the USB ON/OFF switch to ON.
5 Connect the other end of the USB cable
to the USB jack on your computer.
It may take some time for the computer to
recognize the camcorder when you connect
the USB cable for the first time.
Then [USB Streaming To ol ] starts up.
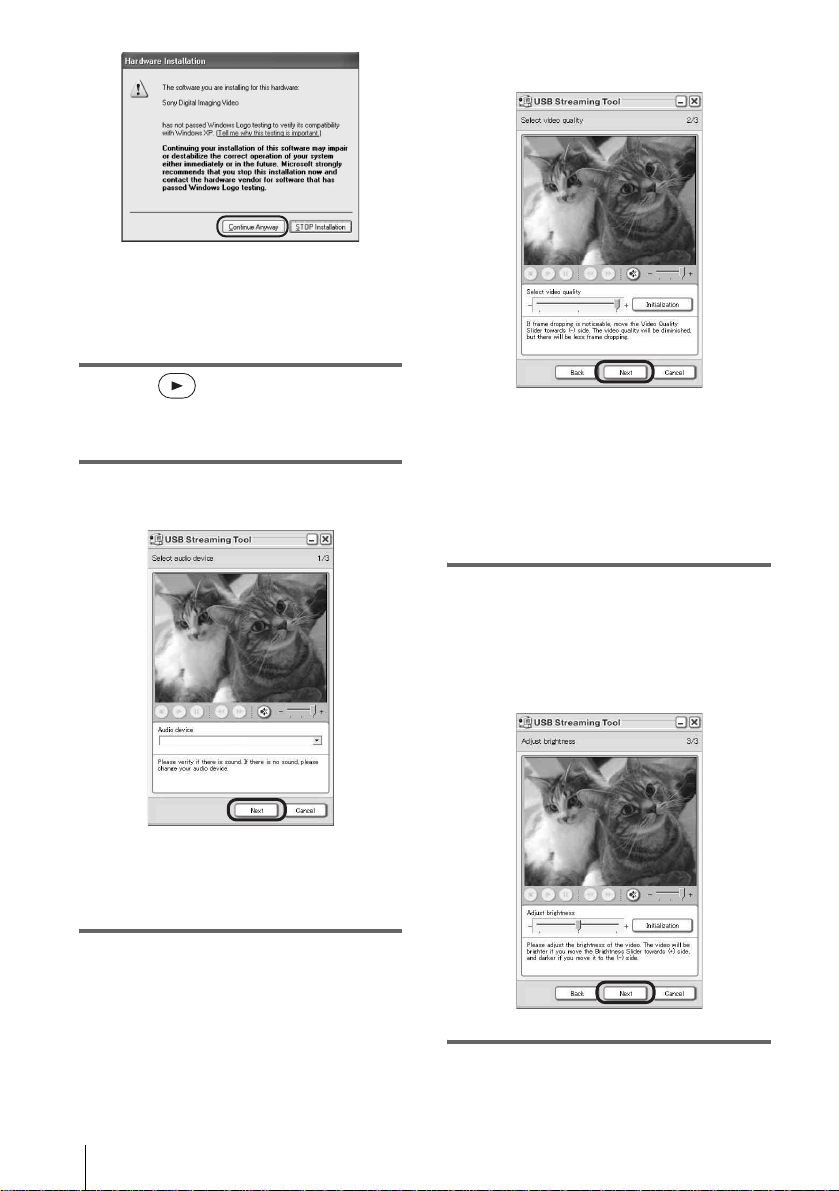
If [Found New Hardware Wizard] appears,
click [Cont i nue An ywa y] an d co mpl et e t he
installation.
For Windows 2000/Windows XP
When the dialogue box prompting you to
confirm the digital signature appears, select
[Yes] if you use W indows 2000 or select
[Continue Anyway] if you use Wind ow s
XP.
z Tip
• Slide the POWER switch to selec t th e
CAMERA-TAPE mode, and you can view
,continued
Connecting to a Windows computer
11
Page 12
z Tip
• You can confirm the r e is no prob le m e ve n if
you select [Yes] or [Continue Anyway ]
depending on the OS.
6 Click (Playback).
Make sure that the movie recorded on a tape
is played back.
7 Make sure you hear the sound, then
click [Next].
adjusting the slider in the (-) direction
makes the image quality lower.
b Note
• When you adjust the image quality, the picture
and the sound break off for a moment.
Tip
z
• If the movie is not smooth, adjust the slider in
the (-) direction.
9 Adjust the brightness, then click
[Next].
Adjusti ng the slider in the (+) direction
makes the picture brighter, and adjusting
the slider in the (-) direction makes the
picture dark er.
b Note
• When you cannot hear the sound, select another
device.
8 Adjust the image quality, then click
[Next].
Adjusting the slider in the (+) direction
makes the image quality highe r and
Connecting to a Windows computer
12
10Click [Done].
[Picture Packag e M enu] starts up.
Page 13

The settings from steps 7 to 9 are saved.
From the second time on, [USB Streaming
Tool] does not start up.
z Tip
• To adjust the image quality and brightne ss when
connecting your camcorder to the computer after the
second time, select [Start], [Programs ] ([All
Programs] for Windows XP), [Picture Package],
[Handycam Tools], and [USB Streaming Tool], then
start up [USB Streaming Tool].
Using the USB cable (supplied) when copying pictures on a “Memory Stick”
b Notes
• Do not connect your camcorder to the computer
at this point.
• The computer may not recognize the camcorder
if you connect them with the USB cable (supplied)
before turning on your camcorder.
1 Turn on the computer.
Close down all applications running on the
computer.
For Windows 2000/Windows XP
Log on as Administ rators.
2 In sert a “Memory Stick” into your
camcorder.
Connecting to a Windows computer
When you connec t your camcorder and the
computer, [Picture Package Menu] st ar ts up,
then pictur es reco rded on a “Memory Stick” are
automatically copied to the computer. Before
following t he proc edur es bel ow, ma ke su re you
have installed Picture Package on your
computer (p. 8).
If your computer has a Memory Stick
slot
Insert a “Memory Stick” on which pictures are
recorde d into the Mem ory Stick sl ot on your
computer. [Pict ur e Package Viewer] st arts up
after pictures are automatically copied. You can
skip the followi ng steps. To check whe re the
images are stored on a “Memory Stic k, ” see
page 14.
to USB jack
USB cable
(supplied)
to USB jack
3 Prepare the power source for your
camcorder, then slide the POWER
switch to select the PLAY/EDIT mode.
Use the supplied AC Adaptor as the power
source. The name of th e power switch on
the camcorder va ri es depending on the
model.
4 Set [STD-USB] in the menu settings of
your camcorder to on.
The procedure of the m enu settings varies
depending on the model.
5 Connect the USB cable (supplied) to
the USB jack on the camcorder.
The location of the USB j ack varies
depending on the m odel. Refer to the
separate Camera Opera ti ons Guide
supplied with your camcorder for the
location.
For the model that is supplied with the
Handycam Station, connect the USB cable
to the USB jack on the H andycam Station,
then set the USB ON/OFF switch to ON.
6 Connect the other end of the USB cable
to the USB jack on your computer.
[USB MODE] appears on the LCD screen
of your camcorder .
,continued
Connecting to a Windows computer
13
Page 14
It may take some time for the computer to
recognize the camcorder when you connect
the USB cable for the first time.
[Picture Package Menu] starts up, and
pictures in a “Memo ry St ic k” are
automatically copied to the computer.
.
After all the pictures are copied to the
computer, [Pic tu re Package Viewer] starts
up.
Documents] or [My Pictures] folder. Where
pictures are saved v aries depending on the OS .
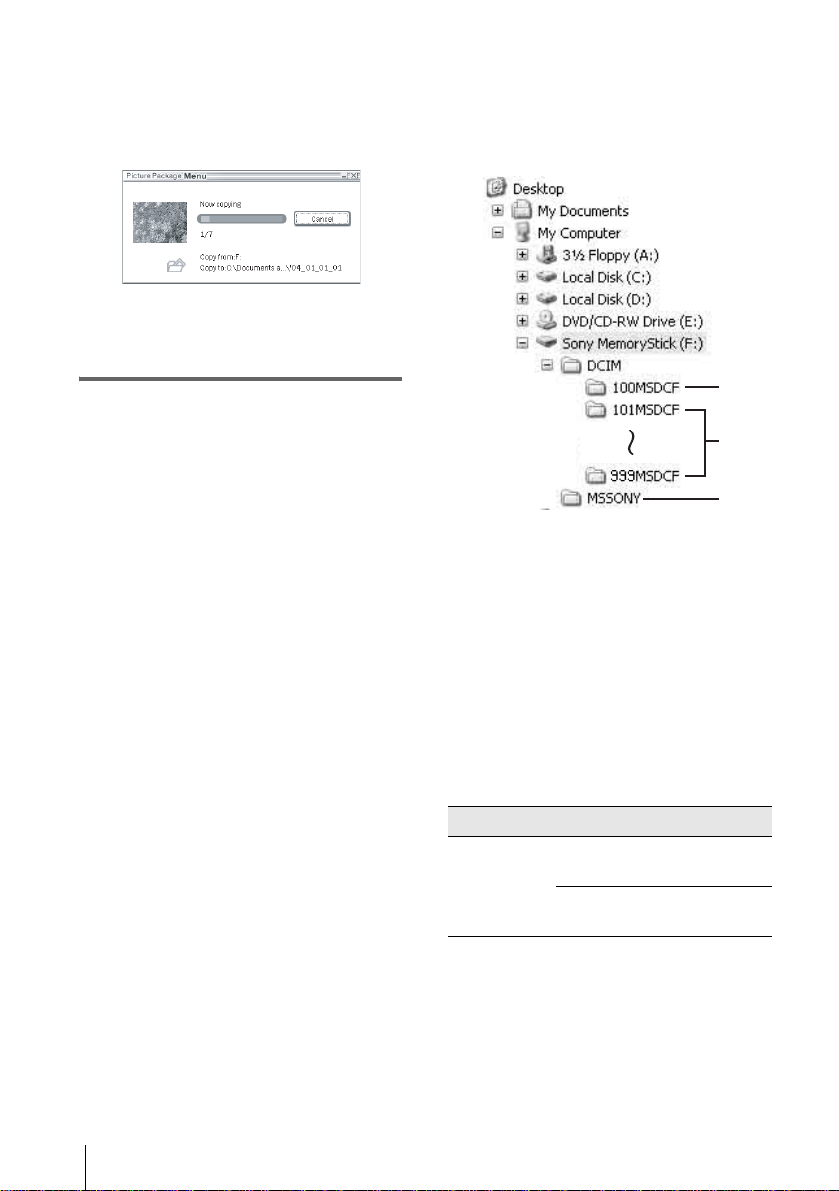
Pictures on a “Memory Stick”
The pictures ar e stored in t he [Removab le Disk]
or [Sony MemoryS tick] folder dis played in [My
Computer].
A
For Windows XP
The automatic playback wizard starts up at th e
default setting. Follow the steps below to
deactivate this setting. (From the second time
on, you can skip th is procedure.)
1 Click [Settin gs] of [Picture P ackage
Menu].
2 Check [Do not automatically launch
Windows AutoPlay.] ( O nl y w he n using
memory device under Windows XP).
3 Click [OK].
To change the Picture Package Menu
settings
Click [Copy automatically] t [Settings] to
change [Basic], [Copy], and [Delete].
Click [Restore default s] to return to the default
setting.
To copy pictures to the computer
without using Picture Package Menu
Double-click the [Removable Disk] or [ Sony
MemoryStick] icon displayed in [My
Computer]. Then, drag and drop a picture in the
folder onto the hard disk drive of your
computer.
On destination folders and file names
Pictures transferred to the computer
using Picture Package Men u
The pictures are copied to the [Date] folders in
the [Picture Package] created inside the [My
B
C
A Folder containing image files recorded
using other camcorders without the
folder creation function (for playback
only)
B Folder containing image files recorded
with your camcorder
When no new folders have been created,
only [101MSDC F] is displayed.
C Folder containing movie data recorded
using other camcorders without the
folder creation function (for playback
only)
Folder File Meaning
101 MSDCF
(up to 999
MSDCF)
ssss stands for any number between 0001 to
9999.
DSC0sss
s.JPG
MOV0sss
s.MPG
Still image
file
Movie file
Connecting to a Windows computer
14
Page 15

To disconnect the USB cable
For Windows 2000/Windows Me /
Windows XP
If [USB MODE] appears on the LCD scr een,
follow the procedure below to disconnect the
USB cable.
1 Click the [Un p l ug or eject hardwar e ]
icon on the task tray.
Click this icon.
task tray
2 Click [Safely remove Sony Camcorder ]
([Unplug or eject hardware] in Windows
2000/Windows Me).
Click here.
3 Click [OK] in Windows 2000/Windows
Me.
4 Disconnect the USB cable from the
camcorder and computer.
If [USB MODE] do es not appear on the LCD
screen, do only step 4 above.
For Windows 98/Window s 98SE
Do only step 4 above.
• If your computer has a USB keyboard and a
USB mouse as standard equipmen t , l eave
them connected and connect the camcorder to
an available USB ja ck w i t h the USB cable
(supplied).
Connecting to a Windows computer
b Notes
• Operation is not guaranteed if you connect two or
more USB devices to the computer.
• Operation is not guaranteed if you connect the USB
cable to the USB jack on a keyboard or USB hub.
• Make sure to connect the cable to the USB jack on
the computer.
• Operation is not guaranteed on all the recommended
environments.
Using the i.LINK cable (optional)
b Notes
• Do not disconnect the USB cable while the access
lamp is lit.
• Make sur e to disc onne ct the USB cable (supplied)
before turning off your camcorde r.
Recommended connection
Connect as shown in the following illustrations
to operate the camcorder correctly.
• Connect the camcorder to a comput er via the
USB cable (suppli ed). Make sure no othe r
USB devices are connected to the computer.
to i.LINK (IEEE1394)
connector
i.LINK cable
(optional)
to DV
Interface
,continued
Connecting to a Windows computer
15
Page 16

The location of the DV Interface varies
depending on the model. Refer to the separate
Camera Operations Guide supplied with your
camcorder for the location.
For the model that is supplied with the
Handycam Station, connect the i.LINK cable to
the DV Interface on the Handycam Station.
z Tip
• You can use other image editing software that can
read video signals to edit the recorded pictures. For
details on the operation of other software, refer to the
help files or the operating instruc tions of that
software.
To disconnect the i.LINK cable
Turn off the pow er of the camcorder and
disconnect the i.LINK cable from the
camcorder and computer.
Connecting to a Windows computer
16
Page 17

Managing pictures on a Windows computer
Copying, viewing and creating pictures
This chapter de scribes how to use the
applications that are included in Picture
Package.
There are appl i cations that ap pear on [Picture
Package Menu] and an application that starts up
from the [Start] menu of the computer.
Picture Package VCD Maker (p. 2 4)
You can create a Video CD from pictu res
recorded on a tape.
Application that starts up f rom the
[Start] menu of the computer
MEMORY MIX Image Tool (p. 26)
You can copy imag es for MEMORY MIX to a
“Memory Stick.”
For details of MEMORY MIX functions, refer
to the separate Camera Operations Guide
supplied with your camcorder.
Applications that appear on Picture
Package Menu
If you double-click [Picture Packa ge Menu]
icon on the desktop, [Picture Package Menu]
appears.
The following applications appear on [Picture
Package Menu].
Picture Package Viewer ( p. 17)
You can view the pi ct ur es copied from your
camcorder by sel ecting from thumbn ai ls. Still
images and movies are saved in folders by date.
Picture Package Auto Video (p. 18)
You can easily create original videos with
added music and effects using pictures recorded
on a tape.
Picture Package Auto Slide (p . 21)
You can select yo ur favorites from pictures
imported from a “Memory Stick” and e as il y
create your origin al sl ide show with added
music and effects.
b Notes
• Before following the procedures below, make sure
you have installed Picture Packa ge on yo ur
computer (p. 8).
• For Windows 2000/Windows XP, log on as
Administrators.
Tip
z
• You can change the applications that appear on the
menu with the [Settings] screen.
Viewing video and pictures on your computer – Picture Package Viewer
Pictures copied from your camcorder are saved
in folders b y date.
You can view the pictures by selecting from
thumbnails.
1 Turn on the computer.
2 Double-click [Picture Package Menu]
icon on the desktop.
[Picture Package Menu] starts up.
3 Click [Viewing video and pictures on
PC].
Managing pictures on a Windows computer
Picture Package CD Backu p (p. 23)
You can save pi ctures co pied onto a computer t o
a CD-R.
,continued
Managing pictures on a Windows computer
17
Page 18

[Picture Pa ckage View er] start s up, the n the
pictures in the new es t f ol der appears.
Folder functions
With [Picture Package Viewer], pictures copied
from your camcorder are saved in folders by
date. The folders are grouped by year. You can
select and view pic t ures from any folder or
memory device.
To add comments to a folder
Right-click on the desired folder and insert th e
comments. You can also change the date of the
folder. If you change the date of a folder, the
folder sequen ce changes.
4 Double-click a picture you want to see.
The selected picture is displayed.
Still image files
You can print, expand, and rota te pictures
using the buttons at the to p of the sc reen . If
you click (Exif), the recor ding
condition s such as shut te r sp eed, exp os ure,
aperture, etc. appear.
Movie files
Creating an original video – Picture Package Auto Video
You can create original video that is edited
automatically to match the mu sic and effe cts
you have selected.
The maximum length of your original movies
you can create on a computer is 1 0 minutes.
b Note
• You cannot save pictures from a tape directly onto
the hard disk drive of your computer.
Tip
z
• You can use an i.LINK cabl e for this funct ion.
1 Turn on the computer.
2 Prepare the power source for your
camcorder, then slide the POWER
switch repeatedly to select the PLAY/
EDIT mode.
Use the supplied AC Adaptor as the power
source.
The name of the power switch on the
camcorder vari es depending on the mo del .
You can play, stop, and pause movies using
the buttons at the top of the screen.
Managing pictures on a Windows computer
18
3 Set [USB STREAM] in the menu
settings of your camcorder to on.
The procedure of th e m enu settings varies
depending on the m odel.
Page 19

z Tip
• This operati on is not necessary when
connecting the camcord er to the computer via
an i.LINK cable (p. 15).
4 Search for the point on the tape where
you want to start copying.
5 Co nnect your camcorder to the
computer using a USB cable (supplie d)
or i.LINK cable (optional) (p. 11, 15).
[Picture Pac kage Menu] starts up
automatically.
6 Click [Automatic Video Producer].
[Picture Pac kage Auto Video] starts up.
.
music on the application. Select music, then
click [OK].
.
8 Click [Effect settings], then select the
effect.
Managing pictures on a Windows computer
7 Click [Music settings], then select the
music
You can select music from music files in the
computer or music CDs other than sample
You can select one of the 5 effects. Se le ct
an effect, then click [OK].
.
,continued
Managing pictures on a Windows computer
19
Page 20

9 Click [Output settings], then select
where to store the images.
When you select [Video CD] fo r where to
store the ima ges, place a new CD-R in th e
disc drive. Select where to save images,
then click [OK].
.
b Note
• CD-RWs cann ot be use d.
10Click [Start].
music and effects. The remaining time
appears on the co m puter screen.
.
11Click [No] when you want to finish.
.
To create another copy with the same
content, click [Yes], then place a new CDR in the disc drive.
b Notes
• Any and all third party musical contents you may
acquire from CDs, the Interne t or ot he r so ur ces a re
the copyrighted work of the respective owners
thereof, and except to the extent protected by
applicable laws, you are not permitted to use any of
the third party musical co ntent s. Pl ease ref er to “On
Copyrights” of “Read this first” above - m ent ioned
(p. 3) for further note on your use of such th ird party
musical contents.
• When you select a music file longer than 10 minutes,
the playback fades out auto matically.
The movie is auto m atically copied from
your camcorder and is edited with selected
Managing pictures on a Windows computer
20
Tips
z
• When the recor de d ti me o f th e m ovie on the ta pe is
longer than the selected music file, the movie is
edited automatically according to the length of the
music file.
• If you want to rewind to the beginning of a tape and
copy, click [Options] and check [Rewind the tape to
the beginning, then capture].
• If you saved a created movie on the hard disk, you
can view it with [Picture Package Viewe r].
• If you select CD-R for where to save, you can view
the created video as a video CD. For deta il s on
playback of video CDs, see page 26.
Page 21

Creating an original slide show – Picture Package Auto Slide
You can add musi c and effects to selecte d
pictures saved on your computer and
automatically cr eat e a slide show. You can
combine still images and movies in the slide
show.
The maximum length of your original slide
show you can create on a computer is 10
minutes.
1 Turn on the computer.
2 Double-click [Picture Package Menu]
icon on the desktop.
[Picture Pac kage Menu] starts up.
3 Click [Automatic Slide show
Producer].
[Picture Package Auto Slide] starts up.
4 Open the desired folder on the left side
of the screen, select pictures as
materials for slide show.
The selected picture is marked with .
.
5 Click the [View selected pictures] tab,
and make sure the desired pictures are
selected.
.
6 Click [Create slide show].
7 Click [Music settings], then select the
music.
Managing pictures on a Windows computer
You can select music from music files in the
computer or music CDs other than the
,continued
Managing pictures on a Windows computer
21
Page 22

sample music on the application. Select
music, then click [OK].
.
8 Click [Effect settings], then select the
effect.
9 Click [Output settings], then select
where to store the images.
When you select [Video CD] for wh ere to
store the images, place a new CD-R in th e
disc drive. Select where to store the images,
then click [OK].
.
You can select one of the 5 effects . Se l ect
an effect, then click [OK].
.
Managing pictures on a Windows computer
22
b Note
• CD-RWs cannot be used.
10Click [Start].
Page 23

Slide show creation starts. The remaining
time appears on the computer screen.
.
Saving the images on CD-R – Picture Package CD Backup
You can save pictures copied on the computer,
as a backup, to a CD-R.
1 Turn on the computer.
11Click [No] when you want to finish.
.
To create another copy with the same
content, cli ck [Yes], then place a new CDR in the disc drive.
b Notes
• Any an d all thir d pa r ty musical contents you may
acquire from CDs, the Internet or other sources are
the copyrighted work of the respective owners
thereof, and except to the ex te nt prot ected by
applicable laws, you are not permitted to use any of
the third party musical co ntents. Pleas e refer to “On
Copyrights” of “Read this first” above-mentioned
(p. 3) for further note on your use of such third party
musical contents.
• When you select a music file longer than 10 minutes,
the playback fades out automatically.
Tips
z
• If you save d a cr eate d sl ide show on the ha r d disk,
you can view it as a movie file with [Picture Package
Viewer].
• If you select CD-R for where to save, you can view
the created slide show as a video CD.
For details
on playback of vid eo CDs, see page 26.
2 Double-click [Picture Package Menu]
icon on the desktop.
[Picture Package Menu] starts up.
3 Click [Save the images on CD-R].
[Picture Pack age CD Backup] starts up .
4 Open the desired folder on the left side
of the screen, select pictures you want
to save.
The selected picture is marked with .
.
5 Click the [View selected pictures] tab,
and make sure the desired pictures are
selected.
.
Managing pictures on a Windows computer
,continued
Managing pictures on a Windows computer
23
Page 24

6 Click [Write to CD-R].
.
Place a new CD-R in the di sc drive.
b Note
• CD-RWs cann ot be use d.
To create another copy with the same
content, click [Yes], then place a new CDR in the disc drive.
Creating a Video CD (Direct Access to Video CD Burn) – Picture Package VCD Maker
You can copy recor ded movies on a tape to a
Video CD using a comp ut er equipped with a
disc driv e c ompatible with CD-R s.
The following procedure describes how to
create a Video CD from a picture recorded on a
tape (maximum length of about one hour).
7 Click [Start].
Saving to a CD-R starts. The remaining
time appears on the computer screen.
.
8 Click [No] when you want to finish .
The disc tray comes out automatically.
.
b Notes
• Some models a r e not comp a tible for this operation.
Regarding supported models, check to see if there is
a listing for the Burn VCD feature in the index of the
separate Camera Operations Guide.
• You can only use a USB cable for this operation.
You cannot use an i.LINK cable.
• You cannot save pictures from a tape directly onto
the hard disk drive of your computer.
1 Turn on the computer.
2 Prepare the power source for your
camcorder, then slide the POWER
switch repeatedly to select the PLAY/
EDIT mode.
Use the supplied AC Adaptor as the power
source since it takes a few hours to create a
Video CD.
The name of the power switch on the
camcorder vari es depending on the mo del .
3 Set [USB STREAM] in the menu
settings of your camcorder to on.
The procedure of th e m enu settings varies
depending on the m odel.
Managing pictures on a Windows computer
24
4 Insert a recorded cassette into your
camcorder.
Page 25

5 Co nnect your camcorder to a
computer via a USB cable (supplied)
(p. 11).
[Picture Pac kage Menu] starts up
automatically.
b Note
• When you connect your camcorder to a
computer, make sure you insert the connector in
the correct direction. If you insert the co nnector
forcibly, it may be damaged, and cau se s a
malfunction of your camcorder.
6 For touch panel models,
select [BURN VCD] on or
of your camcorder.
For SEL/PUSH EXEC dial models,
press BURN DVD/VCD of your
camcorder, then select [VCD] on the
[SELECT DISC].
[Picture Package VCD Maker] starts up.
The procedure of th e m enu settings varies
depending on the model.
7 Pl ace a new CD-R in the disc drive of
the computer.
b Note
• CD-RWs canno t be used .
CAPTURING: The picture recorded on
the tape is being copied to the computer.
CONVERTING: The picture is being
converted to the M P EG1 format.
WRITING: The picture is being wr itt en
onto the CD-R.
b Notes
• The screen varie s dep en ding on the model.
• You cannot cancel the operation after
[Finalizing VCD.] is displayed on the LCD
screen of your camcorder.
9 Follow the steps below to finish
creating a Video CD.
For touch panel models
Select [ END] or [NO] of your
camcorder.
For SEL/PUSH EXEC dial models
Press BURN DVD/VCD of your
camcorder.
The disc tray comes out automatically.
.
BURN VCD
COMPLETED
Create another
Disctray opens.
YES
copy?
0:00:00:00
NO
Managing pictures on a Windows computer
8 For touch panel models,
select [EXEC] of your camcorder.
For SEL/PUSH EXEC dial models,
press the dial of your camcorder.
.
BURN VCD
START
CREATE VCD?
EXEC
The status of th e operation on your
computer is displayed on the LCD screen of
your camcorder.
0:00:00:00
CANCEL
To create another Video CD with the same
content, follo w th e on-screen instruct ions,
place a new CD-R in th e di sc drive, then
repeat steps 8 and 9.
b Note
• The screen varie s dep en ding on the model.
z
Tip
• You can also operat e st ep s 8 and 9 from your
computer.
b Notes
• The importi ng of the pi ct ur e stops automatically,
when there is a blank portion of 10 seconds or longer
on the tape.
• Select a hard disk that has enough space (more than
about 6 GB) for the [Temporary folder] on the
[Options] screen.
,continued
Managing pictures on a Windows computer
25
Page 26

• Once you have created a Video CD, you cannot add
images to the same CD - R.
• There may be a few second -b reak ab out e ve ry 10
minutes on the created Video CD. This is due to the
AVI format used to create the Video CD, which
divides a picture every 10 minutes (abo ut 4 GB) to
write it on a CD-R.
• The picture being written onto the CD-R does not
appear on the computer scre en.
Tip
z
• The importing of the picture stops automatica lly
when the tape is played to the end.
Copying images for MEMORY MIX to a “Memory Stick” (only the models with a Memory Stick slot)
You can copy images for the MEMORY MIX
function to a “Mem or y St i ck. ”
Refer to the separate Camera Operations Guide
supplied with your camcorder for details on the
MEMORY MIX function.
To play the Video CD
You can play back t he Video CD in one of th e
following devices. Refer to the operating
instructions supplied with each pl ayer for
details.
– a DVD player compatible with Video CDs
– a computer equipped with a DVD drive and
software compatible with Video CDs
– a computer equipped with Windows M edia
Player (You ma y not be able to play back th e
Video CD depending on the computer
environment, in cluding such factor s as the
operating s ystem or the hardware. T he menu
functions of Wind ow s Media Player do not
work.)
The following procedure describes how to play
back a Video CD using Windows Media Player.
1 Place a Video CD in the disc drive of your
computer and start up Windows Media
Player.
For Windows XP
Click [Start ], [All Progra ms],
[Accessori es], [Entertai nment], then
[Windows Media Player].
For other operating systems
Click [Start], [Programs], [Accessories],
[Enterta inment], then [Windows Media
Player].
2 Open [My Computer], [CD-R], then
[MPEGAV]. Then, drag a nd drop the
movie file [sss*.DAT] onto the
Windows Media Pla yer screen.
* sss indicates the actual file name.
1 Turn on the computer.
2 Insert a “Memory Stick” into your
camcorder.
3 Prepare the power source for your
camcorder, then slide the POWER
switch repeatedly to select the PLAY/
EDIT mode.
The name of the power switch on the
camcorder vari es depending on the mo del .
4 Set [STD-USB] in the menu settings of
your camcorder to on.
The procedure of th e m enu settings varies
depending on the model. For details, refer
to the separate Camera Operations Guide
supplied with your camcorder.
5 Co nnect your camcorder to the
computer via the USB cable (supplied)
(p. 12).
Click if [Picture Package Menu] starts
up automatically.
6 Start up [MEMORY MIX Image
Tool].
For Windows XP
Click [Start], [All Programs], [Pictu re
Package], [Handycam Tools], then
[MEMORY MIX Image Tool].
For other operating systems
Click [Star t], [Programs ], [Picture
Package], [Handycam Tools], then
[MEMORY MIX Image Tool].
Managing pictures on a Windows computer
26
Page 27

7 Click [Copy].
.
After copying is finished, a new folder
appears.
Normally, a new folder is automatically
created with a number one higher than the
last created folder.
b Note
• You cannot copy pictures when all folders from
100 to 999 are used.
Managing pictures on a Windows computer
Managing pictures on a Windows computer
27
Page 28

Connecting to a Macintosh computer
Connecting your camcorder to a computer
b Note
• The computer may not recognize the camcorder
if you connect them with the USB cable (supplied)
before turning on your camcorder.
1 Insert a “Memory Stick” into your
camcorder.
2 Prepare the power source for your
camcorder, then slide the POWER
switch repeatedly to select the PLAY/
EDIT mode.
Use the supplied AC Adaptor as the power
source.
The name of the power sw i tch on the
camcorder varies de pending on the model.
3 Set [STD-USB] in the menu settings of
your camcorder to on.
The procedur e of the menu setti ng s varies
depending on the model.
5 Connect the other end of the USB cable
to the USB jack on your computer.
[USB MODE] ap pears on the LCD scree n
of your camcorde r, and a “Memory Stick”
icon appears on the desktop.
To disconnect the USB cable/ To tur n off
the camcorder/To eject the “Memory
Stick”
1
Quit all application s running on the
computer.
2 Drag and drop the “M em ory Stick” or
drive icon on the desktop onto the
[Trash] icon.
3 Disconnect the U SB cable from the
camcorder and comp uter.
b Notes
• Make sure to dis co nne ct the USB cable ( suppl ied)
before turning off your camcorder.
• If you are using Mac OS X, turn off the compute r
before disconnecting the USB cable and ejecting the
“Memory Stick”.
4 Connect the USB cable (supplied) to
the USB jack on your camcorder.
The location of the USB jack varies
depending on the model. Refer to the
separate Camera Operations Guide
supplied with your camcorder for the
location.
For the model that is supplied with the
Handycam Station , connect the USB cable
to the USB jack on the Handycam Station,
then set the USB ON /O FF switch to ON.
b Note
• When you connect your camcorder to a
computer, make sure you insert the connector in
the correct direction. If you insert the connector
forcibly, it may be damaged, and ca use s a
malfunction of your camcorde r.
Connecting to a Macintosh computer
28
Page 29

Copying pictures
Installing software on
recorded on a
“Memory Stick”
(only the models with
a Memory Stick slot)
Double-click the “Memory Stick” icon.
Then, drag and drop the desired picture
file onto the hard disk icon.
To play back movies
You need QuickT ime 3.0 or a later version
installed on your computer.
The picture or sou nd m ay break up when you
directly pla y back a pic ture saved on a “Memory
Stick.” Make sure to copy th e pictu re file to the
hard disk before playing.
b Notes
• For deta ils on the “Memory Stick” that you can use
with the camcorder, refer to the separate Camera
Operations Guide supplied with your camcorder.
• If you would like to copy pictures recorded on a tape,
copy the pictures to a “Memory Stick” on your
camcorder first.
a computer
When installin g the ImageMixer V C D2 from
the supplied CD-ROM, you can crea t e video
CDs using still images and mo v ies re corded on
your computer as materials.
An image file compatible with Video CD
creation in Roxio’s Toast will be created. A
Video CD can be created by writing the image
file to disk in the Toast.
b Note
• You cannot copy pictures recorded on a tape into
your computer using ImageMixer VCD2 . To copy
images, connect your camcorder to the computer
with an i.LINK cable and use the standard softwa re
in the OS.
1 St art up the computer
Close down all applications running on the
computer before installing the software
2 Place th e supplied CD-ROM in the
disc drive of your computer
3 Doub le -click CD-RO M icon.
Connecting to a Macintosh computer
4 Copy [IMXINST.SIT] in the [MAC]
folder to a folder of your choice.
5 Double-click [IMXINST.SIT] in the
folder it was copied to.
6 Double-click the unzipped
[ImageMixerVCD2_Install].
7 When the user acceptance screen is
displayed, enter your name and
password.
The installation of the software starts.
For details on ImageMixer VCD2, refer to the
software’s on-line he lp.
Connecting to a Macintosh computer
29
Page 30

Other functions
Creating a DVD (Direct Access to “Click to DVD”)
– Asia Pacific Regional
http://www.css.ap.sony.com/
–Korea
http://scs.sony.co.kr/
–Taiwan
http://vaio-online.sony.com/tw/vaio/
–China
http://www.sonystyle.com.cn/vaio/
–Thailand
http://www.sony.co.th/vaio/index.html
– Latin America
http://vaio-online.sony.com/
to i.LINK (IEEE1394)
connector
i.LINK cable
(optional)
to DV
Interface
b Notes
• Some mod els are not compatible for this operation.
Regarding supported models, check to see if there is
a listing for the Burn DVD feature in the index of the
Camera Operations Guide.
• You can only use an i.LINK cable for this operation.
You cannot use a USB cable.
You can create DVDs when you connect your
camcorder to a Sony VAIO series computer*
that supports “Click to DVD” via an i.LINK
cable (optional). The picture is automatically
copied and written to a DVD.
The following procedures describe how to
create a DVD from a picture recorded on a tape.
For system and operation requ irements, visit the
following URL:
* Note that you need a Sony VAIO computer
equipped with a DVD drive that can be used to
write DVDs. You also need the computer with
“Click to DVD Ver.1.2” (Sony original s oftware) or
later installed.
– Europe
http://www.vaio-link.com/
–USA
http://www.ita.sel.sony.com/support/
dvimag/
Using the Direct Access to “Click to
DVD” function for the first time
The Direct Access to “Click to DVD” function
enables you to copy pictures recorded on a tape
to a DVD easily if your camcorder is conne cted
to a computer. B efore operating the Direct
Access to “Click to DVD” function, follow the
steps below to start “Click to DVD Automatic
Mode Launcher.”
1 Turn on the com puter.
2 Click the start menu, then select [All
Programs].
3 Select [Click to DVD] from t he programs
displayed, then click [Click to DVD
Automatic Mode Launcher].
[Click to DVD Automatic Mode Launcher]
starts up.
z Tips
• After you start up [Click to DVD Automatic Mode
Launcher] once, from then on it starts up
automatically when you turn on your com pute r .
• [Click to DVD Automatic Mode Launcher] is set up
for each Windows XP user.
1 Turn on the computer.
Quit all applications running with an
i.LINK.
2 Prepare the power source for your
camcorder, then slide the POWER
switch repeatedly to select the PLAY/
EDIT mode.
Use the supplied AC Adaptor as the power
source since it takes a few hours to create a
Other functions
30
Page 31

DVD. The name of the power switch on the
camcorder vari es depending on the model.
3 Insert a recorded cassette into your
camcorder.
4 Co nnect your camcorder to a
computer via an i.LINK cable
(optional). (p. 15)
b Note
• When you connect your camcorder to a
computer, make sure you insert the connector in
the correct direction. If you insert the co nnector
forcibly, it may be damaged, and cau se s a
malfunction of your camcorder.
5 For touch panel models,
select [BURN DVD] on or
of your camcorder.
For SEL/PUSH EXEC dial models,
press BURN DVD/VCD of your
camcorder, then select [DVD] on the
[SELECT DISC].
“Click to DVD” starts up and the on -screen
instructions appear on your comp ut er.
The procedure of the menu setting vari es
depending on the model.
6 Place a writable DVD in the disc drive
of the computer.
7 For touch panel models,
select [EXEC] on your camcorder.
For SEL/PUSH EXEC dial models,
press the dial on your camcorder.
BURN DVD
START
CREATE DVD?
0:00:00:00
The status of the operation on your
computer i s displa yed on the LCD scr een of
your camcorder.
CAPTURING: The picture recorded on
the tape is being copied to the computer.
CONVERTING: The picture is being
converted to the M P EG2 format.
WRITING: The picture is being wr itt en
onto the DVD.
b Note
• The screen varie s dep en ding on the model.
Tip
z
• If you use a DVD-RW/+RW which has other
data stored on it, the me ssage [This is a
recorded disc. Delete and overwrite? ] appears
on the LCD screen of your camcorder. When
you select [EXEC], the existing data is e r as ed
and new data is written.
8 Follow the steps below to finish
creating a DVD.
For touch panel models
Select [ END] or [NO] of your
camcorder.
For SEL/PUSH EXEC dial models
Press BURN DVD/VCD of your
camcorder.
The disc tray comes out automatically.
BURN DVD
COMPLETED
Create another
copy?
Disctray opens.
YES NO
To create another DVD with the same
content, follo w th e on-screen instruct ions,
then repeat steps 7 and 8. The disc tray
comes out and place a new writ able DVD in
the disc drive.
0:00:00:00
Other functions
EXEC
CANCEL
b Note
• The screen varie s dep en ding on the model.
,continued
Other functions
31
Page 32

To cancel the operation
For touch panel models
Select [CANCEL] on the LCD screen of your
camcorder.
For SEL/PUSH EXEC dial models
Press BURN DVD/VC D of your camcorder.
b Notes
• You cannot can cel the operation after [Finalizing
DVD.] is displayed on the LCD screen of your
camcorder.
• Do not disconnec t the i. LINK cable or set the
POWER switch to another mode on your camcorder
until the picture is comp le te ly copied to the
computer.
• The DVD is created even if you disco nne c t the
i.LINK cable (optional) or turn off the power of your
camcorder while [WRITING] or [CONVERTING]
is displayed.
• When any of the following occurs, copying of the
picture is canceled. A DVD containing the data up to
the point the operation was canceled is created.
Refer to the help files of “Click to DVD Automatic
Mode Launcher” for details.
– When there is a blank portion of 10 se co nds or
longer on the tape.
– When the data of the tape con ta ins a date be fo re
the recording date o f th e later images.
– When normal and wide size pic ture s a re r ecor de d
on the same tape.
• You cannot operate your camcorder in the following
situations:
– While playing back a tape
– While recording images onto a “Memory Stick”
– When “Click to DVD” is st arted up from the
computer
– When [A/V t DV OUT] in the menu settings of
your camcorder is set to on
• You may not be able to create a DVD from an 8mm
tape if it contai ns pictu res reco rded in a fo rmat othe r
than Digital 8 format.
Other functions
32
Page 33

Connecting an analog
VCR to the computer
via your camcorder
— Digital convert function
DV Interface
A/V connecting cable
A/V (audio/video)
jack
: Signal flow
(supplied)
to i.LINK (IEEE1394)
connector
i.LINK cable (optional)
(White)
(Red)
AUDIO/VIDEO
jacks
Other functions
(Yellow)
S video
plug (Black)
b Notes
• Some models are not compatible fo r this operation.
Regarding supported models, check to see if there is
a listing for the Digital convert function in the index
of the Camera Op e rations Guide.
• The supplied A/V cable varies depending on the
model. Refer to the separate Camera Ope r at ions
Guide supplied with your cam co rd er with the
operations guide of the analog video unit
You can convert an analog signal output fr om
an analog device such as a VCR to a digital
signal and t ran sf er i t t o a di git al devi ce , s uc h as
a computer, via your camcorder.
Software that can capture video signals must be
installed on the co m p uter.
VCR (analog)
Before operation
Set [DISPLAY] in the menu settings to [LCD
PANEL] (the default setting).
1 Turn on the analog video unit.
2 Slide the POWER switch repeatedly to
select the PLAY/EDIT mode.
Use the supplied AC Adaptor as the power
source.
The name of the power swi t ch on the
camcorder varies depending on the model.
3 Set [A/VtDV OUT] in the menu
settings of your camc order to on.
,continued
Other functions
33
Page 34

The procedur e of the menu setti ng s varies
depending on the model.
4 Start playback on the analog video
unit.
5 Sta rt capturing procedures on your
computer. Regarding operation , refer
to the operating instructions supplied
with the software or on-line help.
After capturing images and sound
Stop capturing procedures on your com puter,
and stop playback on the analog video unit.
b Notes
• The bundled software Picture Package or
ImageMixer VCD2 do not support th e dig ita l
convert function.
• You may not be able to output the pictures correctly
depending on the condition of the analog video
signal input to your camcorder.
• You cannot transf e r pictur e s w ith c opyr i ght
protection signals to a compute r .
• You can use a USB cable instead of an i.LINK cable
(optional) to transfer pictures to a c omputer. Note,
however, that the picture displayed may lack the
smoothness.
• The location of the USB jack and the shape of the
cable vary depending on the model. For details, refer
to the separate Camera Operations Guide supplied
with your camcorder.
• When you are using a USB cable or an i.LINK cable
to connect your camcorder to a compu ter, make sure
you insert the connector in the correct direction. If
you insert the connector forcibly, it may be
damaged, and causes a malfunction of your
camcorder.
Other functions
34
Page 35

Additional information
Troubleshooting
Symptom Cause and/or Corrective Actions
The computer does not recognize
your camcorder.
You cannot view the pictures the
camcorder is seeing on the
computer.
You cannot view t he pictures
recorded on a tape on the
computer.
You cannot view t he pictures
recorded on a tape on the
Macintosh computer. (only the
models with a Memory Stick
slot)
You cannot view t he pictures
recorded on a “Memor y St ick”
on the computer . (only the
models with a Memory Stick
slot)
cDisconnect the cable from the computer and camcorder, then
connect it again firmly.
cFor the model that is supplied with the Handycam Station, set
the USB ON/OFF switch to ON.
cFor the model that is supplied with the Handycam Station,
connect the Handy cam Station to the camc order firmly.
cDisconnect the USB device other than the keyboard, the mouse,
and the camcorder from the computer .
cDisconnect the cable from the computer and camcorder, restart
the computer, then connect them again correctly (p. 11, 13, 28).
cDisconnect the cable from the computer, turn on the camcorder,
then connect it again.
cSlide the POWER switch repeatedly to select the CAMERA-
TAPE mode, set [USB STREAM] in the menu settings of your
camcorder to on .
cDisconnect the cable from the computer, turn on the camcorder,
then connect it again.
cSlide the POWER switch repeatedly to select the PLAY/EDIT
mode, set [USB STREAM] in the menu settings of your
camcorder to on .
cTo copy pictures recorded on a tape to your Macintosh
computer, copy the pictures to a “Memory S tick” in your
camcorder first, then copy the pictures recorded on the
“Memory Stick” to your computer.
cInsert the “Memory Stick” firmly.
cYou cannot use an i.LINK cable. Connect the camcorder and the
computer using the USB cable.
cSlide the POWER switch repeatedly to select the PLAY/EDIT
mode, set [STD-USB] in the menu settings o f your camcorder to
on.
• The computer does not recognize the “M e mory Stick” during
camcorder opera tion such as tape playback or editing.
cFinish camcorder operation before connecting the camcorder
to the computer.
Additional information
,continued
Additional information
35
Page 36

Symptom Cause and/or Corrective Actions
The image does not appear on
[USB Streaming Tool] when
using the USB cable.
cThe USB driver has been registered incorrectly as the computer
was connected to your camcorder before the installati on of the
USB driver was completed. Follow the procedure below to
install the [Picture Package] correctly.
For Windows 98*/Windows 98SE/Wind ows M e
* When cop ying or playing the pictures on a tape using a computer, the
operation is not guaranteed on Windows 98.
1 Check that your camcorder is connected to a computer.
2 Right-click [My Computer], then click [Properties].
The [System Prope rt ies] screen appear s.
3 Click the [Device Manager] tab.
4 If devices below are already installed, right-click them,
then click [Remove] to delete t hem.
For copying and viewing pictures recorded on a
tape
• [USB Audio Devi ce] in the [Sound, video and game
controllers] folder
• [USB Device] i n the [Other devices] fol der
• [USB Composi t e Device] in the [Uni versal Serial Bus
Controller] folder
For copying and viewing pictures recorded on a
“Memory Stick” (only the models with a M em ory
Stick slot)
• [? Sony Handycam] or [? Sony DSC] with a “?” mark in the
[Other devices] folder
5 When the [Conf irm Device Removal] screen appear s,
click [OK].
6 Turn off the power of your camcorder, disconnect the
USB cable, then restart the computer.
7 Place the supplied CD -ROM in the disc drive of yo ur
computer.
8 Follow the steps below and try to install the USB driver
again.
1 Double-click [My Computer].
2 Right-click [PICTUREPACKAGE] (Disc drive)*.
* Drive nam e s (s uc h as (E:)) ma y va r y depe nding on the computer.
3 Click [Open] .
4 Double-click [Driver].
5 Double-click [Set up.exe].
Additional information
36
b Note
• Deleting anything other than [USB Audio Device], [USB Device], [USB
Composite Device], [? Sony Handycam] and [? Sony DSC] ma y c au se
malfunction of your compute r.
Page 37

Symptom Cause and/or Corrective Actions
The image does not appear on
[USB Streaming Tool] when
using the USB cabl e. (Co ntin ued
from the previous page)
For Windows 2000
Log on as Administrators.
1 Check that your camcorder is connected to a computer.
2 Right-click [My Computer], then click [Properties].
The [System Properties] screen appears.
3 Click the [Hardware] tab.
4 Click [Device Manager].
5 Click [View], then click [Devices by type].
6 If devices below are a l ready installed, right- cl i ck t h em ,
then click [Uninstall] to delete them.
For copying and viewing pictures recorde d on a
tape
• [USB Composite Device] in the [Universal Serial Bus
Controller] fold er
• [USB Audio Device] in th e [Sound, video and gam e
controller] folder
• [Composite USB Device] in the [Other devices] folder
For copying and viewing pictures recorde d on a
“Memory Stick” (only the models with a Memory
Stick slot)
• [? Sony Ha ndyc am] o r [? Sony D SC] w ith a “?” mark i n t he
[Other devices] folder
7 When the [Conf ir m D evice Removal] screen appears,
click [OK].
8 Turn off the power of your camcorder, disconnect the
USB cable, then res tart the computer.
9 Place the supplied CD-ROM in the di s c drive of your
computer.
10 Follow the steps below and try to install the USB driver
again.
1 Double-click [My Computer].
2 Right-click [PICTUREPACKAGE] (Disc drive)*.
* Drive nam e s (such as (E:) ) may vary de pe nding on the computer.
3 Click [Open].
4 Double-click [Driver].
5 Double-click [Setup.exe].
Additional information
b Note
• Deleting anything other than [USB Composite Device], [USB Audio
Device], [Composite USB Device], [? Sony Handycam] and [? Son y
DSC] may cause malfunction of your computer.
,continued
Additional information
37
Page 38

Symptom Cause and/or Corrective Actions
The image does not appear on
[USB Streaming Tool] when
using the USB cable. (Continued
from the previous page)
For Windows XP
Log on as Administrators.
1 Check that your camcorder is connected to a computer.
2 Click [Start].
3 Right-click [My Computer], then click [Properties].
The [System Prope rt ies] screen appear s.
4 Click the [Hardwa re] tab.
5 Click [Device Manager].
6 Click [V iew], then c lick [Devices by type ].
7 If devices below are already installed, right-click them,
then click [Uninstall ] to delete th em.
For copying and viewing pictures recorded on a
tape
• [USB Composi t e Device] in the [Uni versal Serial Bus
Controller] folder
• [USB Audio Devi ce] in the [Sound, video and game
controllers] folder
• [USB Device] i n the [Other devices] fol der
For copying and viewing pictures recorded on a
“Memory Stick” (only the models with a M em ory
Stick slot)
• [? Sony Handycam] or [? Sony DSC] with a “?” mark in the
[Other devices] folder
8 When the [Conf irm Device Removal] screen appear s,
click [OK].
9 Turn off the power of your camcorder, disconnect the
USB cable, then restart the computer.
10 Place th e s upplied CD-ROM in the disc drive of your
computer.
11 Follow the steps below and try to install the USB driver
again.
1 Double-click [My Computer].
2 Right-click [PICTUREPACKAGE] (Disc drive)*.
* Drive nam e s (s uc h as (E:)) ma y va r y depe nding on the computer.
3 Click [Open] .
4 Double-click [Driver].
5 Double-click [Set up.exe].
Additional information
38
b Note
• Deleting anythi ng other than [USB Composite Device], [U SB Audio
Device], [USB Device], [? Sony Handycam] and [? Sony DSC] may
cause malfunction of your computer.
Page 39

Symptom Cause and/or Corrective Actions
The “Memory Stick” icon
([Removable Disk] or [Sony
MemoryStick]) does not appear
on the computer screen. (only the
models with a Memory Stick
slot)
cSlide the POWER switch repeatedly to select the PLAY/EDIT
mode on your camcorder.
cInsert a “Mem or y St ick” into your camcorder.
cDisconnect the USB device other than the keyboard, the mouse,
and the camcord er from the computer (p. 15).
cSet [STD-USB] in the menu settings of your camcorder to on.
• The computer does not recognize the “M e mory Stick” during
camcorder opera tion such as tape playback or editing.
cFinish camcorder operation before connecting the camcorder
to the computer.
Picture Package does not
cClose Picture Pac k age, then restart the com puter.
function correctly.
An error message ap pears while
operating Picture Package.
The CD-R drive is not
recognized or data c annot be
cClose Pictu re Pack age fi rst, then set the P OWER swi tch on your
camcorder to another mode.
cFor the compatible drive, visit the following URL:
http://www.ppackage.com/
written on the CD-R in Picture
Package Auto Video, Auto Slide,
CD Backup or VCD Maker.
You cannot copy pi ct ur es. (only
the models with a Memory Stick
slot)
cDisplay pictures recorded on a “Memory Stick” with the
following procedures.
1 Double-click [My Computer].
2 Double-click the i con for the newly reco gni zed drive
[Removable Disk (F:)] (For Windows XP, [Sony Memory
Stick]).
It may take some time until the drive is recognized. If the
computer does not recognize it, the USB driver may be
installed incorrectly.
3 Double-click the desired image file.
Additional information
An error message ap pears when
you place the supplied CD-ROM
in your computer.
[USB Streaming... This function
is not available.] appears on the
screen of your cam corder.
z Tip
• Windows XP does not start up [Picture Package Menu] automatically at
the default setting even though [Sony MemoryStick] appears in [My
Computer]. To deactivate the setting, see “For Windows XP” in
“Using the USB cable (supplied) when copying pictures on a “Memory
Stick”” (p. 13).
cSet the computer di splay as follows:
Windows: 800 × 600 dots or more, High Color (16 bits, 65 000
colors) or m ore
Macintosh: 800 × 600 dots or more, 32 00 0 colors or more
cStart the operations for MEMORY MIX, recording or playing
back pictur es recorded on a “Memor y St ick” after USB
Streaming is fini shed.
,continued
Additional information
39
Page 40

Symptom Cause and/or Corrective Actions
[Cannot start Easy Handycam
with USB connected] or [Cannot
cancel Easy Hand ycam with
USB connected] appears on the
screen of your cam c order.
There is no sound when the
camcorder is co nnected to the
computer via a USB cable.
cYou cannot start or cancel the Easy Handycam settings while the
USB cable is conne ct ed. Disconnect the USB cable from your
camcorder first.
cChange the settings for your computer environment as described
in the following procedures:
1 Select [Sta rt], [Program s]( [All Program s] for Windows
XP), [Picture Package], [Handycam Tools], and [USB
Streaming Tool] then, start up [USB Streaming Tool].
2 Select another device on the [Select audio device] screen.
3 Follow the on-screen instructions, click [Next] , then click
[Done].
b Note
• Sound is not suppor te d on W ind ows 98.
The movie is not sm ooth. cChange the settings as described in the following procedures:
1 Select [Sta rt], [Program s]( [All Program s] for Windows
XP), [Picture Package], [Handycam Tools], and [USB
Streaming Tool] , th en start up [USB Streaming Tool].
2 Adjust the slider in the (-) direction on [Select video
quality].
3 Follow the on-screen instructions, click [Next] , then click
[Done].
Additional information
40
Page 41

Index
A
AVI forma t...........................26
B
BURN DVD ........................31
BURN VCD.........................25
C
CD-R ........... 20, 22, 23, 24, 25
CD-ROM ...............................8
CD-RW .............20, 22, 24, 25
Click to DVD.......................30
Copying pictures on a
“Memory Stick ”
D
Digital convert function......33
Direct Access to “Click to
DVD”
............................30
Direct Access to Video CD
Burn
...............................24
DirectX 9.0b..........................9
DV Interface........... 15, 30, 33
DVD .....................................30
.... 13, 29
Picture Package Auto Slide
.......................................21
Picture Package Auto Video
.......................................18
Picture Pack age CD Backup
.......................................23
Picture Package VCD Maker
.......................................24
Picture Package Viewer......17
S
SEL/PUSH EXEC dial models
................................25, 31
STD-USB...................... 13, 26
T
Touch panel model s ..... 25, 31
U
USB cable .........10, 11, 13, 15
USB STREAM....... 11, 18, 24
USB Streaming............. 11, 24
W
Windows ..............................17
Windows Media Player ......26
Writable DVD.....................31
Additional information
H
Handycam Station
................7, 11, 13, 16, 28
I
i.LINK cable
..............10, 15, 18, 30, 33
ImageMixer VC D2 .............29
Install......................................8
M
Macintosh.............................28
MEMORY MIX..................26
“Memory Stick ”..... 13, 26, 29
O
On-line help.................. 10, 29
P
Picture Package.............. 6, 17
Additional information
41
Page 42

Page 43

Page 44

Printed on 100% recycled paper using
VOC (Volatile Organic Compound)-free
vegetable oil based ink.
Printed in Japan
 Loading...