

Page 1
Digital Video Camera Recorder
Digital
Video Camera
Recorder
Operating Instructions
Before operating the unit, please read this manual thoroughly,
DCR-DVD100E/DVD200E
and retain it for future reference.
Mode d’emploi
Avant la mise en service de cet appareil, prière de lire
attentivement le mode d’emploi et de le conserver pour toute
référence future.
3-081-302-12 (1)
DCR-DVD200E
DCR-DVD100E/DVD200E
©2003 Sony Corporation
TM
SERIES
Page 2

2-GB
Page 3

English
Welcome!
Congratulations on your purchase of this Sony Handycam. With your Handycam you can capture life’s
precious moments with superior picture and sound quality.
Your Handycam is loaded with advanced features, but at the same time it is very easy to use. You will soon
be producing home video that you can enjoy for years to come.
Getting Started
To prevent fire or shock hazard, do not expose the unit to rain or moisture.
To avoid electrical shock, do not open the cabinet.
Refer servicing to qualified personnel only.
NOTICE ON THE SUPPLIED AC POWER ADAPTOR FOR CUSTOMERS IN THE
UNITED KINGDOM
WARNING
A moulded plug complying with BS1363 is fitted to this equipment for your safety and
convenience.
Should the fuse in the plug supplied need to be replaced, a fuse of the same rating as the
supplied one and approved by ASTA or BSI to BS1362 (i.e., marked with or mark) must
be used.
If the plug supplied with this equipment has a detachable fuse cover, be sure to attach the fuse
cover after you change the fuse. Never use the plug without the fuse cover. If you should lose
the fuse cover, please contact your nearest Sony service station.
For the customers in Europe
ATTENTION
The electromagnetic fields at the specific frequencies may influence the picture and sound of this
camcorder.
This product has been tested and found compliant with the limits set out in the EMC Directive for
using connection cables shorter than 3 meters. (9.8 feet)
Notice
If static electricity or electromagnetism causes data transfer to discontinue midway (fail), restart
the application or disconnect and connect the USB cable again.
3-GB
Page 4

Read this first
What you can do with your DVD Handycam
Your DVD Handycam uses DVD-R and DVD-RW as a recording media.
You can enjoy your DVD Handycam in ways that are new and different from those
of a tape media-based camcorder. Read the next few pages to find out how.
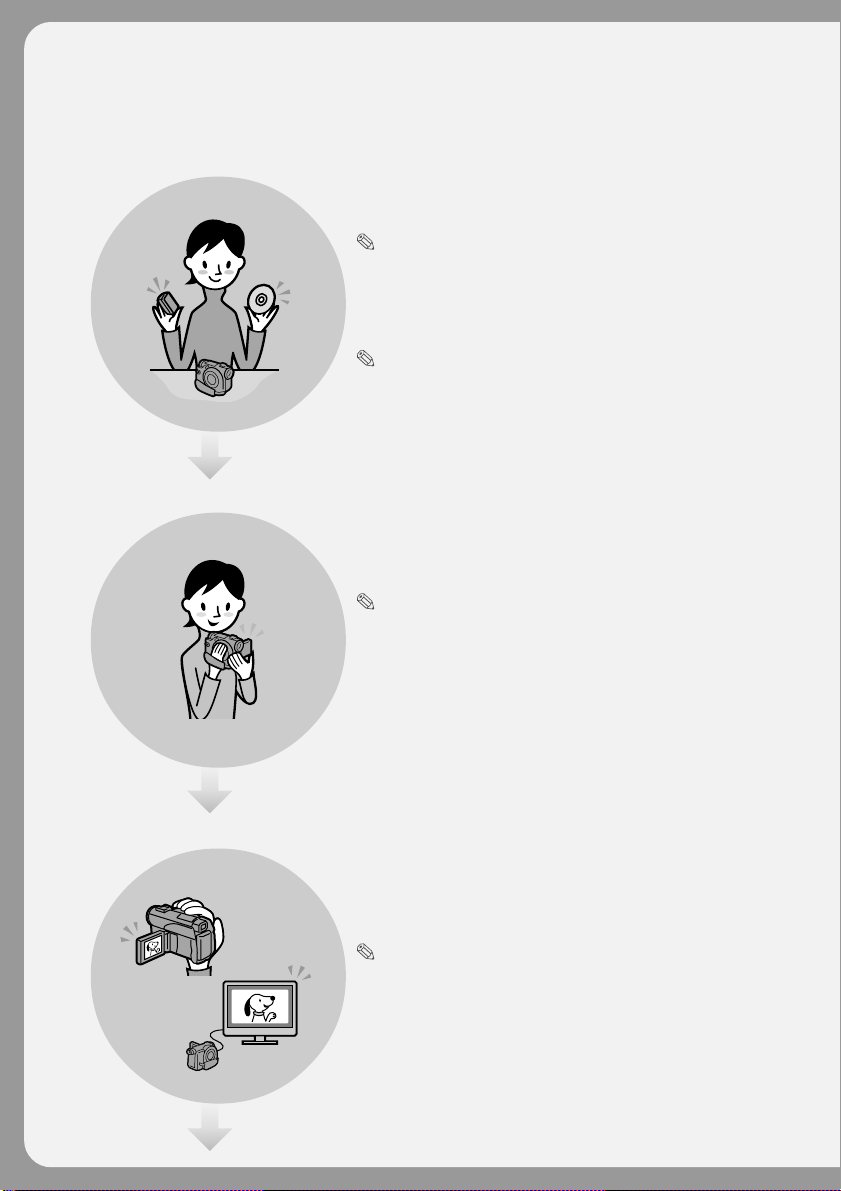
You can find a scene quickly using
a Visual Index display.
The Visual Index display shows thumbnails of movies and still
images recorded on the disc in your DVD Handycam. You can
find the desired scene quickly using this convenient index.
4-GB
You can play back still
images, one after another.
You can play back still images one after
another on your DVD Handycam. You can
also enjoy the playback of still images
continuously on a DVD player if you
finalise the disc.
Page 5
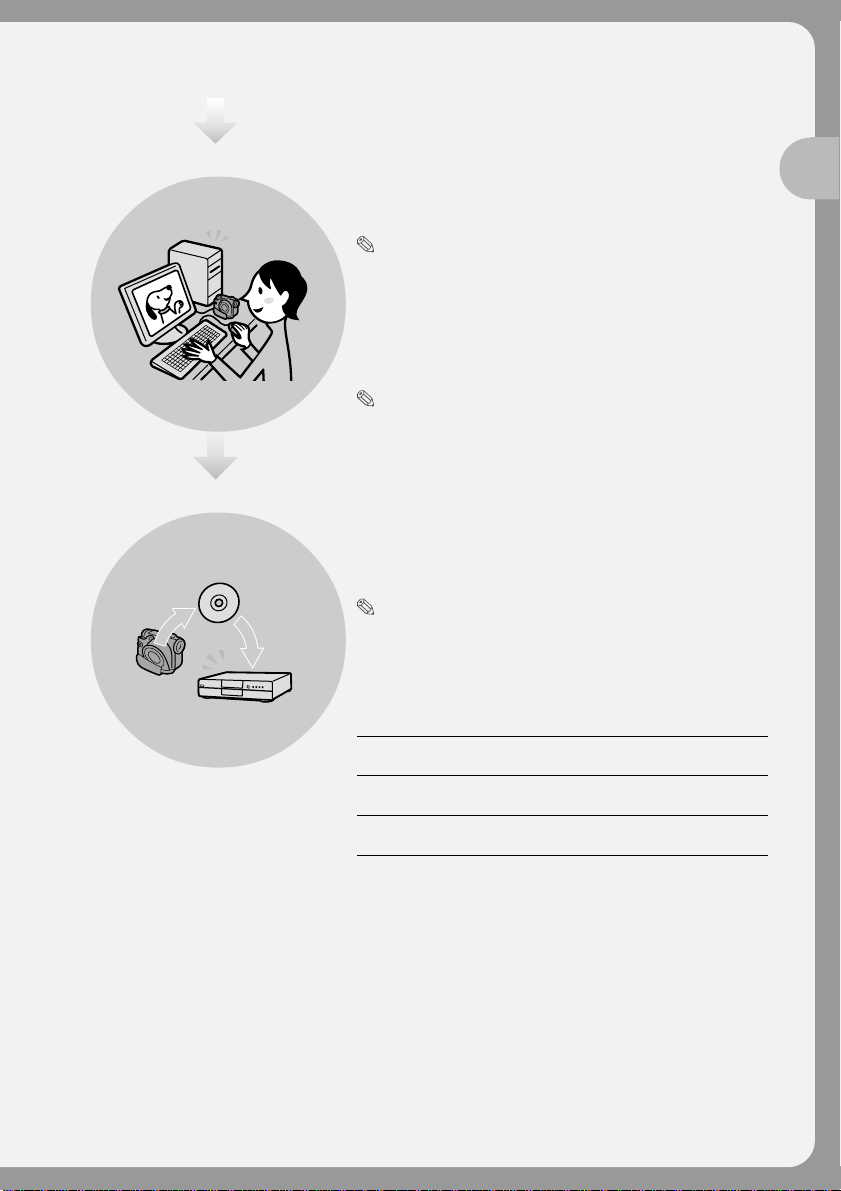
You can play back a disc
recorded with your DVD
Handycam on your DVD
player.
You can play back a disc recorded with your
DVD Handycam on DVD players that can play
back DVD-R/DVD-RW.
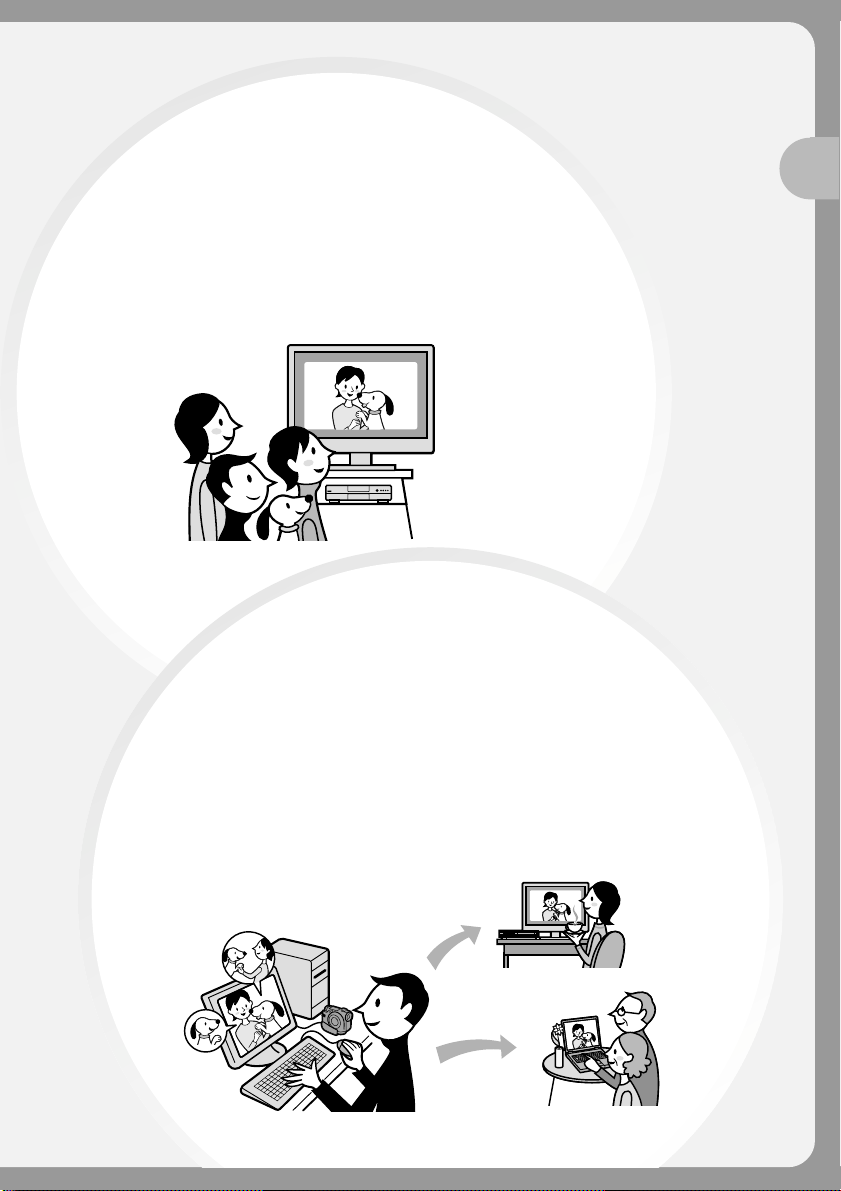
You can edit and copy a disc easily
by connecting your DVD
Handycam to your computer.
You can edit and copy a disc easily on your computer
using the supplied ImageMixer Ver.1.5 for Sony DVD
Handycam software. It also enables you to produce
your own original DVD disc.
Read this first
5-GB
Page 6
What is the difference between DVD-R and DVD-RW?
2 types of discs are available and they are different in the following ways.
Which disc
can I use?
8cm DVD-Rs and 8cm DVD-RWs
are available.
8cm DVD-R
You can use the following discs:
• DMR30 (single-sided disc)
• DMR60 (double-sided disc)
8cm DVD-RW
You can use the following discs:
• DMW30 (single-sided disc)
• DMW60 (double-sided
disc)
How can I
choose
between these
2 discs?
The number of recordable times is
different for the 2 discs. Choose the one
that meets your needs.
DVD-Rs can be recorded only
once.
It is suitable for permanent records and
for making a backup copy.
Recorded in VIDEO mode.
DVD-RWs can be overwritten
repeatedly.
It is suitable for source gathering and
temporary recordings.
You can choose VIDEO mode or VR
mode to make your recordings (see
page 26).
Discs other than these 2 types
cannot be used in your DVD
Handycam.
Examples of incompatible discs
• 12cm DVD-R
• 12cm DVD-RW
• DVD+R
• DVD-RAM
• DVD+RW
• DVD-ROM
• CD-R
• CD-RW
6-GB
Page 7
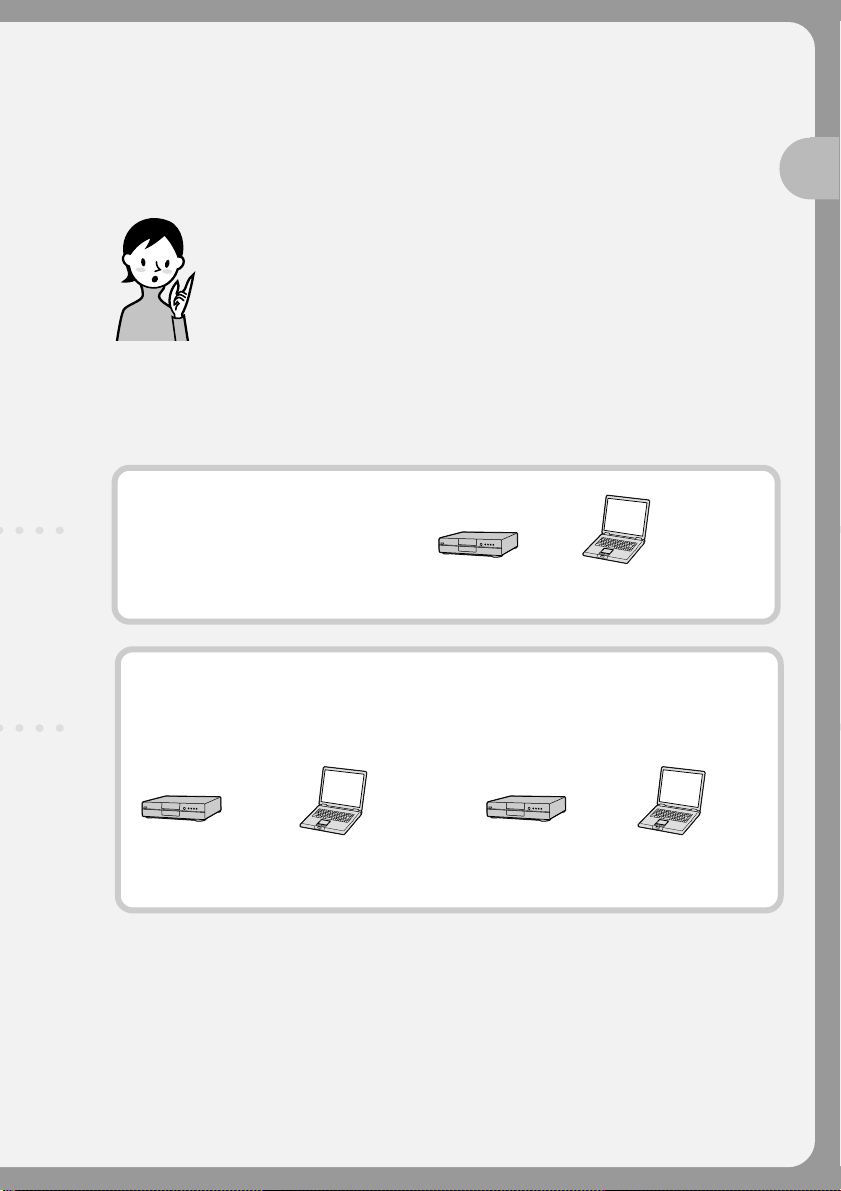
What kind of player can I use for
playback?
You can play back a disc you have recorded on your DVD Handycam on other players by
finalising the disc (see page 64).
The following list shows examples of players that can play back a disc recorded by your
DVD Handycam. However, playback compatibility is not guaranteed with all players.*
DVD-R
(VIDEO mode only)
Players compatible
with the DVD Video format.
DVD player/
DVD recorder
Computer with a
DVD drive installed
Read this first
DVD-RW
(in VIDEO mode)
Players that can play back DVD-RWs.
DVD player/
DVD recorder
Computer with a
DVD drive installed
DVD-RW
(in VR mode)
Players that can play back DVD-RWs
in VR mode.
DVD player/
DVD recorder
Computer with a
DVD drive installed
In VIDEO mode and VR (Video Recording) mode
VIDEO mode: A disc has wide compatibility with other players.
VR mode: A disc can be edited on DVD Handycam but the players are limited.
* DVD-R/RW discs recorded by Sony DVD Handycam camcorders are designed to be compatible with
and may be played back on most home DVD players, computer DVD drives, and PlayStation 2 video
game consoles.**
** Playback on all home DVD players, computer DVD drives, and consoles cannot be guaranteed. Some
players, drives, and video game consoles lack the ability to read due to the optical reflection
standards of DVD-R/RW discs and/or due to encoding incompatibilities. Refer to the specifications of
your playback equipment for additional compatibility information.
7-GB
Page 8
How to prepare and use your DVD Handycam
Preparing
Prepare a new disc.
• You can start recording promptly with a DVD-R.
• You need to format a DVD-RW before recording.
Formatting is required also when using a once recorded
DVD-RW again.
Select a recording format (either VIDEO
mode or VR mode) when using DVD-RW.
Shooting
Both movies and still images can be
recorded on a single disc.
Because your movies and still images are recorded in free
areas on the disc automatically, important recordings are
not overwritten.
8-GB
Playing back
Select a scene to play back from the Visual
Index display.
Continued on the right page.
Page 9
Editing
Finalising
You can make a copy of a disc you have
recorded by connecting your DVD
Handycam to your computer with the
supplied software.
For the recommended computer system environment, see
page 89.
You can produce an original DVD by
editing your movies/still images on your
computer.
Finalise the disc so that it is compatible
with other DVD players.
You may not overwrite, edit, or format a disc after finalising
it.
Overwrite Edit Format
DVD-R No No No
(VIDEO mode)
DVD-RW Yes*
(VIDEO mode)
DVD-RW Yes*
(VR mode)
1
2
No Yes*
2
Yes*
Yes*
3
3
Read this first
*1 Unfinalising a disc is required.
*2 Unfinalising a disc is not required.
*3 Recorded data will be erased.
9-GB
Page 10

Table of contents
Read this first
What you can do with your
DVD Handycam ............................... 4
What is the difference between
DVD-R and DVD-RW? .................... 6
How to prepare and use your DVD
Handycam ......................................... 8
Getting started
Using this manual ................................. 12
Checking the supplied accessories ..... 14
Step 1 Preparing the power source ... 15
Installing/removing the battery
pack............................................ 15
Charging the installed battery
pack............................................ 16
Showing the remaining battery time
– BATTERY INFO .................... 18
Connecting to a wall socket .......... 18
Step 2 Opening the LCD screen .......... 19
Step 3 Turning on the power.............. 20
Step 4 Setting the date and time ........ 21
Simple setting of the clock using a
time difference ......................... 23
Step 5 Adjusting the LCD screen and
the viewfinder................................. 24
Adjusting the brightness of the LCD
screen ......................................... 24
Adjusting the viewfinder .............. 25
Step 6 Preparing a disc for recording. 26
Shooting movies/still images
Shooting movies/still images ............. 28
Before shooting ............................... 28
Shooting movies ............................. 29
Shooting still images ...................... 34
Shooting techniques to match your
circumstances .................................. 41
Shooting backlit subjects
– BACK LIGHT ........................ 41
Shooting in the dark
– NightShot/Super NightShot/
Colour Slow Shutter ................ 41
Shooting with the subject checking
the image – Mirror mode........ 43
Self-timer recording ....................... 43
Adjusting the white balance
manually ................................... 44
Shooting for the wide-screen TV
– Wide mode ............................ 45
10-GB
Optimizing the camera
automatically
– PROGRAM AE...................... 47
Adjusting the exposure
manually ................................... 48
Focusing manually ......................... 49
Shooting with special effects .............. 50
Using fader
(for movies only)...................... 50
Using special effects – Picture
effect/Digital effect ................. 51
Other functions...................................... 53
Checking the last scene
– Review .................................... 53
Deleting the last scene
(DVD-RWs only)...................... 53
Changing the disc title ................... 54
Viewing the recordings
Playing a disc on your camcorder ...... 55
Choosing and viewing a recording
– Visual Index........................... 55
Various playback modes ............... 57
To display the indicators during
playback – Display .................. 58
Magnifying recorded images
– PB ZOOM .............................. 60
Playing still images automatically
– Slide Show ............................. 61
Viewing recordings on TV................... 62
If your TV is already connected
to a VCR .................................... 62
If your TV or VCR is a monaural
type ............................................ 62
If your TV or VCR has a 21-pin
connector
(EUROCONNECTOR) ............ 62
Finalising a disc for other
players
Finalising a disc ..................................... 64
Playing back a finalised disc on other
players.............................................. 66
Playing back a disc on DVD
players ....................................... 66
Playing back movies on a computer
with a DVD drive installed .... 68
Showing still images on a computer
with a DVD drive installed .... 68
Structures and file names of movies
and still images ........................ 69
Page 11

Table of contents
Recording on a finalised disc
– Unfinalising
(VIDEO mode DVD-RWs only) ... 70
Recording again on a used disc
– Formatting (DVD-RWs only)..... 72
Using a disc in VR mode
(DVD-RWs only)
Selecting the playing order on your
camcorder – Playlist ....................... 74
Registering movies or still images
to the Playlist ............................ 74
Saving all the still images on a
disc to a movie file ................... 77
Erasing unnecessary scenes from
the Playlist ................................ 78
Changing the order within the
Playlist ....................................... 80
Dividing a movie within the
Playlist ....................................... 82
Playing the Playlist......................... 84
Editing the original data ...................... 85
Dividing a movie............................ 85
Deleting movies/still images ....... 87
Viewing/dubbing discs/editing
the recordings on your
computer
Connecting your camcorder to your
computer – Introduction ............... 89
System requirements ..................... 89
Installing the USB driver ............... 90
Installing software.......................... 91
Connecting your camcorder to
the computer ............................ 92
Consulting the on-line help
(operating instructions) of
ImageMixer Ver.1.5 for Sony
DVD Handycam ...................... 97
Viewing scenes recorded on your
computer.......................................... 98
Viewing scenes on the disc ........... 98
Making a disc copy
– Disc Dubbing ............................. 100
Making a disc copy ...................... 100
Editing and saving scenes.................. 101
Editing movies .............................. 101
Saving the movie on your
computer ................................. 101
Creating an original disc .................... 102
Making a menu............................. 102
Editing the contents ..................... 103
Recording on a disc ...................... 104
Connecting your camcorder to
a TV and a VCR
Dubbing a disc to a tape..................... 105
Connecting your camcorder to
a VCR....................................... 105
Dubbing to a tape ......................... 106
Dubbing a TV programme or video
tape onto a disc ............................. 107
Connecting your camcorder to a
TV or a VCR........................... 107
Dubbing onto a disc ..................... 107
Customizing your camcorder
Changing the SETUP display............ 108
Selecting the option of each
item ................................................. 109
Troubleshooting
Types of trouble and corrective
action .............................................. 116
Self-diagnosis display......................... 123
Warning indicators ............................. 124
Warning messages .............................. 125
Additional information
About the “InfoLITHIUM” battery
pack ................................................ 127
Glossary................................................ 128
Using your camcorder abroad .......... 129
Maintenance information and
precautions .................................... 130
Specifications ....................................... 134
Parts and controls/Index
Identifying parts and controls........... 136
Index ..................................................... 144
Getting started
11-GB
Page 12

— Getting started —
Using this manual
The instructions in this manual are for the 2 models listed in the table below. Before you
start reading this manual and operating your camcorder, check the model number by
looking at the bottom of your camcorder. The DCR-DVD200E is the model used for
illustration purposes. Otherwise, the model name is indicated in the illustrations. Any
differences in operation are clearly indicated in the text, for example, “DCR-DVD200E
only”.
Types of differences
Model DVD100E DVD200E
Image device CCD, gross approx. CCD, gross approx.
LCD screen 6.2 cm (2.5 type) 6.2 cm (2.5 type)
Note on TV colour systems
TV colour systems differ depending on the country or region. To view your recordings
on a TV, you need a PAL system-based TV.
Copyright precautions
4.5mm (1/4 type) 3.8 mm (1/4.7 type)
800 000 pixels 1 070 000 pixels
Television programmes, films, video tapes, and other materials may be copyrighted.
Unauthorised recording of such materials may be contrary to copyright laws.
You cannot dub copyright protected software on your camcorder.
Contents of the recording cannot be compensated if recording or playback is not made due to a
malfunction of the camcorder, storage media, etc.
12-GB
Page 13

Using this manual
Camcorder care
LCD screen/finder
The LCD screen and the finder are manufactured using extremely high-precision
technology, so over 99.99 % of the pixels are operational for effective use.
However, there may be some tiny black points and/or bright points (white, red,
blue or green in colour) that appear constantly on the LCD screen and the finder.
These points are normal in the manufacturing process and do not affect the
recording in any way.
Disc compatibility with other players
Discs recorded on your camcorder must be finalised to play with other players. For
details on how to finalise a disc, see “Finalising a disc” (page 64).
Discs recorded in VIDEO mode
You must finalise a disc after all the recording is finished. You cannot record again on a
disc recorded in VIDEO mode once you finalise it. On DVD-RW, you can record again
by unfinalising it.
Compatible players: DVD players
Discs recorded in VR mode
Only DVD-RWs can be recorded in VR mode. Finalising is required only when other
DVD-RW compatible players cannot play the disc. You can record again with your
camcorder on a finalised disc recorded in VR mode.
Compatible players: DVD players that can play back DVD-RWs in VR mode
Note
You may not be able to play certain finalised discs, depending on the disc and the
players.
Getting started
13-GB
Page 14
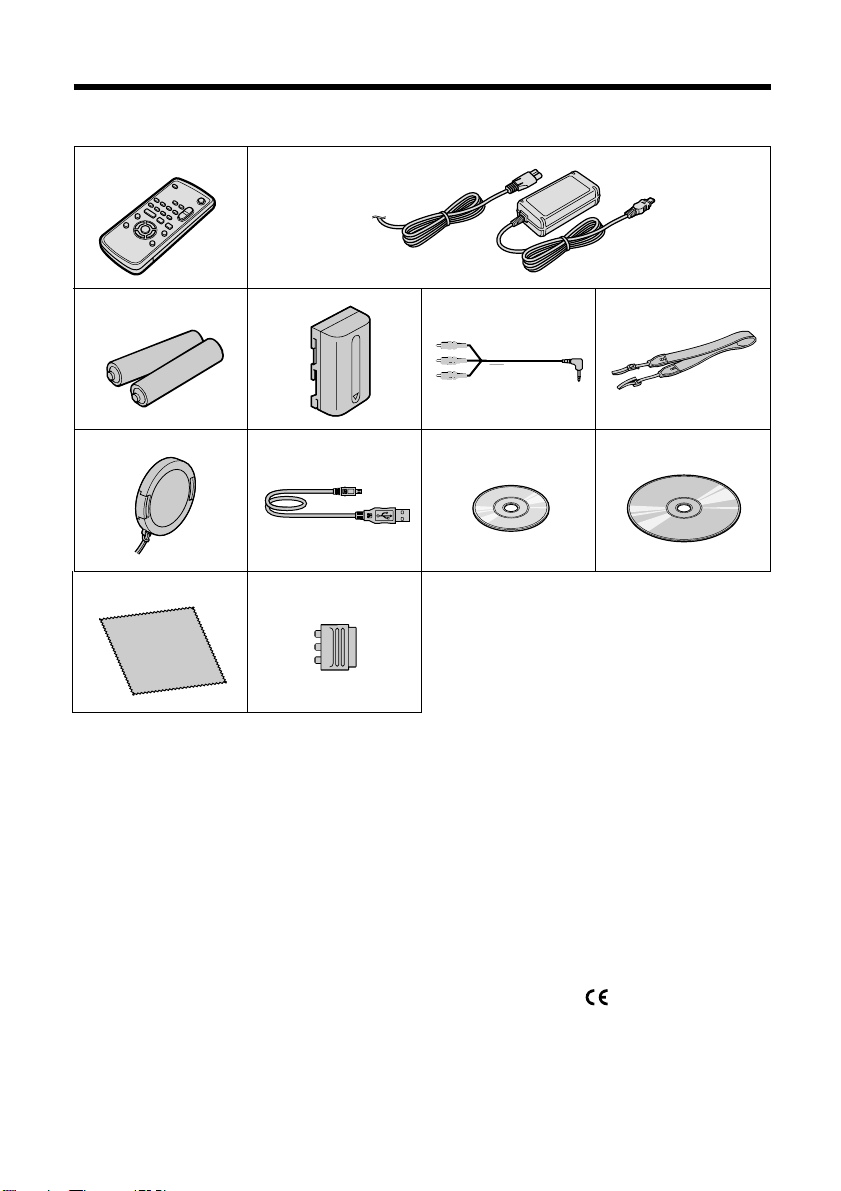
Checking the supplied accessories
Make sure that the following accessories are supplied with your camcorder.
12
3
7
1 Wireless Remote Commander (1)
(page 141)
2 AC-L15A AC adaptor (1),
Mains lead (1) (page 16)
3 Size AA (R6) battery for the Remote
Commander (2) (page 142)
4 NP-FM50 rechargeable battery pack
(1) (page 15)
4 5
8 9
qsqa
6
0
5 A/V connecting cable (1)
6 Shoulder strap (1)
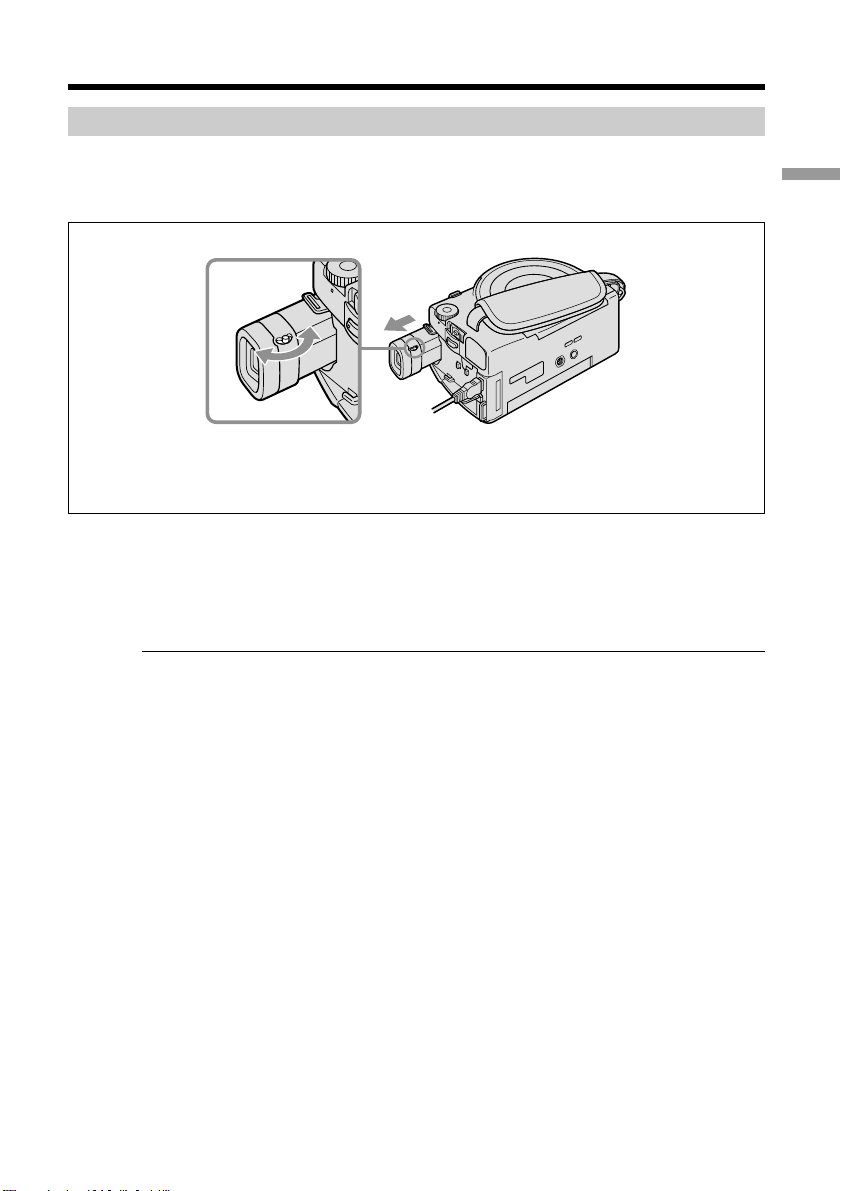
7 Lens cap (1) (page 29)
8 USB cable (1) (page 92)
9 DVD-R (DMR30) (1)
q; CD-ROM (SPVD-011 USB Driver) (1)
qa Cleaning cloth (1)
qs 21-pin adaptor* (1) (page 62)
* The models with
their bottom surfaces only.
mark printed on
14-GB
Page 15
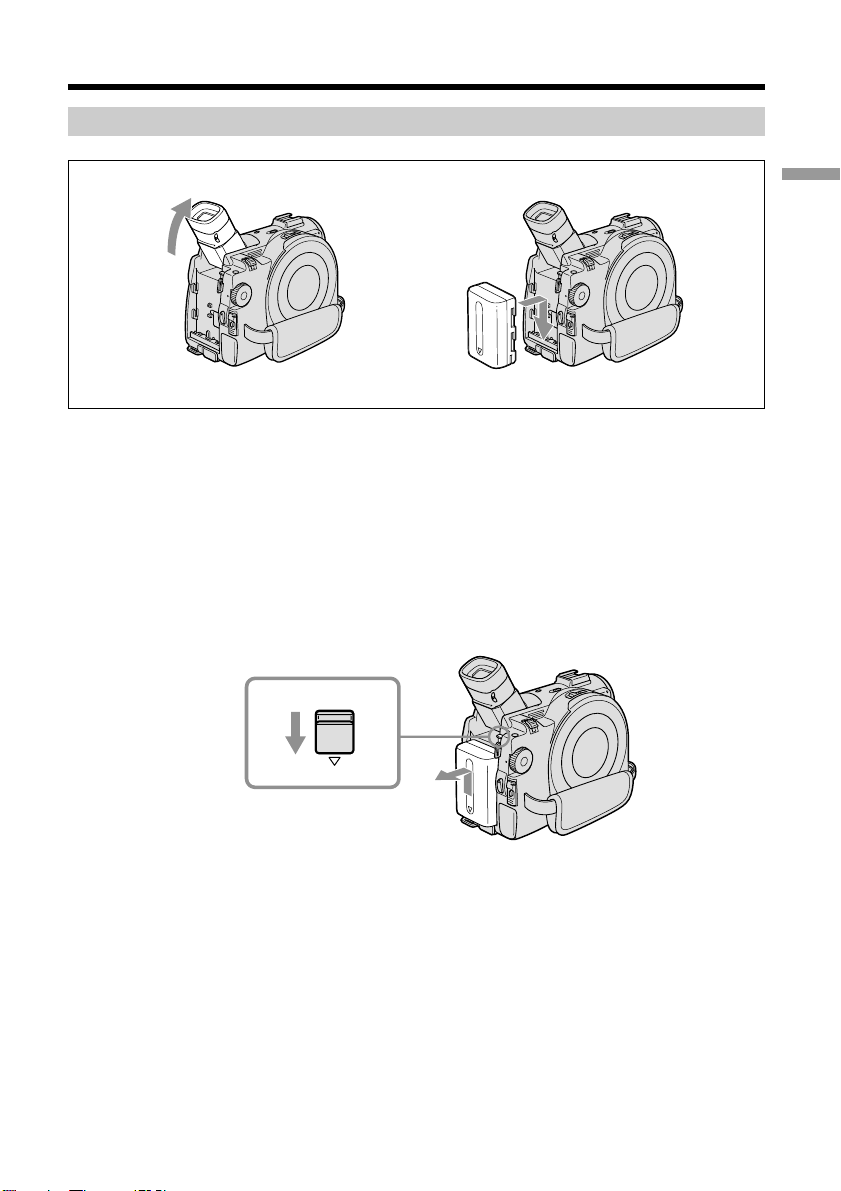
Step 1 Preparing the power source
Installing/removing the battery pack
1
2
1 Lift up the viewfinder.
2 Slide the battery pack in and down until it clicks.
To remove the battery pack
1 Lift up the viewfinder.
2 Slide the battery pack up and out in the direction of the arrow while pressing
BATT down.
BATT
Getting started
BATT release button
15-GB
Page 16
Step 1 Preparing the power source
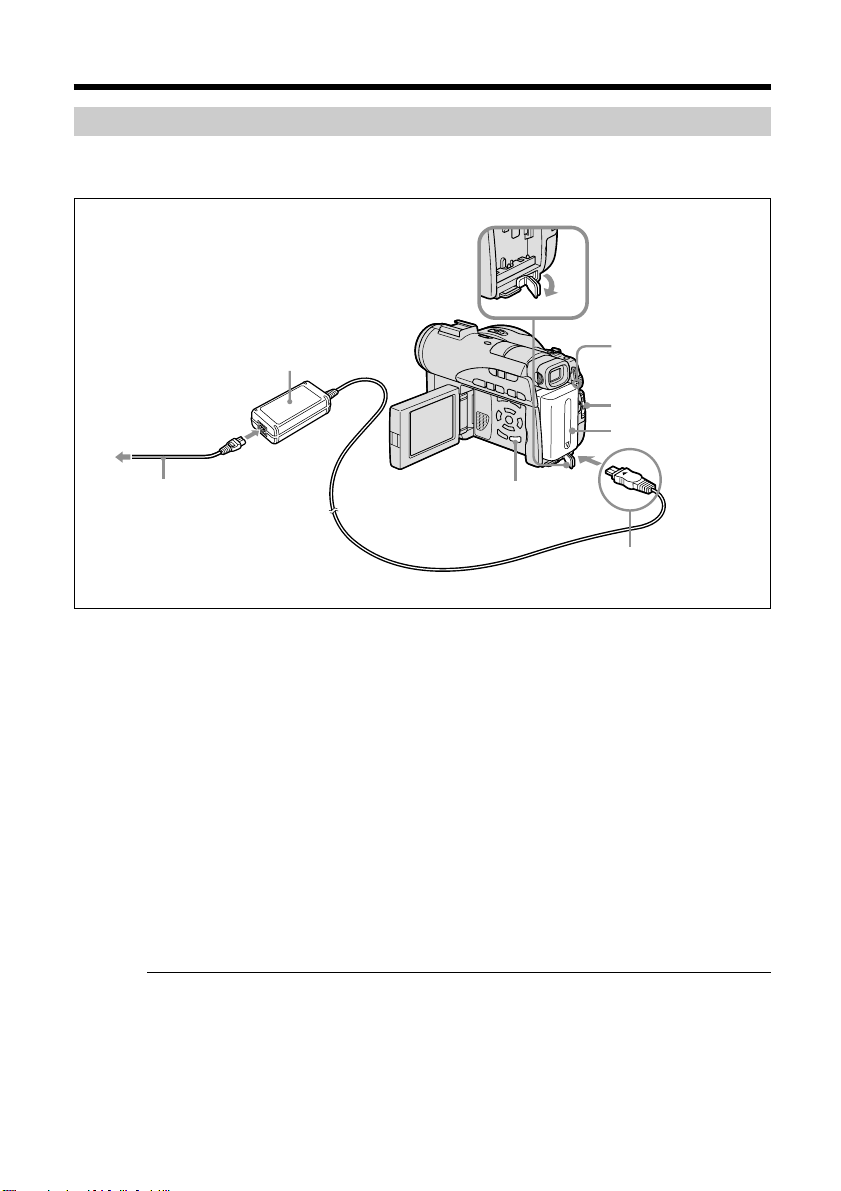
Charging the installed battery pack
Your camcorder operates only with the “InfoLITHIUM” battery pack (M series).
See page 127 for more information on the “InfoLITHIUM” battery pack.
Open the DC IN
jack cover.
AC adaptor
3
4
POWER/CHG lamp
5
1
2
Mains lead
DISPLAY/BATT INFO
button
With the v
mark facing up
1 Make sure that the battery pack is installed on the camcorder.
2 Open the DC IN jack cover, then connect the AC adaptor supplied with your
camcorder to the DC IN jack on your camcorder with the plug’s v mark facing
up.
3 Connect the mains lead to the AC adaptor.
4 Connect the mains lead to the wall socket.
5 Slide the POWER switch downward while pressing the green button in the
centre.
Charging begins. The POWER/CHG lamp lights in orange during the charge,
then turns off when the charge is completed (full charge).
After charging the battery pack
Disconnect the AC adaptor from the DC IN jack on your camcorder.
16-GB
Notes on the AC adaptor
•Prevent metallic objects from coming into contact with the metal parts of the DC plug
of the AC adaptor. This may cause a short-circuit, damaging the AC adaptor.
•Place the AC adaptor near a wall socket. If any trouble occurs with this unit while
using the AC adaptor, disconnect the plug from the wall socket as soon as possible to
cut off the power.
•The POWER/CHG lamp may flash if the battery pack is not installed correctly or the
battery pack is damaged.
Page 17

Step 1 Preparing the power source
Charging time (full charge)
Battery pack
NP-FM50 (supplied) 150
NP-FM70 240
NP-QM71/QM71D 260
NP-FM91/QM91/QM91D 360
Approximate number of minutes required at 25°C to charge an empty battery pack. The
charging time may increase if the battery’s temperature is extremely high or low
because of the ambient temperature.
Recording time with the viewfinder
Battery pack
NP-FM50 (supplied) 85 75 40 35
NP-FM70 185 170 90 85
NP-QM71/QM71D 215 195 105 95
NP-FM91/QM91/QM91D 325 295 160 145
Continuous Typical
DVD100E DVD200E DVD100E DVD200E
Recording time with the LCD screen
Battery pack
NP-FM50 (supplied) 70 65 35 30
NP-FM70 155 145 75 70
NP-QM71/QM71D 180 165 90 80
NP-FM91/QM91/QM91D 275 255 135 125
Approximate number of minutes you can record when using a fully charged battery pack.
Continuous Typical
DVD100E DVD200E DVD100E DVD200E
Getting started
* Approximate number of minutes you can record, including starting/stopping,
zooming and turning the power on/off. The actual battery life may be shorter.
Playing time
Battery pack
NP-FM50 (supplied) 80 80 100 100
NP-FM70 175 175 210 210
NP-QM71/QM71D 205 205 245 245
NP-FM91/QM91/QM91D 305 305 375 375
Approximate number of minutes of playing time when using a fully charged battery pack.
Notes
•If the power goes off even though the remaining battery time indicator indicates that
the battery pack has enough power to operate, charge the battery pack fully again so
that the indication on the remaining battery time indicator is correct.
•Battery pack performance decreases in low-temperature surroundings and recording
may not be possible even though the battery time remaining may be as much as 20
minutes. Recharge the battery pack fully in this case.
•NP-FM30 is not recommended because of its short recording time when used with
your camcorder .
Playing time on LCD screen Playing time with LCD closed
DVD100E DVD200E DVD100E DVD200E
17-GB
Page 18
Step 1 Preparing the power source
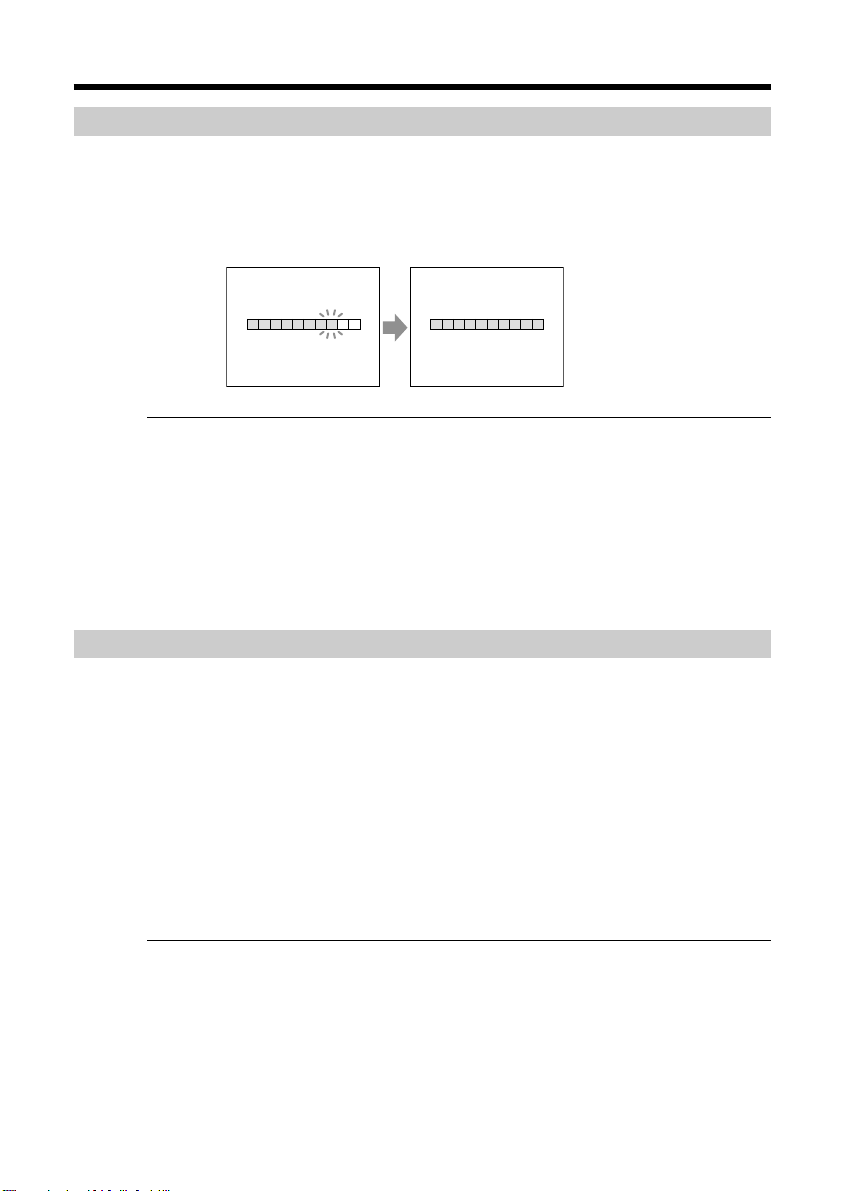
Showing the remaining battery time – BATTERY INFO
1 Open the LCD screen while pressing OPEN.
2 Press DISPLAY/BATT INFO.
The remaining battery time appears for a while on the LCD display.
BATTERY INFO
BATTERY CHARGE LEVEL
0% 50%
REC TIME AVAILABLE
LCD SCREEN
VIEWFINDER::5260
100%
min
min
During charging
Notes
•The remaining battery time may not be indicated in the following cases:
– The battery pack is not installed correctly.
– The battery pack is damaged.
– The battery pack is empty.
•The number displayed as Battery Info is the approximate recording time.
•While the remaining battery time is being calculated, “CALCULATING BATTERY
INFO...” is displayed.
•It may take some time to display the remaining battery time after DISPLAY/BATT
INFO is pressed.
Connecting to a wall socket
When you use your camcorder for a long time, it is recommended that you power it
from a wall socket using the AC adaptor.
1 Open the DC IN jack cover, then connect the AC adaptor supplied with your
camcorder to the DC IN jack on your camcorder with the plug’s v mark facing
up.
2 Connect the mains lead to the AC adaptor.
3 Connect the mains lead to a wall socket.
See page 16 for details.
BATTERY INFO
BATTERY CHARGE LEVEL
0% 50% 100%
REC TIME AVAILABLE
LCD SCREEN
VIEWFINDER::6575
min
min
Fully charged
18-GB
WARNING
Your camcorder is not disconnected from the AC power source (mains) as long as it is
connected to the wall socket, even if your camcorder itself has been turned off.
Notes
•The AC adaptor can supply power even if the battery pack is attached to your
camcorder.
•The DC IN jack has “source priority”. This means that the battery pack cannot supply
any power if the AC adaptor is connected to the DC IN jack, even when the mains
lead is not plugged into a wall socket.
Page 19
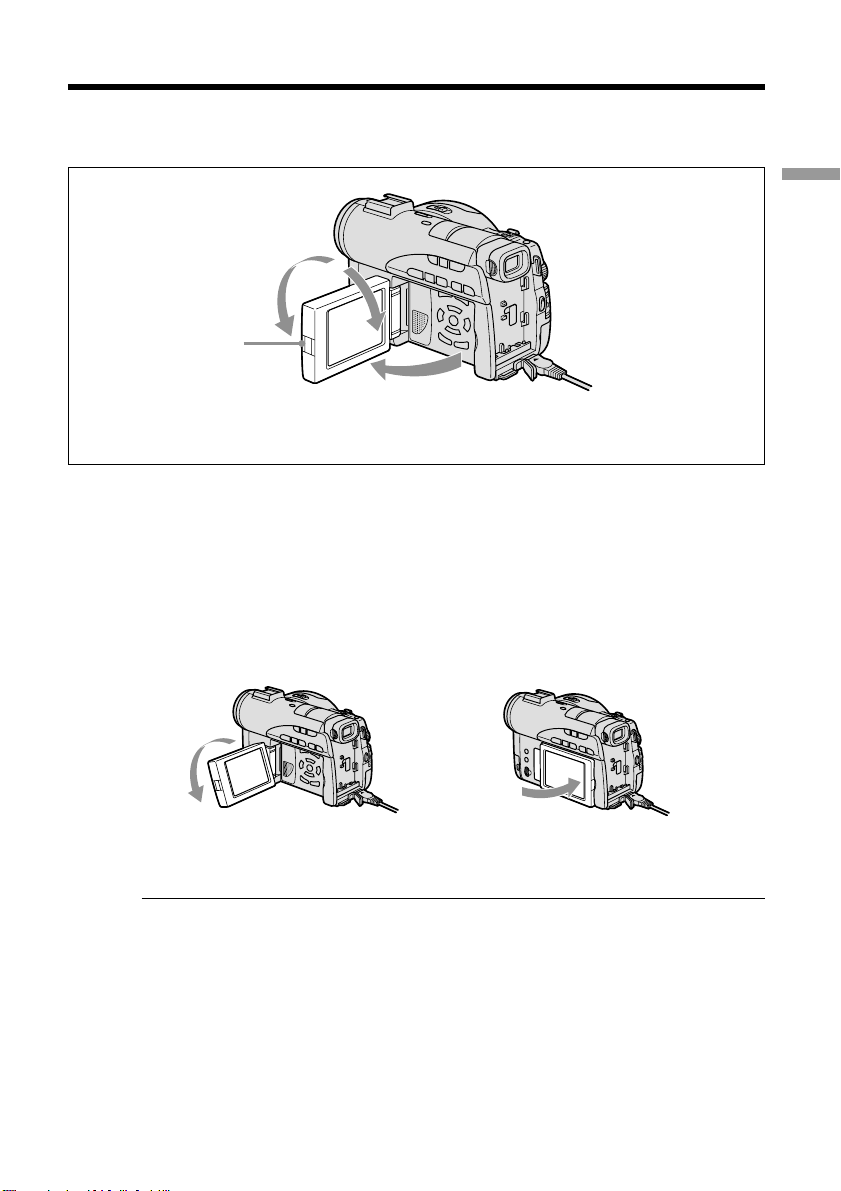
Step 2 Opening the LCD screen
LCD screen is used for such as changing settings, shooting images in various angles,
and reviewing recorded images.
2
180º
Getting started
OPEN button
90º
90º
1
1 Open the LCD screen while pressing OPEN.
2 Adjust the direction of the LCD screen to the desired position.
When you adjust the angle of the LCD screen, make sure if the LCD screen is
opened up to 90 degrees.
You can turn the LCD screen over and move it back to the camcorder body
with the LCD screen facing out as shown below.
Rotate the LCD screen 180
degrees.
Move the LCD screen back
to the camcorder.
Notes
•When closing the LCD screen, set it vertically until it clicks, then swing it into the
camcorder body.
•When the LCD screen is moved back to the camcorder while recording or while in
standby to record, the screen backlight is fixed to the [BRT NORMAL].
19-GB
Page 20
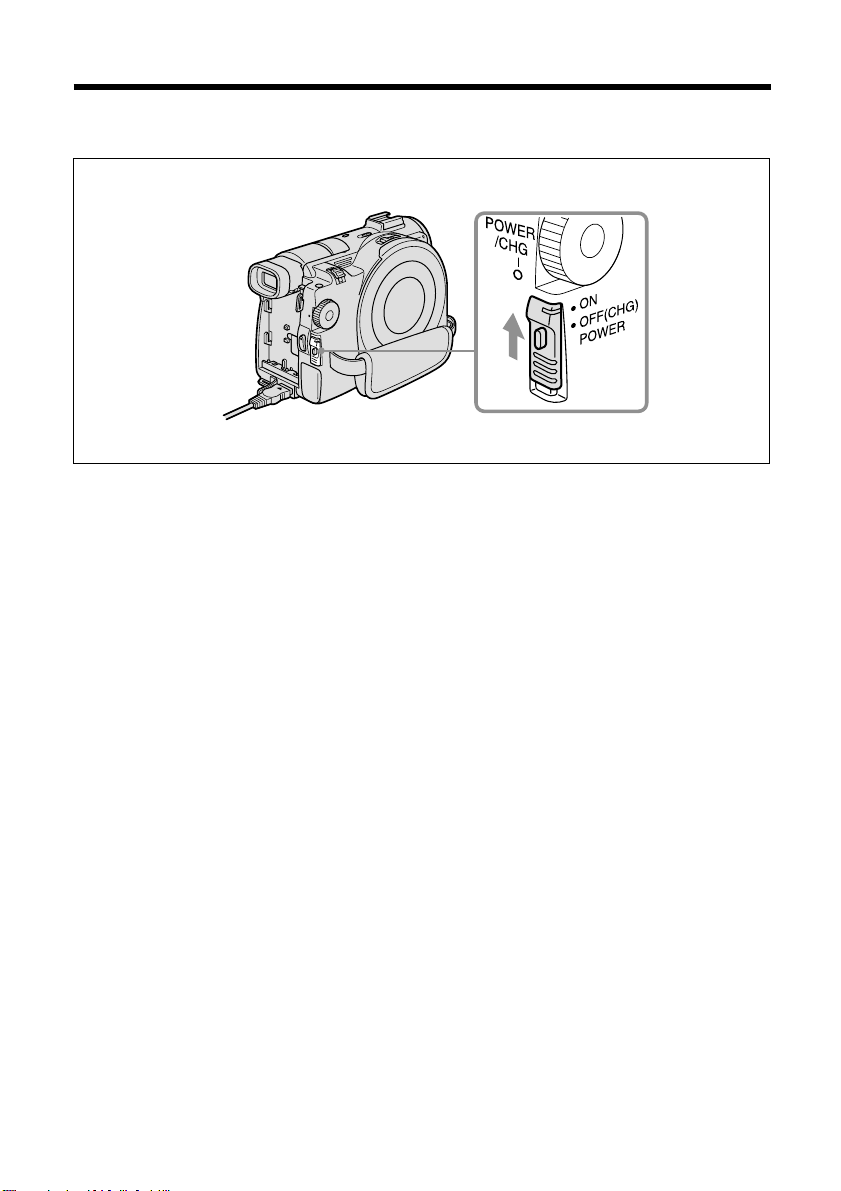
Step 3 Turning on the power
Slide the POWER switch upward while pressing the green button in the centre.
Your camcorder turns on and the POWER/CHG lamp lights up in green.
To turn off the power
Slide the POWER switch downward while pressing the green button in the centre.
When the POWER/CHG lamp turns off, the power cuts off.
20-GB
Page 21
Step 4 Setting the date and time
Set the date and time when you use your camcorder for the first time. Set the
geographical area, then the summer time, the year, the month, the day, the hour and
then the minute, in that order.
If you do not use your camcorder for about 3 months, the date and time settings may
be cleared from memory (bars may appear) because the built-in rechargeable battery in
your camcorder will have been discharged during that time. In that case, charge the
built-in rechargeable battery by connecting the AC adaptor, and set the date and time
again (page 16, 132).
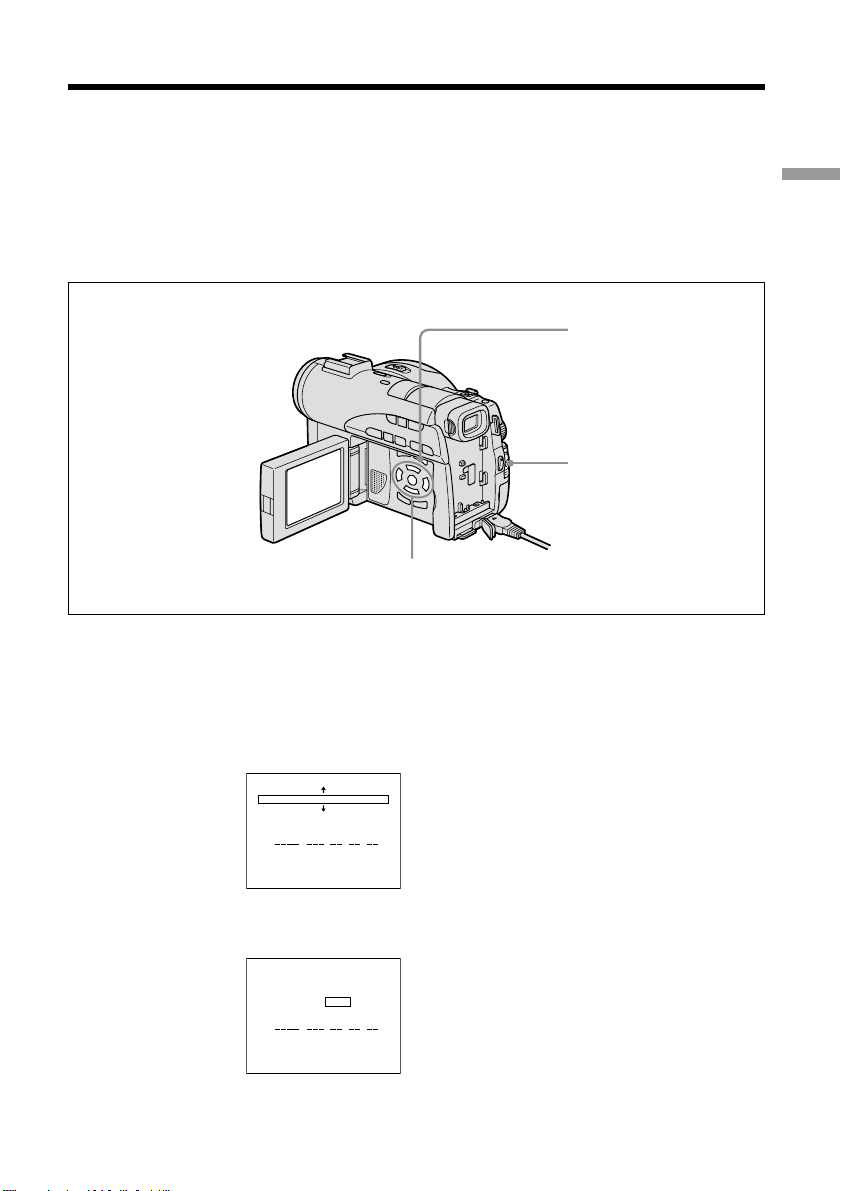
SETUP button
POWER switch
b/v/V/B/ENTER buttons
Getting started
1 Open the LCD screen while pressing OPEN.
2 Turn the power on by sliding the POWER switch upward while pressing the
green button.
The CLOCK SET display appears.
CLOCK SET
AREA 1
Lisbon, London
SUMMERTIME
DATE Y M D
[ ENTER ] : NEXT ITEM
+0.0GMT
OFF
:
3 Select the desired geographical area with v/V, and press ENTER.
CLOCK SET
AREA 1
Lisbon, London
SUMMERTIME
DATE Y M D
[ ENTER ] : NEXT ITEM
OFF
ON
+0.0GMT
:
21-GB
Page 22
Step 4 Setting the date and time
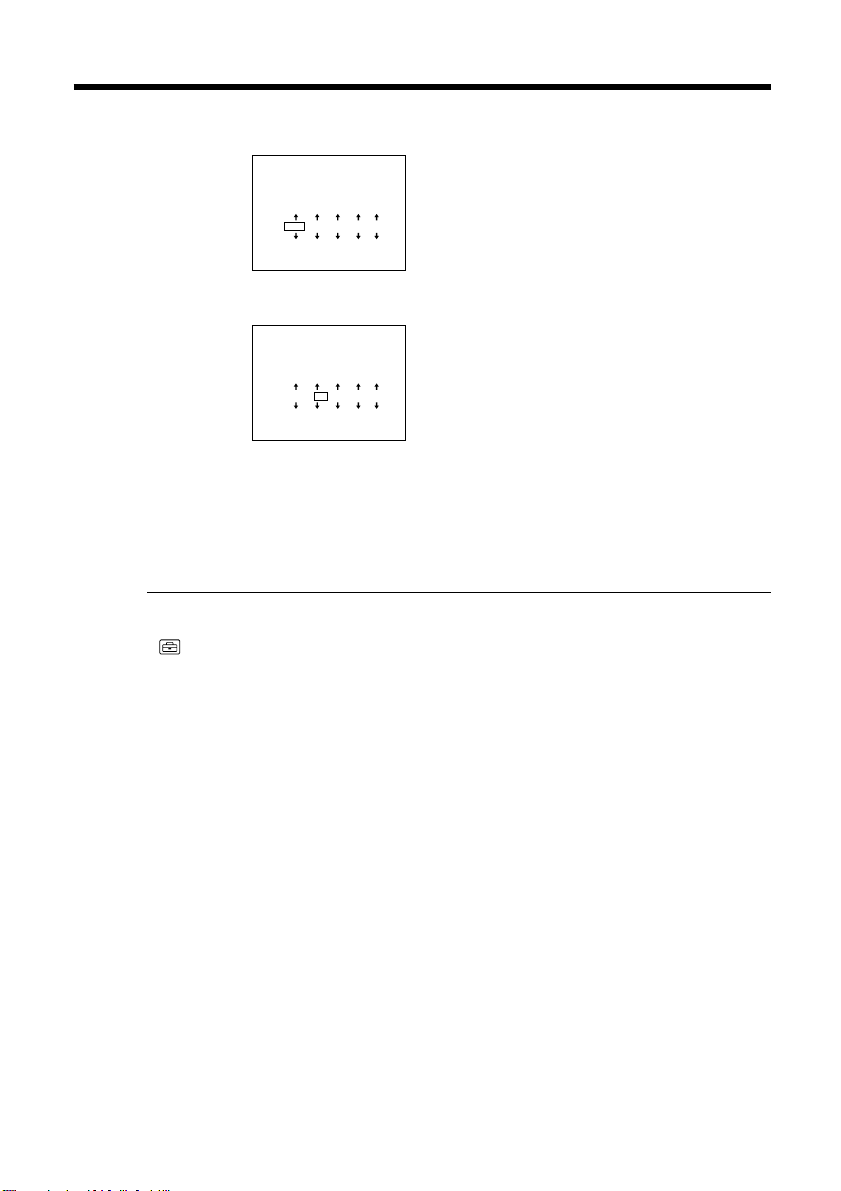
4 Set summer time ([SUMMERTIME]) to [ON] with v/V if necessary.
CLOCK SET
AREA 1 +0.0GMT
Lisbon, London
2003 1 1
OFF
0 : 00
SUMMERTIME
DATE Y M D
[ ENTER ] : NEXT ITEM
5 Select the desired year with v/V, and press ENTER.
CLOCK SET
AREA 1 +0.0GMT
Lisbon, London
2003
OFF
1 1 0 : 00
SUMMERTIME
DATE Y M D
[ ENTER ] : NEXT ITEM
6 Set the month, day, hour and minute with the same procedure as in step 5.
Set the minute using a time signal, etc., with v/V, and press ENTER.
The clock starts to move.
The internal clock of your camcorder operates on a 24-hour cycle.
Tips
•If the CLOCK SET display does not appear in step 2, press SETUP, then select
(SETUP MENU), then [CLOCK SET] with v/V.
•If the SETUP display appears after step 6, press SETUP.
The SETUP display disappears.
22-GB
Page 23
Step 4 Setting the date and time
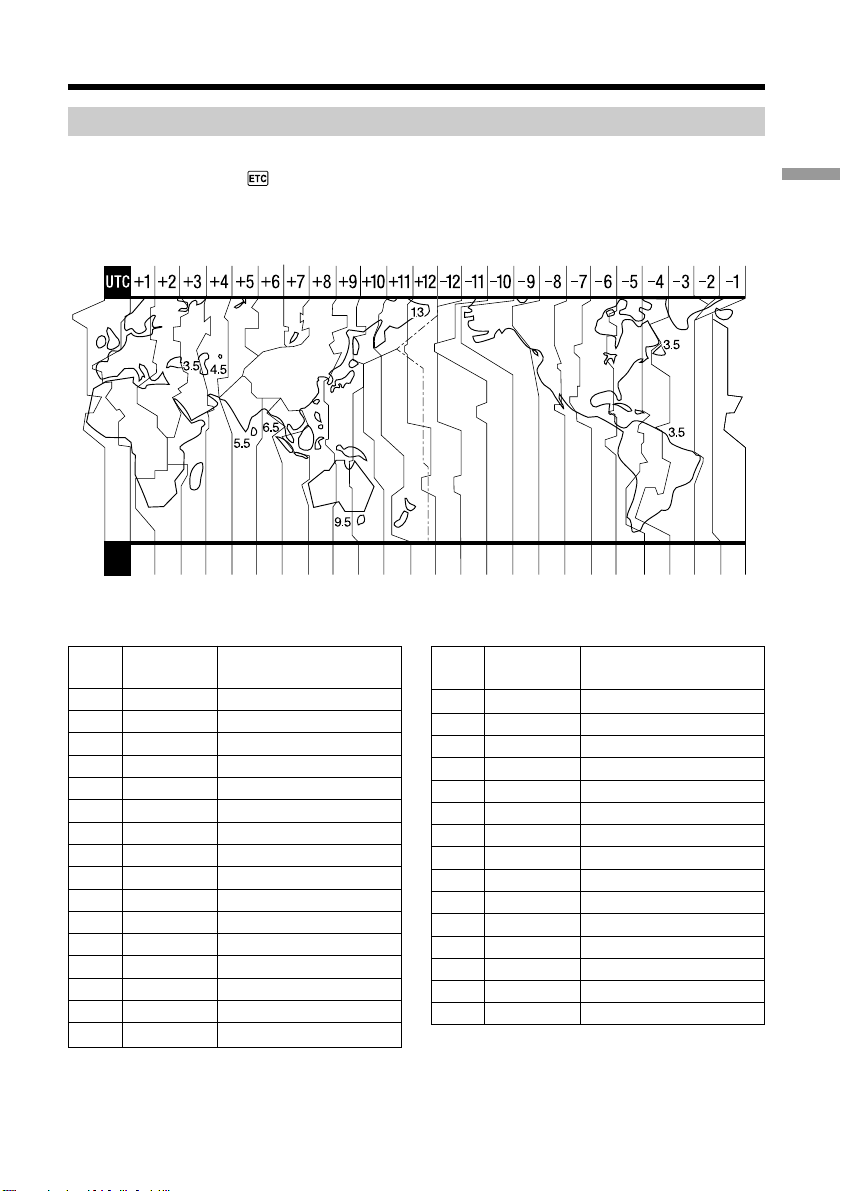
Simple setting of the clock using a time difference
You can easily set the clock to the local time by setting a time difference. In the SETUP
display, select (OTHERS) then [AREA SET] with v/V/ENTER.
World time difference
1 234681012131416171819 20 2122 23 2425 26 27293031
Getting started
Area Time-zone
code differences
1
GMT
2
+01:00
3
+02:00
4
+03:00
5
+03:30
6
+04:00
7
+04:30
8
+05:00
9
+05:30
10
+06:00
11
+06:30
12
+07:00
13
+08:00
14
+09:00
15
+09:30
16
+10:00
Area setting
Lisbon, London
Berlin, Paris
Helsinki, Cairo
Moscow, Nairobi
Tehran
Abu Dhabi, Baku
Kabul
Karachi, Islamabad
Calcutta, New Delhi
Almaty, Dhaka
Rangoon
Bangkok, Jakarta
HongKong, Singapore
Seoul, Tokyo
Adelaide, Darwin
Melbourne, Sydney
Area Time-zone
code differences
+11:00
17
+12:00
18
–12:00
19
–11:00
20
–10:00
21
–09:00
22
–08:00
23
–07:00
24
–06:00
25
–05:00
26
–04:00
27
–03:30
28
–03:00
29
–02:00
30
–01:00
31
Area setting
Solomon Is.
Fiji, Wellington
Eniwetok, Kwajalein
Midway Is., Samoa
Hawaii
Alaska
LosAngeles, Tijuana
Denver, Arizona
Chicago, MexicoCity
New York, Bogota
Santiago
St. John’s
Brasilia, Montevideo
Fernando de Noronha
Azores
23-GB
Page 24
Step 5 Adjusting the LCD screen and the viewfinder
Adjusting the brightness of the LCD screen
Adjust the brightness of the LCD screen properly in your sight.
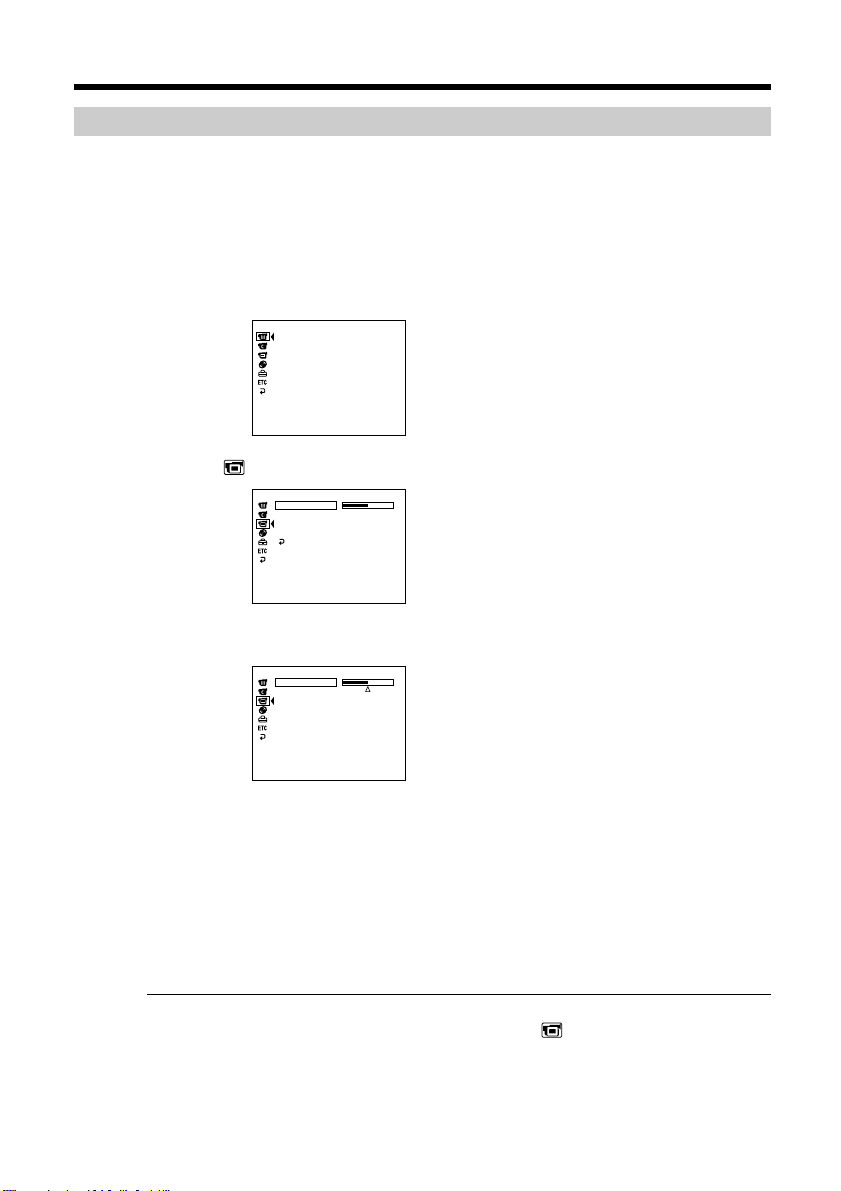
1 Open the LCD screen while pressing OPEN.
2 Turn the power on by sliding the POWER switch upward while pressing the
green button.
3 Press SETUP.
The SETUP display appears.
MANUAL SET
PROGRAM AE
P EFFECT
D EFFECT
WHT BAL
AUTO SHTR
[ SETUP ] : END
4 Select (LCD/VF SET) with v/V, and press ENTER.
LCD / VF SET
LCD BRIGHT
LCD B. L.
LCD COLOUR
VF B. L.
RETURN
[ SETUP ] : END
5 Select [LCD BRIGHT] with v/V, and press ENTER.
LCD / VF SET
LCD BRIGHT
24-GB
[ SETUP ] : END
6 Adjust the brightness of the LCD screen with b/B, and press ENTER.
b: Get darker
B: Get brighter
The LCD screen brightness is adjusted.
7 Press SETUP.
The SETUP display disappears from the LCD display.
Tips
•You can change the brightness of the backlight. Select (LCD/VF SET) then [LCD
B.L.] in the SETUP display when using the battery pack (page 111).
•The [LCD BRIGHT] and [LCD B.L.] settings do not affect the brightness of the image
when you are recording.
Page 25
Step 5 Adjusting the LCD screen and the viewfinder
Adjusting the viewfinder
When recording pictures with the LCD screen closed, check the picture with the
viewfinder. Adjust the viewfinder lens to accommodate your eyesight so that the image
in the viewfinder comes into sharp focus.
Getting started
2
Viewfinder lens
adjustment lever
1
1 Lift up the viewfinder.
2 Move the viewfinder lens adjustment lever as you can see the characters in the
viewfinder clearly.
Tips
•If you install an NP-FM70/QM71/QM71D/FM91/QM91/QM91D battery pack in
your camcorder, extend and lift up the viewfinder and adjust the angle of it.
•You can change the brightness of the viewfinder backlight. Select [VF B.L.] in the
SETUP display when using the battery pack (page 111).
•The [VF B.L.] setting does not affect the brightness of the image when you are
recording.
•Recording pictures with the viewfinder is recommended in the following cases:
– When the picture seen on the LCD display is poor.
– When you want to save on battery consumption.
25-GB
Page 26
Step 6 Preparing a disc for recording
A new DVD-R or DVD-RW is required for recording. You cannot overwrite or delete
data recorded on a DVD-R, but you can delete data and record again with a DVD-RW.
The preparation procedure is different depending on the type of disc you use.
Note
You can open the disc cover only while the Access/Open lamp is lit in green. The cover
will be locked after about 30 seconds if you do not open the disc cover. When the lamp
turns off, slide the disc cover OPEN switch again.
Tips
•The camcorder is set in the VIDEO mode as the default setting.
•Formatting is required when a DVD-RW is used for the first time.
3
4
Access/Open lamp
5
26-GB
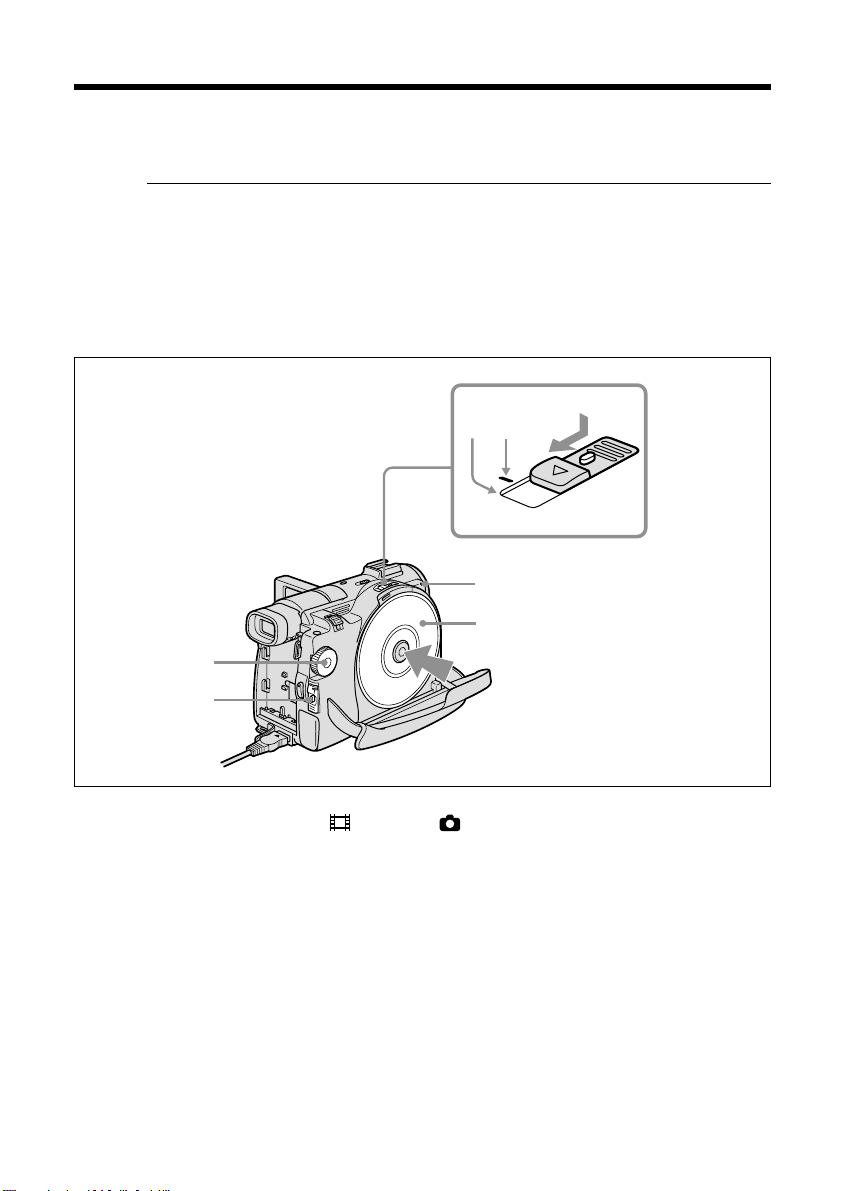
1
2
1 Set the mode dial to (Movie) or (Still).
2 Turn the power on by sliding the POWER switch upward while pressing the
green button.
3 Slide the disc cover OPEN switch to the mark.
The beep sounds and PREPARING TO OPEN COVER appears on the LCD
display. After a while, the beep sound changes and the Access/Open lamp
lights in green, and SLIDE [OPEN] appears.
4 Slide the disc cover OPEN switch again to the end.
The disc cover opens.
5 Set the disc with the label side facing up, then press firmly to seat it on the
centre spindle until it clicks.
Make sure that the disc is not exposed to fingerprints and dust.
Page 27

Step 6 Preparing a disc for recording
6 Close the disc cover.
Your camcorder starts recognising the inserted disc.
With a DVD-R, you can start recording immediately after DISC ACCESS
disappears on the LCD display. See page 29 for details on shooting movies and
see page 34 for details on shooting still images.
The FORMAT display appears when you insert a DVD-RW. Proceed to step 7.
FORMAT
REC FORMAT
EXECUTE
EST. PROCESS TIME : 7sec
REC FORMAT : VIDEO
VIDEO
7 When recording in VIDEO mode, select [EXECUTE] and [YES] with b/v/V/
B, then press ENTER.
When recording in VR mode (page 7):
1 Select [REC FORMAT] with v/V, then press ENTER.
2 Select [VR] with v/V, then press ENTER.
3 Select [EXECUTE] with v/V, then press ENTER.
4 Select [YES] with v/V, then press ENTER.
The disc formatting starts. When the formatting is completed, you can start
recording on the DVD-RW.
Getting started
Notes
•If you close the disc cover with the disc set incorrectly, it may cause your camcorder to
malfunction.
•Do not shock or vibrate your camcorder during “DISC ACCESS” appearing.
•It may take some time to recognise the disc depending on the disc type and condition.
•You may hear the motor running when the disc cover is closed without a disc being
set. This is not a malfunction.
•Do not remove the battery pack or disconnect the AC adaptor while formatting.
•See page 133 for details on disc handling.
To eject the disc
1 Perform the steps 3 and 4 on page 26.
2 Take out the disc after the disc spin stops completely.
Note
You can open the disc cover only while the Access/Open lamp is lit in green.
On disc information
When you replace a disc, disc information such as the date you started to use it and
information on previously recorded areas appears for about 5 seconds. The information
on previously recorded areas may not be displayed correctly depending on the
condition of the disc.
27-GB
Page 28
— Shooting movies/still images —
Shooting movies/still images
Before shooting
To shoot movies/still images correctly, note the following:
– Do not vibrate your camcorder during shooting.
– Do not expose the disc to dirt and dust.
– Do not scratch the disc.
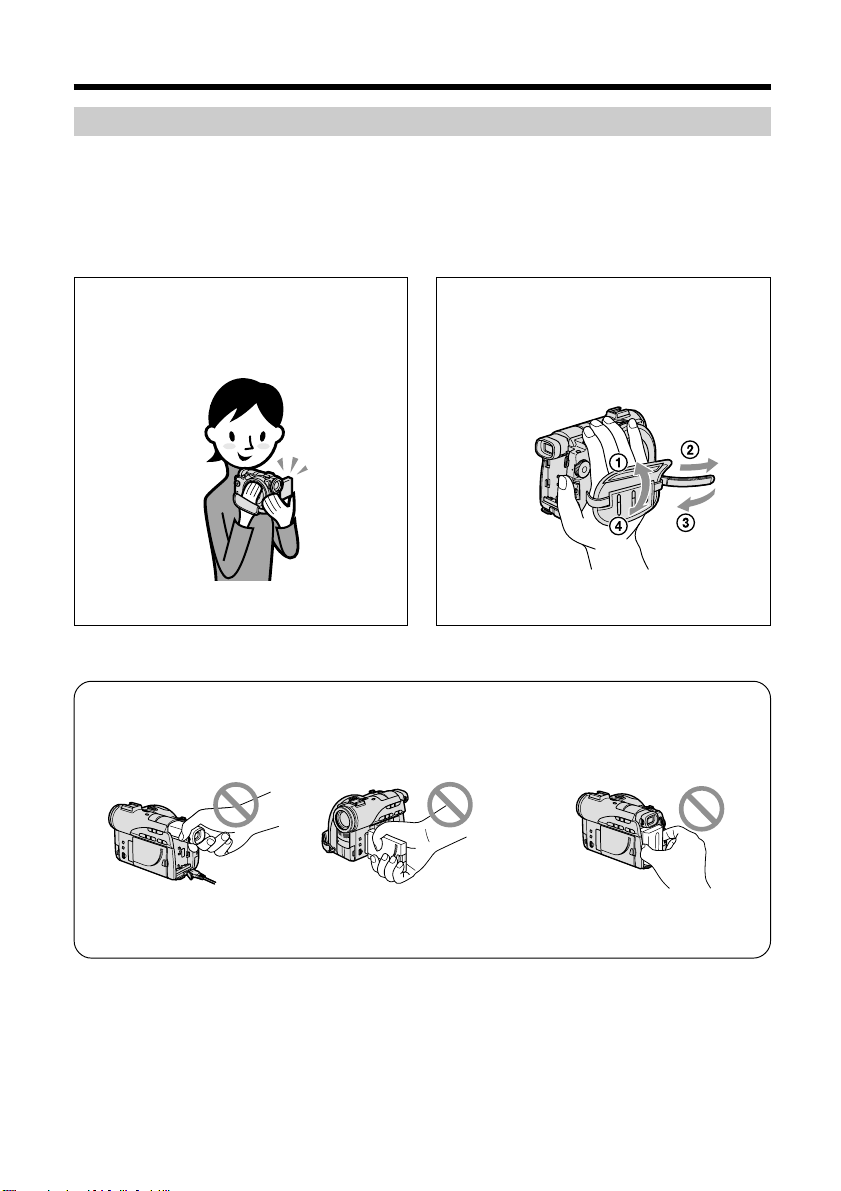
You can shoot stable images by holding the camcorder correctly.
To hold your camcorder
Hold your camcorder with your fingers
inserted through the grip belt.
Note
Do not pick up your camcorder by the viewfinder, the LCD screen, or the battery pack.
To fasten the grip belt
Fasten the grip belt firmly following the
illustration below.
28-GB
Viewfinder LCD screen Battery pack
Page 29
Shooting movies/still images
Shooting movies
Perform “Getting Started” from step 1 to 6 beforehand (page 15).
The following operation is common with VIDEO mode and VR mode.
6
1
3
2
7
Recording
5
lamp
4
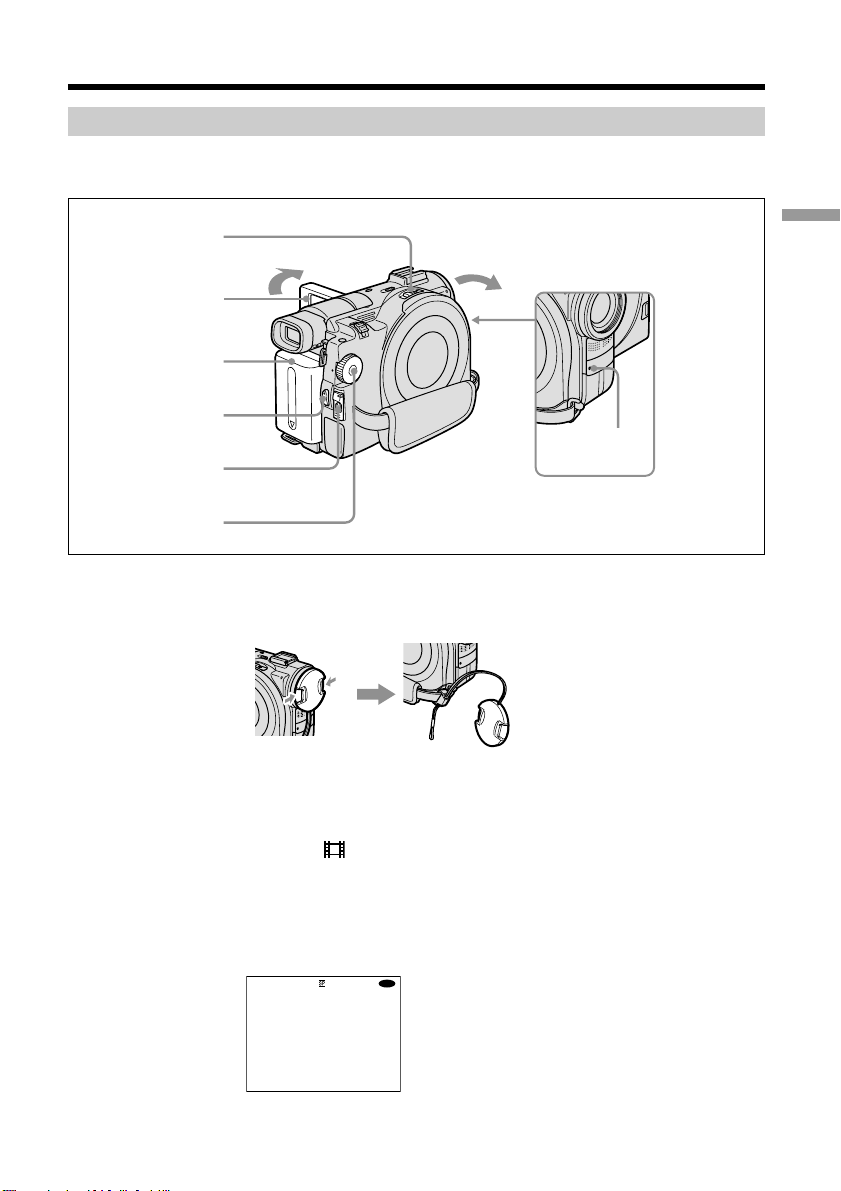
1 Remove the lens cap by pressing both knobs on the sides of the cap.
2 Install the battery pack or connect the AC adaptor (page 15).
3 Open the LCD screen while pressing OPEN.
The image is not displayed in the viewfinder when the LCD screen opens.
4 Set the mode dial to (Movie).
5 Turn the power on by sliding the POWER switch upward while pressing the
green button.
6 Insert a disc (page 26).
This sets your camcorder to standby.
-
R
STBY0:00:00
VIDEO
Shooting movies/still images
29-GB
Page 30

Shooting movies/still images
7 Press START/STOP (z).
Your camcorder starts recording. The REC indicator appears on the LCD
display. The camera recording lamp located on the front of your camcorder
lights up. To stop recording, press START/STOP again.
REC 0:00:01
Notes
•Do not touch the built-in microphone during recording.
•When the Access/Open lamp lights in red, data is being recorded on the disc. Take
note of the following when data is being recorded, or the data or the disc may be
damaged.
– Do not shock or vibrate the camcorder.
– Do not turn the power off.
– Do not remove the battery pack or disconnect the AC adaptor.
– Do not open the disc cover.
•The time to access the disc for recording may vary depending on the type of movies.
•There may be time difference between the point when you press START/STOP and
the actual point that the recording stops.
Tip
If you leave your camcorder powered by battery pack for 5 minutes while a disc is
inserted, your camcorder automatically turns off. This is to save battery power and to
prevent battery wear. Set the POWER switch to OFF (CHG) once, then set to ON, and
your camcorder is set to a standby mode. You can cancel the automatic power-off by
setting the (SETUP MENU) – [A. SHUT OFF] menu item to [NEVER] in the SETUP
display.
-
VIDEO
R
30-GB
After recording
1 Eject the disc (page 27).
2 Turn the power off by sliding the POWER switch downward while pressing
the green button.
3 Close the LCD screen.
4 Remove the battery pack or disconnect the AC adaptor.
Page 31

Shooting movies/still images
Indicators displayed in the recording mode
These indicators are not recorded on discs.
Remaining battery time (page 18)
Recording mode (page 33)
STBY/REC
Counter
Disc type (page 6)
-
R
40min
REC
0:00:01
[30min]
VIDEO
Recording format (page 7)
Remaining time
This appears after you insert a disc for 8 seconds.
Shooting movies/still images
1 1 2003
11:23:45
Date and time
The date and time are displayed about 5 seconds
after the power is turned on.
Notes
•The remaining battery time indicator shows the approximate continuous recording
time remaining. The indicator may not be displayed accurately, depending on the
conditions under which you are recording. When you close the LCD screen and open
it again, it takes about 1 minute for the correct remaining battery time in minutes to be
displayed.
•The recording data (date/time or various settings in effect when shooting) are not
displayed while recording. However, they are recorded automatically onto the disc.
To display the recording data, press DATA CODE on the Remote Commander during
playback (page 58).
31-GB
Page 32

Shooting movies/still images
To use the zoom feature
Move the power zoom lever a little for a slower zoom. Move it further for a faster zoom.
Using the zoom sparingly results in better-looking recordings.
W: For wide-angle (subject appears farther away)
T : For telephoto (subject appears closer)
32-GB
To use zoom greater than 10×
Zoom greater than 10× is performed digitally. Digital zoom can be set to 20 × or 120 ×.
The picture quality deteriorates as you move the power zoom lever towards the “T”
side.
To activate digital zoom, select the digital zoom power in [D ZOOM] in the SETUP
display (page 110). The digital zoom is set to [OFF] as the default setting.
The right side of the bar shows
the digital zooming zone.
The digital zooming zone
appears when you select the
digital zoom power in the
SETUP display.
Note
You cannot use the digital zoom to shoot still images.
Tip
If you cannot get a sharp focus, move the power zoom lever to the “W” side until the
focus is sharp. You can shoot a subject that is at least about 80 cm away from the lens
surface in the telephoto position, or about 1 cm away in the wide-angle position.
W
T
Page 33

Shooting movies/still images
To Select the recording mode
Your camcorder records and plays back in the HQ (high quality) mode, SP (standard
play) mode, and the LP (long play) mode. Your camcorder is set to SP mode as the
default setting.
1 Set the mode dial to (Movie).
2 Press SETUP.
MANUAL SET
PROGRAM AE
P EFFECT
D EFFECT
WHT BAL
AUTO SHTR
[ SETUP ] : END
3 Select (DISC SET) with v/V, then press ENTER.
DISC SET
REC MODE
FORMAT
FINALISE
UNFINALISE
DISC TITLE
[ SETUP ] : END
RETURN
SP
REMAIN
4 Select [REC MODE] with v/V, then press ENTER.
The remaining time differs depending on the recording mode.
DISC SET
REC MODE
FORMAT
FINALISE
UNFINALISE
DISC TITLE
[ SETUP ] : END
RETURN
HQ
SP
LP
REMAIN
5 Select the desired recording mode with v/V, then press ENTER.
Shooting movies/still images
[30min]
[30min]
Recording mode Recording time* Details
HQ 20 minutes High quality
SP 30 minutes Standard play
LP 60 minutes Long play
* • The numbers are for the reference.
• The picture quality generally improves as the recording time decreases.
• The table shows approximate recording time and the above numbers apply to
a single-sided disc, and it will be doubled for a double-sided disc.
6 Press SETUP.
The SETUP display disappears from the LCD display.
Notes
•You can record for a longer time in the LP mode, but the recording mode is degraded
compared with the SP mode, and block noise may appear in scenes with quick
movement.
•Recording time may shorten depending on the type of images you are shooting.
33-GB
Page 34

Shooting movies/still images
Shooting still images
Perform “Getting Started” from step 1 to 6 beforehand (page 15).
The following operation is common with VIDEO mode and VR mode.
7, 8
6
1
3
2
5
4
1 Remove the lens cap by pressing both knobs on the sides of the cap.
2 Install the battery pack or connect the AC adaptor (page 15).
3 Open the LCD screen while pressing OPEN.
The image is not displayed in the viewfinder when the LCD screen opens.
4 Set the mode dial to (Still).
5 Turn the power on by sliding the POWER switch upward while pressing the
green button.
6 Insert a disc (page 26).
This sets your camcorder to standby.
-
R
FINE
0
VIDEO
34-GB
Page 35

Shooting movies/still images
7 Press and hold PHOTO down lightly, then check out the image.
When the AE/AF lock indicator (z) stops flashing and remains on, your
camcorder is ready for shooting. The brightness of the image and focus are
adjusted, are targeted for the middle of the image, and are set.
FINE
When you press PHOTO of the Remote Commander, the image appeared on
the LCD display is recorded at once.
8 Press PHOTO all the way down.
The CAPTURE indicator appears after the shutter sounds. Recording is
complete when the bar scroll indicator disappears.
FINE
The image displayed when you pressed PHOTO all the way down in this step
will be recorded.
Number of recorded images
-
R
0
VIDEO
-
R
VIDEO
Shooting movies/still images
Notes
•When the mode dial is set to (Still), the following functions do not work.
– Wide mode
– Digital zoom
– SteadyShot
– Super NightShot
– Colour Slow Shutter
– Fader
– Picture effect
– Digital effect
– The Sports lesson feature of [PROGRAM AE] (The indicator flashes.)
•When the Access/Open lamp lights in red, data is being recorded on the disc. Take
note of the following when data is being recorded, or the data and the disc may be
damaged.
– Do not shock or vibrate the camcorder.
– Do not turn the power off.
– Do not remove the battery pack or disconnect the AC adaptor.
– Do not open the disc cover.
•When you press PHOTO lightly in step 7, the image momentarily flickers. This is not a
malfunction.
•You can neither turn off the power nor press PHOTO while CAPTURE appears on the
LCD display.
•The time to access the disc for recording may vary depending on the type of still
images.
35-GB
Page 36

Shooting movies/still images
Tips
•The amount of recording data may vary depending on the settings for image quality
and image size, and the type of images you are shooting.
•The recording data (date/time or various settings in effect when shooting) are not
displayed while recording. However, they are recorded automatically onto the disc.
To display the recording data, press DATA CODE on the Remote Commander during
playback.
•The angle of view for still images is slightly wider compared with the angle of view of
the movie mode (DCR-DVD200E only).
•If you leave your camcorder powered by battery for 5 minutes while a disc is inserted,
your camcorder automatically turns off. This is to save battery power and to prevent
battery wear. Set the POWER switch to OFF (CHG) once, then set to ON, and your
camcorder is set to a standby mode. You can cancel the automatic power-off by setting
the (SETUP MENU) – [A.SHUT OFF] menu item to [NEVER] in the SETUP
display.
To Use the zoom feature
Move the power zoom lever a little for a slower zoom. Move it further for a faster zoom.
For details, see page 32.
36-GB
Page 37

Shooting movies/still images
To select the still image quality
You can select the image quality for still image recording.
The default setting is [FINE].
1 Set the mode dial to (Still).
2 Press SETUP.
MANUAL SET
PROGRAM AE
FLASH MODE
FLASH LVL
WHT BAL
[ SETUP ] : END
3 Select (CAMERA SET) with v/V, then press ENTER.
Shooting movies/still images
CAMERA SET
SELFTIMER
BURST
QUALITY
IMAGESIZE
N. S. LIGHT
[ SETUP ] : END
OFF
RETURN
4 Select [QUALITY] with v/V, then press ENTER.
The amount of recording data varies depending on the settings for image
quality.
CAMERA SET
SELFTIMER
BURST
QUALITY
IMAGESIZE
N. S. LIGHT
[ SETUP ] : END
RETURN
FINE
STANDARD
REMAIN
[2000]
5 Select the desired image quality with v/V, then press ENTER.
6 Press SETUP
The SETUP display disappears from the LCD display.
Image quality settings
Setting Meaning
FINE (FINE) Use this mode when you want to record high quality
STANDARD (STD) This is the standard image quality level for your
images. Fine images are compressed to about 1/4.
camcorder. Standard images are compressed to about
1/10.
37-GB
Page 38

Shooting movies/still images
To select the still image size (DCR-DVD200E only)
You can select either of 2 image sizes, 1152 × 864 or 640 × 480. The default setting is
1152 × 864.
1 Set the mode dial to (Still).
2 Press SETUP.
MANUAL SET
PROGRAM AE
FLASH MODE
FLASH LVL
WHT BAL
[ SETUP ] : END
3 Select (CAMERA SET) with v/V, then press ENTER.
CAMERA SET
SELFTIMER
BURST
QUALITY
IMAGESIZE
N. S. LIGHT
[ SETUP ] : END
OFF
RETURN
4 Select [IMAGESIZE] with v/V, then press ENTER.
The amount of recording data varies depending on the settings for image size.
CAMERA SET
SELFTIMER
BURST
QUALITY
IMAGESIZE
N. S. LIGHT
[ SETUP ] : END
RETURN
1152 x 864
640 x 480
REMAIN
[2000]
38-GB
5 Select the desired image size with v/V, then press ENTER.
The indicator changes as follows:
1152 640
6 Press SETUP
The SETUP display disappears from the LCD display.
File size of still images
Image quality File size
640 × 480 image size 1152 × 864 image size*
FINE 150 KB 500 KB
STANDARD 60 KB 200 KB
The table shows approximate file size.
* DCR-DVD200E only.
Tip
The image size is 640 × 480 for DCR-DVD100E.
Page 39

Shooting movies/still images
To shoot images continuously (BURST, DCR-DVD200E only)
You can record still images continuously by setting [BURST] beforehand.
It takes about 10 seconds to record the continuous images on the disc. You cannot shoot
still images while the camera is recording.
NORMAL [a]
Your camcorder shoots up to 4 still images in 1152 × 864 size or 12 still images in
640 × 480 size at about 0.7 sec intervals. ( )
[a]
EXP BRKTG (Exposure bracketing) [b]
Your camcorder automatically shoots 3 images at about 0.7 sec intervals at different
exposures. ( )
[b]
1 Set the mode dial to (Still).
2 Press SETUP.
MANUAL SET
PROGRAM AE
FLASH MODE
FLASH LVL
WHT BAL
Shooting movies/still images
[ SETUP ] : END
3 Select (CAMERA SET) with v/V, then press ENTER.
CAMERA SET
SELFTIMER
BURST
QUALITY
IMAGESIZE
N. S. LIGHT
[ SETUP ] : END
OFF
RETURN
4 Select [BURST] with v/V, then press ENTER.
CAMERA SET
SELFTIMER
BURST
QUALITY
IMAGESIZE
N. S. LIGHT
[ SETUP ] : END
RETURN
OFF
NORMAL
EXP BRKTG
39-GB
Page 40

Shooting movies/still images
5 Select [NORMAL] or [EXP BRKTG] with v/V, then press ENTER.
CAMERA SET
SELFTIMER
BURST
QUALITY
IMAGESIZE
N. S. LIGHT
[ SETUP ] : END
NORMAL
RETURN
6 Press SETUP.
The SETUP display disappears from the LCD display.
7 Press PHOTO all the way down.
Images are recorded continuously as the settings specified above.
In the [NORMAL] settings, images are recorded continuously to the maximum
number while pressing PHOTO.
Notes
•The number of continuous images you can shoot may vary depending on the image
size and the remaining of the disc.
•The flash unit (optional) is disabled during continuous shooting.
Tips
•Shooting with the self-timer or the Remote Commander, images are automatically
recorded up to the maximum number possible.
•The effect of exposure bracketing may be difficult to recognise on the LCD display. It
is recommended that you connect your camcorder to a TV or a computer to see its
effect.
40-GB
Number of still images recordable in a disc
Your camcorder compresses image data in JPEG format (extension .jpg).
Default image data file name is as following:
•100-0001: This file name appears on the LCD display of your camcorder.
•DSC00001.jpg: This file name appears on the display of your personal computer.
Number may vary depending on the settings of the image quality, the image size and
the type of images you are shooting.
Image quality Image size Recordable number**
FINE 1152 × 864* 2 150
640 × 480 5 100
STANDARD 1152 × 864* 4 100
640 × 480 8 100
* DCR-DVD200E only.
** The table shows approximate recordable number and the above numbers apply to a
single-sided disc, and it will be doubled for a double-sided disc.
Note
On image data compatibility
Image data files recorded by your camcorder conform with the Design Rule for Camera
File Systems standard established by the JEITA (Japan Electronics and Information
Technology Industries Association).
Page 41
Shooting techniques to match your circumstances
Shooting backlit subjects – BACK LIGHT
When you shoot a subject with the light source
behind the subject or a subject with a light
background, use the backlight.
BACK LIGHT
button
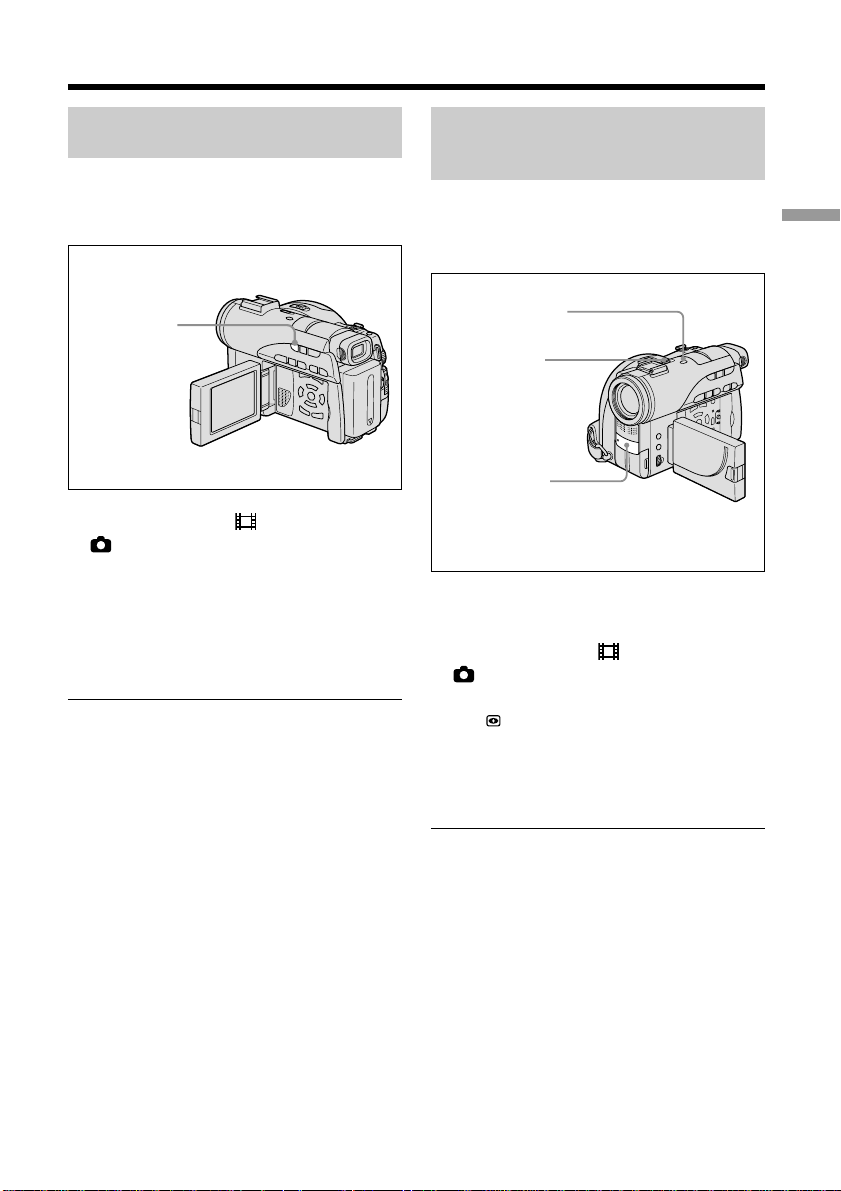
1 Set the mode dial to (Movie) or
(Still).
2 Press BACK LIGHT.
The . indicator appears on the LCD
display.
To cancel BACK LIGHT
Press BACK LIGHT again.
Note
If you press EXPOSURE (page 48) when
shooting with BACK LIGHT, the backlight will
be cancelled.
Shooting in the dark – NightShot/Super NightShot/ Colour Slow Shutter
NightShot enables you to shoot a subject in the
night or in a dark place. When using Night
Shot, the picture may be recorded in incorrect
or unnatural colours.
SUPER NS/COLOUR
SLOW S button
NIGHTSHOT
switch
NIGHTSHOT
light emitter
To use NightShot
1 Set the mode dial to (Movie) or
(Still).
2 Slide the NIGHTSHOT switch to ON.
The and “NIGHTSHOT” indicators flash
on the LCD display.
To cancel the NightShot mode
Slide the NIGHTSHOT switch to OFF.
Shooting movies/still images
Notes
•Do not use the NightShot mode in bright
places (e.g. outdoors in the daytime). This
may cause your camcorder to malfunction.
•If focusing is difficult with the autofocus
mode when using the NightShot mode, focus
manually.
•While recording using the NightShot Light,
do not obstruct the Infrared rays (NightShot
Light) emitter with your finger.
•While using NightShot, you cannot use the
following functions:
–Exposure
–PROGRAM AE (The indicator flashes)
–White balance
41-GB
Page 42

Shooting techniques to match your circumstances
To use Super NightShot
The Super NightShot makes subjects more
than 16 times brighter than those recorded in
the NightShot.
1 Set the mode dial to (Movie).
2 Slide the NIGHTSHOT switch to ON.
3 Press SUPER NS.
The and ”SUPER NIGHTSHOT”
indicators flash on the LCD display.
To cancel Super NightShot
Press SUPER NS again to make the S indicator
disappear. To cancel NightShot, slide
NIGHTSHOT to OFF.
Notes
•You cannot use Super NightShot to record
still images.
•While using Super NightShot, the shutter
speed is automatically adjusted depending
on the brightness. At this time, the motion of
the picture may slow down.
•While using Super NightShot, you cannot use
the following functions:
–Fader
–Exposure
–Digital effect
–PROGRAM AE
–White balance
To use Colour Slow Shutter
Colour Slow Shutter enables you to record
colour images in a dark place.
Colour Slow Shutter may not work normally in
total darkness.
1 Set the mode dial to (Movie).
2 Slide the NIGHTSHOT switch to OFF.
3 Press COLOUR SLOW S.
The and ”COLOUR SLOW SHUTTER”
indicators flash on the LCD display.
To cancel Colour Slow Shutter
Press COLOUR SLOW S again to make the
indicator disappear.
Notes
•You cannot use Colour Slow Shutter to
record still images.
•While using Colour Slow Shutter, the shutter
speed is automatically adjusted depending
on the brightness. At this time, the motion of
the picture may slow down.
•While using Colour Slow Shutter, you cannot
use the following functions:
–Fader
–Exposure
–Digital effect
–PROGRAM AE
To use the NightShot Light
The picture will be clearer with the NightShot
Light on.
NightShot Light rays are infrared and so are
invisible. The maximum shooting distance
using the NightShot Light is about 3 m.
To enable the NightShot Light, set
(CAMERA SET) – [N.S.LIGHT] to ON in the
SETUP display.
The default setting is ON.
42-GB
Page 43
Shooting techniques to match your circumstances
Shooting with the subject checking the image – Mirror mode
The picture on the LCD display is a mirrorimage. However, the picture will be normal
when recorded.
2
3
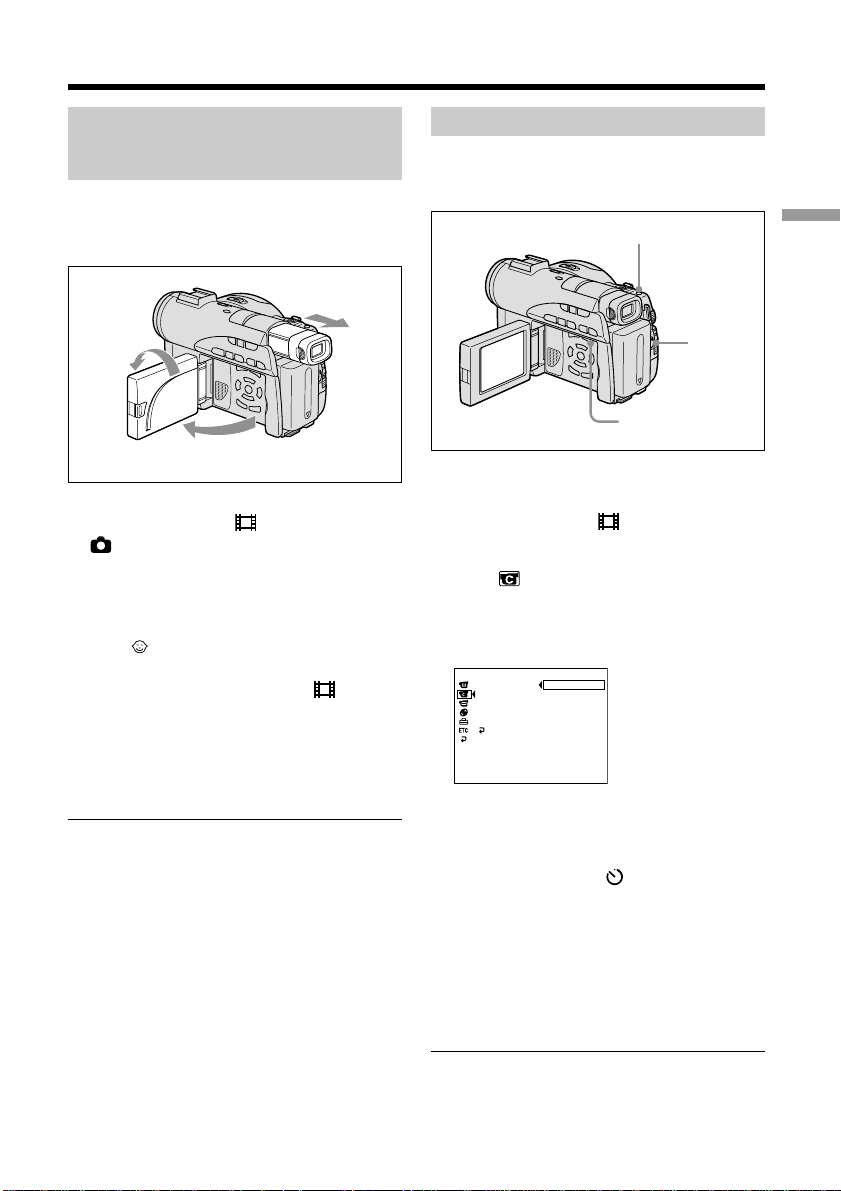
1 Set the mode dial to (Movie) or
(Still).
2 Extend the viewfinder.
3 Open and rotate the LCD screen 180
degrees.
The indicator appears in the
viewfinder and on the LCD display.
When the mode dial is set to
(Movie), Xz appears in the standby
mode, and z appears in the recording
mode. Some indicators appear mirrorreversed and others are not displayed.
Self-timer recording
You can also use the Remote Commander for
this operation.
PHOTO button
START/
STOP
button
SETUP button
On shooting movies
1 Set the mode dial to (Movie).
2 Press SETUP.
3 Select (CAMERA SET) with v/V, then
press ENTER.
4 Select [SELFTIMER] withv/V, then press
ENTER.
CAMERA SET
SELFTIMER
D ZOOM
16 : 9WIDE
STEADYSHOT
N. S. LIGHT
RETURN
[ SETUP ] : END
OFF
ON
Shooting movies/still images
Note
The viewfinder automatically turns off when
using the LCD display, except in the mirror
mode.
5 Select [ON] with v/V, then press ENTER.
6 Press SETUP.
The SETUP display disappears from the
LCD display and the (self-timer)
indicator appears.
7 Press START/STOP.
Self-timer starts counting down with a
beep. In the last 2 seconds of the
countdown, the beep gets faster, then
recording starts automatically 10 seconds
after pressing START/STOP.
Tip
To stop the countdown, press START/STOP.
To restart the countdown, press START/STOP
again.
43-GB
Page 44

Shooting techniques to match your circumstances
On shooting still images
1 Set the mode dial to (Still), then perform
Steps 2 to 6 on the previous page .
2 Press PHOTO all the way down.
Self-timer starts counting down with a
beep. In the last 2 seconds of the
countdown, the beep gets faster, then
recording starts automatically 10 seconds
after pressing PHOTO.
Notes
•When the self-timer recording is finished, the
self-timer is automatically cancelled.
•You can set self-timer during the standby
only.
•You cannot stop the count-down on shooting
still images by pressing PHOTO.
To cancel self-timer
Set (CAMERA SET) – [SELFTIMER] to
[OFF] in the SETUP display during the
standby.
Adjusting the white balance manually
Normally white balance is adjusted
automatically. Adjust manually in the
following cases:
•When shooting at the place that the light
condition changes such as a party hall.
•When shooting a night scene and a neon
sign.
1 Set the mode dial to (Movie) or
(Still).
2 Press SETUP.
3 Select (MANUAL SET) with v/V, then
press ENTER.
MANUAL SET
PROGRAM AE
P EFFECT
D EFFECT
WHT BAL
AUTO SHTR
[ SETUP ] : END
AUTO
RETURN
4 Select [WHT BAL] with v/V, then press
ENTER.
MANUAL SET
PROGRAM AE
P EFFECT
D EFFECT
WHT BAL
AUTO SHTR
RETURN
[ SETUP ] : END
AUTO
HOLD
OUTDOOR
INDOOR
44-GB
5 Select the desired white balance with v/V,
then press ENTER.
HOLD :
When recording a single-coloured subject
or background
(OUTDOOR) :
•When recording a sunset/sunrise, just
after sunset, just before sunrise
•When recording a neon signs, or
fireworks
•Under a colour-matching fluorescent
lamp
n (INDOOR) :
•Where lighting condition changes quickly
•When recording in TV lighting in a studio
•Under sodium lamps or mercury lamps
6 Press SETUP.
The SETUP display disappears from the
LCD display.
Page 45

Shooting techniques to match your circumstances
To return to the automatic white
balance mode
Set (MANUAL SET) – [WHT BAL] to
[AUTO] in the SETUP display.
Note
In the [HOLD] white balance mode, set the
white balance to [AUTO] and reset it to
[HOLD] after a few seconds:
–when you change the [PROGRAM AE]
setting.
–when you take your camcorder outdoors
from inside a house, or vice versa.
Tips
•If the picture is being taken in a studio lit by
TV lighting, it is recommended that you
record in the [INDOOR] mode.
•When you record under fluorescent lighting,
use the [AUTO] or [HOLD] mode.
Your camcorder may not adjust the white
balance correctly in the [INDOOR] mode.
•In the automatic white balance mode, point
your camcorder at a white subject for about
10 seconds after turning the power on to get
a better adjustment:
–after you replace the battery pack.
–when you take your camcorder outdoors
from inside a house while holding the
exposure, or vice versa.
•When you slide the NIGHTSHOT switch to
ON, white balance returns to [AUTO].
Shooting for the wide-screen TV – Wide mode
You can record a 16:9 wide picture to watch on
a 16:9 wide-screen TV (16:9WIDE).
Black bands appear on the LCD display during
recording in 16:9WIDE mode [a]. The picture
during playback on a normal TV [b]* or on a
wide-screen TV [c] is compressed in the
longwise direction. If you set the screen mode
of the wide-screen TV to the full mode, you
can watch pictures of normal images [d].
Refer also to the operating instructions of your
TV.
[a]
16:9
WIDE
[b][c]
Shooting movies/still images
[d]
* The picture played back in the wide mode on
a normal TV appears the same as the picture
played back in the wide mode on your
camcorder [a].
45-GB
Page 46

Shooting techniques to match your circumstances
1 Set the mode dial to (Movie).
2 Press SETUP.
MANUAL SET
PROGRAM AE
P EFFECT
D EFFECT
WHT BAL
AUTO SHTR
[ SETUP ] : END
3 Select (CAMERA SET) with v/V, then
press ENTER.
CAMERA SET
SELFTIMER
D ZOOM
16 : 9WIDE
STEADYSHOT
N. S. LIGHT
[ SETUP ] : END
OFF
RETURN
4 Select [16:9WIDE] with v/V, then press
ENTER.
CAMERA SET
SELFTIMER
D ZOOM
16 : 9WIDE
STEADYSHOT
N. S. LIGHT
[ SETUP ] : END
RETURN
OFF
ON
Notes
•You cannot select [OLD MOVIE] during
recording in the wide mode.
•You cannot change a movie recorded in the
16:9WIDE mode to the normal aspect.
5 Select [ON] with v/V, then press ENTER.
CAMERA SET
SELFTIMER
D ZOOM
16 : 9WIDE
STEADYSHOT
N. S. LIGHT
[ SETUP ] : END
ON
RETURN
6 Press SETUP.
The SETUP display disappear from the
LCD display.
To cancel the wide mode
Set [16:9WIDE] to [OFF] in step 5.
46-GB
Page 47

Shooting techniques to match your circumstances
Optimizing the camera automatically – PROGRAM AE
SPOTLIGHT*
This effect prevents people’s faces, for
example, from appearing excessively white
when shooting subjects lit by strong light.
PORTRAIT (soft portrait)
This effect brings out the subject while creating
a soft background for subjects such as people
or flowers.
SPORTS (sports lesson)*
This effect minimises camera-shake on fastmoving subjects such as in tennis or golf.
BEACH&SKI*
This effect prevents people’s faces from
appearing dark in strong light or reflected
light, such as at a beach in midsummer or on a
ski slope.
SUNSETMOON (sunset & moon)**
This effect allows you to maintain atmosphere
when you are recording sunsets, general night
views, fireworks displays and neon signs.
LANDSCAPE**
This effect is for when you are recording
distant subjects such as mountains, and
prevents your camcorder from focusing on
glass or metal mesh in windows when you are
recording a subject behind glass or a screen.
1 Set the mode dial to (Movie) or
(Still).
2 Press SETUP.
MANUAL SET
PROGRAM AE
P EFFECT
D EFFECT
WHT BAL
AUTO SHTR
[ SETUP ] : END
3 Select (MANUAL SET) with v/V, then
press ENTER.
MANUAL SET
PROGRAM AE
P EFFECT
D EFFECT
WHT BAL
AUTO SHTR
[ SETUP ] : END
AUTO
RETURN
4 Select [PROGRAM AE] with v/V, then
press ENTER.
MANUAL SET
PROGRAM AE
P EFFECT
D EFFECT
WHT BAL
AUTO SHTR
[ SETUP ] : END
RETURN
AUTO
SPOTLIGHT
PORTRAIT
SPORTS
BEACH&SKI
SUNSETMOON
LANDSCAPE
5 Select the desired effect with v/V, then
press ENTER.
MANUAL SET
PROGRAM AE
P EFFECT
D EFFECT
WHT BAL
AUTO SHTR
[ SETUP ] : END
SPOTLIGHT
RETURN
Shooting movies/still images
* Your camcorder focuses only on subjects in
the middle to far distance.
** Your camcorder focuses only on distant
subject.
6 Press SETUP.
The SETUP display disappears from the
LCD display.
To cancel PROGRAM AE
Set [PROGRAM AE] to [AUTO] in step 5.
Notes
•The following functions do not work with
PROGRAM AE:
–Colour Slow Shutter
–OLD MOVIE
•When NIGHTSHOT is set to ON, PROGRAM
AE does not work. (The indicator flashes.)
•You cannot use SPORTS to record still
images. (The indicator flashes.)
47-GB
Page 48
Shooting techniques to match your circumstances
Adjusting the exposure manually
Adjust the exposure manually in the following
cases:
– when you need a fine adjustment for subjects
against the light.
– when the subject is too bright against the
background.
– when recording dark pictures (e.g. night
scenes).
2
3
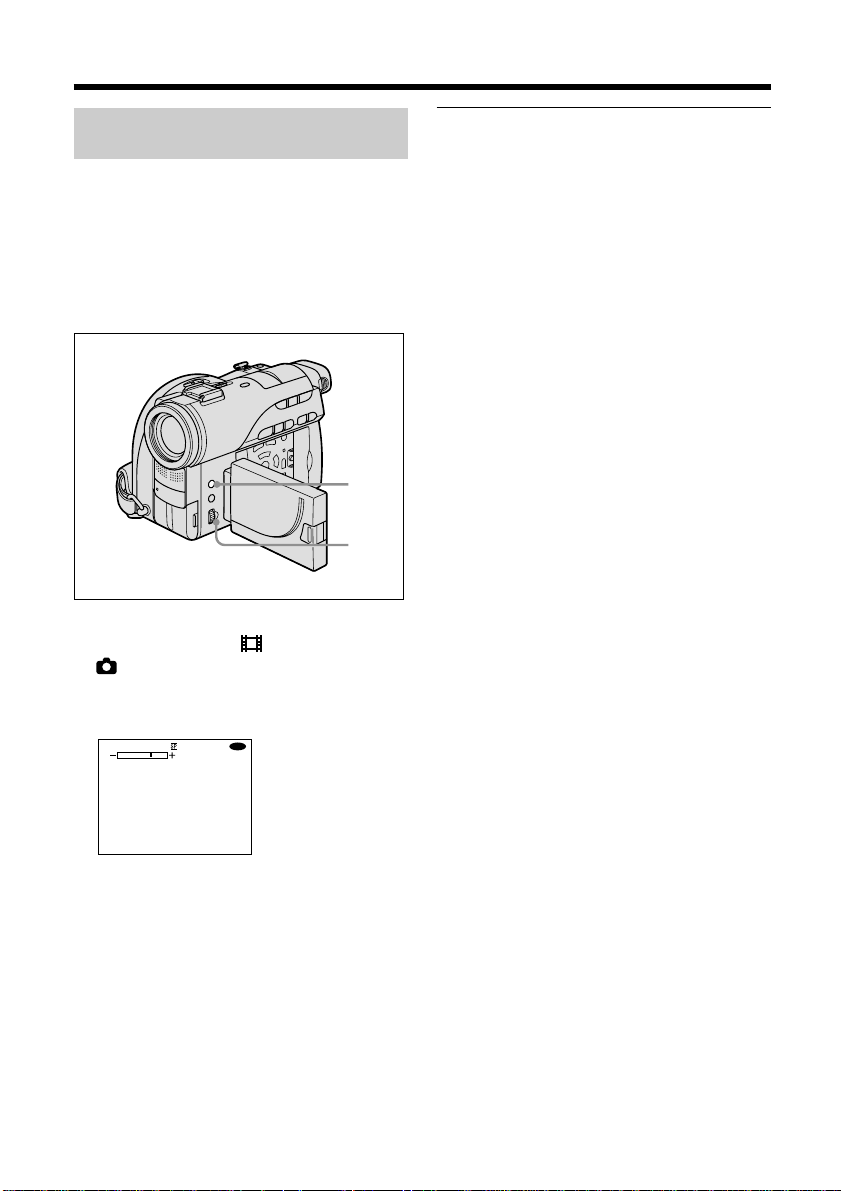
1 Set the mode dial to (Movie) or
(Still).
2 Press EXPOSURE.
The exposure indicator appears.
-
R
0:00:00
VIDEO
Notes
•When you adjust the exposure manually, the
following functions do not work:
–Colour Slow Shutter
–BACK LIGHT
•Your camcorder automatically returns to the
automatic exposure setting:
–if you change the PROGRAM AE effect.
–if you slide the NIGHTSHOT switch to ON,
while adjusting the exposure manually.
3 Turn the dial to adjust the brightness.
+: brighter
-: darker
To return to the automatic
exposure
Press EXPOSURE again.
48-GB
Page 49
Shooting techniques to match your circumstances
Focusing manually
Normally, focus is adjusted automatically.
However, you can gain better results by
manually adjusting the focus in the following
cases:
•The autofocus is not effective when shooting
–Subjects through glass coated with water
droplets
–Horizontal stripes
–Subjects with little contrast with
backgrounds such as walls or sky
•Shooting a stationary subject when using a
tripod
•When you want to change the focus from a
subject in the foreground to a subject in the
background
To return to the autofocus
Press FOCUS again.
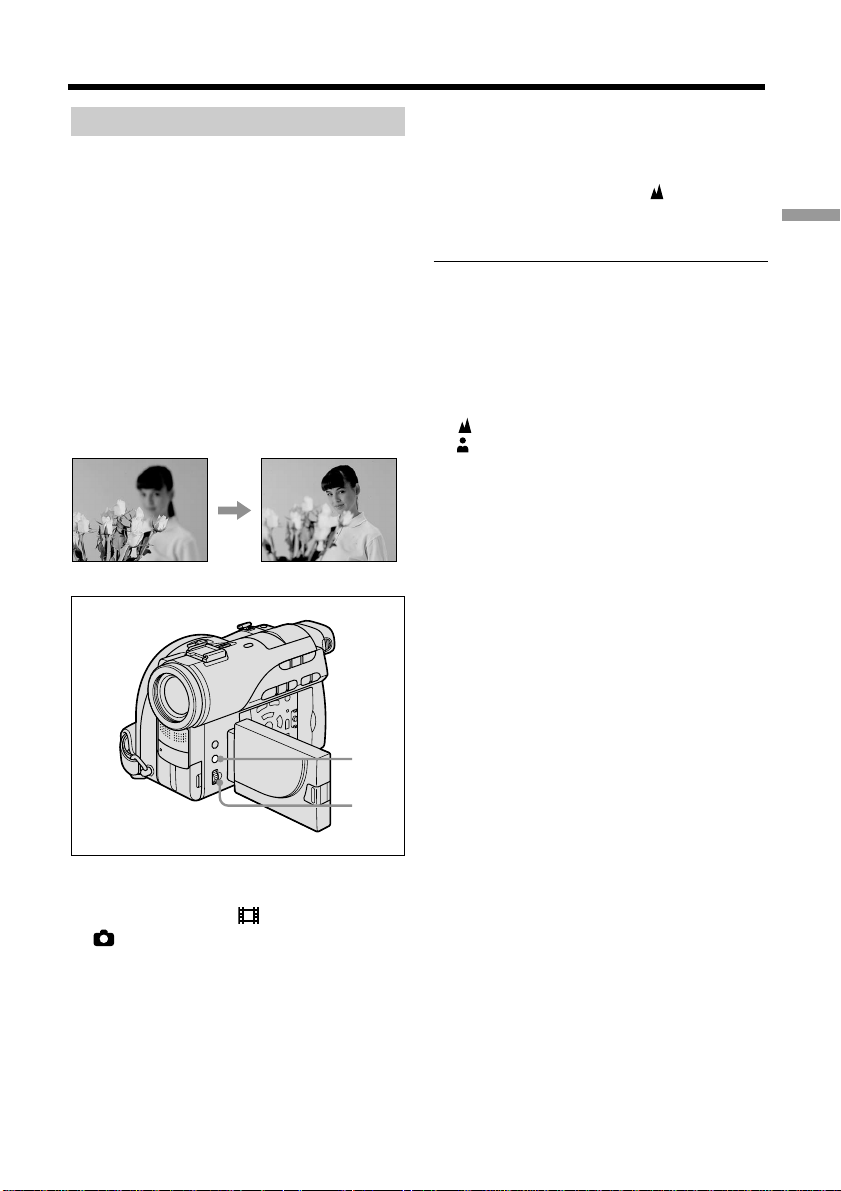
To record distant subjects
Turn the dial to FAR until the indicator
appears.
The focus is fixed at the most distant position.
Tips
•It is easier to focus on subjects if you adjust
the zoom to shoot at the “W” (wide-angle)
position after adjusting the focus at the “T”
(telephoto) position.
•When you shoot close to the subject, focus at
the end of the “W” (wide-angle) position.
•9 changes as follows:
– when recording a distant subject.
– when the subject is too close to focus on.
Shooting movies/still images
2
3
1 Set the mode dial to (Movie) or
(Still).
2 Press FOCUS.
The 9 (manual focus) indicator appears.
3 Viewing the viewfinder or the LCD display,
turn the dial to adjust the focus.
49-GB
Page 50

Shooting with special effects
Using fader (for movies only)
You can fade in or out to give your movie a
more professional appearance.
STBY
FADER
OVERLAP*
WIPE*
STBY
* Fade in only
REC
REC
1 Set the mode dial to (Movie).
2 When fading in
In the standby mode, press the FADER
button until the desired fader indicator
flashes.
When fading out
In the recording mode, press FADER until
the desired fader indicator flashes.
-
R
0:00:00
FADE R
The indicator changes as follows:
FADER t OVERLAP t WIPE
The last selected fader mode is indicated
first.
VIDEO
no indicator (off)
3 Press START/STOP.
The fader indicator stops flashing, then
remains lit.
After fade in/out ends, the fader indicator
disappears.
To cancel fader
Before pressing START/STOP in step 3, press
FADER until the indicator disappears.
50-GB
FADER
button
Notes
•You cannot use the following functions while
using fader. Also you cannot use fader while
using following function.
–Digital effect
–Super NightShot
–Colour Slow Shutter
•When the OVERLAP or WIPE indicator
appears in the standby mode, your
camcorder automatically stores the image
recorded on a disc. While the image is being
stored, the indicators flash fast, and the
playback picture disappears temporarily.
Page 51

Shooting with special effects
Using special effects – Picture effect/Digital effect
You can digitally process movies to obtain
special effects like those in films or on TV.
Picture effect
SEPIA: The picture appears in sepia.
B&W: The picture appears in
monochrome (black-and-white).
PASTEL: The picture appears like a pale
pastel drawing.
MOSAIC: The picture appears mosaic-
patterned.
PASTEL MOSAIC
Digital effect
LUMI. (Luminance key):
You can swap a brighter area in a still image
with a moving picture.
OLD MOVIE:
You can add an old movie-type atmosphere to
pictures. Your camcorder automatically sets
the wide mode to ON and picture effect to
SEPIA, and sets the appropriate shutter speed.
Still image
LUMI.
1 Set the mode dial to (Movie).
2 Press SETUP.
MANUAL SET
PROGRAM AE
P EFFECT
D EFFECT
WHT BAL
AUTO SHTR
3 Select (MANUAL SET) with v/V, then
press ENTER.
MANUAL SET
PROGRAM AE
P EFFECT
D EFFECT
WHT BAL
AUTO SHTR
[ SETUP ] : END
AUTO
RETURN
4 Select [P EFFECT] or [D EFFECT] with v/
V, then press ENTER.
MANUAL SET
D EFFECT
OFF
LUMI .
OLD MOVIE
[ SETUP ] : END
5 Select the desired picture effect mode with
v/V, then press ENTER.
In the [LUMI.] mode, the still image
displayed when ENTER is pressed is
recorded in the memory. Adjust the degree
of the still image swapped by a movie with
b (reduce the degree)/B (increase the
degree).
MANUAL SET
D EFFECT
LUMI.
Bars: Displayed in
LUMI. only.
[ SETUP ] : END
6 Press SETUP.
The SETUP display disappears from the
LCD display.
To cancel effect
Set [P EFFECT] or [D EFFECT] to [OFF] in step
5.
Shooting movies/still images
[ SETUP ] : END
51-GB
Page 52

Shooting with special effects
Notes
•The following functions do not work during
digital effect:
–Fader
–Super NightShot
–Colour Slow Shutter
•While using picture effect, you cannot select
OLD MOVIE.
•The following functions do not work in OLD
MOVIE:
–Wide mode
–Picture effect
–PROGRAM AE
52-GB
Page 53

Other functions
DELETE?
VIDEO
0:00:28
Checking the last scene – Review
You can check the last recorded scene quickly.
REVIEW
button
1 Set the mode dial to (Movie) or
(Still).
2 Press REVIEW.
The playback of the latest scene starts.
To return to recording
Press REVIEW again.
Note
The recording data does not appear on the
Review display.
Tip
When reviewing still images recorded
continuously (BURST, DCR-DVD200E only),
you can forward/backward the images with
./>.
Deleting the last scene (DVD-RWs only)
If the checked scene is unnecessary, you can
delete it on the spot.
Note
You can delete the last scene only when it has
been recorded on DVD-RWs. Any data once
recorded on DVD-Rs cannot be deleted.
EDIT
button
1 Press EDIT during the review.
A deletion confirmation display appears.
-
RW
0:00:28
0:00:28
VIDEO
REVIEW
DELETE?
DELETE?
EXEC.
[ REVIEW ] : END
VIDEO
RET.
2 Select [EXEC.] with b/B, then press
ENTER.
The latest scene is deleted.
Shooting movies/still images
To cancel the deletion
Select [RET.] in step 2.
Notes
•When you delete the still images recorded
continuously (BURST, DCR-DVD200E only),
all the images are deleted once. To delete the
specific image recorded continuously, see
“Deleting movies/still images” (VR mode
only, page 87).
•You cannot delete the last scene:
–when you move the mode dial.
–when you turn the power off.
–when you eject the disc.
53-GB
Page 54

Other functions
Changing the disc title
You can make a title on each disc. As the
default, the date the disc was first used is
added as a disc title.
1 Press SETUP.
MANUAL SET
PROGRAM AE
P EFFECT
D EFFECT
WHT BAL
AUTO SHTR
[ SETUP ] : END
2 Select (DISC SET) with v/V, then press
ENTER.
DISC SET
REC MODE
FORMAT
FINALISE
UNFINALISE
DISC TITLE
[ SETUP ] : END
RETURN
SP
REMAIN
[30min]
3 Select [DISC TITLE] with v/V, then press
ENTER.
The DISC TITLE display appears.
DISC TITLE
1 1 2003
P1
13:23
6 When you have finished entering all the
characters, select [SET] with b/v/V/B,
then press ENTER.
The disc title is set and the display returns
to the SETUP display.
DISC SET
REC MODE
FORMAT
FINALISE
UNFINALISE
DISC TITLE
[ SETUP ] : END
RETURN
BEACH
7 Press SETUP.
The SETUP display disappears from the
LCD display.
Note
When you change a disc title already set by
other devices, the 21st and subsequent
characters are deleted.
Tips
• You can add a space by selecting [ ] between [&]
and [?].
• When you press SETUP in step 6, the disc title is set
and the SETUP display disappears from the LCD
display.
[ SETUP ] : END
4 Delete unnecessary characters by selecting
[B] with b/v/V/B, then press ENTER.
Characters are deleted from the end.
5 Select the desired character with
b/v/V/B, then press ENTER.
Repeat this step to enter a desired title. Up
to 20 characters can be registered.
DISC TITLE
BEACH
[ SETUP ] : END
P1
54-GB
To cancel changing the disc title
In any step from 2 to 5, select [ESC] with
b/v/V/B, then press ENTER.
Page 55

— Viewing the recordings —
Playing a disc on your camcorder
Choosing and viewing a recording – Visual Index
The recorded movies/still images are displayed as a list in the Visual Index display.
You can find the desired scene quickly using this convenient index. If you close the
LCD screen, you can monitor the playback picture in the viewfinder. You can control
playback using the Remote Commander supplied with your camcorder.
2
VISUAL INDEX
button
b/v/V/B/ENTER
buttons
1 Set the mode dial to (Play/Edit).
2 Open the LCD screen while pressing OPEN.
The Visual Index display appears.
N (PLAY) button
Viewing the recordings
x (STOP) button
1
5
Movie tab
Still image tab
1/2
Forwards the page.
Shows current page/total pages.
55-GB
Page 56

Playing a disc on your camcorder
004
VIDEO
0:03:12
3 Select the (Movie) tab or the (Still) tab with b/B according to the kind
of scene you want to play back.
A list of movies or still images appears.
1/2
4 Select the desired movie or still image with b/v/V/B, then press N.
When you select a movie, playback starts and continues until the last scene of
the movie. When you select a still image, the image appears in full screen
mode.
-
R
0:03:12
0:03:12
VIDEO
004
004
VIDEO
5 Adjust the volume when a movie is played back by pressing either +/- on
VOL. The sound is muted when the LCD screen is closed.
Tip
When the Visual Index display does not appear in step 2, press VISUAL INDEX.
56-GB
To return to the Visual Index display
Press VISUAL INDEX again.
To stop playback
Press x.
Pressing N starts playback from the point which x was pressed.
Page 57

Playing a disc on your camcorder
Various playback modes
[Movies]
The sound is muted in the various playback modes.
To pause play back (view a still image)
Press X during playback. To resume normal playback, press X again.
To advance the scene
Press > during playback.
To return to the beginning of the scene
Press . during playback.
To play a previous scene
Press . repeatedly during playback.
To locate a scene while monitoring the picture
Press and hold . or > during playback. To resume normal playback, release the
button.
On the Remote Commander, press or .*
Pressing or repeatedly switches the playback speed from 5x and 15x.
To view the picture at slow speed (slow playback)
Press on the Remote Commander during playback pause.* For slow playback in
the reverse direction, press on the Remote Commander.* The playback in the
reverse direction moves in half a second step.
To view pictures frame-by-frame
Press C on the Remote Commander in the playback pause mode.* For frame-by-frame
playback in the reverse direction, press c.* The playback in the reverse direction
moves in half a second step.
* To resume normal playback, press N.
Note
It may take some time to switch the picture from playback to forwarding/reversing or
vice versa.
Viewing the recordings
[Still images]
To display the next image
Press >.
To display the previous image
Press ..
[Marks on the buttons]
Marks on the buttons different between the camcorder and the Remote Commander.
Marks of the camcorder: Marks of the Remote Commander:
N Playback H Playback
X Pause X Pause
x Stop x Stop
> Next > Next
. Previous . Previous
Scan/Slow (forward)
Scan/Slow (backward)
C Step (forward)
c Step (backward)
57-GB
Page 58

Playing a disc on your camcorder
To display the indicators during playback – Display
Press DISPLAY/BATT INFO on your camcorder, or press DISPLAY on your Remote
Commander.
The indicators appear on the LCD display.
To make the indicators disappear, press DISPLAY/BATT INFO or DISPLAY again.
DISPLAY button
DISPLAY/BATT INFO button
To display date/time and various settings
Your camcorder automatically records not only images on the disc but also the
recording data (date/time or various settings when recorded) (Data code).
To display both the date/time and the data code, set (OTHERS) – [DATA CODE] to
[DATE/CAM] in the SETUP display.
58-GB
To change date/time and various settings
Press DATA CODE on the Remote Commander during playback.
The display changes as follows:
date/time t various settings (SteadyShot, white balance, gain, shutter speed, aperture
value, exposure mode) t no indicator
Date/time
-
R
40min
0003
1 1 2003
11:23:45
Date Time
0:00:18
VIDEO
Page 59

Playing a disc on your camcorder
Various settings (movie)
-
R
40min
0002
0:00:08
VIDEO
Various settings (still image)
-
R
40min
100-0006
6/34
VIDEO
[a]
[g]
[h]
[i]
AUTO
100 AWB
F1 . 8 0dB
[b]
[c]
[d]
0EV
F1 . 8
50
[e]
[f]
[a] SteadyShot OFF [g] Exposure value
[b] Exposure mode [h] Shutter speed
[c] White balance [i] Aperture value
[d] Gain
[e] Shutter speed
[f] Aperture value
Tips
•During recording, various settings are not displayed.
•When you use data code, bars (--- -- ----) appear if:
– the disc is unreadable due to damage or noise.
– the disc was recorded through the AUDIO/VIDEO jack.
•The data code is displayed on the TV screen if you connect your camcorder to a TV.
Viewing the recordings
59-GB
Page 60

Playing a disc on your camcorder
Magnifying recorded images – PB ZOOM
1 In the playback, playback pause or review, move the power zoom lever.
You can choose the magnification from approx. 1.1
W: Decreases the zoom ratio.
T : Increases the zoom ratio.
2 Move the enlarged image in the desired direction with b/v/V/B.
To cancel PB ZOOM
Press ENTER.
You can also cancel PB ZOOM by moving the power zoom lever toward W as far as it
will go.
Zoom lever
✕ to 5✕.
60-GB
Notes
•You cannot process externally input scenes using PB ZOOM of your camcorder.
•You cannot move a magnified circumferential image to the centre of the display.
Tips
•You cannot record images on a disc in your camcorder when you have processed the
image using the disc PB ZOOM. However, you can record images on a VCR using
your camcorder as a player.
•You can operate PB ZOOM in fast forward, fast backward, slow playback and frameby-frame playback.
•PB ZOOM is cancelled when you change the scene with ./>.
Page 61

Playing a disc on your camcorder
VIDEO
SLIDESHOW
[ ENTER ] : START
[ SETUP ] : END
100-0001
1/12
Playing still images automatically – Slide Show
You can see the automatic playback of all the still images recorded on the disc.
1 Set the mode dial to (Play/Edit).
Press VISUAL INDEX when Visual Index does not appear on the LCD display.
2 Press SETUP.
APPLI.
SLIDE SHOW
[ SETUP ] : END
3 Select (APPLI.) with v/V, then press ENTER.
APPLI.
SLIDE SHOW
[ SETUP ] : END
RETURN
READY
4 Select [SLIDE SHOW], then press ENTER.
-
SLIDESHOW
SLIDESHOW
100-0001
100-0001
R
1/12
1/12
VIDEO
VIDEO
Viewing the recordings
[ ENTER ] : START
[ ENTER ] : START [ SETUP ] : END
[ SETUP ] : END
5 Press ENTER.
Still images play back in sequence. Playback stops when all the images are
played back.
To start a slide show from a particular image
Select the desired image with ./> after step 4.
The slide show starts from the selected image and stops after all the images have been
shown.
To cancel a slide show
Press SETUP.
To pause a slide show
Press ENTER. Press ENTER again to restart the slide show.
61-GB
Page 62

Viewing recordings on TV
Connect your camcorder to your TV with the A/V connecting cable supplied with your
camcorder to watch playback pictures on the TV screen. You can operate the video
control buttons in the same way as when you monitor playback pictures on the LCD
display. When monitoring playback pictures on the TV screen, it is recommended that
you power your camcorder from a wall socket using the AC adaptor (page 18). Refer to
the operating instructions of your TV.
Open the jack cover. Connect your camcorder to the TV using the A/V connecting cable
supplied with your camcorder. Then, set the TV/VCR selector on the TV to VCR.
Switch the TV
input to LINE.
AUDIO/VIDEO
A/V connecting cable
(supplied)
: Signal flow
S VIDEO
White
Yellow
Red
INPUT
S VIDEO
VIDEO
AUDIO
TV
If your TV is already connected to a VCR
Connect your camcorder to the LINE IN input on the VCR using the A/V connecting
cable supplied with your camcorder. Set the input selector on the VCR to LINE.
If your TV or VCR is a monaural type
Connect the yellow plug of the A/V connecting cable to the video input jack and the
white or the red plug to the audio input jack on the VCR or the TV. If you connect the
white plug, the sound comes from the L (left) signal. If you connect the red plug, the
sound comes from the R (right) signal.
If your TV or VCR has a 21-pin connector (EUROCONNECTOR)
Use the 21-pin adaptor supplied with your camcorder.
This adaptor is exclusive to an output.
The models with mark printed on their bottom surfaces only.
62-GB
TV
Page 63

Viewing recordings on TV
Tips
•Pictures can be reproduced more faithfully by using an S video cable (optional). With
this connection, you do not need to connect the yellow (video) plug of the A/V
connecting cable. Connect the S video cable (optional) to the S video jacks on both
your camcorder and the TV or the VCR.
•The sound is not output on the other equipment if your camcorder is connected with
an S video cable (optional) only. Use the A/V connecting cable along with an S video
cable.
•To display the indicators on the TV, set [DISPLAY] to [V-OUT/LCD] in
(OTHERS) in the SETUP display (page 114). Then press DISPLAY/BATT INFO on
your camcorder. To turn off the indicators, press DISPLAY/BATT INFO on your
camcorder again.
Viewing the recordings
63-GB
Page 64

— Finalising a disc for other players —
Finalising a disc
You have to finalise the disc before you can play a recorded disc on other players such
as DVD players. Finalising makes the recorded disc DVD-Video compatible, and you
can play the disc on DVD-Video compatible players.
Some players cannot play discs recorded in the VR mode. Make sure of playback
compatibility with your players in advance of recording. For details, see the operating
instructions supplied with your player.
Note that you cannot record again on finalised DVD-Rs.
You can record again on DVD-RWs.
– In VIDEO mode: the disc is recordable if unfinalised.
– In VR mode: the disc is recordable after finalising.
Before finalising the disc
Place your camcorder in a stable position. It takes about a minute to a few hours
for finalising. The shorter the amount of material recorded, the longer it takes for
finalising. The procedure differs between DVD-Rs and DVD-RWs.
Notes
•Power your camcorder from a wall socket using the AC adaptor.
•If you disconnect the AC adaptor during finalising, the disc may be damaged.
•Do not vibrate your camcorder during finalising.
•Playback may pause between the scenes in some players.
1 Connect the AC adaptor to the DC IN jack on your camcorder, then connect
the mains lead to the wall socket.
2 Turn the power on by sliding the POWER switch upward pressing the green
button.
3 Press SETUP.
4 Select (DISC SET) with v/V, then press ENTER.
DISC SET
REC MODE
FORMAT
FINALISE
UNFINALISE
DISC TITLE
[ SETUP ] : END
RETURN
SP
REMAIN
[ 3min]
64-GB
5 Select [FINALISE] with v/V, then press ENTER.
The disc title is set as the date and time the disc was first used. See “Changing
the disc title” on page 54 if you want to change the disc title.
FINALISE
DISC TITLE
PHOTOMOVIE
EXECUTE
RETURN
EST. PROCESS TIME : 3min
DISC TITLE :
BEACH
PHOTOMOVIE : CREATE
[ SETUP ] : END
READY
6 When still images are included on a disc recorded in VIDEO mode, select
[PHOTOMOVIE], [CREATE] with v/V, then press ENTER. Proceed to step 7
in VR mode.
To play back still images on players such as DVD players, still images must be
converted to a movie. Converted still images are played back in sequence. The
original still images remain as JPEG files.
When still images are recorded in VR mode, perform the operation in “Saving
all the still images on a disc to a movie file” (page 77).
Page 65

Finalising a disc
7 Select [EXECUTE] with v/V, then press ENTER.
The confirmation display appears.
8 Select [YES] with v/V, then press ENTER.
Finalising starts. In VIDEO mode, the menu display for the playback on DVD
players appears shortly.
9 Press SETUP when the finalising completion message appears.
The finalising completion display disappears from the LCD display.
FINALISE
DISC TITLE
PHOTOMOVIE
EXECUTE
RETURN
EST. PROCESS TIME : 3min
DISC TITLE :
BEACH
PHOTOMOVIE : CREATE
[ SETUP ] : END
FINALISE
DISC TITLE
PHOTOMOVIE
EXECUTE
RETURN
EST. PROCESS TIME : 3min
DISC TITLE :
BEACH
PHOTOMOVIE : CREATE
[ SETUP ] : END
FINALISE
CREATE
NO
YES
EXECUTING
AVOID ANY VIBRATION
Finalising a disc for other players
0:01
To cancel finalising
Press SETUP in any step from 3 to 7.
Notes
•Do not disconnect the AC adaptor during finalising. If you need to turn the power off
for some reason, do it maintaining the order of sliding the POWER switch to OFF
(CHG) first, then disconnecting the AC adaptor when the POWER/CHG lamp turns
off. When you connect the AC adaptor and turn the power on again, finalising process
continues. Do not eject the disc until finalising is completed.
•When finalising is completed and the SETUP displays disappears with the mode dial
set to (Movie) or (Still), Z flashes on the LCD display. Eject the disc.
•PHOTOMOVIE is the settings for playback on other players. You cannot view the
PHOTOMOVIE on your camcorder. Use the slideshow to play back still images in
sequence on your camcorder (page 61).
•If you change [PHOTOMOVIE] to [CREATE] during finalising, it may take some time
for finalising. The more still images recorded on the disc, the more time it takes to
create a PHOTOMOVIE.
•If still images not compatible with your camcorder (such as still images shot using a
digital still camera and copied to a computer) are converted to a movie using
[PHOTOMOVIE], the movie turns black.
Tips
•When the finalised disc is inserted in your camcorder, the disc format display on the
upper-right corner is shown as below:
– VIDEO mode:
– VR mode:
•Still images converted to a movie are shown with .
VIDEO
VR
65-GB
Page 66

Playing back a finalised disc on other players
Note the following when using a disc on other players.
•Make sure that the vertical-shaped DVD player/computer with a DVD drive are
placed in a horizontal position when playing back 8 cm DVDs.
•Do not use the 8 cm CD adaptor with an 8 cm DVD as it may cause malfunctions.
Playing back a disc on DVD players
To play back a disc recorded in VIDEO mode
You can play back a finalised disc recorded in VIDEO mode on players that can play
back DVD-Rs or DVD-RWs.
When the disc is finalised, a menu display is provided similar to the Visual Index
display. In menu display, 6 scenes are listed per page (200 pages in maximum).
Select the scene to be played back in menu display on the DVD player.
1 1 2003 10 : 30
1 1 2003
1 1 2003
1/2
1 1 2003
15 : 15
16 : 26
1 1 2003
1 1 2003
1 1 2003
17 : 05
14 : 44
1 1 2003
16 : 02
1 1 2003 10 : 30
1
1 2003
16 : 50
Disc title (the date the disc was first used)
15 : 38
16 : 45
Recorded date
Movies
1 1 2003
17 : 10
Still images converted
1 1 2003
1 1 2003
1 1 2003
17 : 30
17 : 32
2/2
to a movie is displayed
16 : 55
after movies.
The first still image is
displayed as the
To play back still images
thumbnail.
Still images are played back as a photo movie swapping images in every 3 seconds.
Pressing m/M during playback skips 10 images.
Notes
•The disc may not be played back on some players.
•Some functions, such as playback of still images, may be disabled on some players.
•To play back still images on other players, still images must be converted to photo
movie. (page 64)
•Still images converted to a photo movie may not be played back clearly, as the
resolution (pixels) of converted photo movie is lower than that of original still images.
Tip
For details on how to use a DVD player, see operating instructions of the DVD player.
66-GB
Page 67

Playing back a finalised disc on other players
To play back a disc recorded in VR mode
You can play back a finalised disc recorded in VR mode on players that can play back
DVD-RWs in VR mode.
The operation is different depending on your player. See operating instructions of your
player.
To play back still images
The operation is different depending on your player. See operating instructions of your
player.
Notes
•To play back still images on other players, still images must be converted into photo
movie (page 77).
•Still images converted to a photo movie may not be played back clearly, as the
resolution (pixels) of converted photo movie is lower than that of original still images.
Finalising a disc for other players
67-GB
Page 68

Playing back a finalised disc on other players
Playing back movies on a computer with a DVD drive installed
The display and the operation may vary depending on the operating system of your
computer.
1 Turn on your computer.
2 Insert the finalised disc to the DVD drive of your computer.
A DVD playback application starts and the movie is played back.
When the DVD playback application does not start automatically, start the
application from the [Start] menu of your computer.
Notes
•Use the DVD drive compatible with 8 cm discs.
•A DVD playback application must have been installed on your computer.
•When playing back movies from the disc, the movie and sound may pause. In this
case, copy the data to the hard disk drive of your computer.
•The disc may not be played back on some computers. For details, see operating
instructions of your computer.
Tip
You can play back the disc on a computer without a DVD drive, by connecting your
camcorder to your computer (page 89).
Showing still images on a computer with a DVD drive installed
The display and the operation may vary depending on the operating system of your
computer. Following screens are example of Microsoft Windows XP Professional.
68-GB
1 Turn on your computer.
2 Insert the finalised disc to the DVD drive of your computer.
When a DVD playback application starts, close the application.
3 Click [Start] t [My Computer].
Or, double-click the [My Computer] icon on the desktop.
My Computer screen appears.
The date the disc was first used is recorded on the volume label of the disc.
When the disc was first used at 6:00 pm on January 1st 2003:
2003_01_01_06H00M_PM
Page 69

Playing back a finalised disc on other players
4 Right-click the DVD drive with the disc inserted, then click [Open].
Folders in the disc appear.
5 Click [DCIM] t [100MSDCF].
The list of still images recorded on the disc appears.
6 Double-click the file to be shown.
The selected still image appears on the screen.
Notes
•Use the DVD drive compatible with 8 cm discs.
•The disc may not be played back on some computers. For details, see operating
instructions of your computer.
Tip
You can play back the disc on a computer without DVD drive, by connecting your
camcorder to your computer (page 89).
Structures and file names of movies and still images
Movies and still images are stored in the following folders on the disc.
Movies: VIDEO_TS folder (on VIDEO mode)
DVD_RTAV folder (on VR mode)
Still images: DCIM\100MSDCF folder
Still image folder
Finalising a disc for other players
Movie folder
69-GB
Page 70

Recording on a finalised disc – Unfinalising
(VIDEO mode DVD-RWs only)
You can record on finalised DVD-RWs by unfinalising them. This operation is valid in
VIDEO mode only. You do not have to unfinalise a VR mode disc.
Insert a finalised DVD-RW into your camcorder beforehand.
1 Press SETUP.
MANUAL SET
PROGRAM AE
P EFFECT
D EFFECT
WHT BAL
AUTO SHTR
[ SETUP ] : END
2 Select (DISC SET) with v/V, then press ENTER.
DISC SET
REC MODE
FORMAT
FINALISE
UNFINALISE
DISC TITLE
[ SETUP ] : END
3 Select [UNFINALISE] with v/V, then press ENTER.
UNFINALISE
EXECUTE
RETURN
RETURN
SP
REMAIN
READY
[ 0min]
70-GB
EST. PROCESS TIME : 22sec
RECORDED AREA :
[ SETUP ] : END
4 Select [EXECUTE] with v/V, then press ENTER.
The confirmation display appears.
UNFINALISE
EXECUTE
RETURN
EST. PROCESS TIME : 22sec
RECORDED AREA :
[ SETUP ] : END
NO
YES
5 Select [YES] with v/V, then press ENTER.
Unfinalising starts.
UNFINALISE
EXECUTING
AVOID ANY VIBRATION
0:10
Page 71

Recording on a finalised disc – Unfinalising
(VIDEO mode DVD-RWs only)
6 Press SETUP when the unfinalising completion message appears.
The message disappears from the LCD display and you can record on the disc
again.
To cancel unfinalising
Press SETUP in any step from 2 to 4.
Notes
•Power your camcorder from a wall socket using the AC adaptor.
•If you disconnect the AC adaptor during unfinalising, the disc may be damaged.
•Do not vibrate your camcorder during unfinalising.
•You can unfinalise DVD-RWs only. You cannot make any modification to DVD-Rs
once the disc is finalised.
Tip
It takes about 20 seconds for unfinalising.
Finalising a disc for other players
71-GB
Page 72

Recording again on a used disc – Formatting
(DVD-RWs only)
You can format recorded DVD-RWs and make them new discs. Note that formatting
erases all the data recorded on the disc.
Insert a recorded DVD-RW into your camcorder beforehand.
1 Press SETUP.
MANUAL SET
PROGRAM AE
P EFFECT
D EFFECT
WHT BAL
AUTO SHTR
[ SETUP ] : END
2 Select (DISC SET) with v/V, then press ENTER.
DISC SET
REC MODE
FORMAT
FINALISE
UNFINALISE
DISC TITLE
[ SETUP ] : END
RETURN
SP
REMAIN
[ 3min]
3 Select [FORMAT] with v/V, then press ENTER.
FORMAT
REC FORMAT
EXECUTE
RETURN
EST. PROCESS TIME : 7sec
REC FORMAT : VIDEO
[ SETUP ] : END
VIDEO
ALL DATA TO BE DELETED
4 Select [REC FORMAT] with v/V, then press ENTER.
FORMAT
REC FORMAT
EXECUTE
RETURN
EST. PROCESS TIME : 7sec
REC FORMAT : VIDEO
[ SETUP ] : END
VIDEO
VR
ALL DATA TO BE DELETED
72-GB
5 Select the disc format from [VIDEO] or [VR] with v/V, then press ENTER.
FORMAT
REC FORMAT
EXECUTE
RETURN
EST. PROCESS TIME : 7sec
REC FORMAT : VIDEO
[ SETUP ] : END
VIDEO
ALL DATA TO BE DELETED
6 Select [EXECUTE] with v/V, then press ENTER.
The confirmation display appears.
FORMAT
REC FORMAT
EXECUTE
RETURN
EST. PROCESS TIME : 7sec
REC FORMAT : VIDEO
[ SETUP ] : END
NO
YES
ALL DATA TO BE DELETED
Page 73

Recording again on a used disc – Formatting (DVD-RWs only)
7 Select [YES] with v/V, then press ENTER.
Formatting starts.
FORMAT
EXECUTING
AVOID ANY VIBRATION
0:10
8 Press SETUP when the format completion message appears.
The message disappears from the LCD display. The disc is formatted and you
can record on the disc again.
To cancel formatting
Press SETUP in any step from 2 to 6.
Notes
•Power your camcorder from a wall socket using the AC adaptor.
•If you disconnect the AC adaptor during formatting, the disc may be damaged.
•Do not vibrate your camcorder during formatting.
•You can format DVD-RWs only. You cannot delete any recorded data from DVD-Rs.
•Formatting a finalised disc becomes as following. In both cases, the recorded data are
all deleted.
– In VIDEO mode: unfinalised
– In VR mode: remains finalised
A disc finalised in VR mode cannot be unfinalised by formatting, but still you can
record/edit on the disc.
Tip
It takes about 10 seconds to format a DVD-RW in VIDEO mode, and about 40 seconds
to format a DVD-RW in VR mode.
Finalising a disc for other players
73-GB
Page 74

— Using a disc in VR mode (DVD-RWs only) —
Selecting the playing order on your camcorder – Playlist
You can play movies and still images in the desired order by making the Playlist on
your DVD-RWs recorded in VR mode. You can change the playing order without actual
modification to the recorded data.
N (PLAY) button
X (PAUSE) button
x (STOP) button
. (PREV) button
> (NEXT) button
EDIT button
Registering movies or still images to the Playlist
74-GB
Insert a recorded DVD-RW in VR mode into your camcorder beforehand.
1 Set the mode dial to (Play/Edit).
2 Press EDIT.
The display to select editing object appears.
EDIT
EDIT MOVIE
EDIT STILL
EDIT PLAYLIST
[ EDIT ] : END
3 Select [EDIT PLAYLIST] with v/V, then press ENTER.
The Playlist edit display appears.
EDIT
SEL. ITEM
RET.
1/1
Page 75

Selecting the playing order on your camcorder – Playlist
ADD?
4 Select [SEL. ITEM] with b/v/V/B, then press ENTER.
EDIT
SEL. ITEM
ERASE
ADD
MOVE
DIVIDE
RETURN
SELECT
SELECT ALL
5 Select [ADD] with v/V, then press ENTER.
EDIT
SEL. ITEM
ERASE
ADD
MOVE
DIVIDE
RETURN
ALL
SELECT
SELECT
6 Select [ SELECT] (movies) or [ SELECT] (still images) with v/V, then
press ENTER.
A thumbnail list of movies or still images on the disc appears.
EDIT ADD
EXEC.
001 1 1 03 18:00
RET.
1/1
Forwards the page.
Shows current page/total pages.
Using the disc in VR mode (DVD-RWs only)
7 Select the scene to be added to the Playlist with b/v/V/B, then press ENTER.
The selected scene is marked with
Repeat this step to select multiple scenes.
EDIT ADD
EXEC.
004
1 1 03 18:00
RET.
1/1
Pressing N starts playback of the selected scene. Press x to return to the
display to select other scenes.
.
8 Select [EXEC.] with b/v/V/B, then press ENTER.
The confirmation display appears.
EDIT ADD
ADD?
ADD?
EXEC.
RET.
75-GB
Page 76

Selecting the playing order on your camcorder – Playlist
9 Select [EXEC.] with b/B, then press ENTER.
The selected movies or still images are registered in the new Playlist. When a
still image is added to a Playlist, it is converted and registered as a new movie
file in the movie tab. It returns to the Playlist edit display when the registration
is completed.
To register all movies at the same time
Select [ ALL] in step 6.
To register all still images at the same time
See “Saving all the still images on a disc to a movie file” on page 77.
To cancel the registration
Press EDIT in any step from 3 to 8.
Note
The Playlist is usable in VR mode only. You cannot use it in VIDEO mode.
Tips
•You can register up to 999 scenes to the Playlist.
•You can register MPEG format movies only to the Playlist. Still images recorded in
JPEG format are converted to MPEG format when registering in the Playlist.
•Still images converted to a movie are shown with .
76-GB
Page 77
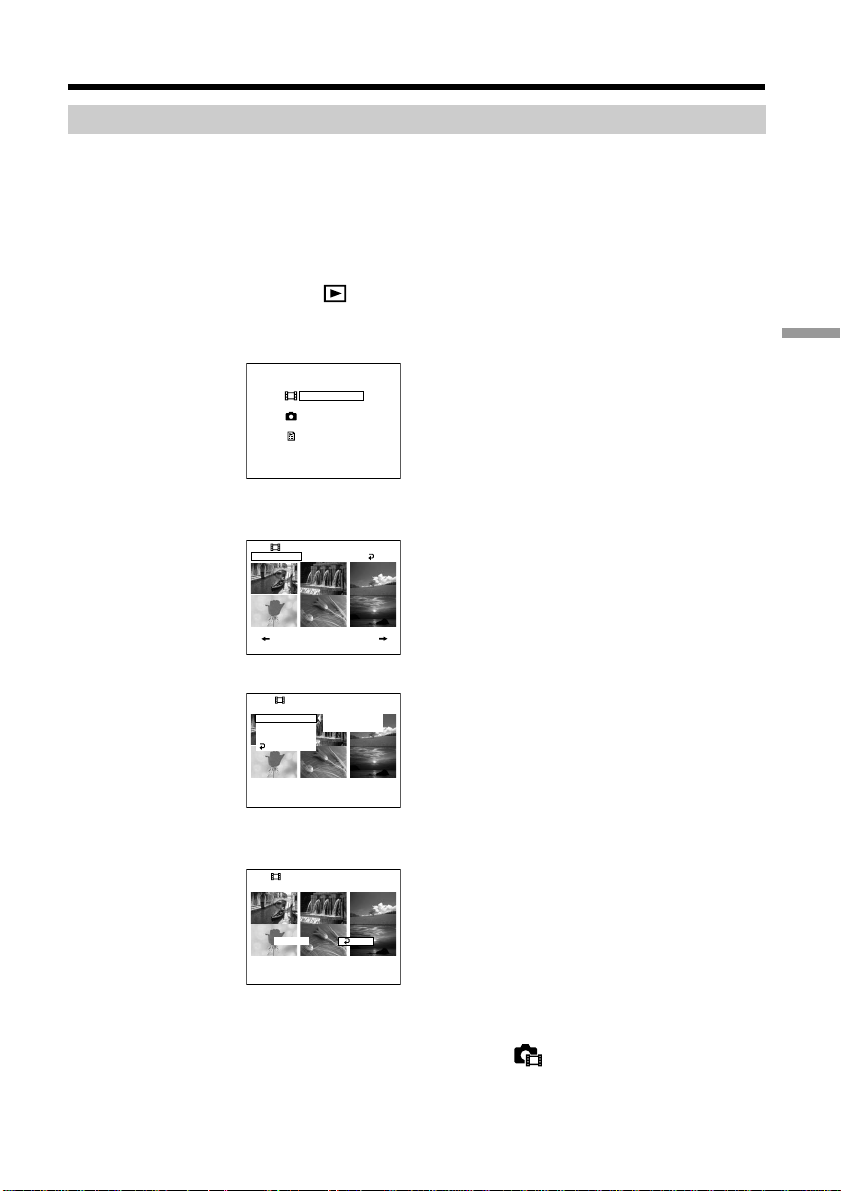
CREATE?
Selecting the playing order on your camcorder – Playlist
Saving all the still images on a disc to a movie file
Saving still images to a single movie provides following merits:
– You can save the remaining space for the Playlist on the disc.
– You can register multiple still images as a single movie scene that is recordable up to
999 on a disc.
Insert a DVD-RW in VR mode with still images recorded into your camcorder
beforehand.
1 Set the mode dial to (Play/Edit).
2 Press EDIT.
The display to select editing object appears.
EDIT
EDIT MOVIE
EDIT STILL
EDIT PLAYLIST
[ EDIT ] : END
3 Select [EDIT MOVIE] with v/V, then press ENTER.
The movie edit display appears.
EDIT
SEL. ITEM
RET.
1/2
Using the disc in VR mode (DVD-RWs only)
4 Select [SEL. ITEM] with b/B, then press ENTER.
EDIT
SEL. ITEM
DELETE SELECT
DIVIDE
PHOTOMOVIE
SELECT ALL
RETURN
5 Select [PHOTOMOVIE] with v/V, then press ENTER.
The confirmation display appears.
EDIT
PHOTOMOVIE
CREATE?
CREATE?
EXEC.
RET.
6 Select [EXEC.] with b/B, then press ENTER.
All the still images on the disc are saved to a single movie file.
Still images saved as a movie are shown with .
It returns to the movie edit display when the saving is completed.
To cancel the saving
Press EDIT in any step from 3 to 5.
77-GB
Page 78

Selecting the playing order on your camcorder – Playlist
Erasing unnecessary scenes from the Playlist
Erasing unnecessary scenes from the Playlist does not affect the actual recorded data on
the disc.
Insert a Playlist-registered DVD-RW into your camcorder beforehand.
1 Set the mode dial to (Play/Edit).
2 Insert a recorded DVD-RW in VR mode, then press EDIT.
The display to select editing object appears.
EDIT
EDIT MOVIE
EDIT STILL
EDIT PLAYLIST
[ EDIT ] : END
3 Select [EDIT PLAYLIST] with v/V, then press ENTER.
The Playlist edit display appears.
EDIT
SEL. ITEM
RET.
1/1
4 Select [SEL. ITEM] with b/B, then press ENTER.
EDIT
SEL. ITEM
ERASE
ADD
MOVE
DIVIDE
RETURN
SELECT
SELECT ALL
78-GB
5 Select [ERASE] with v/V, then press ENTER.
EDIT
SEL. ITEM
ERASE
ADD
MOVE
DIVIDE
RETURN
SELECT
SELECT ALL
6 Select [SELECT] with v/V, then press ENTER.
A thumbnail list of movies or still images registered to the Playlist appears.
EDIT ERASE
EXEC.
001
1 1 03 18:00
RET.
1/1
Page 79

ERASE?
Selecting the playing order on your camcorder – Playlist
7 Select the scene to be erased with b/v/V/B, then press ENTER.
The selected scene is marked with
Repeat this step to erase multiple scenes.
EDIT ERASE
EXEC.
1 1 03 18:10
003
RET.
1/1
Pressing N starts playback of the selected scene. Press x to return to the
display to select other scenes.
.
8 Select [EXEC.] with b/v/V/B, then press ENTER.
The confirmation display appears.
EDIT ERASE
ERASE?
ERASE?
EXEC.
RET.
9 Select [EXEC.] with b/B, then press ENTER.
The selected scenes are erased from the Playlist. It returns to the Playlist edit
display when the erasing is completed.
Using the disc in VR mode (DVD-RWs only)
To erase all the scenes at the same time
Select [SELECT ALL] in step 6 then perform step 9.
To cancel erasing
Press EDIT in any step from 3 to 8.
Tip
Still images registered in a Playlist are converted to a movie file. If you erase still images
from a Playlist, the converted movie file from still images still remains. To delete a
converted movie file from the movie folder, see “Deleting movies/still images” (page
87).
79-GB
Page 80

Selecting the playing order on your camcorder – Playlist
Changing the order within the Playlist
Insert a Playlist-registered DVD-RW into your camcorder beforehand.
1 Set the mode dial to (Play/Edit).
2 Press EDIT.
The display to select editing object appears.
EDIT
EDIT MOVIE
EDIT STILL
EDIT PLAYLIST
[ EDIT ] : END
3 Select [EDIT PLAYLIST] with v/V, then press ENTER.
The Playlist edit display appears.
EDIT
SEL. ITEM
RET.
1/1
4 Select [SEL. ITEM] with b/B, then press ENTER.
EDIT
SEL. ITEM
ERASE
ADD
MOVE
DIVIDE
RETURN
SELECT
SELECT ALL
80-GB
5 Select [MOVE] with v/V, then press ENTER.
A thumbnail list of the scenes registered to the Playlist appears.
EDIT MOVE
EXEC.
1 1 03 18:00
001
RET.
1/1
6 Select the scene to be moved with b/v/V/B, then press ENTER.
The selected scene is marked with
Repeat this step if you want to move multiple scenes.
EDIT MOVE
EXEC.
001
1 1 03 18:00
RET.
1/1
Pressing N starts playback of the selected scene. Press x to return to the
display to select other scenes.
.
Page 81
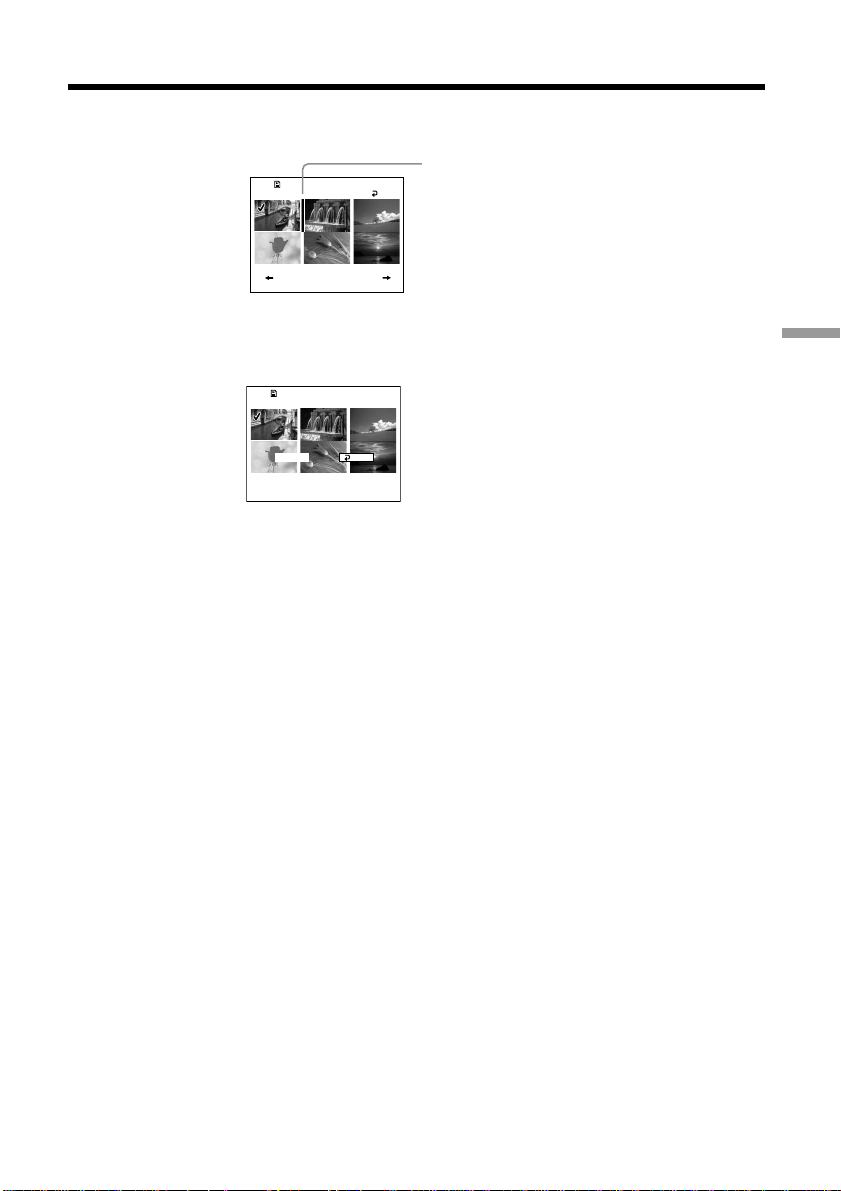
Selecting the playing order on your camcorder – Playlist
MOVE?
7 Select [EXEC.] with b/v/V/B, then press ENTER.
The move destination display appears.
EDIT MOVE
[ENTER] : MOVE
1/1
Move destination bar
RET.
8 Place the move destination bar where you want to move the scenes with
b/v/V/B, then press ENTER.
The confirmation display appears.
EDIT MOVE
MOVE?
MOVE?
EXEC.
RET.
9 Select [EXEC.] with b/B, then press ENTER.
The selected scene in step 6 is moved to the designated position. When you
have selected multiple scenes, the scenes are moved following the order
appeared in the Playlist.
It returns to the Playlist edit display when the moving is completed.
Using the disc in VR mode (DVD-RWs only)
To cancel the change in the order
Press EDIT in any step from 3 to 8.
81-GB
Page 82

Selecting the playing order on your camcorder – Playlist
Dividing a movie within the Playlist
You can divide a movie into 2 scenes. Dividing movies into scenes within the Playlist
does not affect the actual recorded data on the disc.
Insert a Playlist-registered DVD-RW into your camcorder beforehand.
Note
You cannot divide a movie converted from still images.
1 Set the mode dial to (Play/Edit).
2 Press EDIT.
The display to select editing object appears.
EDIT
EDIT MOVIE
EDIT STILL
EDIT PLAYLIST
[ EDIT ] : END
3 Select [EDIT PLAYLIST] with v/V, then press ENTER.
The Playlist edit display appears.
EDIT
SEL. ITEM
RET.
82-GB
1/1
4 Select [SEL. ITEM] with b/B, then press ENTER.
EDIT
SEL. ITEM
ERASE
ADD
MOVE
DIVIDE
RETURN
SELECT
SELECT ALL
5 Select [DIVIDE] with v/V, then press ENTER.
A thumbnail list of the scenes registered to the Playlist appears.
EDIT DIVIDE
001
1 1 03
RET.
18:00
1/2
Page 83

Selecting the playing order on your camcorder – Playlist
2:40
0:00:12
2:40
0:02:05
0:02:05
DIVIDE?
6 Select the scene to be divided with b/v/V/B, then press ENTER.
The dividing display appears and the playback of the selected scene starts.
DIVIDE
EXEC.
[ ] : RETURN
0:00:12
0:00:12
RET.
2:40
2:40
[EDIT] : END
Time in progress
Total time
7 Press ENTER at the point at which you want to divide the movie into scenes.
The movie pauses.
DIVIDE
EXEC.
[ ] : RETURN
0:02:05
0:02:05
RET.
2:40
2:40
[EDIT] : END
Select to finely adjust the
dividing point.
Note
A slight difference may occur from the point where you press ENTER/c/C and the actual
dividing point, as your camcorder selects the dividing point based on half-second increments.
8 Select [EXEC.] with b/v/V/B, then press ENTER.
The confirmation display appears.
Using the disc in VR mode (DVD-RWs only)
DIVIDE
DIVIDE?
DIVIDE?
EXEC.
[ ] : RETURN [EDIT] : END
RET.
0:02:05
0:02:05
9 Select [EXEC.] with b/B, then press ENTER.
Dividing of the movie starts. It returns to the Playlist edit display when the
dividing is completed.
To cancel dividing
Press EDIT in any step from 3 to 8.
83-GB
Page 84

Selecting the playing order on your camcorder – Playlist
Playing the Playlist
Insert a Playlist-registered DVD-RW into your camcorder.
1 Set the mode dial to (Play/Edit).
The Visual Index display appears.
001 1 1 03 18:00
1/2
2 Select (Playlist) tab with b/v/V/B.
A thumbnail list of the scenes registered to the Playlist appears.
Playlist tab
1/2
3 Press N.
A playback of the Playlist starts. On still images, the image appears in
sequence. Playback stops when all the registered scenes are played back.
84-GB
To start playback from a particular scene
Select the scene with b/v/V/B, then press ENTER.
Playback starts from the selected scene.
To display another scene during playback
Press ./>.
To pause the scene
Press X.
To cancel playback
Press x.
Page 85

Editing the original data
Original data stand for the actual recorded movies and still images data on the disc.
You can edit the original data of DVD- RW recorded in VR mode. Editing the original
data affects the actual recorded data.
Dividing a movie
Note that this operation actually divides the original recorded data on the disc.
Insert a recorded DVD-RW in VR mode into your camcorder beforehand.
Notes
•You cannot divide still images and still images converted to a movie.
•When the movie is registered in the Playlist, dividing the original movie does not
affect the movie in the Playlist. Register the divided movies in the Playlist again.
1 Set the mode dial to (Play/Edit).
2 Press EDIT.
The display to select editing object appears.
3 Select [EDIT MOVIE] with v/V, then press ENTER.
The Movie edit display appears.
EDIT
[ EDIT ] : END
EDIT
SEL. ITEM
EDIT MOVIE
EDIT STILL
EDIT PLAYLIST
RET.
Using the disc in VR mode (DVD-RWs only)
1/2
4 Select [SEL. ITEM] with b/B, then press ENTER.
EDIT
SEL. ITEM
DELETE SELECT
DIVIDE
PHOTOMOVIE
SELECT ALL
RETURN
5 Select [DIVIDE] with v/V, then press ENTER.
A thumbnail list of movies on the disc appears.
EDIT DIVIDE
001 1 1 03
RET.
18:00
1/1
85-GB
Page 86

Editing the original data
2:40
0:00:12
2:40
0:02:05
0:02:05
DIVIDE?
6 Select the scene to be divided with b/v/V/B, then press ENTER.
The editing display appears and the playback of the selected movie starts.
DIVIDE
EXEC.
[ ] : RETURN
7 Press ENTER at the point at which you want to divide the movie into scenes.
The movie pauses.
DIVIDE
EXEC.
0:00:12
0:00:12
RET.
2:40
2:40
[EDIT] : END
0:02:05
0:02:05
RET.
Time in progress
Total time
Select to finely adjust the
dividing point.
[ ] : RETURN
2:40
2:40
[EDIT] : END
Note
A slight difference may occur from the point where you press ENTER/c/C and the actual
dividing point, as your camcorder selects the dividing point based on half-second increments.
8 Select [EXEC.] with b/v/V/B, then press ENTER.
The confirmation display appears.
DIVIDE
DIVIDE?
DIVIDE?
EXEC.
[ ] : RETURN [EDIT] : END
RET.
0:02:05
0:02:05
9 Select [EXEC.] with b/B, then press ENTER.
Dividing of the movie starts. It returns to the movie edit display when the
dividing is completed.
To cancel dividing
Press EDIT in any step from 3 to 8.
86-GB
Page 87
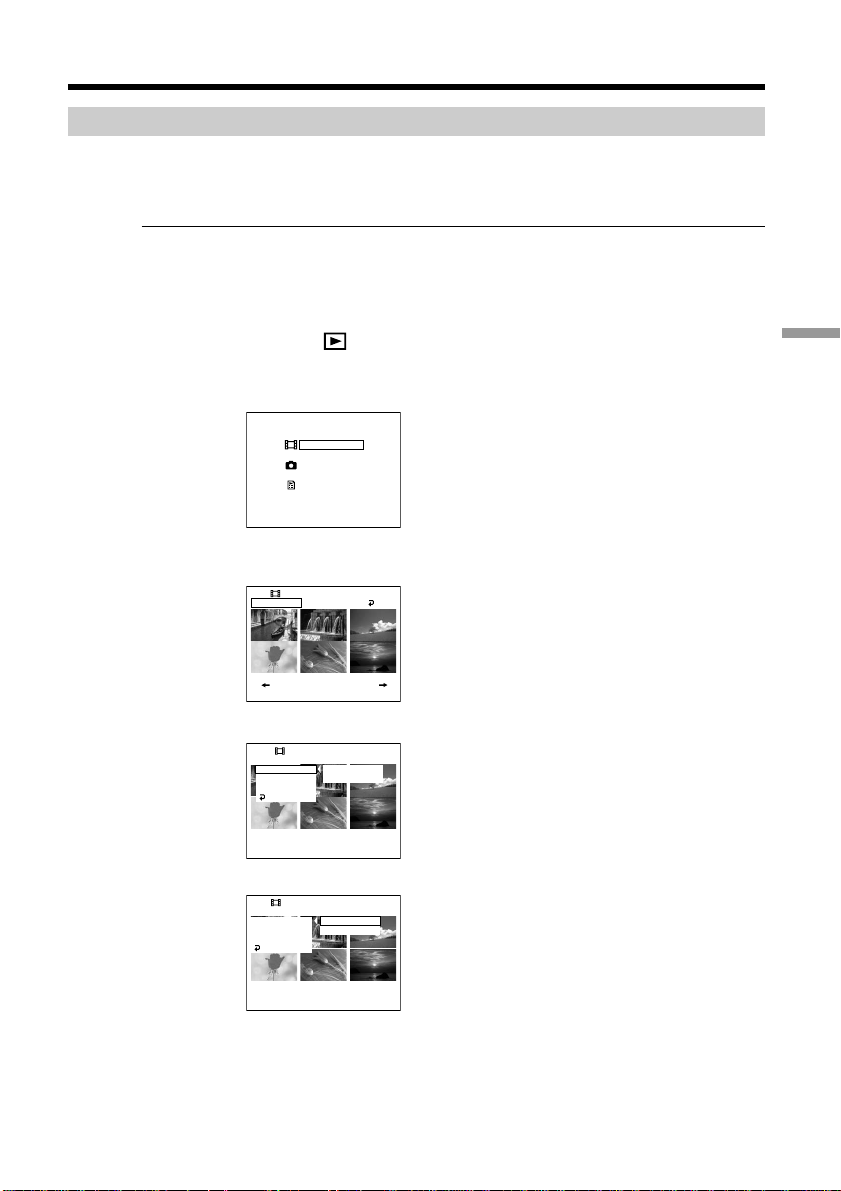
Editing the original data
Deleting movies/still images
You can delete unnecessary original movies/still images. Note that this operation
actually deletes recorded data from the disc.
Insert a recorded DVD-RW in VR mode into your camcorder beforehand.
Notes
•When you delete movies, the movies registered to the Playlist are also deleted.
•Deleting movies/still images may not provide enough space to record movies/still
images additionally.
1 Set the mode dial to (Play/Edit).
2 Press EDIT.
The display to select editing object appears.
EDIT
EDIT MOVIE
EDIT STILL
EDIT PLAYLIST
[ EDIT ] : END
3 Select [EDIT MOVIE] or [EDIT STILL] with v/V, then press ENTER.
The movie or still images edit display appears.
EDIT
SEL. ITEM
RET.
1/2
4 Select [SEL. ITEM] with b/B, then press ENTER.
EDIT
SEL. ITEM
DELETE SELECT
DIVIDE
PHOTOMOVIE
SELECT ALL
RETURN
5 Select [DELETE] with v/V, then press ENTER.
EDIT
SEL. ITEM
DELETE
DIVIDE
PHOTOMOVIE
RETURN
SELECT
SELECT ALL
Using the disc in VR mode (DVD-RWs only)
87-GB
Page 88

Editing the original data
DELETE?
DEL. FROM PLAYLIST, TOO
6 Select [SELECT] with v/V, then press ENTER.
A thumbnail list of the movies/still images recorded on the disc appears.
EDIT DELETE
EXEC.
001
1 1 03 18:00
7 Select the movie or the still image to be deleted with b/v/V/B, then press
ENTER.
The selected scene is marked with
Repeat this step to select multiple movies/still images.
EDIT DELETE
EXEC.
001
1 1 03 18:00
Pressing N starts playback of the selected movie/still image. Press x to
return to the display to select other movie/still image.
8 Select [EXEC.] with b/v/V/B, then press ENTER.
The confirmation display appears.
EDIT DELETE
RET.
1/1
.
RET.
1/1
88-GB
DELETE?
DELETE?
DEL. FROM PLAYLIST, TOO
DEL. FROM PLAYLIST, TOO
EXEC.
RET.
9 Select [EXEC.] with b/B, then press ENTER.
The selected movies/still images are deleted from the disc. It returns to the
movie edit/still image edit display when the deletion is completed.
To delete all movies/still images in the folder at the same time
Select [SELECT ALL] in step 6. All movies or still images respectively are deleted when
you select [EDIT MOVIE] or [EDIT STILL] in step 3.
To cancel the deletion
Press EDIT in any step from 3 to 8.
Tip
To delete all the movies/still images on the disc, perform formatting (page 72).
Page 89

—
Viewing/dubbing discs/ editing the recordings on your computer
—
Connecting your camcorder to your computer – Introduction
You can enjoy the following with your
camcorder by connecting it to your computer:
•Viewing scenes on your computer
•Copying recorded scenes to your computer
•Duplicating a disc
•Editing scenes copied to your computer
•Making original DVD recorded scenes on
your computer.
The USB driver installation is required to
connect your camcorder to your computer.
Install the USB driver before connecting
the camcorder to your computer. If you
connect the camcorder to the computer
first, you will not be able to install the
USB driver correctly.
Tips
•The USB driver can be found on the CD-
ROM supplied, along with the application
software required for viewing scenes.
•Your camcorder is compatible with Hi-Speed
USB (USB 2.0 Specification).
•You can transfer data at a faster rate using
your camcorder with a computer compatible
with Hi-Speed USB.
System requirements
OS:
Microsoft Windows Me,
Microsoft Windows 2000 Professional,
Microsoft Windows XP Home Edition or
Microsoft Windows XP Professional.
The above OS must be installed at the factory.
Operation is not assured in an environment
upgraded to the operating systems described
above or in a multi-boot environment.
CPU:
Minimum: 500 MHz Intel Pentium III or faster
(1 GHz Intel Pentium III or faster
recommended)
Application:
DirectX 8.0a or later
Sound system:
16 bit stereo sound card and stereo speakers
Memory:
64 MB or more
Hard disk:
Available free space required for installation:
at least 250 MB
Available hard disk space recommended:
at least 2 GB (depending on the size of the files
edited)
Display:
Video card with 4 MB of VRAM, Minimum 800
× 600 Hi colour (16 bit colour, 65 000 colours),
Direct Draw display driver capability (At 800 ×
600 or less, 256 colours and less, this product
will not operate correctly.)
USB port:
Must be provided as standard.
Viewing/dubbing discs/ editing the recordings on your computer
Consult the computer manufacturer for the
details on connectors and editing software of
your computer.
The supplied CD-ROM does not support
to connect your camcorder to a
Macintosh computer.
89-GB
Page 90

Connecting your camcorder to your computer – Introduction
Notes on using your computer
Software
Depending on your application software, the
file size may increase when you open a still
image file.
Communications with your computer
Communications between your camcorder and
your computer may not recover properly even
after your computer recovers from Suspend/
Resume, or from Sleep status.
Installing the USB driver
Start the following operation before
connecting the USB cable to your
computer.
Install the USB driver to control your
camcorder from your computer.
If you are using Windows 2000 Professional or
Windows XP Home Edition/Professional, log
in as administrator.
1 Turn on your computer and allow
Windows to load.
When your computer is already turned
on, close all the software.
2 Insert the supplied CD-ROM into the
CD-ROM drive of your computer.
The installation menu screen appears.
90-GB
If the menu screen does not appear,
double-click [My Computer], then
[ImageMixer] (CD-ROM Drive). The
menu screen appears after a while.
Page 91

Connecting your camcorder to your computer – Introduction
3 Move the cursor to [USB Driver] and
click.
InstallShield Wizard programme starts
up.
4 Click [Next].
The USB driver installation starts.
“InstallShield Wizard Complete ” screen
appears after a while.
Installing software
Install the ImageMixer Ver.1.5 for Sony DVD
Handycam (hereinafter referred to as
ImageMixer) software that manages movies
and still images transferred from your
camcorder on your computer, and the
WinASPI software that manages writing data
on CD-Rs/CD-RWs.
1 When the USB driver installation is
completed, click [ImageMixer] on the
menu screen.
Install Wizard programme starts up and
the “Choose Setup Language” screen
appears.
If the menu screen does not appear,
double-click [My Computer], then
[ImageMixer] (CD-ROM Drive). The
menu screen appears after a while.
Viewing/dubbing discs/ editing the recordings on your computer
5 Click [Finish].
The USB driver installation is
completed.
Note
If you connect the USB cable before USB driver
installation is complete, the USB driver will not
be properly registered. Install the USB driver
again following the steps in “If you cannot
install the USB driver” (page 97).
2 Select the language to be used and click
[OK].
91-GB
Page 92

Connecting your camcorder to your computer – Introduction
3 Follow the instructions given in the on-
screen messages. When the “Setup Type”
screen appears, make sure that [PAL] is
selected and continue the procedure. The
“InstallShield Wizard Complete” screen
appears.
4 Click [Finish].
The installation of ImageMixer is
completed. The installation screen of
WIN ASPI appears (Windows 2000
Professional and Windows XP users
only).
5 Follow the instructions given in the on-
screen messages.
6 When The “InstallShield Wizard
Complete” screen appears, click [Finish].
7 Take out the CD-ROM from the CD-ROM
drive after the computer restarts.
Note
On a computer without DirectX 8.0a or later,
DirectX installation starts. Follow the
instructions given in the on-screen messages
and restart the computer after the installation is
complete.
Connecting your camcorder to the computer
Notes
•You can connect only one camcorder to every
single computer.
•Operations are not guaranteed if you connect
your camcorder via a USB hub or to the USB
port not equipped with your computer at
default.
•Operation is not guaranteed on all the
recommended environments.
For Microsoft Windows XP users
1 Connect the AC adaptor to your
camcorder.
2 Set the mode dial to (Play/Edit).
3 Turn the power on your camcorder by
sliding the POWER switch upward
while pressing the green button.
4 Connect the (USB) jacks of the
camcorder and the
computer using the USB cable supplied
with your camcorder.
USB jack
(USB) port of the
USB port
USB cable
To replace WIN ASPI
To be able to use the ImageMixer CD writing
function, you need to install WIN ASPI. If a
different writing application was previously
installed, its writing function may not work
correctly. If that happens, reinstall the original
application and replace WIN ASPI. Note that
the ImageMixer CD writing function may not
work properly.
92-GB
Your computer recognises the
camcorder, and the “Found New
Hardware Wizard” starts.
Page 93

Connecting your camcorder to your computer – Introduction
7 Click [Finish].
The connection between your
camcorder and the computer is
completed.
To disconnect the USB cable
See “To disconnect the USB cable” (page 96).
To confirm the USB driver installation
1 Click [Start] t [Control Panel].
2 Click [Performance and Maintenance]
t [System].
5 Select [Install the software automatically
(Recommended)] and click [Next].
6 Make sure that [Sony DVD Handycam]
is selected as the best match and click
[Next].
Click [Sony DVD Handycam] if it is not
selected.
“Completing the Found New Hardware
Wizard” screen appears.
“System Properties” screen appears.
3 Click [Hardware] tab.
4 Click [Device Manager].
“Device Manager” screen appears.
5 Make sure that “SONY DDX-A1000 USB
Device” appears in DVD/CD-ROM
drives, “Generic volume” in Storage
volumes, and “USB Mass Storage
Device” in Universal Serial Bus
controllers respectively.
When all the devices appear, the USB
driver is installed correctly. If any of
these devices are not shown, install the
USB driver again following “If you
cannot install the USB driver” (page 97).
Viewing/dubbing discs/ editing the recordings on your computer
93-GB
Page 94

Connecting your camcorder to your computer – Introduction
For Microsoft Windows 2000
Professional users
1 Connect the AC adaptor to your
camcorder.
2 Set the mode dial to (Play/Edit).
3 Turn the power on your camcorder by
sliding the POWER switch upward
while pressing the green button.
4 Connect the (USB) jacks of the
camcorder and the
computer using the USB cable supplied
with your camcorder.
USB jack
(USB) port of the
USB port
USB cable
To disconnect the USB cable
See “To disconnect the USB cable” (page 96).
Your computer recognises the
camcorder, and the “Found New
Hardware” dialog box appears.
5 Follow the instructions given in the on-
screen messages.
The connection between your
camcorder and the computer is
completed.
94-GB
Page 95
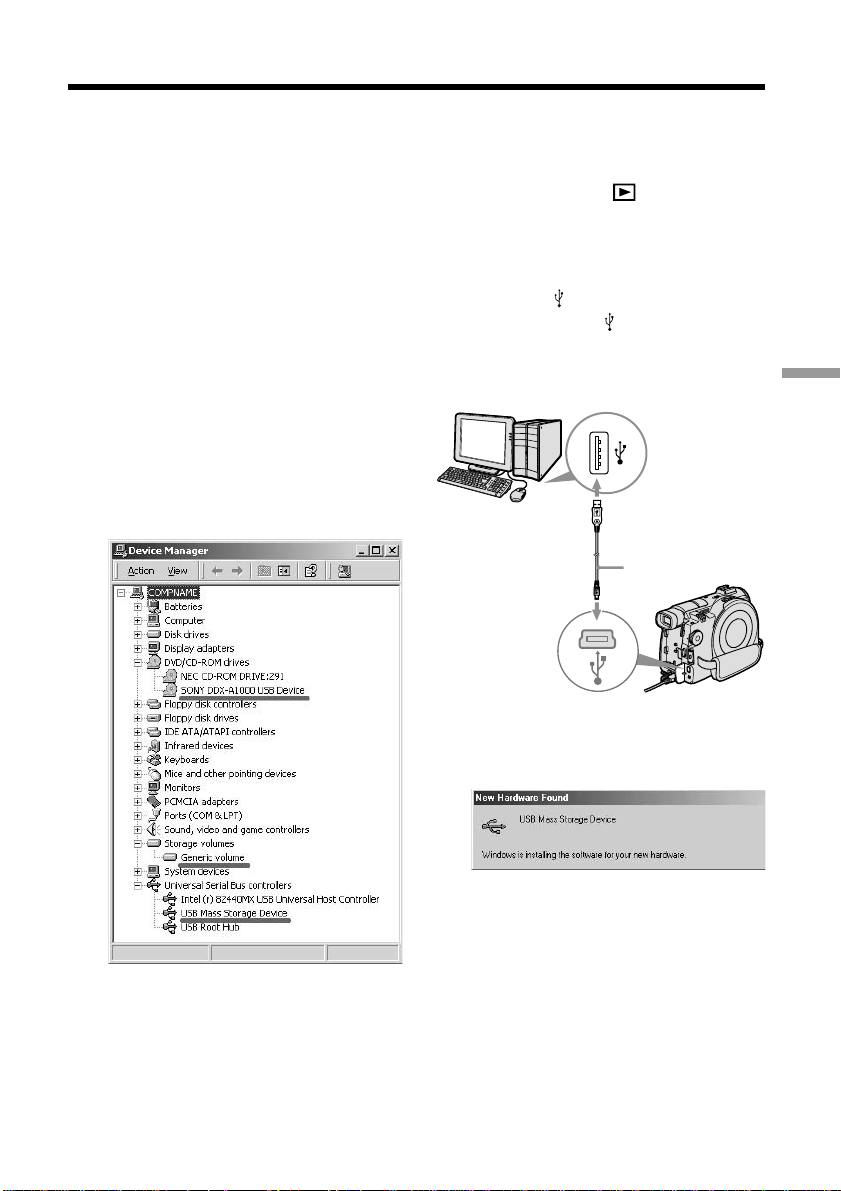
Connecting your camcorder to your computer – Introduction
To confirm the USB driver installation
1 Click [Start] t [Settings] t [Control
Panel].
2 Click [System].
“System Properties” screen appears.
3 Click [Hardware] tab.
4 Click [Device Manager].
“Device Manager” screen appears.
5 Make sure that “SONY DDX-A1000 USB
Device” appears in DVD/CD-ROM
drives, “Generic volume” in Storage
volumes, and “USB Mass Storage
Device” in Universal Serial Bus
controllers respectively.
When all the devices appear, the USB
driver is installed correctly. If any of
these devices are not shown, install the
USB driver again following “If you
cannot install the USB driver” (page 97).
For Microsoft Windows Me users
1 Connect the AC adaptor to your
camcorder.
2 Set the mode dial to (Play/Edit).
3 Turn the power on your camcorder by
sliding the POWER switch upward
while pressing the green button.
4 Connect the (USB) jacks of the
camcorder and the
computer using the USB cable supplied
with your camcorder.
USB jack
(USB) port of the
USB port
USB cable
Viewing/dubbing discs/ editing the recordings on your computer
Your computer recognises the
camcorder, and the “New Hardware
Found” dialog box appears.
5 Follow the instructions given in the on-
screen messages and restart your
computer.
The connection between your
camcorder and the computer is
completed.
95-GB
Page 96

Connecting your camcorder to your computer – Introduction
To disconnect the USB cable
See “To disconnect the USB cable” (page 96).
To confirm the USB driver installation
1 Click [Start] t [Settings] t [Control
Panel].
2 Click [System].
“System Properties” screen appears.
3 Click [Device Manager].
“Device Manager” screen appears.
4 Make sure that “SONY DDX-A1000 USB
Device” appears in CD-ROM, “Sony
DVD Handycam” in Storage device, and
“USB Mass Storage Device” in Universal
Serial Bus controllers respectively.
When all the devices appear, the USB
driver is installed correctly. If any of
these devices are not shown, install the
USB driver again following “If you
cannot install the USB driver” (page 97).
To disconnect the USB cable
1 Move the cursor to the “Unplug or Eject
Hardware” icon on the Task Tray and
click to cancel the applicable drive.
96-GB
2 After the “Safe to Remove Hardware”
dialog box appears, disconnect the USB
cable and turn off your camcorder.
Notes
•Be sure to turn off your camcorder after
disconnecting it from your computer.
Turning off your camcorder keeping
connection to the computer may prevent
from normal disconnection.
•Never disconnect the USB cable when the
Access/Open lamp is lit in red. It may cause
a damage to the disc.
Page 97

Connecting your camcorder to your computer – Introduction
If you cannot install the USB
driver
The USB driver have been registered
incorrectly as your computer was connected to
your camcorder before the installation of the
USB driver was completed. Perform the
following procedure to install the USB driver
correctly.
1 Disconnect your camcorder from the
computer following “To disconnect the
USB cable” (page 96).
2 Install the USB driver again following
“Installing the USB driver” (page 90).
3 Connect your camcorder to the
computer following “Connecting your
camcorder to the computer” (page 92).
The USB driver installation and the
connection between your camcorder
and the computer is completed.
Consulting the on-line help (operating instructions) of ImageMixer Ver.1.5 for Sony DVD Handycam
An ImageMixer Ver.1.5 for Sony DVD
Handycam on-line help is available where you
can find detailed operating instructions for
ImageMixer software.
1 Click located at the top right of the
screen.
Or, click [Start] t [Programs] ([All
Programs] in Windows XP) t
[PIXELA] t [ImageMixer] t [Help].
The ImageMixer Help screen appears.
2 Find the information you need from the
table of contents.
To close the on-line help
Click the button at the top right of the
screen.
If you have any questions about
ImageMixer Ver.1.5 for Sony DVD
Handycam
ImageMixer Ver.1.5 for Sony DVD Handycam
is the product of PIXELA corporation. For
details, refer to the operating instructions of
the CD-ROM supplied with your camcorder.
Viewing/dubbing discs/ editing the recordings on your computer
97-GB
Page 98

Viewing scenes recorded on your computer
You must install the USB driver and the
ImageMixer software to view scenes recorded
on a disc with your computer (page 90, 91).
If you are using Windows 2000 Professional or
Windows XP Home Edition/Professional, log
in as administrator.
Viewing scenes on the disc
You can view scenes recorded on the disc
without finalising on your computer, by
inserting a recorded disc into your camcorder
and connecting it to your computer.
1 Turn on your computer and allow
Windows to load.
2 Connect the AC adaptor to your
camcorder.
3 Set the mode dial to (Play/Edit).
4 Turn the power on your camcorder by
sliding the POWER switch upward
while pressing the green button.
5 Insert a recorded disc into your
camcorder.
6 Connect the (USB) jacks of the
camcorder and the
computer using the USB cable supplied
with your camcorder.
(USB) port of the
7 Double-click [ImageMixer Ver.1.5 for
Sony] icon on the Windows desktop.
Or, click [Start] t [Programs] ([All
Programs] in Windows XP) t
[PIXELA] t [ImageMixer] t [PIXELA
ImageMixer Ver.1.5 for Sony] on your
computer.
The ImageMixer software starts and the
title screen appears.
8 Click on the left of the screen.
The ImageMixer software starts and
thumbnails of the scenes recorded on
the disc appear.
When the thumbnails do not appear,
click
.
Thumbnails
98-GB
USB jack
USB port
USB cable
Click
to view still images.
to view movies and click
Page 99

Viewing scenes recorded on your computer
9 Double-click the scene to view from the
thumbnails.
The selected scene is temporarily copied
to your computer and is displayed in
the preview window.
To return to the thumbnails list, click
below right of the screen.
To save the scene on your
computer
1 Click the thumbnail of the scene to save.
2 Click
The selected scene is saved on your
computer.
Notes
•It may take some time to save the scene
depending on the recording mode (page 33)
and the length of the movie.
•Still images converted to a movie are not
displayed.
Tip
An album is a unit to register and to manage
the saved movies and still images saved from
your camcorder to your computer.
.
Viewing/dubbing discs/ editing the recordings on your computer
To view the album
1 Click .
2 Double-click the scene to view from the
thumbnails.
The selected scene is displayed. When
you have selected a movie, click
start playback.
To return to the thumbnails list, click
at the top right of the screen.
Notes
•If you connect the USB cable before USB
driver installation is complete, the USB
driver will not be properly registered. Install
the USB driver again following the steps in
“If you cannot install the USB driver” (page
97).
•When anything goes wrong with the
operation, close all the software and restart
them.
and
99-GB
Page 100
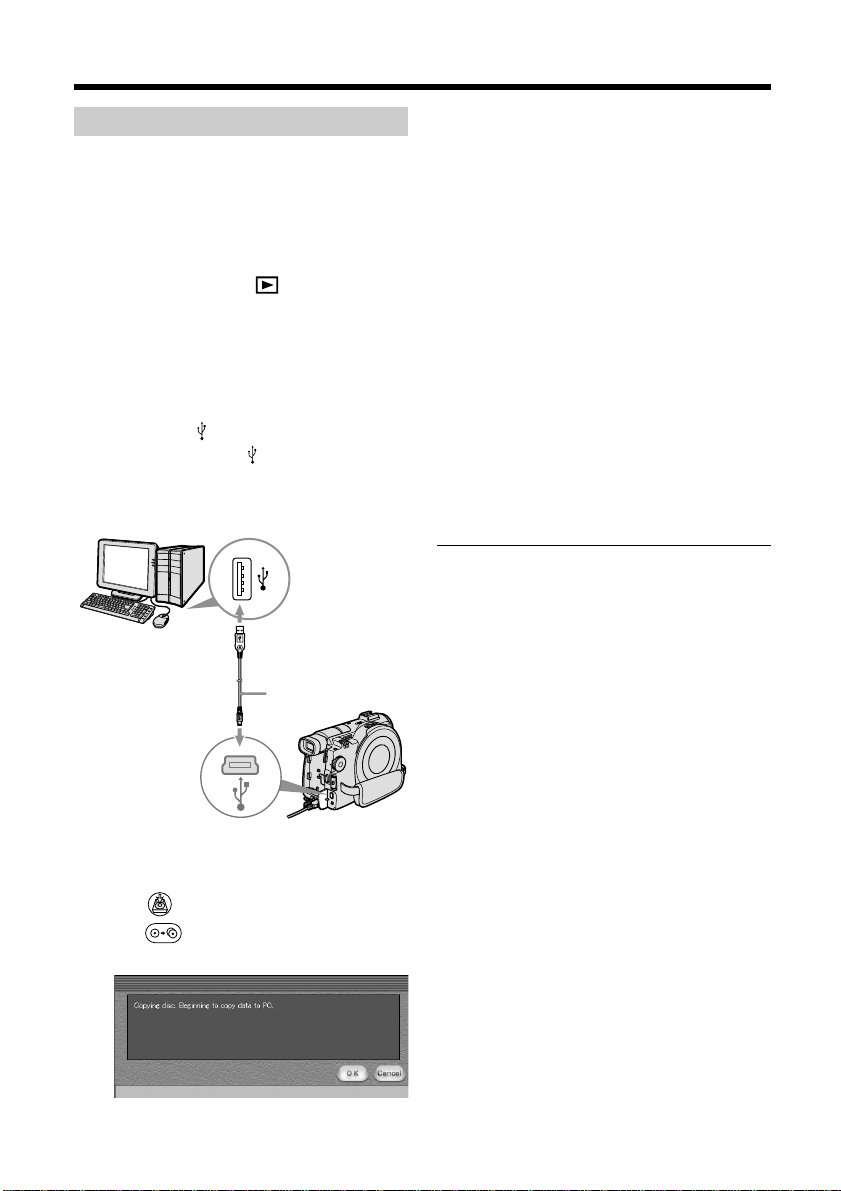
Making a disc copy – Disc Dubbing
Making a disc copy
You can make a copy of a finalised disc.
1 Turn on your computer and allow
Windows to load.
2 Connect the AC adaptor to your
camcorder.
3 Set the mode dial to (Play/Edit).
4 Turn the power on your camcorder by
sliding the POWER switch upward
while pressing the green button.
5 Insert a recorded disc into your
camcorder.
6 Connect the (USB) jacks of the
camcorder and the
computer using the USB cable supplied
with your camcorder.
USB jack
(USB) port of the
USB port
USB cable
7 Start the ImageMixer software on your
computer.
8 Click on the left of the screen.
9 Click (Duplication).
The confirmation screen appears.
10Click [OK].
11When the copy completion message
appears, eject the disc and insert a new
disc into your camcorder.
12Click [OK].
Copying of data from your computer to
the new disc starts. When the disc copy
operation is completed, a screen asking
if you want to make an additional copy
appears.
13If you want to make an additional copy,
click [OK].
The making of an additional copy starts.
If you do not want to make an
additional copy, click [Cancel] to end
the procedure.
14Eject the disc following the instructions
given in the on-screen messages.
Notes
•It may take some time to save the scene
depending on the recording mode (page 33)
and the length of the movie.
•You cannot make a copy of an unfinalised
disc.
•You cannot copy a DVD-RW recorded in VR
mode to a DVD-R. Use another DVD-RW.
•Using DVD-RWs for the copied media
prevents you from unfinalising and making
additional recordings on your camcorder
because the format of copied media is
different from that of your camcorder. You
must format the DVD-RW to record
additional material on the disc.
Tip
To use the disc with other DVD authoring
applications, an export procedure is required.
For details, see the ImageMixer on-line help.
100-GB
 Loading...