

3-800-711-33 (1)
Compact
Component System
Operating Instructions
Mode d'emploi
Manual de instrucciones
###
EN
F
E
##
CMT-T1
1995 by Sony Corporation

English
EN
WARNING
To prevent fire or shock hazard, do not
expose the unit to rain or moisture.
To avoid electrical shock, do not open the cabinet. Refer servicing to
qualified personnel only.
Do not install the appliance in a confined space, such as a bookcase
or built-in cabinet.
Laser component in this product is capable of emitting radiation
exceeding the limit for Class 1.
This appliance is classified as a
CLASS 1 LASER product.
The CLASS 1 LASER PRODUCT
MARKING is located on the rear
exterior.
This caution
label is located
inside the unit.
2
Welcome!
Thank you for purchasing the Sony Compact Component System.
This stereo system is packed with fun features. Here are just a few:
• The CD jacket-size front panel of each component that lets you
stack or place the components as you like
• DBFB (Dynamic Bass Feedback) system that boosts low frequency
range audio to provide deep, powerful bass through the full range
bass reflex speakers
• A preset feature that lets you store and recall up to 20 FM stations,
10 AM stations.
• A timer that lets you set the CD player, tape player or radio to turn
on and off whenever you want
• A remote that lets you control the music from your seat
• An optical output jack for digital recording
About the CMT-T1 system
The system is composed of:
– Tuner CD player : HCD-T1
– Active speaker system : SA-N1
– Stereo cassette deck : TC-TX1

Table
of
Contents
Chapter 1: Setting Up
Connecting the Stereo 4
Inserting the Batteries 6
Setting the Clock 6
Chapter 2: the CD Player
Playing a CD (normal play) 7
Playing Tracks in Random Order (shuffle play) 8
Playing Tracks in the Desired Order (programme play) 8
Playing Tracks Repeatedly (repeat play) 9
Chapter 3: the Radio
Listening to the Radio 10
Presetting Radio Stations 11
Listening to the Preset Radio Stations 11
Chapter 4: the Tape Player
Playing a Tape 12
Recording a CD Automatically 12
Recording a CD, etc., Manually 13
Recording a CD in the Specified Track Order (programme edit) 14
Chapter 5: Sound Adjustment
Adjusting the Balance of the Speakers 15
Reinforcing Bass (DBFB) 15
Listening with the Surround Feature 16
EN
3
Chapter 6: Additional Features
Falling Asleep to Music 17
Waking Up to Music 17
Timer-Recording Radio Programmes 18
Connecting Optional Equipment 19
For Your Information
Precautions 20
Troubleshooting Guide 20
Maintenance 21
Specifications 21
Index to Parts and Controls 22
Index 23

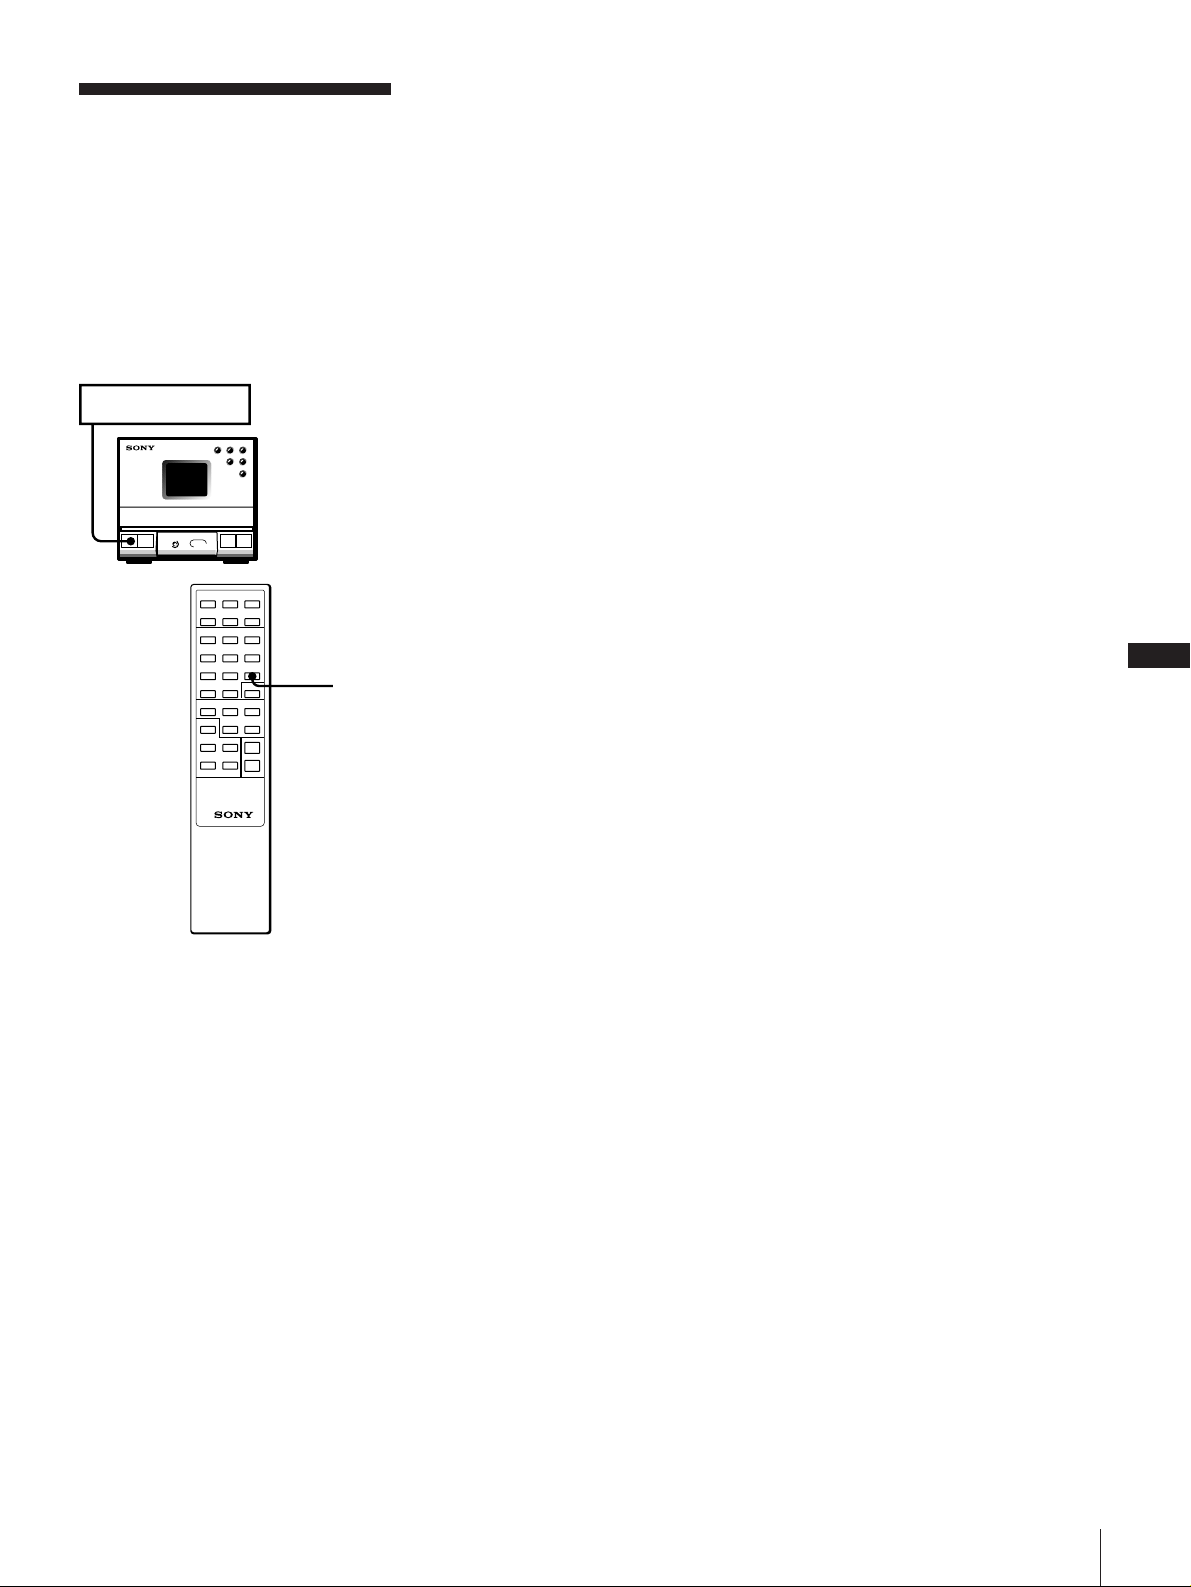
Chapter 1:
Setting
Connecting the
Stereo
Use the illustrations below to connect your
stereo.
STEP 2 Connecting the
Right Speaker
Connect the right speaker to the tuner CD
player with the audio cord (supplied) and
the mains lead.
EN
4
up
Connecting the Stereo
Inserting the batteries
Setting the Clock
STEP 1 Connecting the
Flat Cord
Connect the tuner CD player and the stereo
cassette deck with the flat cord (supplied)
pushing in the connector until it clicks.
To disconnect the flat cord
Pull out the connector of the flat cord while
pressing its sides. Do not pull the flat cord
itself.
Connecting the audio cord
Connect firmly the white plug to the white
(L) jack and the red plug to the red (R) jack.
White
Red
Connecting the mains lead of the
right speaker
Connect the mains lead of the right speaker
to AC OUTLET on the rear panel of the
tuner CD player.
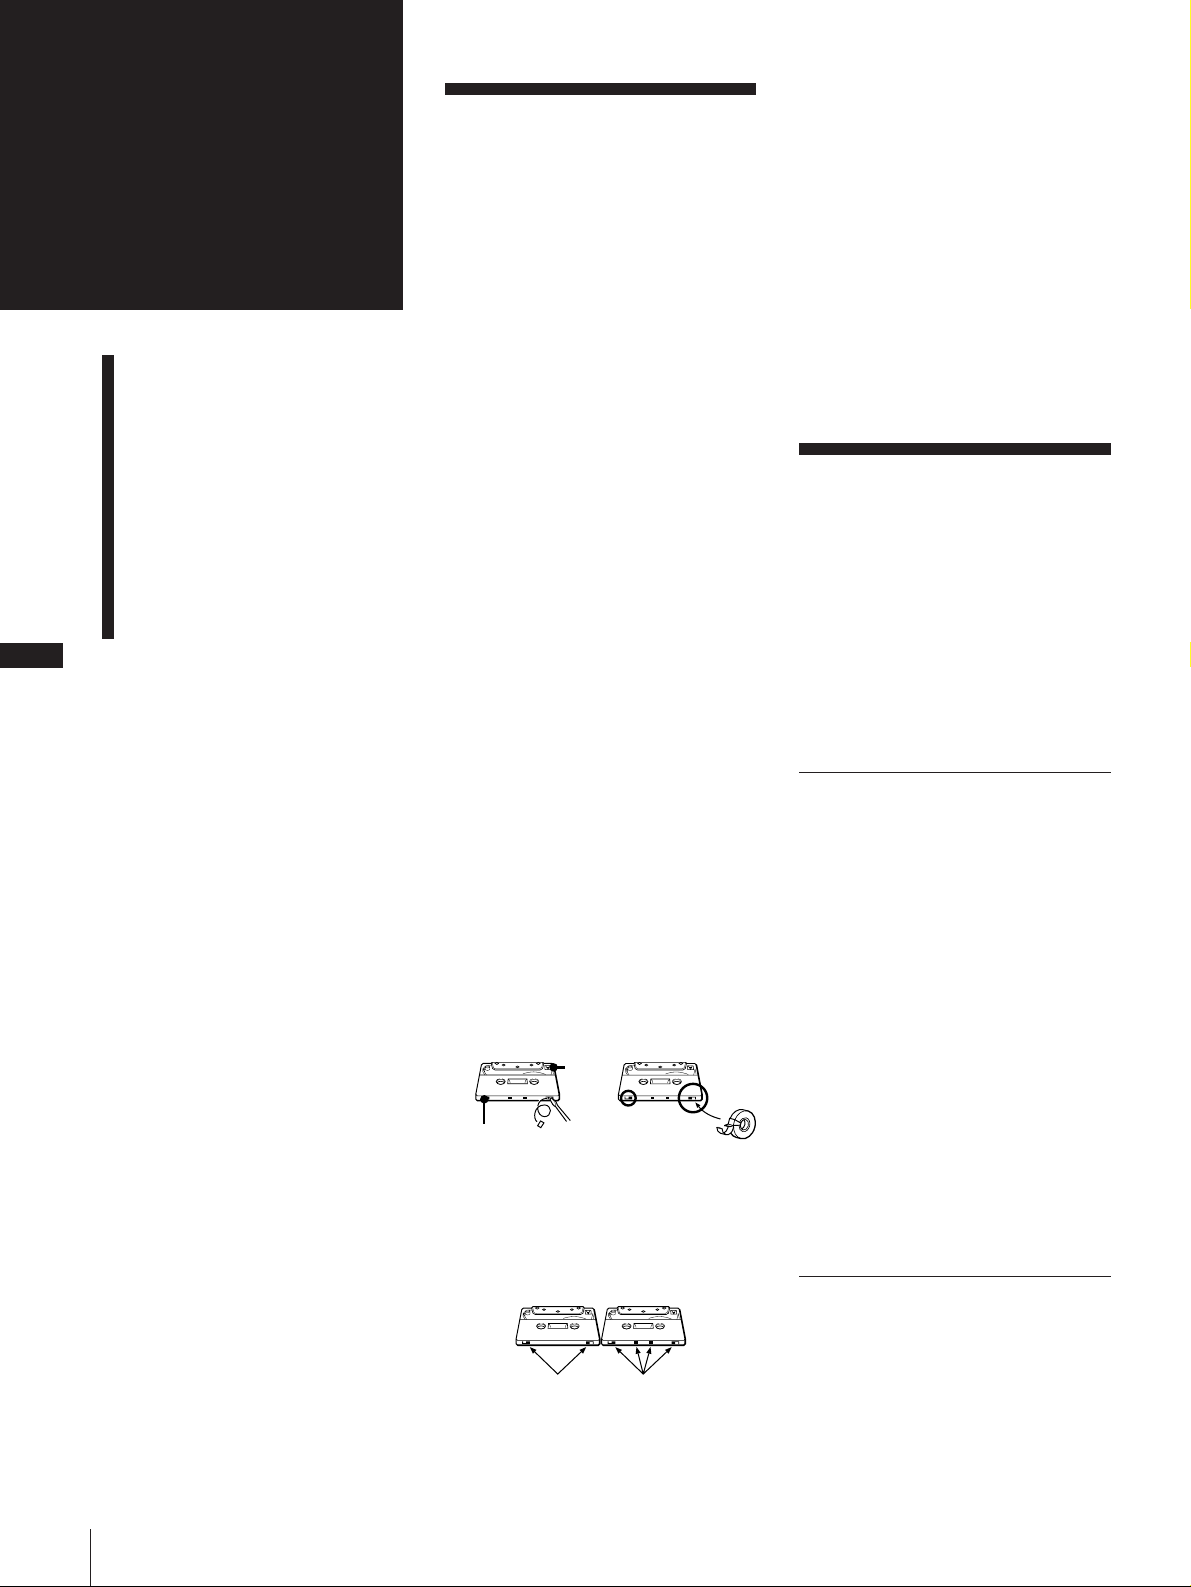
STEP 3 Connecting the
Left Speaker
Connect the left speaker to the right
speaker with the speaker cable (supplied).
Be sure to keep the speaker cable away
from the aerials.
Grey cord to ](red)
Twist each tip
Black-lined cord to } (black)
]
}
Chapter 1: Setting up
FM lead aerial (supplied)
AM loop aerial (supplied)
Right speaker
STEP 2
Mains lead
STEP 5
STEP 4
Tuner CD player
STEP 5
Flat cord (supplied)Audio cord (supplied)Mains leadSpeaker cable (supplied)
Stereo cassette deck
STEP 1
STEP 3
STEP 6
to the wall outlet
! Do this connection last !
Left speaker
EN
5
STEP 4 Connecting the
Aerials
FM lead aerial* (supplied)
AM loop aerial**
(supplied)
* Fix it to the place for optimum reception.
** Orient it toward the direction for optimum
reception.
To improve the reception
Connect an external aerial (p.19).
To set up the AM loop aerial
STEP 5 Setting the
VOLTAGE SELECTOR
Before connecting the power, check that the
VOLTAGE SELECTOR on the rear panel of
the tuner CD player and the right speaker is
set to the local power line voltage. If not, set
the selector to the correct position using a
serewdriver before connecting the AC
power cord to wall outlet.
Tuner CD player
220-240V 120V
VOLTAGE SELECTOR
Right speaker
VOLTAGE SELECTOR
220V240V 120V
STEP 6 Connecting the
Power
Connect the mains lead of the tuner CD
player to the wall outlet after you have
made all the above connections.
Note
• You can remove the front net from the
speaker.
Chapter 1: Setting up

Inserting the
batteries
Insert two R6 (size AA) batteries into the
supplied remote.
Setting the Clock
You need to set the clock before using the
timer function.
EN
Battery life
You can expect the remote to operate for about
six months using Sony SUM-3 (NS) batteries
before the batteries run down. When the
batteries no longer operate the remote, replace
both batteries with new ones.
6
To avoid battery leakage
If you are not going to use the remote for a
long time, remove the batteries to avoid
damage caused by corrosion from battery
leakage.
1
2, 3, 4
ENTER
1 Press TIMER SET.
2 Press TIMER+ or – to display “CLOCK”
and press ENTER.
The hour indication begins flashing.
AM
0201
3 Set the current hour by pressing
TIMER+ or – and press ENTER.
The minute indication begins flashing.
AM
180
4 Set the current minute by pressing
TIMER+ or – and press ENTER.
The clock starts operating.
To correct the clock setting
Repeat steps 1 to 4.
About the time indication
• The built-in clock shows the time in the
display when you press POWER to turn off
the power.
• The upper dot of the “:” in the time display
flashes for the 0 to 29 seconds of the minute
and the lower dot flashes for the 30 to 59
seconds.
Chapter 1: Setting up
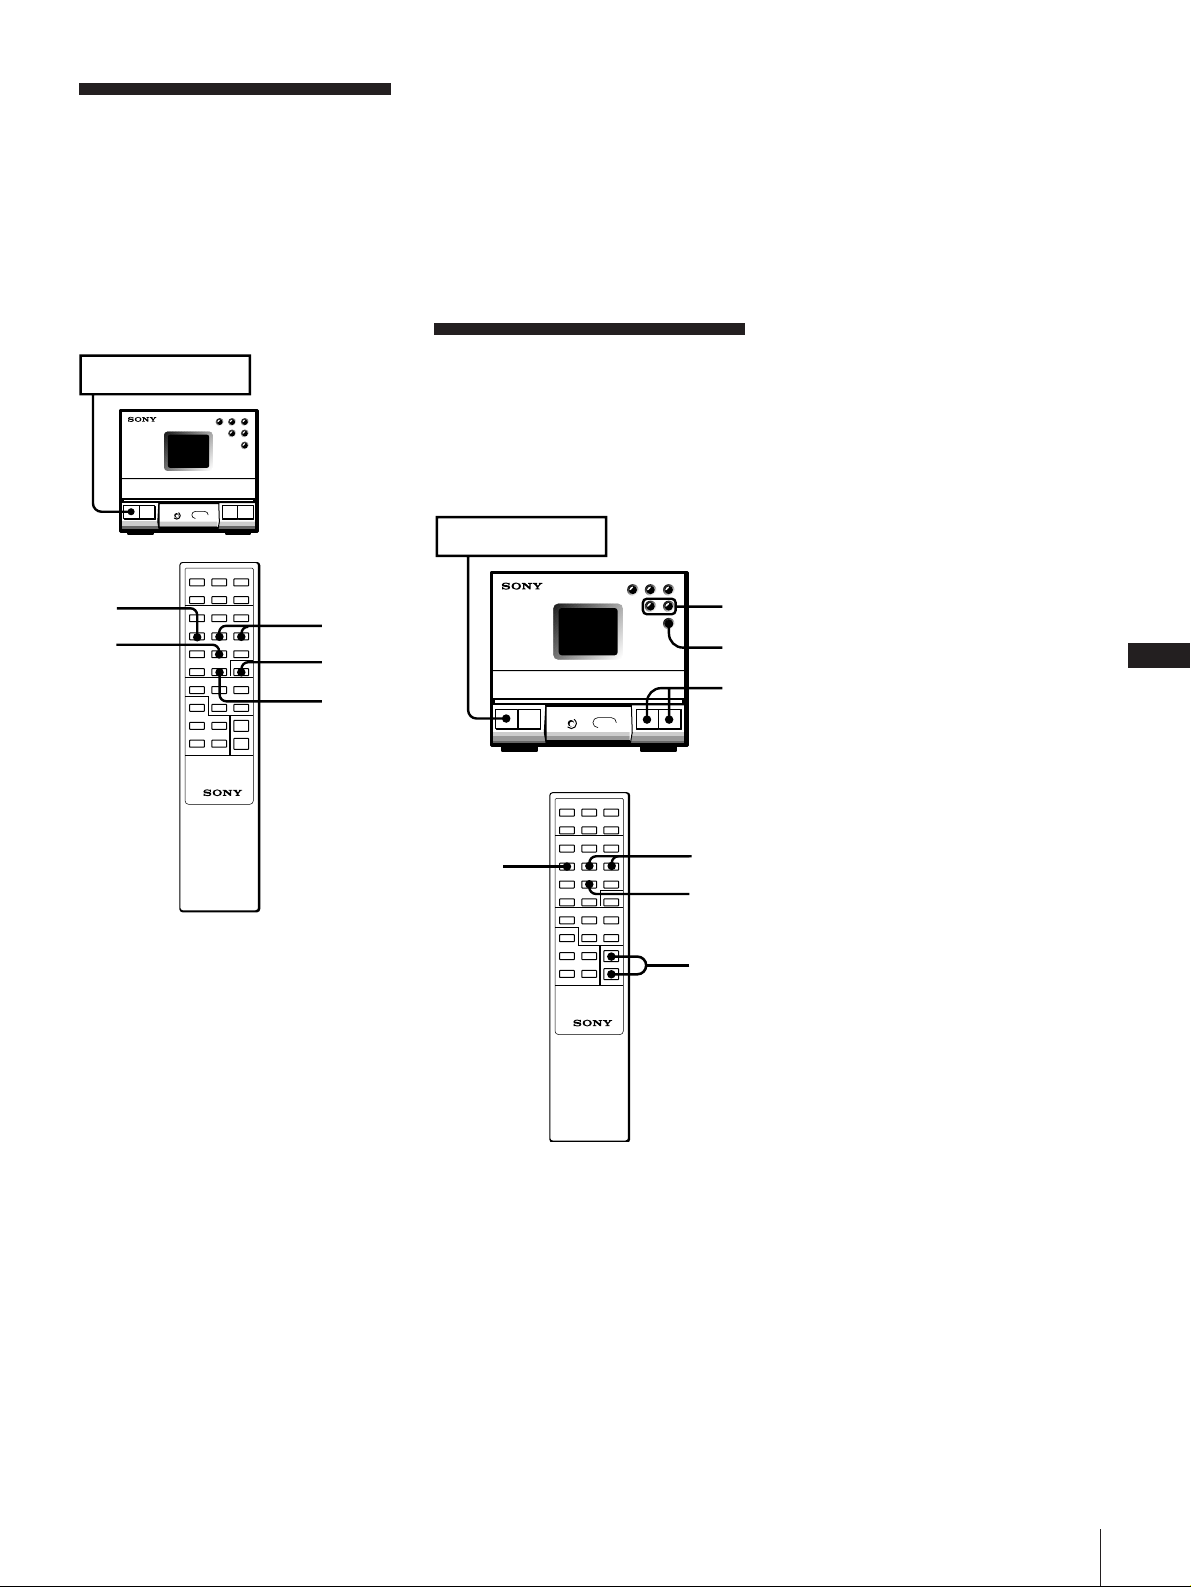
Chapter 2:
the CD
Player
Playing a CD (normal play)
Playing Tracks in Random
Order (shuffle play)
Playing Tracks in the
Desired Order
(programme play)
Playing Tracks Repeatedly
(repeat play)
Playing a CD
(normal play)
You can play CDs in four modes: normal,
shuffle, programme and repeat. The mode
determines which tracks (songs) to play, in
which order and whether or not they will
repeat.
Also, you can play 12 cm and 8 cm CDs.
When you play an 8-cm CD, place it
without an adaptor on the inner circle of
the disc tray.
Before you play the CD, decrease the sound
level by pressing VOL –. This will prevent
damage to the speakers.
Tuner CD player
1
1 Press POWER.
2 Press 6 (open/close) and place a CD on
the CD tray.
p
2
3
4
To find the beginning of a track –
Automatic Music Sensor (AMS)
You can locate the beginning of a track
while the track is playing or while it is in
pause mode.
To locate the beginning of the current or
preceding track, press =0 (or = on
the remote) until you find the desired track.
To locate the beginning of the succeeding
track, press )+ (or + on the remote)
until you find the desired track.
To find a point in a track
You can find a particular point in a track
while playing or pausing a CD. Use the
buttons on the player to operate this
feature. This operation is not possible with
the remote.
To Search
Forward while
listening
Backwards
while listening
Quickly
without
listening while
checking the
playing time in
the display
Operation
Hold down )+
and release it at the
desired point.
Hold down =0
and release it at the
desired point.
Hold down )+ or
=0 during pause
and release it at the
disired point.
EN
7
with the label side up
3 Press ^ (play) (or ( on the remote).
The disc tray closes and the first track
starts playing.
1
003
4 Press VOL + or – to adjust the sound
level.
To
Stop play
Pause
Remove the CD
* Remote
One Touch Play feature
Press ^ (or ( on the remote) when the
power is off or you are listening to another
source.
As long as a CD is in the player, you will be
able to listen to the CD without pressing any
other buttons.
Press
p
^ (or P*)
To resume play, press
here again.
6
Note
If the CD reaches the end while you are
searching quickly without listening,
"OVER"appears in the display. Press =0
(= on the remote) to go back.
To check the total number of tracks
and total playing time
Press DISPLAY on the remote while the
player is in stop mode.
The indications appear for a few seconds.
Total number of tracks
Total playing time
To check the remaining time
Press DISPLAY on the remote repeatedly
while playing a CD.
Each time you press DISPLAY, the display
changes as follows.
Current track number and
playing time
12
4505
Z
v
Current track number and
remaining time on the track
v
Remaining time on the CD
Chapter 2: the CD Player
Playing Tracks in
Random Order
(shuffle play)
You can play all the tracks on the CD in
random order. Use the buttons on the
remote to do this operation.
Tuner CD Player
POWER → ON
6
Playing Tracks in the
Desired Order
(programme play)
You can programme up to 24 tracks to play
in any order you choose. You can do this
by designating the tracks in the order you
want them to play.
Tuner CD Player
POWER → ON
6
6 Press (.
All the tracks you chose play in the
order you designated.
To cancel the programme play
Press TUNING/PLAY MODE until “PGM”
disappears.
To change the programme
To
Add a track at
the end of the
programme
Erase the entire
programme
After all the programmed tracks have
been played
The programme order remains in the CD
player’s memory. You can listen to the same
programme by just pressing (.
Operation
During stop, do steps 3 –
5.
During stop, press p on
the player.
EN
8
1 Press 6 (open/close) and place a CD on
the CD tray.
2 Press TUNING/PLAY MODE
repeatedly until “SHUFFLE” appears in
the display.
3 Press (.
“J” appears and then all the tracks play
in random order.
To cancel shuffle play
Press TUNING/PLAY MODE.
“SHUFFLE” disappears, and tracks
continue playing in their original order.
If you press TUNING/PLAY MODE during
normal play
You can play all the tracks on the CD in
random order.
To skip an undesired track
Press +.
You cannot go back to the preceding track by
pressing =.
3
2
6
2
3
4
1 Press 6 (open/close) and place a CD on
the CD tray.
2 Press TUNING/PLAY MODE
repeatedly until “PGM” appears in the
display.
3 Press = or + until the desired track
number is displayed.
The total playing time including the
chosen track flashes in the display. (The
programme is not entered at this time.)
Track number
MONO AUTO MANUAL
TUNED
PRESET
STEREO
MEMORY
SHUFFLE
SURR
4
DBFB
304
12
12
PGM
REPEAT 1
DAILY REC SLEEP kHz MHz
Total playing time
4 Press ENTER.
The programme number appears for
about a second, and the total playing
time lights up.
Notes
• Once you open the CD tray, the programme
is erased.
• If the total programme time has exceeded
100 minutes, the order of the programme is
displayed instead of the total playing time.
• If you try to programme more than 24
tracks, “FULL” is displayed.
Chapter 2: the CD Player
5 Repeat steps 3 and 4 to programme the
remaining tracks you want to play in the
order you want them to play.
Playing Tracks
Repeatedly
(repeat play)
You can choose between two different
repeat play modes. One repeats all the
tracks in the current play mode; the other
repeats a single track.
Use the buttons on the remote to do this
operation.
Tuner CD Player
POWER → ON
REPEAT
EN
9
Repeating all the tracks (in any play
mode)
Press REPEAT.
“REPEAT” appears in the display, and the
tracks play repeatedly in the current play
mode.
Repeating a single track (in normal
play mode only)
While the desired track is being played,
press REPEAT repeatedly until “REPEAT
1” appears in the display.
To cancel repeat play
Press REPEAT repeatedly until “REPEAT”
or “REPEAT 1” disappears from the
display.
Chapter 2: the CD Player
EN
10
Chapter 3:
the
Radio
Listening to the Radio
Presetting Radio Stations
Listening to the Preset
Radio Stations
Listening to the
Radio
You can have the tuner automatically scan
and tune in the stations with clear signals.
This feature saves you time in searching for
stations with clear signals. However, you
will have to manually tune in stations with
weak signals that are skipped by automatic
tuning.
Tuner CD Player
1
4,5
2
2
4,5
3
5 If you do not want to listen to the
station selected, press TUNING +/–
again to restart the scan.
When the desired station is not
tuned in
Automatic tuning may skip a station with a
weak signal. Tune in the station manually.
1 Press TUNING/PLAY MODE repeatedly
until “MANUAL” appears in the display.
2 Keep pressing TUNING +/– until the
desired station is tuned in.
To improve AM broadcast reception
Reorient the supplied AM loop aerial for AM.
To change the AM tuning interval
(Except for the Middle Eastern
model)
The AM tuning interval is preset to 9 kHz
(10 kHz in some areas) in the facotry. If you
need to change the interval, do as follows:
1 Turn on the power.
2 Change the band to AM.
3 Turn off the power.
4 Turn the power back on while pressing
TUNING+.
After changing the tuning interval, reset the
preset AM radio stations.
1 Press POWER.
2 Press BAND repeatedly until the band
you want appears in the display.
As you press BAND, the band changes
as follows:
FM Bb AM
3 Press TUNING/PLAY MODE until
“AUTO” appears in the display.
4 Press TUNING +/– to tune in the
desired station.
To tune in a higher frequency station,
press TUNING +, and to tune in a lower
frequency station press TUNING –.
The tuner starts scanning stations
automatically, and stops when it finds a
clear station.
“TUNED” appears in the display.
“STEREO” also appears if the FM
station tuned in is broadcasting in
stereo.
When an FM programme is not received
clearly
Press STEREO/MONO until “MONO”
appears in the display. There will be no stereo
effect, but the reception will improve. Press
STEREO/MONO again to restore the stereo
effect.
One Touch Play feature
Press BAND when the power is off or you are
listening to another source.
You will be able to listen to the last received
station without pressing any other buttons.
Chapter 3: the Radio
Presetting Radio
Stations
You can store radio frequencies in the
tuner’s memory to tune in your favourite
stations quickly. You can preset up to 20
FM stations and 10 AM stations.
Use the buttons on the remote to do this
operation.
Tuner CD Player
POWER → ON
To erase a stored station
Store a new station on the preset channel
number of the station you want to erase.
This will erase the old station and replace it
with the new station.
Note
The preset stations will not be erased unless
you store a new station to replace the old ones
even if you disconnect the power source.
Liteninig to the
Preset Radio Stations
Once you have preset the stations, you can
quickly tune in your favourite stations.
Tuner CD Player
POWER → ON
To change the frequency display to
the preset channel display
During listening to a preset radio station,
press DISPLAY on the remote. Each time
you press DISPLAY, the frequency or the
preset channel number appears in the
display.
1
2
3,5
6
4
1 Press BAND repeatedly until the
desired band appears in the display.
FM Bb AM
2 Press TUNING/PLAY MODE
repeatedly until “MANUAL” or
“AUTO” appears in the display.
3 Press TUNING +/– to tune in the
station you want to store.
1
4
3
2
3
1
4
EN
11
4 Press MEMORY.
”MEMORY” and the preset channel
number appear in the display.
5 Decide on a preset channel number for
the radio station (1 to 20 for FM, 1 to 10
for AM). Press TUNING +/– to display
the preset channel number you have
decided on.
6 Press ENTER.
The station is stored at the preset
channel number you have decided on.
7 Repeat steps 3 to 6 for each station you
want to store.
1
Press BAND repeatedly until the
desired band appears in the display.
FM Bb AM
2 Press TUNING/PLAY MODE
repeatedly until “PRESET” appears in
the display.
3 Press TUNING +/– to tune in a preset
station.
The preset channel number appears,
then the station frequency appears and
the broadcast can be heard.
4 Press VOL +/– to adjust volume.
Chapter 3: the Radio
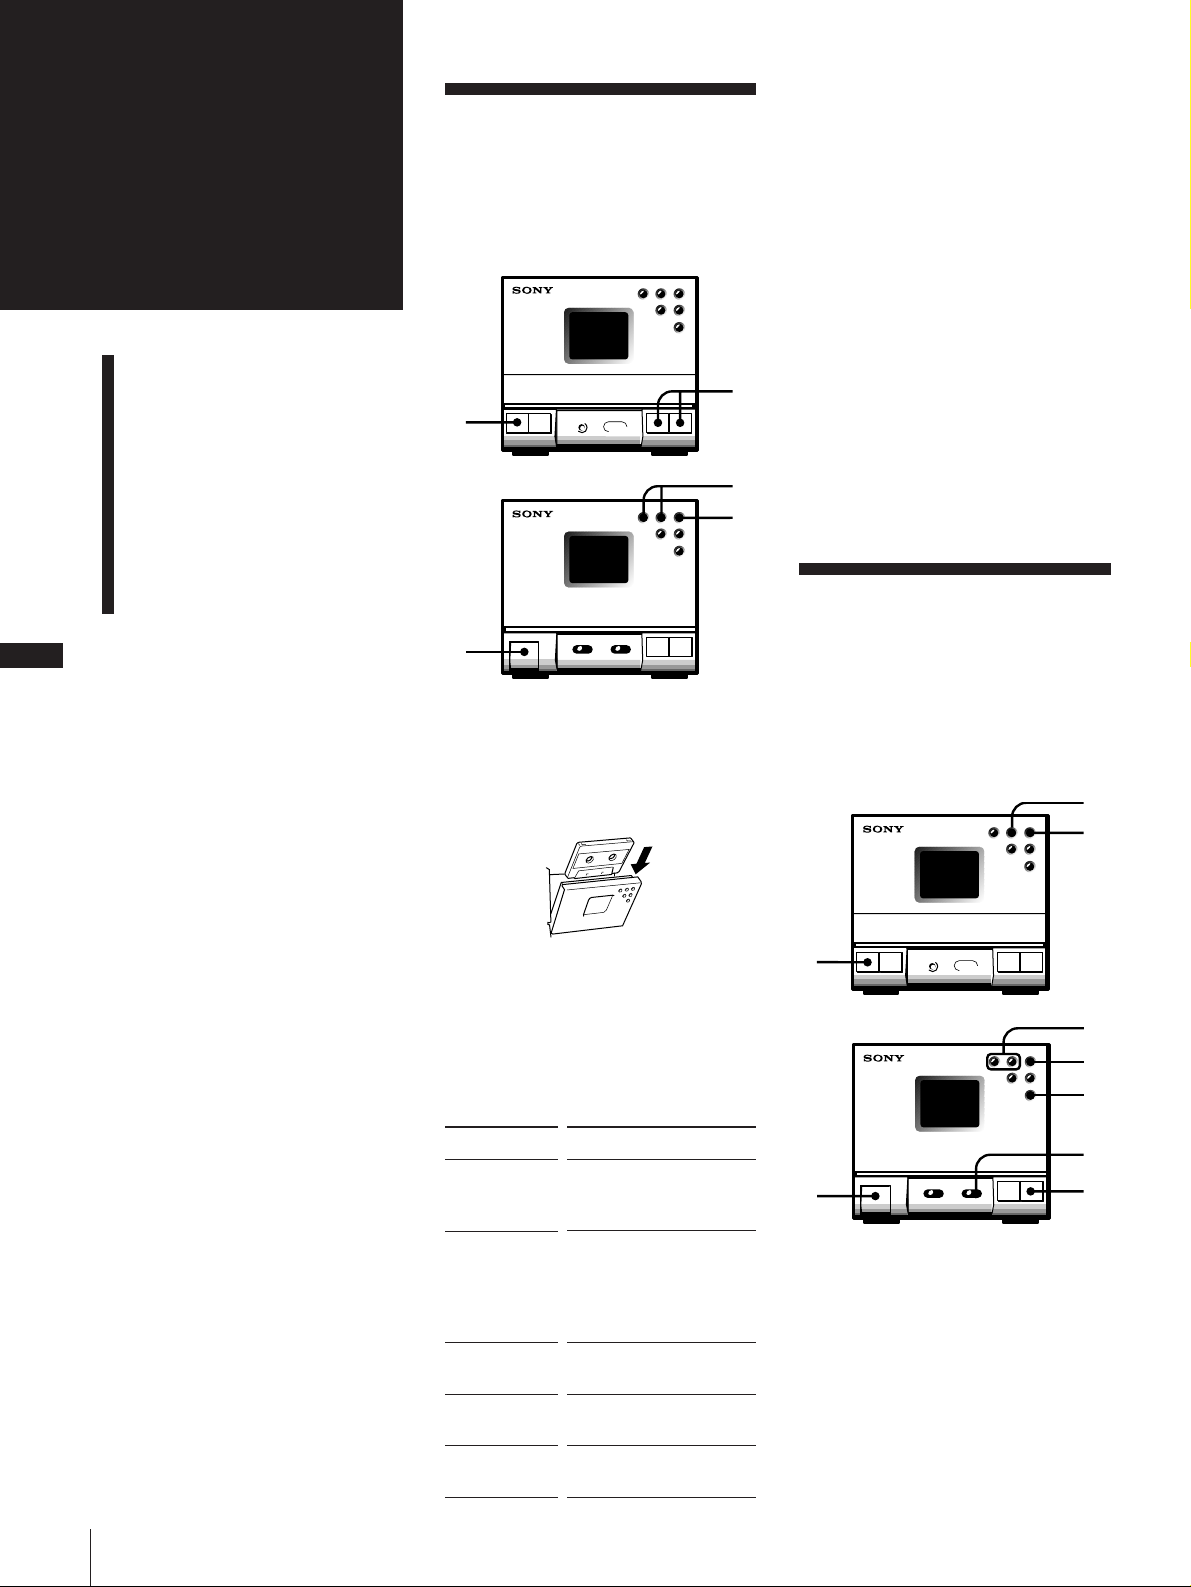
Chapter 4:
the Tape
Player
Playing a Tape
You can use TYPE I (normal), TYPE II
(CrO2) and TYPE IV (metal) tapes. When
you insert a tape, the deck detects the tape
type automatically.
Tuner CD player
When listening to a tape recorded with
the Dolby* B-type noise reduction
system
Slide the DOLBY NR switch to ON.
Dolby noise reduction system reduces tape
hiss noise in low-level high-frequency signals.
* Dolby noise reduction manufactured
under license from Dolby Laboratories
Licensing Corporation.
“DOLBY” and double-D symbol a are
trademarks of Dolby Laboratories Licensing
Corporation.
EN
12
Playing a Tape
Recording a CD
Automatically
Recording a CD, etc.,
Manually
Recording a CD in a
Specified Track Order
(programme edit)
1
Stereo cassette deck
2
1 Press POWER.
2 Press 6 EJECT to open the tape
compartment and insert a recorded
tape.
4
3
p
One Touch Play feature
Press ( or 9 when the power is off or you
are listening to another source.
As long as a tape is in the deck, you will
immediately be able to listen to the tape
without pressing any other buttons. If a tape
is not in the deck, only the power will be
turned on.
Recording a CD
Automatically
You can record a CD on a tape quickly by
using the CD SYNC button. Use the
buttons on the CD player and the cassette
deck. Before recording, make sure the tabs
on the cassette have not been removed.
Tuner CD player
2
p
Chapter 4: the Tape Player
3 Press ( to play the front side.
To play the reverse side, press 9.
4 Press VOL +/– to adjust the volume.
To stop play
Press p.
To
Pause
Find the
beginning of
the current or
succeeding
track
Fast forward or
rewind
Play one side of
the tape
Play both sides
repeatedly*
* The deck stops automatically after repeating
the sequence five times.
Operation
Press P on the deck. To
resume play, press here
again.
During play, press 0 or
) on the deck.
During stop, press 0 or
) on the deck.
Slide DIRECTION to A.
Slide DIRECTION to a.
1
Stereo cassette deck
3
1 Press POWER.
2 Press 6 and place a CD.
3 Press 6 EJECT and insert a blank tape.
6
p
7
4
5
4 Slide DIRECTION to select dual or
single-sided recording.
To record on
One side
Both sides*
* Recording always stops at the end of the
reverse side. Be sure to start from the front
side.
Slide DIRECTION to
A
a
5 Press CD SYNC.
The cassette deck stands by for
recording, and the CD player stands by
for playing.
6 Press ( or 9 to select the tape side to
start recording on.
To start from the front side, press (.
To start from the reverse side, press 9.
(Recording will be made only on the
reverse side.)
7 Press P.
Recording starts. After about 10
seconds, the CD starts playing.
To stop recording
Press p on the deck or the CD player.
To activate DOLBY NR
When you want to reduce the hiss noise in
low-level high-frequency signals, slide the
DOLBY NR switch to ON after step 4.
About CD SYNC (synchronized)
recording
With this feature, the cassette deck records
a CD synchronizing with the length of the
tracks on the CD, so you do not have to
worry about the tape direction or
remaining time while recording.
This stereo system uses the Fade
Synchronized recording feature. With this
feature, the deck slowly fades out a
recording so that a track is not abruptly cut
off at the end of the tape.
If the tape reaches the end of its front side
while recording a track, the deck re-records
it automatically after rewinding the tape to
the beginning of the track. This time, the
track is recorded with a fadeout at the end
of the tape. (Recording ends at this point if
it is a single-sided recording.)
Recording in the original
track order of the CD
When the track order has been
programmed and the total length of the
tracks to be recorded is shorter than the
length of one side of the tape, the unit
automatically operates as follows:
When the CD player is paused, the
deck continues recording silence until
it reaches the end of the front side;
then it reverses the tape and starts
recording.
Front side
1 2 3 4 5
9
8 7 6
Reverse side
Once all of the selected tracks have
been recorded, the deck records about
four seconds of silence and then stops.
Recording a CD, etc.,
Manually
You can record a CD as you like, for
instance, record just the songs you want, or
you can record from any point on the tape.
Tuner CD player
POWER → ON
Stereo cassette deck 6
p
7
5
1
3
4
2
Press FUNCTION repeatedly until the
source you want to record appears in
the display.
Source
CD
Radio
MD, etc.
Indication
CD
TUNER
MD
3 Slide DIRECTION to select dual or
single-sided recording.
To record on one side, set to A.
To record on both sides, set to a.
4 When you want to reduce the hiss noise
in low-level high-frequency signals,
slide DOLBY NR to ON.
5 Press r REC on the deck.
The deck stands by for recording, and
the r REC button lamp and the P
button lamp on the deck light up.
Either the ( or 9 button lamp lights
up, and the other flashes and goes out.
If the ( or 9 button lamp does not
light up or flash, the corresponding tab
on the cassette has been removed. You
cannot record on this side.
6 Press ( or 9 to select the tape side
you want to start recording on.
To start recording on the front side,
press (.
To start recording on the reverse side,
press 9.
7 Press P on the deck.
Recording starts.
When you set the DIRECTION switch to
a, recording stops at the end of the
reverse side.
8 Start playing the sound source.
To stop recording
Press p on the deck.
Note
If you press FUNCTION while recording, the
sound source will be switched to another.
EN
13
Front side
Reverse side
The track at the
end of the reverse
side is also faded
out if it does not
fit in the tape
length.
Recording starts
from the track that
was faded out at
the end of the
front side.
6
2
1 Press 6 EJECT and insert a blank tape.
Chapter 4: the Tape Player

Recording a CD in a
Specified Track Order
(programme edit)
You can adjust the total recording time to
the tape length while making a programme.
Tuner CD player
POWER → ON
1
7
Press 6 EJECT on the deck and insert a
blank tape.
8 Slide DIRECTION to select dual or
single-sided recording.
To record on one side, set to A.
To record on both sides*, set to a.
* Recording always stops at the end of the
reverse side. Be sure to start from the
front side.
9 Press CD SYNC.
The deck stands by for recording, and
the CD player stands by for playing.
10 Press ( or 9 to select the tape side
you want to start recording on.
To start recording on the front side,
press (.
To start recording on the reverse side,
press 9.
EN
14
Stereo cassette deck
6,11
4
3
2
5
1 Press 6 on the CD player and place a
CD.
2 Press FUNCTION repeatedly until
“CD” appears in the display.
3 Press TUNING/PLAY MODE
repeatedly until “PGM” appears in the
display.
4 Press = or + to choose a track.
5 Press ENTER.
Repeat steps 4 and 5 to programme the
remaining tracks you want to record on
side A in the order you want them to be
recorded.
10
7
9
8
11 Press P to release recording pause.
Recording starts. After about 10
seconds, the CD starts playing.
When you programme to record on side
B, the CD will pause after completing
the recording on side A. The deck
continues recording silence until it
reaches the end of side A, then it
reverses the tape and starts recording on
side B. Once all of the selected tracks
have been recorded, the deck records
about 4 seconds of silence and then
stops.
To cancel programme edit
Press TUNING/PLAY MODE until “PGM”
disappears.
Notes
• If the last portion of the track is recorded on
the leader at the end of the tape, recording
may not be made completely.
• When programming for side B after pausing
at the end of side A, make sure the tracks
programmed for side A do not exceed the
length of a single side. Otherwise recording
cannot be made correctly.
To start recording partway through a
tape
Play or record on the tape for more than a few
seconds, then press CD SYNC. As soon as you
start recording, CD starts playing.
When you press CD SYNC after pressing
6 EJECT to insert a tape, CD play will start 10
seconds after recording starts. This will
happen when recording on any part of the
tape because the stereo system is designed to
prevent recording on the leader at the
beginning of the tape.
6 Press P on the remote to pause
recording at the end of side A.
The total recording time “0.00” is
displayed.
Repeat steps 4 and 5 to programme the
remaining tracks you want to record on
side B in the order you want them to be
recorded.
Chapter 4: the Tape Player
Chapter 5:
Adjusting the
Balance of the
Sound
Adjustment
Adjusting the Balance of
the Speakers
Reinforcing Bass (DBFB)
Listening with Surround
Feature
Speakers
You can adjust the balance of the sound
from the speakers to correct the stereo
imaging when the speaker position is not
symmetrical.
Use the buttons on the remote to do this
operation.
Tuner CD Player
Reinforcing Bass
(DBFB)
DBFB (Dynamic Bass Feedback) feature
intensifies low frequency sound for richer
bass reproduction.
You can select one of the two levels of
DBFB: “DBFB1” or “DBFB2”. “DBFB2” is
more effective than “DBFB1”.
Tuner CD Player
POWER → ON
POWER → ON
EN
15
BALANCE L/R
To increase the relative strength of the right
speaker, press BALANCE R.
Each time you press BALANCE R, the
display changes as follows:
10 LEFT b 9 LEFT b ...... b 1 LEFT b
CENTER b 1 RIGHT b2 RIGHT b ......
b 10 RIGHT
To increase the relative strength of the left
speaker, press BALANCE L.
Each time you press BALANCE L, the
display changes in reverse order to the
above.
To listen through the headphones
Connect the headphones to the PHONES
jack. No sound will come from the
speakers.
DBFB
Press DBFB repeatedly until “DBFB1” or
“DBFB2” appears in the display.
Each time you press DBFB, the display
changes as follows:
b DBFB1 b DBFB2 b OFF
Note
When the Surround and DBFB features are set
to OFF, you can enjoy almost the same sound
as the CD source (Source Direct feature).
Chapter 5: Sound Adjustment

EN
16
Listening with the
Surround Feature
With this feature, you can create the
atmosphere of a movie theater or concert
hall. Select one of the two levels of the
Surround feature: “SURR1” and “SURR2”.
“SURR2” is more effective than “SURR1”.
Tuner CD Player
POWER → ON
SURROUND
Press SURROUND repeatedly until
“SURR1” or “SURR2” appears in the
display.
Each time you press SURROUND, the
display changes as follows:
b SURR1 b SURR2 b OFF
Note
When the Surround and DBFB features are set
to OFF, you can enjoy almost the same sound
as the CD source (Source Direct feature).
Chapter 5: Sound Adjustment
Chapter 6:
Additional
Features
Falling Asleep to Music
Falling Asleep to
Music
You can set the stereo system to turn off
automatically so you can go to sleep to
music.
Before setting sleep timer, make sure the
clock has been set correctly.
Tuner CD Player
POWER → ON
Waking Up to Music
You can wake up to music at the preset
time. You only need to set the timer once.
The preset timer activates at the same time
every day. Before setting the wake up
timer, make sure the clock has been set
correctly. To wake up to the sound of the
radio, be sure to preset the station you want
to listen to beforehand. (See “Presetting
Radio Stations”.)
Tuner CD Player
Waking Up to Music
Timer-Recording Radio
Programmes
Connecting Optional
Equipment
SLEEP
1 Play your favourite sound source (a
tape, the tuner or CD).
2 Press SLEEP while the source is playing
to choose how long you want the music
to play.
“SLEEP” and minutes indication appear
in the display. Each time you press
SLEEP, the indication decreases by 10
minutes from 90 to 10.
The power will turn off after the length
of time you chose.
b 90 b 80 b 70 b ...... b 20 b10 bOFF
To cancel the sleep timer
Press SLEEP repeatedly until “SLEEP OFF”
appears in the display.
To check the remaining time before
the sleep timer turns off the system
Press SLEEP once.
The remaining time appears in the display
for several seconds.
To change the preset time while the
sleep timer is on
Press SLEEP several times until the desired
length of time indication appears.
Note
While the sleep timer is activated, the daily
and recording timer functions do not work.
POWER → ON
TIMER
SELECT
3
8
4,5,
6, 7
ENTER
2
1 Prepare the sound source.
Source
CD
Radio
Tape
Preparation
Insert a CD. If you want
to play it from a desired
track, do the necessary
procedures for
programmed CD play
(p.8).
Tune in the desired preset
station.
Insert a tape with the side
you want to play facing
towards you, and press
( to start playing from
the front side.
2 Press VOL +/– to adjust the volume.
3 Press TIMER SET.
4 Press TIMER +/– to display “DAILY”,
and press ENTER.
The hour indication flashes in the
display.
0AM210
DAYLY
EN
17
continue to next page ➔
Chapter 6: Additional Features
➔continued
5 Set the time you want the music to come
on.
Press TIMER +/– to set the hour, and
press ENTER.
The minute indication flashes.
Set the minute in the same way and
press ENTER.
The hour indication for the turn-off time
appears.
AM
7
0
1
DAILY
To check the timer settings
Press TIMER SELECT until “DAILY”
disappears and appears in the display
again.
The preset items appear sequentially.
To change timer settings
Repeat steps 1 to 8.
Timer-Recording
Radio Programmes
recording.)
2 Press BAND repeatedly until the band
you want appears in the display.
3 Press TUNING/PLAY MODE until
“PRESET” appears in the display.
4 Press TUNING +/– to tune in the preset
station.
5 Press TIMER SET.
6 Press TIMER +/– to display “REC”, and
press ENTER.
The hour indication flashes.
EN
18
AM
8
0
1
DAILY
6 Set the time you want the music to go
off.
Press TIMER +/– to set the hour, and
press ENTER.
The minute indication flashes.
Set the minute in the same way and
press ENTER.
The source indication flashes.
CD
DAILY
7 Press TIMER +/– to select the source,
and press ENTER.
Indication
Source
CD
Radio
Tape
MD, etc.
The preset items appear in the display
sequentially.
CD
TUNER
TAPE
MD
You can set the timer to record the radio.
This timer works only once for each setting.
Preset the station beforehand. (See
“Presetting Radio Stations”.)
Make sure the clock is set correctly.
Note
You cannot control with this player the power
on/off and recording start/stop of the
recorder connected to the MD OUT jacks on
the rear. Complete the preparation for timer
recording on the recorder.
Tuner CD player
POWER → ON
4
2
Stereo cassette deck
0AM210
REC
7 Set the time you want to start recording.
Press TIMER +/– to set the hour, and
press ENTER.
The minute indication flashes.
Set the minute in the same way, and
press ENTER.
The hour indication for the turn-off time
flashes.
AM
170
REC
AM
8
0
1
REC
8 Set the time you want to stop recording.
Press TIMER +/– to set the hour, and
press ENTER.
The minute indication flashes.
Set the minute in the same way and
press ENTER.
“TO TAPE” or “TO MD” flashes.
TO
APTE
REC
8 Press SYSTEM POWER to turn off the
system.
At the preset time, the power will go on
and the music will play. At the turn-off
time, the power will go off again.
To cancel the timer
Press TIMER SELECT repeatedly until
“OFF” appears in the display instead of
“DAILY”.
To set the timer with the same items
Press TIMER SELECT to display “DAILY”,
and press SYSTEM POWER to turn off the
system.
Once you set the timer, you do not have to
set the same items again.
Chapter 6: Additional Features
TIMER
SELECT
10
6, 7,
5
8, 9
4
2
3
ENTER
1 Insert a blank tape with the side you
want to record facing towards you, and
press ( to start recording from the
front side.
(Prepare the recorder connected to the
MD OUT jacks on the rear for timer
1
9 Press TIMER +/– to select what you
want to record on, and press ENTER.
To record on a tape, display “TO
TAPE”.
To record on an MD, etc., display “TO
MD”.
The preset items appear in the display
sequentially.
10 Press SYSTEM POWER to turn off the
system.
At the preset time, the power will go on
and recording starts. At the turn-off
time, the power will go off again.
At the preset time, the sound level is
automatically set to the minimum and
will be the same level after the turn off
time.

To cancel the timer
Press TIMER SELECT repeatedly until
“OFF” appears in the display instead of
“REC”.
To set the timer with the same items
Press TIMER SELECT to display “REC”,
and press POWER to turn off the system.
Once you set the timer, you do not have to
set the same items again.
To check the timer settings
Press TIMER SELECT until “REC”
disappears and appears in the display
again.
The preset items appear sequentially.
To change timer settings
Repeat steps 1 to 10.
Connecting Optional
Equipment
Connecting an MD, DAT
deck, etc.
To make a digital recording with an
MD, DAT deck, etc.
Connect the DIGITAL (OPTICAL)
OUTPUT jack on the rear panel of the tuner
CD player to a recorder, deck, etc. that has
an optical connector.
Tuner CD
to digital
input jack
MD/DAT
deck
Digital cable POC-15A
(not supplied), etc.
To make an analog recording with an
MD, DAT, VCR deck, etc.
Connect the MD IN/OUT jacks (phono
jacks) on the rear panel of the stereo to an
MD, DAT, VCR deck, etc. with the Sony
RK-C315 connecting cord (not supplied).
Connecting cord RK-C315
(not supplied), etc.
to the
input jacks
player
CD OPTICAL
DIGITAL OUT
Tuner CD
player
To hear the VCR sound through the
connected speakers, connect the MD IN
jacks on the rear panel of the stereo to the
output jacks on the VCR. In this case,
connect the plugs to jacks of the same
colours.
For details, see the instruction manual for
each equipment.
To listen to the sound of the
connected equipment
Press FUNCTION repeatedly until “MD”
appears in the display.
Connecting an External
Aerial
To improve the FM reception
Connect an external aerial when the signal
reception is too weak with the supplied FM
lead aerial.
Connect an external FM aerial to the FM 75
Ω terminal, using a 75-ohm coaxial cable.
EN
19
To improve the AM reception
Connect an external aerial if the signal
reception is too weak after reorienting the
supplied AM loop aerial. Do not
disconnect the AM loop aerial.
Connect a 6- to 15-meter insulated wire (not
supplied) to the AM terminal and extend
the other end horizontally at a higher place.
Connect the y terminal to the earth.
Important
Earth the external aerial against lightning. To
avoid a gas explosion, do not connect the earth
wire to a gas pipe.
Insulated wire
(not supplied)
Earth wire
(not supplied)
MD/DAT/
VCR deck
to the output
jacks
Chapter 6: Additional Features
For Your
Information
Precautions
If you have any questions or problems
concerning your stereo system, please
consult your nearest Sony dealer.
In case colour irregularity is observed
on nearby TV screen
With this magnetically shielded type of
speaker system, the speakers can be installed
near a TV set. However, colour irregularity
may still be observed on the TV screen
depending on the type of your TV set.
EN
20
Precautions
Troubleshooting Guide
Maintenance
Specifications
Index to Parts and
Controls
Index
On safety
• The unit is not disconnected from the
mains as long as it is connected to the
wall outlet, even if the unit itself has been
turned off.
• Unplug the system from the mains if it is
not to be used for an extended period of
time. To disconnect the mains lead, pull
it out by the plug. Never pull the cord
itself.
• Should any solid object or liquid fall into
a component, unplug the stereo system
and have the component checked by
qualified personnel before operating it
any further.
• The mains lead must be changed only at
the qualified service shop.
On installation
Place the stereo system in a location with
adequate ventilation to prevent heat buildup in the stereo system.
On condensation in the CD player
component
If the system is brought directly from a cold
to a warm location, or is placed in a very
damp room, moisture may condense on the
lens inside the CD player. Should this
occur, the CD player will not operate.
Remove the CD and leave the system
turned on for about an hour until the
moisture evaporates.
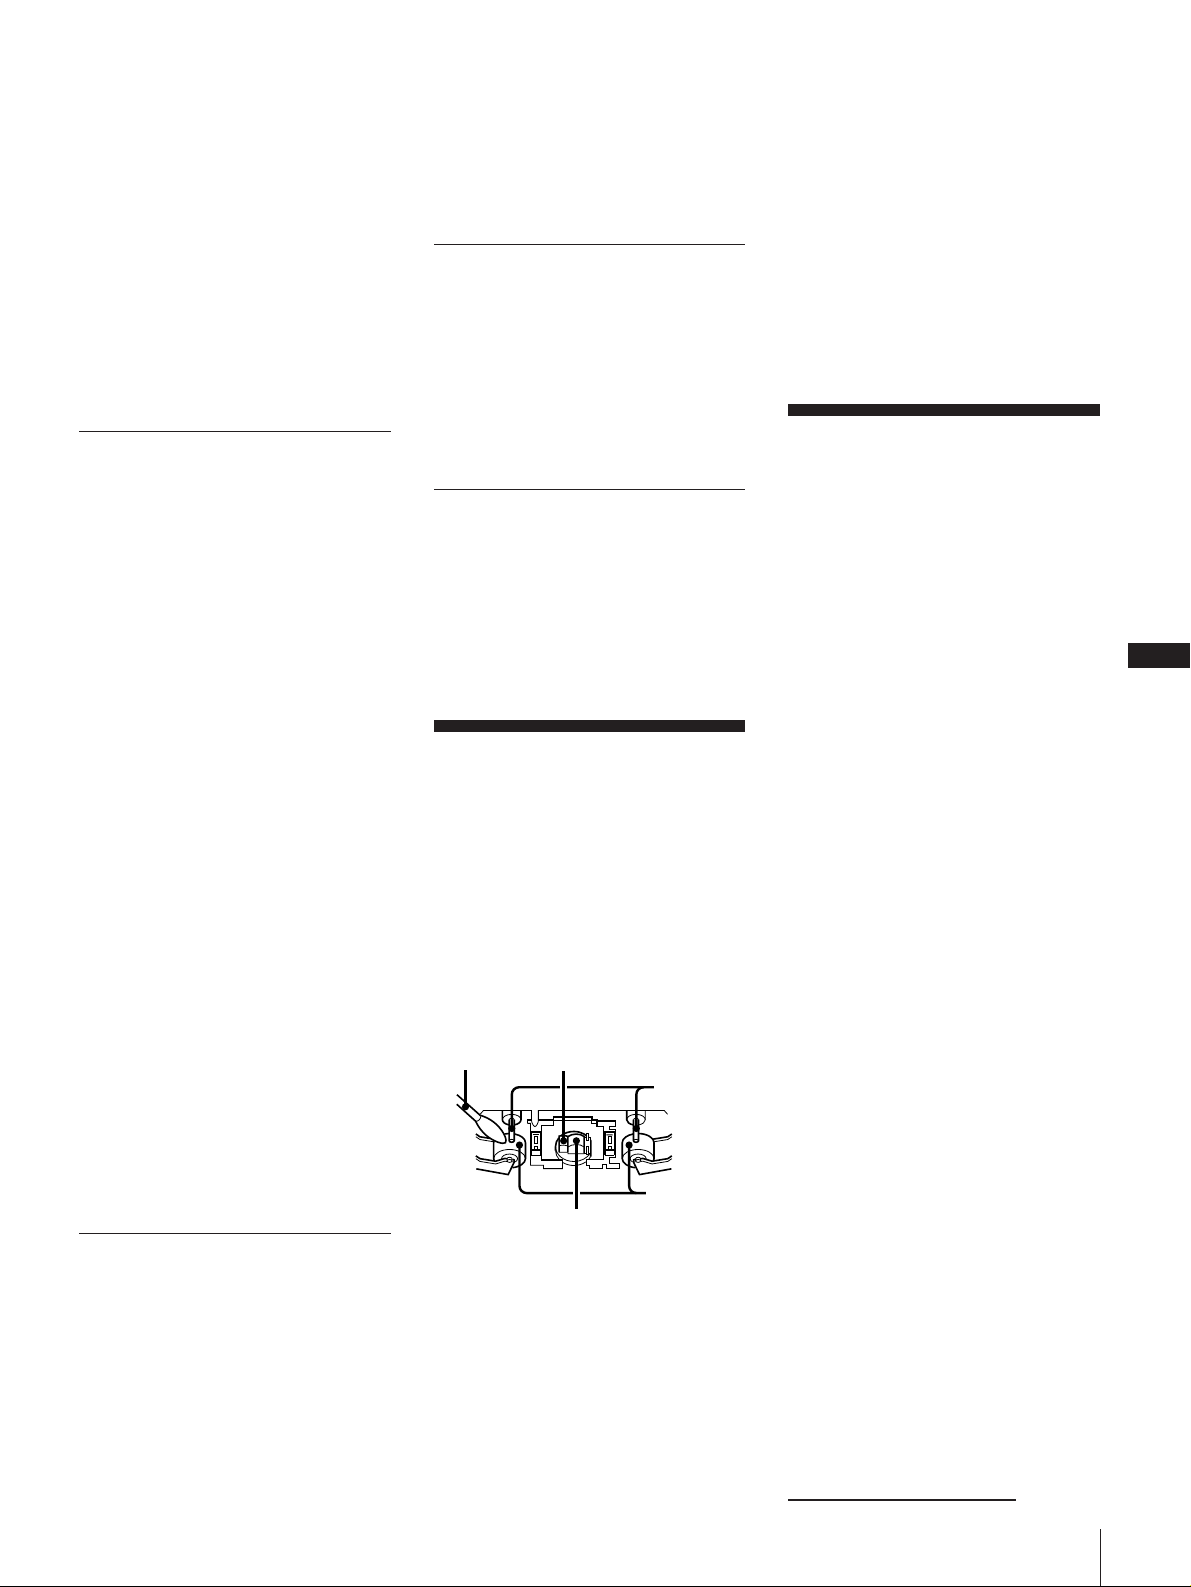
To save a tape permanently
To prevent a tape from being accidentally
recorded over, break off the cassette tab
from side A or B as illustrated. If you later
want to reuse the tape for recording, cover
the broken tab with adhesive tape.
Side A
Tab of side B
When you are using a TYPE II (CrO2) or
TYPE IV (METAL) cassette, be careful not
to cover the detector slots which allow the
tape player to automatically detect the type
of tape.
Tab of side A
If colour irregularity is observed...
Turn off the TV set once, then turn it on after
15 to 30 minutes.
If colour irregularity is observed
again...
Place the speakers farther away from the TV
set.
Troubleshooting
Guide
If you run into any problem using the
stereo, use the following check list after first
checking the following two points:
• The mains lead is connected firmly.
• The speakers are connected correctly and
firmly.
Should any problem persist after you have
made the checks below, consult your
nearest Sony dealer.
General
There is no sound.
m Press POWER to turn on the
stereo.
m Adjust the volume.
m The headphones are connected.
Disconnect them.
The left and right sound are
reversed.
m Check the speaker connection and
speaker placement.
There is severe hum or noise.
m TV or VCR is too close to the
stereo system. Move the stereo
system away from the TV or VCR.
”AM 12:00” flashes in the display.
m Mains interruption occurred. Set
the clock and timer settings again.
For Your Information
TYPE II TYPE IV
Detector slots
CD Player
The CD tray does not close.
m The CD is not placed correctly.
The CD will not play.
m The CD is dirty.
m The CD is inserted label side
down.
m The player is in pause mode.
m Moisture condensation has built-
up. Leave the system turned on
for about an hour until the
moisture evaporates.
Play does not start from the first
track.
m The CD player is in programme or
shuffle mode. Press TUNING/
PLAY MODE repeatedly until the
play mode indication disappears.
Cassette deck
The tape does not record.
m No tape in the tape compartment.
m The tab has been removed from
the cassette.
m The tape has reeled to the end.
The tape does not record nor does it
play back, or there is a decrease in
sound level.
m The heads are dirty. Clean them.
m Magnetic deposits have built-up
on the record/playback head*.
There is excessive wow or flutter, or
the sound drops out.
m The capstans or pinch rollers are
contaminated*.
The tape does not erase completely.
m Magnetic deposits have built-up
on the record/playback head*.
Noise increases or the high
frequencies are erased.
m Magnetic deposits have built-up
on the record/playback head*.
CD Synchronized recording does not
start.
m When you set the tape direction to
a, recording does not start if the
tab of either side is removed from
the cassette.
*See “Maintenance”.
Tuner
”TUNED” flashes in the display.
m Adjust the aerial.
”STEREO” flashes in the display.
m Adjust the aerial.
Severe hum or noise.
m Adjust the aerial.
m The signal strength is too weak.
Connect the external aerial.
m Connect the earth wire.
A stereo FM programme cannot be
received in stereo.
m When "MONO" appears in the
display, press STEREO/MONO on
the remote so that "MONO"
disappears.
m Adjust the aerial.
Timer
The timer does not function.
m Set the clock correctly.
m The mains has been cut off. While
the timer functions, press the
POWER switch to turn off the
system.
m Make sure “DAILY” or “REC”
appears in the display.
Remote
The remote does not function.
m The batteries have run down.
Replace both batteries.
m There is an obstacle between the
remote and the system. Remove
the obstacle.
Maintenance
To clean the tape heads and tape
path
Contaminated tape heads cause poor
recording or sound drop-out in playback.
We recommend cleaning after every 10
hours of operation.
Open the tape compartment and wipe the
heads, the pinch rollers and the capstans
with a cleaning swab slightly moistened
with cleaning fluid or alcohol. Wipe the
parts shown below:
Cleaning swab
Insert a tape when the areas cleaned are
completely dry.
To demagnetize the tape heads
After 20 to 30 hours of use, enough residual
magnetism will have built up on the heads
to begin to cause loss of high frequencies
and hiss. At this time, demagnetize the
heads and all metal parts in the tape path
with a commercially available tape head
demagnetizer. Refer to the instructions of
the demagnetizer.
Erase head
Capstan
Pinch roller
Playback head
To clean the cabinet
Use a soft cloth slightly moistened with
mild detergent solution.
To clean the CD
When a CD is dirty, clean it with a cleaning
cloth. Wipe the CD from the centre out.
Notes on CD
• Do not use solvents such as benzene,
thinner, commercially available cleaners,
or anti-static spray intended for vinyl LPs.
• If there is a scratch, dirt or fingerprints on
the CD, it may cause a tracking error.
Specifications
Tuner CD player (HCD-T1)
Tuner section
Tuning range
FM: 87.5 – 108 MHz
AM: 531 – 1,602 kHz
(at 9 kHz interval)
530 – 1,710 kHz
(at 10 kHz interval)
(Except for the Middle
Eastern model)
Intermediate frequency
FM: 10.7 MHz
AM: 450 kHz
Aerial terminals
FM: 75 ohm unbalanced
AM: External aerial terminal
Timer Quarts lock system
Timer setting
One-minute step
Sleep timer
10-minute step, max. 90
minutes
CD player section
System Compact disc digital audio
system
Laser Semiconductor laser
Wavelength
780 – 790 nm
Frequency response
2 Hz – 20 kHz ±0.5 dB
Signal to noise ratio
More than 90 dB
Harmonic distortion
Less than 0.03%
Preamplifier section
Frequency response
15 Hz – 50 kHz +0 dB
Inputs MD IN:
Stereo phone jack, sensitivity
450 mV, impedance 47 kilohms
Outputs DIGITAL OUT (CD OPTICAL
OUT) jack:
Digital connector, –18 dBm,
wavelength 660 nm
OUTPUT jack:
Stereo phone jack, 1 V, 1 kohm
continue to next page ➔
–3
EN
21
For Your Information

EN
22
➔continued
MD OUT jack:
Stereo phone jack, 250 mV,
1 kohm
PHONES (headphones) jack:
Stereo mini jack, accepts
headphones of 8 ohms or more.
General
Power requirements
120 V or 220 – 240 V AC,
adjustable, 50/60 Hz
Power consumption
25 W
Dimensions
Approx. 142 × 125 × 252 mm
(w/h/d) (5
incl. projecting parts and
controls
Mass Approx. 3 kg (6 lb 10 oz)
Active speaker system (SA-N1)
Speaker system
Full range, bass reflex
Speaker units
10 cm dia., cone type
Rated impedance
4 ohms
Power requirements
120, 220 V or 240 V AC,
adjustable, 50/60 Hz
Continuous RMS power output
12 + 12 watts
(4 ohms at 1 kHz, 5 % THD)
13 + 13 watts
(4 ohms, at 1 kHz, 10 % THD)
Power consumption
27 W
Dimensions
Right: Approx. 125 × 200 × 215
mm (w/h/d) (5 × 77/8 × 8
inches) incl. projecting parts
and controls
Left: Approx. 125 × 200 × 200
mm (w/h/d) (5 × 77/8 × 7
inches) incl. projecting parts
and controls
Mass Right: Approx. 2.9 kg
(6 lb 7 oz)
Left: Approx. 1.7 kg (3 lb 12
oz)
Stereo cassette deck (TC-TX1)
Recording system
4-track 2-channel stereo
Frequency response
(DOLBY NR OFF)
50 – 15,000 Hz (±3 dB), using
Sony TYPE IV cassette
50 – 14,000 Hz (±3 dB), using
Sony TYPE II cassette
50 – 13,000 Hz (±3 dB), using
Sony TYPE I cassette
Wow and flutter
±0.2 % W.PEAK (DIN)
Dimensions
Approx. 142 × 125 × 205 mm
(w/h/d) (5
inches) incl. projecting parts
and controls
For Your Information
5
/8 × 5 × 10 inches)
5
/8 × 5 × 8
1
/8
Mass Approx. 2 kg (4 lb 7 oz)
Supplied accessories
AM loop aerial (1)
Sony RM-ST1 Remote (1)
Sony SUM-3 (NS) batteries (2)
FM lead aerial (1)
Speaker cable (1)
Audio cord (1)
Design and specifications are subject to
change without notice.
Stereo cassette deck
1234
Index to Parts and
Controls
Refer to the pages indicated in parentheses
for how to use the controls.
Controls with an asterisk have indicators on
themselves.
Front Panel
Tuner CD player
2345671
1
/2
7
/8
1 POWER switch (7)
2 Display window (6, 7, 17)
3 ^ (play / pause) button (7)
4 p (stop) button (7, 13)
5 6 (open/close) button (7)
6 =0 and )+ (AMS / search)/
7 BAND button (10)
8 FUNCTION button (13, 19)
9 PHONES jack (15)
0 Remote sensor
!¡ VOL + and – buttons (7, 11, 12)
89
TUNING + and – buttons (7, 10, 14)
0
!¡
56789
1 ( (front side play) and 9 (reverse
side play) buttons (12, 17)
2 p (stop) button (12)
3 AMS / ) (fast rightward) and 0
(fast leftward) buttons (12)
4 P (pause) button (12)
5 6 EJECT button (12, 18)
6 DOLBY NR OFF / ON switch (12)
7 DIRECTION A / a switch (12)
8 r REC button (13)
9 CD SYNC button (12)
Rear Panel
Tuner CD player
12 6543 7
9!¡0!™8
1 FM 75 Ω terminal (5, 19)
2 y (earth) terminal (5, 19)
3 AM terminal (5, 19)
4 MD OUT jacks (19)
5 MD IN jacks (19)
6 OUTPUT jacks (4)
7 VOLTAGE SELECTOR (4)
8 Mains lead (5)
9 AC OUTLET connector (4)
0 SYSTEM CONTROL cable (4)
!¡ AU BUS (audio bus) connector (5)
!™ DIGITAL OUT (CD OPTICAL OUT)
jack (19)

Display Window
234 561
78
1 CD play mode indications (8, 9)
2 Tuner indications (10)
3 Track number/band indication (7, 10)
4 AUTO / MANUAL / PRESET /
MEMORY indications (10, 11)
5 SURR (surround) indication (16)
6 DBFB indication (15)
7 DAILY / REC / SLEEP timer
indications (17, 18)
8 Function / Time / frequency indication
(6, 7, 10)
5 CD and tuner operating buttons
( (play) button (7)
P (pause) button (7)
p (stop) button (7)
BAND button (10, 18)
TUNING + and – /= and + (AMS)
buttons (7, 10)
STEREO / MONO button (10)
TUNING / PLAY MODE button (8, 10)
REPEAT button (9)
DISPLAY button (7)
MEMORY button (11)
6 Tape operating buttons
9 (reverse side play) and ( (front
side play) buttons (12)
p (stop) button (12)
0 (fast leftward) and ) (fast
rightward) buttons (12)
7 FUNCTION button (13, 19)
8 Sound adjustment buttons
DBFB button (15)
SURROUND button (16)
9 BALANCE L and R buttons (15)
0 TIMER + and – buttons (6, 17, 18)
!¡ ENTER button (6, 18)
!™ VOL + and – buttons (7, 11)
Index
EN
23
Remote (RM-ST1)
1
2
3
4
5
6
7
8
9
1 SYSTEM POWER switch (18)
2 SLEEP button (17)
3 TIMER SELECT button (17, 18)
4 TIMER SET button (17, 18)
0
!¡
!™
Aerials 5, 10, 19
AMS 7, 12
CD synchro-recording 12
Clock setting 6
Connecting
optional equipment 19
the system 4
DBFB 15
Inserting batteries 6
Playing
a CD (normal play) 7
a tape 12
tracks in random order (shuffle play)
8
track in the desired order
(programme play) 8
tracks repeatedly (repeat play) 9
Radio stations
presetting 11
tuning in 10
Recording
a CD 12, 13, 14
a CD automatically 12
a CD manually 13
a radio programme 13, 18
Recording CDs
specifying track order 14
Sound adjusting 15
Timer
falling asleep to music 17
timer recording 18
waking up to music 17
Tuner 10
For Your Information

Français
AVERTISSEMENT
Afin de prévenir tout risque d’incendie
ou d’électrocution, abstenez-vous
d’exposer cet équipement à la pluie ou
à l’humidité.
Afin de prévenir tout risque d’électrocution, abstenez-vous d’ouvrir
le boîtier. Confiez l’entretien de cet équipement exclusivement à des
techniciens qualifiés.
N’installez pas cet équipement dans un espace restreint tel qu’une
bibliothèque ou une armoire encastrée.
L’unité laser que contient cet équipement est susceptible
d’émettre des radiations dont les caractéristiques se situent endehors des limites s’appliquant aux appareils de Classe 1.
Cet équipement est considéré
comme un produit LASER de
CLASSE 1.
L’étiquette de marquage des
produits laser de CLASSE 1 est
apposée au dos du boîtier de cet
équipement.
F
2
L’étiquette de mise
en garde ci-après
est apposée à
l’intérieur du
boîtier.
Bienvenue!
Nous vous remercions d’avoir fait l’acquisition de cette chaîne haute
fidélité compacte Sony.
Cette chaîne stéréo est truffée de fonctions amusantes. En voici un
avant-goût:
• Les dimensions du panneau frontal de chaque composant
correspondent à celles d’une pochette de disque compact, ce qui
vous permet de les empiler ou de les agencer comme bon vous
semble.
• Le système DBFB (Dynamic Bass Feedback) amplifie les sons basse
fréquence pour obtenir la diffusion de graves puissantes et
profondes par le biais d’une paire de haut-parleurs bass reflex
pleine plage.
• Une fonction de présélection permet de mémoriser et de rappeler
jusqu’à 20 stations FM, 10 stations AM.
• Le programmateur permet de mettre en service/hors service le
lecteur de disques compacts, le lecteur de cassettes ou la radio à
l’heure de votre choix
• La télécommande permet de contrôler la diffusion du son sans
quitter votre fauteuil
• La prise de sortie optique autorise l’exécution d’enregistrements
numériques
A propos du système CMT-T1
Le système comprend:
– Tuner lecteur CD : HCD-T1
– Jeu de haut-parleurs actifs : SA-N1
– Lecteur de cassettes stéréo : TC-TX1

Table
des
matières
Chapitre 1: Installation
Raccordement de la chaîne stéréo 4
Introduction des piles dans leur compartiment 6
Réglage de l’horloge 6
Chapitre 2: Le lecteur de disques compacts
Lecture d’un disque compact (lecture normale) 7
Lecture des plages dans un ordre quelconque (lecture aléatoire) 8
Lecture des plages dans l’ordre de votre choix (lecture programmée) 8
Lecture des plages à plusieurs reprises (lecture répétée) 9
Chapitre 3: La radio
Ecoute radiophonique 10
Présélection des émetteurs de radiodiffusion 11
Ecouter les stations de radio présélectionnées 11
Chapitre 4: Le lecteur de cassettes
Lecture d’une cassette 12
Enregistrement automatique d’un disque compact 13
Enregistrement manuel d’un disque compact, etc. 14
Enregistrement d’un disque compact selon une séquence spécifiée
(montage programmé) 14
Chapitre 5: Réglage du son
Réglage de la balance des hauts-parleurs 16
Accentuation des graves (DBFB) 16
Ecoute en tétraphonie 17
F
3
Chapitre 6: Fonctions supplémentaires
Extinction programmée 18
Réveil en musique 18
Programmation de l’enregistrement d’émissions radiophoniques 19
Raccordement des équipements en option 20
Pour votre information
Précautions 22
Guide de dépannage 22
Maintenance 23
Spécifications 24
Index des pièces et des commandes 25
Index 26

Chapitre 1:
Installation
Raccordement de la chaîne
stéréo
Introduction des piles dans
leur compartiment
Raccordement de la
chaîne stéréo
Référez-vous aux illustrations ci-après pour
raccorder correctement votre chaîne stéréo.
OPERATION 1
Raccordement du câble
plat
Raccordez le tuner lecteur CD et le lecteur
de cassettes stéréo avec ce cordon plat en
appuyant sur le connecteur jusqu’à ce qu’il
s’encliquette.
OPERATION 2
Raccordement du hautparleur droit
Raccordez le haut-parleur sur le tuner
lecteur CD à l’aide du câble audio (fourni)
et du cordon d’alimentation.
Raccordement du câble audio
Branchez correctement la fiche blanche sur
la prise blanche (L) et la fiche rouge sur la
prise rouge (R).
Blanc
Rouge
Réglage de l’horloge
Pour déconnecter le câble plat
Exercez une traction sur le connecteur du
câble plat tout en appuyant sur les flancs de
F
4
celui-ci. Abstenez-vous de tirer sur le câble
plat lui-même.
Raccordement du cordon
d’alimentation secteur du hautparleur droit
Branchez le cordon d’alimentation du hautparleur droit sur la prise AC OUTLET du
panneau arrière du tuner lecteur CD.
OPERATION 3
Raccordement du hautparleur gauche
Raccordez le haut-parleur gauche au hautparleur droit au moyen du câble de
raccordement des hauts-parleurs (fourni).
Veillez à éloigner ces câbles des antennes.
Cordon gris sur ] (rouge)
Torsadez chacune
des extrémités
Cordon ligné de noir sur } (noir)
]
Chapitre 1: Installation
}

antenne filaire FM (fournie)
Antenne en cadre AM (fournie)
Haut-parleur droit
OPERATION 5
OPERATION 2
Cordon d’alimentation
Câble de raccordement
des hauts-parleurs (fourni)
OPERATION 5
Cordon
d’alimentation
Tuner lecteur CD
OPERATION 4
Câble audio
(fourni)
Lecteur de cassettes stéréo
OPERATION 1
Câble plat
(fourni)
!Effectuez ce raccordement
en dernier lieu!
OPERATION 3
Haut-parleur gauche
OPERATION 6
vers une prise
d’alimentation secteur
F
5
OPERATION 4
Raccordement des
antennes
Antenne filaire*
(fournie)
Antenne en cadre
AM** (fournie)
* Fixez-la de manière à obtenir une qualité de
réception optimale.
** Orientez-la de manière à obtenir une qualité
de réception optimale.
Pour améliorer la qualité de la
réception
Branchez une antenne extérieure (p.21).
Installation de l’antenne en cadre
AM
OPERATION 5 Réglage du
sélecteur de tension
Avant de raccorder l’alimentation, assurezvous que le sélecteur de tension sur le
panneau arrière du tuner lecteur CD et du
haut-parleur droit est correctement réglé. Si
tel n’est pas le cas, utilisez un tournevis
pour mettre le sélecteur dans la position
voulue avant de raccorder l’appareil au
secteur.
Tuner lecteur CD
220-240V 120V
VOLTAGE SELECTOR
Haut-parleur droit
VOLTAGE SELECTOR
220V240V 120V
OPERATION 6
Raccordement de
l’alimentation
Branchez le cordon d’alimentation secteur
du tuner lecteur CD sur la prise de votre
choix après avoir effectué les connexions
qui précèdent.
Remarque
• Vous pouvez retirer la garniture frontale qui
protège les hauts-parleurs.
Chapitre 1: Installation

Introduction des
piles dans leur
compartiment
Introduisez deux piles de type AA (R6)
dans le compartiment de la télécommande
fournie.
Réglage de l’horloge
Vous devez régler l’horloge avant
d’exploiter la fonction de programmation
du système.
1
2,3,4
ENTER
Durée de vie des piles
Dans des conditions d’utilisation normales, la
télécommande devrait fonctionner pendant six
mois environ, si vous utilisez des piles Sony
SUM-3 (NS). Dès que la télécommande cesse
F
de fonctionner correctement, remplacez les
deux piles usées par de nouvelles piles.
6
Pour prévenir toute fuite éventuelle
d’électrolyte
Si vous n’avez pas l’intention d’utiliser la
télécommande avant longtemps, retirez les
piles de leur compartiment afin de prévenir
tout risque d’endommagement dû à la
corrosion ou à une fuite éventuelle
d’électrolyte.
1 Appuyez sur la touche TIMER SET.
2 Appuyez sur la touche TIMER + ou –
pour afficher la mention “CLOCK” et
appuyez sur la touche ENTER.
L’indication de l’heure commence à
clignoter.
AM
0201
3 Réglez l’heure en appuyant sur la
touche TIMER + ou – et appuyez sur la
touche ENTER.
L’indication des minutes commence à
clignoter.
AM
180
4 Réglez les minutes en appuyant sur la
touche TIMER+ ou – et appuyez sur la
touche ENTER.
L’horloge est lancée.
Chapitre 1: Installation
Pour rectifier l’heure
Répétez les opérations 1 à 4.
A propos de l’indication de l’heure
• L’horloge incorporée indique l’heure sur
l’écran d’affichage lorsque vous appuyez sur
la touche POWER pour mettre le système
hors tension.
• Le point supérieur de la mention “:” qui
apparaît sur l’écran d’affichage de l’heure
clignote pendant les 30 premières secondes
de la minute en train de s’écouler tandis que
le point inférieur clignote pendant les
30 secondes restantes.

Chapitre 2:
Le lecteur
de disques
compacts
Lecture d’un disque
compact
(lecture normale)
Lecture des plages dans
un ordre quelconque
(lecture aléatoire)
Lecture des plages dans
l’ordre de votre choix
(lecture programmée)
Lecture des plages à
plusieurs reprises
(lecture répétée)
Lecture d’un disque
compact
(lecture normale)
Vous disposez des quatre modes de lecture
qui suivent: lectures normale, aléatoire,
programmée et répétée. Le mode choisi
détermine les plages musicales jouées par le
lecteur, l’ordre dans lequel elles seront lues
et les conditions de leur répétition
éventuelle.
Ce lecteur permet de jouer indifféremment
des disques compacts de 12 cm et de 8 cm.
Lorsque vous reproduisez un CD de 8 cm,
placez-le sans adaptateur sur le cercle
intérieur du plateau de lecture.
Avant de jouer le disque compact de votre
choix, réduisez le volume sonore en
appuyant sur la touche VOL –. Cette
précaution préviendra tout risque
d’endommagement des hauts-parleurs.
Tuner lecteur CD
p
2
3
4
1
Pour
Interrompre une
lecture
Introduire une
pause de lecture
Retirer le disque
compact
* Télécommande
Fonction de lecture à une touche
Appuyez sur la touche ^ (ou sur la touche
( de la télécommande) lorsque la chaîne est
hors tension ou lorsque vous écoutez une
autre source.
Tant qu’un CD se trouve dans le compartiment
du lecteur approprié, vous pourrez l’écouter
sans devoir actionner aucune autre touche.
Pour trouver le début d’une plage –
détection automatique de la
musique (AMS)
Vous pouvez localiser le début d’une plage
en cours de lecture ou en mode de pause de
lecture.
Pour localiser le début de la plage en cours
de lecture ou de la plage précédente,
appuyez sur les touches =0 ( ou =
de la télécommande) jusqu’à ce que vous
trouviez la plage de votre choix.
Appuyez sur
p
^ (ou P*)
Appuyez de nouveau
sur cette touche pour
reprendre la lecture.
6
F
7
1 Appuyez sur la touche POWER.
2 Appuyez sur la touche 6 (ouverture/
fermeture) et posez un disque sur le
plateau de lecture.
en veillant à ce que l’étiquette du
disque soit orientée vers le haut
3 Appuyez sur la touche ^ (lecture) ( ou
sur la touche ( de la télécommande).
Le plateau de lecture se referme et le
lecteur entame la lecture de la première
page.
1
003
4 Appuyez sur la touche VOL + ou – pour
régler le niveau sonore.
Pour localiser le début de la plage suivante,
appuyez sur les touches )+ (ou +
de la télécommande) jusqu’à ce que vous
trouviez la plage de votre choix.
Pour localiser un point spécifique
appartenant à une plage donnée
Vous pouvez retrouver un passage
déterminé sur une plage pendant la lecture
d’un CD ou en mode de pause. Pour
exécuter cette fonction, vous devez vous
servir des touches du lecteur. La
télécommande ne permet pas d’exécuter
cette opération.
suite page suivante ➔
Chapitre 2: Le lecteur de disques compacts

➔ suite
Pour rechercher
Vers l’avant en
cours de lecture
Vers l’arrière en
cours de lecture
Rapidement
sans écouter et
en contrôlant la
durée de
lecture dans la
fenêtre
d’affichage
Remarque
Si le CD arrive à la fin alors que vous êtes en
cours de recherche rapide sans écoute,
l’indication “OVER” apparaît dans la fenêtre
d’affichage. Appuyez sur =0 (0 sur la
touche = de la télécommande) pour revenir
en arrière.
Pour vérifier le nombre total des
F
plages et le temps de lecture total
Appuyez sur la touche DISPLAY de la
8
télécommande lorsque le lecteur est en
mode d’arrêt.
Les indications correspondantes s’affichent
pendant quelques secondes.
Opération
Maintenez les touches
)+ enfoncées et
relâchez-les dès que vous
avez atteint le point voulu.
Maintenez les touches
=0 enfoncées et
relâchez-les dès que vous
avez atteint le point voulu.
En cours de pause,
maintenez )+ ou
=0 enfoncé et
relâchez-la à l’endroit
voulu.
Lecture des plages
dans un ordre
quelconque
(lecture aléatoire)
Vous pouvez jouer toutes les plages d’un
disque compact donné dans un ordre
quelconque. Pour exécuter cette opération,
servez-vous des touches de la
télécommande.
Tuner lecteur CD
POWER → ON
6
3
2
Lecture des plages
dans l’ordre de votre
choix
(lecture programmée)
Vous avez la possibilité de programmer la
lecture de quelque 24 plages selon la
séquence de votre choix. Pour ce faire, il
vous suffit de désigner les plages dans
l’ordre dans lequel vous souhaitez les
entendre jouées.
Tuner lecteur CD
POWER → ON
6
6
2
3
4
Nombre total des plages
Temps de lecture total
Pour vérifier le temps résiduel
Appuyez sur la touche DISPLAY de la
télécommande à plusieurs reprises au cours
de la lecture d’un disque compact.
Chaque fois que vous appuyez sur la
touche DISPLAY, l’écran évolue comme
suit.
Numéro de la plage en
cours de lecture et temps de
lecture
12
4505
Z
v
Numéro de la plage en
cours de lecture et temps
résiduel de lecture de cette
plage
v
Temps résiduel de lecture
du disque compact
concerné
Chapitre 2: Le lecteur de disques compacts
1 Appuyez sur la touche 6 (ouverture/
fermeture) et posez un disque compact
sur le plateau de lecture.
2 Appuyez à plusieurs reprises sur la
touche TUNING/PLAY MODE jusqu’à
ce que la mention “SHUFFLE”
apparaisse sur l’écran d’affichage.
3 Appuyez sur la touche (.
La mention “J” apparaît à l’écran,
ensuite toutes les plages du disque
compact concerné sont lues dans un
ordre aléatoire.
Pour annuler une lecture aléatoire
Appuyez sur la touche TUNING/PLAY
MODE.
La mention “SHUFFLE” disparaît de
l’écran et la lecture des plages se poursuit
dans leur ordre initial.
Si vous appuyez sur la touche TUNING/
PLAY MODE en cours de lecture
normale
Vous pouvez jouer toutes les plages de ce
disque compact dans un ordre aléatoire.
Pour omettre la lecture d’une plage non
désirée
Appuyez sur la touche +.
Vous ne pouvez revenir à la plage précédente
en appuyant sur la touche =.
1 Appuyez sur la touche 6 (ouverture/
fermeture) et posez un disque compact
sur le plateau de lecture.
2 Appuyez à plusieurs reprises sur la
touche TUNING/PLAY MODE jusqu’à
ce que la mention “PGM” apparaisse sur
l’écran d’affichage.
3 Appuyez sur la touche = ou +
jusqu’à ce que le numéro de la plage de
votre choix apparaisse à l’écran.
Le temps de lecture total, incluant la
durée de la plage que vous venez de
choisir, clignote sur l’écran d’affichage.
(A ce stade, vous n’avez pas encore
enregistré le programme).
Numéro de la plage
TUNED
MONO AUTO MANUAL
STEREO
PRESET
MEMORY
SHUFFLE
SURR
4
DBFB
304
12
12
PGM
REPEAT 1
DAILY REC SLEEP kHz MHz
Temps de lecture total

4 Appuyez sur la touche ENTER.
Le numéro du programme s’affiche
pendant une seconde environ et le
temps de lecture total est mis en
évidence.
5 Répétez les opérations 3 et 4 pour
programmer les plages restantes que
vous souhaitez jouer dans l’ordre de
votre choix.
6 Appuyez sur la touche (.
Toutes les plages que vous avez choisi
de jouer dans l’ordre indiqué par vos
soins.
Pour annuler une lecture
programmée
Appuyez sur la touche TUNING/PLAY
MODE jusqu’à ce que la mention “PGM”
disparaisse de l’écran.
Pour modifier le programme
mémorisé
Lecture des plages à
plusieurs reprises
(lecture répétée)
Vous pouvez choisir entre deux modes
distincts de lecture répétée. Le premier
répète la lecture de toutes les plages
conformément au mode de lecture en cours;
le second ne répète qu’une seule plage.
Pour effectuer cette opération, servez-vous
des boutons de la télécommande.
Tuner lecteur CD
POWER → ON
Pour
ajouter une
plage à la fin
du programme
Effacer le
programme
dans son
intégralité
Au terme de la lecture de toutes les
plages programmées
La séquence programmée est enregistrée dans
la mémoire du lecteur de disques compacts.
Pour écouter le même programme, il suffit
d’appuyer sur la touche (.
Remarques
• Dès que vous ouvrez le plateau de lecture
des disques compacts, le programme est
effacé.
• Si le temps de programmation total dépasse
100 minutes, la séquence de programmation
s’affiche en lieu et place du temps de lecture
total.
• Si vous tentez de programmer plus de 24
plages, la mention “FULL” apparaît sur
l’écran d’affichage.
Opération
Exécutez les opérations 3 à
5 à l’arrêt.
Appuyez sur la touche p
du lecteur à l’arrêt.
REPEAT
Répétition de toutes les plages (dans
un mode de lecture quelconque)
Appuyez sur la touche REPEAT.
La mention “REPEAT” apparaît sur l’écran
d’affichage et les plages correspondantes
sont relues conformément au mode de
lecture en cours.
Répétition d’une seule plage (en
mode de lecture normal
uniquement)
Alors que la plage de votre choix est en
cours de lecture, appuyez à plusieurs
reprises sur la touche REPEAT jusqu’à ce
que la mention “REPEAT 1” apparaisse sur
l’écran d’affichage.
F
9
Pour annuler une lecture répétée
Appuyez à plusieurs reprises sur la touche
REPEAT jusqu’à ce que la mention
“REPEAT” ou “REPEAT 1” disparaisse de
l’écran d’affichage.
Chapitre 2: Le lecteur de disques compacts

Chapitre 3:
La
radio
Ecoute radiophonique
Présélection des
émetteurs de
radiodiffusion
Ecoute
radiophonique
Vous pouvez contraindre le tuner à passer
automatiquement en revue les fréquences
radio en se syntonisant sur les émetteurs
dont la réception est satisfaisante.
Cette fonction permet de gagner du temps
lors de la recherche d’émetteurs dont la
réception est acceptable. Néanmoins, vous
devrez procéder vous-même à la
syntonisation manuelle des émetteurs que
le dispositif de syntonisation automatique
ignore en raison de la médiocrité de leur
réception.
Tuner lecteur CD
1
émetteur dont la réception est
satisfaisante.
La mention “TUNED” apparaît sur
l’écran d’affichage. La mention
“STEREO” apparaît également si
l’émetteur FM accordé émet en
stéréophonie.
5 Si vous ne souhaitez pas écouter
l’émetteur sélectionné, appuyez de
nouveau sur la touche TUNING +/–
pour relancer l’exploration.
Si le tuner ne se syntonise pas sur
l’émetteur de votre choix
Le dispositif de syntonisation automatique
risque d’ignorer un émetteur dont la
réception est médiocre. Procédez à la
syntonisation manuelle du tuner sur
l’émetteur de votre choix.
F
10
Ecouter les stations de
radio présélectionnées
4,5
2
2
4,5
3
1 Appuyez sur la touche POWER.
2 Appuyez à plusieurs reprises sur la
touche BAND jusqu’à ce que la bande
de fréquences de votre choix apparaisse
sur l’écran d’affichage.
Lorsque vous appuyez sur la touche
BAND, la bande de fréquences évolue
comme suit:
FM Bb AM
3 Appuyez sur la touche TUNING/PLAY
MODE jusqu’à ce que la mention
“AUTO” apparaisse sur l’écran
d’affichage.
4 Appuyez sur la touche TUNING +/–
pour syntoniser le tuner sur l’émetteur
de votre choix.
Pour syntoniser le tuner sur un émetteur
dont la fréquence d’émission est plus
élevée, appuyez sur la touche
TUNING + et pour syntoniser le tuner
sur un émetteur dont la fréquence est
moins élevée, appuyez sur la touche
TUNING –.
Le tuner passe automatiquement en
revue les fréquences radio des différents
émetteurs en interrompant ses
recherches chaque fois qu’il détecte un
1 Appuyez à plusieurs reprises sur la
touche TUNING/PLAY MODE jusqu’à
ce que la mention “MANUAL”
apparaisse sur l’écran d’affichage.
2 Continuez à appuyer sur la touche
TUNING +/– jusqu’à ce que le tuner se
syntonise sur l’émetteur de votre choix.
Pour améliorer la réception d’un
émetteur AM
Orientez l’antenne cadre AM fournie pour la
réception en.
Pour changer l’intervalle de
syntonisation AM (sauf sur le modèle
destiné au Moyen-Orient)
L’intervalle de syntonisation est réglé en
usine sur 9kHz (10 kHz dans certaines
régions). Si vous devez changer l’intervalle
de syntonisation, procédez comme suit :
1 Mettez la chaîne sous tension.
2 Sélectionnez la bande de fréquences AM.
3 Mettez la chaîne hors tension.
4 Mettez à nouveau la chaîne sous tension
en appuyant sur TUNING+.
Après avoir changé l’intervalle de
syntonisation, restaurez les stations de
radio AM présélectionnées.
Si la réception d’une émission FM est
médiocre
Appuyez sur la touche STEREO/MONO
jusqu’à ce que la mention “MONO”
apparaisse sur l’écran d’affichage. L’émission
ne sera plus captée en stéréophonie, mais sa
réception s’améliorera.
Appuyez de nouveau sur la touche
STEREO/MONO pour rétablir la diffusion
en stéréophonie.
Fonction de lecture à une touche
Appuyez sur la touche BAND lorsque la
chaîne est hors tension ou lorsque vous
écoutez une autre source musicale.
Vous pourrez écouter le dernier émetteur
accordé sans devoir actionner aucune autre
touche.
Chapitre 3: La radio

Présélection des
émetteurs de
radiodiffusion
5 Attribuez un numéro de présélection à
la station émettrice (1 à 20 en FM, 1 à 10
en AM). Appuyez sur la touche
TUNING +/– pour afficher le numéro
de canal présélectionné que vous venez
d’attribuer.
1
3
2
Vous pouvez enregistrer les fréquences
radio de plusieurs émetteurs dans la
mémoire du tuner afin de syntoniser
rapidement le tuner sur vos émetteurs
favoris. Vous pouvez présélectionner 20
émetteurs FM et 10 émetteurs AM.
Pour effectuer cette opération, servez-vous
des touches de la télécommande.
Tuner lecteur CD
POWER → ON
1
2
3,5
6
4
6 Appuyez sur la touche ENTER.
La mémorisation des coordonnées de
l’émetteur de votre choix correspond au
numéro de canal présélectionné que
vous lui avez attribué.
7 Répétez les opérations 3 à 6 pour chaque
émetteur dont vous souhaitez
mémoriser les coordonnées.
Pour effacer un émetteur radio dont
vous avez mémorisé les coordonnées
Enregistrez les coordonnées d’un nouvel
émetteur radio en lui attribuant le numéro
de canal présélectionné de l’émetteur que
vous souhaitez effacer. Cette opération aura
pour effet d’effacer l’ancien émetteur et de
le remplacer par le nouveau.
Remarque
Les émetteurs présélectionnés ne seront effacés
que si vous enregistrez les coordonnées de
nouveaux émetteurs pour remplacer les
premiers, et ce même si vous déconnectez
l’alimentation secteur de la chaîne stéréo.
Ecouter les stations
de radio
présélectionnées
4
1 Appuyez à plusieurs reprises sur la
touche BAND jusqu’à ce que la bande
de fréquences de votre choix apparaisse
sur l’écran d’affichage.
FM Bb AM
2 Appuyez à plusieurs reprises sur la
touche TUNING/PLAY MODE jusqu’à
ce que la mention “PRESET” apparaisse
sur l’écran d’affichage.
3 Appuyez sur la touche TUNING +/–
pour syntoniser le tuner sur un émetteur
présélectionné.
Le numéro de la station présélectionnée
s’affiche. La fréquence de la station
apparaît ensuite et ses émissions sont
diffusées.
4 Appuyez sur la touche VOL +/– pour
régler le volume.
F
11
1 Appuyez à plusieurs reprises sur la
touche BAND jusqu’à ce que la bande
de fréquences de votre choix apparaisse
sur l’écran d’affichage.
FM Bb AM
2 Appuyez à plusieurs reprises sur la
touche TUNING/PLAY MODE jusqu’à
ce que la mention “MANUAL” ou
“AUTO” apparaisse sur l’écran
d’affichage.
3 Appuyez sur la touche TUNING +/–
pour syntoniser le tuner sur l’émetteur
dont vous souhaitez mémoriser les
coordonnées.
4 Appuyez sur la touche MEMORY.
La mention “MEMORY” et le numéro
du canal présélectionné apparaissent sur
l’écran d’affichage.
Après avoir procédé à la présélection des
émetteurs de radiodiffusion, vous pouvez
rapidement syntoniser le tuner sur les
émetteurs de votre choix.
Tuner lecteur CD
POWER → ON
Pour passer de l’affichage de la
fréquence à celui de la station
présélectionnée
Lorsque vous écoutez une station de radio
présélectionnée, appuyez sur la touche
DISPLAY de la télécommande.
Chaque fois que vous appuyez sur
DISPLAY, la fréquence ou le numéro de
présélection apparaît dans la fenêtre
d’affichage.
3
1
4
Chapitre 3: La radio

Chapitre 4:
Le lecteur
de cassettes
Lecture d’une cassette
Enregistrement
automatique d’un
disque compact
Enregistrement manuel
d’un disque compact,
etc.
Enregistrement d’un
disque compact selon
une séquence spécifiée
(montage programmé)
F
12
Lecture d’une
cassette
Vous pouvez utiliser des cassettes de TYPE
I (normal), de TYPE II (CrO2) et de TYPE IV
(métal). Lors de l’introduction d’une
cassette quelconque, le lecteur détecte
automatiquement le type de la cassette
introduite.
Tuner lecteur CD
1
Lecteur de cassettes stéréo
2
1 Appuyez sur la touche POWER.
2 Appuyez sur la touche 6 EJECT pour
ouvrir le compartiment de lecture et
introduisez une cassette enregistrée.
3 Appuyez sur la touche ( pour jouer la
face A.
Pour jouer la face B, appuyez sur la
touche 9.
4 Appuyez sur la touche VOL +/– pour
régler le volume.
Pour interrompre la lecture d’une
cassette
Appuyez sur la touche p.
Pour
Introduire une
pause
Trouver le
début de la
plage en cours
ou de la plage
suivante
Faire défiler la
bande ou la
rebobiner à
grande vitesse
Jouer un côté
de la cassette
4
Jouer les deux
côtés de la
cassette à
3
plusieurs
reprises*
p
* Le lecteur de cassettes s’arrête
automatiquement après avoir répété la
séquence à cinq reprises.
Lors de l’écoute d’une cassette
enregistrée avec le système de
réduction de bruit DOLBY* de type B
Amenez le commutateur DOLBY NR sur la
position ON.
Le système de réduction de bruit DOLBY
réduit le sifflement des bandes magnétiques
en le transformant en signaux haute
fréquence de faible niveau.
* Réduction de bruit Dolby fabriquée sous
licence de Dolby Laboratories Licensing
Corporation.
DOLBY et le symbole double-D a sont des
marques de Dolby Laboratories Licensing
Corporation.
Fonction de lecture à une touche
Appuyez sur la touche ( ou 9 lorsque
l’installation est hors service ou lorsque vous
écoutez une autre source musicale.
Tant qu’une cassette est introduite dans le
compartiment de lecture, vous pourrez
immédiatement écouter celle-ci sans devoir
actionner aucune autre touche. Si aucune
cassette n’est introduite dans le
compartiment du lecteur, la chaîne sera
simplement mise en service.
Opération
Appuyez sur la touche P
du lecteur de cassettes.
Pour reprendre la lecture,
appuyez de nouveau sur
cette touche.
En cours de lecture,
appuyez sur la touche
0 ou ) du lecteur de
cassettes.
A l’arrêt, appuyez sur la
touche 0 ou ) du
lecteur de cassettes.
Amenez la touche
DIRECTION sur la
position A.
Amenez la touche
DIRECTION sur la
position a.
Chapitre 4: Le lecteur de cassettes

Enregistrement
1 2 3 4 5
9
8 7 6
automatique d’un
disque compact
Le commutateur CD SYNC permet
d’enregistrer rapidement un disque
compact sur une cassette. Utilisez les
touches du lecteur de disques compacts et
du lecteur de cassettes. Avant de procéder à
un enregistrement quelconque, assurezvous que les onglets d’enregistrement de la
cassette n’ont pas été brisés.
Tuner lecteur CD
2
1
Lecteur de cassettes stéréo
6
7
4
3
1 Appuyez sur la touche POWER.
2 Appuyez sur la touche 6 et posez un
disque compact sur le plateau de son
lecteur.
3 Appuyez sur 6 EJECT et introduisez
une cassette vierge.
4 Amenez le commutateur DIRECTION
sur la position voulue afin de
sélectionner un enregistrement sur une
face ou sur les deux.
Pour enregistrer
sur
Une face
Les deux faces*
* L’enregistrement s’interrompt toujours à la
fin de la face B. Veillez à lancer
l’enregistrement à partir de la face A.
Amenez le commutateur
DIRECTION sur la position
A
a
6 Appuyez sur la touche ( ou 9 pour
sélectionner la face de la cassette à partir
de laquelle vous souhaitez lancer
l’enregistrement.
Pour commencer à partir de la face A,
appuyez sur la touche (.
Pour lancer l’enregistrement à partir de
la face B, appuyez sur la touche 9.
(Seul ce côté sera enregistré).
7 Appuyez sur la touche P.
L’enregistrement commence. Au terme
d’un délai de 10 secondes environ, le
lecteur lance la lecture du disque
compact préalablement sélectionné.
p
Pour interrompre un enregistrement
Appuyez sur la touche p du lecteur de
cassettes ou du lecteur de disques
compacts.
Pour activer le système DOLBY NR
Si vous souhaitez réduire le sifflement en le
transformant en signaux haute fréquence de
faible niveau, amenez le commutateur DOLBY
NR sur la position ON après avoir exécuté
l’opération 4.
A propos de l’enregistrement CD
p
SYNC (synchronisé).
Cette fonction permet au lecteur de
cassettes d’enregistrer un disque compact
en synchronisant l’enregistrement en
fonction de la longueur des plages du
disque compact de façon à ne plus avoir à
se préoccuper du sens de défilement de la
5
bande magnétique ou du temps résiduel en
cours d’enregistrement.
Cette chaîne stéréo possède la fonction
d’enregistrement Fade Synchronized
(fondu synchronisé). Cette fonction permet
au lecteur de cassettes d’interrompre en
fondu progressif un enregistrement de
façon à éviter toute interruption abrupte
d’une plage musicale à la fin de la bande
magnétique.
Si la bande arrive à la fin de la face A au
cours de l’enregistrement d’une plage
musicale, le lecteur de cassettes réenregistre
automatiquement cette plage après avoir
rebobiné la cassette jusqu’au début de la
plage considérée. Lors de ce second
enregistrement, cette même plage est
enregistrée avec un fondu fermeture à la fin
de la bande magnétique. (L’enregistrement
prend fin à ce stade, s’il s’agit d’un
enregistrement sur une seule face).
Enregistrement respectant
l’agencement initial des
plages d’un disque compact
Face A
Face B
La plage correspondant
à la fin de la face B fait
également l’objet d’un
fondu fermeture si sa
durée excède la
longueur résiduelle de
la bande magnétique.
Si l’ordre des plages a été préalablement
programmé et si la durée totale des plages à
enregistrer est inférieure à la durée de l’une
des faces de la cassette, le lecteur opère
automatiquement comme suit:
Lorsque le lecteur de disques
compacts est en mode de pause, le
lecteur de cassettes stéréo continue
à enregistrer du silence jusqu’à la fin
de la face A de la cassette, ensuite il
inverse le sens de défilement de la
bande magnétique et lance
l’enregistrement de la face B.
Face A
Face B
Dès que toutes les plages
sélectionnées ont été enregistrées, le
lecteur de cassettes stéréo enregistre
quatre secondes de silence environ
avant de passer en mode d’arrêt.
L’enregistrement
débute à partir
de la plage qui
a fait l’objet
d’un fondu
fermeture à la
fin de la face A.
F
13
5 Appuyez sur la touche CD SYNC.
Le lecteur de cassettes est prêt à
l’enregistrement et le lecteur de disques
compacts est prêt à lancer une lecture.
Chapitre 4: Le lecteur de cassettes

Enregistrement
manuel d’un disque
compact, etc.
Vous pouvez enregistrer un disque
compact comme vous l’entendez, en
n’enregistrant par exemple que les
morceaux de votre choix ou en lançant
l’enregistrement à partir d’un point
quelconque de la bande magnétique.
Tuner lecteur CD
POWER → ON
Lecteur de cassettes
stéréo
F
14
1
1 Appuyez sur la touche 6 EJECT et
introduisez une cassette vierge dans le
lecteur.
2 Appuyez à plusieurs reprises sur la
touche FUNCTION jusqu’à ce que la
source que vous souhaitez enregistrer
apparaisse sur l’écran d’affichage.
6
2
6
p
7
5
3
4
Pour enregistrer une seule face, amenez
le commutateur sur la position A.
Pour enregistrer sur les deux faces,
amenez le commutateur sur la position
a.
4 Si vous souhaitez réduire le sifflement
en le transformant en signaux haute
fréquence de faible niveau, amenez le
commutateur DOLBY NR sur la
position ON.
5 Appuyez sur la touche r REC du
lecteur de cassettes stéréo.
Le lecteur de cassettes stéréo est prêt à
l’enregistrement et les témoins
lumineux des touches r REC et P du
lecteur de cassettes s’allument. L’un des
deux témoins des touches ( ou 9
s’allume tandis que l’autre clignote
avant de s’éteindre.
Si le témoin de la touche ( ou 9 ne
s’allume pas ou ne clignote, cela signifie
que l’onglet de protection
correspondant de la cassette a été retiré.
Vous ne pouvez enregistrer sur cette
face.
6 Appuyez sur la touche ( ou 9 pour
sélectionner la face de la cassette à partir
de laquelle vous souhaitez lancer
l’enregistrement.
Pour lancer l’enregistrement à partir de
la face A, appuyez sur la touche (.
Pour lancer l’enregistrement à partir de
la face B, appuyez sur la touche 9.
7 Appuyez sur la touche P du lecteur de
cassettes.
L’enregistrement commence.
Si vous avez amené le commutateur
DIRECTION sur la position a,
l’enregistrement prend fin lorsque le
lecteur arrive au terme de la face B.
8 Lancez la source sonore.
Pour interrompre l’enregistrement
Appuyez sur la touche p du lecteur de
cassettes stéréo.
Remarque
Si vous appuyez sur la touche FUNCTION en
cours d’enregistrement, l’installation passera
d’une source sonore à l’autre.
Enregistrement d’un
disque compact
selon une séquence
spécifiée
(montage programmé)
Vous pouvez régler le temps
d’enregistrement total en fonction de la
longueur de la bande magnétique lors de
l’exécution d’un programme.
Tuner lecteur CD
POWER → ON
Lecteur de cassettes stéréo
6,11
4
3
2
5
1
10
7
9
8
Source
Disque compact
Radio
Minidisque, etc.
Indication
CD
TUNER
MD
3 Amenez le commutateur DIRECTION
sur la position voulue pour sélectionner
un enregistrement double face ou
simple face.
Chapitre 4: Le lecteur de cassettes
1 Appuyez sur la touche 6 du lecteur de
disques compacts et posez un disque
compact sur le plateau de lecture.
2 Appuyez à plusieurs reprises sur la
touche FUNCTION jusqu’à ce que la
mention “CD” apparaisse sur l’écran
d’affichage.

3 Appuyez à plusieurs reprises sur la
touche TUNING/PLAY MODE jusqu’à
ce que la mention “PGM” apparaisse sur
l’écran d’affichage.
4 Appuyez sur =ou + pour
sélectionner une plage.
5 Appuyez sur la touche ENTER.
Répétez les opérations 4 et 5 pour
programmer les plages restantes que
vous souhaitez enregistrer sur la face A
dans l’ordre dans lequel vous souhaitez
les enregistrer.
6 Appuyez sur la touche P de la
télécommande pour interrompre
l’enregistrement à la fin de la face A.
La durée totale d’enregistrement “0.00”
est affichée.
Répétez les opérations 4 et 5 pour
programmer les plages restantes que
vous souhaitez enregistrer sur la face B
dans l’ordre dans lequel vous souhaitez
les enregistrer.
7 Appuyez sur la touche 6 EJECT du
lecteur de cassettes stéréo et introduisez
une cassette vierge dans le
compartiment du lecteur.
8 Amenez le commutateur DIRECTION
sur la position voulue pour sélectionner
un enregistrement double face ou
simple face.
Pour enregistrer sur une seule face,
amenez ce commutateur sur la position
A.
Pour enregistrer sur les deux faces*,
amenez ce commutateur sur la position
a.
* L’enregistrement s’interrompt toujours à
la fin de la face B. Veillez à lancer
l’enregistrement à partir de la face A.
9 Appuyez sur la touche CD SYNC.
Le lecteur de cassettes stéréo est prêt à
l’enregistrement et le lecteur de disques
compacts est prêt à lancer une lecture.
ensuite il inverse le sens de défilement de
la bande et lance l’enregistrement de la
face B. Dès que toutes les plages
sélectionnées ont été enregistrées, le
lecteur de cassettes enregistre quatre
secondes de silence environ avant de
passer en mode d’arrêt.
Pour annuler un montage programmé
Appuyez sur la touche TUNING/PLAY
MODE jusqu’à ce que la mention “PGM”
disparaisse.
Remarques
• Si la dernière partie de la plage est
enregistrée sur l’amorce présente à la fin de
la bande magnétique, l’enregistrement
risque d’être incomplet.
• En cas de programmation d’enregistrement
de la face B après avoir introduit une pause
à la fin de l’enregistrement de la face A,
assurez-vous que la durée des plages dont
l’enregistrement est programmé pour la face
A ne dépasse pas la longueur d’une seule
face. Sinon l’enregistrement en pâtira.
Pour lancer un enregistrement à partir
d’un point quelconque de la bande
magnétique d’une cassette
Jouez ou enregistrez cette cassette pendant un
laps de temps excédant quelques secondes,
ensuite appuyez sur la touche CD SYNC. Dès
que vous lancez l’enregistrement, le lecteur de
disques compacts entame la lecture du disque
de votre choix.
Si vous appuyez sur la touche CD SYNC
après avoir appuyé sur la touche 6 EJECT
pour introduire une cassette, la lecture du
disque compact de votre choix commencera
10 secondes après le début de
l’enregistrement de la bande. Ce décalage
se produira lors de tout enregistrement à
partir d’un point quelconque de la cassette
concernée parce que le système est conçu
pour prévenir tout enregistrement de
l’amorce présente au début de la bande
magnétique.
F
15
10 Appuyez sur la touche ( ou 9
pour sélectionner la face de la cassette à
partir de laquelle vous souhaitez lancer
l’enregistrement.
Pour lancer l’enregistrement sur la face
A, appuyez sur la touche (.
Pour lancer l’enregistrement à partir de
la face B, appuyez sur la touche 9.
11 Appuyez sur la touche P pour sortir
du mode de pause d’enregistrement.
L’enregistrement débute. Au terme
d’un délai de 10 secondes environ, la
lecture du disque compact commence.
Si vous programmez un enregistrement
sur la face B, le lecteur de disques
compacts introduit une pause après avoir
terminé l’enregistrement de la face A. Le
lecteur de cassettes continue à enregistrer
du silence jusqu’à la fin de la face A,
Chapitre 4: Le lecteur de cassettes

Chapitre 5:
Réglage
du son
Réglage de la balance des
hauts-parleurs
Réglage de la
balance des hautsparleurs
Vous pouvez régler l’équilibre du son
provenant des hauts-parleurs afin
d’améliorer les conditions d’écoute en
stéréophonie lorsque la position des hautsparleurs n’est pas symétrique.
Pour effectuer cette opération, servez-vous
des touches de la télécommande.
Tuner lecteur CD Tuner lecteur CD
Accentuation des
graves
La fonction DBFB (Dynamic Bass Feedback)
intensifie les sons correspondant aux basses
fréquences pour obtenir une restitution
plus ample des graves. Vous avez la
possibilité de sélectionner l’un des deux
niveaux de la fonction DBFB: “DBFB1”
ou”DBFB2". L’option “DBFB2” est plus
efficace que l’option “DBFB1”.
(DBFB)
F
16
Accentuation des graves
(DBFB)
Ecoute en tétraphonie
POWER → ON
POWER → ON
DBFB
BALANCE L/R
Chapitre 5: Réglage du son
Pour augmenter la puissance relative du
haut-parleur droit, appuyez sur la touche
BALANCE R.
Chaque fois que vous appuyez sur la
touche BALANCE R, l’écran évolue comme
suit:
10 LEFT b 9 LEFT b ...... b 1 LEFT b
CENTER b 1 RIGHT b 2 RIGHT b ...... b
10 RIGHT
Pour augmenter la puissance relative du
haut-parleur gauche, appuyez sur la touche
BALANCE L.
Chaque fois que vous appuyez sur la
touche BALANCE L, l’écran évolue dans
l’ordre inverse de la séquence illustrée ciavant.
Pour écouter à l’aide d’un casque
d’écoute
Branchez le casque d’écoute sur la prise
PHONES. Aucun son n’est alors diffusé par
les haut-parleurs.
Appuyez à plusieurs reprises sur la touche
DBFB jusqu’à ce que la mention “DBFB1”
ou “DBFB2” apparaisse sur l’écran
d’affichage.
Chaque fois que vous appuyez sur la
touche DBFB, l’écran évolue comme suit:
b DBFB1 b DBFB2 b OFF
Remarque
Lorsque les fonctions Surround et DBFB sont
désactivées, vous pouvez entendre
pratiquement le même son que celui de la
source CD (fonction Source Direct).

Ecoute en
tétraphonie
Cette fonction permet de recréer
l’atmosphère d’une salle de cinéma ou
d’une salle de concert. Sélectionnez l’un des
deux niveaux de la fonction Surround:
“SURR1” et “SURR2”. L’option “SURR2”
est plus efficace que l’option “SURR1”.
Tuner lecteur CD
POWER → ON
SURROUND
Appuyez à plusieurs reprises sur la touche
SURROUND jusqu’à ce que la mention
“SURR1” ou “SURR2” apparaisse sur
l’écran d’affichage.
Chaque fois que vous appuyez sur la
touche SURROUND, l’écran évolue comme
suit:
b SURR1 b SURR2 b OFF
Remarque
Lorsque les fonctions Surround et DBFB sont
désactivées, vous pouvez entendre
pratiquement le même son que celui de la
source CD (fonction Source Direct).
F
17
Chapitre 5: Réglage du son

Chapitre 6:
Fonctions
supplémentaires
Extinction programmée
Extinction
programmée
Le système permet de programmer son
extinction automatique afin que vous
puissiez vous endormir en musique.
Avant de programmer une telle extinction,
assurez-vous que l’horloge est correctement
réglée.
Tuner lecteur CD
POWER → ON
Pour modifier ce laps de temps
programmé alors que la fonction
d’extinction programmée est active
Appuyez à plusieurs reprises sur la touche
SLEEP jusqu’à ce que l’indication de la
durée de votre choix apparaisse sur l’écran
d’affichage.
Remarque
Lorsque la fonction d’extinction est activée, les
fonctions de programmation diurne et
d’enregistrement cessent d’être
opérationnelles.
F
18
Réveil en musique
Programmation de
l’enregistrement
d’émissions
radiophoniques
Raccordement des
équipements en option
SLEEP
1 Mettez en service la source sonore de
votre choix (cassette, tuner ou disque
compact).
2 Appuyez sur la touche SLEEP lorsque
vous êtes à l’écoute de la source de votre
choix afin de déterminer le temps de
diffusion de cette source.
La mention “SLEEP” et l’indication du
nombre de minutes retenu apparaissent
sur l’écran d’affichage. Chaque fois que
vous appuyez sur la touche SLEEP, cette
indication diminue progressivement de
90 à 10 par incréments de 10 minutes.
La chaîne est automatiquement mise
hors tension dès que la durée
présélectionnée est dépassée.
b 90 b 80 b 70 b ...... b 20 b10 bOFF
Réveil en musique
Vous pouvez vous éveiller en musique à
l’heure de votre choix. Vous ne devez pour
cela régler le programmateur qu’une seule
fois. La minuterie programmée est activée
tous les jours à la même heure.
Avant de régler le programmateur d’éveil,
vérifiez si l’horloge est correctement réglée.
Pour vous éveiller au son de la radio,
présélectionnez au préalable la station que
vous souhaitez écouter. (Voir “Présélection
de stations de radio”.)
Tuner lecteur CD
POWER → ON
TIMER
SELECT
3
8
4,5,
6,7
ENTER
2
Chapitre 6: Fonctions supplémentaires
Pour annuler une extinction
programmée
Appuyez à plusieurs reprises sur la touche
SLEEP jusqu’à ce que la mention “SLEEP
OFF” apparaisse sur l’écran d’affichage.
Pour modifier la durée du laps de
temps qui précède l’extinction
programmée
Appuyez à une seule reprise sur la touche
SLEEP.
Le temps résiduel apparaît sur l’écran
d’affichage pendant plusieurs secondes.

1
Préparez la source musicale de votre
choix.
Source
Disque compact
Radio
Cassette
Préparation
Introduisez un disque
compact dans le
compartiment de son
lecteur. Si vous souhaitez
le jouer à partir d’une
plage précise, effectuez la
procédure nécessaire pour
l’exécution d’une lecture
programmée (p.8).
Syntonisez le tuner sur
l’émetteur présélectionné
de votre choix.
Introduisez une cassette
dans le compartiment de
son lecteur en veillant à
ce que la face que vous
souhaitez entendre soit
orientée vers vous, et
appuyez sur la touche (
pour lancer la lecture à
partir de la “face avant”.
2 Appuyez sur la touche VOL +/– pour
régler le volume.
3 Appuyez sur la touche TIMER SET.
4 Appuyez sur la touche TIMER +/–
pour afficher la mention “DAILY”,
ensuite appuyez sur la touche ENTER.
L’indication horaire clignote sur l’écran
d’affichage.
0AM210
DAYLY
5 Réglez l’heure à partir de laquelle vous
souhaitez que la musique soit diffusée.
Appuyez sur la touche TIMER +/– pour
régler l’heure, ensuite appuyez sur la
touche ENTER.
L’indication des minutes clignote.
Réglez les minutes de la même manière
et appuyez sur la touche ENTER.
L’indication horaire correspondant à
l’heure d’extinction apparaît sur l’écran
d’affichage.
AM
7
0
1
DAILY
AM
8
0
1
DAILY
6 Réglez l’heure à laquelle vous souhaitez
que la diffusion de la source musicale
retenue s’interrompe.
Appuyez sur la touche TIMER +/– pour
régler l’heure, ensuite appuyez sur la
touche ENTER.
L’indication des minutes clignote.
Réglez les minutes de la même manière
et appuyez sur la touche ENTER.
L’indication de la source clignote.
CD
DAILY
7 Appuyez sur la touche TIMER +/– pour
sélectionner la source, ensuite appuyez
sur la touche ENTER.
Source
Disque compact
Radio
Cassette
Minidisque, etc.
Les éléments présélectionnés
apparaissent successivement sur l’écran
d’affichage.
Indication
CD
TUNER
TAPE
MD
8 Appuyez sur la touche SYSTEM
POWER pour mettre l’installation hors
service.
A l’heure présélectionnée, l’installation
sera mise sous tension et la source
musicale appropriée sera sollicitée.
L’installation sera de nouveau mise hors
tension à l’heure d’interruption
présélectionnée.
Pour annuler la programmation
Appuyez à plusieurs reprises sur la touche
TIMER SELECT jusqu’à ce que la mention
“OFF” apparaisse sur l’écran d’affichage en
lieu et place de la mention “DAILY”.
Pour régler la programmation avec
les mêmes éléments
Appuyez sur la touche TIMER SELECT
pour afficher la mention “DAILY”, ensuite
appuyez sur la touche SYSTEM POWER
pour mettre le système hors service.
Dès que vous avez réglé le programmateur,
vous ne devez plus revenir sur le réglage
des mêmes éléments.
Pour vérifier le réglage du
programmateur
Appuyez sur la touche TIMER SELECT
jusqu’à ce que la mention “DAILY”
disparaisse de l’écran avant d’apparaître de
nouveau sur celui-ci.
Les éléments présélectionnés s’affichent
séquentiellement.
Programmation de
l’enregistrement
d’émissions
radiophoniques
Vous avez la possibilité de régler le
programmateur de façon à pouvoir
enregistrer l’émission de radio de votre
choix. Ce programmateur ne fonctionne
qu’une seule fois pour chaque réglage.
Présélectionnez l’émetteur de radiodiffusion
de votre choix avant de procéder à un
enregistrement de ce type. (Cf. “Présélection
des émetteurs de radiodiffusion”).
Assurez-vous que l’horloge est correctement
réglée.
Remarque
Vous ne pouvez pas commander avec ce
lecteur la mise sous/hors tension ni le
démarrage/arrêt d’enregistrement de
l’enregistreur raccordé aux prises MD OUT à
l’arrière. Préparez l’enregistrement par
programmateur sur l’enregistreur.
Tuner lecteur CD
POWER → ON
4
2
Lecteur de cassettes
1
TIMER
SELECT
10
6,7,
5
8,9
4
2
ENTER
3
F
19
Pour modifier le réglage du
programmateur
Répétez les opérations 1 à 8.
suite page suivante ➔
Chapitre 6: Fonctions supplémentaires

➔ suite
CD OPTICAL
DIGITAL OUT
1 Introduisez une cassette vierge avec la
face à enregistrer vers vous et appuyez
sur la touche ( pour démarrer
l’enregistrement sur la face avant.
(Préparez l’enregistreur raccordé aux
prises MD OUT à l’arrière en vue de
l’enregistrement par programmateur.)
2 Appuyez plusieurs fois de suite sur
BAND jusqu’à ce que la gamme d’ondes
voulue apparaisse sur l’écran
d’affichage.
3 Appuyez sur la touche TUNING/PLAY
MODE jusqu’à ce que la mention
“PRESET” apparaisse sur l’écran
d’affichage.
4 Appuyez sur la touche TUNING +/–
pour syntoniser le récepteur sur
l’émetteur présélectionné de votre choix.
5 Appuyez sur la touche TIMER SET.
6 Appuyez sur la touche TIMER +/– pour
afficher la mention “REC”, ensuite
appuyez sur la touche ENTER.
L’indication de l’heure clignote.
F
20
0AM210
REC
7 Réglez l’heure à laquelle vous souhaitez
que l’enregistrement débute.
Appuyez sur la touche TIMER +/– pour
régler l’heure, ensuite appuyez sur la
touche ENTER.
L’indication des minutes clignote.
Réglez les minutes de la même manière,
ensuite appuyez sur la touche ENTER.
L’indication horaire correspondant à
l’heure à laquelle l’enregistrement doit
prendre fin clignote sur l’écran.
AM
170
REC
AM
8
0
1
REC
8 Réglez l’heure à laquelle vous souhaitez
que l’enregistrement prenne fin.
Appuyez sur la touche TIMER +/– pour
régler l’heure, ensuite appuyez sur la
touche ENTER.
L’indication des minutes clignote.
Réglez les minutes de la même manière
et appuyez sur la touche ENTER.
La mention “TO TAPE” ou “TO MD”
clignote.
TO
APTE
REC
9 Appuyez sur la touche TIMER +/– pour
sélectionner le support sur lequel vous
souhaitez réaliser votre enregistrement,
ensuite appuyez sur la touche ENTER.
Pour enregistrer une cassette, affichez la
mention “TO TAPE”.
Pour enregistrer un minidisque, etc.,
affichez la mention “TO MD”.
Les éléments présélectionnés
apparaissent successivement sur l’écran
d’affichage.
10 Appuyez sur la touche SYSTEM
POWER pour mettre le système hors
service.
A l’heure de lancement présélectionnée,
le système est mis sous tension et
l’enregistrement débute. A l’heure
d’arrêt présélectionnée, le système est
de nouveau mis hors tension.
A l'heure programmée, le niveau sonore
est automatiquement réglé au minimum
et restera au même niveau jusqu'à
l'heure de mise hors tension.
Pour annuler la programmation
Appuyez à plusieurs reprises sur la touche
TIMER SELECT jusqu’à ce que la mention
“OFF” apparaisse sur l’écran d’affichage en
lieu et place de la mention “REC”.
Pour régler le programmateur avec
les mêmes éléments
Appuyez sur la touche TIMER SELECT
pour afficher la mention “REC”, ensuite
appuyez sur la touche POWER pour mettre
le système hors tension.
Dès que vous avez réglé le programmateur,
vous ne devez plus revenir sur le réglage
des mêmes éléments.
Pour vérifier le réglage du
programmateur
Appuyez sur la touche TIMER SELECT
jusqu’à ce que la mention “REC”
disparaisse de l’écran avant d’apparaître de
nouveau sur celui-ci.
Les éléments présélectionnés apparaissent
séquentiellement sur l’écran d’affichage.
Pour modifier le réglage du
programmateur
Répétez les opérations 1 à 10.
Raccordement des
équipements en
option
Raccordement d’un
enregistreur de
minidisques ou d’une
platine d’enregistrement
de cassettes DAT, etc.
Pour réaliser un enregistrement
numérique avec un enregistreur de
minidisques ou une platine
d’enregistrement de cassettes DAT,
etc.
Raccordez la prise DIGITAL (OPTICAL)
OUTPUT montée sur le panneau arrière de
la chaîne stéréo à un enregistreur, une
platine, etc. équipé d’un connecteur optique.
Tuner
Enregistreur de
minidisques/
platine
d’enregistrement
de cassettes DAT
Pour réaliser un enregistrement
analogique avec un enregistreur de
minidisques, une platine
d’enregistrement de cassettes DAT,
un magnétoscope, etc.
Raccordez les prises MD IN/OUT (prises
phono) montées sur le panneau arrière de
la chaîne stéréo à un enregistreur de
minidisques, une platine d’enregistrement
de cassettes DAT, un magnétoscope, etc. au
moyen du câble de connexion Sony
RK-C315 (non fourni).
vers les prises
d’entrée
Enregistreur de
minidisques/
platine
d’enregistrement
de cassettes DAT/
magnétoscope
vers les prises
de sortie
Pour écouter le son du magnétoscope via
les haut-parleurs connectés, raccordez les
prises MD IN situées sur le panneau arrière
de la chaîne stéréo aux prises de sortie du
magnétoscope. Dans ce cas, n’oubliez pas
de brancher les fiches sur les prises de
même couleur.
Pour plus de détails, reportez-vous au
manuel d’instruction de chaque équipement.
vers prise d’entrée
numérique
Câble numérique POC-15A
(non fourni), etc.
Câble de connexion RK-C315
(non fourni), etc.
lecteur CD
Tuner
lecteur CD
Chapitre 6: Fonctions supplémentaires

Pour écouter le son diffusé par
l’équipement connecté
Appuyez à plusieurs reprises sur la touche
FUNCTION jusqu’à ce que la mention
“MD” apparaisse sur l’écran d’affichage.
Connexion d’une antenne
extérieure
Pour améliorer la réception FM
Raccordez une antenne extérieure, si la
réception du signal est trop faible avec
l’antenne filaire FM fournie.
Branchez une antenne FM extérieure sur la
borne FM 75 Ω, à l’aide du câble coaxial de
75 ohms.
Pour améliorer la réception AM
Raccordez une antenne extérieure si la
réception du signal est trop faible après
avoir réorienté l’antenne cadre AM fournie.
Ne pas déconnecter l’antenne cadre AM.
Branchez un câble isolé de 6 à 15 mètres de
long (non fourni) sur la borne AM et fixez
l’autre extrémité de ce câble dans un plan
horizontal à un niveau plus élevé. Mettez la
borne y à la terre.
F
21
Important
Mettez l’antenne extérieure à la terre afin de
protéger l’installation de la foudre. Afin de
prévenir tout risque d’explosion de gaz,
abstenez-vous impérativement de raccorder le
fil de terre à une conduite de gaz.
Câble isolé
(non fourni)
Fil de terre
(non fourni)
Chapitre 6: Fonctions supplémentaires

Pour votre
information
Précautions
Guide de dépannage
Maintenance
Spécifications
Index des pièces et
des commandes
Index
F
22
Précautions
Si vous vous posez la moindre question ou
si vous êtes confronté à un problème
quelconque concernant cet équipement,
n’hésitez pas à consulter votre revendeur
Sony le plus proche.
Mesures de sécurité
• Cet équipement n’est pas déconnecté de
l’alimentation secteur tant qu’il est
branché sur la prise murale, même si
l’équipement lui-même a été
préalablement mis hors service.
• Débranchez le système de l’alimentation
secteur si vous n’avez pas l’intention de
l’utiliser avant longtemps. Pour
débrancher le câble d’alimentation
secteur, saisissez-vous de la fiche. Ne
jamais tirer sur le cordon lui-même.
• En cas de pénétration d’un objet ou d’un
liquide quelconque dans le boîtier de l’un
des composants de la chaîne, débranchez
celle-ci et faites vérifier le composant
concerné par un technicien qualifié avant
de le remettre en service.
• Le cordon d’alimentation secteur ne peut
être remplacé que par le personnel d’un
atelier de maintenance agréé.
Installation
Installez la chaîne stéréophonique dans un
local bénéficiant d’une ventilation adéquate
afin de prévenir toute élévation de la
température au sein de celle-ci.
Condensation affectant le lecteur de
disques compacts
Si cet équipement passe directement d’un
endroit froid à un endroit chaud ou s’il est
installé dans une pièce particulièrement
humide, une certaine quantité d’humidité
risque de se déposer par condensation sur
la surface des lentilles que comporte le
lecteur de disques compacts. En pareil cas,
le lecteur de disques compacts ne
fonctionnera pas correctement. Dans cette
éventualité, retirez le disque compact du
lecteur et laissez cet équipement en service
pendant une heure environ afin de
permettre à l’humidité de s’évaporer.
Protection permanente d’une cassette
Pour prévenir tout enregistrement
accidentel d’une cassette quelconque, brisez
l’onglet de protection correspondant à la
face A ou B de cette cassette conformément
à l’illustration. Si vous souhaitez
ultérieurement réenregistrer cette cassette,
il vous suffira d’obturer l’ouverture ainsi
ménagée au moyen d’un petit morceau de
bande adhésive.
Face A
Onglet de
la face B
Onglet de la
face A
Si vous utilisez une cassette de TYPE II
(CrO2) ou de TYPE IV (METAL), veillez à
ne pas obturer les fentes de détection qui
permettent au lecteur de cassettes de
détecter automatiquement le type de
cassette utilisé.
TYPE II
Fentes de détection
En cas de manifestation d’anomalies
chromatiques affectant l’écran du
téléviseur installé à proximité de cette
chaîne
Le blindage magnétique de cette paire de
hauts-parleurs autorise leur installation à
proximité d’un téléviseur. Néanmoins,
certaines anomalies chromatiques risquent de
se manifester sur l’écran du téléviseur en
fonction du type de téléviseur utilisé.
En cas de manifestation d’anomalies
chromatiques...
Mettez le téléviseur hors service puis
remettez-le en service au terme d’un délai
compris entre 15 et 30 minutes.
Si ces anomalies chromatiques
persistent...
Eloignez les hauts-parleurs du téléviseur.
TYPE IV
Guide de dépannage
Si vous rencontrez un problème quelconque
lors de l’exploitation de cette chaîne
stéréophonique, servez-vous de la liste de
contrôle qui suit après avoir préalablement
contrôlé les deux points suivants:
• Le cordon d’alimentation secteur est
correctement raccordé.
• Les hauts-parleurs sont correctement
raccordés.
En cas de persistance d’un problème
quelconque après avoir procédé aux
contrôles indiqués ci-après, n’hésitez pas à
consulter votre revendeur Sony le plus
proche.
Généralités
Il n’y a pas de son.
m Appuyez sur la touche POWER
pour mettre la chaîne
stéréophonique sous tension.
m Réglez le volume.
m Les écouteurs sont branchés.
Déconnectez-les.
Il y a inversion des canaux gauche et
droit.
m Vérifiez le raccordement des
hauts-parleurs et leur installation.
Pour votre information

Vous entendez un bourdonnement
ou des parasites importants.
m Le téléviseur ou le magnétoscope
est installé trop près de la chaîne
stéréophonique. Eloignez la chaîne
stéréophonique du téléviseur ou
du magnétoscope.
La mention “AM 12:00” clignote sur
l’écran d’affichage.
m L’installation a été victime d’une
coupure de courant. Réglez de
nouveau l’horloge et le
programmateur.
Lecteur de disques
compacts
Le plateau de lecture ne se ferme
pas.
m Le disque compact n’est pas
correctement posé sur le plateau
de lecture.
Le lecteur n’arrive pas à lire le
disque compact.
m Le disque compact n’est pas
suffisamment propre.
m Un disque compact a été introduit
dans le compartiment du lecteur,
étiquette orientée vers le bas.
m Le lecteur est en mode pause.
m Une certaine condensation s’est
formée. Laissez l’équipement en
service pendant une heure environ
pour permettre à l’humidité de
s’évaporer.
La lecture ne débute pas par la
première plage du disque.
m Le lecteur de disques compacts est
exploité en mode de lecture
programmée ou aléatoire.
Appuyez à plusieurs reprises sur
la touche TUNING/PLAY MODE
jusqu’à ce que l’indication du
mode de lecture disparaisse.
Lecteur de cassettes
La cassette ne s’enregistre pas.
m Aucune cassette n’est introduite
dans le compartiment de lecture.
m L’onglet d’enregistrement de la
cassette a été préalablement brisé.
m La cassette est en fin de bande
magnétique.
Enregistrement et lecture de la
cassette impossibles, ou son
inaudible.
m Les têtes sont sales. Nettoyez-les.
m Certains dépôts magnétiques se
sont formés sur la tête
d’enregistrement/lecture*.
Pleurage ou scintillement excessif,
ou évanouissement total du son.
m Les cabestans ou les galets
presseurs sont sales*
La bande ne s’efface pas
complètement.
m Certains dépôts magnétiques se
sont formés sur la tête
d’enregistrement/lecture*.
Augmentation du bruit ou
effacement des fréquences les plus
élevées.
m Certains dépôts magnétiques se
sont formés sur la tête
d’enregistrement/lecture*.
L’enregistrement synchronisé d’un
disque compact n’est pas lancé en
temps utile.
m Si vous sélectionnez l’option de
défilement a, l’enregistrement
ne commence pas si l’onglet
d’enregistrement correspondant à
l’une ou l’autre face de la cassette a
été brisé.
* Voir “Maintenance”.
Tuner
La mention “TUNED” clignote sur
l’écran d’affichage.
m Réglez l’antenne.
La mention “STEREO” clignote sur
l’écran d’affichage.
m Réglez l’antenne.
Bourdonnement ou bruit important.
m Réglez l’antenne.
m La puissance du signal est
insuffisante. Branchez l’antenne
extérieure.
m Raccordez le fil de terre.
La réception en stéréophonie d’une
émission diffusée en stéréophonie
s’avère impossible.
m Lorsque l’indication “MONO”
apparaît dans la fenêtre
d’affichage, appuyez sur la touche
STEREO/MONO de la
télécommande de façon à ce que
l’indication “MONO” disparaisse.
m Réglez la position de l’antenne.
Programmateur
Le programmateur ne fonctionne
pas.
m Réglez correctement l’horloge.
m L’installation a été victime d’une
coupure d’alimentation secteur.
Lorsque le programmateur
fonctionne, appuyez sur la touche
POWER pour mettre le système
hors tension.
m Assurez-vous que la mention
“DAILY” ou “REC” apparaît sur
l’écran d’affichage.
Télécommande
La télécommande ne fonctionne pas.
m Les piles sont déchargées.
Remplacez-les toutes les deux.
m Un obstacle entrave la
transmission des signaux entre la
télécommande et le système.
Eliminez cet obstacle.
Maintenance
Pour nettoyer les têtes
d’enregistrement et de lecture ainsi
que la voie d’acheminement de la
bande magnétique
La présence de têtes de lecture/
enregistrement souillées entraîne
l’exécution d’enregistrements de piètre
qualité ou des pertes de son lors de la
lecture des cassettes. Nous vous
recommandons de nettoyer celles-ci au
terme de chaque période d’exploitation de
10 heures.
Ouvrez le compartiment de lecture des
cassettes et essuyez les têtes, les galets
presseurs et les cabestans au moyen d’un
coton-tige légèrement humecté d’alcool ou
d’un agent de nettoyage. Essuyez les pièces
indiquées ci-après:
Coton-tige
Introduisez une cassette dans son
compartiment lorsque les zones que vous
venez de nettoyer sont complètement
sèches.
Pour démagnétiser les têtes du
lecteur/enregistreur de cassettes
Au terme d’une période d’exploitation de
20 à 30 heures, les têtes souffrent d’un
magnétisme rémanent suffisant pour
provoquer un sifflement ou des pertes dans
les aigus. A ce stade, démagnétisez les têtes
et toutes les pièces métalliques situées sur
la voie d’acheminement de la bande
magnétique au moyen d’un démagnétiseur
de tête en vente dans le commerce.
Reportez-vous aux instructions de cet
appareil.
suite page suivante ➔
Tête d’effacement
Cabestan
Galet
Tête de lecture
Pour votre information
presseur
F
23

➔ suite
Pour nettoyer le boîtier de cet
équipement
Employez un chiffon doux imbibé d’une
petite quantité de détergent neutre.
Pour nettoyer un disque compact
En cas de souillure d’un disque compact,
nettoyez-le au moyen d’un chiffon de
nettoyage. Essuyez le disque compact en
allant du centre vers la périphérie.
Remarques concernant les disques
compacts
• Ne jamais utiliser de solvants tels que le
benzène, de diluants pour peintures,
d’agents nettoyants vendus dans le
commerce ou de bombes antistatiques
destinées à l’entretien des disques en
vinyle.
• La présence de griffes, de souillures ou
d’empreintes digitales à la surface d’un
disque compact risque d’être à l’origine
d’erreurs d’alignement.
Spécifications
F
Tuner lecteur CD (HCD-T1)
24
Section tuner
Plage de syntonisation
FM: 87,5 – 108MHz
AM: 531 – 1.602 kHz
(intervalle de 9 kHz)
530 – 1.710 kHz
(intervalle de 10 kHz)
(Sauf sur le modèle
destiné au Moyen-Orient)
Fréquence intermédiaire
FM: 10,7 MHz
AM: 450 kHz
Bornes d’antenne
FM: 75 ohms asymétriques
AM: Borne d’antenne
extérieure
Programmateur
Système de verrouillage à
quartz
Réglage du programmateur
Par incréments d’une minute
Extinction programmée
Par incréments de 10 minutes,
90 minutes au maximum
Section lecteur de disques compacts
Système Système audionumérique de
lecture de disques compacts
Laser Laser à semi-conducteurs
Longueur d’onde
780 – 790 nm
Réponse en fréquence
2 Hz – 20 kHz ± 0,5 dB
Rapport signal/bruit
Plus de 90 dB
Distorsion harmonique
Moins de 0,03 %
Section préamplificateur
Réponse en fréquence
15 Hz – 50 kHz +0 dB
Entrées MD IN:
Prise phono stéréo, sensibilité
450 mV, impédance 47 kohms
Sorties Prise DIGITAL OUT (CD
OPTICAL OUT):
Connecteur numérique,
–18 dBm, longueur d’onde
660 nm
Prise OUTPUT:
Prise phono stéréo, 1 V, 1 kohm
Prise MD OUT:
Prise phono stéréo, 250 mV,
1 kohm
Prise PHONES (écouteurs):
Miniprise stéréophonique,
raccordement d’écouteurs de
8 ohms au moins.
Généralités
Alimentation requise
120 V ou 220 – 240 V CA,
50/60 Hz
Puissance absorbée
25 W
Dimensions
Approximativement
142 × 125 × 252 mm (n/h/p)
(5 5/8 × 5 × 10 pouces)
commandes et pièces saillantes
incluses
Poids Approximativement 3 kg (6 lb
10 oz)
Système de hauts-parleurs actifs
(SA-N1)
Système de hauts-parleurs
Pleine plage, bass reflex
Hauts-parleurs
10 cm de diamètre, du type à
diaphragme conique
Impédance normale
4 ohms
Puissance de raccordement
120, 220 V ou 240 V AC,
réglable, 50/60 Hz
Puissance de sortie RMS continue
12 + 12 watts
(4 ohms à 1 kHz, 5 % THD)
13 + 13 watts
(4 ohms, à 1 kHz, 10 % THD)
Puissance absorbée
27 W
Dimensions
Droit: approximativement
125 × 200 × 215 mm (l/h/p)
(5 × 7 7/8 × 8 1/2 pouces)
commandes et pièces saillantes
incluses
Gauche: approximativement
125 × 200 × 200 mm (l/h/p)
(5 × 7 7/8 × 7 7/8 pouces)
commandes et pièces saillantes
incluses
–3
Poids
Droit: approximativement
2,9 kg (6 lb 7 oz)
Droit: approximativement
1,7 kg (3 lb 12 oz)
Lecteur de cassettes stéréo (TC-TX1)
Système d’enregistrement
Stéréophonique à 2 voies et
4 pistes
Réponse en fréquence
(DOLBY NR OFF)
50 – 15.000 Hz (±3 dB), avec
une cassette Sony de TYPE IV
50 – 14.000 Hz (±3 dB), avec
une cassette Sony de TYPE II
50 – 13.000 Hz (±3 dB), avec
une cassette Sony de TYPE I
Pleurage et scintillement
± 0,2 % W.PEAK (DIN)
Dimensions
Approximativement 142 × 125 ×
205 mm(l/h/p) (5 5/8 × 5 ×8 1/
pouces) commandes et pièces
saillantes incluses
Poids Approximativement 2 kg
(4 lb 7 oz)
Accessoires fournis
Antenne cadre AM (1)
Télécommande
Sony RM-ST1(1)
Piles Sony SUM-3 (NS) (2)
Antenne filaire FM (1)
Câble de connexion pour hautparleur (1)
Câble audio (1)
La conception et les spécifications de ces
équipements sont sujettes à modification
sans préavis.
8
Pour votre information

Index des pièces et
des commandes
En ce qui concerne l’utilisation des
commandes, reportez-vous aux pages
indiquées entre parenthèses.
Les commandes assorties d’un astérisque
sont pourvues d’un indicateur.
Panneau frontal
Lecteur de cassettes stéréo
12
Fenêtre d’affichage
43
1 234 56
Tuner lecteur CD
3
2
1 Commutateur POWER (7)
2 Fenêtre d’affichage (6, 7, 19)
3 Touche ^ (lecture/pause) (7)
4 Touche p (arrêt) (7, 13)
5 Touche 6 (ouverture/fermeture) (7)
6 Touches =0 et )+ (AMS/
recherche)/TUNING + et – (7, 10, 14)
7 Touche BAND (10, 19)
8 Touche FUNCTION (14, 21)
9 Prise PHONES (écouteurs) (16)
0 Capteur de télécommande
!¡ Touches VOL + et – (7, 11, 12)
46751
!º98!¡
57896
1 Touches ( (lecture face A) et
9 (lecture face B) (12, 19)
2 Touche p (arrêt) (12)
3 Touches AMS/) (avance rapide) et
0 (rembobinage rapide) (12)
4 Touche P (pause) (12)
5 Touche 6 EJECT (12, 19)
6 Commutateur DOLBY NR OFF/ON
(12)
7 Commutateur DIRECTION A/a
(13)
8 Touche r REC (14)
9 Touche CD SYNC (14)
Panneau arrière
Tuner lecteur CD
7123 456
98
1 Borne FM 75 Ω (5, 21)
2 Borne y (terre) (5, 21)
3 Borne AM (5, 21)
4 Prises MD OUT (20)
5 Prises MD IN (20)
6 Prises OUTPUT (4)
7 VOLTAGE SELECTOR (4)
8 Câble d’alimentation secteur (5)
9 Connecteur AC OUTLET (4)
0 Câble de SYSTEM CONTROL (4)
!¡ Connecteur AU BUS (bus audio) (5)
!™ Prise DIGITAL OUT (CD OPTICAL
OUT) (20)
!º !¡ !™
78
1 Indications relatives au mode de lecture
des disques compacts (8, 9)
2 Indications relatives au tuner (10)
3 Numéro de plage/indication de cassette
(7, 10)
4 Indications AUTO/MANUAL/
PRESET/MEMORY (10, 11)
5 Indication SURR (surround) (17)
6 Indication DBFB (16)
7 Indications de programmation DAILY/
REC/SLEEP (19, 20)
8 Indication fonction/heure/fréquence
(6, 7, 10)
Télécommande (RM-ST1)
1
2
3
4
5
6
7
8
9
1 Commutateur SYSTEM POWER (19)
2 Touche SLEEP (18)
3 Touche TIMER SELECT (18, 19)
4 Touche TIMER SET (18, 19)
!º
!¡
!™
F
25
suite page suivante ➔
Pour votre information

➔ suite
5 Touches d’exploitation du lecteur de
disques compacts et du tuner
Touche ( (lecture) (7)
Touche P (pause) (7)
Touche p (arrêt) (7)
Touche BAND (10, 19)
Touches TUNING + et –/= et
+ (AMS) (7, 10)
Touche STEREO/MONO (10)
Touche TUNING/PLAY MODE (8, 10)
Touche REPEAT (9)
Touche DISPLAY (8)
Touche MEMORY (11)
6 Touches d’exploitation du lecteur de
cassettes
Touches 9 (lecture de la face B) et
( (lecture de la face A) (12)
Touche p (arrêt) (12)
Touches 0 (avance rapide vers la
gauche) et ) (avance rapide vers la
droite) (12)
7 Touche FUNCTION (14, 21)
8 Touches de réglage du son
Touche DBFB (16)
Touche SURROUND (17)
9 Touches BALANCE L et R (16)
0 Touches TIMER + et – (6, 18, 19)
!¡ Touche ENTER (6, 19)
!™ Touches VOL + et – (7, 11)
F
26
Index
AMS 7, 12
Antennes 5, 10, 19
DBFB 15
Emetteurs de radiodiffusion
présélection 11
syntonisation 10
Enregistrement
automatique d’un disque
compact 12
d’un disque compact 12, 13, 14
d’une émission de radio 13, 18
manuelle d’un disque compact 13
Enregistrement de disques compacts
en spécifiant la séquence des plages à
enregistrer 14
Enregistrement synchronisé des disques
compacts 12
Lecture
des plages à plusieurs reprises
(lecture répétée) 9
des plages dans l’ordre de votre choix
(lecture programmée) 8
des plages dans un ordre quelconque
(lecture aléatoire) 8
d’un disque compact (lecture
normale) 7
d’une cassette 12
Mise en place des piles 6
Programmateur
enregistrement programmé 18
extinction programmée 17
réveil en musique 17
Raccordement
des équipements en option 19
du système 4
Réglage de l’horloge 6
Réglage du son 15
Tuner 10
Pour votre information

Español
ADVERTENCIA
Para evitar riesgos de incendio o
descargas, proteja la unidad de la
lluvia o humedad.
Para evitar descargas eléctricas, no abra la caja. Solicite asistencia de
personal cualificado.
No instale este aparato en un espacio reducido, como un mueble o el
interior de un armario.
Este producto tiene un láser capaz de emitir radiaciones que
superan el límite de Clase 1.
Este producto se ha clasificado
como LASER CLASE 1.
La REFERENCIA DE
PRODUCTO LASER CLASE 1
se encuentra en la parte
posterior externa.
La etiqueta de
precaución se
encuentra dentro
de la unidad.
¡Bienvenido!
Sony le da las gracias por la adquisición del sistema Compact
Component System. Este sistema estéreo incluye funciones
específicas, como las siguientes:
• El panel frontal de cada componente tiene el tamaño de una caja
de CD, lo que permite apilar o elegir la colocación de los
componentes.
• El sistema DBFB (Dynamic Bass Feedback) amplifica la banda de
baja frecuencia para reproducir con potencia y profundidad los
sonidos graves por los altavoces reflectores de banda completa de
graves.
• Una función programada que permite almacenar y rellamar hasta
20 emisoras de FM y 10 emisoras de AM.
• Un temporizador que permite programar el reproductor de discos
compactos, el reproductor de cintas o la radio para que se
encienda o apague en el momento deseado.
• Un mando a distancia para controlar la música desde su sitio.
• Una conexión de salida óptica para la grabación digital.
Acerca del sistema CMT-T1
El sistema se compone de:
– Sintonizador reproductor de CD : HCD-T1
– Sistema activo de altavoz : SA-N1
– Platina estéreo para casetes : TC-TX1
E
2

Indice
Capítulo 1: Instalación
Conexión del sistema estéreo 4
Inserción de las pilas 6
Ajuste del reloj 6
Capítulo 2: Reproductor de disco compacto
Reproducción del CD (normal) 7
Reproducción aleatoria de temas 8
Reproducción programada de temas (reproducción de programa) 8
Reproducción repetida de temas (repetir reproducción) 9
Capítulo 3: Radio
Audición de la radio 10
Memorización de emisoras de radio 11
Recepción de emisoras de radio memorizadas 11
Capítulo 4: Reproductor de cintas
Reproducción de cintas 12
Grabación automática de CD a cinta 12
Grabación manual de CD, etc. a cinta 13
Grabación de los temas del CD en un orden determinado
(edición de programa) 14
Capítulo 5: Ajuste de sonido
Ajuste de balance de los altavoces 15
Amplificación de graves (DBFB) 15
Función de sonido periférico 16
Capítulo 6: Funciones adicionales
Desconexión automática 17
Activación automática 17
Grabación de programas de radio con el temporizador 18
Conexión de componentes opcionales 19
Información adicional
Precauciones 20
Guía de solución de problemas 20
Mantenimiento 21
Especificaciones 21
Indice de componentes y controles 22
Indice alfabético 23
E
3

Capítulo 1:
Instalación
Conexión del sistema
estéreo
Inserción de las pilas
Conexión del sistema
estéreo
Para conectar el estéreo, siga las
indicaciones del dibujo que aparece a
continuación.
PASO 1 Conexión del
cable plano
Conecte el sintonizador reproductor de CD
a la platina para casete estéreo
introduciendo el cable plano (incluido) en
el conector hasta que haga clic.
PASO 2 Conexión del
altavoz derecho
Conecte el altavoz derecho al sintonizador
reproductor de CD con el cable de audio
(incluido) y el cable de alimentación.
Conexión del cable de audio
Inserte bien el enchufe blanco en la toma
(L) blanca y el rojo en la toma (R) roja.
Blanco
Rojo
Ajuste del reloj
Para desconectar el cable plano
Extraiga el conector presionando ambos
lados y sin tirar del cable.
E
Conexión del cable de alimentación
del altavoz derecho
Conecte el cable de alimentación del
altavoz derecho a la salida de CA en el
panel posterior del sintonizador
reproductor de CD.
PASO 3 Conexión del
altavoz izquierdo
Conecte el altavoz izquierdo al altavoz
derecho mediante el cable suministrado.
Asegúrese de que este cable no esté en
contacto con los cables de antena.
4
Cable gris a ] (rojo)
Trence los
extremos
Cable con estrías negras a } (negro)
]
}
Capítulo 1: Instalación

Cable de antena FM (incluido)
Cuadro de antena AM (incluido)
Altavoz derecho
PASO 5
PASO 2
Cable de alimentación
Cable de altavoz (incluido) Cable de
alimentación
PASO 4 Conexión de los
cables de antena
Cable de antena FM*
(incluido)
Cuadro de antena
AM** (incluido)
* Fíjelo para una recepción óptima.
** Oriéntelo en distinta dirección para una
recepción óptima.
Para mejorar la recepción
Conecte una antena externa (p.19).
Instalación del cuadro de antena AM
Sintonizador reproductor de CD
Pletina para casete estéreo
PASO 4
PASO 1
PASO 5
Cable de audio
(incluido)
Cable plano
(incluido)
¡Realizar esta conexión al final!
PASO 5 Ajuste del
selector de tensión
VOLTAGE SELECTOR
Antes de conectar la alimentación,
compruebe que este selector, situado en el
panel posterior del sintonizador
reproductor de CD y del altavoz derecho,
esté ajustado en la tensión de alimentación
de su localidad. De no ser así, ajústelo en la
posición correcta utilizando un
destornillador antes de conectar el cable de
alimentación de CA a la toma de pared.
Sintonizador reproductor de CD
220-240V 120V
VOLTAGE SELECTOR
Altavoz derecho
PASO 3
Altavoz izquierdo
PASO 6
a toma de corriente de
pared
E
5
PASO 6 Conexión a la red
eléctrica
Una vez realizadas las conexiones
anteriores, conecte el cable de alimentación
del sintonizador reproductor de CD a la
toma de corriente de pared.
Nota
• La rejilla frontal del altavoz se puede
extraer.
VOLTAGE SELECTOR
220V240V 120V
Capítulo 1: Instalación

Inserción de las pilas
Ajuste del reloj
Inserte dos pilas R6 (tamaño AA) en el
mando a distancia suministrado.
Duración de las pilas
La duración de las pilas Sony SUM-3 (NS) es
de seis meses aproximadamente. Una vez que
las pilas del mando a distancia se agotan, es
necesario cambiar ambas pilas por otras
nuevas.
Fugas en las pilas
Si no va a utilizar el mando a distancia
durante algún tiempo, extraiga las pilas para
evitar daños por el efecto corrosivo de las
E
fugas.
6
Antes de utilizar el temporizador, necesita
ajustar el reloj.
1
2,3,4
ENTER
1 Pulse TIMER SET.
2 Pulse TIMER + o – para que aparezca
“CLOCK” y, a continuación, pulse
ENTER.
El indicador de horas empieza a
parpadear.
AM
0201
3 Introduzca la hora actual mediante
TIMER + o – y pulse ENTER.
El indicador de minutos empieza a
parpadear.
AM
180
4 Introduzca los minutos mediante
TIMER + o – y pulse ENTER.
El reloj se pone en funcionamiento.
Reajuste del reloj
Repita los pasos del 1 al 4.
Indicación de hora
• Al pulsar POWER para apagar la unidad, el
reloj incorporado muestra la hora en el
visor.
• El punto superior del “:” que aparece en el
visor parpadea durante 0 a 29 segundos,
mientras que el punto inferior parpadea
durante 30 a 59 segundos.
Capítulo 1: Instalación

Capítulo 2:
Reproductor
de disco
compacto
Reproducción del CD
(normal)
Reproducción aleatoria de
temas
Reproducción programada
de temas (reproducción
de programa)
Reproducción repetida de
temas (repetir
reproducción)
Reproducción del CD
(normal)
El disco compacto se puede reproducir en
cuatro modos: normal, aleatorio,
programado y repetido. El modo determina
los temas que se van a reproducir, el orden
y si se van a repetir. También permite
reproducir discos compactos de 12 y 8 cm.
Al reproducir un CD de 8 cm, colóquelo sin
adaptador en el círculo interior de la
bandeja de discos. Para no dañar los
altavoces, baje el volumen mediante VOLantes de reproducir el CD.
Sintonizador reproductor de CD
p
2
3
4
1
1 Pulse POWER.
2 Pulse 6 para abrir y cerrar la bandeja y
colocar el disco.
con la etiqueta hacia arriba.
Función AMS de búsqueda
automática de música
Permite localizar el principio de un tema
mientras lo está escuchando o está en modo
de pausa.
Para localizar el principio del tema que está
escuchando o del anterior, pulse =0 (
o = en el mando a distancia) hasta que lo
encuentre.
Para localizar el principio del siguiente
tema, pulse ) + ( o + en el mando a
distancia) hasta que lo encuentre.
Función de búsqueda de un punto de
un tema
Es posible localizar un punto determinado
de un tema durante la reproducción o la
pausa de un CD. Esta función no se puede
realizar con el mando a distancia.
Para buscar
Hacia delante
durante la
escucha
Hacia atrás
durante la
escucha
Rápidamente
sin escuchar
durante la
comprobación
del tiempo de
reproducción
en el visor.
Funcionamiento
Mantenga pulsado
)+ hasta que
encuentre el punto
deseado.
Mantenga pulsado
=0 hasta que
encuentre el punto
deseado.
Durante el modo de
pausa, mantenga pulsado
)+ o =0 y
libere el botón en el punto
deseado.
E
7
3 Pulse ^, o ( en el mando a distancia,
para que empiece a funcionar.
La bandeja se cierra y el primer tema del
disco empieza a sonar.
1
003
4 Pulse VOL + o – para ajustar el volumen.
Para
Detener la
reproducción
Realizar una pausa
Extraer el CD.
* Mando a distancia
Reproducción mediante una sola
pulsación
Si la unidad está apagada o está escuchando
otra fuente, pulse ^, o ( en el mando a
distancia.
Siempre que el disco compacto se encuentre en
la bandeja, puede escucharlo sin tener que
pulsar otros botones.
Pulse
p
^ (o P*)
Para que vuelva a
funcionar, pulse de
nuevo este botón.
6
Nota
Si el disco se termina mientras realiza una
búsqueda rápida sin escuchar, “OVER”
aparece en el visor. Pulse =0 (0 o =
en el mando a distancia) para retroceder.
Para comprobar el número total de
temas y el tiempo total de registro
Pulse DISPLAY en el mando mientras el
reproductor se encuentra en modo de
parada. Las indicaciones aparecen durante
unos segundos.
Número total de temas
Tiempo total de registro
Para comprobar el tiempo restante
Pulse DISPLAY en el mando repetidas
veces mientras escucha un disco. Cada vez
que se pulsa DISPLAY, el visor cambia de
la siguiente manera.
Número del tema que está
sonando y tiempo de
registro
12
4505
Z
v
Número del tema que está sonando
y tiempo restante del tema
v
Tiempo restante en el disco
compacto
Capítulo 2: Reproductor de disco compacto

Reproducción
aleatoria de temas
Los temas del disco compacto se pueden
escuchar en el orden deseado. Para realizar
esta función, utilice los botones del mando
a distancia.
Sintonizador reproductor de CD
POWER → ON
E
8
5 Repita los pasos 3 y 4 para programar
Reproducción
programada de
temas
programa)
Esta función permite programar hasta 24
temas en el orden seleccionado. Para esto,
es necesario establecer el orden en que
desea escucharlos.
Sintonizador reproductor de CD
6
POWER → ON
(reproducción de
6
3
2
6
2
3
4
los temas restantes que quiere escuchar
y el orden en que desea escucharlos.
6 Pulse (.
Todos los temas elegidos se reproducen
en el orden indicado.
Para cancelar la reproducción
programada
Pulse TUNING/PLAY MODE hasta que
desaparezca “PGM”.
Modificación del programa
Para
Incluir un tema
al final del
programa
Borrar todo el
programa
Una vez que se escuchan todos los
temas programados
El orden establecido permanece en la memoria
del reproductor de disco compacto. Con sólo
pulsar (, puede poner en funcionamiento el
mismo programa.
Notas
• Una vez que se abre la bandeja del CD, el
programa se borra.
• Si el tiempo de duración del programa
supera los 100 minutos, en lugar del tiempo
total de registro aparece el orden de
programación.
• Si intenta programar más de 24 temas, el
visor indica “FULL”.
Funcionamiento
Durante la parada, realice
los pasos 3 – 5.
Durante la parada, pulse
p en el reproductor.
1 Pulse 6 para abrir y cerrar la bandeja
del CD y colocar el disco.
2 Pulse TUNING/PLAY MODE hasta que
“SHUFFLE” aparezca en el visor.
3 Pulse (.
En el visor aparece “J” y los temas se
reproducen de forma aleatoria.
Para cancelar la reproducción
aleatoria
Pulse TUNING/PLAY MODE.
La función “SHUFFLE” se desactiva y los
temas continúan sonando en el orden
original.
Si pulsa TUNING/PLAY MODE en modo
de funcionamiento normal
Puede escuchar los temas del disco en modo
aleatorio.
Para omitir un tema determinado
Pulse +.
No puede volver al tema anterior pulsando
=.
1 Pulse 6 para abrir y cerrar la bandeja
del CD y colocar el disco.
2 Pulse TUNING/PLAY MODE hasta que
“PGM” aparezca en el visor.
3 Pulse = o + hasta que aparezca el
número correspondiente al tema elegido.
En el visor parpadea el tiempo de
registro total, incluido el tiempo de
duración del tema elegido. (El equipo
todavía no se ha programado).
Número de tema
MONO AUTO MANUAL
TUNED
PRESET
STEREO
MEMORY
SHUFFLE
SURR
4
DBFB
304
12
12
PGM
REPEAT 1
DAILY REC SLEEP kHz MHz
Tiempo total de registro
4 Pulse ENTER.
El número de programa se muestra
durante un segundo y el tiempo total de
registro se ilumina.
Capítulo 2: Reproductor de disco compacto

Reproducción
repetida de temas
(repetir reproducción)
Existen dos modos de reproducción
repetida. Uno repite todos los temas en el
modo de reproducción que esté utilizando,
mientras que el otro repite un solo tema.
Utilice los botones del mando a distancia
para realizar esta función.
Sintonizador reproductor de CD
POWER → ON
REPEAT
Para repetir todos los temas en
cualquier modo de reproducción
Pulse REPEAT.
En el visor aparece “REPEAT” y todos los
temas se escuchan de forma repetida en el
modo utilizado
Para repetir un solo tema en modo
de reproducción normal
Mientras está escuchándolo, pulse REPEAT
hasta que “REPEAT 1” aparezca en el visor.
Para cancelar la reproducción
repetida
Pulse REPEAT hasta que “REPEAT” o
“REPEAT 1” no aparezcan en el visor.
E
9
Capítulo 2: Reproductor de disco compacto

Capítulo 3:
Radio
Audición de la radio
Memorización de emisoras
de radio
Recepción de emisoras de
radio memorizadas
Audición de la radio
El sintonizador puede explorar y sintonizar
de forma automática las emisoras de radio
si las señales son nítidas. Esta función
permite sintonizar emisoras de radio con
señales nítidas en menos tiempo. Si por el
contrario las señales son débiles, tendrá que
buscar de forma manual las emisoras
omitidas en la sintonización automática.
1
Sintonizador reproductor de CD
4,5
2
2
4,5
3
Cuando no se sintoniza una emisora
La selección automática puede omitir las
emisoras con señales débiles. Sintonice la
emisora de forma manual.
1 Pulse TUNING/PLAY MODE hasta que
aparezca “MANUAL” en el visor.
2 Mantenga pulsado TUNING +/– hasta
que sintonice la emisora deseada.
Para mejorar la recepción de emisiones
AM
Reoriente el cuadro de antena AM
suministrado.
Para cambiar el intervalo de
sintonización de AM (Excepto para el
modelo de Oriente Medio)
El intervalo de sintonización de AM está
preajustado de fábrica a 9 kHz (10 kHz en
algunas zonas). Si necesita modificar el
intervalo, realice lo siguiente:
1 Active la alimentación.
2 Cambie la banda a AM.
3 Desactive la alimentación.
4 Vuelva a activar la alimentación mientras
pulsa TUNING+.
Después de cambiar el intervalo de
sintonización, vuelva a ajustar las emisoras
de AM programadas.
E
10
1 Pulse POWER.
2 Pulse BAND hasta que la banda elegida
aparezca en el visor.
Al pulsar BAND, la banda cambia de la
siguiente manera:
FM Bb AM
3 Pulse TUNING/PLAY MODE hasta que
aparezca “AUTO” en el visor.
4 Pulse TUNING +/– para sintonizar la
emisora deseada.
Pulse TUNING + para sintonizar una
emisora de frecuencia superior y
TUNING – para sintonizar una de
frecuencia inferior. El sintonizador
comienza a explorar las emisoras de
forma automática, hasta que encuentra
una emisora nítida. En el visor aparece
“TUNED”, y “STEREO” si la emisora
FM sintonizada emite en estéreo.
Si la recepción de un programa FM no
es nítida
Pulse STEREO/MONO hasta que en el visor
aparezca “MONO”. La recepción no es
estéreo, pero mejora. Vuelva a pulsar
STEREO/MONO para restablecer el efecto
estéreo.
Reproducción mediante una sola
pulsación
Pulse BAND si el equipo está desconectado o
durante la recepción del sonido de otra fuente.
Para volver a escuchar la última emisora
seleccionada, no es necesario pulsar otros
botones.
Capítulo 3: Radio
5 Si no desea escuchar la emisora
sintonizada, pulse de nuevo TUNING
+/– para reiniciar la búsqueda.

Memorización de
emisoras de radio
La memoria permite almacenar en el
sintonizador sus emisoras de radio
favoritas y sintonizarlas de forma rápida.
En los modelos alemanes e italianos se
pueden programar 20 emisoras FM y 10
AM. Para realizar esta función, utilice los
botones del mando a distancia.
Sintonizador reproductor de CD
POWER → ON
1
3,5
2
6
4
7 Repita los pasos del 3 al 6 para
almacenar cada una de las emisoras
elegidas.
Para borrar una emisora de la
memoria
Almacene otra emisora en el canal de
programación en que se encuentra la que
quiere borrar. De esta forma, la emisora
antigua se sustituye por otra y desaparece
de la memoria.
Nota
La emisora programada no se borra, aún
cuando se desconecte el equipo, hasta que se
sustituye por otra.
Recepción de
emisoras de radio
memorizadas
Una vez que se ha programado la memoria,
puede sintonizar de forma rápida su
emisora favorita.
Sintonizador reproductor de CD
POWER → ON
3
1
3 Pulse TUNING +/– para sintonizar una
emisora programada.
Aparece el número del canal
memorizado, a continuación, aparece la
frecuencia de la emisora y es posible su
recepción.
4 Pulse VOL +/– para ajustar el volumen.
Para cambiar la indicación de
frecuencia a la de memorización de
canal
Mientras escucha una emisora de radio
memorizada, pulse DISPLAY en el mando a
distancia. Cada vez que lo pulse, el visor
mostrará la frecuencia o el número de canal
memorizado.
E
11
1 Pulse BAND hasta que la banda
deseada aparezca en el visor.
FM Bb AM
2 Pulse TUNING/PLAY MODE hasta que
“MANUAL” o “AUTO” aparezcan en el
visor.
3 Pulse TUNING +/– para sintonizar la
emisora que quiere almacenar.
4 Pulse MEMORY.
”MEMORY” y el número del canal de
programación aparecen en el visor.
5 Decida el número de canal de
programación para la emisora de radio
(1 a 20 para FM, 1 a 10 para AM). Pulse
TUNING +/– para mostrar el número
del canal de programación que se ha
asignado.
6 Pulse ENTER.
La emisora se almacena con el número
del canal asignado.
1
3
2
4
Pulse BAND hasta que aparezca en el
1
visor la banda deseada.
FM Bb AM
2 Pulse TUNING/PLAY MODE hasta que
“PRESET” aparezca en el visor.
4
Capítulo 3: Radio

Capítulo 4:
Reproductor
de cintas
Reproducción de cintas
Grabación automática de
CD a cinta
Grabación manual de CD,
etc. a cinta
Grabación de los temas del
CD en un orden
determinado
(edición de programa)
E
12
Reproducción de
cintas
Puede utilizar cintas TYPE I (normal), TYPE
II (CrO2) y TYPE IV (metal). Al introducir
una cinta en la platina, ésta detecta de
forma automática el tipo de cinta.
Sintonizador reproductor de CD
4
1
Platina para casete estéreo
3
p
2
1 Pulse POWER.
2 Pulse 6 EJECT para abrir el
compartimiento de cinta e introducir
una cinta grabada.
Para
Realizar una
pausa
Encontrar el
principio del
tema que está
sonando o del
siguiente
Avanzar
rápidamente o
rebobinar la
cinta
Reproducir una
cara de la cinta
Reproducir
ambas caras de
forma repetida*
* La platina se para de forma automática tras
repetir la secuencia cinco veces.
Si está recibiendo el sonido de una
cinta grabada con el sistema de
reducción de ruido tipo B de Dolby*
Deslice el interruptor DOLBY NR a ON.
El sistema de reducción de ruido Dolby
reduce los ruidos propios de la cinta en
señales de alta frecuencia de bajo nivel.
* Reducción de ruido Dolby fabricado bajo
licencia de Dolby Laboratories Licensing
Corporation.
DOLBY y el símbolo de la doble D a
son marcas de Dolby Laboratories
Licensing Corporation.
Funcionamiento
Pulse P en la platina. Para
poner el reproductor de
nuevo en funcionamiento,
pulse otra vez este botón.
Durante el
funcionamiento, pulse 0
o ) en la platina.
Durante la parada, pulse
0 o ) en la platina.
Deslice DIRECTION a A.
Deslice DIRECTION a
a.
3 Pulse ( para escuchar la primera cara.
Pulse 9 para escuchar la cara inversa.
4 Pulse VOL +/– para ajustar el volumen.
Para detener la reproducción
Pulse p.
Reproducción mediante una sola
pulsación
Pulse ( o 9 si el equipo está
desconectado o está escuchando otra
fuente.
Siempre que en la platina haya una cinta,
podrá escucharla inmediatamente sin
pulsar otros botones. Si en la platina no hay
ninguna cinta, sólo se conectará la
alimentación.
Grabación
automática de CD a
cinta
Para grabar el disco compacto a cinta de
forma rápida, utilice el botón CD SYNC.
Utilice los botones que se encuentran en el
reproductor de disco compacto y en la
platina del casete. Antes de realizar la
grabación, asegúrese de que no se han
extraído las lengüetas del casete.
Capítulo 4: Reproductor de cintas

Sintonizador reproductor de CD
1
Platina para casete estéreo
3
1 Pulse POWER.
2 Pulse 6 e introduzca un CD.
Uso del interruptor DOLBY NR
p
Para reducir el ruido propio de las cintas en
señales de alta frecuencia de bajo nivel, deslice
2
el interruptor DOLBY NR a ON después de
realizar el paso 4.
Grabación sincronizada CD SYNC
Esta función permite a la platina
sincronizar la grabación según la duración
de los temas incluidos en el CD. De esta
forma, puede despreocuparse de la cara o el
tiempo de grabación de la cinta. Este
sistama estéreo incluye la función de
6
atenuación sincronizada, que evita la
p
interrupción brusca de los temas al final de
la cinta, reduciendo el sonido de forma
7
gradual. Si se acaba la primera cara de la
cinta mientras se está grabando un tema, la
pletina rebobina la cinta hasta el principio
4
del tema interrumpido y vuelve a grabarlo
de forma automática. En este caso, el tema
5
se graba al final de la cinta con desaparición
de sonidoa. (Si se está grabando una sola
cara, el proceso termina en este punto.)
Grabación de los temas del
CD en el orden original
Grabación manual de
CD, etc. a cinta
El disco compacto se puede grabar de
muchas maneras; por ejemplo, puede
grabar sólo las canciones que quiera o
empezar en cualquier parte de la cinta.
Sintonizador reproductor de CD
POWER → ON
Platina para casete estéreo
6
p
7
3 Pulse 6 EJECT e inserte un casete
virgen.
4 Deslice DIRECTION para seleccionar la
grabación de una o dos caras.
Para grabar
Una cara
Ambas caras*
* La grabación siempre se detiene al final de
la segunda cara. Asegúrese de comenzar la
grabación en la primera cara.
Deslice DIRECTION a
A
a
5 Pulse CD SYNC.
La platina se prepara para realizar la
grabación y el reproductor de disco
compacto para funcionar.
6 Pulse ( o 9 para seleccionar la cara
de la cinta que quiere grabar en primer
lugar.
Para que empiece por la primera cara,
pulse (.
Para que empiece por la segunda cara,
pulse 9. (En este caso, sólo se grabará
la segunda cara)
7 Pulse P.
Empieza la grabación. Tras
aproximadamente 10 segundos, el CD
comienza a funcionar.
Para detener la grabación
Pulse p en la platina o el reproductor de
CD.
Cara A
Cara B
El sonido del
último tema de la
cara B desaparece
gradualmente si
supera la duración
de la cinta.
Si se programa el orden de los temas y su
duración es inferior a la de una de las caras,
el equipo realiza automáticamente lo
siguiente:
Cuando el reproductor de CD se
detiene, la platina continúa
grabando sin sonido hasta que
llega al final de la primera cara;
entonces invierte el sentido de la
cinta y continúa grabando.
1 2 3 4 5
9
8 7 6
Una vez grabados los temas
seleccionados, la platina continúa
grabando sin sonido durante cuatro
segundos y después se para.
La grabación
comienza por el
tema cuyo sonido
se ha reducido
gradualmente al
final de la primera
cara.
Cara A
Cara B
1
6
2
1 Pulse 6 EJECT e introduzca una cinta
virgen.
2 Pulse FUNCTION hasta que la fuente
que quiere grabar aparezca en el visor.
Fuente
CD
Radio
MD, etc.
Indicación
CD
TUNER
MD
3 Deslice DIRECTION para seleccionar la
grabación de una o ambas caras.
Para grabar una cara, deslícelo a A.
Para grabar las dos caras, deslícelo a
a.
4 Para reducir el ruido propio de las
cintas en señales de alta frecuencia de
bajo nivel, deslice el interruptor DOLBY
NR a ON.
3
5
4
E
13
Continúa en la página siguiente ➔
Capítulo 4: Reproductor de cintas

➔Continuación
5 Pulse r REC en la platina.
La platina se prepara para grabar y los
indicadores luminosos r REC y P de la
platina se encienden. El indicador ( o
9 se ilumina, mientras que el otro
indicador parpadea y se apaga.
Si el indicador de botón ( o 9 no se
ilumina ni parpadea, significa que se ha
retirado la correspondiente lengüeta del
cassette, por lo que no es posible grabar
en esta cara.
6 Pulse ( o 9 para seleccionar la cara
de la cinta que quiere grabar en primer
lugar.
Para empezar la grabación en la cara A,
pulse (.
Para empezar la grabación en la cara B,
pulse 9.
7 Pulse P en la platina.
Comienza la grabación.
Si se desliza el interruptor DIRECTION
a a, la grabación termina al final de la
cara B.
8 Comience la reproducción de la fuente
de sonido.
Para detener la grabación
Pulse p en la platina.
E
Nota
14
Si pulsa FUNCTION mientras está grabando,
la fuente utilizada se cambia por otra.
Grabación de los
temas del CD en un
orden determinado
(edición de programa)
Al hacer la programación puede ajustar el
tiempo total de grabación a la duración de
la cinta.
Sintonizador reproductor de CD
POWER → ON
1
Platina para casete estéreo
10
7
9
8
6,11
4
3
2
1
Pulse 6 en el reproductor de CD e
introduzca un disco.
5
2 Pulse FUNCTION hasta que en el visor
aparezca “CD”.
3 Pulse TUNING/PLAY MODE hasta que
“PGM” aparezca en el visor.
4 Pulse = o + para elegir un tema.
5 Pulse ENTER.
Repita los pasos 4 y 5 para programar
los temas restantes que quiere grabar en
la cara A y el orden en que quiere que se
graben.
6 Pulse P en el mando a distancia para
detener la grabación al final de la cara
A.
Aparece el tiempo total de grabación
“0.00”.
Repita los pasos 4 y 5 para programar
los temas restantes que quiere grabar en
la cara B y el orden en que quiere
grabarlos.
7 Pulse 6 EJECT en la platina e
introduzca una cinta virgen.
9 Pulse CD SYNC.
La platina se prepara para grabar,
mientras que el reproductor de CD se
prepara para funcionar.
10 Pulse ( o 9 para seleccionar la cara
de la cinta en la que quiere empezar a
grabar.
Para empezar a grabar en la cara A,
pulse (.
Para empezar a grabar en la cara B,
pulse 9.
11 Pulse P para reanudar la grabación
después de una pausa.
Comienza la grabación. Tras
aproximadamente 10 segundos, el CD
comienza a funcionar. Si se ha
programado para grabar la cara B, el
reproductor realiza una pausa tras
completar la grabación en la cara A. La
platina continúa grabando sin sonido
hasta llegar al final de la cara A y,
entonces, invierte el sentido de la cinta
para empezar a grabar en la cara B. Una
vez que se han grabado los temas
seleccionados, la platina continúa
grabando sin sonido durante 4
segundos y después se para.
Cancelación de la edición de
programa
Pulse TUNING/PLAY MODE hasta que
“PGM” no aparezca en el visor.
Notas
• Si la última parte del tema se ha grabado en
la parte en blanco que aparece al final de la
cinta, la grabación puede estar incompleta.
• Al programar la cara B después de realizar
una pausa al final de la cara A, asegúrese de
que la duración de los temas programados
para la cara A no sea superior al de esta cara
de la cinta. De lo contrario, no se puede
realizar una grabación perfecta.
Para empezar a grabar en cualquier
punto de la cinta
Ponga en marcha la cinta o grabe en ella
durante unos segundos y, a continuación,
pulse CD SYNC. El CD se pondrá en
funcionamiento al mismo tiempo que empiece
a grabar. Si pulsa 6 EJECT para insertar la
cinta y, a continuación, CD SYNC, el
reproductor de CD se pone en marcha 10
segundos después de iniciar la grabación. Esto
ocurre cuando se graba en cualquier punto de
la cinta, ya que el sistema estéreo se ha
diseñado para evitar la grabación de la parte
en blanco al principio de la cinta.
Capítulo 4: Reproductor de cintas
8 Deslice DIRECTION para seleccionar la
grabación de una o ambas caras.
Para grabar una cara, deslícelo a A.
Para grabar las dos caras*, deslícelo a
a.
* La grabación siempre se detiene al final
de la cara B. Asegúrese de que comienza
a grabar en la cara A.

Capítulo 5:
Ajuste de
sonido
Ajuste de balance de los
altavoces
Amplificación de graves
(DBFB)
Función de sonido
periférico
Ajuste de balance de
los altavoces
Si la posición de los altavoces no es
simétrica, puede ajustar el balance de
sonido para corregir la reproducción
estéreo. Para realizar esta operación, utilice
los botones del mando a distancia.
Sintonizador reproductor de CD
POWER → ON
Amplificación de
graves
La función DBFB (Dynamic Bass Feedback)
intensifica los sonidos de baja frecuencia
para obtener una reproducción de graves
más variada. Puede seleccionar uno de los
dos niveles DBFB: “DBFB1” o “DBFB2”.
“DBFB2” es más eficaz que “DBFB1”.
Sintonizador reproductor de CD
POWER → ON
(DBFB)
BALANCE L/R
Para aumentar la potencia relativa del
altavoz derecho, pulse BALANCE R.
Cada vez que se pulsa BALANCE R., el
visor cambia de la siguiente manera:
10 LEFT b 9 LEFT b ...... b 1 LEFT b
CENTER b 1 RIGHT b 2 RIGHT b ...... b
10 RIGHT
Para aumentar la potencia relativa del
altavoz izquierdo, pulse BALANCE L.
Cada vez que se pulsa BALANCE L., el
visor muestra la secuencia anterior en
sentido inverso.
Para escuchar por los auriculares
Conéctelos a la toma PHONES. Los
altavoces no emitirán sonido.
DBFB
Pulse DBFB hasta que aparezca “DBFB1” o
“DBFB2” en el visor. Cada vez que se pulsa
DBFB, el visor cambia de la siguiente
manera:
b DBFB1 b DBFB2 b OFF
Nota
Si las funciones de sonido periférico y DBFB se
ajustan a OFF, puede disfrutar de una calidad
de sonido muy similar a la del CD (función
Source Direct).
E
15
Capítulo 5: Ajuste de sonido

Función de sonido
periférico
Esta función permite crear un ambiente
similar al de una sala de cine o de
conciertos. Seleccione uno de los dos
niveles de sonido periférico: “SURR1” y
“SURR2”. “SURR2” es más eficaz que
“SURR1”.
Sintonizador reproductor de CD
POWER → ON
E
16
Pulse SURROUND hasta que “SURR1” o
“SURR2” aparezcan en el visor. Cada vez
que se pulsa SURROUND, el visor cambia
de la siguiente manera:
b SURR1 b SURR2 b OFF
Nota
Si las funciones de sonido periférico y DBFB se
ajustan a OFF, puede disfrutar de una calidad
de sonido muy similar a la del CD (función
Source Direct).
SURROUND
Capítulo 5: Ajuste de sonido

Capítulo 6:
Funciones
adicionales
Desconexión automática
Activación automática
Grabación de programas de
radio con el temporizador
Conexión de componentes
opcionales
Desconexión
automática
El sistema estéreo se puede programar para
que se desconecte de forma automática y
usted pueda dormirse mientras escucha
música. Antes de programar la desconexión
automática, asegúrese de que el reloj se ha
ajustado correctamente.
Sintonizador reproductor de CD
POWER → ON
SLEEP
Nota
El temporizador normal y el de grabación no
funcionan mientras la desconexión automática
está activada.
Activación
automática
Esta función le despierta con música a una
hora determinada. Para esto, sólo necesita
ajustar el temporizador una vez. El
temporizador se programa para que se
active todos los días a la misma hora. Antes
de programar la activación automática,
asegúrese de que ha ajustado el reloj
correctamente. Si quiere despertarse con el
sonido de la radio, compruebe que ha
programado la emisora que quiere
escuchar. (Consulte la sección
“Memorización de emisoras de radio”)
Sintonizador reproductor de CD
POWER → ON
1 Reproduzca su fuente de sonido favorita
(cinta, radio o CD).
2 Pulse SLEEP mientras la fuente está
funcionando para determinar la
duración de la recepción del sonido.
En el visor aparece “SLEEP” y un
indicador de minutos. Cada vez que se
pulsa SLEEP, la cifra del indicador
disminuye en 10 minutos, desde 90
hasta 10. El equipo se desconecta una
vez transcurrido el intervalo de tiempo
seleccionado.
b 90 b 80 b 70 b ...... b 20 b10 bOFF
Para cancelar la desconexión
automática
Pulse SLEEP hasta que aparezca “SLEEP
OFF” en el visor.
Para comprobar el tiempo restante
antes de que el sistema se
desconecte de forma automática
Pulse SLEEP una sola vez.
La indicación aparece en el visor durante
unos segundos.
Para cambiar el tiempo programado
mientras la desconexión automática
sigue activa
Pulse SLEEP varias veces hasta que
aparezca el periodo de tiempo adecuado.
TIMER
SELECT
3
8
4, 5,
6, 7
ENTER
2
1 Prepare la fuente de sonido
Fuente
CD
Radio
Casete
Continúa en la página siguiente ➔
Preparativos
Introduzca un CD. Si
quiere que reproduzca un
tema determinado, realice
los procedimientos
necesarios para
programarlo (p.8).
Sintonice el canal de la
emisora programada.
Introduzca una cinta de
forma que la cara
adecuada mire hacia
fuera y pulse ( para que
empiece a funcionar.
E
17
Capítulo 6: Funciones adicionales

➔Continuación
AM
1
8
0
REC
2 Pulse VOL +/– para ajustar el volumen.
3 Pulse TIMER SET.
4 Pulse TIMER +/– para que aparezca
“DAILY” y, a continuación, ENTER.
La indicación de horas del visor
parpadea.
0AM210
DAYLY
5 Introduzca la hora en que quiere que la
música empiece a sonar.
Pulse TIMER +/– para ajustar la hora y,
a continuación, ENTER. El indicador de
minutos empieza a parpadear.
Ajuste los minutos de la misma manera
y pulse ENTER.
En el indicador aparece la hora de
desconexión.
AM
7
0
1
DAILY
AM
8
0
E
DAILY
1
18
6 Introduzca la hora en la que quiere que
la música se apague.
Pulse TIMER + o – para ajustar la hora
y, a continuación, ENTER. El indicador
de minutos empieza a parpadear.
Introduzca los minutos de la misma
manera y pulse ENTER. El indicador de
la fuente empieza a parpadear.
CD
DAILY
7 Pulse TIMER +/– para seleccionar la
fuente y, a continuación, ENTER.
Fuente
CD
Radio
Cinta
MD, etc.
Estos elementos aparecen en el visor de
forma secuencial.
Indicación
CD
TUNER
TAPE
MD
8 Pulse SYSTEM POWER para
desconectar el sistema.
A la hora programada, el equipo se
encenderá y la música empezará a
sonar. A la hora en que se ha
programado la desconexión, el equipo
volverá a apagarse.
Para cancelar el temporizador
Pulse TIMER SELECT hasta que en el visor
aparezca “OFF” en lugar de “DAILY”.
Para ajustar el temporizador con los
mismos elementos
Pulse TIMER SELECT para que aparezca
“DAILY” y, a continuación, SYSTEM
POWER para apagar el sistema. Una vez
que se ha programado el temporizador, no
necesita ajustar los elementos de nuevo.
Para comprobar la programación del
temporizador
Pulse TIMER SELECT hasta que “DAILY”
desaparezca y aparezca de nuevo en el
visor. Los elementos programados aparecen
en secuencias.
Para cambiar la programación del
temporizador
Repita los pasos del 1 al 8.
Grabación de
programas de radio
con el temporizador
El temporizador se puede programar para
que grabe emisoras de radio. Sin embargo,
sólo funciona una vez por cada ajuste
realizado. Programe en primer lugar la
emisora de radio. (Consulte “Memorización
de emisoras de radio”) Asegúrese de que
ha ajustado bien el reloj.
Nota
No es posible controlar con este reproductor la
activación y desactivación de la alimentación
ni el inicio y parada de grabación de la
grabadora conectada a las tomas MD OUT
situadas en la parte posterior. Finalice la
preparación de la grabación con temporizador
en la grabadora.
Sintonizador reproductor de CD
POWER → ON
4
2
Platina para casete estéreo
1
TIMER
SELECT
10
6,7,
5
2
3
8,9
4
ENTER
1 Inserte una cinta virgen con la cara que
desee grabar orientada hacia fuera y, a
continuación, pulse ( para iniciar la
grabación a partir de la cara frontal.
(Prepare la grabadora conectada a las
tomas MD OUT, situadas en la parte
posterior, para la grabación con
temporizador.)
2 Pulse BAND repetidamente hasta que
el visor muestre la banda deseada.
3 Pulse TUNING/PLAY MODE hasta que
“PRESET” aparezca en el visor.
4 Pulse TUNING +/– para sintonizar la
emisora programada.
5 Pulse TIMER SET.
6 Pulse TIMER + o – para que aparezca
“REC” y, a continuación, pulse ENTER.
El indicador de horas parpadea.
0AM210
REC
7 Programe la hora de inicio de la
grabación.
Pulse TIMER + o – para ajustar la hora
y, a continuación, ENTER
El indicador de minutos empieza a
parpadear.
Ajuste los minutos de la misma forma y
pulse ENTER
El indicador con la hora de desconexión
empieza a parpadear.
Capítulo 6: Funciones adicionales
AM
REC
170

8 Programe la hora para que se detenga la
grabación.
Pulse TIMER + o – para ajustar la hora
y, a continuación, ENTER El indicador
de minutos empieza a parpadear.
Ajuste los minutos de la misma forma y
pulse ENTER
“TO TAPE” o “TO MD” parpadean.
TO
APTE
REC
9 Pulse TIMER +/– para seleccionar la
fuente que quiere grabar y, a
continuación, pulse ENTER.
Para grabar una cinta, en el visor debe
aparecer “TO TAPE”. Para grabar un
MD, etc, en el visor debe aparecer “TO
MD”.
Los elementos programados aparecen
en secuencias en el visor.
10 Pulse SYSTEM POWER para
desconectar el sistema.
A la hora programada, el sistema se
conectará y empezará a grabar. A la
hora programada para la desconexión,
el sistema se apagará de nuevo.
A la hora preajustada, el nivel de sonido
se ajusta de forma automática en el
mínimo y estará al mismo nivel después
de la hora de desconexión.
Para cancelar el temporizador
Pulse TIMER SELECT hasta que en el visor
aparezca “OFF” en lugar de “REC”.
Para ajustar el temporizador con los
mismos elementos
Pulse TIMER SELECT para que aparezca
“REC” y, a continuación, pulse POWER
para desconectar el sistema. Una vez que ha
ajustado el temporizador, no necesita
ajustar los mismos elementos otra vez.
Para comprobar los ajustes del
temporizador
Pulse TIMER SELECT hasta que “REC”
desaparezca y vuelva a aparecer en el visor.
Los elementos programados aparecen en
secuencias.
Para cambiar los ajustes del
temporizador
Repita los pasos del 1 al 10.
Conexión de
componentes
opcionales
Conexión de platinas MD,
DAT, etc.
Para una grabación digital con
platinas MD, DAT, etc.
Conecte la toma de SALIDA (OPTICA)
DIGITAL, que se encuentra en el panel
posterior del reproductor, a la grabadora,
pletina, etc. con conexión óptica.
a toma de
entrada
digital
Platina
MD/DAT
Cable digital POC-15A (no incluido), etc
Para realizar una grabación
analógica con una platina MD, DAT,
VCR, etc.
Conecte las tomas de entrada de línea MD
IN/OUT, que se encuentran en el panel
posterior del sistema estéreo, a la platina
MD, DAT, VCR, etc. mediante el cable de
conexión RK-C315 de Sony (no incluido).
Cable de conexión
RK-C315 (no
incluido), etc
a las tomas de
entrada
Platina
MD/DAT/
VCR
a las tomas de
salida
Para escuchar el sonido de un equipo VCR
por los altavoces conectados, conecte las
tomas MD IN en el panel posterior del
sistema estéreo a las tomas de salida del
equipo VCR. Para esto, inserte los enchufes
en las tomas del mismo color. Para obtener
más detalles, consulte el manual de
instrucciones de cada equipo.
Para recibir el sonido del equipo
conectado
Pulse FUNCTION hasta que en el visor
aparezca “MD”.
Sintonizador
reproductor de CD
CD OPTICAL
DIGITAL OUT
Sintonizador
reproductor
de CD
Conexión de antenas
externas
Para mejorar la recepción FM
Conecte una antena externa si la señal de
recepción es demasiado débil con el cable
de antena FM suministrado. Conecte una
antena externa FM al conector FM de 75 Ω
mediante un cable coaxial de 75 ohm.
Para una mejor recepción AM
Conecte una antena externa si la recepción
de la señal es demasiado débil después de
reorientar el cuadro de antena AM
suministrado. No desconecte el cuadro de
antena AM. Conecte un cable aislado de 6 a
15 metros (no incluido) al conector AM y
extienda el otro extremo en posición
horizontal hasta un lugar más alto. Conecte
el conector y a tierra.
Importante
Ponga a tierra la antena externa contra
descargas eléctricas. Para evitar explosiones de
gas, no conecte el cable de tierra a un conducto
de gas.
Cable aislado
(no incluido)
Cable de tierra
(no incluido)
E
19
Capítulo 6: Funciones adicionales

Información
adicional
Precauciones
Guía de solución de
problemas
Mantenimiento
Especificaciones
Indice de componentes y
controles
Indice alfabético
E
20
Precauciones
Para solucionar problemas en su sistema
estéreo o solicitar más información,
póngase en contacto con el distribuidor de
Sony más cercano.
Seguridad
• La unidad no se desconecta de la toma de
corriente mientras esté enchufada a la
pared, aun habiendo apagado el equipo.
• Si no va a utilizar el equipo durante un
periodo de tiempo, desenchúfelo de la
toma de corriente. Para desconectar el
cable de alimentación, extraiga el enchufe
sin tirar del cable.
• Si vierte un líquido o cae un objeto sólido
sobre un componente del equipo,
desenchufe el sistema y póngase en
contacto con una persona cualificada para
que revise este componente antes de
seguir utilizándolo.
• El cable de alimentación sólo debe
cambiarse en un centro de servicio
autorizado.
Instalación
Sitúe el sistema estéreo en un lugar bien
ventilado para evitar que el equipo se
caliente.
Condensación en los componentes
del reproductor de CD
Si el equipo se cambia directamente de un
lugar frío a otro caliente o se sitúa en una
habitación húmeda, la humedad puede
condensarse en las lentes del reproductor.
Si esto ocurre, el CD no se pondrá en
funcionamiento. Extraiga el disco y deje el
equipo encendido durante
aproximadamente una hora hasta que se
evapore la humedad.
Protección permanente de cintas
Para evitar que una cinta se vuelva a grabar
de forma accidental, rompa las lengüetas
del casete en la cara A o B según se indica.
Si posteriormente desea volver a utilizar
esa cinta para una grabación, cubra las
lengüetas con cinta adhesiva.
Cara A
Lengüeta de la
cara B
Cuando utilice una casete de tipo II (CrO2)
o tipo IV (METAL) no cubra las ranuras que
permiten al reproductor de cintas detectar
de forma automática el tipo de cinta.
Lengüeta de
la cara A
En algunas ocasiones se observa algún
tipo de irregularidad en los colores de
una pantalla de televisión instalado
cerca de un equipo.
El sistema de altavoces con protección
magnética permite instalarlos cerca de un
televisor. Sin embargo, puede seguir
observando algún tipo de irregularidad en el
color dependiendo del tipo de televisor.
Si esto ocurre
Apage el televisor y vúelvalo a encender tras
15 o 30 minutos.
Si todavía observa irregularidades en el
color
Separe los altavoces del televisor.
Guía de solución de
problemas
Si al utilizar el estéreo surge algún
problema, compruebe primero los puntos
siguientes y, a continuación, utilice la lista.
• El cable de alimentación está bien
conectado.
• Los altavoces están bien conectados y
fijos.
Si tras realizar las comprobaciones
oportunas no se ha solucionado el
problema, consulte al distribuidor de Sony
más cercano.
General
No se recibe sonido
m Pulse POWER para encender el
equipo.
m Ajuste el volumen.
m Los auriculares están conectados.
Desconéctelos.
El sonido de los altavoces derecho e
izquierdo se ha invertido.
m Compruebe la conexión de los
altavoces y su ubicación.
Se escucha un zumbido o ruido alto.
m El televisor o sistema VCR está
demasiado cerca del sistema
estéreo. Separe el estéreo del
televisor o VCR.
En el visor parpadea la indicación
“AM 12:00”.
m El suministro eléctrico se ha
interrumpido. Vuelva a ajustar el
reloj y el temporizador.
Información adicional
TIPO II TIPO IV
Ranuras de detección
Reproductor de CD
La bandeja no cierra
m El disco no se ha colocado
correctamente.

El CD no funciona.
m El CD está sucio.
m El CD se inserta con la etiqueta
hacia abajo.
m El reproductor está en modo de
pausa.
m Se ha producido condensación de
la humedad. Deje el sistema
encendido durante una hora, hasta
que la humedad se evapore.
El reproductor no empieza por el
primer tema.
m El reproductor funciona en modo
programado o aleatorio. Pulse
TUNING/PLAY MODE hasta que
desaparezca la indicación sobre el
modo de funcionamiento.
Platina para casete estéreo
El reproductor no graba.
m No hay ninguna cinta en el
compartimiento de las cintas.
m Se ha eliminado la lengüeta del
casete.
m La cinta ha pasado hasta el final.
Zumbido o ruido grave.
m Ajuste la antena.
m La señal es demasiado débil.
Conecte la antena externa.
m Conecte el cable de tierra.
Un programa FM estéreo no se recibe
en estéreo.
m Si “MONO” aparece en el visor,
pulse STEREO/MONO en el
mando a distancia para que
“MONO” desaparezca.
m Ajuste la antena.
Temporizador
El temporizador no funciona.
m Ajuste bien el reloj.
m Se ha interrumpido el suministro
eléctrico. Siel temporizador
funciona, pulse el interruptor
POWER para desconectar el
sistema.
m Compruebe que “DAILY” o
“REC” aparecen en el visor.
Desmagnetización de los cabezales
de la cinta
20 o 30 horas de uso pueden provocar la
concentración de residuos magnéticos en
los cabezales, lo que provoca la pérdida de
altas frecuencias y el aumento de los ruidos
propio de la cinta. Cuando esto sucede, es
conveniente desmagnetizar los cabezales y
las piezas de metal en el paso de cinta con
un producto comercializado para estos
efectos. Consulte las instrucciones del
desmagnetizador.
Limpieza de la carcasa
Utilice un trapo ligeramente empapado en
una solución detergente poco concentrado.
Limpieza del CD
Si el CD está sucio, límpielo con un trapo
desde dentro hacia fuera.
Notas sobre el CD
• No utilice disolventes como gasolina,
diluyentes, productos de limpieza
comercializados o aerosoles antiestáticos
para LP de vinilo.
• Si el CD tiene una arañazo, alguna
suciedad o la marca de los dedos, puede
producirse un error con las pistas.
La cinta no se graba o no se
reproduce, o el nivel de sonido ha
disminuido.
m Los cabezales están sucios.
Límpielos.
m Se han acumulado residuos
magnéticos en los cabezales*.
El ruido de fondo es excesivo o
desaparece el sonido.
m Los cabrestantes o los rodillos de
apriete están sucios.
La cinta no se borra por completo.
m Se han acumulado residuos
magnéticos en los cabezales.
El sonido aumenta o se borran las
altas frecuencias.
m Se han acumulado residuos
magnéticos en los cabezales*.
La grabación sincronizada del CD no
se inicia.
m Si el sentido de la cinta es a, la
grabación no comienza cuando se
ha eliminado la lengüeta de alguna
de las caras del casete.
* Consulte “Mantenimiento”.
Mando a distancia
El mando a distancia no funciona.
m Las pilas se han agotado. Cambie
ambas pilas por otras nuevas.
m Hay un obstáculo entre el mando a
distancia y el equipo. Quítelo.
Mantenimiento
Limpieza de los cabezales y el paso
de cinta.
Los cabezales sucios son los responsables
de grabaciones deficientes y pérdida de
sonido en la reproducción. Se recomienda
limpiarlos cada diez horas de
funcionamiento.
Abra el compartimiento y limpie los
cabezales, los rodillos de apriete y los
cabrestantes con un cepillo ligeramente
empapado en alcohol u otro producto de
limpieza. Limpie las piezas que se muestran
a continuación:
Cepillo
limpiador
Cabezal borrador
Cabrestante
Especificaciones
Sintonizador reproductor de CD
(HCD-T1)
Sección del sintonizador
Gama de sintonización
FM: 87,5 – 108MHz
AM: 531 – 1.602 kHz
(a intervalos de 9 kHz)
530 – 1.710 kHz
(a intervalos de 10 kHz)
(Excepto para el modelo
de Oriente Medio)
Frecuencia intermedia
FM: 10,7 MHz
AM: 450 kHz
Conectores de antena
FM: 75 ohm sin balance
AM: Conector de antena
externo.
Temporizador
Sistema de fijación por cuarzo
Ajustes del temporizador
Un minuto
Desconexión automática
10 minutos, máximo
90 minutos
E
21
Sintonizador
En el visor parpadea “TUNED”.
m Ajuste la antena.
En el visor parpadea “STEREO”.
m Ajuste la antena.
Rodillo de
Cabezal de
reproducción
Inserte la cinta una vez que estén secas las
zonas que se han limpiado.
apriete
Sección del reproductor de CD
Sistema Sistema de audio digital CD
Láser Láser semiconductor
Longitud de onda
780 – 790 nm
Continúa en la página siguiente ➔
Información adicional

➔Continuación
Respuesta de frecuencias
2 Hz – 20 kHz ±0,5 dB
Relación de señal a ruido
Superior a 90 dB
Distorsión armónica
Menor al 0,03 %
Sección del preamplificador
Respuesta de frecuencias
15 Hz – 50 kHz +0 dB
Entradas MD IN:
Toma de línea estéreo,
sensibilidad 450 mV,
impedancia 47 Kohms.
Salidas Toma DIGITAL OUT (salida
óptica CD):
Conector digital, –18 dBm,
longitud de onda 660 nm
Toma OUTPUT:
Toma de entrada de línea
estéreo, 1 V, 1 kohm
Toma MD OUT:
Toma de entrada de línea
estéreo, 250 mV, 1 kohm
Toma PHONES (auriculares):
Minitoma estéreo para
auriculares de 8 ohms o
superior
General
Requisitos de alimentación
E
22
Consumo de energía
Tamaño Aprox. 142 × 125 × 252 mm
Peso Aprox. 3 kg
Sistema de altavoz activo (SA-N1)
Sistema de altavoces
Unidades de altavoz
Impedancia nominal
Requisitos de alimentación
Salida de potencia RMS continua
Consumo de energía
Tamaño Derecho: Aprox. 125 × 200 × 215
Peso Derecho: Aprox. 2,9 kg
120 V o 220 – 240 V CA,
adjustable, 50/60 Hz
25 W
(an/al/prf) incl. componentes
exteriores y controles.
Reflector de banda completa de
graves
10 cm dia., tipo cónico.
4 ohms
120 V, 220 V ó 240 V CA,
adjustable, 50/60 Hz
12 + 12 watts
(4 ohmios a 1 kHz, 5 % THD)
13 + 13 watts
(4 ohmios, a 1 kHz, 10 % THD)
27 W
mm (an/al/prf) incl.
componentes exteriores y
controles
Izquierdo: Aprox. 125 × 200 ×
200 mm (an/al/prf) incl.
componentes externos y
controles.
Izquierdo: Aprox. 1,7 kg
Platina para casete estéreo (TC-TX1)
Sistema de grabación
4 pistas, 2 canales estéreo
Frecuencia de respuestas
(DOLBY NR OFF)
50 – 15.000 Hz (±3 dB), con un
casete Sony TYPE IV
50 – 14.000 Hz (±3 dB), con un
casete Sony TYPE II
50 – 13.000 Hz (±3 dB), con un
casete Sony TYPE I
–3
Fluctuación y trémolo
±0,2 %, W.PEAK (DIN)
Tamaño Aprox. 142 × 125 × 205 mm
(an/al/prf) incl. componentes
externos y controles
Peso Aprox. 2 kg
Accesorios suministrados
Cuadro de antena AM (1)
Mando a distancia Sony RMST1(1)
Pilas Sony SUM-3 (NS) (2)
Cable de antena FM (1)
Cable de altavoz (1)
Cable de audio (1)
Los diseños y especificaciones están sujetos
a cambios sin previo aviso.
Indice de
componentes y
controles
Para obtener información sobre el uso de
los controles, consulte las páginas que se
indican con paréntesis. Los controles con
asterisco tienen indicadores.
6 Botones =0 y )+ (AMS/
búsqueda)/TUNING + y – (7, 10, 14)
7 Botón BAND (10, 18)
8 Botón FUNCTION (13, 19)
9 Toma PHONES (15)
0 Sensor de control remoto
!¡ Botones VOL + y – (7, 11, 12)
Platina para casete estéreo
1234
56789
1 Botones ( (reproduce la cara A) y 9
(reproduce la cara B) (12 ,17)
2 Botón p (parar) (12)
3 Botones AMS/) (rápido rebobinado
de la cinta a la derecha) y 0 (rápido
rebobinado de la cinta a la izquierda)
(12)
4 Botón P (pausa) (12)
5 Botón 6 EJECT (12, 18)
6 Interruptor DOLBY NR OFF/ON (12)
7 Interruptor DIRECTION A/a (12)
8 Botón r REC (13)
9 Botón CD SYNC (12)
Panel frontal
Sintonizador reproductor de CD
1
8!¡!º9
1 Interruptor POWER (7)
2 Ventana de visualización (6, 7, 17)
3 Botón ^ (reproducción/pausa) (7)
4 Botón p (parar) (7, 13)
5 Botón 6 (abrir/cerrar) (7)
234567
Información adicional

Panel posterior
Sintonizador reproductor de CD
3
1 Conector FM 75 Ω (5, 19)
2 Conector y (tierra) (5, 19)
3 Conector AM (5, 19)
4 Toma MD OUT (19)
5 Toma MD IN (19)
6 Toma OUTPUT (4)
7 VOLTAGE SELECTOR (4)
8 Cable de alimentación (5)
9 Conector AC OUTLET (4)
0 Cable SYSTEM CONTROL (4)
!¡ Conector AU BUS (audio bus) (5)
!™ Toma DIGITAL OUT (CD OPTICAL
OUT) (19)
756412
!º !¡ !™89
Ventana de visualización
1
1 Indicación sobre modo de
funcionamiento de CD (8, 9)
2 Indicaciones sobre sintonizador (10)
3 Indicación del número de tema/banda
(7,10)
4 Indicaciones AUTO/MANUAL/
PRESET/MEMORY (10,11)
5 Indicación SURR (sonido periférico) (16)
6 Indicación DBFB (15)
7 Indicaciones del temporizador DAILY/
REC/SLEEP (17,18)
8 Indicación frecuencia/hora/función (6,
7, 10)
234 6
5
87
Mando a distancia (RM-ST1)
1
2
3
4
5
6
7
8
9
1 Interruptor SYSTEM POWER (18)
2 Botón SLEEP (17)
3 Botón TIMER SELECT (17, 18)
4 Botón TIMER SET (17, 18)
5 Botones de funcionamiento del CD y el
sintonizador
( (reproducción) (7)
P (pausa) (7)
p (parar) (7)
BAND (10, 18)
TUNING + y –/= y + (AMS) (7,
10)
STEREO/MONO (10)
TUNING/PLAY MODE (8, 10)
REPEAT (9)
DISPLAY (7)
MEMORY (11)
6 Botones de funcionamiento del
reproductor de cintas
9 (reproducción cara B) y (
(reproducción cara A) (12)
p (parar) (12)
0 (rebobinado rápido a la izquierda) y
) (rebobinado rápido a la derecha)
(12)
7 Botón FUNCTION (13, 19)
8 Botones de ajuste de sonido
DBFB (15)
SURROUND (16)
9 Botones BALANCE L y R (15)
0 Botones TIMER + y – (6, 17, 18)
!¡ Botón ENTER (6, 8)
!™ Botones VOL + y – (7, 11)
!º
!¡
!™
Indice alfabético
Ajuste del reloj 6
Ajuste de sonido 15
AMS 7, 12
Antena 5, 10, 19
Conexión
componentes opcionales 19
sistema 4
DBFB 15
Emisoras de radio
memorización 11
sintonización 10
Grabación de CD
orden de los temas 14
Grabación sincronizada de CD 12
Grabación
un CD 12, 13, 14
un CD de forma automática 12
un CD de forma manual 13
un programa de radio 13, 18
Inserción de las pilas 6
Reproducción
aleatoria de temas (reproducción
aleatoria) 8
de CD (normal) 7
programada de temas (reproducción
de programa) 8
repetida de temas (repetir
reproducción) 9
una cinta 12
Sintonizador 10
Temporizador
activación automática 17
desconexión automática 17
grabación de programas 18
E
23
Información adicional

Sony Corporation Printed in Japan
 Loading...