

Page 1
Compact Hi-Fi
Component
System
3-864-705-13(1)
Operating Instructions
Mode d’emploi
Owner’s Record
The model and serial numbers are located on the bottom. Record the serial number
in the space provided below. Refer to them whenever you call upon your Sony
dealer regarding this product.
Model No. Serial No.
CMT-MD1
GB
FR
CMT-MD1DX
©1998 by Sony Corporation
Page 2
WARNING
To prevent fire or shock hazard, do not
expose the unit to rain or moisture.
To avoid electrical shock, do not open the cabinet.
Refer servicing to qualified personnel only.
Do not install the appliance in a confined space,
such as a bookcase or built-in cabinet.
US and foreign patents licensed from Dolby
Laboratories Licensing Corporation.
The laser component in this product is capable of
emitting radiation exceeding the limit for Class 1.
This appliance is classified
as a CLASS 1 LASER
product. The CLASS 1
LASER PRODUCT
MARKING is located on
the bottom exterior.
The following caution label is located inside the
unit.
IN NO EVENT SHALL SELLER BE
LIABLE FOR ANY DIRECT,
INCIDENTAL OR CONSEQUENTIAL
DAMAGES OF ANY NATURE, OR
LOSSES OR EXPENSES RESULTING
FROM ANY DEFECTIVE PRODUCT OR
THE USE OF ANY PRODUCT.
NOTICE FOR THE CUSTOMERS IN THE
USA
This symbol is intended to alert the
user to the presence of uninsulated
“dangerous voltage” within the
product’s enclosure that may be of
sufficient magnitude to constitute a
risk of electric shock to persons.
This symbol is intended to alert the
user to the presence of important
operating and maintenance (servicing)
instructions in the literature
accompanying the appliance.
Caution:
The use of optical instruments with this product will
increase eye hazard.
Note to CATV system installer:
This reminder is provided to call CATV system
installer’s attention to Article 820-40 of the NEC that
provides guidelines for proper grounding and, in
particular, specifies that the cable ground shall be
connected to the grounding system of the building,
as close to the point of cable entry as practical.
INFORMATION
This equipment has been tested and found to
comply with the limits for a Class B digital device,
pursuant to Part 15 of the FCC Rules. These limits
are designed to provide reasonable protection
against harmful interference in a residential
installation. This equipment generates, uses, and
can radiate radio frequency energy and, if not
installed and used in accordance with the
instructions, may cause harmful interference to
radio communications. However, there is no
guarantee that interference will not occur in a
particular installation. If this equipment does cause
harmful interference to radio or television reception,
which can be determined by turning the equipment
off and on, the user is encouraged to try to correct
the interference by one or more of the following
measures:
—Reorient or relocate the receiving antenna.
—Increase the separation between the equipment
and receiver.
—Connect the equipment into an outlet on a circuit
different from that to which the receiver is
connected.
—Consult the dealer or an experienced radio/TV
technician for help.
CAUTION
You are cautioned that any changes or modification
not expressly approved in this manual could void
your authority to operate this equipment.
NOTICE FOR THE CUSTOMERS IN
CANADA
CAUTION:
TO PREVENT ELECTRIC SHOCK, DO NOT USE
THIS POLARIZED AC PLUG WITH AN
EXTENSION CORD, RECEPTACLE OR OTHER
OUTLET UNLESS THE BLADES CAN BE FULLY
INSERTED TO PREVENT BLADE EXPOSURE.
2
Page 3

Table of Contents
Getting Started
Step 1: Hooking up the system............ 4
Step 2: Setting the time ......................... 8
Step 3: Presetting radio stations .......... 9
Connecting optional A/V components
and outdoor antennas ................... 11
Basic Operations
Playing a CD ......................................... 14
Recording a CD on an MD.................. 15
Playing an MD ...................................... 17
Listening to the radio........................... 18
Recording from the radio .................... 20
The CD Player
Playing the CD tracks repeatedly ...... 22
Playing the CD tracks in random
order ................................................ 22
Programming the CD tracks ............... 23
Using the CD display........................... 24
Labeling a CD ....................................... 25
Making a space between tracks 3
seconds long ................................... 36
– Editing
Before you start editing ....................... 38
Labeling an MD .................................... 39
Erasing recordings ............................... 40
Moving recorded tracks ...................... 42
Dividing recorded tracks .................... 43
Combining recorded tracks ................ 44
Undoing the last edit ........................... 45
Sound Adjustment
Reinforcing the bass sound ................. 46
Selecting the Preset Equalizer menu . 47
Other Features
Labeling the preset station .................. 47
Using the Radio Data System (RDS)
(European model only) ................. 49
Falling asleep to music ........................ 49
Waking up to music ............................. 50
Timer recording radio programs ....... 51
GB
The MD Deck
– Playback
Playing the MD tracks repeatedly ..... 26
Playing the MD tracks
in random order ............................. 27
Programming the MD tracks .............. 27
Using the MD display.......................... 29
– Recording
Before you start recording .................. 30
Recording the favorite CD tracks
on an MD ........................................ 31
Recording on an MD manually .......... 32
Starting recording with 6 seconds of
prestored audio data ..................... 33
Marking track numbers ....................... 35
Additional Information
Precautions ............................................ 53
System limitations of MDs .................. 54
Self-diagnosis Display ......................... 55
Troubleshooting ................................... 55
Specifications ........................................ 58
Index....................................................... 60
3
Page 4
R
–
+
L
Getting Started
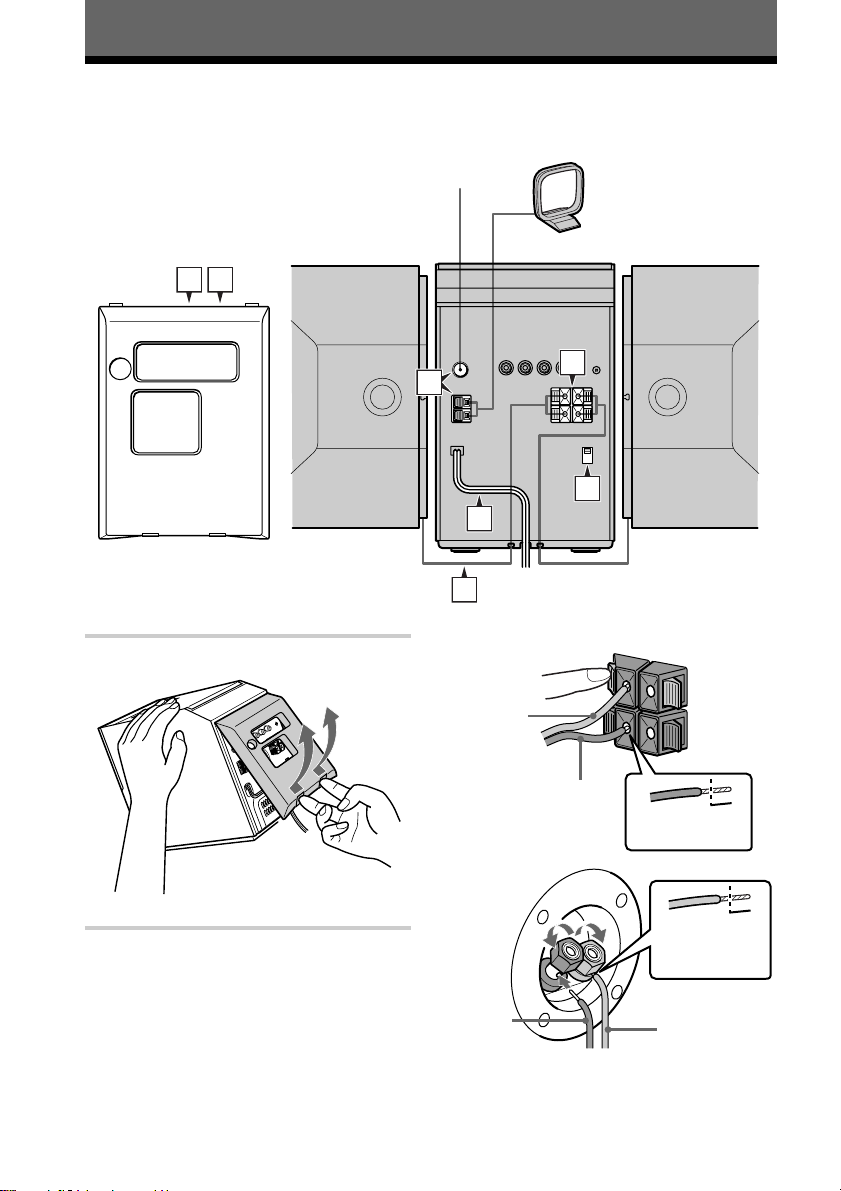
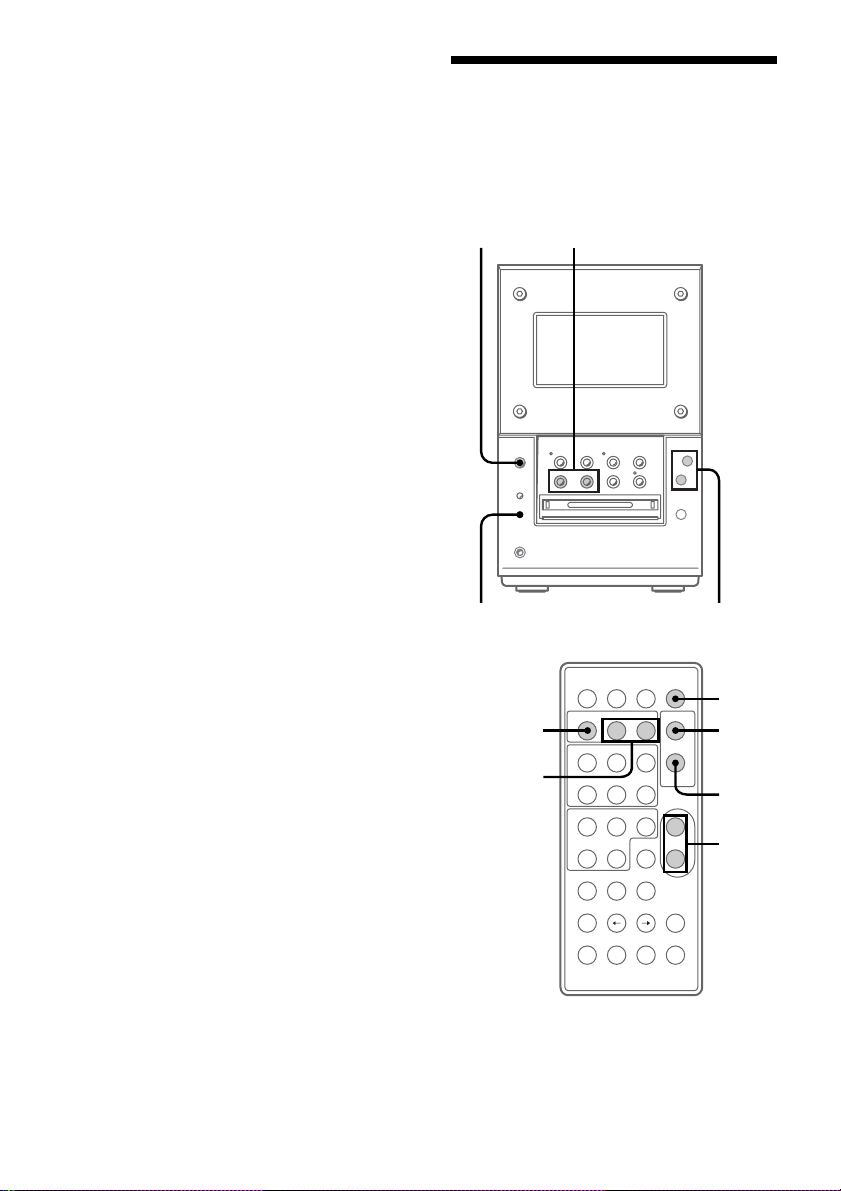
Step 1: Hooking up the system
Follow steps 1 through 8 to hook up your system using the supplied cords and accessories.
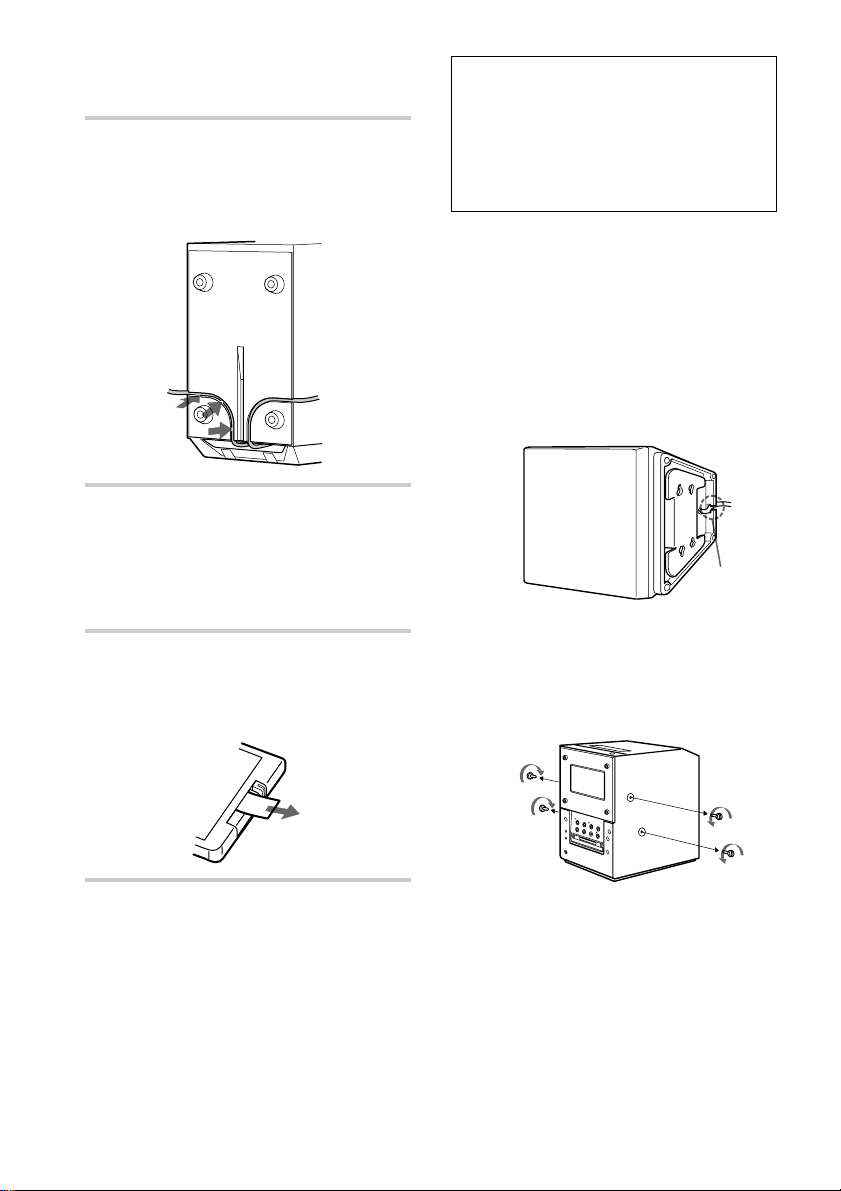
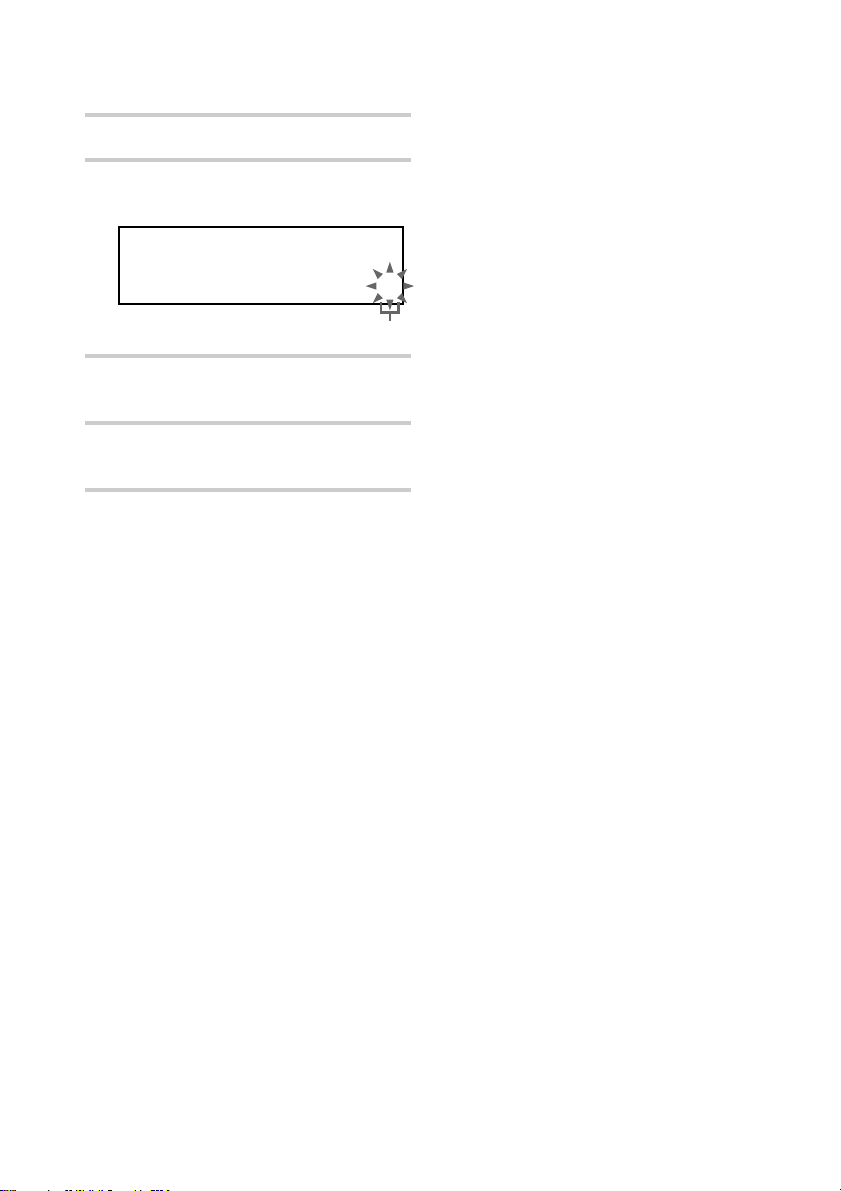
The rear cover
15
1 Remove the rear cover.
Right speaker
FM antenna
3
7
6
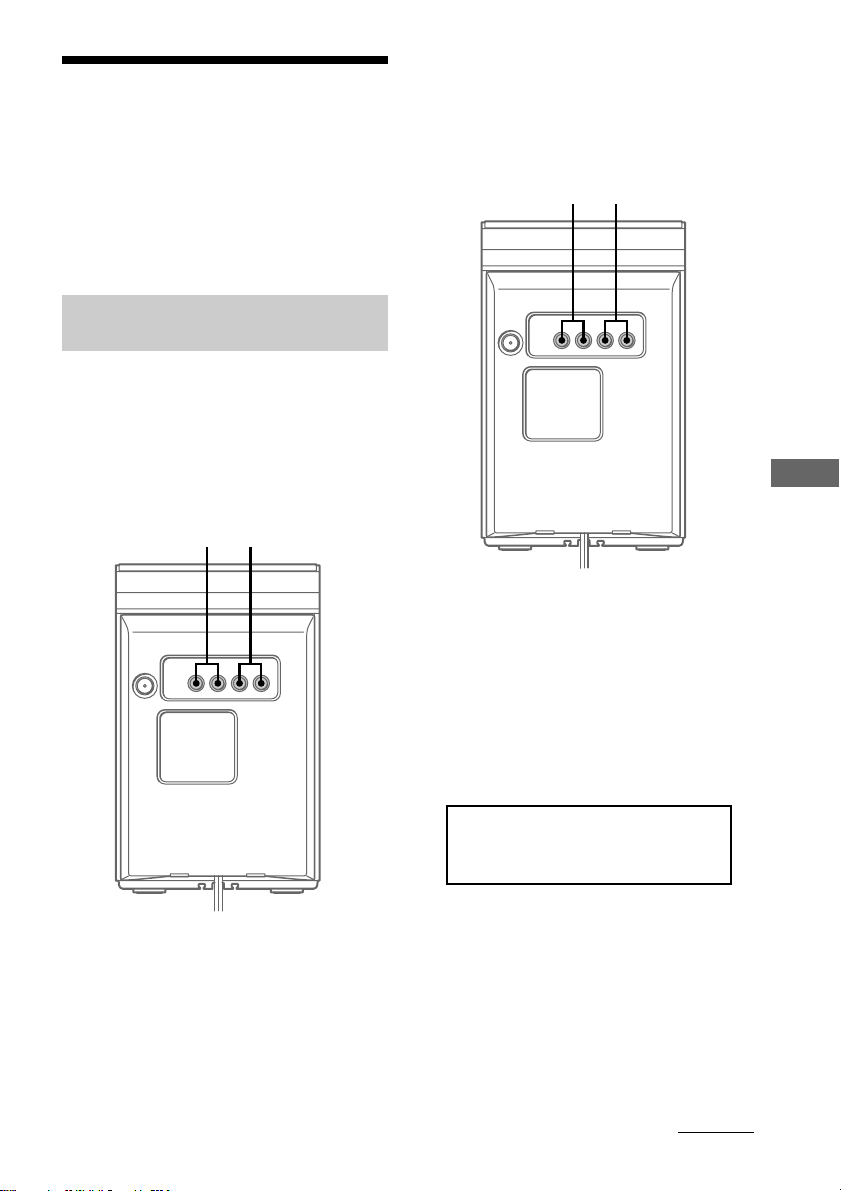
Jack type A
White/
Solid/
Red (‘)
AM loop antenna
Left speaker
2
4
2 Connect the speakers.
1 Connect the speaker cords to
SPEAKER terminals as shown below.
4
Push in on the
tabs and pull up
the cover
Jack type B
Black (’)
Black/
Stripe/
Black (’)
Note
Keep the speaker cords away from the
antennas to prevent noise.
Insert this
portion
Insert this
portion
White (‘)
Page 5
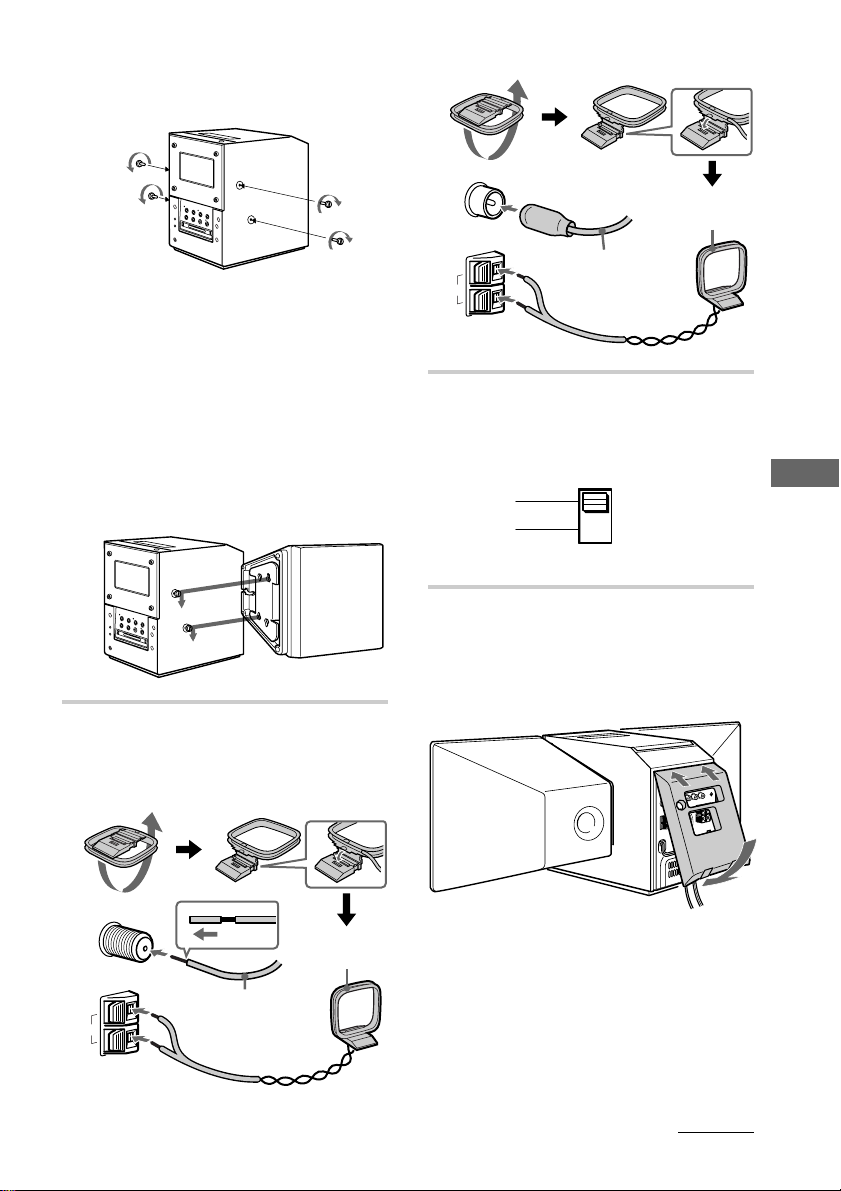
2 (CMT-MD1 only)
Fasten the four screws to both sides of
the system.
3 (CMT-MD1 only)
Attach the speakers.
Facing the front of the system, attach
the speaker connected to the
SPEAKER R terminals onto the right
side of the system and the speaker
connected to the SPEAKER L
terminals onto the left side of the
system.
Afterwards, push down on the
speakers to make sure they are
securely fastened to the system.
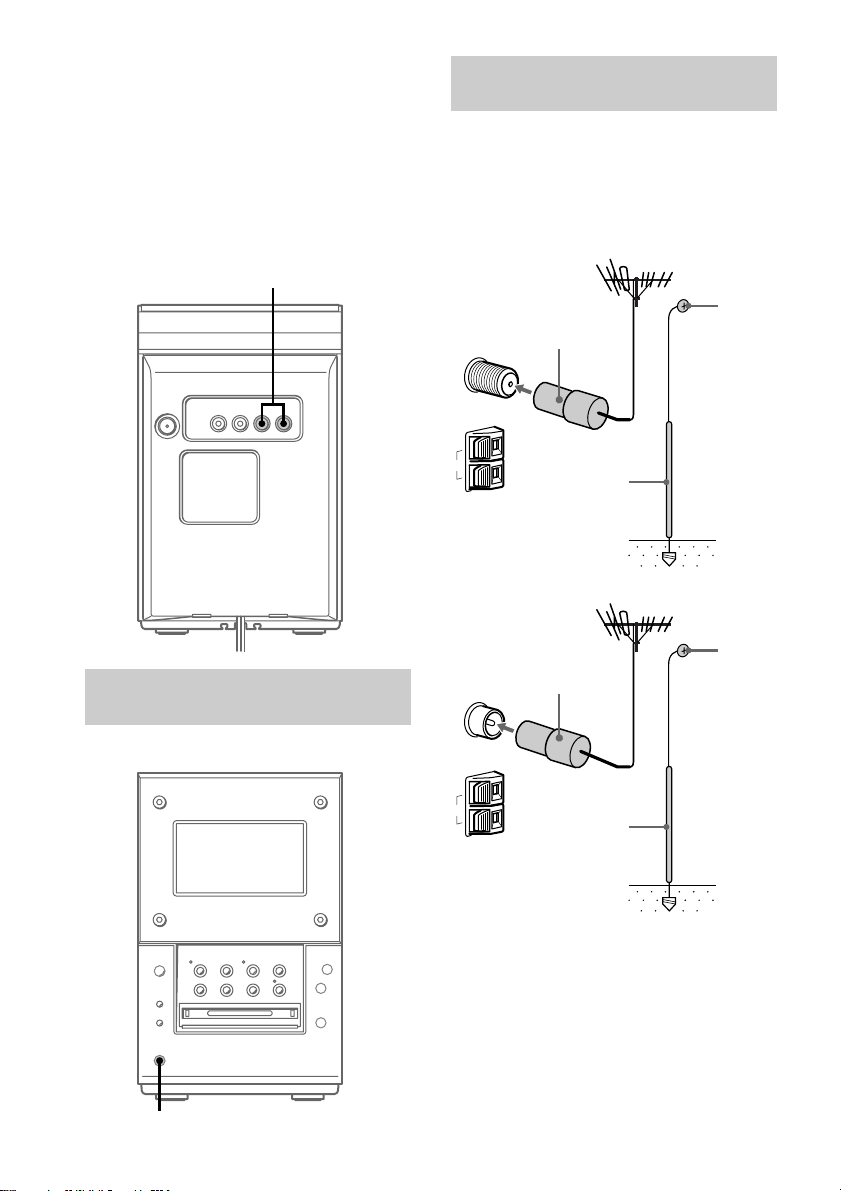
3 Connect the FM/AM antennas.
Set up the AM loop antenna, then
connect it.
Jack type A
Jack type B
FM
75Ω
COAXIAL
LOOP
ANTENNA
y
AM
Extend the FM
wire antenna
horizontally
AM loop
antenna
4 For models with a voltage selector,
set VOLTAGE SELECTOR to the
position of your local power line
voltage.
110-120V
220-240V
VOLTAGE SELECTOR
5 After making sure that the cords are
correctly and securely connected,
reinstall the rear cover.
Put the wires through the hole at the
bottom of the rear cover.
Getting Started
FM
75Ω
COAXIAL
LOOP
ANTENNA
y
AM
Extend the FM
wire antenna
horizontally
AM loop
antenna
continued
5
Page 6
Step 1: Hooking up the system
(continued)
6 Turn the system upside down
holding the disc door with firm
hand and set the speaker cord into a
groove at the bottom of the system.
7 Connect the power cord to a wall
outlet.
If the plug of the power cord does not fit
your wall outlet, detach the supplied
adaptor from the plug (only for models
equipped with an adaptor).
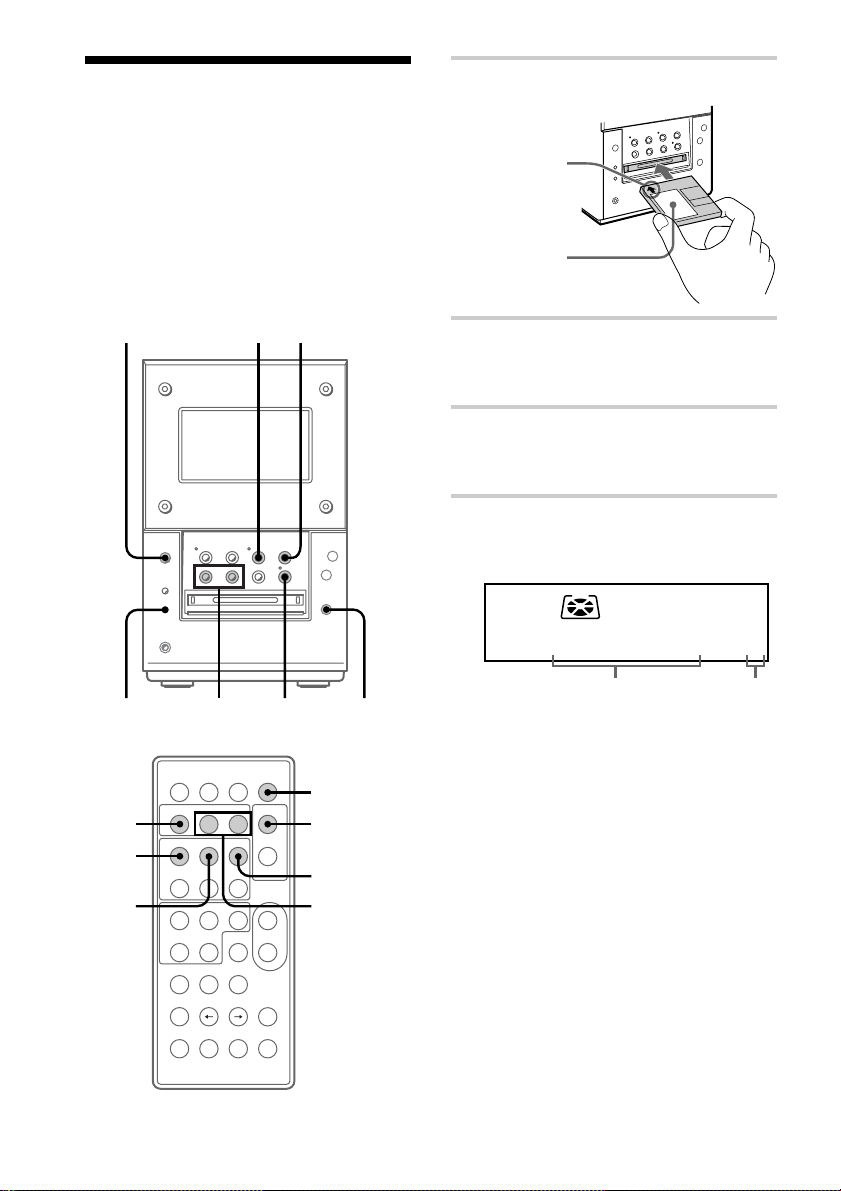
8 To use the remote, pull out the
insulating sheet to allow power to
flow from the battey.
The remote already contains a battery.
Note on the glass over the display
The glass over the display window on the cover
of the CMT-MD1/MD1DX is made of tempered
glass. Under normal conditions, this tempered
glass is more shock resistant and able to bear
more weight than ordinary glass. This glass,
however, may shatter if it receives a sharp blow
or if it is scratched.
To detach the speakers (For CMT-MD1
only)
1 Slide the speakers in the opposite direction
of the arrows of the illustration in “Attach
the speakers” (see step 2 -3 on page 5.)
2 After detaching the speakers, set the
speaker cords into the speaker cord groove
at the bottom of the speaker. Otherwise,
the speaker cord could be damaged.
Groove
Tip (CMT-MD1 only)
When using the system with the speakers detached,
you may remove the four screws on both sides of
the system. If you do, be sure to retain the screws
for future use.
Note (CMT-MD1 only)
Do not attempt to lift up the system by the speakers.
There is a chance the system will detach and drop.
To move the system, detach the speakers first and
carry them separately.
On placement
The system is equipped with a cooling fan on the
rear panel. Do not block the rear and side
ventholes. Keep a distance of 10 cm (4 in) or more
between the back of the system and wall.
6
Page 7
To replace the speaker grille (For
CMT-MD1 only)
To remove the speaker grille, grasp one of the
corners and lift the grille out towards you. You can
replace the grille with one of the other supplied
grilles of a different color.
Verify which sides of the grille are rounded, then
attach the grille with the rounded sides on the top
and the bottom.
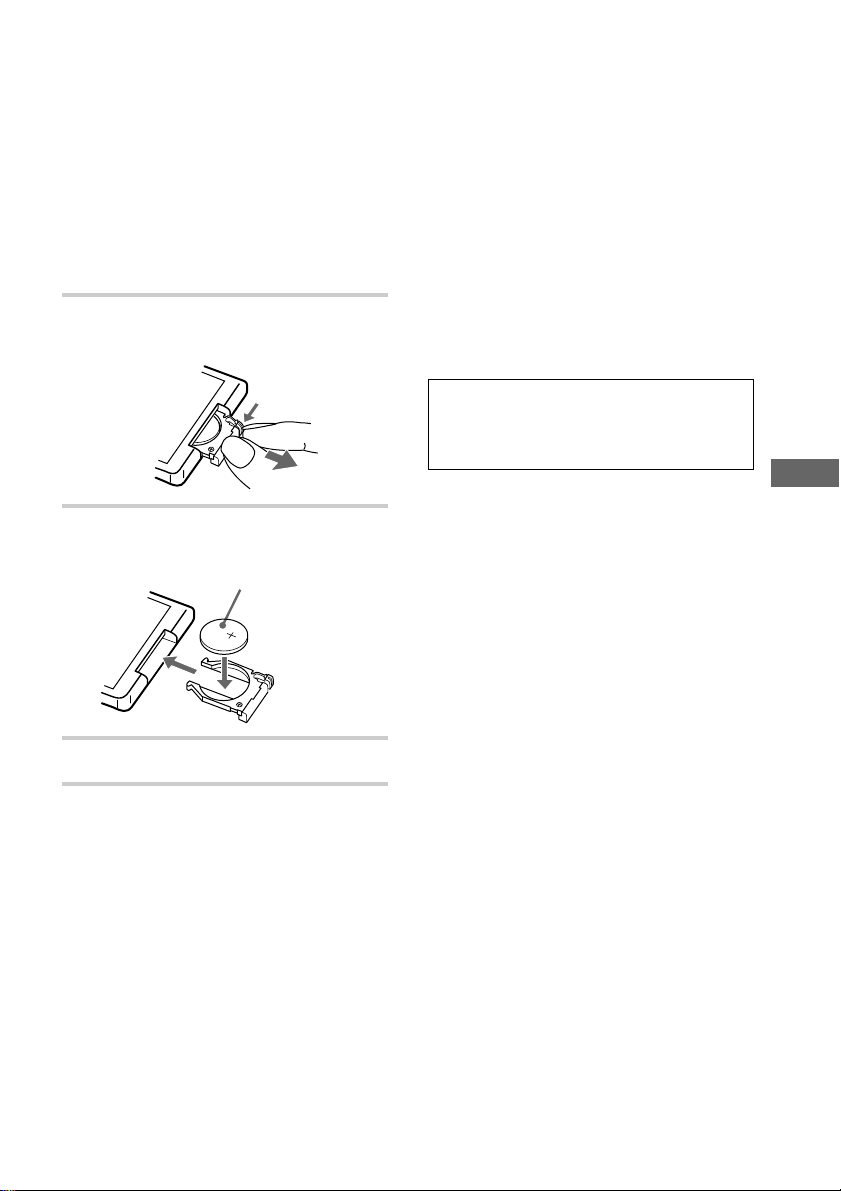
Replacing the battery in the
remote
1 Slide out and remove the battery
case.
2 Insert a new lithium battery CR2025
with the + side facing up.
a lithium battery
CR2025
To avoid battery leakage
If you are not going to use the remote for a long
time, remove the battery to avoid damage caused by
corrosion from battery leakage.
Notes on lithium battery
• Keep the lithium battery out of the reach of
children.
Should the battery be swallowed, immediately
consult a doctor.
• Wipe the battery with a dry cloth to assure a good
contact.
• Be sure to observe the correct polarity when
installing the battery.
• Do not hold the battery with metallic tweezers,
otherwise a short-circuit may occur.
WARNING
Battery may explode if you mistreated.
Do not recharge, disassemble or dispose of in
fire.
Getting Started
3 Slide the battery case back in.
CAUTION
Danger of explosion if battery is incorrectly
replaced.
Replace only with the same or equivalent type
recommend by the manufacturer. Discard used
batteries according to the manufacturer’s
instructions.
Battery life
You can expect the remote to operate for about six
months (using a Sony CR2025 lithium battery)
before the battery run down. When the battery no
longer operates the remote, replace the battery with
a new one.
7
Page 8
Step 2: Setting the time
You must set the time before you use the
timer functions.
The clock is on a 24-hour system for the
European model, and a 12-hour system for
other models.
The European model is used for illustration
purpose.
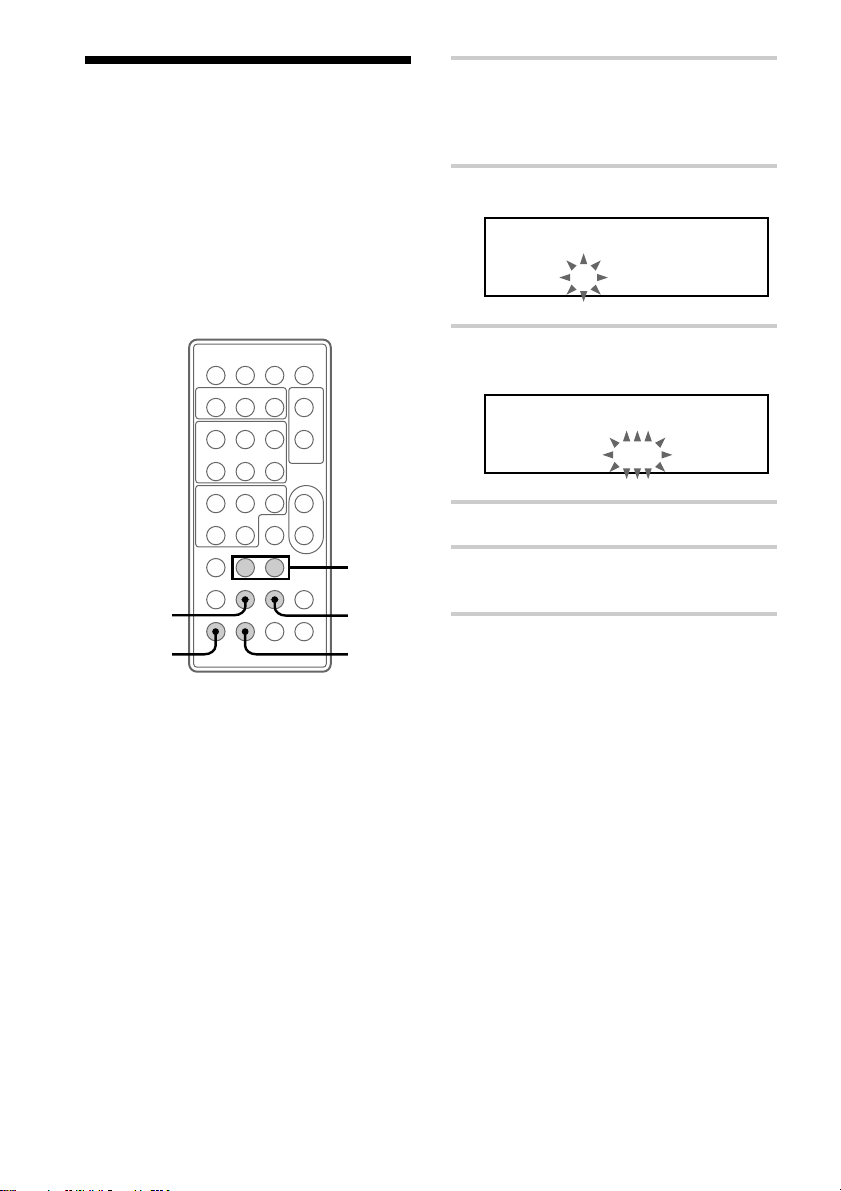
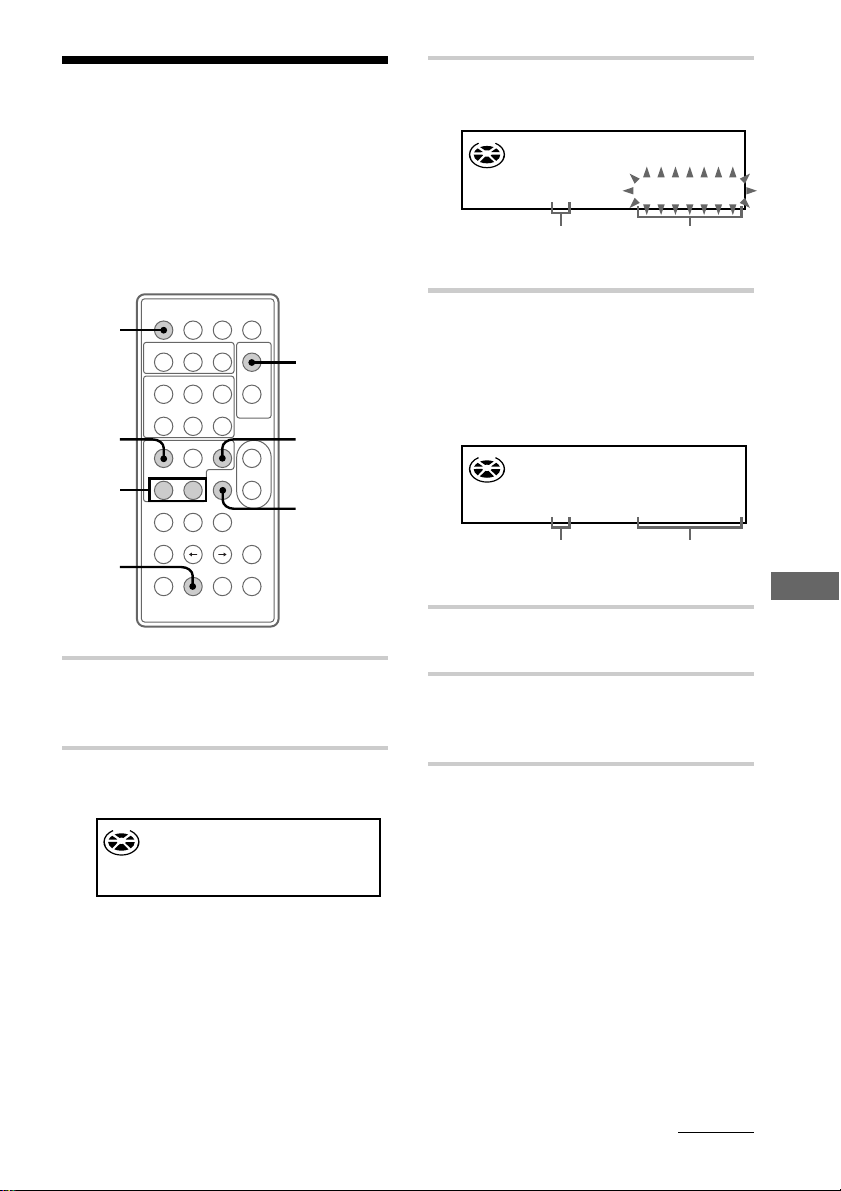
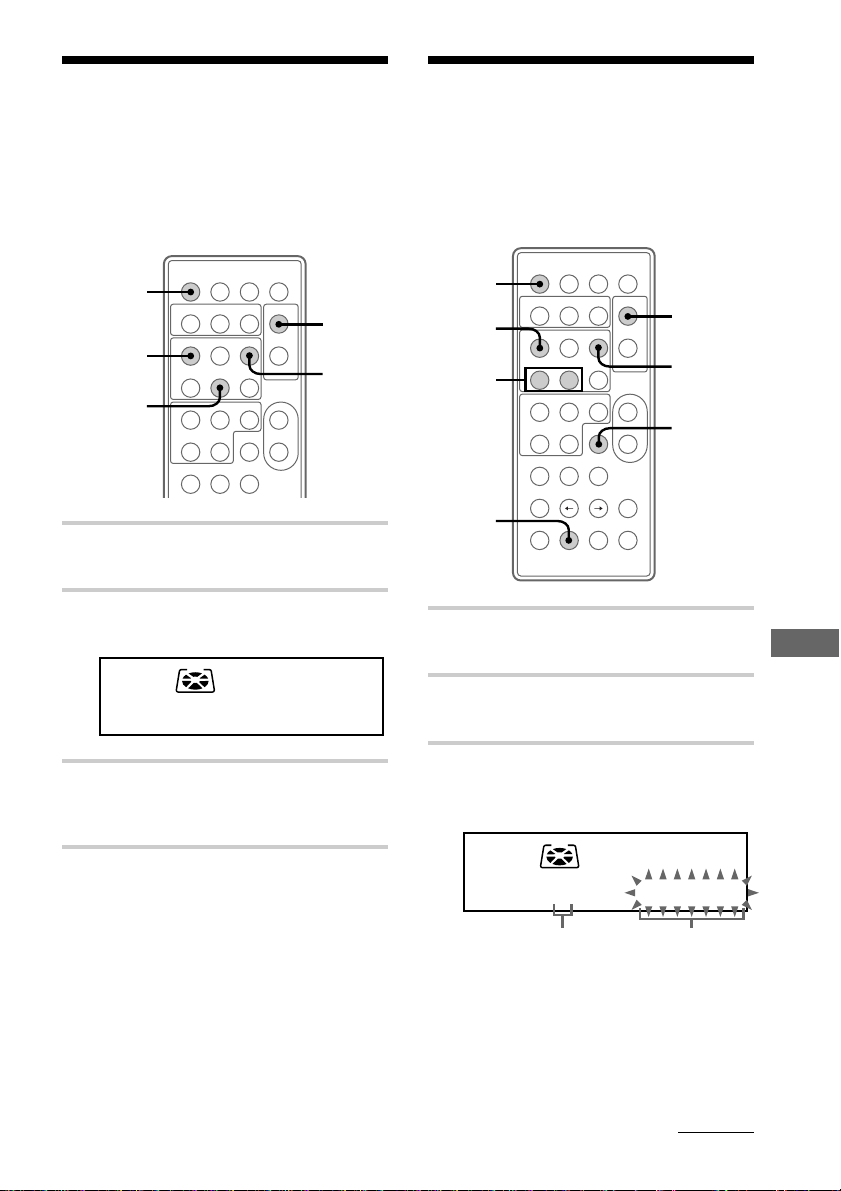
1 Press CLOCK/TIMER SET while
the power is off.
The clock appears and the hour
indication flashes.
2 Press +/– to set the hour.
:000
CURSOR ?
1
–+
(P p
=+
(P p
=+
–+
1 / u
3 Press ENTER/YES or CURSOR /.
The minute indication flashes.
:1001
+
–
2,4
4 Press +/– to set the minute.
5 Press ENTER/YES.
The clock starts.
3
3,5
If you have made a mistake
Press CURSOR ? or / repeatedly so that
the incorrect item flashes, then set it again.
To change the preset time
You can change the preset time while the
power is on.
1 Press CLOCK/TIMER SET.
2 Press +/– repeatedly until “CLOCK SET ?”
appears.
3 Press ENTER/YES.
4 Repeat steps 2 through 5.
Tips
• The built-in clock shows the time in the display
while the power is off.
• The upper dot flashes for the first half of a minute
(0 to 29 seconds), and the lower dot flashes for the
last half of a minute (30 to 59 seconds).
8
Page 9
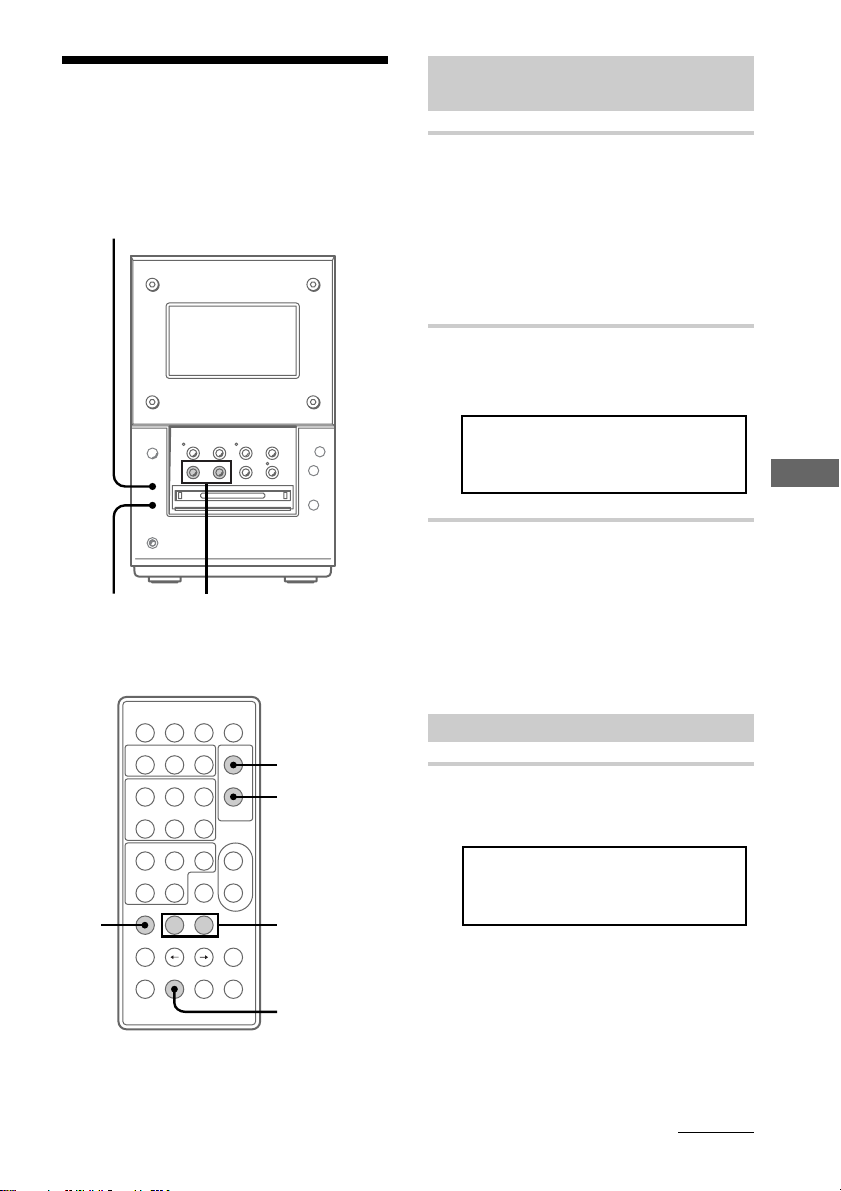
Step 3: Presetting radio stations
You can preset the 20 for FM and 10 for AM
stations.
FUNCTION
To tune in the desired
station
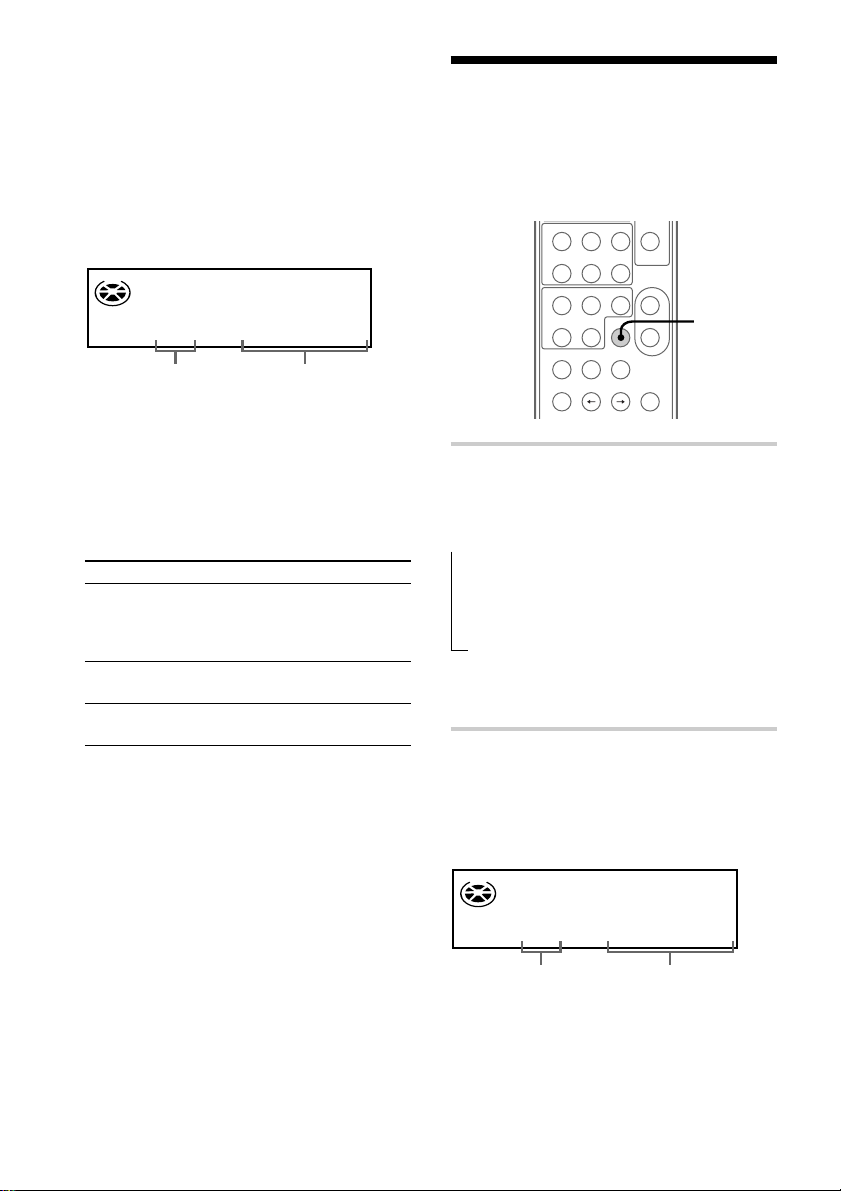
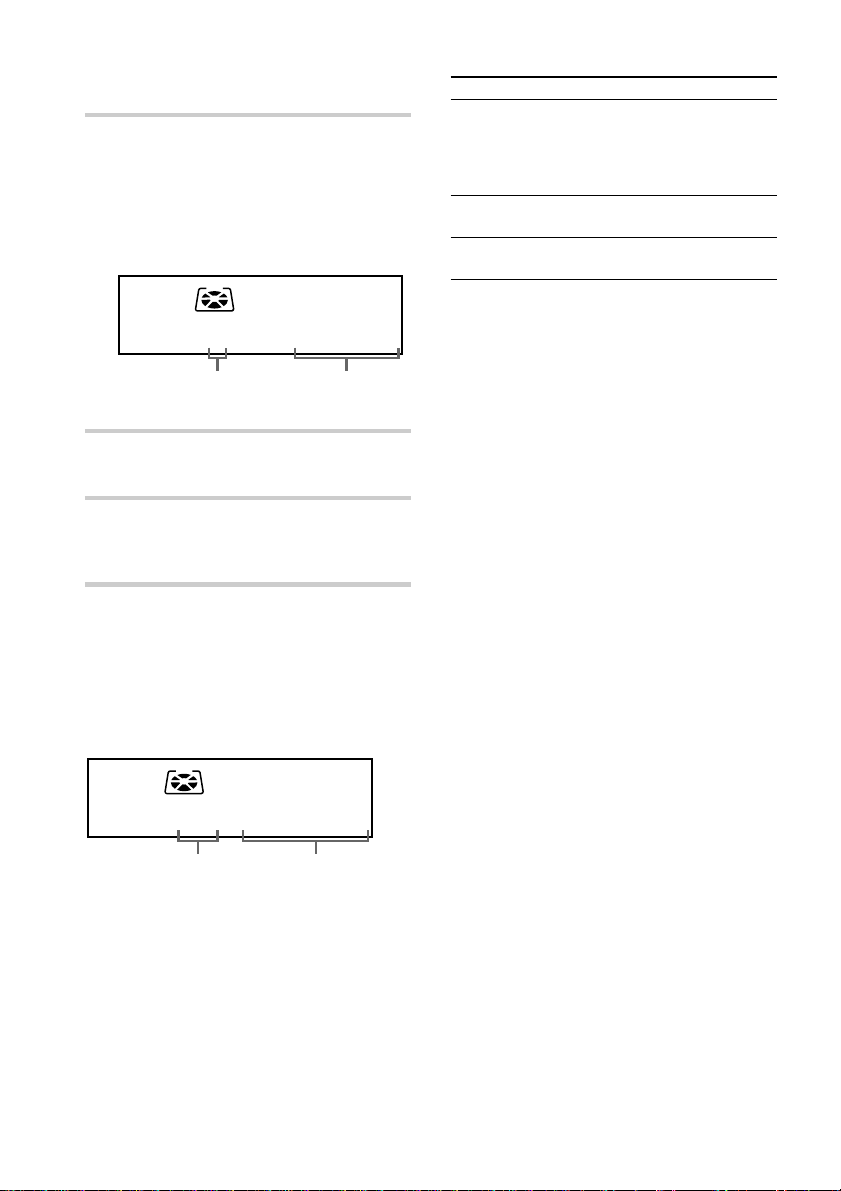
1 Press TUNER/BAND repeatedly
until the band you want appears in
the display.
Pressing TUNER/BAND turns the
power on.
Each time you press the button, the band
changes as follows:
FM ˜ AM
1/u
1 3
(P p
=+
(P p
=+
4
(P
= 0
–
–+
–+
g
2 Press TUNING MODE on the
remote repeatedly until “AUTO”
appears.
LEVEL SYNC
p
(P p
) +
+
+
–
6
.75HM8FM z
-
AUTO
DBFB
Getting Started
3 Press TUNING +/–.
The frequency indication changes and
scanning stops when the system tunes in
a station. “TUNED” and “STEREO” (for
a stereo program) appear. When you
want to stop scanning, press
TUNING MODE on the remote.
1 / u
2
STEREO/MONO
To preset the station
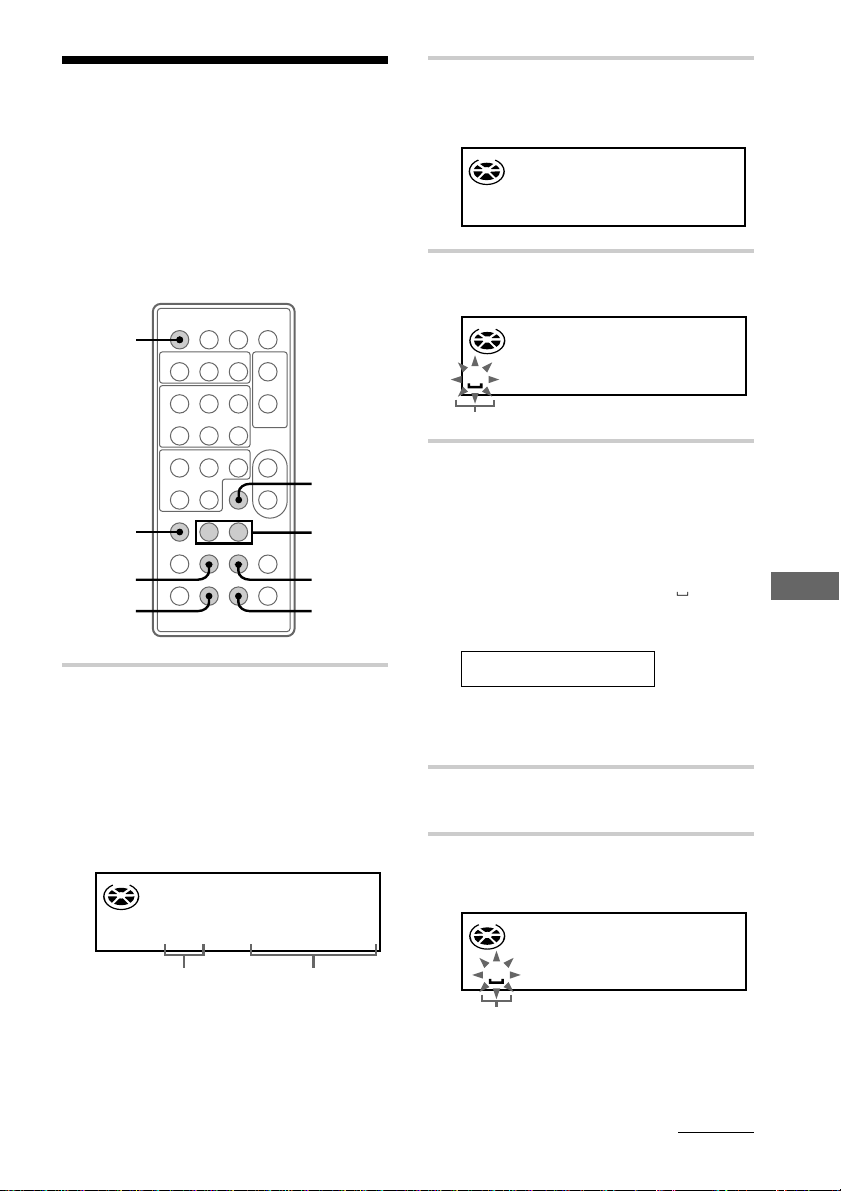
4 Press EDIT, then +/– on the remote
repeatedly until “Frq-Memory ?”
appears.
LEVEL SYNC
+
–
TUNED AUTO
-
DBFB
M-eomqFrry?
4,6
5,7
continued
9
Page 10
Step 3: Presetting radio stations
(continued)
5 Press ENTER/YES on the remote.
6 Press +/– on the remote to select the
preset number you want.
LEVEL SYNC
-
TUNED
DBFB
.75HM8Mz1F
The preset number
7 Press ENTER/YES on the remote.
The station is stored.
8 Repeat steps 1 through 7 to preset
other stations.
To tune in a station manually
Press TUNING MODE on the remote
repeatedly until “MANUAL” appears in step
2, then press TUNING +/– to tune in the
station and continue from step 4.
To change the preset number
Start again from step 1.
To change the AM tuning interval
(except for European model)
The AM tuning interval is factory-set to
9 kHz (10 kHz in some areas). To change the
AM tuning interval, tune in any AM station
first, then turn off the power. While holding
down the FUNCTION button, turn the power
back on. When you change the interval, all
the AM preset stations are erased. To reset
the interval, repeat the same procedure.
Tips
• The preset stations are retained for a day even if
you disconnect the power cord or if a power
failure occurs.
• You can create titles for the preset stations (see
page 47).
• To improve broadcast reception, reorient the
supplied antennas or connect the optional external
antenna.
• When an FM program has static noise, press
STEREO/MONO on the remote until “MONO”
appears. There will be no stereo effect, but the
reception will improve. Press the button again to
restore the stereo effect.
10
Page 11
Connecting optional A/V components and outdoor antennas
To enhance your system, you can connect
optional components. Refer to the
instructions included with each component
for details.
Connecting audio
components
Connecting an MD deck for analog
recording
Be sure to match the color of the plugs and
the connectors. To listen to the sound from
the connected MD deck, press FUNCTION
repeatedly until “TAPE” appears.
To the audio input
of the MD deck
To the audio output
of the MD deck
Connecting a tape deck
Be sure to match the color of the plugs and
the connectors. To listen to the sound from
the connected tape deck, press FUNCTION
repeatedly until “TAPE” appears.
To the audio input
of the tape deck
To the audio output
of the tape deck
To listen to analog components
If the sound from a connected component is
distorted, reduce the input level.
1 Press FUNCTION repeatedly until “TAPE”
appears.
2 Turn off the system by pressing 1/u.
3 While holding FUNCTION down, press
1/u again.
“Attenuate ON” appears and “ATT” lights
in the display.
LEVEL SYNC
-
ATT
DBFB
Getting Started
At nut ONeate
To reset to the original level, repeat steps 1, 2,
and 3.
continued
11
Page 12
Connecting optional A/V
components and outdoor
antennas (continued)
Connecting a VCR
Be sure to match the color of the plugs and
the connectors. To listen to the sound from
the connected VCR, press FUNCTION
repeatedly until “TAPE” appears.
To the audio output of
the VCR
Connecting outdoor
antennas
Connect an outdoor antenna to improve
reception.
FM antenna
Connect an optional FM outdoor antenna or
you can use a TV antenna instead.
Jack type A
SIGNAL
y
IEC standard socket
connector (not supplied)
FM
75Ω
L
IA
X
A
O
C
P
O
O
L
A
N
N
E
T
N
A
y
AM
Ground wire
(not supplied)
Jack type B
GND
D
N
G
L
A
N
IG
S
Connecting the
headphones
Connect the headphones to the PHONES jack.
p
(P p
(P
1/u
= 0
) +
–
+
PHONES jack
12
SIGNAL
IEC standard socket
connector (not supplied)
FM
Ω
75
L
IA
X
A
O
C
P
O
LO
A
N
TEN
AN
y
AM
g
+
–
6
Ground wire
(not supplied)
y
GND
D
N
L G
A
N
IG
S
Page 13
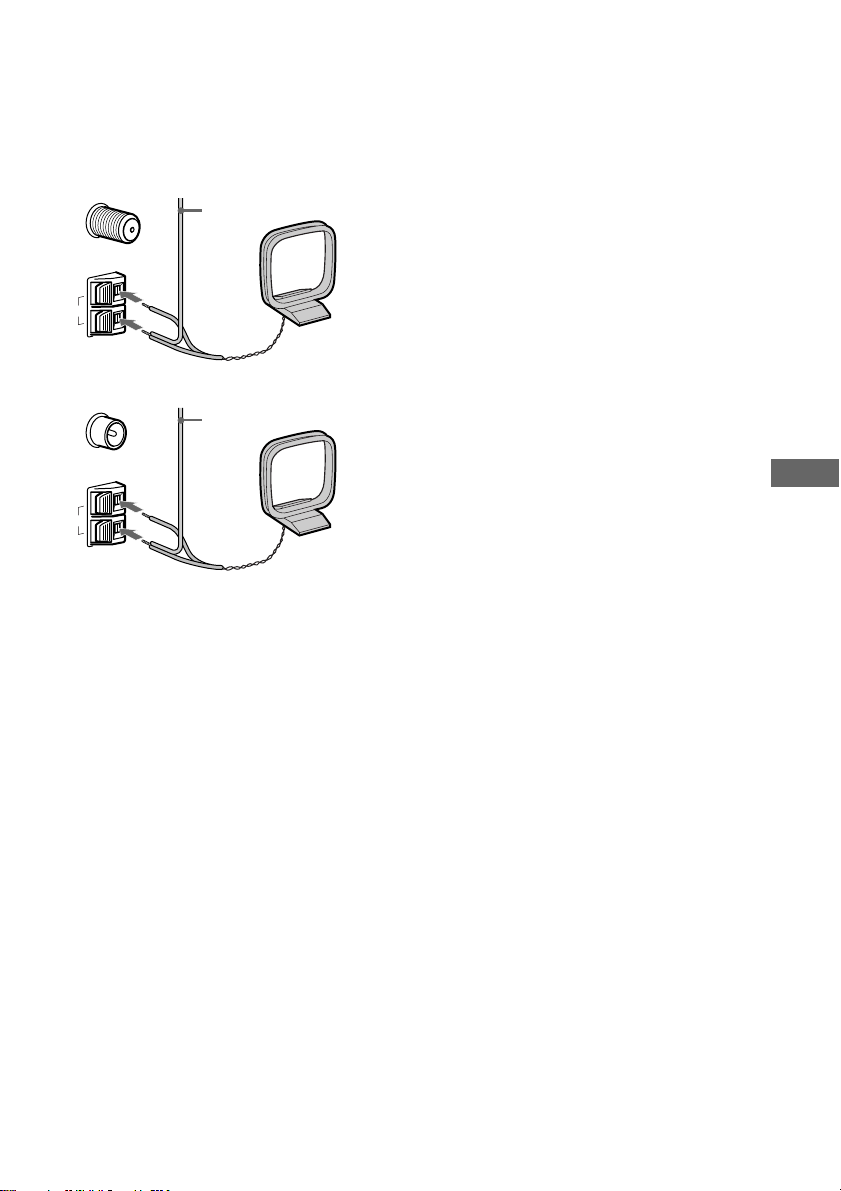
AM antenna
Connect a 6 to 15 meter (20 to 50 feet)
insulated wire to the AM antenna terminal.
Leave the supplied AM loop antenna
connected.
Jack type A
Insulated wire
FM
75Ω
COAXIAL
LOOP
ANTENNA
y
AM
(not supplied)
Jack type B
Insulated wire
FM
75Ω
COAXIAL
LOOP
ANTENNA
y
AM
(not supplied)
Important
If you connect an outdoor antenna, connect a
ground wire to the y terminal with the screw
clamp. To prevent a gas explosion, do not
connect the ground wire to a gas pipe.
Getting Started
13
Page 14
Basic Operations
Playing a CD
To turn on the system, press 1/u.
1/u
OPEN/
CLOSE
CD
CD (
CD P
14
3 1,2
CD p
(P
1/u
= 0
) +
–
=0/)+
–+
(P p
=+
(P p
=+
–+
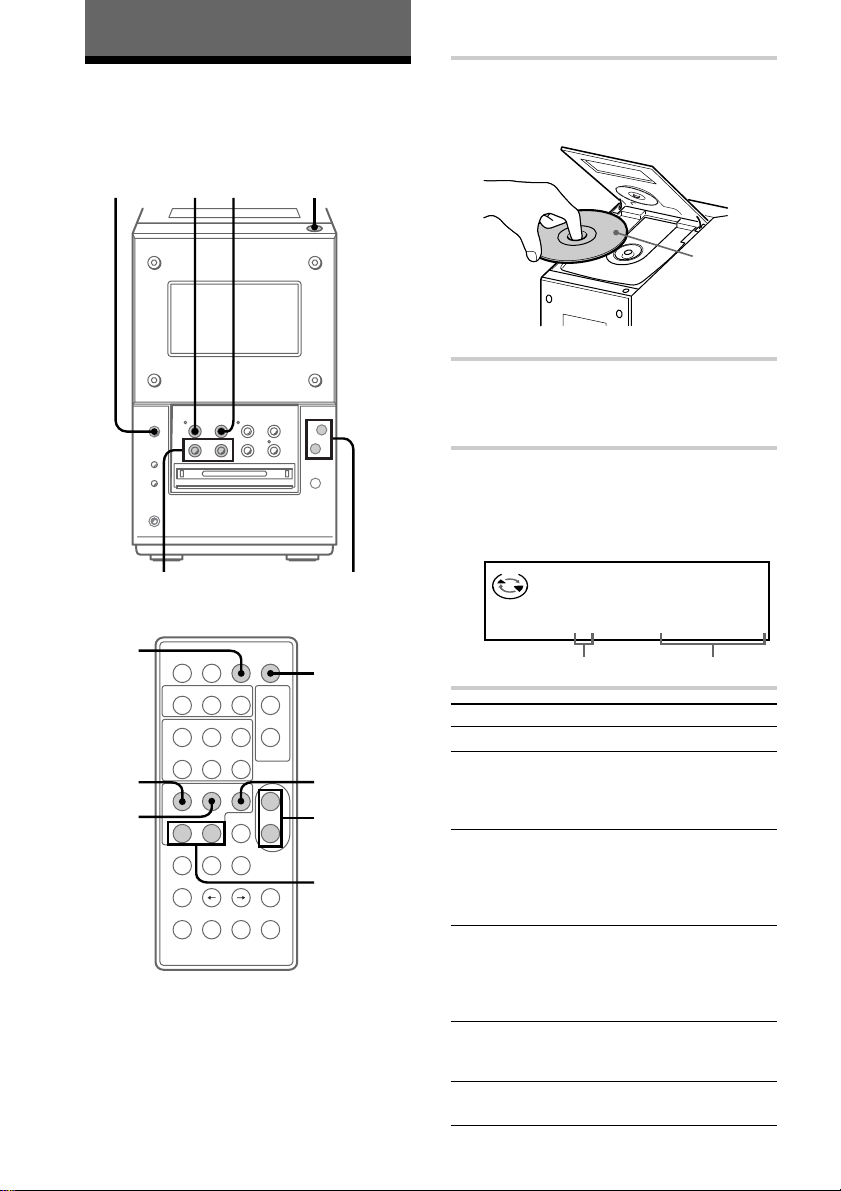
1 Press CD 6 (or OPEN/CLOSE CD
on the remote) to open the disc door
and place a CD on the disc tray.
6
With the
6
g
label side up
2 Press CD 6 (or OPEN/CLOSE CD
p
(P p
+
+
–
6
VOLUME +/–CD/MD
on the remote) to close the disc
door.
3 Press CD ^ (or CD ( on the
remote).
Play starts.
The CD ^ indicator lights up green.
CD
TRACK
LEVEL SYNC
-
DBFB
10mD5sC 3
1 / u
+
–
1/u
CD p
VOL +/–
CD =/+
To
Stop play
Pause
Select a track
Find a point in
a track
Remove the CD
Adjust the
volume
Do this
Press CD p.
Press CD ^ (or CD P on the
remote). The CD ^ indicator
lights up orange. Press again
to resume play.
Press CD/MD =0 (or CD
= on the remote) or CD/
MD )+ (or CD + on
the remote) repeatedly until
you find the desired track.
Press and hold CD/MD
=0 or )+, during
play and release it at the
desired point. “– OVER –”
appears when the CD ends.
Press CD 6 (or OPEN/CLOSE
CD on the remote) to open the
door.
Press VOLUME +/– (or
VOL +/– on the remote).
The playing timeThe track number
Page 15
Tips
• You can start playing from the desired track in
step 3.
1 Press CD/MD
until you find the desired track.
2 Press CD ^.
• Pressing CD ^ (or CD ( on the remote) when
the power is off automatically turns the power on
and starts CD play if there is a CD on the disc tray
(One Touch Play).
• You can switch from another source to the CD
player and start playing a CD by pressing CD ^
(or CD ( on the remote) (Automatic Source
Selection).
• If there is no CD on the disc tray, “CD NO DISC”
appears in the display.
=0 or )+ repeatedly
Notes
• Do not use a CD with tape, seal or paste, on it as
this may damage of the system.
• Do not push the disc door closed, as this may
damage the system. Press CD 6 (or OPEN/
CLOSE CD on the remote) to close the disc door.
Recording a CD on an MD
— CD-MD Synchro Recording
You can make a digital recording of a CD on
an MD, marking track numbers in the same
sequence as the original CD. If you use a
recorded MD, the system automatically
locates the end of the recorded portion and
starts the new recording from there. You can
also record a program of favorite tracks (see
page 31).
To turn on the system, press 1/u.
1/u 2,3
54
6
p
(P p
(P
1/u
= 0
) +
–
+
MD indicator
MD p
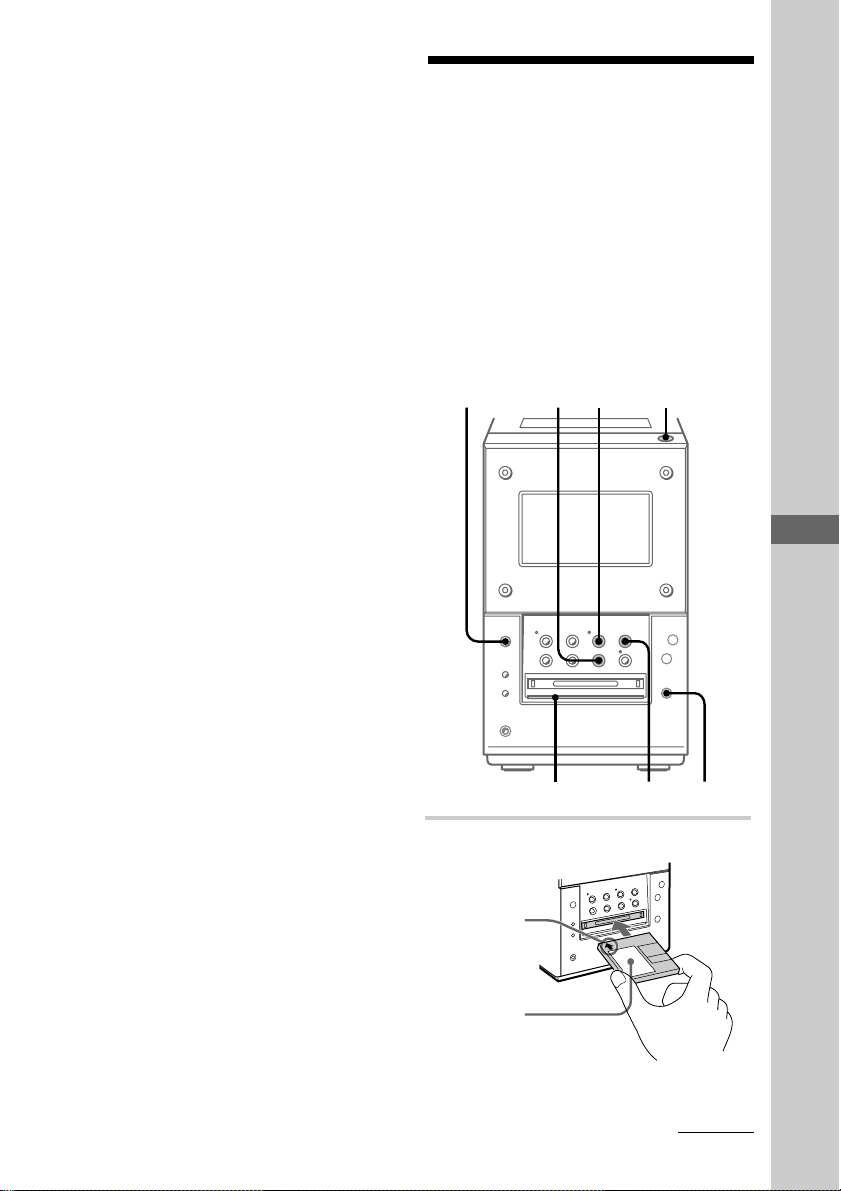
1 Insert a recordable MD.
With the
arrow
pointing
toward the
system
With the
label side up
and the
shutter slide
rightward
g
+
–
6
MD 6
continued
Basic Operations
15
Page 16
Recording a CD on an MD
(continued)
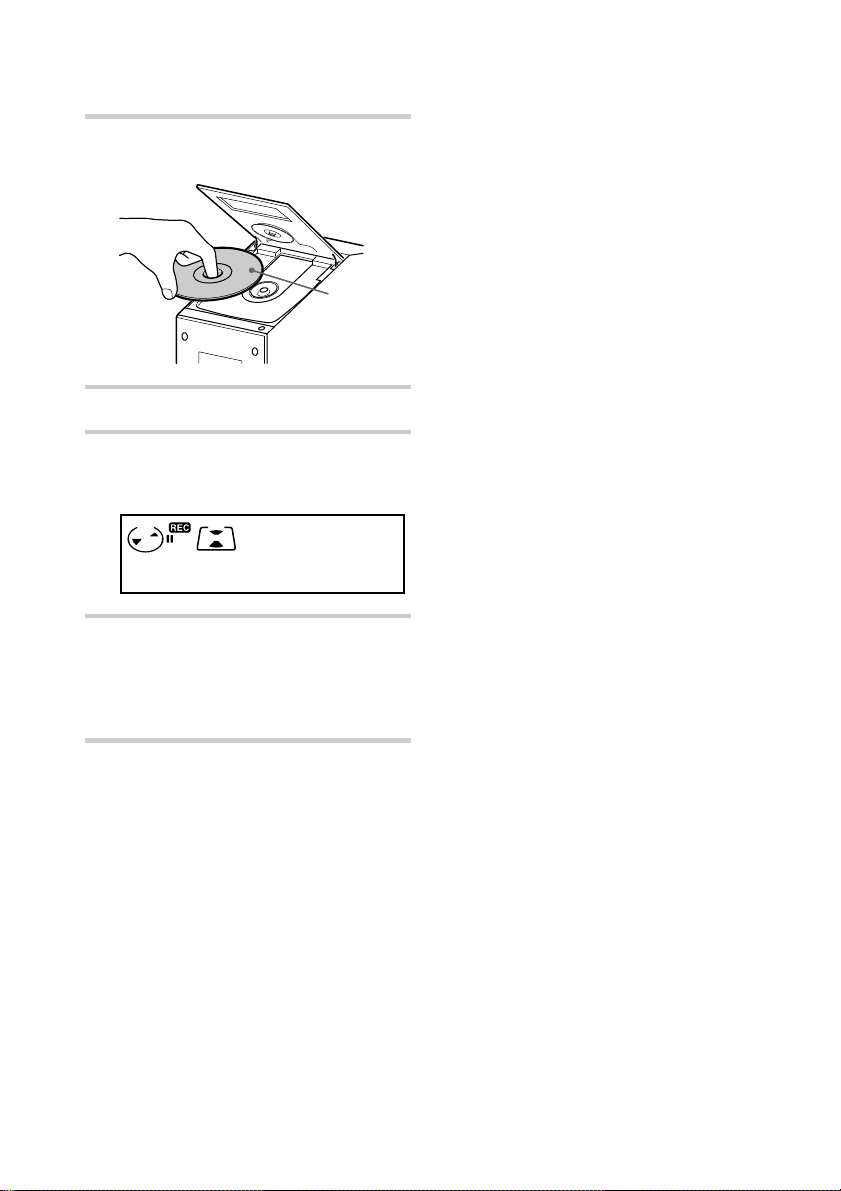
2 Press CD 6 to open the disc door
and place a CD on the disc tray.
With the
label side up
6
3 Press CD 6 to close the disc door.
4 Press CD-MD SYNC.
The MD stands by for recording and the
CD pauses at the beginning.
MDCD
SYNC
TRACK
LEVEL SYNC
-
CD 7 s2m31-
5 Press MD ^.
Recording starts. When the recording is
completed the CD stops and the MD
pauses automatically. Press MD p, the
MD stops.
DBFB
While “TOC” is lit or is flashing
To ensure complete recording, do not move
the system or disconnect the power cord. The
system updates the Table of Contents (TOC)
while “TOC” is flashing.
If the MD ends during recording
The CD and the MD stop automatically.
Notes
• The MD recording is complete only after all the
recording information is entered to TOC at which
point TOC stops flashing and goes out. Be careful
not to disconnect the power cord or move the
system before this point. Before disconnecting the
power cord, do the following:
– Remove the MD.
– Press 1/u to turn off the system.
• If the MD is record protected, “MD Protected”
appears in the display and the MD cannot be
recorded on. Press MD 6 and remove the MD,
slide the record protection tab to the closed
position (see page 30), reinsert the MD and try
again.
• Please do not use MDs with labels that are
protruding or labels that have not been positioned
correctly. Use of such MDs may damage this
system.
To stop recording
Press MD p.
Before inserting an MD
When the power is on, make sure the MD
indicator is off. If the MD indicator lights up
blue, another MD is already inserted. Press
MD 6 and remove the MD.
Tip
The MD is labeled with the disc title of the CD
automatically (see page 25) when using a new
recordable MD or an MD whose tracks have been
completely erased (see page 41) (Disc Memo Copy
function).
16
Page 17
Playing an MD
To turn on the system, press 1/u.
You can play an MD just like a CD.
1/u
2
MD p
VOLUME +/–
1 Insert an MD.
With the
arrow
pointing
toward the
system
With the
label side up
and the
shutter slide
rightward
1/u
CD/MD
=0/)+
MD (
MD =/+
(P
p
= 0
) +
–
+
MD indicator
(P p
=+
(P p
=+
(P p
–+
–+
1 / u
g
2 Press MD ^ (or MD ( on the
remote).
Play starts. The MD ^ indicator lights
up green.
+
–
6
MD 6
To
Stop play
Pause
1/u
MD P
Select a track
MD p
+
VOL +/–
–
Find a point
in a track
Remove the
MD
Adjust the
volume
MD
TRACK
LEVEL SYNC
-
DBFB
10mD5sM 3
The track
number
Do this
Press MD p.
Press MD ^ (or MD P on the
remote). The MD ^ indicator
lights up orange.
Press again to resume play.
Press CD/MD =0 (or MD
=on the remote) or CD/MD
)+ (or MD + on the
remote) repeatedly until you find
the desired track.
Press CD/MD =0 or
)+ during play and release
it at the desired point.
Press MD 6.
Press VOLUME +/– (or VOL +/–
on the remote).
The playing
time
Basic Operations
continued
17
Page 18
Playing an MD (continued)
Before inserting an MD
When the power is on, make sure the MD
indicator is off. If the MD indicator lights up
blue, another MD is already inserted. Press
MD 6 and remove the MD.
Tips
• You can start playing from the desired track in
step 2.
1 Press CD/MD
remote) or CD/MD )+ (or MD + on the
remote) repeatedly until the desired track
appears in the display.
2 Press MD ^.
• Pressing MD ^ (or MD ( on the remote) when
the power is off automatically turns the power on
and starts MD play if there is an MD in the deck
(One Touch Play).
• You can switch from another source to the MD
deck and start playing an MD by pressing MD ^
(or MD ( on the remote) (Automatic Source
Selection).
Note
Please do not use MDs with labels that are
protruding or labels that have not been positioned
correctly. Use of such MDs may damage this
system.
=0 (or MD =on the
Listening to the radio
Preset radio stations in the system’s memory
first. To turn on the system, press 1/u.
1/u
1
3
g
(P
p
1/u
(P p
= 0
) +
–
+
+
–
6
VOLUME +/–
18
TUNER BAND
PRESET +/–
–+
(P p
=+
(P p
=+
–+
1 / u
1/u
TUNING
MODE
STEREO/
MONO
+
VOL +/–
–
Page 19
1 Press TUNER/BAND (or TUNER
BAND on the remote) repeatedly
until the band you want appears.
Each time you press the button, the band
changes as follows:
FM ˜ AM
LEVEL SYNC
-
MANUAL
DBFB
75MF 8.MHz
2 Press TUNING MODE on the
remote repeatedly until “PRESET”
appears.
LEVEL SYNC
-
DBFB
PRESET
75MF 8.MHz
3 Press TUNING + or – (or PRESET +
or – on the remote) to select the
desired station’s preset number.
LEVEL SYNC
-
DBFB
PRESET
7M1F 8. HM5z
Frequency or the station
name* or RDS station
name**
* If you label a preset station, it appears
in the display.
** European model only.
The
preset
number
To
Turn off the
radio
Adjust the
volume
Do this
Press 1/u to turn off the
system.
Press VOLUME +/– (or
VOL +/– on the remote).
To listen to non-preset radio
stations
• Press TUNING MODE on the remote
repeatedly until “MANUAL” appears in
step 2, then press TUNING + or – to tune in
the desired station (Manual Tuning).
• Press TUNING MODE on the remote
repeatedly until “AUTO” appears in step 2,
then press TUNING + or –. The frequency
indication changes and scanning stops
when the system tunes in a station
(Automatic Tuning).
To cancel the Automatic Tuning
Press TUNING MODE on the remote.
Tips
• Pressing TUNER/BAND (or TUNER BAND on
the remote) when the power is off automatically
turns the power on and tunes in the last received
station (One Touch Play).
• You can switch from another source to the tuner
by pressing TUNER/BAND (or TUNER BAND on
the remote) (Automatic Source Selection).
• To improve broadcast reception, reorient the
supplied antennas or connect the optional external
antenna.
• When an FM program has static noise, press
STEREO/MONO on the remote until “MONO”
appears. There will be no stereo effect, but the
reception will improve. Press the button again to
restore the stereo effect.
Basic Operations
19
Page 20
Recording from the
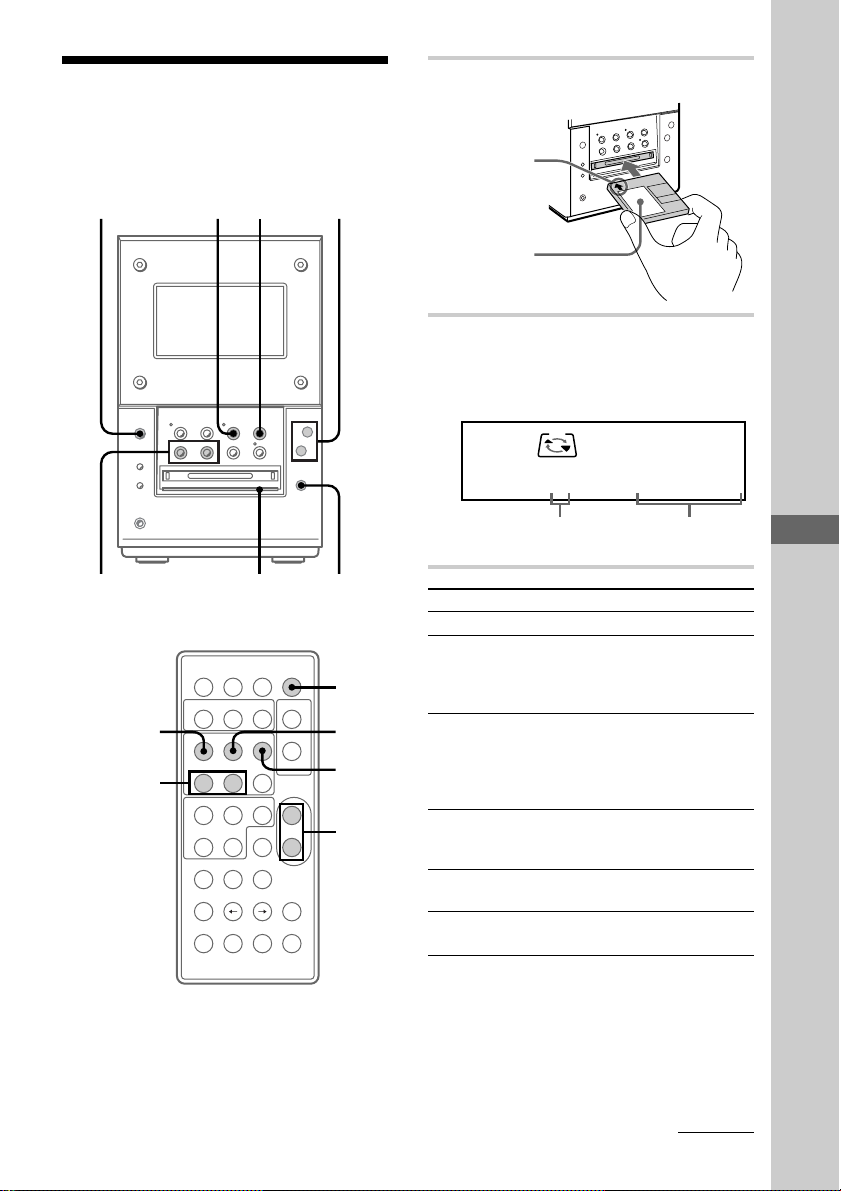
1 Insert a recordable MD.
radio
You can record a radio program on an MD. If
you use an MD with tracks already recorded
on it, the system automatically locates the end
of the recorded portion and starts the new
recording from there. To record after erasing
all tracks on an MD, see page 41.
To turn on the system, press 1/u.
MD p
61/u
g
(P
p
= 0
–
42
–+
–+
(P p
) +
+
1 / u
5
+
–
6
MD 6
1/u
3
MD p
4
+
–
2
6
6
1/u
(P p
=+
(P p
=+
With the
arrow pointing
toward the
system
With the
label side up
and the shutter
slide rightward
2 Press TUNER/BAND (or TUNER
BAND on the remote) repeatedly
until the band you want appears.
3 Press TUNING MODE on the
remote repeatedly until “PRESET”
appears.
4 Press TUNING + or – (or PRESET +
or – on the remote) to select the
desired station’s preset number.
MD
LEVEL SYNC
-
DBFB
PRESET
7M1F 8. HM5z
Frequency or the
preset station name*
or RDS station name**
* The titles you entered appear
sequentially (see “Labeling the preset
station” on page 47).
** European model only.
The
preset
number
20
Page 21

5 Press REC.
The MD stands by for recording and the
REC indicator lights up red.
6 Press MD ^ (or MD ( or MD P
on the remote).
Recording starts.
To stop recording
Press MD p.
To record non-preset radio
stations
To record non-preset stations, press
TUNING MODE on the remote repeatedly
until “MANUAL” appears in step 3, then
press TUNING + or – to tune in the desired
station.
Tip
If noise is heard while recording an AM radio
station, reorient the AM loop antenna to reduce the
noise.
While “TOC” is lit or is flashing
To ensure complete recording, do not move
the system or disconnect the power cord. The
system updates the Table of Contents (TOC)
while “TOC” is flashing.
Notes
• The MD recording is complete only after all the
recording information is entered to TOC at which
point TOC stops flashing and goes out. Be careful
not to disconnect the power cord or move the
system before this point. Before disconnecting the
power cord, do the following:
– Remove the MD.
– Press 1/u to turn off the system.
• If the MD is record protected, “MD Protected”
appears in the display and the MD cannot be
recorded on. Press MD 6 and remove the MD,
slide the record protection tab to the closed
position (see page 30), reinsert the MD and try
again.
• Please do not use MDs with labels that are
protruding or labels that have not been positioned
correctly. Use of such MDs may damage this
system.
Basic Operations
21
Page 22
The CD Player
Playing the CD tracks repeatedly
–– Repeat Play
You can repeat a CD in normal play, Shuffle
Play and Program Play.
1 / u
–+
(P p
=+
(P p
=+
–+
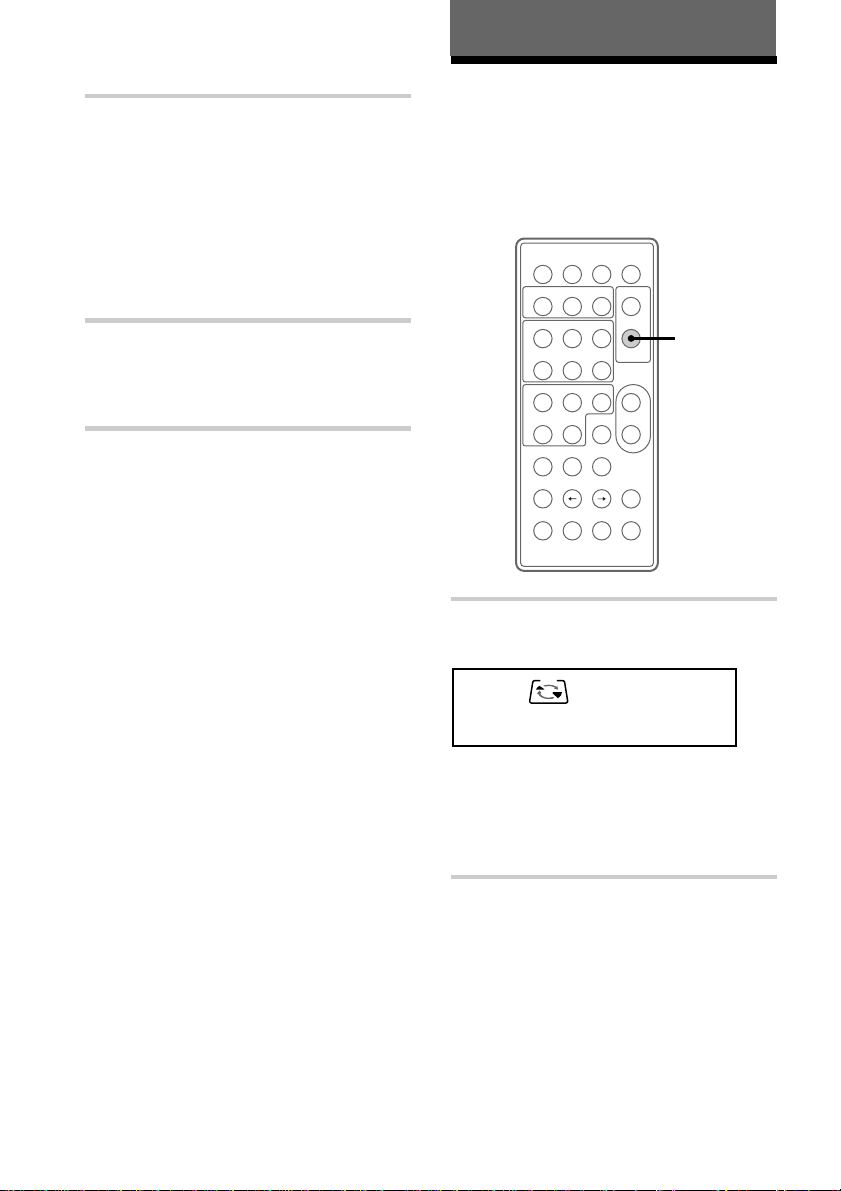
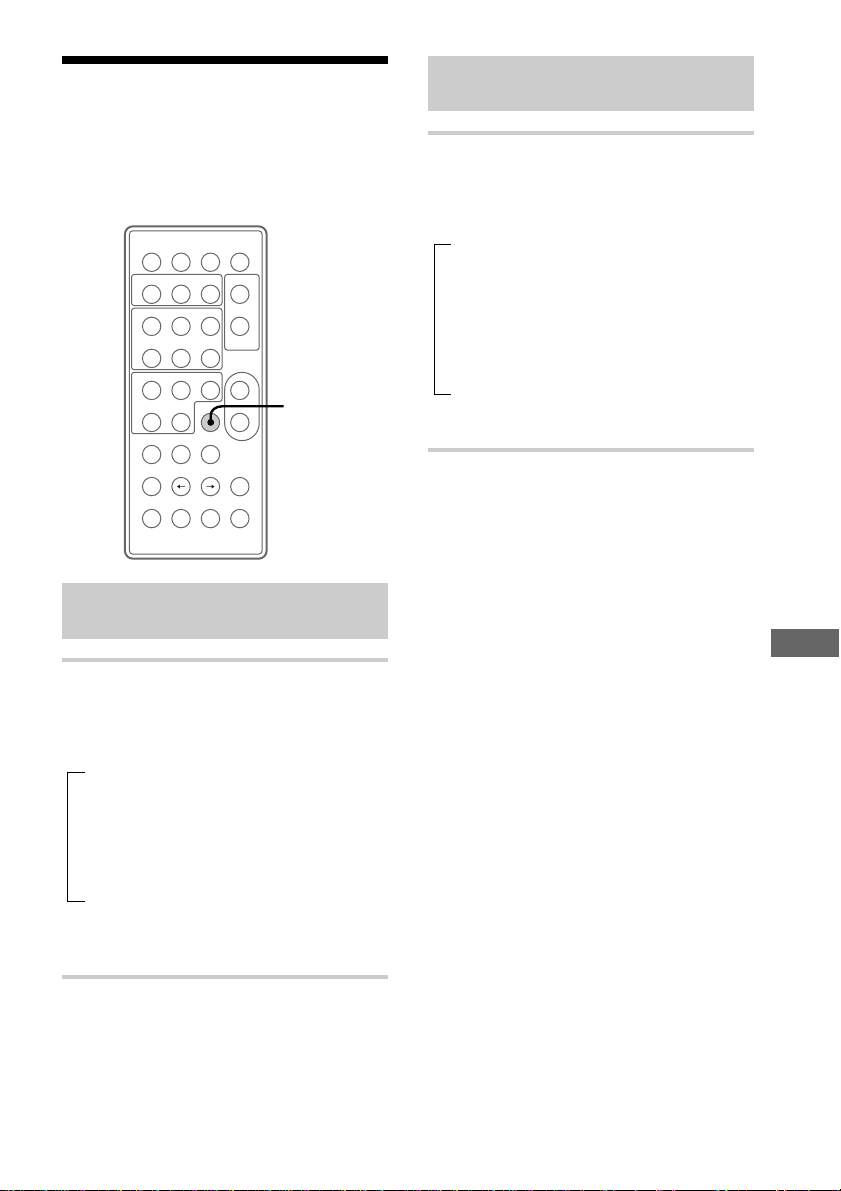
Press REPEAT during play until
“REPEAT” or “REPEAT 1” appears.
CD
TRACK REPEAT
1DC235sm
+
–
LEVEL SYNC
-
REPEAT
DBFB
Playing the CD tracks in random order
–– Shuffle Play
You can play all the tracks on a CD in
random order.
1 / u
1
–+
(P p
=+
3
(P p
=+
–+
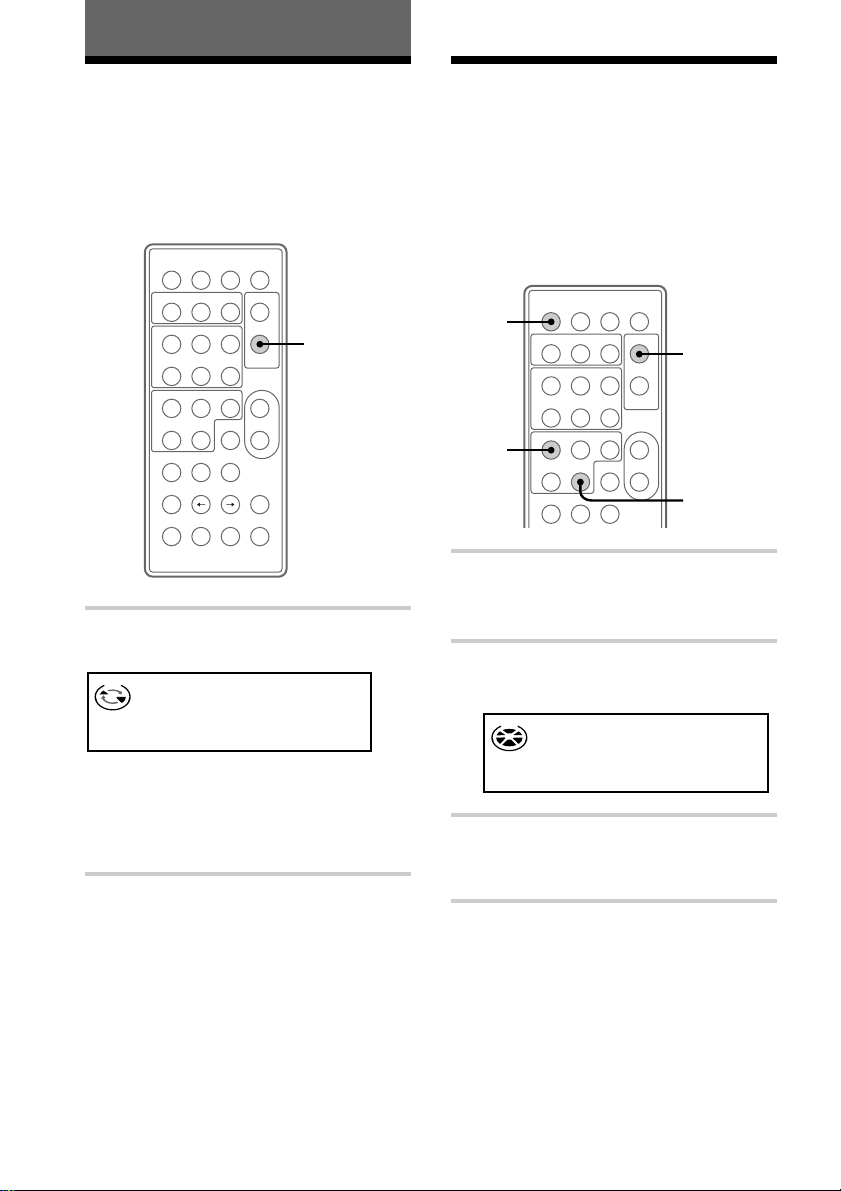
1 Press FUNCTION repeatedly until
“CD” appears then place a CD on
the disc tray.
2 Press PLAY MODE repeatedly until
“SHUFFLE” appears.
CD
+
–
LEVEL SYNC
SHUFFLE
2
CD +
-
DBFB
REPEAT: For all the tracks on the current
CD.
REPEAT 1*: For a single track only.
* You cannot repeat only one track during Shuffle
Play and Program Play.
To cancel Repeat Play
Press REPEAT until “REPEAT” or
“REPEAT 1” disappears.
22
7DC 72m311s
3 Press CD (.
Shuffle Play starts. “J” appears, and all
the tracks play in random order.
To cancel Shuffle Play
Press PLAY MODE repeatedly until
“SHUFFLE” and “PGM” disappear.
Tips
• You can start Shuffle Play during normal play by
displaying “SHUFFLE.”
• To skip a track, press CD +.
Page 23
Programming the CD tracks
–– Program Play
3 Press CD + or = until the
desired track appears in the display.
CD
LEVEL SYNC
-
PGM
DBFB
You can make a program of up to 24 tracks in
the order you want them to be played. You
can make a Synchro Recording of the
program on the MD (see page 31).
1 / u
1
6
3
–+
(P p
=+
(P p
=+
–+
2
CD p
+
–
DISPLAY
4
1 Press FUNCTION repeatedly until
“CD” appears in the display, then
place a CD on the disc tray.
2 Press PLAY MODE repeatedly until
“PGM” appears.
DC 4m09s7
Selected track
number
4 Press ENTER/YES.
The track is programmed. “Step”
appears, followed by the total number of
programmed steps. The number of the
last programmed track appears,
followed by the total playing time of the
program.
CD
The playing time
of the selected
track
LEVEL SYNC
-
PGM
DC 4m09s7
The number of the
last programmed
track
5 To program additional tracks,
repeat steps 3 and 4.
6 Press CD (.
All the tracks play in the order you
selected.
The total playing
time of the
programmed tracks
DBFB
The CD Player
CD
DC0
LEVEL SYNC
-
PGM
DBFB
continued
23
Page 24
DISPLAY
Programming the CD tracks
(continued)
Using the CD
To check the total number of
programmed tracks
Press DISPLAY in stop mode. “Step” appears,
followed by the total number of programmed
tracks. The number of the last programmed
track appears, followed by the total playing
time of the program.
CD
LEVEL SYNC
-
PGM
DBFB
DC 8m0 s1128
The number of the last
programmed track
To check the programmed track
number
Press CD + or = repeatedly during the
Program Play.
Additional tasks
To
Cancel Program
Play
Add a track to
the program
Erase the entire
program
Tip
The program you made remains after Program Play
finishes. To play the same program again, press
CD (.
Note
When the total playing time of the programmed
tracks exceeds 100 minutes, “- - m - - s” appears in
the display.
Do this
Press CD p, then press PLAY
MODE repeatedly until
“PGM” and “SHUFFLE”
disappear.
Do steps 3 and 4 with the
Program Play stopped.
Press CD p with the Program
Play stopped.
The total playing
time of the
programmed tracks
display
You can check the remaining time of the
current track or that of the CD.
(P p
=+
(P p
=+
Press DISPLAY repeatedly during play.
Each time you press the button, the display
changes as follows:
n Elapsed time of the current track
The remaining time of the current track
n
n
The remaining time of the current CD*
* The remaining time of the program is displayed
during Program Play.
To check the total playing time
and number of tracks on the CD
The total playing time and number of the
tracks are displayed during normal or shuffle
play in stop mode.
CD
DC 2m31s717
–+
LEVEL SYNC
+
–
-
DBFB
24
The total number
of the tracks
The total playing
time
Page 25
Labeling a CD
–– Disc Memo Function
You can label up to 20 CDs with titles of up to
12 symbols and characters. Whenever you
load a labeled CD, the title (disc name)
appears in the display. If you label a CD and
make a CD-MD Synchro Recording on a new
MD, the title is automatically recorded on the
MD.
1 / u
1
–+
(P p
=+
(P p
=+
2
CURSOR ?
3,8
–+
+
–
4,
DISPLAY
2,5
6
CANCEL/NO
2 Press EDIT and press +/–
repeatedly until “Name in ?”
appears.
CD
DISC
LEVEL SYNC
-
imn?Nea
3 Press ENTER/YES.
The cursor flashes.
CD
Cursor
4 Press CHARACTER repeatedly
until the type of character you want
appears.
Each time you press the button, the
display changes as follows:
A (Upper case) n a (Lower case) n 0
(Numbers) n ! (Symbols)* n (Space)**
n A…
* You can use the following symbols.
DISC
LEVEL SYNC
-
DBFB
DBFB
The CD Player
1 Press FUNCTION repeatedly until
“CD” appears, then place a CD on
the disc tray.
Make sure the CD is stopped and the
total number of tracks and the playing
time appear in the display.
If “SHUFFLE” or “PGM” appears in the
display, press PLAY MODE repeatedly
until it disappears.
CD
LEVEL SYNC
-
DBFB
DC 2m31s717
The total
number of tracks
The total
playing time
!"#$%&'()∗+,–./:;<=>?@_`
** To enter a space
Go to the step 6. You cannot label a
blank space for the first letter.
5 Press +/– repeatedly until the
desired character appears.
6 Press CURSOR /.
The character you selected in step 5 stops
flashing and the cursor shifts to the right.
CD
DISC
LEVEL SYNC
-
A
Cursor
continued
DBFB
25
Page 26
REPEAT
Labeling a CD (continued)
7 Repeat steps 4 through 6 to
complete the entire title.
If you enter an incorrect character, press
CURSOR ? or / until the character
you want to change flashes, then repeat
steps 4 through 6.
To erase a character, press
CANCEL/NO while the character is
flashing. You cannot insert characters
between previously inserted characters.
8 Press ENTER/YES to complete the
labeling procedure.
The title is memorized into the system
and then the original display appears.
To cancel labeling
Press EDIT.
Note
Turn on the system power at least once a month,
otherwise the titles are erased from the memory.
To check the titles
Press DISPLAY while playback is stopped.
Each time you press the button, the display
changes as follows:
The disc title
˜
The total number of tracks and the total
playing time
To erase a disc title
1 Press EDIT, then press +/– repeatedly until
“Name Erase ?” appears.
2 Press ENTER/YES.
The disc title flashes.
“No Name” appears if no disc title is
stored.
3 Press +/– repeatedly until the disc title you
want to erase appears.
4 Press ENTER/YES again.
“Complete” appears and the disc title is
erased.
To cancel erasing
Press CANCEL/NO.
The MD Deck – Playback
Playing the MD tracks repeatedly
— Repeat Play
You can repeat a single track or all the tracks
on a disc.
1 / u
–+
(P p
=+
(P p
=+
Press REPEAT during play until
“REPEAT” or “REPEAT 1” appears.
MD
11mD5sM3
REPEAT: For all the tracks on the current
MD.
REPEAT 1*: For a single track only.
* You cannot repeat a single track during Shuffle
Play and Program Play.
To cancel Repeat Play
Press REPEAT until “REPEAT” or “REPEAT
1” disappears.
+
–
–+
LEVEL SYNC
TRACK REPEAT
-
DBFB
26
Page 27
Playing the MD
Programming the
tracks in random
order
–– Shuffle Play
You can play the tracks in random order.
1 / u
1
–+
3
MD +
(P p
=+
(P p
=+
–+
1 Press FUNCTION repeatedly until
“MD” appears, then insert an MD.
2 Press PLAY MODE repeatedly until
“SHUFFLE” appears in stop mode.
MD
72mD1sM317
+
–
LEVEL SYNC
-
SHUFFLE
2
MD p
DBFB
MD tracks
–– Program Play
You can make a program of up to 25 tracks in
the order you want them to be played.
1 / u
1
6
3
–+
(P p
=+
(P p
=+
–+
2
MD p
+
DISPLAY
–
4
1 Press FUNCTION repeatedly until
“MD” appears, then insert an MD.
2 Press PLAY MODE repeatedly until
“PGM” appears in stop mode.
The MD Deck - Playback
3 Press MD (.
Shuffle Play starts. “J” appears, and all
the tracks play in random order.
To cancel Shuffle Play
Press MD p to stop the Shuffle Play, then
press PLAY MODE repeatedly until
“SHUFFLE” disappears.
Tip
To skip tracks, press MD +.
3 Press MD + or = repeatedly
until the desired track number
appears in the display.
MD
LEVEL SYNC
-
TRACK PGM
4mD9sM07
Selected track
number
The playing
time of the
selected track
continued
DBFB
27
Page 28
Programming the MD tracks
(continued)
4 Press ENTER/YES.
The track is programmed. “Step”
appears, followed by the total number of
programmed tracks. The number of the
last programmed track appears,
followed by the total playing time of the
program.
MD
LEVEL SYNC
-
PGM
DBFB
4mD9sM07
The number of the
last programmed
track
5 To program additional tracks,
repeat steps 3 and 4.
6 Press MD (.
All the tracks play in the order you
selected.
To check the total number of
programmed tracks
Press DISPLAY in stop mode. “Step”
appears, followed by the total number of
programmed tracks. The number of the last
programmed track appears, followed by the
total playing time of the program.
MD
The total playing
time of the
programmed tracks
LEVEL SYNC
-
TRACK PGM
DBFB
Additional tasks
To
Cancel Program
Play
Add a track to
the program
Erase the entire
program
Do this
Press MD p to stop the
Program Play, then press
PLAY MODE repeatedly until
“PGM” and “SHUFFLE”
disappear.
Do steps 3 and 4 with the
Program Play stopped.
Press MD p with the Program
Play stopped.
Tip
The program you made remains after Program Play
finishes. To play the same program again, press
MD (.
8mD8sM01 12
The last number of the
programmed tracks
To check the programmed track
number
Press MD + or = repeatedly during the
Program Play.
28
The total playing
time of the
programmed tracks
Page 29
Using the MD display
You can check the remaining time and total
playing time of an MD.
1 / u
–+
(P p
=+
(P p
=+
Checking the remaining
time of a track
–+
+
DISPLAY
–
Checking the remaining
time of a disc
Press DISPLAY in stop mode.
Each time you press the button, the display
changes as follows:
The total playing time and the track
n
numbers on the MD
nn
The remaining recordable time on the
MD
(Only for a recordable MD)
Disc title on the MD**
** “No Name” appears if no disc title is stored.
To label a disc, see page 39.
Press DISPLAY during play.
Each time you press the button, the display
changes as follows:
The playing time and the track number
n
of the current track
n
The remaining time and the track
number of the current track
n
The track title of the current track*
* “No Name” appears if no track title is stored.
To label a disc, see page 39.
The MD Deck - Playback
29
Page 30

The MD Deck – Recording
Before you start
After recording
recording
MDs (Mini Disc) let you digitally record and
play music with high quality sound
comparable with the sound of CDs. Another
feature of MDs is track marking. The track
marking feature lets you quickly locate a
specific point or easily edit the recorded
tracks. However, depending on the source
you record, the recording method varies.
Also, the way the track numbers are recorded
differs depending on the source.
When the source you record from is:
• This system’s CD player
– The digital signal from the CD is recorded
as it is (digital recording).*
– Track numbers are automatically marked
as on the original CD.
• This system’s tuner and other analog
components
– The analog signal is converted to a digital
signal and recorded (analog recording).**
–A track number is marked at the beginning
of a recording, but when you turn on the
Level Sync function (see page 35), track
numbers are automatically marked in sync
with the level of the input signal.
/ Press MD 6 to remove the MD or
press 1/u to turn off the system
power.
“TOC” starts lighting or flashing. The
MD recording is complete only after the
recording information is entered to MD.
Note
The MD recording is complete only after all the
recording information is entered to TOC at which
point TOC stops flashing and goes out. Be careful
not to disconnect the power cord or move the
system before this point. Before disconnecting the
power cord, do the following:
– Remove the MD.
– Press 1/u to turn off the system.
Protecting a recorded MD
• To protect a recorded MD, slide the tab on the side
of the MD to open the slot.
In this position, the MD cannot be recorded on.
To record on the MD, slide the tab to close the slot.
Tab
* For details on the limitations for digital
recording, see page 54.
** This signal is converted because these systems do
not use digital signals.
Note on MD track numbers
On an MD, the track number (track sequence), track
start and end point information, etc., are recorded in
the TOC* area independent of the sound
information. You can edit recorded tracks quickly
by modifying the TOC information.
* TOC: Table Of Contents
30
Slide the tab
• If the MD is record protected, “MD Protected”
appears in the display and the MD cannot be
recorded on. Slide the tab to closed position
reinsert the MD and try again.
Page 31

Recording the
Selecting the tracks
favorite CD tracks
on an MD
You can select your favorite CD tracks with
the Program Play feature, then record the
program on an MD using the CD Synchro
Recording feature.
87
MD p
g
p
(P p
(P
1/u
= 0
) +
–
+
MD indicator
+
–
6
MD 6
1 Press FUNCTION on the remote
repeatedly until “CD” appears, then
place a CD on the disc tray.
2 Press PLAY MODE on the remote
repeatedly until “PGM” appears.
3 Press CD + or = on the remote
repeatedly until the desired track
number appears.
CD
LEVEL SYNC
-
PGM
DBFB
DC 4m09s7
Selected track
number
4 Press ENTER/YES on the remote.
The track is programmed. “Step”
appears, followed by the total number of
programmed tracks. The number of the
last programmed track appears,
followed by the total playing time of the
program.
CD
The playing
time
LEVEL SYNC
-
PGM
DBFB
1
3
4
–+
(P p
=+
(P p
=+
–+
1 / u
The MD Deck - Recording
2
MD p
DC 4m09s7
The number of the
last programmed
track
5 To program additional tracks,
The total playing
time of the
programmed tracks
repeat steps 3 and 4.
+
–
Recording on an MD
6 Insert a recordable MD.
If the MD indicator lights up blue,
another MD is already inserted, press
MD 6 and remove the MD.
continued
31
Page 32

Recording the favorite CD tracks
DISPLAY
on an MD (continued)
Recording on an
7 Press CD-MD SYNC.
The MD stands by for recording and the
CD is in pause for playback. If you use
an MD with tracks already recorded on
it, the system automatically locates the
end of the recorded portion and starts
the new recording from there.
8 Press MD ^.
Recording starts from the last recorded
portion of the MD. The CD stops and
the MD pauses automatically when the
recording is completed. If there is no
remaining recording time on the MD, the
MD stops.
To stop recording
Press MD p.
If the MD ends while recording, the MD and
the CD automatically stop.
Tip
The MD is labeled with the disc title of the CD (see
page 25) when using a new recordable MD or an
MD whose tracks have been completely erased (see
page 41) (Disc Memo Copy function).
While “TOC” is lit or is flashing
To ensure complete recording, do not move
the system or disconnect the power cord. The
system updates the Table of Contents (TOC)
while “TOC” is flashing.
Notes
• The MD recording is complete only after all the
recording information is entered to TOC at which
point TOC stops flashing and goes out. Be careful
not to disconnect the power cord or move the
system before this point. Before disconnecting the
power cord, do the following:
– Remove the MD.
– Press 1/u to turn off the system.
• If the MD is record protected, “MD Protected”
appears in the display and the MD cannot be
recorded on. Press MD 6 and remove the MD,
slide the record protection tab to the closed
position (see page 30), reinsert the MD and try
again.
• Please do not use MDs with labels that are
protruding or labels that have not been positioned
correctly. Use of such MDs may damage this
system.
32
MD manually
The system automatically locates the end of
any recorded portion of an MD and starts
recording from that point.
43
MD p
g
(P
p
= 0
) +
–
+
–+
(P p
+
–
+
–
6
MD 6
1/u
MD indicator
2
=+
(P p
=+
1 Insert a recordable MD.
If the MD indicator lights up blue,
another MD is already inserted, press
MD 6 and remove the MD.
2 Press FUNCTION to select the
source (e. g., CD) you want to
record.
• CD: Recording from the CD.
• TUNER: Recording from the radio.
• TAPE: Recording from other
components.
Page 33

3 Press REC.
The MD is now ready for recording.
4 Press MD ^.
Recording starts.
5 Start playing the source you want to
record.
When recording from this system’s CD,
the track numbers are automatically
marked. Press REC while recording to
mark the track numbers (see “Marking
track numbers” on page 35).
To stop recording
Press MD p.
If “Level Over” appears in the
level meter
A high-level signal was input during
recording in the tape function. When the
sound is distorted, reduce the recording level
(see page 56), then re-record.
While “TOC” is lit or is flashing
To ensure complete recording, do not move
the system or disconnect the power cord. The
system updates the Table of Contents (TOC)
while “TOC” is flashing.
Tip
You can see the recording time and the remaining
time in the display while recording by pressing
DISPLAY on the remote.
Notes
• The MD recording is complete only after all the
recording information is entered to TOC at which
point TOC stops flashing and goes out. Be careful
not to disconnect the power cord or move the
system before this point. Before disconnecting the
power cord, do the following:
– Remove the MD.
– Press 1/u to turn off the system.
• If you pause recording during CD recording, a
track number is recorded at that point. Also, note
that the tracks are recorded as the same single
track with a single track number when a single
track of the same CD is recorded repeatedly.
• Please do not use MDs with labels that are
protruding or labels that have not been positioned
correctly. Use of such MDs may damage this
system.
Starting recording with 6 seconds of prestored audio data
— Time Machine Recording
When recording from an FM or satellite
broadcast, the first few seconds of material
are often lost due to the time it takes you to
ascertain the contents and press the record
button. To prevent the loss of this material,
the Time Machine Recording feature
constantly stores 6 seconds of the most recent
audio data in a buffer memory. When you
start recording the sound source, the
recording actually starts with the 6 seconds of
audio data stored in the buffer memory in
advance, as shown in the illustration below:
When you press
ENTER/YES in step 5
Audio data in 6-second
buffer memory
Beginning of the
source to be recorded
End of the source
to be recorded
Time
Recorded
portion
The MD Deck - Recording
continued
33
Page 34

Starting recording with 6 seconds
of prestored audio data
(continued)
1/u
2
(P
= 0
(P p
=+
(P p
=+
p
) +
–
+
–+
–+
MD p
(P p
1 / u
+
–
g
+
–
6
3
MD p
5
4 Start playing the source you want to
record.
5 Press ENTER/YES on the remote at
the point you want to start
recording.
Recording of the source starts with the
6 seconds of audio data stored in the
buffer memory.
If you use an MD with tracks already
recorded on it, the system automatically
locates the end of the recorded portion
and starts the new recording from there.
To stop Time Machine Recording
Press MD p.
While “TOC” is lit or is flashing
To ensure complete recording, do not move
the system or disconnect the power cord. The
system updates the Table of Contents (TOC)
while “TOC” is flashing.
Notes
• The MD recording is complete only after all the
recording information is entered to TOC at which
point TOC stops flashing and goes out. Be careful
not to disconnect the power cord or move the
system before this point. Before disconnecting the
power cord, do the following:
– Remove the MD.
– Press 1/u to turn off the system.
• The system starts storing audio data when the MD
is in recording pause in step 3 and you start
playing the source. If you press ENTER/YES on
the remote within 6 seconds of this point then
Time Machine Recording starts with less than 6
seconds of audio data.
• Please do not use MDs with labels that are
protruding or labels that have not been positioned
correctly. Use of such MDs may damage this
system.
1 Insert a recordable MD.
2 Press FUNCTION repeatedly to
select the source (e.g., TUNER) you
want to record.
3 Press REC.
The MD stands by for recording.
34
Page 35

Marking track
1 / u
numbers
The track numbers can be marked as follows:
• Mark the track numbers automatically.
When you record from this system’s CD
(digital recording) or during level-synchro
recording, the track numbers are
automatically marked.
• At any point while recording.
You can mark the track numbers while
recording any sources.
Marking track numbers
automatically while
recording
–– Level-Synchro Recording
The “LEVEL-SYNC” is factory set to ON and
the track numbers are automatically marked.
If “LEVEL-SYNC” is not displayed during
recording, turn it on as follows. Track
numbers are automatically marked when the
input signal is under a certain level for more
than two seconds and then exceeds the
previous level.
6
MD p
3
–+
(P p
=+
(P p
=+
–+
2
MD p
+
–
3
4,5
1 Press REC. The MD stands by for
recording.
2 Press PLAY MODE on the remote
until “PGM” and “SHUFFLE”
disappear.
3 Press EDIT, then press +/– on the
remote repeatedly until
“LevelSync ?” appears.
4 Press ENTER/YES on the remote.
“LevelSync ON ?” appears.
The MD Deck - Recording
5 Press ENTER/YES on the remote
again.
g
“LEVEL-SYNC” lights up.
6 Press MD ^.
Recording starts.
(P
p
1/u
(P p
= 0
) +
–
+
+
–
6
To stop recording
Press MD p.
1
continued
35
Page 36

Marking track numbers
(continued)
To cancel automatic track marking
1 Press EDIT on the remote during recording
pause.
2 Press +/– on the remote repeatedly until
“LevelSync ?” appears.
3 Press ENTER/YES on the remote.
“LevelSyncOFF?” appears.
4 Press ENTER/YES on the remote again.
“LEVEL-SYNC” disappears.
When “LEVEL-SYNC” disappears, a track
number is marked only at the beginning of
each recording.
Notes
• You may not mark track numbers automatically if
the sound source to be recorded is noisy (e.g.,
tapes or radio programs).
• The MD recording is complete only after all the
recording information is entered to TOC at which
point TOC stops flashing and goes out. Be careful
not to disconnect the power cord or move the
system before this point. Before disconnecting the
power cord, do the following:
– Remove the MD.
– Press 1/u to turn off the system.
Marking track numbers
at a specific point while
recording
–– Track Mark
You can mark track numbers at any time
while recording, regardless of the type of
sound source.
(P
p
1/u
(P p
= 0
) +
–
+
+
–
6
Making a space between tracks 3 seconds long
–– Smart Space, Auto Cut
The Smart Space and Auto Cut functions let
you make a blank space between tracks three
seconds long automatically while making a
digital recording.
Smart Space
If there is extended silence of 4 to 29 seconds
while digital recording, the system replaces
the silence with a blank of about 3 seconds
and continues recording.
Auto Cut
If there is no sound input for 30 seconds
while digital recording, the system replaces
the silence of 30 seconds with a blank of
about 3 seconds and enters recording pause.
Notes
• The Smart Space and Auto Cut functions are
factory set to ON.
• If you turn the power off or disconnect the power
cord, the system will recall the last setting (ON or
OFF) of the Smart Space and Auto Cut functions
the next time you turn the power on.
• The MD recording is complete only after all the
recording information is entered to TOC at which
point TOC stops flashing and goes out. Be careful
not to disconnect the power cord or move the
system before this point. Before disconnecting the
power cord, do the following:
– Remove the MD.
– Press 1/u to turn off the system.
REC
Press REC while recording at the point
you want to add a track mark.
The tracks following the added one are
numbered.
36
Page 37

5
MD p
1 Press REC during recording pause.
2 Press EDIT, then press +/– on the
remote repeatedly until “S. Space ?”
appears.
2
3,4
1/u
(P
p
(P p
= 0
) +
–
+
–+
(P p
=+
(P p
=+
–+
1
1 / u
g
3 Press ENTER/YES on the remote.
“S. Space ON ?” appears.
4 Press ENTER/YES on the remote
+
–
6
MD p
+
–
2
again.
5 Press MD ^.
Recording starts.
To stop recording
Press MD p.
To turn off the Smart Space and
Auto Cut functions
1 Press EDIT on the remote during recording
pause.
2 Press +/– on the remote repeatedly until
“S. Space ?” appears.
3 Press ENTER/YES on the remote.
“S. Space OFF ?” appears.
4 Press ENTER/YES on the remote again.
The MD Deck - Recording
37
Page 38

The MD deck – Editing
Before you start editing
You can edit the recorded tracks on an MD.
By using the editing functions, you can create
a new sequence to the recorded MD.
Before editing
To edit the MD, the system requires the
following conditions:
• The MD is recordable.
• The MD is in the Continuous mode.
Before editing, check the conditions by
following the procedure below.
Editing functions
• Name – Labeling MDs
Use this function to label discs and tracks.
You can use upper case, numbers and
symbols for the titles.
• Erase – Erasing recordings
Use this function to erase a single track one
by one or all tracks at once.
• Move – Changing the order of tracks
Use this function to change the track
numbering.
• Divide – Adding track numbers
Use this function to add track numbers.
This lets you locate your favorite phrases
quickly.
• Combine – Combining recorded
tracks
By using this function, the blank space
between two tracks is erased and those two
tracks are combined to one track. You can
combine the tracks which are not
numerically consecutive, i.e. the track 1 and
track 4, etc.
• Undo – Cancelling the last edit
Use this function to cancel the last edit and
restore the contents of the MD to the
condition before the edit.
1 Check the tab of the MD to be
edited.
If the MD is record protected, “MD
Protected” appears in the display and
the MD cannot be edited.
If the MD is protected against erasure,
slide the tab to close the slot.
2 Press PLAY MODE on the remote
repeatedly until “PGM” and
“SHUFFLE” disappear.
You can edit the MD only in Continuous
mode. You cannot edit the MD in Shuffle
or Program mode.
After editing
/ Press MD 6 to remove the MD or
press 1/u to turn off the system
power.
The MD editing is complete only after
the editing information is entered to
TOC, and “TOC” is lit or is flashing.
Note
The MD editing is complete only after all the editing
information is entered to TOC at which point TOC
stops flashing and goes out. Be careful not to
disconnect the power cord or move the system
before this point. Before disconnecting the power
cord, do the following:
– Remove the MD.
– Press 1/u to turn off the system.
38
Page 39

Labeling an MD
–– Name Function
If you record a labeled CD on a new MD, the
title is automatically recorded on the MD
(Disc Memo Copy function). You can also
create titles (names) for your recorded MDs
and tracks. You can use up to 1,700 characters
for a disc.
1 / u
–+
+
–
1
SCROLL
4
2,5
6
CANCEL/NO
MD
=/+
2
CURSOR ?
3,8
(P p
=+
(P p
=+
–+
4 Press CHARACTER repeatedly
until the type of character you want
appears.
Each time you press the button, the
display changes as follows:
A (Upper case) n a (Lower case) n 0
(Numbers) n ! (Symbols)* n (Space)**
n A…
* You can use the following symbols.
!"#$%&'()∗+,–./:;<=>?@_`
** To enter a space
Go to the step 6. You cannot label a
blank space for the first letter.
5 Press +/– repeatedly until the
character you want appears.
6 Press CURSOR /.
The character you selected in step 5 stops
flashing and the cursor shifts to the right.
MD
TOC EDIT
DISC
LEVEL SYNC
-
M
DBFB
1 To label a disc, press MD p to stop
playing the disc.
To label a track, press MD + or =
until the desired track number appears.
2 Press EDIT, then press +/–
repeatedly until “Name in ?”
appears.
3 Press ENTER/YES.
The cursor starts flashing.
MD
Cursor
TOC EDIT
DISC
LEVEL SYNC
-
DBFB
7 Repeat steps 4 through 6 to
complete the entire title.
If you enter an incorrect character,
press CURSOR ? or / until the
character you want to change flashes,
then repeat steps 4 through 6.
To erase a character, press
CANCEL/NO while the character is
flashing. You cannot insert characters
between previously inserted characters.
8 Press ENTER/YES to complete the
labeling procedure.
The titles you labeled appear
sequentially, then the display returns to
the original.
To cancel labeling
Press EDIT.
continued
The MD Deck - Editing
39
Page 40

Labeling an MD (continued)
Notes
• You can label a track title while playing, but you
must complete labeling before the track ends.
• If the MD is record protected, “MD Protected”
appears in the display and the MD cannot be
recorded on. Press MD 6 and remove the MD,
slide the record protection tab to the closed
position (see page 30), reinsert the MD and try
again.
To check the titles (with the
remote only)
To check the disc titles, press SCROLL while
play is stopped. To check the track titles,
press SCROLL while playing. The titles scroll
across the display. To stop scrolling, press
SCROLL. Press the button again to resume
scrolling.
To erase all titles
1 Press EDIT then press +/– repeatedly until
“Name Erase ?” appears.
2 Press ENTER/YES.
“Name Erase ??” appears. To cancel
erasing at this time, press MD p.
3 Press ENTER/YES again.
“Complete” appears.
All the track titles are erased.
To erase a track title
1 Press MD =or + until the desired
track title appears.
2 Press EDIT then press +/– repeatedly until
“NameErase?” appears.
3 Press ENTER/YES.
“Complete” appears.
The track title you selected in step 1 is
erased.
Erasing recordings
–– Erase Function
The system lets you erase unwanted tracks
quickly and easily. You can restore the
contents to the condition before erasing
(unerase) by using the Undo function.
Note, however, check carefully the portion to
be erased, as you cannot undo an edit after
performing any additional edits.
The three options for erasing recordings are:
• Erasing a single track.
• Erasing all tracks.
• Erasing a portion of a track.
To erase a single track
You can erase a track simply by selecting its
track number. When you erase a track, the
total number of tracks on the MD decreases
by one and all the tracks following the erased
one are renumbered.
Eg.: Erasing track B.
B
Erase track B
4
C
D
Track
number
Original
tracks
ERASE
When erasing multiple tracks, you should
proceed in order from high to low track
number to prevent the renumbering of tracks
that have not been erased yet.
123
A
123
AC D
40
1
2
3,4
(P p
=+
(P p
=+
–+
+
–
2
Page 41

1 Press MD + or = repeatedly
until the track number you want to
erase appears.
MD
TRACK
LEVEL SYNC
-
DBFB
DM7
The track number you want to erase
2 Press EDIT, then press +/–
repeatedly until “Erase ?” appears.
MD
TOC EDIT
TRACK
LEVEL SYNC
-
DBFB
7se?Era
3 Press ENTER/YES.
“Erase ??” appears.
4 Press ENTER/YES again to erase
the track.
“Complete” appears for a few seconds
and the selected track and title are
erased.
To cancel erasing
Press EDIT.
Note
“Erase!! ?” appears when the track was recorded or
edited on another deck and is erase protected. To
erase the track, press ENTER/YES while “Erase!! ?”
appears.
To erase all tracks
You can erase the entire MD (all titles and
tracks) all at once.
1
(P p
=+
–+
+
–
1
2,3
1 While the MD is stopped, press
EDIT then press +/– repeatedly
until “All Erase ?” appears.
2 Press ENTER/YES.
“All Erase ??” appears.
3 Press ENTER/YES.
“Complete” appears for a few seconds
and all tracks and titles are erased.
To cancel erasing
Press EDIT.
The MD Deck - Editing
continued
41
Page 42

Erasing recordings (continued)
To erase a portion of a
track
By using the Divide, Erase, and Combine
functions, you can erase specific portions of a
track.
E.g.: Erasing a portion of track A.
Portion to
Track
number
Original
tracks
DIVIDE
(page 43)
123
A
1234
A-a
be erased
B
Divide track A into
three parts
The renumbered
track
A-c
B
Moving recorded tracks
–– Move Function
Using the Move function, you can change the
order of any track on the disc. When you
move tracks, the tracks are automatically
renumbered.
E.g.: Moving track C to position 2.
Track
number
Original
tracks
MOVE
123
A
BC
12 34
A
4
D
D
BC
ERASE
(page 40)
COMBINE
(page 44)
Erase track
1234
A-a A-c
123
A- (a+c)
A-(b)
B
Combine tracks A-a
and A-c
B
1 Press MD + or =repeatedly
2 Press EDIT, then press +/–
3 Press ENTER/YES.
(P p
1
2
=+
(P p
=+
–+
+
–
2,4
3,5
until the track number you want to
move appears.
repeatedly until “Move ?” appears.
42
Page 43

4 Press +/– repeatedly until the track
number you want to move the track
to (new track number) appears.
MD
TOC EDIT
TRACK
LEVEL SYNC
-
DBFB
17 ok?
The original
track number
5 Press ENTER/YES.
“Complete” appears for a few seconds
and the selected track moves to
appointed position.
To cancel moving
Press EDIT.
The number you want
Dividing recorded tracks
–– Divide Function
You can use this function to add track
numbers to multiple tracks that are recorded
as one track. This function also lets you mark
track numbers. The total number of tracks
increases by one and all the tracks following
the new division are renumbered.
E.g.: Dividing track 2 into tracks B and C.
Track
number
Original
tracks
DIVIDE
12 3
123 4
1
2
B
A
AB DC
–+
(P p
=+
(P p
=+
–+
C
Divide track 2 into
track B and C
1 / u
+
–
D
2
The MD Deck - Editing
3,4
1 While playing the MD, press MD P
at the point where you want to
divide the track.
The MD pauses.
2 Press EDIT, then press +/–
repeatedly until “Divide ?” appears.
continued
43
Page 44

Dividing recorded tracks
(continued)
Combining
3 Press ENTER/YES.
“Rehearsal” and “Position ok?”appear
alternately and the portion to be divided
is played repeatedly.
• To shift the division point:
While monitoring the sound, press
+/– to find the division point.
The point moves in increments of 1/86
second (1 frame).
4 Press ENTER/YES again when you
find the point where you want to
divide the track.
“Complete” appears for a few seconds
and the newly created track begins
playing.
To cancel dividing
Press EDIT.
Notes
• If you divide a labeled track (page 39) into two
tracks, only the first track is labeled with the title.
E.g.
12
Andante
Adagio
Allegro
recorded tracks
–– Combine Function
You can combine 2 tracks into a single track.
The total number of tracks decreases by one
and all tracks following the combined ones
are renumbered.
E.g.: Combining tracks 1 and 3.
Track
number
Original
tracks
COMBINE
E.g.: Combining tracks 4 and 1.
Original
tracks
COMBINE A
12
BD
A
12
C
A
12
A
B
12433
B
43
C
Combine tracks
A and C
3
B
D
C
DC
D
5
4
12433
Adagio
Andante
The latter track will have no title
• The track cannot be divided at the beginning or
end. If these points are designated, "Impossible"
appears. Press +/– to change the position.
45
Allegro
44
1,4
2
3,5
(P p
=+
(P p
=+
–+
+
–
2
Page 45

1 Press MD + or = repeatedly
until the track number first to be
combined appears.
For example, to combine tracks 4 and 1,
select track 4.
2 Press EDIT, then press +/–
repeatedly until “Combine ?”
appears.
3 Press ENTER/YES.
MD
TOC EDIT
TRACK
LEVEL SYNC
-
454+
The number of the first track
4 Press MD + or = repeatedly
until the second track number of the
two to be combined appears.
DBFB
Undoing the last edit
–– Undo Function
This function lets you cancel the last edit and
restore the contents of the MD to the
condition before the edit.
Note, however, that you cannot undo an edit
if you do any of the following after the edit:
• Press REC or CD-MD SYNC on the system.
• Update the TOC by turning the power off
or ejecting the MD.
• Disconnect the power cord.
(P p
=+
1
–+
+
–
1
MD
TOC EDIT
TRACK
LEVEL SYNC
-
DBFB
413+
The second track
number of the
two to be
combined
5 Press ENTER/YES again to combine
the tracks.
“Complete” appears for a few seconds
and the tracks are combined. Play starts.
To cancel combining
Press EDIT.
Notes
• If both of the combined tracks have track titles, the
title of the second track is erased.
• If “Impossible” appears, the tracks cannot be
combined. This happens when you've edited the
same track too many times. This is due to a
technical limitation of the MD system and is not a
mechanical error.
New track number
2,3
1 While the MD is stopped with no
track number appearing in the
display, press EDIT and then press
+/– repeatedly until “Undo?”
appears.
“Undo?” does not appear if you have not
done any previous editing.
The MD Deck - Editing
continued
45
Page 46

Undoing the last edit (continued)
Sound Adjustment
Reinforcing the
2 Press ENTER/YES.
One of the following messages appears,
depending on the last edit.
Message:Editing done:
Labeling a track or
an MD
Erasing a single
track
Erasing all tracks
Moving a tracks
Dividing a track
Combining tracks
“Name Undo?”
“Erase Undo?”
“Move Undo?”
“Divide Undo?”
“Combine Undo?”
3 Press ENTER/YES again.
“Complete” appears for a few seconds
and the contents of the MD are restored
to the condition before the edit.
To cancel the Undo Function
Press EDIT.
bass sound
You can listen to music with stronger bass or
more powerful sound.
1 / u
–+
(P p
=+
(P p
=+
Press DBFB*.
“DBFB” appears in the display.
Press again to cancel DBFB.
*DBFB : Dynamic Bass Feedback.
+
–
–+
DBFB
46
Tip
DBFB is factory set to ON.
Page 47

Other Features
Selecting the Preset Equalizer menu
The Preset Equalizer enables you to select the
sound characteristic among 5 sound effects
according to the music you are listening to.
(P p
=+
(P p
=+
Press MUSIC MENU repeatedly.
Each time you press the button, the display
changes as follows:
n ROCK n POP n JAZZ
FLAT N DANCE N CLASSIC N
+
–
–+
MUSIC MENU
Labeling the preset station
— Station Name
You can label each preset station with up to
10 characters (Station Name). The Station
Name appears when you tune in the station.
1 / u
1
3
4
CURSOR ?
5,10
1 Press TUNER BAND repeatedly
until the band you want appears
(FM or AM).
–+
(P p
=+
(P p
=+
–+
+
–
2
6, DISPLAY
4,7
8
CANCEL/NO
Sound Adjustment/Other Features
Other Features
To cancel the Preset Equalizer
Press MUSIC MENU repeatedly until
“FLAT” appears.
Tips
• The Preset Equalizer menu is factory set to
“ROCK”.
• The Preset Equalizer effect is not recorded on an
MD or tape.
2 Press TUNING MODE repeatedly
until “PRESET” appears.
3 Press PRESET +/– repeatedly until
the preset number of the station you
want to label appears.
4 Press EDIT, then press +/–
repeatedly until “Name in ?”
appears.
LEVEL SYNC
-
DBFB
PRESET
Name in ?
continued
47
Page 48

Labeling the preset station
(continued)
5 Press ENTER/YES.
The cursor starts flashing.
LEVEL SYNC
-
Cursor
6 Press CHARACTER repeatedly
until the type of character you want
appears.
Each time you press the button, the
display changes as follow:
A (Upper case) n a (Lower case) n 0
(Numbers) n ! (Symbols)* n (Space)**
n A…
* You can use the following symbols.
!"#$%&'()∗+,–./:;<=>?@_`
** To enter a space
Go to the step 8. You cannot label a
blank space for the first letter.
7 Press +/– repeatedly until the
desired character appears.
DBFB
PRESET
1
10 Press ENTER/YES to complete the
labeling procedure.
To cancel labeling
Press EDIT.
To check the titles
Press DISPLAY.
Each time you press the button, the display
changes as follows:
The station name ˜ Frequency
To erase the name
Do steps 1 to 6 and press CANCEL/NO
repeatedly until the label disappears.
8 Press CURSOR /.
The character you selected in step 7 stops
flashing and the cursor shifts to the right.
J 1
Cursor
9 Repeat steps 6 through 8 to
complete the entire title.
If you enter an incorrect character, press
CURSOR ? or / until the character
you want to change flashes, then repeat
steps 6 through 8. To erase a character,
press CANCEL/NO while the character
is flashing.
48
LEVEL SYNC
-
DBFB
PRESET
Page 49

Using the Radio
SLEEP
Falling asleep to
Data System (RDS)
(European model only)
What is the Radio Data
System?
Radio Data System (RDS)* is a broadcasting
service that allows radio stations to send
additional information along with the regular
program signal.
Note
RDS may not work properly if the station you are
tuned to is not transmitting the RDS signal properly
or if the signal is weak.
* Not all FM stations provide RDS service, nor do
they all provide the same types of services. If you
are not familiar with the RDS system, check with
your local radio stations for details on RDS
services in your area.
Receiving RDS
broadcasts
Simply select a station from the FM
band.
When you tune in a station that provides RDS
services, the station name appears in the
display.
To check the RDS information
Each time you press DISPLAY, the display
changes as follows:
Station name
˜
Frequency
music
— Sleep Timer
You can set the system to turn off after a
certain time, so that you can fall asleep to
music. You can set the timer in 10 minutes
increments.
1 / u
–+
(P p
=+
(P p
=+
Press SLEEP repeatedly to select a
desired time.
Each time you press the button, the minute
display (the time after which the system turns
off) changes as follows:
90min n 80min n 70min
SLEEP OFF
To check the remaining time
Press SLEEP once.
To change the turn off time
Select the time you want by pressing SLEEP.
To cancel the Sleep Timer function
Press SLEEP repeatedly until “SLEEP OFF”
appears.
Tip
You can use the Sleep Timer, even when you have
not set the clock.
–+
+
–
...
10min n
Other Features
49
Page 50

Waking up to music
— Wakeup Timer
You can wake up to music at a preset time.
Make sure you have set the clock (see page 8).
1 / u
10
–+
(P p
=+
(P p
=+
CLOCK/
TIMER
SELECT
3
–+
+
–
2
4,6,7,8
CURSOR ?//
5,6,7,9
4 Press +/– repeatedly until
“DAILY TIMER ?” appears.
5 Press ENTER/YES.
The hour indication flashes.
6 Set the time to start play.
Press +/– to set the hour, then press
ENTER/YES.
The minute indication flashes.
CD
LEVEL SYNC
-
ON 8 0:0
Press +/– to set the minute, then press
ENTER/YES.
The hour indication flashes again.
7 Set the time to stop playback
following the above procedure.
CD
LEVEL SYNC
-
DAILY
DAILY
DBFB
DBFB
1 Prepare the music source you want
to play.
• CD: Insert a CD. To start from a
specific track, make a program (see
page 23).
• MD: Insert an MD. To start from a
specific track, make a program (see
page 27).
• Radio: Tune in a station (see page 9).
2 Press VOL +/– to adjust the sound
volume.
3 Press CLOCK/TIMER SET.
50
CD PLAY
8 Press +/– repeatedly until the music
source you want appears.
The indication changes as follows:
n MD PLAY ˜ CD PLAY N
nTUNER N
9 Press ENTER/YES.
The start time, followed by the stop time,
and the music source appear, then the
original display appears.
10 Press 1/u to turn off the system.
Page 51

To change the setting
Do steps 1 to 5, then press CURSOR ? or /
until the time you want to change flashes.
To check the setting / To reactivate
the timer
Press CLOCK/TIMER SELECT repeatedly
until “DAILY TIMER” appears. The start
time, followed by the stop time, and the
sound source appears, then the original
display appears.
To cancel the timer
Press CLOCK/TIMER SELECT repeatedly
until “TIMER OFF” appears.
Notes
• You cannot activate wake up timer and recording
timer at the same time.
• Do not operate the system from the time the
power turns on until the playback starts (about 20
seconds).
• If the power turns on before the preset time,
playback starts with your selected music source at
the preset time.
• If you use another component, you must set the
timer on both systems to the same time.
Timer recording radio programs
To timer record, you must first preset the
radio station (see page 9) and set the clock
(see page 8).
The MD is automatically labeled with the
Station Name, the start time and the stop time
of the recording if the station is labeled (see
page 47).
1 / u
9
–+
(P p
=+
(P p
=+
CLOCK/
TIMER
SELECT
–+
+
–
3,5,6
2
4,5,6,7
1 Tune in the preset radio station (see
page 19).
2 Press CLOCK/TIMER SET.
3 Press +/– repeatedly until
“REC TIMER ?” appears.
4 Press ENTER/YES.
The hour indication flashes.
continued
Other Features
51
Page 52

Timer recording radio programs
(continued)
5 Set the time to start recording.
Press +/– to set the hour, then press
ENTER/YES.
The minute indication flashes.
LEVEL SYNC
-
REC
ON 8 0:0
Press +/– to set the minute, then press
ENTER/YES.
The hour indication flashes again.
6 Set the time to stop recording
following the procedure in step 5.
7 Press ENTER/YES.
The start time, followed by the stop time,
preset number and the “MD” appear,
then the original display appears.
8 Insert a recordable MD.
9 Press 1/u to turn off the system.
DBFB
To change the setting
Start over from step 1.
To check the setting / To reactivate
the timer
Press CLOCK/TIMER SELECT repeatedly
until “REC TIMER” appears. The start time,
followed by the stop time, the preset number,
and the “MD” appear, then the original
display appears.
To cancel the timer
Press CLOCK/TIMER SELECT repeatedly
until “TIMER OFF” appears.
Tip
When you record from the radio, you can mark on
the MD, the start time, the stop time and the title
automatically if you have labeled the preset stations
(see page 47).
Notes
• You cannot activate wake up timer and recording
timer at the same time.
• Do not operate the system from the time the
power turns on until the recording starts (about 20
seconds).
• When you record on a blank MD, the first 15
seconds are not recorded.
• If the power is on about 20 seconds before the
preset time, the recording will not be made.
• The volume is reduced to minimum during
recording.
52
Page 53

Additional Information
Precautions
The nameplate is located on the bottom exterior.
On operating voltage
Before operating the system, check that the
operating voltage of your system is identical with
the voltage of your local power supply.
On safety
• The glass over the display window on the cover of
the CMT-MD1/MD1DX is made of tempered
glass.
Under normal conditions, this tempered glass is
more shock resistant and able to bear more weight
than ordinary glass. This glass, however, may
shatter if it receives a sharp blow or if it is
scratched.
• The system is not disconnected from the AC
power source (mains) as long as it is connected to
the wall outlet, even if the system itself has been
turned off.
• Unplug the system from the wall outlet if it is not
to be used for an extended period of time.
To disconnect the power cord, pull it out by the
plug. Never pull the cord itself.
• Should any solid object or liquid fall into the
system, unplug the system and have it checked by
qualified personnel before operating it any
further.
• AC power cord must be changed only at the
qualified service shop.
• When you connect the power cord to mains, even
through the power is off, the system begins
charging for remote and timer functions.
Therefore the surface of this unit become warm,
this is normal.
On placement
• Make sure the system fan is on during use.
Place the system in a location with adequate air
circulation, and do not place any on the system.
• Place the system in a location with adequate
ventilation to prevent heat build up.
• Do not install the system in a confined space, such
as a bookcase or built-in cabinet to prevent heat
build up.
• Do not place the system in an inclined position.
• Do not place the system in locations where it is;
– Extremely hot or cold
– Dusty or dirty
– Very humid
– Subject to vibrations
– Subject to direct sunlight.
On installing
When you move the system, remove the CD or MD.
On operation
• If the system is brought directly from a cold to a
warm location, or is placed in a very damp room,
moisture may condense on the lens inside the CD
player or the MD deck. Should this occur, the
system will not operate properly. Remove the CD
or MD and leave the system turned on for about
an hour until the moisture evaporates.
• When you move the system, take out any discs.
If you have any questions or problems concerning
your system, please consult your nearest Sony
dealer.
On the speaker system
This speaker system is not magnetically shielded
and the picture on TV sets may becomes
magnetically distorted. In such a case, turn off the
power of the TV set once, and after 15 to 30 minutes
turn it on again.
If there seems to be no improvement, locate the
speaker system further away from the TV set. Also,
be sure not to place objects in which magnets are
attached or used near the TV set, such as audio
racks, TV stands and toys. These may cause
magnetic distortion to the picture due to their
interaction with the system.
Notes on MDs
• Do not open the shutter to expose the MD. Close
the shutter immediately if the shutter opens.
• Affix the label supplied with the disc only to the
specified label indentation. Do not affix the label
around the shutter or in other locations. Note that
the shape of the indentation depends on the disc.
Label
Shutter
position
• Wipe the disc cartridge with a dry cloth to remove
dirt.
• Do not expose the MD to direct sunlight or heat
sources such as hot air ducts, nor leave it in a car
parked in direct sunlight.
Notes on CDs
• Before playing, clean the CD with a cleaning cloth.
Wipe the CD from the center out.
• Do not use a CD with tape, seals, or paste on it as
this may damage the system.
• Do not use solvents such as benzine, thinner,
commercially available cleaners, or antistatic
spray intended for vinyl LPs.
• Do not expose the CD to direct sunlight or heat
sources such as hot air ducts, nor leave it in a car
parked in direct sunlight.
Cleaning the cabinet
Use a soft cloth slightly moistened with mild
detergent solution.
Additional Information
53
Page 54

System limitations of MDs
The recording system in your MD deck has
the limitations described below.
Note, however, that these limitations are due
to the inherent nature of the MD recording
system itself, not to mechanical causes.
“Disc Full” lights up before the
MD has reached the maximum
recording time (60 or 74 minutes)
When 255 tracks have been recorded on the MD,
“Disc Full” lights up regardless of the total recorded
time. More than 255 tracks cannot be recorded on
the MD. To continue recording, erase unnecessary
tracks or use another recordable MD.
“Disc Full” lights up before the
maximum number of tracks (255)
is reached
Fluctuations in emphasis within tracks are
sometimes interpreted as track intervals, increasing
the track count and causing “Disc Full” to light up.
The remaining recording time
does not increase even after
erasing numerous short tracks
Tracks shorter than 12 seconds are not counted, so
erasing them may not increase the recording time.
Some tracks cannot be combined
with others
Track combination may become impossible when
tracks are shorter than 12 seconds.
The total recorded time and the
remaining time on the MD do not
add up to the maximum recording
time (60 or 74 minutes)
Recording is done in minimum units of 2 seconds
each, no matter how short the material. The
recorded contents may be shorter than the
maximum recording capacity. Disc space may also
be reduced by scratches.
The sound may drop out while
searching the edited tracks
Tracks created through editing may exhibit sound
dropout during searching because high-speed
playback requires time to search for the position on
the disc when the tracks are not in order.
Track numbers cannot be marked
When “LEVEL-SYNC” (page 35) lights up in the
display window during analog recording, the track
numbers may not be marked at the beginning of the
track:
• if the input signal is below a certain fixed level for
less than two seconds between tracks.
• if the input signal is below a certain fixed level for
more than two seconds in the middle of the track.
Guide to the Serial Copy
Management System
Digital audio components, such as CDs, MDs, and
DATs let you copy music easily with high quality by
processing music as a digital signal.
To protect the copyrighted music programs, this
system uses the Serial Copy Management System
that allows you to make only a single copy of a
digitally recorded source through digital-to-digital
connections.
You can make only a first generation copy*
through a digital-to-digital connection.
For example:
1 You can make a copy of a commercially available
digital sound program (for example, a CD or MD),
but you cannot make a second copy from the firstgeneration copy.
2 You can make a copy of a digital signal from a
digitally recorded analog sound program (for
example, an analog record or a music cassette
tape) or from a digital satellite broadcast program,
but you cannot make a second copy.
*A first-generation copy means a digital recording
of a digital signal made on digital audio
equipment. For example, if you record from this
system’s CD to the MD, you make a firstgeneration copy.
Note
This copy management system doesn’t apply when
you make a recording through analog-to-analog
connections.
54
Page 55

Self-diagnosis Display
This system has the Self-diagnosis display
function to let you know if there is a system
malfunction. The display shows a code made
up of three letters and a message alternately
to show you the problem. To solve the
problem refer to the following list. If any
problem persists, consult your nearest Sony
dealer.
C1
1
MD Protected
C11/MD Protected
The MD is protected against erasure.
mRemove the MD and slide the tab to close
the slot (page 30).
C13/REC Error
Recording is not possible.
mMove the system to a stable place and
start recording over from the beginning.
The MD is dirty or is scratched or the MD
does not meet the standards.
mChange the MD with another one and
start recording over from the beginning.
C13/Disc Error
The system cannot read the disc
information correctly.
mEject the MD once, then insert it again.
C14/Disc Error
The system cannot read the disc
information correctly.
mChange the MD with another one.
mErase all the recorded contents of the MD
using the Erase function on page 41.
Troubleshooting
If you have any problem using this system,
use the following checklist.
First, check that the power cord is connected
firmly and that the speakers are connected
correctly and firmly.
Should any problem persist, consult your
nearest Sony dealer.
General
There is no sound.
•Press VOLUME +.
•Make sure the headphones are not
connected.
•Check the speaker connections.
There is severe hum or noise.
•A TV or VCR is placed too close to the
system. Move the system away from the
TV or VCR.
“0:00” flashes in the display.
•A power interruption occurred. Set the
clock and timer settings again.
The timer does not function.
•Set the clock correctly.
The remote does not function.
•Make sure to pull out the insulating sheet
from the remote.
•Make sure that the battery is inserted
correctly (with the + side facing up).
•There is an obstacle between the remote
and the system.
•The remote is not pointing in the
direction of the system’s sensor.
•The battery has run down. Replace the
battery.
•Do not place the system in locations
where it is near an electric inverter
system.
The display shows a code made up of
three letters and a message
•This system has the Self-Diagnostic
function (see “Self-diagnosis Display” on
this page).
Additional Information
continued
55
Page 56

Troubleshooting (continued)
Speakers
Sound comes from one channel, or the left
and right volume are unbalanced.
•Check the speaker connections and
speaker placement.
CD Player
The CD will not play.
•The CD is dirty. Clean the CD with a
cleaning cloth.
•The face of the CD is scratched. Exchange
the CD.
•The CD is inserted label side down.
•Moisture condensation has built up.
Remove the CD and leave the system
turned on for about 2 hours until the
moisture evaporates.
Play does not start from the first track.
•The CD is in program or shuffle mode.
Press PLAY MODE repeatedly until
“SHUFFLE” and “PGM” disappear.
“– OVER –” is displayed.
•You have reached the end of the CD.
Press CD = to return to the beginning
of the CD.
MD Deck
The controls do not work.
•The MD is dirty or scratched.
(“Disc Error” appears.) Replace the MD
with a new one.
The MD will not play.
•Moisture condensation has built up.
Remove the MD and leave the system
turned on for several hours until the
moisture evaporates.
•Insert the MD in the direction of the
arrow.
•Nothing is recorded on the MD.
Recording is not possible.
•The MD is protected against erasure.
(“MD Protected” appears.) Slide the tab
to close the slot (see page 30).
•Connect the sound source properly.
•A pre-recorded MD is in the deck.
Replace the disc with a recordable MD.
•Replace the disc with a recordable MD
that has sufficient time remaining or erase
unnecessary tracks.
•The power cord was unplugged or a
power interruption occurred during
recording. Start recording over from the
beginning.
“MD End” is displayed.
•You have reached the end of the MD.
Press MD = to return to the beginning
of the MD.
“Level Over” appears during analog
recording.
A strong signal was input during recording
in the TAPE function. When the sound is
distorted, reduce the recording level, then
re-record. If distortion may occurs:
1 Stop play or turn off the power of the
other component connected to the TAPE
input.
“Level Over” disappear.
2 Press EDIT on the remote during
recording or pause.
3Press +/– on the remote.
“Attenuate ?” appears.
4Press ENTER/YES on the remote.
“Attenuate ON?” appears.
5Press ENTER/YES on the remote again.
“ATT” appears.
6Turn on the power of the other
component connected to the TAPE input
and continue recording or start recording
over from the beginning.
To cancel the setting, select
“AttenuateOFF?” in step 4.
56
Page 57

Tuner
Severe hum or noise (“TUNED” or
“STEREO” flashes in the display.)
•Adjust the antenna.
•The signal strength is too weak. Connect
an external antenna.
•Make sure the antenna is connected
properly.
•You cannot fold or roll up the antenna.
•The two wires comprising the FM
antenna have been pulled further apart
since the system was first purchased.
Repair or replace with a new one.
•The AM antenna wire is detached from
the stand.
A stereo FM program is not received in
stereo.
•Press STEREO/MONO so “STEREO”
appears.
If other problems not described
above occur, reset the system as
follows:
1 Unplug the power cord.
2 Hold down 1/u, then plug the power cord
into the wall outlet again.
The system is reset to the factory settings. All
the settings you made, such as the preset
stations, clock, and timer are cleared. You
should set them again.
Messages
One of the following messages may appear or
flash in the display window during
operation.
MD
Auto cut
The MD is pausing the recording because
silence continued for 30 seconds or more
during digital recording.
Blank Disc
The inserted recordable MD is new or all
tracks on the MD have been erased.
Cannot Copy
You cannot make a digital recording (see
“Guide to the Serial Copy Management
System” on page 54).
Cannot EDIT
You tried to edit in Program or Shuffle Play
mode.
Cannot REC
A pre-recorded MD is in the deck.
Disc Error
The inserted MD is damaged or does not
contain a TOC.
Impossible
You tried to combine from the first track on
an MD, which is not possible. You tried to
divide the first or end of the track.
Level Over
A strong signal was input during analog
recording in the TAPE function. Reduce the
recording level following the procedure
(see “Troubleshooting” on page 56).
MD Disc Full
There is no time remaining on the disc (see
“System limitations of MDs” on page 54).
MD NO DISC
There is no MD in the deck.
MD Protected
The inserted MD is protected against
erasure.
Name Full
There is no more space to store track or
disc titles.
New
The MD stands by for recording on a brand
new MD or from the last recorded portion.
No Name
The inserted MD has a track numbers but
no disc titles.
No Track
The inserted MD has a disc title but no
tracks.
MD End
You have reached the end of the last track
during high-speed search.
Push STOP !
You pressed PLAY MODE during play.
continued
Additional Information
57
Page 58

Troubleshooting (continued)
Smart Space
The signal was input again after silence
continued for 30 seconds or less during
digital recording.
TOC Reading
The system is reading the TOC information
of the MD.
TOC Writing
The system is writing the information of
recorded or edited contents.
Track End
You have reached the end of the MD while
adjusting the division point during Divide
Function.
TUNER
Name Full
The system has stored the maximum
number of characters to be input.
CD
Name Full
There is no more space to store track or
disc titles.
– OVER –
You have reached the end of the CD while
pressing CD + during pause.
Specifications
Amplifier section
AUDIO POWER SPECIFICATIONS:
(USA models only)
POWER OUTPUT AND TOTAL
HARMONIC DISTORTION:
with 4 ohm loads both channels driven, from
90-15,000 Hz; rates 15 watts per channel
minimum RMS power, with no more than
0.9% total harmonic distortion from
250 milliwatts to rated output.
Canadian model:
Continuous RMS power output
European model:
DIN power output (Rated)
Continuous RMS power output (Reference)
Music power output (Reference)
Other models:
Continuous RMS power output (Reference)
Peak music power output 280 watts
Inputs TAPE IN (phono jacks):
Outputs TAPE OUT (phono jacks):
PHONES (Stereo minijack):
SPEAKER: accepts impedance of 4 to
17 + 17 watts
(4 ohms at 1 kHz, 10%
THD, 120 V) (Reference)
15 + 15 watts
(4 ohms at 1 kHz, DIN,
230 V)
17 + 17 watts
(4 ohms at 1 kHz,
10% THD, 230 V)
22 + 22 watts
15 + 15 watts
(4 ohms at 1 kHz,
10% THD, 240 V)
voltage 250 mV/125 mV,
impedance 47 kilohms
voltage 250 mV
impedance 1 kilohms
accepts headphones of 8
ohms or more.
16 ohms.
58
Page 59

CD player section
System Compact disc and digital
Laser Semiconductor laser
Laser output Max. 44.6 µW*
Frequency response 20 Hz - 20 kHz
audio system
(λ=780 nm)
Emission duration:
continuous
*This output is the value
measured at a distance of
200 mm from the
objective lens surface on
the Optical Pick-up Block
with a 7 mm aperture.
MD deck section
System MiniDisc digital audio
Laser Semiconductor laser
Laser output Max. 44.6 µW*
Recording time 74 minutes max. (using
Sampling frequency 44.1 kHz
Frequency response 20 Hz to 20 kHz
system
(λ=780 nm)
Emission duration:
continuous
*This output is the value
measured at a distance of
200 mm from the
objective lens surface on
the Optical Pick-up Block
with a 7 mm aperture.
MDW-74)
Tuner section
FM stereo, FM/AM superheterodyne tuner
FM tuner section
Tuning range
Tourist model: 76.0 - 108.0 MHz
Other models: 87.5 - 108.0 MHz
(50 kHz step)
(50 kHz step)
Antenna FM lead antenna
Antenna terminals 75 ohms unbalanced
Intermediate frequency 10.7 MHz
AM tuner section
Tuning range
European model:
AM: 531 - 1,602 kHz
Other models:
AM: 531 - 1,602 kHz
Antenna AM loop antenna
Intermediate frequency 450 kHz
(with the interval set at
9 kHz)
(with the interval set at
9 kHz)
530 - 1,710 kHz
(with the interval set at
10 kHz)
External antenna
terminals
Speaker
SS-CMD1 for CMT-MD1
Speaker system 1-way, bass-reflex type
Speaker units 10 cm (4 in) dia, cone type
Dimensions Approx. 215 × 215 ×
woofer
1
160 mm (8
3
6
/2 × 8 1/2 ×
/8 in) (w/h/d) incl.
projecting parts and
Mass Approx. 1.6 kg ( 3 lb
controls
8 oz.) net per speaker
SS-MD1DX for CMT-MD1DX
Speaker system 2-way, bass-reflex type
Speaker units 10 cm (4 in) dia, woofer
2.5 cm (1 in) dia, dome
Rated impedance 4 ohms
Dimensions Approx. 140 × 215 ×
type tweeter
225 mm (5
7
8
/8 in) (w/h/d)
5
/8 × 8 1/2 ×
Mass Approx. 2.4 kg ( 5 lb
5 oz.) net per speaker
General
Power requirements
North American model: 120 V AC, 60 Hz
European model: 230 V AC, 50/60 Hz
Other models: 110 - 120 V or 220 - 240 V
Power consumption
North American and European models:
Other models: 80 watts
Dimensions Approx. 130 × 215 ×
Mass Approx. 4.6 kg (10 lb
Supplied accessories Remote RM-SMD1 (1)
Design and specifications are subject to change
without notice.
AC, 50/60 Hz
70 watts
1
245 mm (5
3
9
/8 × 8 1/2 ×
/4 in) (w/h/d) incl.
projecting parts and
controls
2 oz.)
AM loop antenna (1)
FM lead antenna (1)
Speaker grille (CMT-MD1
only) (4)
Screw (CMT-MD1 only,
for attaching the
speakers) (4)
Speaker cord
(CMT-MD1DX only) (2)
Additional Information
59
Page 60

Index
A
Adjusting
the sound 46
the volume 14, 17
Antenna 5, 12
After
editing 38
recording 30
AMS 14, 17
Analog recording 30
Automatic Source Selection
15, 18, 19
Auto cut 36
B
Battery 6, 7
Before
editing 38
recording 30
C
CD player 14, 22
CD-MD Synchro Recording
15, 31
Clock setting 8
Combine Function 44
Connecting. See Hooking up
D
DBFB 46
Digital recording 30
Display 24, 29
Divide Function 43
E, F, G
Erase Function 40
Erasing
a portion of a track 42
a single track 40
all tracks on an MD 41
H, I, J, K
Hooking up
optional components 11
the antennas 5, 12
the power cord 6
the speaker 4
L
Labeling
a CD 25
an MD 39
a preset station 47
Level Sync Recording 35
M
MD deck 17, 26, 30, 38
MD messages 57
Move function 42
N
Name Function 39
Normal Play 14
O
One Touch Play 15, 18, 19
P, Q
Playing
a CD 14
an MD 17
a preset radio station 18
tracks in random order
(Shuffle Play) 22, 27
tracks in the desired
order (Program Play)
23, 27
tracks repeatedly
(Repeat Play) 22, 26
Preset equalizer menu 47
Presetting radio stations 9
Preset tuning 18
Program Play 23, 27
Protecting recordings 30
R
Radio stations
presetting 9
tuning in 18
RDS 49
Recording
a CD 15, 31
a radio program 20
on an MD 30
timer recording 51
Repeat Play 22, 26
Resetting the system 57
S
Saving recordings 30
Self-diagnosis display 55
Serial copy management
system 54
Setting the time 8
Shuffle Play 22, 27
Sleep Timer 49
Smart space 36
Sound adjustment 46
Speakers 4, 6
Station Name 47
System limitations 54
T
Time Machine Recording 33
Timer
falling asleep to music
49
timer recording 51
waking up to music 50
Track marking 36
Track numbers 35
Troubleshooting 55
Tuner 9, 18, 49
U, V
Undo 45
W, X, Y, Z
Wake-up timer 50
60
Page 61

Additional Information
61
Page 62

AVERTISSEMENT
Pour éviter les risques d’incendie ou
d’électrocution, n’exposez pas l’appareil à
la pluie ou l’humidité.
Pour éviter les électrocutions, n’ouvrez pas
l’habillage. Les réparations et l’entretien ne doivent
être effectués que par du personnel qualifié.
N’installez pas l’appareil dans un espace confiné
comme dans une bibliothèque ou un meuble
encastré.
Dolby Laboratories Licensing Corporation autorise
une license d’exploitation de ses brevets d’invention
américains et étrangers.
Le composant laser de cet appareil peut émettre des
radiations au-delà de la limite de la classe 1.
Cet appareil est classifié
comme produit LASER de
CLASSE 1. La marque
CLASS 1 LASER
PRODUCT se trouve à
l’extérieur sur le dessous.
Ce message est placé à l’intérieur de l’appareil.
NOTICE POUR LES CLIENTS AU CANADA
ATTENTION
POUR PREVENIR LES CHOCS ELECTRIQUES, NE
PAS UTILISER CETTE FICHE POLARISEE AVEC
UN PROLONGATEUR, UNE PRISE DE COURANT
OU UNE AUTRE SORTIE DE COURANT, SAUF SI
LES LAMES PEUVENT ETRE INSEREES A FOND
SANS EN LAISSER AUCUNE PARTIE A
DECOUVERT.
LE REVENDEUR NE PEUT EN AUCUN
CAS ÊTRE TENU RESPONSABLE DE
DOMMAGES DIRECTS, INDIRECTS OU
ACCIDENTELS, QUELLE QU’EN SOIT
LA NATURE, OU DE PERTES OU
DEPENSES RESULTANT D’UN
PRODUIT DEFECTUEUX OU DE
L’UTILISATION D’UN PRODUIT.
2
Page 63

Table des matières
Pour commencer
Etape 1: Raccordement du système .... 4
Etape 2: Réglage de l’heure.................. 8
Etape 3: Préréglage des stations .......... 9
Branchement de composants A/V en
option et d’antenne
extérieure ........................................ 11
Les opérations de base
Lecture d’un CD ................................... 14
Enregistrement d’un CD sur un
MD ................................................... 15
Lecture d’un MD .................................. 17
Ecoute d’un programme radio ........... 18
Enregistrement d’un programme
radio................................................. 20
Le lecteur de CD
Lecture répétée de certaines plages d’un
CD .................................................... 22
Lecture des plages d’un CD dans le
désordre .......................................... 22
Programmation des plages du CD .... 23
L’affichage du CD ................................ 24
Marquage d’un CD .............................. 25
La platine MD
– Lecture
Lecture répétée de certaines plages
d’un MD .......................................... 26
Lecture des plages du MD dans le
désordre .......................................... 27
Programmation des plages d’un
MD ................................................... 27
Utilisation de l’affichage du MD........ 29
– Enregistrement
Avant de commencer un
enregistrement ............................... 30
Enregistrement de vos plages CD
préférées sur un MD ..................... 31
Enregistrement manuel sur un MD... 32
Début d’un enregistrement avec 6
secondes de données audio.......... 33
Numérotation des plages .................... 35
Séparation des plages par un espace
de 3 secondes.................................. 36
– Montage
Avant de commencer le montage ...... 38
Marquage d’un MD ............................. 39
Effacement d’un enregistrement ........ 40
Déplacement d’une plage
enregistrée....................................... 42
Division d’une plage enregistrée ....... 43
Combinaison de plages enregistrées . 44
Annulation du dernier montage ........ 45
Réglage du son
Renforcement des graves .................... 46
Sélection du menu Preset Equalizer .. 47
Autres caractéristiques
Marquage des stations préréglées...... 47
Le système RDS (Radio Data System)
(uniquement sur le modèle
Européen)........................................ 49
Pour s’endormir en musique .............. 49
Pour se réveiller en musique .............. 50
Enregistrement programmé
d’émissions radio........................... 51
Informations supplémentaires
Précautions ............................................ 53
Limites du système MD ...................... 54
Utilisation de l’afficha d’auto-
diagnostic ........................................ 55
Dépistage des pannes .......................... 55
Caractéristiques .................................... 58
Index................................ Dos du manuel
FR
3
Page 64

R
–
+
L
Pour commencer
Etape 1: Raccordement du système
Suivez la procédure de 1 à 8 pour raccorder votre système à l’aide des câbles et accessoires
fournis.
Couvercle arrière
Haut-parleur droit
15
1 Retirez le couvercle arrière.
Antenne FM
3
7
6
Prise de type A
Blanc/
uni/
rouge
(‘)
Boucle d’antenne AM
Haut-parleur gauche
2
4
Appuyez sur les
ergots pour retirer
le couvercle.
2 Raccordez les haut-parleurs.
1 Raccordez les câbles de haut-parleurs
sur les bornes SPEAKER comme
indiqué ci-dessous.
4
Noir/
rayé/
noir (’)
Prise de type B
Noir (’)
Remarque
Maintenez les câbles de haut-parleurs à
distance des antennes pour empêcher les
bruits.
Insérez cette
partie
Insérez cette
partie
Blanc (‘)
Page 65

2 (CMT-MD1 seulement)
Serrez les quatre vis des deux côtés du
système.
3 (CMT-MD1 seulement)
Fixez les haut-parleurs.
Mettez-vous face à l’appareil pour
fixer le haut-parleur raccordé aux
prises SPEAKER R sur le côté droit de
l’appareil et le haut-parleur raccordé
aux prises SPEAKER L sur le côté
gauche de l’appareil.
Ensuite, appuyez sur les haut-parleurs
pour vous assurer qu’ils sont
fermement fixés au système.
3 Raccordez les antennes FM/AM.
Installez l’antenne AM, puis raccordezla.
Prise de type A
Prise de type B
FM
75Ω
COAXIAL
LOOP
ANTENNA
y
AM
Déployez le fil
d’antenne FM à
l’horizontale
Boucle
d’antenne AM
4 Sur les modèles à sélecteur de
tension, réglez VOLTAGE
SELECTOR sur la position
correspondant à la tension de votre
secteur.
110-120V
220-240V
VOLTAGE SELECTOR
5 Vérifiez que les cordons sont
correctement et fermement
connectés, puis réinstallez le
couvercle arrière.
Passez les fils par le trou à la base du
couvercle arrière.
Pour commencer
FM
75Ω
COAXIAL
LOOP
ANTENNA
y
AM
Déployez le fil
d’antenne FM à
l’horizontale
Boucle
d’antenne AM
suite
5
Page 66

Etape 1: Raccordement du
système (suite)
6 Retournez l’appareil en maintenant
fermement la porte du logement à
disque et insérez le cordon du hautparleur dans la cannelure à la base
de l’appareil.
7 Raccordez le cordon d’alimentation
à une prise murale.
Si la fiche du cordon d’alimentation ne
s’adapte pas dans votre prise murale,
déposez l’adaptateur fourni de la fiche
(seulement pour les modèles pourvus
d’un adaptateur).
Remarque sur le verre au-dessus de
l’affichage
Le verre au-dessus de l’affichage sur le couvercle
du CMT-MD1/MD1DX est en verre trempé.
Dans des conditions normales, ce verre trempé
résiste mieux aux chocs et peut supporter un
poids supérieur au verre ordinaire. Mais il peut
voler en éclats s’il reçoit un coup violent ou s’il
est rayé.
Pour détacher les haut-parleurs
(CMT-MD1 seulement)
1 Glissez les haut-parleurs dans le sens
contraire des flèches de l’illustration de
“Fixez les haut-parleurs” (voir l’étape 2 -3
à la page 5).
2 Après le retrait des haut-parleurs, placez
les cordons de haut parleur dans les
cannelures à la base des haut-parleurs.
Sinon, ils pourront être endommagés.
Cannelure
8 Pour utiliser la télécommande,
retirez la feuille isolante pour
permettre le passage de l’électricité
de la pile.
La télécommande contient déjà une pile.
Remarque (CMT-MD1 seulement)
N’essayez pas de soulever le système en saisissant
les haut-parleurs. Il pourrait se détacher et tomber.
Pour déplacer le système, détachez d’abord les hautparleurs et portez-les séparément.
A propos de la mise en place
Le système est équipé d’un ventilateur de
refroidissement sur le panneau arrière. Ne bloquez
pas les fentes d’aération arrière et latérale. Ménagez
un espace d’au moins 10 cm (4 po) entre l’arrière du
système et le mur.
6
Conseil (CMT-MD1 seulement)
Quand vous utilisez cet appareil avec les hautparleurs détachés, il est possible de retirer les quatre
vis sur les deux côtés de l’appareil. Dans ce cas,
rangez-les pour pouvoir les réutiliser dans le futur.
Page 67

Pour remplacer le grille d’un hautparleur (CMT-MD1 seulement)
Pour retirer la grille d’un haut-parleur, saisissez un
des coins et soulevez la grille pour l’enlever. Vous
pourrez alors la remplacer par une des grilles de
couleur différente fournies.
Vérifier lesquels des côtés de la grille sont arrondis,
puis fixez-la avec les côtés arrondis dirigés vers le
haut et le bas.
Remplacement de la pile de la
télécommande
1 Faites glisser la support de la pile
pour le retirer.
Pour éviter une fuite de la pile
Si la télécommande doit rester inutilisée pendant
longtemps, retirez la pile pour éviter les dommages
qui pourraient survenir à cause de la corrosion due
à la fuite de la pile.
Remarques sur la pile au lithium
• Conserver la pile au lithium hors de portée des
enfants.
En cas d’avalement, consultez immédiatement un
médecin.
• Essuyez la pile avec un chiffon sec pour assurer un
bon contact.
• Respectez bien les polarités à l’insertion de la pile.
• Ne saisissez pas la pile avec une pince métallique,
sinon un court-circuit pourrait survenir.
ATTENTION
Utilisée de façon incorrecte, la pile peut exploser.
Ne pas la recharger, la démonter ni la jeter dans
un feu.
2 Insérez une nouvelle pile au lithium
CR2025, en dirigeant la face + vers
le haut.
une pile au lithium
CR2025
3 Réinsérez le support de la pile dans
la télécommande.
ATTENTION
Il y a risque d’explosion si la pile est remplacée de
manière incorrecte.
Remplacez-la seulement par une pile de type
identique ou équivalent recommandée par le
fabricant. Jetez les piles usées conformément aux
instructions du fabricant.
Vie de service de la pile
Vous pouvez espérer que la télécommande
fonctionnera environ six mois (avec une pile au
lithium CR2025 Sony) avant l’épuisement de la pile.
Remplacez la pile par une neuve quand elle ne
permet plus le fonctionnement de la télécommande.
Pour commencer
7
Page 68

Etape 2: Réglage de l’heure
Il faut régler l’heure avant de pouvoir utiliser
les fonctions de l’horloge.
L’horloge fonctionne en cycles de 24 heures
pour le modèle européen et de 12 heures pour
les autres modèles.
Des explications données le sont sur le
modèle Européen.
1 / u
–+
(P p
=+
(P p
=+
CURSOR ?
–+
+
–
2,4
3
1 Appuyez sur CLOCK/TIMER SET
alors que l’appareil est hors tension.
L’horloge apparaît et l’indication
d’heure clignote.
2 Appuyez sur +/– pour régler
l’heure.
:000
3 Appuyez sur ENTER/YES ou
CURSOR /.
L’indication des minutes clignote.
:1001
4 Appuyez sur +/– pour régler les
minutes.
5 Appuyez sur ENTER/YES.
L’horloge commence à tourner.
1
3,5
En cas d’erreur
Appuyez sur CURSOR ? ou / plusieurs
fois de telle sorte que le réglage erroné
clignote, et réglez-le une fois de plus.
Pour changer l’heure préréglée
L’heure préréglée peut être changée lorsque
l’appareil est sous tension.
1 Appuyez sur CLOCK/TIMER SET.
2 Appuyez sur +/– plusieurs fois jusqu’à ce
que “CLOCK SET ?” apparaisse.
3 Appuyez sur ENTER/YES.
4 Répétez les étapes 2 à 5.
Conseils
• L’horloge intégrée donne l’heure sur l’affichage
lorsque l’appareil est éteint.
• Le point supérieur clignote pendant la première
moitié d’une minute (0 o 29 secondes), et le point
inférieur clignote pendant la deuxième moitié
d’une minute (30 à 59 secondes).
8
Page 69

Etape 3: Préréglage des stations
Le nombre de stations qu’il est possible de
régler est de 20 en FM et de 10 en AM.
FUNCTION
Pour se brancher sur la
station voulue
1 Appuyez plusieurs fois sur
TUNER/BAND jusqu’à ce que la
bande voulue apparaisse sur
l’affichage.
Appuyez sur TUNER/BAND pour
mettre l’appareil sous tension.
Chaque fois que vous appuyez sur la
touche, la bande change, comme suit:
FM ˜ AM
1/u
1 3
(P p
=+
(P p
=+
4
(P
p
= 0
) +
–
+
–+
–+
(P p
1 / u
+
–
g
+
–
6
2
STEREO/MONO
4,6
2 Appuyez plusieurs fois sur
TUNING MODE sur la
télécommande jusqu’à ce que
“AUTO” apparaisse.
LEVEL SYNC
-
AUTO
DBFB
.75HM8FM z
3 Appuyez sur TUNING +/–.
L’indication de fréquence change et le
balayage s’arrête lorsque le système s’est
accordé sur une station. Les messages
“TUNED” et “STEREO” (pour un
programme stéréo) apparaissent. Pour
arrêter le balayage, appuyez sur
TUNING MODE sur la télécommande.
Préréglage des stations
4 Appuyez sur EDIT, puis plusieurs
fois sur +/– sur la télécommande
jusqu’à ce que “Frq-Memory ?”
apparaisse.
LEVEL SYNC
-
TUNED AUTO
DBFB
Pour commencer
5,7
M-eomqFrry?
suite
9
Page 70

Etape 3: Préréglage des stations
(suite)
5 Appuyez sur ENTER/YES sur la
télécommande.
6 Appuyez sur +/– sur la
télécomande pour sélectionner le
numéro de présélection voulu.
LEVEL SYNC
-
TUNED
DBFB
.75HM8Mz1F
Le numéro de présélection
7 Appuyez sur ENTER/YES sur la
télécommande.
La station est mise en mémoire.
8 Répétez les étapes 1 à 7 pour
prérégler d’autres stations.
Pour s’accorder manuellement sur
une station
Appuyez plusieurs fois sur TUNING MODE
sur la télécommande jusqu’à ce que
“MANUAL” apparaisse dans l’étape 2, puis
sur la touche TUNING +/– pour vous
accorder sur la station. Continuez ensuite à
partir de l’étape 4.
Changement du numéro de la
présélection
Recommencez une fois de plus à partir de
l’étape 1.
Conseils
• Les stations préréglées restent mémorisées
pendant un jour si vous débranchez le cordon
d’alimentation ou si une panne de courant
survient.
• Il est possible de donner un nom aux stations
préréglées (voir page 47).
• Pour améliorer la réception d’émissions,
réorientez les antennes fournies ou connectez
l’antenne externe en option.
• Si un programme FM est bruyant, appuyez sur
STEREO/MONO sur la télécommande jusqu’à ce
que “MONO” apparaisse. Vous n’aurez plus
l’effet stéréo, mais la réception sera meilleure.
Appuyez sur la touche une fois de plus pour
retrouver l’effet stéréo.
Pour modifier l’intervalle d’accord
AM (sauf sur le modèle Européen)
L’intervalle d’accord AM est réglé en usine à
9 kHz (10 kHz dans certaines régions). Pour
modifier l’intervalle d’accord AM, accordezvous d’abord sur une station AM quelconque,
et éteignez ensuite l’appareil. Rallumez
l’appareil en maintenant enfoncée la touche
FUNCTION. Lorsque vous modifiez
l’intervalle, vous effacez toutes les stations
AM préréglées. Pour modifier l’intervalle,
recommencez les mêmes opérations.
10
Page 71

Branchement de
composants A/V en
option et d’antenne
extérieures
Vous pouvez étendre votre système en y
raccordant des composants en option.
Consultez le mode l’emploi fourni avec
chaque composant pour les détais.
Raccordement de
composants audio
Raccordement d’une platine MD
pour l’enregistrement analogique
Faites bien coïncider les couleurs des prises et
des connecteurs. Pour écouter le son de la
platine MD raccordée, appuyez de manière
répétée sur FUNCTION jusqu’à l’apparition
de “TAPE”.
Raccordement d’une platine à
cassette
Faites bien coïncider les couleurs des prises et
des connecteurs. Pour écouter le son de la
platine à cassette raccordée, appuyez de
manière répétée sur FUNCTION jusqu’à
l’apparition de “TAPE”.
Vers l’entrée audio de
la platine à cassette
Vers la sortie audio de
la platine à cassette
Pour commencer
Vers l’entrée audio
de la platine MD
Vers la sortie audio
de la platine MD
Pour écouter des composants
analogiques
Si le son provenant d’un appareil raccordé
comporte des distorsions, réduisez le niveau
d’entrée.
1 Appuyez plusieurs fois sur FUNCTION
jusqu’à ce que “TAPE” apparaisse.
2 Mettez le système hors tension en
appuyant sur 1/u.
3 Tout en maintenant FUNCTION enfoncé,
appuyez à nouveau sur 1/u.
“Attenuate ON” apparaît sur l’affichage et
“ATT” s’allume.
LEVEL SYNC
-
ATT
DBFB
At nut ONeate
Pour restaurer le niveau original, répétez les
étapes 1, 2 et 3.
suite
11
Page 72

Branchement de composants A/V
en option et d’antenne extérieures
(suite)
Raccordement d’un magnétoscope
Faites bien coïncider les couleurs des prises et
des connecteurs. Pour écouter le son du
magnétoscope raccordé, appuyez de manière
répétée sur FUNCTION jusqu’à l’apparition
de “TAPE”.
Vers l’entrée audio du
magnétoscope
Raccordement
d’antennes extérieures
Raccordez une antenne extérieure pour
améliorer la réception.
Antenne FM
Raccordez une antenne extérieure FM en
option. Une antenne TV peut en tenir lieu.
Prise de type A
SIGNAL
Connecteur à douille
standard IEC (non fourni)
FM
75Ω
L
IA
X
A
O
C
P
O
O
L
A
N
N
E
T
N
A
y
AM
Fil de masse
(non fourni)
Prise de type B
y
GND
D
N
L G
A
N
IG
S
Raccordement des écouteurs
Branchez les écouteurs dans la prise
PHONES.
g
p
(P p
(P
12
1/u
Prise PHONES
= 0
) +
–
+
+
–
6
Connecteur à douille
standard IEC (non fourni)
FM
75Ω
L
IA
AX
O
C
P
O
LO
A
N
TEN
N
A
y
AM
Fil de masse
(non fourni)
SIGNAL
y
GND
D
N
L G
A
N
SIG
Page 73

Antenne AM
Raccordez un fil isolé de 6 à 15 mètres (20 à 50
pieds) de long à la borne de l’antenne AM. Ne
débranchez pas l’antenne cadre AM fournie.
Prise de type A
FM
Ω
75
COAXIAL
LOOP
ANTENNA
y
AM
Fil isolé (non fourni)
Prise de type B
FM
Ω
75
COAXIAL
LOOP
ANTENNA
y
AM
Fil isolé (non fourni)
Important
Si vous raccordez une antenne extérieure,
raccordez un fil de masse à la borne y, sans
oublier de visser la borne. Pour éviter une
explosion de gaz, ne raccordez pas le fil de
masse à une conduite de gaz.
Pour commencer
13
Page 74

Les opérations de base
Lecture d’un CD
Pour allumer l’appareil, appuyez sur 1/u.
1/u
3 1,2
CD p
(P
1/u
p
= 0
) +
–
+
=0/)+
(P p
6
g
+
–
6
VOLUME +/–CD/MD
1 Appuyez sur CD 6 (ou OPEN/
CLOSE CD sur la Télécommande)
pour ouvrir le logement à disque et
placez un CD sur le plateau.
Etiquette
6
vers le
haut.
2 Appuyez sur CD 6 (ou OPEN/
CLOSE CD sur la Télécommande)
pour fermer le plateau.
3 Appuyez sur CD ^ (ou CD ( sur
la télécommande).
La lecture commence.
Le témoin CD ^ s’allume en vert.
CD
TRACK
LEVEL SYNC
-
DBFB
10mD5sC 3
14
OPEN/
CLOSE
CD
CD (
CD P
–+
(P p
=+
(P p
=+
–+
1 / u
+
–
1/u
CD p
VOL +/–
CD =/+
Numéro de la piste
Pour
Arrêter la
lecture
Interrompre
momentanément
Sélectionner
une plage
Trouver un
point sur une
plage
Enlever un CD
Régler le
volume
Durée
Faites comme suit
Appuyez sur CD p.
Appuyez sur CD ^ (ou CD P sur
la télécommande). Le témoin CD
^ s’allume en orange. Appuyez
sur la touche une fois de plus pour
reprendre la lecture.
Appuyez sur CD/MD =0 (ou
CD = sur la télécommande) ou
CD/MD )+ (ou CD + sur la
télécommande) plusieurs fois
jusqu’à ce que vous trouviez la plage
voulue.
Appuyez sur CD/MD =0 ou
)+ et maintenez-la enfoncée
pendant la lecture, pour la relâcher
au point voulu. “– OVER –”
apparaît lorsque le CD est terminé.
Appuyez sur CD 6 (ou OPEN/
CLOSE CD sur la Télécommande)
pour ouvrir le logement.
Appuyez sur VOLUME +/– (ou sur
VOL +/– sur la télécommande).
Page 75

Conseils
• Pour commencer la lecture à partir de la piste
voulue, voir l’étape 3.
1 Appuyez sur CD/MD =0 ou )+
plusieurs fois jusqu’à ce que vous trouviez la
plage voulue.
2 Appuyez sur CD ^.
• Si vous appuyez sur CD ^ (ou CD ( sur la
télécommande) lorsque l’appareil est éteint, il
s’allume automatiquement et commence à lire le
CD s’il y a un CD sur le plateau (Lecture
automatique - One Touch Play).
• Il est possible de se brancher sur le lecteur de CD à
partir d’une autre source, et de lancer la lecture du
CD en appuyant sur la touche CD ^ (ou
CD ( sur la télécommande) (Sélection
automatique de la source).
• S’il n’y a pas de CD dans le lecteur, “CD NO
DISC” apparaît sur l’affichage.
Remarques
• N’utilisez jamais un CD sur lequel il y a un
autocollant ou de la colle, cela pourrait
endommager le lecteur de CD.
• N’appuyez pas sur le logement à disque pour le
fermer, car cela peut endommager l’appareil.
Appuyez sur CD 6 (ou OPEN/CLOSE CD sur la
Télécommande) pour fermer le logement à disque.
Enregistrement d’un CD sur un MD
— Enregistrement synchro CD-MD
Il est possible d’enregistrer un CD en
numérique sur un MD, en marquant les
numéros de plage dans la même succession
que sur le CD d’origine. Si vous utilisez un
MD qui a déjà été enregistré, la platine MD
localise automatiquement la fin de la partie
enregistrée et commence l’enregistrement à
partir de là. Vous pouvez également
enregistrer un programme constitué de vos
morceaux préférés (voir page 31).
Pour allumer le système, appuyez sur 1/u.
1/u 2,3
54
6
g
p
(P p
(P
1/u
= 0
) +
–
+
Témoin MD
–
6
MD p
1 Insérez un MD enregistrable.
Flèche pointant
vers la platine.
Etiquettes vers le
haut et coulisseau
de fermeture à
droite.
Les opérations de base
+
MD 6
suite
15
Page 76

Enregistrement d’un CD sur un MD
(suite)
2 Appuyez sur CD 6 pour ouvrir le
logement à disque et placez un CD
sur le plateau.
Etiquette
6
vers le
haut.
3 Appuyez sur CD 6 pour fermer le
logement.
4 Appuyez sur CD-MD SYNC.
La platine MD attend l’enregistrement,
et le CD s’arrête à son début.
MDCD
SYNC
TRACK
LEVEL SYNC
-
DBFB
CD 7 s2m31-
5 Appuyez sur MD ^.
L’enregistrement commence. Lorsque
l’enregistrement est terminé, le lecteur
de CD s’arrête et la platine MD passe
automatiquement en pause. Appuyez
sur MD p, la platine MD s’arrête.
Pendant que “TOC” est allumé ou
clignote
Pour effectuer un enregistrement complet, ne
déplacez pas la platine et ne débranchez pas
le cordon d’alimentation. La lplatine met à
jour la table des matières (TOC - Table of
Contents) lorsque “TOC” clignote.
Au cas où le MD se termine
pendant l’enregistrement
Le CD et le MD s’arrêtent automatiquement.
Remarques
• L’enregistrement du MD est terminé uniquement
après que toutes les informations d’enregistrement
sont entrées dans le TOC. Dès cet instant, le TOC
s’arrête de clignoter et s’éteint. Veillez à ne pas
déconnecter le cordon d’alimentation ou à
déplacer le cordon d’alimentation ce moment.
Avant de débrancher le cordon d’alimentation,
procédez comme suit:
– Retirez le MD.
– Appuyez sur 1/u pour mettre le système hors
tension.
• Si le MD est protégé contre l’enregistrement, “MD
Protected” apparaît dans l’affichage, et il n’est pas
possible d’enregistrer sur le MD. Appuyez sur MD
6 et enlevez le MD, faites coulisser la patte de
protection d’enregistrement vers la position
fermée (voir page 30), insérez le MD et essayez
une fois de plus.
• N’utilisez pas de MD avec étiquette saillante ou
mal placée. Cela pourrait endommager l’appareil.
Arrêt de l’enregistrement
Appuyez sur MD p.
Avant d’insérer un MD
L’appareil étant allumé, vérifiez si le témoin
MD est éteint. Si le témoin MD est allumé en
bleu, cela signifie qu’un autre MD est déjà
inséré. Appuyez sur MD 6 et enlevez le MD.
Conseil
Le MD est automatiquement identifié avec le titre
du disque du CD (voir page 25) lors de l’utilisation
d’un MD enregistrable ou d’un MD dont les plages
ont été complètement supprimées (voir page 41)
(fonction Disc Memo Copy).
16
Page 77

Lecture d’un MD
1 Insérez un MD.
Pour allumer l’appareil, appuyez sur 1/u.
Un MD se lit exactement comme un CD.
1/u 2 MD p
(P
1/u
= 0
–
CD/MD
=0/)+
MD (
MD =/+
(P p
=+
(P p
=+
p
(P p
) +
+
Témoin MD
–+
–+
VOLUME +/–
g
+
–
6
MD 6
1 / u
+
–
1/u
MD P
MD p
VOL +/–
Flèche pointant
vers la platine.
Etiquette vers le
haut et coulisseau
de fermeture à
droite.
2 Appuyez sur MD ^ (ou MD (
sur la télécommande).
La lecture commence. Le témoin MD ^
s’allume en vert.
MD
TRACK
LEVEL SYNC
-
10mD5sM 3
DuréeNuméro de la plage
Pour
Arrêter la
lecture
Interrompre
momentanément
Sélectionner
une plage
Trouver un
point sur
une plage
Enlever le
MD
Régler le
volume
Faites comme suit:
Appuyez sur MD p.
Appuyez sur MD ^ (ou
MD P sur la commande à
distance). Le témoin MD ^
s’allume en organe. Appuyez sur
la touche une fois de plus pour
reprendre la lecture.
Appuyez sur
CD/MD =0 (ou MD =
sur la télécommande) ou
CD/MD )+ (or MD + sur
la télécommande) plusieurs fois
jusqu’à ce que vous trouviez la
piste voulue.
Appuyez sur
CD/MD =0 ou )+
pendant la lecture et relâchez-la
au point voulu.
Appuyez sur MD 6.
Appuyez sur VOLUME +/– (ou
VOL +/– sur la télécommande).
DBFB
Les opérations de base
suite
17
Page 78

Lecture d’un MD (suite)
Avant d’insérer un MD
L’appareil étant allumé, vérifiez si le témoin
MD est éteint. S’il est allumé en bleu, cela
signifie qu’un autre MD est déjà inséré.
Appuyez sur MD 6 et enlevez le MD.
Conseils
• La lecture peut alors commencer sur la plage
voulue fixée à l’étape 2.
1 Appuyez sur CD/MD =0 (ou
MD = sur la télécommande) ou
CD/MD )+ (ou MD + sur la
télécommande) plusieurs fois jusqu’à ce que la
plage voulue apparaisse sur l’affichage.
2 Appuyez sur MD ^.
• Si vous appuyez sur MD ^ (ou MD ( sur la
télécommande) alors que l’appareil est éteint, il
s’allume automatiquement et commence à jouer le
MD s’il y en a un dans le lecteur (Lecture
automatique - One Touch Play).
• Il est possible de passer d’une autre source à la
platine MD et de commencer à jouer un MD en
appuyant sur la touche MD ^ (ou MD ( sur la
télécommande) (Automatic Source SelectionSélection automatique de la source).
Remarque
N’utilisez pas de MD avec étiquette saillante ou mal
placée. Cela pourrait endommager l’appareil.
Ecoute d’un programme radio
Commencez par pré régler les stations de
radio dans la mémoire du récepteur. Pour
allumer l’appareil, appuyez sur 1/u.
1/u
3
g
(P
p
1/u
(P p
= 0
) +
–
+
+
–
6
18
1
TUNER BAND
PRESET +/–
–+
(P p
=+
(P p
=+
–+
VOLUME +/–
1 / u
+
–
1/u
TUNING
MODE
STEREO/
MONO
VOL +/–
Page 79

1 Appuyez plusieurs fois sur
TUNER/BAND (ou TUNER BAND
sur la télécommande) jusqu’à ce que
la bande voulue apparaisse.
Chaque fois que vous appuyez sur la
touche, la bande change de la manière
suivante:
FM ˜ AM
LEVEL SYNC
-
MANUAL
75MF 8.MHz
2 Appuyez plusieurs fois sur
TUNING MODE sur la
télécommande jusqu’à ce que
“PRESET” apparaisse.
LEVEL SYNC
-
75MF 8.MHz
3 Appuyez sur TUNING + ou – (ou
PRESET + ou – sur la
télécommande) pour sélectionner le
numéro de la station préréglée
voulue.
LEVEL SYNC
-
7M1F 8. HM5z
Fréquence ou nom
de la station préréglée*
ou station RDS**
* Si vous avez donné un nom à une
station préréglée, il apparaît sur
l’affichage.
** Uniquement sur le modèle européen.
Le numéro
de
présélection
DBFB
DBFB
PRESET
DBFB
PRESET
Pour
Eteindre la
radio.
Régler le
volume
Faites comme suit:
Appuyez sur 1/u pour
éteindre l’appareil.
Tournez VOLUME +/– (ou
appuyez sur VOL +/– sur
la télécommande).
Pour écouter des stations de radio
qui n’ont pas été préréglées
• Appuyez plusieurs fois sur
TUNING MODE sur la télécommande
jusqu’à ce que “MANUAL” apparaisse
dans l’étape 2, puis sur TUNING + ou –
pour vous régler sur la station voulue.
(Accord manuel)
• Appuyez plusieurs fois sur
TUNING MODE sur la télécommande
jusqu’à ce que “AUTO” apparaisse dans
l’étape 2, puis sur TUNING + ou –. La
fréquence affichée change et le balayage
s’arrête lorsque l’appareil capte une station
(Réglage automatique de la station).
Suppression du mode Automatic
Tuning
Appuyez sur TUNING MODE sur la
télécommande.
Conseils
• Si vous appuyez sur TUNER/BAND (ou TUNER
BAND sur la télécommande) alors que l’appareil
est éteint, il s’allume automatiquement et se règle
sur la dernière station reçue (Lecture automatique
- One Touch Play).
• Il est possible de passer d’une autre source sur le
tuner en enfonçant la touche TUNER/BAND (ou
TUNER BAND sur la télécommande) (Automatic
Source Selection).
• Pour améliorer la réception d’émissions,
réorientez les antennes fournies ou connectez
l’antenne externe en option.
• Si un programme FM est bruyant, appuyez sur
STEREO/MONO sur la télécommande jusqu’à ce
que “MONO” apparaisse. Vous n’aurez plus
l’effet stéréo, mais la réception sera meilleure.
Appuyez sur la touche une fois de plus pour
retrouver l’effet stéréo.
Les opérations de base
19
Page 80

Enregistrement d’un programme radio
Il est possible d’enregistrer une programme
radio sur un MD. Si vous utilisez un MD dont
certaines pistes sont déjà enregistrées, la
platine MD localise automatiquement la fin de
la partie enregistrée et lance le nouvel
enregistrement de là. Pour enregistrer après
avoir effacé toutes les pistes d’un MD, voir
page 41.
Pour allumer l’appareil, enfoncez la touche 1/u.
MD p
61/u
g
(P
p
1/u
(P p
= 0
) +
–
+
+
–
6
1 Insérez un MD enregistrable.
Flèche pointant
vers la platine.
Etiquette vers le
haut et coulisseau
de fermeture à
droite.
2 Appuyez plusieurs fois sur
TUNER/BAND (ou TUNER BAND
sur la télécommande) jusqu’à ce que
la bande voulue apparaisse.
3 Appuyez plusieurs fois sur
TUNING MODE sur la
télécommande jusqu’à ce que
“PRESET” apparaisse.
4 Appuyez sur TUNING + ou – (ou
PRESET + ou – sur la
télécommande) pour sélectionner le
numéro de présélection de la station
voulue.
MD
LEVEL SYNC
-
DBFB
PRESET
20
2
6
6
42
–+
(P p
=+
(P p
=+
–+
5
1 / u
7M1F 8. HM5z
MD 6
1/u
3
MD p
4
+
–
Fréquence ou nom de la
station préréglée* ou
nom de la station RDS**
* Les titres que vous avez introduits
apparaissent successivement (voir
“Marquage des stations préréglées”
page 47).
** Uniquement sur le modèle européen.
Le numéro
de
présélection
Page 81

5 Appuyez sur REC.
Le MD se met en attente
d’enregistrement le témoin REC s’allume
en rouge.
6 Appuyez sur MD ^ (ou MD (
ou MD P sur la télécommande).
L’enregistrement commence.
Arrêt de l’enregistrement
Appuyez sur MD p.
Enregistrement de stations qui
n’ont pas été préréglées
Pour enregistrer des stations qui n’ont pas été
préréglées, appuyez plusieurs fois sur
TUNING MODE sur la télécommande
jusqu’à ce que “MANUAL” apparaisse dans
l’étape 3, puis sur TUNING + ou – pour
accorder la station voulue.
Conseil
Si vous entendez du bruit pendant l’enregistrement
d’une station de radio AM, réorientez l’antenne
cadre AM pour le réduire.
Pendant que “TOC” est allumé ou
clignote
Pour effectuer un enregistrement complet, ne
déplacez pas la platine et ne débranchez pas
le cordon d’alimentation. La platine met à
jour la table des matières (TOC - Table of
Contents) lorsque “TOC” clignote.
Remarques
• L’enregistrement du MD est terminé uniquement
après que toutes les informations d’enregistrement
sont entrées dans le TOC. Alors, le TOC s’arrête de
clignoter et s’éteint. Veillez à ne pas déconnecter le
cordon d’alimentation ou à déplacer la platine
avant ce moment. Avant de débrancher le cordon
d’alimentation, procédez comme suit:
– Retirez le MD.
– Appuyez sur 1/u pour mettre le système hors
tension.
• Si le MD est protégé contre l’enregistrement, “MD
Protected” apparaît sur l’affichage et le MD ne
peut être utilisé pour l’enregistrement.
Appuyez sur MD 6 et retirez le MD, faites glisser
la patte de protection vers la position fermée (voir
page 30), réinsérez le MD et réessayez.
• N’utilisez pas de MD avec étiquette saillante ou
mal placée. Cela pourrait endommager l’appareil.
Les opérations de base
21
Page 82

Le lecteur de CD
Lecture répétée de certaines plages d’un CD
–– Lecture répétée
Il est possible de répéter un CD en modes de
lecture normale, aléatoire et programmée.
1 / u
–+
(P p
=+
(P p
=+
Appuyez sur REPEAT pendant la
lecture jusqu’à ce que “REPEAT” ou
“REPEAT 1” apparaisse.
CD
1DC235sm
REPEAT : Toutes les plages du CD en cours.
REPEAT 1* : Une seule plage.
* La répétition d’une seule plage est impossible
dans les modes Shuffle Play et Program Play.
Suppression du mode de lecture
répétée
Appuyez sur REPEAT jusqu’à ce que
“REPEAT” ou “REPEAT 1” disparaisse.
22
+
–
–+
LEVEL SYNC
-
TRACK REPEAT
REPEAT
DBFB
Lecture des plages d’un CD dans le désordre
— Lecture aléatoire (Shuffle Play)
Toutes les plages d’un CD peuvent être lues
dans le désordre.
1 / u
1
–+
(P p
=+
3
(P p
=+
–+
1 Appuyez plusieurs fois sur
FUNCTION jusqu’à ce que “CD”
apparaisse, et placez ensuite un CD
sur le plateau.
2 Appuyez plusieurs fois sur
PLAY MODE jusqu’à ce que
“SHUFFLE” apparaisse.
CD
7DC 72m311s
3 Appuyez sur CD (.
La lecture aléatoire (Shuffle Play)
commence. “J” apparaît, et toutes les
plages sont lues dans le désordre.
Suppression du mode de lecture
aléatoire
Appuyez plusieurs fois sur PLAY MODE
jusqu’à ce que “SHUFFLE” et “PGM”
disparaissent.
Conseils
• Il est possible de lancer le mode de lecture
aléatoire pendant une lecture normale en affichant
“SHUFFLE.”
• Pour sauter une plage, appuyez sur CD +.
+
–
LEVEL SYNC
SHUFFLE
-
2
CD +
DBFB
Page 83

Programmation des plages du CD
— Lecture programmée (Program
Play)
Il est possible de composer un programme
comptant jusqu’à 24 plages, dans l’ordre dans
lequel vous souhaitez les entendre. Ce
programme peut être enregistré (Synchro
Recording) sur des MD (voir page 31).
1 / u
1
6
3
–+
(P p
=+
(P p
=+
–+
2
CD p
+
–
DISPLAY
4
3 Appuyez sur CD + ou =
jusqu’à ce que la plage voulue
apparaisse sur l’affichage.
CD
LEVEL SYNC
-
PGM
DC 4m09s7
Numéro de la plage
sélectionnée
4 Appuyez sur ENTER/YES.
“Step” apparaît, suivi du nombre total
d’étapes programmées. La piste est
programmée. Le numéro de la dernière
plage programmée apparaît, suivi de la
durée totale du programme.
CD
Durée de la piste
sélectionnée
LEVEL SYNC
-
PGM
DC 4m09s7
Numéro de la
dernière plage
programmée
5 Pour programmer des plages
supplémentaires, répétez les étapes
3 et 4.
Temps de lecture
total des plages
programmées
DBFB
DBFB
Le lecteur de CD
1 Appuyez plusieurs fois sur
FUNCTION jusqu’à ce que “CD”
apparaisse sur l’affichage, et placez
ensuite un CD sur le plateau.
2 Appuyez plusieurs fois sur
PLAY MODE jusqu’à ce que “PGM”
apparaisse.
CD
LEVEL SYNC
-
PGM
DC0
6 Appuyez sur CD (.
Toutes les pistes sont lues dans l’ordre
sélectionné.
DBFB
suite
23
Page 84

Programmation des plages du CD
DISPLAY
(suite)
Vérification du nombre total de
plages programmées
Appuyez sur DISPLAY en mode stop. “Step”
apparaît, suivi du nombre total de plages
programmées. Le numéro de la dernière
plage programmée apparait, suivi de la durée
totale du programme.
CD
LEVEL SYNC
-
PGM
DBFB
DC 8m0 s1128
Numéro de la dernière
plage programmée
Vérification du numéro de la
plage programmée
Appuyez plusieurs fois sur CD + ou
=pendant la lecture programmée.
Tâches supplémentaires
Pour
Annuler le
mode Program
Play
Ajout d’une
plage au
programme
Effacement de
tout le
programme
Conseil
Le programme que vous avez composé est conservé
après la lecture en mode de lecture programmée.
Pour jouer le même programme une fois de plus,
appuyez sur CD (.
Remarque
“- - m - - s” apparaît dans l’affichage quand le temps
total de lecture des plages programmées dépasse
100 minutes.
Faites ce qui suit:
Appuyez sur CD p, puis
plusieurs fois sur PLAY
MODE jusqu’à ce que “PGM”
et “SHUFFLE” disparaissent.
Exécutez les étapes 3 et 4 de
Program Play arrêté.
Appuyez sur CD p de
Program Play arrêté.
Temps de lecture
total des plages
programmées
L’affichage du CD
Il est possible de vérifier le temps qu’il reste à
jouer sur la plage en cours ou sur le CD.
(P p
=+
(P p
=+
Appuyez plusieurs fois sur DISPLAY
pendant la lecture.
Chaque fois que vous appuyez sur la touche,
l’affichage change de la manière suivante:
n Temps écoulé de la plage en cours.
Durée restante de la plage en cours.
n
n
Durée restante du CD en cours*.
* La durée restante du programme est affichée
pendant la lecture en mode Programme Play.
Vérification de la durée totale et
du nombre de plages sur le CD
Pendant la lecture normale ou en mode
Shuffle play, la durée totale et le nombre des
pistes sur le CD sont affichés en mode stop.
CD
DC 2m31s717
Nombre total des
plages
–+
Durée totale
+
–
LEVEL SYNC
-
DBFB
24
Page 85

Marquage d’un CD
–– Fonction Disc Memo
Vous pouvez donner des titres comptant
jusqu’à 12 symboles et caractères à 20 CD au
plus. Lorsque vous chargez un CD marqué, le
titre (nom du disque) apparaît sur l’affichage.
Si vous avez marqué un CD et si vous réalisez
un enregistrement Synchro CD-MD sur un
MD neuf, le titre est automatiquement
enregistré sur le MD.
1 / u
1
–+
(P p
=+
(P p
=+
2
CURSOR ?
3,8
1 Appuyez plusieurs fois sur
FUNCTION jusqu’à ce que “CD”
apparaisse, et placez ensuite un CD
sur le plateau.
Vérifiez que le CD s’est arrêté et que le
nombre total de plages et sa durée
apparaissent dans l’affichage. Si
“SHUFFLE” ou “PGM” apparaît sur
l’affichage, appuyez sur PLAY MODE
plusieurs fois jusqu’à ce que ces
messages disparaissent.
CD
DC 2m31s717
–+
+
–
LEVEL SYNC
-
4,
DISPLAY
2,5
6
CANCEL/NO
DBFB
2 Appuyez sur EDIT puis plusieurs
fois sur +/– jusqu’à ce que “Name
in ?” apparaisse.
CD
DISC
LEVEL SYNC
-
imn?Nea
3 Appuyez sur ENTER/YES.
Le curseur clignote.
CD
Curseur
4 Appuyez plusieurs fois sur
CHARACTER jusqu’à ce que le type
de caractère voulu apparaisse.
Chaque fois que vous appuyez sur la
touche, l’affichage change de la manière
suivante:
A (Majuscule) n a (Minuscule) n 0
(Nombres) n ! (Symboles)*
n (Espace)** n A…
*Vous pouvez utiliser les symboles ci-
dessous.
!"#$%&'()∗+,–./:;<=>?@_`
** Pour entrer un espace
Passez à l’étape 6. Il est impossible
d’utiliser un blanc pour la première
lettre.
5 Appuyez plusieurs fois sur +/–
jusqu’à ce que le caractère voulu
apparaisse.
6 Appuyez sur CURSOR /.
Le caractère que vous avez choisi dans
l’étape 5 s’arrête de clignoter et le
curseur se déplace vers la droite.
CD
DISC
DISC
LEVEL SYNC
-
LEVEL SYNC
-
DBFB
DBFB
Le lecteur de CD
DBFB
Nombre total des plages
Durée totale
A
Curseur
suite
25
Page 86

REPEAT
Marquage d’un CD (suite)
La platine MD – Lecture
7 Répétez les étapes 4 à 6 pour
introduire le titre complet.
Si vous avez fait une erreur, appuyez sur
CURSOR ? ou / jusqu’à ce que le
caractère à modifier clignote, puis
répétez les étapes 4 à 6.
Pour effacer un caractère, appuyez sur
CANCEL/NO pendant que le caractère
clignote. Il n’est pas possible d’insérer
des caractères entre des caractères
préalablement introduits.
8 Appuyez sur ENTER/YES pour
terminer l’opération de marquage.
Le titre est mémorisé dans l’appareil,
puis l’affichage d’origine réapparaît.
Pour supprimer les marquage
Appuyez sur EDIT.
Remarque
Mettez l’appareil sous tension au moins une fois par
mois, sinon les titres seront effacés de la mémoire.
Pour vérifier les titres
Appuyez sur DISPLAY, la lecture étant
arrêtée.
A chague pression, l’affichage change de la
manière suivante:
Titre du disque
˜
Nombre total des plages et durée totale
Effacement du titre d’un disque
1 Appuyez sur EDIT, puis plusieurs fois sur
+/– jusqu’à ce que “Name Erase ?”
apparaisse.
2 Appuyez sur ENTER/YES.
Le titre du disque clignote.
Si aucun titre n’a été mémorisé pour le
disque, “No Name” apparaît.
3 Appuyez plusieurs fois sur +/– jusqu’à ce
que le titre du disque que vous désirez
supprimer disparaisse.
4 Appuyez sur ENTER/YES une fois de plus.
“Complete” apparaît et le titre du disque
s’efface.
Pour supprimer l’effacement
Appuyez sur CANCEL/NO.
26
Lecture répétée de certaines plages d’un MD
— Lecture répétée
Il est possible de répéter une seule plage ou
toutes les plages d’un disque.
1 / u
–+
(P p
=+
(P p
=+
Appuyez sur REPEAT pendant la
lecture jusqu’à ce que “REPEAT” ou
“REPEAT 1” apparaisse.
MD
11mD5sM3
REPEAT : Pour toutes les plages du MD en
cours.
REPEAT 1* : Pour une seule plage.
* Il est impossible de répéter une seule plage dans
les modes Shuffle Play et Program Play.
Pour annuler la lecture répétée
Enfoncez la touche REPEAT jusqu’à ce que
“REPEAT” ou “REPEAT 1” disparaisse.
+
–
–+
LEVEL SYNC
-
TRACK REPEAT
DBFB
Page 87

Lecture des plages
Programmation
du MD dans le
désordre
–– Lecture aléatoire (Shuffle Play)
Les plages peuvent être lues dans le désordre.
1 / u
1
–+
3
MD +
(P p
=+
(P p
=+
–+
1 Appuyez plusieurs fois sur
FUNCTION jusqu’à ce que “MD”
apparaisse, puis insérez un MD.
2 Appuyez plusieurs fois sur
PLAY MODE jusqu’à ce que
“SHUFFLE” apparaisse en mode
d’arrêt.
MD
72mD1sM317
3 Appuyez sur MD (.
La lecture dans le désordre commence.
“J” apparaît, et toutes les plages sont
lues dans le désordre.
Pour annuler la lecture dans le
désordre
Appuyez sur MD p pour arrêter la lecture
aléatoire, puis plusieurs fois sur PLAY
MODE jusqu’à ce que “SHUFFLE”
disparaisse.
Conseil
Pour sauter des pistes, appuyez sur MD +.
+
–
LEVEL SYNC
-
SHUFFLE
2
MD p
DBFB
des plages d’un
MD
–– Lecture programmée (Program
Play)
Il est possible de réaliser un programme
comptant jusqu’à 25 plages, dans l’ordre dans
lequel vous voulez les lire.
1 / u
1
6
3
–+
(P p
=+
(P p
=+
–+
2
MD p
+
DISPLAY
–
4
1 Appuyez plusieurs fois sur
FUNCTION jusqu’à ce que “MD”
apparaisse, puis insérez un MD.
2 Appuyez plusieurs fois sur
PLAY MODE jusqu’à ce que “PGM”
apparaisse en mode d’arrêt.
3 Appuyez plusieurs fois sur
MD + ou = jusqu’à ce que le
numéro de la plage voulue
apparaisse sur l’affichage.
MD
Numéro de la
plage
sélectionnée
LEVEL SYNC
-
TRACK PGM
4mD9sM07
Durée de la
plage
sélectionnée
DBFB
suite
La platine MD – Lecture
27
Page 88

Programmation des plages d’un
MD (suite)
4 Appuyez sur ENTER/YES.
La plage est programmée. “Step”
apparaît, suivi du nombre total de plages
programmées. Le numéro de la dernière
plage programmée apparaît, suivi de la
durée totale du programme.
MD
LEVEL SYNC
-
PGM
DBFB
Tâches supplémentaires
Pour
Annuler la
lecture
programmée
Ajouter une
plage au
programme
Effacer le
programme
Faites ce qui suit:
Appuyez sur MD p, puis
plusieurs fois sur PLAY
MODE jusqu’à ce que “PGM”
et “SHUFFLE” disparaissent.
Exécutez les étapes 3 et 4 avec
Program Play arrêté.
Appuyez sur MD p, avec
Program Play arrêté.
4mD9sM07
Numéro de la
dernière plage
programmée
5 Pour programmer des plages
supplémentaires, répétez les étapes
3 et 4.
6 Enfoncez la touche MD (.
Toutes les plages sont lues dans l’ordre
sélectionné.
Vérification du nombre total de
plages programmées
Appuyez sur DISPLAY en mode stop. “Step”
apparaît, suivi du nombre total de plages
programmées. Le numéro de la dernière
plage programmée apparait, suivi de la durée
totale du programme.
MD
Temps de lecture
total des plages
programées
LEVEL SYNC
-
TRACK PGM
DBFB
8mD8sM01 12
Numéro de la dernière
plage programmée
Temps de lecture
total des plages
programmées
Conseil
Le programme que vous avez réalisé est conservé
lorsque la lecture programmée s’est terminée. Pour
relire le même programme, appuyez sur MD (.
Vérification du nombre de plages
programmées
Appuyez plusieurs fois sur MD + ou =
pendant la lecture programmée.
28
Page 89

Utilisation de l’affichage du MD
Vérification de la durée qui reste à jouer et de
la durée totale d’un MD.
1 / u
Vérification de la durée
qui reste à joues sur un
disque
Appuyez sur DISPLAY en mode stop.
Chaque fois que vous appuyez sur la touche,
l’affichage change de la manière suivante:
–+
(P p
=+
(P p
=+
–+
+
DISPLAY
–
Vérification de la durée
qui reste à jouer pour
une plage
Appuyez sur DISPLAY pendant la
lecture.
Chaque fois que vous appuyez sur la touche,
l’affichage change de la manière suivante:
La durée et le numéro de la plage en
n
cours.
n
La durée totale et le nombre des plages
n
sur le MD.
n
La durée qui peut encore être enregistrée
sur le MD.
(Uniquement pour un MD enregistrable)
n
Titre du MD**.
** “No Name” apparaît si aucun titre n’a été mis en
mémoire. Pour marquer un disque, voir page 39.
La platine MD – Lecture
La durée qui reste à jouer et le numéro
de la plage en cours.
n
Le titre de la plage en cours*.
* “No Name” apparaît si aucun titre n’a été mis en
mémoire. Pour marquer un disque, voir page 39.
29
Page 90

La platine MD –
Enregistrement
Après l’enregistrement
Avant de commencer un enregistrement
Les MD (Mini Disc) vous permettent
d’enregistrer et de lire numériquement de la
musique avec une qualité de son comparable
à celle des CD. Une autre caractéristique des
MD est la possibilité de marquer les plages.
Cette possibilité vous permet de localiser
rapidement un point particulier ou de monter
aisément les plages enregistrées. Cependant,
la méthode d’enregistrement dépend de la
source que l’on enregistre. La monter dont les
numéros de plage sont enregistrés dépend
également de la source.
Lorsque la source d’enregistrement
est:
• Le lecteur de CD de cet appareil
– Le signal numérique du CD est enregistré
tel quel (enregistrement numérique)*.
– Les numéros des plages sont marqués
automatiquement, comme sur le CD
d’origine.
• Du syntoniseur de cet appareil et
d’autres composants
– Le signal analogique est converti en signal
numérique et enregistré (enregistrement
analogique)**.
– Un numéro de plage est marqué au début
d’un enregistrement, mais si vous activez
la fonction Level Sync (voir page 35), les
numéros de plage sont marqués
automatiquement en synchronisme sur le
signal d’entrée.
* Pour des détails concernant les limites de
l’enregistrement numérique, voir page 54.
** Ce signal est converti parce que ce système
n’utilise pas signaux numériques.
Remarque sur les numéros de plage
des MD
Sur un MD, le numéro de la plage (succession des
plages), les informations de début et de fin de plage,
etc., sont enregistrés dans la région TOC*
indépendante de l’information sonore. Les plages
enregistrées peuvent être montées rapidement en
modifiant l’information TOC.
* TOC: Table of Contents (table des matières)
30
/ Appuyez sur MD 6 pour retirer le
MD ou appuyez sur 1/u pour
mettre le système hors tension.
“TOC” s’allume ou clignote.
L’enregistrement MD se termine
uniquement lorsque les informations
d’enregistrement sont entrées dans le
MD.
Remarque
L’enregistrement du MD est terminé uniquement
après que toutes les informations d’enregistrement
sont entrées dans le TOC. Alors, le TOC s’arrête de
clignoter et s’éteint. Veillez à ne pas déconnecter le
cordon d’alimentation ou à déplacer la platine avant
ce moment. Avant de débrancher le cordon
d’alinmentaion, procédez comme suit:
– Retirez le MD.
– Appuyez sur 1/u pour mettre le système hors
tension.
Protection d’un MD enregistré
• Pour protéger un MD enregistré, faites glisser la
patte située sur le côté du MD, pour ouvrir la
fente.
Dans cette position, le MD ne peut plus être
enregistré. Pour enregistrer sur le MD, faites
coulisser la patte de manière à refermer la fente.
Patte
Faites coulisser
la patte pour
l’ouvrir
• Si le MD est protégé contre l’écriture, le message
“MD Protected” apparaît dans l’affichage, et il
n’est plus possible d’enregistrer sur le MD. Faites
coulisser la patte pour fermer la fente, réinsérez le
MD et essayez à nouveau.
Page 91

Enregistrement de vos plages CD préférées sur un MD
Le mode lecture programmée (Program Play)
vous permet de sélectionner vos plages CD
préférées, et ensuite d’enregistrer le
programme sur un MD dans le mode
enregistrement CD syncrho (CD Synchro
recording).
87MD p
Sélection des plages
1
Appuyez plusieurs fois sur la touche
FUNCTION sur la télécommande
jusqu’à ce que “CD” apparaisse, puis
placez un CD sur le plateau.
2
Appuyez plusieurs fois sur
PLAY MODE sur la télécommande
jusqu’à ce que “PGM” apparaisse.
3
Appuyez plusieurs fois sur
CD + ou =sur la télécommande
jusqu’à ce que le numéro de la plage
voulue apparaisse.
CD
LEVEL SYNC
-
PGM
DC 4m09s7
DBFB
1
3
4
1/u
= 0
Témoin MD
(P
p
(P p
) +
–
+
–+
(P p
=+
(P p
=+
–+
1 / u
Numéro de la plage
g
sélectionnée
4
Appuyez sur ENTER/YES sur la
Durée de la plage
sélectionnée
télécommande.
+
–
6
MD 6
2
La plage est programmée. “Step” apparaît,
suivi du nombre total de plages
programmées. Le numéro de la dernière
plage programmée apparaît, suivi de la durée
totale du programme.
CD
LEVEL SYNC
-
PGM
DC 4m09s7
Numéro de la
dernière plage
programmée
5
Pour programmer des plage
supplémentaires, répétez les étapes 3 et
Temps de lecture
total des plages
programées
DBFB
La platine MD – Enregistrement
4.
MD p
+
–
Enregistrement sur un
MD
6
Insérez un MD enregistrable.
Si le témoin MD s’allume en bleu, cela
signifie qu’un autre MD a déjà été inséré;
enfoncez la touche MD 6 et enlevez le MD.
suite
31
Page 92

Enregistrement de vos plages CD
DISPLAY
préférées sur un MD (suite)
7
Appuyez sur CD-MD SYNC.
La platine MD attend l’enregistrement,
et le CD est à l’arrêt, en attente d’être lu.
Si vous utilisez un MD sur lequel des
plages ont déjà été enregistrées, la
platine MD localise automatiquement la
fin de la partie enregistrée et commence
le nouvel enregistrement à partir de là.
8
Appuyez sur MD ^.
L’enregistrement commence à partir de
la dernière partie enregistrée du MD. Le
lecteur de CD s’arrête et le la platine MD
se met automatiquement en pause
lorsque l’enregistrement est terminé. S’il
n’y a plus de place disponible pour
l’enregistrement sur le MD, la platine
MD s’arrête.
Pour arrêter l’enregistrement
Appuyez sur MD p.
Si le MD se termine en cours d’enregistrement, le
MD et le CD s’arrêtent automatiquement.
Conseil
Le titre du CD est marqué sur le MD (voir page 25)
lorsque l’on utilise un MD enregistrable neuf ou
un MD dont toutes les plages ont été effacées (voir
page 41) (Fonction Disc Memo Copy).
Lorsque “TOC” est allumé ou clignote
Pour être sûr que l’enregistrement soit complet, ne
déplacez pas la platine et ne débranchez pas le
cordon d’alimentation. La platine met la table des
matières (TOC - Table of Contents) à jour lorsque
“TOC” clignote.
Remarques
• L’enregistrement du MD est terminé uniquement
après que toutes les informations d’enregistrement
sont entrées dans le TOC. Alors, le TOC s’arrête de
clignoter et s’éteint. Veillez à ne pas déconnecter le
cordon d’alimentation ou à déplacer la platine
avant ce moment. Avant de débrancher le cordon
d’alimentation, procédez comme suit:
– Retirez le MD.
– Appuyez sur 1/u pour mettre le système hors
tension.
• Si le MD est protégé contre l’enregistrement, “MD
Protected” apparaît sur l’affichage, et il n’est pas
possible d’enregistrer sur le MD. Appuyez sur MD
6 et enlevez le MD, faites glisser la patte de
protection contre l’enregistrement en position
fermée (voir page 30), insérez le MD et faites une
nouvelle tentative.
• N’utilisez pas de MD avec étiquette saillante ou
32
mal placée. Cela pourrait endommager l’appareil.
Enregistrement manuel sur un MD
Le système localise automatiquement la fin
de toute partie enregistrée sur un MD et lance
l’enregistrement à partir de ce point.
43MD p
g
(P
p
1/u
2
=+
(P p
=+
1 Insérez un MD enregistrable.
Si le témoin MD s’allume en bleu, cela
signifie qu’un autre MD a déjà été inséré;
appuyez sur MD 6 et enlevez le MD.
2 Appuyez sur FUNCTION pour
sélectionner la source (par exemple
le CD) à enregistrer.
• CD : Enregistrement à partir du CD.
• TUNER : Enregistrement d’un
programme radio.
• TAPE : Enregistrement à partir d’autre
composants.
(P p
= 0
) +
–
+
Témoin MD
–+
+
–
6
MD 6
+
–
Page 93

3 Appuyez sur REC.
La platine MD est prête pour
l’enregistrement.
4 Appuyez sur MD ^.
L’enregistrement commande.
5 Commencez la lecture de la source à
enregistrer.
Lorsque vous effectuez un enregistrement
à partir du lecteur de CD de cet appareil,
les numéros de plage se marquent
automatiquement. Appuyez sur REC
pendant l’enrègistrement pour marquer
les numéros de plage (voir
“Numérotation des plages” page 35).
Pour arrêter l’enregistrement
Appuyez sur MD p.
Si “Level Over” apparaît dans
l’indicateur de niveau
Un signal de haut niveau a été entré en cours
d’enregistrement avec la fonction cassette. Si le son
est déformé, réduisez le niveau d’enregistrement
(voir page 56), puis ré-enregistrez.
Pendant que “TOC” est allumé ou
clignote
Pour être sûr d’enregistrer tout, ne déplacez pas la
platine et ne débranchez pas le cordon
d’alimentation. La platine met à jour la table des
matières (TOC - Table of Contents) pendant que
“TOC” clignote.
Conseil
Pendant que l’on enregistre, il est possible de voir la
durée de l’enregistrement et le temps encore
disponible en appuyant sur DISPLAY de la
télécommande.
Remarques
• L’enregistrement du MD est terminé uniquement
après que toutes les informations d’enregistrement
sont entrées dans le TOC. Alors, le TOC s’arrête de
clignoter et s’éteint. Veillez à ne pas déconnecter le
cordon d’alimentation ou à déplacer la platine
avant ce moment. Avant de débrancher le cordon
d’alimentation procédez comme suit:
– Retirez le MD.
– Appuyez sur 1/u pour mettre le système hors
tension.
• Si vous faites une interruption pendant
l’enregistrement d’un CD, un numéro de plage
s’enregistre à cet endroit. Remarquez également
que les plages sont enregistrées sous la forme
d’une seule plage, avec un seul numéro de plage
lorsque la même plage d’un CD est enregistrée
plusieurs fois.
• N’utilisez pas de MD avec étiquette saillante ou
mal placée. Cela pourrait endommager l’appareil.
Début d’un enregistrement avec 6 secondes de données audio
— Enregistrement à l’aide de
l’horloge (Time Machine
Recording)
Si vous enregistrez une émission FM ou
satellite, les premières secondes sont souvent
perdues à cause du temps qu’il vous faut pour
vérifier que le contenu est bien celui que vous
voulez et pour appuyer sur la touche
d’enregistrement. Pour empêcher que cette
partie soit perdue, l’enregistrement à l’aide de
l’horloge conserve en permanence en mémoire
6 secondes des dernières données audio, dans
une mémoire tampon. Lorsque vous
commencez l’enregistrement de la source
sonore, l’enregistrement commence par les 6
secondes de données audio conservées à
l’avance dans la mémoire tampon, comme le
montre l’illustration ci-dessous:
Lorsque vous appuyez
sur ENTER/YES dans
l’étape 5
Données audio dans la mémoire
tampon de 6 secondes
Début de la source à
enregistrer
Fin de la source à
enregistrer
Durée
Partie
enregistrée
suite
La platine MD – Enregistrement
33
Page 94

Début d’un enregistrement avec 6
secondes de données audio (suite)
MD p
g
p
(P p
(P
2
1/u
= 0
(P p
=+
(P p
=+
) +
–
+
–+
–+
+
–
6
3
1 / u
MD p
+
–
5
1 Insérez un MD enregistrable.
2 Appuyez plusieurs fois sur
FUNCTION fois pour sélectionner
la source (par exemple TUNER) à
enregistrer.
3 Appuyez sur REC.
La platine est prête à enregistrer.
4 Commencez à lire la source à
enregistrer.
5 Appuyez sur ENTER/YES de la
télécommande à l’endroit où vous
désirez commencer
l’enregistrement.
L’enregistrement de la source commence
par les 6 secondes de données audio
conservées dans la mémoire tampon.
Si vous utilisez un MD sur lequel
certaines plages ont été enregistrées, la
platine MD localise automatiquement la
fin de la partie enregistrée et lance le
nouvel enregistrement à partir de là.
Pour arrêter l’enregistrement à
l’aide de l’horloge
Appuyez sur MD p.
Pendant que “TOC” est allumé ou
clignote
Pour être sûr d’enregistrer tout, ne déplacez
pas la platine et ne débranchez pas le cordon
d’alimentation. La platine met à jour la table
des matières (TOC - Table of Contents)
pendant que “TOC” clignote.
Remarques
• L’enregistrement du MD est terminé uniquement
après que toutes les informations d’enregistrement
sont entrées dans le TOC. Alors, le TOC s’arrête de
clignoter et s’éteint. Veillez à ne pas déconnecter le
cordon d’alimentation ou à déplacer la platine
avant ce moment. Avant de débrancher le cordon
d’alimentation, procédez comme suit:
– Retirez le MD.
– Appuyez sur 1/u pour mettre le système hors
tension.
• La platine MD commence la mémorisation des
données audio lorsque la platine se trouve en
mode de pause d’enregistrement à l’étape 3 et que
vous démarrez la lecture sur la source. Si vous
appuyez sur la touche ENTER/YES de la
télécommande dans les 6 secondes,
l’enregistrement automatique programmé
démarre avec moins de 6 secondes de données
audio.
• N’utilisez pas de MD avec étiquette saillante ou
mal placée. Cela pourrait endommager l’appareil.
34
Page 95

Numérotation des
1 / u
plages
Les numéros de plage peuvent être marqués
comme suit:
• Marquage automatique des numéros de
plage.
Les numéros de plage sont automatiquement
marqués quand vous enregistrez à partir du
lecteur de CD (enregistrement numérique) de
ce système ou pendant l’enregistrement
Level-Synchro.
• En tout point pendant l’enregistrement.
Il est possible d’enregistrer les numéros de
plage pendant l’enregistrement de n’importe
quelle source.
Numérotation des plages
automatique pendant un
enregistrement analogique
— Enregistrement Level-Synchro
Le “LEVEL-SYNC” est réglé à ON à l’usine et
les numéros de plage sont automatiquement
marqués.
Si “LEVEL-SYNC” n’est pas affiché pendant
l’enregistrement, affichez-le en procédant
comme suit. Les numéros de plage sont
automatiquement marqués quand le signal
d’entrée est inférieur à un certain niveau
pendant plus de deux secondes, puis dépasse
à nouveau le niveau précédent.
6 MD p
3
–+
(P p
=+
(P p
=+
–+
2
MD p
+
–
3
4,5
1 Appuyez sur REC. Le MD passe en
mode de veille d’enregistrement.
2 Appuyez sur PLAY MODE sur la
télécommande jusqu’à ce que
“PGM” et “SHUFFLE”
disparaissent.
3 Appuyez sur EDIT, puis plusieurs
fois sur +/– sur la télécommande
jusqu’à ce que “LevelSync ?”
apparaisse.
4 Appuyez sur ENTER/YES sur la
télécommande.
“LevelSync ON ?” apparaît.
5 Appuyez sur ENTER/YES sur la
télécommande une fois de plus.
“LEVEL-SYNC” s’allume.
La platine MD – Enregistrement
g
(P
p
1/u
(P p
= 0
) +
–
+
+
–
6
1
6 Appuyez sur MD ^.
L’enregistrement commence.
Pour arrêter l’enregistrement
Appuyez sur MD p.
suite
35
Page 96

Numérotation des plages (suite)
Pour annuler la numérotation
automatique des plages
1 Appuyez sur EDIT sur la télécommande en
cours de pause d’enregistrement.
2 Appuyez plusieurs fois sur +/– sur la
télécommande jusqu’à ce que
“LevelSync ?” apparaisse.
3 Appuyez sur ENTER/YES sur la
télécommande.
“LevelSyncOFF?” apparaît.
4 Appuyez de nouveau sur ENTER/YES sur
la télécommande.
“LEVEL-SYNC” disparaît.
Si “LEVEL-SYNC” disparaît, un numéro de
plage est indiqué uniquement au début de
chaque enregistrement.
Remarques
•Il n’est pas possible de marquer les plages
automatiquement lorsque la source à enregistrer est
bruyante (par exemple bandes magnétiques ou
programmes radio).
•L’enregistrement du MD est terminé uniquement après que
toutes les informations d’enregistrement sont entrées dans
le TOC. Alors, le TOC s’arrête de clignoter et s’éteint.
Veillez à ne pas déconnecter le cordon d’alimentation ou à
déplacer la platine avant ce moment. Avant de débrancher
le cordon d’alimentation, procédez comme suit:
– Retirez le MD.
– Appuyez sur 1/u pour mettre le système hors tension.
Numérotation des plages
en un endroit précis
pendant l’enregistrement
– Marquage des plages
Il est possible de marquer les numéros de
plage à n’importe quel moment pendant
l’enregistrement, quel que soit le type de
source. Marquage des plages
p
(P p
(P
1/u
= 0
) +
–
+
Appuyez sur REC pendant
l’enregistrement, au point où vous
voulez ajouter un marquage de plage.
Les plages qui suivent celle qui a été ajoutée
sont renumérotés.
36
+
–
6
REC
Séparation des plages par un espace de 3 secondes
— Smart Space, Auto Cut
Les fonctions Smart Space et Auto Cut vous
permettent de créer automatiquement un
espace vierge de trois secondes entre les
plages lorsque vous réalisez un
enregistrement numérique.
Smart Space
Si pendant l’enregistrement numérique
survient un silence de 4 à 29 secondes, la
platine MD remplace le silence par un blanc
d’environ 3 secondes et poursuit
l’enregistrement.
Auto Cut
S’il n’y a pas d’entrée de son pendant 30
secondes en cours d’enregistrement
numérique, la platine MD remplace les 30
secondes de silence par un blanc d’environ 3
secondes et passe en mode de pause
d’enregistrement.
Remarques
• Les fonctions Smart Space et Auto Cut sont réglées
en usine sur ON.
• Si vous éteignez l’appareil ou si vous débranchez
le cordon d’alimentation, la platine MD rappellera
le dernier réglage (ON ou OFF) des fonctions
Smart Space et Auto Cut lorsque vous l’allumerez
à nouveau.
• L’enregistrement du MD est terminé uniquement
après que toutes les informations d’enregistrement
sont entrées dans le TOC. Alors, le TOC s’arrête de
clignoter et s’éteint. Veillez à ne pas déconnecter le
cordon d’alimentation ou à déplacer la platine
avant ce moment. Avant de débrancher le cordon
d’alimentation, procédez comme suit:
– Retirez le MD.
– Appuyez sur 1/u pour mettre le système hors
tension.
Page 97

5
MD p
1 Appuyez sur REC pendant la pause
d’enregistrement.
2 Appuyez sur EDIT, puis plusieurs
fois sur +/– sur la télécommande
g
jusqu’à ce que “S. Space ?”
apparaisse.
3 Appuyez sur ENTER/YES sur la
(P
p
1/u
(P p
= 0
) +
–
+
+
–
6
télécommande.
“S. Space ON ?” apparaît.
4 Appuyez sur ENTER/YES sur la
télécommande une fois de plus.
5 Appuyez sur MD ^.
L’enregistrement commence.
1
2
3,4
–+
(P p
=+
(P p
=+
–+
1 / u
Pour arrêter l’enregistrement
Appuyez sur MD p.
Pour désactiver les fonctions
Smart Space et Auto Cut
MD p
+
–
2
1 Appuyez sur EDIT sur la télécommande en
cours de pause d’enregistrement.
2 Appuyez plusieurs fois sur +/– sur la
télécommande jusqu’à ce que “S. Space ?”
apparaisse.
3 Appuyez sur ENTER/YES sur la
télécommande.
“S. Space OFF ?” apparaît.
4 Appuyez de nouveau sur ENTER/YES sur
la télécommande.
La platine MD – Enregistrement
37
Page 98

La platine MD
– Montage
Avant de commencer le montage
Il est possible de monter les plages
enregistrées sur un MD. Les fonctions de
montage vous permettent de créer une
nouvelle séquence des morceaux enregistrés
sur le MD.
Fonctions de montage
• Name – marquage des MD
Utilisez cette fonction pour marquer les
disques et les plages. Pour les titres, vous
disposez de lettres majuscules, de nombres
et de symboles.
• Erase – Effacement d’un
enregistrement
Utilisez cette fonction pour effacer les
plages une à une ou toutes les plages
simultanément.
• Move – modification de l’ordre des
plages
Utilisez cette fonction pour modifier la
numérotation des plages.
• Divide – Addition de numéros de
plage
Utilisez cette fonction pour ajouter les
numéros de plage. Cela vous permettra de
localiser rapidement vos phrases préférées.
• Combine – Conjonction de plages
enregistrées
Cette fonction vous permet d’effacer
l’espace blanc entre deux plages, et de les
combiner en une seule. Vous pouvez
combiner des plages dont les numéros ne
sont pas consécutifs, par exemple la plage 1
et la plage 4, etc.
• Undo – Suppression du dernier
montage
Utilisez cette fonction pour annuler la
dernière modification et pour retrouver le
contenu du MD dans l’état avant le
montage.
38
Avant le montage
Pour monter le MD, il faut que la platine MD
réponde aux conditions ci-dessous:
• Le MD est enregistrable.
• La platine MD est en mode Continuous.
Avant le montage, vérifiez si ces conditions
sont remplies suivant la procédure cidessous.
1 Contrôlez la patte de protection du
MD à éditer.
Si le MD est protégé contre
l’enregistrement, “MD Protected”
apparaît dans l’affichage et le MD ne
peut pas être édité.
Si le MD est protégé contre l’effacement,
faites glisser la patte pour obturer la
fente.
2 Appuyez plusieurs fois sur
PLAY MODE sur la télécommande
jusqu’à ce que “PGM” et
“SHUFFLE” disparaissent.
Vous ne pouvez éditer le MD qu’en
mode continuous. Vous ne pouvez pas
éditer de MD en mode de lecture
aléatoire ou programmée.
Après le montage
/ Appuyez sur MD 6 pour enlever le
MD ou appuyez sur 1/u pour
mettre le système hors tension.
Le montage sur le MD est terminé
uniquement après que toutes les
informations de montage sont entrées
dans le TOC, et “TOC” s’allume ou
clignote.
Remarque
Le montage sur le MD est terminé uniquement
après que toutes les informations de montage sont
entrées dans le TOC. Alors, le TOC s’arrête de
clignoter et s’éteint.
Veillez donc à ne pas déconnecter le cordon
d’alimentation et à ne pas déplacer la platine avant
ce moment. Avant de débrancher le cordon
d’alimentation, procédez comme suit:
– Retirez le MD.
– Appuyez sur 1/u pour mettre le système hors
tension.
Page 99

Marquage d’un MD
–– Fonction Name
Si vous enregistrez un CD intitulé sur un
nouveau MD, le titre est automatiquement
enregistré sur le MD (fonction Disc Memo
Copy). Vous pouvez également créer des
titres (noms) pour vos MD enregistrés et
plages. Sur un disque, on peut utiliser jusqu’à
1.700 caractères.
4 Appuyez plusieurs fois sur
CHARACTER jusqu’à ce que le type
de caractère voulu apparaisse.
Chaque fois que vous appuyez sur la
touche, l’affichage change de la manière
suivante:
A (Majuscules) n a (Minuscules)
n 0 (Nombres) n ! (Symboles)*
n (Espace)** n A…
* Vous pouvez utiliser les symboles
ci-dessous.
!"#$%&'()∗+,–./:;<=>?@_`
1 / u
–+
+
–
1
SCROLL
4
2,5
6
CANCEL/NO
MD
=/+
2
CURSOR ?
3,8
(P p
=+
(P p
=+
–+
1 Pour marquer un disque, appuyez
sur MD p pour arrêter la lecture du
disque.
Pour marquer une plage, appuyez sur
MD + ou = jusqu’à ce que le
numéro de la plage voulue apparaisse.
2 Appuyez sur EDIT, puis plusieurs
fois sur +/– jusqu’à ce que
“Name in ?” apparaisse.
** Pour entrer un espace
Passez à l’étape 6. Un blanc ne peut
pas être utilisé comme première
lettre.
5 Appuyez plusieurs fois sur +/–
jusqu’à ce que le caractère voulu
apparaisse.
6 Appuyez sur CURSOR /.
Le caractère que vous avez sélectionné
dans l’étape 5 s’arrête de clignoter, le
curseur se déplace vers la droite.
MD
TOC EDIT
DISC
LEVEL SYNC
-
M
7 Répétez les étapes 4 à 6 pour
introduire le titre complet.
Si vous avez fait une erreur, appuyez sur
CURSOR ? ou / jusqu’à ce que le
caractère à changer clignote, puis répétez
les étapes 4 à 6.
Pour effacer un caractère, appuyez sur
CANCEL/NO pendant que le caractère
clignote. Il n’est pas possible d’insérer
des caractères entre ceux insérés
précédemment.
DBFB
La platine MD – Montage
3 Appuyez sur ENTER/YES.
Le curseur se met à clignoter.
MD
Curseur
TOC EDIT
DISC
LEVEL SYNC
-
DBFB
8 Appuyez sur ENTER/YES pour
terminer l’opération de marquage.
Les titres que vous avez introduits
apparaissent successivement, et
l’affichage revient alors à l’affichage
initial.
Pour supprimer le marquage
Enfoncez la touche EDIT.
suite
39
Page 100

Marquage d’un MD (suite)
Remarques
• Vous pouvez introduire un nom de plage pendant
la lecture de cette plage, mais le marquage doit
être terminé avant que la plage soit finie.
• Si le MD est protégé contre l’enregistrement, le
message “MD Protected” apparaît sur l’affichage,
et il n’est pas possible d’enregistrer sur le MD.
Appuyez sur MD 6 et enlevez le MD, faites
coulisser la patte de protection contre
l’enregistrement vers la position fermée (voir page
30), replacez le MD et faites un nouvel essai.
Pour vérifier les titres
(uniquement avec la
télécommande)
Pour vérifier les titres des disques, enfoncez
la touche SCROLL alors que la lecture est
arrêtée. Pour vérifier les titres des plages,
enfoncez la touche SCROLL pendant la
lecture. Les titres défilent sur l’affichage. Pour
arrêter le déroulement des titres, enfoncez la
touche SCROLL. Appuyez sur la touche une
fois de plus pour reprendre le déroulement.
Pour effacer tous les titres
1 Appuyez sur EDIT puis plusieurs fois sur
+/– jusqu’à ce que “Name Erase ?”
apparaisse.
2 Appuyez sur touche ENTER/YES.
“Name Erase ??” apparaît. Pour annuler
l’effacement, appuyez sur MD p.
3 Appuyez sur touche ENTER/YES une fois
de plus.
“Complete” apparat.
Tous les titres de plage sont effacés.
Pour effacer le titre d’une plage
1 Appuyez sur MD = ou + jusqu’à ce
que le titre de la plage voulue apparaisse.
2 Appuyez sur EDIT, puis plusieurs fois sur
+/– jusqu’à ce que “NameErase?”
apparaisse.
3 Appuyez sur ENTER/YES.
“Complete” apparat.
Le titre de plage que vous avez sélectionné
dans l’étape 1 est effacé.
Effacement d’un enregistrement
— Fonction Erase
La platine MD vous permet d’effacer
rapidement et aisément des plages à
supprimer. Il est possible de retrouver le
contenu tel qu’il était avant l’effacement (non
effacé) avec la fonction Undo.
Cependant, vérifiez soigneusement la partie à
effacer, parce qu’il n’est plus possible
d’annuler une modification après avoir
effectué d’autres modifications
additionnelles.
Les trois options d’effacement des
enregistrements sont les suivantes:
• Effacement d’une seule plage.
• Effacement de toutes les plages.
• Effacement d’une partie d’une plage.
Effacement d’une seule
plage
Une plage peut être effacée en sélectionnant
simplement son numéro de plage. Lorsque
vous effacez une plage, le nombre total des
plages sur le MD diminue de un, et toutes les
plages qui suivent la plage effacée sont
renumérotées.
Ex. : Effacement de la plage B.
Numéro
de plage
Plages
initiales
ERASE
Lorsque vous effacez plusieurs plages, il faut
travailler dans l’ordre des numéros plus
élevés aux numéros plus petits, pour éviter
que des plages qui n’ont pas encore été
effacées soient renumérotées.
123
A
123
AC
(P p
1
=+
(P p
=+
2
Effacement de la
plage B
CD
B
+
–
–+
4
D
2
40
3,4
 Loading...