

SOMFY Dexxo Pro 800 - 1000 RTS, Dexxo Pro 800 RTS, Dexxo Pro 1000 RTS Installation Manual
somfy.com
Dexxo Pro 800 - 1000 RTS
5048550F
FR
Manuel d’installation
DE
Gebrauchsanweisung
EN
Installation manual
PL
Instrukcja montażu
IT
Manuale d’installazione
NL
Installatiegids

1
EN
CONTENTS
GENERAL PRESENTATION �������������������������������������������������� 2
SAFETY INSTRUCTIONS ���������������������������������������������������� 2
Caution 2
Safety instructions 2
PRODUCT DESCRIPTION ���������������������������������������������������� 2
Product components 2
Area of application 2
POINTS TO CHECK PRIOR TO INSTALLATION ���������������������������������� 3
Preliminary checks 3
Safety instructions 3
INSTALLATION �������������������������������������������������������������3
Installation height 3
Detailed description of installation steps 3
PROGRAMMING ����������������������������������������������������������� 5
Programming button description 5
End limit setting and self-learning 5
Memorising the remote controls for operation in «Total opening» mode 5
OPERATING TEST ���������������������������������������������������������� 5
Using the remote controls 5
Obstacle detection function 5
Built in lighting operation 5
CONNECTING PERIPHERALS ������������������������������������������������ 6
Description of the various peripherals 6
Electrical connections for the various peripherals 6
SETUP �������������������������������������������������������������������� 7
General setup diagram 7
Meanings of the various parameters 7
CLEARING REMOTE CONTROLS AND ALL SETTINGS ���������������������������� 9
Clearing remote controls 9
Resetting all settings 9
LOCKING PROGRAMMING ��������������������������������������������������� 9
REFITTING COVERS �������������������������������������������������������� 9
TROUBLESHOOTING ������������������������������������������������������� 9
Operating codes displayed 9
Programming codes displayed 9
Error and failure codes displayed 10
Accessing stored data 10
TECHNICAL SPECIFICATIONS ����������������������������������������������� 11
Dimensions 11
2
EN
PRODUCT DESCRIPTION
Product components
Fig. 1
Key. Number Description Key. Number Description
1 1 Motor head 15 6 HU8 nut
2 1 Motor cover 16 2 Shaft
3 1 Built-in light cover 17 2 Circlips
4 1 Lintel bracket 19 4 Self-shaping Ø 4x8 screw
5 1 Door bracket 20 2 Special screw for plastic Ø 3.5x12
6 2 Ceiling bracket 21a 1 Single part rail
7 2 Motor head bracket 21b 1 Two part rail
8 1 Manual release cord 21b1 1 Sleeve
9 1 Link arm 21b2 8 Self-shaping Ø 4x8 screw
10 1 Travel stop 22 2 HM8 self-locking nut
11 4 Chain retainer pad 23 2 Bracket
12 1 Power cable 24 1 Spacer
13 2 Hex. head M8x16 bolt 25 2 Keygo remote control
14 4 Hex. head M8x12 bolt & washer 26 1 24 V 21 W BA15s socket light bulb
Area of application
Fig. 2
Types of doors (Fig.2)
A: Projecting up and over door.
B: Sectional door:
- if the door’s upper prole is a specic one, use the “sectional door mounting bracket” ref.: 9009390.
- if the door surface exceeds 10 sq. metres, use the “sectional door adapter” ref.: 2400873.
C: Sideways opening sliding door:
- for side wall mounting, use:
- a belt transmission rail
- an “adjustable cranked arm” ref.: 9014481.
- for ceiling mounting, use:
- an “articulated arm” ref.: 9014482.
D: Swinging door. Use the swinging door kit, ref.: 2400459.
E: Semi and non projecting door. Use:
- a high performance transmission rail
- “the semi and non projecting door kit” ref.: 2400458.
Some doors of this type may prove impossible to automate. Contact SOMFY’s technical department.
GENERAL PRESENTATION
This product complies with the “safety, specic rules for powering vertically opening garage doors in residential use” requirements (standard EN
60335-2.95). When installed in line with these instructions and in compliance with the “Installation Checklist”, the product will be compliant with
standards EN 13241-1 and EN 12453.
The instructions referred to in the installation manual and instructions for use of this product are designed to prevent damage to property and personal
injury along with compliance with the above standards. Failure to comply with these instructions absolves Somfy from any liability resulting from
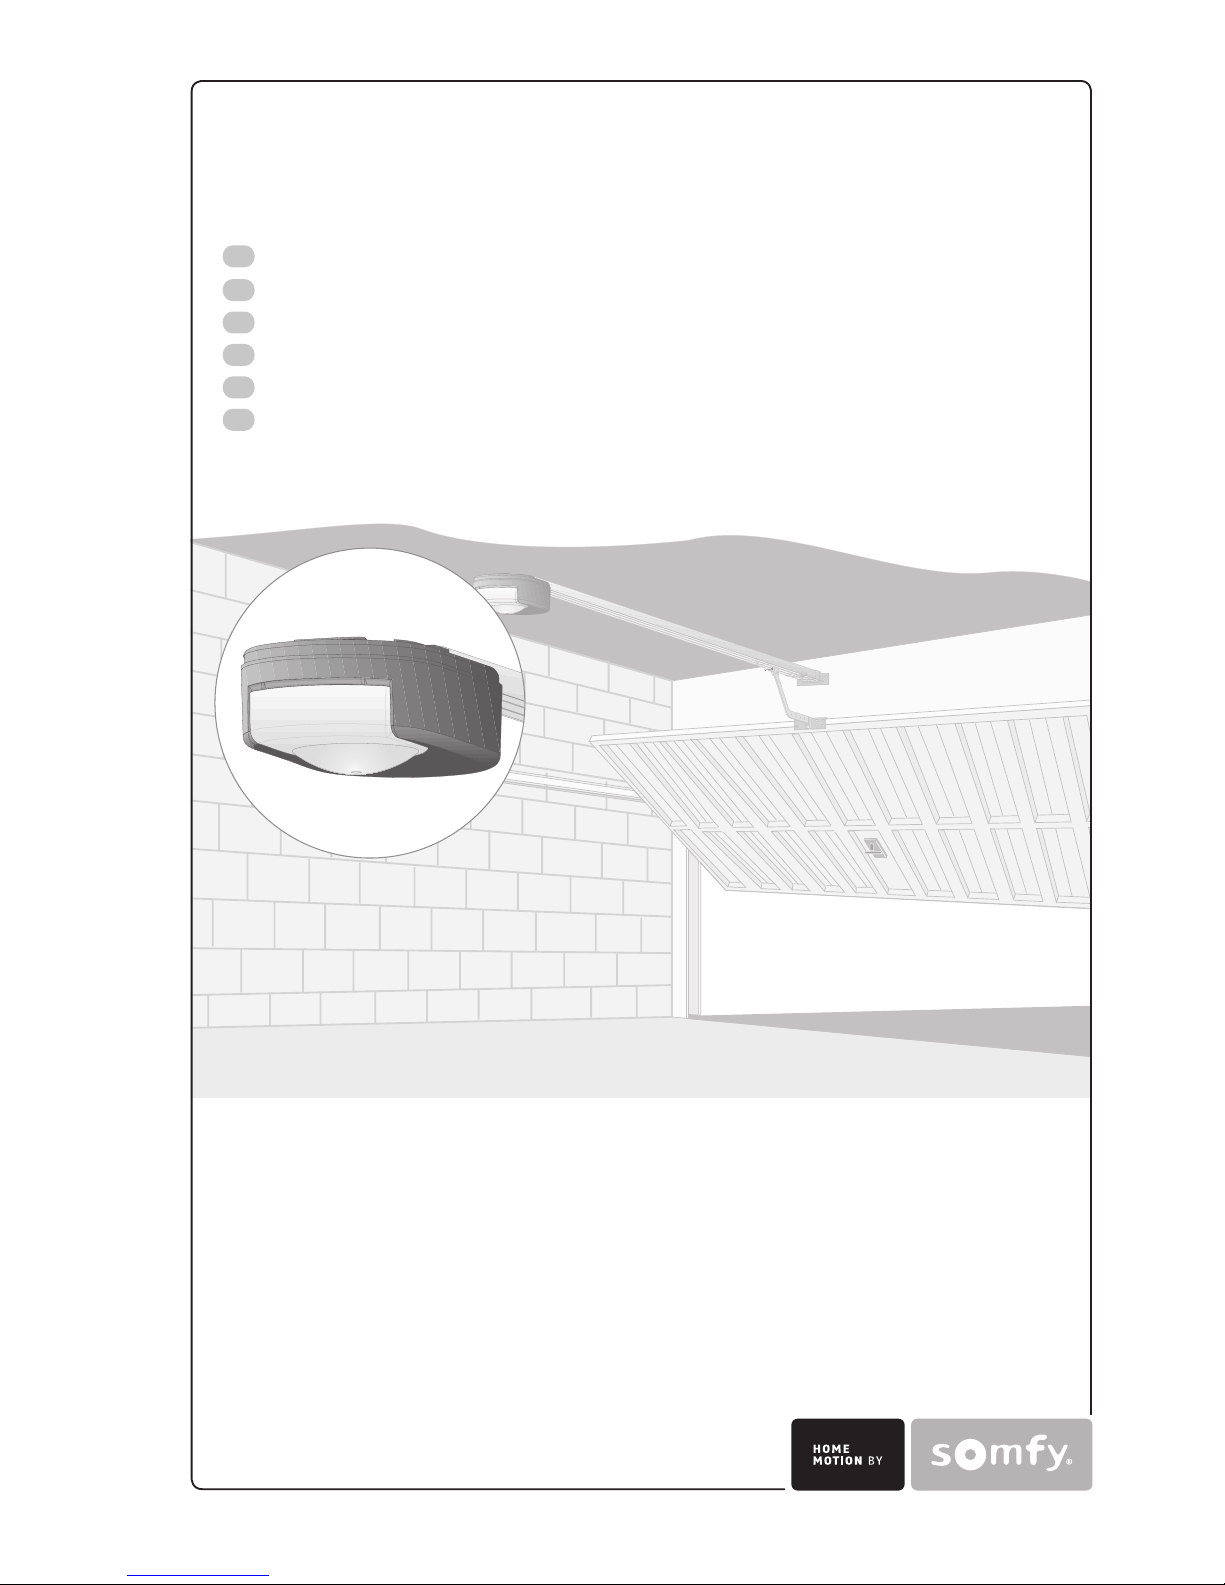
damage that may be caused. Dexxo Pro is a product that must be installed inside the garage with an integrated back-up control system.
Somfy hereby declares that the device is compliant with the essential demands and other relevant requirements of directive 1999/5/CE. A declaration of
compliance is available from the web site at www.somfy.com/ce (Dexxo Pro). This product is suitable for use in the European Union and in Switzerland.
SAFETY INSTRUCTIONS
Caution
These are important safety instructions. Always follow the instructions, incorrect installation may lead to serious injury.
Safety instructions
Before installing the motor drive unit, remove all unessential lines or chains and switch off all equipment that is not essential for motorised door operation.
Before installing the motor drive unit, make sure that the door is in good mechanical condition, that it is properly balanced and that it opens and closes correctly.
Locate all control systems at least 1.5 metres above oor level, making sure that they are visible from the entrance to the garage but safe from moving parts.
Position the manual release cord no more than 1.8 metres above oor level.
Where a removable release mechanism is used, we recommend storing it close to the door.
Fix the label describing the manual release procedure close to the release mechanism.
Fix the warning labels describing the hazards of door motion close to any xed control mechanisms installed and make sure that the labels are clearly
visible to the user.
After installation, make sure that the mechanism is correctly adjusted and that the motor drive unit reverses its motion when the door encounters an
obstacle that is at least 50 mm from oor level.
After installation, make sure that no part of the door overhangs an area accessible to the public.
After installation, make sure that the motor drive unit inhibits or stops the door opening motion when the door is loaded down with a 20 kg weight
attached to a central position of the door’s bottom edge.
3
EN
Installation height
Fig. 4
Measure the distance “D” between the door’s highest point and the ceiling.
If “D” is between 35 and 200 mm, mount the complete system straight onto the ceiling.
If “D” exceeds 200 mm, mount the complete assembly so that the height “H” falls between 10 and 200 mm.
Detailed description of installation steps
Fig. 5 to 15
Mounting the lintel bracket and the door bracket (Fig. 5)
When installing the system directly onto the ceiling (ush with the ceiling), the lintel bracket can be mounted on the ceiling, if necessary recessed from
the lintel by up to 200 mm max. (Fig. 5-
).
Assembling the two part rail (Fig. 6)
[1] [2] [3]. Unfold the two parts of the rail.
Ensure that the chain or belt is not twisted.
[4]. Assemble the two parts of the rail using the sleeve.
[5]. Mount the complete assembly using the eight mounting screws.
[6]. Tighten the nut to tension the chain or belt. The compressed rubber must measure 18 and 20 mm.
The mounting screws must not penetrate the rail (do not drill).
When installing the system directly onto the ceiling, do not use the sleeve mounting screws.
INSTALLATION
Door dimensions (Fig. 3)
For maximum door heights, the motor travel can be optimised:
• By installing the motor head at a 90° angle (Fig. 7-
).
• By xing the lintel bracket to the ceiling, behind the lintel itself by up to 200 mm (Fig. 5-
)
• By cutting the link arm to size.
Preliminary checks
Check the garage door can be operated manually and runs smoothly. Ensure the door is in good mechanical condition (pulleys, mounts…) and is
correctly balanced (spring tension).
Remember that any work performed on door springs may be dangerous.
The structure of your garage (walls, lintel, inside surfaces, cross members, door rails…) are used to mount the Dexxo Pro system. Reinforce them
where necessary.
Never splash water onto the system. Never install Dexxo Pro in a location where water may cause damage.
The bottom edge of the door should be tted with a rubber strip to avoid hard contact and enhance the contact surface.
If the garage door is the only entry point into the garage, t an external release (external release keylock (ref. 9012961) or an external release
(ref. 9012962) and include a back-up battery (ref. 9001001).
If the garage door includes a separate pedestrian door, the door must be tted with an interlock to prevent garage door movement when the pedestrian
door is open (pedestrian door safety kit ref. 2400657).
If the garage door opens on to a public road, install an indicator light, such as a ashing orange light (ref. 9015171).
If the garage door operates in automatic mode, install a photoelectric cell type safety system (ref. 9014994 or ref. 9013647) and a ashing orange
light type indicator.
Make sure that the door does not comprise any accessible parts.
Unlocking the door may trigger uncontrolled door movement if the door is not balanced correctly.
Safety instructions
Safety instructions must be complied with throughout the installation process:
• Take off any personal jewellery (bracelet, chain or others) during installation work.
• During drilling and welding work, always wear safety glasses and suitable protection.
• Always use suitable tools.
• Take care when handling the motor drive system.
• Never connect the mains power supply or the battery back-up system before completing the installation process.
• Never use high pressure water systems for cleaning purposes.
POINTS TO CHECK PRIOR TO INSTALLATION
 Loading...