

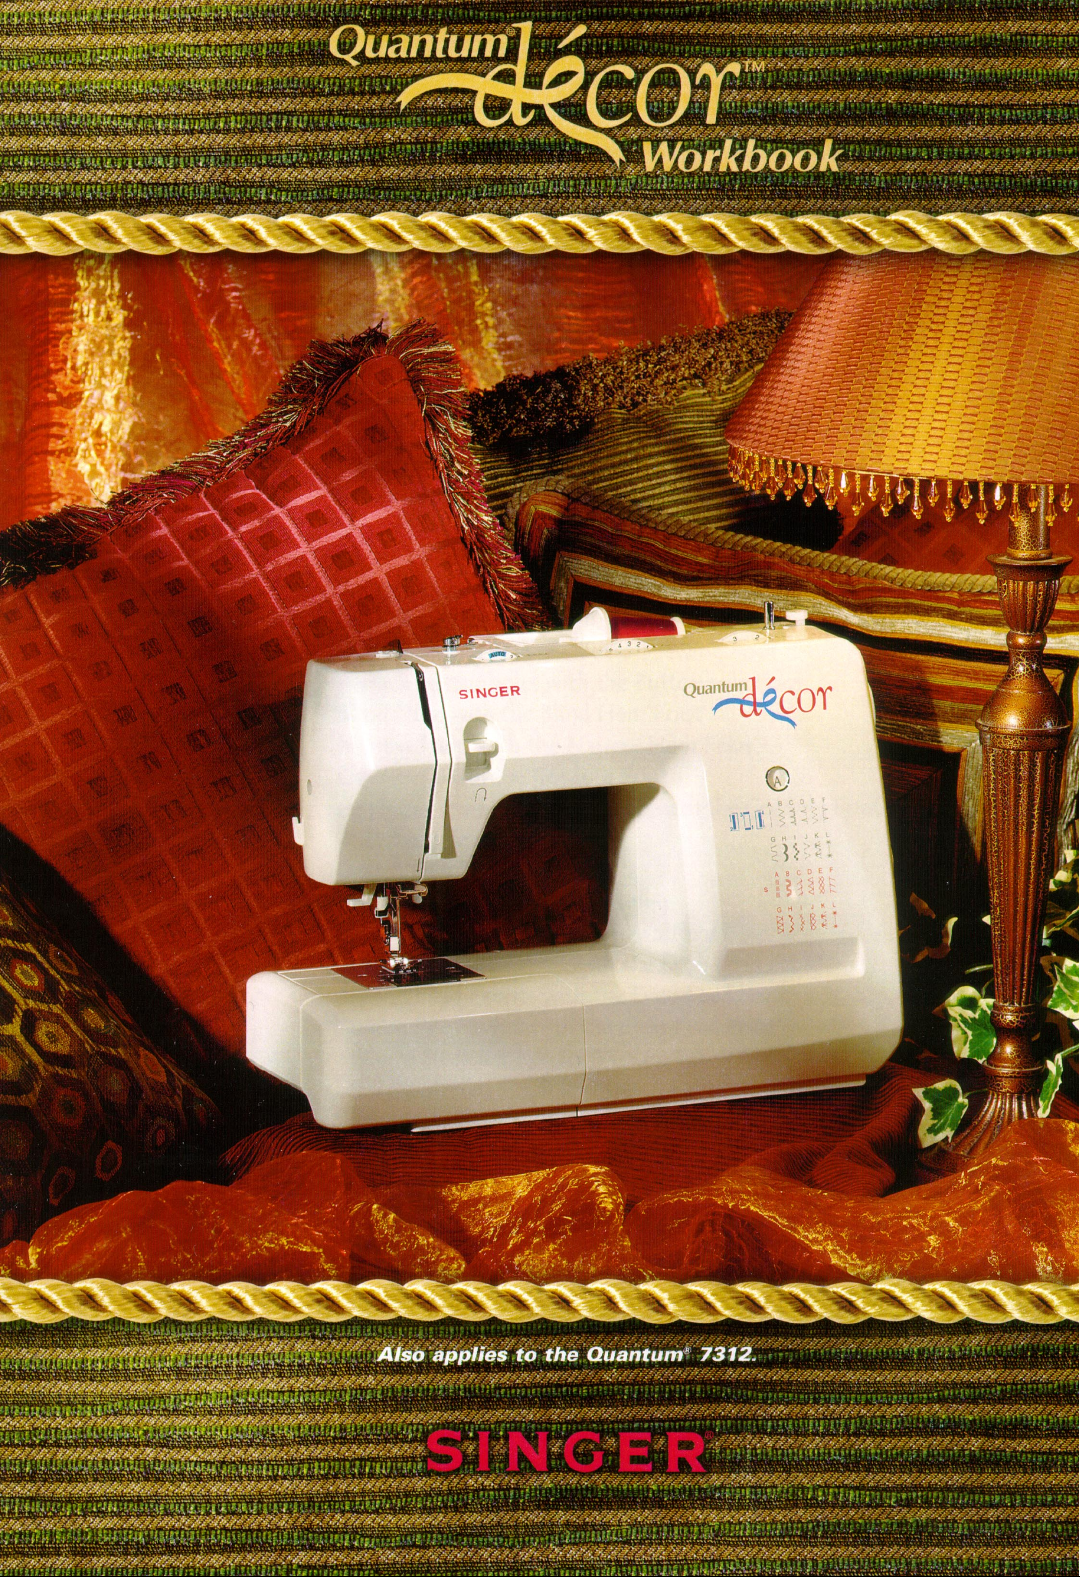
Page 1
Page 2
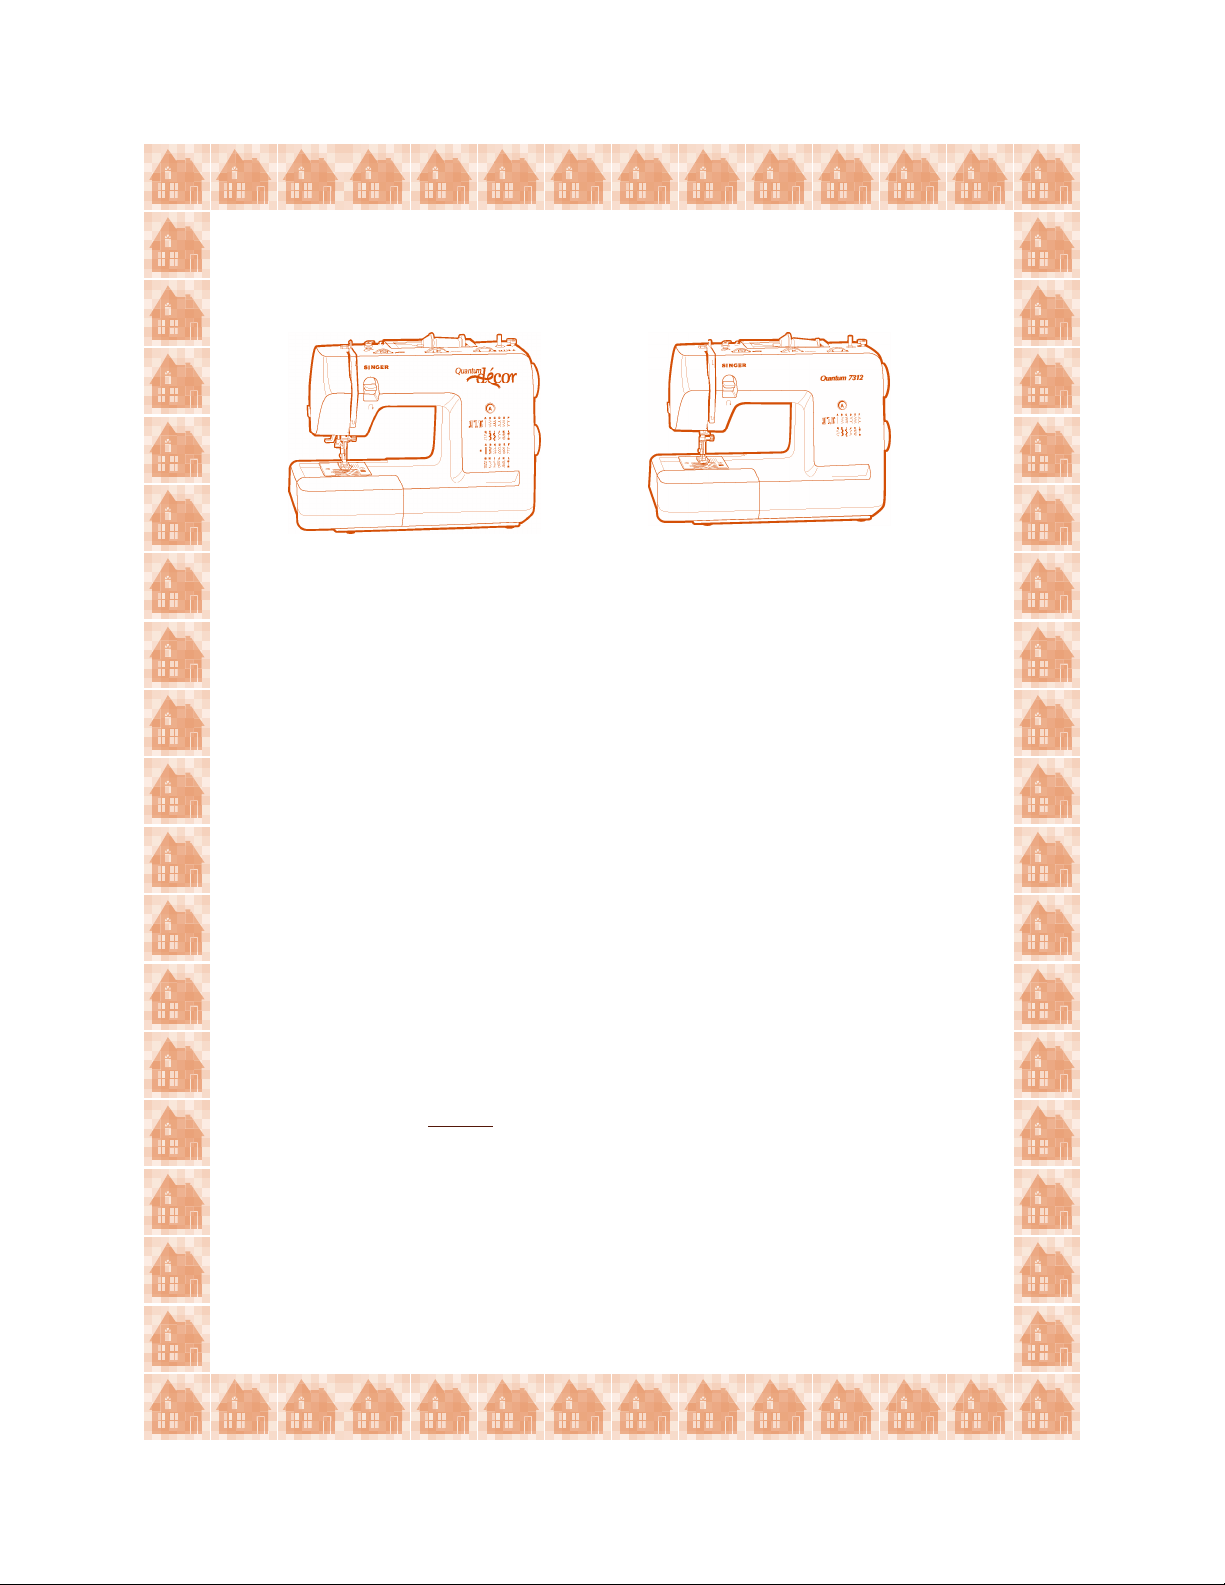
Quantum
Quantum® Décor and Quantum
QuantumQuantum
Décor and Quantum® 7312
Décor and Quantum Décor and Quantum
7312
7312 7312
Straight Stitch
Create Quilted Fabric with the Seam/Quilt Guide
Create Piping with the Zipper Foot
Satin Stitch Appliq u é with t he Satin Foot
Button Sewing with the Button Sewing Foot
Bartack Buttonholes with the Buttonhole Foot
Blind Hem with the Blind Hem Foot
Narrow Hem with the Narrow Hem Foot*
Gathering with the Cording Foot
Applying Trims, Cords & Braids with the Cording Foot
Attaching Beaded Trims
Couching a Strand of Pearls
Faux Tatted or Crocheted Edging
Crazy Quilting with Decorative Stitches
Sewing Multiple Layers with the Even Feed Foot*
Sewing Plaid Fabrics with the Even Feed Foot*
Sewing Pile Fabrics with the Even Feed Foot*
Straight Stretch Stitch for Woven Fabrics**
Straight Stretc h Stitch for Stretc h Fabrics**
Ribbing Application**
Overedge Stitching**
Attaching Elastic
Sewing with a Wing Needle
Straight Stitch, Reverse and Needle Positions
Sewing Leather
Decorative Bobbin Work
*Indicates optional foot for Quantum 7 312
** Stitch found only on Quantum Décor
Page 3
Straight Stitching, Reverse and Needle Positions
Straight Stitching, Reverse and Needle Positions
Straight Stitching, Reverse and Needle PositionsStraight Stitching, Reverse and Needle Positions
Machine Set
Machine Set----Up:
Machine SetMachine Set
Stitch: “A”, Straight Stitch
Stitch Width: 0, Center Needle Position
Stitch Length: 3
Presser Foot: Standard Foot
Materials
Materials:
MaterialsMaterials
(2) 5” X 5” pieces of medium weight cotton
Procedures:
Procedures:
Procedures:Procedures:
Sew a straight stitch on the fabric.
Change the stitch width to 3, notice the needle position changes.
Sew another row of straight stitching.
Change the stitch width to 7, notice the needle is in the far left position.
Sew a straight stitch and compare the differences in needle position.
Sew a straight seam and prac t ic e reinf o r cing the seam using the
reverse knob.
Change the stitch length dial to 1, begin to sew.
Slowly move the stitch length dial to 7, notice how close or far apart the
stitches look depending on the stitch length setting.
Up:
Up:Up:
1
Page 4
Machine Set
Machine Set----up:
Machine SetMachine Set
Stitch: “A”, Straight Stitch
Stitch Width: 0, Center Needle Position
Stitch Length: 3
Presser Foot: Standard Foot
Materials:
Materials:
Materials:Materials:
(2) 5” X 5” pieces of cotton with a piece of batting between the two pieces,
creating a quilt-type sample
Procedure:
Procedure:
Procedure:Procedure:
up:
up:up:
Straight Stitching
Sew diagonally from the top left corner to the bottom right corner.
Use the reverse lever to reinforce the seam.
2
Page 5
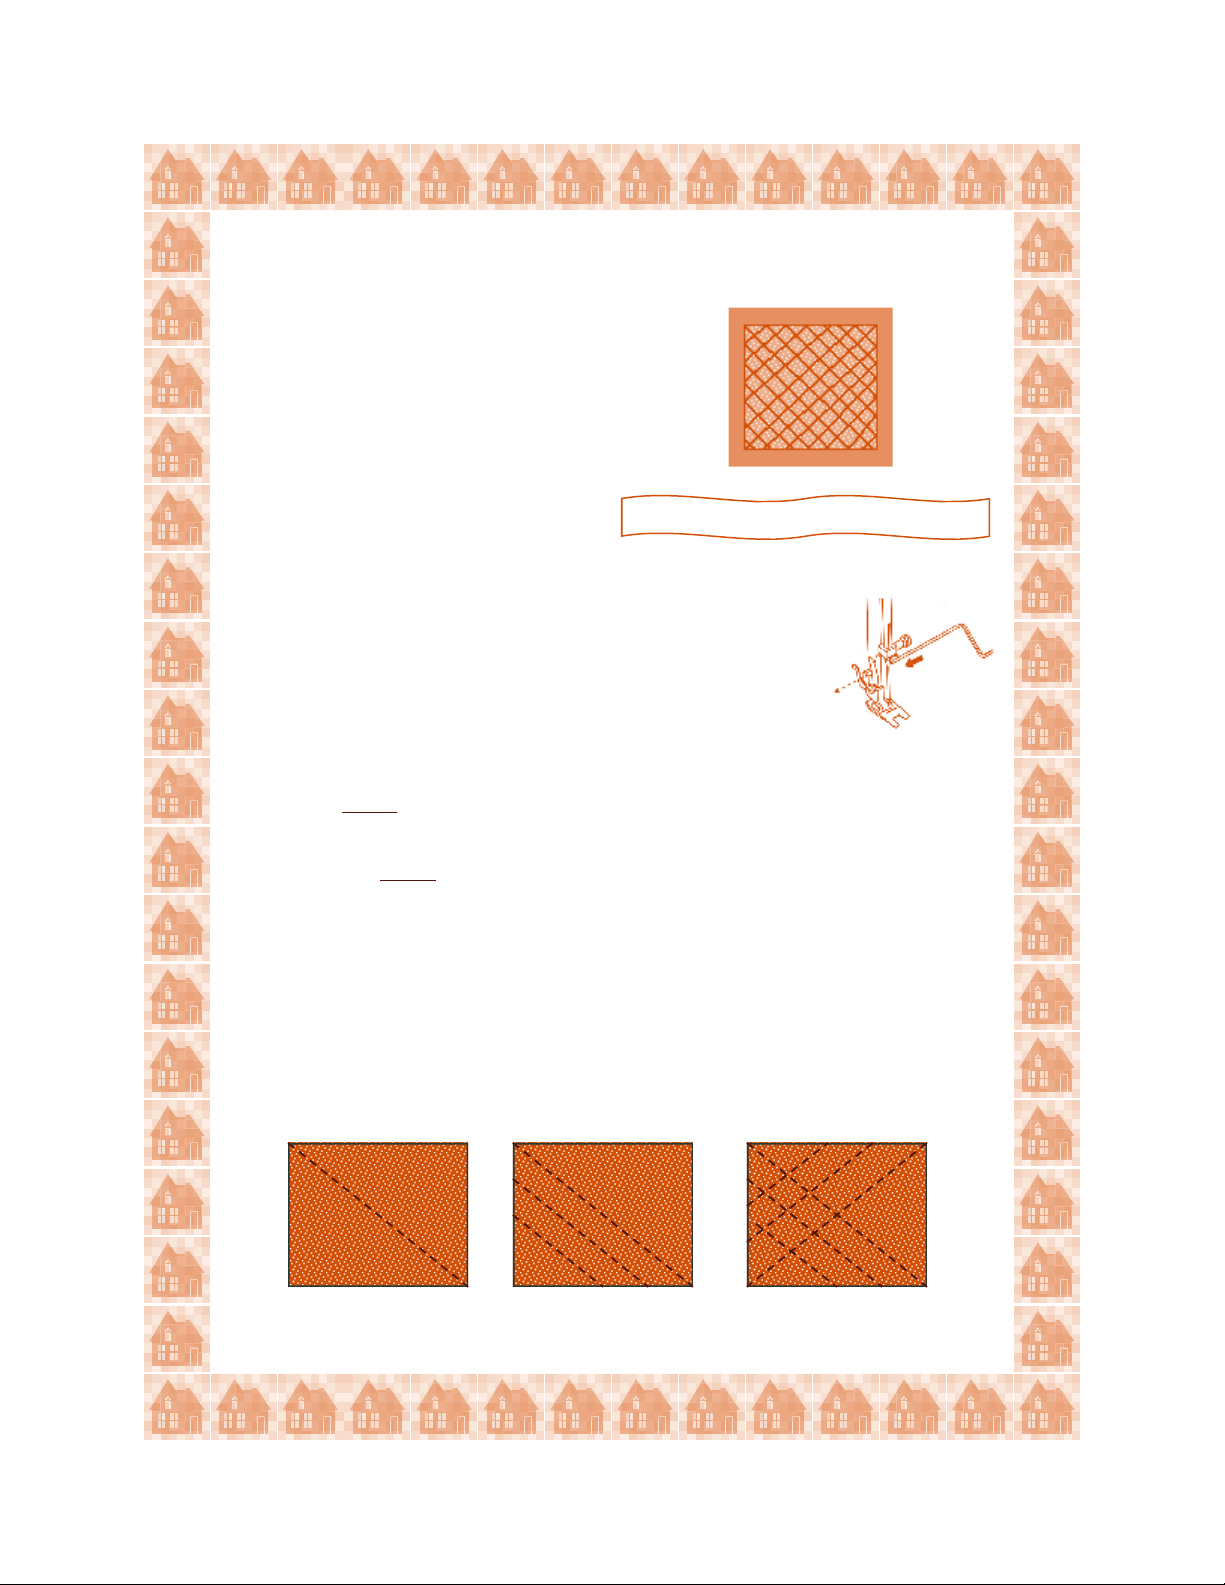
Create Quilted Fabric
Machine Set
Machine Set----Up:
Machine SetMachine Set
Stitch: “A”, Straight Stitch
Stitch Width: 0, Center Needle Position
Stitch Length: 2.5
Presser Foot: Standard Foot
Materials:
Materials:
Materials:Materials:
Quilt-type sample that was previously used on the Straight Stitch exercise
Procedure:
Procedure:
Procedure:Procedure:
Attach the Seam/Quilt guide.
Use the guide to ensure even spacing and straight lines,
or when large (projects cover the machine’s seam guides
on throat plate)
Position fabric approximately 1-2 inches from the
right of the previously sewn straight stitch.
Up:
Up: Up:
Quilt pillow tops for a designer look!
Position the guide so that it rides on the previous row of stitching.
Sew successive rows using the guide.
Change the direction, sew diagonally from the to p right corner to the
bottom left corner of the fabric.
Sew 3 or more rows, using the guide.
3
Page 6
Create Piping
Machine Set
Machine Set----up:
Machine SetMachine Set
Stitch: “A”, Straight Stitch
Stitch Width: 3
Stitch Length: 3
Presser Foot: Zipper Foot
Materials:
Materials:
Materials:Materials:
5” X 6” home décor fabric, cut on bias
7” of purchased cording
Procedure:
Procedure:
Procedure:Procedure:
Fold fabric wrong sides together.
Place cording inside of the fo ld .
On the right side of the fabric sew a straight stitch close to the piping.
up:
up:up:
Attach piping to pillows
and furniture to add a bold
finishing touch!
Adjust stitch width to move the needle closer to the piping
Note
Note: The Zipper Foot can be attached right or left, allowing for
NoteNote
the cording to be inserted from either side.
4
Page 7
Satin Stitch Appliqué
Machine Set
Machine Set----up:
Machine SetMachine Set
Stitch: “B”, Zigzag Stitch
Stitch Width: 3
Stitch Length: -1
Presser Foot: Satin Foot
Materials:
Materials:
Materials:Materials:
A simple-shaped appliqué fused onto a cotton-type
fabric (base fabric), with a medium weight
tear-away stabilizer underneath. Fusing the
appliqué into place will prevent the appliqué from sh if ting w h ile stitch ing. Th e
stabilizer underneath the fabric is used to support the fabric when using wide
dense stitches.
Procedure:
Procedure:
Procedure:Procedure:
up:
up:up:
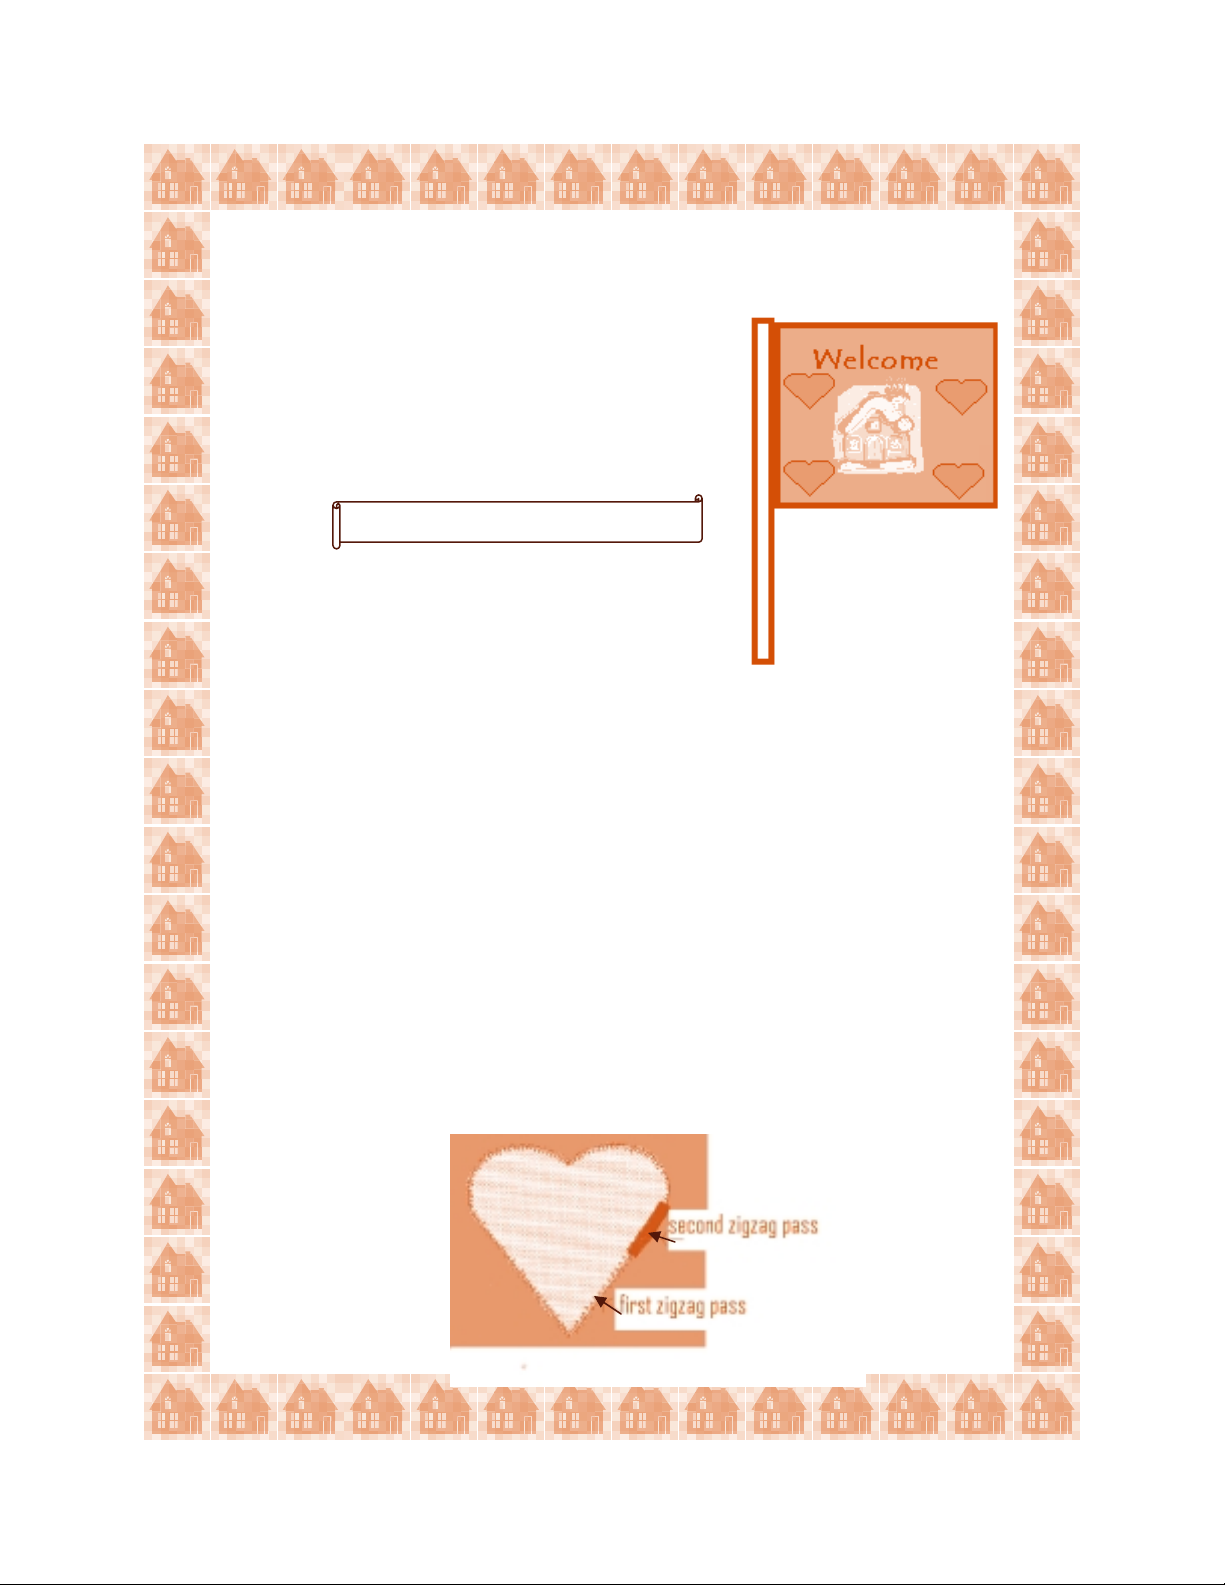
A close zigzag is called a Satin Stitch.
Place the applique under the transparent foot, so that the left swing of the
needle falls on the applique and the right swing of the needle falls on the
base fabric.
Stitch around the applique.
Widen the stitch width to 4 and change the stitch length to below 1.
Stitch around the applique again, covering th e previously sewn stitching.
Sewing over an applique twice is not always necessary, however, it does
give a beautiful full-covered or raised effect.
5
Page 8
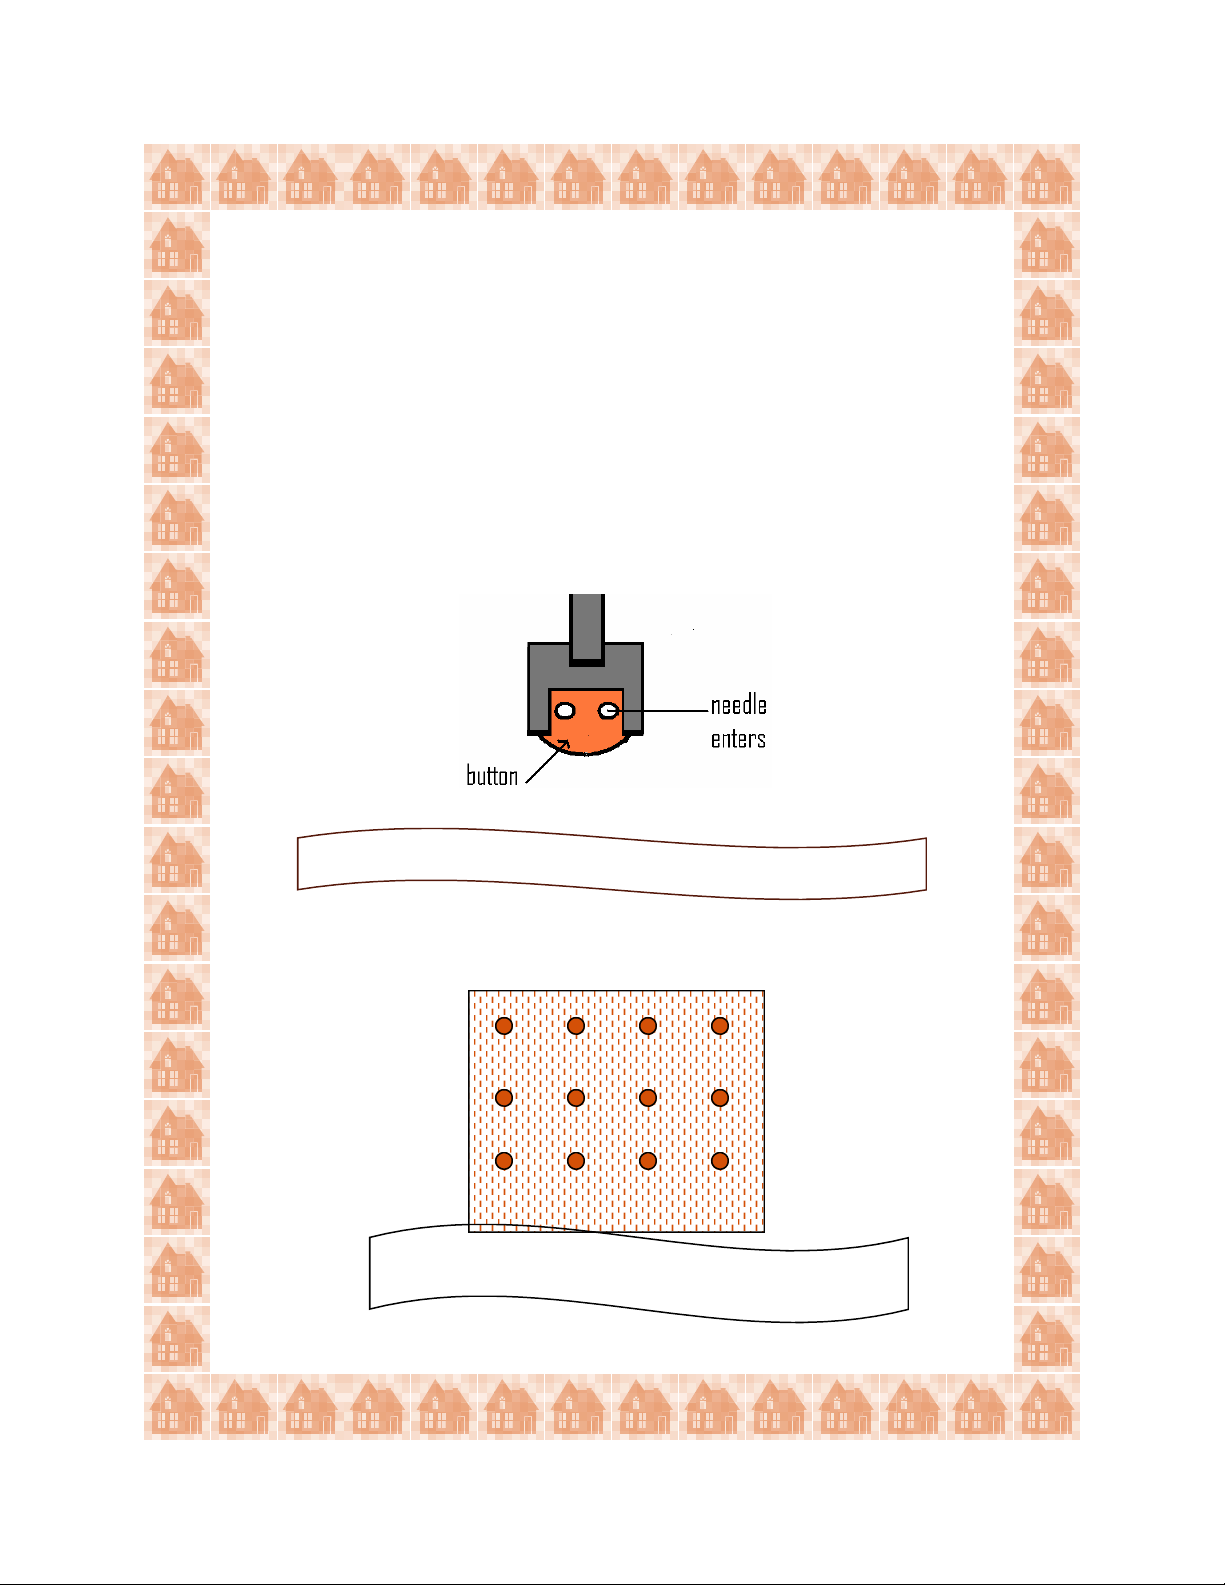
Button Sewing
Machine Set
Machine Set----Up:
Machine SetMachine Set
Stitch: “B”, Zigzag
Stitch Width: Determined by button (usually 3mm)
Stitch Length: (does not apply because feed dogs are lowered)
Feed Dogs: Down Position
Presser Foot: Button Sewing Foot
Materials:
Materials:
Materials:Materials:
Home Décor fabric or shirting
(1) two-hole button
Procedure:
Procedure:
Procedure:Procedure:
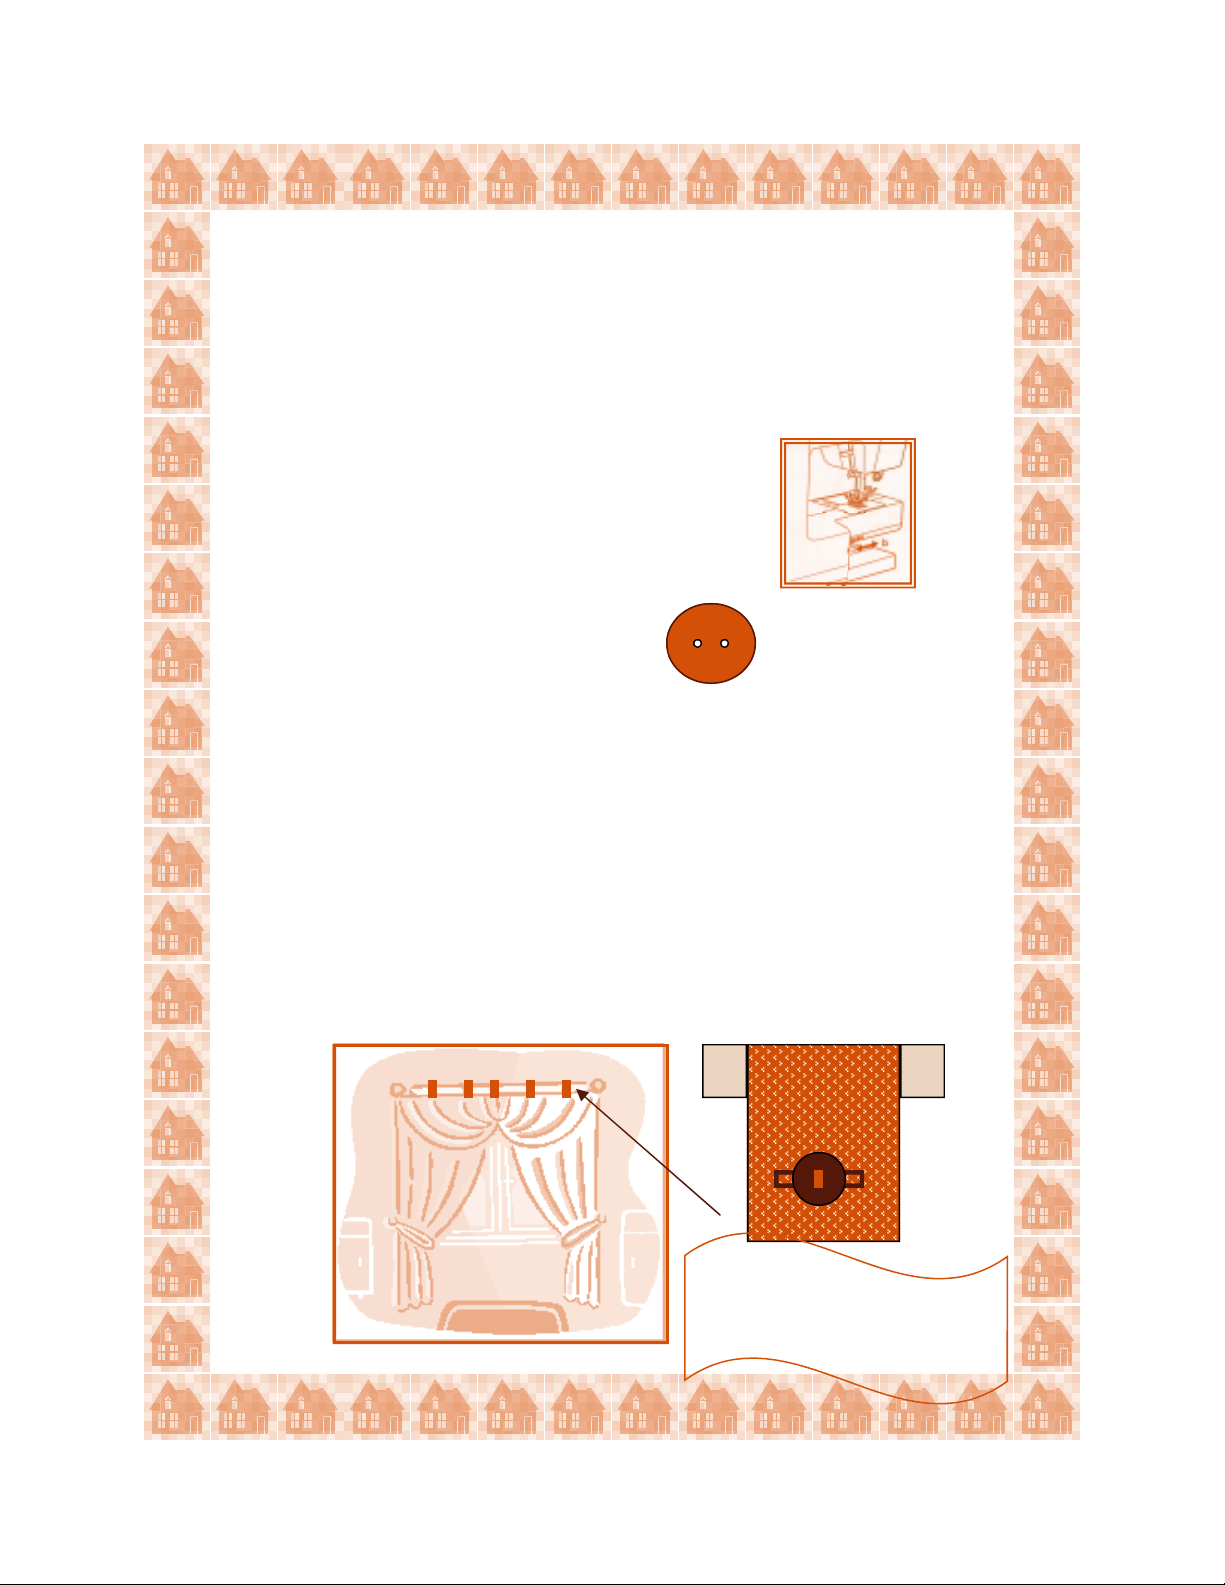
Fold fabric in half and place under foot.
Position the button on the fabric so that the holes in the button are
between the toes of the foot.
Up:
Up:Up:
Lower the presser foot to hold the button in place.
Turn the hand wheel forward, adjust so that the needle goes into either
the right or left hole.
Adjust the stitch width dial to fine tune the swing of the needle into the
other hole.
Recheck the swing of the needle into the other hole. Now use the foot
control to stitch 6-8 stitches.
Use buttonholes and decorative
buttons for versatile and stylish
tabs on curtains.
6
Page 9
Before removing the button and fabric from the machine, set machine
to straight stitch. Leave width at current setting and stitch in place for
three stitches. This forms a tie-off on the back side to secure the button.
Apply a liquid fray-preventer on the backside of fabric on the knots.
Trim threads after they dry, being careful not to cut thread knots.
Note:
Note: Remember to raise the feed dogs when finished.
Note: Note:
For a thread shank, place a needle or toothpick on the button and stitch.
Use decorative buttons to tie-off a quilt or wall hanging!
7
Page 10
Bartack Buttonholes
Machine Set
Machine Set----Up:
Machine SetMachine Set
Stitch: Step One of the Four-Step Buttonhole
Stitch Width: 5-7
Stitch Length: Buttonhole symbol
Presser Foot: Buttonhole Foot (after attaching, push the moveable
white part to most rear position)
Materials:
Materials:
Materials:Materials:
Home décor fabric with interfacing or tear -away stabilizer
Disappearing marking pen or tailor chalk (for marking size of buttonhole)
Button (to establish length of buttonhole)
Procedure:
Procedure:
Procedure:Procedure:
Fold fabric in half crosswise, with interfacing or stabilizer between layers.
Lay button on fabric and mark the top and bottom of the button.
This will establish the starting and ending points of the buttonhole.
Up:
Up:Up:
Push the foot’s white movable piece to the most fo r w ard red line on
the foot.
Place the fabric under the foot, matching the foot’s red mark with the
bottom mark on the fabric.
Sew 5 to 6 stitches of Step One (which is the lower/bottom bartack)
Cut open buttonhole and use a seam sealant to reinforce the buttonhole.
Note: To adjust the density or if the sides are uneven, refer to the manual
for adjustment instructions.
8
Page 11

Turn Pattern Selection knob to Step Two of the Four-Step buttonhole.
Sew, and the machine will stitch in reverse, making lef t sid e o f th e
buttonhole.
Stop sewing when the needle reaches the fabric mark indicating the top
of the buttonhole.
Turn Pattern Selection knob to Step Three, the upper/top bartack.
Sew 5 to 6 stitches.
Turn Pattern Selection knob to Step Four, to form the right side of the
buttonhole.
Sew, the machine will stitch forward , making th e f inal sid e o f the
buttonhole.
Stop sewing when the needle reaches the bottom of the buttonhole,
indicated by the mark on the fabric.
Cut open buttonhole and use a seam sealant to reinforce the buttonhole.
9
Page 12

Blind Hem
Machine Set
Machine Set----Up:
Machine SetMachine Set
Set-up for Step 1 (to finish raw edges)
Stitch: “E”, Multi-Zigzag
Stitch Length: 1.0
Stitch Width: 5
Presser Foot: Standard Foot
Set-up for Step 2
Stitch: ”A”, Straight Stitch
Stitch Length: 4
Stitch Width: 0
Tension Dial: 1
Presser Foot: Standard Foot
Set-up for Step 3 (to create the hem)
Stitch: “D”, Blindhem
Stitch Length: 2.5-3.5
Stitch Width 3-4
Tension Dial: 2
Presser Foot: “F”, Blindhem Foot
Materials:
Materials:
Materials:Materials:
Medium weight woven fabric
Procedure:
Procedure:
Procedure:Procedure:
Up:
Up:Up:
(to baste the fold)
Use the Blind hem to finish the
edges of tablecloths and drapes.
Sew a Multi-Zigzag to f inish one of the fabric’ s raw ed ges .
Guide the fabric so the right swing of the needle is on the
raw edge of the fabric.
10
Page 13

Fold under 1 “ and baste in place.
Position sample with wrong side facing up, and turn the hem back to the
right side, creating a soft fold at the top edge of the hem. The bulk of the
fabric is to the left of the foot.
Begin stitching, making sure the forward stitch es f all near the finished
edge, and the needle’s left swing just bites into the fold, catching only
2 or 3 threads of the fabric.
Note: Always use matching thread to help “hide” the stitches.
11
Page 14

Narrow Hem
Machine Set
Machine Set----Up:
Machine SetMachine Set
Stitch: “A”, Straight Stitch
Stitch Width: 0, Center Needle Position
Stitch Length : 2
Presser Foot: Rolled or Narrow Hem Foot
Materials:
Materials:
Materials:Materials:
Medium to light weight cotton fabric
Procedure:
Procedure:
Procedure:Procedure:
Up:
Up:Up:
(optional foot for Quantum 7312)
Use the Narrow Hem to create
delicate edge finishes.
To start the hem at the very edge of the fabric:
Fold over a 1/8” of the fabric’s edge at the starting point for a distance of a
about an inch.
Fold the fabric over another 1/8”.
Stitch the small hem into place with a Straight Stitch.
Leave the needle in the fabric, but lift the presser foot.
Guide the fabric into the scroll of the foot.
Lower foot and continue to sew, holding the thr ead tails fir mly beh ind the
foot.
Hold fabric taut and slightly up to help the fabric “roll” into the scroll.
12
The foot’s scroll
Page 15

Gathering with the Cording Foot
Machine Set
Machine Set----Up:
Machine SetMachine Set
Stitch: “B”, Zigzag
Stitch Width: 3
Stitch Length: 3
Presser Foot: Cording Foot
Materials:
Materials:
Materials:Materials:
10” long cord of pearl cotto n or st r ing
5” X 3” Home Décor fabric
Procedure:
Procedure:
Procedure:Procedure:
Place a single cord in the center groove of the foot.
Secure the cord by tying a knot at the back of the foot.
Place the fabric under the foot.
Up:
Up:Up:
Sew a test to ensure that the Zigzag stitches are sewing over the cord, not
into the cord. The Zigzag stitch makes a casing for the cord.
After stitching is finished, pull the cord which will draw up or gather the
fabric.
Adjust the gathers evenly by sliding the fabric along the cord.
Sew a straight stitch to secure the gathers into place.
Note:
Note:
Note:Note:
This technique is great for heavy fabrics such as home decorator or
textured fabrics.
13
Page 16

Applying Trims, Cords or Braids
Machine Set
Machine Set----Up:
Machine SetMachine Set
Stitch: “I”, Decorative Stitch
Stitch Width: 5-7
Stitch Length: 1
Presser Foot: Cording Foot
Materials:
Materials:
Materials:Materials:
Three strands of thin cording
Home Décor fabric
Procedure:
Procedure:
Procedure:Procedure:
Thread one decorative cord through each of the foot’s three grooves or
slots.
Secure the three cords at the back of the foot by tying a knot.
Place the fabric under the foot and sew.
Up:
Up:Up:
The foot will hold all the cords in place as they are sewn to the fabric.
Note:
Note:
Note:Note:
There are several decorative cords available, each
creating unique effects to projects.
Experiment with different cords and various
Zigzag-type stitches!
14
Page 17

Attaching Beaded Trims
Machine Set
Machine Set----Up:
Machine SetMachine Set
Stitch: “E”, Multi-Mending
Stitch Width: 5-7
Stitch Length : 2
Presser Foot: Standard Foot
Materials:
Materials:
Materials:Materials:
Beaded trim
Home Décor fabric
Procedure:
Procedure:
Procedure:Procedure:
Press and stitch with a straight stitch a 1” hem into the fabric. Finish
edges if needed.
Place fabric on machine with wrong side facing up.
Up:
Up:Up:
Attach trim to add a
special finishing touch!
Place trim header on fabric’s edge, right side facing down.
Sew on the the trim’s header.
Fabric’s wrong side
Stitch the trim to the fabric at the trim’s header.
15
Page 18

Couching a Strand of Pearls
Machine Set
Machine Set----Up:
Machine SetMachine Set
Stitch: “B”, Zigzag
Stitch Width: Adjust according to size of pearls
Stitch Length: 2-3
Presser Foot: Standard Foot
Tension: 2-3
Materials:
Materials:
Materials:Materials:
Monofilament Thread
String of Pearls, size 3mm
Felt or Stabilized Woven Fabric
Procedure:
Procedure:
Procedure:Procedure:
Lay pearls or other couching trim on top of fabric.
Up:
Up:Up:
Stitch, adjusting width to ensure the stitch slightly encases the trim.
16
Page 19

Faux Tatted or Crocheted Edging
Machine Set
Machine Set----up:
Machine SetMachine Set
Stitch: “K”, Decorative Stitch
Stitch Width: 7
Stitch Length: 4
Presser Foot: Stan da rd Foot
Note:
Note:
Note: Note:
Use a size 90/14 or larger needle
Materials:
Materials:
Materials:Materials:
Linen-like fabric, starched and one long edge hemmed
25wt. cotton thread in both needle and bobbin
Rinse-away stabilizer—fold ed t o cr eate d ouble layer
Procedure:
Procedure:
Procedure:Procedure:
Position stabilizer under the hemmed edge of the fabric, with the bulk
of the fabric to the left of the presser foot.
up:
up:up:
Stitch so that the left swing of the needle just penetrates the folded
edge of the fabric, and the rest of the stitch penetrates the stabilizer.
Secure thread tails on both ends by tying square knots before trimming
them.
A drop of liquid fray preventer will ensure that stitching will not
come undone.
17
Page 20

Crazy Quilting
Machine Set
Machine Set----Up:
Machine SetMachine Set
Stitch: H, I, K, L
Red stretch stitches: A, B, E, F, G, H, I, K, L*
Stitch Width: Adjust acc ording to preference
Stitch Length: Adjust acco rding to preference
Presser Foot: Satin Foot or Standard Foot
*The Red Stretch stitches are only found on the Quantum Decor.
Materials:
Materials:
Materials:Materials:
Assorted fabric scraps
Foundation fabric or paper
Procedure:
Procedure:
Procedure:Procedure:
Crazy-piece the scraps onto the foundation fabric or paper, starting from
the center and working outward.
Up:
Up:Up:
Create Crazy Quilt bed covers
with left over scraps!
Select desired decorative stitch and center the stitching over the seam lines.
Use rayon, metallic or other decorative threads.
Note:
Note: See the Singer Quilting Bible for more ideas on crazy quilting.
Note:Note:
18
Page 21

Shirring with the Gathering Foot
Machine Set
Machine Set----Up:
Machine SetMachine Set
Stitch: “A”, Straight Stitch
Stitch Width: 0, Centered Needle Position
Stitch Length: 4
Tension: Increase the tension to 9
Presser Foot: Gathering Foot
Materials:
Materials:
Materials:Materials:
12” piece of organza (light weight fabric s r ec ommended)
Procedure:
Procedure:
Procedure:Procedure:
Pull one to two threads on the fabric’s crossw ise gr ain, to create a straight
stitching line.
Turn the handwheel to ensure the needle is correctly positioned. It
should line up with the Gathering Foot’s needle opening.
Up:
Up:Up:
Shirr a single row to gather for a ruffle or
shirr several rows for a textured effect.
Sew on the “pulled” line.
Use the foot's edge as a guide to sew the next row of stitching. Rows will
be 1/4” apart if the foot is used as a guide.
Sew 3 or 4 more rows.
Note:
Note:
Note:Note:
After several rows of shirring have been sewn, use the Honeycomb stitch,
Red Stretch “E” to tack the gathers into place, thus creating a
beautiful smocking effect.
19
Page 22

Using the Even Feed Foot
to Sew Multiple Fabric Layers
(optional for Quantum 7312)
Machine Set
Machine Set----Up:
Machine SetMachine Set
Stitch: “A”, Straight Stitch
Stitch Width: 0, Center Needle Position
Stitch Length: 3
Presser Foot: Even Feed Foot
Materials:
Materials:
Materials:Materials:
(2) 5” X 5” pieces of cotton with a piece of batting between the two fabrics
Procedure:
Procedure:
Procedure:Procedure:
Up:
Up:Up:
Sew from one edge to the other down the center of the fabric.
The Even Feed Foot (also known as a Walking Foot) has its
own set of feed dogs that work in conjunction with the machine’s feeding system to improve the flow of the fabric. This is
particularly important when sewing sever al lay er s of fabric, such
as in quilting. The Even Feed Foot “pulls” the top layer or layers of fabric through at the same speed as the machine’s feed
dogs are pulling the bottom layer or layers of fabric - - -
making for more even feeding!
20
Page 23

Using the Even Feed Foot
to Sew Plaid Fabrics
(optional for Quantum 7312)
Machine Set
Machine Set----Up:
Machine SetMachine Set
Stitch: “A”, Straight Stitch
Stitch Width: 0, Center Needle Position
Stitch Length: 3
Presser Foot: Even Feed Foot
Materials:
Materials:
Materials:Materials:
(2) 5” X 5” pieces of plaid or striped fabric
Procedure:
Procedure:
Procedure:Procedure:
Up:
Up:Up:
Match plaids, right sides together
Sew the two pieces together using the built-in seam guide on the machine
to maintain a consistent seam allowance.
Match plaids, stripes or border prints with ease!
21
Page 24

Using the Even Feed Foot
to Sew Pile Fabrics
(optional for Quantum 7312)
Machine Set
Machine Set----Up:
Machine SetMachine Set
Stitch: “B”, Zigzag
Stitch Width: 2
Stitch Length: 1.5
Presser Foot: Even Feed Foot
Materials:
Materials:
Materials:Materials:
(2) 5” X 5” pieces of fake-fur
Procedure:
Procedure:
Procedure:Procedure:
Up:
Up:Up:
Sew the two pieces together using the built-in seam guide on the machine
to maintain a consistent seam allowance.
s
i
t
o
T
g
h
o
F
d
e
e
F
n
e
v
E
e
w
t
a
e
r
l
i
p
r
u
f
n
e
v
e
m
i
n
a
m
n
e
h
o
l
c
o
a
w
b
,
s
m
u
t
s
!
s
l
g
n
i
k
a
e
k
n
a
l
r
o
s
e
-
e
k
a
f
s
t
s
d
n
a
u
t
d
e
f
f
22
Page 25

Straight Stretch Stitch
for Woven Fabrics
(Quantum Décor model only)
Machine Set
Machine Set----Up:
Machine SetMachine Set
Stitch: Red Stretch “A”, Triple Straight Stitch
Stitch Width: 0, Center Needle Position
Stitch Length: Red “S” setting
Presser Foot: S ta n dard Foot
Materials:
Materials:
Materials:Materials:
Denim, folded in half
Procedure:
Procedure:
Procedure:Procedure:
Up:
Up:Up:
Stitch the two layers.
This stitch is wonderful for built-in strength!
It is ideal when sewing heavy-weight fabrics or to
create a bolder straight stitch. Try it as a topstitch on jeans, or a home decorating project.
The triple straight stitch provides excellent
reinforcement for projects, such as stuffed
animals or upholstery .
23
Page 26

Straight Stretch Stitch
for Stretch Fabrics
(Quantum Décor model only)
Machine Set
Machine Set----Up:
Machine SetMachine Set
Stitch: Red Stretch “A”, Triple Straight Stitch
Stitch Width: 0, no width
Stitch Length: Red “S” setting
Presser Foot: S ta n dard Foot
Materials:
Materials:
Materials:Materials:
Knit fabric, folded in half
Yellow Band Needle
Procedure:
Procedure:
Procedure:Procedure:
Stitch the two layers.
After sewing, notice how the stitch stretches when the fabric is stretched.
Up:
Up:Up:
Try the Straight St r e tc h Stit ch for “no-pop” seams
on dance wear, workout clothes and bathing suits.
24
Page 27

Ribbing Application
(Quantum Décor model only)
Machine Set
Machine Set----Up:
Machine SetMachine Set
Stitch: Red Stretch “G”, Overedge stitch
Stitch Width: 7
Stitch Length: Red “S”
Presser Foot: Standard Foot
Materials:
Materials:
Materials:Materials:
6” X 6” Medium to heavy weight knit fabric or polar fleece
3” X 6” Ribbing
Procedure:
Procedure:
Procedure:Procedure:
Cut a curve in the knit fabric to resemble a neckline.
Fold ribbing in half lengthwise.
Starting at the left side of the knit curve, place ribbing on front side of
curve.
Up:
Up:Up:
Match all 3 cut edes and place under the foot.
Line up fabric edges with guide on foot and stitch the length of the seam.
Stretch ribbing slightly to fit the cut edge of the knit.
When finished, lift foot and pull threads and fabr ic straight bac k behind
foot and trim.
Note:
Note: The Overedge Stretch Stitch makes sewing seams in knits look as
Note: Note:
though they were finished on a serger. This stitch is stronger and more durable
than overlock/serger stitching....
25
Page 28

Overedge Stitching
(Quantum Décor model only)
Machine Set
Machine Set----up:
Machine SetMachine Set
Stitch: “G”, Double Overedge
Stitch Width: 5-7
Stitch Length: 1.0
Presser Foot: S ta n dard Foot
Materials:
Materials:
Materials:Materials:
(2) pieces of woven fabric
Procedure:
Procedure:
Procedure:Procedure:
Right sides together, place the fabric under the foot.
Align the fabric’s edges with the foot’s edge.
Sew, joining two pieces of fabric and finish ing th e ed ges in one o per ation.
up:
up:up:
Use the Overedge stitch to finish almost
every seam...clean professional finish
inside every sewing project !!!
26
XXXXXXXXXXXXXXXXXXXXXXXXXXXX
Page 29

Attaching Elastic
Machine Set
Machine Set----Up:
Machine SetMachine Set
Stitch: “E”, Multi-Zigzag or Red Stretch “E”, Honeycomb Stitch*
Stitch Width: 7
Stitch Length: 3 for Multi-Zigzag or Red “S” for Honeycomb Stitch*
Presser Foot: Standard Foot
Materials:
Materials:
Materials:Materials:
Nylon Tricot 4” X 8”
3/8” wide elastic strip, 7” long
Procedure:
Procedure:
Procedure:Procedure:
Thread elastic through the needle-opening hole in th e foot.
Pull 2-3” of elastic to the back of the foot, enough to firmly grasp.
Position fabric under the foot.
Up:
Up:Up:
Sew, gently stretching the elastic while sewing.
Note
Note: The foot holds the elastic into place, making it easier to evenly
NoteNote
stretch the elastic.
Apply elastic on fitted
sheets or baby
bumper covers!
*Found only on the Quantum Décor.
27
Page 30

Sewing with a Wing Needle
Machine Set
Machine Set----Up:
Machine SetMachine Set
Stitch: “B”, Zigzag Stitch
Stitch Width: 1
Stitch Length : 5
Presser Foot: Transparent Satin Foot or Standard Foot
Needle: Wing Needle
Note:
Note:
Note:Note:
----For best results use a stitch with forward-back movement,
so that the needle penetrates the same hole more than
once.*
-For more pronounced holes stitch over previous stitching,
making sure the needle goes into the same holes
Materials:
Materials:
Materials:Materials:
Linen or other natural fiber fabric– spray starch for added firmness
60-80 weight white sewing thr ead
60-80 weight white sewing thread in bobbin
Procedure:
Procedure:
Procedure:Procedure:
Up:
Up:Up:
Trace a design onto fabric using chalk, w ater -s oluble or air-soluble marker.
(use stencils, templates or create a design)
Stitch along the drawn lines of the design.
Use a Wing needle to create a beautiful hem-stitching
effect on pillowcases, napkins, or table runners.
*Found only on the Quantum Décor.
28
Page 31

Sewing on Leather
Machine Set
Machine Set----Up:
Machine SetMachine Set
Stitch: “A”, Straight Stitch
Stitch Width: 0, Center Needle Position
Stitch Length: 3-4
Presser Foot: Transparent Satin Foot or Standard Foot
Needle: Leather Needle (Wedge Needle)
Materials:
Materials:
Materials:Materials:
Fashion Leather
Procedure:
Procedure:
Procedure:Procedure:
Finger press a 1-inch hem in the leather.
Sew, using the seam guides to ensure a straight stitching.
Note:
Note:
Note:Note:
A Roller Foot or Even Feed Foot feeds the leather, vinyl or suede
through the machine more easily.
Up:
Up:Up:
29
Page 32

Decorative Bobbin Work
Machine Set
Machine Set----Up:
Machine SetMachine Set
Stitch: “G”, “I” or “J”, Decorative Stitch
Stitch Width: 7
Stitch Length: 3
Presser Foot: S ta n dard Foot
Tension: 7-8
Note:
Note: Any open stitch that does not have too much
Note: Note:
forward/reverse or side-to-side movement works well.
Materials:
Materials:
Materials:Materials:
Felt or Stabilized Fabric
2mm Silk Ribbon or light-weight yarn
Procedure:
Procedure:
Procedure:Procedure:
Hand-wind ribbon onto bobbin, insert bobbin into the machine.
by pass the tension in the bobbin.
Up:
Up:Up:
Place matching colored standard thread in the needle.
Slowly stitch, with wrong side of the fabric facing up.
Use this technique to create textured effects on cr azy quilts, pillo w s trims,
and more.
30
 Loading...