


Before Using the Product
Thank you very much for your buying the SINDOH’s Product.
This Quick Start Guide specifies the right way to use the Machine and simple repairing in
detail to maintain it in optimal state at all times and to contribute to your company’s office
rationalization and efficiency.
Please read the Quick Start Guide carefully and keep it close at head, before using this
product. Before using the Machine, read the Guidelines for Safety Use to use the Machine
sefely and correctly.
Prohibition and Restriction of Reproduction
1. The content of this Quick Start Guide is subject to change without prior notice.
We disclaim all responsibility for any direct/indirect loss due to your handling this
machine or the operation results or for any damage caused by misuse.
2. Copying or printing paper money in circulation, banknote, revenue stamp, bond, stock,
bank bill, check, passport, or driver’s license is forbidden by the laws.
3. The works such as copyright book, music, picture, map, drawing, or photograph can be
used by copying it for personal or family use or within the corresponding scope, but
other uses are forbidden by the laws.
4. The above contents in this paragraph are part of legislation and they are not the
reprinting from the legislation. We disclaim all the responsibility for the accuracy or
integrity. For the legality of a copy or print, we suggest you get legal advice.

Table of contents
Chapter 1. Introduction
1. Introduction -----------------------------------------------------------------
2. Environmental Information ------------------------------------------------
ENERGY STAR® ------------------------------------------------------------------
What is an ENERGY STAR® Product? ------------------------------------------
Environmental benefits of power management --------------------------------
Recycled Paper ---------------------------------------------------------------------
Duplex printing --------------------------------------------------------------------
3. Safety information ---------------------------------------------------------
Disassemble and modification ---------------------------------------------------
Power cord -------------------------------------------------------------------------
Power source ----------------------------------------------------------------------
Power plug--------------------------------------------------------------------------
Environmental initiatives
Warning and precaution symbols -----------------------------------------------
Meaning of symbols --------------------------------------------------------------
---------------------------------------------------------
1-2
1-3
1-3
1-3
1-3
1-3
1-3
1-3
1-4
1-4
1-4
1-5
1-5
1-6
1-6
Grounding --------------------------------------------------------------------------
Installation --------------------------------------------------------------------------
Ventilation --------------------------------------------------------------------------
Actions in response to troubles --------------------------------------------------
Consumables ----------------------------------------------------------------------
When moving the machine ------------------------------------------------------
When using the machine ---------------------------------------------------------
Papers ------------------------------------------------------------------------------
When the Fax is not installed : Before successive holidays ------------------
Battery Caution --------------------------------------------------------------------
ⅰ
Table of contents
1-7
1-7
1-8
1-8
1-8
1-9
1-10
1-10
1-10
1-10

4. Regulation notices ----------------------------------------------------------
INTERFERENCE-CAUSING EQUIPMENT STANDARD (ICES-003 ISSUE 5)
USER INSTRUCTIONS FCC PART 15 - RADIO FREQUENCY DEVICES
(for U.S.A. users) ------------------------------------------------------------------
1-11
1-11
(for Canada users) -----------------------------------------------------------------
For users in countries not subject to class B regulations ---------------------
Laser safety ------------------------------------------------------------------------
Internal laser radiation ------------------------------------------------------------
CDRH regulations ----------------------------------------------------------------
Laser safety label -----------------------------------------------------------------
Ozone release ---------------------------------------------------------------------
Notification for California Customers -------------------------------------------
5. Caution notations and labels ----------------------------------------------
6. Special Notice to User -----------------------------------------------------
For Canada -------------------------------------------------------------------------
For U.S.A ---------------------------------------------------------------------------
For New Zealand ------------------------------------------------------------------
7. Space requirements --------------------------------------------------------
1-11
1-11
1-12
1-12
1-12
1-13
1-13
1-13
1-14
1-15
1-15
1-15
1-17
1-18
8. Operation precautions ------------------------------------------------------
Power source ----------------------------------------------------------------------
Operating environment -----------------------------------------------------------
Storage of copies -----------------------------------------------------------------
9. Legal restrictions on reproduction ----------------------------------------
1-19
1-19
1-19
1-19
1-20
Table of contents
ⅱ

Chapter 2. Overview of This Machine
1. User’s Guides ---------------------------------------------------------------
2. User Manual CD ------------------------------------------------------------
3. Notations and symbols used in this manual ------------------------------
4. About this machine --------------------------------------------------------
Front side ---------------------------------------------------------------------------
Rear side ---------------------------------------------------------------------------
Booklet manuals ------------------------------------------------------------------
User’s guides included in User Manual CD ------------------------------------
Operating environment -----------------------------------------------------------
Procedural instruction -------------------------------------------------------------
Symbols used in this manual ----------------------------------------------------
Product and key names ----------------------------------------------------------
Name of each part -----------------------------------------------------------------
Option configuration ---------------------------------------------------------------
List of optional components -----------------------------------------------------
2-2
2-2
2-2
2-3
2-3
2-4
2-4
2-4
2-5
2-6
2-6
2-6
2-9
2-10
2-10
5. About power supply -------------------------------------------------------
6. Names and functions of Control Panel keys ------------------------------
7. About the Message Window display -------------------------------------
8. Entering characters --------------------------------------------------------
ⅲ
Power Switch and Power key locations -----------------------------------------
Turning the Power Switch ON or OFF -------------------------------------------
Using the Power key --------------------------------------------------------------
Main Screen (Copy Mode) -------------------------------------------------------
Main Screen (Scan Mode) -------------------------------------------------------
Main Screen (Fax Mode) --------------------------------------------------------
Table of contents
2-11
2-11
2-12
2-13
2-14
2-17
2-17
2-17
2-18
2-19

Changing Input Mode -------------------------------------------------------------
Key Operation ----------------------------------------------------------------------
Chapter 3. Loading Paper
2-19
2-19
1. Paper ------------------------------------------------------------------------
Unavailable paper -----------------------------------------------------------------
Storing paper -----------------------------------------------------------------------
3. Loading Paper in Tray 1, Tray 2 -------------------------------------------
Checking the available paper types ---------------------------------------------
Checking the available paper sizes -----------------------------------------------
Precautions for correct operations -----------------------------------------------
2. Loading paper into the Manual Feed Tray ---------------------------------
How to load paper into the Manual Feed Tray ----------------------------------
Loading postcards -----------------------------------------------------------------
Loading envelopes -----------------------------------------------------------------
Chapter 4. Initial Settings of This Machine
3-2
3-2
3-3
3-4
3-4
3-5
3-6
3-6
3-8
3-9
3-10
1. Preparation for network connection (for administrators) -----------------
Checking a LAN cable for connection -------------------------------------------
Assigning an IP address ---------------------------------------------------------
Table of contents
4-2
4-2
4-2
ⅳ

Chapter 5. Basic Usage
1. Using the print function (Windows environment) -------------------------
Checking a LAN cable for connection -------------------------------------------
Checking the network settings --------------------------------------------------
Installing the printer driver --------------------------------------------------------
Changing the installation settings
(Windows 7/8/8.1/Server 2008 R2/Server2012/Server 2012 R2) -------------
Installing the printer driver --------------------------------------------------------
Configuring the optional environment of this machine ------------------------
2. Using the scan function ----------------------------------------------------
Printer driver -----------------------------------------------------------------------
Preparation for printing (network connection) ----------------------------------
Preparation for printing (USB connection) --------------------------------------
Initial settings of the printer driver ----------------------------------------------
How to print -----------------------------------------------------------------------
Available operations in scan function -------------------------------------------
How to send -----------------------------------------------------------------------
5-2
5-2
5-2
5-2
5-3
5-3
5-5
5-5
5-6
5-9
5-9
5-10
5-12
5-12
5-13
3. Using the copy function ----------------------------------------------------
4. Printing a file stored on USB memory -------------------------------------
5. Registering a destination ---------------------------------------------------
ⅴ
How to copy -----------------------------------------------------------------------
Introduction of copy function -----------------------------------------------------
Supported USB memory devices -----------------------------------------------
Printing procedure ----------------------------------------------------------------
Address book ----------------------------------------------------------------------
Registering an address book -----------------------------------------------------
Table of contents
5-15
5-15
5-16
5-18
5-18
5-18
5-20
5-20
5-20

Chapter 6. Specifications
1. Checking the specifications of this machine ------------------------------
2. Checking the specifications of optional devices --------------------------
Reverse Automatic Document Feeder D200RDF -----------------------------
Warranty Conditions
6-2
6-4
6-4
Table of contents
ⅵ


D200 Series
Quick Start Guide
Introduction
1

Introduction
1. Introduction
This [Quick Start Guide] uses illustrations to describe operating procedures for the most commonly used
functions in an easy-to-understand way.
Start by using this manual to become proficient with the useful functions that this machine offers.
For details on the various functions, refer to the User’s Guides on the User Manual CD included with this
machine.
In order to operate the machine safely and properly, be sure to read the safety information on page 1-4 of this
manual before use.
In addition, this manual contains the following information. Be sure to read the manual before using the
machine.
- Items that must be observed to use the machine safely
- Information regarding product safety
- Precautions when using the machine
- Descriptions on trademarks and copyrights
The illustrations and screens used in this manual may appear slightly different from views of the actual
equipment and screens.
1-2

Introduction
2. Environmental Information
Environmental initiatives
The company continuously strives to reduce the negative environmental impacts of all stages of its business
operations. As part of such activities, the company is implementing resource-saving steps by reducing the
number of pages in the User's Guide.
For the information necessary to operate the machine, please refer to the bundled User Manual CD.
ENERGY STAR®
As an ENERGY STAR® Partner, this machine meets the ENERGY STAR® Guidelines for energy efficiency.
1
What is an ENERGY STAR® Product?
An ENERGY STAR® product has a special feature that allows it to automatically switch to a “low-power
mode” after a period of inactivity. An ENERGY STAR® product uses energy more efficiently, saves you money
on utility bills and helps protect the environment.
Environmental benefits of power management
Electricity consumption of a device depends on both its properties and the way of using the device. Suitable
power management setting offers you resource saving usage way. By setting the time to go into power saving
modes (e.g. sleep mode) shorter (or optimal), electricity consumption can be reduced.
Recycled Paper
This product can print on recycled paper and environmental stewardship initiatives certified paper which com-
plies with European standard EN 12281 as well as virgin paper. In addition it can print on lighter paper, 64g/m2
for example. Using such light paper contributes to resources-saving.
Duplex printing
With a product which has a duplex unit, you can print on both sides of paper automatically. Using this function
leads to reducing consumption of natural resources and your cost.
Attached printer driver provides this duplex printing function as initial setting in your computer (The setting can
be changed after installation manually).
1-3
Introduction
3. Safety information
This section contains detailed instructions on the operation and maintenance of this machine. To achieve optimum
utility of this device, all operators should carefully read and follow the instructions in this manual.
Please read the following section before connecting the machine to the supply. It contains important information
related to user safety and preventing equipment problems.
Please keep this manual in a handy place near the machine.
Make sure you observe all of the precautions appear in each section of this manual.
-Some parts of the contents of this section may not correspond with the purchased product.
The following indicators are used on the warning labels or in the manuals to categorize the level of safety
warnings.
- Ignoring this warning could cause serious injury or even death.
- Ignoring this caution could cause injury or damage to property.
Reference
Warning and precaution symbols
Warning
Caution
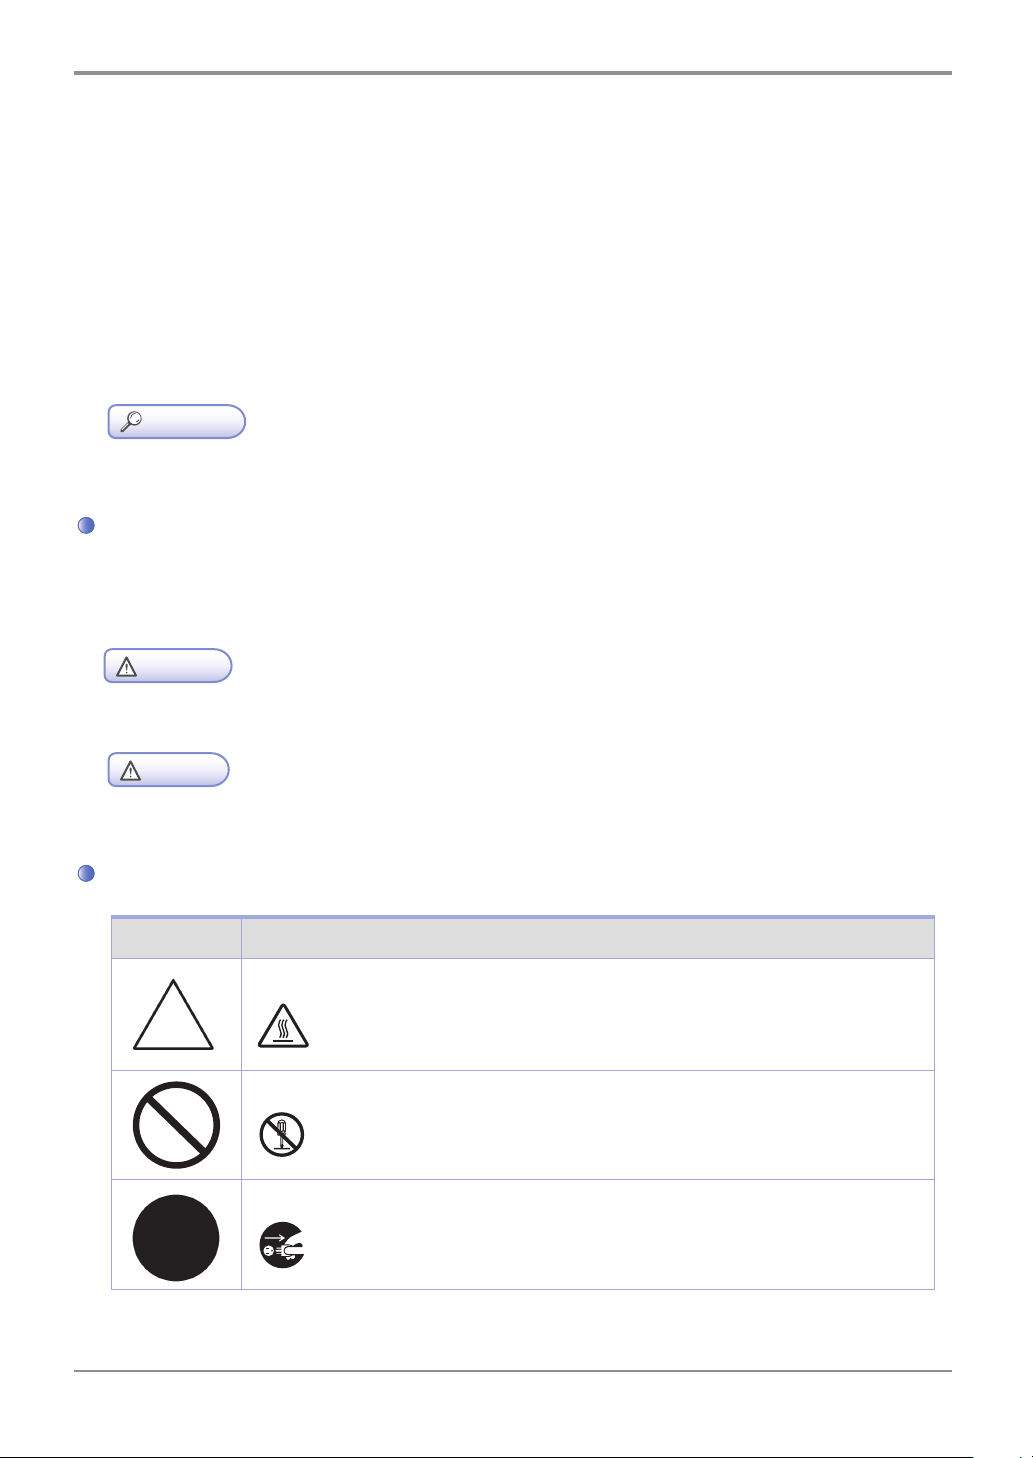
Meaning of symbols
Symbol Description
A triangle indicates a danger against which you should take precaution.
1-4
A diagonal line indicates a prohibited course of action.
A solid circle indicates an imperative course of action.
This symbol warns against cause burns.
This symbol warns against dismantling the device.
This symbol indicates you must unplug the device.
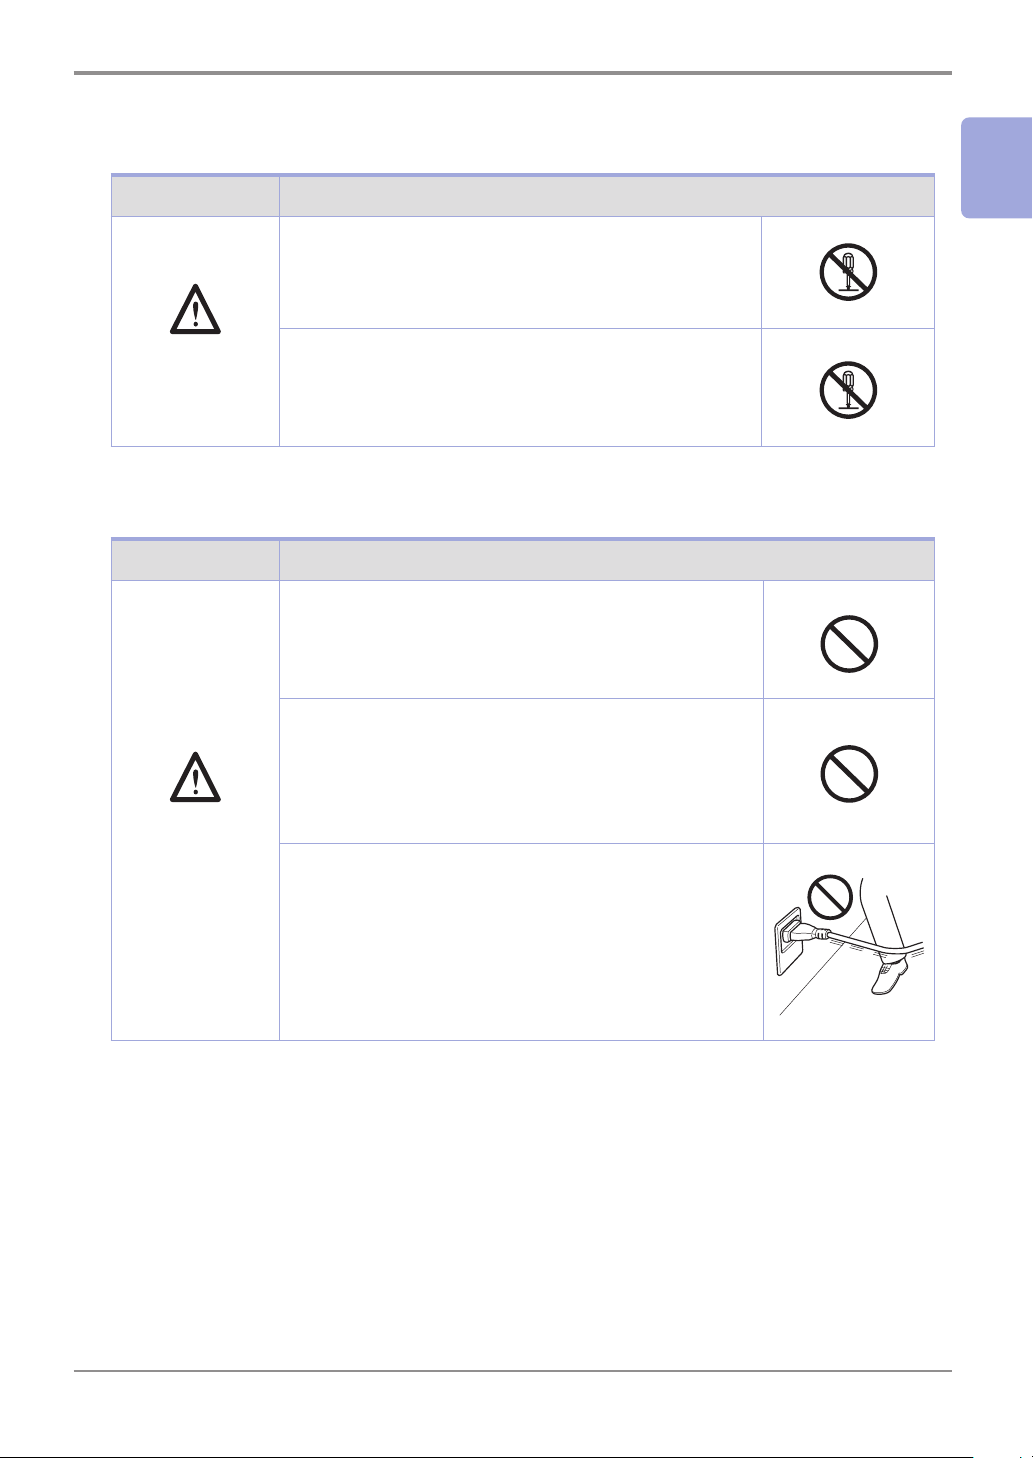
Disassemble and modification
Introduction
Symbol Description
WARNING
Power cord
Symbol Description
WARNING
1
Do not modify this product, as a fire, electrical shock, or
breakdown could result. If the product employs a laser,
the laser beam source could cause blindness.
Do not attempt to remove the covers and panels which
have been fixed to the product. Some products have a highvoltage part or a laser beam source inside that could cause
an electrical shock or blindness.
Use only the power cord supplied in the package. If a power
cord is not supplied, only use the power cord and plug that
is specified in POWER CORD INSTRUCTION. Failure to use
this cord could result in a fire or electrical shock.
Do not use the power cord other than being supplied in the
package. If a power cord is not supplied, only use the power
cord and plug that is specified in POWER CORD INSTRUCTION.
Failure to use this cord could result in a fire or electrical shock.
Do not scratch, abrade, place a heavy object on, heat, twist,
bend, pull on, or damage the power cord. Use of a damaged
power cord (exposed core wire, broken wire, etc.) could
result in a fire or breakdown. Should any of these conditions
be found, immediately turn OFF the powerswitch, unplug
the power cord from the power outlet, and then call your
authorized service representative.
1-5
Introduction
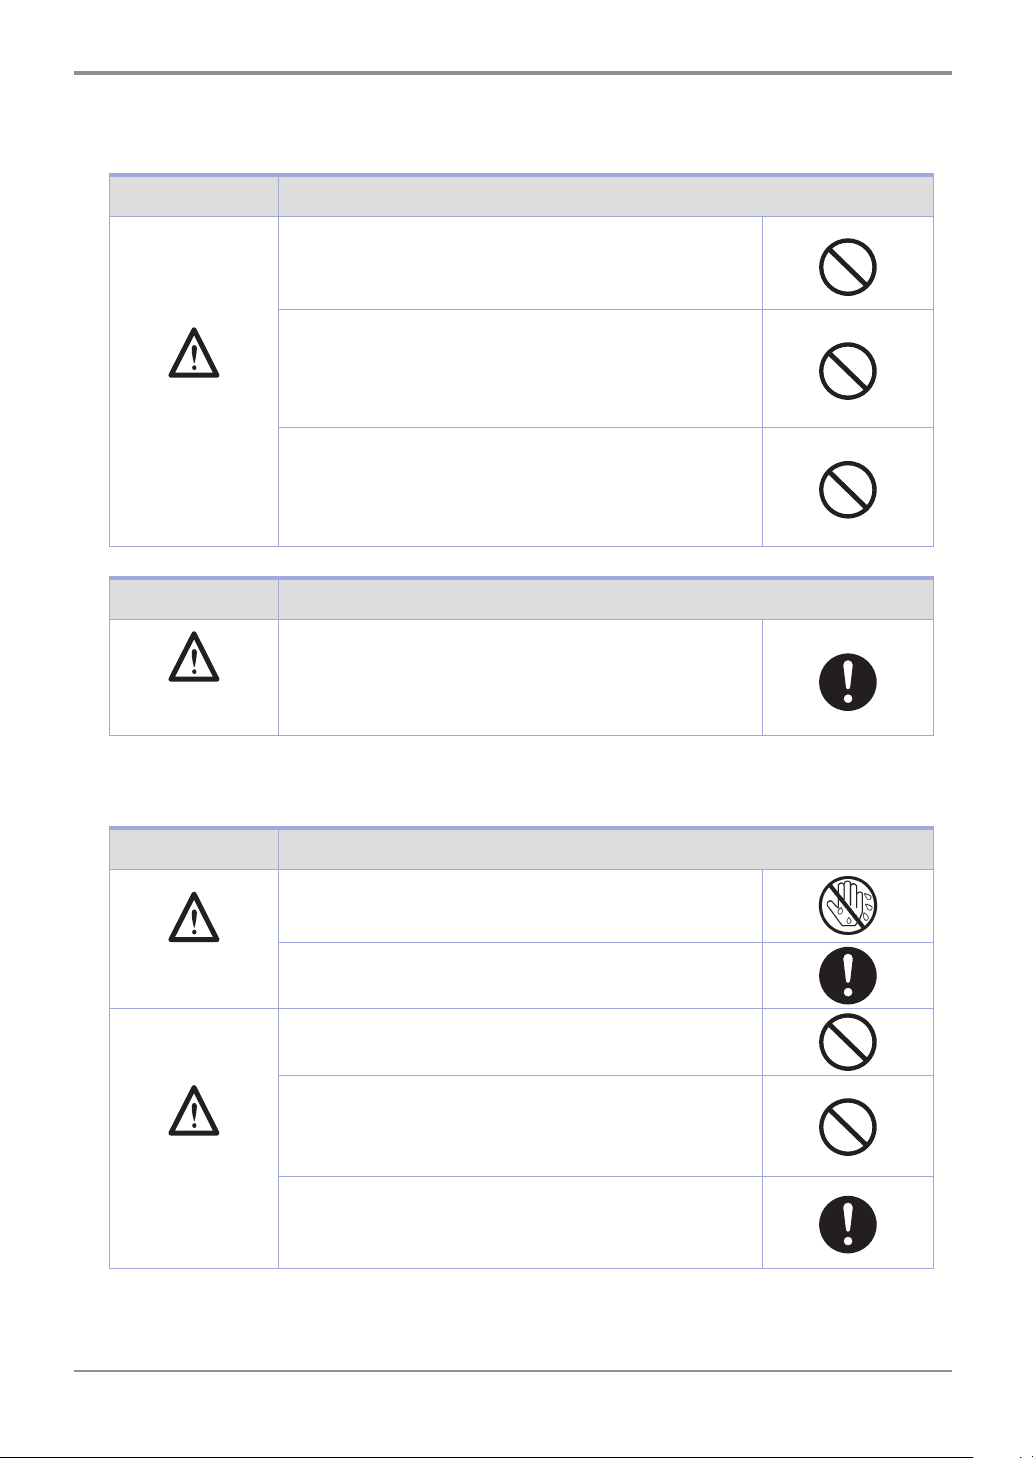
Power source
Symbol Description
WARNING
Symbol Description
Do not use the power source voltage other than being
specified on the machine. Failure to do that could result in
a fire or electrical shock.
Do not use a multiple outlet adapter to connect any other
appliances or machines.
Use of a power outlet for more than the marked current
value could result in a fire or electrical shock.
Do not use an extension cord in principle. Use of an extension
cord could cause a fire or electrical shock. Contact your
authorized service represen- tative if an extension cord is
required.
CAUTION
Power plug
Symbol Description
WARNING
CAUTION
The outlet must be near the equipment and easily
accessible. Otherwise you can not pull out the power plug
when an emergency occurs.
Do not unplug and plug in the power cord with a wet
hand, as an electrical shock could result.
Plug the power cord all the way into the power outlet.
Failure to do this could result in a fire or electrical shock.
Do not place any objects around the power plug, as the power
plug may be difficult to pull out when an emergency occurs.
Do not tug the power cord when unplugging. Pulling on
the power cord could damage the cord, resulting in a fire
or electrical shock.
Remove the power plug from the outlet more than one time a
year and clean the area between the plug terminals. Dust that
accumulates between the plug terminals may cause a fire.
1-6
Grounding
Introduction
Symbol Description
WARNING
Installation
Symbol Description
WARNING
1
Make sure to ground this product. (Connect the power cord
to an electrical outlet that is equipped with a grounding
terminal.) Failure to do so and an unlikely event of leakage
could result in a fire or electrical shock.
Do not place a flower vase or other container that contains
water, or metal clips or other small metallic objects on this
product. Spilled water or metallic objects dropped inside the
product could result in a fire, electrical shock, or breakdown.
Should a piece of metal, water, or any other similar foreign
matter get inside the product, immediately turn OFF the
power switch, unplug the power cord from the power outlet,
and then call your authorized service representative.
Do not use flammable sprays, liquids, or gases inside or near
this machine. Do not clean the inside of this machine using a
flammable gas duster. A fire or explosion could result.
CAUTION
After installing this product, mount it on a secure base. If
the unit moves or falls, it may cause personal injury.
Do not place the product in a dusty place, or a site exposed
to soot or steam, near a kitchen table, bath, or a humidifier.
A fire, electrical shock, or breakdown could result.
Do not place this product on an unstable or tilted bench,
or in a location subject to a lot of vibration and shock. It
could drop or fall, causing personal injury or mechanical
breakdown.
Do not let any object plug the ventilation holes of this
product. Heat could accumulate inside the product,
resulting in a fire or malfunction.
1-7
Introduction
Ventilation
Symbol Description
Using this product in a poorly ventilated room for a long
time or producing a large volume of copies or prints may
CAUTION
Actions in response to troubles
Symbol Description
WARNING
cause the odor of exhaust air from the machine. Ventilate
the room well.
Do not keep using this product, if this product becomes
inordinately hot or emits smoke, or unusual odor or noise.
Immediately turn OFF the power switch, unplug the power
cord from the power outlet, and then call your authorized
service representative. If you keep on using it as is, a fire
or electrical shock could result.
Do not keep using this product, if this product has been
dropped or its cover damaged. Immediately turn OFF the
power switch, unplug the power cord from the power outlet,
and then call your authorized service representative. If you
keep on using it as is, a fire or electrical shock could result.
CAUTION
Consumables
Symbol Description
WARNING
The inside of this product has areas subject to high
temperature, which may cause burns.
When checking the inside of the unit for alfunctions such
as a paper misfeed, do not touch the locations (around
the fusing unit, etc.) which are indicated by a “Caution
HOT” caution label.
Do not throw the toner cartridge or toner into an open
flame. The hot toner may scatter and cause burns or other
damage.
1-8
Symbol Description
Introduction
CAUTION
Do not leave toner-related parts (toner units, PC drum
units, imaging units or developing units) within easy reach
of children. Licking any of these parts or ingesting toner
could damage your health.
Do not store toner-related parts (toner units, PC drum units,
imaging units or developing units) near devices susceptible
to magnetism, such as precision equipment and data storage
devices, otherwise they may malfunction. They could cause
these products to malfunction.
Do not force open the toner-related parts (toner units, PC
drum units, imaging units or developing units). If toner
tumbles from the toner bottle, take utmost care to avoid
inhaling it or even getting skin contact.
If toner lands on your skin or clothing, wash thoroughly
with soap and water.
If you inhale toner, move to a place with fresh air and gargle
with a lot of water repeatedly. Should you get symptoms
such as coughing, seek medical advice.
If you get toner into your eyes, immediately rinse them with
running water for over 15 minutes. Seek medical advice if
irritation persists.
1
If you swallow toner, rinse out your mouth and drink a
few glasses of water. Seek medical advice if necessary.
When moving the machine
Symbol Description
Whenever moving this product, be sure to disconnect
the power cord and other cables. Failure to do this could
damage the cord or cable, resulting in a fire, electrical shock,
or breakdown.
CAUTION
When moving this product, always hold it at the locations
specified in the User’s Guide or other documents. If the
unit is moved while held at locations other than those
specified, it may fall, causing severe personal injury.
1-9
Introduction
When using the machine
Symbol Description
When using the machine, do not look at the light of the
lamp for a prolonged time. Eyestrain could result.
CAUTION
Papers
Symbol Description
Do not use stapled paper, conductive paper (such as silver
paper or carbon paper) or treated heat-sensitive/inkjet
CAUTION
paper, otherwise a fire may result.
When the Fax is not installed: Before successive holidays
Symbol Description
Unplug the product when you will not use the product for
long periods of time.
CAUTION
Battery Caution
Symbol Description
Risk of explosion if battery is replaced by an incorrect
type.
Dispose of used battery according to the instructions.
CAUTION
1-10

4. Regulation notices
USER INSTRUCTIONS FCC PART 15 - RADIO FREQUENCY DEVICES
(for U.S.A. users)
Introduction
1
- This equipment has been tested and found to comply with the limits for a Class A digital device,
-The design and production of this unit conform to FCC regulations, and any changes or
-This device must be used with a shielded interface cable. The use of non-shielded cables is
INTERFERENCE-CAUSING EQUIPMENT STANDARD (ICES-003 ISSUE 5) (for Canada users)
Note
pursuant to Part 15 of the FCC Rules. These limits are designed to provide reasonable protection
against harmful interference when the equipment is operated in a commercial environment. This
equipment generates, uses and can radiate radio frequency energy and, if not installed and used in
accordance with the instruction manual, may cause harmful interference to radio communications.
Operation of this equipment in a residential area is likely to cause harmful interference in which
case the user will be required to correct the interference at his own expense.
Warning
modifications must be registered with the FCC and are subject to FCC control. Any changes
made by the purchaser or user without first contacting the manufacturer will be subject to
penalty under FCC regulations.
likely to result in interference with radio communications and is prohibited under FCC rules.
This Class A digital apparatus complies with Canadian ICES-003.
Cet appareil numérique de la classe A est conforme à la norme NMB-003 du Canada.
For users in countries not subject to class B regulations
-This is a Class A product. In a domestic environment this product may cause radio
- This device must be used with a shielded interface cable. The use of non-shielded cables
Warning
interference in which case the user may be required to take adequate measures.
is likely to result in interference with radio communications and is prohibited under CISPR
rules and local rules.
1-11
Introduction
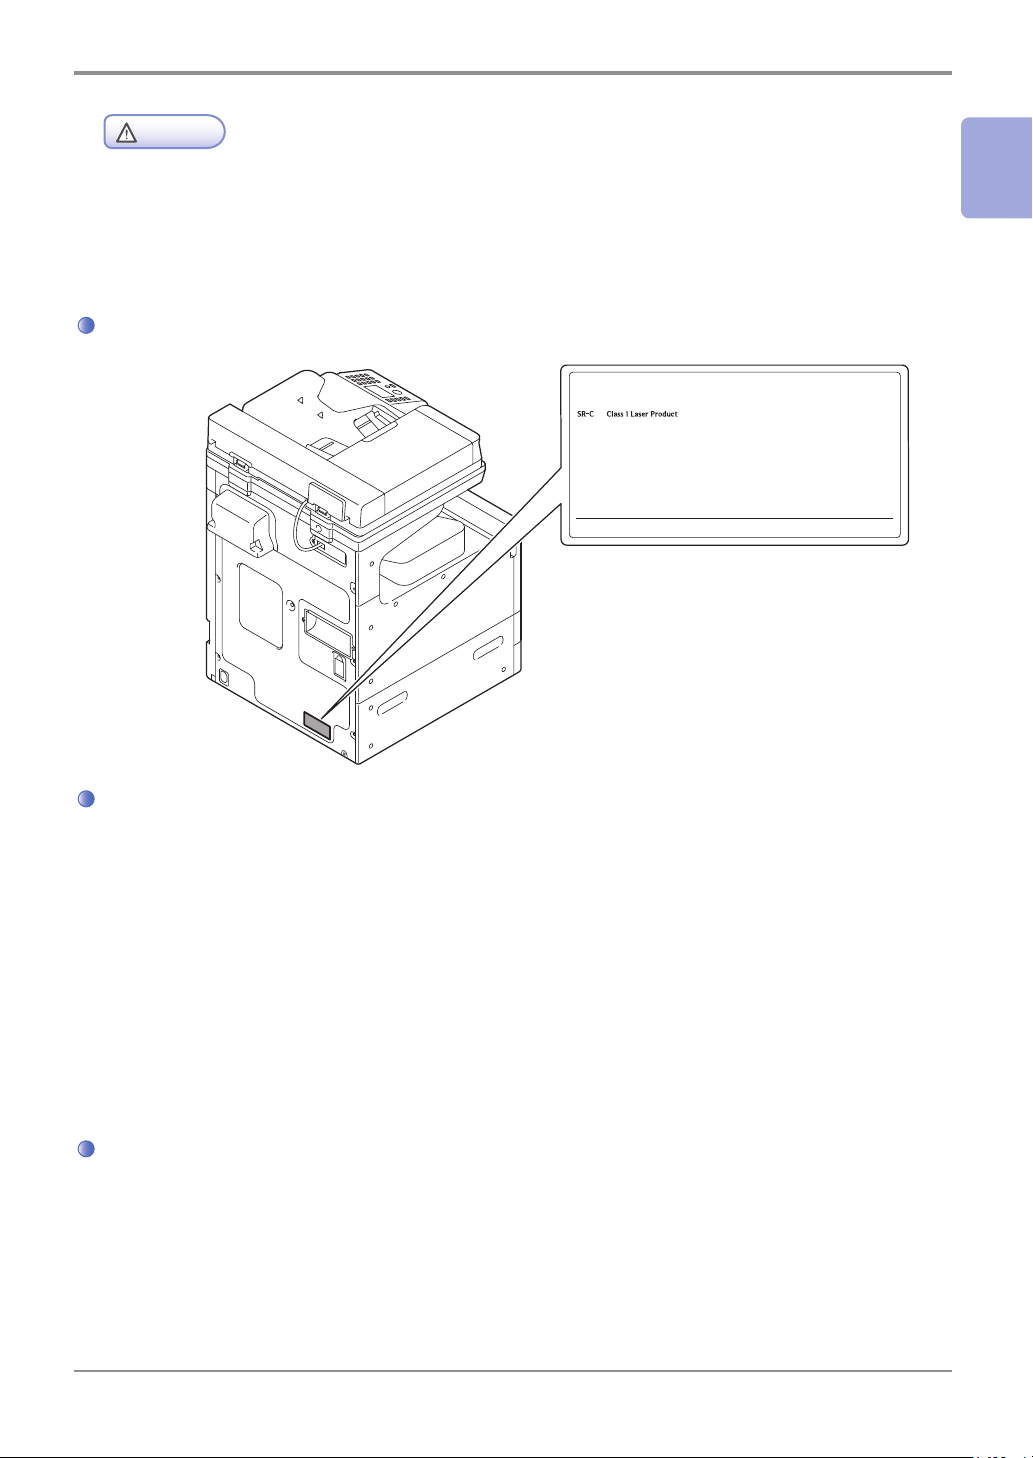
Laser safety
This is a digital machine which operates using a laser. There is no possibility of danger from the laser provided the
machine is operated according to the instructions in the manuals.
Since radiation emitted by the laser is completely confined within protective housing, the laser beam cannot escape
from the machine during any phase of user operation.
This machine is certified as a Class 1 laser product: This means the machine does not produce hazardous laser radiation.
Internal laser radiation
Maximum Average Radiation Power : 6.0 μW at the laser aperture of the print head unit.
Wavelength : 770-800 nm
This product employs a Class 3B laser diode that emits an invisible laser beam.
The laser diode and the scanning polygon mirror are incorporated in the print head unit. The print head unit is
NOT A FIELD SERVICE ITEM :
Therefore, the print head unit should not be opened under any circumstances.
Laser Aperture of
the Print Head Unit
Print Head
CDRH regulations
This machine is certified as a Class 1 Laser product under Radiation Performance Standard according to the
Food, Drug and Cosmetic Act of 1990. Compliance is mandatory for Laser products marketed in the United
States and is reported to the Center for Devices and Radiological Health (CDRH) of the U.S. Food and Drug
Administration of the U.S. Department of Health and Human Services (DHHS). This means that the device
does not produce hazardous laser radiation.
The label shown on page 1-11 indicates compliance with the CDRH regulations and must be attached to
laser products marketed in the United States.
1-12
Introduction
Use of controls, adjustments or performance of procedures other than those specified in this
- This is a semiconductor laser. The maximum power of the laser diode is 20 mW and the
Caution
manual may result in hazardous radiation exposure.
wavelength is 770-800 nm.
Laser safety label
6LQGRK&R/WG6HRQJVXLURLVLSVDJLO6HRQJGRQJJX6HRXO.RUHD
1
Ozone release
Locate the Machine in a Well-Ventilated Room
A negligible amount of ozone is generated during normal operation of this machine. An unpleasant odor may,
however, be created in poorly ventilated rooms during extensive machine operations. For a comfortable,
healthy and safe operating environment, it is recommended that the room be well ventilated.
Placer l’appareil dans une pièce largement ventilée Une quantité d’ozone négligable est dégagée pendant le
fonctionnement de l’appareil quand celui-ci est utilisé normalement. Cependant, une odeur désagréable peut
être ressentie dans les pièces dont l’aération est insuffisante et lorsque une utilisation prolongée de l’appareil
est effectuée. Pour avoir la certitude de travailler dans un environnment réunissant des conditions de confort,
santé et de sécurité, il est préférable de bien aérer la pièce ou se trouve l’appareil.
Notification for California Customers
This product uses a CR Lithium Battery which contains perchlorate material.
This perchlorate warning applies to perchlorate-containing lithium batteries sold or distributed in California,
USA.
“Perchlorate Material - Special handling may apply, See www.dtsc.ca.gov/hazardouswaste/
perchlorate.”
1-13
Introduction
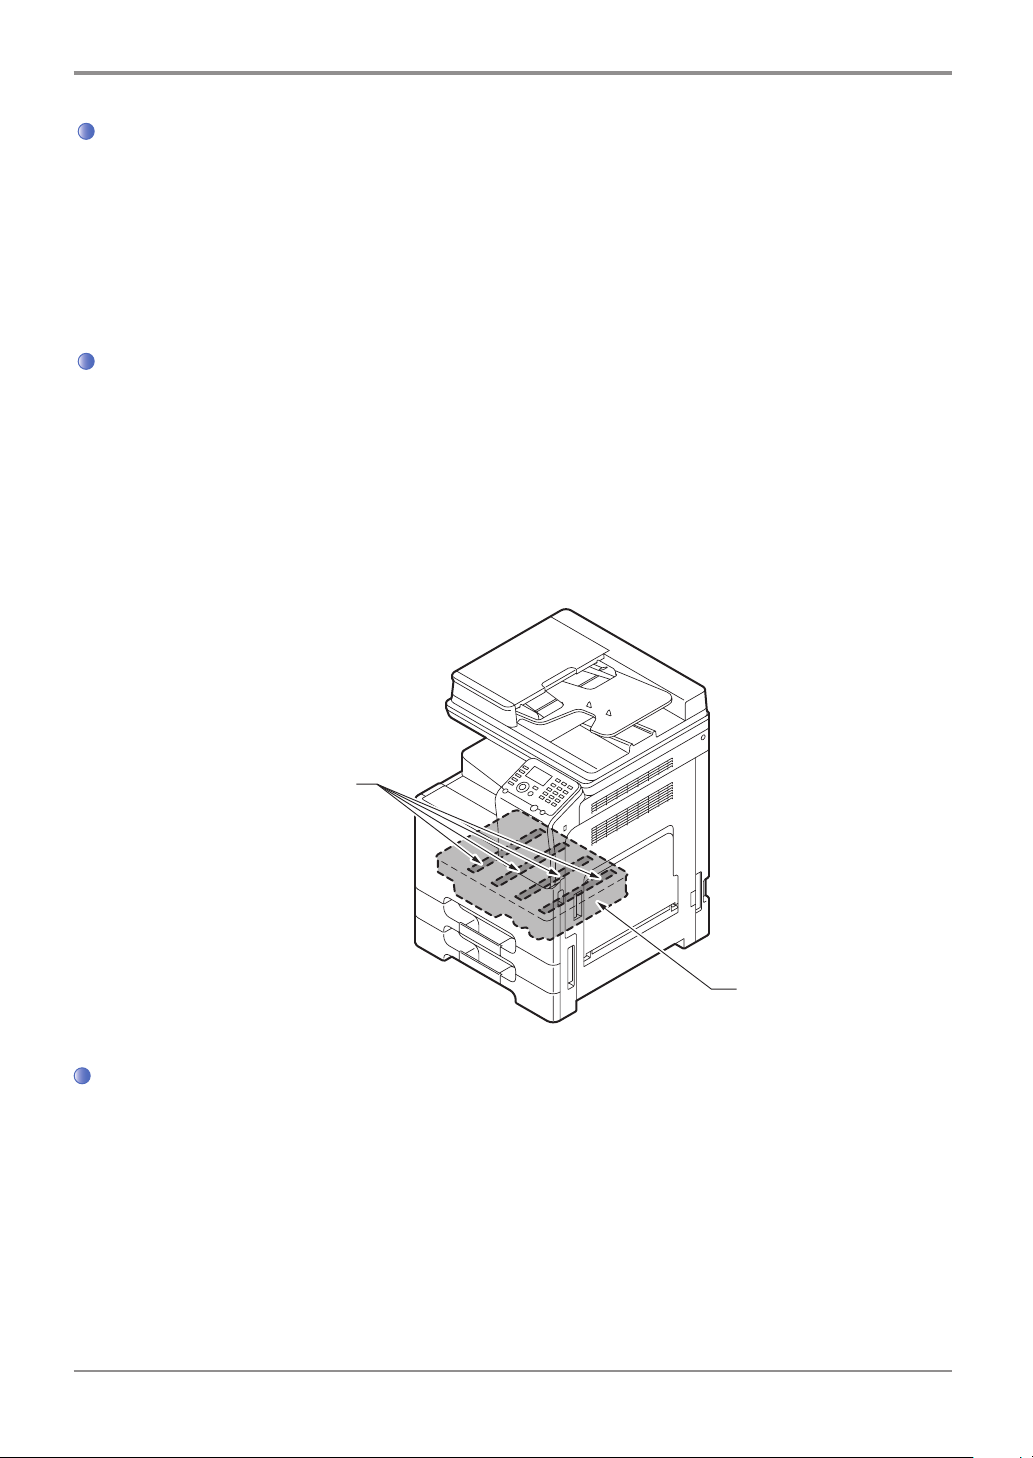
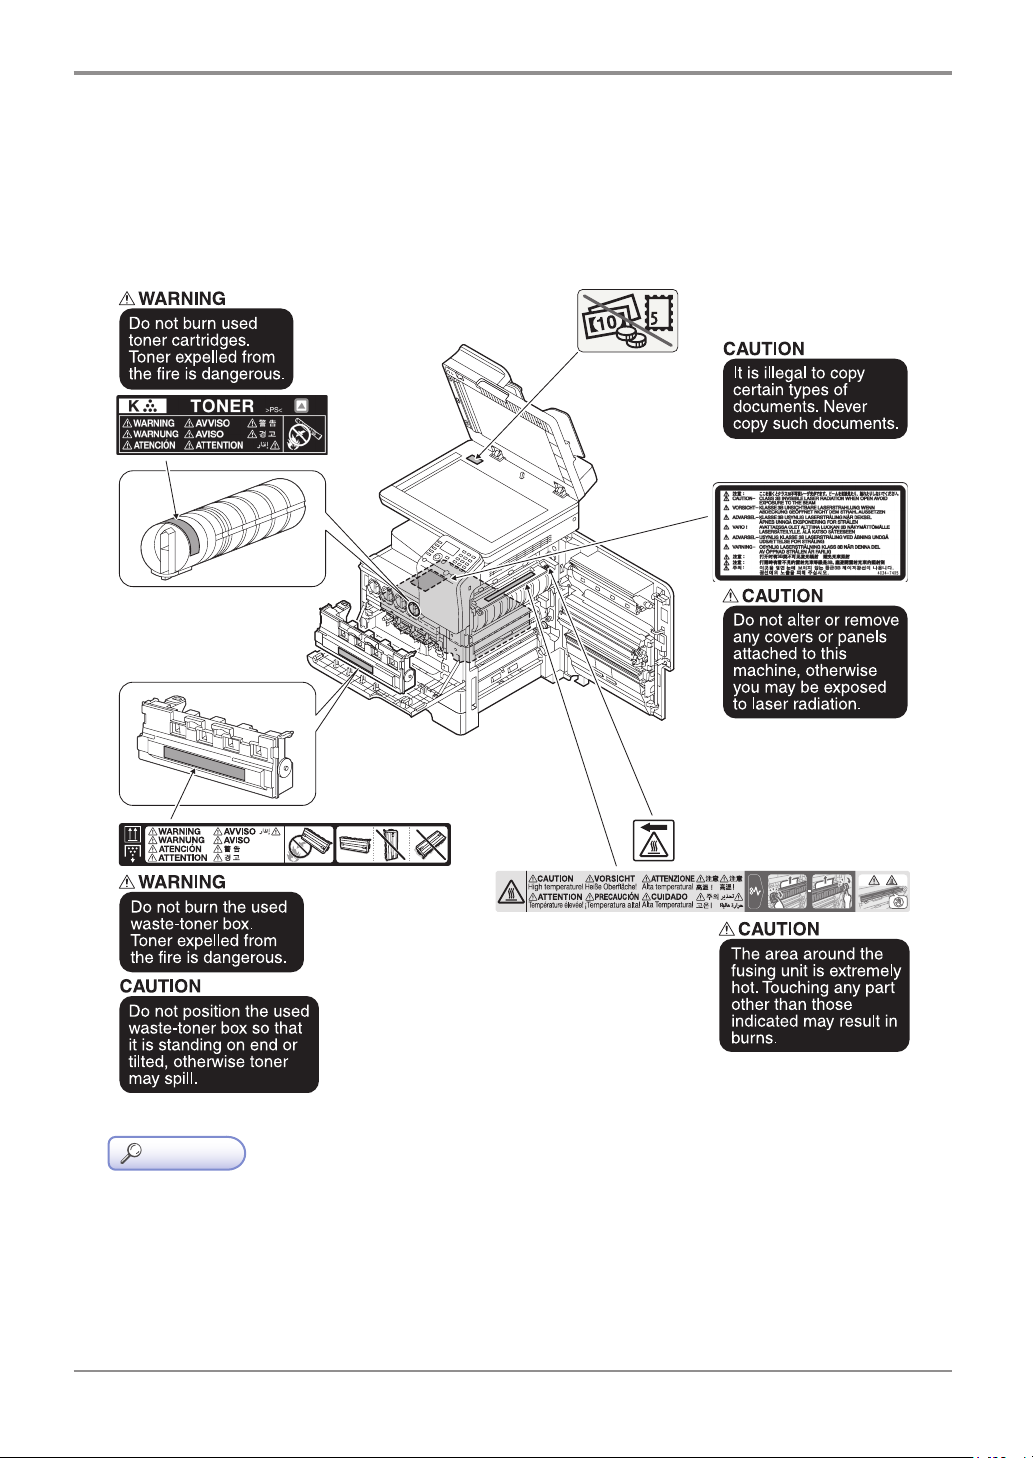
5. Caution notations and labels
Safety precaution notations and labels appear on this machine at the following positions. Be very careful that
an accident does not occur when operations such as removing paper jams and staple jams are performed.
- Do not remove caution labels or notations. If any caution label or caution notation is soiled, please
Reference
clean to make legible. If you cannot make them legible, or if the caution label or notation is damaged,
please contact your service representative.
1-14

6. Special Notice to User
For Canada
Introduction
1
- This product meets the applicable Industry Canada technical specifications. The Ringer Equivalence
- Le present materiel est conforme aux specifications techniques applicables d’Industrie Canada.
FCC PART 68 REQUIREMENTS:
This equipment complies with Part 68 of the FCC rules and the requirements adopted by the ACTA. On the
cover of this equipment is a label that contains, among other information, a product identifier in the format
US:AAAEQ##TXXXX. If required, this information must be provided to the telephone company.
Note
Number is an indication of the maximum number of devices allowed to be connected to a telephone
interface. The termination on an interface may consist of any combination of devices subject only to
the requirement that the sum of the RENs of all the devices does not exceed five.
Avis
L’indice d’equivalence de la sonnerie (IES) sert a indiquer le nombre maximal de terminaux qui peuvent
etre raccordes a une interface telephonique. La terminaison d’une interface peut consister en une
combinaison quelconque de dispositifs, a la seule condition que la somme d’indices d’equivalence de
la sonnerie de tous les dispositifs n’excede pas 5.
For U.S.A.
This equipment uses certification jack USOC RJ11C.
A plug and jack used to connect this equipment to the premises wiring and telephone network must comply
with the applicable FCC Part 68 rules and requirements adopted by the ACTA.
A compliant telephone cord and modular plug is provided with this product. It is designed to be connected
to a compatible modular jack that is also compliant. See installation instructions for details.
The REN is used to determine the number of devices that may be connected to a telephone line. Excessive
RENs on a telephone line may result in the devices not ringing in response to an incoming call. In most but
not all areas, the sum of RENs should not exceed five (5.0).
To be certain of the number of devices that may be connected to a line, as determined by the total RENs,
contact the local telephone company. For products approved after July 23, 2001, the REN for this product is
part of the product identifier that has the format US: US:AAAEQ##TXXXX. The digits represented by ## are
the REN without a decimal point (e.g., 03 is a REN of 0.3). For earlier products, the REN is separately shown
on the label.
1-15
Introduction
If this equipment D202FKT causes harm to the telephone network, the telephone company will notify you in
advance that temporary discontinuance of service may be required. But if advance notice isn’t practical, the
telephone company will notify the customer as soon as possible. Also, you will be advised of your right to file
a complaint with the FCC if you believe it is necessary.
The telephone company may make changes in its facilities, equipment, operations or procedures that could
affect the operation of the equipment. If this happens the telephone company will provide advance notice in
order for you to make necessary modifications to maintain uninterrupted service.
If trouble is experienced with this equipment D202FKT, for repair or warranty information, please contact the
Sindoh dealer location where you purchased this equipment. If the equipment is causing harm to the
telephone network, the telephone company may request that you disconnect the equipment until the
problem is resolved.
Connection to party line service is subject to state tariffs. Contact the state public utility commission, public
service commission or corporation commission for information. If you home has specially wired alarm
equipment connected to the telephone line, ensure the installation of D202FKT does not disable you alarm
equipment. If you have questions about what will disable alarm equipment, consult your telephone company
or a qualified installer.
The Telephone Consumer Protection Act of 1991 makes it unlawful for any person to use a computer or other
electronic device, including FAX machines, to send any message unless such message clearly contains in a
margin at the top or bottom of each transmitted page or on the first page of the transmission, the date and
time it is sent and an identification of the business or other entity, or other individual sending the message
and the telephone number of the sending machine or such business, other entity, or individual. (The
telephone number provided may not be a 900 number or any other number for which charges exceed local or
long-distance transmission charges.)
In order to program this information into your FAX machine, you should complete the following steps: See
[Sending by Renaming the Sender ([Fax Header Settings])], of the User’s Guide [Fax Operations].
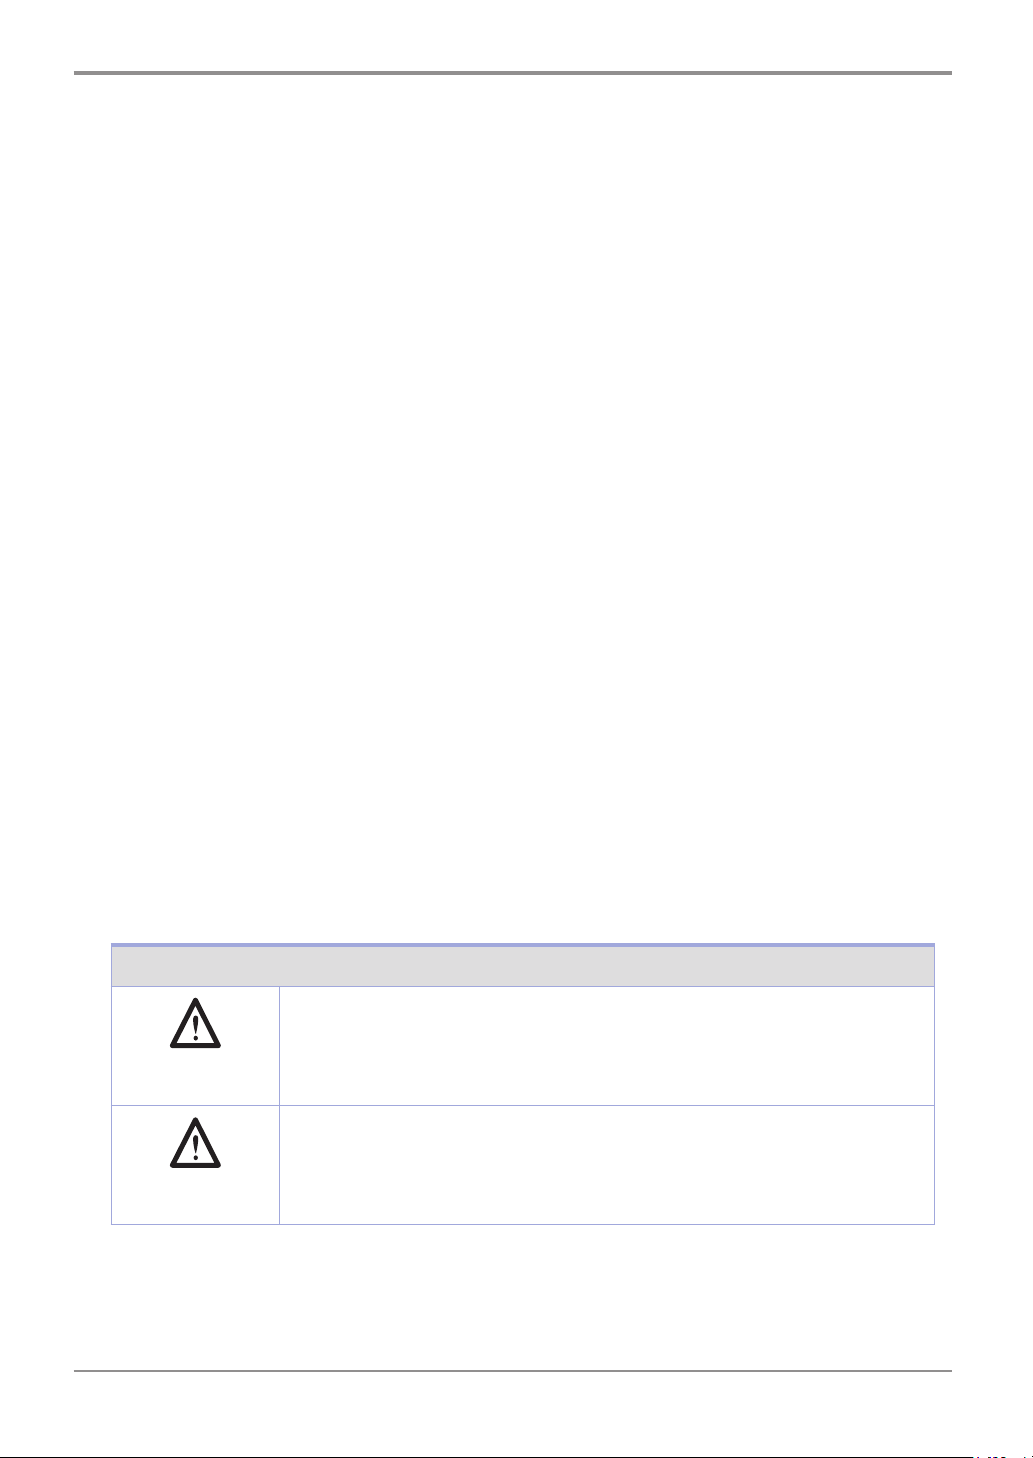
WARNING/CAUTION Explained
The exclamation point within an equilateral triangle followed by the word
“Warning” is intended to alert the user to the possibility that a disregard for
WARNING
CAUTION
the warning may result in fatal hazards or critical injuries. Be sure to focus your
attention on the Warning headings when reading this Quick Start Guide.
The exclamation point within an equilateral triangle followed by the word
“Caution” is intended to alert the user to the possibility that a disregard for
the caution may result in minor injuries or in physical damage. Be sure to focus
your attention on the Caution headings when reading this Quick Start Guide.
1-16

Introduction
For New Zealand
1
This device is equipped with pulse dialing while the Telecom standard is DTMF tone dialing. There is no
guarantee that Telecom lines will always continue to support pulse dialing.
2
This equipment does not fully meet Telecom’s impedance requirements. Performance limitations may
occur when used in conjunction with some parts of the network. Telecom will accept no responsibility
should difficulties arise in such circumstances.
3
The grant of a Telepermit for any item of terminal equipment indicates only that Telecom has accepted that
the item complies with minimum conditions for connection to its network. It indicates no endorsement of
the product by Telecom, nor does it provide any sort of warranty. Above all, it provides no assurance that any
item will work correctly in all respects with another item of Telepermitted equipment of a different make or
model, nor does it imply that any product is compatible with all of Telecom’s network services.
4
The automatic calling functions of this equipment must not be used to cause a nuisance to other customers.
5
Telepermitted equipment only may be connected to the auxiliary telephone port. The auxiliary port is not
specifically designed for 3-wire connected equipment. 3-wire might not respond to incoming ringing
when connected to this port.
1
6
[Administrator Settings]
setting must be configured between 2 and 7.
[Fax Settings]
-
[Line Parameter Setting]
-
[Number of RX Call Rings]
-
1-17
Introduction
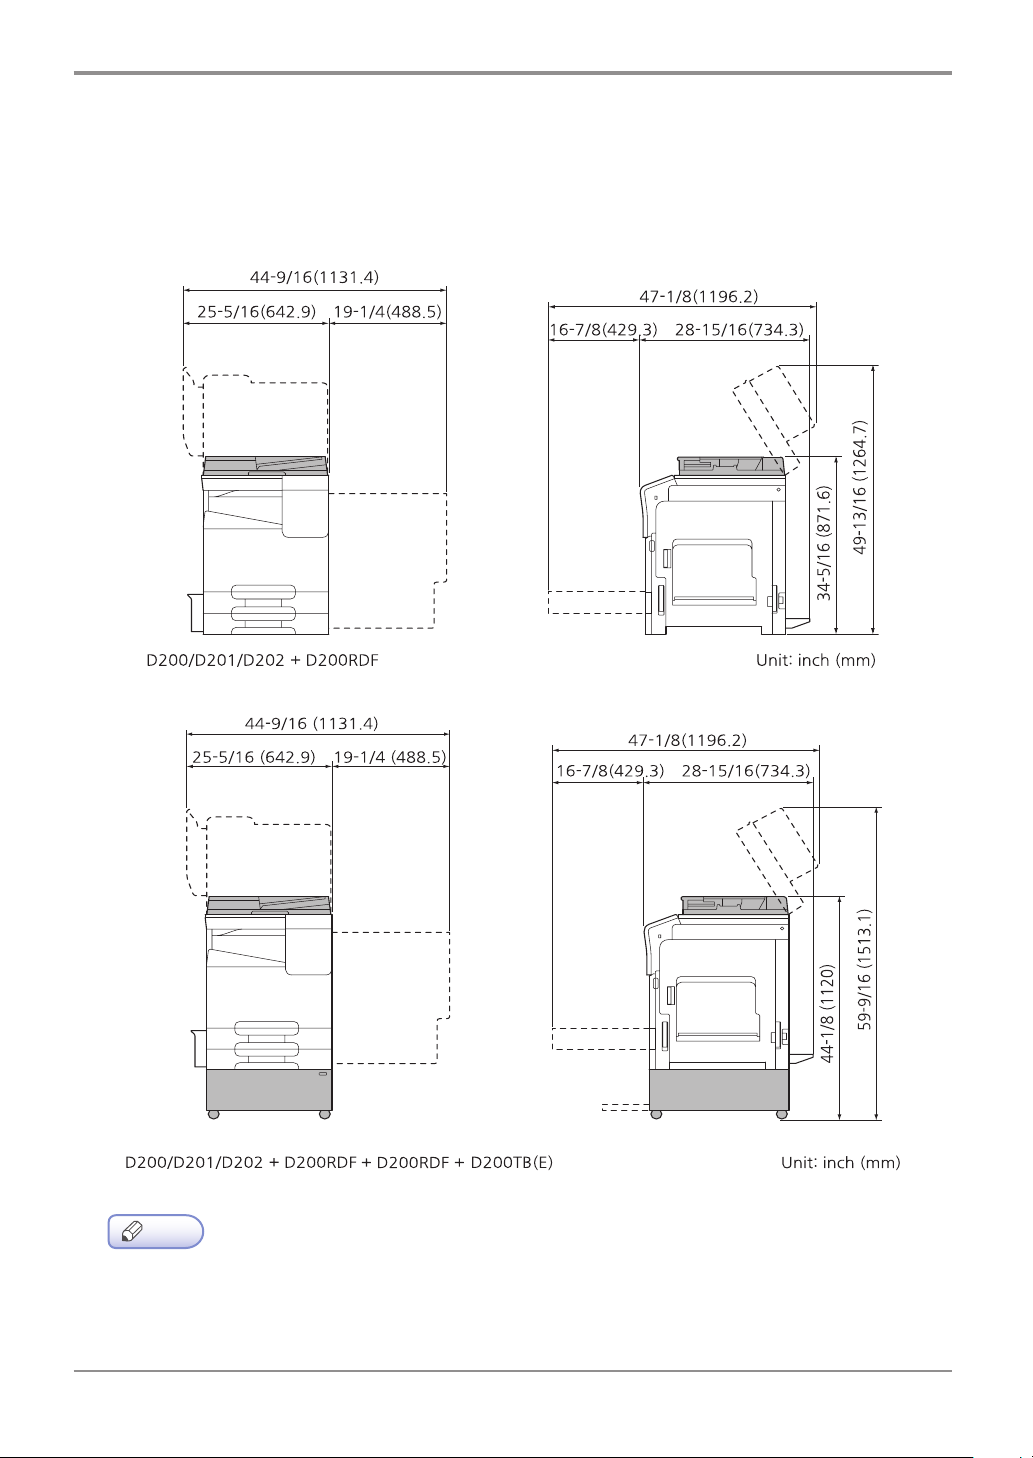
7. Space requirements
To ensure that machine operation, consumables replenishing, part replacement, and regular maintenance
can easily be performed, adhere to the recommended space requirements detailed below.
- Be sure to allow a clearance of 8 inches (200 mm) or more at the back of this machine for the
ventilation duct.
Note
1-18

8. Operation precautions
Introduction
To ensure the optimum performance of this machine, observe the precautions described below.
Power source
The power source requirements are as follows.
-
Voltage fluctuation :
- Frequency fluctuation : Maximum ± 3 Hz (at 50 Hz/60 Hz)
- Use a power source with as little voltage or frequency fluctuations as possible.
Operating environment
The environmental requirements for correct operation of the machine are as follows.
- Temperature : 50°F (10°C) to 86°F (30°C) with fluctuations of no more than 18°F (10°C) within an hour
- Humidity : 15% to 85% with fluctuations of no more than 10% within an hour
Storage of copies
To store copies, follow the recommendation listed below.
- Copies that are to be kept for a long time should be kept where they are not exposed to light in order to
prevent them from fading.
Maximum ± 10% (at 110 V/120 V/220 to 240 V AC)
1
- Adhesive that contains solvent (e.g., spray glue) may dissolve the toner on copies.
- Color copies have a thicker layer of toner than normal black
copy is folded, the toner at the fold may peel off.
-
and-white copies. Therefore, when a color
1-19

Introduction
9. Legal restrictions on reproduction
Certain types of originals must never be reproduced with the purpose or intent to pass reproductions of such
originals off as the originals.
The following is not a complete list, but is meant to be used as a guide to responsible reproduction.
<Financial Instruments>
- Personal checks - Traveler’s checks
- Money orders
Bonds or other certificates of indebtedness
-
<Legal Originals>
- Food stamps - Postage stamps (canceled or uncanceled)
- Checks or drafts drawn by government agencies - Internal revenue stamps (canceled or uncanceled)
- Passports - Immigration papers
- Motor vehicle licenses and titles - House and property titles and deeds
<General>
- Identification cards, badges, or insignias - Copyrighted works without permission of the
In addition, it is prohibited under any circumstances to reproduce domestic or foreign currencies, or works
of art without permission of the copyright owner.
When in doubt about the nature of an original, consult with legal counsel.
- This machine provides the forgery prevention function in order to prevent financial instruments from
Reference
being reproduced illegally. We appreciate your understanding that printed images may infrequently
have some noise or image data may not be stored under certain circumstances due to this forgery
prevention function.
Certificates of deposit
-
- Stock certificates
copyright owner
1-20

D200 Series
Quick Start Guide
Overview of This
Machine
2

Overview of This Machine
1. User’s Guides
Booklet manuals
Manual title Overview
[Quick Start Guide]
(This guide)
User’s guides included in User Manual CD
Manual title Overview
[User’s Guide Introduction] This guide contains information that is useful to know before
[User’s Guide Print Operations] This guide describes how to install the printer driver as well as
[User’s Guide Copy Operations] This guide describes various methods to make copies.
[User’s Guide Scan Operations] This guide describes scan transmission operations and
[User’s Guide Maintenance/
Troubleshooting]
This guide describes how to perform basic operations of this
machine and configure initial settings.
beginning to operate this machine, such as the name of each part
and how to turn the power on and off, use the Control Panel, and
load an original or paper.
basic usage and applications.
necessary preparations.
You can scan a paper document, convert it to digital data, and
send the result to the computer or server.
This guide describes how to replace consumables, clean this
machine, and perform troubleshooting.
[User’s Guide Description of
Utility Keys]
[User’s Guide Applied Functions]
2-2
This guide describes Utility settings such as [User Settings] and
[Admin Settings] for this machine.
This guide describes the special usages of this machine such as
how to use Web Connection, manually install the printer driver,
and configure print settings using Linux.

Overview of This Machine
2. User Manual CD
User Manual CD is contained in the package of this machine.
The CD includes the user’s guides required to use this machine.
Open the folder “User Manual” in User Manual CD. Double-click on PDF file you want to open.
Operating environment
Item Description
Supported operating systems Microsoft Windows Vista (SP2) / Windows 7 (SP1)/ Windows 8
Apple Mac OS X 10.4/10.5/10.6/10.7/10.8
Required application For Windows
- Adobe Reader 9.x/10.x/11.x
For Mac OS
- Adobe Reader 8.x/9.x/10.x/11.x
2
2-3

Overview of This Machine
3. Notations and symbols used in this manual
Procedural instruction
◎ This check mark symbol shows a precondition of a procedure.
1
This format number “1” represents the first step.
2
This format number represents the order of consecutive steps.
- This symbol indicates a supplementary explanation of a procedural instruction.
Symbols used in this manual
- This symbol indicates that a failure to heed the instructions may lead to death or serious
- This symbol indicates that a failure to heed the instructions may lead to mishandling that
- This symbol indicates a risk that may result in damage to this machine or documents.
Follow the instructions to avoid property damage.
- This symbol indicates supplemental information of a topic.
- This symbol indicates reference functions related to a topic.
Warning
injury.
Caution
may cause injury or property damage.
Important
Note
Reference
Related setting
- This shows the settings related to a particular topic for any user.
Related setting (for the administrator)
- This shows the settings related to a topic only for administrators.
2-4

Product and key names
Notations used in this manual Description
Overview of This Machine
[ ]
【 】 , Bold text
An item enclosed in brackets [ ] indicates a key name on the
Touch Panel or computer screen, or the name of a user’s guide.
This presents a key name, part name, product name, or option
name on the Control Panel.
2
2-5

Overview of This Machine
4. About this machine
Name of each part
Front side
The illustration shows the main unit with optional Reverse Automatic Document Feeder D200RDF and
Table D200TB(E) installed.
No. Name No. Name
1 Control Panel 5 Power Switch
2 Warning Indicator 6 Manual Feed Tray
3 Reverse Automatic Document
Feeder(RADF)
3-a ADF Feed Cover 8 Table
3-b Document Guide 9 Tray1, Tray2
3-c Document Feed Tray 10 Front Cover
3-d Document Output Tray 11 Data Indicator
4 USB Host Port 12 Power key
2-6
7 Right Door Release Lever

View with Reverse Automatic Document Feeder (RADF) opened
Overview of This Machine
2
No. Name No. Name
13 Output Tray 15 Original Size Scale
14 Slit Scan Glass 16 Original Glass
2-7

Overview of This Machine
View with Front Cover and Right Door opened
No. Name No. Name
17 Fusing Unit Cover Lever 22 Charger Cleaner
18 Fusing Unit 23 Lock Release Tab
19 Right Door 24 Printhead Cleaner
20 Auto Duplex Unit (D201/D202 only) 25 Waste Toner Box
21 Drum Unit 26 Toner Cartridge
2-8

Overview of This Machine
Rear side
The illustration shows the main unit with optional Reverse Automatic Document Feeder D200RDF,
Table D200TB(E), Fax Kit D202FKT, and Fax Mount Kit D200FKTM installed.
2
No. Name
1 LINE (telephone line) Jack
2 TEL (telephone) Jack
3 Ethernet port (1000Base-T/100Base-TX/10Base-T)
4 USB Port (Type B)
5 Power Connection
2-9

Overview of This Machine
Option configuration
List of optional components
No. Name Description
1 Original Cover
D200PCV
2 Reverse Automatic
Document Feeder
D200RDF
3 Table D200TB(E) Used to install this machine on the floor.
The following optional components are built into this machine and are not shown in the figure above.
No. Name Descriptionv
4 Fax Kit D202FKT Used to operate this machine as a fax machine.
5 Fax Mount Kit
D200FKTM
Used to fix the loaded originals.
Automatically feeds and scans originals by page. This unit also
reverses and automatically scans 2-sided originals.
This unit is required to install the Fax Kit.
2-10

Overview of This Machine
5. About power supply
Power Switch and Power key locations
This machine has two power switches: Power Switch outside the machine and Power key on the Control Panel.
2
No. Name Description
1 Power key Press this key to switch this machine to Power Save mode. This
function reduces power consumption and has more significant
power saving effect.
For details, refer to page 2-12.
2 Power Switch Press this switch when turning the main power of this machine
on or off, or when restarting this machine.
- While printing, do not turn the Power Switch off. Otherwise, it may lead to a paper jam.If the Power
Note
Switch is turned off while this machine is running, the system deletes the currently loaded data or
communicating data as well as queued jobs.
2-11

Overview of This Machine
Turning the Power Switch ON or OFF
1
Connect the Power Cord to this machine.
2
Connect the Power Cord to the power outlet.
3
When turning the main power on, press “ㅣ”of the Power Switch.
A screen appears to show that this machine is in the process of start-up.
When the main screen is displayed, this machine is ready to use.
4
When turning the main power off, press o of the Power Switch.
- When restarting this machine, turn the Power Switch off and on again after 10 or more seconds
Reference
have elapsed. Not doing so may result in an operation failure.
Related setting (for the administrator)
- The mode to be displayed initially when the main power is switched ON can be selected.
To configure settings: Utility key - [Admin Settings] - [System Settings] - [Reset Settings] -
[System auto reset] - [Priority Mode] (Default: [Copy])
2-12

Overview of This Machine
Using the Power key
Press the Power key to switch this machine to Power Save mode.
When the Power key is pressed, the status of this machine changes as shown below. Depending on how long
the Power key is pressed, the state of the Power Save mode to be activated will differ.
Power
key
Short
press
Hold
down
Related setting (for the administrator)
Status of this
machine
Low Power mode
(Default)
Sleep mode Flash:
Auto Power
OFF mode
Status of
LED
Flash:
Blue
Blue
Flash:
Orange
Description
The back light of the Message Window is turned off to
limit the power consumption.
This machine returns to Normal mode
when it receives data or faxes or when the user
presses a key on the Control Panel.
Provides a greater power saving effect than Low
Power mode. The time required to return to Normal
mode is longer than that from Low Power mode.
This function provides a more significant power saving
effect than the Sleep mode, which is close to the state
where the main power is turned off.
In Auto Power OFF mode, this machine cannot receive
data or faxes, and also it cannot scan or print an
original. To enable the machine to return to Normal
mode from the Auto Power OFF mode, press the
Power key again.
2
- Press the Power key to select whether to switch to Low Power or Sleep mode.
To configure settings: Utility key - [Admin Settings] - [System Settings] - [Pwr Sup/Pwr Sav] -
[Power Save Settings] (Default: [Low Power])
2-13

Overview of This Machine
6. Names and functions of Control Panel keys
No. Name Description
1 Message Window Displays setting screens and messages.
【
2
Fax/Fax LED
【
3
Scan/Scan LED】Press this key to enter Scan mode. (Scan to E-mail, Scan to FTP, Scan to
【
4
Copy/Copy LED】Press this key to enter Copy mode.
】
Press this key to enter Fax mode.
The LED lights up in blue to indicate that the machine is in Fax mode.
For details of the fax function, refer to [User’s Guide Fax Operations]
included in the optional Fax Mount Kit D200FKTM.
a shared folder on a computer, or Scan to USB Memory)
The LED lights up in blue to indicate that the machine is in Scan mode.
For details of the scanner function, refer to
[User’s Guide Scanner Operations].
The LED lights up in blue to indicate that the machine is in Copy mode.
For details of the copy function, refer to
[User’s Guide Copy Operations].
2-14

No. Name Description
Overview of This Machine
【
5
Keypad
【
6
Stop/Reset
【
7
Start
【
8
Access
9 Data Indicator Flashes or lights up to indicate the data status on this machine.
【
10
Back
】
】
】
】
】
Use this keypad to enter desired number of copies. This keypad is also
used to enter fax numbers, mail addresses, and names.
For details, refer to page 2-19.
Press this key to return the settings to their defaults. This key is also
used to press this key to stop functions.
Press this key to start an operation such as copying, scanning, or faxing.
- Lights up blue : This machine is ready to start operating.
- Lights up orange : This machine is not ready to start operating.
Note
- If this indicator lamp lights up orange, check whether any warning
or message is displayed on the Message Window.
Press this key to perform authentication on the Login screen if user
authentication or account track is installed on this machine.
Press Access under the login condition to log out.
- Flash in blue : Indicates that data is being sent or received.
- Lights up blue : Indicates that data is being saved or processed.
Press this key to clear the specified number of copies and entered text.
Press to return to the previous screen.
Press to cancel the setting that is currently displayed.
2
11
12
13
14
15
16
【
【▲/▼】
【◀/▶】
【
【
【
】
Select
Power】 key Press this key to switch this machine to Power Save mode.
ID Copy
On hook
】
】
Press this key to select the setting that is currently displayed.
Press this key to move the selection mark up and down
when the setting menu is displayed.
This key is also used to adjust the number for number input.
Press this key to move the selection mark left and right
when the setting menu is displayed.
Press to move the input position when inputting characters.
Press to adjust the level setting.
For details, refer to page 2-13.
Run ID card copy.
For details of the copy function,
refer to [User’s Guide Copy Operations].
Press this key to recall the last number dialed.
This key is also used to insert a pause when a number is dialed.
For details of the fax function, refer to [User’s Guide Fax Operations]
included in the optional Fax Mount Kit D200FKTM.
2-15

Overview of This Machine
No. Name Description
17 【
18 【
19
20 【
Redial/Pause
Addressbook
Warning Indicator Indicates the status of this machine by the lamp color, flashing, or a
Utility
】
】
Press this key to recall the last number dialed.
This key is also used to insert a pause when a number is dialed.
For details of the fax function, refer to [User’s Guide Fax Operations]
included in the optional Fax Mount Kit D200FKTM.
】
Press this key to display the information registered in the favorite list,
speed dial destinations and group dial destinations.
For details, refer to [User’s Guide Scanner Operations] or [User’s
Guide Fax Operations] included in the optional Fax Mount Kit
D200FKTM.
lamp lighting up.
- Flash in orange : Warning
- Lights up orange : The machine has stopped.
You can switch to the setting menu screen.
2-16

Overview of This Machine
7. About the Message Window display
The machine status, error messages etc. can be checked in the Message Window.
Main Screen (Copy Mode)
No. Name Description
1 Copy settings Allows the current settings to be checked and the various settings to
be changed. For details, refer to [User’s Guide Copy Operations].
2
2 Number of copies Indicates the number of copies.
3 Status Depending on the situation, the machine status or an error message
may appear.
Main Screen (Scan Mode)
No. Name Description
1 Scan settings Allows the current settings to be checked and the various settings to
be changed. For details, refer to [User’s Guide Scan Operations].
2 Available memory Indicates the percentage of memory available.
3 Status Depending on the situation, the machine status or an error message
may appear.
2-17

Overview of This Machine
Main Screen (Fax Mode)
- For details, refer to [User’s Guide Fax Operations] included in the optional Fax Mount Kit
D200FKTM.
Reference
2-18

Overview of This Machine
8. Entering characters
Use the Keypad to enter numbers, characters and symbols.
Changing Input Mode
Every time the # key on the Control Panel is pressed, the input mode switches between the alphabet and
numbers.
Display Description
[A...] Alphabet input mode
[1...] Number input mode
Key Operation
The characters that can be entered differ depending on the input mode.
The characters that can be entered for each input mode are as follows.
2
Keypad [1...] Number input mode [A...]Alphabet input mode
1 1 .,'?!"1-()@/:;_
2 2 ABC2abc
3 3 DEF3def
4 4 GHI4ghi
5 5 JKL5jkl
6 6 MNO6mno
7 7 PQRS7pqrs
8 8 TUV8tuv
9 9 WXYZ9wxyz
0 0 (space)0
*
#
# *+=#%&<>[]{}|^`
2-19

Overview of This Machine
-
respectively.
- To erase all entered text, hold down the【Back】key.
- To delete only part of the entered text, use the【◀】 key and 【▶】 key to move the cursor to the
- If the same key is to be used to enter two characters in a row, press the 【▶】 key after selecting
the first character.
- To enter a space, press the 【0】 key once in the alphabet input mode.
Reference
】
【
When the 【#】 key or the
character that you want to delete, and then press the 【Back】 key.
key is pressed on the fax number input screen, # or
appears
2-20

D200 Series
Quick Start Guide
Loading Paper
3

Loading Paper
1. Paper
Checking the available paper types
Paper type Paper weight Paper capacity
Plain paper
Recycled paper
Single Side Only*
Special Paper*
User Paper 1
User Paper 2
*
*
Thick 1
3
User Paper 3
*
Thick 1+
3
User Paper 4
*
Thick 2
3
User Paper 5
*
Thick 3
3
User Paper 6
*
Thick 4 68-3/8 lb to 79-13/16 lb
15-15/16 lb to 23-15/16 lb
(60 g/m2 to 90 g/m2)
1
2
3
3
24-3/16 lb to 31-15/16 lb
(91 g/m
2
to 120 g/m2)
24-3/16 lb to 31-15/16 lb
(91 g/m
2
to 120 g/m2)
42 lb to 55-5/8 lb (158 g/m2 to
209 g/m2)
55-7/8 lb to 68-1/8 lb
(210 g/m
(257 g/m
2
to 256 g/m2)
2
to 300 g/m2)
Manual Feed Tray : 150 sheets
Tray 1, Tray2 : 500 sheets
Manual Feed Tray : 20 sheets
Tray 1, Tray2 : 150 sheets
Manual Feed Tray : 20 sheets
Tray 1, Tray2 : 150 sheets
Manual Feed Tray : 20 sheets
Tray 1, Tray2 : 150 sheets
Manual Feed Tray : 20 sheets
Tray 1, Tray2 : 150 sheets
Manual Feed Tray : 20 sheets
Envelopes - Manual Feed Tray : 10 sheets
Label sheets - Manual Feed Tray : 20 sheets
1
*
Paper on which you will not print on both sides (for example, when something is already printed on the
front side).
2
*
Fine and other special paper.
3
*
Paper that is registered as a frequently used paper type.
Reference
- Paper other than plain paper is referred to as special paper. When loading special paper into the
paper tray, specify the correct paper type. Otherwise, it may result in a paper jam or image error.
Note
- For paper weight and media adjustment settings, contact your service representative.
3-2

Loading Paper
- When printing on the reverse side of a sheet printed on one side, load paper into the Manual
Feed Tray, and select [Side2] in the paper setting, improving a reduction of the printing image
quality. [Side2] is available when plain paper, recycled paper, Thick 1, Thick 1+, Thick 2, Thick 3, or
Thick 4 is selected in the Manual Feed Tray.
- If Thick 3 or Thick 4 is selected for printing, resulting image quality may not be as expected.
-
- When loading Thick 4 in the paper tray, place A4 or 8
- On an envelope, it is only possible to print on the front (address) side. Also, the result of printing on
the seal overlapping part on the front side cannot be assured. The area that cannot be assured varies
depending on envelope types.
Checking the available paper sizes
Paper feed port Allowable sizes
1/2×11 in the v direction.
3
Manual Feed Tray
Tray 1 A4, A5, B4, B5 (JIS)
Tray 2 A3, A4, A5, B4, B5 (JIS)
Auto Duplex Unit
(D201/D202 only)
SRA3, A3, A4, A5, A6, B4, B5 (JIS), B6
12 e 18, Ledger (11×17), Legal (8-1/2×14), Letter (8-1/2×11),
Executive (7-1/4×10-1/2), Statement/Invoice (5-1/2×8-1/2)
Foolscap (8×13), 8-1/8 e 13-1/4, Folio (8-1/4×13), Government Legal
(8-1/2×13), 8-1/2×13-1/2, 220 mm e 330 mm, 8K, 16K Photo Size 4×6
Width: 3-9/16 inches to 12-5/8 inches (90 mm to 320 mm), Length: 5-1/2
inches to 18 inches (139.7 mm to 457.2 mm)
Legal (8-1/2×14), Letter (8-1/2×11)
Foolscap (8×13), Folio (8-1/4×13), Government Legal (8-1/2×13),
Statement/Invoice (5-1/2×8-1/2), 8-1/2×13-1/2, 16K
Ledger (11×17), Legal (8-1/2×14), Letter (8-1/2×11)
Foolscap (8×13), Folio (8-1/4×13), Government legal (8-1/2×13),
Statement/Invoice (5-1/2×8-1/2), 8-1/2×13-1/2, 8K, 16K
SRA3, A3, A4, A5, A6, B4, B5 (JIS),
B6 12×18, Ledger (11×17), Legal (8-1/2×14), Letter (8-1/2×11),
Executive (7-1/4×10-1/2), Statement/Invoice (5-1/2 ×8-1/2)
Foolscap (8×13), 8-1/8×13-1/4, Folio (8-1/4×13),
Government Legal (8-1/2×13), 8-1/2×13-1/2, 220 mm×330 mm, 8K,
16K Photo 4×6
Wdith : 5-1/2 inches to 12-5/8 inches (139.7 mm to 320 mm),
Length : 5-13/16 inches to 18 inches (148 mm to 457.2 mm)
3-3

Loading Paper
- For all paper sizes, the areas excluding 3/16 inches (4.2 mm) from the paper edge for printing, 3/16
When configuring a user setting of the page size using the application, specify the paper size within
- The page margin setting is determined depending on your application. If the default paper size or
- Photo Size 4 x 6 may not be available depending on the sales area.
Note
inches (4.2 mm) from the paper edge for copying and 1/8 inches (3 mm) from the paper edge for all
other cases are judged to be printable areas.
the printable area so that the optimal result is obtained.
margin is selected, there may be some part of the paper that is not able to be printed on. To obtain
the optimal result, configure the custom setting so that an image is included in the printable area of
this machine.
Precautions for correct operations
Unavailable paper
Do not load the following types of paper into the tray. Not observing these precautions may lead to reduced
print quality, a paper jam, or machine damage.
-
- Paper that has been printed on using a heat
transfer printer or an inkjet printer
- Folded, curled, wrinkled, or torn paper
- Paper that has been left unwrapped for a long period of time
- Paper that is damp, perforated, or that has been hole punched
- Extremely smooth or extremely rough paper, or paper with an uneven surface
- Treated paper such as carbon
or iron-on transfer paper
- Paper that has been decorated with foil or embossing
- Paper of a non-standard shape (paper that is not rectangular)
- Paper that is bound with glue, staples or paper clips
- Paper with labels attached
- Paper with ribbons, hooks, buttons, etc., attached
- Paper with different paper quality (roughness) on the front and back sides
- Paper that is too thin or too thick
- Paper containing static electricity
- Acidic paper
-
backed paper, thermal paper, pressure-sensitive paper,
- Other types of unavailable paper
3-4

Loading Paper
Storing paper
To store paper, be sure to note the following points.
- Store paper on an even, horizontal surface, and do not take the paper out of its packaging until it is loaded
into a tray. If paper is left for a long period of time outside its package, it may cause a paper jam.
- When not using paper that has been taken out of its package once, return it to the original package and
store it in a horizontal, cool, dark place.
- Do not store paper in locations or in environments that are:
●
Too humid
●
Exposed to direct sunlight
●
Subject to high temperatures (95°F (35°C) or more)
●
Too dusty
- Do not set paper against the other or store it vertically.
3
- When purchasing a large quantity of paper or special paper, carry out a trial print to check the printing
Note
quality in advance.
3-5
Loading Paper
2. Loading paper into the Manual Feed Tray
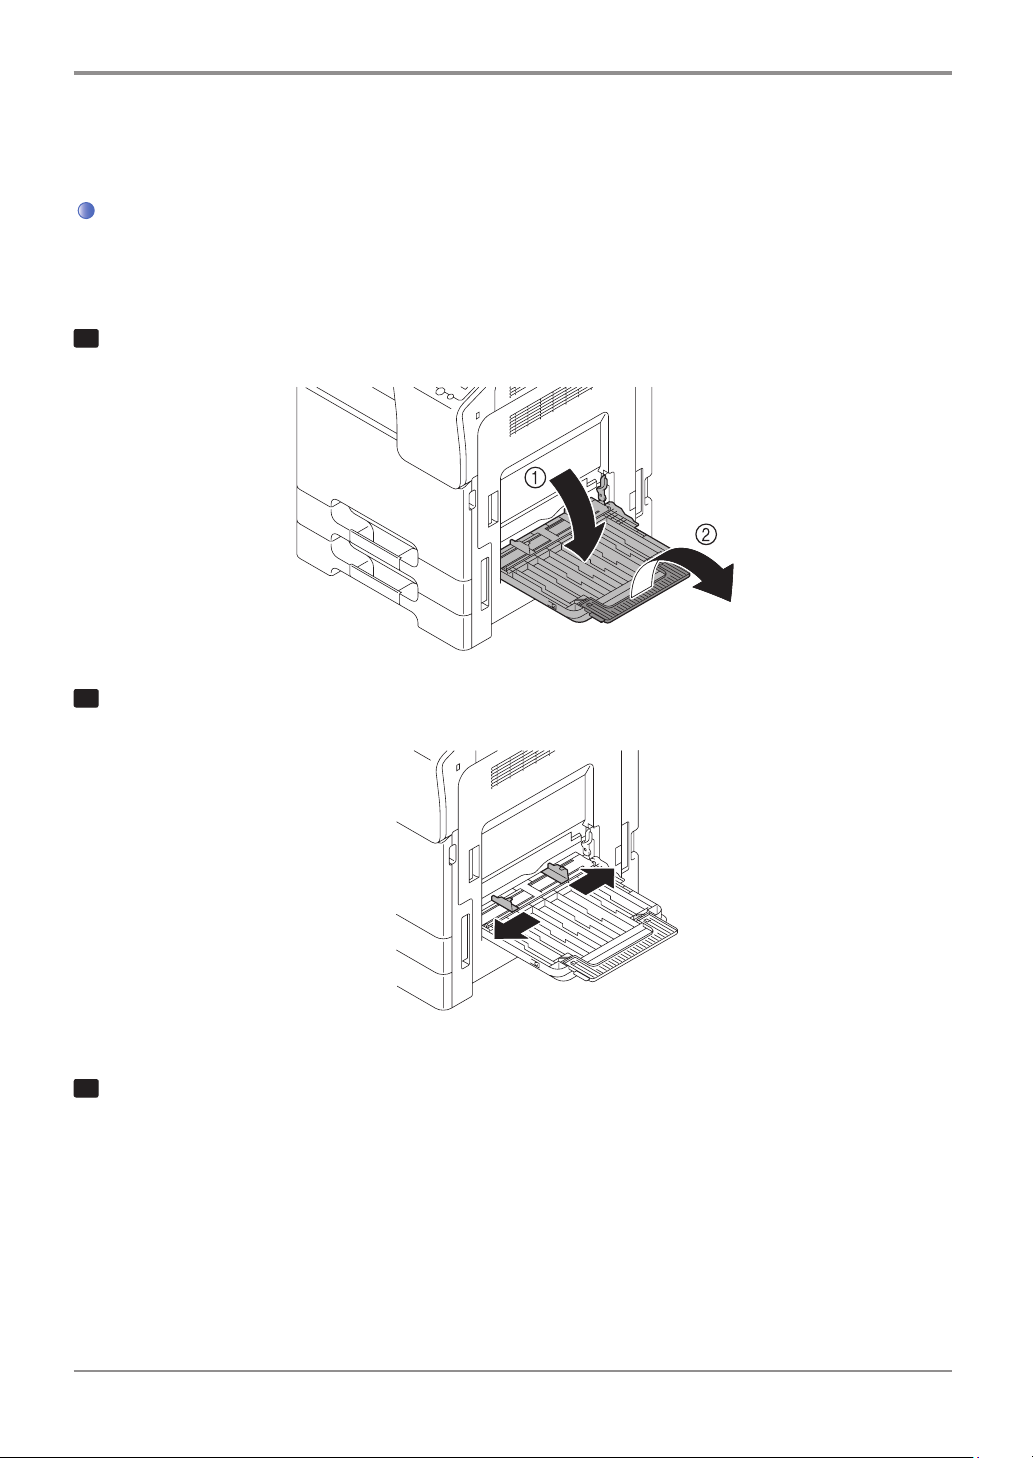
How to load paper into the Manual Feed Tray
When selecting a paper size other than for paper trays, use the Manual Feed Tray.
To use the Manual Feed Tray, load paper and specify the paper type and paper size.
1
Open the Manual Feed Tray.
2
Spread out the paper guide.
3
With the side to be printed on facing down, insert the paper as far as possible into the feed slot.
- For details on the available paper sizes, refer to page 3-2.
- For details on how to load postcards, refer to page 3-8.
- For details on how to load envelopes, refer to page 3-9.
3-6

Loading Paper
- Load paper within the guide indicating the upper limit. If paper is curled, flatten it before loading.
4
Reference
Align the paper guide to the paper size.
3
5
Lower the lever to raise the push up plate.
The paper setting screen is displayed in the Message Window of this machine.
3-7

Loading Paper
6
Change the paper type and paper size on the Control Panel.
When loading custom sized paper, also specify the paper size.
Loading postcards
Up to 20 postcards can be loaded into the tray at a time.
1
With the print side facing down, load a postcard as shown in the figure.
2
Align the paper guide to the paper size.
3
Lower the lever to raise the push up plate.
The paper setting screen is displayed in the Message Window of this machine.
4
Change the paper type and paper size on the Control Panel.
- If the size of the postcard set up is not found in the list of paper sizes, check the size of the postcard
and then specify the size in [Custom].
- When printing data stored on a computer onto a postcard, use the [Basic] tab of the printer driver
Reference
to configure settings. For details, refer to [User’s Guide Print Operations].
3-8

Loading envelopes
Up to 10 envelopes can be loaded into the tray at a time.
Loading Paper
- Before loading, remove air from the envelope(s), and securely press along the flap fold line.
Otherwise, it will result in wrinkles or a paper jam.
1
- When the flap is in the long side of an envelope, load the envelope so that its flap is placed at the back.
Reference
Position so the flap part is facing up, and load an envelope as shown in the figure.
3
2
Align the paper guide to the paper size.
3
Lower the lever to raise the push up plate.
The paper setting screen is displayed in the Message Window of this machine.
4
Change the paper type and paper size on the Control Panel.
- If the size of the envelope set up is not found in the list of paper sizes, check the size of the envelope
and then specify the size in [Custom].
3-9

Loading Paper
3. Loading Paper in Tray 1, Tray 2
The procedure for loading paper is common between Tray 1 and Tray 2. The following explains how to load
paper into Tray 1.
1
Pull out Tray 1.
2
Slide the paper guide to fit the size of the loaded paper.
3
Load paper into the tray with the print side facing up.
- For details on the available paper sizes, refer to page 3-2.
3-10

Loading Paper
- Do not load the sheets up to the point where the top of the stack is higher than the , mark. If paper
4
5
5
- To configure settings: Utility key - [Paper Settings] - [TRAY1]
Reference
is curled, flatten it before loading.
Align the paper guide to the paper size.
Close Tray 1.
Change the paper type on the Control Panel.
3
3-11


D200 Series
Quick Start Guide
Initial Settings of
This Machine
4

Initial Settings of This Machine
1. Preparation for network connection (for administrators)
Checking a LAN cable for connection
Check that a LAN cable connected to the network is connected to the LAN port of this machine.
For details on the cable connection port, refer to page 2-9.
Assigning an IP address
If this machine has a fixed IP address, manually enter the IP address, subnet mask, and default gateway address.
To configure the following settings, select Utility - [Admin Settings] - [ETHERNET] - [TCP/IP] - [IPv4 Settings]
on the Control Panel.
Settings Description
[IP ADDESS] When manually specifying the IP address, enter the fixed IP address
assigned to the machine.
[SUBNET MASK] When manually specifying the IP address, enter the subnet mask.
[DEFAULT
GATEWAY]
When manually specifying the IP address, enter the default gateway.
[IP Appl Method] When automatically specifying the IP address, select the method for
automatic retrieval.
- [DHCP] : [ON] is specified by default.
- [BOOTP] : [OFF] is specified by default.
- [ARP/PING] : [OFF] is specified by default.
- [AUTO IP Settings] : Fixed to [Enable].
- If this machine’s IP address is changed and the network settings are completed, this machine restarts.
- To check the IP address assigned to this machine, print out the Configuration Page.
To print out the Configuration Page, select [REPORT/STATUS] - [REPORT] - [Configuration Page]
Note
from the main screen of each mode.
4-2

D200 Series
Quick Start Guide
Basic Usage
5

Basic Usage
1. Using the print function (Windows environment)
This section describes how to configure print settings in Windows environment.
- For details on how to configure print settings in Mac OS environment,
refer to Chapter 3 “Printing in the Mac OS Environment” in [User’s Guide Print Operations].
For details on how to configure print settings in Linux environment,
refer to Chapter 5 “Printing in the Linux Environment” in [User’s Guide Applied Functions].
Before using this machine as a printer, you need to install the printer driver on your computer.
The following types of printer drivers are available. Select the printer driver that meets your printing aims.
Reference
Printer driver
Printer driver Page description
language
PCL driver
PCL6 This is a standard driver for printing general office
Description
originals.
Among the three drivers, this driver provides the fastest
printing speed.
PS driver PostScript 3
Emulation
XPS driver XPS Developed after Windows Vista, this driver supports XML
Preparation for printing (network connection)
This driver is effective for high
created in PostScript
Adobe or other vendors.
This driver is often used in graphics and light printing
applications where good color reproducibility is important.
Paper Specification (XPS).
This driver has several advantages,
including high
-
supporting application software from
-
quality reproduction of translucence.
-
definition printing of data
Checking a LAN cable for connection
Check that a LAN cable is connected to the LAN port of this machine.
For details on the cable connection port, refer to page 2-9
.
5-2

Checking the network settings
Print out the Configuration Page, then check that an IP address is assigned to this machine.
To print out the Configuration Page, select [REPORT/STATUS]
-
[REPORT]
-
[Configuration Page]
Basic Usage
.
- If no IP address is displayed, you need to set up the network. For details, refer to page 4-2.
Reference
Installing the printer driver
Install the printer driver using the installer.
◎ Administrator privileges are required to perform this task.
◎ Use the Driver CD.
1
Insert the printer driver CD into the CD-ROM drive of the computer.
2
- Make sure that the installer starts, then proceed to Step
- If the installer does not start, open the printer driver folder on the CD-ROM, double-click [Set up.exe],
3
then go to Step
- If the [User Account Control] window appears, click [Continue] or [Yes].
2
3
[Printer]
Click
Read the license agreement, then click
.
.
[AGREE]
.
.
5
4
Check the contents of the
5
Connected printers are detected.
- For Windows Vista/7/8/8.1/Server 2008/Server 2008 R2/Server 2012/Server 2012 R2, you can select
6
- If this machine is not detected, restart it.
- You do not need to change the printing method from [Normal Printing] (Port 9100) unless otherwise
- As the printing method, you can select [Normal Printing] or [Internet Printing] (IPP).
[Install printers/MFPs]
Select
[Preference for IPv4] or [Preference for IPv6]. The address has the preference when detected in both
IPv4 and IPv6.
Select this machine, then click
specified by the administrator.
[Readme]
, then click
[Next]
window, then click
[Next]
.
.
[Next]
.
5-3

Basic Usage
- Among the connected printers, only the target model is automatically detected and displayed.
If multiple target models are displayed, check the IP addresses.
- If the connection to this machine cannot be recognized, it is not displayed in the list. In such a case,
select [Specify the Printer/MFP Except for the Above. (IP Address, Host Name)], then manually
specify the IP address and host name of this machine.
7
Select the check box of the printer driver you want to install, then click
- For features of each printer driver, refer to page 5-2.
8
Check the components to be installed, then click
[Install]
.
[Next]
.
5-4

Basic Usage
9
If necessary, change the printer name or print a test page, then click
Installation of the printer driver is then completed.
Settings Description
[Review]
[Rename Printer] Changes this machine name, if necessary.
[Property] Sets the optional operating environment of this machine.
[Print Setting] Changes the default print settings of this machine, if necessary.
[Print Test page] If necessary, print a test page to check that printing process works correctly.
- When you finish installing the printer driver, configure the default settings of the printer driver. For
Reference
details, refer to page 5-9.
Preparation for printing (USB connection)
Displays the installed components for checking.
For details, refer to page 5-9.
For details, refer to page 5-9.
[Finish]
.
5
Changing the installation settings (Windows 7/8/8.1/Server 2008 R2/Server 2012/Server 2012 R2)
If you are using Windows 7/8/8.1/Server 2008 R2/Server 2012/Server 2012 R2, change the computer settings
before installing the printer driver.
◎ The XPS driver does not support USB connection.
1
Open the
- In Windows 8.1, click [
- In Windows 8, right-click the Start window, then click [All apps] - [Control Panel].
- In Windows Server 2012/Server 2012 R2, click [Control Panel] in the Start window.
- In Windows 7/Server 2008 R2, open the Start menu, then click [Control Panel].
2
Click
3
Click
The [System Properties] window appears.
[Control Panel]
[System and Security]
[Advanced system settings]
window.
] in the Start window, then click [Control Panel].
[System]
-
.
on the menu in the left-hand pane.
5-5

Basic Usage
4
5
select [Never install driver software from Windows Update.], then click [Save Changes].
- After you have installed the printer driver,
change the setting back to [Yes, do this automatically (recommended)].
[Hardware]
In the
[No, let me choose what to do]
Select
tab, click
[Device Installation Settings]
,
.
6
Click
[OK]
to close the
[System Properties]
window.
Installing the printer driver
Install the printer driver using the installer.
◎ Administrator privileges are required to perform this task.
5-6

◎ Use the Driver & Utilities CD-ROM.
1
Connect a USB cable to the USB port of this machine.
- For details on the cable connection port, refer to page 2-9.
- If a wizard window for adding new hardware opens, click [Cancel].
2
Insert the printer driver CD-ROM into the CD-ROM drive of the computer.
3
- Make sure that the installer starts, then go to Step
- If the installer does not start, open the printer driver folder on the CD-ROM,
4
double-click
- If the [User Account Control] window appears, click [Continue] or [Yes].
[Set- up.exe]
, then go to Step
.
.
Basic Usage
3
4
5
6
USB-connected printers are detected.
7
[Printer]
Click
Read the license agreement, then click
Check the contents of the
Select
Select this machine, then click
.
[Readme]
[Install printers/MFPs]
, then click
[Next]
[AGREE]
window, then click
.
[Next]
.
.
[Next]
5
.
5-7

Basic Usage
8
Select the check box of the printer driver you want to install, then click
- For features of each printer driver, refer to page 5-2.
9
Check the components to be installed, then click
1
0
If necessary, change the printer name or print a test page, then click
[Install]
.
[Next]
[Finish]
.
.
Installation of the printer driver is then completed.
Settings Description
[Review]
[Rename Printer] Changes this machine name, if necessary.
[Property] Sets the optional operating environment of this machine.
[Print Setting] Changes the default print settings of this machine, if necessary.
[Print Test page] If necessary, print a test page to check that printing process works
- When you finish installing the printer driver, configure the default settings of the printer driver.
For details, refer to page 5-9.
Reference
Displays the installed components for checking.
For details, refer to page 5-9.
For details, refer to page 5-9.
correctly.
5-8

Basic Usage
Initial settings of the printer driver
Configuring the optional environment of this machine
When you use this machine for the first time, configure the printer driver so that it contains information such as
what options are installed on this machine and whether or not authentication settings have been configured.
1
Display the
- In Windows 8.1, click [
- In Windows 8, right-click the Start window, then click [All apps] - [Control Panel] - [Hardware and Sound]
- [View devices and printers].
- In Windows Server 2012/Server 2012 R2, open the Start window,
then click [Control Panel] - [Hard- ware] - [View devices and printers].
- In Windows 7/Server 2008 R2, open the Start menu, then click [Devices and Printers].
If [Devices and Printers] is not displayed, select [Control Panel] - [Hardware and Sound], and click
[View devices and printers].
- In Windows Vista/Server 2008, click the Start menu, and select [Control Panel] - [Hardware and Sound]
- [Printers].
When [Control Panel] is displayed in Classic View, double-click [Printers].
- In Windows Server 2003, click the Start menu, then select [Printers and Faxes].
If [Printers and Faxes] is not displayed, select [Control Panel] - [Printers and Other Hardware] -
[Printers and Faxes]. When [Control Panel] is displayed in Classic View, double-click
[Printers and Faxes].
[Properties]
window of the printer driver.
] in the Start window, then click [Control Panel].
5
2
- If you are using Windows Vista/7/8/8.1/Server 2008/Server 2008 R2/Server 2012/Server 2012 R2,
the information of this machine is automatically obtained and applied for [Device Option].
- When [Auto] in [Obtain Settings] is disabled, clicking [Obtain Device Information],
obtains and reflects the information on this machine to [Device Option].
- If you are using Windows Server 2003, set the option manually using [Device Option]. Select the item
[Configure]
In the
whether or not authentication settings have been configured.
[Auto] under [Obtain Settings] is enabled by default. Thus,
to change from the list, and set a value in [Setting].
tab, configure the information such as what options are installed on this machine and
5-9

Basic Usage
3
1
From the [File] menu, select [Print].
2
- The [Print] dialog box varies depending on the application software.
[OK]
Click
.
How to print
Open data of the original using the application software.
[Printer Name]
In
[Select Printer]
(or
), make sure that the desired printer has been selected.
3
Specify the print range and the number of copies to print.
5-10

Basic Usage
4
- The print settings you have changed here return to the default values when you exit the application
software.
5
Printing is executed.
- The printer driver contains a function to easily recall frequently used print settings. For details,
refer to Chapter 2 “Printing in the Windows Environment” in [User’s Guide Print Operations].
[Properties]
Click
[Print]
Click
Reference
[Preferences]
(or
.
) to change the print settings of the printer driver, if necessary.
5
5-11

Basic Usage
2. Using the scan function
Available operations in scan function
The original data scanned by this machine can be sent to a computer or server, or saved on the USB memory.
It may be necessary to make the following settings prior to using the scan function.
For details, refer to the explanations of each function.
The scan function provides the following sub-functions.
Function Description
Scan to E-mail
SMB Send Sends a converted file to a shared folder of a computer. To use this func-
FTP TX Sends a converted file to the FTP server. This function is useful when
WebDAV Send Sends a converted file to the WebDAV server. This function is useful
Save to USB Memory Saves the original data scanned by this machine in the USB memory
WS Scan Scan can be performed according to instructions from a computer with-
TWAIN Scan Converts the original data scanned by this machine into a file, and imports
- It may be necessary to make the following settings prior to use the Scan Function.
For details on how to use each function, refer to [User’s Guide Scan Operations].
Reference
Sends a converted file to any E-mail address as an E-mail attachment.
tion, specify your computer or file server as a destination.
transferring a file through the FTP server.
when transferring a file through the WebDAV server.
device connected to the machine.
out complicated system settings.
This function is supported by Windows of Vista or later.
it from a computer on the network using TWAIN
-
compatible applications.
5-12

How to send
Basic Usage
1
Press the
2
Load the original.
【
Scan
】
key.
5
- Do not place an original heavier than 4-7/16 lb (2 kg) on the original glass. Furthermore, do not use
3
4
- Also, the scanned original data can be saved on a USB memory.
For details, refer to [User's Guide Scan Operations].
Reference
excessive force to press down on a book or any other form of original that must be spread on the
original glass. Otherwise, the machine may be damaged or a failure may occur.
Select the current destination from the main (scan mode) screen by pressing the +/, key, then press the
Select key.
[Set Destination]
Select
by pressing the +/, key, then press the Select key.
5-13

Basic Usage
5
Specify the destination.
- For details on how to specify a destination, refer to page 5-20.
- You can specify multiple destinations.
6
If necessary, configure scan settings.
7
Press the
- Press the +/, key before sending, and check the destination and settings as necessary.
- To redo operations for specifying destinations or option settings, press 【Stop/Reset】 key.
- If you press the 【Stop/Reset】 key while scanning the original, scanning stops.
Sending starts.
- It is convenient to register frequently used destinations in a program. For details on the program,
【
】
Start
key.
Reference
refer to [User’s Guide Scan Operations].
5-14

3. Using the copy function
How to copy
Basic Usage
1
Press the
2
Load the original.
【
Copy
】
key.
5
- Do not place an original heavier than 4-7/16 lb (2 kg) on the original glass. Furthermore,
do not use excessive force to press down on a book or any other form of original that must be spread
3
- The standard size will be detected automatically.
If you fail to set the original size correctly, the image may be cut off.
- For details on copy settings, refer to page 5-16.
4
- To re-enter the number of copies, press the 【Back】 key.
Reference
on the original glass. Otherwise, the machine may be damaged or a failure may occur.
If necessary, configure copy settings.
If necessary, specify the number of copies using the Keypad.
5-15

Basic Usage
5
Press the
- If you press the 【Stop/Reset】 key while scanning the original, scanning stops. To stop scanning the
The original is scanned, and copying starts.
Introduction of copy function
This section describes the convenient copy functions. For details on how to use each function,
refer to [User’s Guide Copy Operations].
【
】
Start
key.
original, check that [YES] is selected when an message appears to prompt you to stop scanning, then
press the Select key.
Function Overview
[Zoom]
[CLR] Select a color for copying.
[Orig. Type] Select the optimum settings for the original to copy it at the optimum image
[DENSITY] Adjust the density of a copy image.
[Original Direction] Specify the orientation of the loaded original.
You can copy an original image enlarged or reduced by an arbitrary zoom
ratio.
quality level.
5-16

Basic Usage
Function Overview
[Scan Resolution] Adjust the resolution of the original.
[Bkgd. Removal] You can adjust the background density of an original with the colored
background such as newspaper or an original made with recycled paper.
[SHARPNESS] Adjust the sharpness of the contour of text or images.
Smoothen the rough contour or sharpen the blurred image.
[BRIGHTNESS] Adjust the brightness of an image.
[Saturation] Adjust the saturation of an image.
[RED]/[GREEN]/[BLUE] Adjust the intensity of each color of an image.
[TEXT ENHANCEMENT] Adjust the enhancement of the text against the background.
[Contrast] Adjust the shading of an image.
[COLOR BALANCE(Y)]/
[COLOR ALANCE(M)]/
[COLOR BALANCE(C)]/
[COLOR BALANCE(K)]
[DUPLEX] Copy the 1-sided original on both sides of paper, or copy the 2-sided original
[Combine] Multiple pages (such as two or four pages) can be reduced and copied on
[ID CARD COPY] When you want to copy cards, such as an insurance card, a driver license
[Paper] Select the size and type of the paper for copying. You can also change the
[Original Size] Select the size of the original to be scanned.
[Separate Scan] If the number of original sheets is so large that they cannot be loaded
Adjust each color balance of an image.
on both sides or on a single side of sheets of paper.
the same side of a single sheet, enabling you to reduce paper consumption.
You can further reduce paper consumption by combining with the 2-Sided
copy function.
card and a business card, you can arrange the front and back sides of the card
on a single page and copy the images on to the same side of one sheet. This
can reduce the number of sheets used.
size and type settings of the paper loaded in paper trays.
into the ADF at the same time, you can load them in several batches and
handle them as one job.
5
[Mixed Original] Even for scanning the original including multiple pages mixed with different
size, by using ADF, the size of each original can be detected.
[Finishing] You can select whether to sort the output sheets or group them when
printing multiple sets of copies.
5-17

Basic Usage
4. Printing a file stored on USB memory
Supported USB memory devices
USB memory devices that have the following specifications can be connected to this machine.
Item Specifications
Supported media
File system FAT32
File Type PDF, Compact PDF, JPEG, TIFF, XPS, Compact XPS, OpenXPS, OOXML
Note the following points when connecting a USB memory device to this machine.
- Use the USB connector on the side that is near the Control Panel.
- Do not disconnect the USB memory device while saving a file to the USB memory or printing a file in
- Use only a USB memory device on this machine. Do not use other USB devices (such as a hard disk
- Do not connect or disconnect the USB memory device when the hourglass is displayed in the
Message Window while this machine is active.
- Do not disconnect the USB memory device directly after connecting it.
Note
the USB memory.
unit or USB switching hub).
USB memory device (USB 2.0/1.1 supported)
(.docx/.xlsx/.pptx), and PPML (.ppml/.vdx/.zip)
Printing procedure
Connect a USB memory device to the USB port of this machine.
1
On the main screen of the copy mode, select [USB to Print] by pressing the +/, key, then press the Select
2
key.
5-18

Basic Usage
To print a file other than PDF or XPS format, select [File Type] by pressing the 【▲/▼】 key, then press the
3
【
- The setting selected in [File Type] is also applied to the next operation and after.
When selecting a file to print, if you want to display only PDF and XPS format files, change the setting
】 key. Select
Select
of [File Type] to [PDF, XPS].
by pressing the 【▲/▼】 key, then press the 【
[ALL]
Select
】 key.
4
5
- Select [Up] to move upward.
- Select a folder to open the folder and move to a lower level.
6
[File List]
Select
Select the file to print by pressing the 【▲/▼】 key, then press the
If necessary, change print settings, then select
Settings Description
[Paper] Select the paper tray for the printing paper. The paper size can be specified
[DUPLEX]
(D201/D202)
[COPIES] Set the number of copies to print.
[Collate] When printing data by multiple copies, select whether or not to feed out
by pressing the 【▲/▼】key, then press the
【
Start
when the selected file type is TIFF or JPEG.
Select whether or not to print data on one side or both sides of sheets
of paper. To print data on both sides, select the binding position.
copies separately one by one like “12345”, “12345”, and “12345”.
】
【
Select
【
】
key.
Select
】
key.
5
5-19

Basic Usage
5. Registering a destination
Address book
Registering a frequently used destination on this machine will save you the trouble of having to enter it each
time you send data. A destination registered on this machine is called an Address Book.
Up to 2,000 address books can be registered. The destination types that can be registered are E-mail address,
computer name, etc. depending on the transmission mode.
Registering an address book
Address book can be registered or edited using Web Connection.
- Address book can only be registered in Web Connection. For details on the registration procedure,
in [User’s Guide Applied Functions].
Reference
refer to Chapter 2 “Configuring the Operating Environment of This Machine”
5-20

D200 Series
Quick Start Guide
Specifications
6

Specifications
1. Checking the specifications of this machine
Item Description
Name D200, D201, D202
Type Desktop type with integrated scanner and printer
Color mode Full Color
Scanning resolution Standard : 600 dpi×300 dpi
Maximum : 600 dpi×600 dpi *
* To use this function, contact your service representative.
Writing resolution 600 dpi×600 dpi
Gradation 256
Memory size 2 GB
Originals Sheets, books, objects (Max. weight limit: 4-7/16 lb (2 kg))
Max. original size A3 or Ledger (11×17)
Output size Tray 1 :
Width : 5-1/2 inches 11-11/16 to (139.7 mm to 297 mm),
Length : 7-3/16 inches 14-5/16 to (182 mm to 364 mm)
Tray 2 :
Width : 5-1/2 inches 11-11/16 to (139.7 mm to 297 mm),
Lenght : 7-3/16 inches 17 to (182 mm to 431.8 mm)
Manual Feed Tray :
Width : 3-9/16 inches 12-5/8 to (90 mm to 320 mm),
Length : 5-1/2 inches 18 to (139.7 mm to 457.2 mm)
Image chipping
width
Warm-up time
(73.4
F (23 C),
std. voltage)
First copy time Full color : 10.2 sec. or less, Black : 7.8 sec. or less
At printing :
Leading edge or trailing edge : 3/16 inches (4.2 mm) or less,
Left or right : 3/16 inches (4.2 mm) or less
At copying :
Leading edge : 3/16 inches (4.2 mm) or less,
Trailing edge : 1/8 inches (3 mm) or less,
Left or right : 1/8 inches (3 mm) or less
Time period from when the Power Switch is turned on to when this machine
is ready for printing
38 sec. or less
Time period from when Sleep mode is released to when this machine is
ready for printing while the Power Switch is on
20 sec. or less
6-2

Item Description
Copy speed D202 : 28 sheets/min. (A4 or Letter, plain paper)
D200/D201 : 22 sheets/min. (A4 or Letter, plain paper)
Specifications
Paper handling/paper
capacity
Paper weight Main unit : 15-15/16 lb to 68-1/8 lb(60 g/m
Number of
continuous copies
Auto duplex
(D201/D202 only)
Stacking capacity 250 sheets (Plain paper)
Power supply AC 110 V, 15 A, 60 Hz
Max. power
consumption
Dimensions
[W] X [D] X [H]
Paper tray 2 levels (universal tray 500 sheets e 2)
Manual Feed Tray 150 sheets
Manual Feed Tray : 15-15/16 lb to 79-13/16 lb(60 g/m
1 to 999 sheets
Paper size Width : 5-1/2 inches 12-5/8 inches (139.7 mm to 320 mm),
Length : 5-13/16 inches to 18 inches (148 mm to 457.2 mm)
Paper
weight
AC 120 V, 12 A, 60 Hz
AC 220 V to 240 V, 8 A, 50/60 Hz
1.5 kW (110 V/120 V)
1.58 kW (230 V)
22 inches X 24-15/16 inchesX 30-5/8 inches (559 mm X 634 mm X 778.5 mm)
15-15/16 lb to 68-1/8 lb (60 g/m
2
to 256 g/m2)
2
2
to 256 g/m2)
to 300 g/m2)
6
Space
Requirements
[W] X [D] X [H]
Weight D201/D202 : Approx. 163-1/8 lb (74 kg) (including consumables)
41-1/4 inches×41-13/16 inches×30-5/8 inches (1047.5 mm×1062.8 mm
778.5 mm) (When the Right Door is opened while a Paper Tray is pulled out)
D200 : Approx. 156-1/2 lb (71 kg) (including consumables)
×
6-3

Specifications
2. Checking the specifications of optional devices
Reverse Automatic Document Feeder D200RDF
Item Specifications
Model number
Document feeder type Reverse Automatic Document Feeder
Original types 1-sided original :
Original size Max. A3 or Ledger (11×17) (Fax mode: Max. 39-3/8 inches (1000 mm))
Original loading capacity 70 sheets (21-1/4 lb (80 g/m
Feeding speed
(when copying A4 or
Letter size original)
D200RDF
Plain paper (9-5/16 lb to 34-1/6 lb (35 g/m
2-sided/mixed original :
Plain paper (13-5/16 lb to 34-1/16 lb (50 g/m
Only originals of the same width can be mixed.
2
))
Standard scanning resolution (600 dpi e 300 dpi)
1-sided original : 22 sheets/min. (Full color), 28 sheets/min. (Black)
2-sided original : 8 sheets/min. (Full color), 10 sheets/min. (Black)
Maximum scanning resolution (600 dpi×600 dpi)*
1-sided original : 11 sheets/min. (Full color), 22 sheets/min. (Black)
2-sided original : 4 sheets/min. (Full color), 8 sheets/min. (Black)
* To use this function, contact your service representative.
2
to 128 g/m2))
2
to 128 g/m2))
Power supply Supply from machine
Dimensions
[W] X [D] X [H]
Weight Approx. 11-11/16 lb (5.3 kg)
22 inches×18-11/16 inches×3-3/4 inches (559 mm×474 mm×96 mm)
6-4

■
Memo
Specifications
6
6-5

www.sindoh.com
Warranty Conditions (D200, D201, D202)
- The term of the warranty for the Machine of this product is 1 (one) year, and the quantity
under warranty is 60,000 sheets.
- Warranty expires, when machine’s real-time usage overruns quantity under warranty
during the warranty period.
※ Average Use Quantity
- The average use quantit y is calculated based on the ordinary regular checkup.(Under the Standard mode)
- D200, D201 : Color – 585 sheets/month, Black&White – 1,755 sheets/month
- D202 : Color – 750 sheets/month, Black&White – 2,250 sheets/month
Standard Mode base
Item D200 D201 D202
Print
Color Ratio
Paper Ratio Vertical: 93%, Horizontal: 7%
Basic Density
Average Print (1month)
※ Toner Usage – Black: 27,000 sheets / Color: 24,500 sheets (A4 / 5% chart base).
※ Difference in use may occur due to the density of image.
※ Claim decision criteria(Machine, Consumable) conforms to the criteria defined by us.
B&W 1 page / job 1 page / job 1 page / job
Color 1 page / job 1 page / job 1 page / job
25%
B/W= 5% for each color, Black 5%
Color: 585sheets / Mono: 1,755 sheets
Color: 750 sheets /
Mono: 2,250 sheets
- Please refer to below chart for replacement cycle of main consumables. (unit : sheets)
Item D200 D201 D202
Developing
Unit
Drum
Unit
K 590,000
C, M, Y 590,000
K 70,000 70,000 120,000
C, M, Y 55,000 55,000 75,000
Transfer belt unit
Transfer roller unit
Fuser unit
Waste toner box
225,000 225,000 280,000
225,000 225,000 280,000
590,000
40,000

※ Since the above replacement items are based on using the A4 5% chart in general use
environment, the error of the replacement time may occur.
※ Please follow the replacement cycle since the above replacement items give direct impact.
※ The items (general parts) out of the above items should be checked up for the need or fault.
If a trouble arises, the actions taken by professional engineer will be required.
※ If any defect occurs within the replacement cycle, it shall be handled according to the claim
decision criteria by us.


 Loading...