


A1 Series
User Manual
Read the User manual before operating the
product, and keep the manual at a convenient
place near the product.
3dprinter.sindoh.com

Safety Instructions
Be sure to observe the following instructions when using the device..
Warning: Failure to observe the instructions may lead to death or serious injury.
• Directly plug the power cord in the receptacle on the wall. Do not use extension cord.
• If the power cable or plug is worn or damaged, pull out the power plug.
• The exposure of the interior of the machine can cause electric shock or burns.
• Do not remove covers or screws other than specified in this manual.
• Do not place the device in a highly moist environment as it may cause deformation and
malfunction.
• Avoid contact of electrical terminal with metal products such as necklaces, coins, keys,
watches, etc.
• Do not hold the interior parts to lift or move the device.
• Turn off the power and pull out the power plug under the following circumstances;
- When in contact with liquid
- When in need for a service or repair request
- When the device cover is damaged
• For the method of disposal, contact local service center or use a proper collection site.
• Please turn off the power when leaving the office after business hours or in circumstances
when machine is unoccupied for a long period of time as it may cause abrupt fire accidents.
Caution: Failure to observe instructions may cause injuries or damages to property
• Protect device from humid or wet conditions e.g. rain, snow, etc.
• Remove power cord from receptacle on the wall before moving device.
• Be careful not to damage power cord while device is being moved.
• When removing the power cord, please pull the plug and hot the power cable.
• Be cautious of clips, staples and any other small metal objects from falling inside the device.
• Please be cautious on safety when touching the interior of the machine, e.g. cleaning the
interior
• Do not dispose of device or consumables together with household waste. For the method of
disposal, please contact local service center or use a proper collection site.
• Our product maintains high quality standards and performance.
It is recommended to use genuine components only.
Components can be acquired from any authorized distributors.

Before using the device
Thank you for purchasing our product.
This user manual contains detailed information about correct use of device and easy
maintenance to maintain the optimal state, and to contribute to the rationalization of office
work of your company
Please carefully read the user manual before using the device and keep close at hand.
In order to use the device correctly and safely, please carefully note the precautions before use.
Prohibition and limitation
1. This use manual has been created for the convenience of the users, so actual product may
differ from image and explanations shown.
2. The contents of this user manual are subject to be changed without notice. We are not
responsible for the direct and/or indirect loss or damages caused by results of handling or
operating the product in any case and for results occurring from user’s negligence.
3. The copyrighted literary works can be duplicated and used for personal use or household use
and within the same parameter. In other cases than the aforementioned, it is prohibited by
law.
4. The above details present only a part of the applicable laws and regulations. Details on these
laws/regulations may not be stated as they are. We do not guarantee its correctness and
completeness. Please consult a legal advisor to check if the object you intend to print is legal.
5. User is responsible for all loss derived from modification of the product executed by the user
or third party.
6. Font used in the user manual is the “NANUM” font provided by NAVER.

Contents
Before using the device
1. Preface
2. Conventions
Symbols
3. Safety Information
4. Precautions
4.1 Installation
4.2 Moving the Device
5. Handling Consumables
5.1 Resin
5.2 Isopropyl Alcohol, IPA
6. Instructions for Use
7. Ventilation
8. Notices
9. Disposal of Used Battery
10. Wifi Module Disclaimer
--------------------------------------------------------------------------------------------------------------- 1
-------------------------------------------------------------------------------------------------------------- 2
----------------------------------------------------------------------------------------------------------------- 7
------------------------------------------------------------------------------------------------------------- 11
--------------------------------------------------------------------------------------------------------- 2
------------------------------------------------------------------------------------------------- 3
---------------------------------------------------------------------------------------------------------- 5
---------------------------------------------------------------------------------------------------------- 5
------------------------------------------------------------------------------------------------ 6
------------------------------------------------------------------------------------------- 7
--------------------------------------------------------------------------------------------- 8
------------------------------------------------------------------------------------------------ 9
--------------------------------------------------------------------------------------------------------- 10
---------------------------------------------------------------------------------------- 13
---------------------------------------------------------------------------------------- 14
11. USB Memory Disclaimer
--------------------------------------------------------------------------------------- 16
Chapter.1 Preparations for Machine Operation
1. Specifications
1.1 Printing
1.2 Device
1.3 Software/Support
2. Components
2.1 Basic Components
2.2 Finishing Kit (Optional)
2.3 Resin Cartridge (Optional)
3. Understanding the parts
4. Installation (Including Connection, Cartridge Setup and S/W Installation)
4.1 Device Connection
4.2 S/W Installation
---------------------------------------------------------------------------------------------------- 1-2
---------------------------------------------------------------------------------------------------------- 1-2
------------------------------------------------------------------------------------------------------------ 1-2
--------------------------------------------------------------------------------------------- 1-2
----------------------------------------------------------------------------------------------------- 1-3
--------------------------------------------------------------------------------------------- 1-3
--------------------------------------------------------------------------------------- 1-4
--------------------------------------------------------------------------------- 1-5
--------------------------------------------------------------------------------------- 1-6
-------------------------------------------------------------------------------------------- 1-9
------------------------------------------------------------------------------------------------ 1-9
--------------------------- 1-9

Chapter.2 UI Menu Function
1. UI Menu Function Descriptions
1.1 Home
1.2 Cartridge
1.3 Settings
1.4 Saved Files
1.5 Info
1.6 Quick Guide
------------------------------------------------------------------------------------------------------------- 2-3
--------------------------------------------------------------------------------------------------------- 2-4
Change
------------------------------------------------------------------------------------------------------------ 2-4
---------------------------------------------------------------------------------------------------------- 2-7
XY Scale
Z Offset
Chamber Heating
Resin Auto Supply
Platform Leveling
Dashboard Logging
Network
Test Print
S/W Update
General
----------------------------------------------------------------------------------------------------------- 2-4
--------------------------------------------------------------------------------------------------------- 2-10
--------------------------------------------------------------------------------------------- 2-12
--------------------------------------------------------------------------------------------- 2-14
---------------------------------------------------------------------------------------------- 2-16
------------------------------------------------------------------------------------------- 2-19
--------------------------------------------------------------------------------------------------------- 2-21
-------------------------------------------------------------------------------------------------------- 2-25
---------------------------------------------------------------------------------------------------- 2-27
---------------------------------------------------------------------------------------------------------- 2-30
----------------------------------------------------------------------------------------------------- 2-34
------------------------------------------------------------------------------------------------------------- 2-36
--------------------------------------------------------------------------------------------------- 2-40
------------------------------------------------------------------------------- 2-2
Chapter.3 Printing
1. Printing
1.1 Printing from USB Flash Drive
1.2 Printing via PC
1.3 Changing Resin
------------------------------------------------------------------------------------------------------------ 3-2
------------------------------------------------------------------------------- 3-2
-------------------------------------------------------------------------------------------------- 3-8
------------------------------------------------------------------------------------------------- 3-8
Chapter.4 Checking Printed Output
1. Checking Printed Output
1.1 Detaching Printed Output
1.2 Finishing Printed Output
1.3 Preparing the Next Print
1.4 Enhancing Print Quality
2. When Printer Can’t be Turned ON
3. When Problems Persist
-------------------------------------------------------------------------------------- 4-2
----------------------------------------------------------------------------------- 4-2
------------------------------------------------------------------------------------- 4-4
------------------------------------------------------------------------------------- 4-5
-------------------------------------------------------------------------------------- 4-10
--------------------------------------------------------------------------- 4-11
----------------------------------------------------------------------------------------- 4-12

ⅳ
Chapter.5 Maintenance
1. Machine Cleaning
1.1 Printer Interior Cleaning
1.2 Periodical Inspection
Oil/Grease Inspection
1.3 Platform
1.4 Resin Tank
1.5 Protective Glass
1.6 Resin Cartridge
1.7 Orange Cover
2. Error Messages and Solutions
3. Problems and Solutinos
3.1 If resin is not properly supplied
3.2 In case of opening orange cover during printing
3.3 In case of printing failure
4. Replacing Consumables
4.1 Replacing Resin Cartridge
4.2 Replacing Platform
4.3 Replacing Resin Tank
--------------------------------------------------------------------------------------------------------- 5-3
----------------------------------------------------------------------------------------------- 5-2
-------------------------------------------------------------------------------------- 5-2
------------------------------------------------------------------------------------------ 5-2
---------------------------------------------------------------------------------------- 5-2
------------------------------------------------------------------------------------------------------- 5-10
------------------------------------------------------------------------------------------------ 5-13
------------------------------------------------------------------------------------------------- 5-16
--------------------------------------------------------------------------------------------------- 5-18
-------------------------------------------------------------------------------- 5-21
---------------------------------------------------------------------------------------- 5-22
----------------------------------------------------------------------------- 5-22
------------------------------------------------------------------------------------ 5-22
---------------------------------------------------------------------------------------- 5-23
----------------------------------------------------------------------------------- 5-23
-------------------------------------------------------------------------------------------- 5-27
------------------------------------------------------------------------------------------ 5-29
------------------------------------------------------- 5-24

Before Using the Device
1. Preface
This user manual describes detailed explanations and points to note in operating the device. Please read the
user manual very carefully before starting use of the device, and keep it for reference purpose at close.
- The contents of the user manual is subject to be changed without any prior notifications.
Sindoh shall not be liable for consequential, special, indirect damages or losses caused by the
handling or operating of the machine or by the user’s negligence.
- Copyrighted works can be printed and used for home and/or personal use; other usage is prohibited
by law.
- The above details present only a part of the applicable laws and regulations and the details of the law
may not stated as they are. Sindoh is not responsible for its correctness and completeness.
Please consult your legal advisor to check if the object you intend to print is legal.
- The user manual may include a little different descriptions of the device from the actual one.
Some options may not be available in some countries. Please contact local distributor for details.
Some standard units are optional in some countries.
Please consult your local service center.
- In some countries, some models are not available.
Please consult your local sales office.
- This manual uses metric units of measurements.
- Font used in the user manual is the “NANUM” font provided by NAVER.

Before Using the Device
2. Conventions
Symbols
This manual uses the following symbols and meanings.
- Indicates important safety notes.
Ignoring these notes could result in serious injury or death.
Be sure to read these notes carefully for your safe operations of the device.
- Indicates important safety notes.
Ignoring these notes could result in minor injury or damage to the machine or to property.
Be sure to read these notes carefully for your safe operations of the device.
- Indicates points to pay attention to when using the device, and explanations of likely causes
of resin misuse, damage to originals, or loss of data.
Be sure to read these explanations before operating the device..
- Indicates supplementary explanations of the device’s functions, and instructions on resolving
user errors.
- Indicates supplementary explanations of the device’s functions, and instructions on resolving
user errors.
[ ]
Indicates the messages or menus that appear on the device’s LCD display panel.
【 】
Indicates the names of each function keys on the device control panel and display window.
Before Using the Device
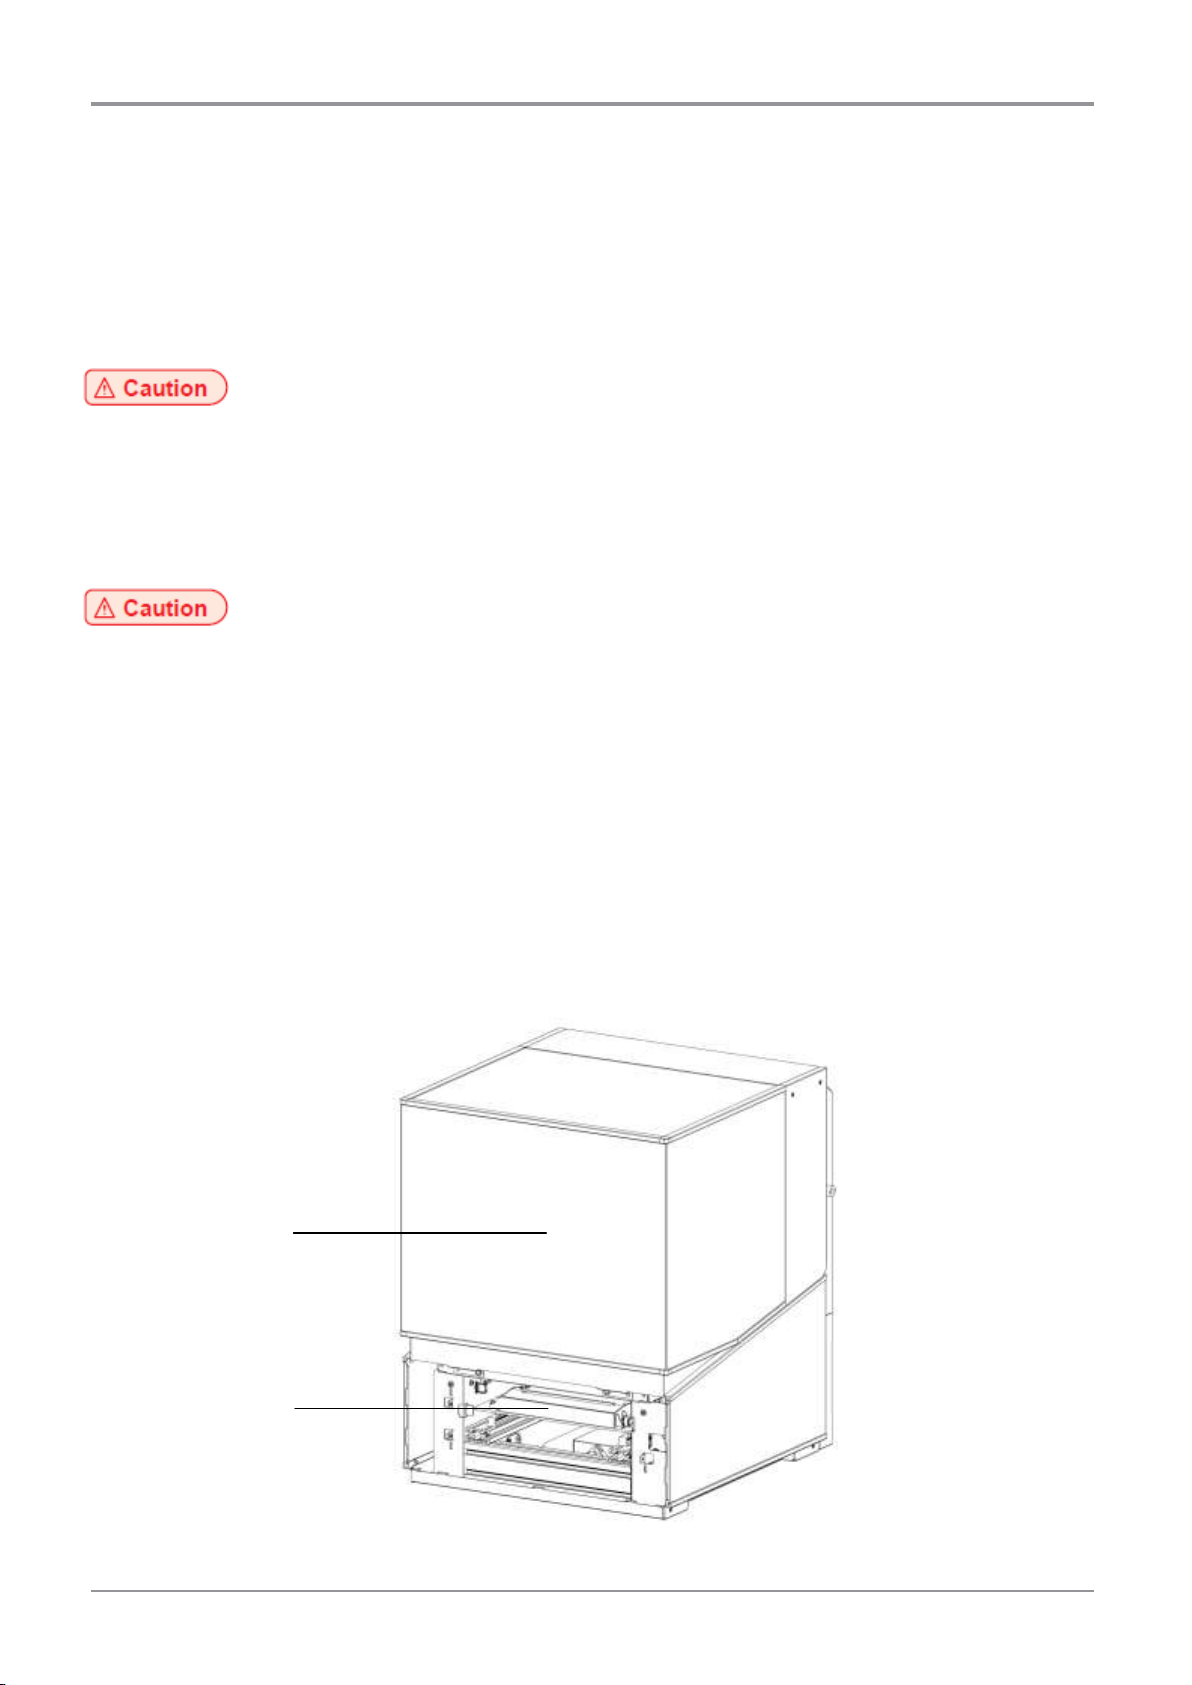
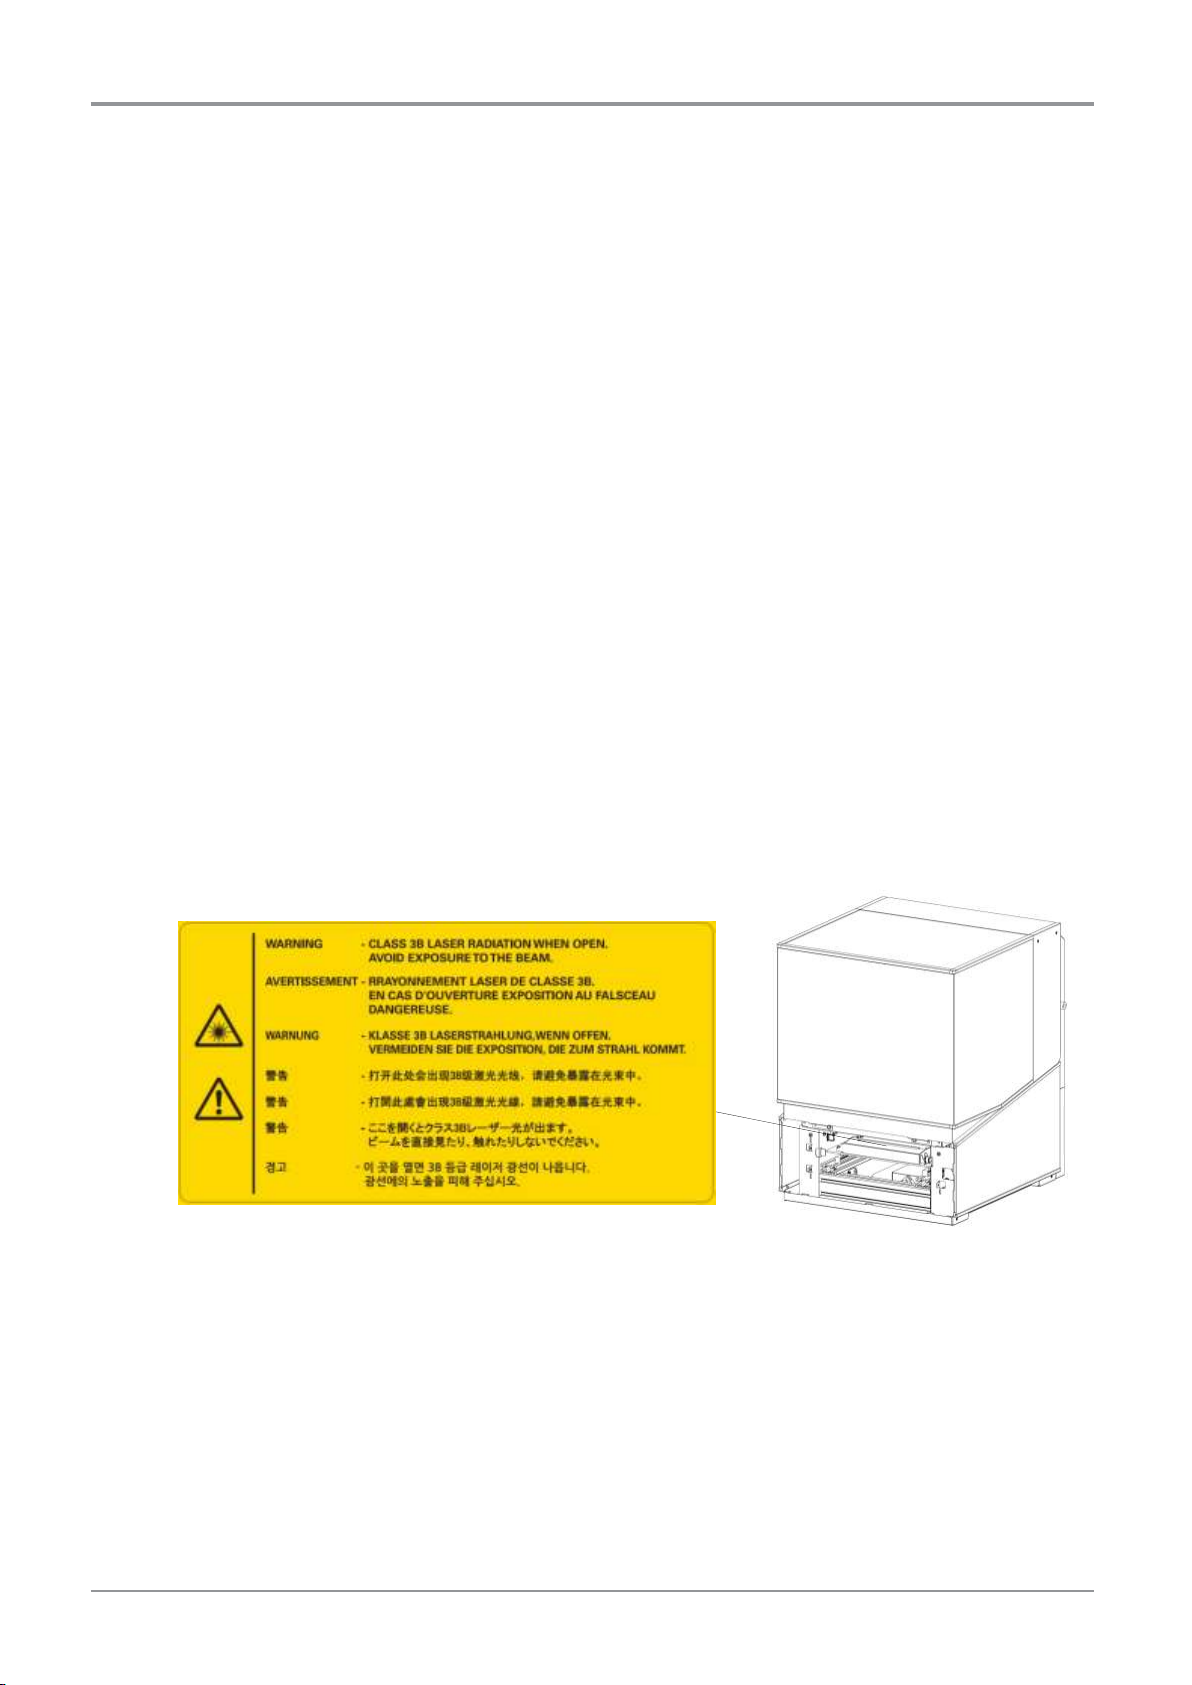
Laser Unit
Orange Cover
3. Safety Information
Please plug the power cord into a properly grounded outlet with is near and quickly accessible from the device.
Do not use or place the machine in wet or humid environment.
This device is very sophisticated 3D printing device, so please keep in mind the following safety information for
safe use.
Prohibition of modification by user
Use of controls or adjustments or performance of procedures other than those specified herein may result in
hazardous radiation exposure.
Do not modify the device at user’s will in any cases. Warranty will be void if user modifies or changes the device.
Furthermore, user may be exposed to potential dangers.
Internal laser radiation
• Typical Wavelength : 405 nm
• This machine uses GaAs laser diode with a wavelength of 400~410nm and an output of Max. 450 mW
(Class 3B).
• The laser diode and polygon mirrors are incorporated in laser unit.
• Laser unit is NOT A FIELD SERVICE ITEM.
Therefore, laser unit must not be opened under any circumstances.
• This machine is classified as Class 1 Laser Product by using external covers.
Orange cover cuts off internal laser radiation to protect users from exposure to Class 3B laser radiation.
Be careful not to cause damages such as cracks or breakage to orange cover due to impact.
If orange cover is cracked or broken, stop using the device immediately and contact a local service center
for repair.

Before Using the Device
Laser safety
The Center for Devices and Radiological Health (CDRH) prohibits the repair of laser based optical units in the
field. The optical housing unit can only be repaired in a factory or at a location with the requisite equipment.
The laser subsystem is replaceable in the field by a qualified Customer -Engineer. The laser chassis is not
repairable in the field. Customer engineers are therefore directed -to return all chassis and laser subsystems to
the factory or service depot when replacement of the optical subsystem is required.
Exterior covers
Do not remove exterior covers. Removing covers can make user exposed to serious dangers, and will make
warranty of the device void.
Resin
Nitril gloves should be worn in case of handling resin to preventing contact with resin. Wearing protective glass
is strongly recommended to prevent splashing of resin into eyes. Be careful not to let resin accidentally enter
inside the body through nose or mouth.
Finishing tools
Some of finishing tools being used to handle printed outputs such as scrappers, knives, tweezers, nippers, etc)
have sharp edges. Handle them with caution because it may cause injury or hazardous situations in sudden.
Before Using the Device
Pain
Contact with this part may cause pain. To avoid personal pain or damages to the device, you
need to follow the instructions below before moving the device.
Do not open the orange cover during machine operation.
Do not put any parts of your body or small things like necklace, hair, etc in the machine
during machine operation. It may cause personal pain or damages to the device.
When unplugging the power cord, please turn off the device using power button first and remove power
cord from the power outlet.
Unplug and release all cords and cables before moving the machine.
Do not use the power cords other than being provided along with this device or being approved by the
manufacturer.
Do not twist, bend, step on the power cord, or place heavy things on it.
Be careful not to peel off the power cord, or not to overload it.
Do not let the power cord to get caught by such as furniture or walls.
Incorrect use of the power cord may cause fire or electric shock.
Check the power cord periodically. When checking, unplug the power cord from the outlet.
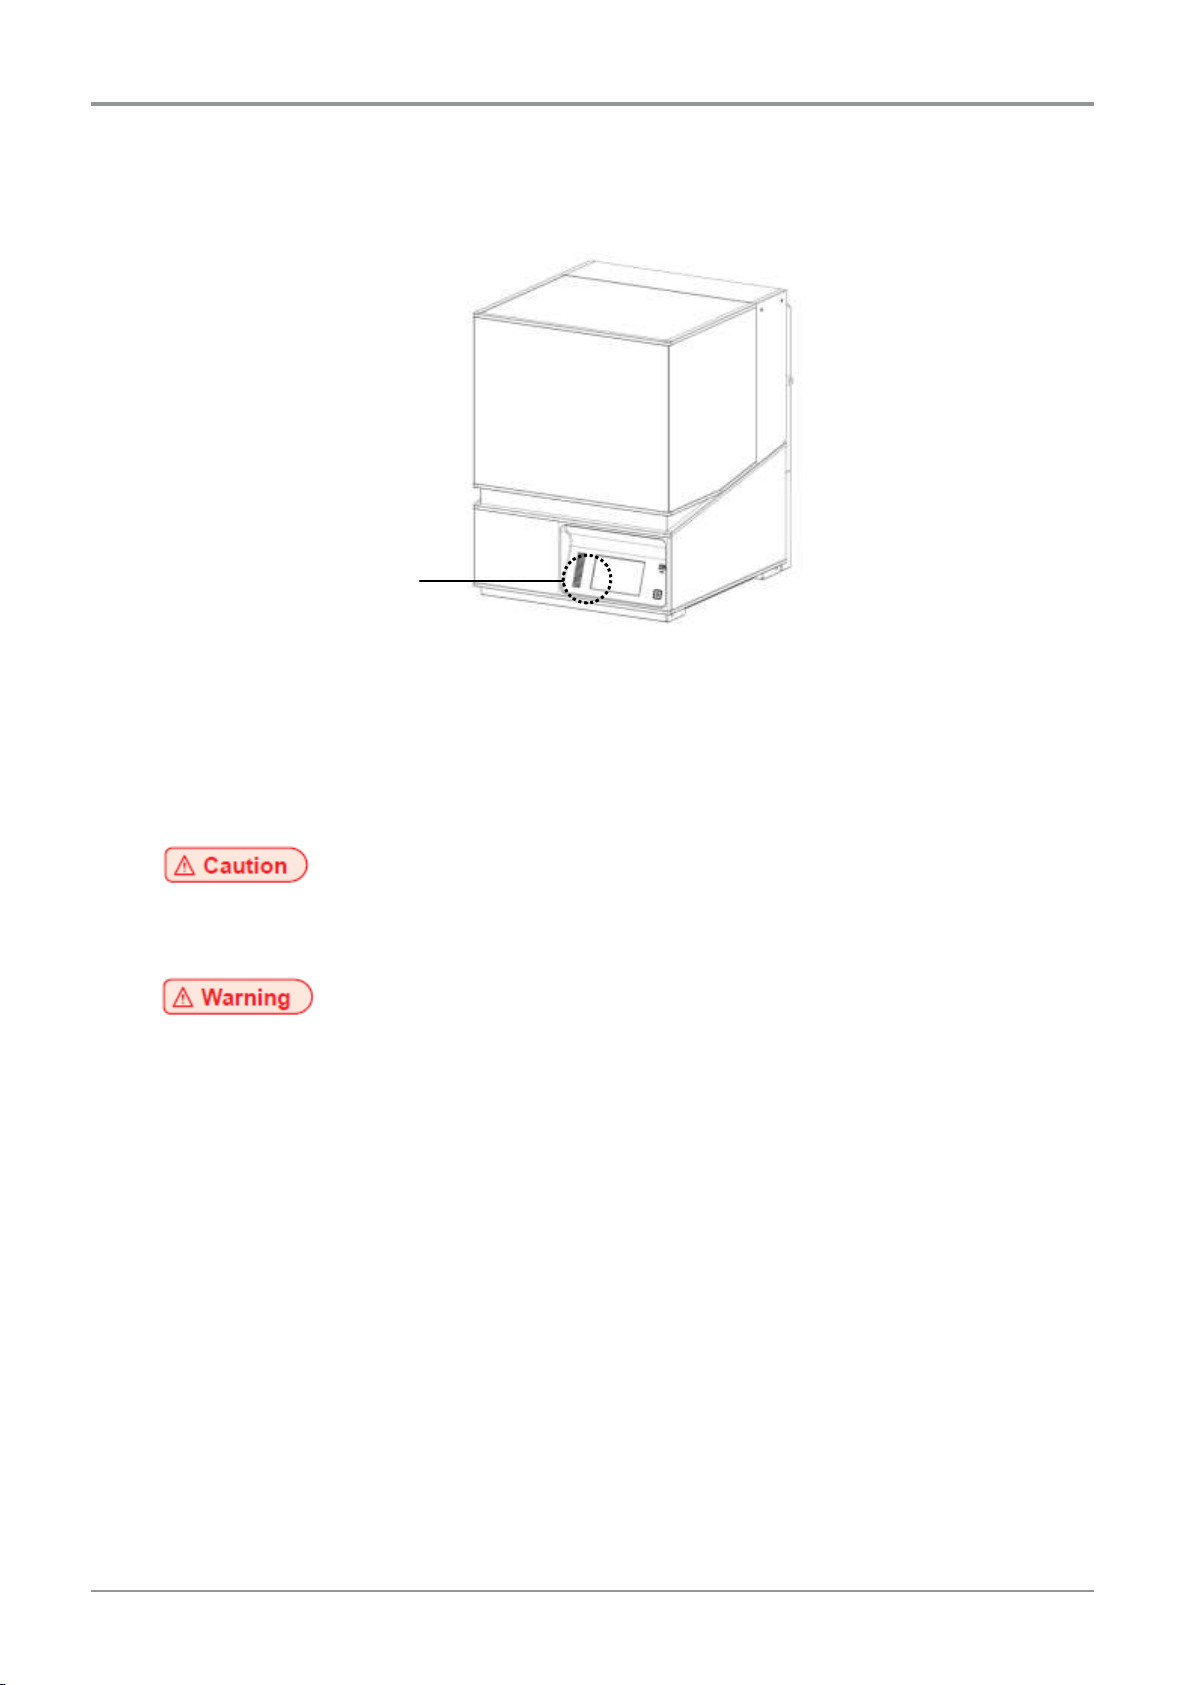
If any problems like malfunctions, body parts being caught inside the device, etc occur, quickly press the
pause [ ] or stop [ ] button located on the touch screen.
Regarding Issues not being described in the user manual, please contact a local service center.
Electric shock
Contact with this part may result in electric shock. To avoid electric shocks, follow the
instructions below.
Proceed your work after turning off the device and unplugging the power cord from
the outlet in case of accessing the system board, or installing hardware or optional memory devices. If the
device is connected with another device, turn it off and separate the cables from the device.
This product has been designed, tested and approved to meet strict safety requirements of international
safety standards. Some safety features of parts may not be guaranteed. Sindoh is not liable for problems
caused by using an unauthorized spare parts or consumables.
Be sure to turn off the power and unplug the power cord before cleaning inside and outside of the device
to remove electrical hazards.
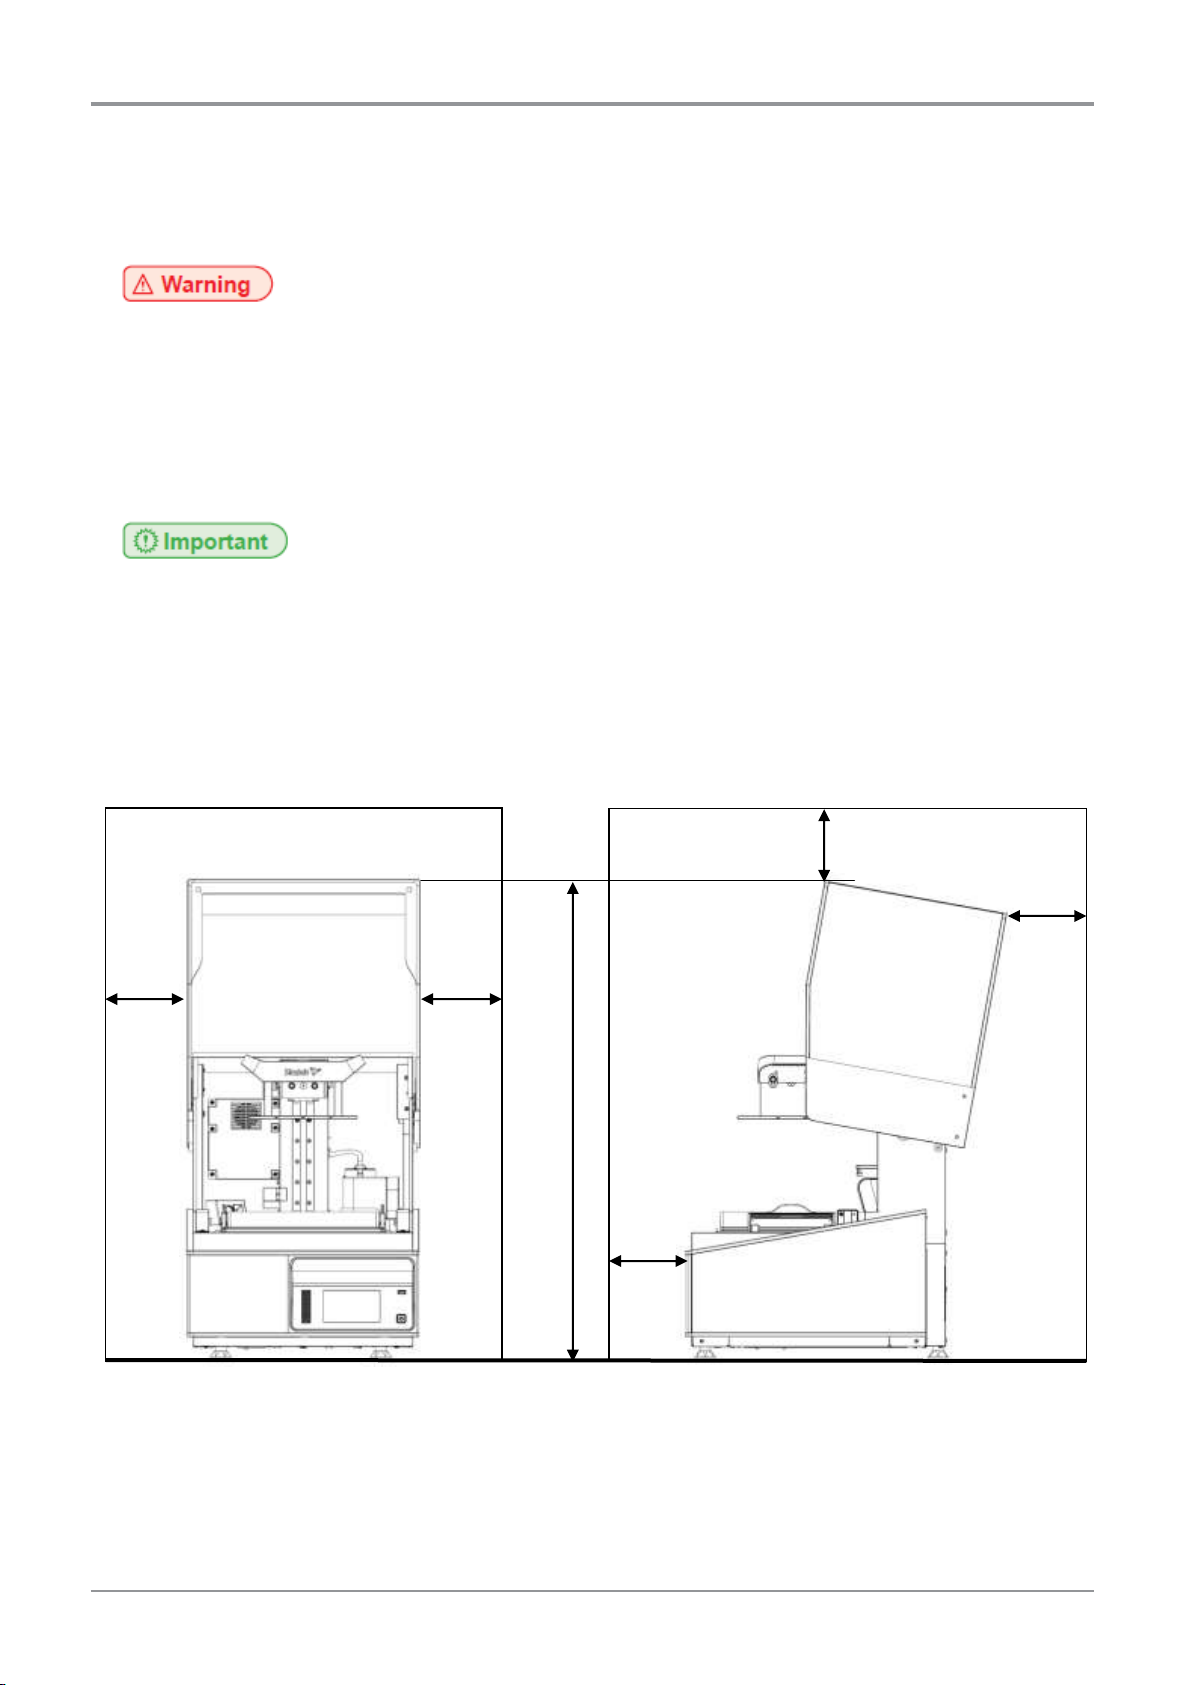
927.2 mm
100mm
100mm
100mm
100mm
100mm
Before Using the Device
4. Precautions
4.1 Installation
- Install the device in a well ventilated area.
- You can smell odor during the operation. It should not be harmful, but if the area of the place
where the device is located is not well ventilated, make sure to ventilate the area appropriately
periodically.
- Place the device in the place where it can’t be touched by children, pets, etc to remove any
possibilities of accidents.
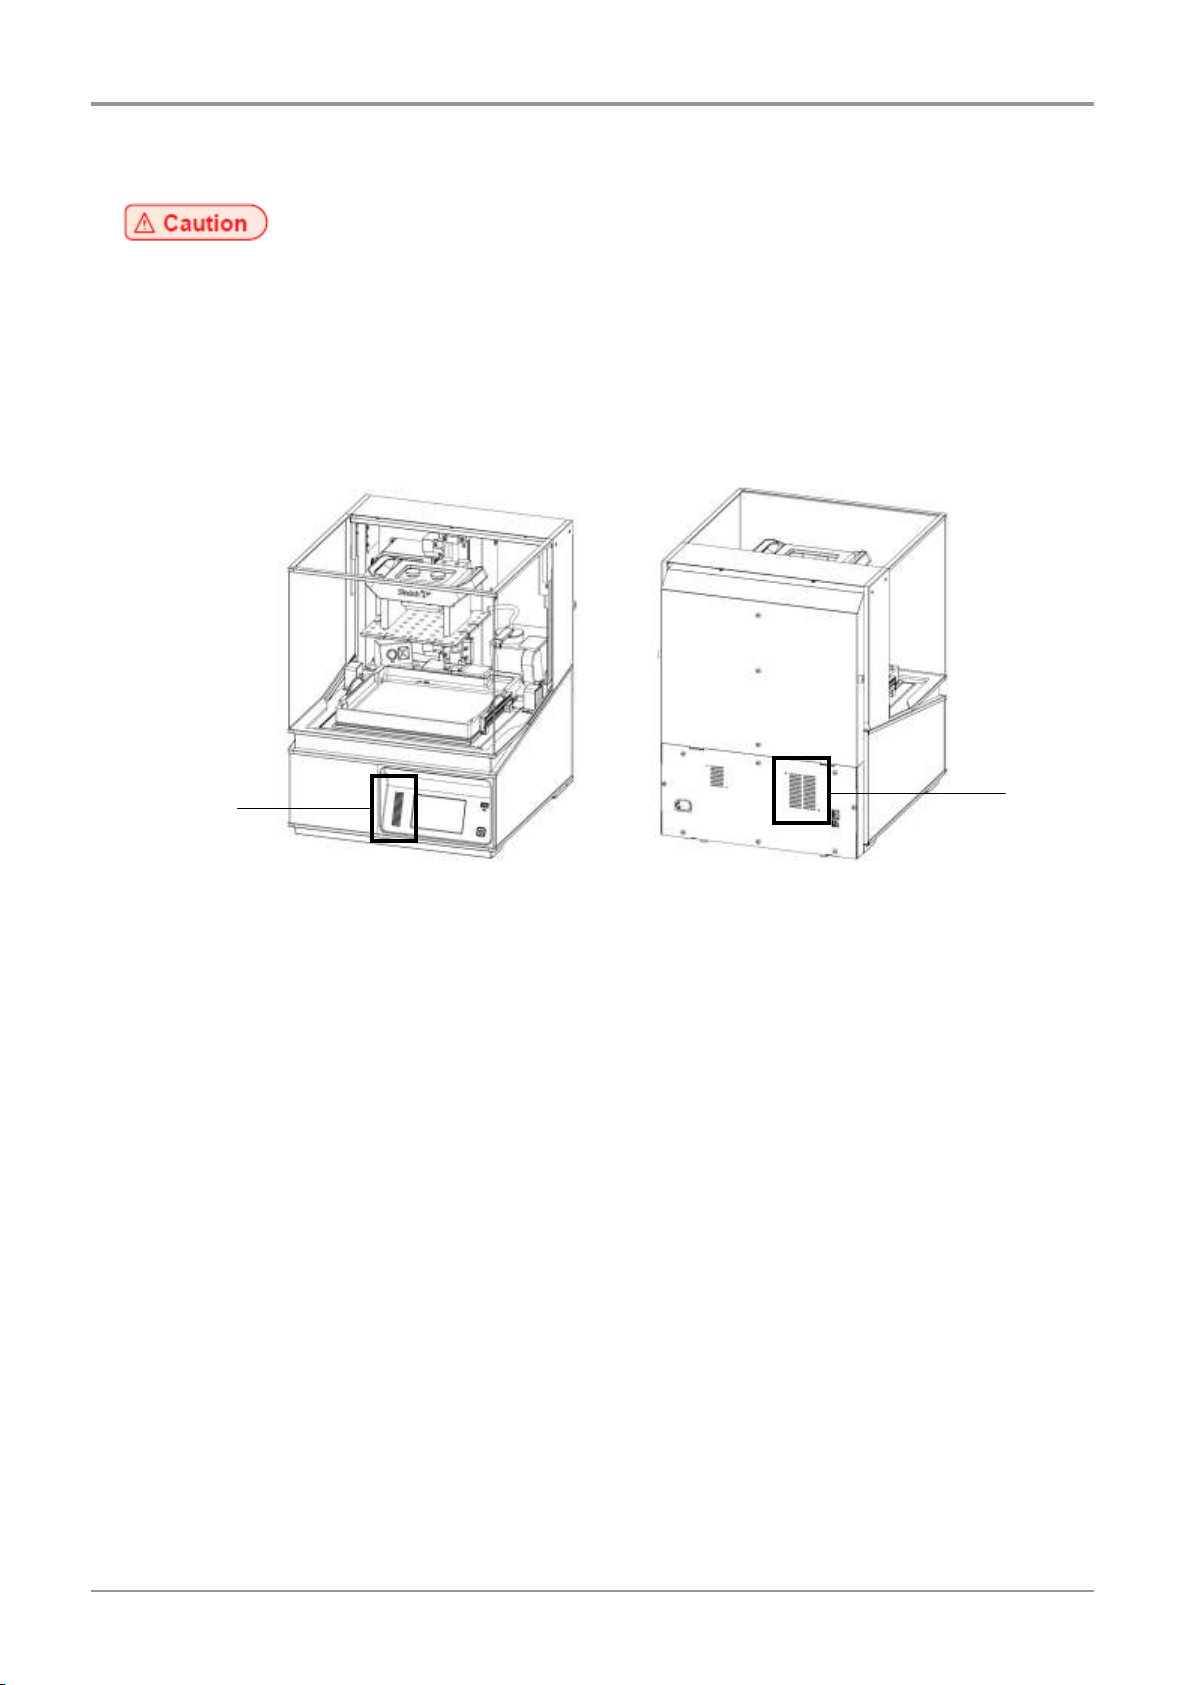
- Install the device with its vents spaced at least 10cm away from walls and other equipments.
- Secure properly sufficient space around the device for easy ventilation and operation.
- Use the device at temperatures of 20℃~30℃ and relative humidity of 15%~70%.
- Do not install or use the device outside.
Front
Side
1
2 3 4
Before Using the Device
4.2 Moving the device
Turn off the power by pressing power button.
Unplug the power cord and all cables being connected the device.
Make sure if resin tank is removed. Otherwise, resin in the resin tank may overflow.
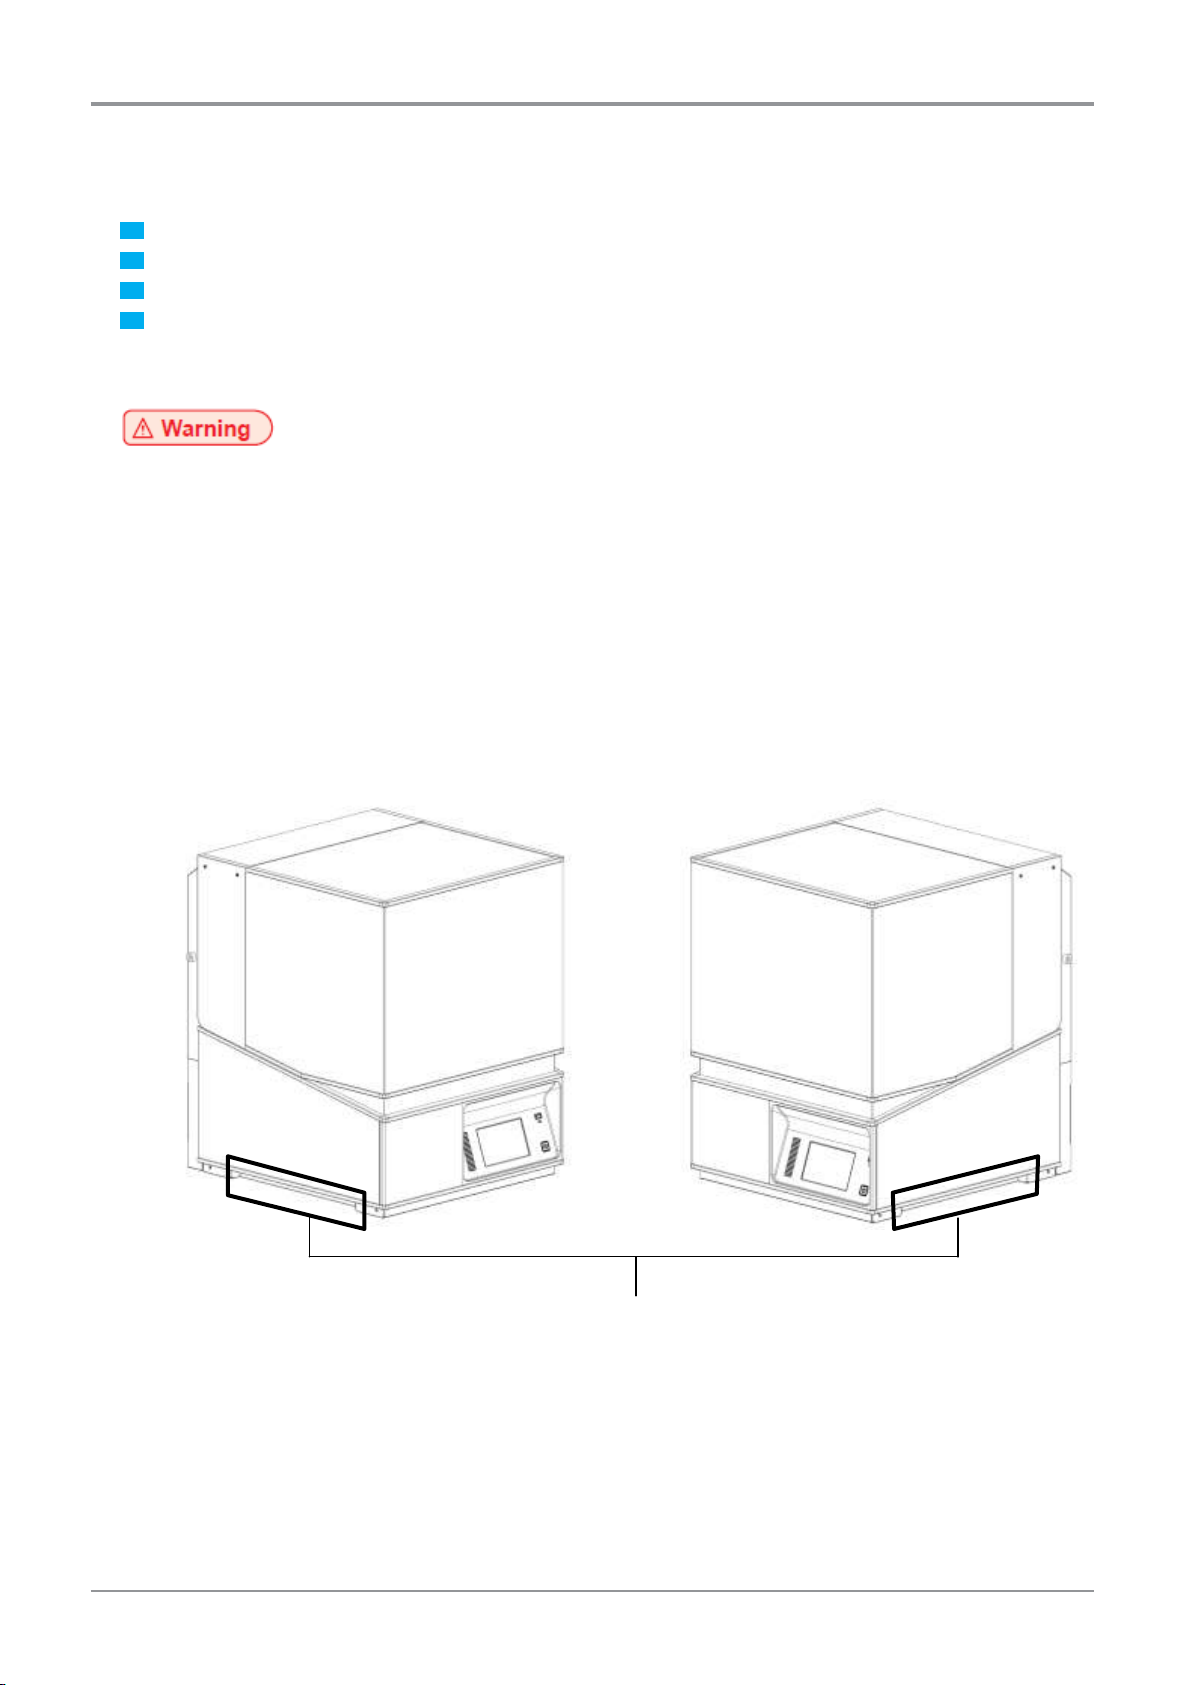
Lift the device using handles located in the left/right side of the device. Two people must work
together using their both hands because the device is very heavy.
- Be sure to unplug the power cord from the outlet and remove all cables before moving the device.
- It is strongly recommended that two or more people work together for safety.
- Bend your knees enough to protect your spine when lifting the machine.
- Use lift handles. If you hold the other parts of the device, it may break them.
- Repack the device with the box provided when transporting a long distance is required. Do not
tilt or upset the box after repacking because it may cause the damage of the device or
malfunctions.
- Do not move the device with the orange cover opened. It may cause injuries due to the
movement of cover.
- If any resin remains in the resin tank, remove the resin tank before moving the device.
Lift handles

Before Using the Device
5. Handling Consumables
- Keep consumables out of reach of children, pet, etc.
- If skin irritation occurs after touching resin, please see a doctor.
- Do not keep the resin cartridge in the following places
• Exposed to fire
• Exposed to direct sunlight
• Where temperature and humid may rise
• Where sharp change of temperature may occur
• Covered with dust
• Inside a vehicle for a long time
- Keep resin cartridge away from physical impact or vibration.
- Do not unpack the resin cartridge from packaging box until you are just ready to use.
5.1 Resin
Followings are standard cautions to be kept during the use of resin.
- Wear nitril gloves all the time while handling the resin.
- Resins being used for this device should not be used for the food, drink and medical purposes.
- Do not eat resin of any forms.
- Do not use touch screen with hands or any tools contaminated with resin. Touch screen may
malfunction if it is covered with resin.
- If storing the remaining resin is necessary, resin must be cleaned remove dirt, plastic debris, etc by
filtering. Use dedicated container to store resin and seal the cap firmly.
- If resin is stored in the resin tank, it can be cured or color dye can be separated. Stir the resin with
a rubber scrapper or spatula in every 24hours to mix it up well. If resin tank is damaged due to
improper resin tank management, manufacture will not take a responsibility.
- Please note that you shall follow our technical information or support being described in this
manual at your own discretion and risk.
- Sindoh is not responsible for the use and handling of resin other than those described in this
manual.
- Resin specifications can be changed without any notice.
- In case of disposal of resin, follow MSDS(Material Safety Data Sheet) instructions of resin

Before Using the Device
5.2 Isopropyl Alcohol (IPA)
- Isopropyl alcohol is supposed to be sold separately. You should consult the chemical manufacturer
or supplier for more in depth safety information. Carefully follow the safety instructions provided
with the isopropyl alcohol you purchase.
- Isopropyl alcohol can be flammable, even explosive, and should be kept away from heat, fire or
sparks.
- Any containers holding isopropyl alcohol should be kept closed or covered when not in use
because it is highly volatile.
- It is also recommended that you wear protective gloves and have good ventilation when work
with IPA.
- Need to replace new IPA for the best performance regularly because it is easily diluted.
- We do not manufacture and sell Isopropyl alcohol. Consult the manufacturer for details of safety
information.
- When disposing IPA, be sure to follow the instructions specified by the manufacturer or supplier.
- Do not use Isopropyl alcohol or ammonia-based cleaner to clean orange cover. Acryl(PMMA)
material which orange cover is made of can cause chemical reaction with some types of chemicals
such as IPA, ammonia-based cleaner, etc, so that cover will be broken or deformed. Be sure to
use a dedicated cleaner for acryl material.

Before Using the Device
6. Instructions for Use
- Precautions for resin
• Wear nitril gloves all the time while handing the resin.
• Check the remaining resin capacity before starting print. In case that manual supply of resin
is necessary, check if the device is not operating and supply resin into tank very slowly in order
to prevent bubbles because bubbles can degrade the print quality.
- Precautions for resin tank
• Underneath the resin tank, there is transparent sheet made of Teflon. The print quality can
be degraded if the sheet is damaged or deformed due to user’s carelessness. Replace the
transparent sheet or resin tank itself as soon as sheet damage or deformation is found.
- Precautions for platform
• Use a scrapper to remove prints from the platform.
• After removing prints from the platform, it should be cleaned up for the next print job.
- Never operate the device in the way this manual does not specifically instruct.
- Never try to open orange cover. It may cause degradation of print quality, print failure and
damage on eyes due to laser exposure.
Notification for California customers, USA
- This product uses chemicals known to the State of California to cause cancer and birth defects or
other reproductive harm. This appliance and its accessories can cause low-level exposure to
chemicals during operation, which can be reduced by operating the appliance in a well ventilated
area.
Intake
Outtake
Before Using the Device
7. Ventilation
- Use the machine in a place with good ventilation. If the machine is used in a place without good
ventilation, this may be harmful for your health. Ventilate it on a regular basis.
- Do not block vents. Inappropriate cooling may lead to high temperatures inside the machine.
- In general, a new machine may produce small amount of gaseous components, so ensure good
ventilation when the machine is used for the first time. If the machine is in operation for an
extended time, do not stay in the same room for a long time.
Average Sound Pressure at 1 Meter Away
Printing
45dBA
Standby
Under 40dBA
Operation
20℃~30℃ , 15%RH~70%RH
Shipping
-20℃~40℃, 15%RH~95%RH (for 0℃ or lower temperature, room temperature should be
higher than the outdoor’s, must not touch the floor)
Storage
-20℃~40℃, Below 80%RH (No condensation, must not touch the floor)
Shipping
10℃~50℃, 15%RH~95%RH (Must be sealed)
Storage
15℃~35℃, 20%RH~70%RH (Must be sealed, any light source must not exist)
Before Using the Device
8. Notices
❖ Noise Emission Level
The following noise level is measured in accordance of ISO 7779 and reported to meet ISO 9296.
Some modes may not be available in products you purchased.
❖ Temperature/Humidity
• Machine
• Resin Cartridge
❖ Disposal of the Products
Do not dispose the machine and consumables together with household wastes.
For disposal or recycling, contact your local sales office.
❖ EMI(Electromagnecit Interference) Notice
This machine complies with the limits for Class A.
Class (Industrial Device) : This is a class A Product. In a domestic environment this product may
cause radio interference in which case the user may be required to take adequate measures.
① FCC COMPLIANCE STATEMENT
This device complies with part 15 of the FCC Rules. Operation is subject to the following two
conditions:
(1) This device may not cause harmful interference, and (2) this device must accept any
interference received, including interference that may cause undesired operation.
② INFORMATION TO USER
This equipment has been tested and found to comply with the limits for a Class A digital
device, pursuant to part 15 of the FCC Rules. These limits are designed to provide reasonable
protection against harmful interference in a residential installation.
This equipment generates uses and can radiate radio frequency energy and, if not installed
and used in accordance with the instructions, may cause harmful interference to radio
communications. However, there is no guarantee that interference will not occur in a
particular installation. If this equipment does cause harmful interference to radio or television
reception, which can be determined by turning the equipment off and on, the user is
encouraged to try to correct the interference by one m ore of the following measures:

Mode
Description
Power Consumption
Printing
A device is printing using electronic input data.
250W
Standby
A device is in standby mode.
50W (Heater OFF)
160W (Heater ON)
Power Off
A power plug is plugged into the outlet with the machine’s
switch off.
Less than 0.5W
Before Using the Device
- Reorient or relocate the receiving antenna.
- Increase the separation between the equipment and receiver.
- Connect the equipment into an outlet on a circuit different from that to which the receiver
is connected.
- Consult the dealer or an experienced radio/TV technician for help.
③ CAUTION
Any changes or modifications not expressly approved by the manufacturer responsible for
compliance could void the user’s authority to operate the equipment.
④ This product has the certification issued under the authority of the FCC by one of Certification
Body.
FCC ID : 2AB83-A1
⑤ IC Compliance
This Class [A] digital apparatus complies with Canadian ICES-003.
Cet appareil num rique de la classe [A] est conforme la norme NMB-003 du Canada.
❖ Wireless LAN Specifications
The wireless device may be affected by electromagnetic interference so it should not be used for
like saving services.
❖ WLAN Notice
Exposure to radio frequency radiation:
The following notice is applicable if your printer has a wireless network card installed.
The radiated output power of this device is far below the FCC radio frequency exposure limits.
A minimum clearance of 20 cm (8 inches) must be maintained between the antenna and any
persons for this device to satisfy the RF exposure requirements of the FCC.
❖ Power Consumption
Power Consumption of the Products:
The table below shows power consumption.
The above power consumption is the hourly average value.
Instant power consumption can be much higher than the average value.
Deactivated Mode
The machine consumes power even in the deactivated mode. Unplug the power cord to
completely stop the power consumption.
Before Using the Device
Total Energy Usage
It would be useful to calculate the Total energy usage of the machine.
Since the electricity bill is charged in Watt unit, you have to multiply time spent in each mode by
power consumption in order to calculate the energy use.
Total energy usage is the sum of energy used in each mode.
Condensation
Dramatic change of the ambient temperature may produce water droplets on the interior and
exterior of the machine. Wipe the water droplets on the outer surface, but for the inside please let
them dry off by leaving front door and cover opened.
Notice of Laser
This machine is certified in the U.S. to conform to the requirements of DHHS21 CFR Subchapter J
for Class 1 laser products, and elsewhere is certified as a Class 1 laser product conforming to the
requirements of IEC 60825-1:2014.
Class 1 laser products are not considered to be hazardous.
The laser system and machine are designed so there is never any human access to laser radiation
above a Class 1 level during normal operation, user maintenance or prescribed service condition.
Caution Notation and Label
Laser caution label appears on this machine at the following position. Be very careful that an
accident does not occur during operations.
Do not remove caution labels or notations. If you can’t make them legible, or if caution label or
notation is damaged, please contact your service representative.

Before Using the Device
9. Disposal of Used Battery
Control board uses a Lithium battery.
Please discard used batteries following the environmentally friendly procedure stated on the
manufacturer guidelines.
To replace batteries, please contact a qualified service engineer.
Wifi Module Inside
Before Using the Device
10. Wifi Module Disclaimer
❖ This device includes a WIFI module compatible only with Sindoh’s 3D Printer models.
❖ Precautions
- This Wifi module can cause radio interference, therefore it should not be used for any purposes
related to human lives.
- Do not expose this product to water, humidity or liquid.
- Do not expose this product to direct light, hot temperature or fire.
- If the machine has been modified by unauthorized personnel, Sindoh is not liable for the
machine trouble or failure.
- To prevent RF signals that exceed FCC RF exposure limits from being exposed to human, this
module has been mounted in a place that minimizes human access.

Frequency
IEEE 802.11b : 2412MHz ~ 2462MHz
IEEE 802.11g : 2412MHz ~ 2462MHz
IEEE 802.11n(20MHz) : 2412MHz ~ 2462MHz
IEEE 802.11n(40MHz) : 2422MHz ~ 2452MHz
Antenna Power Density
IEEE 802.11b : 10mW(10dbm)/MHz
IEEE 802.11g : 10mW(10dbm)/MHz
IEEE 802.11n(20MHz) : 10mW(10dbm)/MHz
IEEE 802.11n(40MHz) : 10mW(10dbm)/MHz
No. of Channels
IEEE 802.11b : 11
IEEE 802.11g : 11
IEEE 802.11n(20MHz) : 11
IEEE 802.11n(40MHz) : 7
Modulation
IEEE 802.11b : DSSS/CCK
IEEE 802.11g : OFDM
IEEE 802.11n(20MHz) : OFDM
IEEE 802.11n(40MHz) : OFDM
Power Consumption
5V 500mA(Maximum)
Dimension
37.0mm X 28.0mm X 3.7 mm
Operation Temperature
0 ~ 60 ℃
Storage Temperature
-10 ~ 80 ℃
Before Using the Device
❖ Precautions

Before Using the Device
11. USB Memory Disclaimer
This USB Memory is compatible with all Sindoh’s 3D printer products.
❖ FCC COMPLIANCE STATEMENT
This device complies with part 15 of the FCC Rules. Operation is subject to the following two
conditions:
(1) this device may not cause harmful interference, and (2) this device must accept any interference
received, including interference that may cause undesired operation.
❖ INFORMATION TO USER
This equipment has been tested and found to comply with the limits for a Class B digital device,
pursuant to part 15 of the FCC Rules. These limits are designed to provide reasonable protection
against harmful interference in a residential installation.
This equipment generates, uses and can radiate radio frequency energy and, if not installed and used
in accordance with the instructions, may cause harmful interference to radio communications.
However, there is no guarantee that interference will not occur in a particular installation.
If this equipment does cause harmful interference to radio or television reception, which can be
determined by turning the equipment off and on, the user is encouraged to try to correct the
interference by one more of the following measures:
- Reorient or relocate the receiving antenna.
- Increase the separation between the equipment and receiver.
- Connect the equipment into an outlet on a circuit different from that to which the receiver is
connected.
- Consult the dealer or an experienced radio/TV technician for help.
❖ CAUTION
Any changes or modifications not expressly approved by the manufacturer responsible for compliance
could void the user’s authority to operate the equipment.
❖ Specification of compatible USB flash drive for A1 Series
- Please use the enclosed USB flash drive.
- The enclosed USB flash drive is in FAT32 format.
The A1 Series 3D printer does not support USB flash drives in NTFS format.
- The warranty will not be valid if a 3rd party USB drive is used.

Before Using the Device
❖ IC Identification on Class of ITE
CAN ICES-3 (B)/NMB-3 (B)
DECLARATION OF CONFORMITY
Product name : USB Flash Drive
Model name : 8GB-WJ004, 4GB-WJ004
FCC Rules : Tested to comply with FCC Part 15, Class B
Operating Environment : For HOME OR OFFICE USE
FCC COMPLIANCE STATEMENT
This device complies with part 15 of the FCC Rules. Operation is subject to the following two
conditions: (1) this device may not cause interference, and (2) this device must accept any
interference received, including interference that may cause undesired operation.
RESPONSIBLE PARTY
Name : Sindoh America, Ltd.
Address : 6047 Tyvola Glen Circle, Suite #115, Charlotte, NC 28217
Phone No. : 1-704-414-6690
We hereby declare that the above specified equipment with the trade name and model
number was tested conforming to the applicable FCC Rules under the most accurate
measurement standards possible, and that all the necessary steps have been taken and in
force to assure that production units of the same equipment with the Commission’s
requirements.
Manufacturer : Sindoh Co., Ltd.
Address : 3, Seongsuiro24(isipsa)-gil, Seongdong-gu, Seoul, 04797 REPUBLIC OF KOREA

A1 Series
USER MANUAL
Printing Method
SLA (Stereo Lithography Apparatus)
Max. Print Size (mm)
W(max):200, D(max):200, H(max):180
Layer Thickness Setting
0.025~0.100mm
Laser Wavelength
405nm
Laser Power
250mW
Resin
Acrylic, ABS-Like
Temperature Management
Fan Heater Type
Bed Leveling
Manual, Semi-Auto
Resin Supply
Air-Pump Type Automatic Supply with Level Sensor
Power
250W
Dimensions (mm)
449 x 501 x 600 (W x D x H)
Weight
44.3Kg (excluding resin cartridge)
Ports
USB Device, USB Host, Wifi, Ethernet
Software Support
Sindoh Exclusive Slicer
File Format
*.stl, *.ply, *.obj
Operating System
Window 7 or Above, Mac OSX 10.10 or Above
Memory Requirements (Recommended)
DRAM 8GB+
1 Preparations for Machine Operation
1. Specifications
1.1 Printing
1.2 Device
1.3 Software/Support
Graphic adapter must support OpenGL 2.0 or higher.
1 Preparations for Machine Operation
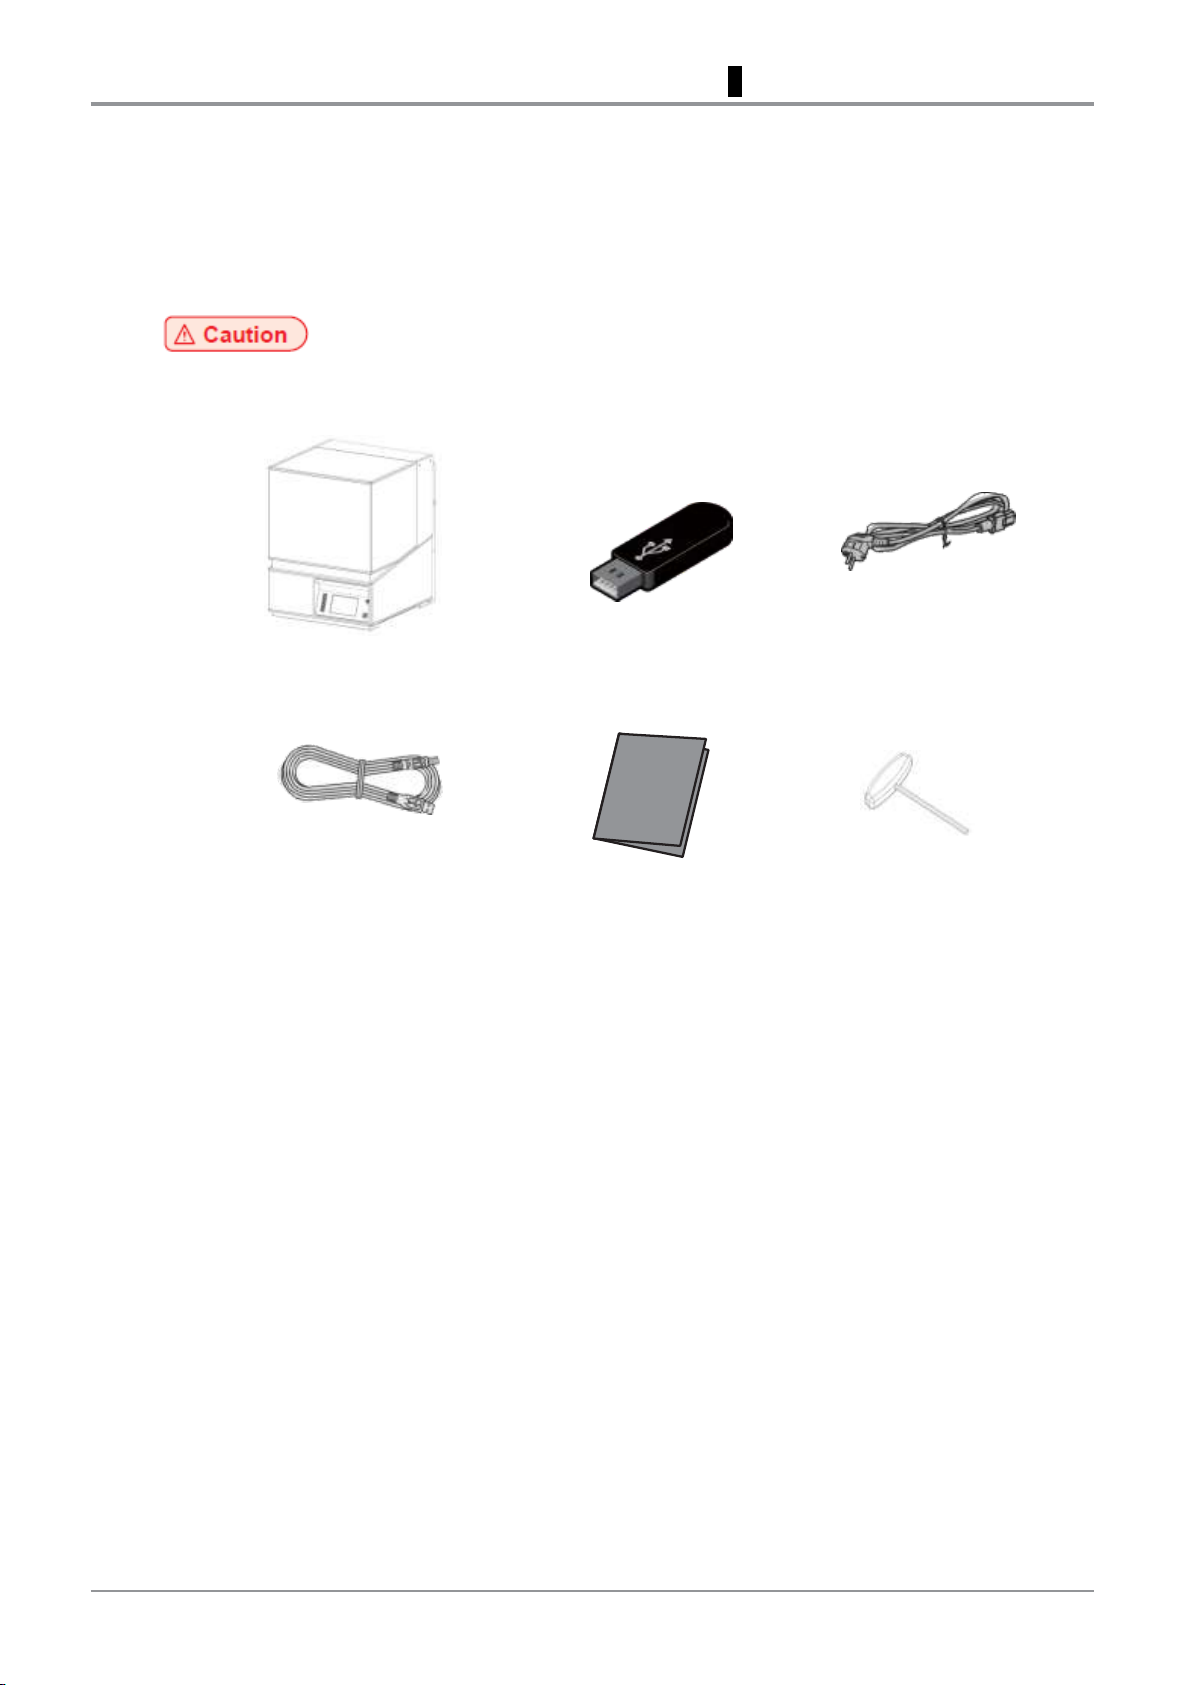
2. Components
2.1 Basic Components
Please check all basic components in the packaging box.
Please keep the box and packaging material; they are needed for product exchange or repair service.
3D Printer
USB Memory
Power Cable
USB Cable
Quick Start Guide
T-Handle Hexagon Wrench (M5)
1 Preparations for Machine Operation
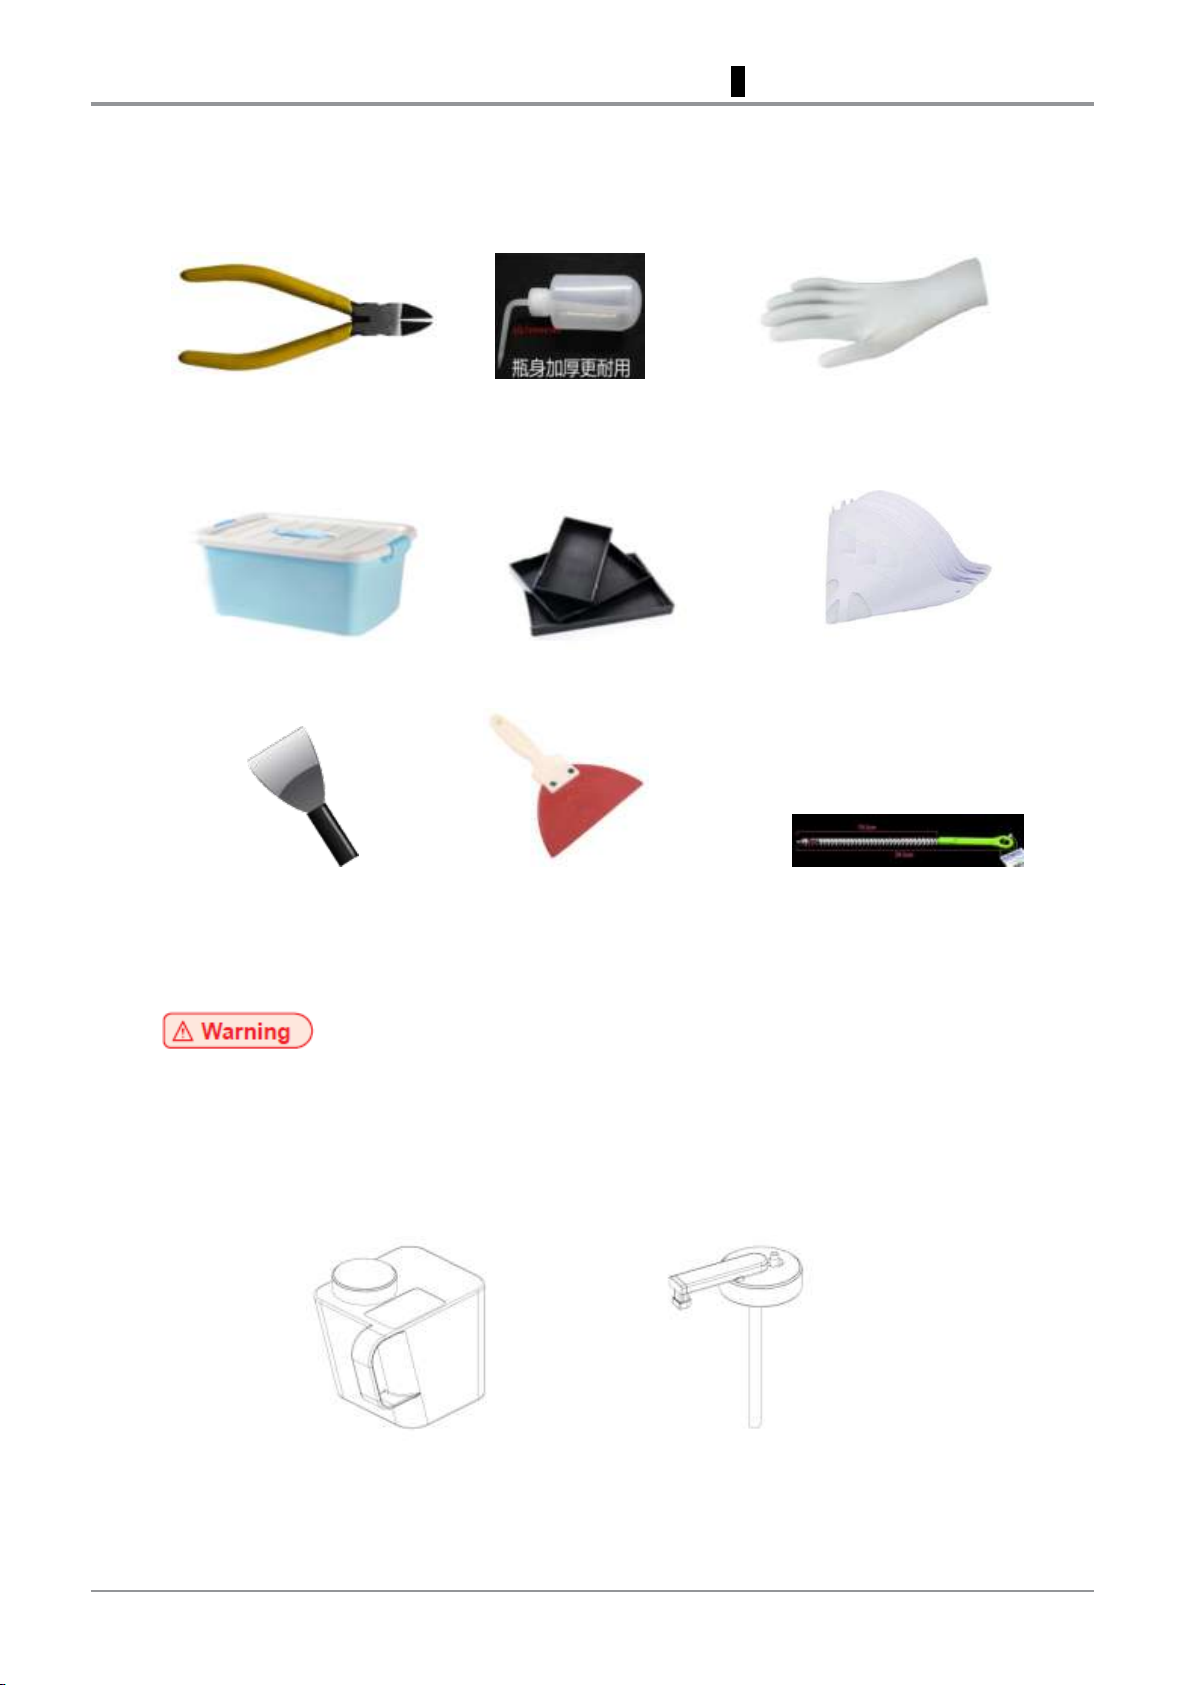
2.2 Finishing Kit (Optional)
Nipper Sprayer Nitril Glove
Washing Tub Cleaning Tray Filter
Metal Scrapper Rubber Scrapper Platform Cleaning Brush
- The blades of the metal scrapper can be very sharp. Please be cautious. Please do not use for
other than removing printables and cleaning platform.
- Please do not touch the blade of the scrapper with any of body parts in any cases.
2.3 Resin Cartridge (Optional)
Resin Cartridge Cap for Resin Supply
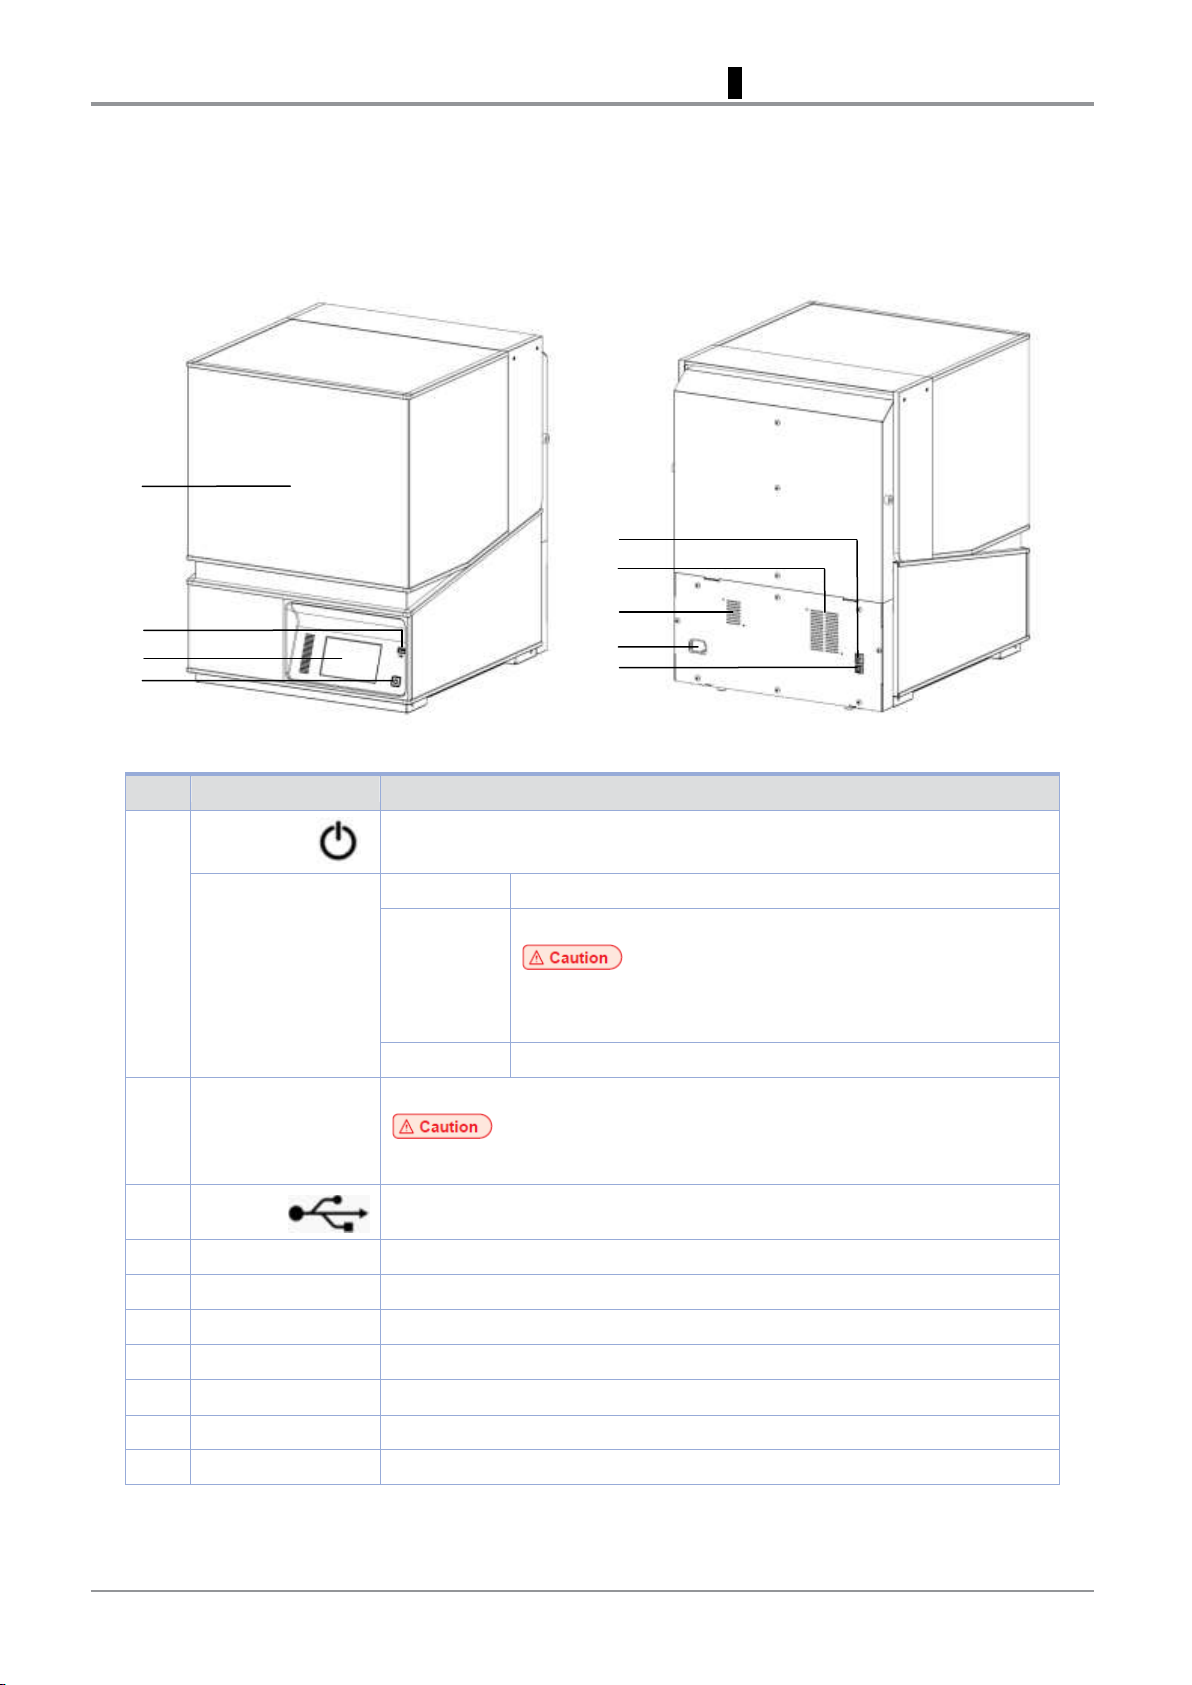
No.
Part Name
Description
1
Power
Button
Press this button shortly to turn on printer.
Press and hold for more than 2 seconds to turn off the printer.
Power Button
Indicator
Lamp ON
Power is ON
1 second
interval
flickering
Can be turned on instantly (power cable is connected)
-
In case of not using the printer for long period of time, please unplug the
power cord
-
The lamp may flicker for a few seconds after power cord is disconnected.
Lamp OFF
Inactive Mode (power cord is unplugged)
2
LCD Control Panel
Screen used to control printer
-
Usage of printer is recommended after removing the protection film on LCD control panel. If the
film is not removed, the touch screen may not work properly.
3
USB
Port
Connect USB flash drive containing printing information and print directly from
USB flash drive.
4
Orange Cover
Access to the operating area.
5
Power Port
Power cord connector
6
Speaker
Play warning sound.
7
Ventilator Fan
Discharges heat from interior.
8
LAN Port
Allows a device to connect to a network using a LAN cable.
9
USB Port
Used to connect printer to computer with a USB cable.
10
Carrying Handles
Handles to use when moving the printer.
2 1 3 4 5 6 7 8 9
1 Preparations for Machine Operation
3. Understanding the parts
[ Front ] [ Rear ]

No.
Part Name
Description
1
Resin Tank
Working space where resin is filled and printing is processed.
2
Resin Tank Locking Levers
Levers that lock and unlock the resin tank.
3
Camera
Let users monitor how the printing is going on.
4
Resin Level Detect Sensors
Detect resin height to fill the optimum amount of resin in resin tank.
No.
Part Name
Description
1
Platform
Workbench to which resin is cured by laser and print is attached.
2
Platform Handles
Let users to hold when handling platform.
3
Platform Locking Screws
Fix platform after adjusting level of platform and resin tank.
4
Platform Locking Knobs
Fix platform after mounting.
1 2 3 4 1 2 3
4
1 Preparations for Machine Operation
[ Interior ]
[ Platform ]

No.
Part Name
Description
1
Resin Cartridge
Bottle being filled with resin.
2
Resin Cartridge Handle
Let users hold the cartridge in case of handling it.
3
Nozzle
Discharges resin through it from the cartridge.
4
Cap
Seals cartridge
5
Tube
Connects air pump and cap.
1
2
3
4
5
1 Preparations for Machine Operation
[ Resin Cartridge ]

1
5 4 3 2 1
1 Preparations for Machine Operation
4. Installation (Including Connection, Cartridge Setup and
S/W Installation)
Please remove all packaging materials from inside and outside of the device. Furthermore, open the
orange cover and remove all protective materials and accessories from interior.
4.1 Device Connection
Connect the power cable to the power socket on the rear side of the device, and connect the power
cable to the power outlet.
Press the power button, located on the lower right of the device.
When the home screen is displayed on the LCD screen, install the resin cartridge. (Refer to [Resin
Cartridge] of [5.Maintenance])
Connection to PC
1) Direct Connection: Connects one end of the enclosed USB cable to the back of the device and the
other end to the PC.
2) Network Connection: Refer to [Network] of [2.UI Menu Function]
Plug USB flash drive in, and install machine drivers and Slicer program.
4.2 S/W Installation
Start the S/W installation by clicking on “3DWOX Desktop.exe” file in the enclosed USB flash drive.

4
3
2
1 Preparations for Machine Operation
Install the additional files required by the software list.
When installation of the file is complete, a pop-up window shows up as the picture below. Press [Next]
button to initiate the installation of 3DWOX Desktop Program.
Choose the destination location of the files and press [Next] to proceed.

6
5
1 Preparations for Machine Operation
All configurations get saved and the installation starts.
After all installation is complete, you can see that “3DWORK Desktop” icon created on the desktop of
your computer.

A1 Series
USER MANUAL

Cartridge
Change Cartridge
Setting
XY Scale
Z Offset
Chamber Heating
Resin Auto Supply
Dashboard Logging
Network
Test Print
S/W Update
General
Language
Power Saving
Beep Sound
Units
Time Setting
Time Zone Setting
Email Setting
Security
Saved Files
Info
Statistics
History
Quick Guide
Programs
2 UI Menu Function
1. UI Menu Function Descriptions

No.
Name
Description
1
Home Button
Move to Home screen.
2
Slide Menu Bar
Open Slide Menu.
3
Title
Description of the current active screen.
4
Cartridge
Display whether or not the resin cartridge is installed.
5
Resin Status
Display how much resin remains in the cartridge.
6
Wifi
Display the status of Wifi connection.
7
Time
Display the current time.
8
Working Area
Main workspace of UI screen.
1 2 3 4 5 6 7
8
2 UI Menu Function
1.1 Home
The first screen that user can see after the device is turned ON. This is the starting point where every
operations of the device start.

Cartridge
Change
2
1
2 UI Menu Function
1.2 Cartridge
Change
This function is used to replace the resin cartridge in case that the current resin cartridge is empty or user
wants to switch to the different type of resin.
Press [Cartridge] from the Home screen.
Press [Change].

5
4
3
2 UI Menu Function
Open the orange cover, and remove the cartridge currently being used.
Replace sealing cap with resin supply cap for the new cartridge, and insert nozzle and tube as being
instructed on UI screen.
Replace resin supply cap with sealing cap for the used cartridge, and install the new cartridge.

6
2 UI Menu Function
Press [Finish] when installation of the new cartridge is complete, and UI screen will be moved to Home
screen in 5 seconds automatically.

Setting
XY Scale
Z Offset
Chamber Heating
Resin Auto Supply
Dashboard Logging
Network
Test Print
S/W Update
General
Language
Power Saving
Beep Sound
Units
Time Setting
Time Zone Setting
Email Setting
Security
2 UI Menu Function
1.3 Setting

2
1
2 UI Menu Function
XY Scale
This function allow users to change horizontal(X)/vertical(Y) ratio of prints in case that the size difference
of 3D model and actual prints exist.
Press [Slide Menu Bar] from the Home screen.
Press [Setting] from the Menu screen

5
4
3
2 UI Menu Function
Press [XY Scale].
XY Scale screen where horizontal(X) and vertical(Y) scale can be adjusted is shown.
Change X/Y scale values by pressing [+] or [-] until they reach the target numbers. Adjustable range is
95.0~105.0% in 0.1% unit. Press [Save] when finished.

2
1
2 UI Menu Function
Z Offset
This function allows users to adjust the distance between platform and resin tank to change the thickness
of the first layer of raft.
Change Z Offset value to [-] direction in case of printing failure caused by a drop of raft. On the other hand,
change Z offset value to [+] value to increase raft thickness in case that raft is thicker than specified.
Press [Slide Menu Bar] from the Home screen.
Press [Setting] from the Menu screen

5
4
3
2 UI Menu Function
Press [Z Offset].
Z Offset screen is shown up.
Change a value by pressing [+] or [-] until it reaches the target number. Adjustable range is -
0.05mm~+0.5mm in 0.05mm unit. Press [Save] when finished.

2
1
2 UI Menu Function
Chamber Heating
This function allows users to enable or disable chamber heater feature when 3rd party resin is used in Open
Mode or heater needs to be turned ON or OFF in any circumstances necessary.
※ Temperature in the chamber is automatically controlled by heater in case of Sindoh’s resin for the best
printing quality. It is recommended that chamber heating is turned ON when Sindoh’s resin is used.
Press [Slide Menu Bar] from the Home screen.
Press [Setting] from the Menu screen

5
4
3
2 UI Menu Function
Press [Chamber Heating].
If you agree on the message of pop-up window, press [Done] to continue.
Select [On] or [Off], and press [Save] to finish.

2
1
2 UI Menu Function
Resin Auto Supply
This function allows user to enable or disable resin auto supply features.
Press [Slide Menu Bar] from the Home screen.
Press [Setting] from the Menu screen

5
4
3
2 UI Menu Function
Press [Auto Resin Supply].
If you agree on the message of pop-up window, press [Done] to continue.
Select [On] or [Off], and press [Save] to finish.

2
1
2 UI Menu Function
Platform Leveling
This function allows users to make an alignment of platform with resin tank
Press [Slide Menu Bar] from the Home screen.
Press [Setting] from the Menu screen

5
4
3
2 UI Menu Function
Press [Platform Leveling].
Remove all resin remaining in resin tank. If resin is not completely removed from the resin tank,
leveling may be done incompletely. Refer to [Resin tank] of [5.Maintenance] for details of how to
remove resin from the resin tank.
Loosen 6 platform locking screws using T-handle hexagon wrench, and press [Next].

8
7
6
T-Handle
Hexagon Wrench
2 UI Menu Function
※ Do not completely remove screws from the platform and just “loose” them. If you try to remove screws
from platform, they may be dropped into resin tank by accident.
Platform moves down to the lower limit position.
When platform lowering is complete, fasten back 6 platform locking screws using T-handle hexagon
wrench, and press [Next].
All leveling procedure is complete.

2
1
2 UI Menu Function
Dashboard Logging
This function let users to remotely check the status of device, and send management information by email.
Press [Slide Menu Bar] from the Home screen.
Press [Setting] from the Menu screen

4
3
2 UI Menu Function
Press [Dashboard Logging].
Select [On] or [Off], and press [Save] to finish.

2
1
2 UI Menu Function
Network
This function let users to set up network configurations of the device. Both wired and wireless LAN can be
configured in details.
Press [Slide Menu Bar] from the Home screen.
Press [Setting] from the Menu screen

No.
Name
Description
1
Network Type
Select Wifi or wired LAN.
2
ON/OFF
Turn ON or OFF Wifi.
3
SSID
Select SSID or enter SSID manually if it is hidden.
4
DHCP
Allocate IP address automatically
5
Static
Enter static IP address and related parameters.
4
3
1 2 3
4
5
2 UI Menu Function
Swipe the screen upward, and press [Network].
Network setup screen is shown up.

6
5
2 UI Menu Function
List of SSIDs is displayed. Select a SSID you want to connect, and press [Save] to store the setting. If
selected SSID requires password, enter it.
Press [DHCP] to see an allocated IP address after getting connected.

8
7
2 UI Menu Function
Press [Static] if a fixed IP address is required. Press pen icon[ ] to enter IP address manually.
For wired LAN, repeat the same procedure as the case of wireless if required.

2
1
2 UI Menu Function
Test Print
This function allows users to print a sample model already saved in the internal memory of printer.
Press [Slide Menu Bar] from the Home screen.
Press [Setting] from the Menu screen

5
4
3
2 UI Menu Function
Swipe the screen upward, and press [Test Print].
List of sample model files is shown up. Select a file to be printed.
Printing gets started.

3 2 1
2 UI Menu Function
S/W Update
This function keeps S/W of the device up to date. It works only when network connection is available.
Press [Slide Menu Bar] from the Home screen.
Press [Setting] from the Menu screen
Swipe the screen upward, and press [S/W Update].

6
5
4
2 UI Menu Function
Press [Update] if you wish to proceed.
S/W update is in progress.
When S/W update is finished, press [Done] to reboot the device.

3 2 1
2 UI Menu Function
General
This function allows users to change general settings.
Press [Slide Menu Bar] from the Home screen.
Press [Setting] from the Menu screen
Swipe the screen upward, and press [General].

4
2 UI Menu Function
List of general items appears. Select an item to change.
▣ Language
System language of the device can be chosen. Select a language using [<] and [>].
▣ Power Saving
Time delay before entering power saving mode can be set. Adjustable range is 0~120 minutes in 5
minutes unit. Change value using [<] and [>].
0 minute: Power saving mode is disabled.
5~120 minutes: Time delay before entering power saving mode.
▣ Beep Sound
You can turn ON or OFF the beep sound of the device.
▣ Units
Units of temperature and length can be changed.
Temperature: Select between ˚C and ˚F.
Length : Select between meter(m) and inch(ft).
▣ Time Settings
The current time and date of the device can be shown, and can be changed manually if they are
incorrect. Press [>] to change the settings.

2 UI Menu Function
▣ Time Zone Settings
The current time zone setting of the device can be shown. Press [>] to change, and swipe the screen
up and down to choose the new time zone.
▣ Email Settings
Email address, which a photo capturing the printing status will be sent to, can be specified.

Title
Descriptions
Email Address
Email address which a photo capturing the printing status will be sent to.
Address
SMTP server address of email service.
Port
SMTP server port number.
Normally the port number 25 is used, and sometimes 465 or 587 is used depending on
security setting. For details, please contact the administrator of email server or email service
provider.
ID
SMTP server login ID
- Enter the ID for your email account.
- Depending on the service provider, a full email address may be requested.
For details, please contact the administrator of email server or email service provider.
PW
SMTP server login password
- Enter the password for your email account.
Security
Security method for SMTP server.
- The default value is [None]. For further details, contact your server hosting company or
mail service provider.
2 UI Menu Function
Inquire your email service administrator or service provider for detailed information of the input
information on each category. Especially for SMTP server login ID, it may be needed to enter the entire
email address which includes the domain name.
This setting is for the SMTP(Simple Mail Transfer Protocol) server to be used for sending emails. The
SMTP setting may have to be enabled depending on the system.
To check the detailed setting values, please refer to the setup information from your email service
provider. For the set up to use the outgoing email service, please find information by internet search or
your email service provider’s instructions.
A certain amount of time may be required after setting up SMTP service before using. For more details,
please inquire your email provider for the service policies.
▣ Security
This is a feature to set up security of 3D printer.

Saved Files
2
1
2 UI Menu Function
1.4 Saved Files
Press [Slide Menu Bar] from the Home screen.
Press [Saved Files] from the Menu screen

No.
Name
Description
1
Info
Displays detailed information of file
2
Delete
Deletes a file from the internal memory of printer
3
Print
Starts printing a selected file. Printing gets started.
3
1 2 3
2 UI Menu Function
List of files existing in printer’s internal memory is shown.
▣ Info
It shows details of file such as ile name, resin type, how much resin is required to complete printing,
printing time, number of total layers, and z-direction resolution.

Info
Statistics
History
2
1
2 UI Menu Function
1.5 Info
This allows users to check detailed information about the device, and to set the name of the device and
administrator password.
Press [Slide Menu Bar] from the Home screen.
Press [Info] from the Menu screen.

4
3
2 UI Menu Function
In Info screen, it is possible to set the name of the device and administrator password, and to see the
other detailed information about the device. For history of device usage, press [History].
Statistical information regarding machine usage is shown. For details, press [>].
▣ Total Print Time
Total running time of the device by now is displayed.
▣ Number of Printed Model
Total number of print jobs and number of print jobs which are successfully finished are displayed.

2 UI Menu Function
▣ Cumulative Usage - Resin
Total cumulative amount of resin is displayed, and usage of each individual resins is displayed too.
▣ Most Recent Print File List
List of files being printed most recently is displayed.

Quick Guide
2
1
2 UI Menu Function
1.6 Quick Guide
Press [Slide Menu Bar] from the Home screen.
Press [Quick Guide] from the Menu screen.

Programs
2
1
2 UI Menu Function
1.7 Programs
This feature allows users to install add-in SW such as web browser, etc, and make shortcuts for frequently
used functions so that you can access them very quickly.
Press [Slide Menu Bar] from the Home screen.
Press [Programs] from the Menu screen.

3
2 UI Menu Function
Press [Programs] from the Menu screen.
▣ Internet
You can access the internet using build-in web browser.
▣ Program Manager
You can install or uninstall add-In S/W.

2 UI Menu Function
▣ Install / Uninstall
List of add S/W is shown. Press [ ] to install, or [ ] to uninstall.

A1 Series
USER MANUAL

1
3 Printing
1. Printing
User can start printing via USB flash drive, USB cable, or over the network.
The following Home screen on the device means it is ready to start print.
1.1 Printing from USB Flash Drive
Connecting USB flash drive into the device.
In order to print using USB flash drive, insert the flash drive into USB port.

No.
Name
Description
1
File Name
A list of files existing in the USB flash drive.
2
Download
Downloading a file to the internal memory of the printer.
3
Preview
Preview image of print appears.
2
1 2 3
3 Printing
When the USB flash drive is connected while in the home screen, a list of files in the USB appears.
Printing Files
Select a file to print in a file list and then pop-up windows asking if everything is ready comes up. If
there is no previous prints remaining and resin tank is installed properly, press [Done].

3 Printing
File is copied to the internal memory of printer first, and printing gets started.
If there is not enough resin in the resin tank, more resin needs to be filled. Air pump starts to run to
supply resin and resin starts coming out of the nozzle of resin cartridge. Once resin is filled enough,
pump stops and printing starts.

3
3 Printing
If temperature in the chamber is lower than the level being required, heater starts to heat up the
chamber.
Be aware of that sometimes it may take a time for heating. When you are busy, you may need to start
printing even if chamber temperature does not reach the target. If you can’t wait until heating process
is finished, press [Start Now].
Print Preview
If you press [ ] in a file list of USB flash memory, print preview screen appears. Press [Print] if you
wish to start printing or press [Cancel] to go back to file list.

4
3 Printing
Pausing Print
Pressing [Pause] during printing will pause the current print job, and pop-up menu showing additional
functions appears.
▣ Printing Check
Printing status can be checked. Press [Raise the Platform] to move the platform upward so that user
can check printing status..
▣ Change Cartridge
This function allows users to replace resin cartridge with new one if needed.
▣ Resume
Returning to the printing screen, and print job will resume.

6
5
3 Printing
Canceling Print
Press [Cancel] if you need to terminate print permanently. Pop-up windows shows up to check If you
really want to cancel printing. Press [Cancel Printing] if you are sure, or press [Continue Printing] if you
want to resume printing.
Printing Completion
If printing is complete, platform moves up to return to ready position. When platform’s moving is
finished, remove print from the platform following on-screen instructions and press [Done].
For removing print from platform, refer to [4.Checking Printed Output] for details.

432
1
3 Printing
1.2 Printing via PC
Prepare PC connected to the same network which the printer is connected to.
Run Slicer S/W
Press [Print] button.
Follow steps (same as steps 3~9 of printing from USB flash drive)
For pausing and canceling print, please refer to [Printing from USB flash drive] for details.
1.3 Changing Resin
When a different type of resin from the current one needs to be used, clean up resin tank and platform in
order to ensure the best print quality and to prevent mixing up of different type of resins.
Regarding how to clean resin tank and platform, refer to [5.Maintenance].

A1 Series
USER MANUAL

2
1
Platform
Platform locking knobs
4 Printed Output Check
1. Checking Printed Output
Wear nitril gloves before getting started and do not take off gloves until all processes are finished.
1.1 Detaching Printed Output
Standing by until platform’s returning to ready position.
After printing is finished, wait until platform completely returns to ready position.
Do not open the orange cover before platform stops moving.
Removing platform locking knobs
When platform stops moving, open the orange cover and remove two platform locking knobs by
turning them in counterclockwise direction.
Be careful not to drop knobs into resin tank when removing them.

4
3
4 Printed Output Check
Removing platform locking screws
Hold the platform firmly by using either one of handles, and scrape down remaining resin on platform
toward resin tank with the other hand.
Be careful not to drop or splash resin to other parts but resin tank.
Use a metal scrapper with care because blade is sharp. You may be injured especially when scrapping
platform.
Detaching the printed output from platform
Remove the platform and move it to cleaning tray enclosed in finishing kit. Insert blade of metal
scrapper between printed output and platform and detach it by pushing scrapper slowly and carefully.
Start detaching from corners of printed output and continue to insert scrapper inward.

2
1
4 Printed Output Check
When removing and moving platform, be careful not to drop or splash resin.
- Use a metal scrapper with care because blade is sharp. You may be injured when removing output.
- Close the orange cover after removing platform from the device. Resin can be cured if resin is
exposed to light sources for long time. Cured resin may degrade the print quality, and cause print
failure.
1.2 Finishing Printed Output
Removing supports
Remove supports using nipper enclosed in the finishing kit.
Use a nipper with care because blade is sharp. Be careful not to cut your fingers or hand.
Cleaning printed output with Isopropyl alcohol (IPA)
Do not place IPA close to heat, fire or sparks because IPA can be flammable, even explosive.
Pour Isopropyl alcohol(IPA) in the washing tub enclosed in the finishing kit, and put the printed output
in IPA. Clean the surface of printed output using brush or toothbrush.
Use sprayer to wipe out fine gaps or holes of output with IPA.

1
3
Metal Scrapper
Platform
Cleaning Brush
4 Printed Output Check
Drying and post curing
- Curing time may vary depending on the printed output’s size and shape.
- For quick curing, fill a transparent container with water and put a printed output in the water.
Clean up Isopropyl alcohol completely using paper towel or dry it well using air compressor. Then
expose the printed output to sunlight for 60 minutes, or use curing machine (optional) for curing.
1.3 Preparing the Next Print
Cleaning platform
Remove debris of print and contaminants remaining on platform using metal scrapper.
Clean every each holes of platform using platform cleaning brush.
Clean remaining resin using paper towel and Isopropyl alcohol.
Finally, clean all remaining Isopropyl alcohol using dry paper towel.
Please remove platform first, and install it very last. Resin dropped or splashed from platform may flow
in the inside of the device.

2
Resin Tank
Supporters
4 Printed Output Check
Cleaning resin tank
Release locking levers in both sides and pull out resin tank from the device.
- Before removing resin tank, check if platform cleaning has been done. If not, resin may be dropped
to protective glass. It may result in contamination of optical parts such as protective glass, laser unit,
etc or penetration of resin into the device.
- If there is remaining resin in resin tank, be sure not to drop or splash resin in handling resin tank.
To prevent contamination of transparent acryl window in the bottom of resin tank, use some supports
in four corners or lay a clean piece of paper underneath.

Rubber Scrapper
4 Printed Output Check
Pour all remaining resin into a clean bottle. If resin is not flowing down well, use rubber scrapper
enclosed in the finishing kit to scrap down resin.
If too much force is applied to the scrapper, film can stretch or tear. Scrape the surface of film softly.
After pouring is done, remove all remaining resin inside of the resin tank using Isopropyl alcohol (IPA)
and paper towel, and then clean up IPA using dry paper towel.
- Never use Isopropyl alcohol (IPA) or ammonia-based cleaner to clean the bottom of the resin tank.
- In the bottom of resin tank, there is a transparent window made of Acryl (PMMA). Acryl (PMMA)
material can cause chemical reaction with some type of chemicals such as IPA, ammonia-based
cleaner, etc, so that window will be broken or deformed.
- Be sure to use a dedicated cleaner for acryl material to clean the transparent window.
- Do not place a bottle containing resin in a place where light source exists. Resin will be cured due
to the light.

4
3
Protective Glass
Tilt Bracket
4 Printed Output Check
Checking protective glass
A transparent protective glass is located under the resin tank. It can be seen when resin tank is
removed.
Check if there is resin or any types of contaminants on the protective glass, and clean if needed. For
details of how to clean the protective glass, please refer to [Protective Glass] of [5. Maintenance].
Protective glass is made of Acryl (PMMA). Never use Isopropyl alcohol (IPA) or ammonia-based cleaner
to clean the protective glass.
Installing resin tank
Place the resin tank in the middle of mounting area. Check if the bottom of resin tank has a contact
with the tilt bracket.
Then push the resin tank to backside until it stops moving, and the lock the resin tank with levers.

2 1 7
6
5
4 Printed Output Check
Supplying resin
Pour the resin, which was stored in a clean bottle, back into the resin tank using filter.
Be careful not to exceed the MAX line shown on the resin tank.
Installing platform
Install the platform on the mount, and fasten two knobs by turning in clockwise direction.
Closing that orange cover
1.4 Enhancing Print Quality
Following the guideline for resin use
Print quality is seriously influenced by condition of resin. Start use resin before the expiration date, and
store resin under the recommended conditions including temperature and humidity.
Installation site
Running the device in the place exposed to shocks and vibrations may cause degradation of print
quality or printing failure. Install on the leveled place that is not affected by shock and vibration

2
1
4 Printed Output Check
2. When Printer Can’t be Turned ON
When the power is ON again, platform moves upward to initial position.
As described in [1. Checking Printed Output], remove aborted print from the platform, and clean
platform and resin tank for the next job.

1
4 Printed Output Check
3. If problems Persist
Please visit http://www.sindoh.com for help.

A1 Series
USER MANUAL

5 Maintenance
1. Machine Cleaning
If a cleaning tool or contaminants such as resin, IPA, etc enters into the device, it may cause
malfunctions or failures. Turn off the power while cleaning.
1.1 Printer Interior Cleaning
Over time, there will be a build-up of resin in the printer. If resin goes into conveyor belt or any optical
parts, it may result in printer malfunction, degradation of print quality, and printing failure.
Please clean the inside of the printer regularly or right after print job.
Wear nitril gloves if there is any risk of touching resin.
1.2 Periodical Inspection
Oil/Grease Inspection
During manufacturing, grease/oil is applied to some mechanical parts, especially driving system.
After a period of time, grease and oil can dry and cause some noise during operation.
At least once a month, inspect the condition of grease and oil.
Especially, if printer begins to make a noise during operation, immediately check if grease and oil is
applied properly. If necessary, contact local service center for inspection.

2
1
Metal Scrapper
Platform Cleaning Brush
5 Maintenance
1.3 Platform
If debris of cured resin, half-cured resin, contaminants exist on the surface of platform or in the holes
of it, platform leveling may not be performed perfectly. They can cause the degradation of print
quality, or print failure just in case.
For the best printing performance, clean the platform regularly and after each printing jobs.
Wear nitril gloves before starting cleaning.
Remove debris of print and contaminants remaining on platform using metal scrapper. Clean every
surface including upper and lower surfaces, and any possible place which resin may be applied.
Use a metal scrapper with care because blade is sharp. You may be injured especially when scrapping
platform.
Clean every each holes of platform using platform cleaning brush.

3
5 Maintenance
Clean remaining resin using paper towel and Isopropyl alcohol. Finally, clean all residual Isopropyl
alcohol using dry paper towel.
Do not place IPA close to heat, fire or sparks because IPA can be flammable, even explosive.
1.4 Resin Tank
Resin tank consists of aluminum die-casted walls, transparent window, flexible film, silicon gaskets.
For the best print quality, it is very important to keep optical parts such as transparent window and
flexible film clean and undamaged. If window and film is scratched, damaged, or contaminated, laser
beam will be scattered, reflected or blocked. These defects may cause degradation of print quality or
print failure.
For the best performance and life, ensure that resin tank is maintained as directed.
1.4.1 Resin Tank Life
Resin tank’s life can vary depending on shape and size of prints, printing location, layer thickness and
resin type. If resin tank is well maintained, it can be used generally until at least 100 print jobs or 1,000
hours
Film needs to be replaced if a hole, scratch, tear, stretch or any types of serious damage occurs. In
addition, replace transparent window if it gets scratched or dirty with contaminants, which cannot be
removed.
1.4.1 Checking Resin Tank
Wear nitril gloves before starting cleaning.
Thoroughly check the resin tank in case that print quality is not good, print failure occurs, and resin
tank is changed. Before starting new print job, clean the resin tank and check if problems exist.

2
1
5 Maintenance
Checking the inside of resin tank
To check the inside of resin tank, inspect it by scrapping the bottom of resin tank using rubber
scrapper. Look at film and transparent window by carefully scrapping from one side to the other.
Do not scrape the bottom of resin tank too strongly. Film can loosen or tear out.
Remove the following contaminants below. Use cleaning filter for the better cleaning performance. If
serious damages like hole, scratch, etc are found in film and transparent window, repair or replace
resin tank.
• Residues of prints sticking to film
• Cured resin or particles floating in resin
• Pigmentation of film
• Damages like hole, scratch, etc of film
Checking the outside of resin tank
Upset the resin tank, and check if fingerprints, dirt, and scratches exist on transparent window. If resin
is still filled in the resin tank, tilt the resin tank to let resin flow to see the bottom of it.
 Loading...