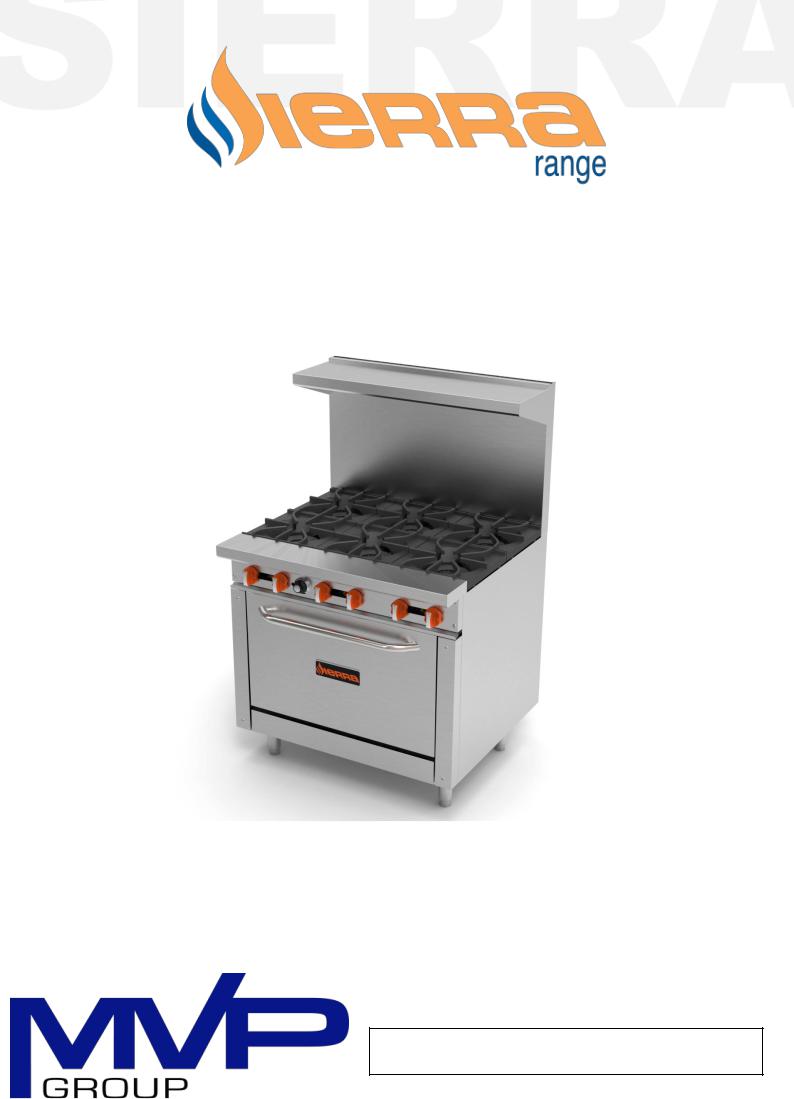
Sierra SR636, SR424 User Manual
OWNER´S MANUAL
INSTRUCTIONS- INSTALLATION-OPERATION-MAINTENANCE
OVENS AND MULTIPLES
SR-4-24, SR-6-36, SR-24G -24, SR-36G -36, SR-4B-12G-36, SR-2B-24G-36
**READ THIS MANUAL IN IT’S ENTIRELY BEFORE USING THIS RANGE**
5659 ROYALMOUNT AVE MONTREAL, QC, CANADA H4P 2P9
TEL (514) 737-9701; 1-888-275-4538
2 to 17
IMPORTANT SAFETY INFORMATION
FOR YOUR SAFETY: Do not store or use gasoline or other flammable vapors or liquids in the vicinity of this or any other appliance.
MESURE DE SÉCURITÉ: Ne pas entreponer ni utiliser d´essence ni autres vapeurs ou liquides inflammables á proximité de cet appareil ou de tout autre appareil.
WARNING: Improper installation, adjustment, alteration, service or maintenance can cause property damage, injury or death. Read the installation, operating and maintenance instructions thoroughly before installing or servicing this equipment.
MISE EN GARDE: Une installation, un réglege, une modification, ine réparation ou un entretien inadécuat peut provoquer des dommager matériels, des blessures ou la mort. Lisez sougneusement les instructions d´installation, d´utilisation et d´entretien avant d´installer ou de reparer cet équipement
3 to 17
PLEASE RETAIN THIS MANUAL FOR FUTURE REFERENCE
All equipment manufactured by SIERRA RANGE. is for use with the type of gas specified on the rating plate and for installation will be in accordance with National Fuel Gas Code ANSI Z223.1 (latest edition)
IMPORTANT: Installing, Operating and Service Personnel:
Qualified, certified licensed and/ or authorized personnel who are familiar with and experience in state/local installation codes should perform installation of the equipment. Qualified or authorized personnel who have read this manual and are familiar with the functions of the equipment should perform operation of the equipment.
Qualified personnel who are knowledgeable with Sierra equipment should perform service of the equipment.
The BTU input rating on all equipment is calibrated for elevations up to 2,000 feet above sea level. All orifice drill sizes are referenced for operation at or below this altitude. For operation at elevations above 2,000 feet, the BTU rating must be reduced 4% for each 1,000 feet of elevation or the orifice drill size must be changed appropriately. For high altitude drill sizes, call your local gas company or Factory Authorized Service Center.
All units are equipped with fixed orifices and cannot be adjusted. If converting the gas appliance from natural to propane, or vice versa, all orifices and the regulator must be changed. The correct type of gas, for which the unit is configured, is noted on the name plate. The type of gas specified MUST be used. For proper conversion, contact a qualified service technician or your Factory Authorized Service Center.
SHIPPING DAMAGE CLAIM PROCEDURE
Merchandise must be inspected prior to the carrier leaving your premises. Damage must be noted in writing on the BOL and pictures must be taken at this time.
-For any goods shipped prepaid by MVP Group Corp., and the goods are damaged and/or lost in transit, please call the Logistics Department at MVP immediately (1-888-275-4538 x 333)
-MVP Group will not be held responsible for damages that are not notated on the BOL or not reported within 5 business days of being delivered.
-For goods shipped via 3rd party carrier, any claim for damages or loss must be made by the consignee directly with the carrier. MVP Group Corp. assumes no responsibility for damage or loss while in transit.
INSTALLATION INSTRUCTIONS
Gas pressure regulator provided with the equipment must be installed when the appliance is connected to gas supply. The area around the appliance must be kept free and clear of combustibles such as solvents, cleaning liquid, broom, rags, etc. Proper clearances must be provided at the front of the appliance for servicing and proper operation.
4 to 17
Provisions shall be incorporated in the design of the kitchen, to ensure adequate supply of fresh air and adequate clearance for air openings into the combustion chamber, for proper combustion, and ventilation. For proper operation of the appliance, do not obstruct the flow of combustion and ventilation air.
The installation must conform with local codes, or in the absence of local codes, to the national fuel gas code, ANSI Z223.1 (or latest addenda). The Appliance and its individual shut off valve must be disconnected from the gas supply piping system during any pressure testing of that system in excess of ½ PSI (3.45Kpa).
The appliance must be isolated from the gas supply piping system by closing its individual manual shut off valve during any pressure testing of the gas supply piping system at test pressures equal to or less than ½ PSI (3.45Kpa).
The gas supply line must be at least the same size as the gas inlet of the appliance.
FLEXIBLE COUPLINGS, CONNECTORS AND CASTERS
For an appliance equipped with casters the installation shall be made with a connector that complies with the Standard for Connectors for Movable Gas Appliances, ANSI Z21.69 or Connectors for Moveable Gas Appliances, CAN/CGA-6.16, and a quick disconnect device that complies with the standard for Quick Disconnect Devices for Use with Gas Fuel, ANSI Z21.41, or Quick Disconnect Devices for Use with Gas Fuel, CANI-6.9. Adequate means must be provided to limit the movement of the appliance without depending on the connector and the quick-disconnect device or its associated piping to limit the appliance movement.
Restraining devices may be attached to the back frame/panel of the unit.
HIGH SHELF ASSEMBLY
(1)Mount the back guard/ flue riser to the range with sheet metal screws in the back.
(2)Mount the high shelf to the riser with bolts provided (see attachment at the end of this manual for a diagram that describes the installation of the back guard / flue riser).
NOTE: If a Salamander broiler / Cheese Melter is to be mounted on a range, read installation instructions for Salamander broiler / Cheese Melter before installing high shelf. Special care must be taken to ensure that the gas supply piping and/or gas pressure regulator is not exposed to exhaust gases, or elevated temperatures.
The gas supply (service) line must be the same size or greater than the inlet line of the appliance. Royal ranges and ovens use a 3/4” NPT inlet. Sealant on all pipe joints must be resistive to LP gas.
OPERATING INSTRUCTIONS: Before lighting, check all joints in the gas supply line for leaks. DO NOT USE OPEN
FLAME TO CHECK FOR LEAKS! USE SOAP AND WATER SOLUTION.
Putting an open flame beside a new gas connection is extremely dangerous. LIGHTING: Initial pilot lighting:
CAUTION: When lighting pilots and checking for leaks, do not Stand with your face close to the combustion chamber.
5 to 17
All Sierra appliances are adjusted and tested before leaving the factory, effectively matching them to sea level conditions. Adjustments and calibrations to assure proper operation may be necessary on installation to meet local conditions; low gas characteristics, to correct possible problems caused by rough handling or vibration during shipment, and are to be performed only by qualified service personnel. These adjustments are the responsibility of the customer and/or dealer and are not covered by our warranty. Before lighting any pilots, make sure that burner valves and thermostats are turned “off”.
A.TOP BURNERS / RAISED GRIDDLE–BROILER / BROILER. All top section burners are equipped with constant burning pilots. These are to be manually lighted immediately after the gas is turned on and the system is checked for leaks. Burner pilots are provided for each burner and can be rechecked for proper adjustment. Adjustments can be made with a screwdriver to
the brass pilot valve accessible through the valve cover.
B.HOT TOP / GRIDDLE. The pilot should be lighted immediately after the gas is turned on and the system is checked for leaks. The pilot can be reached with a long match through the valve cover, or by lifting the plate upward and accessing through the top.
C.STANDARD OVEN. Pilot gas is tapped from the main burner manifold pipe, routed through tubing to a pilot safety valve, and then to the pilot burner. Gas flow is controlled by the safety valve.
Oven pilot lighting or relighting is to be completed in the following sequence:
(1) Turn the oven thermostat knob to “off” and wait 5 minutes.
(2) Remove the oven’s lower kick plate by lifting up and out. This exposes the pilot safety valve and the igniter button.
(3) Make sure any accumulated gas has dispersed. Since propane gas is heavier than air, check near the floor area for the odor of propane gas before attempting to light any pilot burners.
(4) Depress the red button on the safety valve and hold it in throughout the lighting procedure.
(5) Press the red button of the pilot igniter, and you should hear a snap and see a spark at the pilot burner. If a spark or spark igniter is not present apply a lit match to the pilot burner head.
(6) Continue to depress the safety valve button until the pilot remains lit when released.
(7) If pilot is extinguished, repeat step 4 through 6 above.
(8) Turn the oven thermostat knob “on” and set to desired temperature setting, watch to make sure the oven burner ignites from the pilot and that there are no yellow flames from the burner.
(9) Turn the oven thermostat to “off” and replace the lower kick plate.
NOTE: It may be necessary to relight the pilot several times until the lines are purged of any trapped air and a constant gas flow is attained.
MAINTENANCE INSTRUCTIONS
CAUTION: Never use ammonia in an oven that is warmer than room temperature and always have direct ventilation! If the appliance is on casters and is connected to the supply piping by means of a connector for
6 to 17
movable appliances, there is a restraining device at the rear of the unit. If disconnection of the restraint is necessary, reconnect the restraint after the appliance has been returned to its originally installed position.
CLEANING
DAILY: Clean top grate(s) with warm water, mild cleaner and wire brush. Clean and brush off debris from and around the burner area. Empty and clean grease pan. Griddle plates should be cleaned with warm water and scrubbed with cleaning abrasive such as a griddle brick of fine grit type. Top surface can also be ‘bleached’ with vinegar, pickle juice or club soda when the plate is warm to give the plate a ‘new’ look.
Remove the baking racks. Wash in hot soapy water and replace after the rest of the oven is cleaned. Remove the oven bottom by lifting it out from the front then sliding forward, out of the oven. Scrape off any food particles with a nylon griddle scraper. Be very careful about scratching the porcelain finish on the oven liner panels. Wash all the above with hot soapy water, then reassemble. Baked on spills may be loosened and stubborn stains removed with ordinary household ammonia and scrubbing with a nylon pad in a cold oven only. Do not allow spray type oven cleaners to come into contact with the temperature probe in the oven. After cleaning the oven, rinse well with 1/4 cup of vinegar to one quart of clear water solution to neutralize any caustic residue of the cleaning compound. Wipe dry.
PERIODIC: Remove open burners and clean with warm water and wire brush. Make sure the ports are not clogged. Check valves and lubricate, if necessary. Consult your service agency or local Gas Company.
STAINLESS STEEL PARTS
Do not use steel wool, abrasive clothes, cleansers or powders to clean stainless steel surfaces. All stainless steel parts should be wiped regularly with hot soapy water during the day and a stainless steel liquid cleaner at the end of the day. To remove encrusted materials, soak in hot water to loosen the material, and then use a wood or nylon scraper.
Contact the factory, factory representative or a local service company to perform maintenance and repairs.
 Loading...