

Page 1
s
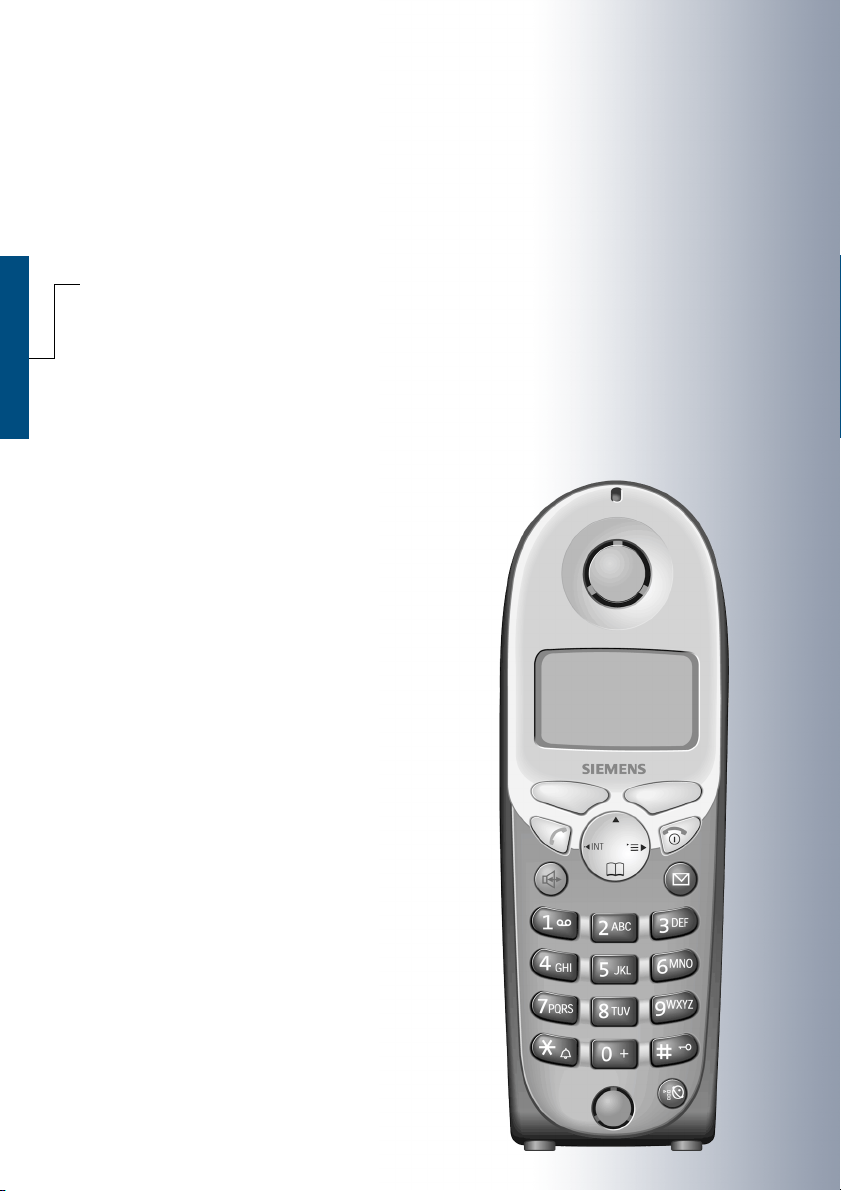
HiPath 3000
Hicom 150 E/150 H
Gigaset 4000 Comfort
Operating Instructions
Warnin g
Please read the safety notes before
putting the device into service.
Page 2
Safety notes
Telep ho ne
Danger:
• Do not use the telephone in environments where there is
danger of explosion.
• Do not use the telephone in damp environments. The units
are not splashproof.
• Your telephone emits transmit power, see page 52. Local
safety regulations must be observed.
Note:
• For people with hearing aids: radio signals may interfere
with hearing aids.
• If you lend your telephone to someone else, please make
sure that you include the operating instructions with it.
Batteries
Caution:
• Only use permitted batteries, see page 10.
• Do not use conventional batteries. These could damage the
unit (e.g. risk of explosion).
• Avoid contact with water and fire.
• Only use the plug-in power supply unit provided.
Note:
Please dispose of batteries, the telephone and the
charging shell in accordance with the environmental
specifications.
I
Page 3
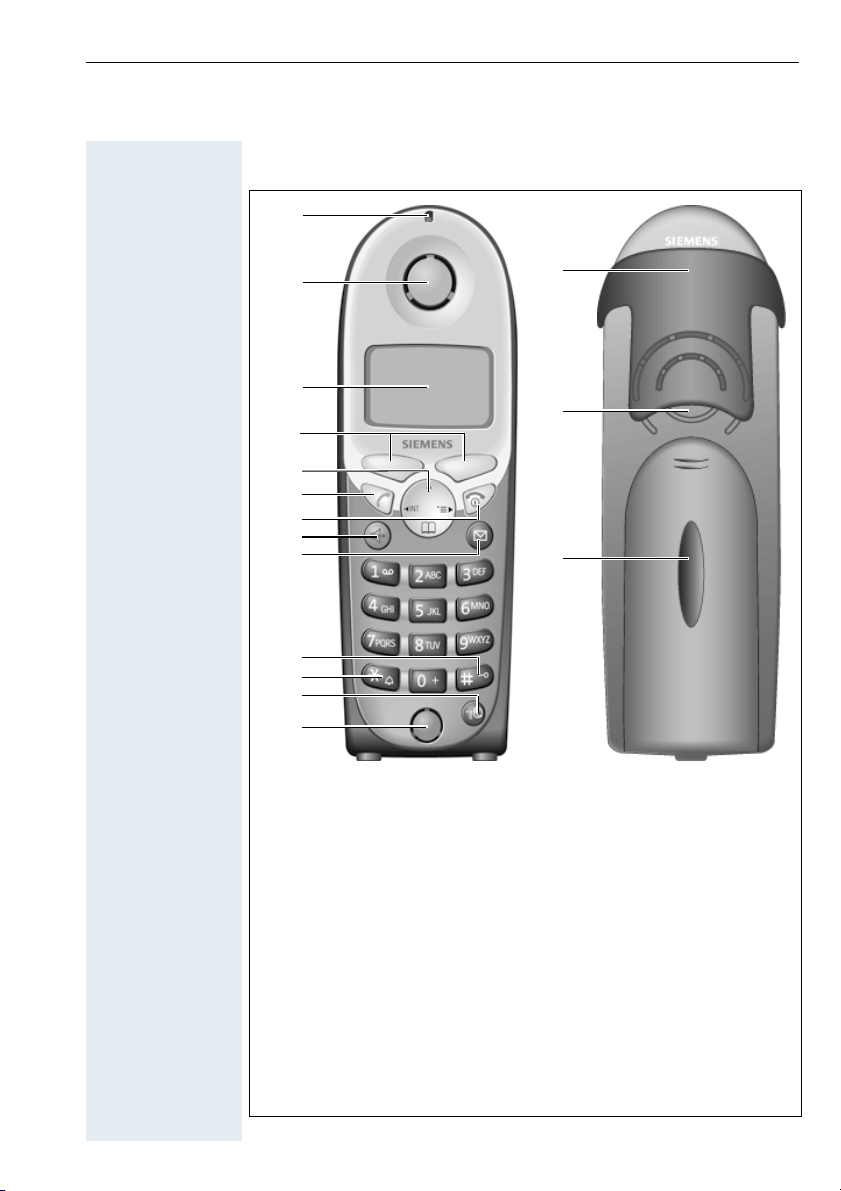
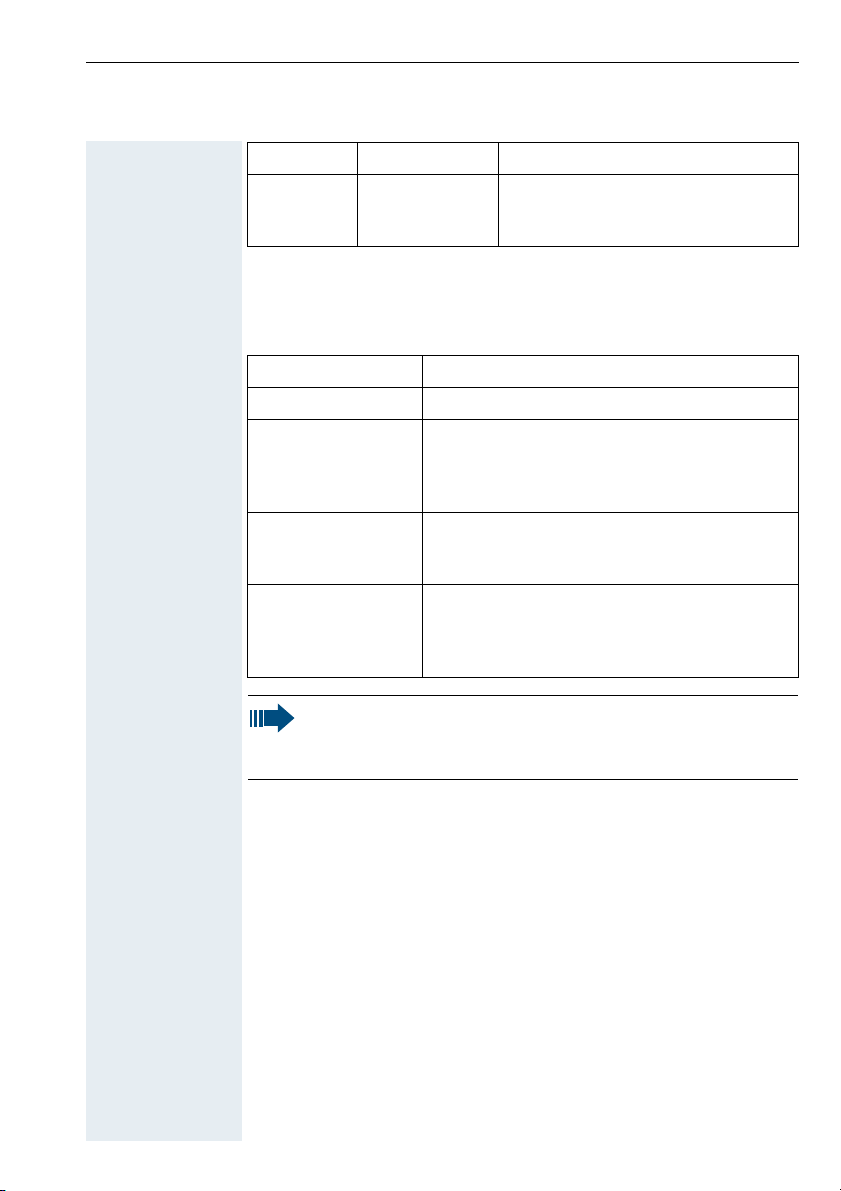
Unit parts
1
2
3
4
5
6
7
8
9
10
11
12
13
1 Status LED 9 Missed calls list
2 Receiver inset 10 Lock key
3 Display 11 Star key
4 Display keys 12 NET key
5 Control key 13 Microphone
6 Talk key 14 Attachment clip
7 On-hook and on/off key 15 Ringer loudspeaker
8 Speakerphone key 16 Battery compartment lid
14
15
16
II
Page 4

"/
*
-
+
+ "/
Quick reference guide
Activating or deactivating the mobile telephone
Hold down the on/off key.
Activating or deactivating the keypad lock
A
Hold down the hash key.
Starting a call
*
Press the talk or speakerphone key and dial the phone number.
or
-
Enter the phone number and press the talk or speakerphone key.
Opening the telephone directory
Press the control key.
Activating or deactivating speakerphone mode
-
Press the speakerphone key.
Ending a call
or (
-
"/
III
or (
Press the on-hook key or place the mobile telephone in the charging
shell.
Answering a call
Press the talk or speakerphone key or remove the mobile telephone
from the charging shell (only if "Auto Answer" is active, see page 30).
Page 5

Contents
Safety notes I
Telephone ...................................................................... I
Batteries......................................................................... I
Unit parts.................................................................. II
Quick reference guide.......................................... III
Keys, function selection and display 1
Function keys................................................................ 1
Control key.................................................................... 2
Display keys .................................................................. 2
Operating status display ............................................... 3
Function selection......................................................... 4
Function selection using menus............................... 4
Function selection in call status................................ 5
Useful information about mobile telephones 6
Features ........................................................................ 6
Environmental conditions..............................................7
Radio range ................................................................... 7
Displaying the radio range ........................................ 7
Leaving the radio network........................................ 7
Putting the mobile telephone into service 8
Removing the protective cover..................................... 8
Inserting the batteries ................................................... 8
Charging and using the batteries ..................................9
Operating and charging times ................................ 10
Permitted batteries................................................. 10
Fitting the attachment clip .......................................... 10
Activating/deactivating the mobile telephone ............. 11
Setting the language ................................................... 11
IV
Page 6

Registering the mobile telephone at the
telephone system........................................................12
Overview.................................................................12
Preparing for registration ........................................12
Registering at the system for the first time............13
Activating/deactivating the keypad lock.......................13
Conducting calls 14
Internal/external dialling...............................................14
Dialling via the telephone directory or NET
carrier list .....................................................................16
Answering a call ..........................................................16
Speakerphone mode ...................................................17
Number redial 18
Overview .....................................................................18
Manual number redial..................................................18
Automatic redial...........................................................18
Functions.....................................................................19
Telephone directory and NET carrier list 20
Overview .....................................................................20
Telephone directory functions .....................................21
Dialling with the telephone directory or NET
carrier list .....................................................................22
Sending and receiving text messages 23
Overview .....................................................................23
Selecting texts.............................................................24
Text messages........................................................24
Automatic advisory messages ................................24
Creating text messages...............................................25
Sending text messages ...............................................25
Opening incoming text messages...............................25
V
Page 7

Settings 26
Overview..................................................................... 26
Default state ............................................................... 27
Setting the sound setting functions ............................ 28
Menus .................................................................... 28
Activating/deactivating the warning tone ...............30
Setting the auto answer function................................30
Resetting the defaults................................................. 30
Selecting a base.......................................................... 31
Enhanced functions 32
Room monitor and walkie-talkie mode........................ 32
Overview ................................................................ 32
Using as a room monitor ........................................ 32
Configuring and deactivating ............................. 32
Deactivating with another telephone................. 33
Operating in walkie-talkie mode ............................. 33
Prerequisites......................................................33
Activating and deactivating ................................ 33
Making and Answering Calls ............................. 34
Performing the time functions .................................... 35
Overview ................................................................ 35
Functions................................................................36
Switching functions 37
On or message status................................................. 37
Overview ................................................................ 37
Functions................................................................38
Using the system telephone directory............... 38
Using the missed calls list ................................. 38
Using call forwarding ......................................... 38
VI
Page 8

Dial or call status .........................................................39
Overview.................................................................39
Functions ................................................................40
Saving a callback ................................................40
Setting up an enquiry during a call .....................40
Transferring a call ..............................................40
Toggle – switching between two users .............40
Adding callers to a conference...........................40
Switching function codes ............................................41
Entering text 48
Character table ............................................................48
Key utilisation ..............................................................49
Appendix 50
Troubleshooting...........................................................50
Cleaning the mobile telephone ...................................51
Technical data..............................................................52
Hicom cordless EM.................................................52
Mobile telephone....................................................52
Accessories .................................................................52
List of abbreviations ....................................................53
VII
Index 54
Page 9

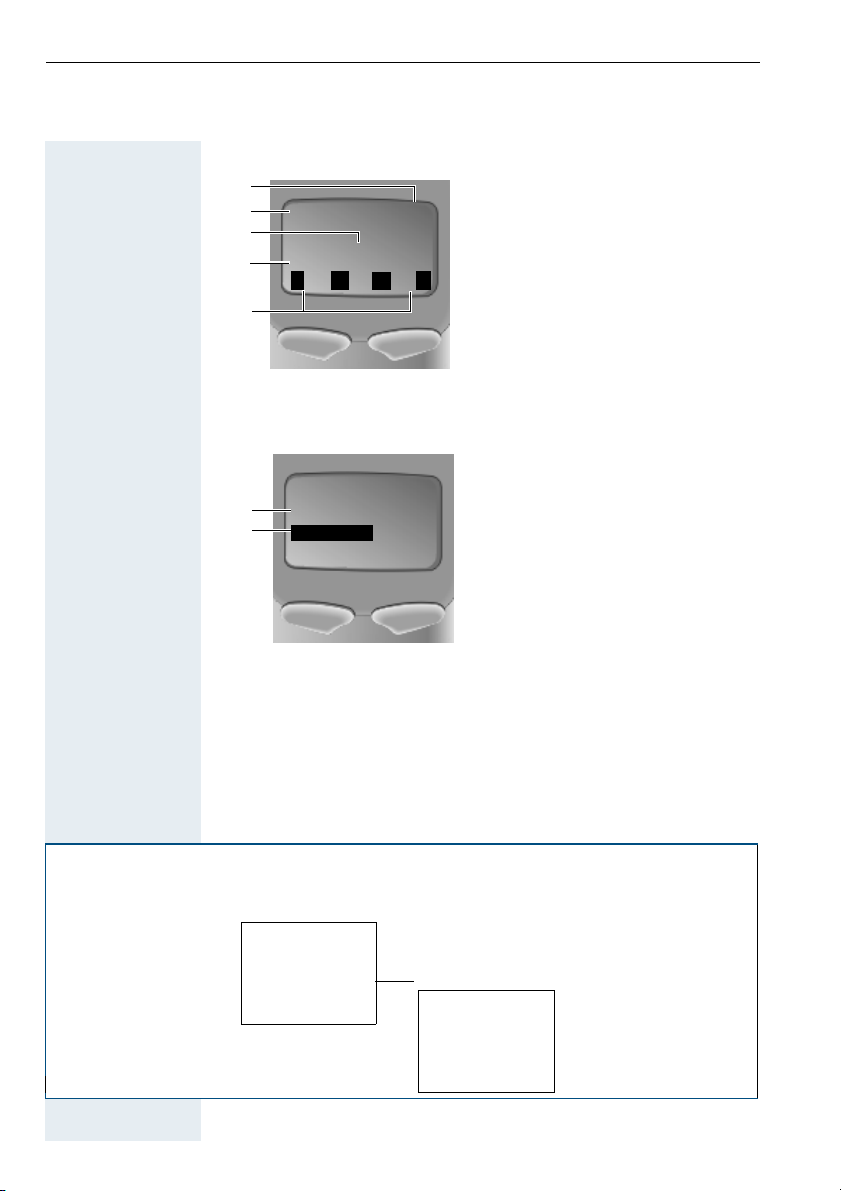
Keys, function selection and display
Function keys
The following function keys are available:
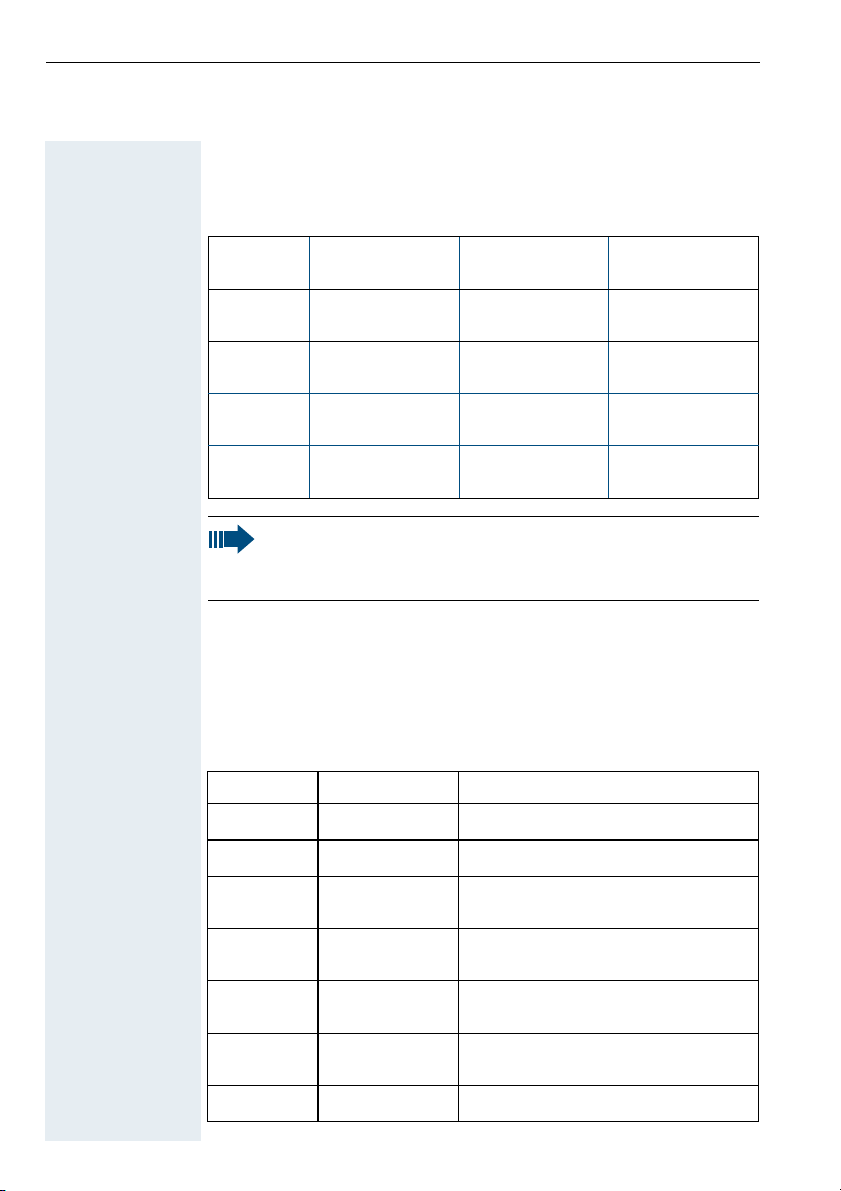
Key Name Use
"
-
5
On-hook and
on/off key
Talk key • Answer a call
Speakerphone
key
Missed calls
list
Star key Activate/deactivate the ringer
• End a call
• Cancel functions
• Jump back to the previous menu
• Switch the mobile telephone to
idle status; activate or deactivate
(see page 11)
• Dial a phone number
• Switch from speakerphone mode
to handset mode
• Access telephone system functions
• Answer a call
• Dial a phone number
• Switch from handset to speakerphone mode
• Access telephone system functions
Access message lists
4
Hash key Activate/deactivate keypad lock
NET key • Open the NET carrier list
1
Page 10
Control key
The control key is assigned different functions depending on the operating situation:
Control
Key
In idle status In lists and
menus
Next menu level upMove the cursor
Open the telephone directory
Open the menu Select an entry
Note:
Some functions associated with the right display key can also
be performed with the control key.
Next menu level
down
(OK)
Next menu level
up, cancel
In an input
field
up one line
Move the cursor
down one line
Move the cursor
right
Move the cursor
left
Display keys
The left display key can be programmed with two functions, whereas
the right display key can be programmed with only one function. Display key programming depends on the operating status. A function
can be represented by text or an icon. The following icons exist:
Icon Name Use
@
0
P
Menu Open the general menu
Delete Delete inputs from right to left
Redial Open a list of the last five phone
numbers called
Missed calls
list
Go back Next menu level up,
Left/right Select a function (dial or call status
OK Confirm selected function
Open the missed calls list
cancel
only, see page 3)
2
Page 11
Icon Name Use
Service menu Open the service menu (only during
a call in Hicom cordless EM V2.2 or
later, see page 41)
Operating status display
The following operating statuses are available:
Operating status Display
Off status Blank display – calls cannot be received.
On or message status
Dial status The user interface of the telephone system is
Call status The user interface of the telephone system is
Note:
The user interface of the mobile telephone is
displayed. The base name is visible. This operating status is a prerequisite for all functions.
displayed. The telephone system functions
are visible.
displayed. The internal phone number and
possibly the name of the user and the functions of the telephone system are visible.
The display language set by default is English. For information
on changing the language, please see pages 11 and 26.
3
Page 12
On or message
status
Example for on or message status display:
1
2
Q
3
4
22.09.01
Base 1
0
5
Call status Example for call status display:
1
123456789
2
Consultation?
Function selection
06:25
@
1 Charging status
2 Receive field strength
3 Current base display
4 Date and time
5 Current functions of the dis-
play keys
1 Internal phone number and/or
name of the user
2 Available function
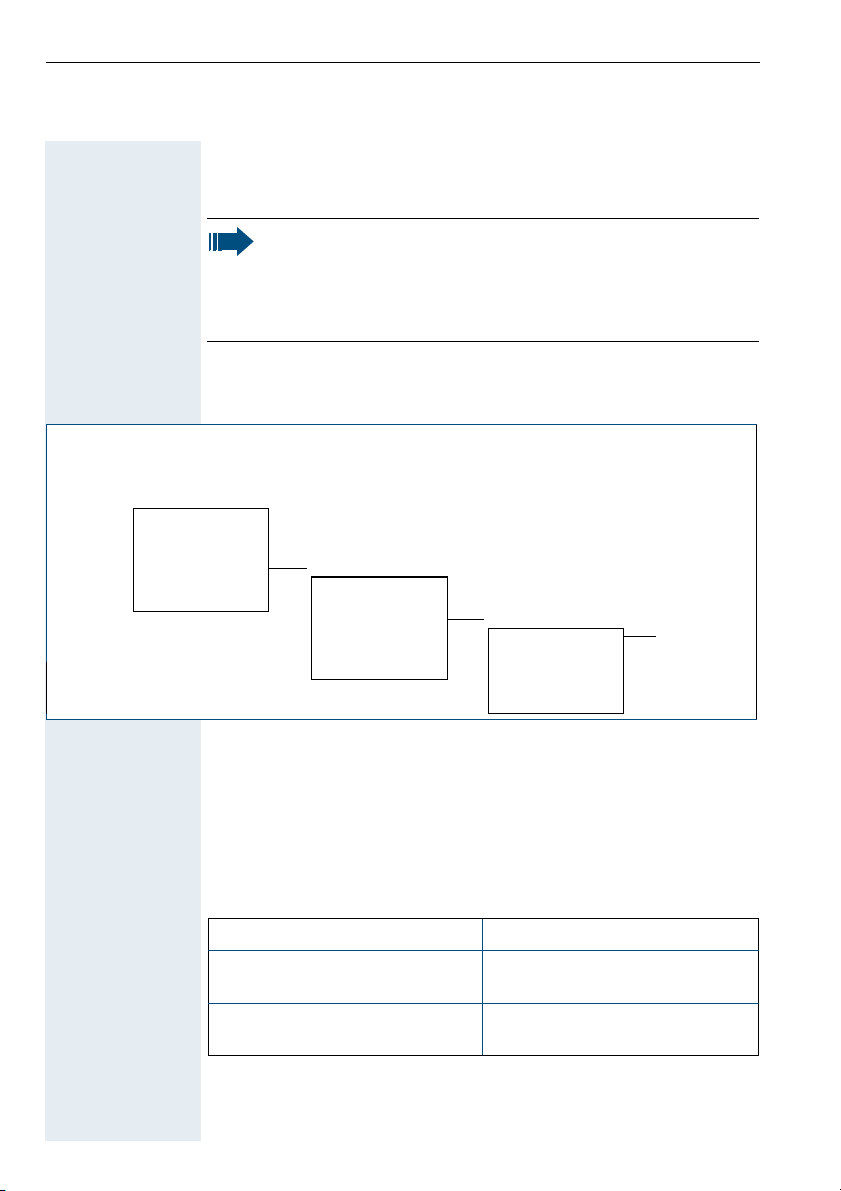
Function selection using menus
The mobile telephone functions are listed in the menus. Overviews of
these menus are displayed, e.g.:
On or message status
%
or
@
4
.,
Main menu
Family/Fun
Calendar/Clock
Sound Settings
H/Set Settings
Base Settings
**************** Language
P
H/Set Settings
Auto Answer
Register H/Set
Select Base
Reset Handset
****************
Page 13
To select a function or a supplementary menu, please follow the overview for the relevant section and press the function and display keys
shown:
@ Press the menu key.
or Mark the function or the supplementary menu you want by pressing
the control key.
Confirm with OK.
A line of stars indicates the end of a menu. If you scroll further, the
first function in the menu is marked again.
P
If you press one of the two display keys when the star line is selected,
the system jumps to the next menu level up or to on or message sta-
or
Go Back
tus.
Function selection in call status
You can scroll between the following functions in call status:
Consultation?
.,
Save number?
.,
Start conference?
.,
Start transfer?
.,
Directory?
.,
Send Message?
Proceed as follows to select a function:
or
Mark the function you want by pressing the display key.
Confirm with OK.
5
Page 14

Useful information about mobile telephones
These operating instructions describe your mobile telephone in connection with Hicom cordless EM at Hicom 150 E/150 H/HiPath 3000.
Note:
Please contact your system administrator if some functions
are not available on your mobile telephone.
Features
Mobile
telephone
Hicom
cordless EM
Amoungst the features of your mobile telephone are:
• Mobile telephone registration and operation at up to four DECT
telephone systems
• Automatic call acceptance on removal from the charging shell
• Speakerphone mode
• Number redial for the last five numbers
• Protection against inadvertent key activation
• Telephone directory for 200 entries
Hicom cordless EM is a cordless DECT telephone system and comprises the following components:
• Radio exchange for Hicom 150 E/150 H/HiPath 3000
• Bases (transmitter/receiver)
• Mobile telephones
• Charging shells
Hicom cordless EM offers the following features:
• Internal and external calls in the entire Hicom cordless EM radio
network
• Internal and external availability at one telephone number throughout the entire radio network (roaming)
• Automatic handover between bases
• Call forwarding to internal users
• Automatic callback for internal and external calls
• Consultation during a call
• Conference for up to five users
6
Page 15
Environmental conditions
For safety information, see page I. Permitted temperature range, see
page 52.
Note:
Do not install the mobile telephone in the vicinity of electronic
equipment to avoid mutual interference.
Radio range
Displaying the radio range
Connection
quality
Range problems The radio range is different indoors and outdoors, see page 52.
The strength of the incoming signal is displayed by the "receive field
strength" icon in on or message status:
1
S
R
Q
Note:
Please consult your system administrator in the event of range
problems.
no receive field strength
low receive field strength
50% receive field strength
100% receive field strength
Leaving the radio network
After leaving the
radio network
The base name flashes on the display. The mobile telephone attempts
repeatedly to synchronise with a base. The intervals between synchronisation attempts increase on account of the integrated power
saving function.
Note:
If you do not require the date and the time to be displayed (see
page 41), you can switch your mobile telephone off to save the
batteries.
Re-registering Switch off the mobile telephone and switch it back on again.
7
Page 16
Putting the mobile telephone into service
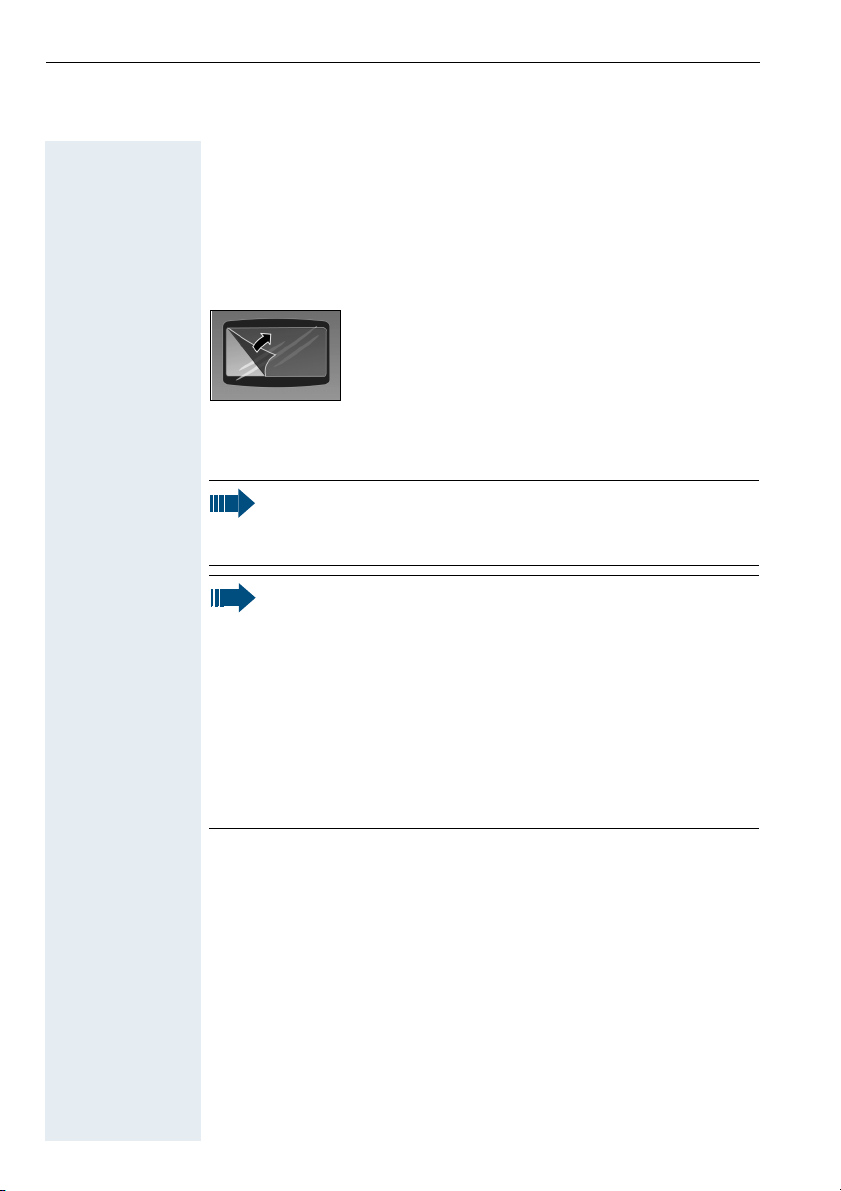
Removing the protective cover
Remove the protective cover from the display before putting the mobile telephone into service.
Inserting the batteries
Note:
The batteries supplied are not charged. They are only charged
in the mobile telephone.
Note:
• Please observe the safety notes on page I.
• Only use permitted batteries, see page 10.
• Always change both batteries at the same time and only
use batteries of the same type and produced by the same
manufacturer.
• Open the battery compartment in a dust-free environment
only.
• Your telephone directory entries, all settings and your PIN
remain stored even if you remove the batteries. The date
and time settings, however, are lost.
Opening the
compartment
8
battery
Inserting
batteries
Press the ridged area and slide back the battery compartment lid.
Insert the permitted batteries observing correct polarity as indicated
in the battery compartment.
Page 17
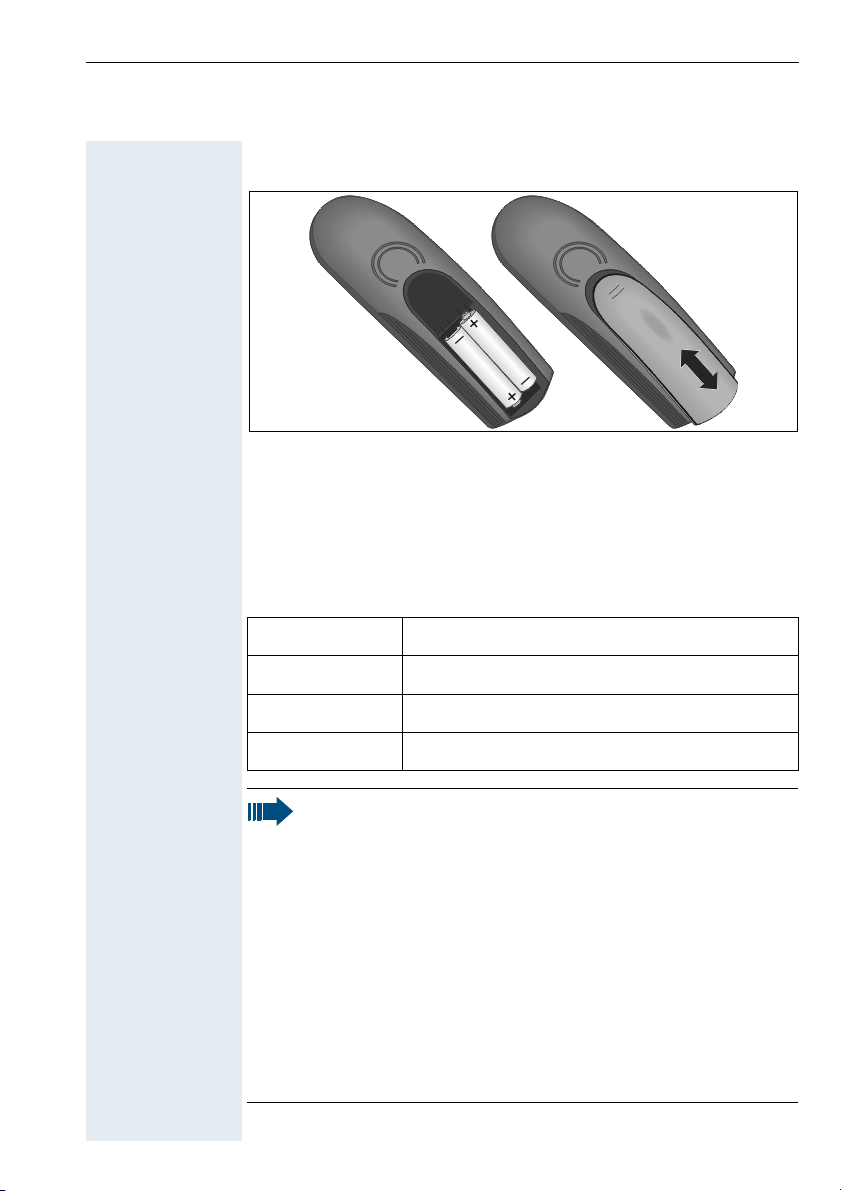
Closing the bat-
tery
compartment
Replace the lid and slide it back over the battery compartment until it
locks.
Charging and using the batteries
To charge the batteries, insert the mobile telephone into the charging
shell with the keypad facing forwards.
The charging status is indicated by the charge status display. This
flashes during charging:
#
Note:
• Initial charging: charge the batteries for at least 16 hours, irrespective of the charging status icon. Without replacing it
in the charging shell, use the mobile telephone until the
battery low beep is heard. This action aligns the charge status display with the battery operating times.
• To achieve full operating and charging times (see page 10),
let the mobile telephone discharge a number of times without replacing it in the charging shell until the battery low
beep sounds.
• For future charging: you can place your mobile telephone in
the charging shell each time it is used. Charging is electronically controlled which ensures that the battery is charged
optimally.
Batteries empty
Batteries 33% charged
Batteries 66% charged
Batteries 100% charged
9
Page 18
Operating and charging times
The operating times are only achieved after several charging and discharging cycles.
Capacity
(mAh)
700 up to 150 over 10 approx. 5.5
120 0 up to 250 over 17 approx. 9
160 0 up to 350 over 23 approx. 12
Standby mode
(hours)
Ta lk tim e
(hours)
Charging time
(hours)
Permitted batteries
The following batteries are permitted for the mobile telephone:
Nickel-Cadmium (NiCd) Nickel-Metal-Hydride (NiMH)
Sanyo N-3U (700 mAh) Saft VHAAH 1300 (1300 mAh)
Mobile Power 700 (700 mAh) YDT 1200 (1200 mAh)
Panasonic P-60AA DT
(600 mAh)
Emmerich 700 (700 mAh) Sanyo HR-3U (1600 mAh)
Panasonic HHR-110 AA
(1100 mAh)
GP GP130 AA HC (1300 mAh)
Emmerich 1300 (1300 mAh)
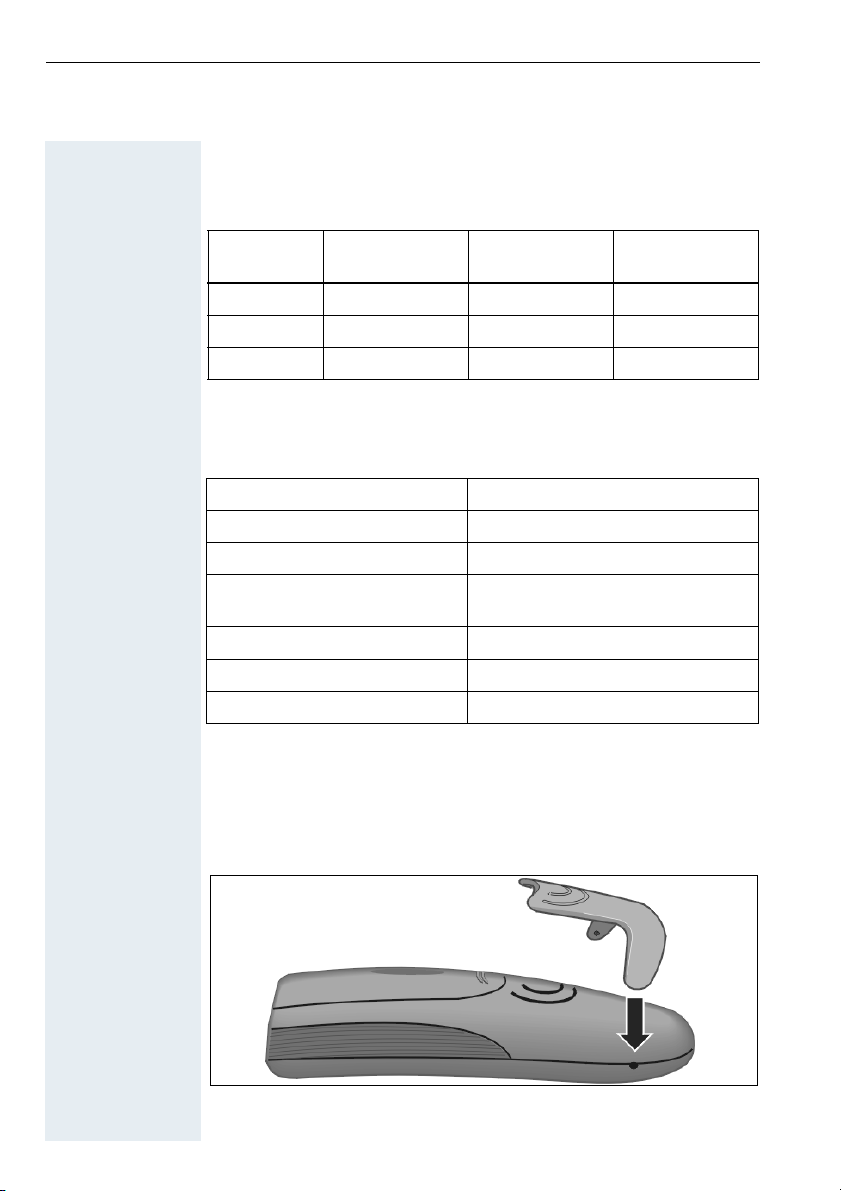
Fitting the attachment clip
Press the attachment clip onto the back of the mobile telephone until
the protrusions on the side of the clip slot into the holes provided on
the mobile telephone.
10
Page 19
Activating/deactivating the mobile telephone
Press the on-hook key until the activation or deactivation is confirmed
by a crescendo tone sequence.
See page 3 for display when the handset is on or in message status.
Note:
• The mobile telephone can only be fully switched off when
removed from the charging shell.
• The mobile telephone is automatically set to on or message status if it is placed in the charging shell, see page 3.
Setting the language
@
H/Set Settings
H/Set Settings
Language
Language
or
or
Open the main menu.
Select the menu item.
or:
Confirm your selection.
Select the menu item.
or:
Confirm your selection.
Select the required language.
Confirm your selection.
Note:
English is set by default as the mobile telephone language.
For information on resetting the mobile telephone’s default
language, see page 26.
11
Page 20
Registering the mobile telephone at the telephone system
Note:
When the telephone system is put into service, the system
administrator provides you with mobile telephones which
have already been registered. You only have to register new
mobile telephones when extending the telephone system.
Overview
On or message status
or
@
.,
Main menu
Family/Fun
Calendar/Clock
Sound Settings
H/Set Settings
Base Settings
**************** Language
P
H/Set Settings
Auto Answer
Register H/Set
Select Base
Reset Handset Base 2
**************** Base 3
P
Register H/Set
Base 1 PIN
Base 4
****************
P P
Preparing for registration
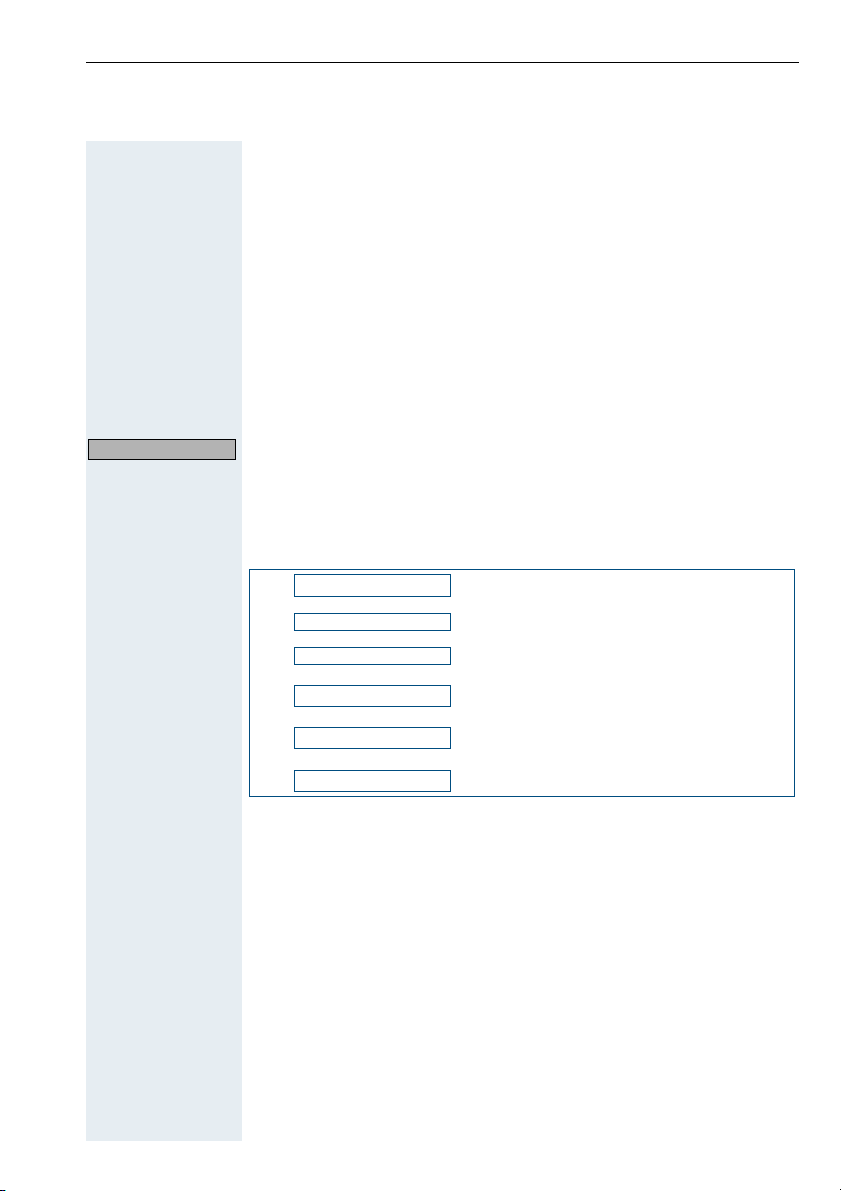
• Ask your system administrator for the following information:
– Phone number of the mobile telephone
– Mobile telephone PIN (8 digits)
• Enter the following data here:
System administrator
System administrator phone
number
Mobile telephone phone
number
• Ask your system administrator to activate the logon window on
the telephone system.
12
Page 21

Note:
The login window closes automatically after ten minutes. Mobile telephone registration must be performed within this time
and must not exceed one minute.
Proceed as is described in the following section to register the mobile
telephone.
Registering at the system for the first time
Register?
YES
Please enter PIN:
Base 1
Query if the mobile telephone is not registered at the system.
Confirm the query.
Enter the mobile telephone PIN.
Confirm your entry.
If registration has been successful, the name of the base is displayed,
with intermediate display of the ring symbol.
Note:
Your mobile telephone is now ready for operation. We recommend setting the date and time to ensure the correct date is
recorded for all calls, see page 36.
Activating/deactivating the keypad lock
The keypad lock protects the telephone against inadvertent key activation, e.g.when carrying it in a bag or pocket. The keypad lock is automatically deactivated when a call is received and re-activated when
the call is over. A key icon on the display indicates that keypad lock is
active.
A
Press the hash key until the activation or deactivation is confirmed by
a crescendo tone sequence.
13
Page 22

"
or
Conducting calls
Note:
Dialling is only possible when the mobile telephone is active.
On or message status is then shown on the display, see
page 3.
-
Start a call with the talk or speakerphone key.
or
(
Preparing a
call
*
*
*
and
or
or
or
You can end a call with the on-hook key or by placing the mobile telephone in the charging shell.
You can also use the on-hook key to cancel all functions.
Internal/external dialling
Internal calls are calls within the telephone system. External calls are
calls in the public telephone network.
Enter the phone number and, where applicable, correct individual
characters with the "Delete" display key.
Note:
You can also start by pressing the talk key and then enter the
phone number. Each digit is then immediately dialled.
For internal dialling:
Enter the internal phone number of the user or use the control key to
open the list of internal users or the telephone directory, see also
page 22.
For external dialling:
Enter the external code, e.g."0" plus the external phone number or
use the control key to open the telephone directory, see also page 22.
14
Page 23

"
or
You can use the menu key to activate the following functions when
entering the phone number:
@
Prep. Dial preparation
Insert Pause
Insert TBR
Copy to Directory
****************
Note:
• "Insert Pause": insert a dial pause, e.g.between the prefix
and phone number or when checking a mailbox.
• "Insert TBR": (not relevant for Hicom cordless EM).
-
Press the talk or speakerphone key.
Note:
• For internal dialling: if the called party is currently conducting a call or is not answering, you can set the "CALLBACK"
function. The called party’s mobile telephone performs an
automatic callback call.
• For external dialling: you are not allowed to conduct external calls if "no access" appears.
Conducting a call
/
and You can scroll through the list of functions that appears during the call
and execute any of the functions shown, see page 5. The following is
also displayed:
For internal dialling:
The phone number and/or name of the user is displayed.
For external dialling:
The phone number dialled is displayed.
15
Page 24

Ending a
call
Reject call
"
or
or
Press the on-hook key or place the mobile telephone in the charging
(
shell.
The call charges are displayed, depending on the system setting.
Dialling via the telephone directory or NET carrier list
For information on dialling with the telephone directory or NET carrier
list, see page 22.
Answering a call
The ringer sounds at the mobile telephone and, depending on the
user (internal/external), the number and the name of the caller are displayed.
The mobile telephone offers this function for rejecting calls.
A call can be answered in the following ways:
Mobile telephone in the charging shell:
(
Remove the mobile telephone from the charging shell (only if "Auto
Answer" is active, see page 30).
-
Mobile telephone outside the charging shell:
Press the talk or speakerphone key.
16
Page 25

Speakerphone mode
Advantages Speakerphone mode offers you the following advantages:
• Other persons can listen to and participate in the call.
• Your hands are free.
• When dialling, you can hear the ring tone, for example, without
having to lift the mobile telephone to your ear.
Activating Speakerphone mode can be activated during a call or when dialling/
answering calls:
-
Press the speakerphone key.
Setting the
volume
or
Save
Deactivating You can deactivate speakerphone mode and switch to handset mode
The volume can be set during a call, if necessary:
-
Press the speakerphone key once more.
Reduce or increase the volume.
Save the volume set if required.
during a call:
Press the talk key.
"
Note:
Hold down the speakerphone key if you want to replace the
mobile telephone in the charging shell during a call,
e.g.because the batteries are empty.
17
Page 26

Number redial
Use the "Redial" display key to open the number redial list. The last
[
five phone numbers dialled are automatically saved in the redial list.
If you tried to call a party from the telephone directory, then the name
of this party is displayed in the case of number redial.
Overview
On or message status
0
Manual number redial
.,
Redial
<Number 1>
<Number 2>
<Number 3> Display Number
<Number 4> Copy to Directory
<Number 5>
**************** ****************
P
@ P
Redial
Automatic Redial
Delete Entry
View
<Number>
<Name>
****************
or
Automatic Redial
18
0 Use the "Redial" display key to open the redial list.
Select the phone number you want with the control key.
Press the talk key.
"
Automatic redial
The phone number is automatically redialled ten times at 20 second
intervals. Speakerphone mode is automatically activated, the speakerphone key flashes. This function deactivates automatically after ten
unsuccessful dial attempts.
Please proceed as shown in the overview on page 18 to activate the
automatic redial function.
Page 27

Off
Display Number
Copy to Directory
Delete Entry
Dial this function to cancel automatic redial, or press any key.
Note:
The automatic redial function deactivates automatically in the
event of an intermediate call.
Functions
Please proceed as shown in the overview to perform a redial function.
The following functions are possible:
Call up one of the numbers saved in the redial list.
Transfer a phone number from the redial list to the telephone directory. Then enter a name for the entry (max. 16 characters).
Delete a number in the redial list.
19
Page 28

Telephone directory and NET carrier list
Use the control key to open the mobile telephone’s telephone directory. The mobile telephone can save entries with names and phone
numbers in its telephone directory. The entries are arranged in the following sequence: blanks, digits, letters, other characters.
Use the NET key to open the mobile telephone’s NET carrier list. The
mobile telephone can save the prefixes for telephone companies or
other locations in its NET carrier list (not relevant for Hicom cordless
EM).
Overview
On or message status
or
*: not relevant for Hicom cordlessEM
.,
Telephone directory
New Entry
<Entry 1>
<Entry 2> <Name> Change
... Anniv.
****************
P
Note:
• Telephone directory and NET carrier list operation is identical.
• You can transfer the redial list phone numbers to the telephone directory, see page 19.
• The external code must be entered before external phone
numbers, e.g."0".
New Entry
<Number>
View Time
Change
Edit Entry
<Number>
<Name> Change
Anniv.
@
Directory
Display Number
Delete Entry
Copy Entry*
Delete List
Send List*
Available Memory
****************
P
P
P
Missed Anniv.
Date
Prompt
Missed Anniv.
Date
Time
Prompt
20
Page 29

New Entry
View
Change
Save
Insert Pause
Insert TBR
Display Number
Delete Entry
Delete List
Available Memory
Note:
You can also save entries in the telephone system’s telephone
directory, see page 38.
Telephone directory functions
Please proceed as shown in the overview on page 20 to perform a telephone directory or NET carrier list function.
Save a new entry with the name (max. 16 characters), phone number
(max. 32 digits) and anniversary in the telephone directory.
Save a new prefix number in the NET carrier list.
View an entry.
Change an entry.
Save a newly generated or modified entry.
Insert a dial pause, e.g.between the prefix and phone number or
when checking a mailbox.
For analogue lines: insert a prompt before the phone number to enable feature utilisation.
Call up a phone number saved in the telephone directory.
Call up a prefix number saved in the NET carrier list. You can extend
this and use it for connection setup.
Delete an entry in the telephone directory.
Delete the entire telephone directory or the NET carrier list, e.g. when
lending the mobile telephone to another user.
This function is also protected by the mobile telephone PIN.
Show the total number of entries that can still be saved in the telephone directory and the NET carrier list. Up to 200 entries are possible.
21
Page 30

Dialling with the telephone directory or NET carrier list
Note:
• Dialling is only possible when the mobile telephone is active. On or message status is then shown on the display,
see page 3.
• The telephone directory or the NET carrier list must contain entries.
or
/
Display Number
or
or
Press the control key or the NET key. The entries are displayed with
the associated names.
*
Scroll to the required entry or enter the first letter of the entry.
Note:
If the initial letter you want to enter is not the first letter on the
relevant key, the key must be pressed the appropriate number
of times to obtain the required letter.
Select and confirm the function. Follow the overview shown on
page 20.
*
For NET carrier list: add the phone number to the selected prefix
(chaining).
Press the talk key. The relevant number is displayed and dialled.
"
22
Page 31

Sending and receiving text messages
Overview
The following overview shows the procedure for sending/opening text
messages and setting advisory messages:
On or message status
"
Sending a text message/setting an advisory message
*
Opening an incoming text message
*: Typing errors cannot be corrected
.,
Dial status (see page 3)
...
Advisory msg. on ? >
Send Message? > 0 = Back on:
... 1 = Holiday until:
Enter a phone no. Text for: <Name> Send
Message to:
Msg. from: <Number> Te xt ? >
Advisory message
...
enter another text*
End? >
0 = Please callback Send? >
1 = Visitor waiting
...
enter another text*
End? >
or
Enter a number
*
.
< Text message > Delete? >
.
Time/date sent? > End? >
.
at: <Time Date>
*
*
Options
Call sender? >
Previous? >
+
Note:
• Text messages can be sent internally to other mobile telephones or to telephones with display, e.g. "optiset E".
• The date and time of incoming text messages are based on
the mobile telephone’s internal clock. It may be necessary
to reset this clock, see page 35.
23
Page 32

Selecting texts
Text messages
Text messages which are selected with the control key or by entering
the number can be saved in your telephone system and then sent:
Number Text Message
0 Please callback
1 Visitor waiting
2 Appointment
3 Urgent call
4 Do not disturb
5 FAX waiting
6 Dictation pls
7 Please join me
8 Coffee please
9 vacate office
These text messages are standard texts and may have been changed
in your telephone system.
Automatic advisory messages
Advisory messages which can be sent automatically to a caller if this
caller’s call is not answered are saved in your telephone system.
These advisory messages can be selected and supplemented in part
by you:
Number Advisory message
0 Back on:
1 Holiday until:
2 Away until:
3 Out all day
4 Out till noon
5 Not available
6 Avail/home:
24
Page 33

Number Advisory message
7 Contact:
8 Avail at:
9 In room:
These advisory messages are standard texts and may have been
changed in your telephone system.
Creating text messages
Please follow the overview on page 23 to create text messages. The
procedure for text entry is described on page 48.
Note:
The mobile telephone uses the telephone system’s character
table for this function. This character table is almost identical
to the table shown on page 48.
Sending text messages
Please proceed as shown in the overview on page 23 to send text
messages.
Note:
Messages can be sent internally to other mobile telephones or
telephones with display, such as "optiset E".
Opening incoming text messages
An advisory tone signals the receipt of a text message on your mobile
telephone. The "Missed Calls List" icon is displayed.
Please follow the overview on page 23 to open incoming text messages.
Note:
Incoming text messages can be opened in Hicom cordless EM
V2.2 and later.
25
Page 34

Settings
Overview
The following overview shows the functions for setting the mobile telephone.
On or message status
or
@
.,
Main menu
Family/Fun
Calendar/Clock
Sound Settings
H/Set Settings
Base Settings Ringer Settings
****************
P
Sound Settings
Handset Volume
Advisory Tones
****************
H/Set Settings
Auto Answer
Language
Register H/Set
Select Base English
Reset Handset
**************** ****************
P
Language
Deutsch
...
Select Base
Best Base
Base 1
Base 2
Base 3
Base 4
****************
26
Page 35

Default state
The following table shows the mobile telephone’s default settings:
Setting Explanation/notes Level Default
state
Sound
Settings
Auto Answer
Room
Monitor.
level
Language
Default Reset
Ringer volume 5 5
Ringer melody 10 1
Beep - off
Handset volume 3 1
Loudspeaker 5 5
Key tones, audible each time a
key is pressed.
Battery tone, audible approx.
5 minutes before the battery runs
out.
Confirmation tone, indicates
whether actions were successful
or unsuccessful.
Define whether the talk key must
be pressed to accept a call when
the mobile telephone is removed
from the charging shell.
Volume at which the mobile telephone dials a phone number.
Select different languages. 14 English
Resetting the defaults deletes
the redial numbers and resets the
sound settings. The registration
(logon) and the mobile telephone
PIN are retained!
- on
- on
- on
- on
2 high
- -
27
Page 36

Setting the sound setting functions
Finding and
setting
or
or
Save
Menu When selecting the menu, the tone sounds at the current setting in
Handset Volume
Menu When selecting the menu, the ringer sounds at the current setting.
Ringer Settings
Please proceed as shown in the overview on page 26 to find a sound
setting function. Then set the required sound setting function as follows:
Use the control key to change the volume, the melody or the status
of the sound setting function.
Use the control key to switch to the next function you want to set in
the menu.
Press this display key to save the settings after setting the sound setting functions displayed in the menu.
Menus
speakerphone mode. You can choose between five volumes in speakerphone mode and three volumes in handset mode.
___Handset Volume___
P
$
$
Save
1
2
You can choose between five ringer volumes, the crescendo ring (increasing volume), no ringer and ten ringer melodies (cannot be saved
in Hicom cordless EM).
1 Volume in speakerphone
%
%
mode
2 Volume in handset mode
___Ringer Settings___
1
2
Time C.
3
$
$
Save
1 Ringer volume
%
%
2 Ringer Melody
1
3 Time control activation func-
tion for the ringer volume
Display when ringer is deactivated.
28
Page 37

Deactivating
Activating
Advisory Tones
Activating and deactivating the ringer with the star key:
B
Hold down the star key for a few seconds.
The ringer is deactivated.
B
Hold down the key for a few seconds.
Note:
The ringer cannot be activated with the star key if it was deactivated via the menu.
Menu The advisory tones have the following meaning:
Advisory tone Meaning
Key tones Every keystroke is confirmed
Confirmation
tones
• Confirmation tone (crescendo tone sequence) when saving inputs/settings and
when placing the mobile telephone in the
charging shell
• Error beep (decrescendo tone sequence)
to signal incorrect inputs
• End-of-menu beep at the menu end
Battery tone The batteries must be charged
___Advisory Tones___
Key Tones:
1
Confirm.:
2
Battery:
3
P
$
$
On
$
$
On
$
$
On
Save
1 Key tone status
%
%
2 Confirmation tone status
%
%
%
%
3 Battery tone status
29
Page 38

Activating
Beep
Deactivating
Activating/deactivating the warning tone
When you activate the warning tone, all other tones are deactivated.
An incoming call is signalled by this brief tone.
If the mobile telephone is in a call pickup group, a pickup call is also
signalled by the warning tone.
B
Hold down the key for a few seconds.
Press the display key within three seconds.
The warning tone is activated.
B
Hold down the key for a few seconds. A confirmation tone is sounded.
Note:
The warning tone cannot be activated if the ringer was deactivated.
Setting the auto answer function
This function allows you to accept calls by removing the mobile telephone from the charging shell.
Please proceed as shown in the overview on page 26 to activate and
deactivate the auto answer function.
The activated function is ticked. It can be deactivated by selecting the
option once more.
Reset Handset
30
Resetting the defaults
This function allows you to restore the default settings at your mobile
telephone, e.g. when lending your mobile telephone to a third party.
Please proceed as shown in the overview on page 26 to restore the
default settings.
Page 39

The default settings are described on page 27. The mobile telephone
features are handled as follows when resetting the defaults:
Feature Reset
Telephone directory retained
Redial list deleted
System registration retained
Selecting a base
Select Base
If your mobile telephone is registered at multiple bases, then you can
set a specific base or the base with the best reception as the base to
be used. The mobile telephone then switches automatically to this
base.
Please proceed as shown in the overview on page 26 to select the
base. The selected base is ticked.
31
Page 40

On or message sta-
tus
or
@
.,
Main menu
Family/Fun
Calendar/Clock
Sound Settings
H/Set Settings
Base settings
****************
Enhanced functions
Room monitor and walkie-talkie mode
Overview
P
Family/Fun
Room Monitor.
Walkie-Talkie Room M.: Off/On
**************** Call to:
Using as a room monitor
This function allows you to monitor a room from a remote location.
The distance between the mobile telephone and the anticipated noise
source should be 1 to 2 metres at least. The mobile telephone dials a
phone number you saved as soon as the volume in this room reaches
a specific level. The called party can hear the noise in the monitored
room when the call is answered.
P
Room Monitor.
Level: High/Low
Deactivate
Off
Call mobile telephone
Call
Change
Save
Q
/
,
Note:
Please ensure that the number saved is not an external barred
phone number and that an answering machine is not activated
for the call number saved.
Configuring and deactivating
Please proceed as shown in the overview on page 32 to configure and
deactivate the room monitor function.
A call received at a mobile telephone at which the room monitor function is activated is only signalled on the display. The ringer does not
sound and the display and the keypad do not light up.
32
Page 41

C
and
The mobile telephone operating time is significantly reduced when
the room monitor function is activated.
Deactivating with another telephone
Answer the call set up by the room monitor function.
A
Press the two keys shown simultaneously.
Operating in walkie-talkie mode
This function allows you to operate mobile telephones outside the radio network.
Mobile telephones cannot be used for calls in walkie-talkie mode. The
range between the mobile telephones involved is max. 300 m. The
mobile telephone operating time is significantly reduced in this mode.
Prerequisites
• The mobile telephones used must be registered at the same base
and have selected this base.
or:
• The mobile telephones used must have set "Best Base".
Note:
All mobile telephones within range and at which walkie-talkie
mode is active and "Best Base" is set are called.
or:
• The mobile telephones used are not registered.
Note:
All mobile telephones within range and at which walkie-talkie
mode is active but are not registered are called.
Activating and deactivating
Please proceed as shown in the overview on page 32 to activate and
deactivate walkie-talkie mode.
33
Page 42

Call
Silent
Making and Answering Calls
Calling mobile telephone
Press the display key.
Called mobile telephone
The call is signalled by a message on the display.
"
Press the display and talk key. The two mobile telephones are connected to each other.
Note:
Although all mobile telephones are called in walkie-talkie
mode, a call can only be conducted between two mobile telephones.
34
Page 43

Performing the time functions
Overview
On or message status
or
@
.,
Main menu
Family/Fun
Calendar/Clock
Sound Settings
H/Set Settings Alarm Clock
Base Settings Missed Dates Date
****************
P
P
Calendar/Clock
Set Appoints.
Date/Time
****************
Set Appoints.
Appoint. On/Off
Time am/pm
H
Save
Alarm Clock
Alarm Clock On/Off
Time
H
Missed Dates
List of missed ap-
pointments or anniversari es
Date/Time
Date
Time am/pm
Mode
Delete
Save
Save
Note:
Please observe the following if you want to use the appointment and alarm clock function:
• First of all, set the date and time (this sets the mobile telephone’s internal clock).
• Do not deactivate the mobile telephone afterwards as this
would reset the date and time and the appointment and
alarm clock function would be based on the wrong time.
• Check the date and time from time to time and reset
where applicable.
35
Page 44

Functions
Set Appoints.
*
Alarm Clock
*
Missed Dates
Missed Appoint.
Date/Time
*
You can arrange for your mobile telephone to remind you of an appointment. Only one appointment can be set. Please proceed as
shown in the overview on page 35 to enter the appointment.
For example: enter the time 19:05.
1905
This icon indicates that an appointment is set.
Note:
No appointment reminders are performed during automatic redial and in call status.
* Press any key to deactivate an appointment reminder.
When the alarm clock is activated, it rings every day at the set time.
You can choose between 12-hour display (am, pm) and 24-hour display. Please proceed as shown in the overview on page 35 to enter
the alarm time.
For example: enter the time 19:05.
1905
This icon indicates that an alarm call is set.
Note:
No alarm calls are performed during automatic redial and
when the room monitor is active.
* Press any key to deactivate an alarm call.
An appointment or anniversary which was signalled by your mobile
telephone but not answered is saved in a missed dates list. Please
proceed as shown in the overview on page 35 to display the missed
dates list.
This icon indicates that the missed dates list contains an unanswered
appointment.
a
This icon indicates that the missed dates list contains an unanswered
anniversary.
This display indicates a new unanswered appointment or anniversary.
We recommend setting the date and time to ensure the correct time
is recorded for all calls. You can choose between 12-hour display (am,
pm) and 24-hour display. Please proceed as shown in the overview on
page 35 to enter the date and time.
For example: enter the time 19:05.
1905
36
Page 45

Switching functions
On or message status
Overview
The following overview shows a selection of the switching functions
which can be accessed in on or message status.
The menu only shows the switching functions which are activated at
your telephone system.
Note:
A complete list of the switching functions available at your telephone system can be found on page 41.
On or message status
"
.,
Switching functions
Directory? >
Missed Call List?>
Forwarding on? > <Entry 2> Call? >
...
P
System telephone dir.
<Entry 1>
...
Missed calls list
<Caller 1>
<Caller 2> Call? >
...
Scroll Next? >
Next? >
Delete? >
Call forwarding:
1 = all calls? >
2 = external calls only? >
3 = internal calls only? >
*
Save? >
37
Page 46

Functions
Please proceed as shown in the overview on page 37 to use one of
these functions.
Using the system telephone directory
Directory? >
Missed Call List?>
Forwarding on? >
Entries that you saved in the system telephone directory can be called
up from any mobile telephone connected to the system.
You can scroll to the required entry or enter the first letter of the relevant entry.
Note:
• If the initial letter you want to enter is not the first letter on
the relevant key, the key must be pressed the appropriate
number of times to obtain the required letter.
• You can also save entries in the mobile telephone’s directory, see page 20.
Using the missed calls list
You can use this function to display calls that you were unable to answer. You can also call the original party back or delete the call.
Using call forwarding
You can use this function to forward calls to another telephone.
38
Page 47

Dial or call status
Overview
The following overview shows the switching functions which can be
accessed in dial or call status.
Dial or call status
Switching functions
Callback? >
Consultation? > Callback set
****************
*
*
Callback
Start consultation End consultation
Please dial
or: or:
Transfer call Cancel call transfer
Please dial
or: or:
*
or:
Transfer
1st calling party 2nd calling party
To gg le ? >
or: or:
B9
*
*
*
Quit and return? >
Quit and return? >
To gg le ? >
B9
*
Start conference
Please dial
or:
*A
*: standard code, may differ in your telephone system
*
*
Conference? >
End conference
Quit and return? >
or:
A
*
Note:
• The "Callback" function works in dial status. The called party is called, but has not yet answered the call or is busy.
• The "Consultation" function works in call status.
39
Page 48

Callback? >
Consultation? >
Transfer
To gg le ? >
Functions
Please proceed as shown in the overview on page 39 to use one of
these functions.
Saving a callback
You can use this function to save a callback request if the internal party called is conducting a call or does not answer.
Note:
• The callback is performed automatically by the telephone
system as soon as the called party is free.
• You can save up to five callbacks.
Setting up an enquiry during a call
You can use this function to consult another internal or external party
while a call is in progress.
Transferring a call
You can use this function to forward a call which you answered to another station.
Toggle – switching between two users
You can use this function during an enquiry to switch back and forth
between calling parties as often as needed.
Press the on-hook key to deactivate the toggle function. The two calling parties are now connected to each other.
Conference? >
40
Adding callers to a conference
This function allows you to set up a telephone conference with up to
five calling parties. The calling parties are added one after the other.
Repeat the procedure described in the overview on page 39 for each
calling party.
Page 49

Switching function codes
For Version 2.2 The following table shows the telephone system’s switching func-
tions which you can execute via your mobile telephone by entering
the standard codes displayed.
As of Version 3.0 The following table shows the telephone system’s switching func-
tions which you can execute via your mobile telephone either in interactive mode, in the service menu or by entering the standard codes
displayed.
The individual functions must be enabled. The codes are standard
codes. They can be set differently. For more information, consult your
system administrator.
The successful execution of a switching function is signalled by a crescendo tone sequence whereas a faulty execution is signalled by a decrescendo tone sequence.
Key sequences
Interactive mode
Service menu
+ code Enter the standard codes
Switching functions Interac-
tive mode
Accepting call waiting
Answer a (second) call.
Call waiting
• Without tone
• With tone
Automatic call waiting
• Activate
• Deactivate
Missed calls list
(see page 37)
Saving a phone number
••
•
•
•
•
Service
menu
•
•
•
•
•
•
Standard
code
55
*
87
*
#87
490
*
#490
#82
82
*
41
Page 50

Switching functions Interac-
tive mode
Do not disturb
• Activate
• Deactivate
Avoid being disturbed by calls.
Call forwarding
• Activate
• Deactivate
• All calls
• External calls only
• Internal calls only
Forward calls to another tele-
phone (see page 37).
Call distribution (ACD)
• Register (start of session)
• De-register (end of session)
• Available
• Not available
• Activate wrap up
• Deactivate wrap up
• Activate night destination
• Deactivate night destination
Distribution calls in a team.
Advisory message
• Activate
• Deactivate
(see page 23)
Associated service
Activate or deactivate functions for other telephones.
Associated dialling
Set up connections for other
telephones.
•
•
•
•
•
•
•
•
•
Service
menu
•
•
•
•
•
•
•
•
•
•
•
•
•
•
•
•
•
•
•
Standard
code
97
*
#97
1
*
#1
11
*
12
*
13
*
401
*
#401
402
*
#402
403
*
#403
404
*
#404
69
*
#69
83
*
67
*
42
Page 51

Switching functions Interac-
tive mode
Override
Override a busy connection
and speak.
Reset services for the local
base
Reset activated functions.
Voice calling
Communication with telephone partner via partner’s
loudspeaker in the telephone.
Phone test •
Flex call •
Call trace
Identify an external caller via
the network carrier. The feature must be requested separately.
Send a text message
Display/delete a text message
••
•
•
Service
menu
•#0
•
•
•
•
Standard
code
62
*
80
*
940
*
508
*
84
*
68
*
#68
Text messages sent
(see also page 23).
Conference (up to 5 users)
• Start
• Expand
•End
Add other users (see page
39).
Show user list ••
Clear down conference user
(USA only)
•
•
•
•
•
•
•
•
#68
*
#3
*
3
491
43
Page 52

Switching functions Interac-
tive mode
Call charge display •
Speed dialling
• Dial
• Change
Dial centrally saved speed dialling destinations.
Line
•Transfer
•Enable
To g g l e
Switch between two connections (see page 39).
Silent monitoring (USA only)
Mobile telephone registration (not available in USA)
DTMF dialling (tone dialling)
Send DTMF signals.
Night service
• Activate
• Deactivate
Forward all calls to a fixed destination.
Park
Unpark
Hold call and resume at different telephones.
Page
•Search
•Answer
Locate person using assigned
pocket receivers.
•
••
•
•
Service
menu
•
•
•
•
•
•
•
•
•
•
•
•
Standard
code
65
*
7
*
92
*
43
*
2
*
944
*
942
*
53
*
44
*
#44
56
*
#56
45
*
#45
44
Page 53

Switching functions Interac-
tive mode
Project code
Assign toll connections to certain projects.
Consultation
• Quit and return
• Transfer/pick up
• Return to held party
(see page 39)
Callback
• Request
• Delete
Save a callback (see page 39).
Suppress phone number
• Activate
• Deactivate
Your number or name is not
displayed for external users
(basic comfort telephone only).
Assign phone number
Assign another number to
your own phone. These numbers then appear in the display
of the called party’s telephone.
Prerequisite: the trunk connection is a multi-device connection (not available in USA).
Answer group
• Activate
• Deactivate
Signal calls from other tele-
phones and answer calls at
these telephones.
•
•
•
••
•
•
•
•
•
Service
menu
•
•
•
•
•
•
•
•
Standard
code
60
*
0
*
58
*
#58
86
*
#86
41
*
81
*
#81
45
Page 54

Switching functions Interac-
tive mode
Hunt group/group call
• Activate
• Deactivate
Calls to the hunt group/group
call are no longer signalled at a
removed user’s telephone.
Hunt group: the telephones
ring one after the other.
Group call: the telephones
ring simultaneously.
Actuate switch
• Activate
• Deactivate
To switch on/off certain devic-
es (e.g.relay).
Recall to network (flash)
For analogue lines: insert a
signal before the call number
to be able to use features.
Language selection •
System telephone directory
(see page 37)
Te l e p ho n e
• Lock (system)
•Unlock
• Change the lock code
Prevent unauthorised use.
•
•
•
•
•
Service
menu
•
•
•
•
•
•
•
•
Standard
code
85
*
#85
90
*
#90
51
*
48
*
66
*
#66
93
*
46
Page 55

Switching functions Interac-
tive mode
Appointment (telephone
system)
• Enter
• Delete
Enter a single appointment
within the next 24 hours.
Door opener via DTMF
•Enable
•Lock
Activate door opener with
code.
Door opener via adapter
box
Activate the door opener via
the telephone.
Start transfer •
Call pickup, directed
Answer calls for another
phone on your own phone.
Call pickup, group
Call pickup
Answer calls for telephones
within a call pickup group on
your own phone.
Call forwarding, external
(not available in the USA)
• Activate
• Deactivate
•
•
•
•
Service
menu
•
•
•
•
•
•
•
•
•
Standard
code
46
*
#46
89
*
#89
61
*
59
*
57
*
64
*
#64
Retrieve an external call
from common hold
Transfer a call on hold to the
assigned line.
Central code lock •
•
*
*
63
943
47
Page 56

Entering text
a
Character table
This character table is the internal character table of the mobile telephone. It shows the assignment of all keys:
Press x 1
a
S
a b c 2 ä á à â ã ç
9
d e f 3 ë é è ê
g h i 4 ï í ì î
;
j k l 5
<
m n o 6 ö ñ ó ò ô õ
=
p q r s 7 ß
>
t u v 8 ü ú ù û
?
w x y z 9 ÿ ý æ ø å
C
X
B
A
b: Switch from lower case to upper case letters
. , ? ! 0 + - : ¿ ¡ “ ‘ ; _
a]A
# @ \ & §
: Blank is inserted
Press x 2
Press x 3
Press x 4
Press x 5
Press x 6
Press x 7
M
1
b
* / ( ) < = > %
£ $ ¥ ¤
Press x 8
Press x 9
Press x 10
Press x 11
Press x 12
Press x 13
Press x 14
48
Page 57

Key utilisation
To enter a character, press the appropriate key the relevant number of
times or until the character appears.
The first letter of a word is automatically written in upper case letters.
This is followed by lower case letters.
A character is always inserted to the left of the cursor.
Control the cursor.
Delete the character to the left of the cursor.
A A
Delete the last character (for user-generated text messages only, not
for entries in the telephone directory).
Note:
Characters cannot be deleted or added in the text messages
and advisory messages saved in the telephone system.
49
Page 58

Appendix
Troubleshooting
Some malfunctions can be resolved without outside intervention. The
following table provides a list of such malfunctions.
Error Possible cause Remedy
No display. Mobile telephone not
switched on.
Batteries empty. Charge or replace bat-
No reaction to keystroke.
De-crescendo tone
sequence during input.
The following appears:
Base Search
No ringer at the mobile telephone.
Nothing audible during a call.
The following appears
immediately after the
talk key is pressed:
Connect. Release
No dial tone available;
no calls can be made.
Keypad lock activated.
An incorrect entry
was made.
The mobile telephone
is outside the base radio range; radio signal
too weak.
Mobile telephone not
registered.
Interval between synchronisation attempts
are too long.
Ringer is deactivated. Activate the ringer.
The left side of the
control key was
pressed – the microphone and the receiver inset are muted.
Hicom cordless E is
being used by other
users.
Press on-hook key until confirmation tone
sounds.
teries.
Press hash key until
confirmation tone
sounds.
Repeat key sequence
while watching the
display; where applicable, consult the operating instructions.
Move into radio
range, change location.
Register mobile telephone.
Switch off handset
and switch it back on
again.
Press the "Go Back"
display key to re-activate the microphone
and the receiver inset.
Repeat call later.
50
Page 59

Error Possible cause Remedy
The following, for example, appears:
Base 1
Outgoing and incoming calls and activation/deactivation are
not possible.
Mobile telephone is
blocked.
Remove the batteries
from the mobile telephone and then re-insert them, see page
8.
Cleaning the mobile telephone
To clean the handset and the charging shell, simply wipe them with a
damp or antistatic cloth; never use a dry cloth.
Do not use abrasive cleaning agents!
51
Page 60

Technical data
Hicom cordless EM
Standards DECT in accordance with ETSI, CTR 6, CTR
10, GAP
Number of channels 120 duplex channels
Radio frequency range 1.88 GHz to 1.90 GHz
Duplex operation Time duplex with a 10 ms frame length each
Channel configuration 1728 kHz
Bit rate 1152 kbit/s
Modulation GFSK
Voice encoding 32 kbit/s (ADPCM)
Transmit power 10 mW average power per channel,
250 mW peak power per channel
Range Outdoors approx. 300 m,
indoors approx. 50 m
Mobile telephone
Operating times with
fully charged battery
Permitted environmental conditions for
operation
Weight incl. battery approx. 185 g
Dimensions
(L x W x H)
see page 10
+5 °C to +45 °C
20% to 75% relative humidity
approx. 155 x 53.6 x 36.2 mm
Accessories
Charging shell
For charging the mobile telephone batteries and storing the mobile
telephone safely.
Note:
More information is available on request. Please contact your
nearest Siemens Sales office.
52
Page 61

List of abbreviations
The following is a list of abbreviations used in this manual.
Abbreviation Definition
% Percent
ADPCM Analogue Digital Pulse Code Modulation
°C Degrees Celsius
CTR Common Technical Regulation
DECT Digital Enhanced Cordless
Telecommunications
ETSI European Telecommunications Standard
Institute
EU European Union
gGram
GAP Generic Access Profile
GFSK Gaussian Frequency Shift Key
GHz Gigahertz
HHigh
kbit/s Kilobits per second
kHz Kilohertz
L Length
LED Light Emission Diode
mMetre
mAh Milliampere-hour
mm Millimetre
MHz Megahertz
ms Milliseconds
mW Milliwatt
W Width
53
Page 62

Index
A
Abbreviations 53
Accessories 52
Activate 11
Advisory message 42
Advisory tones 29
Alarm Clock 36
Anniversary 36
Answer group 45
Appointment 47
Assign phone number 45
Associated dialling 42
Associated service 42
Auto Answer 30
Available Memory 21
B
Base selection 31
Batteries
capacity 10
charging 9
charging time 10
inserting 8
life 10
low beep 27
permitted ~ 10
standby mode 10
talk time 10
Battery compartment 8
Battery life 52
Battery low beep
function 27
C
Call
answering 16
rejecting 16
Call charge display 44
Call distribution 42
Call forwarding 37, 38, 42, 47
Call pickup
directed 47
group 47
Call status 4, 39
Call trace 43
Call waiting 41
accepting 41
automatic ~ 41
Callback 37, 39, 45
Capacity 10
Chaining 22
Character table 48
Charging shell 52
Charging status 9
Charging time 10
Cleaning 51
Code lock 47
Codes 41
Conducting calls 14
Conference 39, 40, 43
Confirmation tone
function 27
Connection quality 7
Consultation 45
Control key 2
use 2
D
Date 36
Deactivating 11
Default state 27
Deleting
callback 37
character 49
entry 21
Dial pause 15
Dial status 3, 39
Display
available memory 21
call status 4
on or message status 4
Display keys
use 2
Do not disturb 42
54
Page 63

E
Electronic equipment
interference 7
Enabling a line 44
Enquiry 39, 40
Entering text 48
L
Line
enable 44
transfer 44
Linking 22
Lock code 46
F
Features
Hicom cordless EM 6
mobile telephone 6
Fitting the attachment clip 10
Flex call 43
Forwarding a call 40
Function keys 1
use 1
Function selection
in call status 5
via menus 4
G
Group call 46
H
Handset volume 28
Hicom cordless EM
components 6
features 6
Hunt group 46
I
Internal/external dialling 14
K
Key tones
function 27
Keypad lock 13
Keys
control key 2
display keys 2
function keys 1
M
Missed Anniv. 36
Missed Appoint. 36
Missed calls list 37, 38, 41
Missed dates list 36
Mobile telephone
features 6
N
NET carrier list
dialling 22
Night service 44
Number
deleting 21
Number redial 18
deleting an entry 19
list 18
manual 18
transferring a phone
number 19
O
On or message status 4, 37
Operating statuses 3
Operating times, mobile
telephone 52
Override 43
P
Page
answer 44
search 44
Park 44
Permitted batteries 10
Private automatic branch
exchange 6
55
Page 64

Project code 45
Protective cover 8
R
Radio network
leaving 7
re-registering 7
Radio range 7
Range 52
Range problems 7
Recall to network 46
Registering 13, 44
Reset services 43
Resetting 30
Retrieve
external call 47
Ringer 28
Room monitor 32
S
Safety notes I
Saving a phone number 41
Service menu 3, 41
Setting the language 11
Silent monitoring 44
Sound setting functions 28
Speakerphone mode
activating 17
deactivating 17
setting the volume 17
Speed dialling 44
Standby mode 10
Suppress phone number 45
Switch 46
Switching functions 41
System administrator 12
System telephone
directory 38
System telephone directory 37, 46
Telephone
lock 46
unlock 46
Telephone directory 21
~ of the mobile
telephone 20
~ of the mobile telephone 21
~ of the system 37, 38
available memory 21
deleting 21
deleting an entry 21
dialling 22
new entry 21
using the phone number 21
Test 43
Test du poste 43
Text message 43
Text messages 23, 43
advisory messages 24, 42
creating 25
receiving 25
sending 25
Time 36
Toggle 39, 40, 44
Tone dialling 44
Transfer 39
Transferring a line 44
Transmit power 52
Troubleshooting 50
U
Unit parts II
User list 43
V
Voice calling 43
W
Walkie-talkie mode 33
Warning tone 30
T
Talk time 10
Technical data 52
56
Page 65

3$0%
1P A31003-M1531-B755-1-7619
Enter the following telephone numbers when passing on the device!
In the event of a malfunction: For sales queries:
Printed on recycled paper - doing more for the environment!
This device complies with the requirements of the following EU guidelines:
• 89/336/EC "Electromagnetic Compatibility"
• 73/23/EC "Electric Operating Resources for Use within Specific Voltage Parameters"
and therefore displays the CE symbol.
© Siemens AG 2001 • All rights reserved. • Subject to availability. Right of modification reserved.
Issued by Information and Communication Networks • Hofmannstraße 51 • D-81359 München
Siemens Aktiengesellschaft
Reference no.: A31003-M1531-B755-1-7619 • Printed in the Federal Republic of Germany
Page 66

3$0%
1P A31003-M1531-B755-1-7619
Enter the following telephone numbers when passing on the device!
In the event of a malfunction: For sales queries:
Printed on recycled paper - doing more for the environment!
© Siemens AG 2001 • Subject to availability • Right of modification reserved.
Information and Communication Networks • Hofmannstraße 51 • D-81359 München, Germany
Siemens Aktiengesellschaft
Reference No.: A31003-M1531-B755-1-7619 • Printed in the Federal Republic of Germany
 Loading...