

Page 1
s
Hicom 150
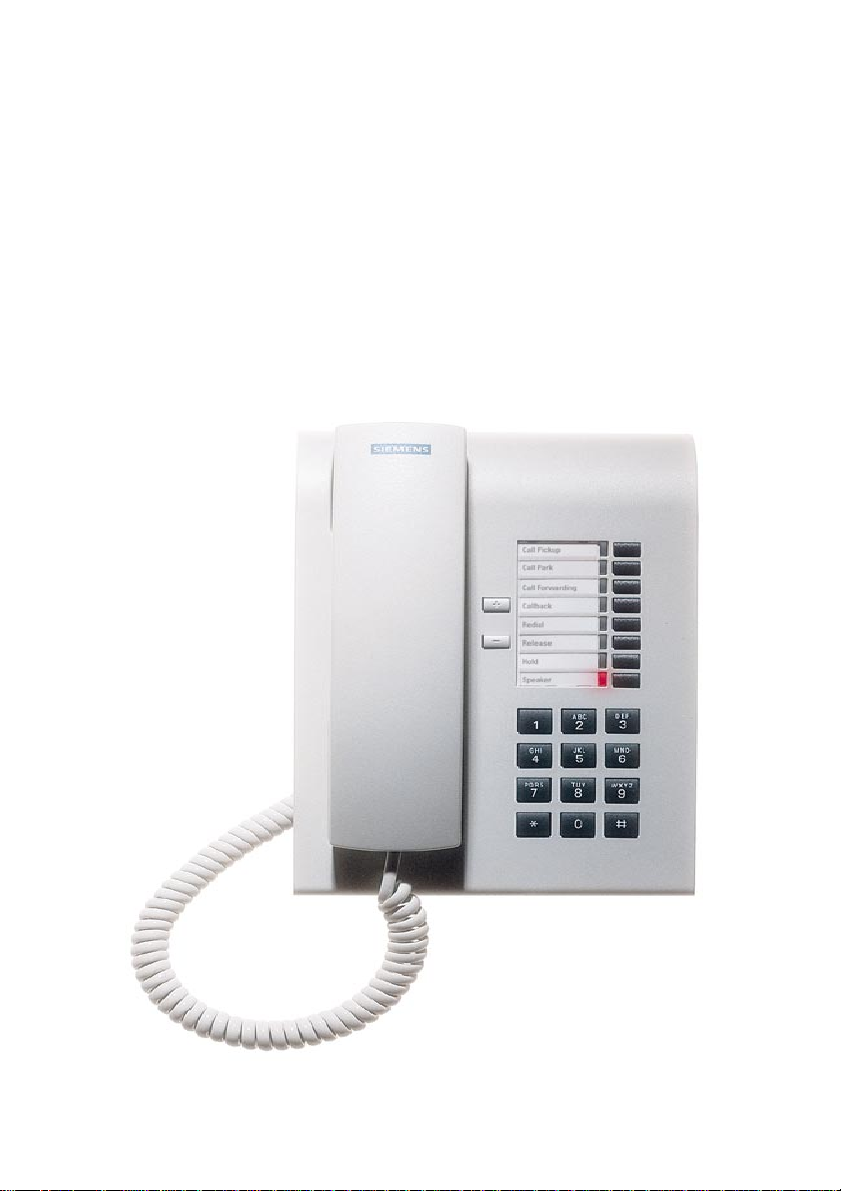
optiset E basic
Page 2

2
Page 3

User Guide
Introduction ..............................................................................................5
Standard Features ...................................................................................6
Internal and External Dialling ...................................................................6
Dialling the Switchboard ...........................................................................6
Call Transfer .............................................................................................7
Enquiry Call ..............................................................................................8
8 Wa y Conference....................................................................................9
Call Pickup .............................................................................................10
Call Park.................................................................................................11
Call Back ................................................................................................12
Call Diversion Features ........................................................................14
Call Forwarding Variable.........................................................................14
Call Forwarding No Answer ....................................................................15
Call Forwarding Busy .............................................................................15
PIN Features ..........................................................................................16
Electronic Telephone Lock......................................................................16
Optional Features .................................................................................. 17
Individual Abbreviated Dialling................................................................17
System Abbreviated Dialling...................................................................18
Last / Stored Number Redial ..................................................................19
3
Page 4

User Guide - Cont’d
Timed Reminder.....................................................................................20
Night Service.......................................................................................... 21
Key Settings (+/–)...................................................................................22
Quick Reference ......................................................................................24
4
Page 5

Introduction
This guide is designed to assist extension users on a Siemens Hicom 150
Communications System to use all authorised features.
Your extension may not be authorised
representative can confirm features that are available to you.
Your extension may also be subject to trunk barring thus restricting where you
may dial.
The optiset E basic digital telephone has 8 preprogrammed keys:Callback Conference
Transfer Call Forward
Release Call Pickup
Park Redial
All other System features are accessed from this telephone by dialling codes
and/or programme keys.
The basic telephone is not equipped with a microphone but does have a
loudspeaker for hands-free dialling.
Please refer to the separate instruction manuals for the optiset E entry,
standard, advance/advance plus and memory telephones.
∗∗
∗ to use all features. The Siemens
∗∗
∗∗
∗ - authorised features are those features that your company has designated
∗∗
for your use and may vary from extension to extension.
5
Page 6

Internal and External Dialling
Handset operation
- lift handset, listen for internal dial tone
- dial the required extension number or external number preceded by
line access code (code is normally 0)
Handsfree operation
Standard Features
- do not lift handset
- dial the required extension number or external number preceded by
line access code (code is normally 0)
- lift handset when called party answers
V Your telephone may have restricted dialling facilities, e.g. trunk calls
may not be permitted.
Dialling the Switchboard
Handset operation
- lift handset, listen for internal dial tone
- dial code for switchboard (code is normally 9)
Handsfree operation
- do not lift handset
- dial code for switchboard (code is normally 9)
- lift handset when operator answers
6
Page 7

Call Transfer
You may transfer an internal or external call from your extension to any other
extension or to the switchboard.
Transfer to a Free Extension (Announcing the Call)
- press Transfer key, listen for internal dial tone
- dial the required extension or switchboard
- when the extension or the switchboard answers, announce
the call and replace handset
- if called party does not answer
- press Transfer key to return to original call
Transfer to a Free Extension (Call not Announced)
- press Transfer key, listen for internal dial tone
- dial the required extension or switchboard
- when you hear ring tone, replace handset
The call has now been transferred. If the ringing extension does not answer
within a predetermined time the call will automatically be transferred back to
your extension.
Transfer to a Busy Extension
- press Transfer key, listen for internal dial tone
- dial the required extension number
- when you hear busy tone, replace handset
The call has now been transferred to the busy extension. If the busy extension
terminates the call within a predetermined time and replaces the handset the
transferred call will ring the extension. If the extension remains busy the call
will automatically be transferred back to your extension.
7
Page 8

Enquiry Call
This feature allows you to hold an existing call, dial another extension or even
an external number, conduct a conversation without the original caller
overhearing, and then return to the original caller.
Activate Enquiry Call
- press Transfer key, listen for internal dial tone
- dial the required extension number or dial 0 and then
the required external number
- conduct your conversation
- press Transfer key to return to the original call
Alternating between Parties (Shuttle)
During an enquiry call you may alternate between both parties
- press Transfer key and
- press Transfer key to alternate between callers
8
∗∗
∗ 79 to return to original caller
∗∗
Page 9

8 Way Conference
This feature allows you to bring up to 7 parties into an existing conversation on
your extension. The 7 parties could be external, internal or a mix of both.
Activate Conference
- you are engaged on a call
- press Transfer key, listen for internal dial tone
- dial the required extension or 0 and the external number
- press Conference key
- conference tone is heard and 3 parties are connected.
Repeat the procedure to add more parties to the conference.
Consult with an internal or external party when busy with a conference
- press Transfer key, listen for internal dial tone
- dial the required extension or 0 and the external number
- consult with party
- press Transfer key
- you are now reconnected to the conference.
9
Page 10

Call Pickup
The call pick up feature allows you to answer any ringing extension in your
pickup group from your telephone.
Activate Call Pickup
An extension within your pickup group is ringing
- Call Pickup LED flashes
- lift handset, listen for internal dial tone
- press Call Pickup key
- you have now answered the call
Activate Call Pick Up Select
A call for an extension which is not in your Pick Up group is ringing
- lift handset, listen for internal dial tone
∗∗
- dial
∗ 22 plus the number of the ringing extension
∗∗
- you will now have answered the call
10
Page 11

Call Park
This feature allows you to Park an external call on your extension to be
retrieved at any extension or from the switchboard.
There are 10 Park positions (0-9 on keypad).
Park a Call
- press Park key plus location number (0-9)
- Park LED on
- replace handset
- Park LED remains on
Retrieve a Parked Call
- Park LED is on
- lift handset, listen for internal dial tone
- press Park key plus location number (0-9)
- Park LED is off
- call is now on the line
If the call is not retrieved it will automatically recall to your extension after a
predetermined time.
Your telephone will ring
- lift handset
- you are now connected to the caller
11
Page 12

Call Back
Call Back requests can be left on extensions which have been rung and not
answered or are busy.
Activate Call Back - Busy
- called extension is busy
- press Callback key
- confirmation tone is heard
- replace handset
The system will automatically call you back when both your extension and the
called extension are free.
- lift handset
- ring tone is heard as the required extension is rung
Should you fail to answer a Call Back that you have activated, the system will
automatically cancel the feature after ringing your extension for a predetermined
time.
Activate Call Back - No answer
- called extension does not answer
- press Callback key
- confirmation tone is heard
- replace handset
When the called party returns to the office and has used the telephone the
system will ring your telephone.
- lift handset
- ring tone is heard as the required extension is rung
12
Page 13

Call Back - Cont’d
Cancel Call Back (Before Ring Back)
- lift handset
- dial # 77
- confirmation tone is heard
- replace handset
13
Page 14

Call Forwarding Variable
This feature allows you to forward or divert your calls immediately to an
extension of your choice.
Programme Call Forwarding
- lift handset, listen for internal dial tone
∗∗
- dial
∗ 34 plus extension number
∗∗
- listen for confirmation tone
- replace handset
When you lift the handset special dial tone will be heard to remind you that the
feature is activated
Call Diversion Features
Cancel Call Forwarding
- lift handset
- dial # 34
- listen for confirmation tone
- replace handset
Calls will now ring as normal on your extension.
14
Page 15

Call Forwarding No Ans wer
When this feature has been programmed your telephone will ring 5 times and
then divert your calls to an extension of your choice.
Programme Call Forwarding No Answer
- lift handset, listen for internal dial tone
∗∗
- dial
∗ 35 plus extension number
∗∗
- listen for confirmation tone
- replace handset
Call Forwarding Busy
This feature will forward your calls to an extension of your choice whenever you
are busy.
Programme Call Forwarding Busy
- lift handset, listen for internal dial tone
∗∗
- dial
∗ 36 plus extension number
∗∗
- listen for confirmation tone
- replace handset
Cancel Call Forwarding No Answer / Busy
- lift handset
- dial # 34
- listen for confirmation tone
- replace handset
15
Page 16

Electronic Telephone Lock
This feature allows you to lock your extension, by dialling your PIN, which
prevents unauthorised use of your extension.
The PIN will be supplied by your System Administrator.
Lock your Extension
PIN Features
- lift handset
∗∗
- dial
∗ 95 and your PIN
∗∗
- listen for confirmation tone
- replace handset
Your extension will now be restricted to local or internal calls only
Unlock your Extension
- lift handset
##
- dial
# 95 and your PIN
##
- listen for confirmation tone
- replace handset
V You will still be able to receive calls when your extension is locked.
16
Page 17

Individual Abbreviated Dialling
In addition to the System Abbreviated dialling lists you may programme 10
additional numbers, under the dial keypad digits 0-9, for your exclusive use.
These numbers will, however, be subject to any trunk barring limits which
apply to your extension.
Programme numbers
∗∗
- dial
∗ 01
∗∗
Optional Features
- enter digit (0-9) under which to store new number
- enter required external number (preceded by 0 for outside line)
- replace handset
Dial numbers
- lift handset, listen for internal dial tone
∗∗
- dial
∗ 10
∗∗
- enter digit (0-9) under which required number is stored
- wait whilst system dials the number
When you enter a number in a location that already has a stored number this
will be deleted and the new number accepted.
17
Page 18

System Abbreviated Dialling
The system allows for the storage of 1000 external telephone numbers. By
utilising the system abbreviated dialling you will be permitted to dial specific
numbers that would be outside your normal trunk barring limits.
Use the System Abbreviated Dialling
- select the relevant access code from your Abbreviated Dialling
Directory
- lift handset, listen for internal dial tone
- dial the relevant code
- wait whilst system dials the number
The system will now dial the required external number, the time taken will vary
according to the type of main exchange to which your Hicom 150 is connected.
∗∗
∗ 11000 -
∗∗
∗∗
∗ 11999
∗∗
18
Page 19

Last / Stored Number Redial
The Hicom 150 allows for 2 types of Number Redial i.e. Last Number Redial
or Stored Number Redial.
The default setting on your telephone is for Last Number Redial.
Contact your System Administrator if Stored Number Redial is required.
Redial last number
The system automatically stores the last number dialled from your telephone.
- lift handset, listen for internal dial tone
- press Redial key
- the number is now automatically dialled by the system
Stored a Number
You have dialled a number and have not been answered or the number is busy,
do not disconnect.
- press Redial key
- listen for confirmation tone
- replace handset
- number is stored for later use
The number will remain stored until another number is stored, thus erasing the
previous number.
Redial the Number
- lift handset, listen for internal dial tone
- press Redial key
- the number is now automatically dialled by the system
19
Page 20

Timed Reminder
This feature allows an extension to store one timed reminder. The system will
then call the extension at the required time.
Programme Timed Reminder
- lift handset, listen for internal dial tone
∗∗
- dial
∗ 99
∗∗
- dial required time e.g. 0945 for 9:45 am
1430 for 2:30 pm
Reminder Callback
- telephone rings with special callback ringing
- lift handset
- replace handset
If not answered your telephone will ring for 40 seconds and then 5 minutes later
will ring again for 40 seconds.
Timed Reminder is now cancelled.
Cancel the Reminder before Ringback
- lift handset
- dial # 99
- listen for confirmation tone
- replace handset
20
Page 21

Night Service
When the designated Night Service extension rings
- lift handset, listen for internal dial tone
∗∗
- dial
∗ 24
∗∗
- you are now connected to the caller
Check with System Administrator if any other type of Night Service is
operational.
21
Page 22

Ke y Settings (+/–)
The Plus and Minus keys allow for the individual setting of the levels of speech,
ringing and ring tones.
Change Speech Volume
- whilst busy on a call
- press + or – keys to adjust Speech volume
- press + and – keys simultaneously to store setting
Change Ringing volume or Ring Tone frequency
- Do not lift handset
- press + and – keys simultaneously
- press 1 and then + or – keys to adjust Ringing volume
- or 2 and then + or – keys to adjust Ring Tone frequency
- press + and – keys simultaneously to store setting
22
Page 23

23
Page 24

Quick Ref erence
eniLedistuO0elbairaVdrawroFllaC
rotarepO9snAoNdrawroFllaC
elttuhSR∗ 97ysuBdrawroFllaC
ecnerefnoCyaW3R∗ 87llalecnac-43#
kcaBllaCR∗ 77pukciPllaC
lecnac-77#tceleSpukciPllaC
kcoLnoisnetxE
kcolnu-edoC&59#eveirter-
ecivreSthgiN
∗ edoC&59
∗ 42
∗ txe&43
∗ txe&53
∗ txe&63
∗ 12
∗ txe&22
kraPllaCR∗ )9-0(&29
∗ )9-0(&29
Siemens Telecommunications (Pty) Ltd. Private Bag X71 Halfway House 1685
24
 Loading...