

Page 1
MODEL
XL-DAB227NH
XL-DAB257NH
MICRO COMPONENT SYSTEM
This Quick Start Guide will help you to correctly install and operate your system.
1
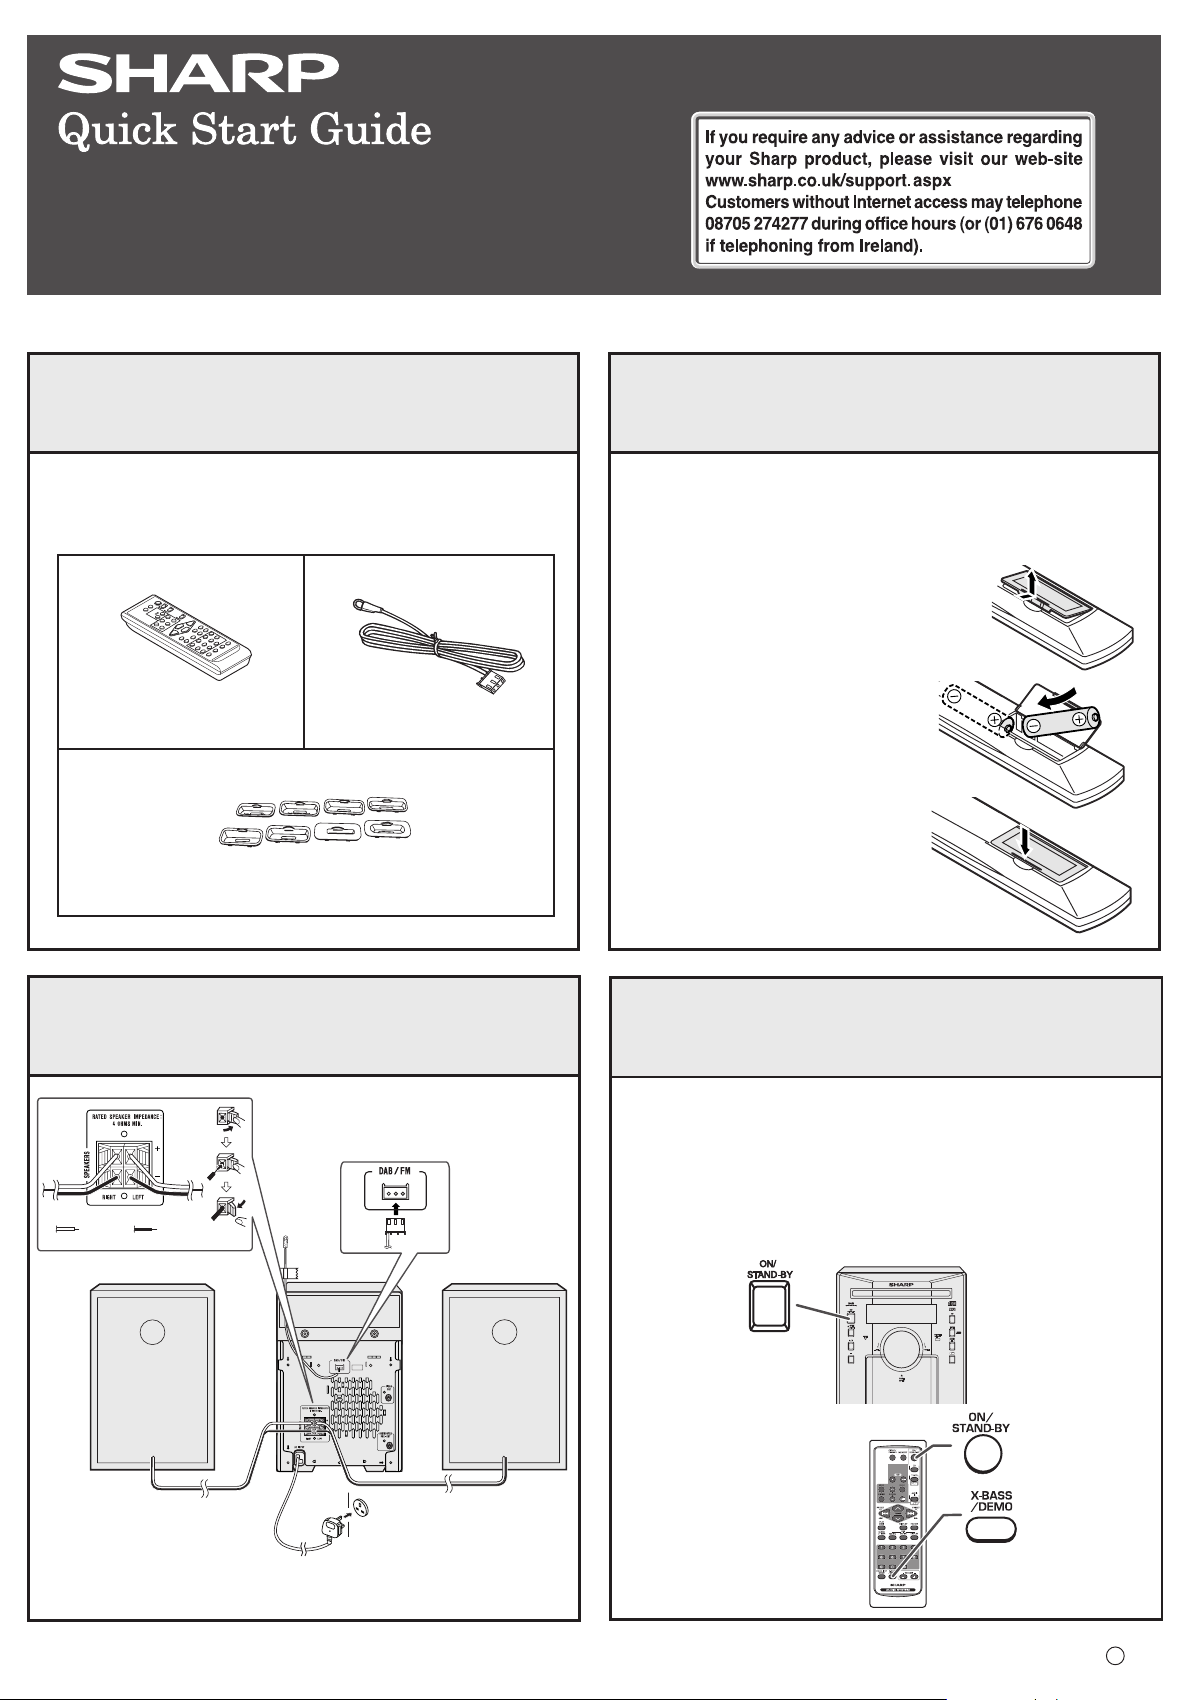
Accessories
2
Remote control battery installation
Use 2 “AA” size batteries (UM/SUM-3, R6, HP-7 or similar).
Batteries are not included.
1 Open the battery cover.
Remote control × 1
iPod adaptor × 8
3
System connections
DAB/FM
Red Black
aerial
DAB/FM aerial × 1
2 Insert the batteries as shown.
3 Close the cover.
4
Turn on your system
The first time the unit is plugged in, the unit will enter the
demonstration mode. You will see words scroll.
1 Press the X-BASS/DEMO button to cancel the demonstration
mode.
2 Press the ON/STAND-BY button to turn the power on.
Right
speaker
Left
speaker
Wall socket (AC 220 - 240V ~ 50 Hz)
TINSEA276AWZZ
08H R AS 1
Page 2
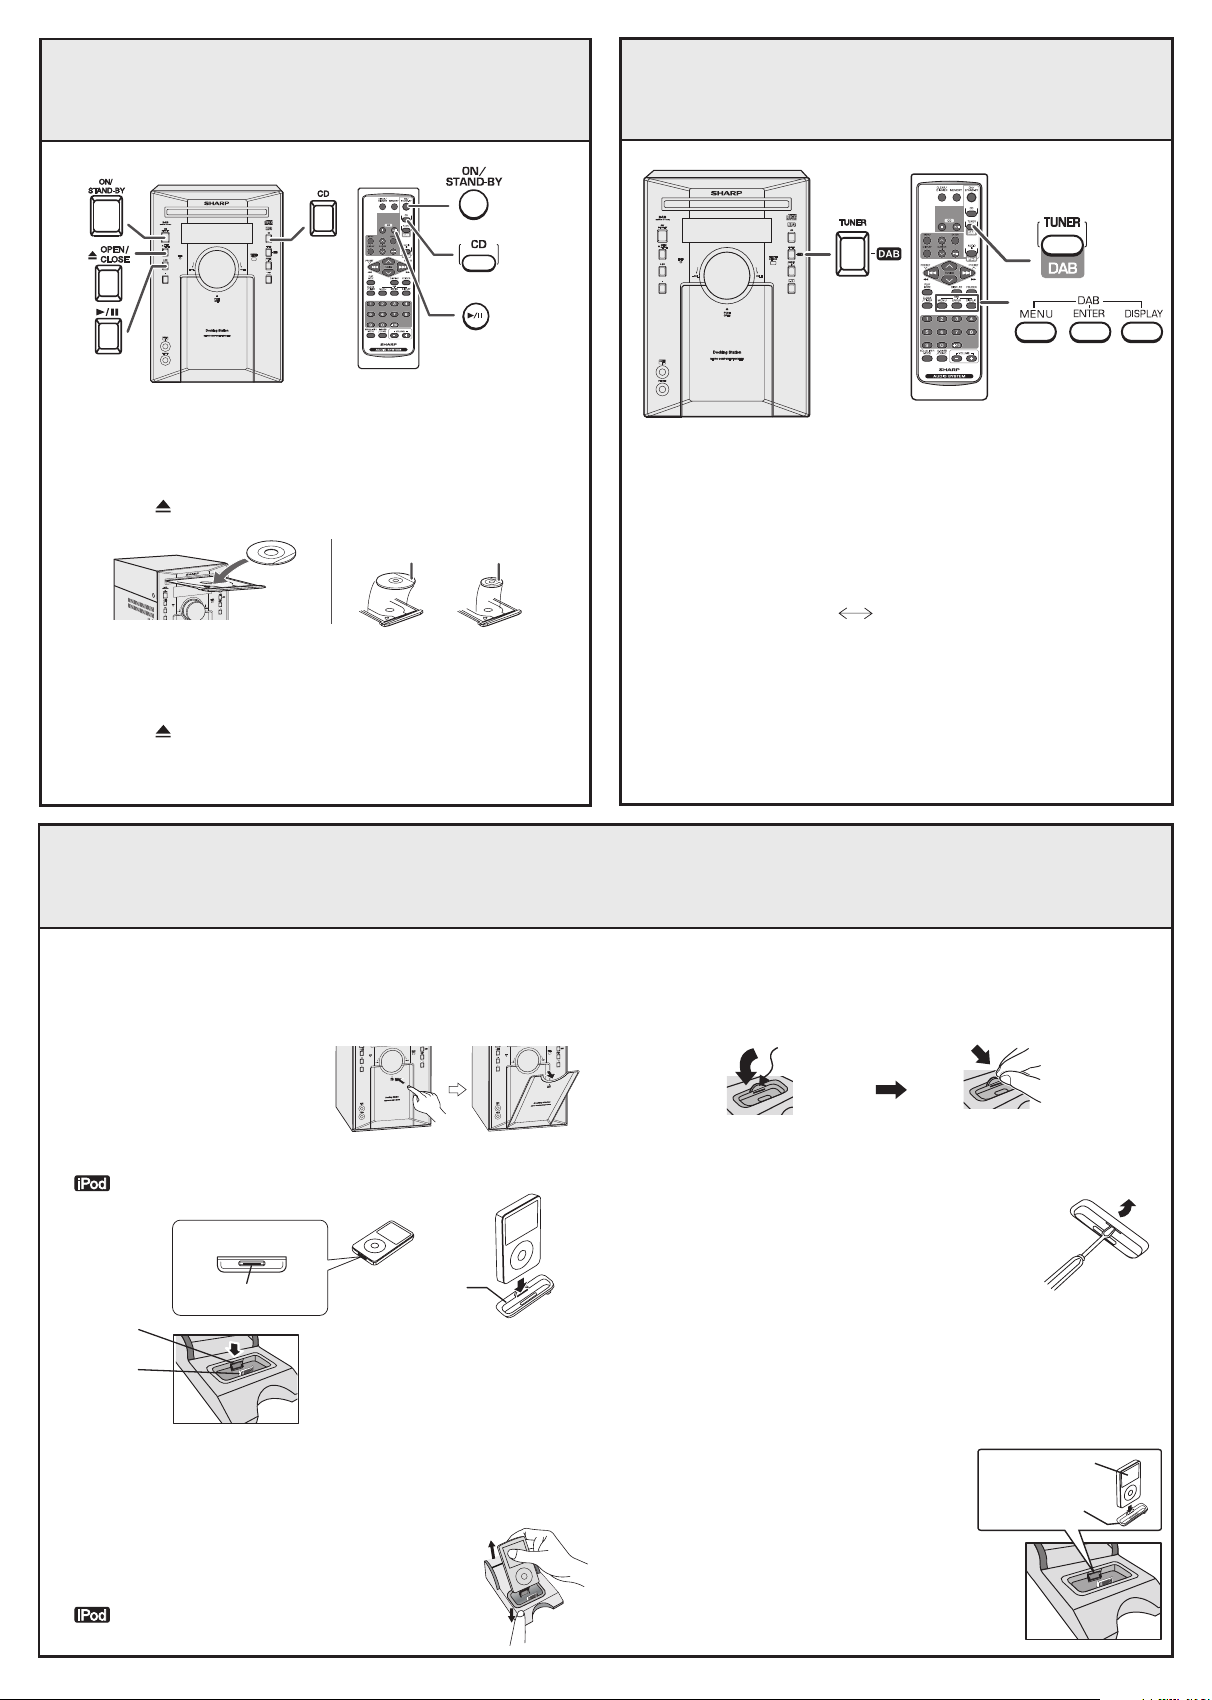
Listening to a CD or MP3/WMA disc
XL-DAB227
1 Press the ON/STAND-BY button to turn the power on.
Listening to the DAB
XL-DAB227
2 Press the CD button.
3 Press the OPEN/CLOSE button to open the disc tray.
12 cm (5")
7
2
2
B
A
D
-
L
X
8 cm (3")
4 Place the disc on the disc tray, label side up.
Be sure to place 8 cm (3") disc in the middle of the disc tray.
5 Press the OPEN/CLOSE button to close the disc tray.
00
66
0
6
00
6 Press the
66
/
button to start playback.
Listening to the iPod
HH
H To insert iPod adaptor
HH
1 Press the ON/STAND-BY button to turn the power on.
2 Open the iPod docking station
by pushing the area marked
7 7
“
7 PUSH OPEN”.
7 7
3 Insert the iPod adaptor into the iPod dock and connect your iPod.
indicator will appear.
iPod (bottom)
iPod
7
2
2
B
A
D
L
X
L-DAB227
X
1 Press the ON/STAND-BY button to turn the power on.
2 Press the DAB MENU button on the remote control to select
“AUTO TUNE”.
3 Within 20 seconds, press the DAB ENTER button.
X X
W W
X
W
X X
4 Press the TUNING (
W W
or
) button to select the mode.
AUTOTUNE UK? AUTOTUNE FULL?
5 Within 20 seconds press the DAB ENTER button.
HH
H To remove iPod adaptor
HH
1 Adaptor with tip.
Hold this tip and pull as direction shown to remove adaptor.
pull up
2 Adaptor without tip.
Insert the tip of a screwdriver (“–” type, small) into
the iPod adaptor hole as shown and lift upward to
remove.
iPod adaptor
adaptor table on page 16 in
the operation manual.
iPod dock
iPod
connector
Dock connector
Note: For details, refer iPod
Caution:
Do not place the iPod docking base without any support from below when
inserting the iPod unit, otherwise it may damage the iPod docking station.
HH
H To remove iPod unit
HH
Press and hold the iPod docking base when removing
the iPod unit.
indicator will disappear.
HH
H iPod playback
HH
1 Press the ON/STAND-BY button to turn the power on.
2 Press the iPod button to select iPod function.
3 Insert iPod unit in iPod dock of main unit.
“DOCK OK” will be displayed for 3 seconds
except for iPod mini and 4th Generation
iPod.
iPod adaptor
Note: The iPod label and iPod indicator
will displayed on display.
4 Press the iPod 0 / 6 button to start playback.
iPod
 Loading...