

Page 1

Using the Operation Buttons
Selecting the Input Signal Source
Operation Buttons
Projector Remote control
INPUT
Adjusting the Volume
Press INPUT 1.2.3 or INPUT 4.5 on the projector or
INPUT (1, 2, 3, 4 or 5) on the remote control to change
the mode.
• When no signal is received, “NO SIGNAL” will be displayed.
When a signal that the projector is not preset to receive is
received, “NOT REG.” will be displayed.
On-screen Display
INPUT 1 Mode INPUT 2 Mode INPUT 3 Mode
INPUT 4 Mode INPUT 5 Mode
Projector Remote control
VOLUME
Muting the Sound
Projector
Remote control
MUTE
Press VOLUME ⴑ/ⴐ to adjust the volume.
On-screen Display
Press MUTE to temporarily turn off the sound.
Press MUTE again to turn the sound back on.
On-screen Display
E-31
Page 2

Superimposing a Black Screen
Projector
Projected Image
sg
BLACK
SCREEN
Remote control
This function can be used to superimpose a black
screen over the projected image.
Blacking out the Projected Image
Press BLACK SCREEN. The screen turns black and
“BLACK SCREEN” is displayed on the screen. To return
to the original projected image, press BLACK SCREEN
again.
Operation Buttons
Displaying a Still Image
Projector Remote control
FREEZE
On-screen Display
This function allows you to instantly freeze a moving
image. This is useful when you want to display a still
image from a computer or video, giving you more time
to explain the image to the audience.
You can also use this function to display a still image
from a computer while you make preparations for the
next computer images to be presented.
1 Press FREEZE to freeze the image.
2 Press FREEZE again to return to the moving image.
E-32
Page 3

Magnifying a Specific Portion of an Image
Operation Buttons
Remote control
On-screen Display
∂/ƒ/ß/©
UNDO
ENLARGE
⳯4
This function allows you to magnify a specific portion of
an image. This is useful when you want to display a
detailed portion of the image.
1 Press ENLARGE ( ) to zoom in. (Press ENLARGE
) to zoom out.)
(
ⴒ1 ⴒ4 ⴒ9 ⴒ16 ⴒ36 ⴒ64
2 To return to ⴒ1, press UNDO.
• If you press ENLARGE ( ) when the zoom is set to ⳯1,
no change will occur. And if you press ENLARGE ( ) when
the zoom is set to ⳯64, no change will occur.
• If the input signal is changed during digital image
magnification, the image will return to ⳯1. The input signal
is changed
(a) when INPUT 1, 2, 3, 4 or 5 is pressed,
(b) when the input signal is interrupted, or
(c) when the input resolution and refresh rate changes.
Press ENLARGE ( )
to zoom in.
Press ∂/ƒ/ß/©.
Pan Around the Screen
Enlarging the screen image and move it around.
When the image is magnified, press ∂/ƒ/ß/© to pan
and scan around the image.
E-33
Page 4
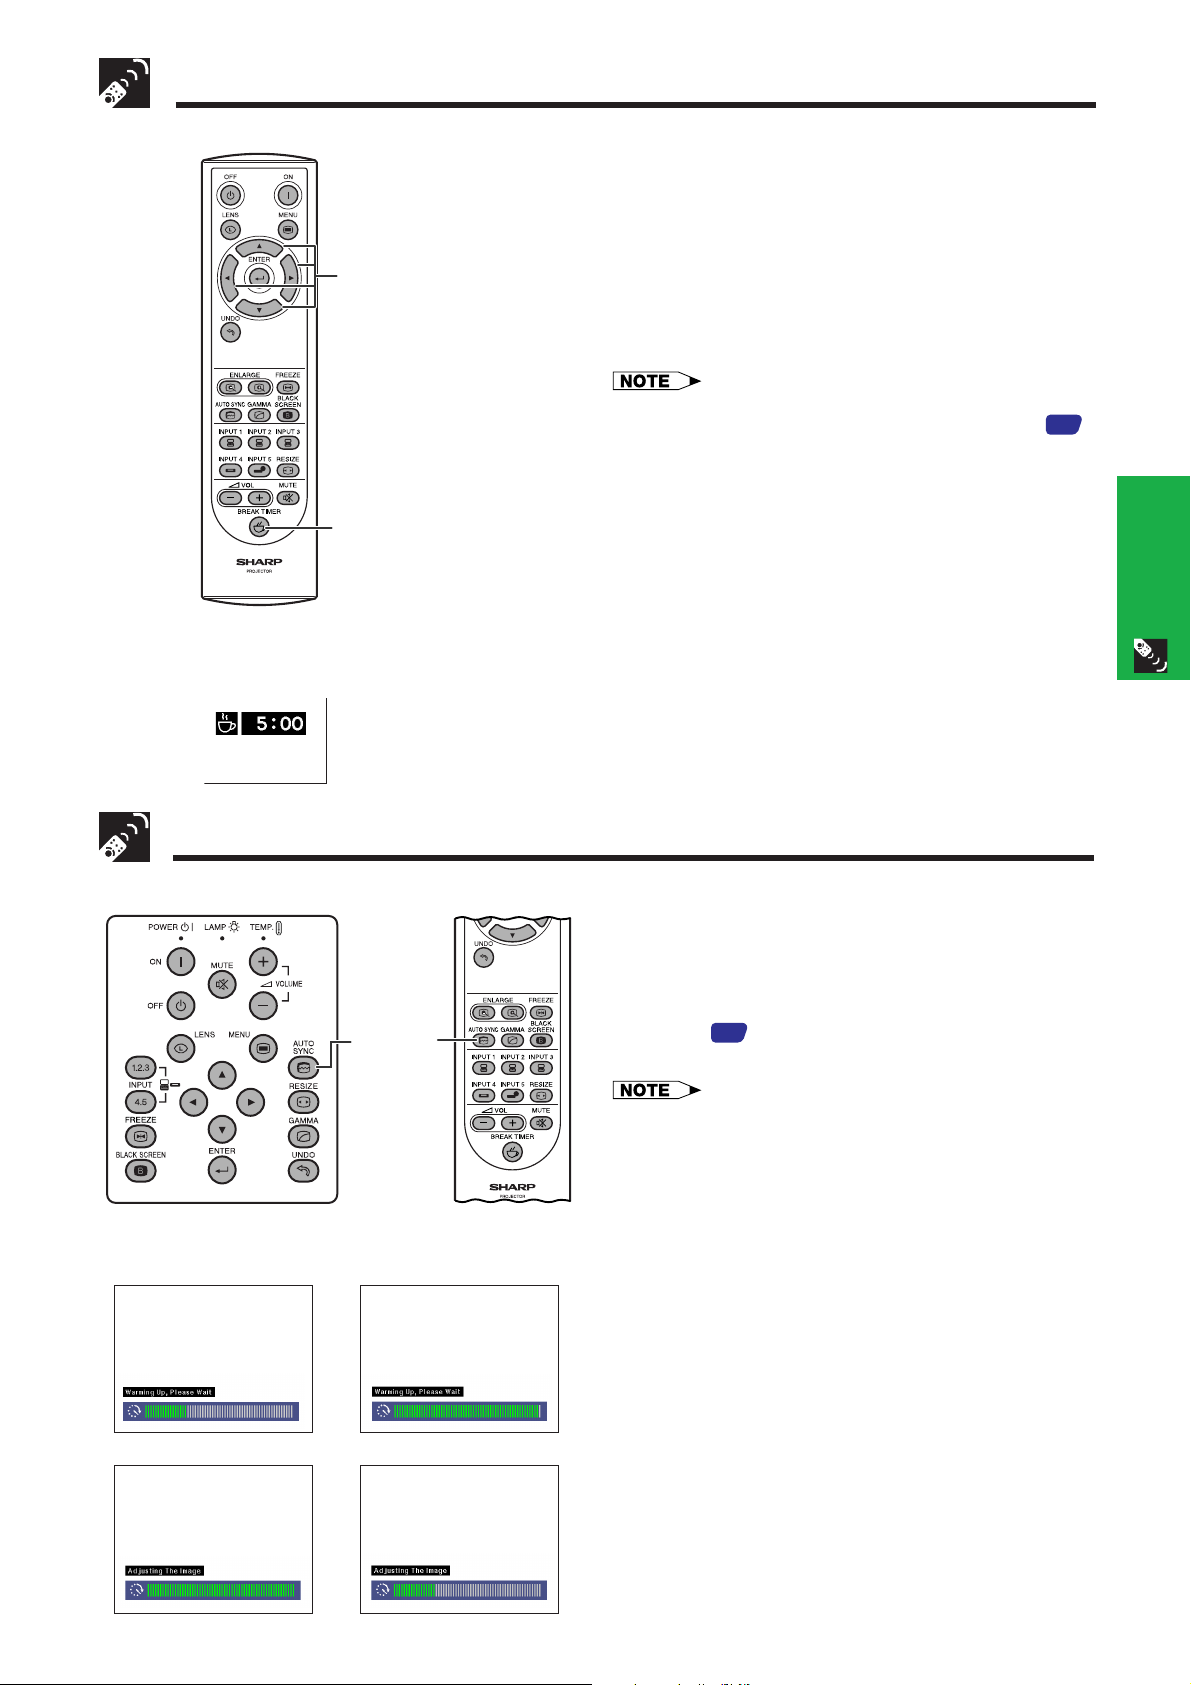
Displaying and Setting the Break Timer
Remote control This function can be used to show the remaining time
for break during meeting.
1 Press BREAK TIMER. The timer starts to count
down from 5 minutes.
• You can set the Break Timer 1 to 60 minutes with ∂/ƒ/
∂/ƒ/ß/©
BREAK TIMER
ß/©. The timer starts to count down as soon as ∂/ƒ/
ß/© is pressed.
2 Press BREAK TIMER to cancel the Break Timer.
• The Break Timer is displayed against the background image
selected in “Selecting a Startup Image.” (See page
49
)
Operation Buttons
On-screen Display
Computer Image Adjustments using AUTO SYNC
Projector Remote control
AUTO
SYNC
This function can be used to automatically adjust a
computer image.
Press AUTO SYNC. During Auto Sync adjustment, the
On-screen Display changes as shown on the bottom
left.
• See page 45 “Auto Sync Adjustment” for setting the Auto
Sync.
• Auto Sync adjustment may take some time to complete,
depending on the image of the computer connected to the
projector.
On-screen Display
g
s
f
E-34
Page 5

Adjusting the Picture Aspect Ratio
COMPUTER
Operation Buttons
4:3 aspect ratio
Other aspect ratios
Projector
UNDO
RESIZE
Remote control
1024 ⳯ 768 – 800 ⳯ 600 SVGA (800 ⳯ 600)
1024 ⳯ 768 ––XGA (1024 ⳯ 768)
1024 ⳯ 768 – 1280 ⳯ 960SXGA (1280 ⳯ 960)
1024 ⳯ 768 – 1600 ⳯ 1200UXGA (1600 ⳯ 1200)
960 ⳯ 768 1024 ⳯ 768 1280 ⳯ 1024SXGA (1280 ⳯ 1024)
This function allows you to modify or customize the
picture display mode to enhance the input image.
Depending on the input signal, you can choose
NORMAL, FULL, DOT BY DOT, BORDER, STRETCH or
SMART STRETCH image.
1 Press RESIZE. Each time RESIZE is pressed, the
picture mode changes as shown below.
2 To return to the standard image, press UNDO while
“RESIZE” is displayed on the screen.
FULLNORMAL DOT BY DOT
•“NORMAL” is fixed when XGA (1024 ⳯ 768) signals are entered.
Output screen image
NORMAL
Input Signal
Resolution lower
than XGA
4:3 aspect ratio
XGA
4:3 aspect ratio
Resolution higher
than XGA
4:3 aspect ratio
Projects a full screen image
while maintaining the
aspect ratio.
Projects a full screen image
while ignoring the
FULL
aspect ratio.
DOT BY DOT
Projects the original
resolution signal of the image.
E-35
SXGA
(1280 ⳯ 1024)
Page 6

Adjusting the Picture Aspect Ratio
VIDEO
NORMAL BORDER STRETCH SMART STRETCH
480I, 480P, 580I, 580P,
NTSC, PAL, SECAM
720P, 1035I, 1080
•“STRETCH” is fixed when 720P, 1035I or 1080I signals are entered.
* The Digital Shift function can be used with these images.
4:3 aspect ratio
Letter box, squeeze
I
16:9 aspect ratio
Input Signal
4:3 aspect ratio
1024 ⳯ 768 768 ⳯ 576*
––
NORMAL
Projects a full screen image.
Projects 4:3 image fully in
STRETCH (the following
BORDER
column) image.
1024 ⳯ 576*
Output screen image
1024 ⳯ 576*
–
STRETCH
Projects 16:9 image evenly
over entire screen (top/
bottom black bands).
SMART STRETCH
Projects the image fully in a 16:9 screen by
enlarging only the surrounding areas while
keeping the aspect ratio in the middle part of
the image at 4:3.
Operation Buttons
480I, 480P, 580I, 580P,
NTSC, PAL, SECAM
720P, 1035
I
, 1080
I
Letter box
Squeeze
16:9 aspect ratio
E-36
Page 7

Gamma Correction Function
STANDARD
Operation Buttons
Projector • Gamma is an image quality enhancement function
Remote Control
that offers a richer image by brightening the darker
portions of the image without altering the brightness
UNDO
of the brighter portions.
• Four gamma settings are available to allow for
differences in the images displayed and in the
GAMMA
brightness of the room.
• When you are displaying images with frequent, dark
scenes, such as a film or concert, or when you are
displaying images in a bright room, this feature makes
the dark scenes easier to see and gives the
impression of greater depth in the image.
Gamma Modes
Gamma modeSelected Mode
On-screen Display
(Example: RGB mode)
STANDARD
PRESENTATION
CINEMA
CUSTOM
Standard picture without gamma correction.
Brightens darker portions of image for more
enhanced presentations.
Gives greater depth to darker portions of image
for a more exciting theater experience.
Allows you to adjust gamma value using Sharp
Advanced Presentation Software.
PRESENTATION
CINEMA
CUSTOM
sss
1 Press GAMMA. Each time GAMMA is pressed,
the gamma level toggles as shown on the left.
2 To return to the standard image, press UNDO while
“GAMMA” is displayed on the screen.
• The CUSTOM setting of VIDEO mode optimizes the video
source to reproduce the image more beautifully. It darkens
bright portions of the image and gives greater depth to
darker portions of the image.
Select CUSTOM as your default setting if you prefer a
smooth textured image to a sharply contrasted one.
• STANDARD and CINEMA settings of VIDEO mode (except
COMPONENT 480P/580P/720P/1035I/1080I) incorporate a
DYNAMIC GAMMA function for optimizing GAMMA
correction frame by frame in real time, thus providing a more
beautiful image.
• PRESENTATION settings are the same for both RGB and
VIDEO modes.
E-37
 Loading...