

Page 1

MODEL
UX-P710
UX-A760
FACSIMILE
OPERATION MANUAL
Page 2
(EU Only)
To urządzenie spełnia wymagania dyrektywy 1999/5/EC.
Η συσκευή αυτή ανταποκρίνεται στις απαιτήσεις των οδηγια 1999/5/ΕK.
Acest echipament este în conformitate cu cerinţele impuse prin Directiva 1999/5/EC.
Това оборудване отговаря на изискванията на Директива 1999/5/EО.
This equipment complies with the requirements of Directive 1999/5/EC.
To urz ądzenie pracuje w publicznej sieci telefonicznej zgodnie ze standartami ES203021.
Αυτή είναι µια συσκευή φαξ που λειτουργεί σύµφωνα µε τα αναλογικά δηµόσια τηλεφωνικά δίκτυα µεταγωγής που
ακολουθούν το Πρότυπο ES203021.
Acesta este un fax care operează în reţelele telefonice analogice comutate publice care respectă standardul
ES203021.
Тов а е факсова машина, която работи по аналоговите публични комутируеми телефонни мрежи, следващи
стандарта ES203021.
This is a facsimile product operating in analogue public switched telephone networks which follow the ES203021
Standard.
Deklaracja Zgodności jest dostępna pod adresem.
Προβολή της ∆ήλωσης Συµµόρφωσης µπορεί να γίνει στην ακόλουθη διεύθυνση URL.
Declaraţia de conformitate poate fi vizualizată la următoarea adresă URL.
Декларацията за съвместимост можете да видите на следния URL адрес.
The Declaration of Conformity can be viewed at the following URL address.
http://www.sharp.de/doc/UX-P710.pdf
http://www.sharp.de/doc/UX-A760.pdf
Autoryzowany przedstawiciel odpowiedzialny za rynek Unii Europejskiej
Υπεύθυνος εξουσιοδοτηµένος αντιπρόσωπος για την Κοινοτική Αγορά της Ευρωπαϊκής Ένωσης
Reprezentantul autorizat pentru Uniunea Europeană
Упълномо щен представител, отговарящ за Общия пазар на EC
Authorized representative responsible for the European Union Community Market
SHARP ELECTRONICS (Europe) GmbH
Sonninstraße 3, D-20097 Hamburg
Datalight is a registered trademark of Datalight, Inc.
TM
FlashFX
Copyright 1993 - 2004 Datalight, Inc. All Rights Reserved.
U.S. Patent Office 5.860.082/6.260.156
is a trademark of Datalight, Inc.
Page 3

Table of Contents
English
Introduction 2
A Look at the Operation Panel 5
1. Installation 8
Unpacking Checklist. . . . . . . . . . . . . . 8
Setup . . . . . . . . . . . . . . . . . . . . . . . . . 8
Imaging Film. . . . . . . . . . . . . . . . . . . . 9
Loading Paper . . . . . . . . . . . . . . . . . 12
Initial Settings. . . . . . . . . . . . . . . . . . 13
Setting the Reception Mode . . . . . . . 14
Volume Adjustment . . . . . . . . . . . . . 15
Flash Select Setting For PBX. . . . . . 16
Language Select Setting . . . . . . . . . 16
2. Sending Faxes 17
Transmittable Documents . . . . . . . . 17
Loading the Document . . . . . . . . . . . 17
Resolution and Contrast. . . . . . . . . . 18
Sending a Fax: Normal Dialling . . . . 19
Storing Numbers . . . . . . . . . . . . . . . 20
Sending a Fax: Auto Dialling . . . . . . 23
Making Phone Calls . . . . . . . . . . . . . 25
3. Receiving Faxes 26
Using TEL/FAX (T/F) Mode . . . . . . . 26
Using FAX Mode . . . . . . . . . . . . . . . 27
Using TEL Mode . . . . . . . . . . . . . . . 27
Using A.M. Mode (UX-A760) . . . . . . 30
Reception to Memory . . . . . . . . . . . . 30
4. Answering System (UX-A760
only) 32
Recording an OGM . . . . . . . . . . . . . . 32
Using the Answering System . . . . . . 32
Answering System Settings . . . . . . . 34
Override Ringing . . . . . . . . . . . . . . . . 35
Remote Operations. . . . . . . . . . . . . . 36
5. Making Copies 39
6. Caller ID (Requires Service) 40
Activating Caller ID . . . . . . . . . . . . . . 40
Caller ID List . . . . . . . . . . . . . . . . . . . 40
Blocking Calls . . . . . . . . . . . . . . . . . . 42
7. Key Lock Function 44
8. Maintenance 46
Cleaning the Machine . . . . . . . . . . . . 46
Cleaning the Print Head and Rollers. 47
9. Troubleshooting 50
Problems and Solutions . . . . . . . . . . 50
Messages and Signals . . . . . . . . . . . 54
Clearing Paper Jams . . . . . . . . . . . . 57
Quick Reference Guide 60
Index 61
1
Page 4

Introduction
Specifications
Imaging film Initial sample roll (included with machine):
Yields approx. 20 A4 pages
Replacement roll (not included):
UX-71CR (30 m x one roll)
UX-72CR (30 m x two rolls)
(one roll yields approx. 90 A4 pages)
Paper tray capacity
Recording system
Effective printing width 205 mm max.
Memory capacity
Modem speed 14,400 bps with auto fallback to lower speeds.
Transmission time* Approx. 9 seconds
Compatibility ITU-T (CCITT) G3 mode
Compression scheme MH, H2, MMR
Automatic dialling 100 numbers; 3 Rapid Keys
Effective scanning width 205 mm max.
Scanning resolution Horizontal: 8 pels/mm
Approx. 10 A4 sheets (80 g/m
(at room temperature)
Thermal transfer recording
UX-P710: Approximately 40 average pages
UX-A760: Approximately 50 average pages with no
voice messages recorded, or 15 minutes of voice
messages (including OGMs) with no documents in
memory (maximum of 30 voice messages).
Vertical:
Standard: 3.85 lines/mm
Fine /Halftone: 7.7 lines/mm
Super fine: 15.4 lines/mm
2
)
Halftone (greyscale) 64 levels
*Based on Sharp Standard Chart at standard resolution, excluding time for protocol signals (i.e.,
ITU-T phase C time only)
2
Page 5

Applicable telephone line
Analog public switched telephone network
PBX
(ES203021) /
Reception modes
TEL/FAX,TEL, FAX, A.M.
(A.M. mode is only available on the UX-A760)
Automatic document
A4: 10 sheets max. (80 g/m
2
)
feeder
Contrast control Automatic/Dark selectable
Copy function Ye s
Display 16-digit LCD display
Power requirements 220-230 V AC, 50 Hz
Noise emission
Less than 70 dBA (measured according to EN ISO
7779)
Power consumption Standby: 1.5 W (only when CID and fax remote
reception are set to NO)
Maximum: 90 W
Operating temperature 5 - 35°C
Humidity 30 - 85% RH
Dimensions (without
attachments)
Width: 296 mm
Depth: 180 mm
Height: 86 mm
Weight (without
Approx. 2.3 kg
attachments)
As a part of our policy of continuous improvement, SHARP reserves the right to make design and
specification changes for product improvement without prior notice. The performance
specification figures indicated are nominal values of production units. There may be some
deviations from these values in individual units.
Important: This machine is not designed for use on a line which has call waiting, call
forwarding, or certain other special services offered by your telephone company (errors
may occur during transmission and reception of faxes).
This machine is not compatible with digital telephone systems.
3
Page 6

Important safety information
Do not disassemble this machine or attempt any procedures not described in this
manual. Refer all servicing to qualified service personnel.
Do not install or use the machine near water, or when you are wet. For example, do not
use the machine near a bath tub, wash bowl, kitchen sink or laundry tub, in a wet
basement, or near a swimming pool. Do not spill any liquids on the machine.
Unplug the machine from the power outlet and telephone socket and consult a
qualified service representative if any of the following situations occur:
- Liquid has been spilled into the machine or the machine has been
exposed to rain or water.
- The machine produces odors, smoke, or unusual noises.
- The power cord is frayed or damaged.
- The machine has been dropped or the housing damaged.
Do not allow anything to rest on the power cord, and do not install the machine where
people may walk on the power cord.
This machine must only be connected to a
Connecting it to any other kind of outlet will damage the machine.
Never insert objects of any kind into slots or openings on the machine. This could
create a risk of fire or electric shock. If an object falls into the machine that you cannot
remove, unplug the machine and consult a qualified service representative.
Do not place this machine on an unstable cart, stand or table. The machine could be
seriously damaged if it falls.
Never install telephone wiring during a lightning storm.
Never install telephone sockets in wet locations unless the socket is specifically
designed for wet locations.
Never touch bare telephone wires or terminals unless the telephone line has been
disconnected at the network interface.
Use caution when installing or modifying telephone lines.
Avoid using a telephone (other than a cordless type) during an electrical storm. There
may be a remote risk of electric shock from lightning.
Do not use a telephone to report a gas leak in the vicinity of the leak.
The power outlet must be installed near the equipment and must be easily accessible.
The machine does not have a power on/off switch, so the power is turned on and off by
simply plugging in or unplugging the power cord.
220-230 V AC, 50 Hz, earthed outlet.
4
Page 7
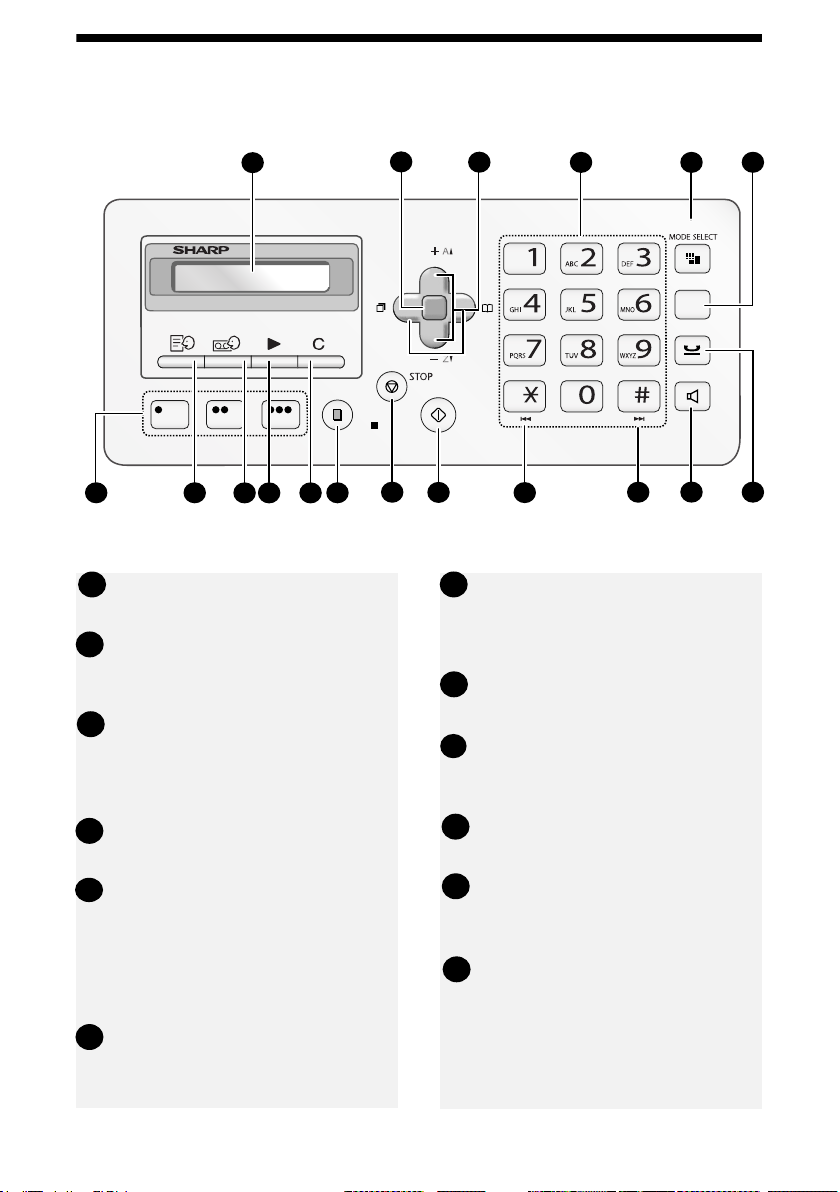
A Look at the Operation Panel
2
COPY/
HELP
2
?
3
F
START
14
4
15
1
7
8
9 10 11
12
Note: The above illustration shows the operation panel of the UX-A760.
Display: This displays messages to
1
help you operate the machine.
Rapid Keys: Numbers stored in the
7
phonebook can be assigned to
these keys for one-touch dialing (p.
Function key: Press this key
2
23).
followed by the arrow keys to select
special functions and settings.
MEMO key: Press to record a
8
memo (UX-A760 only).
Arrow keys: Use to scroll through
3
and select settings, and to search
for numbers in the phonebook (p.
23).
ANNOUNCE key: Press to record a
9
greeting (outgoing message) (UXA760 only).
5
R
1613
17
6
18
Number keys: Use to dial fax
4
numbers.
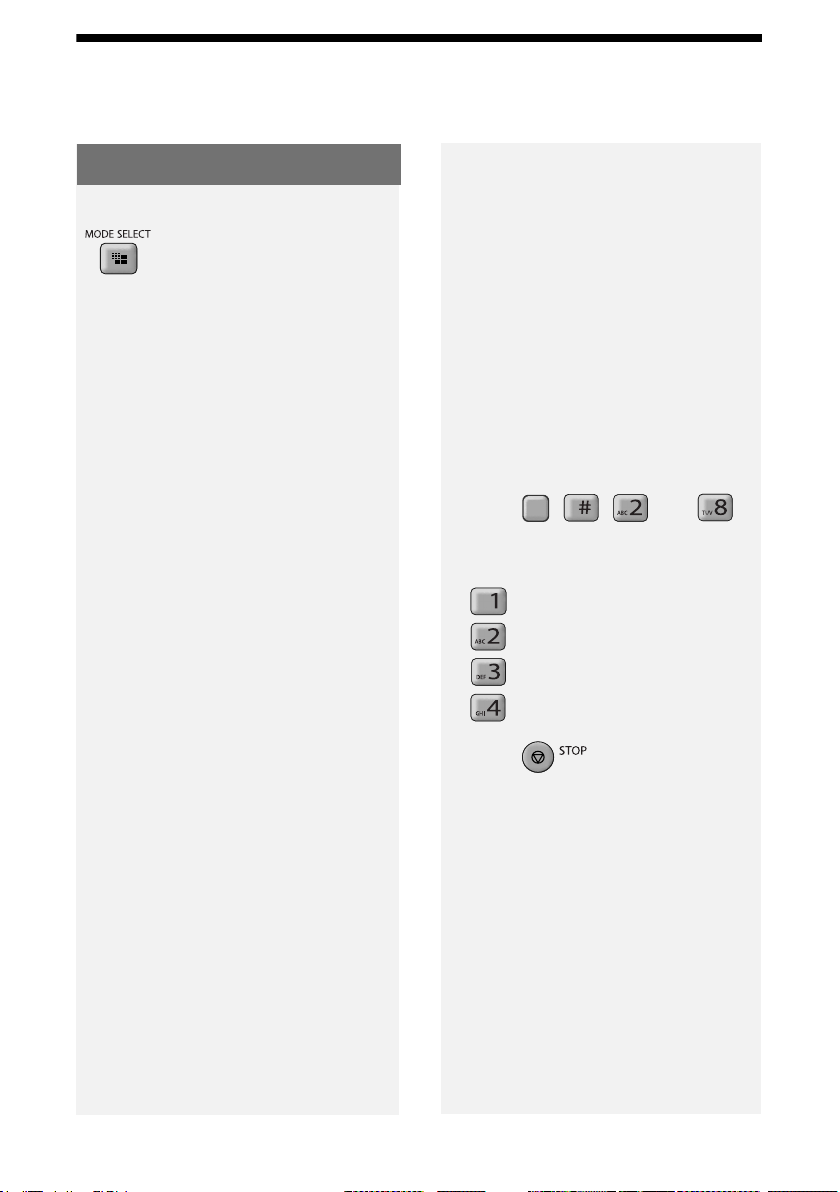
MODE SELECT key
5
When a document is in the feeder,
press to adjust the scanning
resolution (p. 18). At any other time,
press to select the reception mode
(p. 14).
R key: If you are on a Flash-type
6
PBX, use this key to dial out (page
19).
PLAY key: Press to play messages
10
(UX-A760 only).
DELETE key: Press to delete
11
various data from the machine (UXA760 only).
COPY/HELP key: When a
12
document is in the feeder, press to
make a copy of the document (p.
39). At any other time, press to print
out the Help List, a quick reference
guide to the operation the machine.
5
Page 8

STOP key: Press to cancel an
13
operation before it is completed.
START key: Press after dialling to
14
send a fax (p. 19).
REPEAT key: Press while listening
15
to a message to repeat it (UX-A760
only).
SKIP key: Press while listening to a
16
message to skip it (UX-A760 only).
Monitoring phone conversations
SPEAKER key: Press before
17
dialing to listen to the line and fax
tones through the speaker when
faxing (Normal Dialling, p. 19).
Note: This is not a speakerphone.
It cannot be used for speaking.
HOLD key (UX-A760)
18
HOLD/DELETE key (UX-P710):
Press during a call to put the call on
hold.
On the UX-P710, this key is also
used to delete various data from the
machine.
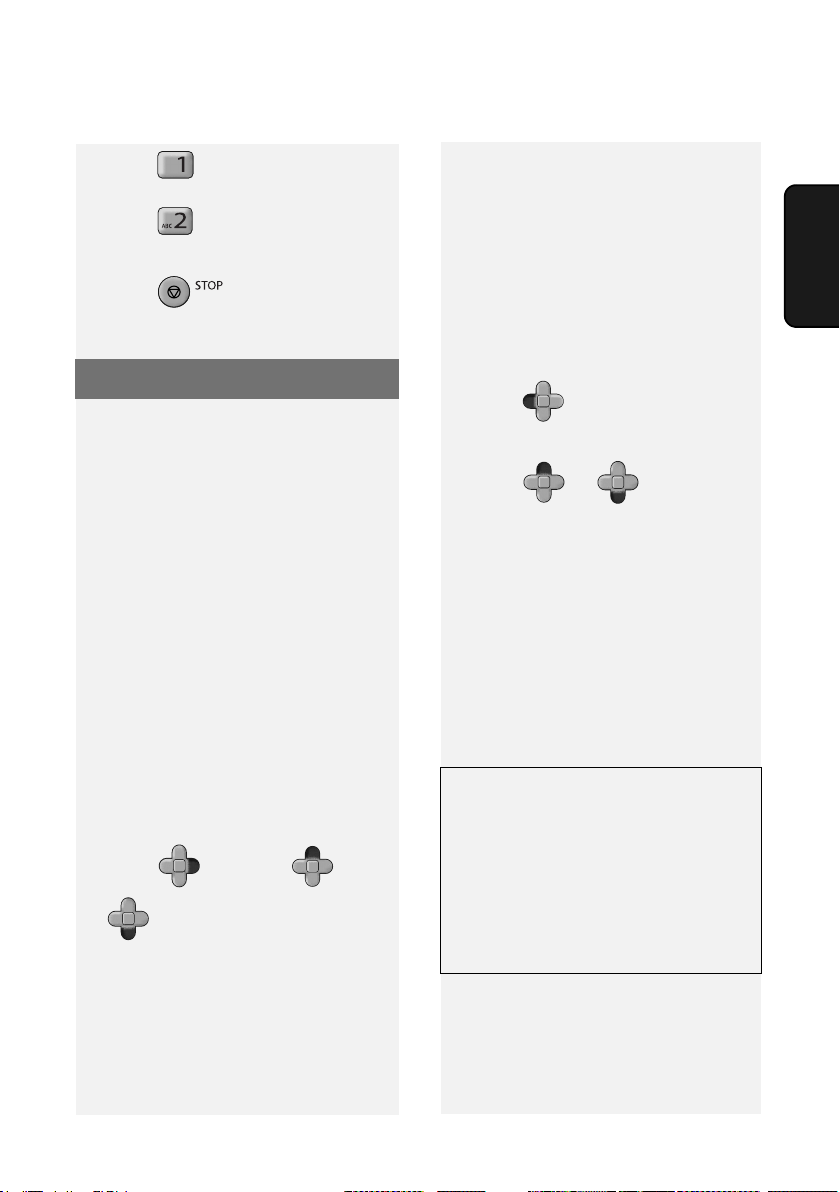
When speaking through the handset, you can press to allow a third person to
listen to the conversation through the speaker. (To turn off the speaker, press the
key again.)
To adjust the volume of the speaker when monitoring a conversation, press
F
or (the volume reverts to the lowest setting each time the handset is
replaced).
Note that the speaker cannot be used for speaking; it is only for listening.
To avoid feedback (a loud howling sound), be sure to turn off the speaker (press
once again) before you replace the handset.
6
F
F
Page 9

Entering letters
When the display prompts you to enter a name or other text, press the number
keys for each letter as shown below.
Note: To enter a number in a name, press and then press the desired
number. To switch back to letter entry mode, press again. (“ABC” appears at
F
F
the right of the display when letter entry mode is selected, and “123” appears
when number entry mode is selected. )
A =
B =
C =
D =
E =
F =
G =
H =
I =
J =
K =
L =
M =
Example: SHARP = 7777 44 2 777 7
♦ To enter two letters in succession that require the same key, press after
N =
O =
P =
Q =
R =
S =
T =
U =
8
TUV
V =
8
TUV
W =
X =
Y =
Z =
8
TUV
F
F
entering the first letter to move the cursor to the right.
♦ To backspace and clear a mistake, press on the UX-P710, or
C
on the UX-A760.
♦ To enter a lower case letter, continue pressing the key for the letter until the
lower case letter appears.
♦ Press repeatedly to enter , : ! ? & / ( ) [ ] (space)
Press repeatedly to enter @ . / - _
Note: When is pressed repeatedly, national characters may also appear
after the above symbols. This depends on the language that is selected (see
page 16). National characters are not available for all languages.
7
Page 10
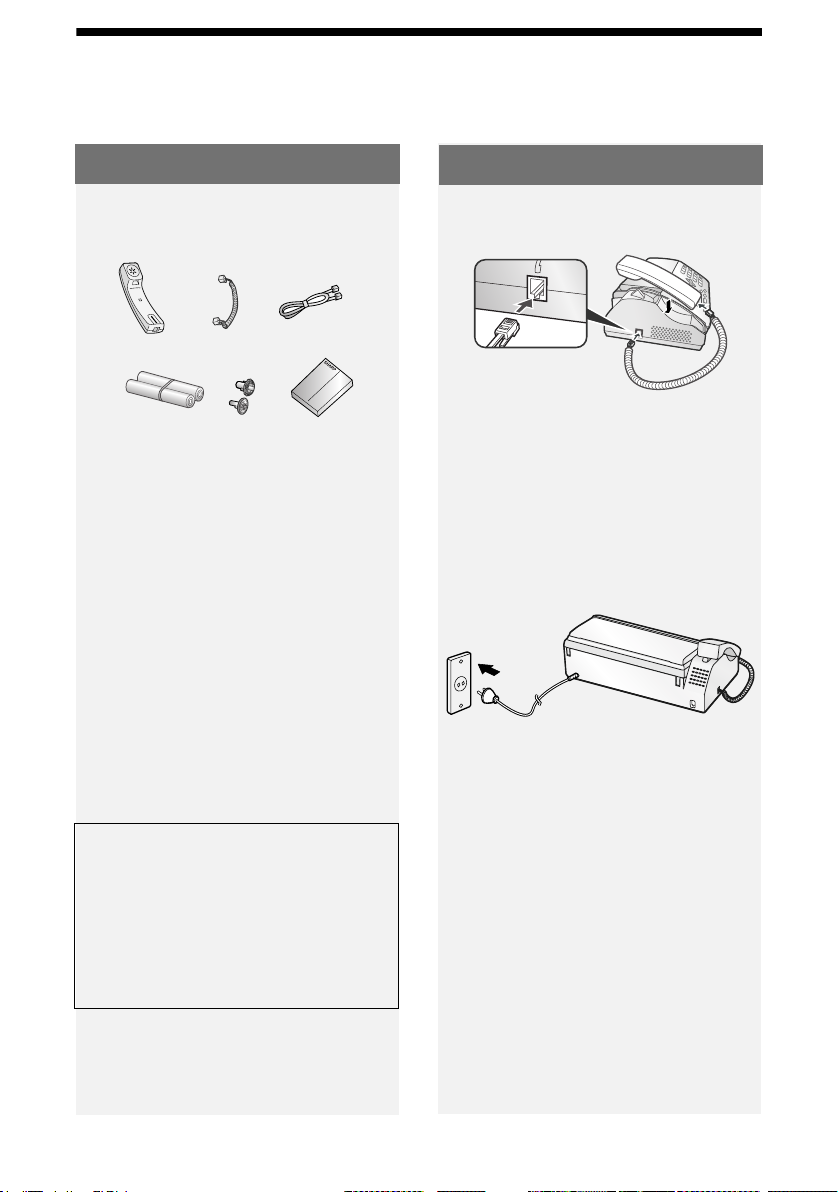
Unpacking Checklist
1. Installation
Unpacking Checklist
Handset
Sample roll of
imaging film (already
loaded in machine)
Handset
cord
Points to keep in mind when
setting up
Phone
line cord
Manual
♦ Do not place the machine in direct
sunlight.
♦ Do not place the machine near
heaters or air conditioners.
♦ Keep dust away from the machine.
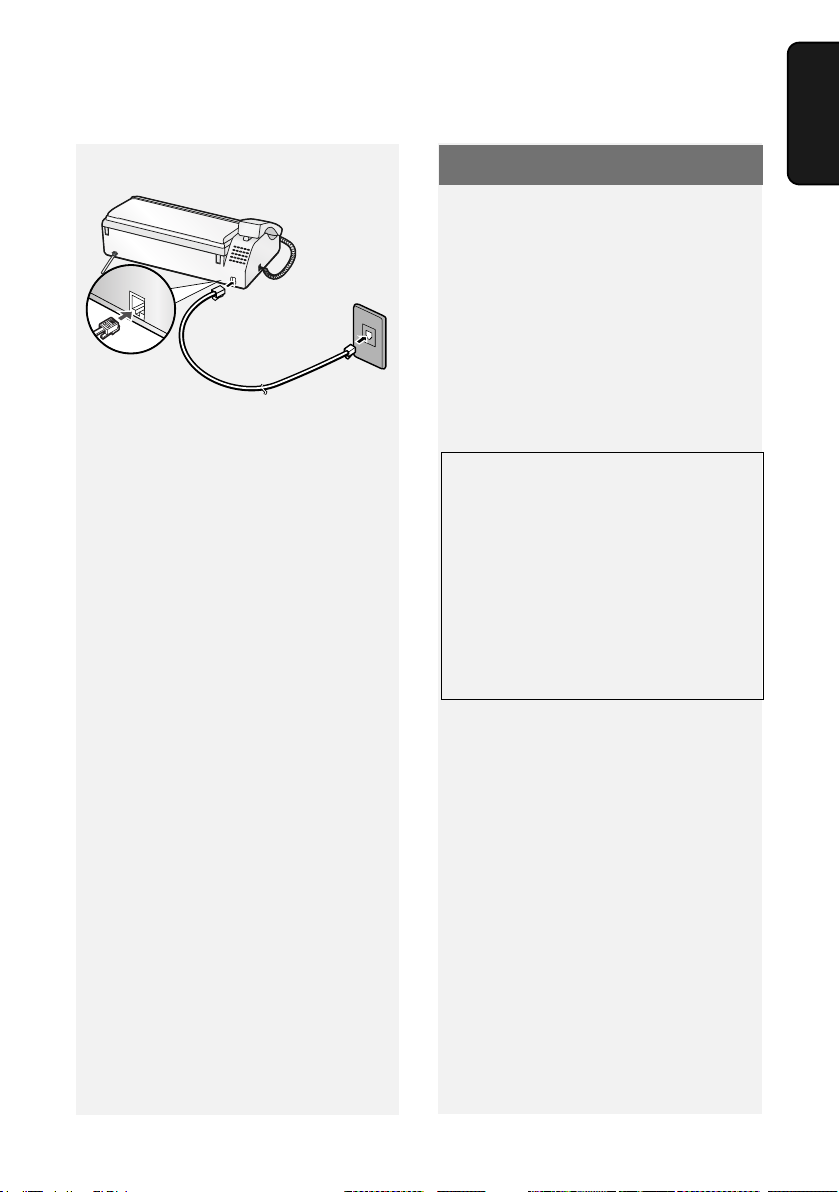
Setup
Connecting the handset
Connecting the power cord
Plug the power cord into a 220-230 V,
, earthed AC outlet.
50 Hz
♦ The power outlet must be installed
near the equipment and must be
easily accessible.
♦ Keep the area around the machine
clear.
About condensation
If the machine is moved from a cold to a
warm place, condensation may form on
the scanning glass, preventing proper
document scanning. To remove the
condensation, turn on the power and
wait approximately two hours before
using the machine.
8
♦ It is recommended that you install
surge protectors for the power and
telephone lines. Surge protectors can
be purchased at most telephone
specialty stores.
Page 11
Imaging Film
TEL.LINE
Connecting the phone line
TEL. LINE
socket
Standard wall
socket
Imaging Film
Checking the pre-loaded sample
roll
A sample roll of imaging film has been
pre-loaded in the machine. Perform
steps 1 to 2 and 8 to 10 of Replacing
the imaging film below to check the film
and make sure it is taut.
♦ The sample roll of imaging film can
print about 20 pages.
If [FILM END] appears
If [FILM END] appears in the display for
longer than 10 seconds, open the
machine (see Steps 1 and 2 of
Replacing the imaging film below) and
check the film. If the film has
completely wound onto the front spool,
replace the film. Otherwise, perform
Steps 8 to 10 of Replacing the imaging
film to remove slack.
Replacing the imaging film
1. Installation
Replacement film
When replacing the imaging film, use
the following imaging film:
SHARP UX-71CR (one roll)
or
SHARP UX-72CR (two rolls)
Follow the steps below to replace the
imaging film.
Note: Before replacing the imaging
film, remove any paper from the paper
tray and push in the tray extension.
9
Page 12
Imaging Film
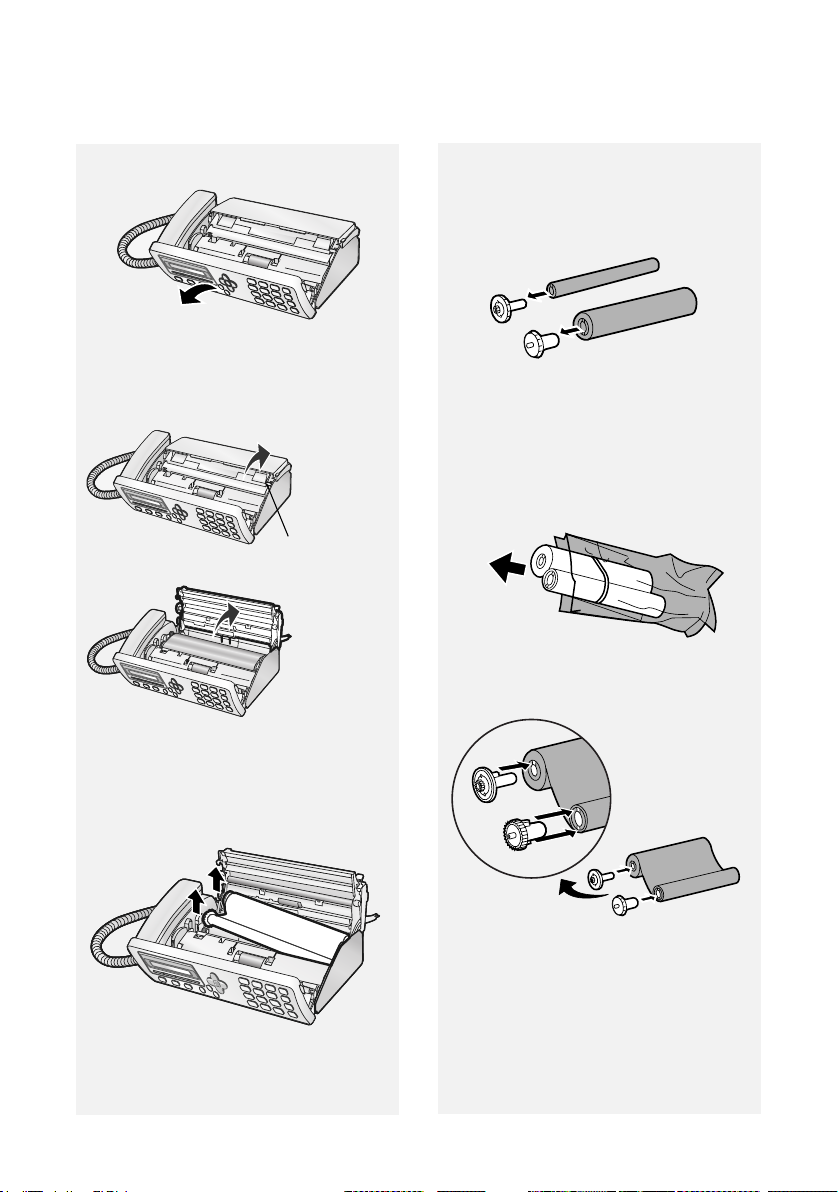
1 Open the operation panel.
2 Press the release and open the print
compartment cover.
Press green release
4 Remove the two green gears from
the spools.
DO NOT DISCARD THE TWO
GREEN GEARS!
5 Remove the new roll of imaging film
from its packaging.
• Cut the band that holds the rolls
together.
6 Insert the green gears.
3 Remove the used roll from the
compartment, lifting the left ends of
the spools first.
10
1 Slot
2 Slots
Make sure the gears fit into the
slots in the ends of the rolls.
Page 13
Imaging Film
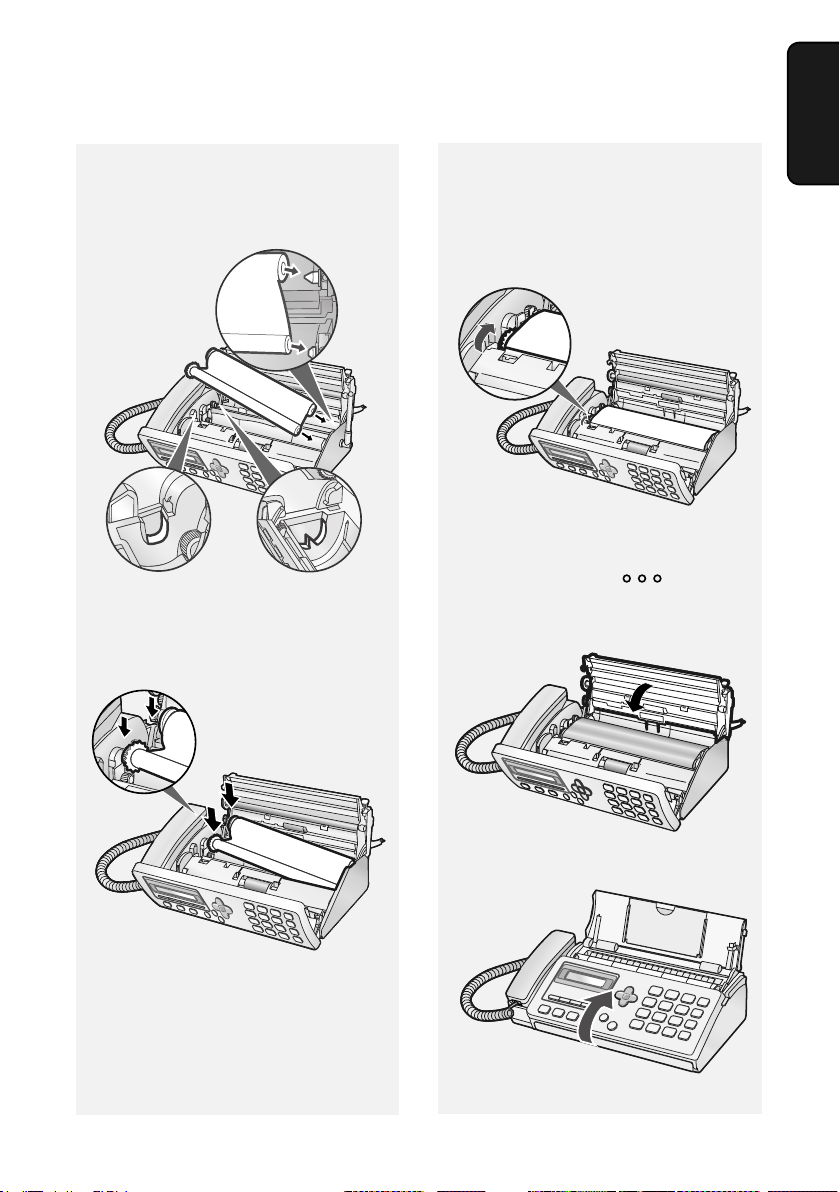
7 Insert the new roll of film into the
print compartment:
a. Fit the right ends of the spools
onto the pins.
b. Place the left ends so that the
shafts of the gears fit into the
holders.
8 Turn the front gear in the direction
shown until the film is taut.
• If there is a label on the film,
continue to turn the gear until the
label is no longer visible.
9 Close the print compartment cover.
• Press down on the marks on
both sides of the cover to make sure
it clicks into place.
1. Installation
10 Close the operation panel.
11
Page 14
Loading Paper
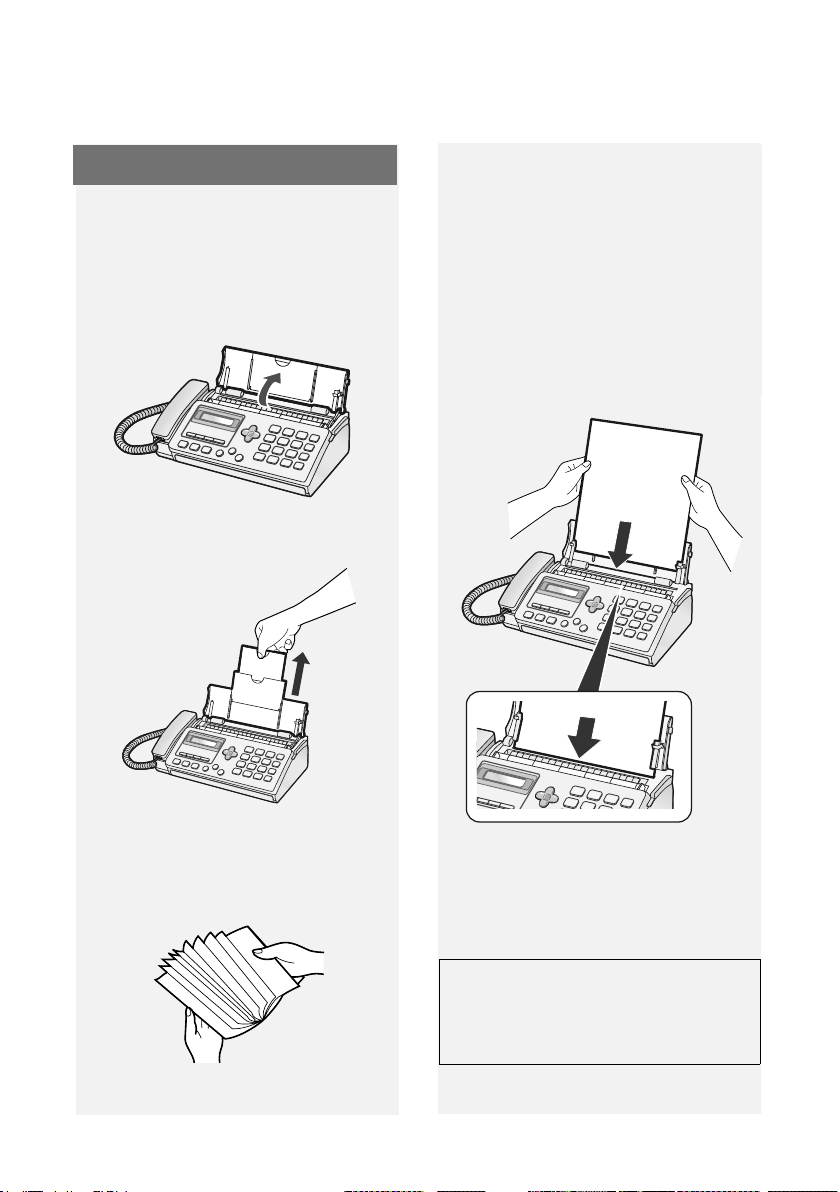
Loading Paper
Approximately 10 sheets of A4-size
paper (80 g/m
paper tray (at room temperature).
2
) can be loaded in the
1 If the paper tray is closed, open it.
2 Pull out the tray extension.
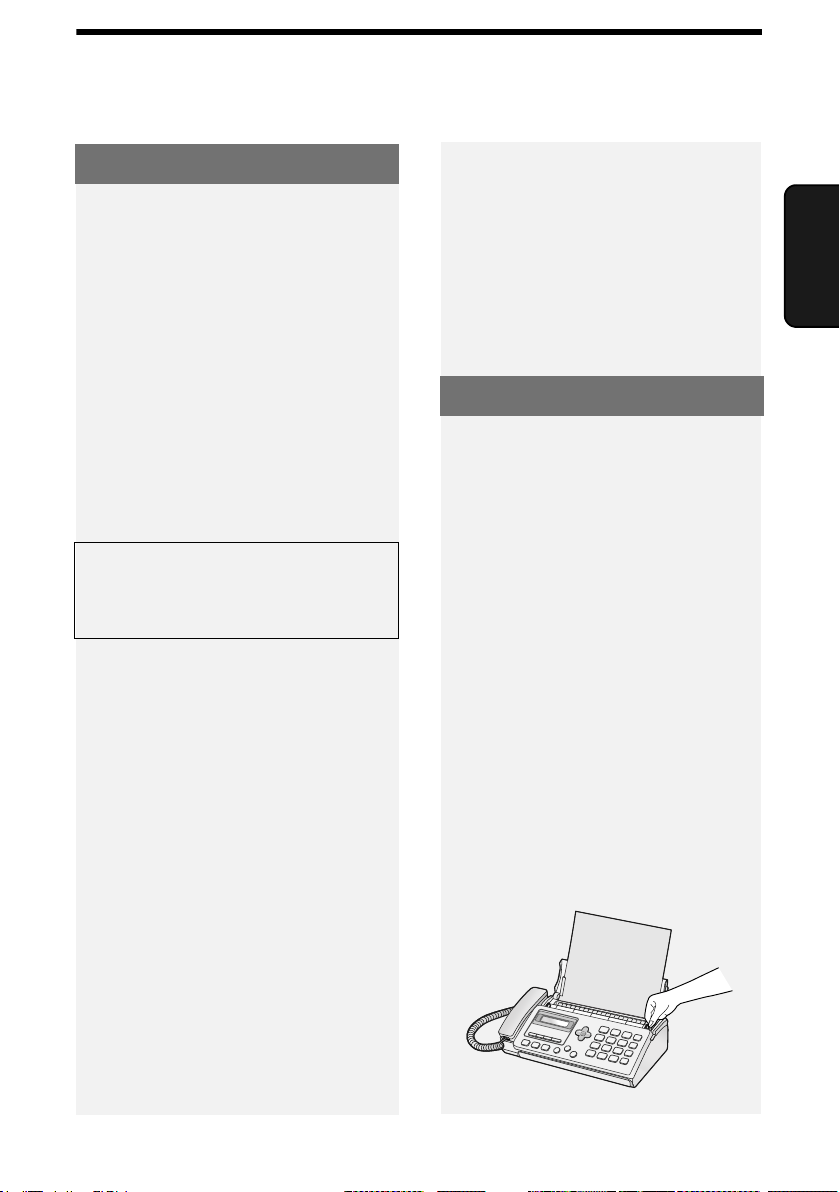
4 Insert the stack of paper into the
tray, print side down.
• If paper remains in the tray, take it
out and combine it into a single stack
with the new paper.
• Printing on the reverse side of the
paper may result in poor print quality.
• Do not use paper that has already
been printed on or is curled.
3 Fan the paper, and then tap the
edges against a flat surface to even
the stack.
12
Note: If paper is left in the tray a long
time, it will become curled. Curled
paper will not feed properly and may
cause a paper jam.
When not using the machine:
When not using the machine, keep
the paper tray closed.
Page 15
Initial Settings
Initial Settings
Setting the date and time
Set the date and time in the machine.
♦ The date and time will be printed
automatically at the top of all fax
pages you send. The date and time
also appear in the display.
1 Press , , .
F
• The currently set date appears
(example): [DATE 15-08-2008]
2 Enter a two-digit number for the day
("01" to "31").
Example: the 5th
[DATE 05-08-2008]
• To backspace and clear a mistake,
press on the UX-P710, or
C
on the UX-A760.
6 Press .
Display: [OWN NUMBER SET]
START
7 Press to exit.
Note: The time setting will change
automatically at the beginning and end
of summertime.
Entering your fax number
Enter your fax number in the machine.
♦ Your entered fax number will be
printed automatically at the top of all
fax pages you send.
1 Press , ,
F
2 Press to select SET.
(To clear your number, press
twice and go to Step 5.)
3 Enter your fax number with the
number keys (max. 20 digits).
1. Installation
3 Enter a two-digit number for the
month ("01" for January, "02" for
February, "12" for December, etc.).
Example: January
[DATE 05-01-2008]
4 Enter the year (4 digits).
Example:
• The currently set time appears
(example): [TIME 12:19]
5 Enter a two-digit number for the hour
("00" to "23") and a two-digit number
for the minute ("00" to "59").
Example: 9:25
• To insert a space, press . To
enter “+”, press
• To backspace and clear a mistake,
press on the UX-P710, or
C
on the UX-A760.
4 Press .
Display:
START
[OWN NAME SET]
5 Press to exit.
13
Page 16
Setting the Reception Mode
Entering your name
Enter your name in the machine.
♦ Your entered name will be printed
automatically at the top of all fax
pages you send.
1 Press , , .
F
2 Press to select SET.
(To clear your name, press
twice and go to Step 5.)
3 Enter your name by pressing
number keys for each letter as
shown in the chart on page 7. Up to
24 characters can be entered.
• To backspace and clear a mistake,
press on the UX-P710, or
C
on the UX-A760.
4 Press .
Display:
START
[DATE&TIME SET]
5 Press to exit.
Setting the Reception Mode
The machine has the following modes
for receiving incoming faxes:
FAX mode:
Select this mode when you only want to
receive faxes on your line. The machine
automatically answers all calls and
receives incoming faxes.
TEL mode:
This mode is the most convenient for
receiving phone calls. Faxes can also
be received; however, all calls must
first be answered by picking up the
machine's handset or an extension
phone connected to the same line.
TEL/FAX (T/F) mode:
This mode is convenient for receiving
both faxes and voice calls. The
machine answers all calls on a preset
number of rings. If the machine detects
that a call is a voice call (including a
manually dialled fax), it will make a
special ringing sound to alert you to
answer. If the machine detects that the
call is an automatically dialled fax, it will
begin reception.
14
A.M. () mode (UX-A760 only):
Select this mode when you go out and
want the machine’s answering system
to answer all calls. Voice messages will
be recorded, and fax messages will be
received automatically.
Page 17
Volume Adjustment
Setting the reception mode
To set the reception mode, make sure
a document is not loaded in the feeder,
and then press until the
desired mode appears in the display.
♦ For more information on receiving
faxes, see Chapter 3.
Volume Adjustment
Speaker volume
1 Press .
F
2 Press or to select the
F
desired level.
F
• Press again to turn off the
speaker.
Ringer volume
F
1 Press or to select
F
HIGH, MIDDLE, LOW, or OFF.
(Make sure has not been
pressed.)
F
• The ringer will ring once at the
selected level.
1. Installation
2 If you selected “OFF OK?” to turn
off the ringer, press .
Note: When the reception mode is set
to TEL, the ringer will still ring at LOW if
turned off.
START
15
Page 18
Flash Select Setting For PBX
Key Tone setting
The machine normally sounds a beep
each time you press a key on the
operation panel. This confirms that the
key has been correctly pressed.
If desired, you can turn off the beep
sound. Follow the steps below.
1 Press , , and .
F
2 Press (YES) to turn on the
beep sound.
Press (NO). to turn off the
beep sound.
3 Press to exit.
Flash Select Setting For PBX
Note: This setting is normally only used
in Germany. In other countries, you can
try changing the setting if you encounter
difficulty with the default setting.
If the machine is connected to a PBX
and the PBX uses the “Flash” method to
connect to an outside line, you must
select the appropriate Flash Select
setting depending on whether your PBX
line is a normal telephone line or a highspeed line.
1 Press , , and .
F
2 Press (SHORT TIME) if your
PBX line is a normal telephone line.
Press (LONG TIME) if your
PBX line is a high-speed line.
3 Press to exit.
16
Language Select Setting
This setting is used to change the
language used in the display, reports
and lists.
1 Press , , and .
F
2 Press to select English.
Press to select Polish.
Press to select Turkish.
Press to select Romanian.
3 Press to exit.
Page 19
2. Sending Faxes
Transmittable Documents
Minimum document size/weight
148 x 140 mm
2
52 g/m
Maximum document size/weight:
Loading up to 10 sheets at once:
A4 (210 x 297 mm)
2
80 g/m
Loading 1 sheet at a time:
210 x 356 mm
157 g/m
2
Transmittable Documents
Documents which are taped, torn,
♦
smaller than the minimum size,
carbon backed, easily smudged, or
have a slick, coated surface should be
photocopied, and the copy loaded in
the feeder.
♦ Documents that are curled or have a
wave-like pattern must be flattened.
Loading the Document
Up to 10 A4-size sheets can be placed
in the feeder at once. The sheets will
feed automatically starting from the
bottom sheet.
Faxes
2. Sending
The maximum scanning width is
205 mm, and the top and bottom 5 mm
of a document cannot be scanned.
Other restrictions
♦ The scanner cannot recognise yellow,
greenish yellow, or light blue ink.
♦ Remove all clips, staples, and pins
before loading documents in the
feeder (these will damage the
machine).
♦ Ink, glue, or correcting fluid on a
document must be dry before
scanning.
♦ To send or copy more than the
maximum number of sheets, place
the additional sheets gently in the
feeder just before the last sheet is
scanned. Do not force the sheets in,
as this may cause double-feeding or
jamming.
♦ For large or thick sheets that must be
loaded one at a time, insert each
sheet into the feeder as the previous
sheet is being scanned. Insert gently
to avoid double-feeding.
1 Adjust the document guides to the
width of your document.
17
Page 20
Resolution and Contrast
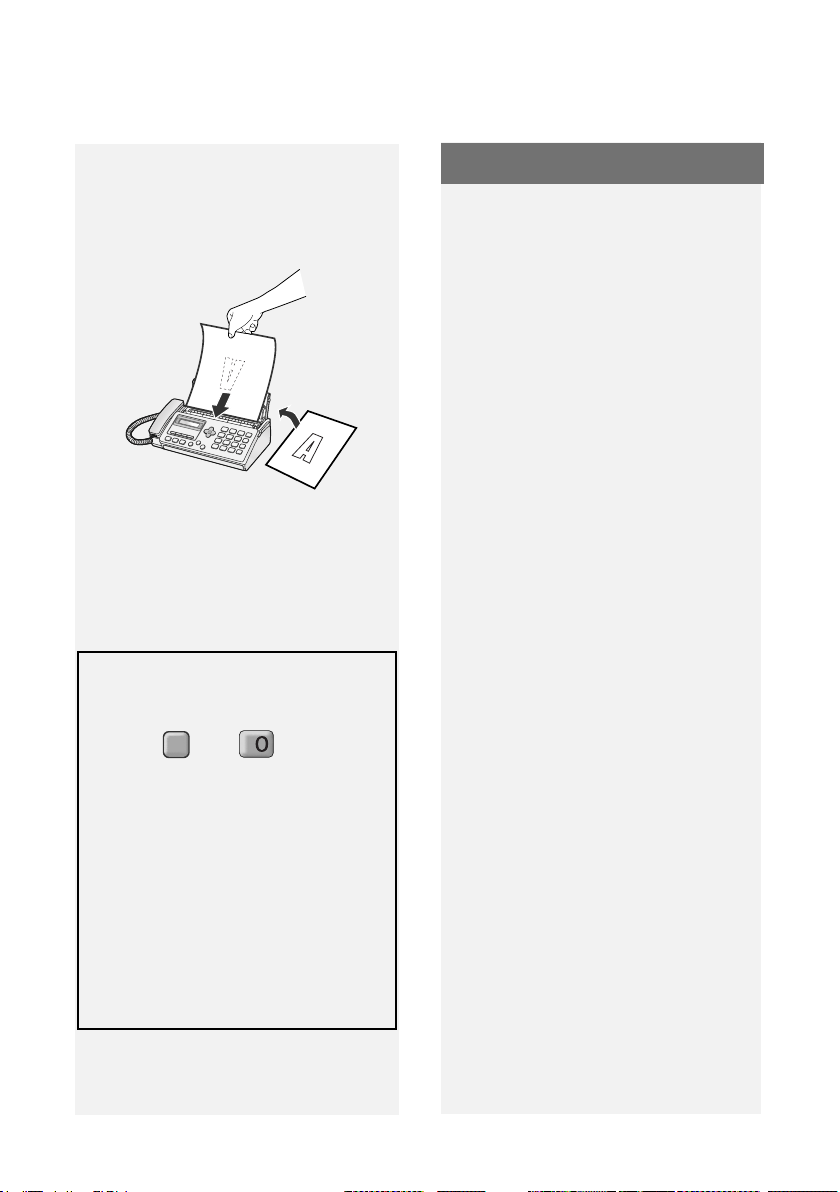
2 Place the document face down with
the top edge going in first, and
insert it all the way into the feeder.
Make sure that the roller draws the
document in.
• Display: [READY TO SEND].
3 Adjust the resolution and/or contrast
settings (p. 18), and then dial the
receiving machine (p. 19).
Removing a document from the
feeder
1 Press then . The
document will feed out.
F
2 If the document is jammed and
does not feed out, open the cover
and remove the document (see
Clearing a jammed document on
page 57).
Resolution and Contrast
You can adjust the resolution and
contrast before sending a document.
♦ The default resolution setting is
STANDARD. The default contrast
setting is AUTO.
♦ Adjust the settings each time you
don't want to use the default settings.
Note: The resolution and contrast
settings are only effective for sending;
not for receiving.
Resolution settings
STANDARD Use STANDARD for
ordinary documents.
This provides the fastest
transmission.
FINE Use FINE for documents
containing small letters
or fine drawings.
SUPER FINE Use SUPER FINE for
documents containing
very small letters or very
fine drawings.
HALF TONE Use HALF TONE for
photographs and
illustrations. The original
will be reproduced in 64
shades of gray.
• Caution: Attempting to remove a
jammed document without opening
the cover may damage the feeder
mechanism.
18
Page 21
Sending a Fax: Normal Dialling
Contrast settings
AUTO Use AUTO for normal
documents.
DARK Use DARK for faint
documents.
1 Load the document(s).
• The resolution/contrast cannot be
adjusted unless the document is
loaded.
2 Press one or more times
until the desired resolution and
contrast settings appear in the
display.
• The first time you move through the
list of resolution settings, the contrast
setting AUTO will appear next to
each resolution setting. The second
time you move through the list, the
contrast setting DARK will appear.
Note: In order to transmit in SUPER
FINE resolution, the receiving machine
must also have that resolution. If not,
your machine will automatically step
down to FINE.
Sending a Fax: Normal Dialling
With Normal Dialling, you pick up the
handset (or press ) and dial by
pressing the number keys.
♦ If a person answers, you can talk with
them through the handset before
sending the fax. (If you pressed
, you must pick up the handset
to talk.)
♦ Normal Dialling allows you to listen to
the line and make sure the other fax
machine is responding.
1 Load the document(s).
• If desired, press to set the
resolution and/or contrast.
2 Pick up the handset or press .
Listen for the dial tone.
3 Dial the fax number of the receiving
machine by pressing the number
keys.
• If you are on a Flash-type PBX and
Faxes
2. Sending
are dialing out, press , wait for
the connection to the outside line,
and then dial the number.
R
4 Wait for the connection. Depending
on the setting of the receiving
machine, you will either hear a fax
tone or the other person will answer.
19
Page 22

Storing Numbers
• If the other person answers, ask
them to press their Start key (if you
pressed , pick up the handset
to speak with them). This causes the
receiving machine to issue a fax
tone.
5 When you hear the fax tone, press
START
. Replace the handset.
• If the transmission is completed
successfully, the machine will beep
once.
• If an error occurs, the machine will
beep three times.
Note: If the transmission is
unsuccessful and the display shows
[DOCUMENT JAMMED], remove the
document as explained on page 57.
Storing Numbers
Storing fax and phone numbers
in the phonebook
You can store fax and phone numbers
in the machine’s phonebook for
automatic dialling. Up to 100 numbers
can be stored.
Follow the steps below to store a fax or
phone number.
1 Press , .
F
2 Enter the name of the destination or
other party by pressing number
keys for each letter as shown in the
chart on page 7. Up to 20
characters can be entered.
• To backspace and clear a mistake,
press on the UX-P710, or
C
on the UX-A760.
20
3 Press .
START
4 Enter the fax number with the
number keys (max. of 32 digits).
(Note: A space cannot be entered.)
• If a pause is required between any of
the digits, press . The pause
appears as a hyphen. Several
pauses can be entered in a row.
F
Page 23

Storing Numbers
• If you are on a Flash-type PBX and
are storing a number for an outside
line, press , press to insert
R
F
a pause, and then enter the fax or
voice number. (When you dial the
auto-dial number, you will
automatically dial out without the
need to press the key.)
R
• If you are storing a fax/phone
number for an outside line and are
on a PBX that requires dialing a
number to dial out, enter the number
to dial out, press to insert a
F
pause, and then enter the fax/phone
number. (When you dial the auto-dial
number, you will automatically dial
out without the need to dial the
number for an outside line.)
5 Press .
START
6 Press to exit.
Assigning a number in the
phonebook to a Rapid Key
You can assign your most frequently
dialled numbers to the Rapid Keys.
Three Rapid Keys are available.
♦ When a number is assigned to a
Rapid Key, it can be dialled by simply
pressing the Rapid Key.
♦ To assign a number to a Rapid Key,
the number must first be stored in the
phonebook (page 20).
Follow the steps below to assign a
number in the phonebook to a Rapid
Key.
1 Press , and then press
or until the number you wish
F
F
F
F
to assign to a Rapid Key appears.
2 Press the Rapid Key that you wish
to assign the number to.
Example:
Faxes
2. Sending
Printing the TEL # LIST
To print a list showing the fax and
phone numbers stored in the
phonebook, press , , ,
F
and then to select YES.
Changing the number assigned to a
Rapid Key: To change the number
assigned to a Rapid Key, simply repeat
the steps above to assign the new
number to the Rapid Key. The new
number will replace the old number.
Clearing a Rapid Key: To clear a
number from a Rapid Key, hold down
the Rapid Key until [CLEARED]
appears in the display.
21
Page 24

Storing Numbers
Editing numbers in the
phonebook
To make changes to a number stored in
the phonebook, follow these steps:
1 Press , press or
F
F
F
F
until the number you wish to edit
appears, and press .
F
2 Make the desired changes to the
name.
• To move the cursor, press or
F
. To backspace and clear a
F
mistake, press on the UX-
P710, or on the UX-A760.
C
To enter letters, see the chart on
page 7.
• If you do not wish to change the
name, go directly to Step 3.
Deleting numbers from the
phonebook
Deleting a single number:
1 Press , and then press
or until the number you wish
F
F
F
F
to delete appears.
2 UX-P710: Press twice.
UX-A760: Press twice.
Deleting all numbers:
C
1 UX-P710: Press .
UX-A760: Press .
2 Press , .
C
3 Press .
START
4 Make the desired changes to the
number.
• To backspace and clear a mistake,
press on the UX-P710, or
C
on the UX-A760.
• If you do not wish to change the
number, go directly to Step 5.
5 Press .
START
6 Press to exit.
22
Page 25
Sending a Fax: Auto Dialling
Using an auto-dial number to
send a fax
1 Load the document(s).
If desired, press to set the
resolution and/or contrast.
2 Dial the fax number using one of the
methods below:
• Rapid Key Dialling: If the number is
assigned to a Rapid Key, press the
Rapid Key.
• Using the phonebook: Press
Sending a Fax: Auto Dialling
To cancel transmission, press
•
.
• If the transmission is completed
successfully, the machine will beep
once.
• If an error occurs, the machine will
beep three times.
Redial
The machine retains the most recent 20
numbers that have been dialled. You
can automatically redial any of these
numbers.
1 Load the document(s).
Faxes
2. Sending
F
, and then or until
F
F
F
the name or number of the other
party appears in the display (names
will appear in alphabetical order).
To go directly to names that begin
with a particular letter, press the
appropriate number key one or more
times to enter that letter (see page
7).
When the desired destination
appears, press .
START
• Direct keypad dialling: Press the
number keys to enter a full fax
number (to insert a pause between
digits, press ). When finished,
press .
F
START
3 Dialling and transmission will take
place automatically.
• If desired, press to set the
resolution and/or contrast.
2 Press .
F
Display: [<REDIAL>]
F
3 If needed, press or
F
F
until the desired number appears in
the display.
4 Press . Dialling begins.
START
• Make sure the desired number
appears before pressing , or
redialling will not take place
(sometimes it takes several seconds
for the number to appear).
START
23
Page 26
Sending a Fax: Auto Dialling
Note: If the transmission is
unsuccessful and [DOCUMENT
JAMMED] appears in the display,
remove the document as explained on
page 18.
Deleting redial numbers
Deleting a single redial number:
F
1 Press , and then press
or until the number you wish
F
F
F
to delete appears.
2 UX-P710: Press twice.
UX-A760: Press twice.
Deleting all redial numbers:
C
1 UX-P710: Press .
UX-A760: Press .
C
4 Press .
START
5 The number will appear. Press
START
again to store it.
Automatic redialling
If you use the phonebook or a Rapid
Key to send a fax and the line is busy,
the machine will automatically make
three redial attempts at intervals of five
minutes.
During this time, [RECALLING] will
appear in the display, followed by the
attempt number. You will not be able to
dial any other locations while the
message appears.
♦ To clear the message and stop
automatic redialling, press .
♦ Under certain conditions, automatic
redialling may stop before three
redialling attempts are made.
2 Press , .
Storing a redial number in the
phonebook
F
1 Press , and then or
F
F
as needed until the number
F
you wish to store appears.
2 Press .
F
3 Enter a name for the number (see
page 7).
24
Dial Tone Check
This setting determines whether or not
the machine checks for the presence of
a dial on the line before automatic
dialing.
Initial setting: NO
Note: If you set this setting to YES and
find that the machine is unable to dial,
change the setting to NO.
1 Press , , , and .
F
Page 27
Making Phone Calls
2 Press (YES) to have the
machine check for a dial tone.
Press (NO) to have the
machine not check for a dial tone.
3 Press to exit.
Making Phone Calls
Dialing using the keypad
1 Lift the machine’s handset.
2 Press the number keys to dial the
phone number.
Dialling using a Rapid Key
1 Lift the machine’s handset.
2 Press the Rapid Key to which the
number is assigned.
• You can also press the Rapid Key
first (the speaker will turn on and
dialing will begin), and then pick up
the handset.
Dialling using the phonebook
1 Press , and then or
the other party appears in the
display (names will appear in
alphabetical order).
F
F
until the name or number of
F
F
To go directly to names that begin
with a particular letter, press the
appropriate number key one or
more times to enter that letter (see
page 7).
2 Lift the machine’s handset.
Redialling
1 Press .
Display: [<REDIAL>]
2 Press or until the
desired number appears in the
display.
F
F
F
F
3 Lift the machine’s handset.
• Make sure the desired number
appears before lifting the handset, or
redialling will not take place
(sometimes it takes several seconds
for the number to appear).
Communication time display
While a fax is being sent or received,
and while you are using the handset
for a phone call, the amount of time the
line has been in use will appear in the
display. This can be used as a general
guideline to the length of the call.
Faxes
2. Sending
25
Page 28
Using TEL/FAX (T/F) Mode
3. Receiving Faxes
Using TEL/FAX (T/F) Mode
To select TEL/FAX mode, press
(with no document in the
feeder) until [T/F] appears in the
display.
When the reception mode is set to TEL/
FAX, the machine automatically
answers all calls on 2 rings (the number
of rings can be changed by changing
the Number of Rings setting on page
27). After answering, the machine
monitors the line for about five seconds
to see if a fax tone is being sent.
♦ If the machine detects a fax tone (this
means that the call is an automatically
dialed fax), it will automatically receive
the fax.
♦ If your machine doesn't detect a fax
tone (this means that the call is a
voice call or manually dialed fax), it
will make a special ringing sound
(called “pseudo ringing”) for 15
seconds to alert you to pick up the
machine’s handset. If you don't
answer within this time, the machine
will send a fax tone to the other
machine to allow the calling party to
send a fax manually.
Silent fax reception
To have the machine receive faxes
silently and signal voice calls only by
pseudo ringing (not regular ringing), set
the reception mode to TEL/FAX and
turn the ringer off as explained on page
15.
Pseudo ring duration
If desired, you can change the duration
of pseudo ringing in Tel/Fax mode.
Initial setting: 15 seconds
1 Press , , , and .
F
2 Press a number to select the
desired duration:
15 seconds
30 seconds
60 seconds
120 seconds
3 Press to exit.
Note: Only the machine will make the
special ringing sound. Another phone
connected to the same line will not ring
after the machine initially answers the
call.
26
Page 29
Using FAX Mode
Using FAX Mode
To select FAX mode, press
(with no document in the feeder) until
[FAX] appears in the display.
In FAX mode, the machine
automatically answers all calls on two
rings and receives incoming faxes.
♦ If you pick up a phone connected to
the same line before the machine
answers, you can talk to the other
party and receive a fax as explained in
Using TEL Mode on page 27.
Number of Rings setting
To change the number of rings on which
the machine answers calls in TEL/FAX
mode and FAX mode, follow the steps
below. Any number from 2 to 5 can be
selected.
Initial setting: 2 rings
1 Press , , , and .
F
2 Enter the desired number of rings
(any number from 2 to 5).
Example: (4 rings)
3 Press to exit.
Using TEL Mode
To select TEL mode, press
(with no document in the feeder) until
[TEL] appears in the display.
In TEL mode, you must answer all calls
(even faxes) by picking up the
machine’s handset or an extension
phone connected to the same line.
Important: If a document is loaded in
the machine’s feeder, remove it before
performing either procedure below.
Answering with the machine’s
handset
1 When the machine rings, pick up
the handset.
2 If you hear a fax tone, wait until the
display shows [RECEIVING] and
then replace the handset.
• If [RECEIVING] does not appear,
press to begin reception.
(This is necessary if you have set the
Fax Signal Receive setting to NO
(page 29).)
START
3 If the other party first speaks with
you and then wants to send a fax,
press after speaking.
(Press before the sender presses
their Start key.)
START
Faxes
3. Receiving
• When [RECEIVING] appears in the
display, hang up.
27
Page 30
Using TEL Mode
Answering a call on a phone
connected to the same line
Note: To ensure correct operation of
this feature, the Fax Remote Reception
setting must be set to YES (see page
28).
1 Answer the phone when it rings.
2 If you hear a soft fax tone, wait until
the machine responds (the phone
will go dead), then hang up.
3 If the machine doesn't respond, or if
the other party first talks to you and
then wants to send a fax, press
once and twice on the
phone (only on a tone dial phone).
This signals the machine to begin
reception. Hang up.
(You can also start fax reception by
setting down the phone without
hanging up, walking over to the
machine, and pressing .)
START
• Step 3 is necessary if you have set
the Fax Signal Receive setting to NO
(page 29).
Putting a call on hold
To put the other party on hold during a
phone call, press ( on the
UX-A760). When this is done, they
cannot hear you. You can put the
handset back in the cradle without
breaking the connection. When you are
ready to speak with the other party
again, pick up the handset. If you did
not put the handset back in the cradle,
press again to resume
conversation.
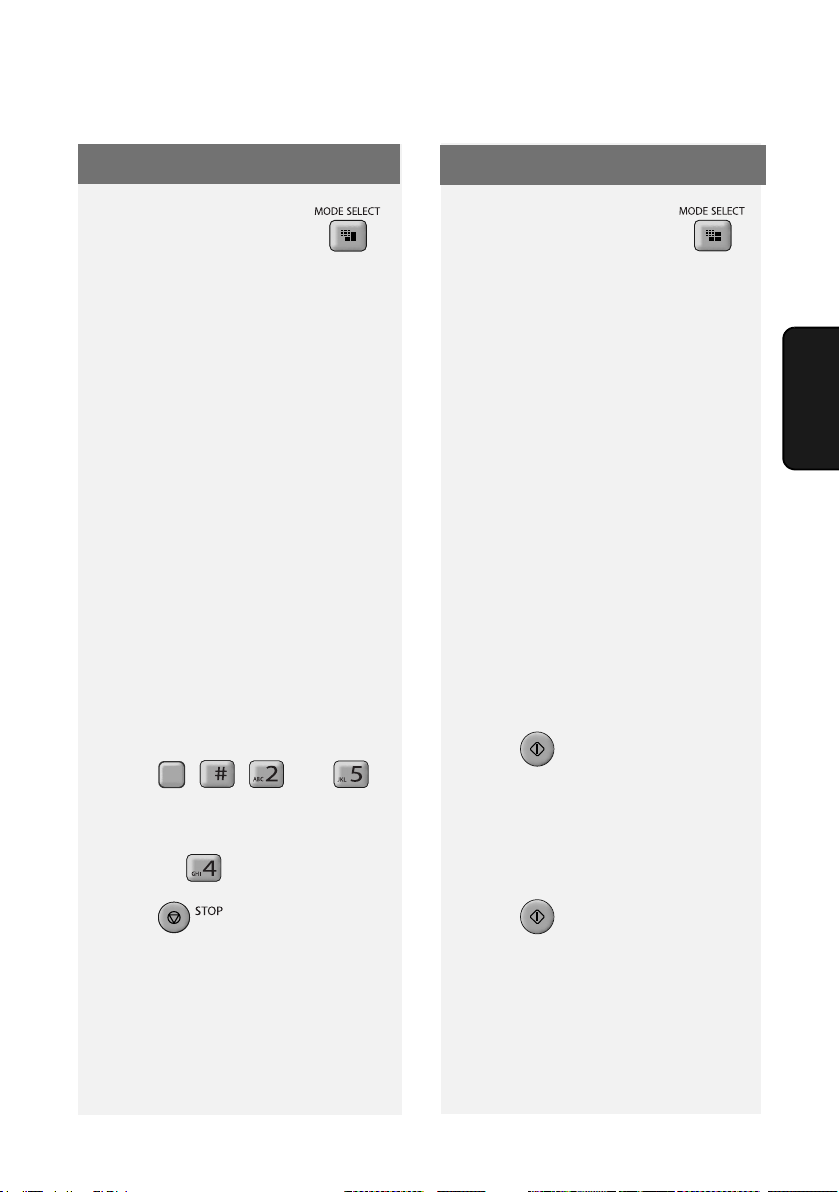
Fax Remote Reception setting
If you want ensure that the machine is
always able to start fax reception when
you press , , on an
extension phone, set this function to
YES (this keeps the machine from
entering sleep mode).
Initial setting: NO
28
1 Press , , , and .
F
2 Press (YES) to turn on fax
remote reception (disable sleep
mode).
Press (NO) to turn off fax
remote reception.
3 Press to exit.
Page 31

Using TEL Mode
Fax Remote Number setting
If desired, you can use a number other
than 5 to activate fax reception from an
extension telephone. You can select any
number from 0 to 9.
Initial setting: 5
1 Press , , , and .
F
2 Enter the desired number (any
number from 0 to 9).
3 Press to exit.
Fax Signal Receive setting
The machine will automatically begin
reception if you hear a soft fax tone
after answering a call on the machine or
an extension phone connected to the
same line. If you prefer to turn off
automatic reception, follow the steps
below.
Initial setting: YES
1 Press , , , and .
F
2 Press (YES) to turn on
automatic reception.
Press (NO) to turn off
automatic reception.
Receive Ratio setting
Note: This setting applies to all
reception modes.
The machine is initially set to
automatically reduce the size of
received faxes to fit the size of the
printing paper. This ensures that the
edges of a fax are not cut off. If desired,
you can turn this function off and have
received documents printed at full size.
♦ If a document is too long to fit on the
printing paper, the remainder will be
printed on a second page. In this
case, the cut-off point may occur in
the middle of a line.
♦ Automatic reduction may not be
possible if the received document is
too large, contains too many fine
graphics or images, or is sent at high
resolution. In this case, the remainder
of the document will be printed on a
second page.
Initial setting: AUTO
1 Press , , , and .
F
2 Press (AUTO) to have
received faxes automatically
reduced.
Press (100%) to have received
faxes printed at full size.
Faxes
3. Receiving
3 Press to exit.
3 Press to exit.
29
Page 32

Using A.M. Mode (UX-A760)
Using A.M. Mode (UX-A760)
When A.M. mode ( ) is selected on
the UX-A760 to activate the answering
system, faxes are received
automatically. For more information,
see Chapter 4.
UX-P710 only:
Using the machine with an
existing answering system
If you have an answering system (in a
phone or other device) connected to
the same line as the machine and you
want to receive both faxes and voice
messages while you are out, follow
these steps.
1 Make sure that the machine’s Fax
Signal Receive setting is set to
YES (page 29). (This enables the
machine to automatically begin fax
reception if it detects a fax tone
after the answering system
answers a call.)
2 Make sure your answering
system’s greeting is no longer than
20 seconds, and insert several
seconds of silence at the beginning
of the greeting. (This will allow the
machine to clearly detect fax tones
when a fax is being sent.)
3 When you go out, make sure the
machine is set to TEL mode (press
until TEL appears in the
display
). (The machine should not
automatically answer calls; only the
answering system should answer.)
Reception to Memory
The machine is set to initially receive
faxes to memory and then automatically
print them out.
This allows reception to take place even
if there is no paper in the paper tray, or
when a problem occurs that prevents
printing such as no imaging film or a
paper jam. Received faxes are held in
memory until paper is loaded in the tray
or the printing problem is resolved. After
you load paper or otherwise resolve the
problem, press to print the
faxes.
START
♦ When there is no paper in the tray and
a fax has been received to memory,
[ADD PAPER & ]/[PRESS START
KEY] will appear. If a printing problem
has occurred, a message indicating
the problem will appear in the display.
♦ Received faxes are automatically
cleared from memory after they are
printed out.
♦ If the memory becomes full, fax
reception will not be possible (see
“Memory capacity” on page 2 for the
number of pages that can be held in
memory).
♦ When receiving a halftone fax, the
memory may become full before
reception is completed ([MEMORY IS
FULL] will appear). In this case,
change the Fax Receive setting to
“PAPER” (see page 31), and ask the
sender to send the fax again.
30
Page 33

Reception to Memory
Fax Receive setting
If you prefer that faxes not be received
to memory, follow the steps below to
change the Fax Receive setting to
“PAPER”.
♦ When the Fax Receive setting is
“PAPER”, fax reception will not take
place (a communication error will
occur) if a problem occurs that
prevents printing. However, there is no
concern that fax reception will be
prevented by the memory being full.
♦ When “PAPER” is selected, make
sure there is paper in the paper tray.
Initial setting: MEMORY
1 Press , , , and .
F
2 Press (MEMORY) to receive
faxes to memory before printing
them out.
Press to have received faxes
printed without receiving them to
memory.
Erasing received faxes from
memory
When received faxes are held in
memory due to a printing problem, you
can erase the faxes from memory
without printing them out.
Caution: When this procedure is
performed, the faxes will be lost.
1 UX-P710: Press .
UX-A760: Press .
2 Press , .
Checking how much memory is
currently in use
To check the percentage of memory
currently in use, press , . The
percentage will appear briefly in the
display.
C
F
Faxes
3. Receiving
3 Press to exit.
31
Page 34

Recording an OGM
4. Answering System (UX-A760 only)
Recording an OGM
The built-in answering system allows
you to receive both voice messages and
faxes while you are out.
♦ The answering system is only
available on the UX-A760.
♦ When no faxes are in memory, a
maximum of 15 minutes of voice
messages of any type, or a maximum
of 30 messages total, can be
recorded.
To use the answering system, you must
first record an outgoing message
(OGM). This is the greeting that the
machine plays after answering a call to
inform callers that they can leave a
message or send a fax.
Example:
“Hello. You've reached ______ . No one
is available to take your call right now.
Please leave a message after the beep
or press your facsimile Start key to send
a fax. Thank you for calling.”
1 Press .
2 Lift the handset.
3 Press and speak into the
handset to record a message.
START
• The outgoing message can be up to
60 seconds long. While recording,
the display will show the time left to
record.
Checking the outgoing message
To listen to the outgoing message,
press then .
♦ The outgoing message cannot be
erased. If you need to change it,
repeat the recording procedure.
Using the Answering System
Turning on the answering system
To turn on the answering system so that
callers can leave messages, press
until appears in the
display ( indicates that A.M. mode is
selected).
♦ It will not be possible to set the
reception mode to A.M. mode if an
outgoing message has not been
recorded.
When A.M. mode is selected, the
machine automatically answers all calls
on 2 rings if it has received at least one
message, or on 4 rings if it has not
received any messages (see Toll Saver
on page 36), and plays your outgoing
message.
After the outgoing message plays,
callers can leave a message. If the
machine detects that a fax machine is
sending a fax tone, it will automatically
begin fax reception.
4 When finished, replace the handset
or press .
32
Page 35

Using the Answering System
Listening to your messages
1 Press .
2 The messages will play. While
messages are playing, you can do
any of the following:
• Repeat: To repeat a message or
move back to a previous message,
press (press repeatedly if
necessary).
• Skip: To skip forward to the next
message, press .
• Change playback speed: Press
one or more times to
change the playback speed in the
order [FAST ] > [SLOW] > normal.
• Stop: To stop playback, press
.
Note: Playback will stop if you receive a
call or lift the handset.
Printing the Message list
To print a list showing the date and time
that each message was received, follow
the steps below.
1 Press , , .
F
2 Press to select YES.
Erasing received messages
Erasing a single message:
While the message is playing, press
C
twice.
Erasing all messages:
In the date and time display, press
C
, , .
Recording memos
You can record memos for yourself and
other users of the machine. Memos will
be played back with any other recorded
messages when is pressed.
1 Pick up the handset.
2 Press and speak into the
handset.
3 When you have finished speaking,
replace the handset or press
.
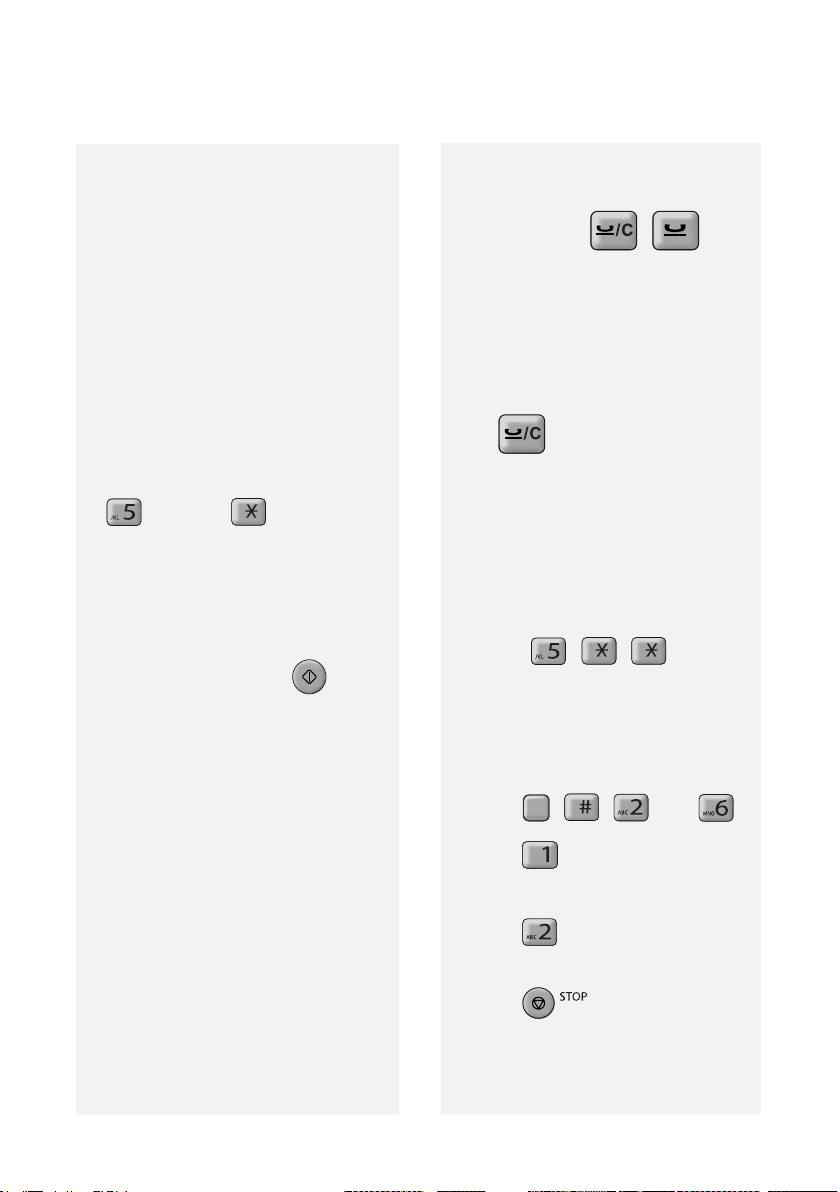
Recording phone conversations
(2-way recording)
To record a phone conversation, press
to begin recording. Press
to stop recording (recording
will stop automatically if you hang up).
The conversation will play back when
is pressed.
System
4. Answering
33
Page 36

Answering System Settings
Answering System Settings
Call screening
Each time a caller calls and leaves a
message in the answering system, you
can have the caller’s voice broadcast
through the speaker.
♦ You can pick up the handset while the
caller is speaking to answer the call.
This allows you to monitor incoming
calls and take only those calls that you
wish to answer immediately.
Initial setting: YES
1 Press , , , and
F
2 Press (YES) to turn on Voice
Monitor.
Press (NO) to turn off Voice
Monitor.
3 Press to exit.
Maximum allowed recording time
The answering system is initially set to
allow each caller a maximum of 4
minutes to leave a message. If desired,
you can change this setting to 15, 30, or
60 seconds.
2 Press a number to select the
recording time:
15 seconds
30 seconds
60 seconds
4 minutes
3 Press to exit.
OGM Only mode
Turn on this function if you want your
outgoing message to play but do not
want to let callers leave messages.
(The machine will receive faxes sent by
automatic dialling.)
Initial setting: NO
1 Press , , , and
F
2 Press (YES) to turn on OGM
Only mode.
Press (NO) to turn off OGM
Only mode.
3 Press to exit.
1 Press , , , and .
F
34
Page 37

Override Ringing
Override Ringing
This function allows selected callers
using a touch-tone telephone to
override the answering system's
outgoing message and cause the
machine to make a special ringing
sound, alerting you that they are calling.
This is useful when you are near the
machine but only want to talk with
certain callers, taking all other calls on
the answering machine.
Programming the override code
To override the answering system, your
callers must enter a 3-digit override
code from their telephone. This code
has been set to "009" at the factory. If
you wish to change the code, follow the
steps below.
Important! Make sure the override
code is different from the remote code
(page 36).
1 Press , , , and .
F
2 Enter the desired 3-digit code.
3 Press .
START
Overriding the answering system
Your callers should follow the steps
below to override the answering
machine.
1 The caller calls your machine from a
tone dial telephone. When the
outgoing message begins, the caller
presses on their telephone.
• The caller will hear a short beep, and
the outgoing message will stop.
2 The caller enters the override code
and then .
• If an incorrect code is entered, the
caller will hear four beeps. He or she
must re-enter the correct code within
10 seconds or the line will be
disconnected.
3 Your machine will make a special
ringing sound. Pick up the handset
to answer the call.
• If you do not answer within 30
seconds, the outgoing message will
play again and the caller can leave a
message.
System
4. Answering
4 Press to exit.
35
Page 38

Remote Operations
Remote Operations
When you are out, you can call the
machine from any touch-tone telephone
and listen to your messages using the
remote commands.
Remote code
To listen your messages from an
outside phone, you must enter a 3-digit
remote code. The remote code has
been set to "001" at the factory. If you
wish to use a different number, follow
the steps below.
1 Press , , , and .
F
2 Enter the desired 3-digit code.
3 Press .
START
4 Press to exit.
Toll Saver
When you call the machine to listen to
your messages, it will answer after two
rings if it has received at least one
message, or after four rings if it has not
received any messages.
This allows you to save money on
telephone charges, particularly if you
are calling long distance. If the machine
does not answer after two rings, you
can simply hang up before it answers,
saving yourself the cost of that call.
If you do not want to use the Toll Saver
function, you can turn it off by following
the steps below. In this case, the
machine will answer after the number of
rings set with the Number of Rings
setting (see page 27).
Initial setting: YES
1 Press , , , and
F
2 Press (YES) to turn on the Toll
Saver function.
Press (NO) to turn off the Toll
Saver function.
3 Press to exit.
Retrieving your messages
1 Call the machine from a touch-tone
telephone. When your outgoing
message begins, press on the
telephone.
• You will hear a short beep, and the
outgoing message will stop.
• If the machine is in FAX mode, press
immediately after the machine
answers (before you hear the fax
tone).
Note: If the machine’s memory is full,
the machine will answer after 20 rings
and the outgoing message will not play.
In this case, start from Step 2.
36
Page 39

Remote Operations
2 Enter your remote code number and
then press .
• You will hear a series of beeps equal
to the number of messages
recorded, or one long beep if four or
more messages have been received.
The machine will then play back the
messages. When all messages have
been played back, you will hear a
long beep.
• If no messages have been received,
you will hear a short beep. You can
either hang up, or perform any of the
remote operations described in the
following section.
3 While the messages are playing,
you can do any of the following:
• Repeat: Press , .
• Skip forward: Press , .
• Stop playback: Press , .
After stopping playback, you can
enter any of the remote commands
described in the following section.
• Play new messages only: First stop
playback by pressing , ,
and then press , .
• Erase all messages: Press ,
, .
• Repeat playback: Press ,
.
• Perform other operations: You ca n
enter any of the remote commands
described in the following section.
• Hang up: Before hanging up, press
twice if you want the machine
to resume normal operation
immediately (in some cases, the
machine may not accept new calls
for one or two minutes after you
hang up unless you press
twice).
Comments:
♦ If you enter an incorrect command, or
pause too long while entering a
command, you will hear 4 beeps. Reenter the correct command.
♦ If you wait more than 10 seconds
before entering a command, or enter
your remote code number incorrectly
twice in a row, you will be
disconnected.
System
4. Answering
• Erase: To erase the message you
are currently listening to, press ,
.
4 When you have finished listening to
your messages, you can do any of
the following:
37
Page 40

Remote Operations
Other remote commands
After listening to your messages, you
can enter any of the following
commands.
Note: The following commands cannot
be entered while messages are being
played. If you do not want to wait until
playback ends to enter a command, first
stop playback by pressing , ,
and then enter the command.
Changing the reception mode
♦ A.M. mode: , ,
♦ FAX mode: , ,
♦ TEL mode: , ,
Caution: If you select TEL mode, you
will not be able to enter any other
remote commands.
♦ TEL/FAX mode: , ,
Recording a “memo” (p. 33)
1 Press , .
2 When you hear a short beep, speak
into the telephone to record the
memo.
3 When you are finished, press ,
.
OGM Only mode (p. 34)
Turning on OGM Only mode:
Press , , .
Turning off OGM Only mode:
Press , , .
Recording a new outgoing message
1 Press , .
2 When you hear a short beep, speak
into the telephone to record the new
message.
• The message can be up to 60
seconds long. After 60 seconds, you
will hear a beep, and the new
message will play back. To stop
recording before 60 seconds
elapses, press , .
38
Page 41

5. Making Copies
The machine can be used as a
convenience copier. Follow the steps
below to make a copy.
1 Load the document(s). (Maximum of
10 A4-size sheets.)
• The default resolution for copying is
FINE. To change the resolution or
contrast setting, press .
(Note: If STANDARD resolution is
selected, copying will take place at
FINE resolution.)
2 When you are ready to begin
copying, press .
COPY/
?
HELP
Copies
5. Making
39
Page 42

Activating Caller ID
6. Caller ID (Requires Service)
Activating Caller ID
Important: To use this function, you
must subscribe to a Caller ID service
from your phone company. The
machine may not be compatible with
some Caller ID services.
If you subscribe to a Caller ID service,
you can have the machine show the
name and number of the caller when
you receive a call. Follow the steps
below to activate this function.
1 Press , , and .
F
2 Press (YES) to turn on Caller
ID.
(To turn off Caller ID, press
(NO).)
3 Press to exit.
Note: Some caller ID services may not
provide the name of the caller. In this
case, only the phone number will
appear when you receive a call.
Display messages
One of the following messages will
appear while the machine rings if caller
information is not available.
NO
SERVICE
CALLER-ID
ERROR
OUT OF
AREA
PRIVATE
CALL
No caller information was
received. Make sure that
your service has been
activated.
Noise on the telephone
line prevented reception of
caller information.
The call was made from
an area which does not
have Caller ID service, or
the service is not
compatible with your
service.
Caller information was not
provided at the caller’s
request.
Caller ID List
The machine keeps a log of the most
recent 20 calls and faxes you have
received (the Caller ID list). You can
view the list and automatically dial a
number from the list.
40
♦ The list is only available if you have
Caller ID service and have turned on
the Caller ID function.
♦ After you have received 20 calls,
each new call will delete the oldest
call.
Page 43

Caller ID List
1 Press twice.
F
Display: [<REVIEW CALLS>]
F
2 Press or to scroll
F
through the list
F
.
• To exit the list, press .
3 To dial a number, scroll until the
number appears and:
• Fax: Load the document and press
START
. Transmission will begin.
• Voice call: Pick up the handset.
Dialing will begin automatically.
Deleting calls from the list
Deleting a single call:
To delete a single call from the list,
display the call and
UX-P710: Press twice.
UX-A760: Press twice.
C
Printing the Caller ID list
To print the Caller ID list, follow the
steps below.
1 Press , , .
F
2 Press to select YES.
Storing a number in the Caller
ID list in the phonebook
F
1 Press twice, and then
or as needed until the
F
F
number you wish to store appears.
2 Press .
F
F
3 Enter a name for the number (see
page 7).
4 Press .
START
5 The number will appear. Press
START
again to store it.
Deleting all calls:
To delete all calls from the list, return to
the date and time display (press
), and then follow these steps:
1 UX-P710: Press .
UX-A760: Press .
2 Press , .
C
6. Caller ID
41
Page 44

Blocking Calls
Blocking Calls
Blocking “PRIVATE CALLS”
If you have Caller ID service and have
turned on the Caller ID function, you
can have the machine automatically
block all calls for which Caller ID
information is not provided at the
caller’s request (calls for which
“PRIVATE CALL” appears).
♦ When this function is turned on, the
machine will break the connection as
soon as it receives Caller ID
information when a “PRIVATE CALL”
is received.
1 Press , , .
F
2 Press (YES) to turn on the
function. (To turn off the function,
press (NO).)
3 Press to exit.
Blocking “OUT OF AREA” calls
2
Press (YES) to turn on the
function. (To turn off the function,
press (NO).)
3 Press to exit.
Blocking calls from specified
numbers (Anti Junk numbers)
If you have Caller ID service and have
turned on the Caller ID function, you
can have the machine automatically
block calls from numbers that you
specify.
To use this function, enter the fax/phone
numbers that you want to block. Up to
30 numbers can be entered.
1 Press , , , .
F F
2 Enter the number (maximum of 20
digits).
Note: Enter numbers only; hyphens
and spaces cannot be entered.
3 Press .
START
If you have Caller ID service and have
turned on the Caller ID function, you
can have the machine automatically
block all calls for which “OUT OF AREA”
appears.
♦ When this function is turned on, the
machine will break the connection as
soon as it receives Caller ID
information when an “OUT OF AREA”
call is received.
1 Press , , .
42
F
4 Press to exit.
Deleting a single Anti Junk number:
1 Press , , .
2 Press or until the
number you wish to delete appears.
F
F
F
F
3 UX-P710: Press twice.
UX-A760: Press twice.
C
Page 45

Deleting all numbers:
1 UX-P710: Press .
UX-A760: Press .
C
2 Press , .
Printing the Junk number list
To print a list of your currently stored
Anti Junk numbers, follow the steps
below.
Blocking Calls
1 Press , , .
F
2 Press to select YES.
6. Caller ID
43
Page 46

7. Key Lock Function
The Key Lock function is used to
prevent unauthorised operation of the
machine. When the Key Lock function is
activated, all operations are prohibited
except for the following:
♦ Phone calls can be made by picking
up the handset and dialling using one
of the Rapid Keys (page 25). Dialling
using the phonebook and by pressing
the number keys is prohibited. It is
recommended that you store
emergency phone numbers in the
Rapid Keys.
♦ A fax can be sent using a Rapid Key if
the handset is picked up before the
Rapid Key is pressed. When you hear
the fax tone from the receiving
machine, press to begin
transmission (if a person answers, ask
them to press their Start key).
can be pressed to adjust the
resolution before dialling, and
can be pressed to cancel an
operation.
START
♦ Phone calls can be made and
received using an extension phone.
To use the Key Lock function, you must
first store a 4-digit Key Lock code as
explained below, and then activate the
function as explained on the following
page.
Storing the Key Lock code
1 Press , , and .
F
2 Press (SET) to store the Key
Lock code.
• If [ALREADY STORED] appears in
the display, the Key Lock code has
already been programmed. If you
wish to change the code, you must
first delete the old code (see page
45) and then store the new code.
3 Enter the 4-digit number that you
wish to use for the Key Lock code.
4 Press .
START
5 Press to exit.
♦ Faxes can be received automatically
when the reception mode is set to
FAX, TEL/FAX, or A.M. mode (page
15). Faxes can be received manually
by pressing when the call is
answered on the handset (page 27),
or by pressing , , on an
extension phone when the call is
answered on an extension phone
(page 30).
44
START
• Important: Be sure to keep a record
of the Key Lock code, as it must be
entered to deactivate the Key Lock
function and allow normal operation
of the machine. In the event that you
forget the code and have kept no
record, contact SHARP customer
service.
Page 47

Activating the Key Lock
function
Note: Before activating the Key Lock
function, be sure to set up any Rapid
Key numbers (page 21) that you wish to
use after the Key Lock function is
activated.
To activate the Key Lock function, hold
F
down until [KEY LOCK] appears in
the display.
♦ If [SET LOCK CODE] appears in the
display, a Key Lock code has not been
stored. Store a Key Lock code and
then activate the Key Lock function.
♦ [<<<RINGING!>>>] will appear to
signal an incoming call if the ringer
has been turned off (page 15).
Releasing the Key Lock
Follow the steps below when you wish
to release the Key Lock and operate the
machine normally.
1 Hold down until [CANCEL KEY
LOCK]/[ENTER LOCK CODE]
appear alternately in the display.
F
2 Enter the Key Lock code.
3 Press .
START
[KEY LOCK] will appear in the display
while the Key Lock function is activated.
Only the operations described on page
44 can be performed.
The following messages may also
appear:
♦ [FAX RX IN MEMORY] will appear
when there is no paper in the tray and
a fax has been received to memory.
Release the Key Lock as explained
below, add paper, and press
to print the fax.
START
♦ [COM ERROR XX]: This will appear if
a line error occurs during fax
reception or transmission (see page
50). Press to clear the
message.
♦ If the Caller ID function has been
turned on (page 40), Caller ID
information will appear when a call is
received.
• [CANCELED] will briefly appear
followed by the date and time
display.
Clearing (changing) the Key
Lock code
In the event that you need to clear the
Key Lock code, follow the steps below.
♦ If you need to change the code, first
clear it and then store a new code.
1 Press , , and .
F
2 Press (CLEAR).
3 Enter the current Key Lock code.
4 Press .
START
5 Press to exit.
Function
7. Key Lock
45
Page 48

Cleaning the Machine
8. Maintenance
Cleaning the Machine
Cleaning the scanning glass
and rollers
Any dirt on the scanning glass and
rollers will degrade the quality of
transmitted documents and copies.
Clean these frequently as explained
below.
1 Open the operation panel.
2 Rotate the lever on the left side of
the roller forward so that it points
straight up
.
3 Pull the left side of the white roller
up out of its holder.
4 Wipe the scanning glass and rollers
with a clean cloth or swab.
46
• Make sure that all dirt and stains
(such as correcting fluid) are
removed. Dirt and stains will cause
vertical lines on transmitted images
and copies.
• If the scanning glass is difficult to
clean, try moistening the cloth with
isopropyl alcohol or denatured
alcohol. Take care that no alcohol
gets on the rollers.
Page 49

Cleaning the Print Head and Rollers
4 Replace the left end of the white
roller in its holder.
• If the right end of the roller came out
of its holder during cleaning, reinsert the right end into its holder
before replacing the left end.
5 Rotate the lever back down.
6 Close the operation panel.
8. Maintenance
Cleaning the Print Head and
Rollers
Clean the print head frequently to
ensure optimum printing performance.
Note: Remove any paper from the
paper tray and push in the tray
extension before cleaning the print
head.
1 Open the operation panel.
47
Page 50

Cleaning the Print Head and Rollers
2 Press the release and open the
print compartment cover.
Press green release
3 Remove the imaging film from the
compartment, lifting the left ends of
the spools first.
4 Wipe the print head and rollers with
a dry cloth. (If the head is difficult to
clean, try moistening the cloth with
water.)
Rollers
Print head
Caution:
• Do not use benzene, thinner, or
other solvents. Avoid touching the
print head with hard objects.
• The print head may be hot if the
machine has just received a large
number of documents. If this is the
case, allow the print head to cool
prior to cleaning.
5 Replace the imaging film:
a. Fit the right ends of the spools
onto the pins.
48
Page 51

Cleaning the Print Head and Rollers
b. Place the left ends so that the
shafts of the gears fit into the
holders.
6 Turn the front gear in the direction
shown until the film is taut.
8 Close the operation panel.
8. Maintenance
Cleaning the housing
Wipe the external parts and surface of
the machine with a dry cloth.
Caution: Do not use benzene or
thinner. These solvents may damage or
discolor the machine.
7 Close the print compartment cover.
• Press down on the marks on
both sides of the cover to make sure
it clicks into place.
About the lithium battery:
The machine uses a lithium battery to
retain settings and information
programmed in the machine when the
power is turned off. Battery power is
consumed primarily when the power
is off. With the power kept
continuously off, the life of the battery
is about 5 years. If the battery dies,
have your dealer or retailer replace it.
Do not try to replace it yourself.
49
Page 52

Problems and Solutions
9. Troubleshooting
Problems and Solutions
Line error
Problem Solution
COM ERROR XX appears
in the display.
(XX is a number used by
service technicians to
diagnose problems)
A line error occurs when your machine cannot
communicate correctly with another fax machine. The
error is usually due to a problem on the phone line.
Try faxing again. If unsuccessful, check the following:
• Check the connection. The cord from the TEL. LINE
socket to the wall socket should be no longer than two
meters.
• Make sure there are no modem devices sharing the
same telephone line.
• Check with the other party to make sure their fax
machine is functioning properly.
• Have your telephone line checked for line noise.
• Try connecting the machine to a different phone line.
• If the error persists, the machine may need service.
Dialling and transmission problems
Problem Solution
No dial tone when you
pick up the handset or
press .
• Make sure that the telephone line is properly
connected to both the TEL. LINE socket and the wall
socket (see page 9).
• Make sure that the telephone line is good.
50
Page 53

Problems and Solutions
Dialling is not possible. • Make sure the power cord is properly plugged into a
The power is on, but no
transmission takes place.
Nothing is printed at the
receiving end.
A distorted image is
received at the other end.
power outlet.
• Make sure that the telephone line is properly
connected to both the TEL. LINE socket and the wall
socket (see page 9).
• Make sure that the receiving machine has paper.
• If the receiving machine is in manual mode with no
attendant, reception will not be possible.
• Check the display for error messages.
• Pick up the handset and check for a dial tone. Dial the
receiving machine manually and make sure that it is
responding (you should hear a fax tone).
• Make sure that the document for transmission is
placed face down in the feeder.
• Noise on the telephone line may cause distortion. Try
sending the document again.
• Make a copy of the document on your machine. If the
copy is also distorted, your machine may need
service.
9. Trouble-
shooting
Reception and copying problems
Problem Solution
The printing paper does
not feed correctly, or multifeeds occur.
• Fan the paper before inserting it in the paper tray, and
tap the edges against a flat surface to even the stack.
(When adding paper, if paper still remains in the tray,
take it out and combine it with the new paper.)
• Make sure the paper is inserted straight in the tray.
• Do not insert more than 10 sheets of paper in the tray.
51
Page 54

Problems and Solutions
The printing paper comes
out blank when you try to
receive a document.
• Make sure that the document is loaded properly in the
feeder of the transmitting machine. Make a copy or
print a report to confirm the printing ability of your
machine.
Print quality is poor. • It is important to select a paper that is appropriate for
the thermal transfer printer in your fax. We
recommend using laser quality paper that has a very
smooth finish. Copier paper will work, but it
sometimes tends to yield a lighter print quality.
The received document is
faint.
• Ask the other party to send higher contrast
documents. If the contrast is still too low, your fax
machine may need service. Make a copy or print a
report to check your machine’s printing ability.
Received images are
distorted.
• Noise on the telephone line may cause distortion.
Have the other party try sending the document again.
• The print head may be dirty. Clean the print head as
explained on page 47.
• Make a copy or print a report on your machine. If the
copy or report is also distorted, your machine may
need service.
The quality of copies is
poor and/or dark vertical
lines appear.
• Any dirt or material on the scanning glass will cause
spots to appear on copies and transmitted faxes.
Clean the scanning glass as explained on page 46.
A received document or
copy prints out in strips.
ADD PAPER & /
PRESS START KEY
appears in the display.
52
• Make sure the operation panel is completely closed
(press down on both sides of the panel).
• The machine has received a fax to memory. Add
paper to the paper tray and press to print the
START
fax (see page 30).
Page 55

General problems
Problem Solution
Problems and Solutions
Nothing appears in the
display.
The machine does not
respond when you press
any of its keys.
Automatic document
feeding does not work for
transmission or copying.
• Make sure the power cord is properly plugged into a
power outlet.
• Connect another electrical appliance to the outlet to
see if it has power.
• If a beep sound is not made when you press the keys,
unplug the power cord and then plug it in again
several seconds later.
• Check the size and weight of the document (see
Transmittable Documents on page 17).
9. Trouble-
shooting
53
Page 56

Messages and Signals
Messages and Signals
Display messages
♦ If a message is longer than the display, the parts of the message will alternate.
♦ If you have turned on the Caller ID function, see page 40 for display messages
related to Caller ID.
ADD PAPER & /
PRESS START KEY
(alternating messages)
A.M. IN USE
(UX-A760 only)
COM ERROR XX
(XX is a number used by
service technicians to
diagnose problems)
COVER OPEN Open the operation panel and make sure that the print
DOCUMENT JAMMED The original document is jammed. See the following
FAX RX IN MEMORY This appears when the Key Lock function is activated
This appears when a fax has been received to memory
(page 30) because there is no paper in the tray. Add
paper and press to print the fax.
The answering system has answered a call and the
outgoing message is playing.
Transmission or reception was not successful. If this
message alternates with another message indicating a
problem, fix the problem and try the fax operation again.
If no other message appears, press to clear
the message and then try the fax operation again. If the
error persists, see Line Error on page 50.
compartment cover is completely closed (press down on
the marks on each side of the cover).
section, Clearing Paper Jams. Document jams will occur
if you load more than 10 pages at once or load
documents that are too thick (see page 17).
and a fax has been received to memory because there
is no paper in the paper tray. Release the Key Lock (see
page 45), add paper, and then press to print
the fax.
START
START
54
Page 57

Messages and Signals
FILM END Open the operation panel and the print compartment
KEY LOCK The Key Lock function has been activated. See page
MEMORY IS FULL The memory is full. This may occur during fax reception
MESSAGE #
(UX-A760 only)
NO # STORED This appears if you attempt to search for an auto-dial
ON HOOK DIAL
OVER HEAT The print head has overheated. Operation can be
cover and check the imaging film (see Replacing the
imaging film on page 9). If the film has completely
wound onto the front spool, replace the film. Otherwise,
make sure the film is loaded correctly and remove any
slack.
44.
if too much data is received before the pages can be
printed out. If faxes have been received to memory
because printing is not possible (an additional message
will indicate the problem), resolve the problem so that
printing can continue (see page 30).
The indicated number of messages are recorded in the
answering system.
number when none have been stored.
The key has been pressed and the fax machine is
waiting for you to dial.
continued after it cools.
9. Trouble-
shooting
PAPER JAMMED A paper jam has occurred. Remove the jam as
explained on page 59.
PRINT HEAD FAIL The print head has failed and requires service.
PRINTER ERROR A printer error has occurred. Try the operation again.
PRINTING The machine is preparing to or printing out a document
from memory.
READY TO SEND A document has been loaded and the fax machine is
waiting for you to begin faxing or copying.
55
Page 58

Messages and Signals
RECALLING This appears if you attempt to send a fax by automatic
dialling and the line is busy or the receiving fax machine
does not answer. Your fax machine will automatically
reattempt the call. (See Automatic redialling on page
24.)
Audible signals
Continuous tone 3 seconds Indicates the end of transmission,
reception, or copying.
Intermittent tone
(3 beeps)
Rapid intermittent
tone
5 seconds
(1 second on, 1
second off)
35 seconds
(0.7 seconds on,
0.3 seconds off)
Indicates incomplete transmission,
reception, or copying.
Indicates that the handset is off hook.
56
Page 59

Clearing Paper Jams
Clearing Paper Jams
Clearing a jammed document
If the original document doesn’t feed
properly during transmission or copying,
or [DOCUMENT JAMMED] appears in
the display, first try pressing then
. If the document doesn't feed out,
remove it as explained below.
Important: Do not try to remove a
jammed document without releasing it
as explained below. This may damage
the feeder mechanism.
F
1 Open the operation panel.
2 Rotate the lever on the left side of
the roller forward so that it points
straight up
.
3 Pull the left side of the white roller
up out of its holder.
shooting
9. Trouble-
57
Page 60

Clearing Paper Jams
4 Remove the document.
5 Replace the left end of the white
roller in its holder.
• If the right end of the roller came out
of its holder while you were removing
the document, re-insert the right end
into its holder before replacing the
left end.
6 Rotate the lever back down.
7 Close the operation panel.
58
Page 61

Clearing Paper Jams
Clearing jammed printing paper
Note: Remove any paper from the
paper tray and push in the tray
extension before removing jammed
printing paper.
1 Open the operation panel.
2 Press the release and open the print
compartment cover.
Press green release
4 Turn the front gear in the direction
shown until the film is taut.
5 Close the print compartment cover.
• Press down on the marks on
both sides of the cover to make sure
it clicks into place.
shooting
9. Trouble-
3 Remove the paper.
6 Close the operation panel.
59
Page 62

Quick Reference Guide
Sending Faxes
Place your document
(up to 10 pages) face
down in the document
feeder.
Normal Dialling
1. Lift the handset or press .
2. Dial the fax number.
3. Wait for the reception tone (if a person
answers, ask them to press their Start
key).
4. Press .
START
Dialling using the phonebook
1. Press , then
F
F
F
or until
F
the desired destination appears in the
display.
2. Press .
START
Rapid Key Dialling
1. Press the desired Rapid Key.
Recording an Outgoing
Message (UX-A760 only)
1. Press .
Receiving Faxes
Press until the desired reception
mode appears in the display.
FAX mo d e : The fax machine automatically
answers and receives faxes.
TEL mode: Answer all calls (even faxes)
by picking up the handset. To begin fax
reception, press .
START
TEL/FAX(T/F) mode: The fax machine
automatically answers and receives faxes.
Voice calls are signalled by a special
ringing sound.
A.M. mode: (UX-A760 only)
Select this mode when you go out to
receive both voice messages and faxes.
Storing Auto Dial Numbers
1. Press , .
2. Enter a name by pressing number keys.
A =
B =
C =
D =
E =
F =
3. Press .
F
(To enter two letters in succession that
require the same key, press
F
after entering the first letter.)
G =
H =
I =
J =
K =
L =
M =
START
N =
O =
P =
Q =
R =
S =
T =
8
TUV
U =
8
TUV
V =
8
TUV
W =
X =
Y =
Z =
2. Lift the handset, press , and
START
speak into the handset.
3. When finished, press
60
4. Enter the fax number.
5. Press and then .
START
Page 63

Index
Index
A
A.M. reception mode, 14, 30
Answering system, using with machine
(UX-P710 only), 30
Audible signals, 56
Auto-dial numbers
Deleting, 22
Editing, 22
Storing, 20
Using, 23
C
Call screening, 34
Caller ID, 40
Caller ID list, 40
Contrast, 19
Copies, 39
D
Date, setting, 13
Dial Tone Check, 24
Dialling
Automatic redialling, 24
Normal, 19
Phonebook, 23, 25
Rapid Key, 23, 25
Redialling, 23, 25
Display messages, 40, 54
Document restrictions, 17
Document sizes, 17
E
Erasing received faxes, 31
F
Fax Receive setting, 31
FAX reception mode, 14, 27
Fax Remote Number setting, 29
Fax Remote Reception setting, 28
Fax Signal Receive setting, 29
Flash Select setting, 16
H
Halftone setting, 18
Handset, 8
Hold, 28
Housing, cleaning, 49
I
Imaging film, checking and replacing, 9
Initial settings, 13
J
Jams, clearing, 57
K
Key Tone setting, 16
Keylock function, 44
L
Language Select setting, 16
Letters, entering, 7
Line error, 50
Loading paper, 12
Loading the document, 17
M
Memory use, checking, 31
Memory, substitute reception to, 30
N
Normal Dialling, 19
Number of Rings, 27
O
OGM only mode, 34
Override Ringing, 35
P
Paper jams, clearing, 57
Paper, loading, 12
Phone calls, 25
61
Page 64

Index
Phonebook
Deleting numbers, 22
Editing numbers, 22
Storing numbers, 20
Using to dial, 23, 25
Power cord, 8
Pseudo ring duration, 26
R
Rapid Key Dialling, 23, 25
Rapid Keys, assigning numbers to, 21
Reception mode
A.M., 14, 30
FAX, 14, 27
TEL, 14, 27
TEL/FAX, 14, 26
Recording time, 34
Redialling, 23, 25
Redialling, automatic, 24
Remote code, 36
Removing original document, 18
Resolution, 18
Ringer volume, 15
S
Scanning glass, cleaning, 46
Sender’s fax number, entering, 13
Sender’s name, entering, 14
Speaker volume, 15
Storing fax and phone numbers, 20
T
TEL reception mode, 14, 27
TEL. LINE socket, 9
TEL/FAX reception mode, 14, 26
Telephone line cord, 9
Time, setting, 13
Toll Saver function, 36
62
Page 65

REMOTE OPERATION CARD
The card below is provided as a quick guide to remote operation. Cut it out
and carry it with you when you go out.
Remote Operation Guide
1. Call your fax from a touch-tone telephone, and
press # when the outgoing message begins.
2. Enter your remote code: .
3. Press # .
4. After listening to your messages, you can either
hang up to save them, or enter one of the
commands on the reverse side.
Page 66

REMOTE COMMANDS
•PLAYBACK
Play messages ................. 7#
Move backward/repeat...... 2#
Skip forward...................... 5#
Stop .................................. 0#
Play new messages only .. 6#
(first stop playback)
• ERASING MESSAGES
Erase single message ...... 3#
Erase all messages .......... 33#
• RECORDING A MEMO
Start .................................. * #
End ................................... 0 #
• RECORDING A NEW OGM
Start .................................. 4#
• FAX RECEPTION MODES
A.M. mode ........................ 81#
FAX mode......................... 82#
TEL mode......................... 83#
TEL/FAX mode................. 84#
• OGM ONLY MODE
Turn on ............................. 11#
Turn off ............................. 12#
Page 67

Spis treści
Polski
Wprowadzenie 2
Pulpit sterowniczy 5
1. Instalacja 8
Dostarczone wyposażenie. . . . . . . . . 8
Konfiguracja. . . . . . . . . . . . . . . . . . . . 8
Folia kopiująca . . . . . . . . . . . . . . . . . . 9
Wkładanie papieru . . . . . . . . . . . . . . 12
Ustawienia początkowe. . . . . . . . . . 13
Ustawianie trybu odbioru. . . . . . . . . 14
Regulacja głośności. . . . . . . . . . . . . 15
Ustawianie systemu Flash w centrali
PBX . . . . . . . . . . . . . . . . . . . . . . . . . 16
Ustawianie języka . . . . . . . . . . . . . . 16
2. Wysyłanie dokumentów 17
Akceptowane dokumenty . . . . . . . . 17
Wkładanie dokumentu . . . . . . . . . . . 17
Regulowanie rozdzielczości i
kontrastu . . . . . . . . . . . . . . . . . . . . . 18
Wysyłanie dokumentu: Standardowe
wybieranie numeru. . . . . . . . . . . . . . 19
Zapisywanie numerów . . . . . . . . . . . 20
Wysyłanie dokumentu: Automatyczne
wybieranie . . . . . . . . . . . . . . . . . . . . 23
Wykonywanie rozmów
telefonicznych . . . . . . . . . . . . . . . . . 25
3. Odbieranie dokumentów 26
Praca w trybie TEL\FAKS (T\F) . . . . 26
Praca w trybie FAKS . . . . . . . . . . . . 27
Praca w trybie TEL. . . . . . . . . . . . . . 27
Praca w trybie AUT. ZGŁ.
(UX-A760). . . . . . . . . . . . . . . . . . . . . 30
Odbiór do pamięci . . . . . . . . . . . . . . 30
4. System zgłoszeniowy
(tylko UX-A760) 32
Nagrywanie zapowiedzi OGM . . . . . 32
Korzystanie z systemu
zgłoszeniowego . . . . . . . . . . . . . . . . 32
Ustawienia systemu
zgłoszeniowego. . . . . . . . . . . . . . . . . 34
Wymuszenie dzwonka . . . . . . . . . . . 35
Funkcje zdalne . . . . . . . . . . . . . . . . . 36
5. Kopiowanie 39
6. Identyfikacja dzwoniącego
(usługa wymaga subskrypcji)40
Aktywowanie funkcji identyfikacji
dzwoniącego. . . . . . . . . . . . . . . . . . . 40
Lista identyfikacji dzwoniących . . . . 40
Blokowanie rozmów . . . . . . . . . . . . . 42
7. Funkcja blokady klawiatury 44
8. Konserwacja 46
Czyszczenie urządzenia . . . . . . . . . . 46
Czyszczenie głowicy drukującej i
rolek . . . . . . . . . . . . . . . . . . . . . . . . . 47
9. Rozwiązywanie problemów 50
Problemy i rozwiązania. . . . . . . . . . . 50
Komunikaty i sygnały . . . . . . . . . . . . 54
Usuwanie zacięć papieru . . . . . . . . . 57
Skrócony opis obsługi 60
Indeks 61
1
Page 68

Wprowadzenie
Specyfikacje
Folia kopiująca Rolka próbna (dostarczona z telefaksem):
Ok. 20 stron A4
Zalecana rolka (sprzedawana oddzielnie):
UX-71CR (30 m x jedna rolka)
UX-72CR (30 m x dwie rolki)
(jedna rolka: ok. 90 stron A4 )
Pojemność podajnika papieru
System zapisu
Właściwa szerokość druku
Rozmiar pamięci UX-P710: Ok. 40 przeciętnych stron
Szybkość modemu 14 400 bitów na sekundę z automatyczną redukcją.
Czas transmisji* Ok. 9 sekund
Kompatybilność Tryb ITU-T (CCITT) G3
System kompresji MH, H2, MMR
Automatyczne wybieranie
numeru
Właściwa szerokość
skanowania
Rozdzielczość
skanowania
Ok. 10 stron A4 (80 g/m2) (w temperaturze pokojowej)
Zapis termiczny
Maks. 205 mm
UX-A760: Ok. 50 przeciętnych stron, jeśli nie
nagrywano wiadomości głosowych, lub 15 minut
wiadomości głosowych (wliczając zapowiedzi OGM),
jeśli nie zapisywano żadnych dokumentów
(maksymalnie 30 wiadomości głosowych).
100 numerów; 3 Klawisze szybkiego wybierania
Maks. 205 mm
Pozioma: 8 pikseli/mm
Pionowa:
Tryb Standard: 3,85 linii/mm
Tryb Fine /Półtony: 7,7 linii/mm
Tryb Super fine: 15,4 linii/mm
Półtony (skala szarości) 64 poziomy
*Na podstawie standardowej karty Sharp, przy standardowej rozdzielczości, z wyłączeniem
czasu na sygnały protokołu (tj. tylko czas ITU-T, faza C)
2
Page 69

Linia telefoniczna
Analogowa publiczna sieć telefoniczna (ES203021) /
centrala PBX
Tryby odbioru
Automatyczny podajnik
TEL/FAKS,TEL, FAKS, AUT. ZGŁ.
(Tryb AUT.
A4: Maks. 10 stron (80 g/m
Z
GŁ. jest dostępny tylko w urządzeniu UX-A760)
2
)
dokumentów
Regulacja kontrastu Do wyboru: Automatycznie/Ciemny
Kopiowanie Jest
Wyświetlacz 16-znakowy wyświetlacz LCD
Wymagania dotyczące
Prąd zmienny 220-230 V, 50 Hz
zasilania
Emisja szumu
Poniżej 70 decybeli (zmierzona zgodnie z EN ISO 7779)
Zużycie energii Gotowość: 1,5 W (jeśli dla identyfikacji dzwoniącego i
zdalnego odbioru faksu ustawiono opcję NIE)
Maks.: 90 W
Dopuszczalna temperatura
5 - 35°C
otoczenia podczas pracy
urządzenia
Wilgotność 30 - 85% RH
Wymiary (bez
dodatkowego wyposażenia)
Szerokość: 296 mm
Głębokość: 180 mm
Wysokość: 86 mm
Ciężar (bez
Ok. 2,3 kg
dodatkowego wyposażenia)
Stawiając sobie za cel ciągłe doskonalenie swoich produktów, firma Sharp zastrzega
sobie prawo do wprowadzania zmian parametrów i danych technicznych telefaksu
bez powiadomienia. Dane dotyczące wydajności poszczególnych elementów są
wartościami nominalnymi produkowanych urządzeń. W poszczególnych przypadkach
dopuszcza się odchylenia od podanych wielkości.
Ważne!!
Urządzenie nie jest przeznaczone do użytku z liniami telefonicznymi, obsługującymi
funkcje oczekiwania, przekazywania połączeń ani inne usługi specjalne oferowane przez firmy
telekomunikacyjne. W przypadku próby korzystania z urządzenia w połączeniu z takimi
usługami podczas wysyłania i odbierania faksów mogą wystąpić błędy.
Urządzenie nie jest zgodne z systemami telefonii cyfrowej.
3
Page 70

Ważne informacje dotyczące bezpieczeństwa
Urządzenia nie należy samodzielnie demontować ani wykonywać czynności
nieopisanych w niniejszej instrukcji. Wszelkie naprawy należy zlecać
wykwalifikowanemu personelowi technicznemu.
Urządzenia nie należy używać w pobliżu wody ani wtedy, gdy użytkownik jest mokry.
Urządzenia nie należy na przykład używać w pobliżu wanny, umywalki, zlewu
kuchennego, suszarki, w wilgotnej piwnicy ani w pobliżu basenu kąpielowego. Do
wnętrza urządzenia nie powinny się w żadnym przypadku dostać jakiekolwiek płyny.
Urządzenie należy odłączyć od sieci elektrycznej i linii telefonicznej oraz skontaktować się z
serwisem w każdej z poniższych sytuacji:
- Do wnętrza urządzenia dostała się ciecz lub urządzenie zostało narażone na kontakt z wodą.
- Podczas pracy urządzenia wydzielany jest przykry zapach, dym lub słychać nietypowy dźwięk.
- Kabel zasilający został uszkodzony.
- Urządzenie zostało upuszczone lub uszkodzono obudowę.
Na kablu sieciowym nie należy ustawiać żadnych przedmiotów ani nie należy
instalować urządzenia w taki sposób, aby po kablu deptały przechodzące osoby.
Opisywany telefaks może być podłączony jedynie do uziemionego gniazdka napięcia
zmiennego
uszkodzenie i unieważnienie gwarancji.
Do otworów i szczelin urządzenia nigdy nie należy wkładać żadnych przedmiotów.
Działanie takie może spowodować porażenie prądem. Jeśli do urządzenia wpadnie
przedmiot i nie można go wyjąć, należy odłączyć urządzenie od zasilania sieciowego i
skontaktować się z przedstawicielem wykwalifikowanego serwisu.
Nie należy umieszczać urządzenia na niestabilnym wózku, stojaku ani stole. W razie
upadku urządzenie może zostać poważnie uszkodzone.
Nigdy nie należy instalować okablowania telefonicznego podczas burzy.
Gniazd telefonicznych nie wolno instalować w miejscach wilgotnych chyba, że są to
gniazda przeznaczone do pracy w takich warunkach.
Nigdy nie należy dotykać nieizolowanych przewodów telefonicznych, o ile nie zostały
odłączone od linii.
Podczas instalowania i modyfikowania linii telefonicznej należy zachowywać
ostrożność.
Należy unikać korzystania z telefonu (jeśli nie jest bezprzewodowy) w czasie burzy z
wyładowaniami elektrycznymi. Istnieje zagrożenie porażeniem prądem w wyniku
uderzenia piorunu.
W przypadku wycieku gazu nie należy zgłaszać takiej awarii, korzystając z telefonu w
pobliżu wycieku.
Gniazdo elektryczne powinno znajdować się w pobliżu urządzenia, w łatwo
dostępnym miejscu.
Urządzenie nie ma włącznika zasilania, dlatego włącza się je i wyłącza podłączając i
odłączając wtyczkę.
220-230 V, 50 Hz. Podłączenie do innego napięcia spowoduje
4
Page 71

Pulpit sterowniczy
5
1
7
Uwaga:
Wyświetlacz:
1
pomagające w obsłudze urządzenia.
Przycisk funkcyjny:
2
8
9 10 11
Powyższa ilustracja przedstawia panel sterowania w urządzeniu UX-A760.
Wyświetla komunikaty
12
Naciśnięcie tego
przycisku oraz klawiszy strzałek
umożliwia wybranie różnych
specjalnych funkcji i ustawień.
Klawisze strzałek: Umożliwiają
3
poruszanie się po ustawieniach i
wybieranie ustawień oraz
przeszukiwanie numerów w książce
telefonicznej (str. 23).
Klawiatura numeryczna:
4
Umożliwia
wprowadzenie numerów telefaksu.
Przycisk
5
Jeśli dokument znajduje się w
WYBÓR TRYBU
podajniku, należy nacisnąć ten
przycisk, aby wyregulować
rozdzielczość skanowania (str. 18). Jeśli
w podajniku nie znajduje się dokument,
należy nacisnąć ten przycisk, aby
wybrać tryb odbioru (str. 14).
Przycisk R: Naciśnij ten przycisk,
6
aby wykonać zewnętrzne
połączenie z centrali PBX (str. 19).
COPY/
HELP
2
?
3
F
START
14
Klawisze szybkiego wybierania:
7
Można im przypisać numery
4
15
5
R
1613
17
6
18
zapisane w pamięci. Naciśnięcie
jednego z tych przycisków
spowoduje automatyczne
wybieranie numeru telefaksu (str.
23).
Przycisk NOTATKA: Naciśnij ten
8
przycisk, aby nagrać notatkę
głosową (tylko UX-A760).
Przycisk POWITANIE: Naciśnij ten
9
przycisk, aby nagrać powitanie
(zapowiedź) (tylko UX-A760).
Przycisk ODTWARZANIE:
10
ten przycisk, aby odtworzyć
Naciśnij
wiadomość (tylko UX-A760).
Przycisk USUŃ: Naciśnij ten
11
przycisk, aby usunąć dane różnego
typu z telefaksu (tylko UX-A760).
5
Page 72

Przycisk KOPIA/POMOC
12
podajniku znajduje się dokument,
: Jeśli w
naciśnięcie tego przycisku powoduje
wykonanie kopii dokumentu (str. 39).
Jeśli w podajniku nie ma dokumentu,
naciśnięcie tego przycisku powoduje
wydrukowanie Listy pomocy –
skróconego opisu obsługi urządzenia.
Przycisk STOP: Ten przycisk
13
umożliwia anulowanie operacji
przed jej zakończeniem.
Przycisk START: Naciśnięcie tego
14
przycisku, po wybraniu numeru,
powoduje rozpoczęcie transmisji
(str. 19).
Przycisk POWTÓRZ: Naciśnięcie
15
tego przycisku spowoduje ponowne
odtworzenie słuchanej wiadomości
(tylko UX-A760).
Przycisk PRZEJDŹ DALEJ:
16
Naciśnięcie tego przycisku, podczas
odsłuchiwania wiadomości,
spowoduje przejście do następnej
wiadomości (tylko UX-A760).
Monitorowanie rozmów telefonicznych
Przycisk GŁOŚNIK:
17
tego przycisku słychać sygnały linii
Po naciśnięciu
telefonicznej i telefaksu podczas
wysyłania dokumentu (str. 19).
Uwaga:
głośnomówiącego.
To nie jest funkcja trybu
Aby można było
przeprowadzić rozmowę, należy
podnieść słuchawkę.
Przycisk ZAWIESZANIE (UX-
18
A760)
Przycisk ZAWIESZANIE/USUŃ
(UX-P710): Naciśnięcie tego
przycisku w trakcie rozmowy
powoduje zawieszenie rozmowy z
drugą stroną.
Przycisk ten umożliwia w
urządzeniu UX-P710 usuwanie
danych różnego typu.
Naciśnięcie przycisku podczas rozmowy umożliwi osobie trzeciej słuchanie
rozmowy poprzez głośnik. (Naciśnij przycisk ponownie, aby wyłączyć głośnik.)
Aby podczas monitorowania dialogu dostosować głośność głośnika, naciśnij
F
przycisk lub (po odłożeniu słuchawki natężenie głośności spada do
F
F
najniższego ustawienia).
Nie ma możliwości wykorzystania głośnika jako mikrofonu; jest on przeznaczony
tylko do słuchania.
W celu uniknięcia sprzężenia zwrotnego (pogłosu), należy wyłączyć głośnik
(naciśnij ponownie przycisk ) przed odłożeniem słuchawki.
6
Page 73

Wprowadzanie liter
Jeżeli konieczne będzie wprowadzenie nazwy lub innego tekstu, należy
skorzystać z klawiatury numerycznej według poniższej tabeli.
Uwaga: Aby dodać liczbę do nazwy, naciśnij przycisk , a następnie
F
wprowadź żądaną liczbę. Aby wrócić do trybu wprowadzania liter, ponownie
naciśnij przycisk . (Jeśli wybrano tryb wprowadzania liter, po prawej stronie
F
wyświetlacza można zobaczyć wskaźnik „ABC”. Jeśli wybrano tryb
wprowadzania liczb w tym samym miejscu widoczne będzie „123”. )
A =
B =
C =
D =
E =
F =
G =
H =
I =
J =
K =
L =
M =
Na przykład SHARP = 7777 44 2 777 7
N =
O =
P =
Q =
R =
S =
T =
U =
8
TUV
V =
8
TUV
W =
X =
Y =
Z =
8
TUV
F
♦ Aby wpisać kolejno po sobie dwie litery wymagające tego samego przycisku,
po wpisaniu pierwszej litery naciśnij przycisk .
F
♦ Aby usunąć znak lub wprowadzić poprawki, naciśnij przycisk w
urządzeniu UX-P710 lub w urządzeniu UX-A760 .
C
♦ Aby zmienić wielkość liter, naciskaj przycisk przypisany odpowiedniej literze
dopóki nie pojawi się żądana wielkość litery.
♦ Żeby wprowadzić jeden z poniższych symboli, naciskaj przycisk ,
dopóki nie pojawi się żądany znak , : ! ? & / ( ) [ ] (spacja)
Żeby wprowadzić jeden z poniższych symboli, naciskaj przycisk ,
dopóki nie pojawi się żądany znak @ . / - _ Ż
Uwaga: Na końcu listy znajdują się dodatkowo znaki charakterystyczne
dla wybranego języka. Znaki pojawią się zależnie od wybranego języka (zob.
str
.
16). Urządzenie nie zostało wyposażone w znaki dla wszystkich języków.
Ł
Ę Ś Ą Ń
7
Page 74

Dostarczone wyposażenie
1. Instalacja
Dostarczone wyposażenie
Słuchawka
Rolka próbna folii
kopiującej (zainstalowana
w urządzeniu)
Kabel
słuchawkowy
Wskazówki dotyczące
konfiguracji
Kabel
telefoniczny
Instrukcja
obsługi
♦ Urządzenia nie należy narażać na
bezpośrednie działanie promieni
słonecznych.
♦ Urządzenia nie należy ustawiać w
pobliżu kaloryferów ani klimatyzacji.
♦ Urządzenia należy chronić przed
kurzem.
♦ Wokół urządzenia należy utrzymywać
porządek.
Skraplanie się pary wodnej
Jeśli telefaks był przenoszony z
pomieszczenia chłodnego do ciepłego,
szyba skanera może się pokryć
skroploną parą wodną, uniemożliwiając
prawidłowe skanowanie dokumentów.
Aby usunąć parę z szyby, należy
wyłączyć zasilanie i odczekać około
dwóch godzin.
Konfiguracja
Podłączanie słuchawki
Podłączanie kabla zasilającego
Kabel zasilający należy podłączyć do
gniazda sieci elektrycznej prądu
zmiennego o napięciu
220-230 V, 50 Hz
♦ Gniazdo elektryczne należy
zainstalować w pobliżu urządzenia, w
łatwo dostępnym miejscu.
♦ Zaleca się instalację bezpiecznika
przeciwprzepięciowego dla zasilania i
linii telefonicznej. Bezpieczniki
przeciwprzepięciowe można zakupić
w większości sklepów sprzedających
części do telefonów.
.
8
Page 75

Folia kopiująca
TEL.LINE
Podłączanie kabla telefonicznego
Gniazdo
TEL.LINE
Standardowe
gniazdo w ścianie
Folia kopiująca
Sprawdzanie zainstalowanej
fabrycznie rolki próbnej
W urządzeniu wstępnie zamontowana
została rolka próbna. Wykonaj
czynności opisane w kroku 1 do 2 i 8
do 10, opisane w dziale Wymiana folii
kopiującej, aby sprawdzić folię
kopiującą oraz jej naciągnięcie.
♦ Na rolce próbnej można wydrukować
około20 stron.
W przypadku wyświetlenia się
komunikatu [BRAK FOLII]
Jeśli na wyświetlaczu pojawi się
komunikat [BRAK FOLII] na dłużej niż 10
sekund, należy zdjąć obudowę (zob.
kroki 1 i 2 w części Wym
kopiującej
cała folia nawinęła się na przednią
szpulę, należy ją wymienić. W
przeciwnym razie, należy wykonać kroki
od 8 do 10 opisane w części
folii kopiującej
część.
) i sprawdzić stan folii. Jeśli
, aby usunąć obluzowaną
iana folii
Wymiana
1. Instalacja
Wymiana folii kopiującej
Zalecana folia
Należy korzystać z następującej folii
kopiującej:
SHARP UX-71CR (jedna rolka)
lub
SHARP UX-72CR (dwie rolki)
Aby wymienić folię, wykonaj
następujące czynności.
Uwaga: Przed przystąpieniem do
wymiany folii, należy usunąć papier z
podajnika i wsunąć z powrotem
wystającą część podajnika.
9
Page 76

Folia kopiująca
1 Otwórz pulpit sterowniczy.
2 Zwolnij blokadę i otwórz zespół
drukujący.
4 Wyciągnij dwie zielone zębatki ze
szpul.
DWA ZIELONE KOŁA ZĘBATE
BĘDĄ JESZCZE POTRZEBNE!
5 Wyjmij nową rolkę folii kopiującej z
opakowania.
• Przetnij opaskę spinającą rolki.
6 Zamontuj zielone koła zębate.
3 Wyjmij zużytą rolkę z zespołu
drukującego. Zacznij od
podniesienia lewych końców szpuli.
10
1 szczelina
2 szczeliny
Upewnij się, że koła zębate pasują
do szczelin na końcach rolek.
Page 77

7 Załóż nową rolkę w zespole
drukującym:
a. Prawe końce szpuli muszą
pasować do kołków.
b. Umieść lewe końcówki w taki
sposób, aby wałki koła zębatego
pasowały do uchwytu.
Folia kopiująca
8
Obracaj we wskazanym kierunku
przednie koło zębate, dopóki folia nie
zostanie odpowiednio naciągnięta.
• Jeśli na folii znajduje się etykieta,
obracaj koło zębate dopóki etykieta
nie będzie już widoczna.
9 Zamknij pokrywę zespołu
drukującego.
• Dociśnij w miejscach zaznaczonych
po obu stronach obudowy,
aby upewnić się czy pokrywa
została odpowiednio zamknięta.
1. Instalacja
10 Zamknij pulpit sterowniczy.
11
Page 78

Wkładanie papieru
Wkładanie papieru
Do podajnika papieru można włożyć
ok. 10 stron A4 (80 g/m
temperaturze pokojowej).
2
) (przy
1 Podajnik papieru musi być otwarty.
2
Wyciągnij wystającą część podajnika.
4 Umieść stertę papieru w podajniku,
stroną druku do dołu.
• Jeśli w podajniku znajduje się papier,
wyjmij go i umieść z powrotem z
nowym stosem papieru.
• Drukowanie na odwrotnej stronie
papieru może spowodować słabą
jakość druku.
•
Nie umieszczać papieru zwiniętego
ani kartek, na których już drukowano.
3 Rozluźnij kartki i wyrównaj stos
arkuszy uderzając jego krawędzią o
płaską powierzchnię.
12
Uwaga: Jeśli papier będzie pozostawał
w podajniku przez dłuższy czas, może
dojść do jego zwinięcia. Zwinięty
papier może spowodować niewłaściwe
przesuwanie się papieru w podajniku i
zacięcie papieru.
Postępowanie przy wyłączonej
maszynie:
W takiej sytuacji należy zamknąć
podajnik papieru.
Page 79

Ustawienia początkowe
Ustawienia początkowe
Ustawianie daty i godziny
Ustaw datę i godzinę w urządzeniu.
♦
Data i godzina są drukowane u góry
każdej wysłanej strony. Data i godzina są
także widoczne na wyświetlaczu.
1 Naciśnij przycisk , , .
F
• Wyświetlona zostanie aktualnie
ustawiona data (na przykład): [DATA
15-08-2008]
2 Wprowadź dwucyfrową liczbę
oznaczającą dzień („01” do „31”).
Na przykład: 5
[DATA 05-08-2008]
• Aby poprawić ewentualną pomyłkę,
naciśnij przycisk w
urządzeniu UX-P710, lub w
urządzeniu UX-A760 .
C
3 Wprowadź dwucyfrowy numer
miesiąca („01” - styczeń, „02” - luty,
„12” - grudzień, itd.).
Na przykład: styczeń
[DATA 05-01-2008]
4 Wprowadź rok (4 cyfry).
Na przykład:
• Wyświetlona zostanie aktualnie
ustawiona godzina (na przykład):
[GODZINA 12:19]
5 Wprowadź dwucyfrową godzinę
(„00” do „23”) oraz dwucyfrowo
minuty („00” do „59”).
Na przykład: 9:25
6 Naciśnij przycisk .
Na wyświetlaczu pojawi się
komunikat: [UST. WŁASNY NR]
START
7 Aby wyjść, naciśnij .
Uwaga: Urządzenie posiada funkcję
automatycznej aktualizacji sezonowych
zmian czasu.
Wprowadzanie własnego
numeru faksu
W urządzeniu wprowadź własny numer
faksu.
♦ Wprowadzony numer faksu będzie
drukowany u góry każdej wysłanej
strony.
1 Naciśnij przycisk , , .
F
2 Naciśnij przycisk , aby wybrać
USTAW.
(Aby usunąć numer, naciśnij
dwukrotnie przycisk i przejdź
do kroku 5.)
3 Za pomocą klawiatury numerycznej
wprowadź numer faksu (maks. 20
znaków)
.
• Aby wstawić pauzę, naciśnij
przycisk
naciśnij przycisk
•
Aby wprowadzić poprawki, naciśnij
przycisk w urządzeniu UX-
P710 lub w urządzeniu UXA760 .
. Aby wstawić „+”,
C
1. Instalacja
13
Page 80

Ustawianie trybu odbioru
4 Naciśnij przycisk .
Na wyświetlaczu pojawi się
komunikat:
[UST. NAZW. WŁ.]
START
5 Aby wyjść, naciśnij .
Wprowadzanie nazwy
użytkownika
W urządzeniu wprowadź własną
nazwę.
♦ Wprowadzona nazwa będzie
drukowana u góry każdej wysłanej
strony.
1 Naciśnij przycisk , , .
F
2 Naciśnij przycisk , aby wybrać
USTAW.
(Aby usunąć nazwę, naciśnij
dwukrotnie przycisk i przejdź
do kroku 5.)
3 Wprowadź nazwę za pomocą
klawiatury numerycznej według
tabeli na str. 7. Można wprowadzić
do 24 znaków.
• Aby wprowadzić poprawki, naciśnij
Ustawianie trybu odbioru
Urządzenie może pracować w jednym
z poniższych trybów odbioru:
Tr y b FAKS:
Ten tryb należy wybrać, aby tylko
odbierać dokumenty. Telefaks będzie
automatycznie odbierał wszystkie
połączenia i przyjmował wysyłane
dokumenty.
Tr y b T EL:
Jest to najwygodniejszy tryb do
odbierania rozmów telefonicznych.
Można także przyjmować dokumenty,
jednak najpierw trzeba przyjąć
rozmowę, podnosząc słuchawkę
telefaksu lub dodatkowego telefonu.
Tryb TEL/FAKS (T/F):
Ten tryb jest wygodny do odbierania
rozmów i dokumentów. Telefaks będzie
reagował na wszystkie połączenia po
ustawionej liczbie sygnałów. Jeśli
wykryta zostanie zwykła rozmowa (a
także ręcznie wybrane transmisje
dokumentów), urządzenie zadzwoni.
Jeśli wykryty zostanie faks
przychodzący, odbiór zostanie
rozpoczęty automatycznie.
przycisk w urządzeniu UX-
P710 lub w urządzeniu UXA760 .
4 Naciśnij przycisk .
Na wyświetlaczu pojawi się
komunikat:
C
START
[UST.DATY,CZASU]
5 Aby wyjść, naciśnij .
14
Tr y b () AUT. ZGŁ. (tylko UX-A760):
Tego trybu należy używać tylko wtedy,
gdy do faksu podłączony został
automat zgłoszeniowy. Tryb umożliwia
zapis wiadomości głosowych oraz
automatyczny odbiór faksów.
Page 81

Regulacja głośności
Ustawianie trybu odbioru
Aby ustawić tryb odbioru, należy sprawdzić,
czy w podajniku
na pewno nie ma
dokumentu, oraz nacisnąć i przytrzymać
przycisk dopóki na wyświetlaczu
nie pojawi się odpowiedni tryb.
♦ Więcej informacji na ten temat
zawarto w Rozdziale 3.
Regulacja głośności
Głośność głośnika
1 Naciśnij przycisk .
F
2 Naciśnij przycisk lub ,
F
aby wybrać żądany poziom
głośności.
F
• Naciśnij ponownie przycisk ,
aby wyłączyć głośnik.
Głośność dzwonka
F
1 Naciśnij przycisk lub ,
F
aby wybrać GŁOŚNY, ŚREDNI,
CICHY, lub WYŁ.. (Należy upewnić
się, że nie został naciśnięty
przycisk .)
F
• Dzwonek zadzwoni raz z
ustawionym poziomem głośności.
2 Jeśli wybrałeś „WYŁ. OK?”,
naciśnij przycisk .
START
1. Instalacja
Uwaga:
Jeśli włączony jest tryb TEL, po
wyłączeniu dzwonka nadal będzie można
go słyszeć na poziomie CICHY.
15
Page 82

Ustawianie języka
Ustawienia dźwięku klawiszy
Naciśnięcie przycisku na pulpicie
sterowniczym spowoduje wydanie
dźwięku. Oznacza to, że przycisk został
naciśnięty w odpowiedni sposób.
W razie potrzeby, dźwięk klawiszy
można wyłączyć. W tym celu należy
wykonać następujące czynności.
1
Naciśnij przycisk , i .
F
2 Naciśnij przycisk (TAK), aby
włączyć dźwięk przycisków.
Naciśnij przycisk (NIE), aby
wyłączyć dźwięk przycisków.
3 Aby wyjść, naciśnij .
Ustawianie systemu Flash w
centrali PBX
Uwaga: Ustawienia te z reguły stosuje
się tylko w Niemczech. W pozostałych
krajach, można spróbować zmienić te
ustawienia, jeśli wystąpiły trudności z
domyślnymi ustawieniami.
Jeśli telefaks jest podłączony do
centrali PBX wykorzystującej metodę
„Flash” do podłączania się do linii
zewnętrznej, należy wybrać
odpowiednie ustawienia Flash,
uwzględniając przy tym podłączenie
centrali PBX do zwykłej lub szybkiej
linii.
2
Naciśnij (KROTKI CZAS) jeśli
centrala PBX jest zwykłą linią
telefoniczną.
Naciśnij (DŁUGI CZAS), jeśli
centrala PBX jest linią szybką.
3 Aby wyjść, naciśnij .
Ustawianie języka
Ustawienia te służą do zmiany języka
używanego na wyświetlaczu, raportach
i listach.
1 Naciśnij przycisk , i .
F
2 Naciśnij przycisk , aby wybrać
język angielski.
Naciśnij przycisk , aby wybrać
język polski.
Naciśnij przycisk , aby wybrać
język turecki.
Naciśnij przycisk , aby wybrać
język rumuński.
3 Aby wyjść, naciśnij .
1 Naciśnij przycisk , i .
F
16
Page 83

Akceptowane dokumenty
2. Wysyłanie dokumentów
Dokumenty, które są posklejane
Akceptowane dokumenty
Minimalny format/gramatura
dokumentu
148 x 140 mm
2
52 g/m
Maksymalny format/gramatura
dokumentu:
Wkładanie do 10 stron na raz:
A4 (210 x 297 mm)
2
80 g/m
Wkładanie pojedynczych kartek:
210 x 356 mm
157 g/m
Maksymalna szerokość skanowanego
dokumentu wynosi
205 mm, 5 mm górnej i dolnej części
dokumentu nie podlega skanowaniu.
2
Inne ograniczenia
♦ Tusz w kolorze żółtym, zielonożółtym i
jasnoniebieskim nie jest
rozpoznawany przez skaner.
♦ Przed włożeniem dokumentu do
podajnika należy usunąć z
dokumentu wszelkie spinacze,
zszywki i pinezki. Jeśli nie zostaną
one usunięte, mogą spowodować
uszkodzenie urządzenia.
♦
taśmą, naddarte, mniejsze od
minimalnego formatu, mają przypiętą
kalkę, łatwo się rozmazują lub mają
śliską, powlekaną powierzchnię,
należy przed transmisją skopiować i
do podajnika włożyć kopię.
♦ Zwijane lub fałdowane dokumenty
powinny zostać wyprostowane.
Wkładanie dokumentu
Jednorazowo do podajnika można
włożyć do 10 dokumentów A4. Będą
one pobierane automatycznie
poczynając od dolnego arkusza.
♦
Jeśli zajdzie potrzeba wysłania większej
liczby dokumentów, należy ostrożnie
dokładać następne kartki do podajnika
zanim ostatnia kartka zostanie
zeskanowana. Nie wolno wkładać
arkuszy na siłę, ponieważ może to
spowodować blokadę faksu lub pobranie
kilku arkuszy za jednym razem.
♦
Jeśli kartki wchodzące w skład
wysyłanego dokumentu są dosyć grube,
każdą następną kartkę należy wkładać
dopiero wtedy, gdy poprzednia kartka
zostanie już zeskanowana. Arkusze
należy wkładać ostrożnie, aby zapobiec
pobieraniu kilku arkuszy za jednym
razem.
1 Ustaw prowadnice zgodnie z
szerokością dokumentu.
2. Wysyłanie
dokumentów
♦ Tusz, klej i korektor znajdujące się na
dokumencie muszą być suche przed
rozpoczęciem skanowania.
17
Page 84

Regulowanie rozdzielczości i kontrastu
2 Włóż do podajnika dokument
drukiem skierowanym w dół.
Dokument należy układać górną
krawędzią do przodu. Sprawdź czy
urządzenie pobiera dokument.
• Na wyświetlaczu pojawi się
komunikat: [
GOTOWY DO WYS].
3 Wyreguluj rozdzielczość i/lub
kontrast (str. 18), a następnie
wybierz numer telefaksu
odbierającego (str. 19).
Wyjmowanie dokumentu z
podajnika
1 Naciśnij przycisk , a
następnie . Dokument
wysunie się.
F
2 Jeśli nie można wyjąć dokumentu,
otwórz pulpit sterowniczy i
wyciągnij dokument (zob.
Usuwanie zaciętego dokumentu
str. 57).
• Ostrzeżenie: Nie należy
wyjmować zaciętego dokumentu
bez uprzedniego otworzenia
pulpitu sterowniczego. Działanie
takie może spowodować
uszkodzenie podajnika.
Regulowanie rozdzielczości i
kontrastu
Przed wysłaniem dokumentu można
ustawić rozdzielczość i kontrast.
♦
Domyślnie ustawiana jest rozdzielczość
STANDARD. Domyślnie ustawiany jest
kontrast AUTO.
♦ Aby użyć innych trybów niż
standardowe, należy je za każdym
razem ustawić na nowo.
Uwaga: Ustawienia rozdzielczości i
kontrastu mają zastosowanie tylko w
przypadku wysyłania dokumentu. Nie
mają wpływu na dokumenty odbierane.
Ustawienia rozdzielczości
STANDARD Trybu STANDARD używa
się dla typowych
dokumentów. To
ustawienie zapewnia
najszybszą i oszczędną
transmisję.
FINE
SUPER FINE Tryb ten jest
POŁTONY Ten tryb jest przydatny
Tryb FINE jest
przeznaczony do transmisji
dokumentów z drobnym
drukiem
przeznaczony do
transmisji dokumentów
z bardzo drobnym
drukiem lub rysunkami.
przy przesyłaniu
fotografii i ilustracji.
Przesłana kopia zostanie
odwzorowana w 64
odcieniach szarości.
lub
rysunkami.
18
Page 85

Wysyłanie dokumentu: Standardowe wybieranie numeru
Ustawienia kontrastu
AUTO Ten tryb służy do
transmisji
standardowych
dokumentów.
CIEMNY W tym trybie należy
wysyłać bardzo jasne
dokumenty.
1 Włóż dokument(y).
• Aby można było ustawić kontrast i/
lub rozdzielczość, w podajniku musi
się znajdować dokument.
2 Naciśnij przycisk jeden
lub więcej razy, dopóki na
wyświetlaczu nie pojawią się
żądane ustawienia rozdzielczości i
kontrastu.
• Przy pierwszym regulowaniu
ustawień rozdzielczości dla każdego
ustawienia rozdzielczości ustawiana
jest opcja AUTO kontrastu. Przy
drugim przechodzeniu przez listę
ustawień wyświetlane jest
ustawienie kontrastu CIEMNY.
Uwaga: Aby możliwa była transmisja w
trybie SUPER FINE, telefaks
odbierający musi również obsługiwać
ten tryb. W przeciwnym przypadku
wybrany zostanie automatycznie tryb
FINE.
Wysyłanie dokumentu:
Standardowe wybieranie numeru
Standardowe wybieranie numeru polega na
podniesieniu słuchawki (lub naciśnięciu
przycisku ) i wybraniu numeru na
klawiaturze numerycznej.
♦
Jeśli druga strona odbierze połączenie,
przed wysłaniem dokumentu można
przeprowadzić rozmowę. (Jeśli naciśnięty
został przycisk , w celu
przeprowadzenia rozmowy konieczne jest
podniesienie słuchawki.)
♦
W przypadku tego sposobu wybierania
numerów można słuchać sygnałów linii
telefonicznej i mieć pewność, że drugi
telefaks przyjmuje połączenie.
1 Włóż dokument(y).
• W razie potrzeby ustaw
rozdzielczość i/lub kontrast za
pomocą przycisku .
2 Podnieś słuchawkę lub naciśnij
przycisk . Poczekaj na sygnał
wolnej linii.
3
Na klawiaturze numerycznej wybierz
numer telefaksu odbierającego.
•
Aby wykonać zewnętrzne połączenie
w centrali PBX, naciśnij przycisk
, poczekaj na połączenie z linią
R
zewnętrzną i wybierz numer telefaksu
odbierającego.
4 Czekaj na połączenie. Zależnie od
ustawienia drugiego telefaksu,
usłyszysz sygnał odbioru lub ktoś
podniesie słuchawkę.
2. Wysyłanie
dokumentów
19
Page 86

Zapisywanie numerów
• Jeśli ktoś odbierze połączenie
(podnieś słuchawkę w przypadku
korzystania z przycisku ),
poproś o naciśnięcie przycisku Start
w drugim telefaksie. Spowoduje to
wysłanie przez drugie urządzenie
sygnału faksu.
5 Gdy usłyszysz sygnał odbioru,
naciśnij przycisk . Odłóż
słuchawkę.
START
• Telefaks zasygnalizuje zakończenie
transmisji pojedynczym dźwiękiem.
• Telefaks zasygnalizuje wystąpienie
błędu potrójnym dźwiękiem.
Uwaga: W przypadku nieudanej
transmisji na wyświetlaczu pojawi się
[ZACIĘTY DOKUMENT], usuń
dokument tak, jak to opisano na str. 57.
Zapisywanie numerów
Zapisywanie numerów faksu i
telefonu w książce telefonicznej
Istnieje możliwość zapisywania
numerów faksu i telefonu w książce
telefonicznej telefaksu na potrzeby
automatycznego wybierania.
Maksymalnie można zapisać 100
numerów.
Aby zapisać numer faksu lub telefonu,
wykonaj poniższe czynności.
1 Naciśnij przycisk , .
F
2 Wprowadź nazwę odbiorcy za
pomocą klawiatury numerycznej
według tabeli na stronie 7. Można
wprowadzić do 20 znaków.
• Aby wprowadzić poprawki, naciśnij
przycisk w urządzeniu UX-
P710 lub w urządzeniu UXA760.
C
20
3 Naciśnij przycisk .
START
4 Z klawiatury numerycznej
wprowadź numer faksu lub telefonu
(maks. 32 znaki). (Uwaga: Nie
można wpisywać spacji.)
• W celu ustawienia pauzy pomiędzy
dwoma cyframi, naciśnij przycisk
F
. Pauza zaznaczona jest
myślnikiem. Można wstawić wiele
pauz obok siebie.
Page 87

Zapisywanie numerów
• W przypadku centrali PBX typu
Flash, aby wprowadzić numer linii
zewnętrznej, naciśnij przycisk ,
naciśnij w celu wstawienia
pauzy, a następnie wprowadź numer
faksu lub telefonu. (Przy wybieraniu
automatycznym, nie ma potrzeby
naciskania przycisku .)
F
R
• W przypadku centrali PBX,
wymuszającej wprowadzenie
numeru w celu wykonania
połączenia zewnętrznego, i zapisu
numeru faksu i/lub telefonu, naciśnij
przycisk , aby wstawić pauzę a
następnie wprowadź numer faksu i/
lub telefonu. (Przy wybieraniu
automatycznym, nie ma potrzeby
wprowadzania numeru linii
zewnętrznej.)
5 Naciśnij przycisk .
F
START
6 Aby wyjść, naciśnij .
Przypisywanie numeru z książki
telefonicznej do Klawisza
R
szybkiego wybierania numeru.
Istnieje możliwość przypisania
najczęściej używanych numerów do
Klawiszy szybkiego wybierania
numerów. Dostępne są trzy Klawisze
szybkiego wybierania numeru.
2. Wysyłanie
dokumentów
♦ Klawisz szybkiego wyboru umożliwia
połączenie bez wprowadzania całego
numeru.
♦ Aby przypisać numer, należy najpierw
zapisać numer w książce
telefonicznej (str. 20).
W celu przypisania numeru z książki
telefonicznej do Klawisza szybkiego
wybierania, wykonaj następujące
czynności.
1 Naciśnij i przytrzymaj przycisk
F
, następnie przycisk lub
F
dopóki nie pojawi się numer,
który ma być przypisany.
F
F
2 Naciśnij Klawisz szybkiego
wybierania numeru, do którego ma
być przypisany dany numer.
Przykład:
Drukowanie LISTY # TEL
Aby wydrukować listę zapisanych w
książce telefonicznej numerów faksów
i telefonów, naciśnij przycisk ,
, , a następnie przycisk
, w celu wybrania TAK.
F
Zmiana numeru przypisanego do
Klawisza szybkiego wybierania
numeru. Aby zmienić przypisany
numer, ponownie wykonaj czynności
opisane powyżej. Nowy numer zastąpi
wcześniej przypisany numer.
Usuwanie ustawień Klawisza
szybkiego wybierania numeru: W
celu dokonania tej czynności,
przytrzymaj Klawisz szybkiego
wybierania dopóki na wyświetlaczu nie
pojawi się informacja [SKASOWANO].
21
Page 88

Zapisywanie numerów
Edytowanie numerów w książce
telefonicznej
Aby wprowadzić zmiany w książce
telefonicznej, wykonaj następujące
czynności:
1 Naciśnij i przytrzymaj przycisk
F
, naciśnij lub ,
F
F
dopóki nie wyświetli się numer,
który ma być zmieniony, następnie
naciśnij przycisk .
F
F
2 Teraz możesz zmienić nazwę.
•
Aby przesunąć kursor, naciśnij przycisk
F
poprawki, naciśnij przycisk w
urządzeniu UX-P710 lub w
urządzeniu UX-A760. Aby wprowadzić
litery, zob. tabelę na str. 7.
•
Jeśli zmiana nazwy jest niepotrzebna,
przejdź bezpośrednio do kroku 3.
F
lub . Aby wprowadzić
C
Usuwanie numerów z książki
telefonicznej
Usuwanie pojedynczego numeru:
1 Naciśnij i przytrzymaj przycisk
F
, następnie przycisk lub
F
dopóki nie wyświetli się
numer, który ma być usunięty.
F
F
2 UX-P710: Naciśnij przycisk
dwa razy.
UX-A760: Naciśnij przycisk
C
dwa razy.
Usuwanie wszystkich numerów:
1 UX-P710: Naciśnij przycisk .
UX-A760: Naciśnij przycisk
C
.
3 Naciśnij przycisk .
START
4 Teraz możesz zmienić numer.
•
Aby wprowadzić poprawki, naciśnij
przycisk w urządzeniu UX-P710
C
lub w urządzeniu UX-A760.
• Jeśli zmiana numeru nie jest
konieczna, przejdź bezpośrednio do
kroku 5.
5 Naciśnij przycisk .
START
6 Aby wyjść, naciśnij .
22
2 Naciśnij przycisk , .
Page 89

Wysyłanie dokumentu: Automatyczne wybieranie
Wysyłanie dokumentu:
Automatyczne wybieranie
Wysyłanie dokumentu przy użyciu
automatycznego wybierania
1 Włóż dokument(y).
W razie potrzeby wyreguluj
rozdzielczość i/lub kontrast za
pomocą przycisku .
2 Wprowadź numer faksu korzystając
z jednej z poniższych metod:
• Wybieranie za pomocą Klawisza
szybkiego wybierania numeru:
Jeśli klawiszowi przypisano numer,
naciśnij go.
•
Korzystanie z książki telefonicznej:
Naciśnij i przytrzymaj przycisk , a
F
następnie lub dopóki nie
F
F
wyświetli się numer lub nazwa osoby, z
którą chcesz się połączyć (nazwy
pojawiają się w porządku
alfabetycznym).
Aby bezpośrednio przejść do nazw
zaczynających się od konkretnej litery,
naciśnij, raz lub kilkakrotnie, odpowiedni
przycisk na klawiaturze numerycznej
(zob. str. 7).
Po pojawieniu się pożądanej nazwy,
naciśnij przycisk .
•
Wybieranie bezpośrednio na
klawiaturze:
Skorzystaj z przycisków na
START
klawiaturze numerycznej, aby
wprowadzić pełny numer faksu (w celu
wstawienia pauzy pomiędzy cyframi,
naciśnij przycisk ). Na koniec
naciśnij przycisk .
F
START
F
3 Nastąpi automatyczne wybieranie
numeru i automatyczna transmisja.
• Aby anulować transmisję, naciśnij
przycisk .
• Telefaks zasygnalizuje zakończenie
transmisji pojedynczym dźwiękiem.
• Telefaks zasygnalizuje wystąpienie
błędu potrójnym dźwiękiem.
Ponowne wybieranie ostatniego
numeru
Telefaks zapamiętuje 20 ostatnio
wybranych numerów. Można
automatycznie wybrać jeden ze
wspomnianych numerów.
1 Włóż dokument(y).
• W razie potrzeby ustaw
rozdzielczość i/lub kontrast za
pomocą przycisku .
2 Naciśnij przycisk .
Na wyświetlaczu pojawi się
komunikat: [<ŁĄCZ PONOWNIE>]
3
W razie potrzeby, naciśnij i
przytrzymaj przycisk lub
dopóki nie wyświetli się żądany
numer.
4 Naciśnij przycisk .
Rozpoczyna się wybieranie numeru.
• Przed naciśnięciem ,
upewnij się, że wyświetlił się
właściwy numer. W przeciwnym
razie może nie dojść do połączenia
(oczekiwanie na wyświetlenie się
numeru może trwać kilka sekund).
F
F
F
START
START
F
2. Wysyłanie
dokumentów
23
Page 90

Wysyłanie dokumentu: Automatyczne wybieranie
Uwaga: Jeśli w przypadku nieudanej
transmisji na wyświetlaczu pojawi się
[ZACIĘTY DOKUMENT], usuń
dokument tak, jak to opisano na str. 18.
Usuwanie ostatnio wybieranych
numerów
Usuwanie jednego ostatnio
wybieranego numeru:
1 Naciśnij i przytrzymaj przycisk
F
, następnie przycisk lub
F
dopóki nie wyświetli się
numer, który ma być usunięty.
F
F
2 UX-P710: Naciśnij przycisk
dwa razy.
UX-A760: Naciśnij przycisk
C
dwa razy.
Usuwanie wszystkich ostatnio
wybieranych numerów
1
UX-P710:
UX-A760:
Naciśnij przycisk .
Naciśnij przycisk .
C
2 Naciśnij przycisk , .
Zapisywanie ostatnio wybieranych
numerów w książce telefonicznej
1 Naciśnij i przytrzymaj przycisk
F
, następnie przycisk lub
F
dopóki nie wyświetli się
numer, który ma być zapisany.
2 Naciśnij przycisk .
F
F
F
3 Wprowadź nazwę dla numeru (zob.
str. 7).
4 Naciśnij przycisk .
START
5 Wyświetli się numer. Ponownie
naciśnij przycisk , aby
zapisać numer.
Automatyczne wybieranie
ostatniego numeru
Jeśli faks jest wysyłany przy wykorzystaniu
numerów z pamięci lub Klawisza
szybkiego wybierania numeru, a linia jest
zajęta, urządzenie automatycznie wykona
trzy próby ponownego połączenia. Próby
będą wykonywane w pięciominutowych
odstępach.
W tym czasie na wyświetlaczu pojawi się
komunikat, [
którym urządzenie stara się połączyć. Nie
ma możliwości połączenia z innym
numerem, dopóki na wyświetlaczu
widoczny jest powyższy komunikat.
WYBIERANIE
START
] oraz numer, z
♦ Aby przerwać operację, naciśnij
przycisk .
♦ Automatyczne wybieranie ostatniego
numeru może się, w niektórych
przypadkach, zatrzymać przed
wykonaniem trzech prób połączenia.
Sprawdzanie dostępności linii
Niniejsze ustawienia umożliwiają
określenie, czy przed wykonaniem
automatycznego połączenia, telefaks
sprawdza czy linia nie jest zajęta.
Ustawienie początkowe: NIE
Uwaga:
telefaks nie może wykonać połączenia,
należy zmienić ustawienia na opcję NIE.
1 Naciśnij przycisk , , i
Jeśli ustawiono opcję TAK, a
F
24
.
Page 91

Wykonywanie rozmów telefonicznych
2 Naciśnij przycisk (TAK), aby
telefaks sprawdził czy linia nie jest
zajęta.
Naciśnij przycisk (NIE), aby
telefaks nie sprawdzał linii.
3 Aby wyjść, naciśnij .
Wykonywanie rozmów
telefonicznych
Wybieranie numeru przy pomocy
klawiatury numerycznej
1 Podnieś słuchawkę.
2 Wprowadź cały numer telefoniczny
za pomocą klawiatury numerycznej.
Wybieranie numeru przy pomocy
Klawisza szybkiego wybierania
1 Podnieś słuchawkę.
2 Naciśnij odpowiedni klawisz
szybkiego wybierania.
• Czynność można także zacząć od
naciśnięcia Klawisza szybkiego
wybierania (włączy się głośnik i
nastąpi łączenie z numerem).
Następnie należy podnieść
słuchawkę.
Wybieranie numeru z książki
telefonicznej
1 Naciśnij ,a następnie
lub dopóki nie wyświetli się
numer lub nazwa osoby (nazwy
F
F
F
F
pojawiają się w porządku
alfabetycznym).
Aby bezpośrednio przejść do nazw
zaczynających się od konkretnej
litery, naciśnij, raz lub kilkakrotnie,
odpowiedni przycisk na klawiaturze
numerycznej (zob. str. 7).
2 Podnieś słuchawkę.
Ponowne wybieranie ostatniego
numeru
1 Naciśnij przycisk .
Na wyświetlaczu pojawi się
komunikat: [<ŁĄCZ PONOWNIE>]
F
2 Naciśnij i przytrzymaj przycisk
F
F
wyświetli się żądany numer.
F
lub dopóki nie
3 Podnieś słuchawkę.
• Przed podniesieniem słuchawki,
upewnij się, że wyświetlił się
właściwy numer. W przeciwnym
razie może nie dojść do połączenia
(oczekiwanie na wyświetlenie się
numeru może trwać kilka sekund).
Wyświetlanie czasu trwania
połączenia
Na wyświetlaczu można zobaczyć
czas, przez jaki linia jest zajęta. Czas
ten wyświetla się, kiedy słuchawka
jest podniesiona lub dokonuje się
wysłanie lub odbiór dokumentu.
Niniejsza opcja pozwala kontrolować
długość wykonywanych połączeń.
2. Wysyłanie
dokumentów
25
Page 92

Praca w trybie TEL/FAKS (T/F)
3. Odbieranie dokumentów
Praca w trybie TEL/FAKS (T/F)
Aby wybrać tryb TEL/FAKS, naciśnij i
przytrzymaj przycisk (w
podajniku nie mogą znajdować się
dokumenty) do momentu pojawienia
się na wyświetlaczu [T/F].
Gdy tryb odbioru jest ustawiony na
TEL/FAKS, telefaks automatycznie
odbiera wszystkie połączenia po
drugim sygnale (istnieje możliwość
zmiany liczby sygnałów poprzez
ustawianie Liczby dzwonków opisane
na str. 27). Po odebraniu linia jest przez
około 5 sekund monitorowana przez
telefaks w celu sprawdzenia, czy
wysyłany jest sygnał faksu.
♦ Jeśli telefaks wykryje sygnał faksu
(oznacza to, że nastąpiło połączenie
automatyczne), rozpocznie
automatycznie odbiór
przychodzącego dokumentu.
♦ Jeśli nie zostanie wykryty sygnał
faksu (oznacza to, że jest to zwykłe
połączenie telefoniczne lub ręcznie
wysłany dokument), telefaks
uruchomi na 15 sekund dodatkowy
dzwonek informując o połączeniu.
Jeśli w tym czasie rozmowa nie
zostanie odebrana, telefaks wyśle
sygnał odbioru do innego urządzenia
umożliwiając osobie telefonującej
ręczne wysłanie dokumentu.
Uwaga: W takim przypadku o
połączeniu informować będzie tylko
dodatkowy brzęczyk urządzenia.
Dodatkowy telefon podłączony do tej
samej linii nie będzie dzwonił po
ustanowieniu połączenia.
Cichy odbiór dokumentu
Aby urządzenie odbierało dokumenty
bez wydawania przy tym dźwięków
oraz informowało o połączeniach
telefonicznych stosując jedynie
dodatkowy dzwonek, należy ustawić
tryb odbioru na tryb TEL/FAKS oraz
wyłączyć dzwonek w sposób opisany
na str. 15.
Czas trwania dodatkowego
dzwonka
W trybie TEL/FAKS istnieje możliwość
zmiany czasu trwania dodatkowego
dzwonka.
Ustawienia początkowe: 15 sekund
1 Naciśnij przycisk , , i
.
F
2 Naciśnij liczbę w celu wybrania
pożądanego czasu trwania:
15 sekund
30 sekund
60 sekund
120 sekund
3 Aby wyjść, naciśnij .
26
Page 93

Praca w trybie FAKS
Praca w trybie FAKS
Aby wybrać tryb FAKS, naciśnij i
przytrzymaj przycisk
podajniku nie mogą znajdować się
dokumenty) dopóki na wyświetlaczu nie
pojawi się [FAKS].
Gdy urządzenie pracuje w trybie FAKS,
telefaks automatycznie odbiera
wszystkie połączenia po dwóch
sygnałach i dokumenty przychodzące.
(w
♦ Po podniesieniu słuchawki w aparacie
podłączonym do tej samej linii,
możliwe będzie przeprowadzenie
rozmowy głosowej i odebrać
dokument tak, jak zostało to opisane
w części Praca w trybie TEL na str.
27.
Ustawienia liczby sygnałów
Aby zmienić liczbę sygnałów, po której
telefaks odbierze połączenie w trybie
FAKS i TEL/FAKS, należy wykonać
następujące czynności. Można wybrać
od 2 do 5 sygnałów.
Ustawienia początkowe: 2 sygnały
1 Naciśnij przycisk , , i
.
F
2 Wprowadź pożądaną liczbę
sygnałów (liczba od 2 do 5).
Przykład: (4 sygnały)
3 Aby wyjść, naciśnij .
Praca w trybie TEL
Aby wybrać tryb TEL, naciśnij i
przytrzymaj przycisk (w
podajniku nie mogą znajdować się
dokumenty) dopóki na wyświetlaczu
nie pojawi się [
W trybie TEL wszystkie połączenia
(łącznie z faksami) należy odbierać
samodzielnie podnosząc słuchawkę
telefaksu lub dodatkowego telefonu
podłączonego do tej samej linii.
Ważne!! Należy usunąć wszystkie
dokumenty z podajnika przed
rozpoczęciem poniższej procedury.
TEL].
Odbiór połączeń przy użyciu
słuchawki telefaksu
1 Gdy dzwonek telefaksu zadzwoni,
podnieś słuchawkę.
2 Jeśli usłyszysz sygnał faksu,
odczekaj, aż na wyświetlaczu
pojawi się komunikat [ODBIOR], a
następnie odłóż słuchawkę.
•
Jeśli na wyświetlaczu nie pojawi się
komunikat [
(Jest to niezbędne, jeśli dla Odbioru
sygnału faksu ustawiono opcję NIE (str.
29).)
ODBIOR
START
, żeby rozpocząć odbiór.
], naciśnij przycisk
3 Jeśli osoba telefonująca chce
najpierw przeprowadzić rozmowę,
po jej zakończeniu naciśnij przycisk
START
. (Przycisk ten należy
nacisnąć zanim osoba wysyłająca
dokument naciśnie przycisk Start w
swoim urządzeniu.)
• Rozłącz się po tym, jak na
wyświetlaczu pojawi się napis
[ODBIOR].
dokumentów
3. Odbieranie
27
Page 94

Praca w trybie TEL
Odbiór połączeń przy pomocy
dodatkowego telefonu
podpiętego do tej samej linii.
Uwaga: Aby zapewnić właściwe
działanie tej opcji, należy dla Odbioru
zdalnego dokumentu ustawić opcję
TAK (zob. str. 28).
1 Gdy zadzwoni dzwonek
dodatkowego telefonu, podnieś
słuchawkę.
2 Jeśli usłyszysz sygnał faksu,
odczekaj, aż telefaks przejmie
połączenie (telefon dodatkowy
zostanie wyłączony), a następnie
odłóż słuchawkę.
3 Jeśli urządzenie nie odpowiada lub,
jeśli najpierw prowadzona jest
rozmowa, a następnie rozmówca
chce przesłać dokument, naciśnij
jeden raz przycisk i dwa razy
przycisk telefonu (telefon musi
być wyposażony w funkcję
wybierania tonowego). Spowoduje
to aktywację odbioru. Następnie
odłóż słuchawkę.
(Odbiór dokumentu można także
rozpocząć poprzez wyłączenie
słuchawki, nie odkładając jej, i
naciśnięcie na urządzeniu przycisku
START
.)
• Wykonanie czynności 3 jest
konieczne, jeśli dla odbioru sygnału
faksu ustawiono opcję NIE (str. 29).
Zawieszanie rozmowy
Aby zawiesić połączenie, naciśnij
przycisk ( w urządzeniu
UX-A760).
rozmówca nie będzie słyszeć
użytkownika. Słuchawkę można
odłożyć na widełki, nie kończąc
rozmowy. Gdy użytkownik jest gotowy
do podjęcia zawieszonej rozmowy,
należy podnieść słuchawkę. Jeśli
słuchawka nie została odłożona na
widełki, naciśnij ponownie przycisk
Po wykonaniu tej czynności
, aby kontynuować rozmowę.
Ustawienia zdalnego odbioru
faksu
Aby w każdym przypadku zapewnić
gotowość telefaksu do odbierania
dokumentu po naciśnięciu przycisku
, , na dodatkowym
telefonie, należy dla powyższej funkcji
ustawić opcję TAK (uniemożliwia to
przejście telefaksu w tryb uśpienia).
Ustawienia początkowe: NIE
1 Naciśnij przycisk , , i
.
F
2 Naciśnij przycisk (TAK), aby
uruchomić zdalny odbiór
dokumentu (uniemożliwia
uruchomienia trybu uśpienia).
Naciśnij przycisk (NIE), aby
wyłączyć zdalny odbiór dokumentu.
28
3 Aby wyjść, naciśnij .
START
Page 95

Praca w trybie TEL
Ustawienia kodu aktywacji zdalnej
Aby aktywować odbiór dokumentów z
dodatkowego telefonu, można
skorzystać z innego numeru niż 5.
Można wybrać liczbę od 0 do 9.
Ustawienia początkowe: 5
1 Naciśnij przycisk , , i
.
F
2 Wprowadź żądany numer (liczby od
0 do 9).
3 Aby wyjść, naciśnij .
Ustawienia sygnału odbioru
faksu
Telefaks automatycznie rozpocznie
odbiór, jeśli po przyjęciu połączenia
wykryje na linii sygnał drugiego faksu.
Aby zmienić to ustawienie, należy
postępować według poniższego opisu.
Ustawienia początkowe: TAK
Ustawienia rozmiaru
odbieranego dokumentu
Uwaga: Niniejsze ustawienia odnoszą
się do wszystkich trybów odbioru.
Ustawienia początkowe telefaksu
obejmują automatyczne dostosowanie
rozmiaru odebranych dokumentów do
rozmiaru papieru. Dzięki tej funkcji
obrzeża dokumentu nie zostają
obcinane. Funkcję można wyłączyć,
umożliwi to odbieranie dokumentów w
pełnym rozmiarze.
♦ Jeśli dokument będzie zbyt duży, aby
zmieścić się na papierze, jego
pozostała część zostanie
wydrukowana na drugiej stronie. W
tym przypadku punkt podziału może
się pojawić na środku linii.
♦ Automatyczne dostosowanie może
nie być możliwe, jeśli otrzymany
dokument będzie zbyt duży, będzie
zawierać za dużo rysunków lub
elementów graficznych, lub został
wysłany w wysokiej rozdzielczości. W
tym przypadku, pozostała część
dokumentu zostanie wydrukowana na
drugiej stronie.
Ustawienia początkowe: AUTO
dokumentów
3. Odbieranie
1 Naciśnij przycisk , , i
.
F
2 Naciśnij przycisk (TAK), żeby
włączyć automatyczny odbiór.
Naciśnij przycisk (NIE), aby
wyłączyć automatyczny odbiór.
3 Aby wyjść, naciśnij .
1 Naciśnij przycisk , , i
.
F
2 Naciśnij przycisk (AUTO), aby
odbierać automatycznie
dopasowywane dokumenty.
Naciśnij przycisk (100%), aby
otrzymane dokumenty były
drukowane w pełnym rozmiarze.
3 Aby wyjść, naciśnij .
29
Page 96

Praca w trybie AUT. ZGŁ. (UX-A760)
Praca w trybie AUT. ZGŁ. (UXA760)
Dokumenty zostaną automatycznie
odebrane, jeśli w urządzeniu UX-A760
wybrany zostanie tryb AUT. ZGŁ. ( ),
aktywujący system zgłoszeniowy. Więcej
informacji na ten temat zawarto w Rozdziale
4.
Tylko UX-P710:
Korzystanie z urządzenia z
systemem zgłoszeniowym
Aby odbierać dokumenty i wiadomości
głosowe przy wykorzystaniu systemu
zgłoszeniowego (w telefonie lub innym
urządzeniu) podłączonego do tej
samej linii, co telefaks, należy
wykonać następujące czynności.
1 Sprawdź, czy odbiór sygnału faksu
w urządzeniu jest ustawiony na
TAK (str. 29). (Umożliwi to
automatyczny odbiór dokumentów,
po wykryciu sygnału faksu i
odebraniu sygnału przez system
zgłoszeniowy.)
2 Sprawdź czy powitanie systemu
zgłoszeniowego nie trwa dłużej niż
20 sekund. Zacznij powitanie
kilkoma sekundami ciszy.
(Umożliwi to urządzeniu łatwe
wykrywanie przychodzących
sygnałów faksów.)
3 Pamiętaj o przestawieniu telefaksu
w tryb TEL, przed oddale
od urządzenia (
naciśnij i
przytrzymaj przycisk
dopóki na wyświetlaczu nie
pojawi się TEL
powinny być automatycznie
odbierane nie przez telefaks, lecz
przez system zgłoszeniowy.)
). (Połączenia
niem się
Odbiór do pamięci
Ustawienia początkowe telefaksu
obejmują odbiór dokumentów do
pamięci oraz ich automatyczny wydruk.
Umożliwia to odbiór dokumentów
nawet, gdy skończył się papier albo
kiedy drukowanie jest niewykonalne,
np. jeśli zabrakło folii kopiującej lub
wystąpiło zacięcie papieru . Odebrane
dokumenty są przechowywane w
pamięci do chwili dodania papieru lub
usunięciu powstałego problemu. Po
dodaniu papieru lub usunięciu
problemu, naciśnij przycisk w
celu wydrukowania dokumentów.
♦
Po odebraniu dokumentu do pamięci,
jeśli w podajniku zabrakło papieru, na
wyświetlaczu widoczny będzie
komunikat, [
[
NACIŚNIJ START
problem związany z drukowaniem, na
wyświetlaczu pojawi się wiadomość
informująca o rodzaju problemu.
DODAJ PAPIER&
]. Jeśli nastąpił
START
]/
♦ Po wydrukowaniu dokumenty
znajdujące się w pamięci zostaną
automatycznie usunięte.
♦ W przypadku zapełnionej pamięci,
odbiór dokumentów jest niemożliwy
(zob. „Pojemność pamięci” na str. 2,
aby sprawdzić ilość stron, którą
można przechowywać w pamięci).
♦ Podczas odbioru obrazów
półtonowych, istnieje możliwość, że
pamięć zostanie zapełniona zanim
zakończy się odbiór dokumentu (na
wyśwetlaczu pojawi się komunikat
([PAMIĘC PEŁNA]). W takim
przypadku, należy ustawić opcję
„PAPIER” w Ustawieniach odbioru
dokumentu (zob. str. 31) i poprosić
nadawcę o ponowne wysłanie
dokumentu.
30
Page 97

Odbiór do pamięci
Ustawienia odbioru dokumentu
Aby dokumenty nie były odbierane do
pamięci, należy wprowadzić opcję
„PAPIER” w ustawieniach Odbioru
faksu. Wykonaj w tym celu następujące
czynności.
♦ Jeśli w ustawieniach Odbioru faksu
wprowadzono opcję “PAPIER”, po
pojawieniu się problemów
uniemożliwiających drukowanie
odbiór faksów będzie niemożliwy
(ukaże się komunikat o błędzie). Nie
ma jednak zagrożenia, że odbiór
dokumentu zostanie przerwany w
przypadku zapełnionej pamięci.
♦ Jeśli wybrano opcję „PAPIER”,
upewnij się, że w podajniku znajduje
się papier.
Ustawienia początkowe: PAMIĘĆ
1 Naciśnij przycisk , , i
.
F
2 Naciśnij przycisk (PAMIĘĆ),
aby przed drukowaniem odebrać
dokumenty do pamięci.
Naciśnij przycisk , aby
drukować dokumenty bez
uprzedniego odebrania ich do
pamięci.
Usuwanie odebranych
dokumentów z pamięci
Przechowywane w pamięci dokumenty,
za względu na problemy
uniemożliwiające drukowanie, można
usunąć bez potrzeby ich drukowania.
Ostrzeżenie: Wykonanie tej czynności
wiąże się z usunięciem wszystkich
dokumentów.
1 UX-P710: Naciśnij przycisk .
UX-A760: Naciśnij przycisk
C
.
2 Naciśnij przycisk , .
Sprawdzanie bieżącej ilości
zajętej pamięci
Naciśnij przycisk , , aby
sprawdzić bieżące procentowe zajętej
pamięci. Procent zajętej pamięci
będzie widoczny na wyświetlaczu.
F
dokumentów
3. Odbieranie
3 Aby wyjść, naciśnij .
31
Page 98

Nagrywanie zapowiedzi OGM
4. System zgłoszeniowy (tylko UX-A760)
Nagrywanie zapowiedzi OGM
Wbudowany system zgłoszeniowy
umożliwia otrzymywanie komunikatów
głosowych i dokumentów podczas
nieobecności użytkownika.
♦ System ten jest dostępny wyłącznie w
modelu UX-A760.
♦ W przypadku, gdy pamięć nie jest
obciążona zapisanymi dokumentami,
istnieje możliwość zapisu dowolnej 15
minutowej wiadomości głosowej lub
30 wiadomości.
Aby skorzystać z systemu zgłoszeniowego,
należy najpierw nagrać zapowiedź (OGM).
Jest to powitanie, informujące osoby
dzwoniące do właściciela telefaksu o
możliwości pozostawienia wiadomości lub
wysłania dokumentu. Powitanie jest
uruchamiane przez telefaks.
Przykład
“Dzień dobry, Dodzwonili się państwo do
______ . W tej chwili nikt nie może odebrać
tego połączenia. Proszę zostawić
wiadomość po sygnale lub nacisnąć
przycisk Start na telefaksie w celu wysłania
dokumentu. Dziękujemy za telefon.
:
”
1 Naciśnij przycisk .
2 Podnieś słuchawkę.
3
Naciśnij przycisk i mów do
słuchawki, aby nagrać wiadomość.
START
• Zapowiedź może trwać maksymalnie
60 sekund. Podczas nagrywania
wiadomości na wyświetlaczu pojawi
się pozostały czas do zakończenia
nagrywania.
4 Po zakończeniu nagrywania odłóż
słuchawkę lub naciśnij przycisk
.
Sprawdzanie zapowiedzi
Aby odsłuchać zapowiedź, naciśnij
przycisk , a następnie .
♦ Zapowiedź nie może być usunięta.
Aby ją zmienić, wykonaj procedurę
nagrywania wiadomości.
Korzystanie z systemu
zgłoszeniowego
Uruchamianie systemu
zgłoszeniowego
Aby uruchomić system zgłoszeniowy w
celu umożliwienia pozostawiania
wiadomości osobom dzwoniącym do
właściciela telefaksu, naciśnij i
przytrzymaj przycisk dopóki
na wyświetlaczu nie pojawi się (
oznacza, że wybrano tryb AUT. ZGŁ.).
♦ Jeśli zapowiedź nie została nagrana,
nie ma możliwości przełączenia trybu
odbioru na tryb AUT. ZGŁ.
W przypadku uruchomionego trybu
AUT. ZGŁ., urządzenie automatycznie
odpowiada na telefony po dwóch
sygnałach, jeśli otrzymało przynajmniej
jedną wiadomość lub po czterech
sygnałach, jeśli nie otrzymało żadnej
wiadomości (zob. Tryb oszczędny na
str. 36).
Osoba dzwoniąca może zostawić
wiadomość po odtworzeniu
zapowiedzi. Urządzenie automatycznie
rozpocznie odbiór dokumentu po
odebraniu sygnału informującego o
jego wysłaniu.
32
Page 99

Korzystanie z systemu zgłoszeniowego
Odsłuchiwanie wiadomości
1 Naciśnij przycisk .
2 Wiadomość zostanie odtworzona.
Podczas odtwarzania można
skorzystać z następujących funkcji:
• Powtórz: Aby powtórzyć
wiadomość lub powrócić do
poprzedniej wiadomości, naciśnij
(w razie konieczności naciśnij
go kilkakrotnie).
•
Pomiń:
Aby przejść do następnej
wiadomości, naciśnij przycisk .
• Zmień prędkość odtwarzania: Raz
lub kilkakrotnie naciśnij przycisk
, aby zmienić prędkość
odtwarzania. Kolejność zmiany:
[SZYBKO] > [WOLNO] > normalnie.
• Stop: Naciśnij przycisk ,
aby zatrzymać odtwarzanie.
Uwaga: Po odebraniu telefonu lub
podniesieniu słuchawki odtwarzanie
zatrzyma się.
Drukowanie Listy wiadomości
W celu wydrukowania listy z datami i
godzinami odebrania wiadomości,
wykonaj następujące czynności:
1 Naciśnij przycisk , , .
F
2 Naciśnij przycisk , aby wybrać
.
TAK
Usuwanie otrzymanych
wiadomości
Usuwanie pojedynczej wiadomości:
Naciśnij dwukrotnie przycisk
podczas odtwarzania wiadomości.
Usuwanie wszystkich wiadomości:
Naciśnij przycisk , ,
na wyświetlaczu wskazującym
godzinę i datę.
C
C
Nagrywanie notatek
Istnieje możliwość nagrania notatki dla
posiadacza urządzenia oraz innych
użytkowników. Po naciśnięciu
nastąpi odtworzenie notatek oraz
innych zapisanych wiadomości.
1 Podnieś słuchawkę.
2 Naciśnij przycisk i mów do
słuchawki.
3 Po zakończeniu nagrywania odłóż
słuchawkę lub naciśnij przycisk
.
Nagrywanie rozmów
telefonicznych (nagrywanie
dwukierunkowe)
W celu nagrania rozmowy
telefonicznej, należy nacisnąć ,
aby rozpocząć zapis. Aby zakończyć
nagrywanie naciśnij przycisk
(po rozłączeniu nastąpi automatyczne
zakończenie nagrywania). Rozmowę
będzie można odsłuchać po
naciśnięciu .
4. System
zgłoszeniowy
33
Page 100

Ustawienia systemu zgłoszeniowego
Ustawienia systemu
zgłoszeniowego
Odtwarzanie wiadomości przez
głośnik
Funkcja umożliwia przesłuchiwanie na
głośnikach, nagrywającej się na
automacie zgłoszeniowym wiadomości.
♦ Umożliwia to odebranie połączenia,
podczas gdy na automacie
zgłoszeniowym nagrywa się
wiadomość. Funkcja pozwala
nadzorować przychodzące
połączenia oraz odbierać tylko
żądane połączenia.
Ustawienia początkowe: TAK
1 Naciśnij przyciski , , i
.
F
2 Naciśnij przycisk (TAK), aby
włączyć opcję odsłuchiwania
wiadomości na bieżąco.
Naciśnij przycisk (NIE), aby
wyłączyć opcję odsłuchiwania
wiadomości na bieżąco.
3 Aby wyjść, naciśnij .
Maksymalny czas nagrywania
Ustawienia początkowe automatu
zgłoszeniowego umożliwiają osobie
dzwoniącej pozostawienie wiadomości
trwającej maksymalnie 4 minuty. Można
zmienić to ustawienie na 15, 30 lub 60
sekund.
2 Naciśnij liczbę w celu wybrania
czasu nagrywania:
15 sekund
30 sekund
60 sekund
4 minuty
3 Aby wyjść, naciśnij .
Tryb pracy bez nagrywania
wiadomości
Uruchom tę funkcję, aby zezwolić na
uruchamianie zapowiedzi i zablokować
zostawianie wiadomości. (Urządzenie
będzie odbierać dokumenty wysłane za
pomocą automatycznego wybierania.)
Ustawienia początkowe: NIE
1 Naciśnij przyciski , , i
.
F
2 Naciśnij przycisk (TAK), aby
włączyć tryb pracy bez nagrywania
wiadomości.
Naciśnij przycisk (NIE), aby
wyłączyć tryb pracy bez nagrywania
wiadomości.
3 Aby wyjść, naciśnij .
1 Naciśnij przyciski , , i
.
F
34
 Loading...