

FV-DB1E TINSEA025SJZZ
1
DAB RECEIVER
MODEL
FV-DB1E
OPERATION MANUAL
If you require any advice or assistance regarding
your Sharp product, please visit our web-site
www.sharp.co.uk/customersupport.
Customers without Internet access may telephone
08705 274277 during office hours (or (01) 676 0648
if telephoning from Ireland).
Thank you for purchasing this SHARP product.
To obtain the best performance from this product, please read this
manual carefully. It will guide you in operating your SHARP product.
The stylized mark ‘DAB Digital Radio’ is a trademark of Digital One
Limited used under licence, and the stylized ‘R’ mark is a registered
trademark of Digital One Limited. ™ & © 2003.
04/4/13 FVDB1E_FRONT.fm
TINSEA025SJZZ

FV-DB1E
Special notes
The mains lead of this product is fitted with a non-rewireable
(moulded) plug incorporating a 3A fuse. Should the fuse need to
be replaced, a BSI or AST A approved BS 1362 fuse marked
and of the same rating as above, which is also indicated on
the pin face of the plug must be used.
Always refit the fuse cover after replacing the fuse. Never use
the plug without the fuse cover fitted.
In the unlikely event of the socket outlet in your home not being
compatible with the plug supplied, cut-off the mains plug and fit
an appropriate type.
DANGER:
The fuse from the cut-off plug should be removed and the cut-off
plug destroyed immediately and disposed of in a safe manner.
Under no circumstances should the cut-off plug be inserted elsewhere into a 13A socket outlet as a serious electric shock may
occur.
To fit an appropriate plug to the mains lead, follow the instructions below:
IMPORTANT:
Important Instruction
The wires in the mains lead are coloured in accordance with the
following code:
Blue : Neutral
Brown : Live
As the colours of the wires in the mains lead of this product may
not correspond with the coloured markings identifying the terminals in your plug, proceed as follows:
● The wire which is coloured blue must be connected to the plug
terminal which is marked N or coloured black.
● The wire which is coloured brown must be connected to the
plug terminal which is marked L or coloured red.
NOTES FOR USERS IN THE U.K. AND IRELAND
Ensure that neither the brown nor the blue wire is connected to
the earth terminal in your three pin plug.
or
Before replacing the plug cover, make sure that:
● If the new fitted plug contains a fuse, its value is the same as
that removed from the cut-off plug.
● The cord grip is clamped over the sheath of the mains lead
and not simply over the lead wires.
IF YOU HAVE ANY DOUBT, CONSULT A QUALIFIED ELECTRICIAN.
SERVICE INFORMATION
In the unlikely event of your equipment requiring repair, please
contact the dealer or supplier from whom it was purchased. Where
this is not possible, please visit our web-site www. sharp.co.uk/
customersupport.
Customers without internet access may telephone 08705
274277 during office hours (or (01) 676 0648 if telephoning
from lreland).
Please note; all calls will be charged at local rate.
Certain replacement parts and accessories may be obtained from
our main parts distributor.
WILLOW VALE ELECTRONICS LTD.
In the unlikely event of this equipment requiring repair during the
guarantee period, you will need to provide proof of the date of
purchase to the repairing company.
Please keep your invoice or receipt, which is supplied at the
time of purchase.
0121 766 5414
0301
2
04/4/12 FV-DB1E_1.fm
TINSEA025SJZZ
FV-DB1E TINSEA025SJZZ
2
WARNINGS
! The supplied AC adaptor contains no user serviceable parts.
Never remove covers unless qualified to do so. It contains dangerous voltages, always remove the mains plug from the main
outlet socket before any service operation or when not in use for
a long period.
! The AC adaptor supplied with the FV-DB1E must not be used
with other equipment.
! Never use an AC adaptor other than the one specified. Other-
wise, problems or serious hazards may be created.
! This unit contains no user serviceable parts. Never remove cov-
ers unless qualified to do so. This unit contains dangerous voltages, always remove mains plug from the socket before any
service operation and when not in use f or a long period.
! To prevent fire or shock hazard, do not expose this appliance to
dripping or splashing. No objects filled with liquids, such as
vases, shall be placed on the apparatus.
NOTES
! This equipment complies with the requirements of Directives 89/
336/EEC as amended by 93/68/EEC.
! The letters in brackets contained in the model number indicate
the colour of the product only. Operation and specifications are
unaffected.
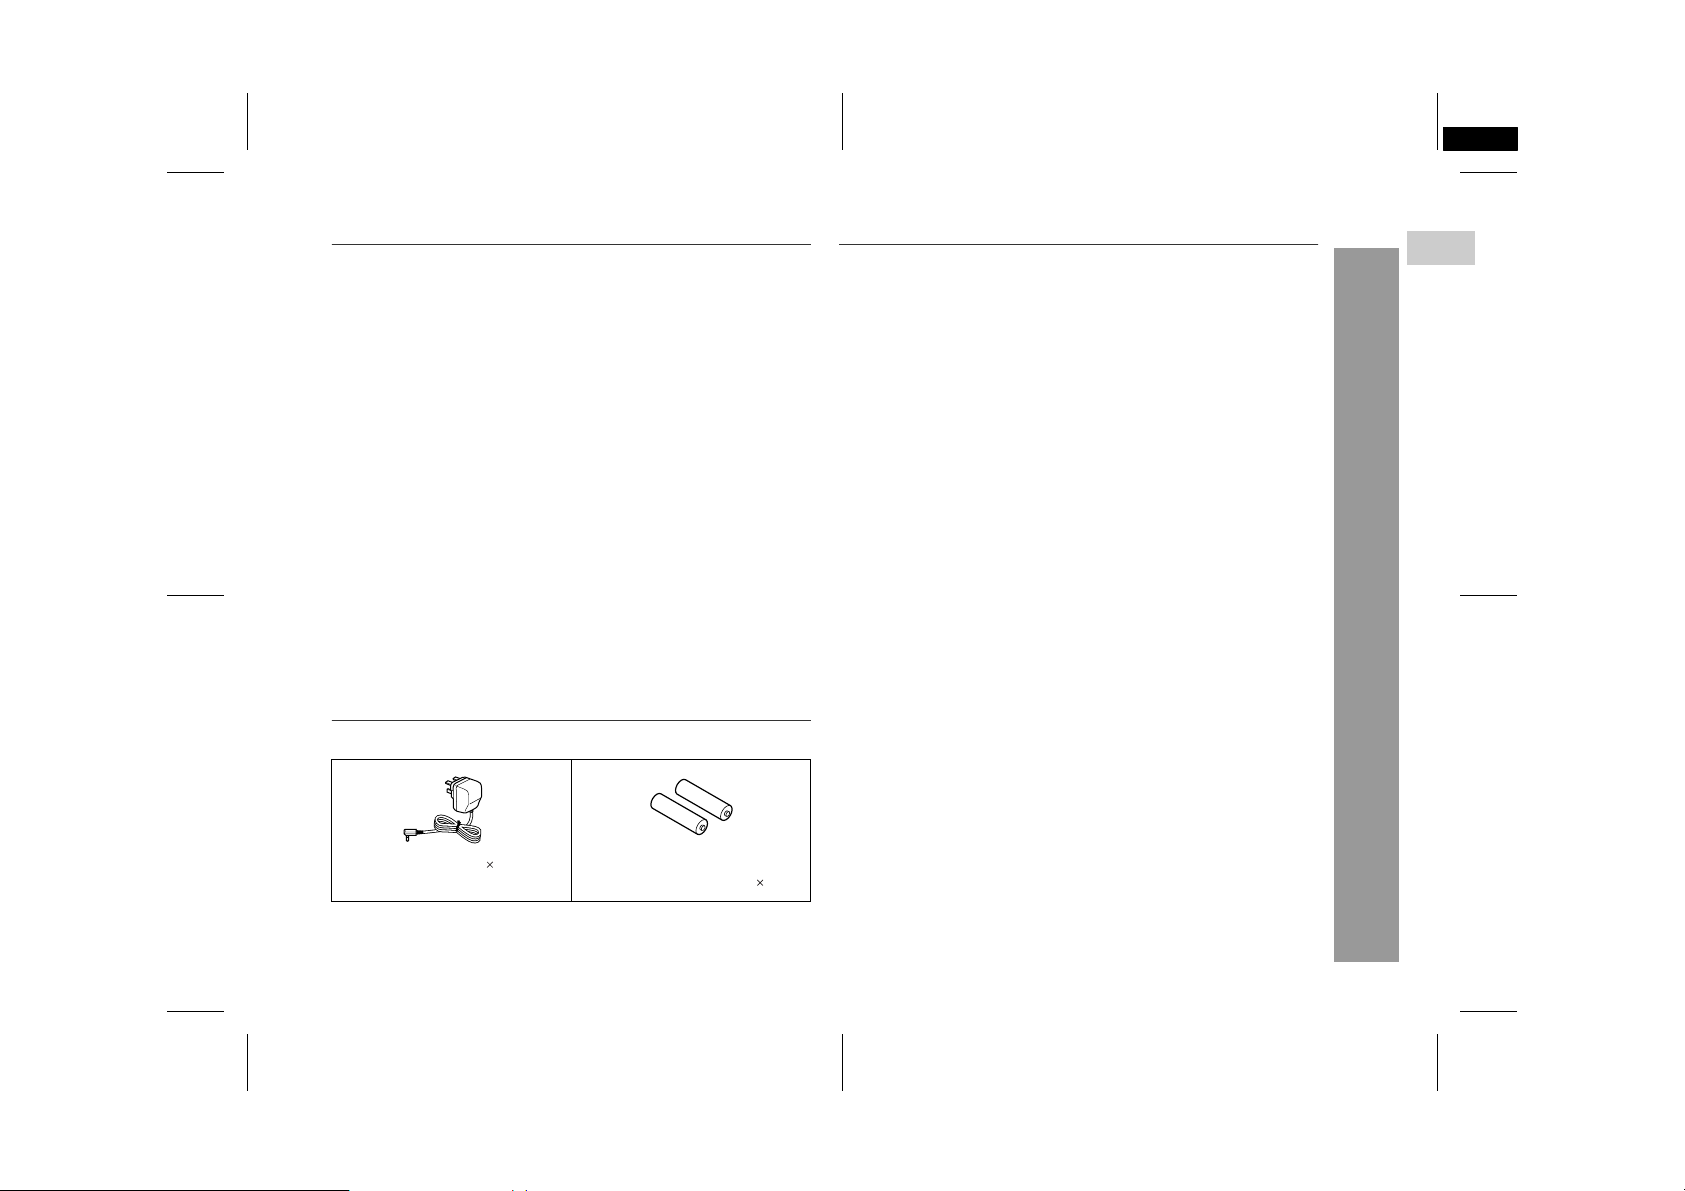
Accessories
Please confirm that the following accessories are included.
Contents
Page
" General Information
Precautions . . . . . . . . . . . . . . . . . . . . . . . . . . . . . . . . . . . . . . . . . 4
Controls and indicators . . . . . . . . . . . . . . . . . . . . . . . . . . . . . . . . 5
" Preparation for Use
Power source . . . . . . . . . . . . . . . . . . . . . . . . . . . . . . . . . . . . . . . . 6
General control . . . . . . . . . . . . . . . . . . . . . . . . . . . . . . . . . . . . . . 7
" DAB (Digital Audio Broadcasting) Operation
Listening to the DAB (Digital Audio Broadcasting) . . . . . .8 - 10
Various settings . . . . . . . . . . . . . . . . . . . . . . . . . . . . . . . . . . . . . 11
Changing the information display . . . . . . . . . . . . . . . . . . . . . . 12
" FM Operation
Listening to the FM . . . . . . . . . . . . . . . . . . . . . . . . . . . . . . . . . . 13
" Advanced Features
Storing stations . . . . . . . . . . . . . . . . . . . . . . . . . . . . . . . . . . . . . 14
Alarm operation . . . . . . . . . . . . . . . . . . . . . . . . . . . . . . . . . . 15, 16
Sleep operation . . . . . . . . . . . . . . . . . . . . . . . . . . . . . . . . . . . . . 16
Enhancing your system . . . . . . . . . . . . . . . . . . . . . . . . . . . . . . 17
" References
Troubleshooting c hart . . . . . . . . . . . . . . . . . . . . . . . . . . . . . . . . 18
Maintenance . . . . . . . . . . . . . . . . . . . . . . . . . . . . . . . . . . . . . . . . 19
Specifications . . . . . . . . . . . . . . . . . . . . . . . . . . . . . . . . . . . . . . 19
TERMS OF GUARANTEE . . . . . . . . . . . . . . . . . . . . . . .Back cover
FV-DB1E
1
General Information
AC adaptor 1 "AA" size battery (UM/SUM-3,
(RADPAA001SJZZ)
Note:
Only the above accessories are included.
R6, HP-7 or similar) 2
04/4/12 FV-DB1E_1.fm
3
TINSEA025SJZZ
FV-DB1E
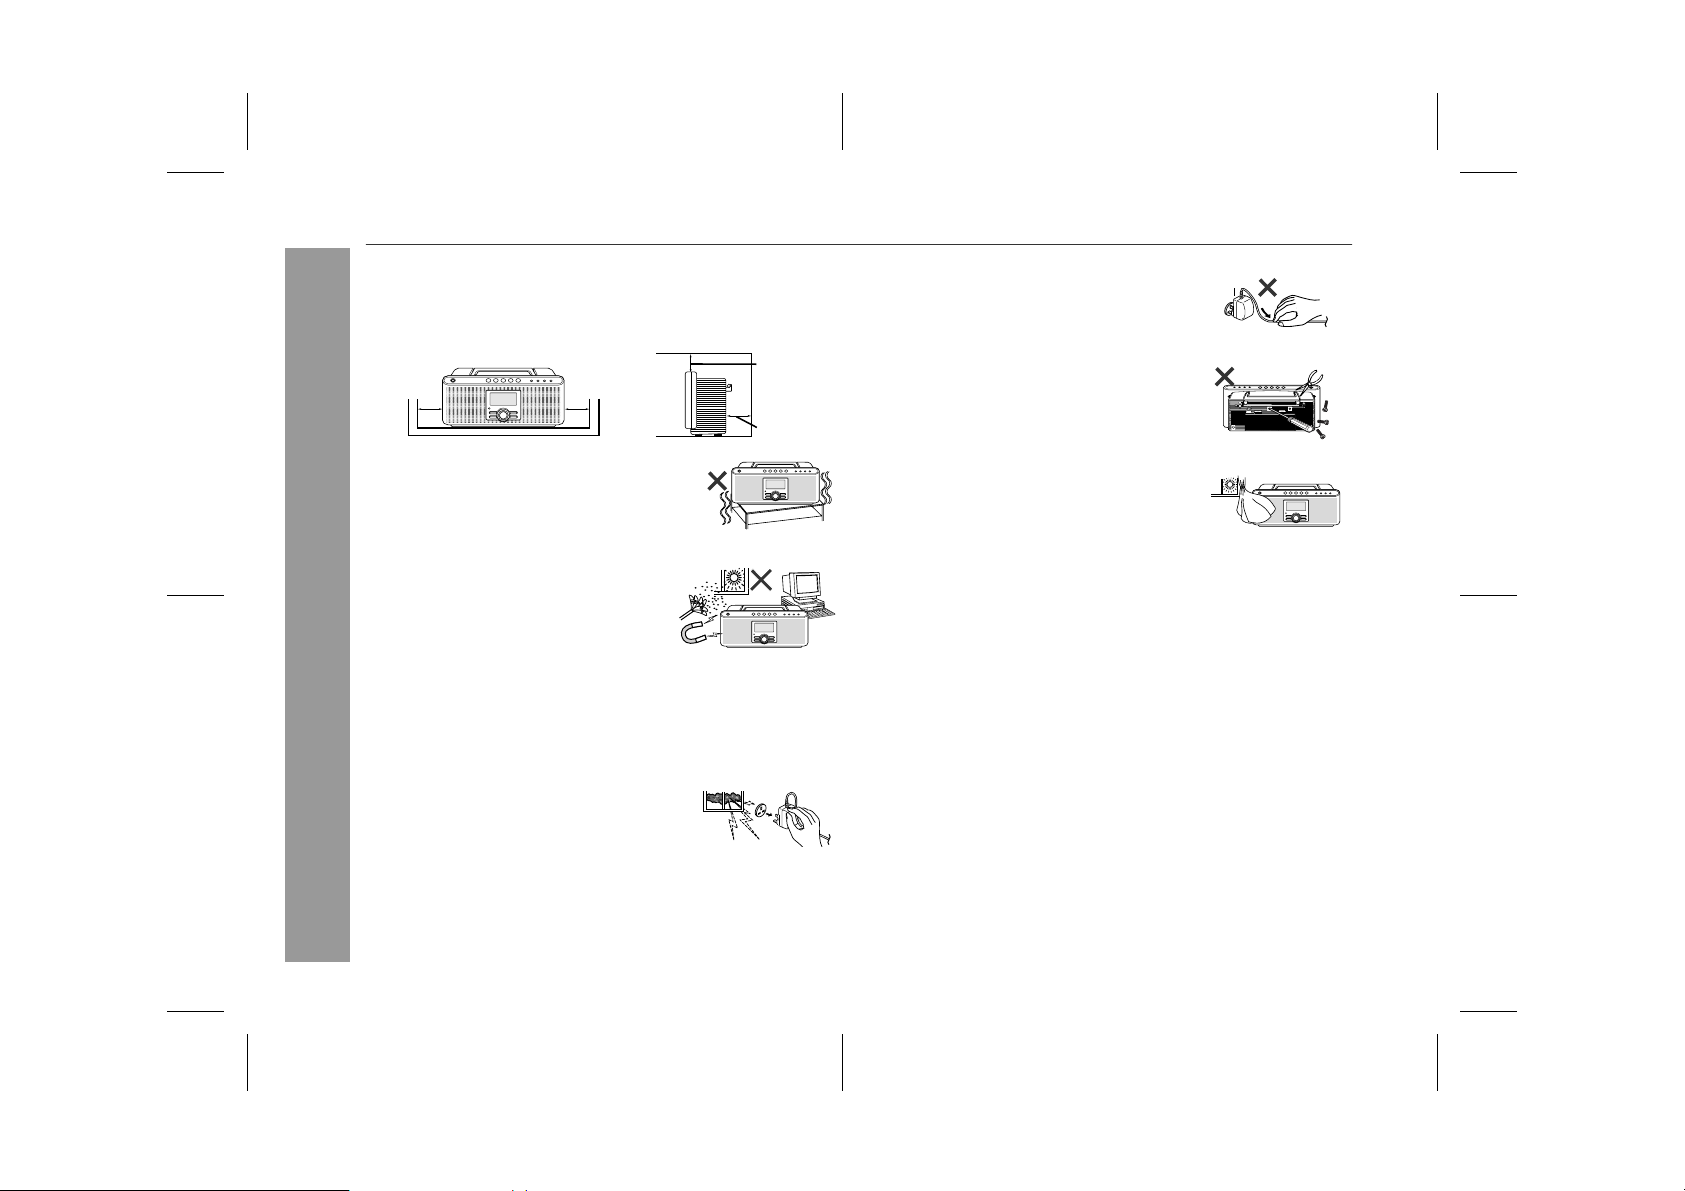
Precautions
" General
! Please ensure that the equipment is positioned in a well venti-
lated area and ensure that there is at least 10 cm (4") of free
space along the sides, top and back of the equipment.
10 cm (4") 10 cm (4")
! Use the unit on a firm, level surface free from
vibration.
! Keep the unit away from direct sunlight,
strong magnetic fields, excessive dust,
humidity and electronic/electrical equipment (home computers, facsimiles, etc.)
which generate electrical noise.
! Do not place anything on top of the unit.
! Do not expose the unit to moisture, to temperatures higher than
60°C (140°F) or to extremely low temperatures.
General Information
! If your unit does not work properly, disconnect the AC adaptor
from the wall socket. Plug the AC adaptor back in, and then turn
on your unit.
! In case of an electrical storm, unplug the
unit for safety.
! Do not use an external power supply, other than the 9 V DC sup-
plied with this unit as it may be damaged.
! SHARP is not responsible for damage due to improper use. Refer
all servicing to a SHARP authorised service centre.
10 cm (4")
10 cm (4")
! Hold the AC adaptor plug by the head when
removing it from the wall socket, as pulling
the lead can damage internal wires.
! Do not remove the outer cover, as this
may result in electric shock. Refer internal service to your local SHARP service
facility.
! The ventilation should not be impeded by
covering the ventilation openings with
items, such as newspapers, tablecloths,
curtains, etc.
! No naked flame sources, such as lighted candles, should be
placed on the apparatus.
! Attention should be drawn to the environmental aspects of bat-
tery disposal.
! The apparatus is designed for use in moderate climate.
! This unit should only be used within the range of 5°C - 35°C
(41°F - 95°F).
Warning:
The voltage used must be the same as that specified on this unit.
Using this product with a higher voltage other than that which is
specified is dangerous and may result in a fire or other type of accident causing damage. SHARP will not be held responsible for any
damage resulting from use of this unit with a voltage other than that
which is specified.
" Volume control
It is advisable to avoid exposure to high volume levels. Do not turn
on the unit with the volume set to the maximum. Keep the volume
moderate when listening to music.
4
04/4/12 FV-DB1E_1.fm
TINSEA025SJZZ

Contr o ls an d in dic ators
1 23
456
1.On/Stand-by Button . . . . . . . . . . . . . . . . . . . . . . . . . . . . . . . . 7
Reference page
2.Preset Number Buttons . . . . . . . . . . . . . . . . . . . . . . . . . . . . 14
3.Preset Zone Select Button . . . . . . . . . . . . . . . . . . . . . . . . . 14
4.Auto Tune Button . . . . . . . . . . . . . . . . . . . . . . . . . . . . . . . . . . 9
5.Informa tion Select Button . . . . . . . . . . . . . . . . . . . . . . . . . . 12
6.Band Select Button . . . . . . . . . . . . . . . . . . . . . . . . . . . . . 9, 13
7.Alarm or Sleep Set Indicator . . . . . . . . . . . . . . . . . . . . . 15, 16
8.Menu Button . . . . . . . . . . . . . . . . . . . . . . . . . . . . . . . . . . . . . 10
9.Clock Button . . . . . . . . . . . . . . . . . . . . . . . . . . . . . . . . 7, 15, 16
10.Tuning Down or Item Select Button . . . . . . . . . . . . . 9, 10, 13
11.Volume Up and Down Button . . . . . . . . . . . . . . . . . . . . . . . . 7
12.Tuning Up or Item Select Button . . . . . . . . . . . . . . . 9, 10, 13
13.Enter Button . . . . . . . . . . . . . . . . . . . . . . . . . . . . . . . . . . . . . . 9
14.Sound Mode Select Button . . . . . . . . . . . . . . . . . . . . . . . . . . 7
FV-DB1E
1
8910
7
11
12 1413
15 16 17 18 19 20 21
2423 25 26
27 28
22
15.DAB Indicator . . . . . . . . . . . . . . . . . . . . . . . . . . . . . . . . . . . . . 9
16.FM Indicator . . . . . . . . . . . . . . . . . . . . . . . . . . . . . . . . . . . . . 13
17. FM St e r e o M o de Indicator . . . . . . . . . . . . . . . . . . . . . . . . . . 13
18.FM Stereo Receiving Indicator . . . . . . . . . . . . . . . . . . . . . . 13
19.Preset Zone Indicators . . . . . . . . . . . . . . . . . . . . . . . . . . . . 14
20.Preset Number Indicators . . . . . . . . . . . . . . . . . . . . . . . . . . 14
21.Primary with Secondary Indicator . . . . . . . . . . . . . . . . . . . . 9
22.Secondary Indicator . . . . . . . . . . . . . . . . . . . . . . . . . . . . . . . 9
23.Telescopic Rod Aerial . . . . . . . . . . . . . . . . . . . . . . . . . . . . . . 8
24.Optical Digital Output Socket . . . . . . . . . . . . . . . . . . . . . . . 17
25.Analogue Line Output Socket . . . . . . . . . . . . . . . . . . . . . . . 17
26.Headphone Socket . . . . . . . . . . . . . . . . . . . . . . . . . . . . . . . . 17
27. Bat t e ry Compartmen t . . . . . . . . . . . . . . . . . . . . . . . . . . . . . . 6
28.DC 9 V Input Socket . . . . . . . . . . . . . . . . . . . . . . . . . . . . . . . . 6
04/4/12 FV-DB1E_1.fm
TINSEA025SJZZ
General Information
5
FV-DB1E
Power source
" Inserting memory batteries
Memory batteries maintain the clock setting and preset stations for
the tuner.
1 Open the battery com-
partment.
2
Insert the supplied 2 "AA"
size batteries (UM/SUM-3,
R6, HP-7 or similar) into
the battery compartm en t.
Insertion and removal:
Push the battery toward to insert or remove.
2
3 Close the battery compartment.
Caution:
Do not use rechargeable batteries (nickel-cadmium battery, etc.).
Notes:
! If memory batteries are not inser ted or low, preset stations and
the clock setting will be lost.
! Enter the power stand-by mode and connect the AC adaptor
Preparation for Use
before replacing memory batteries. Otherwise preset stations
and the clock setting will be lost.
! Replace memory batteries approximately once a year.
Precautions for battery use:
Installing the batteries incorrectly may cause the unit to malfunction.
!
! Insert the batteries according to the direction indicated in the
battery compartment.
Remove the batteries if the unit is not to be used for long periods
!
of time. This will prevent potential damage due to battery leakage.
! Replace all old batteries with new ones at the same time.
! Do not mix old and new batteries.
6
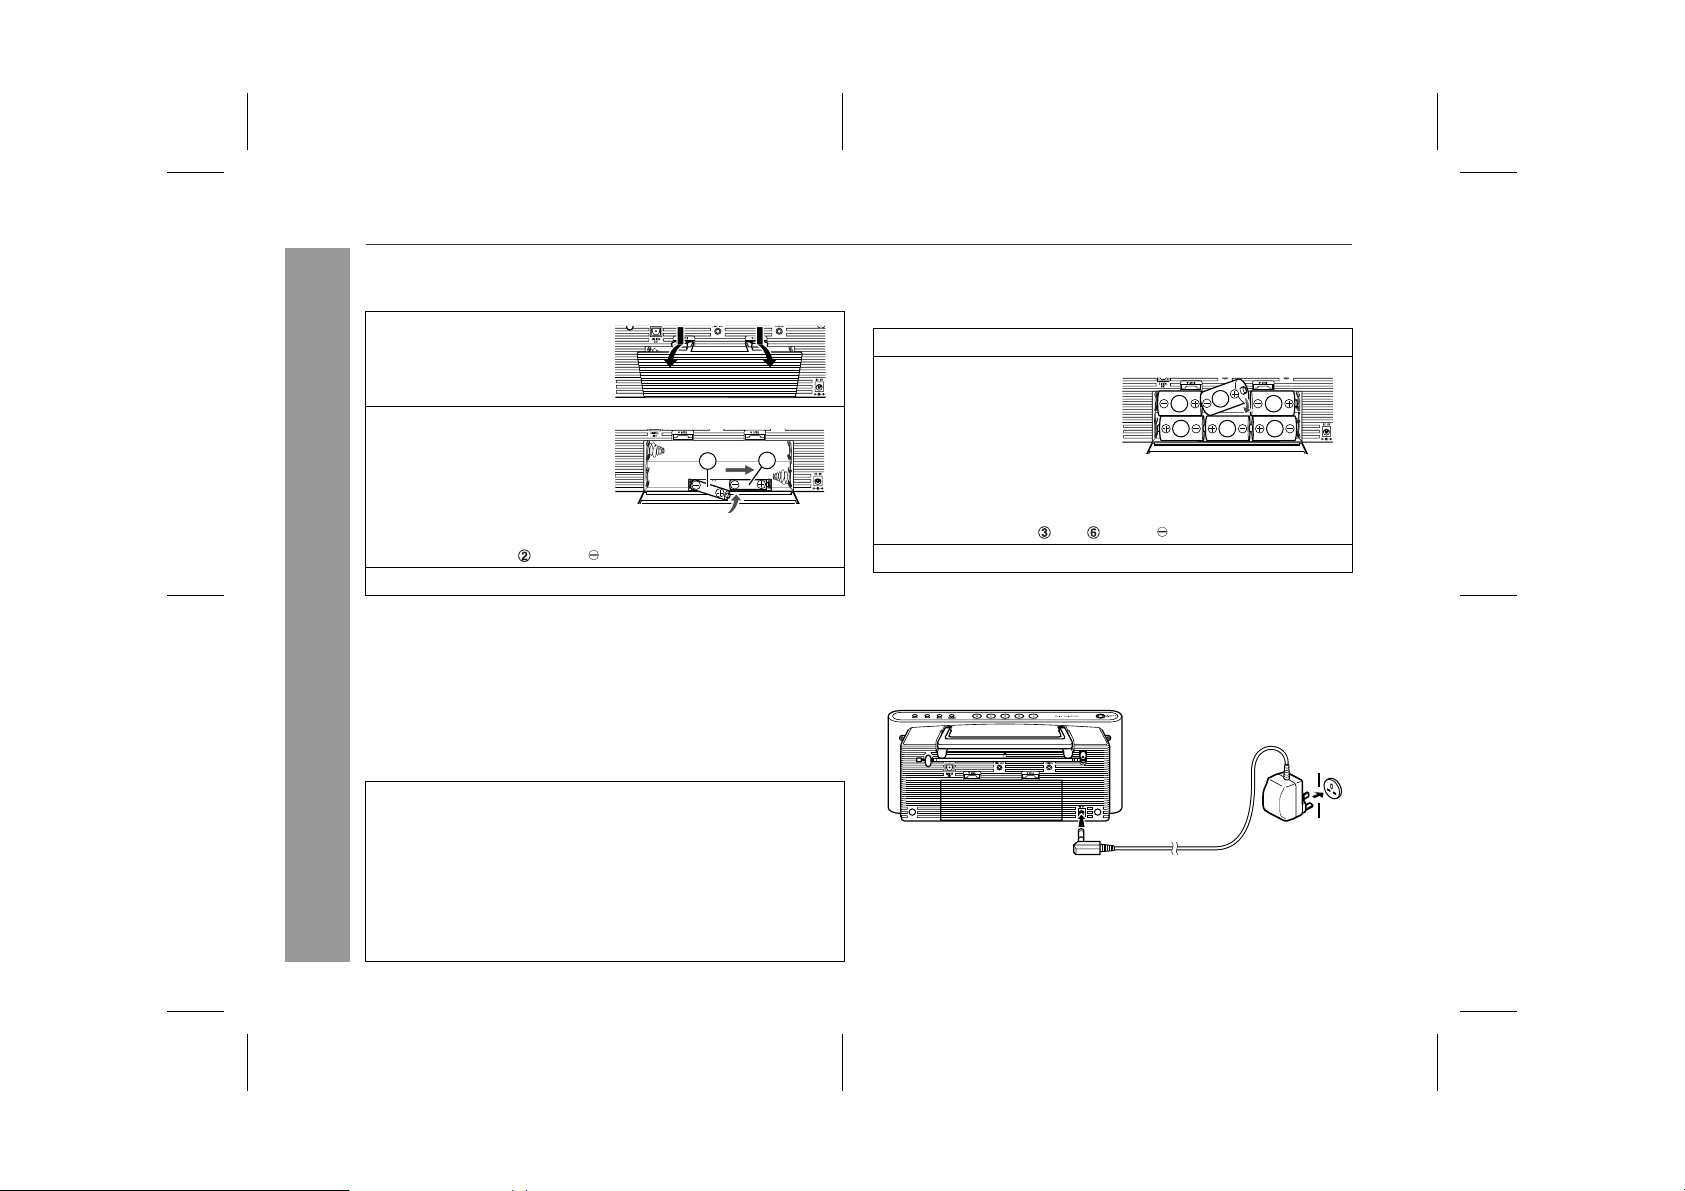
" Using with the main batteries
When the unit is powered by the main batteries, make sure to install
memory batteries. Otherwise preset stations, the clock setting and
DAB setting will be all lost when the main batteries run out.
1
Disconnec t the AC a daptor, and open the batte ry com partmen t.
2
Insert 6 " C" size batteries
(UM/SUM-2, R14, H P-11 or
similar) into the battery
compartment.
1
"C" size batteries (UM/SUM-2, R14, HP-11 or similar) are not
included.
Insertion and removal:
Push the batteries and toward to insert or remove.
6
54
2
13
3 Close the battery compartment.
Battery replacement:
When batteries are low, sound decreases or becomes distorted.
Replace the batteries with new ones.
" Using with the AC adaptor
Plug the AC adaptor into the wall socket, and then insert the plug on
the other end into the DC 9V socket.
Wall socket
(AC 230 - 240 V 50/60 Hz)
To the DC 9V socket
Notes:
! Unplug the AC adaptor from the wall socket if the unit will not be
used for a prolonged period of time.
Connecting the AC adapt or t o th e unit disc onnec ts the main bat teries.
!
! Use only the supplied AC adaptor. Using other AC adaptor may
cause an electric shock or fire.
04/4/12 FV-DB1E_1.fm
TINSEA025SJZZ

General control
" Adjusting the volume
Press the VOLUME (+ or -) button to increase or decrease the volume.
.....
0
21 39 40
" Adjusting the bass
1 Press the SOUND button to select "Bass".
Within 30 seconds , pre s s t he VOLUME control to ad jus t th e b ass .
2
FV-DB1E
2
" To turn the power on
Press the ON/STAND-BY button to turn the power on.
When turned on for the first time, the unit scans radio stations
automatically to create the station list (see page 8).
After use:
Press the ON/STAND-BY button to enter the power stand-by
mode.
Note:
The backlight brightness changes after a while.
After 30 seconds of inactivity, the backlight dims (when using the AC
adaptor) or turns off (when using batteries ). Press a button to tur n it
back on.
...
...
0 +5 5
" Adjusting the treble
1 Press the SOUND button to select "Treble".
Within 30 seconds, press the VOLUME control to adjust the treble.
2
...
...
0 +5 5
" Checking date and time
When a DAB (Digital Audio Broadcasting) station is received, date
and time are set automatically.
Press the CLOCK button until time and date appear on the display.
When "No time date" appears, receive a DAB station to set date
and time.
Notes:
! If memory batteries are not inser ted or low, the clock setting will
be lost. This can be avoided when the AC adaptor is connected.
The clock setting will be lost if the unit is powered only by the
main batteries and set to the power stand-by mode.
! Time is displayed in 24-hour format.
Preparation for Use
7
04/4/12 FV-DB1E_1.fm
TINSEA025SJZZ

FV-DB1E
Listening to the DAB (Digital Audio Broadcasting )
" About DAB (Digital Audio Broadcasting)
Digital Audio Broadcasting is a digital transmission system where
audio signals are converted to digital signals for broadcasting.
DAB is broadcast as a group of data called multiplex (ensemble)
which may contain one or more stations (services). Each station
contains a primary ser vice and there may be one or more secondary ser vices.
This allows several programmes or services to be transmitted on a
single frequency.
DAB SIGNAL
MULTIPLEX
(ENSEMBLE)
SERVICES
SERVICE
COMPONENTS
(STATIONS)
Aerial adjustment:
Raise and extend the telescopic
rod aerial, then adjust the position and length for the best reception.
" Auto tune
When turned on for the first time, the unit scans radio stations
automatically to create a station list.
! 12-digit solid blocks show the progress of scan.
! The number of received stations is displayed.
Total received stations
After the scan:
The stations will be stored in alphanumeric order and the first station
on the list will be selected and you will hear it through the speaker.
! To listen to other stations, see "Selecting a station in the station
list" on page 9.
! You can arrange the order of stations in the station list (see page
11).
Notes:
! If no station is found, "No station" appears.
! Up to 99 appears for total received stations.
DAB (Digital Audio Broadcasting) Operation
8
04/4/12 FV-DB1E_1.fm
TINSEA025SJZZ

FV-DB1E
" Retuning the unit (Auto tune)
You can retune the radio when you move the unit to other areas or
add multiplex channels to the station list.
There are two Auto tune options available.
Autotune UK: All frequencies are scanned in the UK channel allo-
cation. This may take a few seconds.
Autotune Full: The full range of digital frequencies is scanned in
Band III. This may take a minute or more.
1 Press the BAND button until "DAB" ap-
pears on the display.
2 Autotune UK:
Press the AUTO TUNE button for less
than 1 second.
Autotune Full:
Hold down the AUTO TUNE button for 2
seconds or more.
You can cancel the Auto tune by pressing the AUTO TUNE button again.
After the scan:
The unit will return to the station you were listening to and you will
hear it through the speaker. All the stations found are now stored in
the unit.
" Selecting a station in the station list
Once a DAB station is received, you can select stations in the station list.
1 Press the BAND button until "DAB" appears on the display.
2 Whilst receiving a DAB station, press the TUNING ( or )
button repeatedly to select the desired station.
! The upper part of the display shows the current station
name, and the name of the station being scanned (with "
") appears in the lower part.
The current station name
The name of the station being scanned
! If a station has one or more secondary
services, " " appears after to the station
name. You can select a secondary service.
! Whilst selecting a secondary service,
" " appears before the station name.
This indicates a primary service is available.
3 Within 30 seconds, press the ENTER button.
! When the current station is primary with secondary, "P" lights
up.
! When the current station is secondary, "S" lights up.
! When the current station is primary without other services,
no indicator lights up.
Note:
Inactive stations cannot be received by Auto tune ("Not available"
appears). Tune in manually by adjusting the aerial direction (see
page 10).
3
DAB (Digital Audio Broadcasting) Operation
9
04/4/12 FV-DB1E_1.fm
TINSEA025SJZZ

FV-DB1E
Listening to the DAB (Digital Audio Broadcasting) (continued)
! Manual tune
You can manually store stations which Auto tune cannot find. If
reception is poor, you can adjust the sensitivity.
Manual tune is only available after Auto tune. Perform Auto tune
first.
1 Press the BAND button until "DAB" ap-
pears on the display.
2 Press the MENU button repeatedly to
select "Manual tune".
3 Within 30 seconds, press the ENTER
button.
4 Within 30 seconds, press the TUNING
( or ) button to tune in to the desired
station.
5 Within 30 seconds, press the ENTER button.
Reception sensitivity appears. The
"
white block indicates the minimum required level and the solid blocks indicate
the current level.
If the level is below the white block,
"
move the rod aerial or unit to improve reception. When the level reaches the
white block, a multiplex name appears
and the multiplex will be added to the
service list.
DAB (Digital Audio Broadcasting) Operation
Exiting Manual tune:
Press the ENTER button to exit manual tuning.
10
04/4/12 FV-DB1E_2.fm
TINSEA025SJZZ

Various settings
FV-DB1E
! Changing the station order
You can change the order of stations in the station list.
1 Press the BAND button until "DAB" ap-
pears on the display.
2 Press the MENU button repeatedly to
select "Station order".
3 Within 30 seconds, press the ENTER
button.
4 Within 30 seconds, press the TUNING ( or ) button to
select the desired station order.
Alphanumeric:
All stations are displayed in alphanumeric order. This is the default setting.
Fav. station:
The 10 most recent stations appear as "Fav." and then appear
in alphanumeric order.
Active station:
The station list shows receivable stations and then others in alphanumeric order.
Multiplex:
Stations are sorted by frequency, in ascending order.
Trim stn. list:
Delete inactive stations from the list.
5 Within 30 seconds, press the ENTER
button.
! Adjusting the DRC value
When the volume is low, adjust the DRC (Dynamic Range Control)
value to make the sound more audible (may not available for some
broadcast material).
1 Press the BAND button until "DAB" appears on the display.
2 Press the MENU button repeatedly to
select "Set DRC Value".
3 Within 30 seconds, press the ENTER
button.
4 Within 30 seconds, press the TUNING
( or ) button to select the desired
DRC value.
DRC 1: Dynamic range is controlled as set for the broad-
cast. This is the default setting.
DRC 0: DRC is off.
DRC 1/2: Dynamic range is controlled half as much as the
level set for the broadcast.
5 Within 30 seconds, press the ENTER
button.
3
DAB (Digital Audio Broadcasting) Operation
04/4/12 FV-DB1E_2.fm
11
TINSEA025SJZZ

FV-DB1E
Changing the information display
You can switch information in the lower part of display.
Press the INFO button.
Each time the button is pressed, the information display changes in the following order.
When "Not available" appears, the INFO button does not allow you to change the display.
Display Description
Scrolling text Information scrolls across the display when sent from the station (set by default).
You can pause, forward, or reverse scrolling text.
Pausing text scroll: Press the ENTER button.
Forwarding/reversing text scroll: Whilst text scroll is paused, press the TUNING ( or ) button. Press once to
move forward one character, hold down to scroll through, and release to return to
the pause mode.
Resuming text scroll: Whilst text scroll is paused, press the ENTER button again.
Programme type A description of the type of content being broadcast by the station.
Multiplex n a m e The name of the multiplex (ensemble) which provides the current service.
Channel The DAB channel and frequency for the station.
Mode The data transfer speed and channel type (stereo or mono) appear.
12
Signal quality The signal quality is displayed as a number (0 - 100).
[85-100: Good 70-84: Fair 0-69: Poor]
DAB (Digital Audio Broadcasting) Operation
Sensitivity Sensitivity of reception.
The empty block indicates the minimum required level for reception and the solid blocks indicate the current level.
04/4/12 FV-DB1E_2.fm
TINSEA025SJZZ

Listening to the FM
1 Press the ON/STAND-BY button to turn the power on.
2 Press the BAND button until "FM" ap -
pears on the display.
3 Press the TUNING ( or ) button to tune in to the desired
station.
Manual tuni ng:
Press the TUNING button as many times as required to tune in
to the desired station.
Auto tuning:
When the TUNING button is pressed for 2 seconds or more,
scanning will start automatically and the tuner will stop at the
first receivable broadcast station.
Notes:
When radio interference occurs, auto scan tuning may stop auto-
"
matically at that point.
Auto scan tuning will skip weak signal stations.
"
To stop the auto tuning, press the TUNING button again.
"
To receive an FM stereo transmission:
Press the BAND button to display the "ST" indicator.
" " will appear when an FM broadcast is in stereo.
"
If the FM reception is weak, press the BAND button to extinguish
"
the "ST" indicator. The reception changes to monaural, and the
sound becomes clearer.
FM stereo mode indicator
FM stereo receiving indicator
FV-DB1E
4
FM Operation
04/4/12 FV-DB1E_2.fm
13
TINSEA025SJZZ

FV-DB1E
Storing stations
! Memorising a station
You can store up to 20 DAB and FM stations (5 stations for each
zone A-D) and recall them at the press of a button.
For FM stations, stereo and mono modes are memorised.
Advanced Features
1 T une in to the desired station (see page 9, 13).
2 Press the PRESET SELECT button repeatedly to select the
desired preset zone.
3 Hold down the PRESET button (1 - 5) for
2 seconds or more to store the station
in memory.
4 Repeat steps 1 - 3 to set other stations, or to change a pre-
set station.
When a new station is stored in memory, the station previously
memorised will be erased.
Note:
If memory batteries are not inser ted or low, preset stations will be
lost. When the AC adaptor is connected, preset stations remain
without memory batteries. Preset stations will be lost if the unit is
powered only by the main batteries and set to the power stand-by
mode.
! To recall a memorised station
1 Press the PRESET SELECT button repeatedly to select the
desired preset zone.
2 Press the PRESET button (1 - 5) for less
than 1 second to recall a station.
Note:
If the selected preset number is empty the display shows
"Preset ** empty".
14
Zone A
Zone B
Zone C
Zone D
! To erase entire preset memory
1 Hold down the PRESET SELECT button
for 2 seconds or more.
2 Within 30 seconds, press the ENTER
button.
04/4/12 FV-DB1E_2.fm
TINSEA025SJZZ

Alarm operation
At the set time, the alarm sounds or the radio turns on.
Once set, the alarm performs the operation every day.
Use when...
You want to use the alarm as a wake up call, or listen to the radio at
the same time every day.
Before setting alarm:
1 When setting the alarm, connect the AC adaptor to the unit.
If batteries are the only power source, you cannot set the
alarm (see page 6).
2 If the clock is not set, the alarm setting is not available ("No
time date" appears). Receive a DAB station to set date and
time (see page 8, 9).
1 Press the ON/STAND-BY button to turn the power on.
2 To use "Radio" as an alarm, tune in to a station and adjust
the volume.
To use "Tone" as an alarm, proceed to step 3.
3 Press the CLOCK button repeatedly to
select "Set alarm ok?", then press the
ENTER button.
4 Within 30 seconds, press the TUNING
( or ) button to specify the hour to
start, then press the ENTER button.
5 Within 30 seconds, press the TUNING
( or ) b utton to specify the minutes
to start, then press the ENTER button.
6 Within 30 seconds, press the TUNING
( or ) button to select the desired
alarm type.
Tone: The alarm sounds at the set time, and stops after 5
Radio: The radio turns on at the set time, and turns off after
minutes. The volume gradually increases from 0 and
reaches 40 after 1 minute.
1 hour. The volume gradually increases from 0 and
reaches the level set in step 2 after 1 minute.
7 Within 30 seconds, press the ENTER
button.
" " will light up.
8 At the set time, the alarm operation will start.
The current date/time and the remaining time appear alterna tely.
"
The volume decreases 1 minute before the alarm operation
"
finishes.
FV-DB1E
5
Advanced Features
15
04/4/12 FV-DB1E_2.fm
TINSEA025SJZZ

FV-DB1E
Alarm operation (continued)
Sleep operation
16
Stopping the alarm:
Press the ON/STAND-BY button.
About snooze function:
You can pause the alarm sound by pressing buttons other than the ON/STAND-BY
button. In this case, the alarm resumes after 7 minutes.
The remaining time also appears.
Tone:
The alarm stops after 5 minutes when the snooze is not used. If
you use the snooze repeatedly, the alarm will be disabled after 1
hour.
Radio:
The alarm will be disabled after 1 hour.
T o cancel the alarm setting:
Press the ON/STAND-BY button whilst " " is indicated.
To cancel the alarm operation without setting the unit to the stand-by
mode, press the CLOCK button until "Alarm off ok?" appears on the
display, then press the ENTER button.
Advanced Features
To reset or change the alarm setting:
Perform "Alarm operation" from the beginning (see page 15).
Notes:
The alarm operates at the same time e very day until the setting is
"
cancelled. Cancel the alarm when it is not in use.
If the unit is unplugged or a power failure occurs in the alarm
"
stand-by mode, the " " indicator turns off and the alarm setting is
cancelled.
During the sleep operation, the alarm setting is not available.
"
When the set time elapses, sound is muted with the power on.
Before setting sleep:
For the sleep operation, connect the AC adaptor to the unit.
If batteries are the only power source, setting is not possible
(see page 6).
1 P ress the CLOCK button repeatedly to
select "Set sleep".
2 Within 30 seconds, press the TUNING
( or ) button to select the desired
sleep time.
Select set time from 1 - 120 minutes by
"
the minute.
Press the TUNING ( or ) button once to advance the time
"
by 1 minute. Hold it down to advance continuously.
...
21 119 120
3 Within 30 seconds, press the ENTER
button.
" " will light up.
"
Remaining time is displayed during the sleep operation.
"
The volume gradually decreases for the last 1 minute.
"
4 S ound will be muted after the set time
elapses.
" " turns off.
To stop the sleep operation:
Press any button on the unit
whilst "Sleeping" is displayed.
Sleep operation stops.
To cancel the sleep setting:
Press the ON/STAND-BY button whilst " " is indicated.
To cancel the sleep operation without setting the unit to the stand-by
mode, press the CLOCK button until "Sleep off ok?" appears on the
display, then press the ENTER button.
04/4/12 FV-DB1E_2.fm
TINSEA025SJZZ

Enhancing your system
Turn off all other equipment before making this connection.
! Digital connection to an MD recorder, etc.
You can record DAB sound using an MD recorder, etc.
Notes:
Plug in each cable fully to prevent noise interference.
"
Refer to the manual for the connected equipment.
"
FM signals are not sent from the DIGITAL OUT socket.
"
! Connecting to a stereo system, etc.
You can enjoy the sound through a stereo system by connecting to
the unit with an audio cable.
Notes:
Plug in each cable fully to prevent noise interference.
"
Refer to the manual for the connected equipment.
"
The unit produces both DAB and FM sound.
"
FV-DB1E
5
Optical digital cable
(commercially
available)
To optical digital
audio input socket
MD recorder, etc.
Audio cable
(commercially
available)
To the
line input
sockets
Stereo system, etc.
Headphones
! Headphones
Before plugging in or unplugging the headphones, reduce the vol-
"
ume.
" Be sure your headphones have a 3.5 mm (1/8") diameter plug
and impedance between 16 and 50 ohms. The recommended
impedance is 32 ohms.
" Plugging in the headphones disconnects the speakers automati-
cally. Adjust the volume using the VOLUME control.
04/4/12 FV-DB1E_2.fm
TINSEA025SJZZ
Advanced Features
17

FV-DB1E
Troubleshooting chart
Many potential problems can be resolved by the owner without calling a service technician.
If something is wrong with this product, check the following before
calling your authorised SHARP dealer or service centre.
Symptom Possible cause
When a button is
pressed, the unit
does not respon d.
No sound is
heard.
DAB channels
cannot be
received.
Sound from DAB
channels is
interrupted or
distorted.
References
Secondary
services cannot
be received.
The alarm does
not start at the set
time. Or " " is
flashing.
The unit does not
store stations, or
the clock does
not keep time.
Set the unit to the power stand-by mode and
"
then turn it back on.
If the unit still malfunctions, reset it.
"
Is the volume level set to "0"?
"
Are the headphones connected?
"
Signal reception is poor. Adjust the aerial di-
"
rection (see page 8).
" Move the unit to another room or near the
window, then tune in manually
(see page 10).
Is the unit placed near the TV or computer?
"
Move the unit to another room or near the
"
window, then tune in manually
(see page 10).
Are the main batteries dead?
"
Some DAB channels do not offer secondary
"
services. " " appears the station name when
secondary services are available
(see page 9).
Is the AC adaptor of the unit plugged in?
"
Did a power failure occur? Receive a DAB
"
station to set date and time (see page 8, 9).
Are the memory batteries dead?
"
Is the memory battery polarity correct?
"
! If trouble occurs
When this product is subjected to strong external interference
(mechanical shock, excessive static electricity, abnormal supply
voltage due to lightning, etc.) or if it is operated incorrectly, it may
malfunction.
If such a problem occurs, do the following:
1 Set the unit to the stand-by mode and turn the power on again.
2 If the unit is not restored in the previous operation, unplug and
plug in the AC adaptor from the wall socket and replace the main
batteries, memory batteries and then turn the power on.
Caution:
This operation will erase all data stored in memory including clock,
alarm settings, tuner preset, and station list, etc.
! Clearing all the memory (reset)
1 Pr ess the ON/STAND-B Y button to enter the stand-by mode.
2 Whilst pressing down the PRESET 1 button and the PRESET
SELECT button, press the ON/STAND-BY button until "All clear
ok?" appears.
3 Within 30 seconds, press the ENTER button.
"Complete" appears and the memory is cleared.
Caution:
This operation will erase all data stored in memory including clock,
alarm settings, tuner preset, and station list, etc.
! Condensation
When condensation is formed, the unit may not function properly.
Condensation may form in the following cases:
Shortly after turning on a heater.
"
When the unit is placed in a room where there is excessive steam
"
or moisture.
" When the unit is moved from a cool place to a warm place.
To remove condensation:
Leave the unit for approximately 1 hour. The condensation should
evapor ate and the unit will work properly.
18
04/4/12 FV-DB1E_2.fm
TINSEA025SJZZ

Maintenance
Specifications
FV-DB1E
! Cleaning the cabinet
Periodically wipe the cabinet with a soft cloth and a diluted soap
solution, then with a dry cloth.
Caution:
Do not use chemicals for cleaning (petrol, paint thinner, etc.). It
"
may damage the cabinet finish.
Do not apply oil to the inside of the unit. It may cause malfunc-
"
tions.
As part of our policy of continuous improvement, SHARP reserves
the right to make design and specification changes for product
improvement without prior notice. The performance specification figures indicated are nominal values of production units. There may be
some deviations from these values in individual units.
! General
Type DAB receiver
Power source DC 9 V: AC adaptor
Power
consumption
Output power RMS: 4 W (2 W + 2 W) (10 % T.H.D.)
Speaker 8 cm full-range speaker
Output terminals
Dimensions Width: 320 mm
Weight 1.65 kg (without batteries)
(AC 230 - 240 V, 50/60 Hz)
DC 9 V: ["C" size (UM/SUM-2, R14, or HP-11)
battery 6 as main batteries]
DC 3 V: ["AA" size (UM/ SUM-3, R6, or HP-7)
battery 2 as memory batteries]
8 W (AC adaptor)
Headphones: 3.5 mm ste reo min i plu g type 1
16 - 50 ohms (recommended: 32 ohms)
Line output (audio signal):
3.5 mm stereo mini plug type 1
2 V/10 k ohms at DAB 0 dB
Digital output (optical): Square type 1
Height: 135 mm
Depth: 100 mm
! Radio
Frequency range DAB: 174 - 240 MHz
FM: 87.5 - 108 MHz
6
References
04/4/12 FV-DB1E_2.fm
19
TINSEA025SJZZ

TERMS OF GUARANTEE
Sharp Electronics (UK) Ltd. (“Sharp”) guarantees to provide for the repair, or at its option the replacement, of this product subject to the conditions listed below:-
1. This guarantee shall only apply to faults which are due to inferior workmanship or materials. It does
not cover faults or damage caused by accident, misuse, fair wear and tear, neglect, tampering with
the product, or repair other than by a Service Facility appointed by Sharp.
2. As this product is intended for private domestic use only, the guarantee will not apply if the product
is used in the course of a business, trade or profession.
3. To benefit from this guarantee, any fault which occurs must be notified to Sharp, or its appointed
Service Facility within one year from the date this product was purchased. Proof of purchase must
be provided.
4. The guarantee does not cover carriage costs, audio tapes, compact discs or batteries.
5. In the unlikely event of this product requiring repair, please contact the supplier from whom it was
purchased. Where this is not possible, please contact the Sharp Customer Information Centre on
the telephone number given below.
6. No person has any authority to vary the terms or conditions of this guarantee.
7. This guarantee is offered as an additional benefit to your statutory rights, and does not affect these
rights in any way.
If you have any difficulty operating this product, or would like information on other Sharp products,
please telephone the Sharp Customer Information Centre on the number given below.
Sharp Customer Information Centre - Telephone 08705 274277
(or (01) 676 0648 if telephoning from Ireland)
0310
SHARP ELECTRONICS (U.K.) LTD.
Sharp House, Thorp Road, Newton Heath, Manchester, M40 5BE
SHARP CORPORATION
0401_A5
04/4/12 FVDB1E_BACK.fm
TINSEA025SJZZ
04D N AO 1
TINSEA025SJZZ
 Loading...