


4 ANSWERING MACHINE CONNECTION
USING THE CONNECTION
If you have connected an answering machine to your fax as described in "Assembly
and Connections" in Chapter 1, you can receive both voice messages and fax
transmissions on the same line while you are out. To use the connection, first change
the outgoing message of your answering machine, and then set the reception mode of
your fax to ANS. when you go out.
Changing the outgoing message
The outgoing message (OGM) of your answering machine should be changed to
inform callers who want to send a fax to press their Start key. For example, your
message might go as follows:
"Hello. You’ve reached the ABC company. No one is available to take your call right
now. Please leave a message after the beep or press your facsimile Start key to send
a fax. Thank you for calling."
Comments:
••
It is advisable to keep the lengt h of the m ess age un der 10 seconds . If it is too long, you may
have difficulty receiving faxe s sent by auto mat ic dialling.
••
Your cal lers can eve n leave a vo ice m essa ge and send a fax mes sage on the sam e ca ll.
Modify your outg o ing messa ge t o explain that they ca n first leave a voic e messa ge, and then
press their Sta rt key to send a f ax.
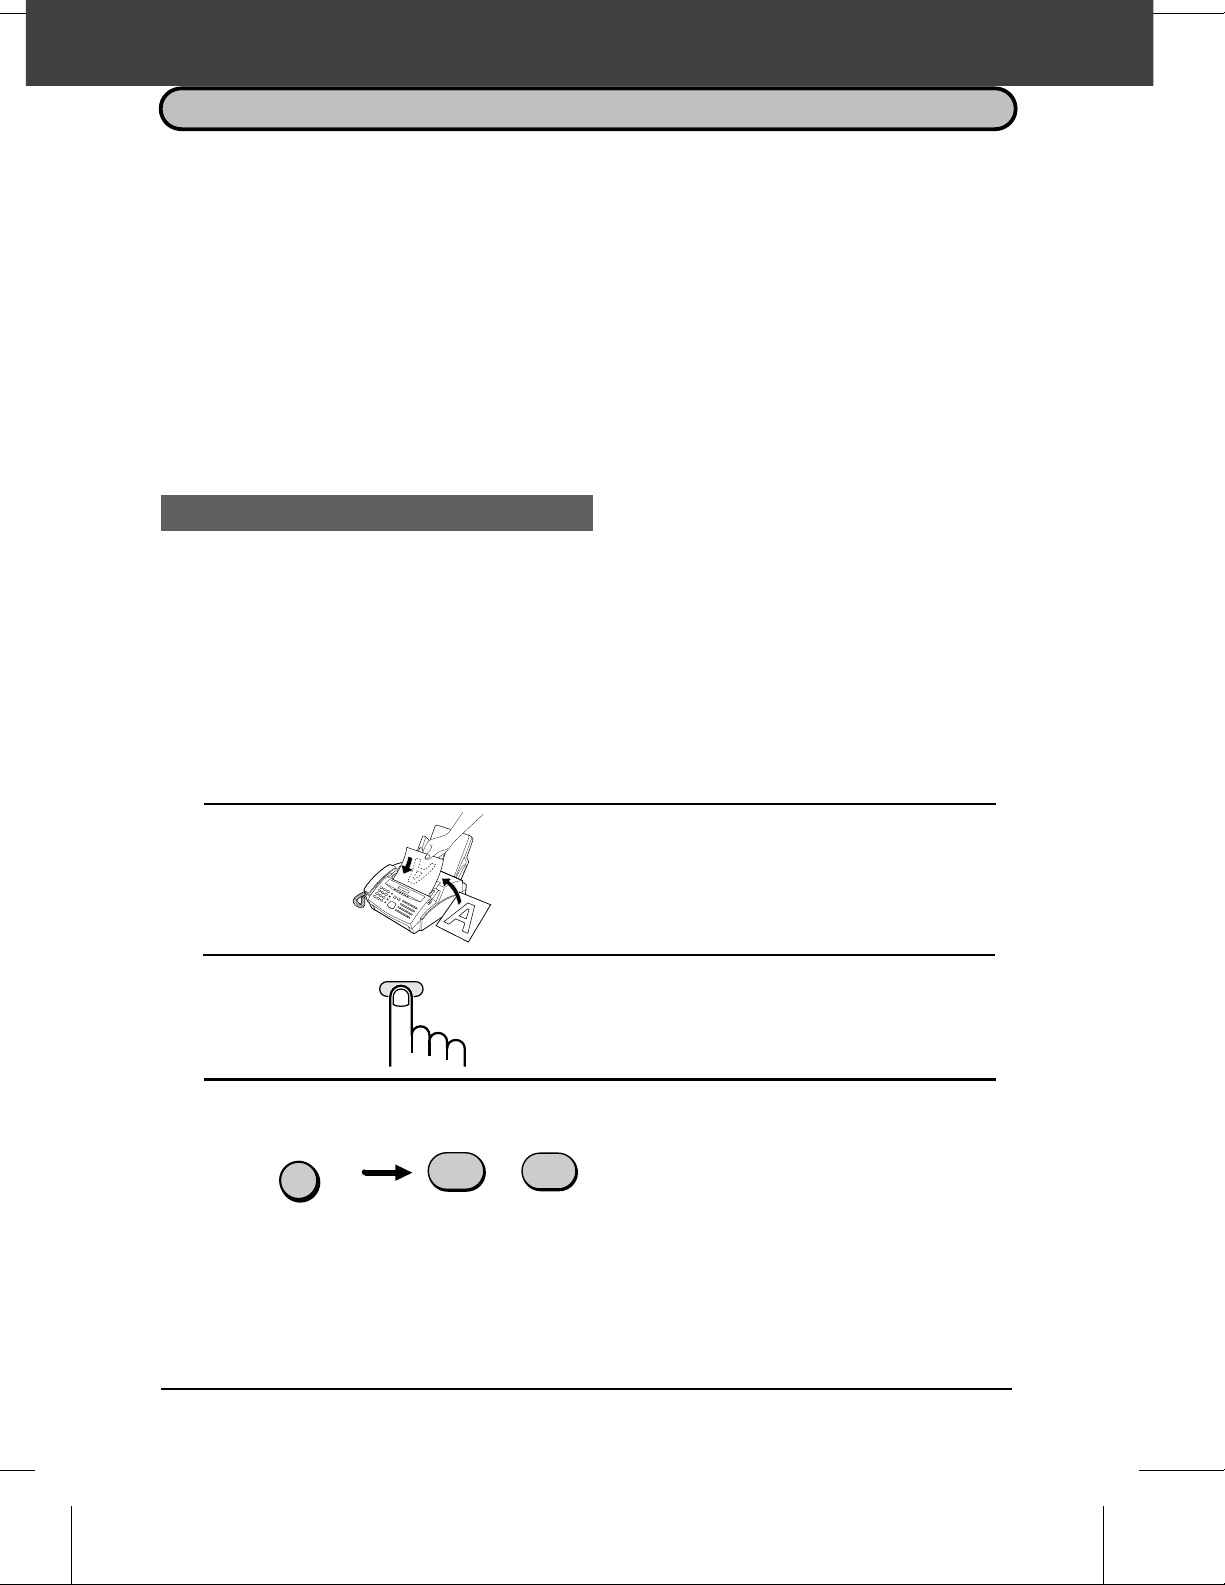
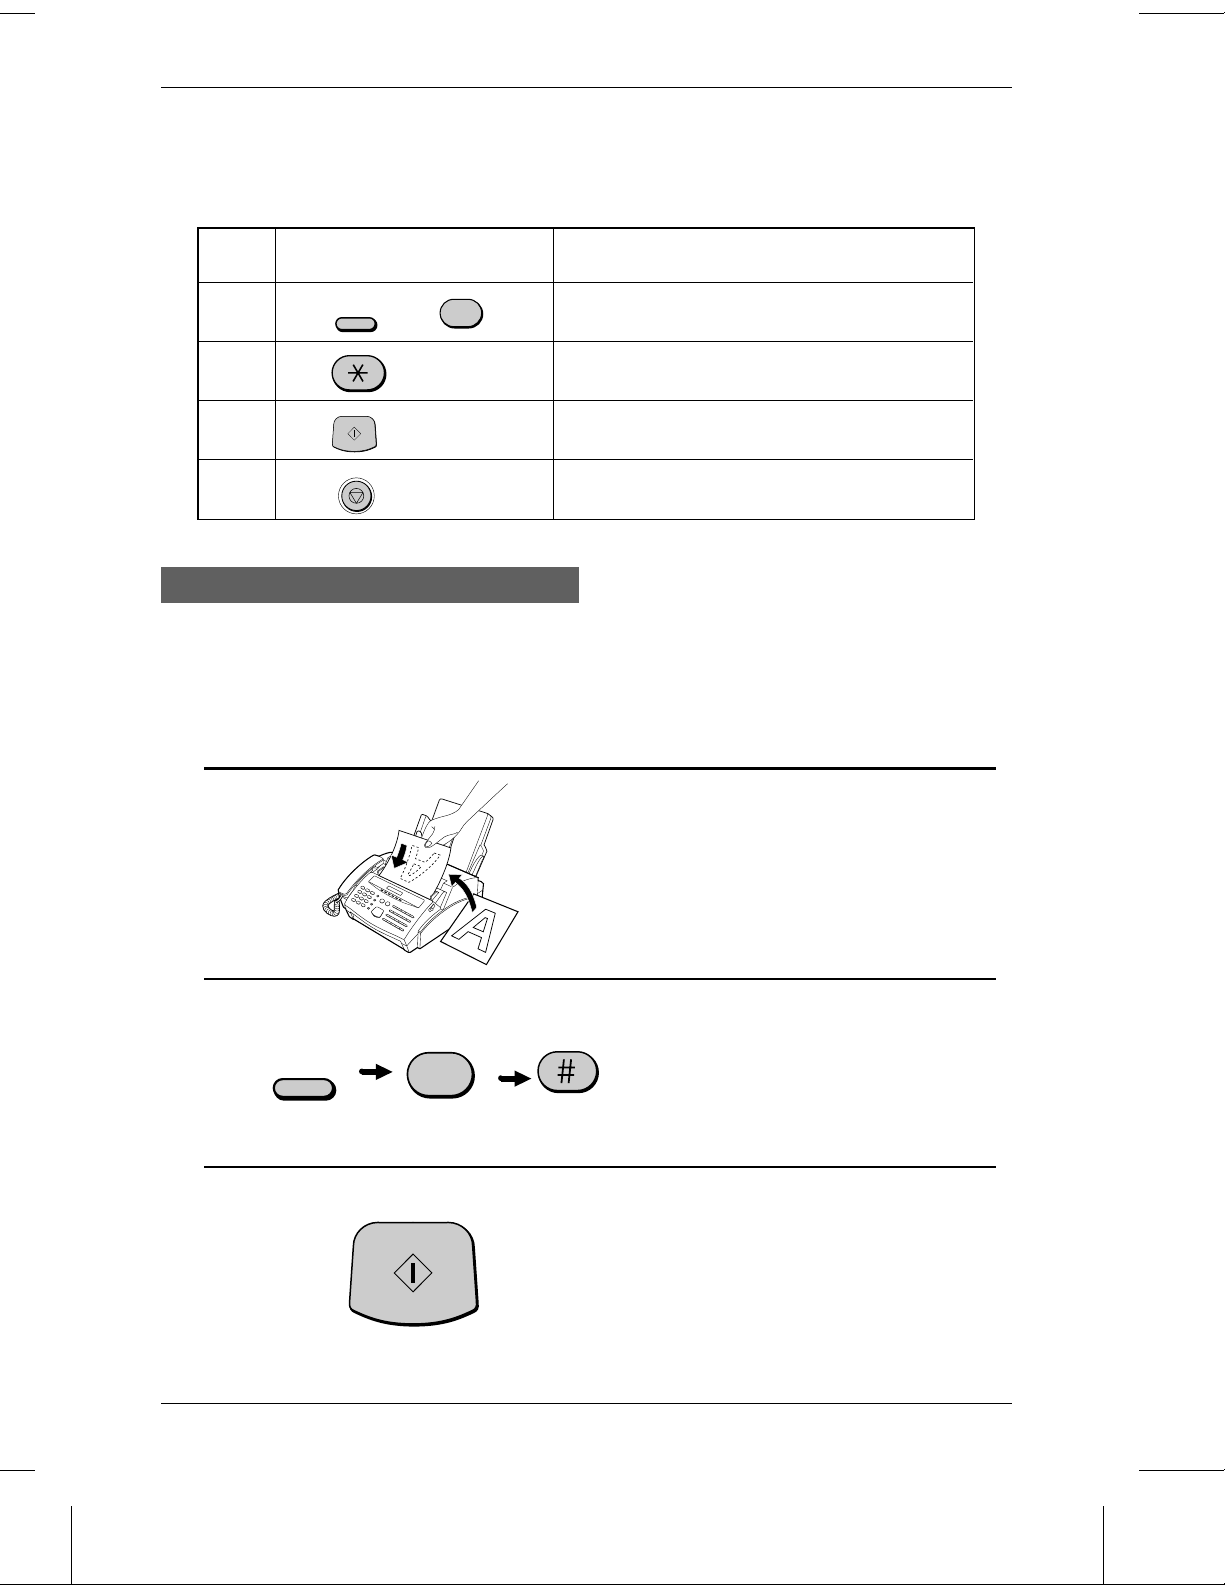
When you go out
1 Set the reception mode of your fax to
ANS. by pressing the RECEPTION
MODE key.
RECEPTION
MODE
AUTO MANUAL ANS.
ANSWERING MACHI NE CONNE CTI O N 4-1

USING THE CONNECTION
2 Set your answering machine to auto
answer.
•• Ideally it should be set to answer on no
more than two rings.
Note:
If your answer ing m achine has a remote r etriev al fun ct ion, make sur e the co de use d to
activate remot e retrieva l is differe nt from the cod e used to activa te fax reception with an
extension telephone (see "Receiving Docum ents" in Chapt er 3). If they are the same,
entering the code from an outs ide telephon e to retrieve m es sage s will cause the fax
machine to be ac tiva ted.
How the answer ing mac hine mode operates
While you are out, all of your incoming calls will be answered by your answering
machine and its outgoing message will play. During this time, your fax will quietly
monitor the line. If your fax detects a fax transmission, it will take over the line and
begin reception.
♦ If the connection is not good or there is noise on the line, the answering machine
and/or fax machine may not respond properly.
♦ The call counter on your answering machine may indicate that voice messages
were received, when only fax messages were received.
Note:
4-2 ANSWERING MACHINE CONNE CTI O N
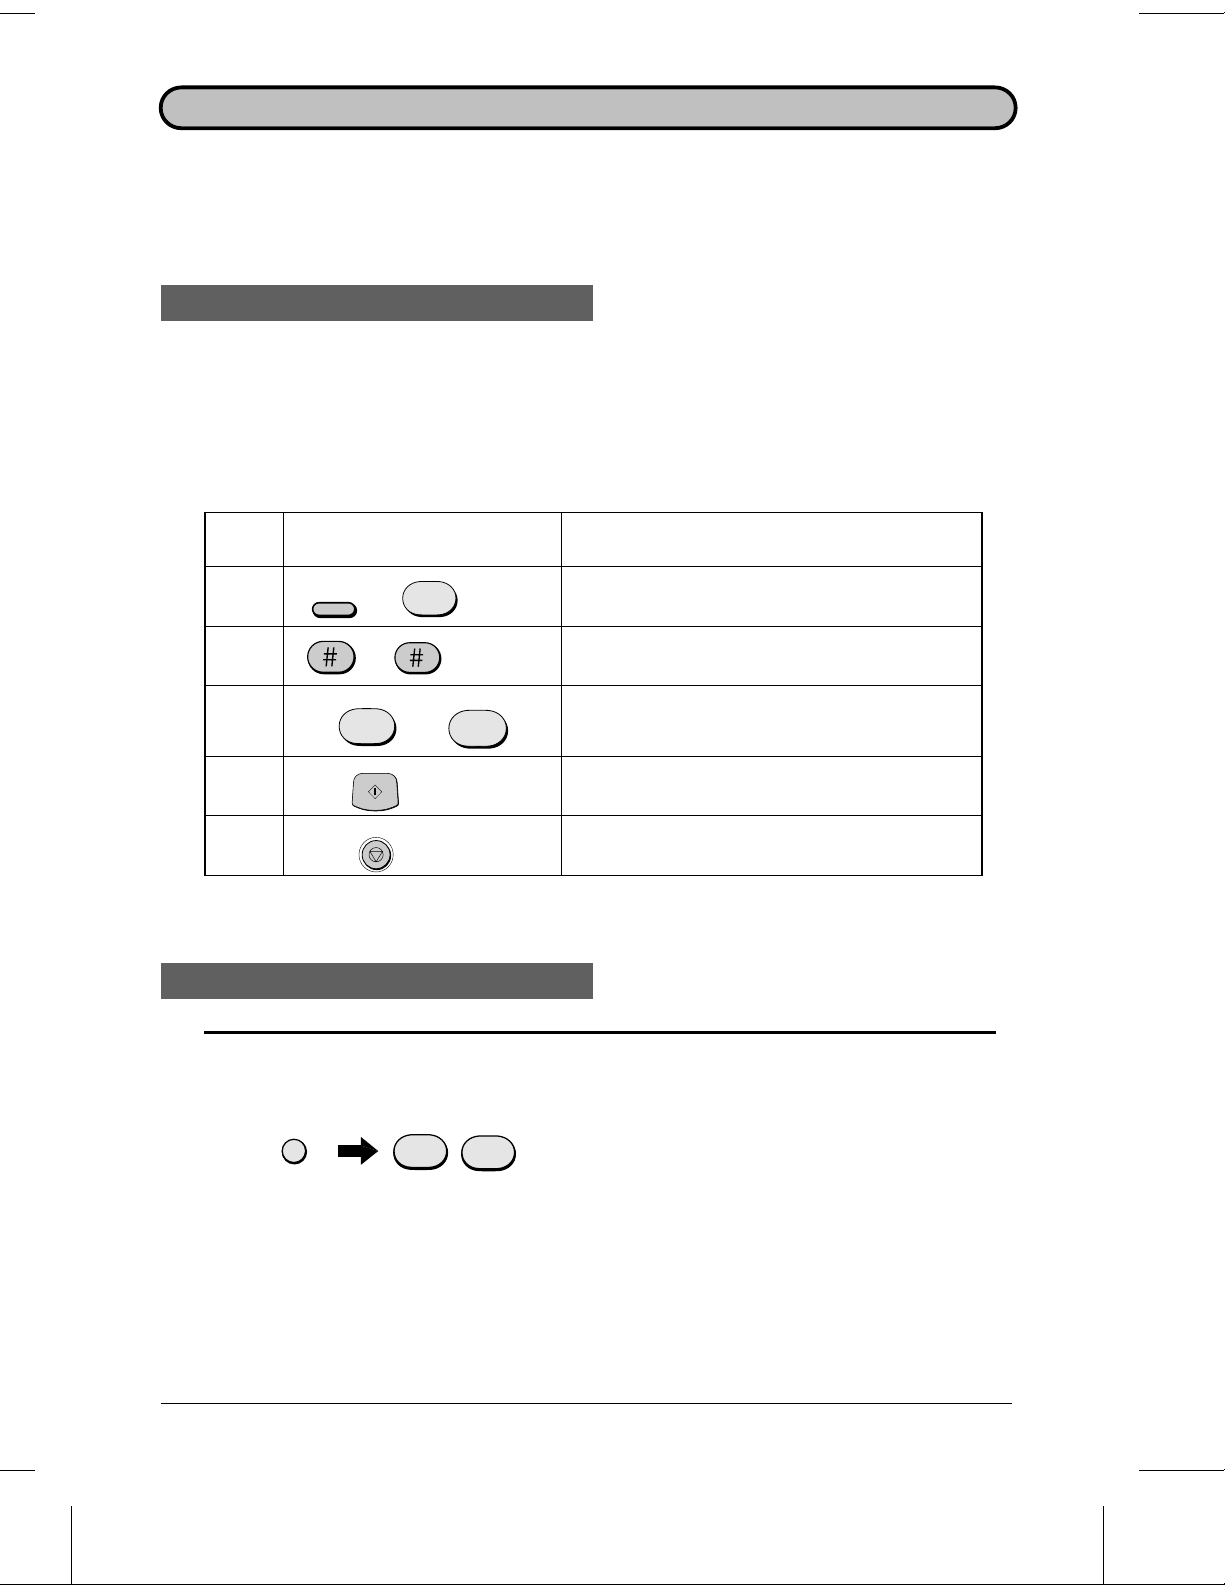
To prevent the fax from taking ov er the line and beginnin g recept ion if you call in from
an externa l phone or ans wer on an exte n sion pho ne, pr ess an y thre e keys (othe r tha n
5
", "
the code to activate fax rec ept ion, "
This can only be performed from a phone capable of tone dialling.
*", and "*") on the dial pad of the phone.

USING THE CONNECTIO N
If it does n’t work
If the connection doesn’t operate properly, first check the following:
♦ Is the answering machine connected properly to the fax? One end of the answering
machine line should be inserted in the "EXT. TEL." socket on the fax ("TEL. SET" in
Ireland), and the other end in the answering machine’s telephone li n e socket.
♦ Is the reception mode set to ANS.?
If the above settings and connections are correct and the connection still doesn’t
operate properly, the timing with which the answering machine and the fax operate
are probably not well synchronized. Som e common synchronization problems a nd
their solutions are described below.
In addition, read the following section, "How fax transmissions are detected", to gain a
better understanding of how the fax operates when an answering machine is
connected. This will help you determine what course of action to take.
♦ Are callers who want to leave a voice message being interrupted by the fax before
they can do so?
The fax is set to take over the line and begin reception if it detects a specified duration
of silence (called "Quiet Detect Time"). If your outgoing message contains a pause
or the caller pauses while leaving a message, and the pause is longer than the
specified duration, the fax will interrupt.
It is best to shorten or eliminate such pauses, but if necessary you can also try
lengthening the Quiet Detect Time setting. This procedure is described in "Optional
A.M. Mode Settings" at the end of this chapter.
♦ Are callers who want to send a fax manually having trouble doing so after your
answering machine’s outgoing message plays?
If so, the answering machine may be disconnecting the line (hanging up) before your
fax has a chance to take over the line and begin reception. You can make your fax
activate sooner by shortening the Quiet Detect Time setting. This procedure is
described in "Optional A.M. Mode Settings" at the end of this chapter.
♦ Are you having trouble receiving documents sent by automatic dialling?
Make sure that y our answering machine’s outgoing message is less than 10 seconds
long, and that your answering machine is set to answer on between 2 and 4 rings.
Inserting a short pause at the beginning of your answering machine’s outgoing
message might also help, as this gives your fax a chance to clearly hear and detect
the fax "calling" tone which the transmitt ing fax sends in the case of automatic dialling.
ANSWERING MACHI NE CONNE CTI O N 4-3

USING THE CONNECTION
How fax transmissions are detected:
Your fax detects fax transmissions in two ways when an answering machine is
connected, depending on whether the document is being sent automatically or
manually:
Automatic dialling:
If the document is sent using a form of automatic dialling, such as Rapid Key or Speed
Dialling, the transmitting fax machine will send a "calling tone" at 3-second intervals
for a period of about 30 to 40 seconds after dialling. When your fax detects this tone, it
will disconnect the answering machine, send a "reception tone" in response, and
begin receiving the transmission.
If the transmitting fax does not receive a reception tone from your fax within 30 to 40
seconds after dialling, it will usually hang up and automatically redial several minutes
later.
Since your fax may not be able to detect the transmitting fax’s calling tone until after
the outgoing message ends, it is important that the answering machine answers the
call within 4 rings and the outgoing message does not last too long. Otherwise, your
fax may not be able to establish communication with the transmitting fax before the
latter hangs up.
Manual dialling:
If the document is being sent by normal (manual) dialling, the transmitting fax machine
does not send a calling tone. Instead, the person faxing normally waits until they hear
a reception tone and then presses their Start key. In the case of an answering
machine connection, they will hear your outgoing message instead of a reception
tone, and then press their Start key.
However, this does not signal a fax transmission to your fax. Instead, it must use a
function called "Quiet Detect Time" to detect the transmission. This function causes
your fax to disconnect the answering machine and begin reception if it detects a
certain duration of silence.
Your fax is set to automatically begin fax reception if it detects a duration of silence of
4 seconds. When the person faxing presses their Start key, the line will go quiet, and
the transmitting fax machine will wait for a reception tone from your fax. Your fax will
therefore disconnect the answering machine 4 seconds after the key is pressed, and
send a reception tone to tell the other fax machine to begin transmission.
If your answering machine has a fast disconnect time and disconnects the line before
4 seconds elapses, fax reception will not be possible. In this case, you must shorten
the Quiet Detect Time setting as described on the following page. On the other hand,
if the Quiet Detect Time setting is too short, your fax may interrupt voice callers if they
pause during their message or if there is a period of silence in your outgoing message.
4-4 ANSWERING MACHINE CONNE CTI O N
5 SPECIAL FUNCTIONS
MEMORY
Your fax has a memory which can be used to store both incoming and outgoing
documents.
♦ Approximately 28 pages of average content (based on ITU-T Test Chart #1 at
standard resolution) can be held in memory if they are all to be transmitted, or 32
pages if they are all received (39 received pages if Option Setting 20, Error
Correction Mode, is set to NO). Less can be held if any were scanned using fine or
halftone resolution.
♦ If you need more memory, a 1 MB add-on option is available from your dealer or
retailer which will increase the capacity to 92 transmission pages or 92 received
pages (99 received pages if Error Correction Mode is set to NO).
Sending documents from memory
With this function, the original document is scanned immediately, stored in memory,
and then transmitted once the connection to the receiving machine is made. This is
convenient when transmitting to places where the line is often busy, as it saves you
from waiting to collect the original document and frees the feeder for other operations.
♦ Only one memory transmission can be set at a time.
♦ The amount of memory currently occupied appears as a percentage in the display
while the document is being scanned.
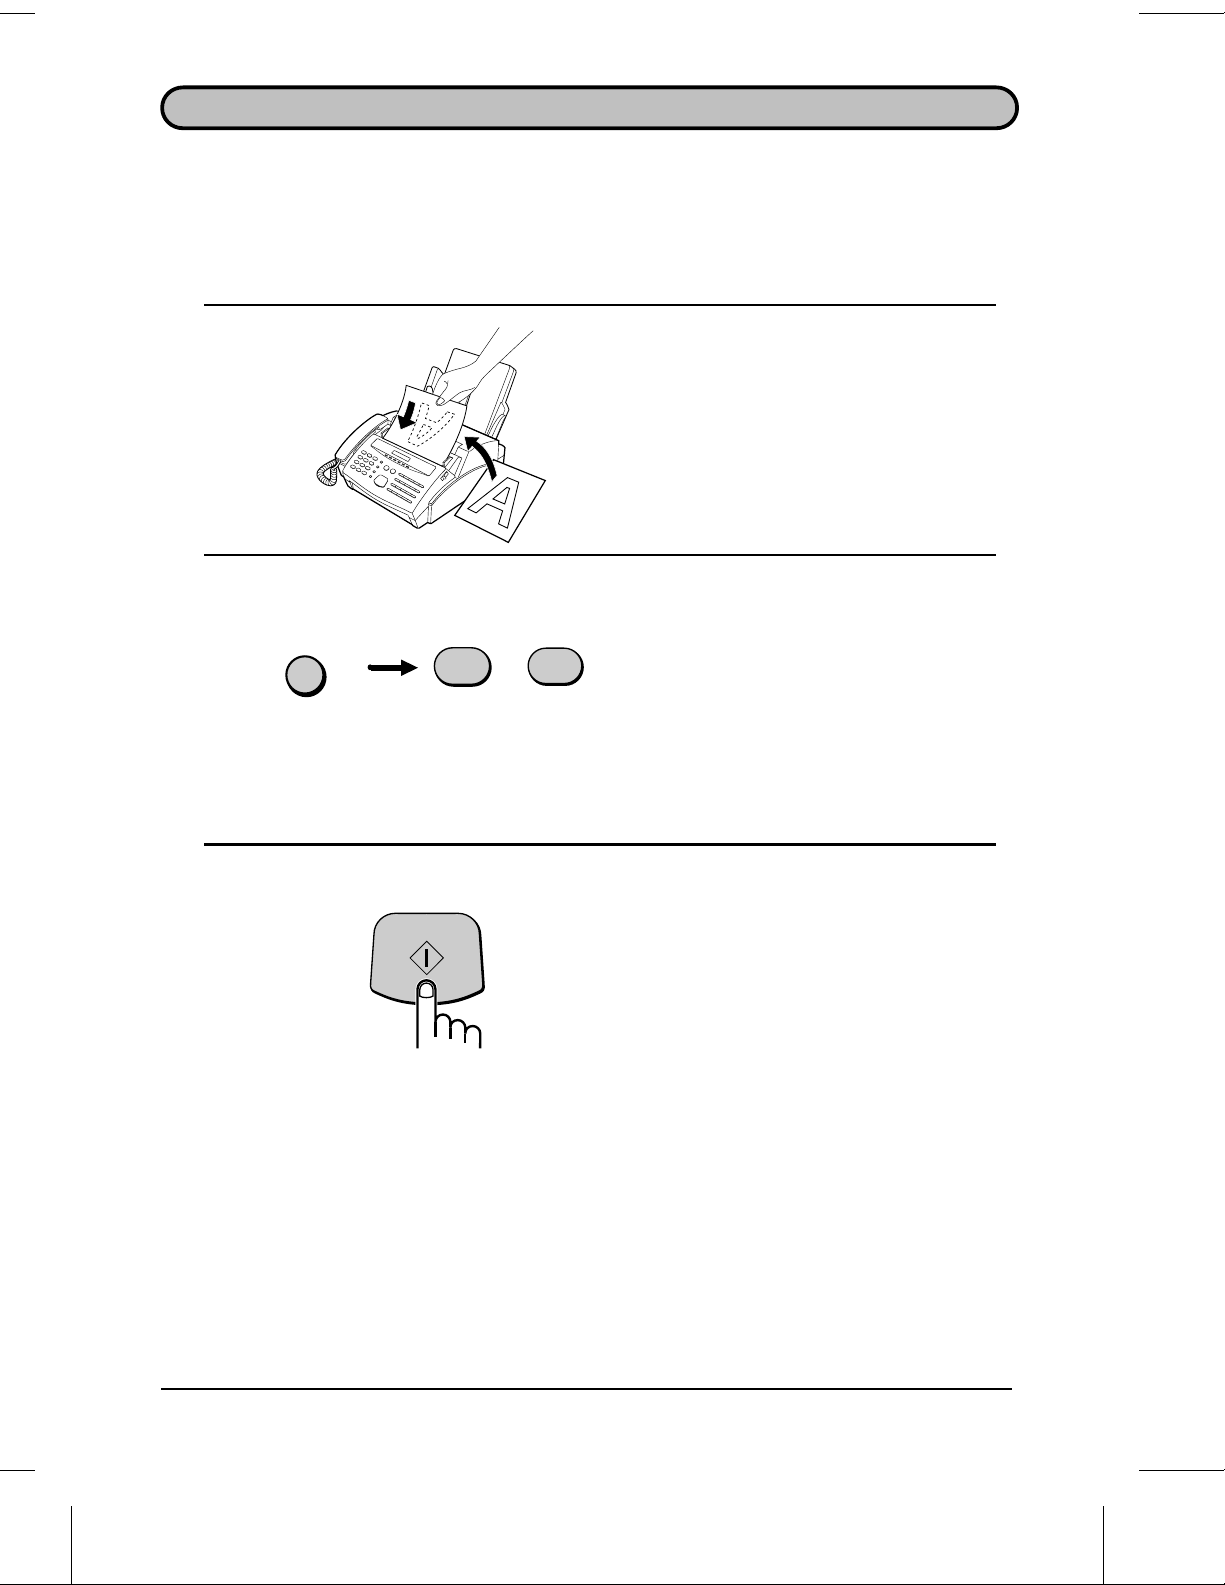
1 Load the document(s).
•• Set the resolution and/or contrast if
desired.
MEMORY
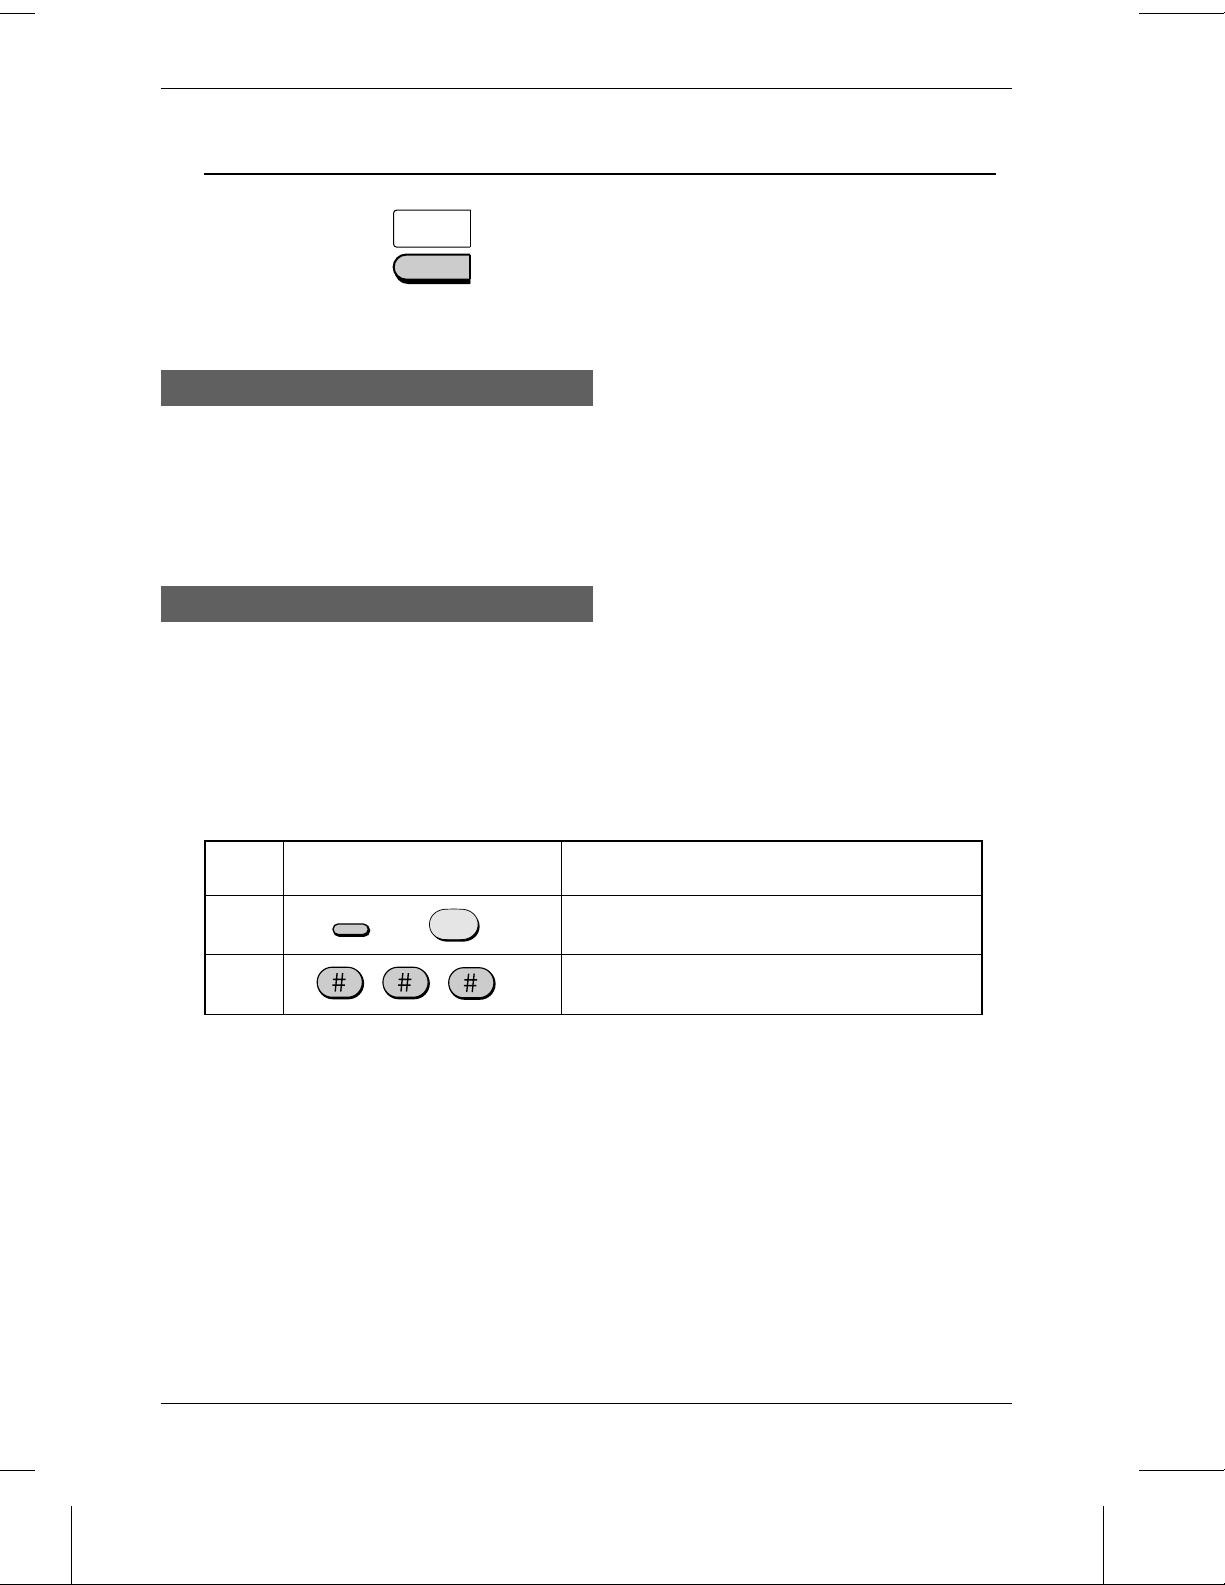
2 Press the MEMORY key.
3 Enter the number of the receiving
SPEED
0
(Example)
1
machine using one of the following
methods:
•• Press a Rapid Key.
•• Press the SPEED key and enter a
Speed Dial number.
•• Enter a full telephone number by
pressing the number keys.
SPECIAL FUNCTIONS 5-1

MEMORY
4 Press the START key if you entered a
START
Speed Dial number o r a full number.
•• The document is first scanned and
stored in memory. The other machine
is then dialled (redialling will be
performed automatically if necessary).
When the connection is made,
transmission begins. Afterwards, the
document is cleared from memory and
your fax returns to standby mode.
If the memory becomes full...
If the memory becomes full while the document is being scanned, MEMORY FULL will
appear in the display.
♦ Press the START key if you want to transmit the pages which have been stored up
to that point in memory. The remaining pages will be ejected from the feeder. After
transmission, the memory will be cleared and you can transmit the remaining
pages. You will also need to transmit the page which was being scanned when the
memory filled up.
♦ Press the STOP key if you want to cancel the entire transmission.
Substitute reception into memory
This is a back-up function which is automatically activated if your fax runs out of
paper, the imaging cartridge needs replacement, or the paper jams.
When you have received a document in memory, FAX RX IN MEMORY will appear in
the display, alternating with CHECK PAPER, REPLACE TONER, or PAPER JAM.
When you add paper, replace the imaging cartridge, or clear the jam, the stored
documents will automatically be printed out.
Caution!
••
When docum ent s are stored in m em ory, do not turn the powe r off . This w ill erase all of the
contents .
••
If document s receive d in mem ory are lost due to a power fa ilure or other interr upt ion of th e
power supply, a "CLEAR REPORT" wi ll be printed out when th e power is restor ed. This gives
information about the r ecep tion s lost, includin g the fax numbe rs of the transm it tin g machine s
if they are available.
5-2 SPECIAL FUNCTIONS
TRANSMISSION RESERVATION
When your fax is busy receiving a document or transmitting a document from memory,
you can "reserve" a transmission by loading the document and entering the fax
number. Once the current operation is completed, your fax will automatically dial the
number and transmit the document, saving you from having to wait.
1 Load the document(s).
•• RESERVE READY will appear in the
display.
•• Set the resolution and/or contrast if
desired.
2 Enter the number of the receiving
machine using one of the following
SPEED
0
1
methods:
•• Press a Rapid Key.
•• Press the SPEED key and enter a
(Example)
Speed Dial number.
•• Enter a full number with the numeric
keys.
3 Press the START key if you entered a
Speed Dial number o r a full number.
•• The number will be dialled once the
current operation is completed, and
transmission will begin once the
connection is made.
Note:
START
If the document is removed from the feed er after a transmission reservat ion is set, the
reservation will be cancelled.
SPECIAL FUNCTIONS 5-3
BROADCASTING
This function allows you to send the same document to as many as 50 different
locations with just one operation. You feed the document through the machine once
and it is stored in memory. After this, the numbers you have entered are automatically
dialled in succession, and the document transmitted to each location.
♦ To enter the fax numbers of the receiving machines, you must use Rapid Keys,
Speed Dial numbers, or Group Keys; no full numbers can be entered.
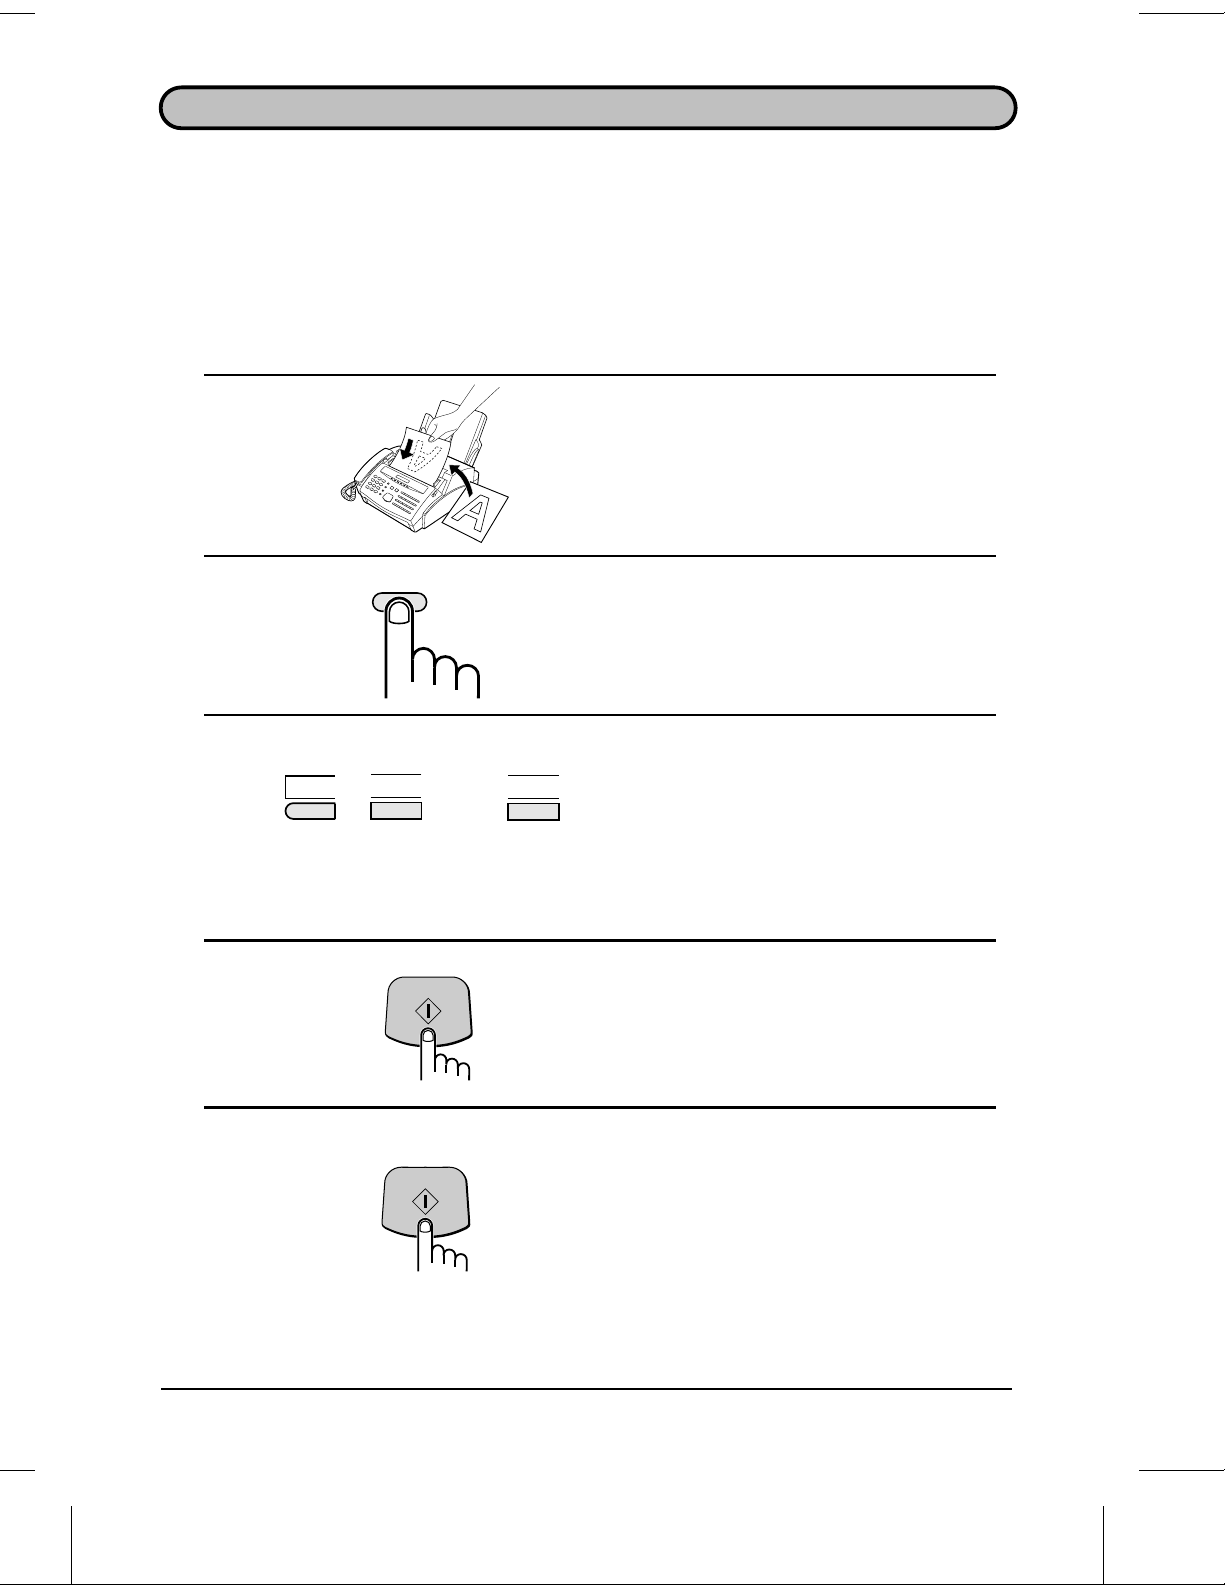
1 Load the document(s).
2 Press the BROADCAST key.
BROADCAST
3 Dial the receiving units using one or
01
4 Press the START key.
5 Press the START key. Transmissio n
02
……
START
START
09
(Example)
more of the following methods:
•• Press one or m ore Rapid Keys.
•• Enter Speed Dial numbers with the
numeric keys.
•• Press one or more Group Keys.
•• Set the resolution and/or contrast if
desired.
will be gin.
•• A Transaction Report is automatically
printed out after Broadcasting is
completed. Check the "Note" column of
the report to see if any of the locations
are marked "Busy" or have a
communication error code. If so, send
the document to those locations again.
5-4 SPECIAL FUNCTIONS
Broadcasting using a Group Key
If the fax machines to which you want to broadcast have all been programmed into
one Group Key, you can perform the broadcasting operation using the following
simplified procedure:
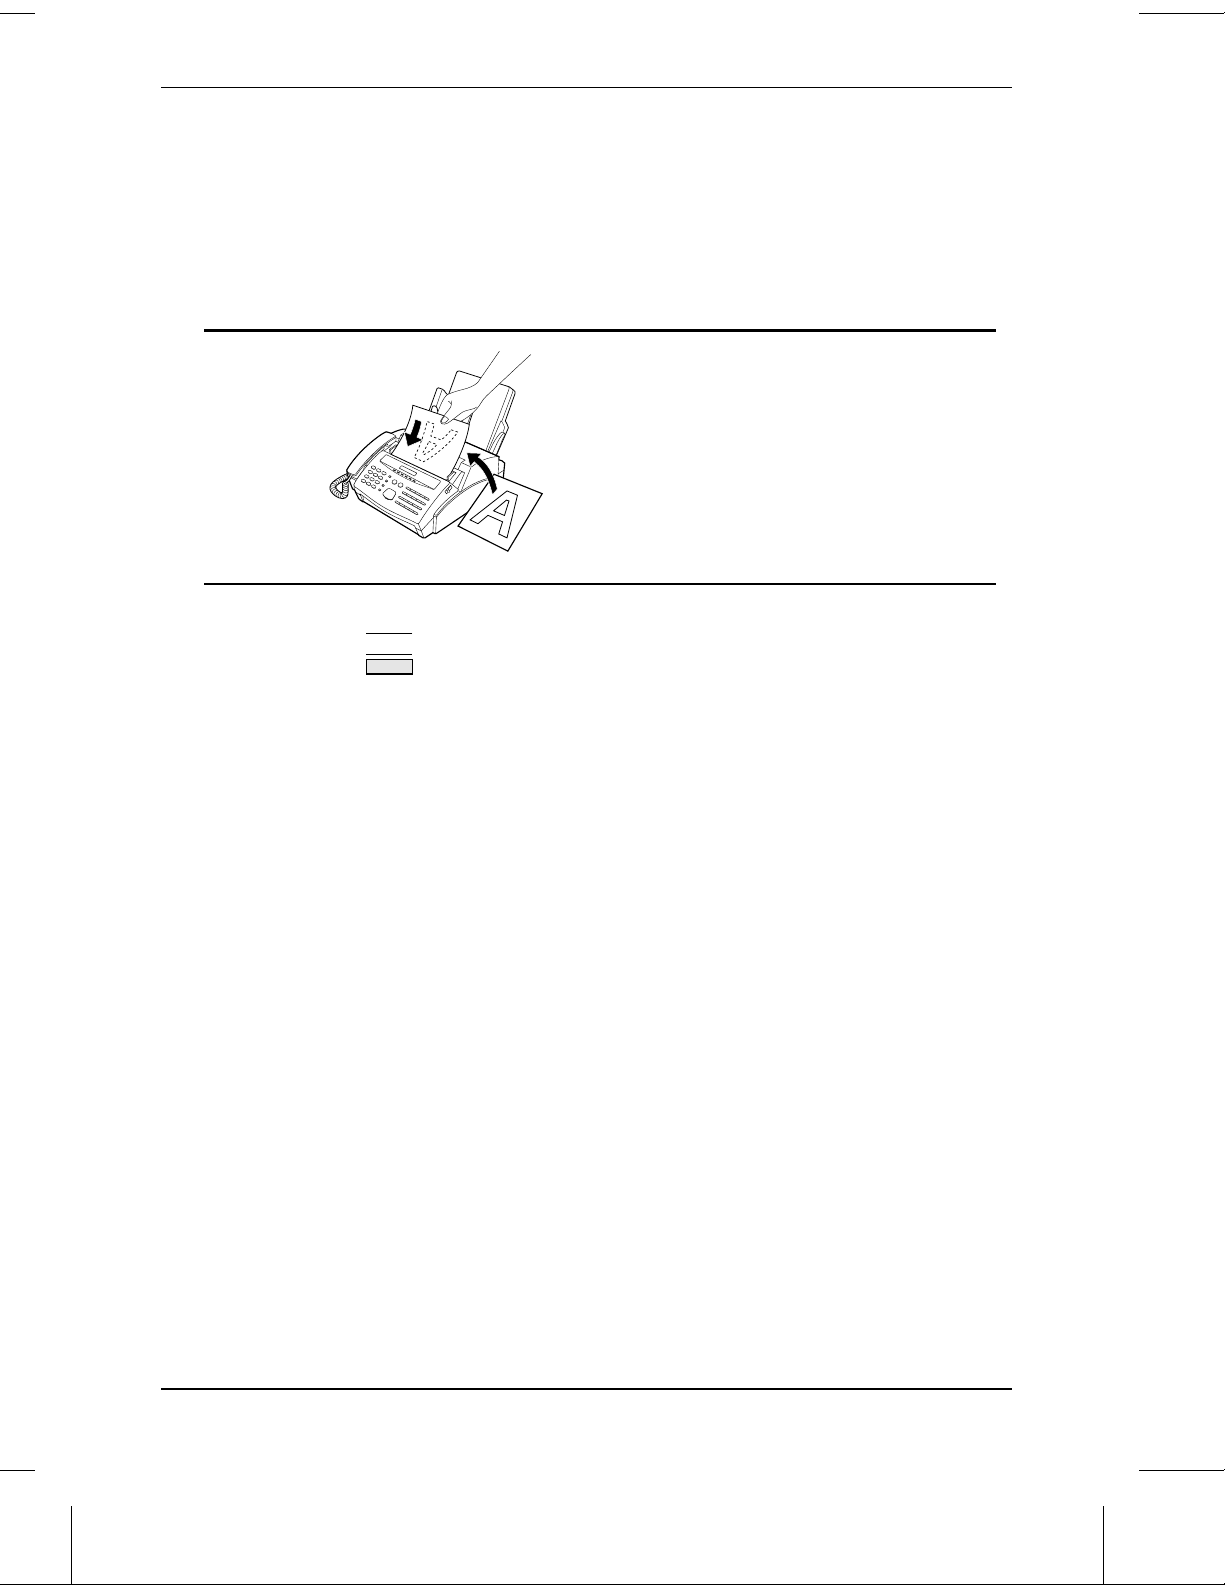
1 Load the document(s).
•• Make any desired transmission
settings (resolution, contrast, etc.).
2 Press the appropriate Grou p Key.
19/G1
Transmission will begin.
BROADCAST ING
(Example)
SPECIAL FUNCTIONS 5-5

CONFIDENTIAL TRANSMISSION
The Confidential function is used to send documents confidentially. When the
receiving machine receives the document, it stores it in memory instead of
immediately printing it out. Print-out will not be performed until the receiving party
enters the correct passcode.
♦ Confidential transmission is only possible when the receiving machine is a Sharp
model with confidential reception capability.
♦ Confidential reception is not possible with the FO-2600.
1 Load the document(s).
•• Make any desired transmission
settings (resolution, contrast, etc.).
2 Press the FUNCTION key, "6", and the
FUNCTION
3
0
6
1
START
4
START
(Example)
"START" key.
•• CONF. TX M ODE will appear in the
display.
If the receiving machine has mu ltiple
mailboxes, enter the ap prop riat e
2-digit mail box n umb er wi th the
numeric keys (if not, skip this step).
Press the START key.
5 Dial the receiving unit using one of
the following metho ds:
01
•• Press a Rapid Key.
•• Press the SPEED key and enter a
Speed Dial number. Press the START
key.
•• Enter a full telephone number with the
(Example)
5-6 SPECIAL FUNCTIONS
numeric keys, and press the START
key.
Transmissio n will take place once the
connection is made.
POLLING
Polling allows you to request another fax machine to send a document to your fax
machine. In other words, the receiving fax machine, not the transmitting fax machine,
activates the transmission. You can use your fax to both poll and be polled by others.
Setting the polling key
To use the polling function, you must first set Rapid Key 16/POLL for use as a polling
key. This is done by pressing the panel keys as shown below.
♦ The polling key cannot be used for both Rapid Key Dialling and Polling. If it has
already been programmed for Rapid Key Dialling, you must clear it first as
described in "Storing Numbers for Automatic Dialling" in Chapter 2.
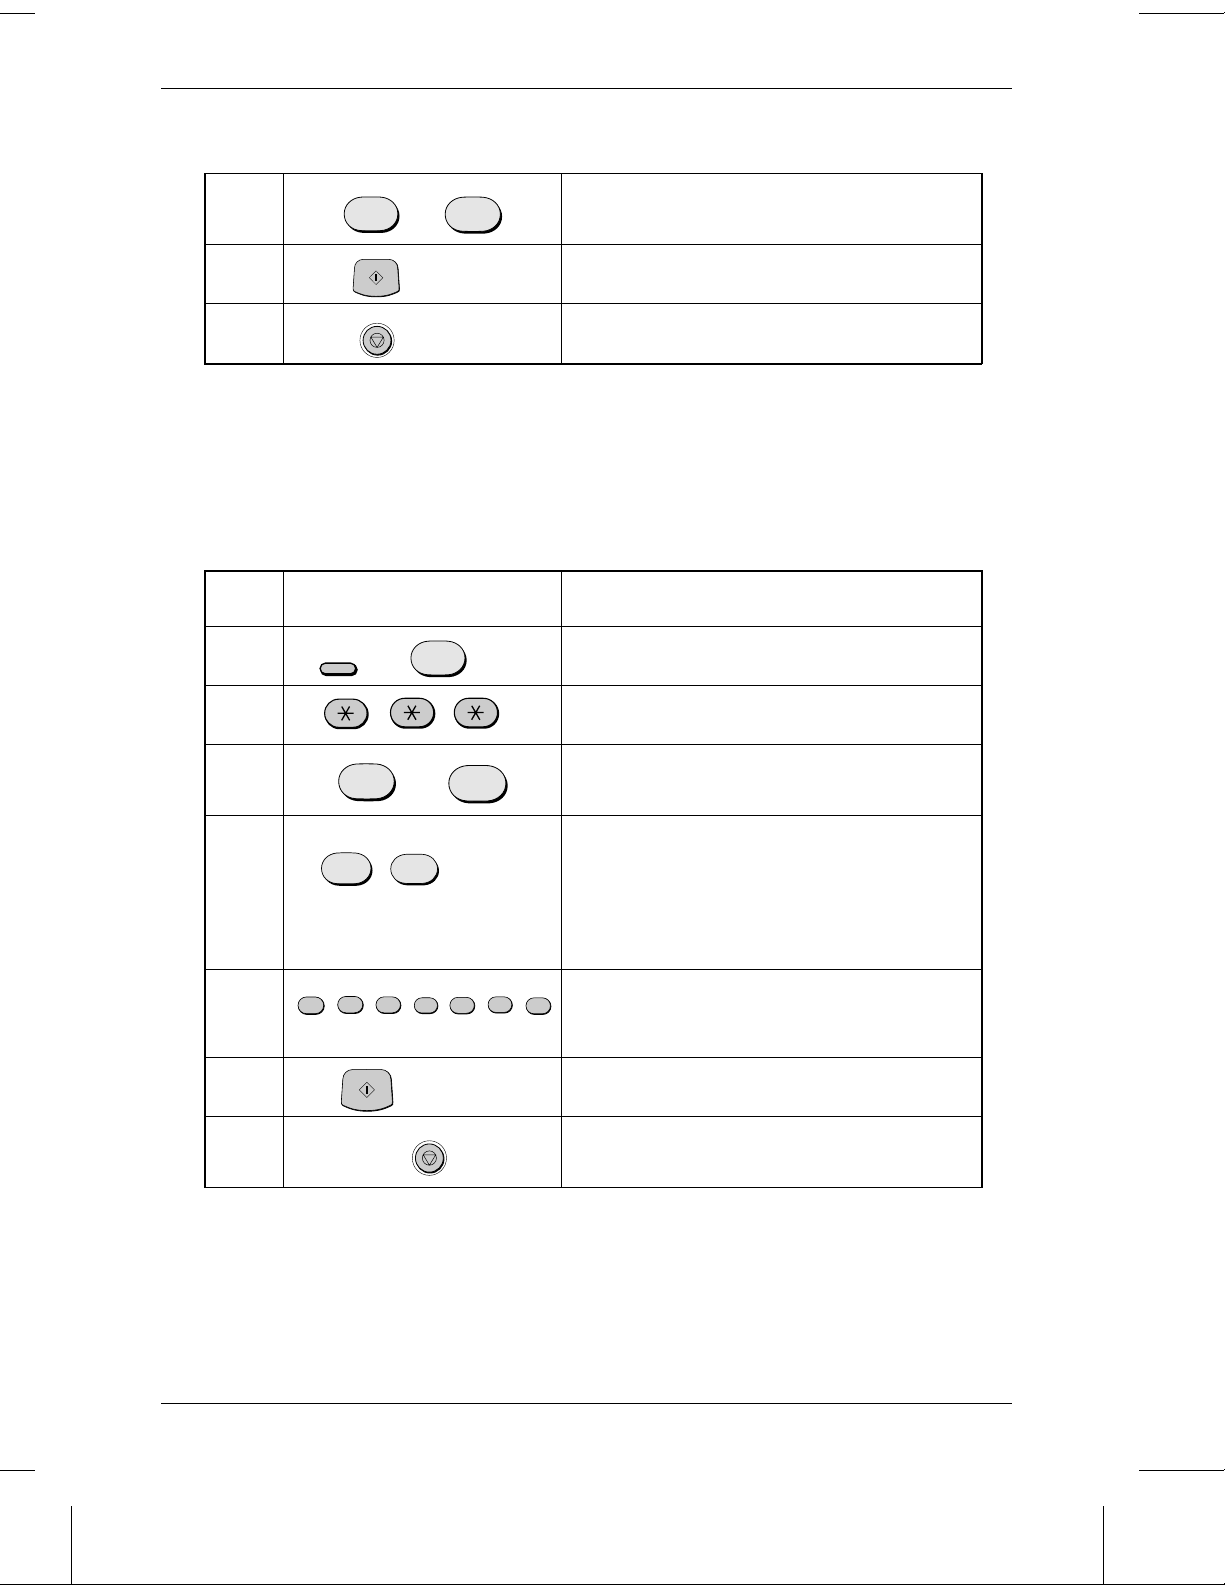
Step Press these keys: Comments
1
FUNCTION
3
2
3
1
START
or
2
ENTRY MODE will appear in the display.
POLLING FUNCTION will appear in the display.
Press "1" to turn the polling function on , or "2" to
turn it off.
4
STOP
5
Exit.
Polling others
1 Dial the fax machine you want to poll
using one of the following methods:
SPEED
0
1
•• Pick up the handset (or press the
SPEAKER key) and dial the full
number. Wait for the fax answerback
tone.
(Example)
•• Press the SPEED key and enter a
2-digit Speed Dial number.
•• Enter the full number using the
numeric keys.
SPECIAL FUNCTIONS 5-7
POLLING
2 Press Rapid Key 16/POLL.
16/POLL
•• If you used the handset, replace it
when POLLING appears in the display.
Reception will begin.
Being polled (Polling Standby)
To let another fax machine poll your fax, simply set the reception mode to AUTO, and
load the document(s) to be sent.
Transmission will take place when the other fax machine calls your fax and activates
polling. Automatic reception is possible whilst your fax is on polling standby.
Polling Security
Polling Security allows you to prevent unauthorized polling of your fax. When this
function is turned on, polling will only take place when the fax number of the polling
fax machine has been entered in your fax’s list of permitted fax numbers (called
"passcode numbers"). The number of the polling fax must also be correctly
programmed into itself.
Turning Polli ng Securi ty on and o ff
Step Press these keys: Comments
1
FUNCTION
3
2
ENTRY MODE will appear in the display.
SECURITY SELECT will appear in the display.
5-8 SPECIAL FUNCTIONS
POLLING
or
3
1
START
2
Press "1" to turn polling security on, or "2" to turn
it off.
4
STOP
5
Storing and cleari ng fax numbe rs for polli ng permission
You can store up to 10 fax numbers in your fax’s list of permitted numbers.
Step Press these keys: Comments
1
FUNCTION
3
2
or
3
1
2
Exit.
ENTRY MODE will appear in the display.
PASSCODE # MODE will appear in the display.
Press "1" to set a number, or "2" to clear a
number.
Storing: Ent er a 2-digit number (from 01 t o 10).
0
1
4
(Example)
5
5
5
5
START
1
3
2
(Example)
This number identifies t he f ax nu mber you will
enter in the next step.
Clearing: Enter the 2-digit number which
identifies the fax number you want to clear, and
go to Ste p 6.
4
Enter the fax number (max. 20 digits).
6
STOP
7
Step 4 or
SPECIAL FUNCTIONS 5-9
Return to Step 4 to enter another number, or
press STOP to exit.

RELAY REQUEST
Relay Request allows you to send a document to another fax machine and have that
fax broadcast the document to a number of other fax machines. This function is useful
when the relay fax machine is closer to the end fax machines than your fax, as it
reduces telephone line costs.
Important:
••
Relay Request can only be used if the interm ed iate relay machine is a Sharp m ac hine havin g
the Relay Broadcast function ( not e that your fax cannot act as a relay mach in e) .
Storing a relay group
To make a relay request, you must first enter the relay group. This consist s of the fax
number of the intermediate relay machine and the fax numbers of the end receiving
machines. Only one group can be entered, and this group will remain in memory until
cleared.
♦ Only a Rapid Key number or a Speed Dial number can be entered to specify the
relay machine; a full number cannot be entered.
♦ Fax numbers of the end receiving machines can be entered as Rapid Key numbers,
Speed Dial numbers, and/or Group Key numbers if they have been stored as such
relay
in the
machine for these numbers.
machine (not in your fax machine). Check with the operator of the relay
♦ The total number of end receiving machines which can be entered varies with the
model used as the intermediate relay machine. Check with the operator of the relay
machine to find out how many receiving machines can be entered.
♦ A maximum of 400 spaces are available in memory for storing the numbers of end
receiving machines. The number of spaces occupied by each number depends on
what kind of number it is:
Rapid Key numb er : 4 spaces
Speed Dial numbe r: 2 spaces
Group Key num b er: 4 spaces (for one gro up)
Full number: Number of digits in number (eg. a maximum of 13 full
numbers can be entered, with a maximum of 30 digits per
number).
5-10 SPECIAL FUNCTIONS
Step Press these keys: Comments
RELAY REQUEST
1
FUNCTION
5
2
START
RELAY FUNCTION will appear in the display.
SET RELAY GROUP will appear in the display.
3
4
0
1
(Example)
START
Enter the fax number of the relay machine by
pressing a Rap id Key or ent erin g a 2-digit Spe e d
Dial number with t he num e ric ke ys.
5
Enter the relay mac hine’s Rapid Key number s of
6
0
1
(Example)
START
the end receiving machines by pressing numeric
keys (not Rapid Key s) . (Skip this step if yo u
don’t want to enter Rap id Key num be rs.)
7
8
0
1
(Example)
START
Enter the relay mac hine’s Speed D ial number s
of the end receiving machines by pressing
numeric keys . (Skip this step if yo u don’t want to
enter Speed Dial num bers .)
9
10
11
12
13
14
Enter numbers of Gro up Keys for end machines
by pressing numer ic keys . (Skip this step if you
don’t want to enter Group Key numbe rs.)
Enter a full fax number ( skip this st ep if you don’t
4
want to enter full numbers) . Include t he area
code (e.g. "201") if the numbe r is outside of the
calling area of the relay unit.
Press START and go back to Step 12 if you
want to en ter anot h er fu ll nu m b er.
START
5
START
START
2
(Example)
5
1
3
2
(Example)
0
5
SPECIAL FUNCTIONS 5-11
RELAY REQUEST
To clear the relay group
Step Press these keys: Comments
1
FUNCTION
2
START
5
RELAY FUNCTION will appear in the display.
CLEAR RELAY GRP will appear in the display.
3
STOP
4
Exit.
Making a relay request
Important:
••
To make a relay requ est , your fax num be r mus t be enter ed int o the Relay Pass code List of
the relay fax machine by the oper at or of th at fax. (Your num b er mu st also be corr ect ly
entered in your fax as descr ibed in "Entering Your Name an d Fax Numb er " in Chapter 2.)
1 Load the document.
•• Set the resolution and/or contrast if
desired.
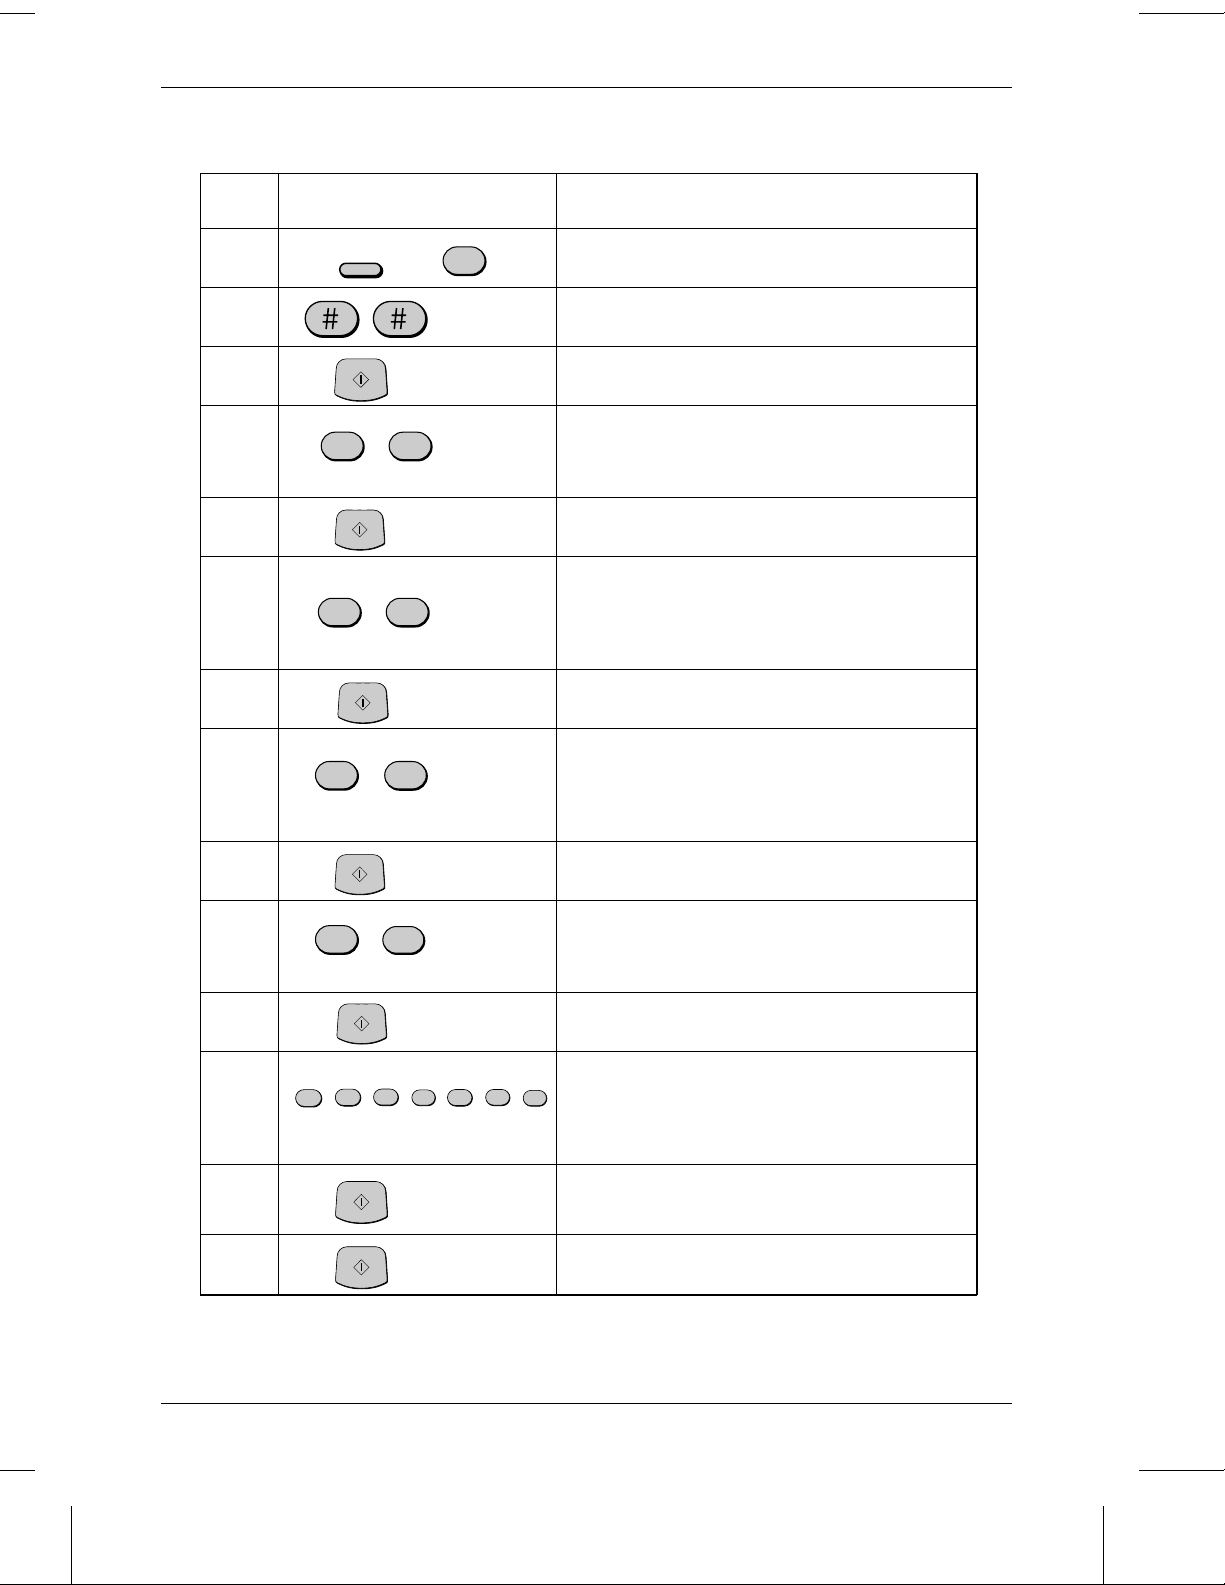
2 Press the FUNCTION key, the "5" key,
and the "#" key.
FUNCTION
3
5-12 SPECIAL FUNCTIONS
5
START
Press the START key.

TIMER OPERATIONS
The timer function allows you to set a transmission or polling operation to be
performed automatically at a time you specify. Up to two transmission operations (one
from the feeder and one from memory) and one polling operation can be set at any
one time, and the times they will be performed can be specified up to a week in
advance.
You can use this function, for example, to take advantage of off-peak telephone rates
without having to be there when the operation is performed.
♦ For a timer transmission, you can either scan the document into memory when you
set the transmission, or leave the document in the feeder before the transmission
time. Scanning the document into memory is convenient because you don’t have to
worry about document mix-ups or forgetting to load the document. If a transmission
from the feeder is set, a highlighted "T" will appear at the right of the display.
♦ Code numbers are used to specify days of the week. Refer to the table below when
making time settings which include a specified day:
Day SUN MON TUE WED THU FRI SAT
Code 0123456
Note:
••
••
••
Only regular transm issions an d polling operations can be set using the procedur e
described below. If you w ant to set a broadcast , confidential, or relay request operation
to be performe d at a specified t ime , progra m the operat ion int o a Progr am Key and
include a timer setting. This is des crib ed in "Ente ring and Using Progr am s " in this
chapter .
Only a rapid/speed number can be entered for a timer transmission , a direct dialled number
cannot be entered.
A timer operat ion is aut omat ically clear ed from mem ory aft er it is completed .
To include a cover sheet with a timer transmission , follow the procedur e in Chapter 3 before
making the setting as below.
Setting a timer operation
Step Press these keys: Comments
1
2
FUNCTION
1
3
START
1
or
4
TIMER MODE will appear in the display.
Select SET.
Press "#" to set a transmiss ion oper at ion (SEND
MODE), or "*" to set a polling operation
(POLLING MOD E ).
SPECIAL FUNCTIONS 5-13

TIMER OPERAT IONS
5
6
7
8
9
10
11
12
1
0
2
START
0
START
RESOLUTION
START
START
5
or
3
(Example)
(Example)
(Example)
MEMORY
0
Enter the time of the operat ion (2 digit s for the
hour and 2 digits for the minute).
Enter the code for th e day of the ope ra tion (skip
this step if the operation will be perform ed within
the next 24 ho ur s) .
Enter the fax number of th e other m achine using
one of the follow ing met hods :
• Press a Rapid Key.
• Enter a Speed Dial number
with the num eric key s.
If this is a transmission opera tion, ad just the
resolution and/o r contra st if desired. (O ther w ise,
skip this step.)
Transmissi on o pera ti on : If you want t o send
the document from m emory, load it now and
press MEMORY. Otherwise, press START and
load the docum ent any time bef or e the se t
transmission tim e. If a non-m emo ry timer
transmission has already be en set ( START:
END OF SET will appear), you must load the
document now and pre ss START to send it from
memory.
Polling operation: Press START.
5-14 SPECIAL FUNCTIONS

TIMER OPERATI ONS
To cancel an operation
If you need to cancel an operation after it has been set, follow the steps below.
If the operation is a transmission operation, you will need to know the number
assigned to it. If you don’t remember the number (it appears in the display when you
set the operation), print out the Timer List. See Chapter 7, "Printing Out Reports and
Lists".
Step Press these keys: Comments
1
2
3
FUNCTION
2
1
START
1
(Example)
TIMER MODE will appear in the display.
Select CLEAR.
Enter the 1-digit timer num ber assigned to the
operation.
4
STOP
5
STOP
Exit.
SPECIAL FUNCTIONS 5-15

ENTERING AND USING PROGRAMS
If you frequently perform the same operation involving the same party, you can
program all the steps of the operation into one Program Key. This allows you to
perform the oper ation by simply pressing that key.
♦ Rapid Keys 17/P1 and 18/P2 can be used as Program Keys. However, a key
cannot be used if it is already being used for Rapid Key Dialling.
♦ Only Rapid Keys, Speed Dial numbers, and Group Keys can be used to enter fax
numbers of receiving machines in Program Keys. Full numbers cannot be entered.
♦ You can also include a timer setting in the program to have the operation performed
automatically at a selected time.
STOP
♦ To clear a mistake, press the
Initial procedure
To program an operation, first perform the following basic procedure. After you have
completed it, refer to the procedure for the specific operation you want to program.
♦ Code numbers are used to set days of the week. Refer to the table below when
making time settings which include a specified day:
key.
Day SUN MON TUE WED THU FRI SAT
Code 0123456
Step Press these keys: Comments
1
FUNCTION
2
3
1
17/P1
4
DEF
ABC
3
2
5
GHI
4
7
(Example )
WXYZ
9
……
(Example )
PROGRAM/GRO UP will appear in the display.
PRG. ENTRY MODE will appear in the display.
Select SET.
Select a Program Key by pressing the
appropriat e Rapid Key.
Enter a name for t he program ( m ax. of 20
letters). (See "Ent ering Let t ers for Nam es" in
Chapter 2.)
Skip this step if you don’t want to enter a name.
5-16 SPECIAL FUNCTIONS

ENTERING AND USING PROG RAM S
START
6
7
8
9
10
11
12
1
1
4
START
START
0
5
(Example)
(Example)
(Example )
Enter the hour (2 digits: "00" to "23"). If you don’t
want to make a timer setting, go to Step 10.
Enter the minute (2 digits - "00" to "59").
Enter the day of the wee k by enter ing th e
appropr iat e code num ber (see pr ev ious t able) .
(Skip this step if the oper atio n will be done within
24 hours of pressing the Program Key.)
Pres s the "# " key or "*" key until the desired
operation appears in the display.
The operations will appear in the fo llow ing order :
• Transm ission
• Polling
• Confidential tra nsm ission
• Broadc ast in g
• Relay Req uest
Continue with the sp ecif ic procedu re for your
operation (see the following pages).
Transmi ssio n
(Continued from "Initial procedure".)
1
0
13
START
14
RESOLUTION
15
Enter the fax numb er of the other mac hine using
one of the following methods:
• Press a Rap id Key.
(Example)
• Enter a Speed Dial number wit h
the numer ic keys.
Adjust the resolution and contras t if desired
(otherwise sk ip this step).
SPECIAL FUNCTIONS 5-17

ENTERING AND USING PROGRAMS
START
16
17
MEMORY
or
STOP
18
Polling
(Continued from "Initial procedure".)
1
0
13
START
14
STOP
15
START
(Example)
If you want the doc ument to be sen t fr om
memory, press MEMORY.
If you want the doc ument to be sen t fr om th e
feed er , pr ess START.
Exit.
Enter the fax numb er of the other mac hine using
one of the following methods:
• Press a Rap id Key.
• Enter a Speed Dial number wit h
the numer ic keys.
Exit.
5-18 SPECIAL FUNCTIONS

Confidential transmission
(Continued from "Initial procedure".)
ENTERING AND USING PROG RAM S
13
14
15
16
17
18
19
20
0
START
0
1
START
RESOLUTION
START
MEMORY
STOP
or
5
(Example)
(Example )
START
Enter the mailbox nu m ber (2 digits). (Skip this
step if the receiving machine doe s not have
mailboxes.)
Enter the fax numb er of the other mac hine using
one of the following methods:
• Press a Rap id Key.
• Enter a Speed Dial number wit h
the numer ic keys.
Adjust the resolution and contras t if desired
(otherwise sk ip this step).
If you want the doc ument to be sen t fr om
memory, press MEMORY.
If you want the doc ument to be sen t fr om th e
feed er , pr ess START.
Exit.
Broadcastin g
(Continued from "Initial procedure".)
……
1
0
13
START
14
RESOLUTION
15
START
START
16
STOP
17
2
0
(Example)
Enter the numbers of the receiving fax machines
using one or more of the following methods:
• Press one or more Rapid Keys.
• Enter one or more Speed Dial num be rs.
• Press one or more G roup Ke y s.
Adjust the resolution and contrast if desired
(otherw ise skip this step) .
Exit.
SPECIAL FUNCTIONS 5-19

ENTERING AND USING PROGRAMS
Relay Request
(Continued from "Initial procedure".)
RESOLUTION
13
START
14
15
MEMORY
or
STOP
16
Note:
A relay group must first be entered see "Relay Request" in prev ious section .
Clearing a Program Key
START
Adjust the resolution and contras t if desired
(otherwise sk ip this step).
If you want the doc ument to be sen t fr om
memory, press MEMORY.
If you want the doc ument to be sen t fr om th e
feed er , pr ess START.
Exit.
To clear a Program key, follow these steps:
Step Press these keys: Comments
1
FUNCTION
2
3
2
17/P1
4
START
7
(Example )
PROGRAM/GRO UP will appear in the display.
PRG. ENTRY MODE will appear in the display.
Select CLEAR.
Press the Prog ram Key you wan t to clear.
5
STOP
6
5-20 SPECIAL FUNCTIONS
Exit.

ENTERING AND USING PROG RAM S
Using a Program Key
A programmed operation is performed as follows:
1 Load the document.
2 Press the appropriate Pro g ram Key.
Note:
A maximum of 2 timer oper ations ca n be set at any on e time, including both timer
operations se t by pre ssing a Progr am Key and opera tion s set as descr ibed in "T ime r
Operat ions" in this chapt er.
17/P1
(Example)
To cancel a program operatio n
If a Program Key has been pressed for a timer operation and you need to cancel the
operation before it is performed, follow these steps:
1 Press the Program Key.
17/P1
(Example)
2 Press the START key.
START
SPECIAL FUNCTIONS 5-21

ANTI JUNK FAX
The Anti Junk Fax function lets you avoid wasting fax paper by preventing reception of
faxes from specified parties.
To use this function, first turn it on as shown below, and then enter the fax numbers
from which you do not want to receive faxes as shown on the following page.
Turning Anti Junk Fax on and off
Step Press these keys: Comments
1
FUNCTION
2
3
1
STOP
4
or
8
2
ANTI JUNK FAX will appear in the display.
ANTI JUNK SELECT will appear in the display.
Press "1" to turn Ant i Junk Fa x on, or "2" to tu rn
it off.
Exit.
5-22 SPECIAL FUNCTIONS

Storing and clea ring j unk fax numbe rs
Comments:
••
Up to 10 fax number s ca n be enter ed in the Ant i Junk Fax List.
••
To clear a fax numbe r from the Ant i Junk Fax List, you need t o know the 2-dig it numb er
which identifies it. If you have f orgot t en this num b er , print out the Ant i Junk Fax Num ber List
as described in Chapter 7.
Step Press these keys: Comments
ANTI JUNK FAX
1
FUNCTION
2
3
1
1
0
4
5
5
5
START
8
2
or
(Example)
5
321
(Example)
ANTI JUNK FAX will appear in the display.
JUNK FAX # MODE will appear in the display.
Press "1" to store a fax number in the Anti Junk
Fax List, or "2" to clear a fax numbe r from the list.
Storing: Ent er a num be r fr om "0 1" to "10". This
number identifies the f ax numb er you will store
in the next step .
Clearing: Ent er t he num ber which ident ifies the
fax number you want to clear , and go to Step 6.
4
Enter the fax number (max. of 20 digits).
6
STOP
7
Step 4 or
Return to Step 4 to enter (or clear) another
number, or press STO P to exit.
SPECIAL FUNCTIONS 5-23

ANTI JUNK FAX
Notes
5-24 SPECIAL FUNCTIONS

6 OPTIONAL SETTINGS
A variety of optional settings are available which you can use to fine-tune your fax to
better suit your needs. The settings are made by pressing the panel keys, and each
setting is described in the list below.
Accessing the settings
Step Press these keys: Comments
1
FUNCTION
2
3
2
STOP
4
or
4
(Example)
OPTION SETTING will appear in the display.
Move throug h the list of set tin gs by pr es sing " #"
to move forward, or "* " to move backward. The
settings w ill appear in the ord er listed be lo w.
When the desired setting appea rs in the display,
change it appropriat ely as des crib ed below.
Exit.
Settings
Setting 1: FINE RESO LUTI ON PRIO RI TY
This sets the defa u lt resolut ion (t he r esolution us ed if a se tting is not made with the
RESOLUTIO N key) fo r transm it t ing docu m ent s. Pre ss "1" (YES) to set it to FINE, or "2 " (NO) to
set it to STANDARD.
• Factor y setting: "2"
Setting 2: NUMBER O F RINGS AUTO RECEPTION
This sets the number of rings your fax allows before answering an incoming call in AUTO
reception m ode . Enter any number f rom "1" to "5" ("1" to "3" in Eire).
• Factor y sett ing: "1"
Setting 3: NUMBER O F RINGS MANUAL RECEPTI ON
This sets your fax to autom a tica lly answer a call after a certain num b er of rings whe n it is in
manual recep tion mode. Any num b er from "0" to "5" can be entered. (In Eir e, ent er any num b er
from "0" to "3"). (enter "0" if you don’t wa n t your fax to answer aut om atically) .
• Factor y setting: "0"
OPTIONAL SETTINGS 6-1

OPTIONAL SETTINGS
Setting 4: ACTIVI TY REPO RT AUTO LISTING
Press ""1" (YES)" to have your fax automatically print out an Activity Report once every 30
operations. (The list can sti ll be printed ou t man ually when de sire d.) Press ""2" (NO)" to turn
automatic print-out off.
• Factory setting: "2"
Setting 5: TRANSACTI ON REPO RT PRINT SELECT
This sets the condition for print ing out Transa ct ion Report s. Ent er a number fro m "1" to "5" as
follows:
1" (ALWAYS PRINTS):
"
Print out after each transmission, recept ion, or error.
2" (ERR/TIMER/ MEM .):
"
3" (SEND ONLY):
"
"
4" (NEVER PRINT):
5" (ERROR ONLY) :
"
• Factor y sett ing: "3"
Setting 6: RECALL TI ME S
This sets the maximum num ber of times your fax will automatically re dial if the line is busy.
Enter any number from "1" t o "4". (In Eire, enter any number from "1" to "3").
• Fact or y setting: "2"
Setting 7: RECALL I NTERVAL
This sets the am ou nt of time your fax w ill wait bet ween au to mat ic redia ls when t he l ine is busy.
Press "1" for 1 minute, "2" for 2 minutes, etc., up to a maxim um of 15 minut es .
• Factor y setting: "5"
Setting 8: AUTO FAX/ PHONE CHANGEOVER
Press "1" (YES) to have your fax detect whet her incoming ca lls are voice calls or fax
transm issions in aut om a tic r ece ptio n mode. Pr ess "2" (NO) to turn the function off.
• Factory setting: "2"
Setting 9: PSEUDO RING I NG DURATI O N
This sets the durat ion of pse udo ringing w he n Autom at ic Fax/Pho ne Chan geov er is turned on.
Ente r a n umber fr om "1" to "4" as shown below (in Eire, only 15 or 30 seconds can be selected ).
1" (15 SEC.):
"
Print out only after an er ror, a timer op eration, or a memory
operation.
Print out only af t er a transmission.
Ne ver p rint out.
Print out only af ter an erro r occur s.
15 seconds
"
2" (30 SEC.):
"
3" (60 SEC.):
4" (120 SEC.):
"
• Factor y setting: "1"
30 seconds
60 seconds
120 seconds
6-2 OPTIONAL SETTINGS

OPTIONAL SETTINGS
Setting 10 : TEL/FAX REMO T E NUMBER (TRANSFER CODE)
This sets the 1-digit num ber f or activ atin g fax recept ion f r om an exte n sion pho ne. Ent er any
number f ro m "0" to "9".
• Fact or y setting: "5" (ie fax is activated by "5 *").
Setting 11 : REMO TE RECEPTION SELECT
This turns det ection of the cod e for activa ting fax rec ept ion fro m an extens io n phone on or off.
Press "1" to turn detect ion on , or "2" to turn detec tion off.
• Factor y setting: "1"
Setting 12 : FAX SIGNAL RECEI V E
Your fax is set to automa tica lly be gin recept ion if you hea r a high-pitch ed f ax tone aft er
answering a call. If you use a comp uter fax mo dem on t he sa me line , you must turn this setting
off in order to prevent you r fax fr om m ista kenly att em pting t o receive docum e nt s sent f rom the
computer fax modem. Press "2" to turn the setting off, or "1" to turn it on.
• Fact ory sett ing: "1"
Setting 13 : AUTO COVER SHEET
Press "1" (YES) to have the fax aut oma tica lly gener at e a cover sheet and send it as the last
page of each tran smission. Pr ess " 2" (NO) to turn the function off.
• Factory setting: "2"
Setting 14 : COPY REDUCE
This sets the amou nt by which copie s are reduce d bef or e print ing to ensure that dat a on the
edges is not cut off. Enter a number from " 1" to "3" as follows:
1 (AUTO)":
"
2 (100 %)":
"
"
3 (95 %)":
• Factor y setting: "2"
Setting 15 : RECEI VE REDUCE
This sets the amou nt by which receive d docu ment s are reduc ed bef or e print ing to ensu re that
data on t he e dges is not cut off. Enter a numbe r from "1" t o "3" as follows:
1 (AUTO)":
"
"
2 (100 %)":
3 (92 %)":
"
• Factor y setting: "1"
Automatic reduction depending on the size of the original
and the printing paper.
No reduction.
Reduction of A4 size originals to the pr int ing pape r size.
Automatic reduction depending on the size of the original
and the printing paper.
No reduction.
Reduction of A4 size originals to the pr int ing pape r size.
OPTIONAL SETTINGS 6-3

OPTIONAL SETTINGS
Setting 16: CO PY CUT-OFF
Press "1" (CO NTI NUE) t o have docu ment s longe r than the print ing pa per be continu ed on a
second page when copied . Press "2" (CUT- O FF) to have the pa rt outside that length not printed .
• Fa ct or y s et t in g: "2"
Setting 17: BEEP LENGTH
This sets the duration of the beep whic h signals the en d of trans mis sion, re cept ion, or copyin g.
Press "1" for 3 seconds, "2 " for 1 second, or "3" for no beep.
• Fact ory sett in g: "1"
Setting 18: FOO TER PRI N T
Press "1" (YES) t o have the tran smitting m ac hine’s fax numb er (if provided) toget he r with the
date and time of recept ion pr inte d at the botto m of each pag e you rece ive (this is in addit ion to
similar informat ion pr int ed at the t op of each page) . Pre ss "2" (NO ) for no foote r printing.
• Fa ct or y s et t in g: "1"
Setting 19: DI AL M O D E
This sets the mode of dialling. Press "1" if you are on a tone dial line, or "2" if you are on a pulse
dial line.
• Fa ct or y s et t in g: "1"
Setting 20: ERROR CORRECTI O N MODE (ECM)
Press "1" (YES) t o have any dist ort ions in a transm ission due t o noise on the telephone line be
corrected bef or e print -o ut at the rece iv ing end. This is only effect ive wh e n the other machine
has ECM as well. Press "2" (NO) to turn the function off.
• Fact ory sett in g: "1"
Setting 21: PBX RECALL
This sets the recall mode use d fo r transf err ing calls on a PBX or utilising BT Networ k se rvic es.
Refer to your PBX m anua l or consult your supp lier f or the cor re ct set ting if th e fa ct or y sett in g is
inappropriate. Enter "1" fo r earth r e call, "2 " for time bre a k recall, or " 3" for no operation.
• Fact ory sett in g: "2"
Setting 22: RI NGING VOLUME
This sets the volume of t he rin ger . Pres s "1" for low, "2 " fo r middle, or "3 " for high.
• Fa ct or y s et t in g: "2"
Setting 23: MERCURY FUNCTI O N
This is used to select the Mer cury Res ident ial Serv ice (U.K only) . Pre ss "1" (YES) to enable the
function, or "2" (NO) to disable it.
• Fa ct or y s et t in g: "1"
6-4 OPTIONAL SETTINGS

7 PRINTING OUT REPORTS AND LISTS
You can print out a variety of lists showing settings and information entered in the fax.
You can also have the fax automatically print out a report on transactions after they
are made. Each list and the report is described below.
Printing out a list
Step Press these keys: Comments
1
FUNCTION
2
3
START
or
2
LISTING MODE w ill appear in the display.
Move through t he list s by press ing "#" o r "*".
Stop when the desired list appears in the display.
Print out the list.
Activity Report
This report shows information on up to 30 of the operations most recently performed.
The report is divided into two parts: the TRANSMISSIONS ACTI VITY REPORT, which
shows information on transmissions, and the RECEPTIONS ACTI VITY REPORT,
which shows information on receptions.
♦ If Option Setting 4 is set to "1", a report will be automatically printed out whenever
information on 30 operations has accumulated. (A report can still be printed out
manually at any time.)
♦ All information is erased after a report is printed out. If automatic print-out is
disabled and print-out has not been performed manually for 30 operations, the
information on the oldest operation will be overwritten each time a new operation is
performed.
Explanation of headings
SENDER/
RECEIVER
START The time at which transmission/ recep tion started .
TX/RX TIME Total time taken for transmission/reception.
PAGES Number of pages transmitted/ r eceived.
TYPE CONF. TX - A confidential operat ion was performed.
The nam e or fax number of the othe r machine involved in t he transact ion. If that machine
does not have an ID function, the comm unication mode w ill appear (for exam ple, "G3").
RELAY TX - A relay operation was perfo rme d.
PRINTING OUT REPORTS AND LI ST S 7-1

PRINTING OUT REPORTS AND LI ST S
(T) - A timer operation was pe rform ed .
(M) - The memory was used.
NOTE OK - Transmission/ re ception was normal.
P.FAIL - A p ower failure occurr ed.
JAM - A problem with the printing paper or document occurred.
BUSY - The line was busy.
COM.E- 0 to COM.E-7 - A telephone line error prevented the transaction. Explanations
of the error numbers are given in the following tables, however, these are primarily for
use by service engineer s. In gene ral, you will want to sim ply t ry the tran sact ion aga in. If
necessar y, check with the other party to make sure their machine is fu nctioning pro perly.
CANCEL - Transmission was cancelled because the STOP key was pressed, no
document was in the feeder, or the other machine requested transmission using a
function which your fax does not have.
CANCEL 3 - Confidential transmission was cancelled because the receiving machine
does not have a confidential function, a confidential passcode is not programmed in it,
its memory is fu ll, or it is not a Sharp mode l.
CANCEL 4 - Confidential transmission was cancelled because an incorrect mailbox
number was en tere d for a fax machine with confident ial ma ilboxes .
CANCEL 5 - A relay request was not successful because the machine to which the
request w as made has no relay function, it is no t a Sharp m odel, or its memory was f ull.
CANCEL 6 - A relay request was not successful because your machine’s fax number
has not been entered into the relay machine’s list of permitted numbers, an automatic
dialling number not stored in the relay machine was specified, or your fax number has
not been entere d in your m achine as described in Chapter 2.
Transmission error s
Able to recognise handsh ake signa l, but it has
E-0
errors.
Cannot recognise the handshake signal from
E-1
the receiver side.
E-2
Line disconnected during transmission.
Line disconnected after modem speed fall-
E-3
back.
Line disconnected during multi-page
E-4
transmission.
Cannot recognize the handshake signal for
E-6
next page at receiver side.
No response from receiver side or "disconnect
E-7
signal" is received at transmitter side.
Error was not corrected after the
E-8
predetermined number of retries because of
an error in a part of a page.
Error occurred after or whilst reception by the
E-11
remote (receiving) machine was revealed to be
impossible.
E-12
Error occurred just after fall-back.
Error occurred after a response to a
E-13
retransmission end command was received.
Reception errors
Able to recognise handsh ake signal, but it has
E-0
errors.
E-1
Line disconnected during reception.
Cannot recog nise the handsha ke signal from
E-2
the transmit ter sid e.
Cannot recognise the last handshake signa l
E-3
from the transmitter side.
Cannot recognise the handsha ke signal for
E-4
next page from the tran sm it ter side in the
case of mode change.
Cannot recognise the handsha ke signal for
E-5
next page from transmitter side.
No response from transmitter or "disconnect
E-7
signal" is received at receiver side.
Error occurred upon completion of reception
E-8
of al l pages.
Error occurred when mod e was changed or
E-9
transmission/reception switching was
performed.
Error occurred during partial page or physical
E-10
page reception.
Error occurred afte r or during inquiry from the
E-11
remote (transmi tting) machin e as to whe the r
reception was possible or not.
E-12
Error occurred during or just after fallback.
Error occurred after ret ransmission end
E-13
command was received.
Error occurred after voice communication
E-14
command was received.
7-2 PRINTING OUT REPORTS AND LISTS

Timer List
This list shows the timer operations
which are currently set.
Telephone and Relay Group List
This list shows the fax and voice
numbers which have been stored
for Automatic Dialling, and the
numbers in the relay group.
PRINTING OUT REPO RT S AND LIST S
Passcode List
This list shows the fax numbers
which have permission to poll you,
as well as the polling and security
status, your name and number as
entered into your fax, and a sample
of the header print which appears
at the top of every page you
transmit. The current setting of the
two answering machine mo de
selections also appear.
Optional Setting List
This list shows the current status of
the optional settings.
PRINTING OUT REPORTS AND LI ST S 7-3

PRINTING OUT REPORTS AND LI ST S
Program and Group List
The top part of this list shows the
programs which have been entered.
The bottom part shows the fax
numbers which have been stored in
each Group Key.
Anti Junk Fax Number List
This list shows the fax numbers
from which reception is not allowed.
Transaction Report
This report is printed out automatically after an operation is completed to allow you to
check the result. The fax is set at the factory to print out the report after every
transmission, but you can change the setting to have it printed out under a variety of
other conditions. This is done by changing Option Setting 5 as described in Chapter 6.
♦ The Transaction Report shows the same information as the Activity Report. See
"Activity Report" in this chapter for an explanation of the headings.
♦ The report cannot be printed out manually.
7-4 PRINTING OUT REPORTS AND LISTS

8 MAINTENANCE
Reading glass and rollers
Clean the reading glass and rollers frequently to ensure the quality of transmitted
images and copies. Open the operation panel (pull the panel release on the right side
of the fax forward), and clean the parts as shown below.
Document
rollers
The housing
White backplat e
Wipe the reading glass, white
backplate, and rollers w ith a soft cloth.
•• Make sure that all dirt and stains (such
as those of correcting fluid) are
removed, as these will cause vertical
lines on transmitted images and copies.
•• Adhesive cellophane tape is useful for
removal of debris from the feed rollers.
Reading glass
Wipe the external parts and surface of the machine with a dry cloth.
Caution!
••
Do not use benzene or thinner. These solvents may damage or discolour the machine.
MAINTENANCE 8-1

MAINTENANCE
Cleaning the drum cartridge
If some of the characters are missing from the printed page, the surface of the drum in
the drum cartridge may need cleaning. Follow the steps below to clean the drum.
1 Remove any documents from the
received document outlet. Open the
operation panel, and remo ve the
received document guide, the imaging
cartridge, and the drum cartridge. (For
detailed instructi o ns, see Steps 1 to 4
in "Installing the Printer Cartridges" in
Chapter 1.)
•• Caution! The fusing unit (the black unit
with ribs extending across the bottom
of the compartment) becomes very hot
during printing. Be careful not to touch
it.
2 Place the drum gen tly on a clean ,
uncluttered, and level surface.
•• Do not touch the green drum in the
drum cartridge, and do not expose the
drum to direct light. Doing so will
damage the surface of the drum.
3
Take a sheet of clean paper and roll it
tightly in to a tub e. Gently tap the
surface of the drum with the tube to
pick up any particles of toner which
may be sticking to the drum.
•• Caution! Do not touch the drum
surface with the edges of the rolled up
paper or wipe the drum with the paper.
This will damage the drum.
4 Replace the drum cartridge, imag ing
cartridge, and received document
PUSH
guide. Close the operation panel. (For
detailed instructi ons, see Step 6 and
Steps 10 to 14 in "Installing the
Printer Cartridg es" in Chapter 1.)
8-2 MAINTENANCE

9 TROUBLESHOOTING
PROBLEMS AND SOLUTIONS
Problem Check and remedy
Nothing appears in the display.
The fax does not respond when you
press any of its key s.
Automatic docu ment feeding do es
not work for transmiss io n or copying.
Dialling cannot be perfor me d .
Nothing is printed at the receiving
end.
The power is on, bu t no
transmission takes place.
•• Make sure the power cord is properly plugg ed int o a power
outlet.
•• Make sure the power switch has been swit ched to the
correct pos ition.
•• Connect another electrical appliance to the outlet to confirm
that it is live .
•• If a beep sound is not made when you pr ess the keys, tur n
off the power and then turn it back on sever al seconds later .
•• Check the size and weight of the document (see
"Transmitt able doc ument s" in Chapt er 3).
•• Make sure that the telephone line is proper ly con nect ed to
both the wall socket and the "TEL. LINE" socket.
•• Make sure that the fax is set to th e cor r ect dialling mode for
your telephone line. See Opt ion Set tin g 19 in Chapter 6.
•• Make sure that the documen t for tran sm ission is place d face
down in the feeder.
•• Make sure that the printing paper is prop er ly loaded in t he
receiving machine.
•• Make sure that the receiving machine has print ing pape r.
A distorted image is received at the
other end.
•• If the receiving machine is in manua l mode with no
attendant, receptio n will not be possible.
•• If the receiving machine is not a Sharp mo d el, mak e sur e it is
G3 compatible.
•• Check the display for error messages.
•• Pick up the handset and check for a dial tone. Call the
receiving machine by nomal (manual) dialling, and confir m
its response.
•• Noise on the telephone line may cause distortion. Tr y
sending the document aga in. (Only when error correction
(Option Setting 20) is turned off.)
•• Make a copy of the document on your fax. If the co py is also
distorted, your fax m ay ha ve a pr oblem . If the pr ob le m
persists, call for serv ice.
TROUBLESHOOTING 9-1

PROBLEMS AND SOLUTIONS
The printing paper does no t come
out.
The printing paper comes out blank
when you try to receive a docume nt.
The received doc um ent is faint.
Received images are distor ted.
No confidential transm ission or
relay broadcast occurs .
•• The printing paper may be jammed. See "Clearing Jamm e d
Printing Paper" in this chapter.
•• Make sure that the printing paper is prop erly loaded in you r
machine.
•• Make sure that the document is loaded pr oper ly in the fe eder
of the transmitt ing m ac hine. Make a co py to conf ir m the
printing ability of your machine.
•• Ask the other party to send hig her contr ast doc ument s. If the
contrast is still too low, your fax may hav e a problem . Make a
copy to check it.
•• The imaging cartridge may need replacement.
•• Noise on the telephone line may cause distortion. Have th e
other party try sending the docum e nt again. (only when er ror
correction ( Opt ion Set t ing 20) is turne d off.)
•• Make a copy of another docum e n t on your fax. If the copy is
also distorted, you r fax may have a pro b lem . If the pro blem
persists, call for serv ice.
•• The photoconductor drum may be damaged. Try a new drum
cartridge.
•• Check the message in the display. See the nex t sect ion,
"Display Messages ".
9-2 TROUBLESHOOTING

MESSAGES AND SIGNALS
Display messages
A confidential transmission ha s been denied becaus e you
CONF REFUSED
DOC. COVER OPEN The operation panel is open. Close it.
entered an incorrect mailbox numbe r for a machine with
mailboxes.
COVER OPEN
DOCUMENT JAM
FAX RX IN MEMORY
FUNCTION MODE The FUNCTION key has been press ed.
LINE ERROR
MEMORY FULL The memory is full. See "Memory " in Chapter 5.
MEMORY PRINTI NG The fax is preparing or printing out a docum ent fro m mem or y.
NO CONF. FUNC
The printer cover (or received document guide) has been
removed or is open. Replace or close it.
The original document is jam med. See the f ol low ing section,
"Clearing Paper Jams".
A fax has been received in memory because the imaging
cartridge needs replacem e nt, the fax mac hine has run out of
printing paper, or the paper is jammed. The fax will be printed
out automatically onc e the pr oblem is fixe d.
Transmiss io n or recept ion was n o t succes sful. Pr ess STOP to
clear the message, and then try again.
Confidential transmission was cance lled because the receiving
machine does not have a confide nt ial function , a confid ent ia l
passcode is not program med in it, its memo ry is full, or it is not
a Sharp model.
CHECK PAPER You are out of printing paper.
A relay request has been denied bec ause the other machine
NO RELAY FUNC
PAPER JAM
ONHOOK DIAL MODE
does not have a relay broa dcas t function , its mem or y is full, or
it is not a Sharp machine.
The printing paper is jammed . See the following section,
"Clearing Paper Jams".
The SPEAKER key has been pressed and the f ax is waitin g
for you to dial.
TROUBLESHOOTING 9-3

MESSAGES AND SIGNALS
RELAY REFUSED
A relay request has been denied bec ause your fa x numbe r
has not been enter ed in the relay m ac hine’s l ist of per mit te d
numbers, an automatic dialling number not stored in the relay
machine was specified, or your fax num ber has not bee n
entered in your mac hine.
RESERVE READY
REPLACE TONER
SIZE ERROR
Audible signals
Continuous tone 3 seconds
Intermitte nt tone
(3 bleeps)
5 seconds
(1 second on,
1 second off)
The machine is ready t o reser ve a transm ission ( see
"Transmission reservation" in Chapter 5).
The imaging cartridge needs repla cemen t, or has not been
installed.
The size of the paper loaded in the paper tray is not A4.
Replace the paper with A4-size paper.
Indicates the en d of transm ission, re cept ion, or
copying.
Indicates incomplet e transm ission, recep tion, or
copying.
Rapid intermittent tone
Rapid intermittent tone
0.5 seconds on,
0.5 seconds off
35 seconds
(0.7 seconds on,
0.3 seconds off)
Indicates that the pr int er cover is open .
Indicates that the han dset is of f hook.
9-4 TROUBLESHOOTING

CLEARING PAPER JAMS
Clearing a jammed document
If a document doesn’t feed properly during transmission or copying, or DOCUMENT
JAM appears in the display, first try pressing the START key. If the document doesn’t
feed out, open the operation panel (pull the release on the right side of the fax
forward) and pull it out gently.
Clearing jammed printing paper
1 If most of the jammed page is
protruding from the back of the fax,
try pulling it out.
•• If the jammed page comes out, clear
the "PAPER JAM" message in the
display by resetting the stack of
printing paper (pull the lever marked
"PULL" on the paper tray toward you,
take out the stack of paper, put it back
in, and push the lever back down).
•• If you are unable to clear the paper jam
in this way, continue with the following
steps.
2 Remove any documents from the
received document outlet. Open the
operation panel, and remove the
received document guide, the imaging
cartridge, and the drum cartridge. (For
detailed instru ctio n s, see Step s 1 to 4
in "Installing the Printer Cartri dges" in
Chapter 1.)
•• Caution! The fusing unit (the black unit
with ribs extending across the bottom of
the compartment) becomes very hot
during printing. Be careful not to touch
it.
TROUBLESHOOTING 9-5

CLEARING PAPER JAMS
3 Wrap the drum cartridge in a large
sheet of paper as shown at left so
that the green drum sectio n is
shielded from light, and place it
gently on a level surface.
•• Do not touch the green drum in the
drum cartridge. This will damage the
surface of the drum.
•• Do not expose the drum to direct light.
This will damage the drum.
4 If the leading edge of the paper has
entered the fusing unit, turn the wheel
Wheel
on the top, right side of the fusing
unit in the direction of the arrow until
the leading edge of the paper is
released from the unit.
•• Caution! Do not pull the paper out of
the fusing unit with your hands. This
may cause toner smudges on
succeeding pages.
•• Important: Do not turn the wheel in
the direction opposite that of the
arrow. Also, note that the wheel will
not turn if the drum cartridge has not
been removed.
Fusing unit
5 Grasp the leading edge of the paper,
and pull it gently out of the
compartment.
9-6 TROUBLESHOOTING

CLEARING PAPER JAMS
6 Replace the drum cartridg e, imagi ng
cartridge, and received document guide.
Close the operatio n panel . (For detailed
instructio n s, see Step 6 and Steps 10 to
14 in "Installing the Printer Cartridges" in
Chapter 1.)
PUSH
TROUBLESHOOTING 9-7

CLEARING PAPER JAMS
Notes
9-8 TROUBLESHOOTING

SPECIFICATIONS
Applicab le tel eph o ne lin e: Public switched telephone network / PBX
Compatibil ity: ITU-T (CCITT) G3 mode
Configuration: Half-duplex, desktop transceiver
Memory size*: 512 KB (approx. 39 average pages with ECM function off)
1 MB add-on available as option
Compression scheme: Modified Huffman and Sharp special mode
Scanning method: Flat-bed, solid-state CCD
Resolution: Horizontal:
8 lines/mm
Vertical:
Standard 3.85 lines/mm
Fine /Halftone 7.7 l ines /m m
Super fine 15.4 lines/mm
Display: 7 x 5 dots, 1 line by 16-digit display
Reception modes: Auto/Manual/Answering machine
Modem speed: 9600 bps with automatic fallback to 7200, 4800, or 2400 bps
Transmission time*: Approx. 13 seconds (Sharp special mode)
Effective recording wid th: 202 mm (average)
Paper capacity: 100 sheets
Input document size: Automatic feeding:
Width 148 to 216 mm
Length 128 to 356 mm
Manual feeding:
Width 148 to 216 mm
Length 128 to 1000 mm
Effective scanning wid th: 210 mm max.
Automatic documen t feeder: 20 sheets max.
Halftone (grey scale): 32 levels
Contrast control: Automatic/Dark selecta ble
Copy funct io n: Single/Mult i-copy/Sort -copy (99 copies/page)
Timer communication: Max. 3 communications
Power requirements: 230 V AC, 50 Hz
Operating temperature: 10 - 30°C
Power consu mp tion : Stand-by: 7 W
Maximum: 680 W
Dimensions: Width: 360 mm
Depth: 412 mm
Height: 169 mm
(Without attachments)
Weight : Approx. 7.2 kg
* Based on ITU-T Test Chart #1 at standa rd resolution in Sharp special mode, excluding time for protoc ol
signals (i.e., ITU-T phase C time only) .
As a part of o ur policy of con tinuous imp rovemen t, SHARP reserves the right to make design and
specification changes fo r product improvement without prior notice. The perfo rmance spe cification
figures indicated are nominal values of productio n units. There ma y be some dev iations from these
values in individual units.
SPECIFICATIONS SPEC.-1

INDEX
A
Activity Repor t . . . . . . . . . . . . . . 6-2,7-1
Answering machine connection
Fax Reception W hen A. M . Fa ils . . . . 4-6
Connecting . . . . . . . . . . . . . . . 1-9
Problems . . . . . . . . . . . . . . . . 4-3
Quiet Detect T ime . . . . . . . . . . . 4-5
Remote Fax disable . . . . . . . . . . 4-2
Remote-tone f ax activation . . . . . . 4-6
Anti Junk Fax . . . . . . . . . . . . . 5-22 - 5- 2 3
Audible signals . . . . . . . . . . . . . . . . 9-4
AUTO reception mo de . . . . . . . . . 2-6, 3-11
Automatic Dialling, storing numbers . . . . . 2-8
Automatic Fax /Ph one Cha ngeo ver . . . 3-13, 6-2
B
Batch page numbering . . . . . . . . . . . . 3-5
Beep length . . . . . . . . . . . . . . . . . . 6-4
Broadcastin g . . . . . . . . . . . . . . . 5-4 - 5-5
Broadcast Key . . . . . . . . . . . . . . 2-1, 5-4
C
Chain Dialling . . . . . . . . . . . . . . . 2-7, 3-8
Cleaning . . . . . . . . . . . . . . . . . . . 8-1
Confidential tra nsmission . . . . . . . . . . . 5-6
Connections . . . . . . . . . . . . . . . 1-6 - 1-7
Contrast . . . . . . . . . . . . . . . . . . . . 3-3
Copies . . . . . . . . . . . . . . . . 3-14 - 3-15
Copy key . . . . . . . . . . . . . . . . 2-1, 3-14
Copy Reduce . . . . . . . . . . . . . . . . . 6-3
Copy Cut-off . . . . . . . . . . . . . . . . . 6 -4
Cover sheet . . . . . . . . . . . . . . . . 3-4,6-3
D
Date, setting . . . . . . . . . . . . . . . . . 2-5
Dialling
Chain . . . . . . . . . . . . . . . 2-7, 3-8
Direct Keypad . . . . . . . . . . . . . 3-7
Normal . . . . . . . . . . . . . . . . . 3-6
Rapid Key . . . . . . . . . . . . . . . 3-7
Search . . . . . . . . . . . . . . . 3-9,3-16
Speed . . . . . . . . . . . . . . . . . 3-8
Dialling mode . . . . . . . . . . . . . . . . . 6-4
Direct Keypad Dialling . . . . . . . . . . . . 3-7
Display messages . . . . . . . . . . . . 9-3 - 9-4
Document fe eder . . . . . . . . . . . . . . . 3-2
Document guides . . . . . . . . . . . . . . . 3-2
Document re st rict ions . . . . . . . . . . . . 3-1
Document rollers . . . . . . . . . . . . . . . 8-1
Document sizes . . . . . . . . . . . . . . . 3-1
Document, readable length and width . . . . 3-1
Drum cartridg e . . . . . . . . . . . . . . . . 1-5
E
Electrical outlet . . . . . . . . . . . . . . . . . 1-6
Errer codes . . . . . . . . . . . . . . . . . . . 7-2
Error correc t ion M ode . . . . . . . . . . . . . 6-4
Extension telephon e, conne ctin g . . . . . . . . 1-9
Extension telephone, using . . . . . . . . . 3-12
F
Fax signal receive . . . . . . . . . . . . 3-11,6-3
Fine Resolution Priority . . . . . . . . . . . . . 6-1
Function Guidanc e List . . . . . . . . . . . Quick-i
Function key . . . . . . . . . . . . . . . . . . 2-1
Footer Print . . . . . . . . . . . . . . . . . . . 6-4
G
Group Key s . . . . . . . . . . . . . . . 2-11, 5-5
H
Halftone . . . . . . . . . . . . . . . . . . . . . 3-3
Handset . . . . . . . . . . . . . . . . . . . . . 1-6
Housing, cleaning . . . . . . . . . . . . . . . 8-1
I
Imaging cartridge . . . . . . . . . . . . . 1-4,1 -5
J
Jams, clearing . . . . . . . . . . . . . . . . . 9-5
L
Letters, entering . . . . . . . . . . . . . 2-3 - 2-4
Liquid crystal display . . . . . . . . . . . . . . 2-1
Loading the doc um ent . . . . . . . . . . . . . 3-2
M
MANUAL reception mode . . . . . . . 2-6, 3-11
Memory
Transmis sion . . . . . . . . . . . 5-1 - 5-2
Reception . . . . . . . . . . . . . . . . 5-2
Memory Key . . . . . . . . . . . . . . . 2-1, 5-1
Mercury function . . . . . . . . . . . . 2-12, 6-4
N
Normal Dialling . . . . . . . . . . . . . . . . . 3-6
Number of Rings in Auto Answer Mode . . . . 6-1
Numeric keys . . . . . . . . . . . . . . . . . . 2-1
Network services . . . . . . . . . . . . . . . 3-14
Index-i

INDEX
O
Optional Sett ing List . . . . . . . . . . . . . . 7-3
P
Paper, loading . . . . . . . . . . . . . 1-10 - 1-11
Paper, setting the size . . . . . . . . . . . . 1-11
PAPER CHECK light . . . . . . . . . . . . . . 2-1
Paper jams, clearing . . . . . . . . . . . . . . 9-5
Paper tray . . . . . . . . . . . . 1-8, 1-10 - 1-11
Passcode List . . . . . . . . . . . . . . . . . 7-3
Pauses in automatic Dialling numbers . . . . . 2-8
PBX operations . . . . . . . . . . . . . 3-17,6-4
Polling . . . . . . . . . . . . . . . . . . 5-7 - 5-9
Polling key, setting . . . . . . . . . . . . . . 5-7
Power cord . . . . . . . . . . . . . . . . . . . 1-6
Program and Group List . . . . . . . . . . . . 7-4
Programs . . . . . . . . . . . . . . . . 5-16 - 5-21
Pseudo ring duration . . . . . . . . . . . 3-13,6-2
Q
Quiet detect t ime . . . . . . . . . . . . . . . . 4-5
R
Rapid Key Dialling . . . . . . . . . . . . . . . 3-7
Rapid Keys . . . . . . . . . . . . . . . . . . . 2-1
Reading glass, cleanin g . . . . . . . . . . . . 8-1
Recall Interval . . . . . . . . . . . . . . . . . 6-2
Recall Times . . . . . . . . . . . . . . . . . . 6-2
Reception mode . . . . . . . . . . . . . . 2-1,2-6
Setting . . . . . . . . . . . . . . . . . . 2-6
ANS mode . . . . . . . . . . . . . . 2-6,4-1
AUTO mode . . . . . . . . . . . . 2-6, 3-11
MANUAL mode . . . . . . . . . . 2-6, 3-11
Reception mode key . . . . . . . . . . . 2-1, 2-6
Receve reduce . . . . . . . . . . . . . . . . . 6-3
Redial key . . . . . . . . . . . . . 2-1, 3-10, 3-16
Redialling . . . . . . . . . . . . . . . . 3-10, 3-16
Relay Request . . . . . . . . . . . . . 5-10 - 5-12
Remote Fax machine disable . . . . . . . . . 4-2
Remote Recept ion Num ber . . . . . . . 3-12, 6-3
Resolution . . . . . . . . . . . . . . . . . . . 3-3
Resolution key . . . . . . . . . . . . . . 2-1, 3-3
Ringing volume . . . . . . . . . . . . . . . . . 1-7
Rollers, cleaning . . . . . . . . . . . . . . . . 8-1
Speaker volume . . . . . . . . . . . . . . . . 1-7
Speed Dial key . . . . . . . . . . . 2-1, 3-6, 3-16
Speed Dialling . . . . . . . . . . . . . . . . . 3-6
Start key . . . . . . . . . . . . . . . . . . . . 2-1
Stop key . . . . . . . . . . . . . . . . . . . . 2-1
Storin g num bers for aut om a tic Dialling . . . . . 2-8
T
Telephone, using as . . . . . . . . . . . . . 3-16
Telephone line cord . . . . . . . . . . . . . . 1-6
TEL/FAX Remo te num ber . . . . . . . . . . . 6-3
TEL. LINE jack . . . . . . . . . . . . . . 1-6,1-9
TEL. SET jack . . . . . . . . . . . . . . 1-6,1-9
Telephone and Relay Group List . . . . . . . . 7-3
Time, setting . . . . . . . . . . . . . . . . . . 2-5
Timer operations . . . . . . . . . . . 5-13 - 5-15
Timer List . . . . . . . . . . . . . . . . . . . 7-3
Toner empty indicat or . . . . . . . . . . . . . 2-1
Transaction Repo rt . . . . . . . . . . . . . . . 7-4
Transaction Repo rt Pr int Selec t . . . . . . . . 6-2
Transmis sion r eservation . . . . . . . . . . . . 5-3
Troubleshooting . . . . . . . . . . . . . 9-1-9-7
S
Search Dial key . . . . . . . . . . 2-1, 3-9, 3-16
Search Dialling . . . . . . . . . . . . . . . . . 3-9
Sender’s name and number, entering . . . . . 2-2
Service indicator . . . . . . . . . . . . . . . . 2-1
Speaker key . . . . . . . . . . 1-7,2-1, 3-6, 3-16
Index-ii

INDEX
Notes
Index-iii

SHARP ELECTRONICS (U.K.) LT D.
Sharp House, Thorp Road , Newton Heath, Manch est er, M40 5B E
SHARP CORPORATION
PRINTED IN JAPAN
(TINSE3545SCZZ)
 Loading...