


Explorer®
Digital Video Recorder
User’s Guide
Get More Out of Your TV…
Watch |
• Your favorite shows anytime you want...on your schedule |
|
• Pause live TV for up to 1 hour without missing a minute |
Record |
• Two live programs at the same time |
|
• All future episodes of your favorite programs by performing a simple, |
|
one-time setup |
Watch & Record • Watch one program while recording another
Play Back Recordings on Other TVs
•Watch two programs at once (using the PIP feature) and record one of them
•Watch a pre-recorded program while recording one or two other programs
•Use the Multi-Room™ DVR* system to play back recordings on up to 4 TVs at the same time
•Each room can either play back the same recording or different recordings, and each room has individual control of the play back
*The Multi-Room DVR feature is only available on the Explorer® 8300™ Multi-Room DVR models.

ALLTOUCH REMOTE CONTROL
The AllTouch® Remote Control includes specific keys that enable you to control your Explorer® Digital Video Recorder (DVR).
IMPORTANT! You must place the remote control in cable mode (press  ) to access the DVR features.
For descriptions of other remote control key functions, refer to the user’s guide for your remote control model.
The following illustration shows the AT8550™ All Touch Remote Control. Your remote control model may vary.
|
Power on/off |
|
|
Select cable mode |
|
Display Program Guide |
Display program information |
|
Move through Program |
Move through settings and |
|
Guide by days |
||
|
program guide |
|
Move through |
|
|
on-screen choices |
Remove banners/graphics |
|
Display General/Quick |
from TV screen |
|
Perform selected action |
||
Settings |
||
Make on-screen choices |
|
|
Display list of recordings |
Display last channel viewed |
|
Instant Replay |
Return to live TV |
|
Rewind |
Fast-forward |
|
Stop |
Record program |
|
|
Resume playing |
|
Pause |
paused program |
|
|
Dedicated DVR Keys |
|
Swap PIP screen |
|
|
with Main screen |
Size HDTV picture |
|
Turn PIP on/off |
Select PIP channels |
|
|
||
Move PIP screen |
|
|
|
Dedicated PIP Keys |
T11808

NOTICE FOR CATV INSTALLERS
The servicing instructions in this notice are for use by qualified service personnel only. To reduce the risk of electric shock, do not perform any servicing other than that contained in the operating instructions, unless you are qualified to do so.
Note to System Installer (U.S.A. and Canada Only)
This reminder is provided to call the system installer's attention to Article 820-93 and Article 820-100 of the NEC (Canadian Electrical Code Part 1), that provide guidelines for proper grounding and, in particular, specify that the metallic sheath of communications cables shall be connected to the grounding system of the building, as close to the point of cable entry as practical.
CAUTION: To reduce the risk of electric shock, do not remove cover (or back). No user-serviceable parts inside. Refer servicing to qualified service personnel.
WARNING
TO PREVENT FIRE OR ELECTRIC SHOCK, DO NOT EXPOSE THIS UNIT TO RAIN OR MOISTURE.
This symbol is intended to alert you that uninsulated voltage within this product may have sufficient magnitude to cause electric shock.Therefore, it is dangerous to make any kind of contact with any inside part of this product.
Ce symbole a pour but d’alerter toute personne qu’un contact avec une pièce interne de ce produit, sous tension et non isolée, pourrait être suffisant pour provoquer un choc électrique. Il est donc dangereux d’être en contact avec toute pièce interne de ce produit.
This symbol is intended to alert you of the presence of important operating andmaintenance (servicing) instructions in the literature accompanying this product.
Ce symbole a pour but de vous avertir qu’une documentation importante sur le fonctionnement et l’entretien accompagne ce produit.
20060907SISD
SAFETY FIRST
Before using the DVR, read the IMPORTANT SAFETY INSTRUCTIONS section of your DVR connectivity guide.
U.S. PATENTS LIST
A patent notice is affixed to this product. In addition, the product may also be covered by one or more of the following patents:
4,498,169; 4,636,852; 4,641,181; 4,651,208; 4,691,353; 4,692,919; 4,698,598; 4,719,642; 4,748,667; 4,829,569; 4,866,770; 4,885,775; 4,888,799; 4,890,319; 4,922,456; 4,922,532; 4,924,498; 4,965,534; 4,991,011; 5,003,384; 5,012,510; 5,029,207; 5,045,816; 5,053,883; 5,054,071; 5,058,160; 5,142,575; 5,142,690; 5,146,526; 5,155,590; 5,214,390; 5,225,902; 5,225,925; 5,235,619; 5,237,610; 5,239,540; 5,241,610; 5,247,364; 5,255,086; 5,257,403; 5,267,071; 5,270,809; 5,271,041; 5,272,752; 5,282,028; 5,285,497; 5,287,351; 5,301,028; 5,309,514; 5,317,391; 5,319,709; 5,341,425; 5,347,388; 5,347,389; 5,357,276; 5,359,601; 5,361,156; 5,367,571; 5,379,141; 5,379,145; 5,381,481; 5,390,337; 5,400,401; 5,406,558; 5,418,782; 5,420,866; 5,420,923; 5,425,101; 5,428,404; 5,430,568; 5,434,610; 5,436,749; 5,438,370; 5,440,632; 5,442,472; 5,455,570; 5,457,701; 5,471,492; 5,477,199; 5,477,262; 5,477,370; 5,481,389; 5,481,542; 5,485,221; 5,493,339; 5,497,187; 5,500,758; 5,502,499; 5,506,904; 5,519,780; 5,539,822; 5,550,825; 5,579,055; 5,579,057; 5,583,562; 5,592,551; 5,596,606; 5,600,378; 5,602,933; 5,640,388; 5,657,414; 5,675,575; 5,684,876; 5,715,515; 5,724,525; 5,740,300; 5,742,677; 5,754,940; 5,757,416; 5,771,064; 5,774,859; 5,825,829; 5,826,167; 5,850,305; 5,854,703; 5,870,474; 5,892,607; 5,920,626; 5,923,755; 5,930,024; 5,930,515; 5,937,067; 5,963,352; 5,966,163; 5,982,424; 5,991,139; 5,999,207; 6,005,631; 6,005,938; 6,016,163; 6,028,941; 6,029,046; 6,052,384; 6,055,244; 6,072,532; 6,105,134; 6,148,039; 6,157,719; 6,188,729; 6,195,389; 6,212,278; 6,215,530; 6,219,358; 6,240,103; 6,243,145; 6,246,767; 6,252,964; 6,272,226; 6,292,081; 6,292,568; 6,320,131; 6,374,275; 6,405,239; 6,411,602; 6,417,949; 6,424,714; 6,424,717; 6,433,906; 6,438,139; 6,463,586; 6,467,091; 6,476,878; 6,493,876; 6,510,519; 6,516,002; 6,516,412; 6,526,508; 6,538,595; 6,546,013; 6,560,340; 6,567,118; 6,570,888; 6,622,308; 6,629,227; 6,664,984; 6,667,994; 6,671,879; 6,674,967; 6,678,891; 6,714,598; 6,721,352; 6,721,956; 6,725,459; 6,738,982; 6,744,892; 6,744,967; 6,751,271; 6,760,918; 6,795,972; 6,802,077; 6,804,708; 6,811,447; 6,817,028; 6,822,972; 6,823,385; 6,832,386; 6,845,106; 6,868,473; 6,874,075; 6,889,191; 6,909,471; 6,917,622; 6,917,628; 6,922,412; 6,927,806; 6,928,656; 6,931,058; 6,937,729; 6,969,279; 6,971,008; 6,971,121; 6,978,310; D348065; D354959; D359737; D363932; D390217; D434753; D507240; D507535; RE36368; RE36988
20051216PL
iii

CONTENTS
AllTouch Remote Control ............................................................... |
inside of front cover |
Notice for CATV Installers .......................................................................... |
iii |
Safety First ................................................................................................ |
iii |
U.S. Patents List ....................................................................................... |
iii |
GET STARTED
NEED TO INSTALL YOUR DVR? |
|
Get Started ................................................................................................ |
1 |
Connect the Explorer DVR to Your TV ........................................................ |
1 |
Important Note Regarding the HDMI Interface on the 8300HD/8300HDC ...... |
2 |
Connect External Devices to the DVR ........................................................ |
2 |
Prepare the Explorer HD DVR to Work With Your TV ................................. |
3 |
Start the Setup Wizard ....................................................................................... |
3 |
Adjust Your HDTV Picture .......................................................................... |
5 |
Adjust Your Picture Format Using Quick Settings ............................................ |
6 |
Adjust Your HD Picture Using General Settings .............................................. |
6 |
KEEP OUT — SET PARENTAL CONTROL AND BLOCKING |
|
Set Parental Control ................................................................................... |
7 |
Program Rating Categories ........................................................................ |
8 |
Block Recordings with Parental Control ...................................................... |
9 |
Watch Blocked Recordings ........................................................................ |
9 |
Set Favorite Channels ................................................................................ |
9 |
CONTROL TV
TRYING TO FIND A PROGRAM? USE THE PROGRAM GUIDE |
|
Search for Programs Using the Program Guide .......................................... |
10 |
Display the Program Guide .............................................................................. |
10 |
Search for a Program by Channel, Title, or Theme .......................................... |
10 |
Search for a Program by Date .......................................................................... |
11 |
Select a Program from the Program Guide ................................................. |
12 |
CONTROLLING LIVE TV AND RECORDINGS |
|
Control Live TV and Recordings .................................................................. |
13 |
Status Bar .......................................................................................................... |
13 |
Pause a Live Program or a Recording ............................................................. |
13 |
Rewind or Fast-Forward a Live or Recorded Program .................................... |
13 |
Use Instant Replay ........................................................................................... |
14 |
Use Slow Motion ............................................................................................... |
14 |
Watch Action Frame by Frame .......................................................................... |
14 |
Catch Up with a Live TV Program ..................................................................... |
14 |
iv

CONTENTS, CONTINUED |
|
USING THE PIP FEATURE |
|
Use Picture-In-Picture ................................................................................ |
15 |
Turn PIP On and Off .......................................................................................... |
15 |
Change the Channel of the PIP Screen ........................................................... |
15 |
Move the Location of the PIP Screen ................................................................ |
15 |
Swap the Main Screen and the PIP Screen ...................................................... |
15 |
RECORD |
|
Record Programs ....................................................................................... |
16 |
Record a Program You Are Watching ............................................................... |
16 |
Record a Program from the Program Guide .................................................... |
16 |
Record Multiple Episodes of a Program .......................................................... |
16 |
Record Two Live Programs at Once ................................................................. |
17 |
Confirm Your Recordings ................................................................................. |
17 |
Record a Pay-Per-View Event ........................................................................... |
17 |
Schedule Future Pay-Per-View Recordings ..................................................... |
17 |
WATCH RECORDINGS |
|
Watch Recordings ..................................................................................... |
18 |
Display a List of Your Recorded Programs ...................................................... |
18 |
Watch Your Recorded Programs ...................................................................... |
18 |
Display a List of Programs Scheduled to Record in the Future ...................... |
18 |
MANAGE |
|
Cancel Recordings ..................................................................................... |
19 |
Cancel a Scheduled Recording ....................................................................... |
19 |
Cancel a Recording That Is in Progress .......................................................... |
19 |
Schedule Manual Recordings ..................................................................... |
19 |
Check Recording Space ............................................................................. |
20 |
Maximize Your DVR’s Storage Space......................................................... |
20 |
NO TIME TO WATCH A PROGRAM? SAVE IT |
|
Save Recordings ........................................................................................ |
21 |
Change the Default Save Time Setting for All Future Recordings ................... |
21 |
Change the Save Time of a Single Recording ................................................. |
21 |
v

CONTENTS, CONTINUED |
|
FINISHED WITH A RECORDING? ERASE IT |
|
Erase Recordings....................................................................................... |
22 |
Automatically Erase Oldest Recordings .......................................................... |
22 |
Erase a Single Recording ................................................................................ |
22 |
Copy Recordings from Your DVR to a VCR Tape ........................................ |
23 |
Add Storage with a SATA Hard Disk Drive (Optional) ................................... |
24 |
Connecting the SATA Device to the DVR ........................................................... |
24 |
Troubleshooting the SATA Drive ........................................................................ |
25 |
Maximize the Life of the DVR ..................................................................... |
26 |
Turn Off Your DVR when Not In Use ................................................................. |
26 |
Provide Adequate Ventilation ............................................................................ |
26 |
USING YOUR DVR WITH A MULTI-ROOM DVR SYSTEM? |
|
The DVR and Your Multi-Room DVR System ............................................. |
27 |
Using Parental Controls on the Client Set-Tops .............................................. |
27 |
GET MORE INFORMATION
Frequently Asked Questions ...................................................................... |
29 |
Questions About the DVR ................................................................................. |
29 |
Questions About Controlling a Live Program or Recording ............................. |
29 |
Questions About PIP ......................................................................................... |
30 |
Questions About Recording and Playing Back Programs ............................... |
30 |
Questions About the Multi-Room DVR Client Set-Top ..................................... |
32 |
Questions About HDTV Programs .................................................................... |
33 |
Get More Information or Assistance ........................................................... |
34 |
Online Documentation or the Explorer eClub .................................................. |
34 |
Customer Support ............................................................................................ |
34 |
Index .......................................................................................................... |
36 |
Quick Tips................................................................................... |
inside of back cover |
Explorer Screens ........................................................................ |
inside of back cover |
vi

GET STARTED
1 


2 

Determine TV Connections.
Determine the types of connections you need to make, based on your TV type (highdefinition [HDTV] or standard-definition [SDTV] TV) and home theater connection requirements. Refer to the manual that came with your TV for more information.
Connect the DVR.
If your service provider has not already installed and connected the DVR for you, connect the DVR to your TV based on the connection information described in “Connect the Explorer DVR to Your TV,” next in this guide.
3 |
Configure the Picture Display. |
Configure the picture display for your TV using the Setup Wizard. See “Prepare the |
Explorer HD DVR to Work With Your TV” on page 3.
CONNECT THE EXPLORER DVR TO YOUR TV
|
|
|
|
|
|
|
|
|
|
The DVR family supports a number of connection options to support connections to |
|
|
|
|
|
|
|
|
|
|
many types of TVs. The following table describes the available DVR outputs, and |
|
|
|
|
|
|
|
|
|
|
includes when the output should be used. For more information about connectivity |
|
|
|
|
|
|
|
|
|
|
requirements and connection diagrams, refer to the connection guide for your DVR |
|
|
|
|
|
|
|
|
|
|
model, the user’s guide for your TV, the Explorer eClub (see “Online Documentation |
|
|
|
|
|
|
|
|
|
|
or the Explorer eClub” on page 34), or contact your service provider. |
OUTPUT TYPE |
|
|
|
|
|
DESCRIPTION |
||||
|
|
|
|
|
|
|
|
|
|
Some HDTVs have a High-Definition Multimedia Interface (HDMI™) or Digital Visual Interface (DVI) |
|
|
|
|
|
|
|
|
|
|
connector. The HDMI connector provides both a digital video and audio connection. The DVI |
|
|
|
|
|
|
|||||
OR |
|
|
|
|
|
connector provides a digital video connection, but not a digital audio connection. |
||||
|
|
|
|
|
|
|
|
|
|
Notes: |
DVI |
|
|
|
|
|
|
• To connect the DVR with a DVI connector to a TV with an HDMI connector requires an |
|||
|
|
|
|
|
|
adapter and a separate audio connection. |
||||
|
|
|
|
|
|
|
|
|
|
• When using the HDMI connection with TVs, you need to complete additional configuration |
|
|
|
|
|
|
|
|
|
|
steps. For more information, see “Important Note Regarding the HDMI Interface on the |
|
|
|
|
|
|
|
|
|
|
8300HD/8300HDC” on the next page. |
|
|
|
|
|
|
|
|
|
|
• If you connect to an HDTV using the DVI or HDMI ports, the DVR is automatically placed in |
|
|
|
|
|
|
|
|
|
|
“HD” mode. |
Attention
Your HDTV does not support HDCP. Please disconnect the HDMI Connector and use the
Y Pr Pb Connection to continue watching TV.
OUT 1 |
OUT 2 |
|
|
|
|
|
Pr |
|
|
|
|
|
|
|
|
|
A |
|
|
NO |
|
|
L |
U |
|
IR |
|
Pb |
|
D |
|
|||
YES |
|
|
I |
OPTICAL |
|
|
|
|
O |
|
|
|
|
|
|
R |
|
|
|
|
Y |
|
|
|
|
|
|
HDTV |
DIGITAL |
VIDEO |
AUDIO OUT |
S - VIDEO |
|
|
|
AUDIO OUT |
|
|
|
OUT |
|
IMPORTANT! Your service provider may have High-Bandwidth Digital Copy Protection (HDCP) activated for your area. If HDCP is activated for your area, and you connect the HDMI (DVI) output cable to an HDTV that does not support HDCP, a message appears, instructing you to disconnect the HDMI connection and watch video output through the PrPbY component connectors.
Pr |
You can use the PrPbY ports, or component outputs, with either an HDTV or a non-HDTV |
Pb |
with component inputs. If connecting to a TV using component outputs, you must use the |
|
Setup Wizard to select the output formats that your particular TV supports. See “Prepare the |
VIDEO |
Explorer HD DVR to Work With Your TV” on page 3. |
|
|
Y/V |
|
Pr
Pb
VIDEO
Y/V
You can use the Y Output (on an HD unit configured for SD operation) or TV Video Output connector for connecting to an SDTV. If you do not see video using this connection, see “Prepare the Explorer HD DVR to Work With Your TV” on page 3.
OR |
|
You can use these connections to connect the DVR to an SDTV. If you use the Cable Out |
S-VIDEO |
CABLE connector, you must tune your TV to the correct channel (typically either channel 3 or |
|
OUT |
OUT |
channel 4). Contact your service provider for more information. |
1394 |
|
(OPTIONAL) Some HDTVs have 1394 connectors. If you connect the DVR to your HDTV |
|
using 1394, you also need to connect separate video and audio connections to your HDTV. |
|
1

CONNECT THE EXPLORER DVR TO YOUR TV, CONTINUED
IMPORTANT NOTE REGARDING THE HDMI INTERFACE ON THE
8300HD/8300HDC
The HDMI interface automatically configures the audio output for a format supported by the TV attached to the DVR through the HDMI connection. This automatic configuration is only performed the first time the DVR is connected through the HDMI interface to a compatible TV. When the automated process is finished, the DVR sets the audio output format to either Dolby® Digital or Other (Linear PCM). The selected format is provided to all digital outputs. As a result, if the TV does not support Dolby Digital decoding, you may need to override the automatic setting to provide Dolby-formatted content to a Home Theater Receiver connected to the digital output on the DVR. In addition, if the DVR is connected to a different TV, you may need to manually set the output to a format that the new TV supports.
To override the automatic configuration or to change the audio output format used on the HDMI interface, complete the following steps:
1.Press  twice. The General Settings menu appears.
2.Press  or
or  to select Audio: Digital Out.
3.Press  to select Dolby Digital. This setting sends Dolby Digital audio to the HDMI, DIGITALAUDIO OUT, and OPTICALAUDIO OUT connectors.
4. Press A to accept the option for the DVR.
5.Press  to return to normal viewing.
Note: If you set the audio output to a format that the TV does support, you will not get any audio through the TV. You will either need to listen with a secondary device such as a Home Theater Receiver or manually switch the configuration back to one supported by the TV to hear the audio for the program using the TV speakers.
CONNECT EXTERNAL DEVICES TO THE DVR
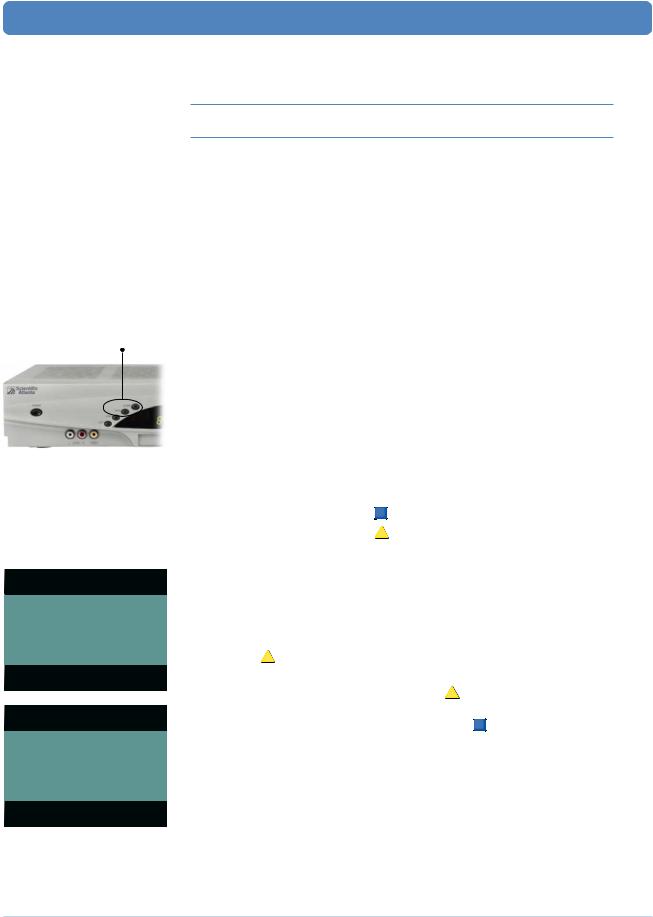
Example of front panel Audio/
Video Inputs on an 8300 DVR
Do you have an external device, such as a VCR, camcorder, or video game device but no Audio/Video Input connectors on your TV for easy connectivity? Connect the external device to your DVR instead!
•On 8300-series DVRs, the DVR front panel has Audio and Video Input connectors that allow you to connect to the video and left/right (L/R) audio outputs of an external device to deliver the audio and video to your TV.
•On 8000-series DVRs, the Audio and Video Input connectors are located on the rear panel of the DVR.
After you connect the external device to your DVR, press the Video Source key on your remote to switch between the external device (Auxiliary) and your DVR. When you switch to the Auxiliary device, an on-screen banner briefly displays “Video Source: Auxiliary.” When you press the Video Source key to switch back to the DVR device, the currently tuned channel is displayed.
Note: The on-screen content of the external device cannot be copied to your DVR hard drive.
2
PREPARE THE EXPLORER HD DVR TO WORK WITH YOUR TV
Press the Guide and Info buttons at the same time
The Setup Wizard is a program that helps you set up your DVR to provide the best picture quality that your TV supports. Based on the type of TV you have, the Wizard allows you to select all picture formats supported by your SDTV or HDTV.
Note: If you are connecting an SD DVR to an SDTV, no setup is required. Skip this section and go to “Set Parental Control” on page 7.
IMPORTANT! Any time that you change connections on your DVR, you must run the Setup Wizard again to make sure your TV is receiving its supported picture formats. This rule does not apply if you are using 1394 connectors.
START THE SETUP WIZARD
1.Press  on your remote to place the remote in cable mode.
Note: For more information about preparing the remote to work with your make and model of TV, refer to the user’s guide for your remote model.
2.Make sure that the DVR is powered OFF, but still plugged into an active power outlet, and properly connected to the TV. See “Connect the Explorer DVR to Your TV” on page 1.
3.Turn the TV ON.
4.Configure the TV to display the input where the DVR is connected (see the user’s guide for your TV for more information).
5.With the DVR powered OFF, press Guide and Info on the DVR front panel at the same time. The TV Connection Set-up screen appears (within 20 seconds).
Notes:
•The TV Connection Set-up screen toggles between an HD and SD mode selection screen until you make a selection. If you do not see video within 30 seconds, check your connections and TV settings.
•The DVR front panel displays either HD or SD while the TV Connection Set-up screen toggles between HD and SD mode.
6.Choose one of the following options:
•To choose HD mode, press
•To choose SD mode, press
B
A
on the remote to start the setup. on the remote to start the setup.
HDTV Setup Wizard
You will be asked a short series of questions that will help you set up your HDTV Settop Box
Press  to start
Setup Options
Note: If you are connected to your HDTV using the component ports and you incorrectly select “SD” mode, your video may appear pink in color.
7.Choose one of the following options:
•If you selected SD mode in step 6, a Setup Complete screen appears. You’re ready to begin using your DVR to watch and record programs. You may skip the rest of this section and go to “Set Parental Control” on page 7.
•If you selected HD mode, the HDTV Setup Wizard screen appears.
Press A to continue the setup.
8. Choose one of the following options from the Setup Options screen: |
|
• |
To choose the Easy Setup option, press A ; then, go to the Easy Setup |
|
Instructions on page 4. |
• |
To choose the Advanced Setup option, press B ; then, go to the Advanced |
|
Setup Instructions on page 4. |
Press  for Easy Setup: Used by most TV viewers
Press for Advanced Setup: Used by advanced TV viewers
 Complete setup
3

PREPARE THE EXPLORER HD DVR TO WORK WITH YOUR TV, CONTINUED
Standard or Widescreen
Press  if your TV has a standard screen (4:3)
Press  if your TV has a widescreen (16:9)
Restart setup |
Complete setup |
Standard or Widescreen
Press  if your TV has a standard screen (4:3)
Press  if your TV has a widescreen (16:9)
Restart setup |
Complete setup |
Save Picture Formats
Press  to view shows in the 1080i format
Press  to test the next format
1080i |
720p |
480i Standard |
480p Standard |
480i Widescreen |
480p Widescreen |
 Return to previous format
  Complete setup
EASY SETUP INSTRUCTIONS
1. Press A or B to select the type of TV screen you have. The setup is complete.
2.Press to begin watching TV.
Notes:
• If you pressed A for the standard screen (4:3) TV setting, the TV is set to receive programming in 480i format on non-HD channels and 1080i format on HD channels.
•If you pressed B for the widescreen (16:9) setting, the TV is set to only receive programming in 1080i format (even on non-HD channels).
3.You are ready to begin using your DVR to watch and record programs. Go to “Set Parental Control” on page 7.
Note: If you need to change your HDTV picture display, go to “Adjust Your HDTV Picture” on page 5.
Tip: After you complete the setup, press  to stretch or zoom the picture.
ADVANCED SETUP INSTRUCTIONS
Note: Refer to the user’s guide that came with your TV for information about the display formats your TV supports.
1.Press A or B to select the type of TV screen you have and display an Instructions screen.
2.The Instructions screen tells you that various picture formats will be displayed for your selection.
3.Before you begin selecting picture formats, read the following:
IMPORTANT! If you see a black screen or if the picture quality is not optimal, do not press  . Press B again to view the next screen format.
4.Follow the on-screen instructions to select your picture formats.
5.Press  to toggle between the Save and Remove options, or press B to see how the next format looks on your TV screen.
6.After finding the best picture format, press  . The setup is complete.
7.Press  to begin watching TV.
8.You are ready to begin using your DVR to watch and record programs. Go to “Set Parental Control” on page 7.
Note: If you need to change your HDTV picture display, go to “Adjust Your HDTV Picture” on page 5.
Tip: After you complete the setup, press  to stretch or zoom the picture.
4
ADJUST YOUR HDTV PICTURE
PICTURE FORMATS AND YOUR HDTV DISPLAY
The following table shows the relationship between the picture format method, the signal the DVR receives, and the format of the picture that displays on your TV screen.
If you chose this picture |
And the DVR receives |
The HDTV displays the |
format method: |
this signal: |
picture in this format: |
Fixed |
1080i, 720p, 480i, 480p |
Picture format selected in the |
|
|
Quick Settings menu |
Pass-Through or Auto-DVI |
1080 |
1080i |
|
720p |
720p |
|
480i |
480i |
|
480p |
480p |
Upconvert 1 |
480i/480p |
480p |
|
720p/1080i |
1080i |
|
|
|
Upconvert 2 |
480i/480p |
480p |
|
720p/1080i |
720p |
GENERAL SETTINGS: SET PICTURE FORMAT
Upconvert 1 and Upconvert 2 - When possible, the DVR tries to improve the program display by taking an SD picture and changing it to a simulated HD picture (upconverting).
Fixed - All programming is displayed using the picture format you last selected. This setting remains fixed until you select a new picture format from the Quick Settings menu.
Pass-Through or Auto DVI - The programming format is not manipulated by the DVR. The DVR passes the signal through to the TV. (See the box on the previous page for more information about Pass-Through.)
If your HDTV uses a DVI or HDMI port, Auto DVI/HDMI appears here instead of
Pass-Through.
 WARNING:
Avoid Screen Burn-In! Do not display the same fixed images on your HDTV screen for extended periods of time. Images such as letterbox bars or side bars, bright closed-captioning backgrounds, station logos, or any other stationary images may cause the picture screen in your HDTV to age unevenly; this is known as screen burn-in. Refer to the user’s guide that came with your HDTV for more information.
CHANGE THE DARKNESS OF BARS USED IN PICTURE DISPLAYS
The DVR automatically adds bars to certain types of program formats to reduce the chance for screen burn-in. If you decide to use these settings to watch programs, you can change the darkness of the bars from Light (default setting) to Medium or Dark.
1.Press  twice to access General Settings.
2.Press  or
or  to select the option Set: TV Borders.
3.Press  to display the Borders options (Light, Medium, or Dark).
4.Press  or
or  to select the shade you want to apply to the bars (Light, Medium, or Dark).
5. Press A to accept the setting. The DVR displays the Set: TV Borders option with your selection shown.
6.To exit from this screen and return to live TV, press  .
.
5
ADJUST YOUR HDTV PICTURE, CONTINUED
Note: If you select PassThrough or Auto DVI/HDMI in the General Settings: Set Picture Format, you cannot change the Picture Format in the Quick Settings menu (the Picture Format option will not be shown). You can only stretch and zoom the picture with the # key on the remote or within Quick Settings.
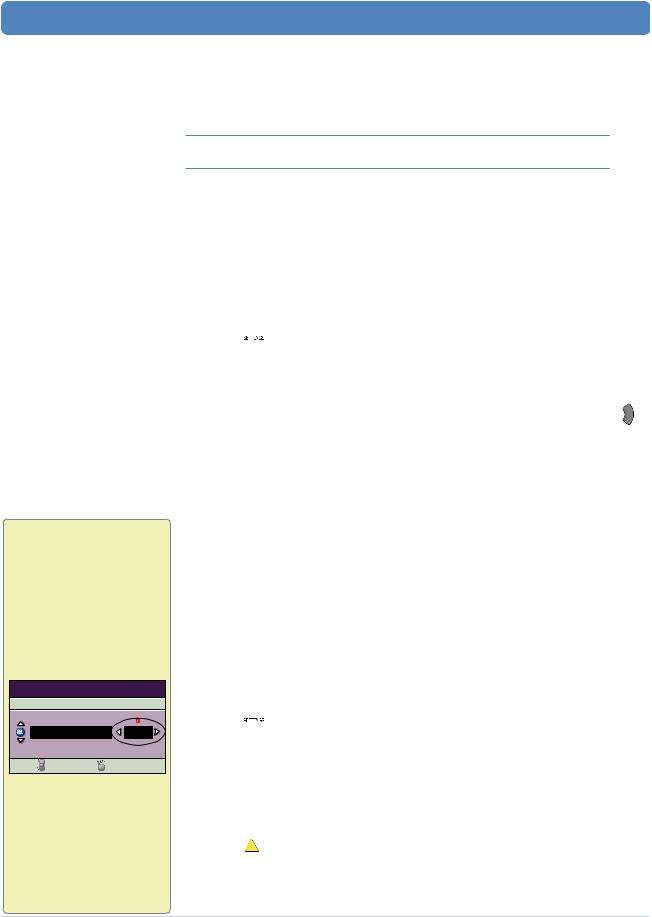
Quick Settings
Highlight an option, then press SELECT.
Turn OFF Parental Control |
|
Picture Format |
720p |
Picture Size |
Normal |
More Settings |
Return to TV |
Pass-Through means that the
DVR does not change the active signal it receives. It is just passing the signal through to the TV. Changing the picture format in General Settings: Set Picture Format to Fixed lets you “fix” or adjust the format in Quick Settings.
After using the Setup Wizard, if you want to change your picture preferences, you can adjust the HDTV picture display using options within the Quick Settings and General Settings menus.
If you do not need to change your picture quality, skip this section and go to “Set Parental Control” on page 7.
Note: The picture format is tied to the content provider’s format and the picture formats supported by your TV.
ADJUST YOUR PICTURE FORMAT USING QUICK SETTINGS
Because the picture quality of a program is affected by many factors, such as how the program was originally recorded and the method used to broadcast the program, you may find that displaying certain programs in a specific picture format provides the picture quality you prefer.
Note: If your HDTV uses a composite, DVI, or HDMI port, it automatically selects the best picture format for the program you are watching. DVI ports, however, can choose only from the picture formats that your HDTV supports.
1.Press  to access Quick Settings.
2.Press  or
or  to select Picture Format.
3.Press  to select the picture format setting.
4.Press  again to display another picture format setting. Each time you press
  , another setting displays.
Note: If you used the Setup Wizard to select picture format settings and your General Setting is not set to Pass-Through, the picture format settings that you selected are available here. For example, if you used the Easy Setup method in the Setup Wizard, only the settings 480i and 1080i are available for you to select.
5.Press  to view the picture with this setting.
6.If necessary, repeat these steps to find a setting that you prefer.
ADJUST YOUR HD PICTURE USING GENERAL SETTINGS
You can adjust how your DVR displays pictures using the Picture Format and TV Borders General Settings menu options.
SET YOUR DEFAULT PICTURE FORMAT
By automating picture adjustments, the DVR uses a method that you choose to automatically select the picture format that provides the best display possible. The methods that you can select from depend partly on the type of video connection your HDTV uses.
1.Press  twice to access General Settings.
2.Press  or
or  to select Set: Picture Format.
3.Press  to select the picture format setting.
4.Press  or
or  to display each option.
Note: See the “General Settings: Set Picture Format” box on the next page for an explanation of each option.
5.Press A to accept the option for the DVR.
Note: The Explorer 8300™ DVR (8300) front panel displays the selected option and scan rate. For example, if you selected Pass-Through, the 8300 front panel displays AUTO.
6.Press  to return to normal viewing.
6
SET PARENTAL CONTROL
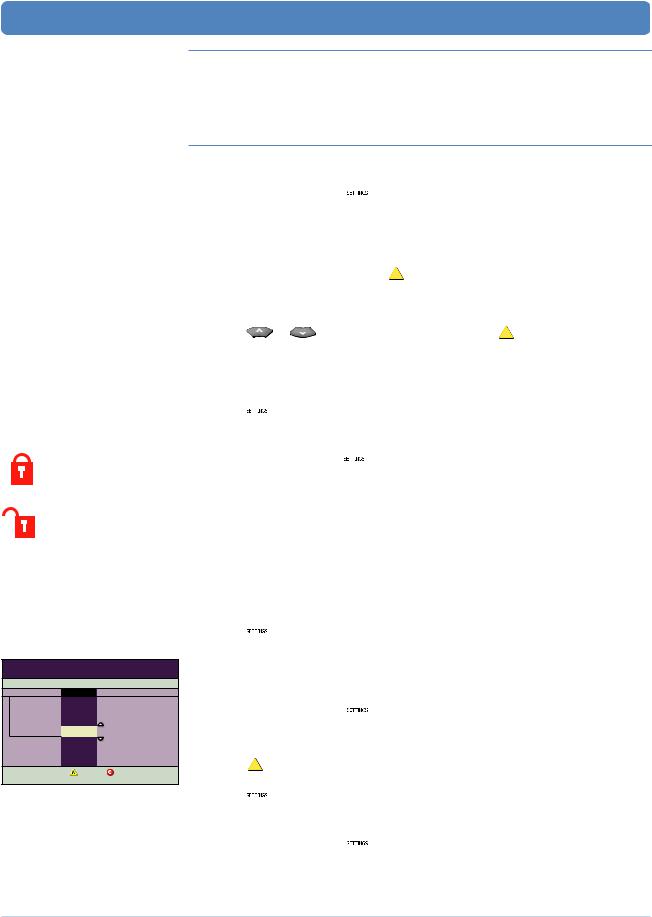
BLOCKING SYMBOLS
Indicates that a recording or program is blocked
Indicates that a recording or program is not blocked
General Settings
Highlight a Preference, press SELECT to change its settings.
PREFERENCE SETTING
|
Hidden |
|
Block: Titles |
Displayed |
|
|
Hidden |
|
|
Accept |
Cancel Changes |
Notes:
•This section covers the basics for setting up parental control and blocking programs. You can also use parental controls to block recordings on your DVR. For more information, see Block Recordings With Parental Control on page 9.
•If you do not want to configure parental control and blocking, skip this section and go to Search for Programs Using the Program Guide on page 10.
CREATING OR CHANGING A PIN
1.Using the remote, press  twice to access General Settings.
2.Press  or
or  to select Block: PIN.
3.What is the current setting for Block: PIN?
•If Enabled and you do not know the PIN, contact your service provider to determine the default PIN, and then go to step 4.
• If Disabled, press  , press A , and then go to step 7.
IMPORTANT! The PIN must be Enabled for the Parental Control feature to work.
4.After receiving the default PIN, press  .
.
5. Press |
or |
to select Change and then press A . |
6.When prompted, enter the 4-digit PIN given to you by your service provider.
7.When prompted, enter a new 4-digit PIN.
8.Enter your new 4-digit PIN again for confirmation.
9.Press  to exit General Settings.
BLOCKING CHANNELS, RATINGS, AND PROGRAM TIMES
1.Using the remote, press  twice to access General Settings.
2.When prompted, enter a PIN and then re-enter it to ensure accuracy.
3.Press  or
or  and select one of the following options:
•Block: Channels—to block all programs on a specific channel
•Block: Rating—to block all programs according to program ratings
•Block: Time New—to block all programs broadcast during a specific time
4.Press  and enter your 4-digit PIN when prompted.
5.Follow the on-screen instructions to block channels, ratings, or time slots. Note: The DVR will record the blocked programs, but the DVR blocks the playback of the recording unless you enter a valid PIN.
6.Press  to exit General Settings.
HIDING OR VIEWING BLOCKED PROGRAM TITLES
You can prevent the DVR from displaying the titles of blocked programs on the program guide and in the DVR Recorded and Scheduled lists.
1.Using the remote, press  twice to access General Settings.
2.Press Move Up  or Move Down
  to select Block: Titles.
3.Press Select  to set the Block: Titles setting to either Hidden or Displayed.
4. Press A to accept your changes.
5.Press  to exit General Settings.
UNBLOCKING THE CURRENT CHANNEL
1.Using the remote, press  to access Quick Settings.
2.Press Move Up  or Move Down
  to select Unblock this Channel.
3.Press Select  to change the Parental Control setting.
4.When prompted, enter your 4-digit PIN.
7

SET PARENTAL CONTROL, CONTINUED
TURNING ON AND OFF PARENTAL CONTROL
1.Using the remote, press  to access Quick Settings.
2.Press  or
or  to select Turn ON Parental Control or Turn OFF Parental Control, respectively.
3.Press  to change the Parental Control setting.
4.When prompted, enter your 4-digit PIN.
Tip: Turning off the DVR and turning it back on by pressing the Power button
on the DVR (or by pressing  on the remote) is an easy way to turn on Parental Control for all the programming you have chosen to block.
PROGRAM RATING CATEGORIES
The following list describes the rating categories and codes associated with movies and television programs in the United States.
TVY The program is appropriate for children of all ages, and specifically designed for children ages 2 through 6 years.
TVY7 The program is appropriate for children age 7 years or older. This rating can include the code FV, indicating mild fantasy or comedy violence.
G, TVG The program is appropriate for viewers of all ages.
PG, TVPG Parental guidance is suggested. The program contains material that parents can find unsuitable for young children. This rating can also include the following codes:
•V - Some violence
•S - Some sexual situations
PG-13 Parental guidance is suggested. Parents can find some program material unsuitable for children under 13 years. Additional codes may be included with the rating.
TV14 Parents are strongly cautioned as some program material may be unsuitable for children under 14 years. This rating can also include the following codes:
•V - Intense violence
•S - Intense sexual situations
•L - Strong indecent language
•D - Suggestive dialog
TVMA Mature audience. The program is designed for an adult audience. Parents can find the program material unsuitable for children under 17 years. This rating can also include the following codes:
•V - Graphic violence
•S - Explicit sexual situations
•L - Crude or indecent language
RRestricted to adult audiences only. The program contains material unsuitable for children.
NC17 Under 18 never admitted. The program or movie is considered too adult (containing violence, sex, or drug use) for viewers under 17.
NR This program or movie is not rated.
NR-Adult No one under age 17 permitted. This program or movie is not rated (NR) but is considered too adult (containing violence, sex, or drug use) for viewers under 17.
8

BLOCK RECORDINGS WITH PARENTAL CONTROL
Recorded Program Options
"Soul Food"
Recorded: Fri 6/13 7:00pm 1hr 0min Save: Until I erase
Options
|
Copy to VCR |
|
|
|
Press |
to record this program |
|
|
Play "Soul Food" |
|
|
|
Unblock "SorulpressFood" |
for more recording options. |
|
|
Erase |
|
Preferences |
|
Change Save Time |
|
|
|
Choose Highlighted Item Options |
Recorded List |
|
You can keep others from watching a recording by using the Block feature. This feature is useful if children also use the DVR and you do not want them to watch certain recordings.
Note: To block a program that is scheduled to be recorded, block the program rating from the General Settings menu. (For details, see “Blocking Channels, Ratings, and Program Times” on page 7.) The DVR records the program, but the recording can be watched only after entering your 4-digit Parental Blocking PIN.
1.Press  to access the Recorded List.
2.Press  or
or  to select the recording you want to block.
3.Press  to access the Recorded Program Options screen.
4.Press  to select the “Block [title of program]” option.
5.Press  . The PIN Entry screen appears.
6.Enter your 4-digit PIN. The PIN Entry screen disappears, and  appears next to the Info icon in the Information area of the Recorded List screen. The lock icon indicates that the program is blocked.
WATCH BLOCKED RECORDINGS
PIN Entry
Enter your PIN to turn OFF Parental Control and ALLOW viewing of All programs.
Clear PIN Entry |
Cancel |
PIN Entry
This program is blocked.
Enter your PIN to unblock.
Clear PIN Entry |
Cancel |
Use either of the two methods described here to watch a blocked program.
Note: If the titles of blocked programs are blocked, see “Hiding or Viewing Blocked Titles” on page 7.
1.Press  to access the Recorded List.
2.Choose one of the following options:
•Press  or
or  to select the “Play [title of program]” option, and then press
 . Enter your 4-digit PIN.
Note: Entering your PIN in this screen allows viewing of all programs and recordings.
•Press  or
or  to select the “Unblock [title of program]” option, and then
press  . Enter your 4-digit PIN.
Note: Entering your PIN in this screen turns off blocking only for this recording.
SET FAVORITE CHANNELS
1.Using the remote, press  twice to access General Settings.
2.Press  or
or  to scroll to Viewer: Favorites.
3.Press  .
.
4.Press  or
or  to scroll to the channel you want to mark as a favorite, and then press
  .
.
5.Repeat step 4 to mark other desired channels as favorites.
6. Press A to save your favorite list.
7.Press  to exit General Settings.
ACCESSING YOUR FAVORITE CHANNELS
1.Press  on the remote to access a channel you have set up as a favorite.
2.Continue pressing  until the channel you want to watch appears.
9
 Loading...