

Page 1
Instructions for
installation and use
F
Français, 1 English, 9 Deutsch, 17
NL
Nederlands, 25IItaliano, 33
GFI 681
GB D
E
Español, 41
COOKER HOOD
Table of contents
Technical characteristics, 10
Electrical connection, 11
Safety measures, 12
Installation, 13
Operation, 14
External exhausting version
Operation with recirculated air
Use of the hood, 15
Lighting, 15
Cleaning, 16
GB
9
Page 2
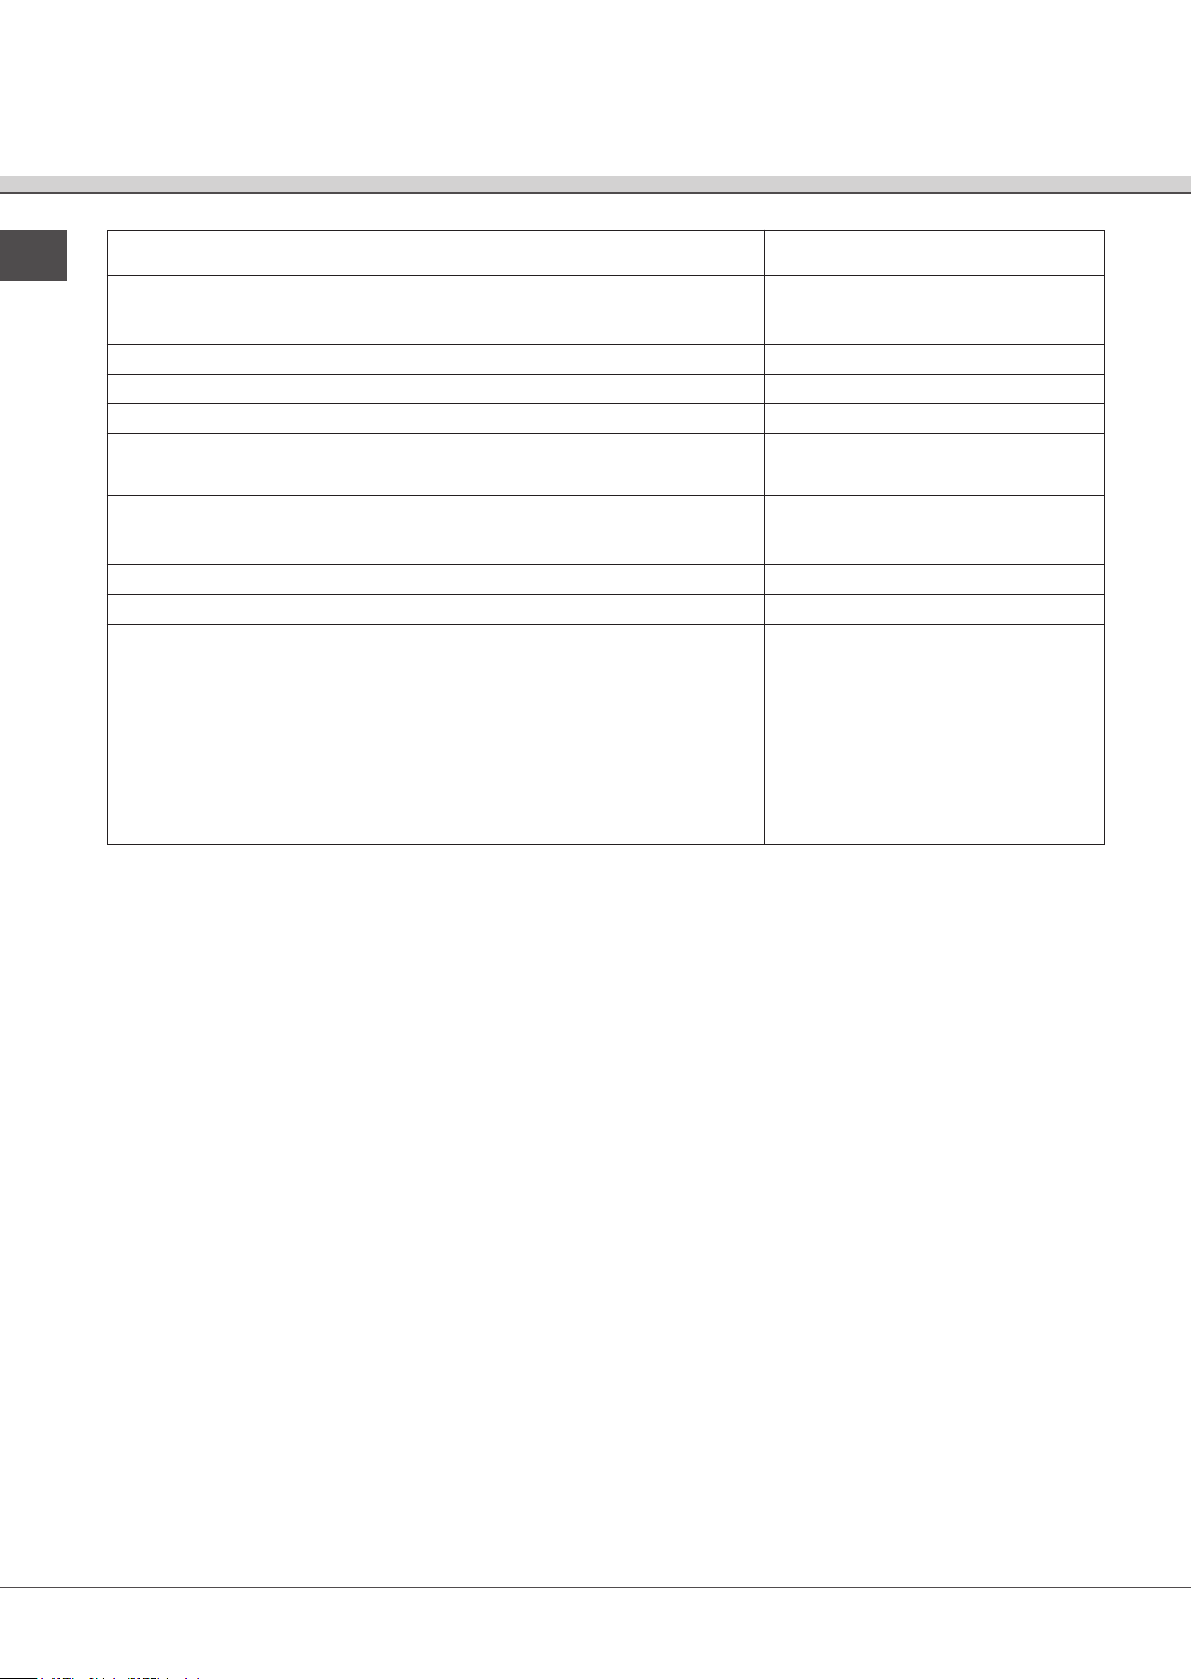
Technical characteristics
Metal grease filter
Aspiration area (cm
2
) 1168
GB
Models GFI 681
Dimensions (in mm)
Width (hole on the bottom side of the cabinet) 750 (696)
depth (hole on the bottom side of the cabinet) 490
height (min./max.) 147
Ø of exhausting connection 120
Weight (in kg) 6,3
Absorption (in watts - 220-240 V ~)
Rated absorption 280
Motor absorption 2 x 120
Lighting absorption (Halogen lamp) 2 x 20
10
Page 3
Electrical connection
! Warning: This appliance must be earthed.
Before installing the hood, it is vital to ensure that the
mains voltage corresponds to the voltage indicated on
the unit’s data plate.
! Only an authorised electrician should connect the
unit to the mains power supply.
! The unit is fitted with an electrical supply chord in
compliance with European standards.
! Attention: if the appliance is permanently connected
to the mains, the plug supplied must be removed and
safely disposed of. The appliance must then be fitted
with a bipolar switch in compliance with current
regulations and have a minimum contact break of
.
3 mm
! The manufacturer will not be held liable for any
problems caused by the user’s failure to observe the
above instructions.
GB
11
Page 4

Safety measures
GB
The cooker hood is designed to operate for extraction
to the outside. It is important therefore to ensure that
sufficient air enters the kitchen for correct operation.
The hood cannot be connected to flues of other
appliances that run on energy sources other than
electricity.
Should the cooker hood be installed in a kitchen with
an instant water-heater or a gas-heating system, it is
strongly recommended for safety reasons not to use
external extraction. In this circumstance a unit with an
active charcoal filter must be used. This can be
obtained from your retailer and it uses recirculated air.
The cooker hood should be placed at least 60 cm
above the hob (glass-ceramic or traditional electric
hobs) or 65 cm where gas is used.
If the instructions for installation for the gas hob
specify a greater distance, this must be adhered to.
If the hood is run at the same time as a burner or
fireplace that depend on ambient air (for example gas,
Diesel, coal or wood heaters, water heaters, etc.) be
careful, because the hood, when it exhausts the air,
removes the ambient air required by the burner or
fireplace for combustion.
For secure operation and to prevent discharged gas
from coming back in, the vacuum must not exceed
0,04 mbr.
This may be done by making sure the air inlet into the
room passes through non-closing openings such as
air recycling wall boxes, doors, windows or with other
technical measures.
The use of an unprotected flame is dangerous for the
filters and could cause fires.
Therefore, never use an open flame under the hood.
The hood must not be connected to fuel exhaust flues
(boilers, heating systems, water heaters, and so on).
Please, keep to the provisions of official directives
regarding the question of fume discharge.
The manufacturers refuse to accept any responsibility
for damage to the hood or its catching on fire because
of failure to observe the above instructions.
12
Page 5

Installation
This appliance is designed to be installed in a cabinet
or other supporting structure.
Make a hole in the bottom of the wall-hung cabinet,
using the dimensions shown in diagram 1.
To fix the hood, proceed as follows:
a) Remove the filter or grease filters and the frame B
(Diagram 1).
b) Fit the hood into the opening.
c) Insert the screws supplied into the”F” holes and
tighten them to fasten
the hood to the cabinet (Diagram 1).
d) Remount the frame.
e) Reinstall the filter or grease filters.
The horizontal sections of the pipe must be slanted
slightly upwards (about 10%) to ensure an easy flow of
the air outwards.
For better efficiency, it is advisable to install the hood
slightly inwards from the cupboard edge so as to
create a recess.
The hood performs best when short pipes (max. 4 m)
with few elbows are used. Caution: do not tighten the
clamp too far, as this may prevent the check valve (V)
from operating properly.
GB
Diagram 1
13
Page 6

Operation
GB
• It is strongly recommended always to be in
attendance when frying under the hood.
• Food must not be flambeed under the hood
because of fire risk.
• For optimal evacuation of cooking smells, it is
recommended that the hood be turned on before
cooking begins. Similarly it is recommended that it
should not be turned off until 10 to 15 minutes after
cooking has finished.
The best performance of the unit is obtained in the
external exhausting version, therefore it is advised,
where possible to use the external exhausting version.
External exhausting version
In this case the fumes are conveyed outside by means
of a special pipe connected with the connection ring
located on top of the hood (Diagram 2).
Diameter of the exhausting pipe must be equal to that
of the connection ring = 120mm.
In the horizontal runs the exhausting pipe must be
slightly slanted (about 10°) and directed upwards to
vent the air easily from the room to the outside.
Attention!
If the hood is supplied with active charcoal filter,
then it must be removed.
Operation with recirculated air
Two charcoal filters, available from your local retailer,
should be used. The filters trap the grease and odours
in the air before recirculating it into the room.
These filters normally last about six months. However,
they cannot be cleaned or recycled. Therefore, they
must be replaced when no longer useable.
If the hood is operated in recirculation mode, proceed
as follows:
Mounting and replacing the active charcoal filter:
• Disconnect the hood from the electricity.
• Remove the grease filter(s) (Diagram 1).
• Remove the frame using the “B” buttons (Diagram 1).
• Insert the charcoal filters, turning the knob in the
clockwise direction until it stops (Diagram 3, E).
• Remount the frame, as well as the grease filter(s),
following the same steps as before but in the reverse
order.
• To remove the charcoal filter, simply turn the centre
knob on the filter in the anticlockwise direction, and it
will slide out of its seat (Diagram 3, G).
Diagram 3
Diagram 2
14
Page 7

Use of
the hood
• The control panel (Diagram 4) is situated next to the
lamp covers and has two control switches: one for
controlling the fan power and an ON-OFF switch for
illuminating the cooking area.
Moving the fan switch to the right increases the fan
power.
For the best performance, we recommend using the
low speeds in normal conditions and the high speeds
in particular cases of strong odour and vapour
concentration.
Diagram 4
Lighting
Disconnect the hood from the electricity.
• Remove the grease filter(s) and the frame.
• Replace the faulty lamp with a new one of the
same kind and technical characteristics.
• Refit the frame and the grease filter(s).
• Before calling for technical assistance because
the hood fails to light up, make sure the lamps are well
mounted.
GB
• It is advisable to switch on the extractor hood a few
minutes before starting cooking and then to leave it
running for some minutes afterwards to ensure that all
odours are extracted.
15
Page 8

Cleaning
GB
Before performing any maintenance operation
disconnect the hood from the mains.
To ensure that your hood works efficiently and
constantly it is recommended that it should be
regularly cleaned (every ten days on average).
Cleaning of the unit’s exterior
Wipe down regularly especially when cooking with
salted water (vegetables, shellfish, etc.)
To clean the outside of the hood, use cloth dampened
either with denaturated alcohol or an adequate
product found on the market.
Never use products containing abrasives.
Cleaning the grease filters
The grease filter captures the greases from the
cooking fumes.
The filter is in layers of stretched aluminium Its life is
nearly unlimited.
At more or less frequent intervals, according to the use
of the hood, in any case at last once every 30 days of
normal use, wash the filter in a dishwasher or in a
soapy water.
When washed in a dish washer, the grease filter may
discolour slightly, but this does not affect its filtering
capacity.
Remove the metal grease filters using the handles
designed for this purpose by pulling the filter
downwards. Diagram 1.
Let the metal grease filters dry without damaging it
before putting it back into place.
Replacing the carbon filter:
These filters normally last about six months. However,
they cannot be cleaned or recycled. Therefore, they
must be replaced when no longer useable.
To fit or replace see page 15.
Important
The manufacturers do not accept responsibility for any
damage to the motor or for fires because of failure to
perform maintenance operations as prescribed in
these instructions.
16
 Loading...