

Page 1
Page 2

M.Schaerer Ltd. Phone: +41 31 858 51 11 User manual
Gewerbestrasse 15 Fax: +41 31 858 51 40 BASE 2 - 02
3302 Moosseedorf E-Mail: info@schaerer.com
Switzerland Internet: www.schaerer.com Order number: 020'221
Page 3
Header
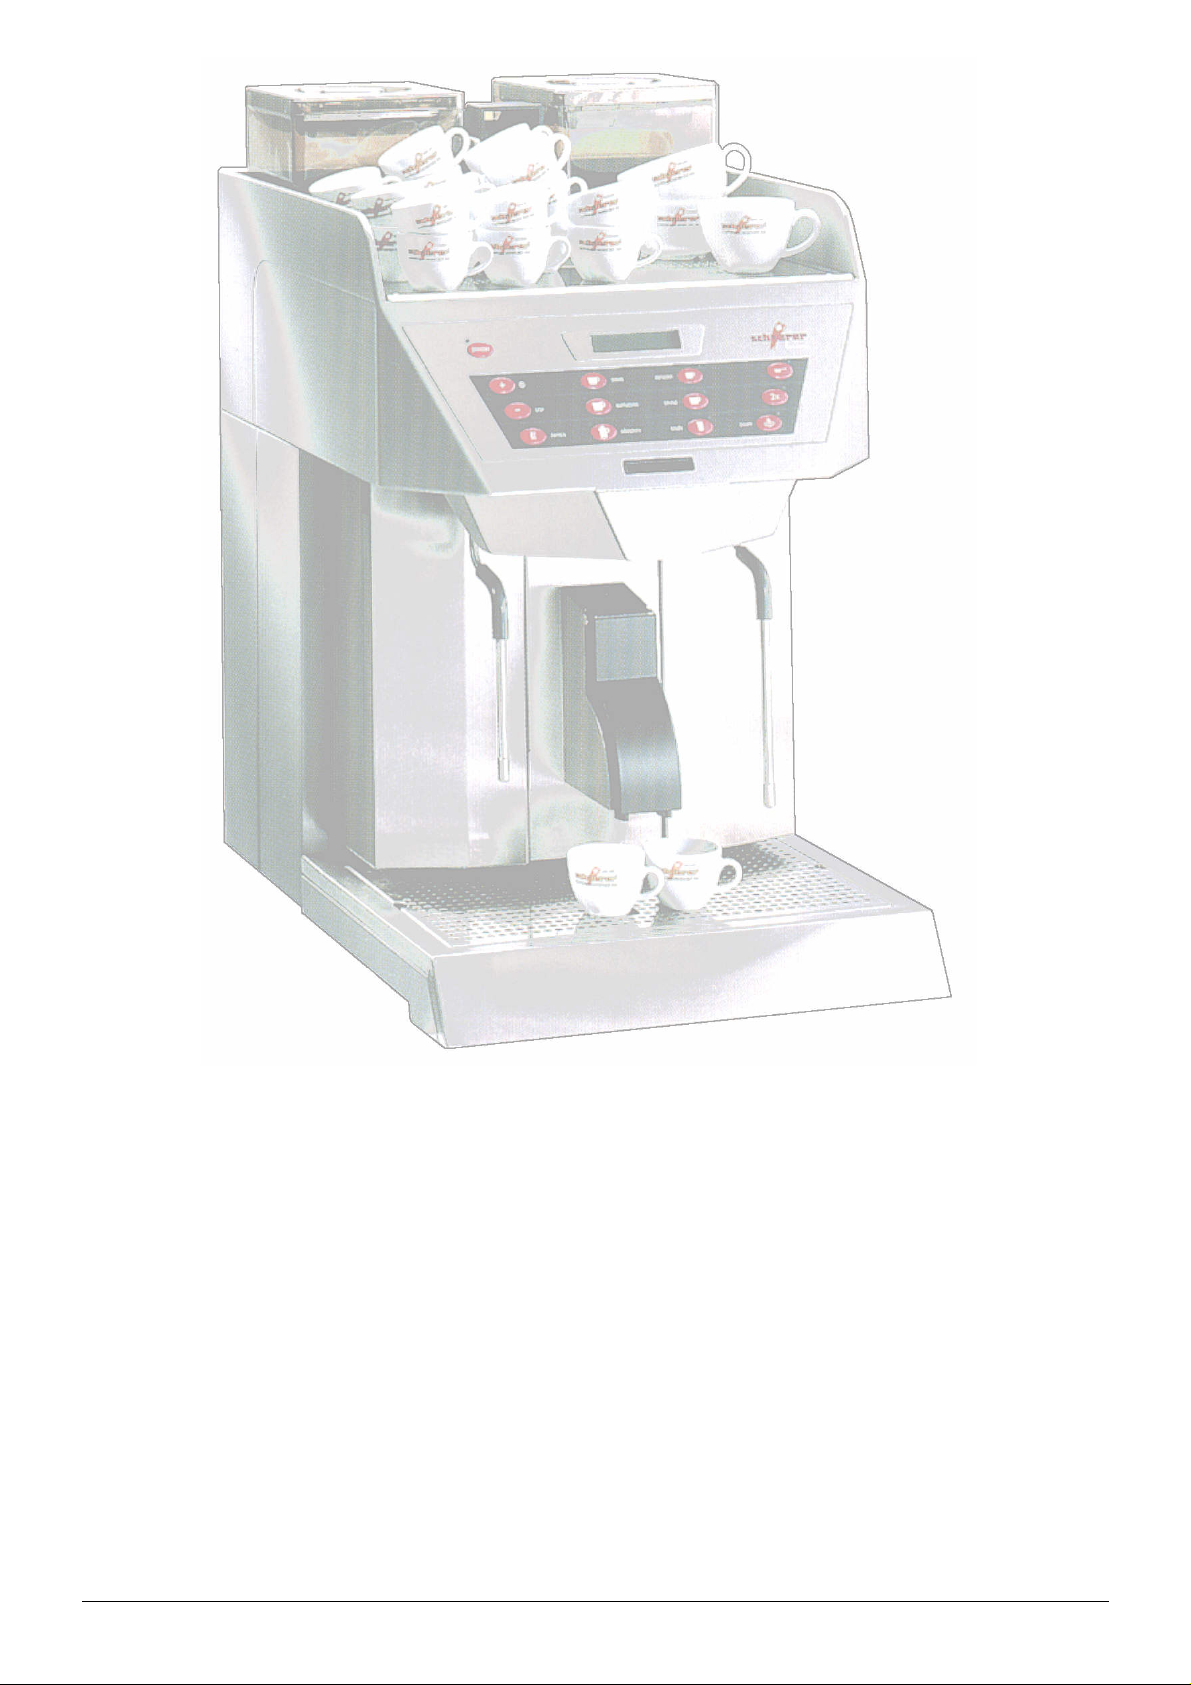
User manual for the
coffee machine
Euroca-2
Published by : M. SCHAERER AG
CH-3302 Moosseedorf
Edition : 2. Edition / March 1998
Replaces : 1. Edition / June 1998
Software : NT 2000 V 1.00
Designed and edited by: M. SCHAERER AG, CH-3302 Moosseedorf
© Copyright by M. SCHAERER AG, CH-3302 Moosseedorf
All rights reserved, including translations into foreign languages. It is prohibited to copy,
reproduce, distribute or communicate by electronic means all or any parts of this
document in any form without the express permission of the publisher.
All information, technical data and illustrations contained in this guide reflect the latest
factual position at the time of going to print. M. SCHAERER AG reserves the right to
introduce modifications at any time without specific notification.
BASE-2-02.00 Page 0-1
Page 4

Header
Page 0-2 BASE-2-02.00
Page 5
Header
Safety Instructions & Warnings!
Before using the machine for the first time,
please read the information in the Operating
Instructions very carefully. They contain
important directions concerning safety, and
the use and maintenance of the machine.
Before using the machine for the first time,
please read the information in the Operating
Instructions very carefully. They contain
important directions concerning safety, and
the use and maintenance of the machine.
Proper Use
The coffee machine is only intended for commercial
use. It is strictly forbidden to make technical
alterations to it or use the machine improperly on
account of the risk that may ensue!
The manufacturer is not liable for any damages that
may be caused by improper use or incorrect operation of the machine.
Use of the Operating Instructions
These Operating Instructions cannot cover every
imaginable use. If you would like additional
information or if you have problems that are not
covered in these Operating Instructions, or not
covered in sufficient detail, please contact an
authorised specialist.
Please keep the Operating Instructions carefully and
pass them on to any subsequent operator.
BASE-2-02.00 Page 0-3
Page 6
Header
Safety Instructions & Warnings!
Unauthorised Operators
Persons unfamiliar with the Operating Instructions, children or those
under the influence of alcohol, drugs or medicines may not operate
the coffee machine or only do so under supervision. Dangerous parts
of self-service coffee machines, such as steam and hot water outlet
points must be clearly marked for customers to see.
Electricity supply
Never touch live parts! They can give an electric shock, which can
lead to serious injury or even death. The coffee machine must only
be connected to alternating current. The voltage must correspond to
that shown on the machine nameplate. It is strictly forbidden to force
objects into the machine or to opening the housing!
Mains cable
Never use the machine with a damaged mains cable. Have faulty
cables and plugs replaced immediately by authorised specialists. Do
not pull or clip the mains cable around corners or sharp edges. Do
not place the mains cable on hot objects or allow it to hang down
over them; protect it from oil. Never lift or pull the machine by the
cable. Never pull the plug by the mains cable or pull it out of the
socket with wet hands. Do not allow the mains cable to hang down
from a table or shelf. Only use an extension cable if you have
confirmed that it is in perfect condition. The extension cable must
have a minimum cross-section of 1.5 mm2 and be fitted with a 5-pole
plug. Get a specialist to install or check the fitting.
Voltage
Make sure that the voltage in your premises at the socket being used
is the same as the voltage on the nameplate of the coffee machine.
The socket must have a 16A fuse at least.
Page 0-4 BASE-2-02.00
Page 7
Header
Safety Instructions & Warnings!
Location
Install the coffee machine in a secure place, so that no one can
knock the machine over or hurt themselves against it. Make sure that
there is no possibility of children playing with the machine. Hot water
or steam could escape: Danger of burns! Do not use the coffee
machine out of doors. Do not place the machine on a hot surface or
in the vicinity of an oven.
The machine may not be used in a large-scale kitchen without the
specific written approval of an M. Schaerer AG authorised Customer
Service Agent.
7 Temperature
The ambient temperature must not fall below 10 °C or exceed 40 °C.
, Protection for your hands
Never reach into the bean container(s) with the machine switched on.
Never put your fingers into the central unit, while coffee is being
prepared:Æ Danger of injury! The central unit moves while coffee is
being prepared, so your fingers could get caught.
Risk of burns
Never tamper with the coffee, hot water or steam outlet points, while
any product is being dispensed:Æ Risk of burns.
Sound emissions
The level of sound emissions can reach 70db(A), particularly when
drinks are being heated.
Coffee bean container
Never put anything other than coffee beans in the coffee bean
container:Æ Danger of damage to the machine.
BASE-2-02.00 Page 0-5
Page 8
Header
Safety Instructions & Warnings!
, Cleaning
Never spray the machine with a hose or high-pressure cleaner when
cleaning it. The use of steam cleaning machines must also be
avoided.
6 Cup rack
No liquids should be emptied out on to the cup rack. Never immerse
the machine in water.
Repairs
If there is a malfunction or fault in the machine, or suspected defect
if the machine has been dropped, pull out the plug immediately.
Never operate a faulty machine. Æ
Repairs must only be carried out by authorised specialists. If
inexpert repairs are carried out, no liability will be accepted for any
damages.
Servicing
The machine must be serviced by an M. Schaerer AG authorised
Customer Service Agent every 12 to 15 months.
Storage
If the machine is to be out of service for a lengthy period, clean and
empty it, switch it off and remove plug from socket. Store the coffee
machine in a dry place, which is not accessible to children.
In order to empty the coffee machine, get advice and assistance from
an M. Schaerer AG authorised Customer Service Agent.
Disposal
If the machine is unusable, it must be disposed of correctly, in
accordance with local and statutory regulations.
Page 0-6 BASE-2-02.00
Page 9

Header
CONTENTS
KAP. TEXT
1 INTRODUCTION.............................................................................................................................................. 1-1
1.1 Welcome to the SCHAERER-Euroca-2 ................................................................................................... 1-1
1.2 Purpose .................................................................................................................................................... 1-1
1.3 How this manual is organised .................................................................................................................. 1-1
2 PRODUCT DESCRIPTION .............................................................................................................................. 2-1
2.1 Introduction of Euroca-2........................................................................................................................... 2-2
2.2 Product data of Euroca-2.......................................................................................................................... 2-5
2.3 How is the machine equipped of Euroca-2 .............................................................................................. 2-6
3 INDICATION- AND OPERATING ELEMENTS ............................................................................................... 3-1
3.1 Indicating- and operating elements of Euroca-2 ...................................................................................... 3-2
3.2 Chip card functions...................................................................................................................................3-3
3.3 Error and display messages..................................................................................................................... 3-5
3.4 Messages when the machine is operating............................................................................................... 3-9
3.5 Operating modes...................................................................................................................................... 3-9
4 INSTALLATION AND OPERATION OF THE MACHINE................................................................................ 4-1
4.1 First installation an operation ................................................................................................................... 4-1
4.2 Installation (basic conditions)................................................................................................................... 4-1
5 OPERATION .................................................................................................................................................... 5-1
5.1 Introduction of Euroca-2........................................................................................................................... 5-3
5.2 Daily use...................................................................................................................................................5-3
5.3 Daily cleaning......................................................................................................................................... 5-10
5.4 Shutdown / switch off the machine......................................................................................................... 5-19
5.5 Guidance on operating specially adapted machines.............................................................................. 5-19
5.6 Programming of the machine ................................................................................................................. 5-20
5.7 Programming with options-chip cards.......................................................................................
6 ACCOUNTING SYSTEMS............................................................................................................................... 6-1
6.1 The MASTER card ................................................................................................................................... 6-2
6.2 MONEY chip card system ........................................................................................................................ 6-3
6.3 Programm chip card................................................................................................................................. 6-9
6.4 Token tester............................................................................................................................................ 6-14
6.5 Coin tester.............................................................................................................................................. 6-15
6.6 Via bar tills.............................................................................................................................................. 6-15
7 FRIGO............................................................................................................................................................... 7-1
7.1 Product description Frigo.......................................................................................................................... 7-2
7.2 Product data of the Frigo.......................................................................................................................... 7-4
7.3 Malfunctions and remedies ...................................................................................................................... 7-5
7.4 Operating elements of the Frigo............................................................................................................... 7-6
7.5 Setting up the Frigo.................................................................................................................................. 7-7
7.6 Cleaning of the Frigo................................................................................................................................ 7-8
8 STANDARD-PROGRAMMING........................................................................................................................ 8-1
9 LIST OF INDEX................................................................................................................................................ 9-1
A APPENDIX.......................................................................................................................................................A-1
A.1 Declaration of conformity.........................................................................................................................A-1
A.2 Performance of container elements.........................................................................................................A-2
A.3 Environmental information on the Euroca................................................................................................A-3
SEITE
............. 5-27
BASE-2-02.00 Page 0-7
Page 10

Header
Page 0-8 BASE-2-02.00
Page 11
1 INTRODUCTION
1.1 Welcome to the SCHAERER-Euroca-2
Congratulations on your purchase of the Schaerer coffee machine
"Euroca-2 "!
The "Euroca-2 " - with its ergonomic design - provides you with a spacious
working area. The modern design and the individual choice of colours make
it possible to adapt the machine to the local circumstances. The machine
combines highest quality and revolutionary technique and has a unique
operating comfort.
1.2 Purpose
These operating instructions will help you to get acquainted with the
fantastic features of the Schaerer office coffee machine Euroca-2 very soon.
Information regarding the correct maintenance, operating features and
technical data can be found therein.
It is imperative that you follow these instructions if you expect the machine to
work properly. Please read them carefully and keep them close to the
machine so that they can be used if the occasion should arise
(programming, cleaning, malfunction...).
1.3 How this manual is organised
Working cycle
Options That pictogram means that it is the question of a model version or an option.
Note This pictogram means "information". The corresponding text will give a
Italic characters When you see that pictogram, please pay special attention to that
Please turn
overPage following page.
This symbol can be seen at the bottom right corner of a page.
Display-Message
) That pictogram means "working cycles to be executed by the enduser".
Your machine may not be equipped with those accessories.
better understanding and is meant as a completion to the functionning
courses.
information.
ª Please turn over the page, you will find further text on this matter on the
Introduction
Every display text changing, by using the push button, will be shown with the
Select product
12:00 22.01.1999
Chip cards The card name (for example PROGRAM, SAVE DATA, etc.) is indicated
The chip card has to be introduced into the machine the proper way (see
BASE-2-02.01 Page 1-1
display message.
with Capital letters. A picture of the chip card can always be found on the left
side of the corresponding information.
arrow)
Page 12

Introduction.
Page 1-2 BASE-2-02.01
Page 13

Product description
2. PRODUCT DESCRIPTION OF EUROCA-2
Sect. TEXT.............................................................................................................................Page
2.1. Introducing the Euroca-2 ..............................................................................................2-2
2.1.1 Overall instructions .......................................................................................................... 2-2
2.1.2. Installation plan................................................................................................................ 2-3
2.1.3. Purpose of use.................................................................................................................2-4
2.1.4 Safety precautions...........................................................................................................2-4
2.1.5. Labelling of the Euroca-2.................................................................................................2-5
2.2 Product data of the Euroca-2........................................................................................2-5
2.2.1. Performance features of the Euroca-2............................................................................. 2-5
2.2.2. Dimensions of the Euroca-2 ............................................................................................ 2-5
2.2.3. Energy supply .................................................................................................................. 2-5
2.2.4. Water connection / discharge.......................................................................................... 2-6
2.3. Equipment.......................................................................................................................2-6
2.3.1. Design variants................................................................................................................2-6
2.3.2. Normal accessories of the Euroca-2 are included in the specification............................2-6
2.3.3. Special accessories of the Euroca-2 are not included in the specification...................... 2-7
BASE-2-02.02 Page 2-1
Page 14
Product description
2.1 Introduction
2.1.1 Introduction
3
6
17
16
12
7
8
1
4
2
5
14
13
15
11
10
9
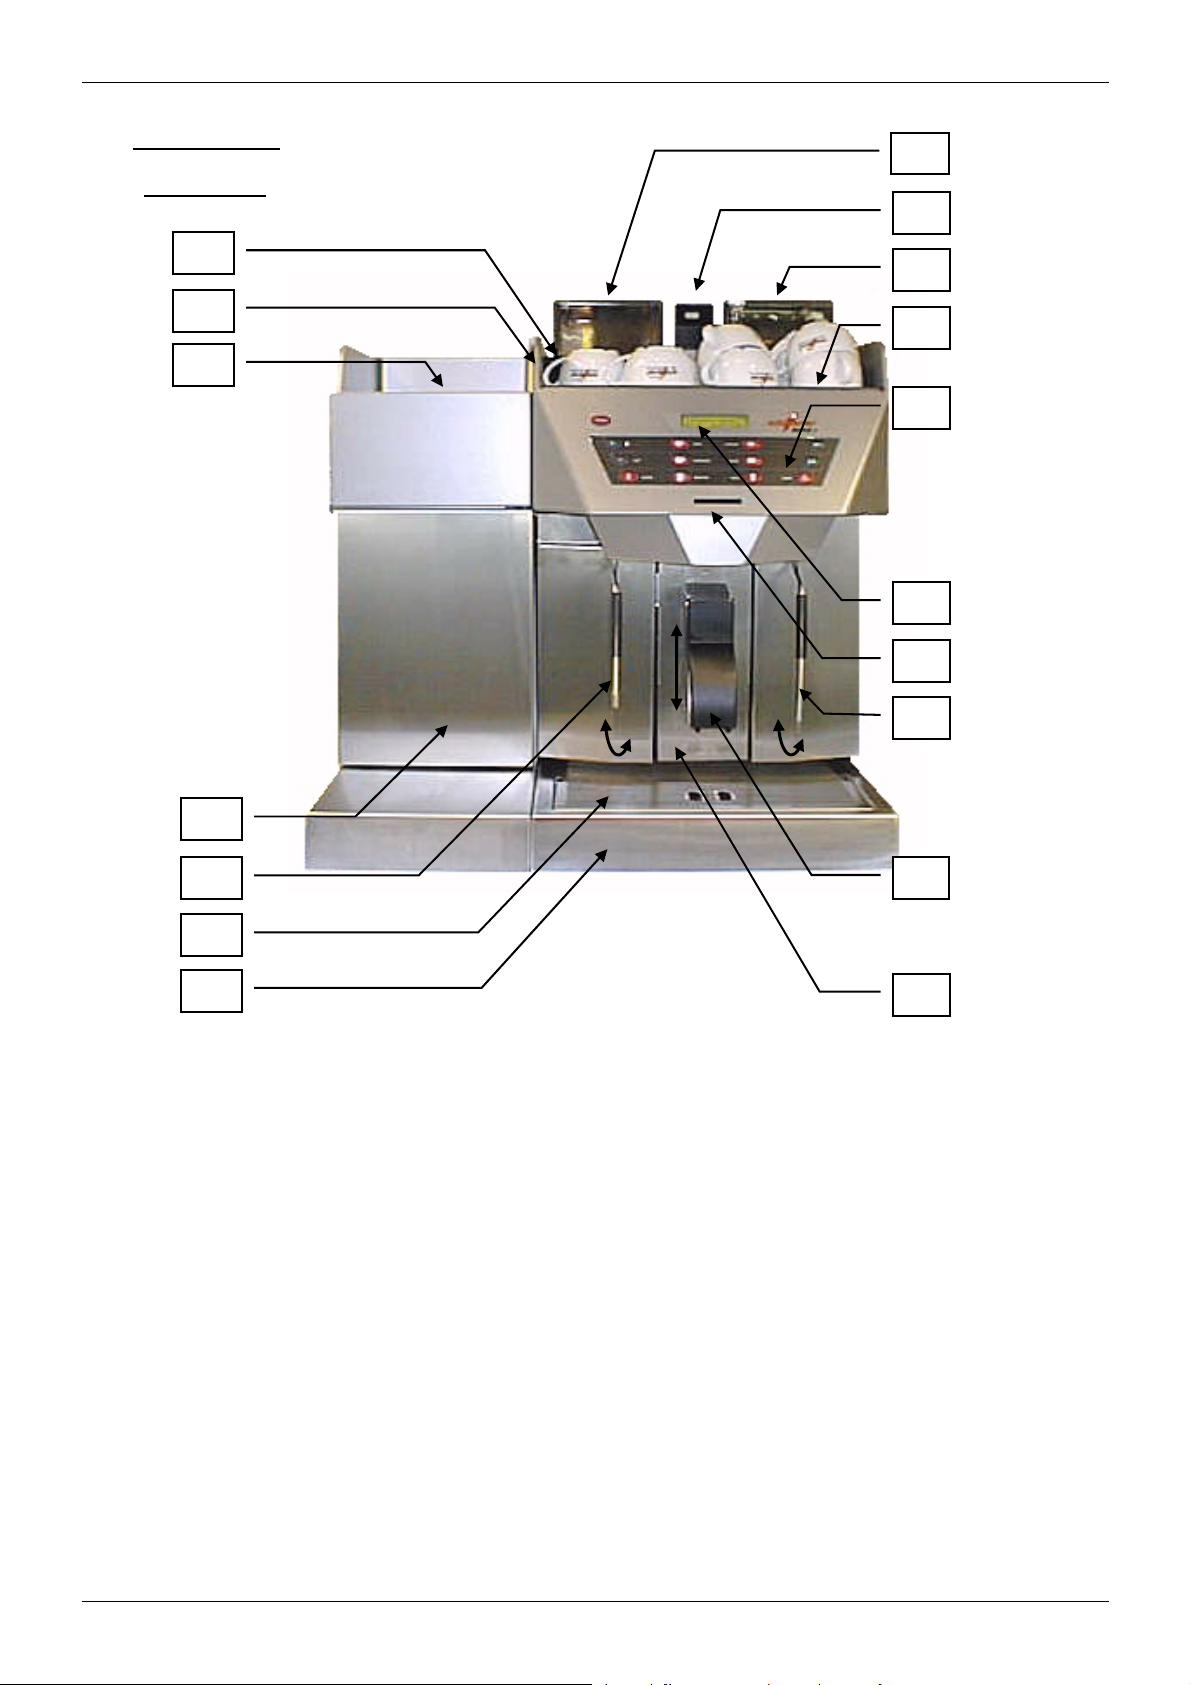
1. Bean container grinder 1 (standard grinder)
2. Bean container grinder 2 (option)
3. Slide for closing the beans container
4. Inlet opening for additional coffee powder and cleaning tabs
5. Cup platform ( heated )
6. Cup frame
7. Drip grille
8. Drip grille basin with/without outlet
9. Grounds drawer ( push outflow completely up )
10. Coffee delivery spout adjustable for height min. Ø 80 mm, max. × 180 mm (deliver carriage)
11. Steam outlet
12. Hot water outlet
13. Illuminated display with 2 lines
14. Operator panel
15. Chip cards slide-in unit
16. Refrigerator for milk ( option )
17. Bean container grinder right (option)
Page 2-2 BASE-2-02.02
Page 15
Product description
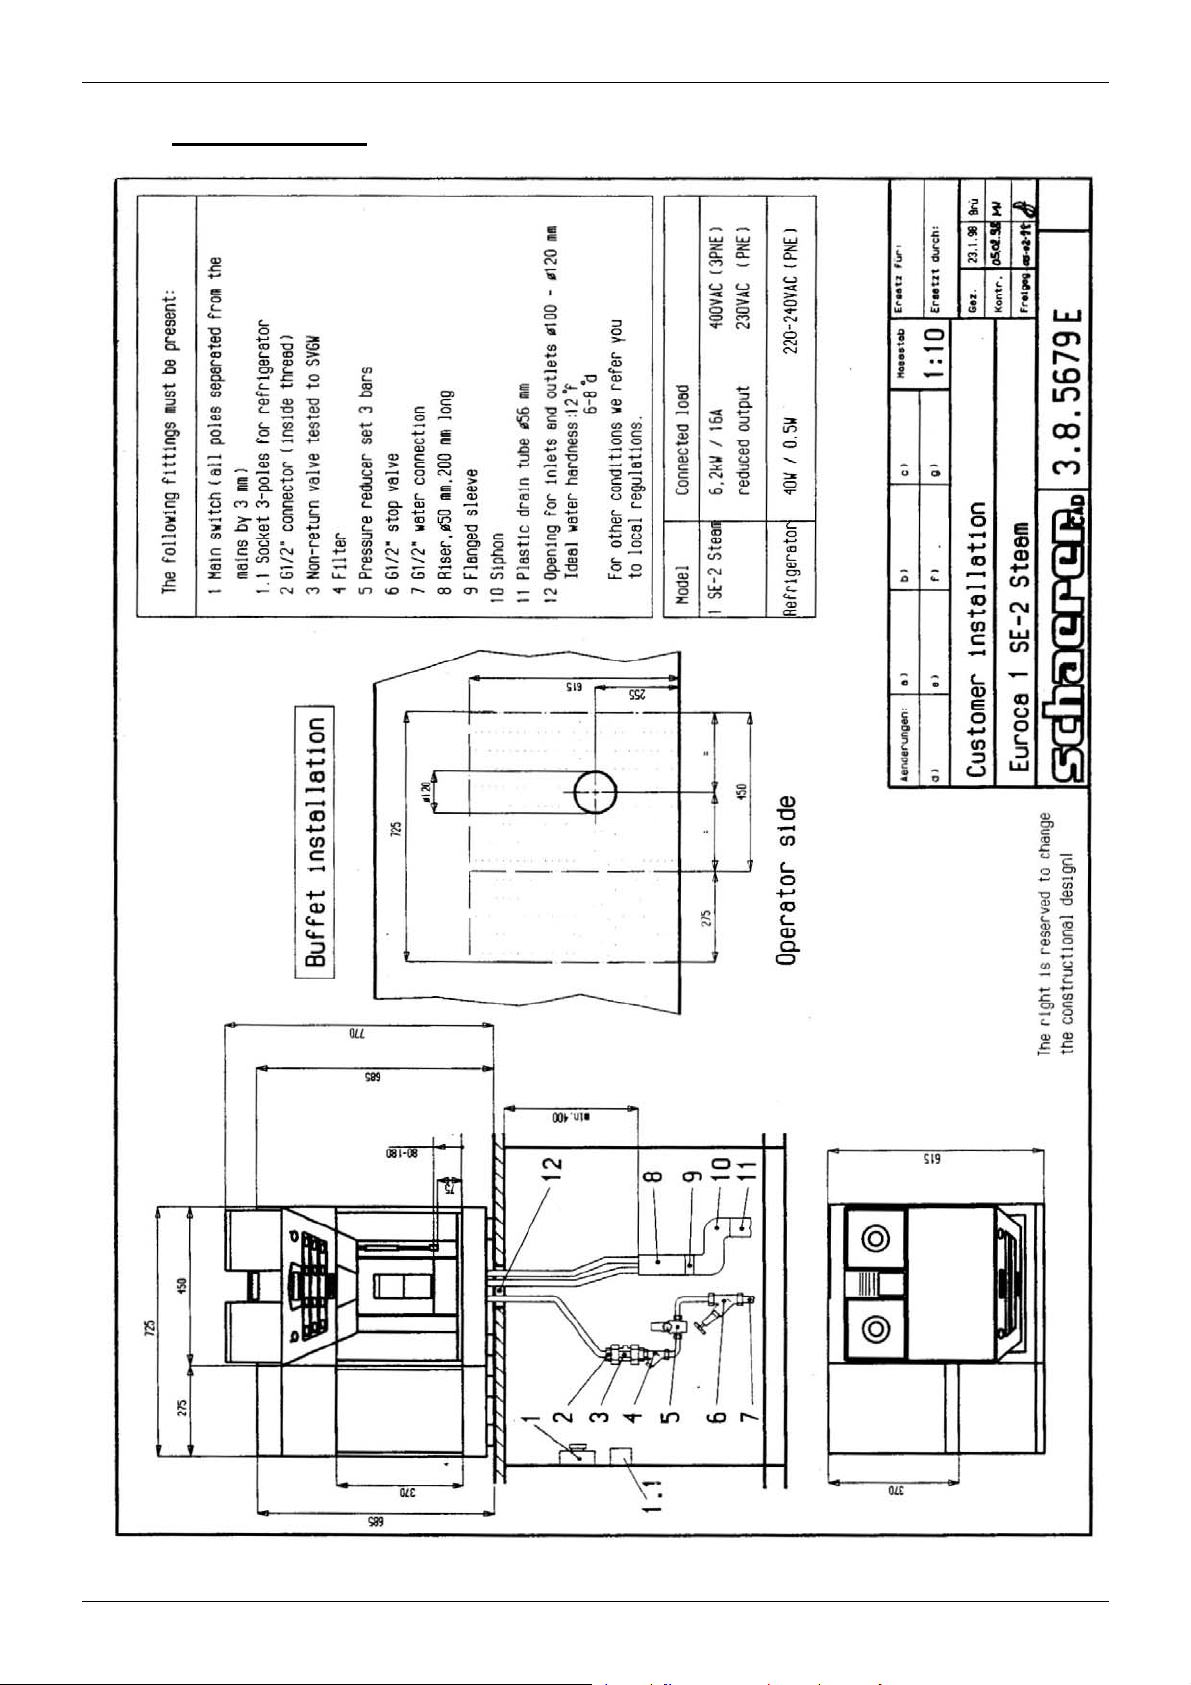
2.1.2 Installation planning
BASE-2-02.02 Page 2-3
Page 16

Product description
2.1.3 User facility
2.1.4 Safety precautions
- Cappuccino (option)
- Milky coffee
- Latté
- Hot milk
- Milk foam
The maintenance of the machine must be executed by qualified
& This machine may not be used in commercial kitchens without the
7 The ambient temperature must not fall below 10ºC or rise above 40ºC.
, The machine must never be sprayed from a hose or with a high-
6 Never spill any liquids into the cup stand..
Never put your hand into the bean containers when the machine is
The following beverages can be made with the Schaerer office:
- Coffee creme
- Ristretto
- Espresso coffee
- Decaffeinated coffee („light coffee“)
- Steam to heat up milk
- Hot water for aromatic tea
personnel, every 12 - 15 months. The authorization is given by M.
SCHAERER Ltd. only.
prior permission of the authorized M. SCHAERER Ltd. representative.
pressure jet cleaner. Neither should the use of steam cleaning
appliances be considered.
switched on.
Never put your hand under the coffee, hot water or steam outlets
during product delivery or when drawing hot water, to avoid risk of
scalding.
The machine should only be operated by trained staff.
: The manufacturer will entertain no liability for damage or
consequential losses of any kind.
The noise value can increase up to 70 db(A), especially by heating up
of drinks.
Page 2-4 BASE-2-02.02
Page 17
Product description
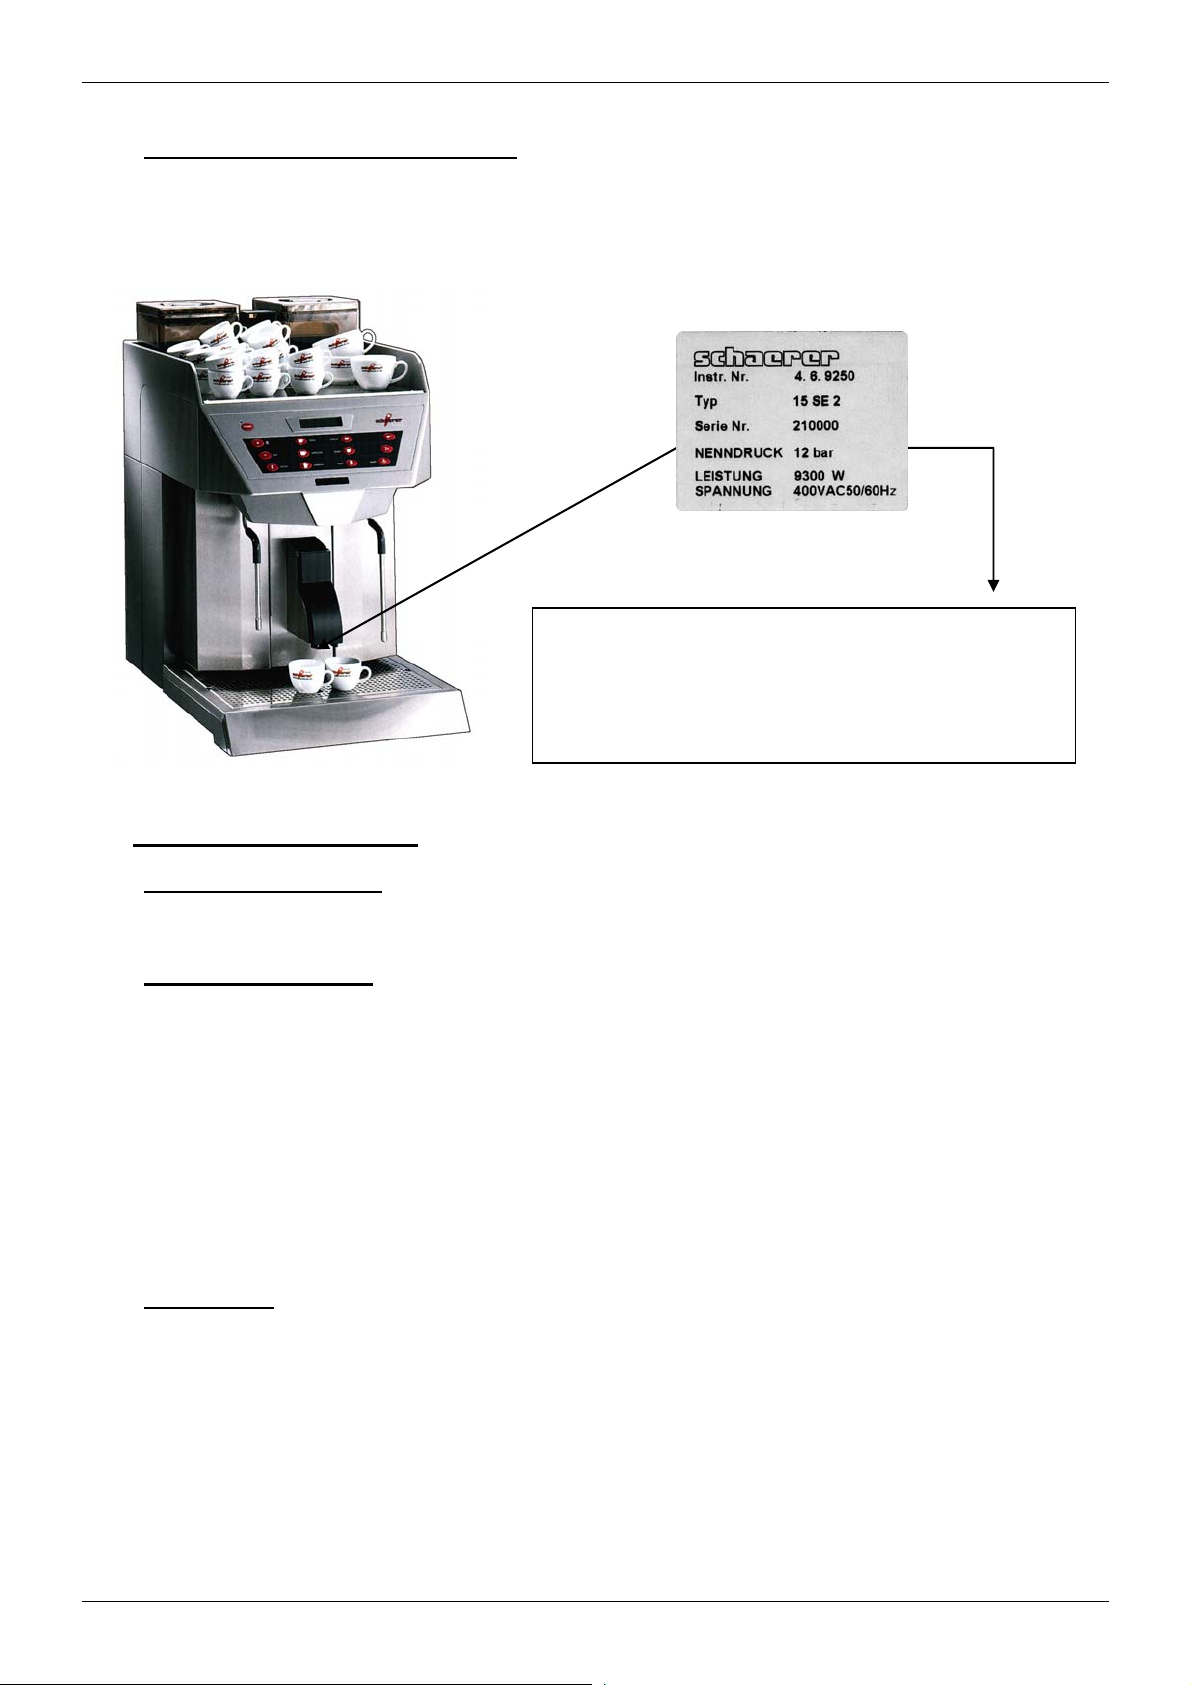
2.1.5 How is the product marked of Euroca-2
Just in case of a warranty or malfunction please write the type plate data
from your machine in the following field! The type plate is to be found in the
machine above the grounds drawer.
2.2 Product data of Euroca-2
2.2.1 Performance of Euroca-2
The output is 100 to 120 cups of coffee or tea per hour.
2.2.2 Dimensions of Euroca-2
Width 480 mm
Height 780 mm
Depth 620 mm
Outlet height 90 / 180 mm
Net weight 64 kg (15 SE-2 )
Subject to change!
2.2.3 Power supply
Model Connecting values
1 SE-2 Steam 6.3 kW / 16 A 400 V AC (3 PNE) 50/60 Hz
1 SE-2 Tea 9.3 kW / 16 A 400 V AC (3 PNE) 50/60 Hz
15 SE-2 9.3 kW / 16 A 400 V AC (3 PNE) 50/60 Hz
The electrical connection must be effected according to the existing
prescriptions (VDE 0100) and the local laws and prescriptions.
ª
Type plate
Draw out the grounds drawer,
to the side on the inner side
Inst.-Nr. ................................
Type: ................................
Serial-No: ................................
Pressure: ................................bar
Voltage: ................................Watt
Power: .............VAC............Hz
BASE-2-02.02 Page 2-5
Page 18

Product description
The power supply line must be at least H 07 RN-F. The voltage indicated on
the machine type plate must be identical with the one where the machine will
be used.
The phase must be secured with 16A.
For special voltages please contact M. Schaerer Ltd or an authorized
representative.
2.2.4 Water connection / outlet
If the machine is connected to a newly installed water supply line then
please make sure that the supply line and the connecting tube are rinsed
carefully so that no dirt can get into the machine.
The coffee machine must be connected to an installed drinking water supply
line (with water tap). The installation is done via the fitted pressure hose and
the screwing G 1/2" to the pressure reducer which is fitted directly on the
water tap (adjust on 3 bar).
For the water outlet you have to connect a temperature resistant outlet hose
to the waste water metal blade and the syphon. Fix the same firmly on the
outlet and make sure that the water can flow out easily.
The ideal limestone of the water should not be higher than 6-8°dWH
(German water hardness measure) or 8-12°fWH (French water hardness
measure). The chlorine content should not be higher than 100 mg per liter.
Ideal ph-value is 7. Otherwise see the local rules.
2.3 How is the machine equipped ?
2.3.1 Different types of models
There are three different versions:
1 SE-2 Steam = Coffee and steam only
1 SE-2 Tea = Coffee and hot water
15 SE-2 = Coffee, hot water and steam
Standard colours white and anthrazite. Upon request the machine can be
ordered in any RAL colour (extra charge).
2.3.2 Standard accessories of the Euroca-2 are included in the specification
-1 Chip carte ” CHEF “ 063930
-1 Chip carte ” SAVE DATA A “ 063933
-1 Chip carte“ SAVE DATA B “ 063920
-1 Spoon 067111
-1
-1
-2
-1 Nipple (G1/2“) 068179
-1
-1
-1
-1
-1 Buckle to Outlet hose without ø 25 mm 067767
-2 Milchbehälter 063243
-1 Dosierbecher clean-up 061020
-1 Reinigungsmittel (Milch) clean-up 2 Liter 061019
-1 O – Ring Set zum Schäumerkopf 050415
-2.5 m Siliconschlauch 067722
-1 Ablaufschlauch 067862
-1 Bride zum Ablaufschlauch Ø 29 mm 066794
-1 Blende 1.2 mm 063446
Designation
Order No.
Packing of cleaning tablets 065221
User manual -
Seals 064249
Brush 067409-A
Reinforced hose 067766
Wallet to hold 2 chipcards 065278
Outlet hose (without Frigo) 067784
Page 2-6 BASE-2-02.02
Page 19

Product description
2.3.3 Standard accessories of the Euroca-2 are not included in the specification
Designation Order No.
- Additional chip card
„ PROGRAMM “ 063941
„ KEY BLOCK “ 063931
„ COFFEE TEST “ 063932
„ MANAGER “ 063940
„ LOAD “ 063937
„ MASTER “ 063934
„ WAITER “ 063936
„ COPY WAITER “ 063942
„ PRINT “ 063943
„ MONEY A “ 063921
„ MONEY B – J “
„ Cup “ 063939
„ Credit – Look “ 063946
„ Clean “ ( for claning the card reader ) 063945
- Chip card loading system.
- Accounting systems (waiter account or chip cards MONEY)..
- Accounting systems (CCI - credit coffee system, CSI - coffee standard
interface).
- Water softener (Filados / Brita).
- 2nd grinder (DUO).
- Water tank (for operation without fresh water connection).
- Cappuccinatore (for a comfortable heating up of milk).
- Frigo for keeping milk cool
BASE-2-02.02 Page 2-7
Page 20

Product description
Page 2-8 BASE-2-02.02
Page 21

Indicating- and operating elements
3. INDICATING- AND OPERATING ELEMENTS
Kap. TEXT.............................................................................................................................Page
3.1. Indicating and operating elements .............................................................................. 3-2
3.2 Chip card functions ....................................................................................................... 3-3
3.2.1. Standard chip cards.........................................................................................................3-3
3.2.2. Optional chip cards for normal operation......................................................................... 3-4
3.2.3. Chip cards for accounting operation................................................................................ 3-4
3.3. Malfunction indications and messages....................................................................... 3-5
3.3.1. Machine blocked, no more drawing possible................................................................... 3-5
3.3.2. Output of coffee products blocked................................................................................... 3-6
3.3.3. Output of steam products blocked................................................................................... 3-7
3.3.4. Output of tea water products blocked.............................................................................. 3-7
3.3.5. Products are being output again......................................................................................3-7
3.3.6. Chip card error messages ...............................................................................................3-8
3.4. Messages in operational readiness............................................................................. 3-9
3.5. Modes of operation........................................................................................................ 3-9
BASE-2-02.03 Page 3-1
Page 22
Indicating- and operating elements
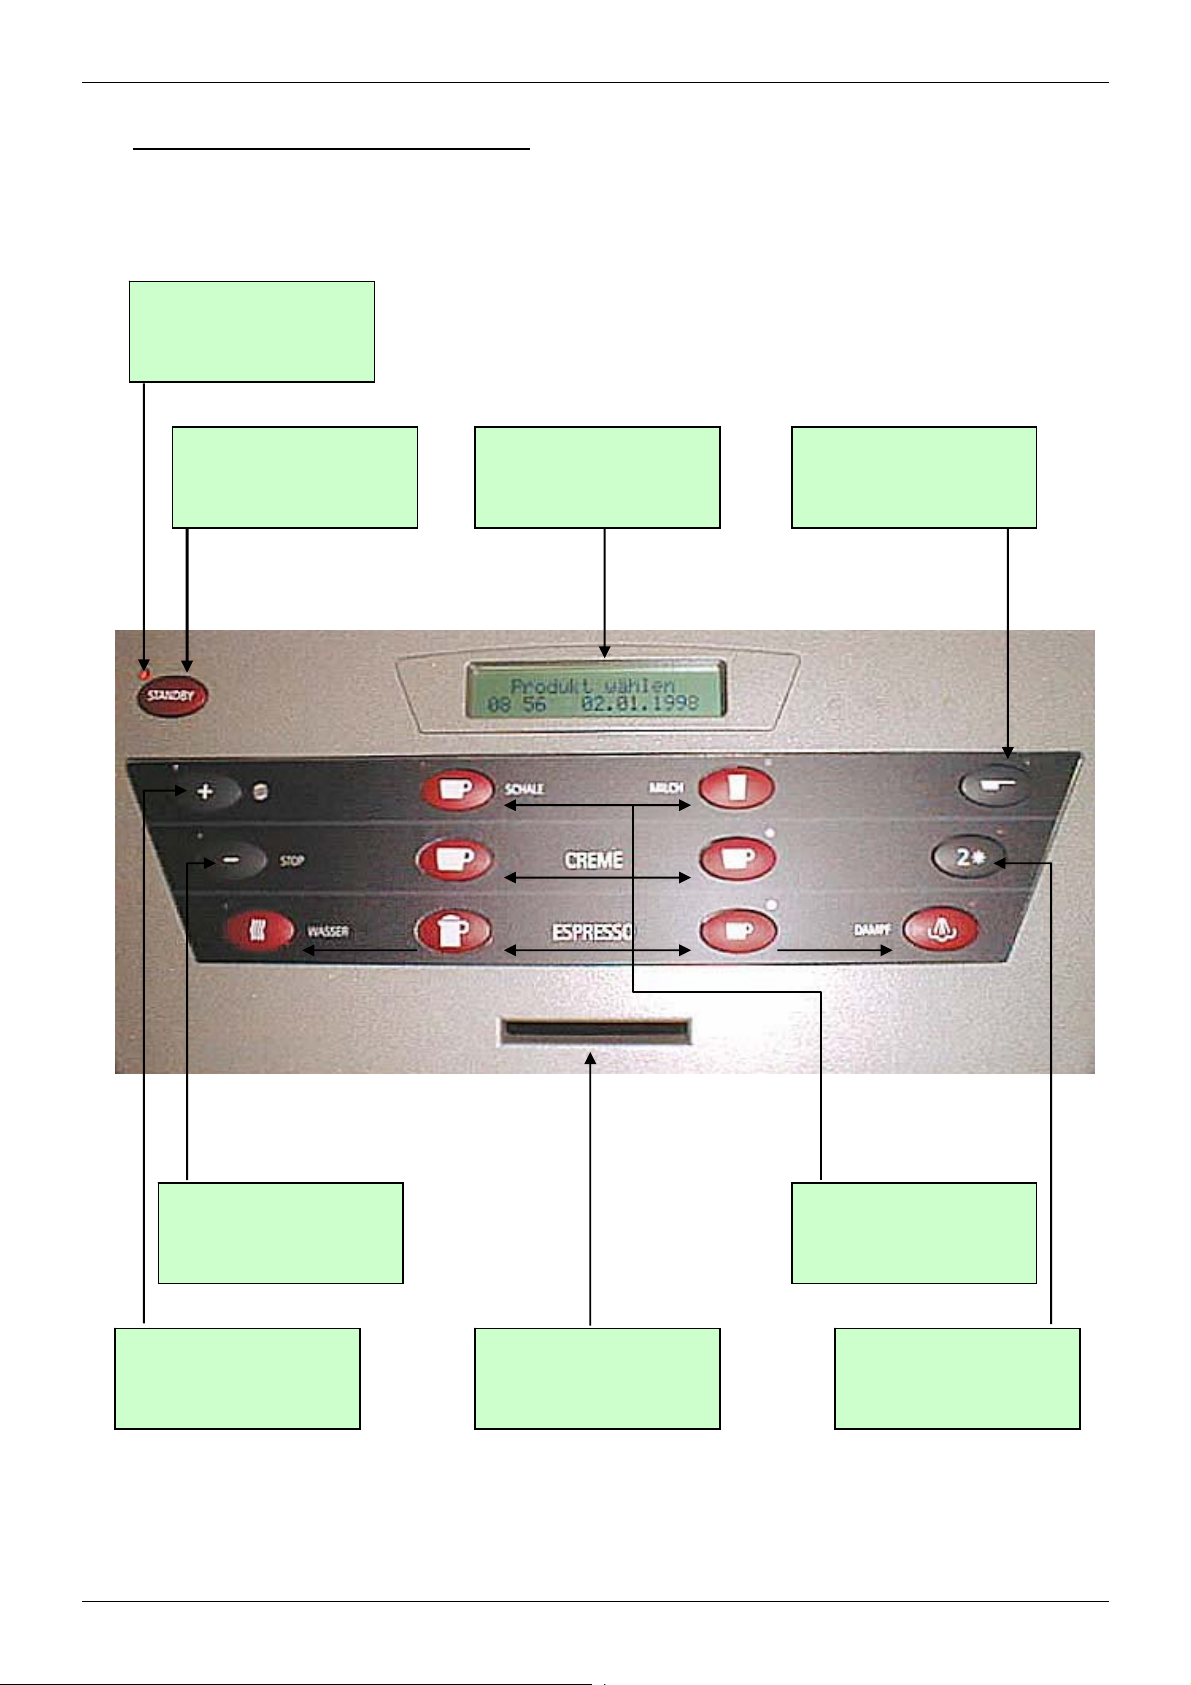
3.1 Indicating- and operating elements
on / off LED
Stand-By Key
Stop- and minus-key
incl. LED
Cleaning and
plus-key incl. LED
Two-lined illuminated LCDDisplay
Chip card insertion which
recognises the single chip
card function
Decaf-key incl. LED
Free selection product key
incl. LED and product
symbols
Shift-key and LED
Page 3-2 BASSE-2-02.03
Page 23
Indicating- and operating elements
3.2 Chip card function
The office coffee machine has been equipped with a modern control unit. In order to
ensure a simple programming of the machine, a few programming groups have been
created, which can be activated by the corresponding chip card. By using those chip
cards these programming groups can be protected from misuse. As an addition important
cards like CHEF, PROGRAMM etc. can be provided with a programmable security code
from the service engineer, which increases the protection from misuse further.
The four possibilities of programmable security code:
Security code - 0 Customer-No.
Main board checks automatically, if the right customer number is
available on the chip card.
Security code - 1 Customer-No. / Pin-code
Checking the customer number and an additional pin code is to be
given at the machine.
Security code - 2 Customer-No. / Card-No.
Checking the customer number
In addition, the internal *card number will be recognised. Another
card from the same programming group will not be accepted.
Security code - 3 Customer-No. / Card-No. / Pin-code
Highest security consisting of level 1 and 2.
*The manufacturer will provide every single chip card with an own
card number.
If a NEW card is inserted into the card reader by programmed security level 1 or 3, every
number can be used as PIN-code, even 0000. This value will be transfered to the card
and from then on it is valid as actual code.
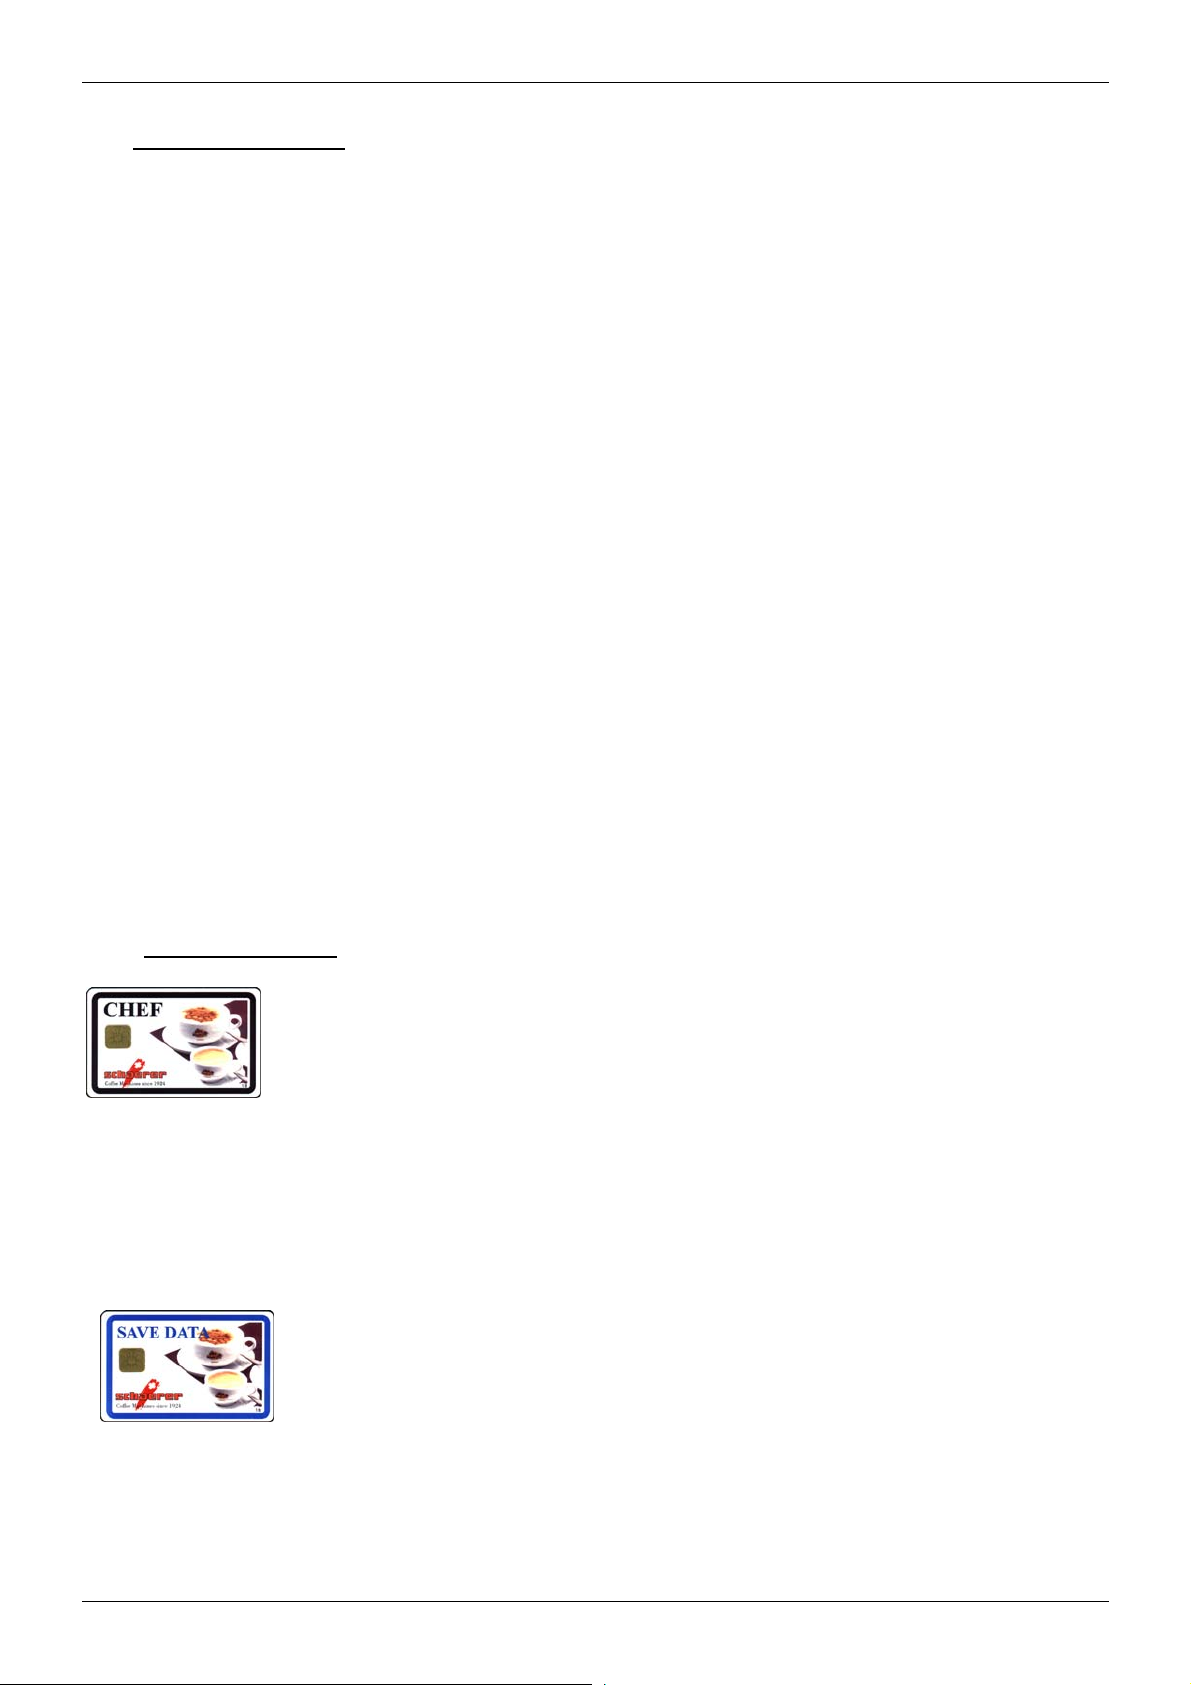
3.2.1 Standard chip cards
The CHEF card allows you to customise the operation of your Euroca-2 machine to your
own requirements. It is also used for control purposes:
- to read the day counter for coffee and per key
- to clear counter
- new product dosage (changing the quantity of water supplied)
- to change grinding quantity
- Changing On / Off times
- to change time
- to change date
- to change PIN-Code (Personal-Identification-number)
- key switch function - if programmed accordingly by the service technician, the machine
can only be switched on and off with the CHEF- or SERVICE-card (with SERVICE-card
only switch on).
The SAVE DATA card is a back-up card on which a machine configuration can be stored
or transmitted to the machine.
Two SAVE cards are required for the Euroca-2:
The " SAVE DATA A " card saves the data of level 1
The " SAVE DATA B " card saves the data of level 2
The respective card recognises automatically which level must be saved.
BASE-2-02.03 Page 3-3
Page 24
Indicating- and operating elements
3.2.2 Optional chip cards
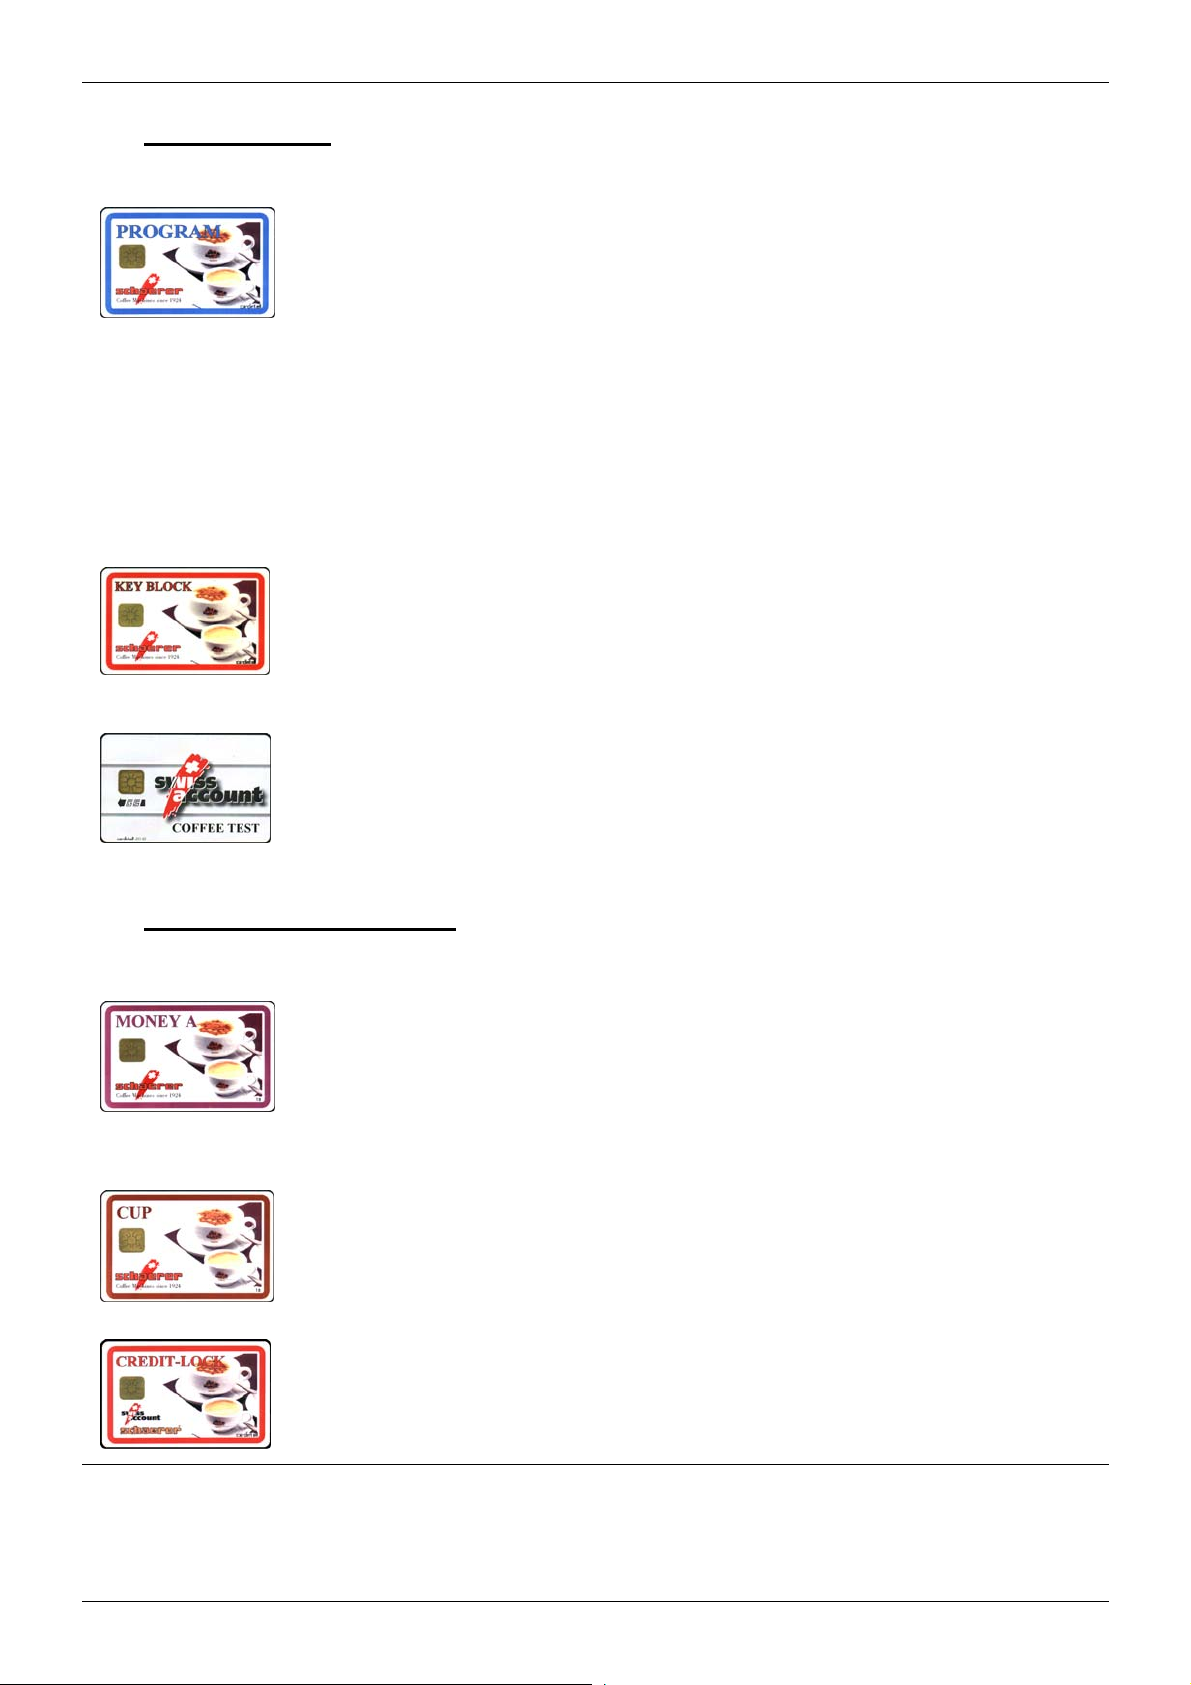
In normal operation the PROGRAM card serves for statistical purposes. With an installed
accounting system the necessary settings can be made with it.
- Switch accounting operation ON / OFF
- Price switching level 1 + 2 (automatic machine on, off and switching times)
- Change product price and article number
- Display MONEY sales
- Delete MONEY sales
- Display MASTER sales
- Delete MASTER sales
- Log in MASTER card
- Delete MASTER cards table
- PROGRAM card - change PIN code
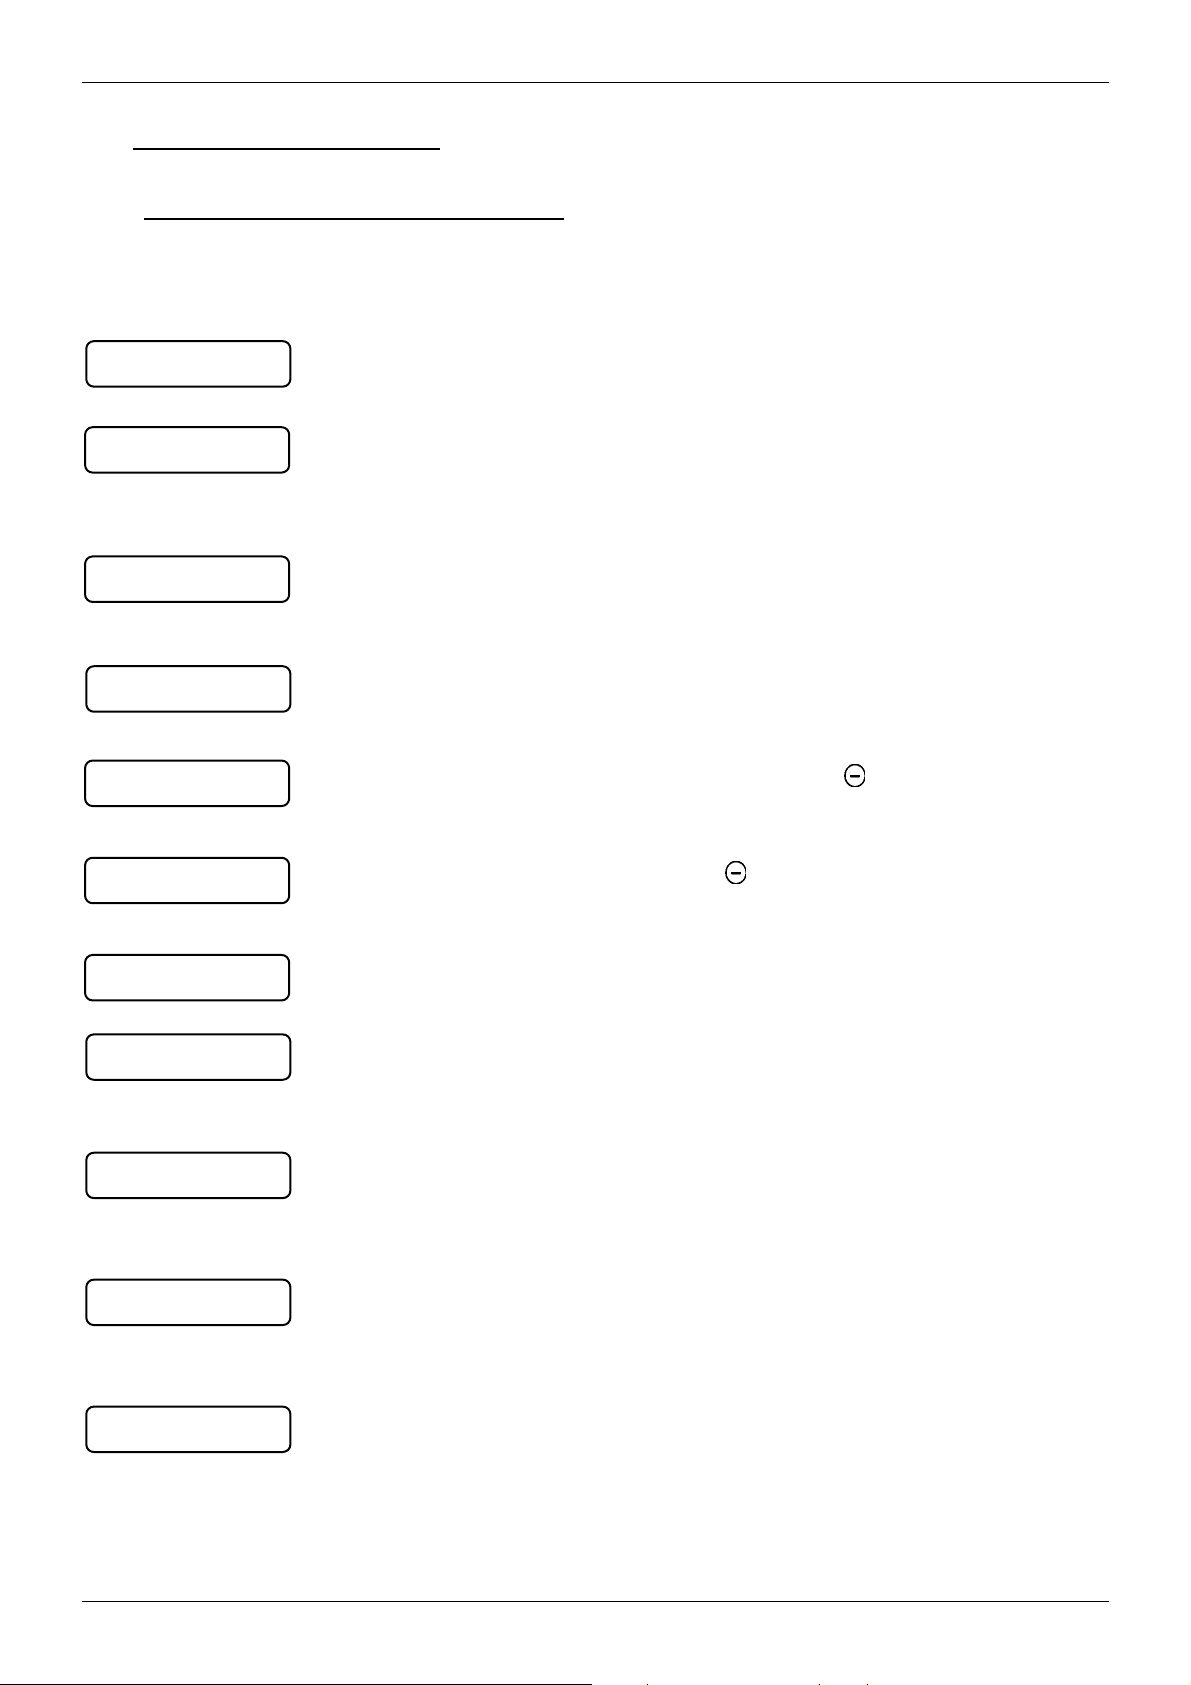
The KEY BLOCK card is being needed to block a single or all product keys.
With the COFFEE TEST card you have a direct access to the coffee test program
(Dosage of grinding quantity).
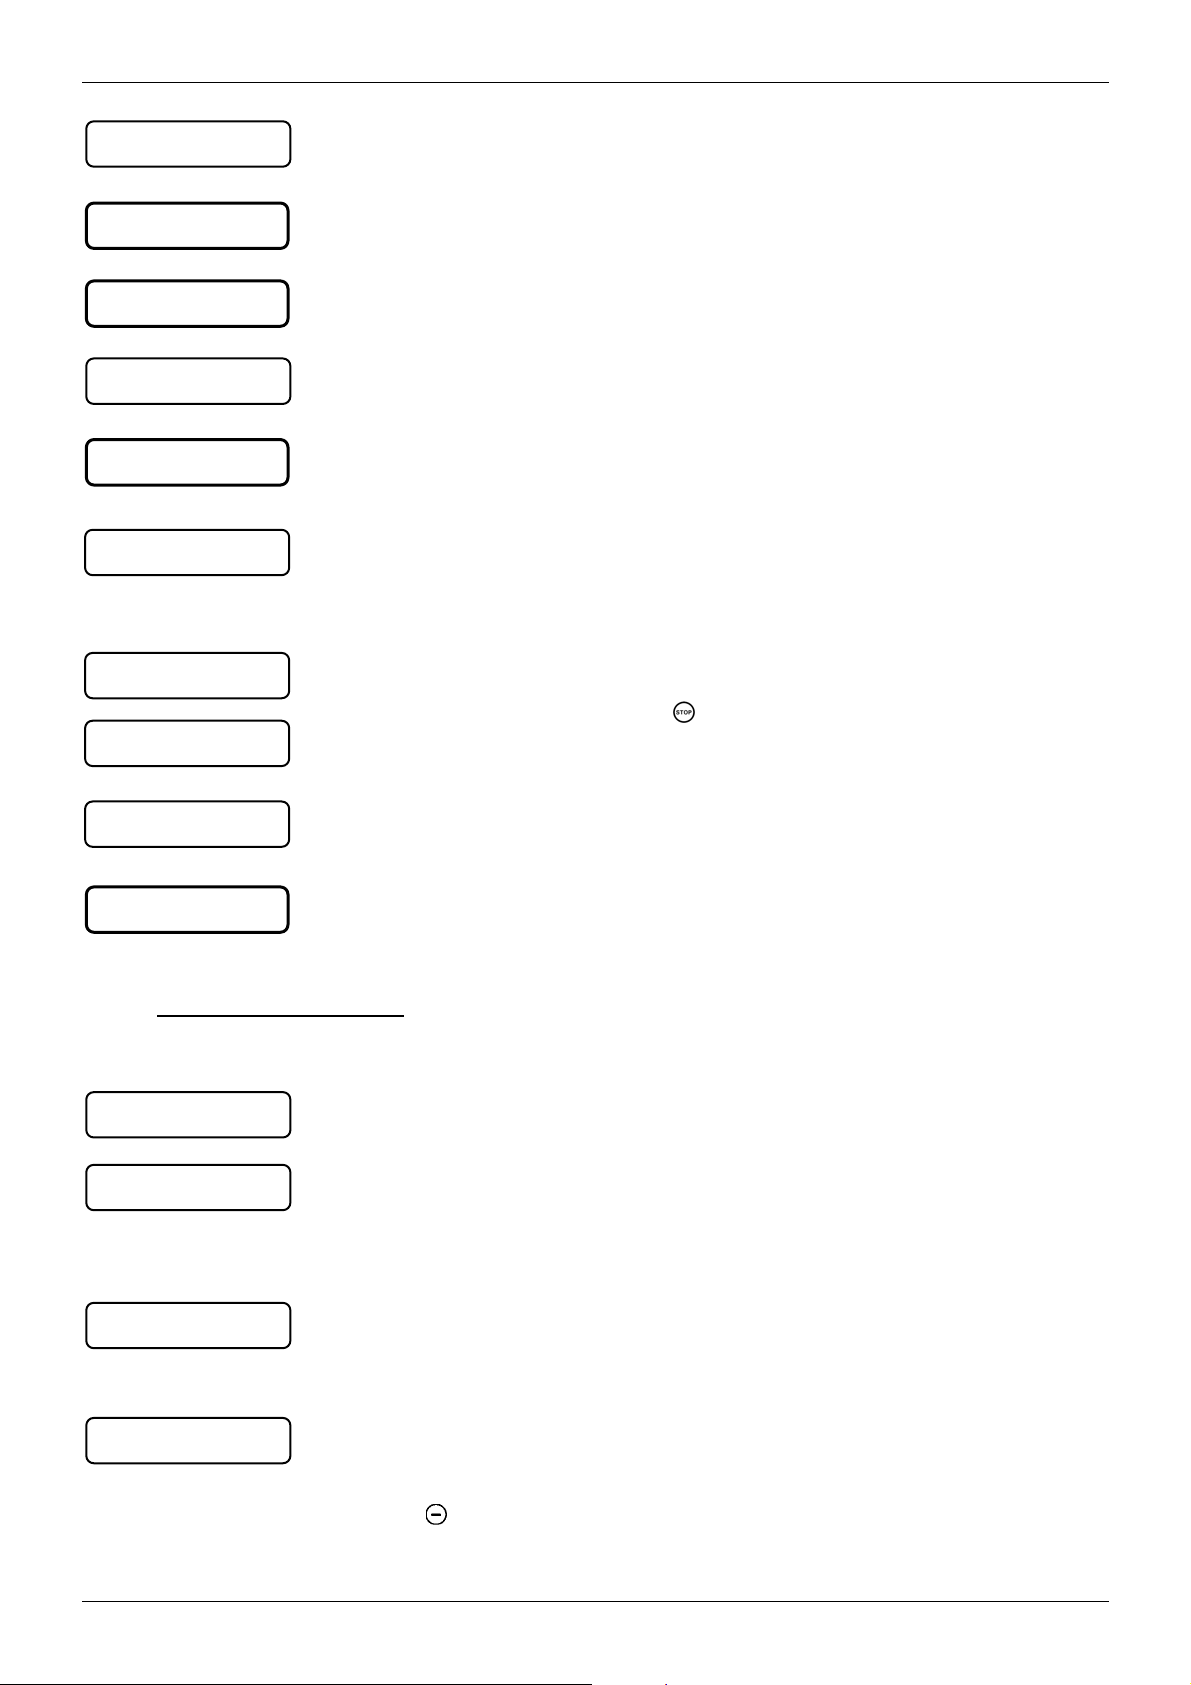
3.2.3 Chip card for accounting system
With the MONEY cards (available from A - J) price level adaptions are possible when
using the MONEY SYSTEM. The grinding quantity and dosage can be individually
programmed on every money card.
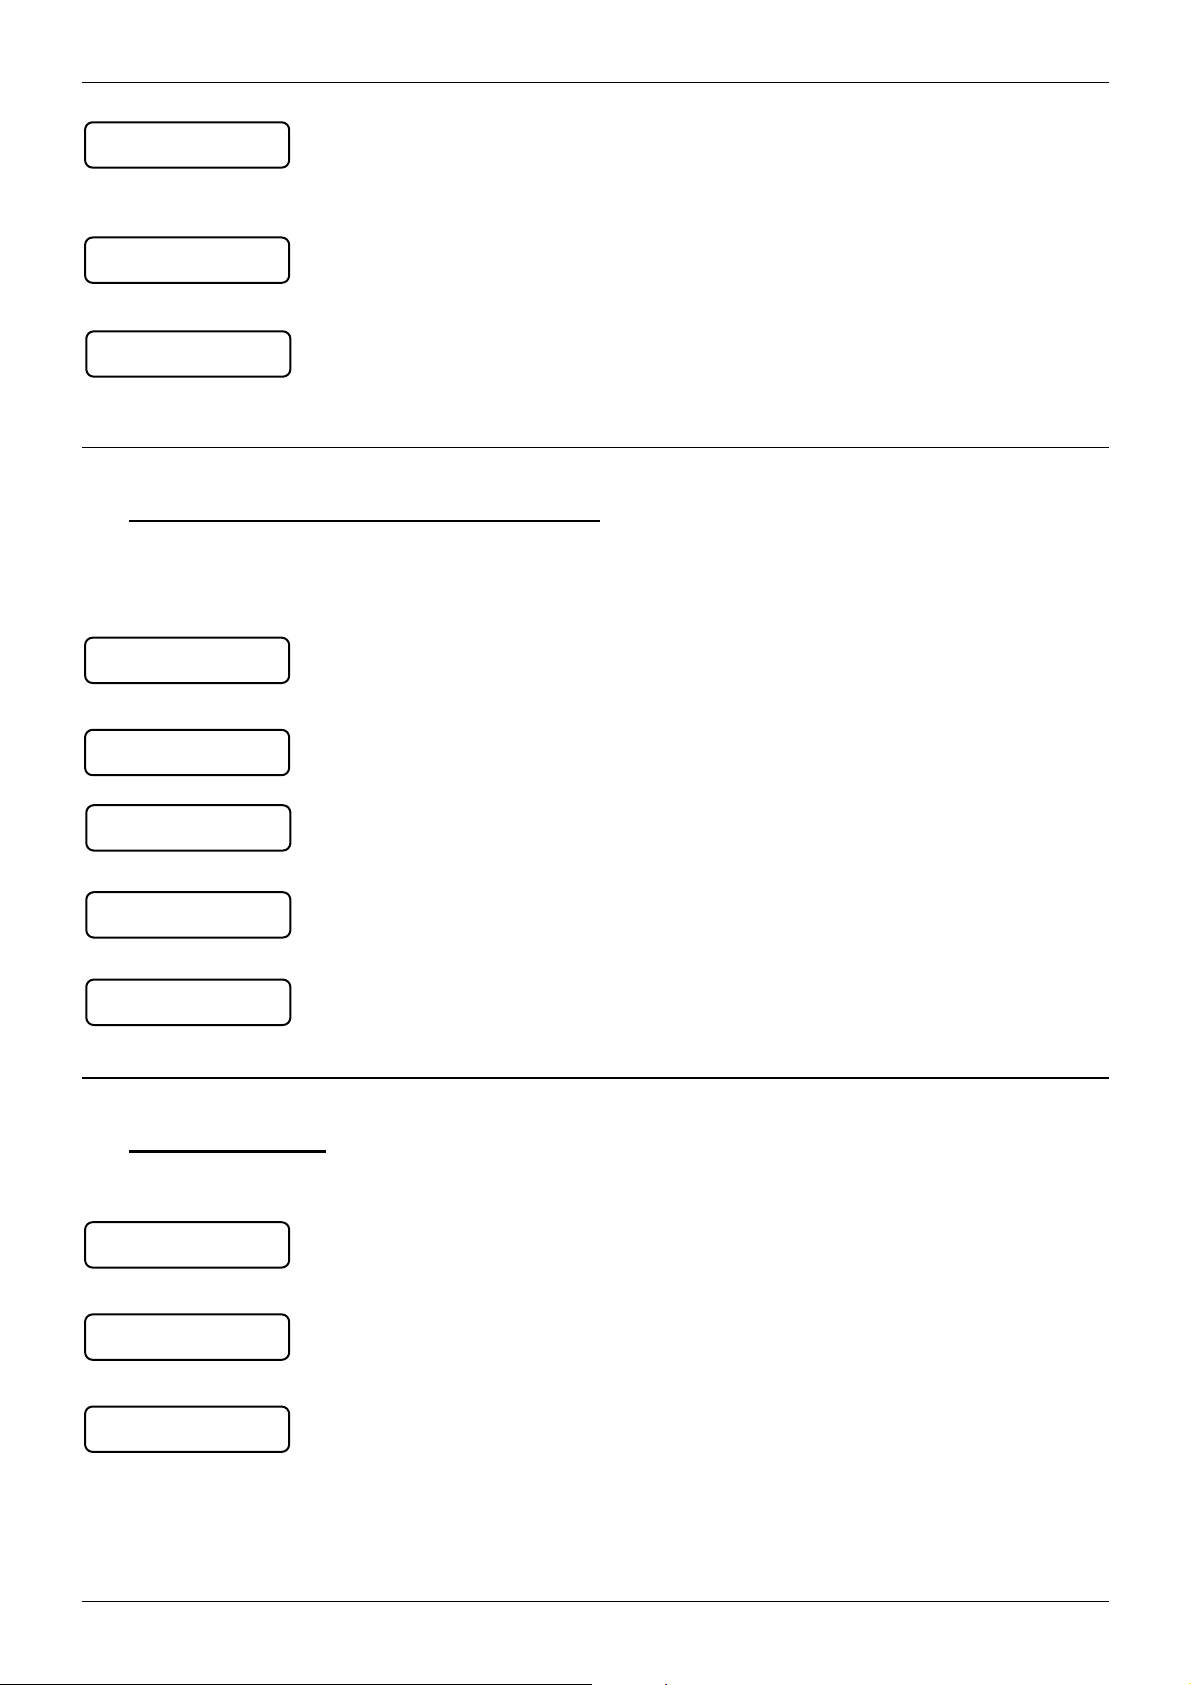
The CUP card works in combination with cup financing by interrogating and keeping
running totals of the meter counts for each product. However, there is no Delete function.
Change with the CREDIT-LOOK – card between standard running operation and
account system.
Page 3-4 BASSE-2-02.03
Page 25
Indicating- and operating elements
pty
p
y
p
g
g
3.3 Error and display message
3.3.1 Machine blocked, no more drawing possible
If the following information appears on the display, any product delivery will be
blocked:
selection locked
heatin
After switching on the machine all drinks drawing is blocked whilst the system
warms up ( approx. 5 min.).
selection locked
container n.i.
lace
Insert ground container. If this message is still shown, it might be a fault by the
microswitch:
) Call your customer service!
<<Button?>>
selection locked
The product key is stuck or dirty. Can be released by cleaning or pushing the key
again. If the fault can not be erased:
) Call your customer service!
selection locked
clean machine
At this display message no product purchase is possible.
Run cleaning program. See chapter 3.5 in the instruction manual.
selection locked
watertank em
Refill fresh water tank with drink water and then push
without fixed water connection)
-key (only for machines
selection locked
waste watertank full
Empty waste water tank and then press -key (only for machines without fixed
water connection)
selection locked
12:00 22.01.1999
All product keys have been blocked with the KEY BLOCK card.
selection locked
heatin
timeout
The heating is defective.
) Call your customer service !
selection locked
comms.interru
ted
The communication to an external unit has been interrupted. Check whether the
external units are connected to the power supply and are correctly connected to
the Euroca-2. But if that is the case, the display message will always be:
) Call your customer service !
selection locked
** LAN-Timeout **
The communication to an external unit has been interrupted. Check whether the
external units are connected to the power supply and are correctly connected to
the Euroca-2. But if that is the case, the display message will always be:
) Call your customer service !
selection locked
error account s
stem
The communication to an external unit has been interrupted. Check whether the
external units are connected to the power supply and are correctly connected to
the Euroca-2. But if that is the case, the display message will always be:
) Call your customer service !
ª
BASE-2-02.03 Page 3-5
Page 26

Indicating- and operating elements
g
p
g
pty
g
g
g
p
selection locked
door o
en
The Frigo door is open ( option ). Check the refrigeratordoor for correct locking. If
the problem exist further:Î
) Call your customer service !
battery flat
The battery of the machine's own control system must be replaced.
) Call your customer service !
** EEPROM error
Serial EEPROM is defective.
) Call your customer service !
motor current
Switch off the Euroca-2, wait 10 - 30 seconds and switch on again. If the problem
persists, switch off the Euroca-2.
) Call your customer service !
motor driver error
Switch off the Euroca-2.
) Call your customer service !
3.3.2 Delivery of coffee product locked
If these messages are shown on the lower display line, the machine will be blocked
for delivery of products.
selection locked
clean machine
At this display message no product purchase is possible.
Run cleaning program. See chapter 3.5 in the instruction manual.
select product
rinder right empty
Pleace fill up the right side grinder with coffeebeans.
select product
rinder left blocked
Pleace fill up the left side grinder with coffeebeans.
selection locked
container
em
Empty the coffee ground container and insert it again.
select product
rinder right blocked
Press
remove the beans container. Remove the remaining coffee beans (e.g. with a
-key. If the problem persists push in the slide of the beans container and
vacuum cleaner) and check the grinder for a jammed object such as a pebble. If no
select product
rinder left blocked
alien element is nipped and the problem exist further:
) Call your customer service !
The temperature sensor in the flow heater for coffee water is defective. Steam
output is disabled::
.sensor coffee
tem
) Call your customer service !
Wait approximately five minutes (it is possible too much coffee water has been
drawn off). If the message does not disapear after this time:
heatin
coffee
) Call your customer service !
rinsing
selection locked
The machine is automatically rinsed.
If this is so Î No fault.
ª
Page 3-6 BASSE-2-02.03
Page 27

Indicating- and operating elements
p
p
g
p
p
g
g
istonmotor timeout
The lifting motor is defective.
) Call your customer service !
select product
outlet missin
The Cappuccinatore is missing or incorrectly assembled.
If the problem persists.
) Call your customer service !
3.3.3 Output of steam products disabled
If one of the following messages appears on the bottom line of the display, delivery
of steam products is barred.
selection locked
clean machine
At this display message no product purchase is possible.
Run cleaning program. See chapter 3.5 in the instruction manual.
The temperature sensor in the steam generator is defective. Steam output is
disabled:
.sensor steam
tem
) Call your customer service !
The level sensor in the steam generator is defective. Steam output is disabled. Tea
and coffee output is also automatically disabled for two minutes after this message
level
robe steam
appears or after the machine is first switched on.
Check the tap for opening. If the problem persists:
Switch off the machine, wait 10-30 seconds and switch on again. If the problem
persists:
) Call your customer service !
timeout heat steam
If system has not reached the reference temperature, following message will
appear at the display: Timeout heating steam.
heatin
steam
Wait ~ 5 minutes ( hotwater consume to great )wen the display
message does not disapeard : The display shows “ timeout heating steam “
) Call your customer service !
3.3.4 Output of tea products disabled
selection locked
clean machine
At this display message no product purchase is possible.
Run cleaning program. See chapter 3.5 in the instruction manual.
timeaut heater tea
If system has not reached the reference temperature, following message will
appear at the display: Timeout heating tea.
The feeler gauge in the boiler is faulty :
Hotwaterporchase is blocked.
) Call your customer service !
tem
.sensor tea
Wait ~ 2 minutes ( hotwater consume to great )wen the display
message does not disapeard : The display shows “ timeout heating the “
heatin
tea
) Call your customer service !
3.3.5 Product can still be selected
The following display messages are not accompanied by automatic suspension of
product delivery. Nevertheless it is important to remedy the situation as quickly as
possible.
selection locked
container full !
Empty grounds container and insert again.
After this message appears, 5 more coffee products can be delivered, if the
grounds container is not emptied in this time, then the Euroca-2 is blocked as a
consequence Î Empty grounds container.
ª
BASE-2-02.03 Page 3-7
Page 28
Indicating- and operating elements
g
y
p
p
pty
Select product
ulseswitch defective
There is a malfunction in the automatic coffee powder portioner (obtainable as option).
) Call your customer service !
select product
clean machine
With appropriate programming (forced cleaning) 50 more coffees can be drawn or
1 more hour of coffee before delivery is blocked and the machine must be cleaned.
select product
button locked
Product key is locked. (Keyblock or not programmed)
credit system
button locked
Product key is locked.
select product
.sensor outside
tem
Option of automatic steam cut-off. Steam can continue to be drawn via the timeout.
) Call your customer service !
select product
flowmeter defect
Execute machine cleaning. Product delivery possible again.
With the appropriate programming (forced cleaning ) 50 more coffees can be
drawn until delivery is blocked and the machine must be cleaned.
) Call your customer service !
system data error!
An error has occured in the programming of product keys or in the general system
data. If in addition a product key is illuminated, it might be possible that you cannot
-button in order to continue working.
product-data error
use the same anymore. Press the
) Call your customer service !
select product
e of filter
chan
The installed water filter needs to be cleaned, refilled or replaced.
) Call your customer service !
select product
milk em
The message occurs when the optional milk monitoring is fitted and is released.
Dispensing of product possible when released
Dispensing of product not possible when blocked.
3.3.6 Chip card error messages
The following indications on the display inform you about operating errors with chip
cards:
*read error
remove card
The card has not been inserted correctly (see arrows) or is defective.
*wrong card
remove card
The Euroca-2 requires a different card type in the current menu.
A MONEY card has been inserted for the first time or the credit is 0.00.
The MONEY card is not logged in. A credit must be loaded onto the MONEY card
with the LOAD card, and/or must be logged in.
No accounting system is installed.
*write error
remove card
The data were not correctly stored on transmission from machine Î SAVE card.
The card was taken out of the card reader too soon. The data could not be
completely transmitted or they are defective.
Repeat the data save.
Product - T5 Error!
Press an
key...
The data were not correctly stored on transmission from SAVE card Î machine.
The card was taken out of the card reader too soon. The data could not be
completely transmitted or they are defective.
Repeat the data save Î
Press
-key, wait five seconds and repeat the data save.
ª
Page 3-8 BASSE-2-02.03
Page 29
Indicating- and operating elements
g up
pty
**data error
remove card
Either the structural integrity of the data on the card has been damaged by
removing the card from the card reader too soon or the card is new and needs to
be logged-on, released or charged up.
* wrong PIN-code
remove card
A wrong PIN-Code (Personal-Identification-Number) has been entered.
Process repetition.
no accounting
There is no accounting system installed.
3.4 Messages when the machine is operating
These messages will only be shown when the machine stands still - no beverages
are delivered. They do not block the delivery of the products.
.....
container full
Empty the ground container. It can only deliver 5 more coffees, afterwards the
machine will block.
.....
heatin
The temperature of a hot water boiler is more than 10° C below the regulated
temperature. Wait for choosing of he next product until the Euroca-2 is heated up.
.....
clean machine
Please start the cleaning process (see chapter 5.3).
credit x.xx
to less amount
Credit insufficient (too little credit).
select product
milk em
The milk container is empty ( option )
3.5 Operating modes
The SCHAERER Euroca-2 has three operating modes:
select product
12:00 22.01.1999
credit operation
12:00 22.01.1999
<< standby >>
If this information appears on the display, then your machine is ready for use, i.e.
by pressing the button the machine will make the corresponding product.
This information appears on the display if the machine is equipped with an internal
or external accounting system ?
The machine has been switched off, but is still connected to the main power
supply. If the Economy mode (energy saving program) has been released by the
technician during programming, then the heating will also be switched off!
ATTENTION: When re-operating the machine needs a short time to reach the
programmed operating temperature.
BASE-2-02.03 Page 3-9
Page 30

Indicating- and operating elements
Page 3-10 BASSE-2-02.03
Page 31

Installation and operation of the machine
4 INSTALLATION AND OPERATION OF THE MACHINE
4.1 First installation and operation
Your office coffee machine will be installed by one of our authorized Schaerer
representatives.
) It is important that after the basic adjustment of the machine and after every adjustment
done by you to save the news data on the SAVE DATA cards which is delivered with
every machine. Please keep the card ready for the technician at all times.
4.2 Installation (basic conditions)
The required feed connections are to be advanced to up to one meter (acc. to the
installation plans) to the place where the machine will be installed.
When installing / connecting the machine please pay attention to the technical data.
Please put the machine on a plane, massive basement, protected from heat, humidity
and steam (do not put the machine in commercial kitchens).
Please pay attention and respect to the local regulations regarding kitchens.
A minimum distance of 1 cm from the wall to the machine must be respected
(air circulation).
Plan and respect free spaces on the top and on the side for maintenance works.
Please pay attention and respect to the ambient temperatures.
At the option “grinding waste dropping” additional hole.
Buffet-, counter version
Option-frigo
BASE-2-02.04 Page 4-1
Page 32

Installation and operation of the machine
Page 4-2 BASE-2-02.04
Page 33

Local control
5. OPERATION
Sect. TEXT.............................................................................................................................Page
5.1. Introduction.................................................................................................................... 5-3
5.2. Daily operation............................................................................................................... 5-3
5.2.1. Set up operational readiness........................................................................................... 5-3
5.2.2. Prepare coffee products ..................................................................................................5-3
5.2.2.1. Prepare coffee products by the second level .................................................................. 5-4
5.2.3. Caffeine-free coffee ....................................................................................................... 5-4
5.2.3.1. Prepare caffeine-free coffee manually............................................................................. 5-4
5.2.3.2. Caffeine-free coffee via grinder and DECAF key ............................................................ 5-5
5.2.3.3. Caffeine-free coffee via grinder without DECAF key....................................................... 5-5
5.2.4. Prepare tea ...................................................................................................................... 5-5
5.2.5. Heat up drinks..................................................................................................................5-6
5.2.6. Prepare hot milk ( with Frigo option )...............................................................................5-7
5.2.7. Prepare milk foam ( with Frigo option )............................................................................5-7
5.2.8. Automatically prepare Cappuccino Magic, milky coffee or latté ( with Frigo option )...... 5-8
5.2.9. Manually prepare Cappuccino Magic and hot milk with a CPT ( option )........................ 5-8
5.2.10. Prepare Cappuccino with Cappuccinatore CPT ( option ) ..............................................5-9
5.3. Daily cleaning...............................................................................................................5-10
5.3.1. Clean coffee machine.................................................................................................... 5-10
5.3.2. Cleaning instructions for Cappuccinatore CPT ( option ).............................................. 5-18
5.4. Ending use / Switch off unit........................................................................................ 5-19
5.5. Operating advice..........................................................................................................5-19
5.5.1. Fill up fresh water tank...................................................................................................5-19
5.5.2. Empty waste water tank.................................................................................................5-19
5.5.3. Operating advice for units with fresh and waste water tank (on mobile trolley)............5-20
5.6. Programming with standard chip cards....................................................................5-20
5.6.1. CHEF card ..................................................................................................................... 5-21
5.6.1.2. Menu overview...............................................................................................................5-21
5.6.1.2. Read off product counters for coffee and tea by key.....................................................5-21
5.6.1.3. Reset product counter to zero ....................................................................................... 5-21
5.6.1.4. Change grinding quantity (coffee powder )....................................................................5-22
5.6.1.5. Change filling quantity water and / or milk to coffee products..................................... 5-22
5.6.1.6. Change metering time steam, hot milk and / or milk foam ..........................................5-23
5.6.1.7. Change switching on and off times................................................................................5-23
5.6.1.8. Change time...................................................................................................................5-24
5.6.1.9. Change date .................................................................................................................. 5-24
5.6.1.10 Change PIN code........................................................................................................... 5-25
5.6.2. SAVE DATA card...........................................................................................................5-25
5.6.2.1. Menu overview...............................................................................................................5-25
5.6.2.2. Store machine data on card........................................................................................... 5.26
5.6.2.3. Load machine data from card to machine ..................................................................... 5-26
BASE-2-02.05 Page 5-1
Page 34

Local control
5.7. Programming with option chip cards........................................................................ 5-27
5.7.1. PROGRAM card ............................................................................................................5-27
5.7.1.1. Menu overview...............................................................................................................5-27
5.7.1.2. Programmable security level ......................................................................................... 5-27
5.7.1.3. Release and block accounting operation....................................................................... 5-28
5.7.1.4. Price switching............................................................................................................... 5-28
5.7.1.5. MONEY card price level 1+2 ......................................................................................... 2-29
5.7.1.6. Change jeton price, with or without MONEY card price level 1+2.................................5-29
5.7.1.7. Change product price and article no. ( for external accounting system CCI / CSI )......5-30
5.7.1.8. Display MONEY sales.................................................................................................... 5-31
5.7.1.9. Delete MONEY sales..................................................................................................... 5-31
5.7.1.10. Display MASTER card...................................................................................................5-31
5.7.1.11. Delete MASTER card..................................................................................................... 5-31
5.7.1.12. Log in MASTER card..................................................................................................... 5-32
5.7.1.13. Delete MASTER table....................................................................................................5-32
5.7.1.14. Change PIN code........................................................................................................... 5-33
5.7.2. KEY BLOCK card........................................................................................................... 5-33
5.7.2.1. Menu overview...............................................................................................................5-33
5.7.2.2. Block key........................................................................................................................5-33
5.7.2.3. Release key ................................................................................................................... 5-34
5.7.3. COFFEE TEST card...................................................................................................... 5-34
5.7.3.1. Menu overview...............................................................................................................5-34
5.7.3.2. Grinding quantity test programme ................................................................................. 5-34
Page 5-2 BASE-2-02.05
Page 35

Local control
g up
5.1 Introduction
The indications in this chapter will help you to get acquainted with the basic functions of
your machine. They are the basic conditions for a simple daily use without any
difficulties.
A correct installation by the authorized Schaerer representative is the basic condition for
a proper functionning of the Euroca-2.
CAUTION : Improper use can result in scalding!
5.2 Daily use
Preparation / to put the machine in operation
5.2.1
1. Before switching on the machine make sure that :
- the machine is connected to the main power supply
- the water connection is open
- the beans container is filled up
- the bean container is empty
- on the display (not illuminated yet) appears :
<<stand by>>
12.00 22.01.1999
Preparation of beverages
5.2.2
2. Push button
The following indication appears on the display:
selection locked
heatin
For machines with fresh water tank, see chapter 5.5.
Depending on the programming of your machine, especially when operated with an
active accounting system, a different information appears on the display when the
machine is in the basic operation mode.
When the cleaning program has been used before turning off the machine, a rinsing
program will follow right after putting the machine in operation again. Afterwards, only if
programmed, a „blind coffee“ will be delivered.
By active key-switch function, the CHEF-card must be inserted into the card reader for
switching on.
If your machine has been installed and logged-on to an accounting system, please read
the instructions in chapter 6.0.
Coffee and hot water are simultaneously ready for drawing.
By pressing the key, preselected products are deleted ( only if no accounting is active ).
If the
interrupted (Coffeeproducts can producted only draving brewphase).
1. Put the cup underneath the outlet. ( The delivery height can be adapted to the cup)
2. Press the desired product key.
3. The key you have selected lights up green. The following message appears on the
display:
key is pressed for more than two seconds, then all active products are
-> All keys are illuminated for a short period.
as soon as the machine
has the right temperature:
select product
12:00 22.01.1999
ª
BASE-2-02.05 Page 5-3
Page 36

Local control
pply
p
pply
4. The whole production process is now being done completely automatically.
Depending on your machine’s program :
- The product keys can be repressed as often as you wish - the same goes for pre-
- Other texts are possible in the display messages ( malfunction message ).
Push button
select product
choise 1 su
selection or mixed operation.
cancel preselected products when the machine is operated with an accounting system.
1
-and the preselection or mixed operation may be blocked. You cannot
CAUTION : Improper use can result in scalding!
5.2.2.1 Prepare coffee products by the second level
If the second level is installed on the Euroca-2 and is released, the product keys can be
selected for two different products
Level 1: Normal application. See Section 5.2.2.
Level 2: As follows
1. Place cup under coffee delivery spout ( The spout height can be adapted to the cup).
2.
3. Press required product key.
4. The LED of the selected key lights up red and in the display appears:
5. The coffee is freshly prepared automatically and is delivered.
Depending on the programming:
- the keys can be optionally repeated and can be selected for mixing.
- other texts are possible in the display messages ( malfunction message ).
Coffee and hot water are simultaneously ready for drawing.
By pressing the
If the
= Press shift key.
select product
choise 1 su
key is pressed for more than two seconds, then all active products are
interrupted (Coffeeproducts can producted only draving brewphase).
1
key preselected products are deleted (only if no accounting is active).
CAUTION : with improper operation there is a danger of scalding.
5.2.3. Caffeine-free coffee
5.2.3.1. Prepare caffeine-free coffee manually
The Euroca-2 has to be manually prepared for caffeine-free, released ex works or by the
service technician.
1. Place cup under the coffee delivery spout. ( The spout height can be adapted to the cup.
2. Press
3. Press the relevant programmed coffee product key:
On the display appears:
ª
Page 5-4 BASE-2-02.05
key.
select product
coffee
owder
Page 37

Local control
g
p
pply
4. Fill coffee powder into the charging hopper.
5. Press the red blinking key.
6. The coffee is prepared and delivered.
Always only use ground coffee.
CAUTION: with improper operation there is a danger of scalding.
5.2.3.2. Coffeine-free coffee via grinder and DECAF key
The Euroca-2 has to be prepared for caffeine-free by means of the grinder, released ex
works or by the service technician.
1. Place cup under the coffee delivery spout ( The spout height can be adapted to the cup).
2. Press
3. Press the relevant programmed coffee product key:
On the display appears:
key.
select product
coffee
owder
By using the key the caffeine-free coffee is drawn and ground by the right- or left-
Note :
hand coffee grinder. In this way caffeine-free and caffeine-containing coffee can be
drawn via the same keys, but via two different grinders.
CAUTION : with improper operation there is a danger of scalding.
5.2.3.3. Caffeine-free coffee via grinder without DECAF key
1. Place cup under the coffee delivery spout. ( The spout height can be adapted to the cup. )
2. Press the relevant programmed caffeine-free coffee product key:
On the display appears:
Note :
The caffeine-free beans coffee is automatically drawn and ground by the right-hand
select product
choise 1 su
coffee grinder.
It should be noted that in this type of programming the caffeine-free products require the
allocation of a separate product key.
1
CAUTION : with improper operation there is a danger of scalding.
5.2.4.
ª
Preparation of tea
1. Put the tea cup underneath the hot water outlet.
2. Push the
3. The hot water is now delivered. If the programmed temperature is not yet reached,
Coffee and tea can be drawn simultaneously.
-button. The following message appears on the display:
select product
12.00 22.01.1999
appears on the display:
select product
heatin
tea
BASE-2-02.05 Page 5-5
Page 38

Local control
By pushing the
Start / Stop-operation is released.
Hot water can not be preselected.
When the Euroca-2 is switched on and is heating up, a selection of hot water is locked.
CAUTION : Improper use can result in scalding!
5.2.5. Heating up of beverages
1. Push the
2. Plunge the steam tube into the filled cup (down to the bottom).
3. Push the
At the same time the steam flows out.
4. The beverage is heated by lifting and lowering the cup (the deeper the sound, the higher
5. Repeat step 3 and 4 until the required temperature is reached.
6. Put the cup aside.
7. Clean the steam tube with a wet towel.
8. Push
By pushing the
The steam tube has to be plunged in the liquid during the outcome.
When the liquid has reached the boiling point, it may start to splash.
If you purchase steam and the machine is working with an accounting system, right after
The steam can not be preselected.
When the Euroca-2 is switched on and is heating up, a selection of steamproducts is
select product
the temperature). The delivery of steam will automatically stop, after the programmed
time has been reached.
Start / Stop-operation has been released.
the purchase you can push the cleaning key then a short steam output is released to
clean the steam tube.
locked.
-key again, the outcome of the water will be finished, as long as the
-key twice shortly, in order to remove the condensed water out of the lines
-key again
-key twice again (= steam tube is now cleaned).
-key again, the steam delivery can be stopped in advance, if the
CAUTION : Improper use can result in scalding!
Page 5-6 BASE-2-02.05
Page 39

Local control
5.2.6. Prepare hot milk ( with Frigo option )
Option :
1. Place an empty cup under the delivery spout.
2. Select the key for milk
select product
12:00 22.01.1999
3. The product is delivered.
By repeated pressing of the key the drawing of milk can be prematurely ended, providing
Start / Stop operation has been released.
Hot milk can not
The milk in the Frigo (refrigerator) has to be kept at a temperature of 3°-5° . If the
milk is not kept at those temperature, a first class appearance of milk foam will
not be guaranteed.
5.2.7. Prepare milk foam ( with Frigo option)
Option :
1. Place a cup or other vessel under the delivery spout.
2. Select the key for milk foam.
select product
12:00 22.01.1999
3. The product is delivered.
By repeated pressing of the key the drawing of milk foam can be prematurely ended,
providing Start / Stop operation has been released.
Milk foam can not
The milk in the Frigo (refrigerator) has to be kept at a temperature of 3°-5° . If the
milk is not kept at those temperature, a first class appearance of milk foam will
not be guaranteed.
be preselected.
be preselected.
BASE-2-02.05 Page 5-7
Page 40

Local control
p
ply
5.2.8. Automatically prepare Cappuccino Magic, milky coffee or latté ( with Frigo option )
Option :
If an accounting system is installed on the Euroca-2 and is released, please read the
instructions in Section 6.0.
Coffee and hot water are simultaneously ready for drawing.
By pressing the
If the
(coffeeproducts can produced only during brewphase).
1. Place cup under the coffee delivery spout ( The spout height can be adapted to the cup ).
2. Press required product key.
3. The LED of the required key lights up red and in the display appears :
4. The product is freshly prepared automatically and is delivered.
Depending on the programming:
- The keys can be optionally repeated and can be preselected for mixing.
-
With the key preselected products can be cancelled.
A cancellation of the preselected products is not possible when in accounting operation.
The milk in the Frigo (refrigerator) has to be kept at a temperature of 3°-5° . If the
milk is not kept at those temperature, a first class appearance of milk foam will
not be guaranteed.
key is pressed for more than two seconds, all active products are interrupted
select product
choice 1 su
Other texts are possible in the display messages ( malfunction message ).
key preselected products are deleted (only if no accounting is active).
1
CAUTION : with improper operation there is a danger of scalding.
5.2.9. Preparation of Cappuccino and hot milk with a CPT ( Option )
Option :
1. Press the
possible when Start / Stop operation is released).
2. Put the milk inlet plastic pipe into the milk box.
3. Put the cup underneath the Cappuccino-Magic.
4. Press
The milk will be delivered.
By pressing the
The froth of the milk can be regulated by the air screw (Pull it out to have more froth,
The difference in height between milk box and cup should not be higher than 40 cm.
The temperature of the milk should not be more than the ambient temperature. Milk that
It doesn’t matter, which one of the products is released first. The only difference is the
If you purchase Cappuccino-Magic and the machine is working with an accounting
When „Magic“ is programmed accordingly, then a purchase of coffee an milk
More detailed information regarding the handling of the Cappuccino-Magic, are shown in
The milk in the Frigo (refrigerator) has to be kept at a temperature of 3°-5° . If the
select product
Start / Stop operation is released.
push it then you have less froth).
has already been heated up and the last consumation date has passed can not be used
for Cappuccino anymore.
the colour of the froth.
system, right after the purchase you can push the cleaning key then a short steam
output is released to clean the steam tube.
simultaneously is possible.
a separate user manual.
milk is not kept at those temperature, a first class appearance of milk foam will
not be guaranteed.
-key twice, in order to release the condensed water out of the tube (only
-key again:
-key again, it is possible to stop the delivery manually, only when
CAUTION : Improper use can result in scalding!
Page 5-8 BASE-2-02.05
Page 41

Local control
5.2.10. Preparing Cappuccino using the Cappuccinatore CPT
Description
Unit components:
1. O-ring seals ( 063111 )
2. Regulating screw
3. Suction hose
4. Cappuccinatore components
5. Steam nozzle (CPT connection)
6. O-ring ( 063112 )
Insert the suction hose (3) into the milk container. Completely close the temperature
regulating screw (2) by turning it clockwise as far as possible, then release one full turn.
Press the button to acurate the valve. If the Cappuccino is too hot, adjust the
temperature by turning the regulating screw slightly conunter-clockwise.
When the required Cappuccino quantity has been output, press the button to close the
valve.
Note:
The height differential between the milk pack and the Cappuccinatore should not be less
than 40 cm.
Milk which has passed ist use-by date or which has been previously heated, will not
foam correctly.
WARNING: Never reach under the delivery spout while a product is being output.
BASE-2-02.05 Page 5-9
Page 42

Local control
5.3. Daily cleaning
To achieve optimal quality of all drinks which are delivered, regular and thorough
cleaning of the Euroca-2 and the installed options is indispensable. Please observe the
safety regulations for the cleaning agent.
Intermediate rinsing:
Intermediate rinsing is available in normal and in accounting operation.
An intermediate rinsing can be executed as required.
1. Hold the
key pressed for 5 seconds ( Cleaning key ).
In the display appears:
2. Press
cleanings
Remove container
key briefly ( water quantity approx. 1 cup ).
rinsing
selection locked
select product
12:00 22.01.1999
Machine is ready for use again.
A servicetechnician may programming an automatical systemflush, a timley
regulary flush will (0-300 min) occur. No product selection is nesessary for this
activation. Six successive peep tones sound immediately before the automatic
rinsing is to be activated to give warning of the imminent automatic rinsing.
5.3.1. Clean coffee machine
The cleaning programme in the Euroca-2 includes manual and
automatic self-cleaning. Together they form a single working process.
Note : For the cleaning of the Euroca-2 without Frigo
points 1 to 12 and point 40 apply.
Options : The Frigo is an option of the Euroca-2.
1.
1. Press the knob of the delivery carriage and push upwards.
2.
2. Hold
key pressed for approx. five seconds, until in the display appears :
cleaning
remove container
Page 5-10 BASE-2-02.05
Page 43

Local control
g
g
g
g
g
3.
3. Draw out the grounds container within five seconds Î otherwise the machine
reverts to normal operational readiness:
The LEDs of the
cleaning
manual cleanin
and keys blink.
4.
4. Simultaneously with both hands ( safety regulation ) press the
and
- keys, until the brewing flask has run into the cleaning position.
!! Caution : Never reach into the machine in this phase Î Danger of accident !!
For safety reasons always use both hands (see illustration)!
5.
5. Clean the brewing cylinder, and especially the part behind the coffee grounds
skimmer, with a brush.
6.
6. Draw out the drip grating from the drip pan and clean.
7.
7. Wipe the coffee powder residues on the machine's shaft into the drip tray and
remove the dirt in the drip tray with a cloth.
With a fixed water drain Î Pour approx. 1 litre of water into the drip tray for
reflushing the line. Dry out the drip tray with a cloth and reinsert the drip grating.
cleaning
manual cleanin
cleaning
manual cleanin
cleaning
manual cleanin
CAUTION : If the Ambiente-2 is equipped with a waste-water tank then the waste-
water tank must be cleaned beforehand.
BASE-2-02.05 Page 5-11
cleaning
manual cleanin
Page 44

Local control
g
8.
9.
10.
11.
12.
8. Clean grounds container and insert again.
LED of the
keys blinks.
cleaning
insert tablet
9. Press the knob of the deliver carriage and push downwards.
cleaning
insert tablet
10. Drop a cleaning agent tablet authorised by the SCHAERER customer service into
the manual charging hopper.
cleaning
insert tablet
Wird eine mehrteilige Reinigungstablette verwendet,ist darauf zu achten das
der ganze Inhalt der Tablettenkapsel in den Trichtr geworfen wird.
11. Press
key briefly.
The automatic cleaning programme is started.
cleaning
selecion locked
Display message without Frigo
Hinweis : Press the
cleanin
cleaning
deterg. CPM
Display message with Frigo
key briefly in order to switch off the Euroca-2
automatically after the cleaning programme. The LED of the
lights up red. A further pressing of the
key deactivates the
key
automatic switching off.
Caution : The machine executes a rinsing cycle. Therefore under no
12.
circumstances place your hands under the coffee delivery spout during the selfcleaning programme as there is danger of scalding.
Without Frigo option move on to paragraph 40.
Page 5-12 BASE-2-02.05
Page 45

Local control
p
13.
13. Open the refrigerator door and draw out the milk container.
14.
14. Place a cleaning container with 4 litres of cold water and the cleaning agent
recommended by Schaerer into the Frigo. Use the water/cleaning agent mixing
ratio in accordance with the description on the packaging of the cleaning agent.
Immerse the two hoses into the cleaning agent.
Caution : You must use a separate cleaning container for the cleaning.
Under no circumstances may the milk container be used for the cleaning.
15.
15. Press
The automatic cleaning programme for the foamer head is started.
16.
key briefly.
Caution : The machine executes a rinsing cycle. Therefore under no
16.
circumstances place your hands under the coffee delivery spout during the selfcleaning programme as there is danger of scalding.
During the rinsing time the milk container can be cleaned with hot water and
rinsed with cold water. Do not use chemical cleaning agents or soap.
17.
17. When the automatic cleaning programme has ended, in the display appears :
Remove the cleaning container from the Frigo, thoroughly wash it out with warm
water and then replace it in the Frigo.
If a milklevelsensor is installed, the following mesage will appear on the display:
”Milk empty “. Besides the
BASE-2-02.05 Page 5-13
cleaning
lease rinse
button flashs.
Page 46

Local control
18.
19.
20.
21.
22.
18. Press
key briefly.
19. The automatic line rinsing from the Frigo to the foamer head is started.
20. Remove the cleaning container from the Frigo. Clean the hoses with a clean cloth.
Clean the interior of the Frigo with lukewarm water containing bicarbonate of soda
or vinegar. Rinse with clean water and dry thoroughly with a soft cloth. On no
account use scouring or cleaning agents or soap.
21. Replace the cleaned milk container into the Frigo and immerse the two hoses into
the container.
22. Tip the foamer head cover completely above up.
Page 5-14 BASE-2-02.05
Page 47

Local control
23.
23. Grasp the foamer head and draw it off forwards. A brief acoustic signal sounds.
24.
24. Hold the foamer head with the right hand (left-handers vice-versa) and using the
left hand draw the hose insert straight out with gentle sideways rocking
movements.
Please bear in mind that the two nipples are of unequal length. When mounting,
special care must be taken that these two elements are correctly fitted together.
(See point 36)
25.
25. Draw apart the foamer head lower part and the foamer head centre part.
When fitting together again please take care that the two outlet openings of
the lower part are mounted on the forward side.
(See point 35)
26.
26. Draw apart the foamer head upper part and the foamer head centre part.
*! Points 27 to 31 inclusive must be executed weekly !
27.
27. Draw off the hose ends from the ventilating valve in the Frigo.
BASE-2-02.05 Page 5-15
Page 48

Local control
28.
28. Hang the hoses on the mounting of the Euroca-2.
29. 29a.
29. Soak the hoses, the delivery insert and all foamer head
parts overnight in the cleaning agent recommended by
M. Schaerer.
Before reassembling and fitting the foamer head,
thoroughly wash off all parts with clean water in order
that all cleaning agent residues are rinsed away.
rückstände vollständig abgespühlt sind.
30. 30a.
30. When fitting the hoses, care must be taken that the
hoses are placed on to the correct nipples of the foamer
valve.
The hose with the foamer setting screw must be fitted to
the rear nipple.
31.
31. Hang the hoses on to the mounting of the Euroca-2 and
close the service door of the Frigo.
Zusammenstellung
Des Schäumerventils
32.
32. When fitting the foamer head take care that the discharge
openings are fitted to the forward side.
Page 5-16 BASE-2-02.05
Page 49

Local control
33. 33a.
33. The hose with the foamer setting screw must be fitted on
to the right side of the foamer head. (The hose nipples of
the foamer head are of different lengths, and the
boreholes of the foamer head are of different depths. If
the hose nipples are pressed into the foamer head the
wrong way round then the two elements cannot be
pressed together sufficiently. Should this be the case,
then please insert the hose nipples the other way round.)
34.
34. Hold the foamer head above and below and press
directly into the mounting.
40
35. After the termination of the automatic cleaning, in the display appears :
select product
12:00 22.01.1999
The Euroca-2 can now undergo a manual cleaning of the exterior.
During the cleaning programme, the machine is blocked for all product deliveries.
If the Stop key is pressed after the start of the cleaning, the machine switches off at
the end of the cleaning.
If the Euroca-2 is switched on (after cleaning and a switching off have taken place),
the foamer head is inserted and the service doors.
of the Euroca-2 is closed, then a rinsing is automatically carried out.
It should be noted that some elements can differ from those in the illustrations. The
reason for this is that the Euroca-2 is continuously subject to innovation.
BASE-2-02.05 Page 5-17
Page 50

Local control
5.3.2.
Description
Daily cleaning
Instructions for cleaning the Cappuccinatore CPT (optional)
Unit components:
1. O-ring seals ( 063111 )
2. Regulating screw
3. Suction hose
4. Cappuccinatore components
5. Steam nozzle (CPT connection)
6. O-ring ( 063112 )
At the end of the working day , the Cappuccinatore needs to be cleaned as follows:
Pour approximately 20 ml Rowa CPM into the cleaning bowl and insert the end of the suction
hose (3) into the cleaning bowl. Press the button to actuate the valve. When only pure steam
comes out of the CPT, the cock or valve can be closed.
Fill the cleaning bowl with cold water and insert the end of the suction hose into the cleaning
bowl. Press the button to actuate the valve. When only pure steam comes out of the CPT, press
the button again to close the valve.
! WARNING: Never reach under the delivery spout while the Cleaning program is running.
Weekly cleaning
After running the Cleaning cycle as described in section 6.4, pull the foamer head down to
release it. Dismantle it into ist component parts and let them soak in the cleaning solution
overnight (20 ml Rowa to 1 litre water). In the morning, clean all the parts thoroughly by hand
and rinse in cold water. Check the condition of the seals (1), reassemble the foamer head
and reattach the unit to the machine.
WARNING: Optimum efficiency cannot be guaranteed unless the Cleaning program is run
regularly.
Page 5-18 BASE-2-02.05
Page 51

Local control
pty
5.4. Shutdown / switch off the machine
At the end of the working day the machine is switched to the Standby mode. For this purpose
press during approx. 3 seconds the
<<standby>>
12.00 22.01.1999
If the machine is not going to be operated for a longer period of time, then the same must be
disconnected from the main power supply and the water connection must be interrupted by
closing the water.
Insert the CHEFF card into the card reader. (Only if the machine is programmed for „Switch
ON/OFF by card“.
ATTENTION: When you subsequently return the machine to use make sure that you open
the water tap first before you restore the power.
-key. The display shows:
5.5. Guidance on operating specially adapted machines
The following instructions only apply to machines with fresh and waste tanks
5.5.1.
5.5.2.
Filling the fresh water tank
If the water level in the fresh water tank falls too low, the -key starts to flash and the display
changes to:
selection locked
watertank em
1. Remove fresh water tank.
2.
Refill the fresh water tank.
3.
Place the fresh water tank.
Acknowledge by pressing the red flashing -key.
4.
To avoid damage of the water pump the machine will not deliver any more products until the
fresh water tank has been refilled.
Emptying the waste water tank
When the waste water tank is full, the -key starts to flash and the display changes to:
selection locked
waste watertank full
1. Remove waste water tank.
2.
Empty and rinse the waste water tank.
3.
Place the waste water tank.
Acknowledge by pressing the red flashing -key.
4.
To prevent the tank from overflowing the product selection is blocked.
BASE-2-02.05 Page 5-19
Page 52

Local control
5.5.3.
Operating instructions for machines with fresh and waste water tank (on a mobile trolley)
The tank capacities are:
16 liters for fresh water tank.
11 liters for waste water tank.
The fresh water tank must be refilled with fresh clean drinking water every day.
If the machine is not going to be used for a longer period of time, both tanks must be drained
and cleaned.
The inside of the machine trolley must be kept dry at all times.
Both tanks must be used only in their intended location (level control).
If the machine has to be moved to a new location do not push the machine trolley. For safety
reasons it must always be pulled.
The machine trolley must not be used for transporting goods. M. Schaerer Ltd. will
accept no liability for damage or consequential losses arising through incorrect handling
of the trolley machine.
5.6. Programming of the machine
The „CHEF“and „SAVE DATA“ chip cards are supplied as standard with your Euroca
machine. These cards provide a convenient way for you to interact with the machine’s
applications software.
All the functional procedures described in this register assume that the machine starts out in
the Ready state and with your standard initial settings in effect.
Keep your chip cards stored in a save place, where unauthorized persons can not get access
to them.
If a chip card is inserted, product selection is blocked.
Page 5-20 BASE-2-02.05
Page 53

Local control
q
5.6.1. CHEF card
The most important settings or changes which are necessary for daily operation can be
made with the CHEF card.
5.6.1.1. Menu overview
- Read off product counters for coffee and tea by use of keys
- Reset product counter to zero
- Regulate filling quantity
- Change grinding quantity
- Change switching on and off times
- Change time
- Change date
- Change PIN code
At the end of each menu the following applies:
Press
or keys to reach the next menu,
or draw out CHEF card normal operational readiness.
5.6.1.2. Read off product counters for coffee and tea by keys
1. Push CHEF card into the card reader.
2. Press
or key till menu:
total prod. counter
C: xxx T: xxx
= displayed value shows the total of all coffee and tea products.
3. The individual drawings can be read off one after another by pressing the relevant
product key.
4. Press
total prod. counter
uantity xxx
key to return to display of point 2,
Press
or keys to reach the next menu,
= displayed value shows the total for the selected product key.
or draw out CHEF card normal operational readiness.
5.6.1.3. Reset product counter to zero
1. Push CHEF card into the card reader.
2. Press
or keys till menu:
delete counter
execute ' Decaf '
3. Press key:
4. Press
delete counter
delete? ' Decaf '
key:
delete counter
... Down ...
5. Press
total prod. counter
C: xxx T: xxx
or keys to reach the next menu,
or draw out CHEF card Î normal operational readiness.
BASE-2-02.05 Page 5-21
Page 54

Local control
p
q
p
g
q
5.6.1.4. Change grinding quantity ( coffee powder ))
With this function the quantity of coffee powder to be used for each individual coffee
product can be individually specified.
1. Push CHEF card into the card reader.
2. Press
change grinding quanti.
or key till menu:
select
roduct
3. Press product key whose grinding quantity is to be changed:
change grinding quanti.
rind quantity +0%
4. Press the or keys to raise or lower the grinding quantity in +/- %.
5. Press
key to confirm the newly set or unchanged value.
6. The grinding quantity is now newly set.
7. Repeat steps 3 to 6 if the grinding quantity is still not right or if there are other products
whose metering must be set.
Press or keys to reach the next menu,
draw out CHEF card normal operational readiness.
5.6.1.5. Change filling quantity water and /or milk to coffee products
With this function the water and/or milk quantity to be delivered for each individual
product can be individually specified ( all coffee products and tea water ).
1. Push CHEF card into the card reader.
2. Press
3. 3Press product key whose filling quantity is to be changed:
4. Press the
5. Press
6. The water quantity is now newly set.
Steps 7 to 8 only for products with milk (Frigo option).
For products without milk move on to step 9.
7. Press the
8. Press
The milk quantity is now newly set.
9. Repeat steps 3 to 6 for water, and steps 3 to 9 for milk, if the filling quantity is still not
right or if there are other products whose metering must be set.
Press or keys to reach the next menu,
or draw out CHEF card normal operational readiness.
or keys till menu:
change fill quantity
select
change fill quantity
water
roduct
uantity 0%
or keys to raise or lower the filling quantity in +/- %.
key to confirm the newly set or unchanged value.
change fill quantity
uantity +0 %
milk
or keys to raise or lower the filling quantity in +/- %.
key to confirm the newly set or unchanged value.
Page 5-22 BASE-2-02.05
Page 55

Local control
p
5.6.1.6. Change metering time Steam, hot milk and/or milk foam
With this function the milk delivery and/or milk foam metering time for each individual
product can be individually specified.
The Start/Stop function is released :
The metering time cannot be set. The delivery of the products is fixed by a timeout and
can only be changed by a service technician.
The Start/Stop function is blocked :
The metering time is individually set as follows.
1. Push CHEF card into the card reader.
2. Press
or keys till menu:
change fill quantity
select
roduct
3. Press product key, whose metering time /filling quantity is to be changed:
change fill quantity
doser time +0 %
4. Press or keys to raise or lower the metering time/filling quantity in +/- %.
5. Press key to confirm the newly set or unchanged value.
6. The metering time /filling quantity is now newly set.
7. Repeat steps 3 to 6 if the metering time /filling quantity is still not right or if there are
other products whose metering must be set.
Press or keys to reach the next menu,
or draw out CHEF card normal operational readiness.
5.6.1.7. Change switching on and off times
The machine can be automatically switched off and on, e.g. to save electricity.
( This setting must be released by the service technician, if it is not already available )
1. Push CHEF card into the card reader.
2. Press v or
execute ' Decaf '
keys till menu:
on/off time
3. Press
key.
Switch-on 00:00
4. With or keys set the hour of the switching-on time.
Switch-on 23:00
5. Press key.
6. With
or keys set the minutes of the switching-on time.
Switch-on 23:30
7. Press key.
8. With
ª
Switch-on 23:30
Switch-off 00:00
or keys set the hours of the switching-on time.
Switch-on 23:30
Switch-off 06:00
BASE-2-02.05 Page 5-23
Page 56

Local control
5.6.1.8. Change time
5.6.1.9. Change date
9. Press
10. Press
key.
or keys to set the minutes of the switching-on time.
11. Press
12. Press
Switch-on 23:30
Switch-off 06:15
key.
or keys to reach the next menu,
draw out CHEF card normal operational readiness.
If the machine has switched off automatically, it can be switched on again at any time by
pressing the key. But in this case the switching function is suspended until the next
cycle. (Switching on the machine is not possible at the precise minute in which the
switching-off time is active. Please wait for a minute.)
The automatic switching on and off can be separately activated for each working day,
by a service technician. Thus, for example, from Monday to Friday the Euroca-2 can be
automatically switched on. At the weekend the Euroca-2 remains switched off, but can
be manually switched on at any time.
If all values for switching on and off times are zero, then the switching on and off function
is inactive.
1. Push CHEF card into the card reader.
2. Press
3. Press
or keys till menu:
change time
execute ' Decaf '
key.
change time
12:00:00
4. With or keys set the hour of the switching-on time.
5. With key confirm.
6. To set minutes and seconds repeat steps 4 and 5.
7. Press or keys to reach the next menu,
draw out CHEF card normal operational readiness.
1. Push CHEF card into the card reader.
2. Press
or keys till menu:
change date
execute ' Decaf '
3. Press key.
4. With
5. With
change date
22.01.1999
or keys set the day.
key confirm.
6. To set the month and the year repeat steps 4 and 5.
7. Press
or keys to reach the next menu,
draw out CHEF card Î normal operational readiness.
Page 5-24 BASE-2-02.05
Page 57

Local control
/
5.6.1.10. Change PIN code
1. Push CHEF card into the card reader.
2. Press
or keys till menu:
change PIN code
execute ' Decaf '
3. Press key.
4. With the
PIN-code 0000
- ` ` Decaf `Æ
`+
- and keys set first digit of the new PIN code.
5. With key confirm.
6. For each further digit repeat steps 4 and 5, until the PIN code has been completely
entered.
7. Press
or keys to reach the next menu,
draw out CHEF card Î normal operational readiness.
With the
key the already set values can be taken over.
PIN code only active with the appropriate programming.
The current PIN code is not displayed.
5.6.2. SAVE DATA card
The SAVE DATA card is a security card on which all machine data can be stored
securely.
Whenever setting changes have been made by the service technician, the Euroca-2
requests the programmer to save the newly set values on the SAVE DATA cards (A +
B).
The SAVE DATA cards should be kept in a safe place where it can be readily found.
Only use the SAVE DATA cards after prior discussion with the authorised SCHAERER
customer service.
SAVE DATA = Level A
SAVE DATA = Level B
5.6.2.1. Menu overview
- Machine Î Card
- Card Î Machine
At the end of each menu the following applies:
draw out SAVE DATA card è normal operational readiness.
BASE-2-02.05 Page 5-25
Page 58

Local control
5.6.2.2. Store machine data on card
1. Push SAVE DATA card into the card reader.
2. Press
3. Press
or keys till menu:
SAVE DATA
machine Æ card
key to transfer data from machine to card:
... save ...
4. Data are transferred if acoustic signal sounds and then the machine returns to normal
operational readiness:
select product
12:00 22.01.1999
5. Draw SAVE DATA card out of the card reader:
5.6.2.3. Load machine data from card to machine
1. Push SAVE DATA card into the card reader.
2. Press
or keys till menu:
SAVE DATA
card Æ machine
3. Press key to transfer data from machine to card.
... Load ...l
4. Data are transferred if acoustic signal sounds, and the date of the last backup appears
in the display:
last backup
Date 22.01.1999
5. Draw SAVE DATA card out of the card reader:
select product
12:00 22.01.1999
The machine is now in normal operational readiness again.
Page 5-26 BASE-2-02.05
Page 59

Local control
/
5.7. Programming with option chip cards
The chip cards which are described in this Section are obtainable as options and are not
included in the standard scope of supply of the Euroca. You will find the chip cards that
are obtainable and a brief description of them in Section 3.2.2.
To begin with, all functional sequences described in this list are available to your
machine when in operational readiness and in the basic setting for daily use.
When a chip card is inserted product selection is blocked.
5.7.1. PROGRAM card
5.7.1.1. Menu overview
5.7.1.2. Programmable security level
In normal operation the PROGRAM card serves for statistical purposes. If an accounting
system is installed, then it is used to make the settings necessary for accounting
operation.
- - Accounting operation release/block
- - Price switching
- - MONEY card price level 1 + 2
- - Change jeton price, with or without MONEY cards price level 1 + 2.
- - Change product price and article number ( only for external accounting operation )
- - Display MONEY sales
- - Delete MONEY sales
- - Display MASTER sales
- - Delete MASTER sales
- - Log in MASTER card
- - Delete MASTER card table
- - Switch on/off time switch operation
- - Change PIN code
At the end of each menu the following applies:
Draw out PROGRAM card -> normal operational readiness.
Press the
or keys till the next menu.
If the service technician has programmed security level 1 or 3 for the PROGRAM card
then the PIN code must be entered again before each use.
1. Push PROGRAM card into the card reader:
2. With the
3. With
PIN-code 0000
- ` ` Decaf Æ`
` +
and keys set first digit of the PIN code.
key confirm.
4. Repeat steps 2 and 3 for each further digit, until the PIN code has been completely
entered.
5. Press
or keys to reach the next menu,
draw out PROGRAM card Î normal operational readiness.
With the key already set values can be taken over.
PIN code only active with appropriate programming.
Current PIN code is not displayed.
BASE-2-02.05 Page 5-27
Page 60

Local control
p
p
y
5.7.1.3. Release or block accounting operation
With this function the accounting operation programmed by the authorised SCHAERER
customer service can be released or blocked. It is only applicable for machines with
connected accounting system.
1. Push PROGRAM card into the card reader.
2. Press or keys till menu:
Accounting mode
................
3. 3. Press
4. 4. Press
5.7.1.4. Price switching
If all values are at zero then the time switch operation is automatically switched
1. Push PROGRAM card into the card reader.
2. Press
3. Press key.
4. With the and keys enter the integer digit places ( Price 1 0-99).
5. With
6. With the
7. With
8. With the
9. With
10. With the
11. With
12. Press
13. If the changed date are to be stored on the DATA SAVE card,
14. Wait until acoustic signal sounds.
15. If the changed date are not to be saved on the DATA SAVE card,
key to switch between released and blocked.
or keys to reach the next menu,
draw out PROGRAM card normal operational readiness.
off and thus Price 1 is always active.
or keys till menu:
change pice level
execute ' Decaf '
price _ 1 00:00
key confirm.
price _ 1 xx:00
and keys enter the fractional digit places ( Price 1 0-99).
key confirm.
price – 1 xx:xx
rice – 2 00:00
and keys enter the integer digit places ( Price 2 0-99).
key confirm.
price – 1 xx:xx
rice – 2 xx:00
and keys enter the fractional digit places ( Price 2 0-99).
key confirm.
or keys to reach the next menu,
draw out PROGRAM card Î
insert card
SAVE DATA / Ke
...
push in DATA SAVE card.
... SAVE ...
credit operation
12.00 22.01.1999
Press
key .
Page 5-28 BASE-2-02.05
Page 61

Local control
p
p
p
y
p
p
p
p
5.7.1.5. MONEY card Price level 1 + 2 change
1. Push PROGRAM card into the card reader.
2. Press
or keys till menu:
change prices
select
roduct
3. Press required product.
4. With the
5. With
price level - 1
roduct price 0:00
and keys enter the first product price ( 0-99.99 ).
key confirm.
Price level - 2
roduct price 0:00
6. With the and keys enter the second product price ( 0-99.99 ).
7. With key confirm.
8. Repeat steps 3 and 7 for each further product price change.
9. Press or keys to reach the next menu,
draw out PROGRAM card Î
insert card
SAVE DATA / Ke
...
10. If the changed date are to be stored on the DATA SAVE card,
push in DATA SAVE card
... SAVE ...
11. Wait until acoustic signal sounds.
credit operation
12.00 22.01.1999
12. If the changed date are not to be saved on the DATA SAVE card,
Press
key .
5.7.1.6. Change jeton price, with or without MONEY card Price level 1 + 2
1. Push PROGRAM card into the card reader.
2. Press
or keys till menu:
change prices
select
roduct
3. Press required product.
4. With the
price level - 1
roduct price 0:00
and keys enter the first product price ( 0-99.99 ).
Without MONEY card operation enter the value 0.00.
5. With
6. With the
key confirm.
price level - 2
roduct price 0:00
and keys enter the second product price ( 0-99.99 ).
Without MONEY card operation enter the value 0.00.
7. With
number tocken/
key confirm.
tocken/Ukey 1-price
rice 0
8. Enter number of jetons which correspond to the price of the product.
9. With
key confirm.
10. Repeat steps 3 and 9 for each further product price change.
11. Press
or keys to reach the next menu,
draw out PROGRAM card Î
ª
BASE-2-02.05 Page 5-29
Page 62

Local control
p
p
p
y
y
insert card
SAVE DATA / Ke
...
12. If the changed date are to be stored on the DATA SAVE card,
push in DATA SAVE card.
... SAVE ...
13. 13. Wait until acoustic signal sounds.
credit operation
12.00 22.01.1999
14. If the changed date are not to be saved on the DATA SAVE card,
Press
key.
5.7.1.7. Change product price and article number ( for external accounting system CCI / CSI )
1. Push PROGRAM card into the card reader.
2. Press
or keys till menu:
change prices
select
roduct
3. Press required product.
price level - 1
roduct price 0:00
4. With the
With
roduct price 0:00
and keys enter the first product price ( 0-99.99 ).
key confirm.
price level - 2
5. With the and keys enter the second product price ( 0-99.99 ).
6. With
key confirm.
single product
article No. 0
7. With the and keys enter the article number ( 0-99 ).
8. With
9. With the
10. With
key confirm.
aouble product
article No. 0
and keys enter the article number ( 0-99 ).
key confirm.
11. Repeat steps 3 and 10 for each further product price and/or article number change.
12. Press
or keys to reach the next menu,
draw out PROGRAM card Î
insert card
SAVE DATA / Ke
...
13. If the changed date are to be stored on the DATA SAVE card,
push in DATA SAVE card.
... SAVE ...
14. Wait until acoustic signal sounds.
credit operation
12.00 22.01.1999
15. If the changed date are not to be saved on the DATA SAVE card,
Press
key .
Page 5-30 BASE-2-02.05
Page 63

Local control
5.7.1.8. Display MONEY sales
1. Push PROGRAM card into the card reader.
2. Press
or keys till menu:
sales amount Money
amoeunt 0.00
3. Press or keys to reach the next menu,
draw out CHEF card normal operational readiness.
5.7.1.9. Delete MONEY sales
1. Push PROGRAM card into the card reader.
2. Press
or keys till menu:
sales amount Money
amoeunt 0.00
3. Press key.
sales amount Money
delete ? ‘ Decaf ‘
4. Press key.
5. 5. Press or keys to reach the next menu,
draw out CHEF card Î normal operational readiness.
5.7.1.10. Display MASTER card
1. 1. Push PROGRAM card into the card reader.
2. 2. Press
sales amount Master
3. 3. Press
draw out CHEF card normal operational readiness.
5.7.1.11. Delete MASTER card
1. Push PROGRAM card into the card reader.
2. Press
sales amount Master
... Down ...
or keys till menu:
amoeunt 0.00
or keys to reach the next menu,
or keys till menu:
amoeunt 0.00
3. Press key.
sales amount Master
delete ? ‘ Decaf ‘
4. Press key.
5. Press
... Down ...
or keys to reach the next menu,
draw out CHEF card normal operational readiness.
BASE-2-02.05 Page 5-31
Page 64

Local control
5.7.1.12. Log in MASTER card
1. Push PROGRAM card into the card reader.
2. Press
3. Press key.
4. Draw out PROGRAM card:
MASTER / PROGRAM
5. Push in MASTER card.
6. Draw out MASTER card.
MASTER / PROGRAM
Should additional masterecards released, repeat point 5+6 several times.
7. Press or keys to reach the next menu,
draw out CHEF card normal operational readiness.
Maximum 20 cards programmable.
5.7.1.13. Delete MASTER table
1. Push PROGRAM card into the card reader.
2. Press
3. Press
delete ? ' Decaf '
4. Press
If the table is not to be deleted,
Press
draw out CHEF card Î normal operational readiness.
or keys till menu:
log on MASTER
execute ' Decaf '
remove card
insert card
card logged in
remove card
insert card
or keys till menu:
delete MASTER
execute ' Decaf '
key.
delete Master
key.
delete Master
... Down ...
or keys to reach the next menu,
Page 5-32 BASE-2-02.05
Page 65

Local control
p
/
5.7.1.14. Change PIN code
1. Push PROGRAM card into the card reader.
2. Press
or keys till menu:
change PIN code
execute ' Decaf '
3. Press key.
4. Press
change PIN code
execute ' Decaf '
key.
PIN-code 0000
` +
- ` ` Decaf `
5. 5. With the and keys enter first digit of the new PIN code.
6. 6. With
key confirm.
7. 7. Repeat steps 5 and 6 for each further digit, until PIN code has been completely
entered.
8. 8. Press
or keys to reach the next menu,
draw out CHEF card normal operational readiness.
With the key already set values can be taken over.
PIN code only active with appropriate programming.
Current PIN code is not displayed.
In event of false entries, repeat steps 3 to 7.
5.7.2. KEY BLOCK card
With the KEY BLOCK card product keys can be blocked, and blocked keys can be
released again.
5.7.2.1. Menu overview
- - Block keys
- - Release keys
5.7.2.2. Block keys
1. Push KEY BLOCK card into the card reader.
2. All released product keys light up red:
button locked
select
roduct
3. Press product key, which is to be blocked. The lamp of the relevant key goes out.
4. Draw out KEY BLOCK card. The required product key is now blocked.
Block all product keys Î Press
key.
Also several keys can be blocked in one procedure. (Display-LED light up).
Non-programmed keys do not light up when the KEY BLOCK card is inserted and
cannot be blocked / release.
BASE-2-02.05 Page 5-33
Page 66

Local control
p
p
g
5.7.2.3. Release keys
1. Push KEY BLOCK card into the card reader.
2. All product keys which do not light up red are blocked:
button locked
select
roduct
3. Press product key, which is to be released. The lamp of the relevant key lights up red.
4. Draw out the KEY BLOCK card.
If all product key have been previously blocked with the
the procedure can be reversed:
Î Press
key, the previously blocked keys are now released again.
Also several keys can be released in one process.
Non-programmed product keys do not light up when the KEY BLOCK card is inserted
and cannot be released / blocked.
5.7.3. COFFEE TEST card
With the COFFEE TEST card a grinding quantity test can be executed and the grinding
period per coffee product can be changed.
The functional possibilities of the COFFEE TEST card will also be appreciated by the
coffee supplier if he wishes to harmonise a new mixture to the machine.
5.7.3.1. Menu overview
- Grinding quantity test
At the end of each menu the following applies:
Draw out COFFEE TEST card -> normal operational readiness.
5.7.3.2. Grinding quantity test programme
1. Push COFFEE TEST card into the card reader:
grinder test
remove container
key and are unchanged, then
2. Take out grounds container -> Automat moves to brewing position:
grinder test
select
roduct
3. Place flat container in the container cavity below the automat.
4. Press coffee product whose grinding quantity is to be verified -> the ground product falls
into the container.
grinder test
rind quantity 0%
5. Verify grinding quantity.
key to raise the ground product in %.
key to reduce the ground product in %.
After terminating the ground product setting the newly set value is automatically at
100%.
ª
Page 5-34 BASE-2-02.05
Page 67

Local control
p
6. With
key confirm.
grind test
select
roduct
To check further products, repeat steps 3 to 6.
7. Reinsert the grounds container.
8. Draw out COFFEE TEST card -> Automat moves back to normal position:
select product
12:00 22.01.1999
BASE-2-02.05 Page 5-35
Page 68

Local control
Page 5-36 BASE-2-02.05
Page 69

Accounting systems
6. ACCOUNTING SYSTEMS
Options :
This Section concerns those users who have equipped the SCHAERER
Euroca-2 with an accounting system.
Possible accounting systems
The Euroca-2 can be operated with or without accounting systems. Various
systems and possibilities are available for the accounting operation.
Sect. Text...............................................................................................................................Page
Usable with all accounting systems
6.1 The MASTER chip card .................................................................................................6-2
6.1.1. Drawing drinks with the MASTER card............................................................................ 6-2
Accounting with internal Euroca-2 systems
6.2 MONEY chip cards system.............................................................................................. 6-2
6.2.1. MONEY card....................................................................................................................6-3
6.2.1.1. Prepare drinks with MONEY card.................................................................................... 6-3
6.2.1.2. Program individual filling and grinding quantity of the coffee products ........................... 6-4
6.2.1.3. Delete individual filling and grinding quantity of the coffee products............................... 6-4
6.2.2. LOAD card ....................................................................................................................... 6-5
6.2.2.1. Menu overview.................................................................................................................6-5
6.2.2.2. Programmable security level ........................................................................................... 6-5
6.2.2.3. Load credit on to MONEY card........................................................................................ 6-5
6.2.2.4. Delete credit on MONEY card ......................................................................................... 6-6
6.2.2.5. Display and delete loading on MONEY card ................................................................... 6-7
6.2.2.6. Chip cards info................................................................................................................. 6-7
6.2.2.7. Release MONEY card...................................................................................................... 6-8
6.2.2.8. Block MONEY card.......................................................................................................... 6-8
6.2.2.9. MONEY history .............................................................................................................. 6-9
6.2.2.10. Change PIN code............................................................................................................. 6-9
6.2.3. PROGRAM card ............................................................................................................6-10
6.2.3.1. Menu overview...............................................................................................................6-10
Drawing drinks with the MASTER card
6.3 Token tester and related systems..............................................................................6-11
6.3.1. Obtaining drinks............................................................................................................. 6-11
6.4 Coin tester without change return and related systems ......................................... 6-11
6.4.1. Obtaining drinks............................................................................................................. 6-11
Accounting with external systems
6.5 External accounting via bar till...................................................................................6-12
6.5.1. Obtaining drinks............................................................................................................. 6-12
BASE-2-02.06 Page 6-1
Page 70

Accounting systems
6.1 The MASTER card
The MASTER card is an account chip card which can be used in conjunction with all
types of systems, in other words both internal and external accounting systems. It
entitles its holder to obtain drinks from the machine free of charge and without the drinks
being booked to the accounting system.
Orders keyed in conjunction with a MASTER card are only added to the machine and
day counters.
The MASTER card needs to be released by the service engineer or with the PROGRAM
card (option) to operate on your machine (see chapter 5.7.1.5). If you intend a MASTER
card to be accepted by more than one machine, it needs to be released on each
machine separately. This is a security precaution.
The MASTER card is available as an optional extra and is not supplied as standard
together with the Euroca-2 .
6.1.1 Drawing drinks with the MASTER card
For free drawing of drinks push the MASTER card into the card reader. Then press the
required product key and draw the card out of the card reader again.
1. Push MASTER card into the card reader:
free product
12:00 22.01.1999
2. Press product key:
The product is delivered.
3. Remove MASTER card.
6.2 MONEY chip cards system
Required chip cards - MONEY - A - card(s)
- MONEY - B - card(s)
- MONEY - C - card(s)
- MONEY - D - card(s)
- MONEY - E - card(s)
- MONEY - F - card(s)
- MONEY - G - card(s)
- MONEY - H - card(s)
- MONEY - I - card(s)
- MONEY - J - card(s)
- LOAD card
- PROGRAM card
- MASTER card (see Section 6.1)
To begin with, all functional sequences described in this section are available in the
Euroca-2 when in operational readiness and in the basic setting for daily use.
Page 6-2 BASE-2-02.06
Page 71

Accounting systems
p
pply
p
6.2.1 MONEY card
The MONEY card is a credit card which must be inserted in the card reader for the
drawing of a drink. The drawings are charged to the card and the remaining credit is
displayed.
The various MONEY cards (MONEY A - J) only differ in their price gradations ( 255 %, 0
% of the programmed product prices). These can be programmed individually by the
service technician to meet the relevant requirements.
A MONEY card can be released for several Euroca-2 machines but this requires that the
identification numbers of all Euroca-2 machines are identical (set by the service
technician).
6.2.1.1 Prepare drinks with the MONEY card
Coffee products
credit operation
12:00 22.01.1999
1. Push MONEY card into the card reader.
credit xx.xx
celect
roduct
2. Press product key.
credit xx.xx
choice x su
3. The drink is delivered.
4. Draw further products or remove MONEY card from the card reader.
Drawing tea or steam
credit operation
12:00 22.01.1999
1. Push MONEY card into the card reader.
credit xx.xx
select
roduct
2. Press tea or steam product key.
credit xx.xx
12.00 22.01.1999
3. The drink is delivered.
A second pressing of the previously selected product key breaks off the water or steam
delivery.
Multiple drawings of water and steam products are not possible.
After pressing the product key the product price is deducted from the credit on the
MONEY card and the new credit is displayed.
Multiple drawings of coffee products are possible.
Press election with several MONEY cards is not possible. All
please wait
remove card
drawings of the first MONEY card are delivered before products
can be drawn with the next MONEY card.
If the MONEY card remains in the card reader for more than five seconds (can be set by
the service technician 0 - 99 seconds), an acoustic signal sounds as a warning that the
MONEY card is still in the card reader (acoustic signal can be deactivated by the service
technician).
This message appears if the product price is higher than the
credit xx.xx
to less amount
available credit on the MONEY card.
BASE-2-02.06 Page 6-3
Page 72

Accounting systems
p
g
g
p
p
p
6.2.1.2 Program individual filling and grinding quantity of the coffee products
credit operation
12.00 22.01.1999
1. Push MONEY card into the card reader:
credit xx.xx
select
roduct
2. Hold key pressed approx. 4 sec.
select product
store ?` Decaf `
3. Select the required product key.
water quantity + 0 %
e `-/+ ` `Decaf`
chan
4. With
5. Press
and keys change the water quantity ( -/+ in max. 30 % ).
key, to confirm the changed water quantity.
grinder quantity +0 %
e `-/+ ` `Decaf`
chan
6. With and keys change the grinding quantity ( -/+ in max. 20 % ).
7. Press
key, to confirm the changed grinding quantity.
select product
store ?` Decaf `
8. Repeat steps 3 to 7 for each further product programming.
9. Press
key, to store the changed data on the card.
... busy ...
credit xx.xx
select
roduct
Acoustic interval signal sounds.
10. Draw MONEY card out of the card reader.
11. Product can be drawn with the newly programmed filling and grinding quantity.
If the MONEY card is withdrawn (step 9) before the storage is effected, a short
acoustic signal is sounded. The values are not stored on the card.
6.2.1.3 Delete individual filling and grinding quantity of the coffee products
credit operation
1. Push MONEY card into the card reader:
2. Hold
credit xx.xx
select
roduct
key pressed approx. 4 sec. until an acoustic signal sounds. The display
announces:
individual measuring
» delete ? ` Decaf `
3. Press
key
Acoustic interval signal sounds.
4. 4. Draw MONEY card out of the card reader.
Credit xx.xx
select
roduct
After deletion, the standard values of the manufacturer are transferred to the card.
Page 6-4 BASE-2-02.06
Page 73

Accounting systems
/
6.2.2 LOAD card
With the LOAD card, credit can be loaded onto or deleted from the MONEY cards.
If no LOAD card is available, the MONEY cards can be loaded by the authorised
SCHAERER customer service.
The LOAD card is obtainable as an option and is not included in the standard scope of
supply of the Euroca-2.
6.2.2.1 Menu overview
- - Load MONEY cards
- - Delete MONEY cards
- - MONEY cards loading
- - MONEY cards Info
- - Release MONEY card
- - Block MONEY card
- - MONEY card history
- - Change PIN code
At the end of each menu the following applies:
Press
Draw out LOAD card normal operational readiness.
or keys to reach the next menu,
6.2.2.2 Programmable security level
If the service technician has programmed security level 1 or 3 for the LOAD card then
the PIN code must be entered again before each use.
1. Push LOAD card into the card reader:
2. With the
3. With
PIN-code 0000
- ` ` Decaf Æ`
` +
and keys enter first digit of the PIN code.
key confirm.
4. Repeat steps 2 and 3 for each further digit, until PIN code has been completely entered.
5. Press
or key to reach the next menu,
Draw out LOAD card Î normal operational readiness.
With the
key already set values can be taken over.
PIN code only active with appropriate programming.
Current PIN code is not displayed.
6.2.2.3 Load credit on to MONEY card
1. Push LOAD card into the card reader.
2. Press
or keys till menu:
load MONEY-cards
execute ‘ Decaf ’
3. Press key.
remove card
ª
BASE-2-02.06 Page 6-5
Page 74

Accounting systems
y
y
4. Draw out LOAD card.
insert card
MONEY / LOAD -Æ
5. Push MONEY card into the card reader.
Amount = Balance
Entry = Amount to be loaded
6. With the
amount xx.xx
entr
x.xx
and keys enter the loading amount.
For each key press a factor which has been programmed by the service technician is added
key, or subtracted = key.
=
7. Press
key.
amount xx.xx
... save ...
remove card
8. Draw out MONEY card.
insert card
MONEY / LOAD -Æ
9. Load a further MONEY card Î Repeat steps 5 to 8.
Back to menu Î Push LOAD card into the card reader.
load MONEY-cards
execute ‘ Decaf ’
10. Press
or keys to reach the next menu,
Draw out LOAD card normal operational readiness.
6.2.2.4 Delete credit on the MONEY card
1. Push LOAD card into the card reader.
2. Press
delete MONEY-cards
or keys till menu:
execute ‘ Decaf ’
3. Press key.
4. Draw out LOAD card:
5. Push MONEY card into the card reader:
6. Press
7. Draw out MONEY card.
8. Delete a further MONEY card Î Repeat steps 5 to 7.
9.
remove card
delete MONEY-cards
execute ‘ Decaf ’
MONEY card
delete ? ' Decaf '
key.
MONEY card
remove card
insert card
MONEY / LOAD -Æ
... bus
...
Back to menu Î LOAD card into the card reader.
delete MONEY-cards
execute ‘ Decaf ’
Press
or keys to reach the next menu,
Draw out LOAD card Î normal operational readiness.
Page 6-6 BASE-2-02.06
Page 75

Accounting systems
play
6.2.2.5 Display and delete MONEY card charge
1. Push LOAD card into the card reader.
2. Press
= Total amount of the charges of all MONEY cards since the
or keys till menu:
load MONEY-cards
amout 0.00
last deletion
3. Press key.
load MONEY-cards
delete ? `Decaf `
4. Press key.
load MONEY-cards
... done ...
5. Press
6.2.2.6 Chip cards Info
The card no. (sequential manufacturer's number ) of the MONEY card can be
For example, if a MONEY card is found the owner can be established by means of the
1. Push LOAD card into the card reader.
2. Press
3. Press
4. Draw out LOAD card.
5. Push MONEY card into the card reader.
6. Draw out MONEY card.
7. 7. Display a further MONEY card Î Insert next MONEY card.
8. 8. Press
load MONEY-cards
amout 0.00
or keys to reach the next menu,
draw out LOAD card Î normal operational readiness.
interrogated.
card number, providing the MONEY cards of the owner were registered at the time of
issue.
or keys till menu:
info MONEY-card
dis
' Decaf '
key.
remove card
insert card
MONEY / LOAD Æ
MONEY - A YY
card no. xxxx
MONEY-A = Price group
YY = Transaction counter ( drawn Pro )
card no. = card number
insert card
MONEY / LOAD -Æ
Back to menu Î Push LOAD card into the card reader.
or keys to reach the next menu,
Draw out LOAD card Î normal operational readiness.
BASE-2-02.06 Page 6-7
Page 76

Accounting systems
y
y
y
y
6.2.2.7 Release MONEY card
1. Push LOAD card into the card reader.
2. Press
release MONEY-card
3. Press key.
4. Draw out LOAD card:
5. Push MONEY card into the card reader :
6. Draw out MONEY card.
7. 7. Release another MONEY card Î Insert next MONEY card.
Back to menu Î Push LOAD card into the card reader.
8. 8. Press
Draw out LOAD card Î normal operational readiness.
6.2.2.8 Block MONEY card
1. Push LOAD card into the card reader.
2. Press
3. Press
or keys till menu:
execute ` Decaf `
remove card
insert card
Mone
/ LOAD Æ
MONEY card
released
remove card
insert card
Mone
/ LOAD Æ
or keys to reach the next menu,
or keys till menu:
lock MONEY-card
execute ` Decaf `
key.
lock card
4. Draw out LOAD card:
insert card
Mone
/ LOAD Æ
5. Insert MONEY card in the card reader.
MONEY card
blocked
remove card
6. Draw out MONEY card.
insert card
Mone
/ LOAD -->
7. 7. Block a further MONEY card Î Insert next MONEY card.
Back to menu Î Push LOAD card into the card reader.
8. 8. Press
or keys to reach the next menu,
Draw out LOAD card Î normal operational readiness.
Page 6-8 BASE-2-02.06
Page 77

Accounting systems
play
/
6.2.2.9 MONEY - History
1. Push LOAD card into the card reader.
2. Press
3. Press key.
or keys till menu:
MONEY history
dis
' Decaf '
No. xx xxxxx
12.00 22.01.1999
The card and register number, the time and the date of the last card writing are
displayed.
4. With the or keys the MONEY card entries can be scrolled through (1-20).
5. Draw out LOAD card
Î normal operational readiness.
The owner of the MONEY card can be determined with the card no. ( manufacturer's
sequential no. ).
For example, if a MONEY card is found the owner can be established by means of the
card number, providing the MONEY cards of the owner were registered at the time of
issue.
6.2.2.10 Change PIN code
1. Push LOAD card into the card reader.
2. Press
or keys till menu:
change PIN code
execute ' Decaf '
3. Press key.
PIN-code 0000
- ` ` Decaf `Æ
`+
4. 4. With the and keys set the first digit of the new PIN code.
5. 5. With
key confirm.
6. 6. Repeat steps 4 and 5 for each digit, until PIN code has been completely entered.
7. 7. Press
or keys to reach the next menu,
Draw out LOAD card Î normal operational readiness.
With the key already set values can be taken over.
PIN code only active with appropriate programming.
Current PIN code is not displayed.
BASE-2-02.06 Page 6-9
Page 78

Accounting systems
6.2.3 PROGRAM card
In the MONEY accounting operation the PROGRAM card is required for statistical
The PROGRAM card is obtainable as an option and is not included in the standard
6.2.3.1 Menu overview
- - Accounting operation release/block
- - Price switching
- - MONEY card Price level 1 + 2
- - Change jeton price, with or without MONEY cards Price level 1 + 2.
- - Change product price and article number ( only for external accounting operation )
- - Display MONEY sales
- - Delete MONEY sales
- - Display MASTER sales
- - Delete MASTER sales
- - Log in MASTER card
- - Delete MASTER card table
- - Switch on/off time switch operation
- - Change PIN code
At the end of each menu the following applies:
Draw out PROGRAM card -> normal operational readiness.
Press the
The operation and programming of the Euroca-2 with the PROGRAM chip card is
purposes and for the setting of operator-relevant data.
scope of supply of the Euroca.
or keys till the next menu.
described in detail in Section 5.7.1.
Page 6-10 BASE-2-02.06
Page 79

Accounting systems
p
p
6.3 Token tester and related systems
Chip cards required - no cards
- MASTER-card (see chapter 6.1)
To begin with, all functional sequences described in this Section are available in the
Euroca-2 when in operational readiness and in the basic setting for daily use.
With the Euroca-2 MONEY card operation can be conducted in parallel with jeton
operation, providing this has been released by the service technician.
6.3.1 Obtaining drinks
1. The initial setting display is:
credit operation
12:00 22.01.1999
2. Insert a token into the token tester
token credit 1
select
roduct
3. Press the required product button. The machine delivers the drink.
You can feed more than one token at a time. Your service engineer defines the number
of tokens required for each product button; when you subsequently select a product
button, that number of tokens is deducted from the displayed credit total.
You may need to feed several tokens to be able to order a particular drink (up to a
maximum of five tokens).
The token tester will not accept tokens unless the machine is switched on and
accounting mode is actuated using the PROGRAM card (see chapter 5.7.1.3).
ATTENTION: Switching off the machine cancels any remaining credit balance
(see chapter 6.2 ).
6.4 Coin tester without change return and related systems
Chip cards required - no cards
- MASTER-card (see chapter 6.1)
All the functional procedures described in this register assume that your machine starts
out in the ready state and with your standard initial settings for daily use in effect.
6.4.1 Obtaining drinks
1. The initial setting display is:
credit operation
12:00 22.01.1999
2. Feed the required amount into the coin tester. Make sure you only insert coins identified
as accepted by the coin tester.
price level-1
select
roduct
ª
BASE-2-02.06 Page 6-11
Page 80

Accounting systems
3. Press the required product button. The machine delivers the drink.
For coin tester with more than one price categories ask your authorised SCHAERER
customer service.
The coin tester will not accept coins unless the machine is switched on and accounting
mode is actuated using the PROGRAM card (see chapter 5.7.1.3).
ATTENTION: Switching off the machine cancels any remaining credit balance
(see chapter 5.7.1.3).
6.5 External accounting via bar till
Chip cards required - no cards
MASTER-card (see chapter 6.1)
-
In this mode of operation, your Euroca-2 machine is networked to an external accounting
system and indirectly linked to the recording cash desk via bar till.
Waiter identification is managed by the external system. When the system has checked
the waiter identification, it sends a goahead signal to the Euroca-2 machine. Every time
products are supplied, the Euroca-2 transmitts the product numbers and quantity to the
cash desk to be booked to the relevant waiter.
All the functional procedures described in this register assume that your machine starts
out in the ready state and with your standard initial settings for daily use in effect.
6.5.1 Obtaining drinks
1. The initial setting display is:
2.
3.
external release
12:00 22.01.1999
Perform the waiter identification procedure in conjunction with the accounting system.
select product
Press the required product button. The machine delivers the drink.
For accounting mode to function properly, the machine must be switched on and
accounting mode is actuated using the PROGRAM card (see chapter
5.7.1.3).
Page 6-12 BASE-2-02.06
Page 81

Product description of the Frigo
7. FRIGO
Options :
This Section concerns those users who have equipped the SCHAERER
Euroca II with a Frigo.
Sect. TEXT.............................................................................................................................Page
7.1. Product description of the Frigo..................................................................................7-2
7.1.1. General view of the Frigo.................................................................................................7-2
7.1.2. Installation plan................................................................................................................ 7-2
7.1.3. Purpose of use of the Frigo .............................................................................................7-2
7.1.4. Safety precautions Frigo..................................................................................................7-3
7.1.5. Labelling of the Frigo ....................................................................................................... 7-3
7.2. Product data of the Frigo.............................................................................................. 7-4
7.2.1. Performance features of the Frigo................................................................................... 7-4
7.2.2. Dimensions of the Frigo...................................................................................................7-4
7.2.3. Energy supply of the Frigo...............................................................................................7-4
7.2.4. Accessories of the Frigo .................................................................................................. 7-4
7.3 Malfunctions and remedies .......................................................................................... 7-5
7.3.1. The Frigo does not function............................................................................................. 7-5
7.3.2. Loud operating noise ....................................................................................................... 7-5
7.3.3. Insufficient cooling ...........................................................................................................7-5
7.4 Controls of the Frigo .....................................................................................................7-6
7.5 Commissioning and setting up the Frigo....................................................................7-7
7.5.1. First use ..........................................................................................................................7-7
7.5.2. Setting the temperature ................................................................................................... 7-7
7.5.3. Set milk foam by means of air regulating valve............................................................... 7-7
7.5.4. Level monitoring of milk container / milk empty ( option )............................................... 7-8
7.5.5. Temperature monitoring of the milk to be warmed ( option )........................................... 7-8
7.6 Cleaning of the Frigo.....................................................................................................
7.6.1. Rinsing the milk lines.......................................................................................................7-8
7.6.2. Steam cleaning................................................................................................................7-9
7.6.3. Defrosting the Frigo ......................................................................................................... 7-9
7.6.4. Cleaning of the Frigo......................................................................................................7-10
7-8
BASE-2-02.07 Page 7-1
Page 82

Product description of the Frigo
7.1. PRODUCT DESCRIPTION OF THE FRIGO
7.1.1 General view of the Frigo
7.1.2. Installation plan
7.1.3. Purpose of use of the Frigo
4
3
2
1
See under Section 2.1.2.
With the Frigo the following additional drinks can also be prepared on
a SCHAERER Euroca II:
- - Cappuccino
- - Milky coffee
- - Latté
- - Hot milk
- - Milk foam
1. Frigo doors
2. Milk container
3. Hose for the milk
and the milk foam
4. Frigo service door
Page 7-2 BASE-2-02.07
Page 83

Product description of the Frigo
7.1.4. Safety precautions Frigo
The maintenance of the machine must be carried out every 12 to 15
months by a customer service authorised by M. SCHAERER AG.
& Without the express written approval of M. SCHAERER AG the
machine may not be used in large-scale catering establishments.
7 The ambient temperature may not drop below 10°C rise above 40°C.
, The machine should never be washed down with a hose or high-
pressure cleaner for cleaning purposes. Likewise one should avoid
steam-cleaning apparatus.
*! Do not keep any liquids in glass containers in the cooling
compartment.
*! The milk in the Frigo (refrigerator) has to be kept at a temperature of
3°-5° C. If the milk is not kept at those temperature during fill up the
milkcontainer, a first class appeearance of milk foam will not be
guaranteed.
7.1.5. Labelling of the Frigo
Type plate
Draw out milk container,
to the side in the interior
Inst.-Nr. .................................
Type: .................................
Serial-No .................................
Pressure: .................................bar
Voltage: .................................Watt
Power: .............VAC ............Hz
BASE-2-02.07 Page 7-3
Page 84

Product description of the Frigo
7.2. PRODUCT DATA OF THE FRIGO
7.2.1. Performance features of the Frigo
The volume capacity of the milk container is maximum 4 litres
7.2.2. Dimensions of the Frigo
Width 300 mm
Height 780 mm
Depth 620 mm
Door swivelling range 300 mm
Net weight 31.0 kg
Subject to change!
7.2.3. Energy supply of the Frigo
Model Connected load
VITRIFRIGO 70 W / 0.49 A 220/240 V AC (PNE) 50/60 Hz
Enquiries should be made of M. SCHAERER AG or of one of its authorised
customer services regarding special voltages.
This machine meets the EU standard 89/336 in regard to radio interference
(EMC).
7.2.4. Accessories of the Frigo
Article Order number
-2 Milk containers 063243
-1 Dosing cap (clean-up) 061020
-1 Cleaning fluid clean-up 2 lt. 061019
-1 O-ring set for foamer head 050415
-2.5 m silicon hose 067722
-1 Buckle to outlet hose with Frigo 067862
-1 Buckle to Outlet hose with ø 29 mm 066794
-1 Panel 1.2 mm 063446
Page 7-4 BASE-2-02.07
Page 85

Product description of the Frigo
7.3. MALFUNCTIONS AND REMEDIES
7.3.1. The Frigo does not function
Check whether
- the temperature regulator is set at zero;
- the supply current is interrupted;
- the circuit breaker (FI) of the electrical installation has tripped;
Î have checked by a service technician.
- the connection Frigo to coffee machine is interrupted
When the Frigo is not connected via the Euroca II:
- the mains connector is damaged or is wrongly inserted in the socket
7.3.2. Loud operating noise
Check whether
- the refrigerator or the cooling unit stands on a leveled surface;
- the refrigerator is touching furniture and vibration is being transmitted;
Î have checked by a service technician.
- the cooling lines on the rear of unit are lying close and vibrating
7.3.3. Insufficient cooling
Check whether
- the door is tightly closed;
- the refrigerator has been set up close to heat sources;
- the refrigerator or the separate cooling unit is insufficiently ventilated;
- the evaporator is iced up;
If the refrigerator continues not to function properly after these checks :
) Inform the customer service!
Î have checked by a service technician.
- the condenser is obstructed by dust;
- the fan turns freely ( in models with forced cooling )
BASE-2-02.07 Page 7-5
Page 86

Product description of the Frigo
7.4. CONTROLS OF THE FRIGO
Ventilating valve
1. Ventilating valve
2. Hose milk foam
3. Hose milk
4. Hoses in milk container
5. Lines for automatic rinsing
3 2
1
4
5
Temperature regulator
Minus –
Turn anticlockwise ( - ), the
temperature becomes warmer.
To switch off turn right up to
the stop.
Plus +
Turn clockwise ( + ), the
temperature becomes cooler.
( See section 7.5.2.)
Minus
Plus
Air regulating valve
for milk foam
Minus
Plus
Hole disk
Plus +
Turn anticlockwise ( + ), the
foam bubble formation is
increased.
Minus –
Turn clockwise ( - ), the foam
bubble formation is reduced.
( See section 7.5.3. )
Hole disk
The hole disk at the air
regulating valve for milk foam
has to point towards the
refrigorator.
Montagehinweis für das
Luftregulierventil
Dieser Montagehinweiskleber
muss sauber gehalten
werden. Ist dieser stark
Verschmutzt oder nicht mehr
ganz erkenn-bar, muss ein
neuer Kleber bei der
M.Schaerer AG ange-fordert
und ersetzt werden.
Page 7-6 BASE-2-02.07
Page 87

Product description of the Frigo
7.5. COMMISSIONING AND SETTING UP THE FRIGO
7.5.1. First use
7.5.2. Setting the temperature
Note : The Frigo must be switched on at least an hour before use so that the
7.5.3. Set milk foam by means of air regulating valve
The Frigo is set up and commissioned by a customer service authorised by M.
SCHAERER AG.
See also Section 4.2.
1. Open the Frigo service door.
2. Setting the temperature :
2.1 Temperature warmer :
-Turn thermostat regulator anticlockwise.
2.2 Temperature colder :
-Turn thermostat regulator clockwise.
2.3 Temperature to basic setting :
-Turn thermostat regulator anticlockwise until the stop.
-Turn thermostat regulator clockwise up to the character " A ".
2.4 Temperature off :
-Turn thermostat regulator anticlockwise till the stop, Frigo is switched off.
3. Close the Frigo service door.
cooling circuit is fully operationally ready (3 - 5°C).
Never put warm milk into the Frigo (refrigerator).
1. Open the service door of the Euroca II.
2. Adjusting the air regulation valve:
- Turn the adjusting screw on the air regulating valve clockwise (smaller
scale figure), the foam bubble formation is reduced, the milk foam is
finer.
- Turn the adjusting screw on the air regulating valve anticlockwise
(larger scale figure), the foam bubble formation is increased, the milk
foam has large bubbles.
3. Close the service door of the Frigo.
BASE-2-02.07 Page 7-7
Page 88

Product description of the Frigo
pty
7.5.4. Level monitoring of milk container / milk empty
Option : An ultrasonic milk-level sensor in the Frigo measures the level of the milk
every 60 ms. A standard value of a minimum of 1 litre is specified. If the level
of milk in the milk container sinks below 1 litre, the following message
appears in the display of the Euroca II:
select product
milk em
The refilling of the milk should be made as soon as possible, for this
message does not subsequently cause the blocking of the Euroca II. If the
rest of the milk is consumed no further milk products can be delivered.
Please fill up with milk.
The maximum capacity of the milk container is 4 litres.
Once the milk has been replenished and the milk container is back in the
Frigo then the following message appears on the display of the Euroca II:
select product
12:00 22.01.1999
All products can now be drawn again.
7.5.5. Temperature monitoring of the milk to be warmed
Option : The SUSA steam outlet continuously monitors with a temperature sensor the
temperature of the milk to be warmed.
Please take note of Section 5.2.6.
7.6. CLEANING OF THE FRIGO
7.6.1. Rinsing the milk lines
Caution !
The rinsing of the milk lines after the drawing of each milk product is
imperative in order to maintain a bacteria-free environment.
Any liability due to improper maintenance and/or not conforming to
regular rinsing in accordance with the regulations is declined by the
manufacturer and the dealer.
Two variants are available and can be set up by a service technician
authorised by Schaerer.
1. The milk lines are automatically rinsed :
After the drawing of each milk product a rinsing is announced and after
its completion all preselected products are automatically activated. A
time delay is programmed (standard time 30 seconds) to precede the
automatic rinsing, after the delivery of the last product. If a new product
is selected during this period the product output follows immediately and
the time delay is set to zero again. If the rinsing is active the product
selection is blocked for 12 seconds (standard value). On the display
appears:
rinsing
selection locked
ª
Page 7-8 BASE-2-02.07
Page 89

Product description of the Frigo
2. The milk lines are manually rinsed:
After each drawing of a milk product a rinsing is announced.
On the display appears:
select product
lease rinse
This message is displayed until the rinsing is started.
Products can be drawn again.
Press
key to start the rinsing. When the rinsing is active, product
selection is blocked for 12 seconds (standard value).
rinsing
selection locked
Important : The rinsing must be started after product drawings
have terminated in order to ensure proper hygiene.
7.6.2. Steam cleaning
The steam cleaning is a brief cleaning of the milk line. If the rinsing (see
Section 7.6.1) is not yet active, there can still be milk residues in the lines
which could have the effect of deteriorating the next product.
The steam cleaning prevents this. In the five seconds after the delivery of
the milk product two brief steam blasts are issued. This ensures that each
product is delivered unspoiled in colour and in taste.
The steam cleaning is set by a service technician authorised by Schaerer.
7.6.3. Defrosting the Frigo
As soon as the ice layer exceeds 3 mm the refrigerator should be defrosted.
This is an important precondition for faultless operation of the unit.
For a complete defrosting turn the thermostat regulator anticlockwise up to
the stop. The Frigo is now switched off.
Never remove the ice layer with pointed or sharp metal objects, as this
could damage the cold plate.
After defrosting start the refrigerator again and set the thermostat to the
required temperature. See under Section 7.5.2. Setting the temperature.
BASE-2-02.07 Page 7-9
Page 90

Product description of the Frigo
7.6.4. Cleaning care of the Frigo
1. External cleaning :
Wash the outside of the Frigo with lukewarm water, wipe with cold water
and dry with a soft cloth. Do not use scouring agents.
2. Internal cleaning :
Take out the milk container and clean it. Clean the Frigo with lukewarm
water containing bicarbonate of soda or vinegar. Rinse with water and
dry thoroughly with a soft cloth. On no account use scouring or cleaning
agents or soap.
3. General :
If the Frigo is taken out of use for long periods then the following
measures must be taken to avoid the formation of mould and unpleasant
odours:
Empty the Frigo completely, clean the interior and leave the door partly
open.
(If the power supply of the Frigo is not connected to the Euroca II, then
disconnect it from the mains supply.)
Please note that the Frigo must be switched on at least an hour before
use so that the cooling circuit is fully operationally ready (3 - 5°C).
4. Condenser :
The condenser should be cleaned at
least once a year with a vacuum
cleaner or a dry brush. See illustration
(this is done by the service technician).
For daily cleaning see also under Section 5.3.1.
Page 7-10 BASE-2-02.07
Page 91

Standard-Programming
8 Standard-Programming Euroca-2 ( Software NT 2000 V 1.00 )
Product -
programming
Product
Risretto
Espresso
Coffee
2 Decaffeinated
Coffee
2 Ristretto
2 Espresso
Counted products
1 1
1 1
1 1
1 1
2 (2)
2 (2)
Strokes per cup
Product
release/
locked
release/
locked
release/
locked
release/
locked
release/
locked
preselection l
Preselect
release/
locked
release/
locked
release/
locked
release/
locked
release/
locked
release/
locked
products
Select grinde
( left. or right.)
Eggi dosage
( option )
Lefts 450 45 % 160 locked 5 0 ms 60 0 150 2.0 - - -
Lefts 170 45 % 160 locked 5 0 ms 60 0 150 2.0 - - -
Lefts 170 45 % 160 locked 0 0 ms 140 0 150 2.0 - - -
Lefts
Lefts 270 45 % 160 locked 5 0 ms 150 0 150 2.0 - - -
Lefts 270 45 % 160 locked 0 0 ms 150 3 s 150 2.0 - - -
Grinding time
1-6 Portion.
0=Manual
insertion
Double product
more grinding
quantity
Pressing
0 160 Locked - 0 140 - 150 2.0 - - -
Runout change-
over
Preboiling
Brew-chamber
oupen ÆOpening
time 0 ms
Fill quantity
Make-up water
0 = locked
Repress pressure
Reapress
Milk quantity
Milk quantity
( 0-30 sec.)
Outled variant :
Milk ahead coffee
Milk with coffee
Milk behind coffee
2 Coffee
Cappuccino
White coffee
Latte
Pot
By-Pass coffee
with spirits
1 2
1 1
1 1
1 1
1 1
1 1
* By-Pass water appears afterward coffee and not simultaneous!
release/
locked
release/
locked
release/
locked
release/
locked
release/
locked
release/
locked
release/
locked
release/
locked
release/
locked
release/
locked
release/
locked
- Lefts 200 - 160 locked 0 0 ms 150
Lefts 170 45 % 160 locked 0 10 ms 280 6 s 150 2.0 - - -
Lefts 170 45 % 160 locked 0 0 ms 60 0 150 2.0 0 % 10 sec
Lefts 170 45 % 160 locked 0 0 ms 80 0 150 2.0 100 % 10 sec
Lefts 170 45 % 160 locked 0 0 ms 80 0 150 2.0 50 % 10 sec
Lefts 170 45 % 160 locked 0 0 ms 200 0 150 2.0
60%
*
Milk ahead
Milk with
Milk behind
Milk ahead
Milk with
Milk behind
Milk ahead
Milk with
Milk behind
-
150 2.0 - - --
- -
BASE-2 -02.08 Page 8-1
Page 92

Standard-Programming
Standard-Programming Euroca-2 ( Software NT 2000 V 1.00 )
Milk
Start / Stop
release/locked
Milk time out 0-150 sec
Standard 10.0 sec
Milk-time dosage 0-99 sec
Standard 10.0 sec
-
Milk foam
Tea
Steam
Special steam
Choco
General
parameter
General
parameter
Start / Stop
release/locked
Start / Stop
release/locked
Start / Stop
release
Start / Stop
release
Dispensing pulse 0-990
Standard 500
/locked
/locked
Milk foam-time out 0-150 sec
Standard 10.0 sec
Tea time out to 0-150 sec
Standard 10.0 sec
Steam time out to 0-150 sec
Standard 10.0 sec
Special Steam time out to 0-150 sec
Standard 90.0 sec
Dispensing time 0-60 sec
Standard 5.0 sec
Milk foam-time dosage 0-99 sec
Standard 10.0 sec
Tea-time dosage 0-99 sec
Standard 10.0 sec
Steam-time dosage 0-99 sec
Standard 10.0 sec
Auto Steam level
release / locked
- -
Temperature Milk 0 ° - 90 ° C
Coffee = 86ºC Over temperature -1 = 16ºC Over temperature r-2 = 7ºC Tea = 95ºC
Steam without KLM = 120ºC /
Steam with KML = 130°C
Ground container quantity = 60 Stück Grinder Empty Message = 450 Milk temperature in the frigo = 3 – 5°C
-
-
-
Standard 70 ° C
BASE-2 -02.08 Page 8-2
Page 93

Index
9. INDEXVERZEICHNIS
— A —
Air regulating valve for setting milk foam..............7-7
— B —
Block accounting operation ................................ 5-28
Blocked, coffee products ...................................... 3-6
Blocked, no more drawing possible...................... 3-5
Blocked, steam products ...................................... 3-7
Blocked, tea products........................................... 3-7
Block keys...........................................................5-33
Block MONEY card............................................... 6-8
— C —
Caffeine-free Coffee ............................................. 5-4
Caffeine-free coffee via grinder and Decaf key.... 5-5
Caffeine-free coffee via grinder without Decaf key5-5
Caffeine-free manually prepare............................ 5-4
Cappuccinatore CPT cleaning............................5-18
Cappuccino Magic prepare with Frigo option....... 5-8
Cappuccino Magic prepare with option CPT........ 5-8
Cappuccino prepare with Cappuccinatore CPT... 5-9
Change article number ( external accounting ) .. 5-30
Change date ....................................................... 5-24
Change filling quantity ........................................ 5-22
Change grinding quantity.................................... 5-22
Change jeton price.............................................. 5-29
Change metering time ........................................ 5-23
Change MONEY card Price level 1+2................ 5-29
Change PIN code CHEF card ............................ 5-25
Change PIN code LOAD card .............................. 6-9
Change PIN code PROGRAM card.................... 5-33
Change price level MONEY card 1+2 ................ 5-29
Change product price ( external accounting ) ... 5-30
Change switching on/off time ............................. 5-23
Change time........................................................ 5-24
Charge credit MONEY card.................................. 6-5
CHEF card.......................................................... 5-21
CHEF card Menu overview................................. 5-21
Chip card CHEF.................................................. 5-21
Chip card COFFEE TEST................................... 5-34
Chip card KEY BLOCK....................................... 5-33
Chip card LOAD.................................................... 6-5
Chip card MASTER card ...................................... 6-2
Chip card MONEY................................................ 6-3
Chip card PROGRAM.........................................5-27
Chip card SAVE DATA....................................... 5-25
Chip cards error message .................................... 3-8
Chip cards for accounting operation..................... 3-4
Chip cards function............................................... 3-3
Chip cards Info...................................................... 6-7
Chip cards PIN code change CHEF................... 5-25
Chip cards PIN code change LOAD..................... 6-9
— C —
Chip cards PIN code change PROGRAM.......... 5-33
Chip cards standard.............................................. 3-3
Chip cards system MONEY.................................. 6-2
Clean coffee machine......................................... 5-10
Cleaning..............................................................5-10
Cleaning Cappuccinatore CPT........................... 5-18
Cleaning care of the Frigo .................................. 7-10
Cleaning of the Frigo ............................................ 7-8
Coffee caffeine-free.............................................. 5-4
Coffee products blocked....................................... 3-6
COFFEE TEST card........................................... 5-34
COFFEE TEST card menu overview.................. 5-34
Coin verifier and related systems ....................... 6-11
Commissioning the Euroca-2 ............................... 4-1
Commissioning the Frigo...................................... 7-7
Conformity declaration............................. Appendix 1
Container elements.................................. Appendix 2
Control and display elements ............................... 3-2
Controls of the Frigo............................................. 7-6
Cooling of the Frigo insufficient ............................ 7-5
Credit on MONEY card charge............................. 6-5
— D —
Daily cleaning...................................................... 5-10
Daily operation...................................................... 5-3
Design variants..................................................... 2-6
Defrosting the Frigo.............................................. 7-9
Delete credit MONEY card ................................... 6-6
Delete MASTER card ......................................... 5-31
Delete MASTER table......................................... 5-32
Delete MONEY sales.......................................... 5-31
Delete product counter ....................................... 5-21
Dimensions of the Frigo........................................7-4
Display and control elements................................ 3-2
Display MASTER card........................................ 5-31
Display MONEY cards charging........................... 6-7
Display MONEY sales ........................................ 5-31
Disposal................................................... Appendix 3
Drawing drinks with the MASTER card ................ 6-2
Drinks with the MONEY card prepare .................. 6-3
— E —
Fill up fresh water tank........................................ 5-19
Empty waste water tank...................................... 5-19
Ending use / Switch off unit ................................ 5-19
Energy supply of the Euroca-2 ............................. 2-5
Energy supply of the Frigo....................................7-4
Environmental aspects of the Euroca-2... Appendix 2
Equipment.............................................................2-6
Error message chip cards..................................... 3-8
Error message coffee products ............................ 3-6
Error message general......................................... 3-7
Error message in operational readiness............... 3-9
Page 9-1 BASE-2-02.09
Page 94

Index
9. INDEXVERZEICHNIS
— E —
Error message steam products ............................ 3-7
Error message tea products................................. 3-7
External accounting via Shank system...............6-12
— F —
Fill up fresh-water tank ....................................... 5-19
Filling quantity individual programming, MONEY. 6-4
First use .............................................................. 4-1
Frigo...................................................................... 7-2
Frigo cleaning ....................................................... 7-8
Frigo cleaning care............................................. 7-10
Frigo controls........................................................ 7-6
Frigo cools insufficiently........................................ 7-5
Frigo defrosting..................................................... 7-9
Frigo dimensions .................................................. 7-4
Frigo does not function......................................... 7-5
Frigo energy supply.............................................. 7-4
Frigo general view ................................................ 7-2
Frigo labelling ....................................................... 7-3
Frigo makes loud operating noise ........................ 7-5
Frigo milk line rinsing............................................ 7-8
Frigo performance features .................................. 7-4
Frigo product data................................................. 7-4
Frigo product description...................................... 7-2
Frigo purpose of use.............................................7-2
Frigo safety precautions ....................................... 7-3
Frigo setting up the............................................... 7-7
Frigo steam cleaning ............................................ 7-9
Frigo taking into use ............................................. 7-7
— G —
General view......................................................... 2-2
General view Frigo................................................ 7-2
Grinding quantity individually program, MONEY.. 6-4
Grinding quantity test programme...................... 5-34
— H —
Heating up drinks.................................................. 5-6
Heat up drinks....................................................... 5-6
Help for malfunctions............................................ 7-5
History MONEY .................................................... 6-9
— I —
Individual filling quantity program, MONEY.......... 6-4
Individual grinding quantity program, MONEY ..... 6-4
Info Chip card ....................................................... 6-7
Installation.............................................................4-1
Installation plan..................................................... 2-3
Insufficient cooling by the Frigo ........................... 7-5
Introducing the Euroca-2 ...................................... 2-2
Introducing the operating instructions................... 5-3
— J —
Jeton verifier and related systems......................6-11
— K —
KEY BLOCK card................................................ 5-33
KEY BLOCK card menu overview...................... 5-33
Keys block........................................................... 5-33
— L —
Labelling of the Euroca-2......................................2-5
Labelling of the Frigo............................................ 7-3
Latté prepare with Frigo option............................. 5-8
Level monitoring milk container ( option ).............7-8
Load machine data from card to machine.......... 5-26
LOAD card............................................................ 6-5
LOAD card menu overview...................................6-5
LOAD card PIN code change ............................... 6-9
LOAD card programmable security level..............6-5
Load machine data from card to machine.......... 5-26
Log in MASTER card.......................................... 5-32
Loud operating noise of the Frigo......................... 7-5
— M —
Machine blocked, no more drawing possible ....... 3-5
Malfunction indications and messages.................3-5
Malfunctions and remedies................................... 7-5
MASTER card....................................................... 6-2
Menu overview CHEF card.................................5-21
Menu overview COFFEE TEST card.................. 5-34
Menu overview KEY BLOCK card...................... 5-33
Menu overview LOAD card...................................6-5
Menu overview PROGRAM card........................ 5-27
Menu overview SAVE DATA card .......................5.25
Messages in operational readiness...................... 3-9
Milk container level monitoring ( option ).............. 7-8
Milk empty ( option ) ............................................. 7-8
Milk foam setting................................................... 7-7
Milk line rinsing Frigo............................................ 7-8
Milky coffee prepare with Frigo option..................5-8
MONEY card.........................................................6-3
MONEY card block ............................................... 6-8
MONEY card charge display ................................ 6-7
MONEY card credit charge...................................6-5
MONEY card credit delete.................................... 6-6
MONEY card release............................................6-8
MONEY card Price level 1+2 change................. 5-29
MONEY chip cards system...................................6-2
MONEY history..................................................... 6-9
MONEY, individually program filling quantity........ 6-4
MONEY, individually program grinding quantity... 6-4
MONEY sales delete .......................................... 5-31
MONEY sales display......................................... 5-31
BASE-2-02.09 Page 9-2
Page 95

Index
9. INDEXVERZEICHNIS
— N —
Normal accessories of the Euroca-2 are
included in the specification............................. 2-6
— O —
Operating advice for special machines............... 5-19
Operating advice for units on mobile wagon...... 5-20
Operating modes ................................................. 3-9
Operating the Euroca-2 ........................................ 5-3
Options chip cards for normal operation .............. 3-4
Output of coffee products blocked........................ 3-6
Output of steam products blocked........................ 3-7
Output of tea products blocked............................. 3-7
— P —
Performance features of the Euroca-2 ................. 2-5
Performance features of the Frigo........................ 7-4
PIN code CHEF card change............................. 5-25
PIN code LOAD card change............................... 6-9
PIN code PROGRAM card change ................... 5-33
Prepare, Cappuccino Magic with Frigo option...... 5-8
Prepare, Cappuccino Magic with option CPT....... 5-8
Prepare, Cappuccino with Cappuccinatore CPT.. 5-9
Prepare coffee products ....................................... 5-3
Prepare coffee products via second level ............ 5-4
Prepare, drinks with the MONEY card.................. 6-3
Prepare, hot milk with Frigo option....................... 5-7
Prepare, hot milk with option CPT........................ 5-8
Prepare hot milk with Frigo option........................ 5-7
Prepare, latté with Frigo option............................. 5-8
Prepare, milky coffee with Frigo option ................ 5-8
Prepare, milk foam with Frigo option.................... 5-7
Prepare the coffee products ................................. 5-3
Prepare tea........................................................... 5-5
Prerequisites......................................................... 4-1
Price level MONEY card change........................ 5-28
Price switching.................................................... 5-28
Product counter read off..................................... 5-21
Product data of the Euroca-2................................ 2-5
Product data of the Frigo...................................... 7-4
Product description Frigo...................................... 7-2
Product price change ( external accounting ).....5-30
Products are being output again........................... 3-7
PROGRAM card ................................................. 5-27
PROGRAM card menu overview........................ 5-27
Program individual filling quantity, MONEY..........6-4
Program individual grinding quantity, MONEY..... 6-4
Programmable security level LOAD card ............. 6-5
Programmable security level, PROGRAM.......... 5-27
Programming with option chip cards .................. 5-27
Programming with standard Chip cards ............. 5-20
PROGRAM, programmable security level.......... 5-27
Purpose of use Euroca-2...................................... 2-4
Purpose of use Frigo ............................................ 7-2
— R —
Rating plates............................................ Appendix 2
Read off product counter.................................... 5-21
Release accounting operation............................ 5-28
Release keys ...................................................... 5-34
Release MONEY card .......................................... 6-8
Release or block accounting operation .............. 5-28
Reset product counter to zero ............................ 5-21
Rinsing the milk line Frigo..................................... 7-8
— S —
Safety precautions Euroca-2 ................................ 2-4
Safety precautions Frigo.......................................7-3
SAVE DATA card................................................5-25
SAVE DATA card menu overview ...................... 5-25
Security level programmable, LOAD card............ 6-5
Security level programmable, PROGRAM ......... 5-27
Settings standard................................................. 8-1
Setting the milk foam ............................................ 7-7
Setting up the Frigo ............................................. 7-7
Set up operational readiness................................ 5-3
Special accessories of the Euroca-2 are
not included in the specification....................... 2-7
Standard accessories of the Ambiente-2 are included
in the specification........................................... 2-6
Standard chip cards..............................................3-3
Standard settings.................................................. 8-1
Steam cleaning Frigo............................................7-9
Steam products blocked....................................... 3-7
Store machine data on card................................ 5-26
Supplementary accessories of the Ambiente-2 are
not included in the specification....................... 2-7
Switching on/off time change..............................5-23
Switch off unit / Ending use ................................ 5-19
— T —
Tea products blocked ........................................... 3-7
Temperature monitoring milk delivery ( option )... 7-8
Test programme grinding quantity ..................... 5-34
— W —
Water connection.................................................. 2-6
Water discharge.................................................... 2-6
Page 9-3 BASE-2-02.09
Page 96

Index
BASE-2-02.09 Page 9-4
Page 97

Appendix
A APPENDIX
A.1 DECLERATION OF CONFORMITY
THESE PRODUCTS COMPLY WITH THE REQUIREMENTS OF THE EU GUIDELINES.
73/23/EEC Electrical equipment for use within specified voltage limits.
89/336/EEC ELECTROMAGNETIC COMPATIBILITY
A CERTIFICATE OF CONFORMITY CAN BE OBTAINED ON REQUEST FROM THE
FOLLOWING ADDRESS.
M.Schaerer AG
Gewerbestrasse 15
CH - 3302 Moosseedorf
Phone : ++41 31 85 85 111
FAX : ++41 31 85 85 140
E-Mail : http://www.schaerer.com
BASE-2-02.AN Page A-1
Page 98

Appendix
A.2 Design and testing in accordance with SVTI and TÜV regulations
Description A.2.2 A.2.2 A.2.3 A.2.4
Sign of manufacturer DA DA HW HW
Operating pressure 2.5 bar 4.0 bar 2.5 bar 2.5 bar
Admissible operating pressure p
Test pressure 18 bar 18 bar 18 bar 18 bar
Admissible operating temperature T
Minimum operating temperature T
Operating temperature 140ºC 152°C 95°C 95°C
Water content Vol. 0.8 l 1.0 l 0.8 l 1.25 l
Year of manufacturing 19.. 19.. 19... 19...
Serial no DA..... DA..... HW..... HW.....
A.2.1 Steam generator - (type - DA)
M. Schaerer AG, CH-3302 Moosseedorf
Typ : SO II F-Nr. : DA....... : Year of construction : 19..
p
U : 230 VAC T
f : 50/60 Hz Version and verification to SVTI and TÜV specifications
max : 12 bar Tmax : 192ºCVol. : 0.8 l
A.2.2 Steam generator - (type - DA)
M. Schaerer AG, CH-3302 Moosseedorf
Typ : SO II F-Nr. : DA....... : Year of construction : 19..
p
U : 230 VAC T
f : 50/60 Hz Version and verification to SVTI and TÜV specifications
max : 12 bar Tmax : 192ºCVol. : 1.0 l
A.2.3 Water heater - USA (type - HW)
M. Schaerer AG, CH-3302 Moosseedorf
Typ : SO II F-Nr. : HW....... : Year of construction : 19..
p
U : 230 VAC T
f : 50/60 Hz Version and verification to SVTI and TÜV specifications
max : 12 bar Tmax : 192ºCVol. : 0.8 l
A.2.4 Water heater - USA (type - HW))
M. Schaerer AG, CH-3302 Moosseedorf
Typ : SE II F-Nr. : HW....... Baujahr : 19..
p
U : 230 VAC T
f : 50/60 Hz Version and verification to SVTI and TÜV specifications
max : 12 bar Tmax : 192ºC Vol. : 1.25 l
max 12 bar 12 bar 12 bar 12 bar
max 192ºC 192°C 192°C 192°C
10ºC 10°C 10°C 10°C
min
min : 10ºC P : 3000 W
min : 10ºC P : 2x3000 W
min : 10ºC P : 3000 W
min : 10ºC P : 2x3000 W
Page A-2 BASE-2-02.AN
Page 99

Appendix
A.3 Enviromental information on the Euroca-2
A.3.2 Packaging: Euroca-2 coffee machines are shipped using reusable cartons and pallets.
A.3.3 Coffee grounds: Wherever possible, all parts replaced during servicing are reconditioned and reused.
A.3.4 Coffee grounds: The coffee grounds left in the grounds drawer may safely be spread on your
gardenor added to a compost heap.
A.3.5 Cleaning agent: The recommended cleaning tablet “Kamareta” is a controlled substance under
(in tablet form toxicity class 5S (chemical safety code (BAG-T) no. 91305). It contains
“ Kamareta ”) 25%sodium perborate and sodium dihydrogen nitrilotriacetate. Avoid eye and
skin contact. Skin and eye irritant .
A.3.6 Cleaning agent: Cleaning agent “ clean-up “:The detergent is not a retail product.
(in liquefied form Keep detergents away from children !
“ clean-up ”) Appearance : Clear, colourless liquid
Density : 0-1.3g /cm
Storage : Keep at 0 to +45°C
pH (1%) : 9.7
Poison class : Exempt
Swiss Health
Dept. Reg. No.: 601 100
In the event of contact with the eyes, rinse immediately with water and consult
a doctor.
A.3.7 Plasic parts: Plastic parts must be disposed of in accordance with the manufacturer’s health &
safety data sheet.
A.3.8 Energy consumption: Energy consumption was as low as technically feasible at the time the machine was
developed.
A.3.9 SCHAERER If recycling is not possible the machine must be disposed of properly and in
Euroca-2 accordance with local and legal regulations.
disposal:
A.3.10 Frigo disposal: If recycling is not possible the machine must be disposed of properly and
inaccordance with local and legal regulations.
3
BASE-2-02.AN Page A-3
 Loading...