

Page 1

Espresso machine E6
User manual
March 2005 - Version 01
Page 2
Schaerer USA Corporation
2900 Orange Avenue, Suite 102
Signal Hill, CA 90755
USA
Phone: +1 (562) 989-3004
Fax: +1 (562) 989-3075
E-Mail: info@schaererusa.com
Internet: www.schaererusa.com
BAE6 - 02
Order number: 021‘301
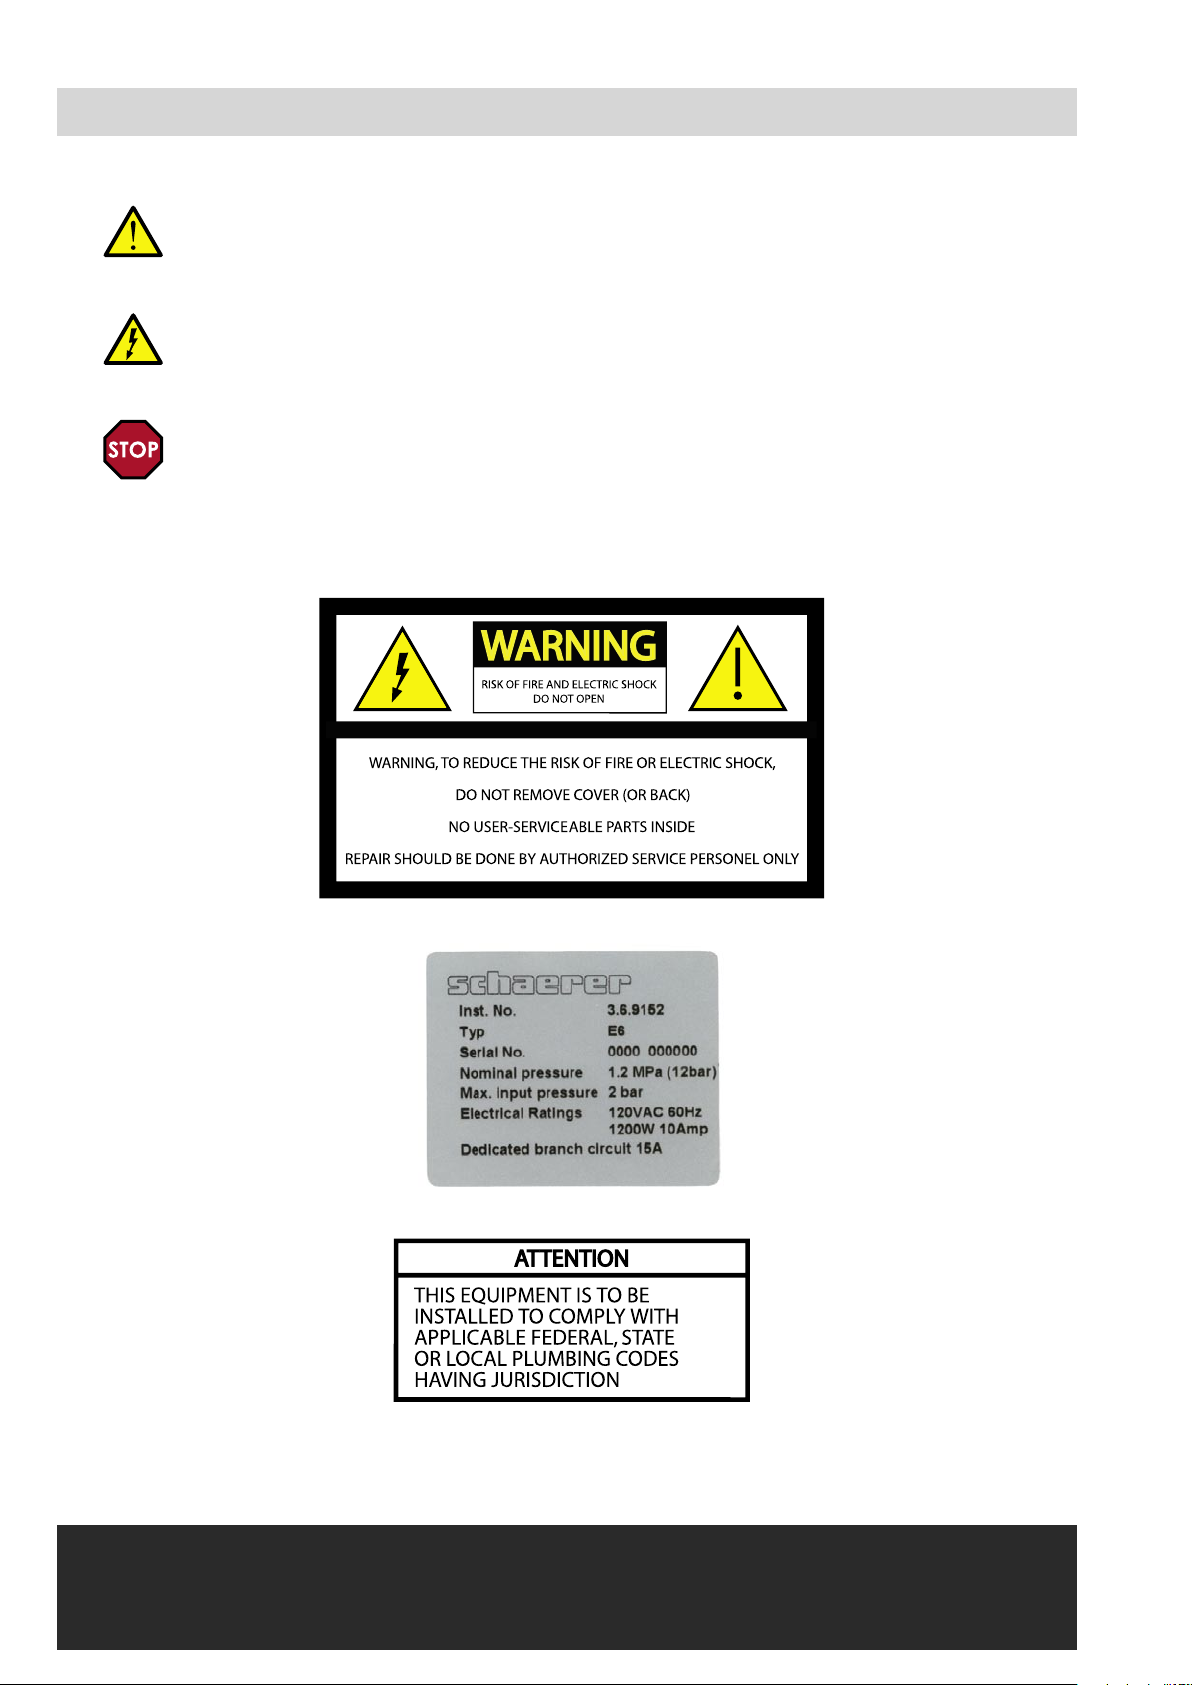
Additional safety information
This Symbol requires special attention. It will inform you in detail on the safety instructions,
commissioning, usage, operation, handling and programming of the espresso machine E6.
It contains important safety instructions to ensure safe use and operation.
This symbol indicates a risk of fire and/or to life and health due to electric shock. Work on electric
system must be carried out by authorized service personnel only. The supply voltage must comply with
the information given on the machine’s serial plate.
Never open the machine or expose its internal parts.
Read the safety instruction chapter, page 9 to 14 inside this user manual.
Page 3

Published by:
M. Schaerer Ltd., CH-3302 Moosseedorf
Version:
Version 01 / March 2005
Software:
V 1.00
Designed and edited by:
M. Schaerer Ltd., CH-3302 Moosseedorf
© Copyright by:
M. Schaerer Ltd., CH-3302 Moosseedorf
All rights reserved, including translation into other languages. This manual may not be copied,
photocopied or distributed, in whole or in part, by any means, nor transmitted electronically, without
the publishers written consent.
All information, illustrations, and specifications in this manual are based on the latest product
information available at the time of publication approval.
M. Schaerer Ltd. reserves the right to change the content at any time without any prior notice.
In case of disagreement (e.g. wrong translation) the English document is our reference!
Note that the pictures and display messages shown inside this manual are only examples!
Your machine and display messages may look different due to the options we offer.
Espresso machine E6
User manual
Page 4
Introduction
4 User manual E6 - 01 USA
www.schaererusa.com Version 01 / 03.2005 / REWE
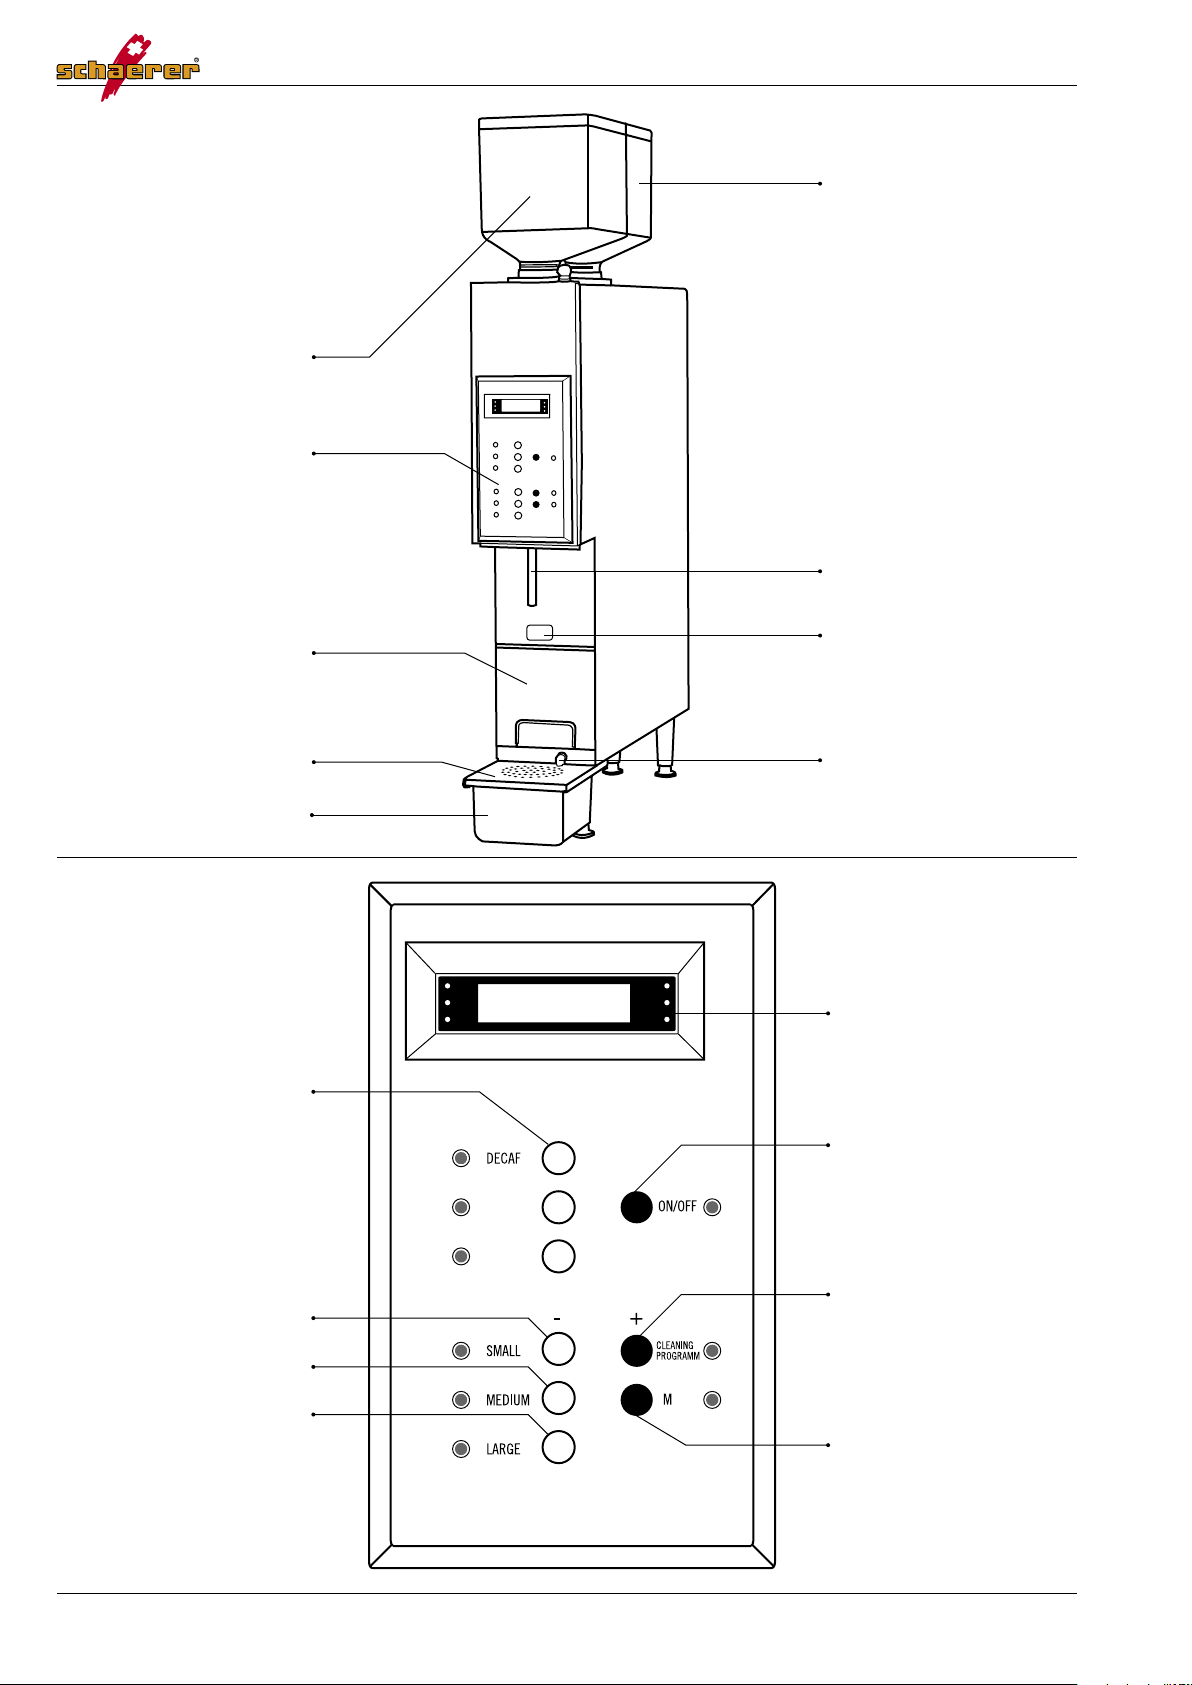
2 lined, illuminated
display with Status
lights (LED)
ON/OFF button
(Stand-by button)
with light (LED)
Cleaning- and plus
button with light (LED)
Programming button
(Memory button)
with light (LED)
DECAF button
with light (LED)
Small product- and minus
button with light (LED)
Meduim product button
with light (LED)
Large product button
with light (LED)
Bean container
DECAF (Decoffeinated)
Bean container
Regular beans
Operating panel
(see below)
Coffee outlet
Grounds container
Drip grid
Drip tray
Discharge tube
'Caution hot' Sticker
Page 5

Introduction
User manual E6 - 01 USA 5
Version 01 / 03.2005 / REWE www.schaererusa.com
Introduction
Welcome
With this new coffee machine, you have purchased a Swiss quality product
especially designed for the catering trade.
This manual will inform you in detail on the programming, commissioning,
usage and cleaning of your new machine. It also contains important safety
instructions to ensure safe use.
Prior to commissioning the machine, carefully read the chapter
"Safety instructions". The manufacturer rejects any liability for damages that
are caused by improper usage of the machine.
Performance of the coffee machine depends to a great extent on
proper usage and careful maintenance of the machine. We therefore
recommend that you read all instructions carefully before commissioning
the machine.
Keep the user manual at hand for future reference.
We trust you will enjoy using your new coffee machine!
Page 6

Introduction
6 User manual E6 - 01 USA
www.schaererusa.com Version 01 / 03.2005 / REWE
Table of contents
Introduction . .. . . . .. . . . .. . . . .. . . . .. . . . .. . .. . . . .. . .. . . . .. . . . .. . .. . . . .. . . . .. . .. . . . .. . . . .. . .. . . . . 5
Welcome . .. . .. . .. . . . .. . .. . . . .. . . . .. . .. . . . .. . . . .. . .. . . . .. . .. . . . .. . . . .. . .. . . . .. . . . .. . .. . . . .. . . . .. . .. . . . .. . . 5
Safety instructions . . .. . . . .. . .. . . . .. . . . .. . .. . . . .. . . . .. . .. . . . .. . . . .. . .. . . . .. . .. . . . .. . . . . 9
General . .. . . . .. . . . .. . . . .. . . . .. . .. . . . .. . . . .. . .. . . . .. . . . .. . .. . . . .. . . . .. . .. . . . .. . .. . . . .. . . . .. . .. . . . .. . . . .. . .. 9
Designated use . . . .. . . . .. . . . .. . .. . . . .. . . . .. . .. . . . .. . .. . . . .. . . . .. . .. . . . .. . . . .. . .. . . . .. . . . .. . .. . . . .. . .. . . 9
Safety symbols . . .. . . . .. . .. . . . .. . .. . . . .. . . . .. . .. . . . .. . . . .. . .. . . . .. . . . .. . .. . . . .. . .. . . . .. . . . .. . .. . . . .. . . . . 9
Prevention of accidents .. . . . .. . . . .. . . . .. . .. . . . .. . .. . . . .. . . . .. . .. . . . .. . . . .. . .. . . . .. . . . .. . .. . . . .. . 10
Operational safety . . .. . .. . .. . . . .. . .. . . . .. . . . .. . .. . . . .. . . . .. . .. . . . .. . . . .. . .. . . . .. . .. . . . .. . . . .. . .. . . . 11
Safety instructions during operation . .. . .. . .. . . . .. . .. . . . .. . . . .. . .. . . . .. . . . .. . .. . . . .. . .. . . . .. 11
Safety instructions during cleaning . . . . .. . . . .. . . . .. . .. . . . .. . .. . . . .. . . . .. . .. . . . .. . . . .. . .. . . . . 12
Hygiene .. . .. . .. . . . .. . . . .. . .. . . . .. . . . .. . .. . . . .. . . . .. . .. . . . .. . .. . . . .. . . . .. . .. . . . .. . . . .. . .. . . . .. . . . .. . .. . . . 13
Liability .. . .. . . . .. . .. . . . .. . . . .. . .. . . . .. . . . .. . .. . . . .. . .. . . . .. . . . .. . .. . . . .. . . . .. . .. . . . .. . . . .. . .. . . . .. . .. . . . . 14
Product description . . . . . .. . .. . .. . . . .. . .. . . . .. . . . .. . .. . . . .. . . . .. . .. . . . .. . .. . . . .. . 16
Espresso machine overview . .. . . . .. . .. . . . .. . . . .. . .. . . . .. . . . .. . .. . . . .. . . . .. . .. . . . .. . .. . . . .. . . . . 16
Espresso machine operating panel . .. . . . .. . . . .. . .. . . . .. . . . .. . .. . . . .. . . . .. . .. . . . .. . . . .. . .. . 16
Espresso machine bean container(s) . . . .. . .. . . . .. . . . .. . .. . . . .. . . . .. . .. . . . .. . .. . . . .. . . . .. . . 16
Espresso machine grounds container and drip tray . . .. . .. . .. . . . .. . . . .. . .. . . . .. . . . . 16
Serial plate . .. . . . .. . .. . . . .. . . . .. . .. . . . .. . . . .. . .. . . . .. . . . .. . .. . . . .. . .. . . . .. . . . .. . .. . . . .. . . . .. . .. . . . .. . . . 17
Operating information . . .. . . . .. . .. . . . .. . .. . . . .. . . . .. . .. . . . .. . . . .. . .. . . . .. . . . .. . .. . . . .. . .. . . . .. . . . 17
Performance characteristics . .. . . . .. . . . .. . . . .. . . . .. . . . .. . . . .. . .. . . . .. . . . .. . .. . . . .. . . . .. . .. . . . . 17
Dimensions and weight .. . . . .. . . . .. . . . .. . . . .. . .. . . . .. . . . .. . .. . . . .. . .. . . . .. . . . .. . .. . . . .. . . . .. . .. . . 17
Power requirements . . .. . .. . . . .. . .. . . . .. . . . .. . .. . . . .. . .. . . . .. . . . .. . .. . . . .. . . . .. . .. . . . .. . . . .. . .. . . . . 17
Volumes .. . . . .. . .. . . . .. . .. . . . .. . . . .. . .. . . . .. . . . .. . .. . . . .. . . . .. . .. . . . .. . .. . . . .. . . . .. . .. . . . .. . . . .. . .. . . . .. 17
Equipment and accessories . .. . .. . .. . .. . . . .. . . . .. . .. . . . .. . . . .. . .. . . . .. . . . .. . .. . . . .. . .. . . . .. . . . 18
Standard accessories (included in shipment) . .. . . . .. . . . .. . . . .. . . . .. . .. . . . .. . . . .. . .. . . 18
Installation layout E6 . . .. . .. . . . .. . . . .. . .. . . . .. . .. . . . .. . . . .. . .. . . . .. . . . .. . .. . . . .. . . . .. . .. . . . .. . .. . . . 19
Commissioning . . . . .. . . . .. . . . .. . .. . . . .. . . . .. . .. . . . .. . . . .. . .. . . . .. . . . .. . .. . . . .. . .. . . . .. 21
Initial commissioning of the coffee machine .. . .. . .. . . . .. . . . .. . .. . . . .. . .. . . . .. . . . .. . .. 21
Set-up conditions . . . .. . .. . . . .. . .. . . . .. . . . .. . .. . . . .. . .. . . . .. . . . .. . .. . . . .. . . . .. . .. . . . .. . . . .. . .. . . . .. . . 21
Location . . . .. . . . .. . . . .. . .. . . . .. . . . .. . .. . . . .. . . . .. . .. . . . .. . . . .. . .. . . . .. . .. . . . .. . . . .. . .. . . . .. . . . .. . .. . . . .. 21
Installation of the coffee machine . . . . .. . . . .. . . . .. . .. . . . .. . . . .. . .. . . . .. . . . .. . .. . . . .. . .. . . . . 21
Safety instructions during commissioning . .. . . . .. . .. . . . .. . . . .. . .. . . . .. . . . .. . .. . . . .. . .. . . . 22
Water supply/Drain . . . . .. . .. . . . .. . . . .. . .. . . . .. . . . .. . .. . . . .. . . . .. . .. . . . .. . .. . . . .. . . . .. . .. . . . .. . . . .. . 22
Operation .. . . . .. . .. . . . .. . . . .. . .. . . . .. . . . .. . .. . . . .. . .. . . . .. . . . .. . .. . . . .. . . . .. . .. . . . .. . . . .. . .. . 24
Introduction . .. . . . .. . . . .. . . . .. . . . .. . . . .. . .. . . . .. . . . .. . .. . . . .. . .. . . . .. . . . .. . .. . . . .. . . . .. . .. . . . .. . . . .. . .. 24
Filling of coffee beans . . . .. . . . .. . .. . . . .. . . . .. . .. . . . .. . .. . . . .. . . . .. . .. . . . .. . . . .. . .. . . . .. . . . .. . .. . . . 24
Making the coffee machine ready for operation . . . .. . . . .. . . . .. . . . .. . . . .. . .. . . . .. . . 24
Switching on the coffee machine . .. . . . .. . . . .. . . . .. . . . .. . . . .. . . . .. . .. . . . .. . .. . . . .. . . . .. . .. . 24
Operation modes .. . .. . .. . .. . . . .. . . . .. . .. . . . .. . . . .. . .. . . . .. . . . .. . .. . . . .. . .. . . . .. . . . .. . .. . . . .. . . . .. . 25
Begin daily routine operation . . .. . . . .. . . . .. . . . .. . . . .. . . . .. . .. . . . .. . . . .. . .. . . . .. . . . .. . .. . . . .. . . 25
Beverage output . . .. . .. . . . .. . .. . . . .. . . . .. . .. . . . .. . . . .. . .. . . . .. . . . .. . .. . . . .. . .. . . . .. . . . .. . .. . . . .. . . . 26
Output of espresso beverages . . . . .. . . . .. . . . .. . .. . . . .. . .. . . . .. . . . .. . .. . . . .. . . . .. . .. . . . .. . . . .. 26
Checking the beverage counters . . . . .. . . . .. . . . .. . . . .. . . . .. . . . .. . .. . . . .. . .. . . . .. . . . .. . .. . . . 27
Checking the cleaning counter . . . . .. . . . .. . . . .. . . . .. . .. . . . .. . . . .. . .. . . . .. . . . .. . .. . . . .. . .. . . . 27
End of operation . . .. . . . .. . . . .. . . . .. . . . .. . . . .. . .. . . . .. . .. . . . .. . . . .. . .. . . . .. . . . .. . .. . . . .. . . . .. . .. . . . .. 28
Switching off the coffee machine . . .. . . . .. . . . .. . . . .. . . . .. . .. . . . .. . .. . . . .. . . . .. . .. . . . .. . . . .. 28
Extended idle time . .. . . . .. . .. . . . .. . . . .. . .. . . . .. . . . .. . .. . . . .. . . . .. . .. . . . .. . .. . . . .. . . . .. . .. . . . .. . . . .. 28
Removal / Relocation / Disassembly . . .. . .. . .. . . . .. . .. . . . .. . . . .. . .. . . . .. . . . .. . .. . . . .. . . . .. 28
Page 7

Introduction
User manual E6 - 01 USA 7
Version 01 / 03.2005 / REWE www.schaererusa.com
Programming .. . .. . .. . . . .. . .. . . . .. . . . .. . .. . . . .. . . . .. . .. . . . .. . . . .. . .. . . . .. . .. . . . .. . . . .. . . 30
Navigation on programming level . . . .. . . . .. . . . .. . . . .. . . . .. . .. . . . .. . . . .. . .. . . . .. . .. . . . .. . . . . 30
Programming overview . . . .. . .. . . . .. . .. . . . .. . . . .. . .. . . . .. . .. . . . .. . . . .. . .. . . . .. . . . .. . .. . . . .. . . . .. . 31
Description for product programming . . .. . .. . .. . .. . . . .. . .. . . . .. . . . .. . .. . . . .. . . . .. . .. . . . .. 32
Description for general settings programming . . .. . .. . . . .. . .. . . . .. . . . .. . .. . . . .. . . . .. . . 32
Cleaning .. . . . .. . . . .. . . . .. . .. . . . .. . . . .. . .. . . . .. . . . .. . .. . . . .. . .. . . . .. . . . .. . .. . . . .. . . . .. . .. . . . .. . 34
Introduction . .. . . . .. . . . .. . . . .. . . . .. . . . .. . .. . . . .. . . . .. . .. . . . .. . .. . . . .. . . . .. . .. . . . .. . . . .. . .. . . . .. . . . .. . .. 34
Daily cleaning procedure . . .. . .. . .. . . . .. . .. . . . .. . .. . . . .. . . . .. . .. . . . .. . . . .. . .. . . . .. . . . .. . .. . . . .. 35
Error messages . . .. . .. . . . .. . .. . . . .. . .. . . . .. . . . .. . .. . . . .. . . . .. . .. . . . .. . . . .. . .. . . . .. . .. . . 38
Display and error messages . .. . . . .. . . . .. . . . .. . . . .. . .. . . . .. . . . .. . .. . . . .. . .. . . . .. . . . .. . .. . . . .. . . 38
Appendix . . .. . . . .. . . . .. . .. . . . .. . .. . . . .. . . . .. . .. . . . .. . . . .. . .. . . . .. . . . .. . .. . . . .. . .. . . . .. . . . .. . . 41
Cleaning agent . .. . . . .. . . . .. . . . .. . . . .. . .. . . . .. . . . .. . .. . . . .. . . . .. . .. . . . .. . .. . . . .. . . . .. . .. . . . .. . . . .. . . 41
Cleaning tablet for the espresso machine . . .. . . . .. . . . .. . . . .. . . . .. . . . .. . .. . . . .. . . . .. . .. . 41
Technical data . .. . .. . . . .. . .. . . . .. . . . .. . .. . . . .. . . . .. . .. . . . .. . .. . . . .. . . . .. . .. . . . .. . . . .. . .. . . . .. . . . .. . . 42
Instant heater (Art.-No.: 068‘557) . .. . . . .. . .. . . . .. . . . .. . .. . . . .. . . . .. . .. . . . .. . .. . . . .. . . . .. . .. . . 42
Environmental aspects . .. . .. . .. . .. . . . .. . . . .. . .. . . . .. . . . .. . .. . . . .. . . . .. . .. . . . .. . .. . . . .. . . . .. . .. . . . 42
Page 8

Introduction
8 User manual E6 - 01 USA
www.schaererusa.com Version 01 / 03.2005 / REWE
Page 9
Safety instructions
User manual E6 - 02 USA 9
Version 01 / 03.2005 / REWE www.schaererusa.com
Safety instructions
This chapter warns about possible dangers when operating the machine.
The information contained herein enables to recognize hazardous
situations.
General
Prior to using the machine, read the operating instructions carefully.
Always comply with the local safety regulations and hygienic guidelines.
Be sure that only qualified personnel work with the machine!
Always keep this manual at hand!
Designated use
Use of the machine (including options and accessories) is subjected to the
agreement on use and the general terms and conditions of M.Schaerer
Ltd. The user manual is an integral part of the above agreement of use.
Any usage other than within the limits specified herein shall be regarded as
not in accordance with the designated use. The manufacturer shall not be
liable for any resulting damage.
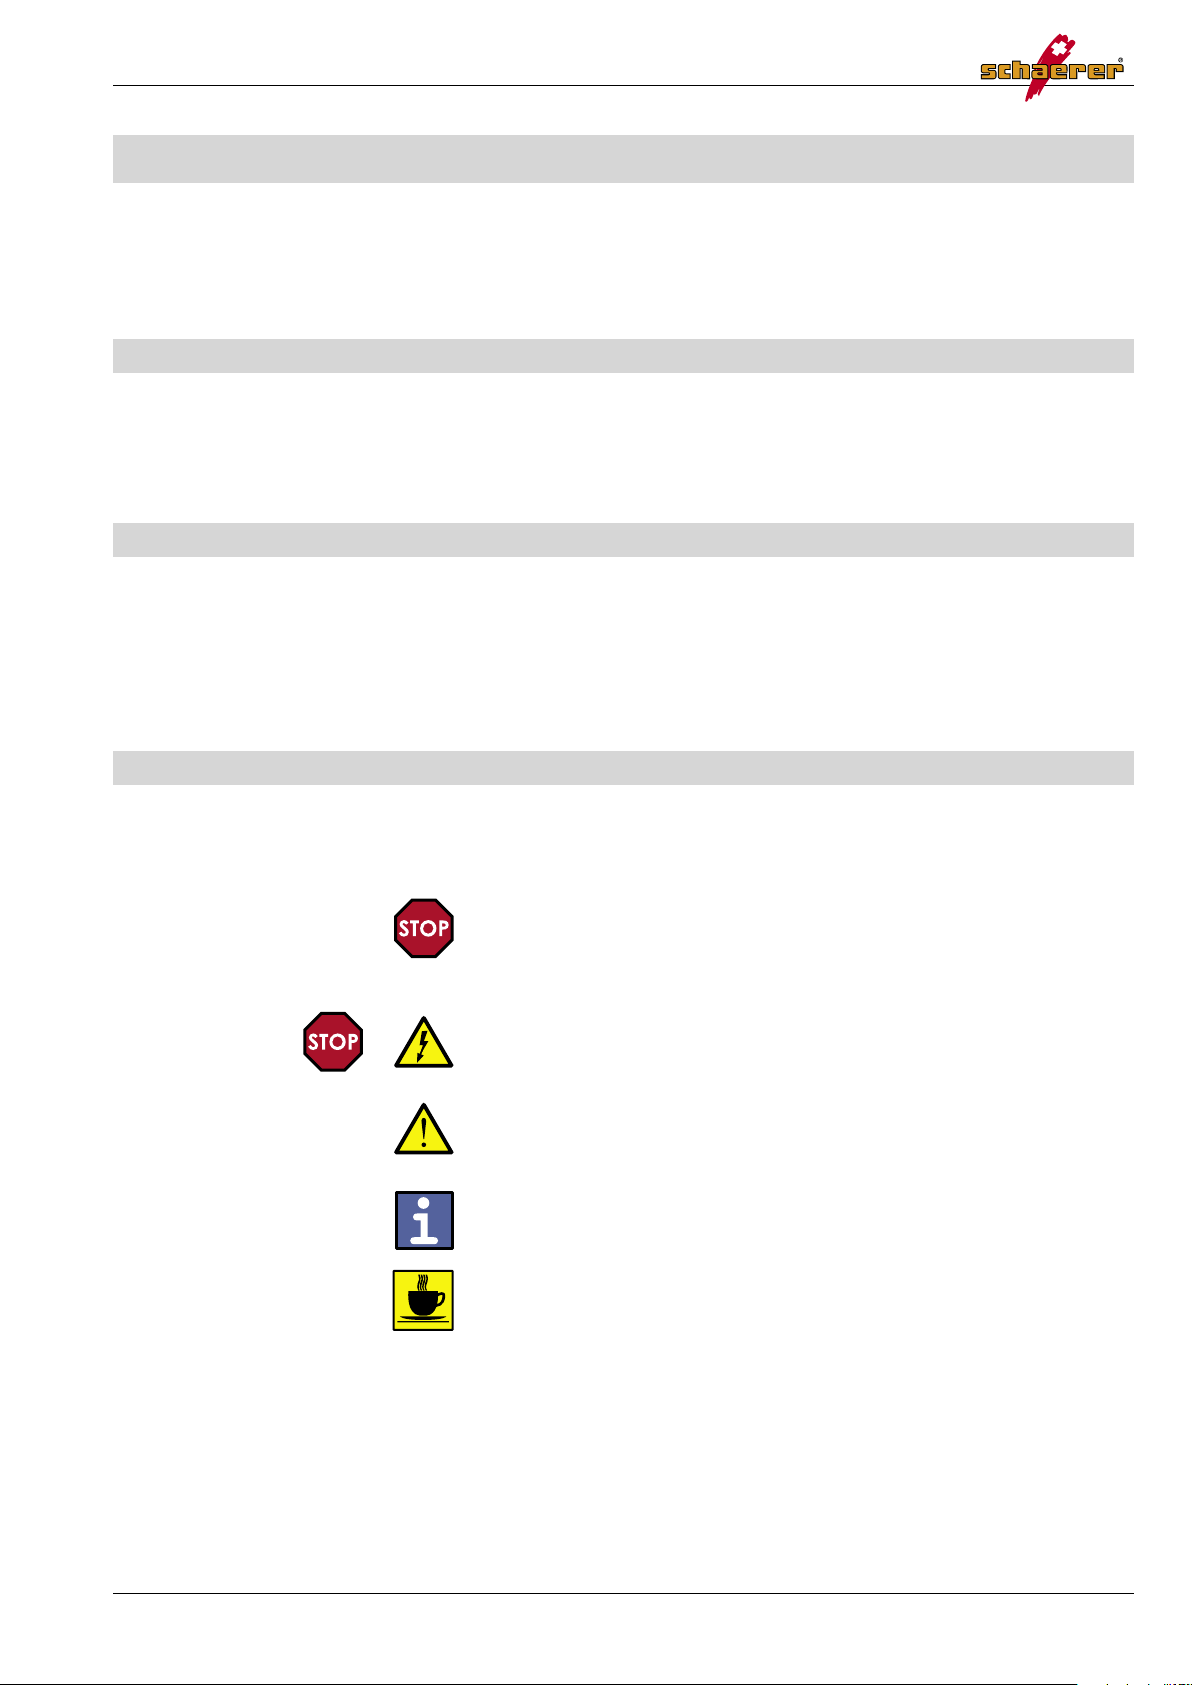
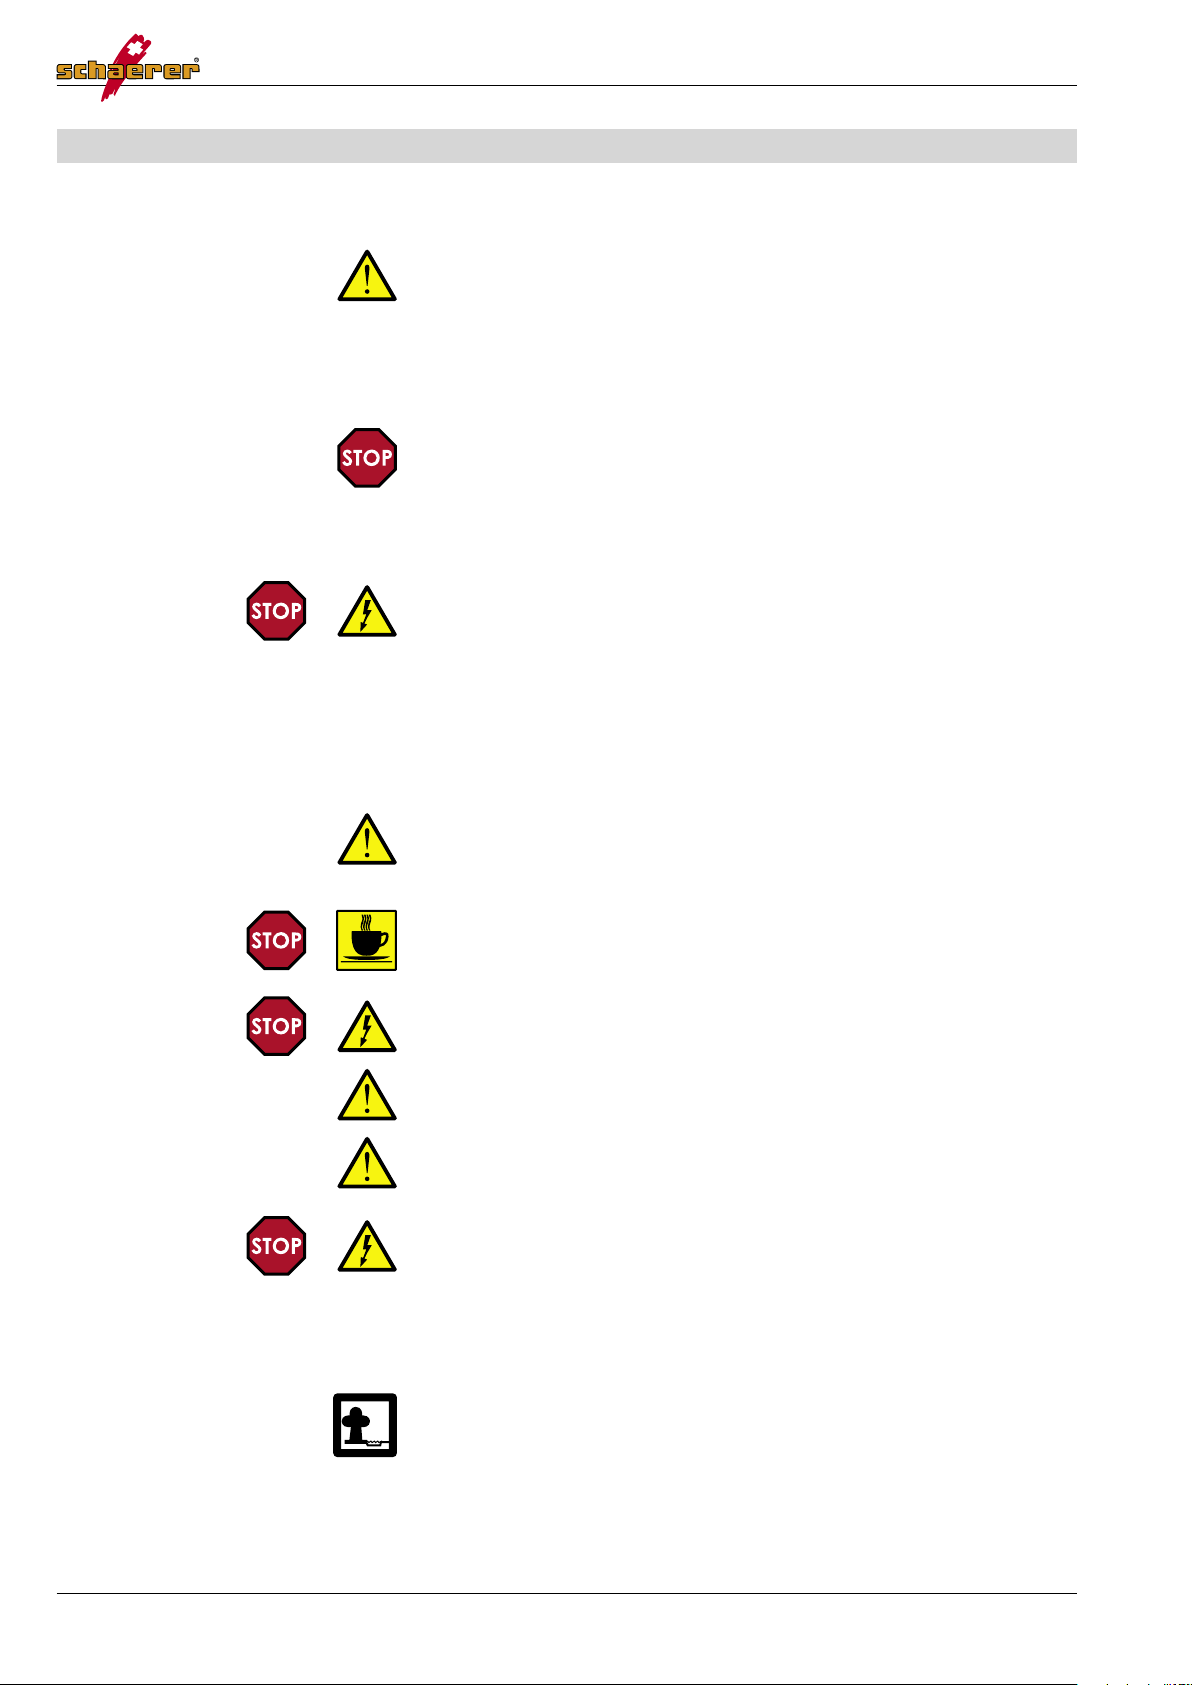
Safety symbols
The following symbols appear next to all safety instructions in this manual.
Follow the instructions to the letter and proceed with outmost care.
This note indicates a risk of severe and/or fatal injury if specific procedural
rules are violated.
Whenever you see this symbol in the operating manual, take all necessary
safety precautions.
This note indicates a risk to life and health due to electric shock!
This note indicates possible damage to property as well as possible
financial and statutory penalties (e.g. loss of rights to claim under
guarantee, liability suits, etc.).
This section provides you with important information.
This section reminds you that all the beverages delivered by
the machine are hot!
Page 10
Safety instructions
10 User manual E6 - 02 USA
www.schaererusa.com Version 01 / 03.2005 / REWE
Prevention of accidents
In case of incorrect operation or misuse, one or more of the following might
occur:
• Risk to life and health of the operator, third persons or animals that
are in proximity to the machine,
• Risk of damage to machine and other property of the operator or of
third parties,
• Inefficient performance of the machine.
Persons who are not familiar with these operating instructions, as well as
children or persons under the influence of alcohol, drugs or medication
may not operate the machine. On self-service units danger zones such as
the coffee outlet, the steam pipe and the hot water outlet must be clearly
labeled in such a manner that the warning is clearly visible to the customer.
Work on electric systems must be carried out by qualified engineers or
technicians only.
The machine must be connected to a grounded and fuse-protected circuit
in compliance with local laws and liability.
The country‘s or local safety rules and regulations apply.
Connection through a residual current operated circuit-breaker is
recommended.
The supply voltage must comply with the information given on the
machine‘s serial plate.
To prevent water damage caused by hose breakage, it is recommended
to run the water supply line through a water stop valve.
Parts of the coffee outlets, the hot water outlet and the steam wand
become very hot during product delivery and cleaning. Only touch the
outlets at the specially designated protective elements.
Never open the machine or expose its internal parts!
Malfunctions must be repaired by a qualified technician only.
Only use original Schaerer spare parts.
Immediately report visible damages and leakages, damaged cables and
plugs to an qualified technician and have them repaired or replaced.
In case of malfunctions or damage discontinue the usage of the machine
and switch the machine to Stand-by mode. Disconnect from mains- and
water supply!
Contact a qualified service technician!
When selecting cleaning agents, make sure that they are environmentally
safe and bear no health risks. Comply with local disposal regulations.
Use cleaning agents recommended by the manufacturer.
Page 11
Safety instructions
User manual E6 - 02 USA 11
Version 01 / 03.2005 / REWE www.schaererusa.com
Operational safety
Safety instructions during operation
The installation, programming, service and repair of the machine must be
carried out by a qualified service technician.
The machine must be connected to the power supply system and drinking
water lines in compliance with local laws and regulations.
Never insert the power plug into a power socket when wet!
Never touch the plug with wet hands.
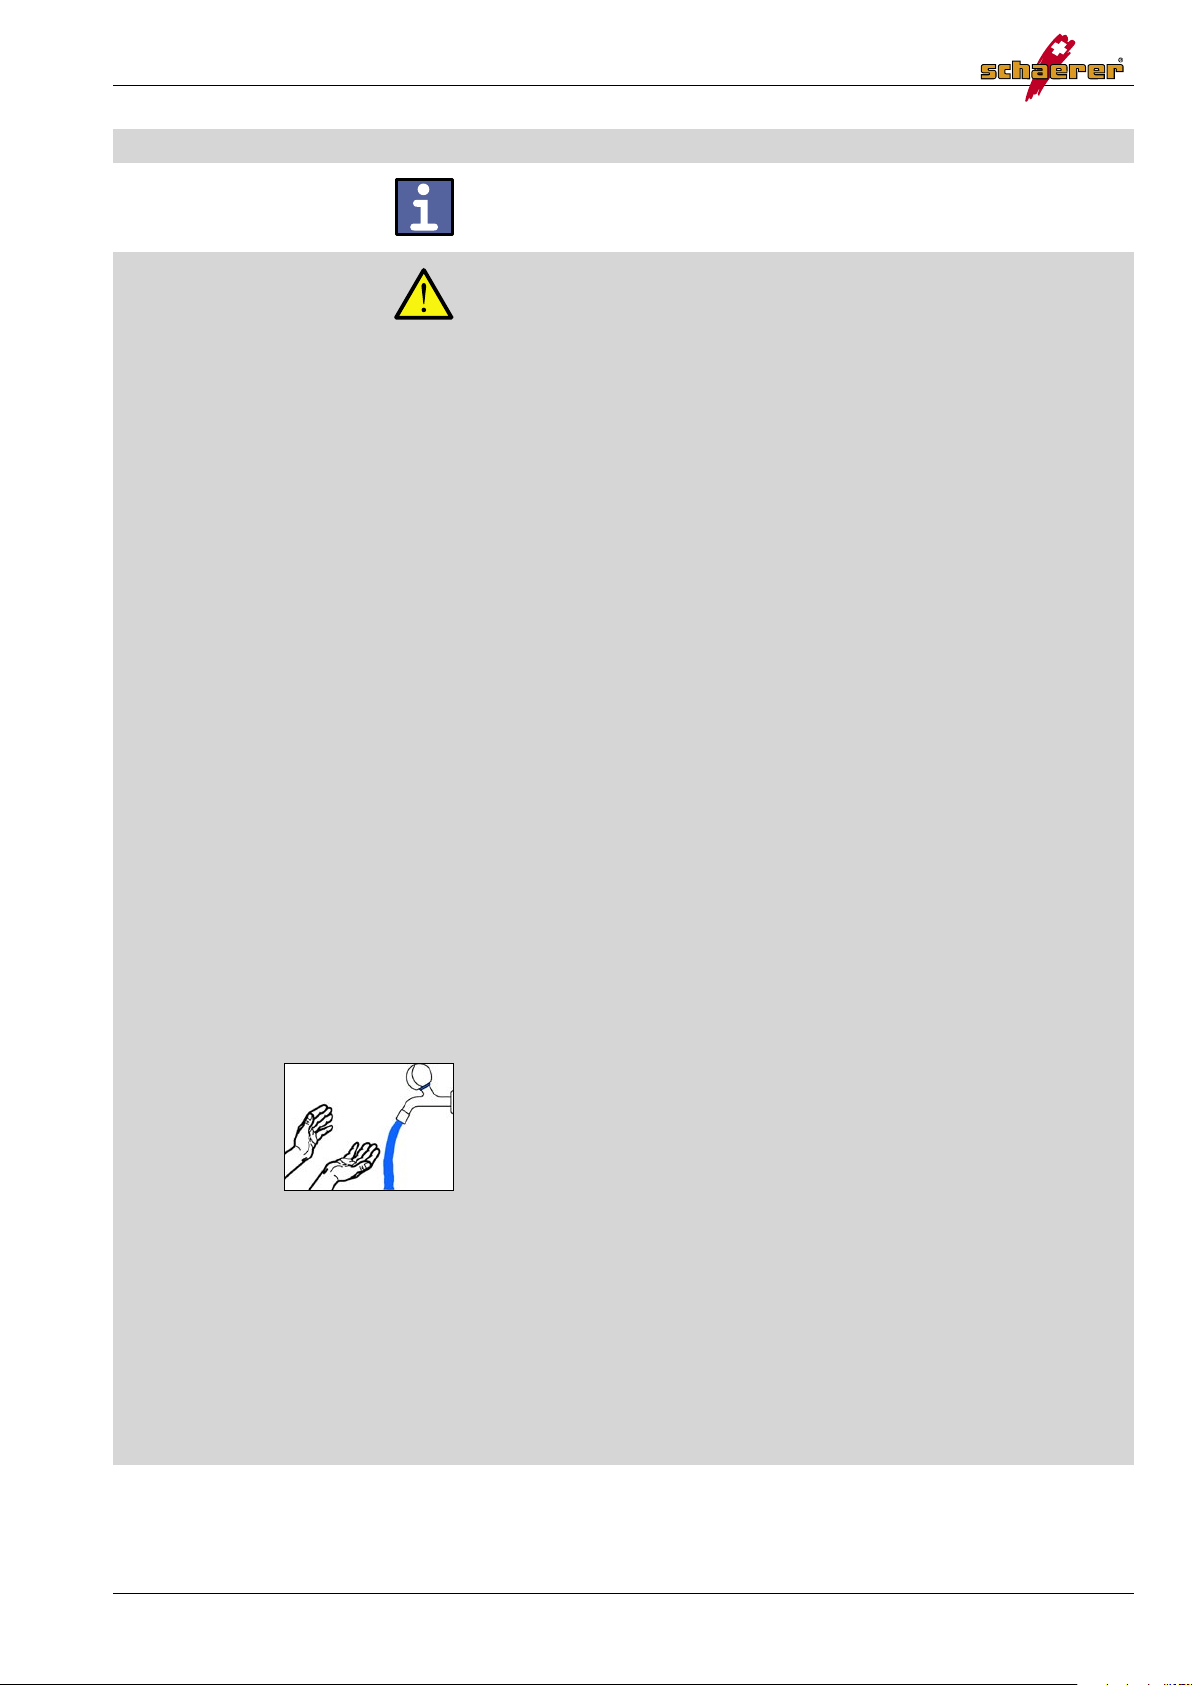
• The beverages delivered by the coffee machine are hot! To protect
yourself against scalding, keep hands and other body parts
away from the outlet area during the preparation and delivery of
beverages.
• Parts of the coffee outlets, the hot water outlet and the steam wand
become very hot during product delivery and cleaning. Only touch
the outlets at the specially designated protective elements.
• During product delivery, never move cups or other objects positioned
below the beverage outlet, the hot water outlet or the steam wand!
The beverages delivered by the machine are hot!
• Never aim steam or hot water jets against persons!
• The coffee machine does not stop dispensing when a cup is removed
from underneath an outlet during serving.
Pressing the [
ON/OFF
] button will only switch the machine to stand-by
mode, and does not physically separate it from the mains supply.
If your machine is equipped with a refrigerator, do not disconnect the
mains supply, as this will switch off the cooling system.
When the coffee machine is not used for a prolonged period of time (z.g.
Company holidays), follow the procedures outlined in the paragraph
"Extended idle times
".
Do not operate the machine if the water supply is shut off or disconnected!
This might result in damage of the machine.
Proper installation and programming of the coffee machine by an qualified
service technician is crucial for a smooth operation and high product
quality.
Page 12
Safety instructions
12 User manual E6 - 02 USA
www.schaererusa.com Version 01 / 03.2005 / REWE
Safety instructions during cleaning
• Never reach into the machine during the cleaning process and
always keep away from the beverage outlet(s).
• Never clean the machine with a hose or a high pressure cleaner!
• Do not use steam cleaning devices!
• Never immerse the machine in water or any other liquids!
• Parts of the coffee outlets, the hot water outlet and the steam wand
become very hot during product delivery and cleaning. Only touch
the outlets at the specially designated protective elements.
• During cleaning and usage of cleaning tools or products,
there is a risk of injury.
• Always follow hygiene regulations according to HACCP!
(refer to page 13).
• Only use cleaning agents recommended by the manufacturer.
• Never mix cleaning agents!
• Ask the manufacturer or a customer service for advice on the
cleaning tools you should use.
• Product delivery is disabled during the cleaning cycle.
• To ensure that all products are available at the best quality, careful
daily and weekly cleaning is imperative.
• The cleaning steps are shown on the display and the Quick reference
card which is supplied with the machine. Please follow these
instructions.
When selecting cleaning agents, make sure that they are environmentally
safe and bear no health risks. Comply with local disposal regulations.
Use cleaning agents recommended by the manufacturer.
Page 13
Safety instructions
User manual E6 - 02 USA 13
Version 01 / 03.2005 / REWE www.schaererusa.com
Hygiene
Prior to using the machine, run the cleaning program
(see chapter "Cleaning").
Always follow hygiene regulations according to HACCP!
(HACCP= Hazard Analysis and Critical Control Point)
Coffee, Milk and other Ingredients:
• Do not use raw milk! Only use pasteurized- or UHT-milk! The milk must
be homogenized!
• Only use pre-refrigerated milk with a maximum temperature of 5 °C.
When the milk is over 5 °C it is not possible to dispense an optimal
product.
• For hygienic reasons it is recommended to use the milk directly from
the original packaging
• If using a milk container: Do not top up milk in the container, always
clean the container thoroughly before filling.
• Do not fill more coffee and milk than required for one day usage.
• It is recommended to throw away remains of milk at the end of the
day (in case the milk was in contact with the milk hoses).
• Check packages on damage before opening.
• Store coffee and ingredients in a dry, cool and dark place.
• Use the eldest ingredients first ("first-in-first-out" principle`).
• Finish the products before the expiry date.
• Seal an opened package properly to preserve freshness and to
prevent from contamination.
• Store coffee and ingredients seperately from cleaning agents.
• Close the cover of the bean container again immediately after filling
the beans!
Cleaning:
• Wash and disinfect your hands thoroughly before cleaning the
machine!
• Clean the machine daily after the coffee service has stopped.
• For daily and weekly cleaning, proceed as described in the User
Manual (chapter "Cleaning") and on the Quick Reference card.
• Never mix cleaning agents!
• Never use abrasives, scrubbers or cleaning tools made of metal!
• Never spray the machine with water or any other liquid!
• Never immerse the machine into water or any other liquid!
• Parts which come in contact with the beverage (during dispensing)
should not be touched after the cleaning.
• Follow the dosing instructions, safety notes and warnings included
with the cleaning products! Read the information on cleaning
agents in the chapter "Appendix".
Page 14
Safety instructions
14 User manual E6 - 02 USA
www.schaererusa.com Version 01 / 03.2005 / REWE
Liability
Warranty and liability claims in the event of injury of people and damage
of property will not be entertained if they are due to one or more of the
following causes:
• Any use other than the designated one;
• Improper installation, usage, operation and service of the machine
and its options / accessories;
• Non-compliance with specified service intervals;
• Operating the machine with defective safety devices or with safety
devices that are not in place;
• Non-compliance with safety instructions in this manual with special
regard to storage, installation, usage, operation and service of the
machine;
• Operating the machine in other than perfect condition;
• Repairs not carried out by a qualified technician;
• Damage due to the influence of foreign bodies, accidents, vandalism
and force majeure;
• Intrusion into the machine with objects.
• Opening of the housing done by any other than a qualified
technician;
• Defects caused by the non-adherence to cleaning, operating and
similar guidelines;
• Defects due to the use of non-original parts or tampering with the
product
• Improper treatment and/or changes in the product.
• Service of the machine in accordance with maintenance regulations
set by the manufacturer.
Note that your machine is designed for professional use which has to be
maintained by a qualified service technician.
The maintenance rate is set in accordance with the output of the machine
and has to be carried out in minimum once per year!
Safety-relevant parts, such as safety valves, safety thermostats, boiler, etc.,
must be replaced and may not to be repaired under any circumstances.
The following parts must be replaced always:
• Safety valves every 12 months
• Boilers (steam generators, instant heaters) every 60 months.
Page 15

Safety instructions
User manual E6 - 02 USA 15
Version 01 / 03.2005 / REWE www.schaererusa.com
Page 16

Product description
16 User manual E6 - 03 USA
www.schaererusa.com Version 01 / 03.2005 / REWE
Product description
Espresso machine overview
(see page 4)
Espresso machine operating panel
(see page 4)
Espresso machine bean container(s)
Fill the container(s) on top of the machine with (freshly) roasted coffee
beans only. The machine grinds the beans freshly for each individual shot.
The front container is intended for regular espresso beans.
The rear container is intended for decafeinated espresso beans.
Espresso machine grounds container and drip tray
The grounds container is located below and behind the coffee spout.
It holds the used grounds which are disposed after each espresso shot .
The grounds container slides straight out from the machine and must be
emptied daily or when prompted by the display.
The drip tray should be checked regularly and drained when necessary.
The drip grid is removable for easy cleaning and access to the inside of the
drip tray.
The drip tray is removable for easy cleaning and draining.
Page 17

Product description
User manual E6 - 03 USA 17
Version 01 / 03.2005 / REWE www.schaererusa.com
Serial plate
The serial plate contains the machine-specific data. The serial plate is on
the inside of the machine and is visible when the grounds container is
removed.
Operating information
Performance characteristics
The output per hour depends on the product type.
Output per hour: 60 Cups
Dimensions and weight
Width : 150 mm
Height : ± 801 mm
Depth : 669.5 mm
Coffee outlet height : 227 mm
Net weight : ± 20 kg
Subject to changes without notice!
Power requirements
Model: Connected load:
E6 1200 W / 15 A 120 VAC 60 Hz
The voltage on the serial plate must correspond to the local mains voltage.
For special voltages ask the manufacturer or one of your authorised after
sales people.
A qualified service technician must install or inspect the installation!
Volumes
1 hot water boiler:
0.35 l hot water
1 grounds container:
50 coffees
2 bean hoppers:
1,2 kg each hopper (regular and decaf)
Page 18

Product description
18 User manual E6 - 03 USA
www.schaererusa.com Version 01 / 03.2005 / REWE
Equipment and accessories
Standard accessories (included in shipment)
Article: Order No.:
1 x User manual *
1 x Quick reference card *
1 x Installation Layout *
1 x Safety Data Sheet 020’822
1 x Measuring cup 061’020
1 x Cleaning brush 067’409
1 x Box Cleaning tablets 065’221
2 x Soft check strip 061’356
Page 19

Product description
User manual E6 - 03 USA 19
Version 01 / 03.2005 / REWE www.schaererusa.com
Installation layout E6
Page 20

Product description
20 User manual E6 - 03 USA
www.schaererusa.com Version 01 / 03.2005 / REWE
Page 21

Commissioning
User manual E6 - 04 USA 21
Version 01 / 03.2005 / REWE www.schaererusa.com
Commissioning
Initial commissioning of the coffee machine
The coffee machine must be installed and commissioned by a qualified
technician.
Set-up conditions
Location
• Do not install the machine near an oven or any other heat source.
• Not suitable for outdoor use. Never expose the coffee machine to
external conditions such as rain, snow, frost, etc.
• Do not place the coffee machine on a surface cleaned with a hose.
• Only place the appliance where it can be supervised by trained
personnel.
• The support surface for the unit must be stable and level and may not
be deformed by the weight of the coffee machine.
The location must comply with the following climatic conditions:
• Ambient temperature from 10 °C to 35 °C
• Relative humidity max. 80 % rF
The machine is designed exclusively for interior use!
Protect the coffee machine from frost. If the coffee machine has been
exposed to temperatures below freezing point, contact an authorised
customer service representative before starting the machine.
Installation of the coffee machine
Installation of the coffee machine should be done under the following
conditions:
• Install the supply lines as shown in the mains-side installation diagram
to within one meter of the place of installation.
• Conform to the technical data.
• Provide and maintain sufficient clearance for maintenance work and
operation:
• Above for filling coffee beans
• Keep approx. 35 cm clear on the right side
• A minimum of 15 cm between machine back panel to wall
(air circulation)
• Comply with the respective local statutory regulations regarding
catering / restaurant premises.
The dimensions of the installed coffee machine are given in the
corresponding installation plan (see page 19).
Page 22

Commissioning
22 User manual E6 - 04 USA
www.schaererusa.com Version 01 / 03.2005 / REWE
Safety instructions during commissioning
Electric shock!
An authorised specialist must install or inspect the installation!
• The phase must be protected with 16 A fuse.
• The machine must be fully disconnected from the power supply.
• Never operate the coffee machine if the mains cable is defective. A
defective mains cable or plug must immediately be replaced by a
qualified service technician.
• Use extension cords only when you are sure that they are in perfect
condition. The extension cord must have a minimum cross section of
1.5 mm² for each core and a permitted 5 pole plug (PNE) for 16 A.
• Power cable and/or extension cords must be placed so that they
pose no safety or health hazard. Do not pinch the cords or pull them
around sharp corners and over sharp edges; do not let them hang
exposed in the room. Do not place the cords on hot surfaces and
protect them from oil and harsh cleaning agents.
• Never lift or pull the appliance by the mains cable. Never pull the
plug out of the socket by gripping the mains cable or extension cord.
Never touch cord and plug with wet hands. Never insert a wet plug
into the socket.
Water supply/Drain
The machine must be connected as shown in the installation layout to a
G 1/2“ drinking water line (see page 18).
If the machine is to be connected to a newly installed water line, the
line and the pressure hose must be properly rinsed to ensure that no dirt
particles are fed into the machine.
If the machine is to be connected to a water drain, the supplied drainage
hose should be connected to the drip tray and the siphon and fastened
securely. The hose should point downwards so that water can easily flow
out of the drip tray.
The coffee machine is specifically designed for a water hardness of
between 5° - 7° dH (German hardness) or 8° - 12° fH (French hardness).
Chlorine content should not exceed 100 mg per litre.
The ideal pH value is 7.
Water pressure:
Minimum: 1 bar
Maximum: 3 bar
We recommend setting the decompression valve to 3 bar.
Feed water temperature:
Minimum: 10 °C
Maximum: 30 °C
Page 23

Commissioning
User manual E6 - 04 USA 23
Version 01 / 03.2005 / REWE www.schaererusa.com
Page 24

Operation
24 User manual E6 - 05 USA
www.schaererusa.com Version 01 / 03.2005 / REWE
Operation
Introduction
This chapter describes the basic functions of the coffee machine. Read
them carefully to ensure smooth routine operation.
Please refer to the Safety instructions during operation on page 11.
Filling of coffee beans
Only pour roasted coffee beans into the coffee bean container(s)!
Never reach with your hands into the coffee bean container(s) when the
machine is switched on. When refilling the bean container(s), do not reach
into the grinder and do not press any of the product buttons!
1. Remove the cover from the coffee bean container.
2. Refill with coffee beans (max. 1 kg) and close the cover again.
A well closed cover prevents the loss of aroma.
Making the coffee machine ready for operation
Prior to switching on the machine, check the following:
• The fresh water supply is open.
• The coffee bean containers are filled (see above).
• The grounds container is empty.
• The coffee machine is connected to the power supply.
• Check whether the coffee sliding hatches are open.
Switching on the coffee machine
Switch on the coffee machine by pressing the [ON/OFF] button.
A product selection can be made when the message "Ready" appears on
the display.
Ready
Page 25

Operation
User manual E6 - 05 USA 25
Version 01 / 03.2005 / REWE www.schaererusa.com
Operation modes
The E6 has two (2) operating modes:
The machine is switched off, but is still plugged in and has AC power.
The display will be slightly darkened.
The machine is ready for normal operation.
The display will be illuminated.
Begin daily routine operation
The E6 is fully programmed at the factory.
All the beverages delivered by the machine are hot!
Switch on the machine by pressing the [ON/OFF] button.
The display will show this message (see left).
If the machine has been off for an extended period,
the display will show this message.
After the machine has reached operating temperature,
the display will show this message.
After pressing the button for the desired product,
the display will show this message.
Pressing the [DECAF] button before selecting the desired product button
will activate the decaf bean container grinder.
Multiple beverages of the same type can be selected by pressing the
desired product button several times (max. 9).
Example:
4 beverages selected
1 beverage being served
3 beverages in queue
Up to nine (9) products can be pre-selected. This is efficient when serving
multiple individual beverages of the same type (in a series).
Once initiated, the current beverage serving process cannot be
terminated. This means that any beverage selection waiting in queue also
cannot be cancelled.
To turn the machine into Stand-by mode press the [ON/OFF] button.
The display will show this message.
<< Stand-by >>
Ready
Welcome
Heating
Ready
Espresso
4 Espresso
<< Standby >>
Page 26

Operation
26 User manual E6 - 05 USA
www.schaererusa.com Version 01 / 03.2005 / REWE
Beverage output
Output of espresso beverages
Pressing the [DECAF] button before selecting the desired product button
will activate the decaf bean container grinder.
All the beverages delivered by the machine are hot!
1. Place an empty cup (with an applicable volume), depending on the
product selection which will be made, under the beverage output.
2. Select desired product button (Small / Medium / Large),
"Espresso" appears on the display.
3. When the beverage output is finished ("Ready" appears on the
display) remove the cup.
Espresso
Ready
Page 27

Operation
User manual E6 - 05 USA 27
Version 01 / 03.2005 / REWE www.schaererusa.com
Total 6
Number 4
Number 2
<< Stand-by >>
Ready
<< Standby >>
Cleaning 6
Ready
Checking the beverage counters
To check the machine’s beverage counters the machine has to be
switched to "Standby" mode by pressing the [ON/OFF] button. The display
will darken and "Stand-by" will be displayed.
Press the [M] button (see cover reverse page) to display the machine’s
total beverage count (all sizes of regular and decaffeinated products).
Press the desired product button (Small / Medium / Large) to check the
counter for each individual product. The number showed includes both the
regular and decaffeinated products.
Press the [DECAF] button to check the number of decaffeinated products.
The number displayed reflects the summery of all decaffeinated products
(and does not distinguish between sizes).
To determine the total beverage count for regular product selections
only, subtract the number of decaf product selections served from the
machine’s total beverage count.
To return the machine to routine operation, press the [ON/OFF] button.
The display will show "Ready".
Checking the cleaning counter
To check the machine’s total cleaning counter (how many times the
machine’s automated cleaning program has been executed), switch the
machine to "Stand-by" mode by pressing the [ON/OFF] button. The display
will darken and "Stand-by" will be displayed.
Press the [CLEANING] button. The display will show the total number of
cleaning cycles executed on the machine.
To return the machine to routine operation, press the [ON/OFF] button.
The display will show "Ready".
The counters can only be resetted by a qualified service technician!
Page 28

Operation
28 User manual E6 - 05 USA
www.schaererusa.com Version 01 / 03.2005 / REWE
<< Stand-by >>
End of operation
Switching off the coffee machine
If the coffee machine is not used for longer periods, e.g. nights, it can
be switched to stand-by. In this mode, the boiler is not heated and no
beverages are available.
1. Press the [ON/OFF] button until the message "Stand-by" appears on
the display (See left).
Extended idle time
1. Do the daily cleaning:
(See section "Daily cleaning procedure" on page 34).
2. Seperate the machine from the mains supply.
3. Close the stop valve on the fresh water line if the machine has a
fixed installation.
4. Store the coffee machine in a dry and clean location. On premises
where the temperature can drop below zero, the boiler has to
be emptied. To empty the boiler, contact a customer service
representative authorised by the manufacturer for assistance or
advice.
Removal / Relocation / Disassembly
Contact a manufacturer authorised customer service representative.
Page 29

Operation
User manual E6 - 05 USA 29
Version 01 / 03.2005 / REWE www.schaererusa.com
Page 30

Programming
30 User manual E6 - 06 USA
www.schaererusa.com Version 01 / 03.2005 / REWE
Programming
Your coffee machine is pre-programmed at the factory.
You have the possibility to program the unit according to your individual
preferences.
The following elements can be programmed in regard to the product
(also see Programming overview):
Water quantity - Coffee quantity (Regular and DECAF) - Preinfusion function
In addition, you can also individually program various functions of the
machine.
• After 30 seconds, the machine will automatically switch to the next
programming step or to the "Ready" mode if no entry is made.
• Running through the programming is only possible in a forwards
direction.
• Machine programming at the
level can only be executed with a
personal PIN code.
For all the functions described in this chapter, it is assumed that the coffee
machine is ready for routine operation.
Navigation on programming level
= Enter programming level.
Continue with sub-menu or go to next step.
/ = Set coffee and water quantity.
Switch parameter on or off.
Page 31

Programming
User manual E6 - 06 USA 31
Version 01 / 03.2005 / REWE www.schaererusa.com
Programming overview
Routine operation
Press to enter programming level.
Product programming:
Set water quantity with
or
.
Continue with .
Set coffee quantity (regular) with
or
.
Continue with .
Set coffee quantity (decaf) with
or
.
Continue with .
Switch on or off with
or
.
Continue with .
End of programming.
General parameters programming:
Select display language with or .
Continue with .
Set brewing temperature with
or
.
Continue with .
Set time until "Standby" mode with
or .
Continue with .
Telephone number for service support.
Continue with .
End of programming.
Ready
English
Temp. 92 °C
Standby 1h
+1 (562) 989-3004
Ready
Ready
Product, + ,C
Shot size 50
Regular 3.00
Preinfusion ON
Decaf 6.00
Press
button
Press
product
button
Page 32

Programming
32 User manual E6 - 06 USA
www.schaererusa.com Version 01 / 03.2005 / REWE
Description for product programming
Description about the settings for small coffee, medium coffee and large
coffee.
Set the water quantity between 0 ml and 304 ml (depending on the cup
size) with the
or
buttons for each product.
Factory setting = Small espresso: 50 ml
Medium espresso: 80 ml
Large espresso: 120 ml
Set the regular coffee quantity between 0.00 sec. and 15.00 sec. with
the
or
buttons for each product.
Factory setting = 8.50 seconds for regular coffee beans
Set the decaf coffee quantity between 0.00 sec. and 15.00 sec. with
the
or
buttons for each product.
Factory setting = 8.00 seconds for decaffeinated coffee beans
Pre-infusion means that the ground coffee will be moistened before the
brewing process starts (for each product). Switch the pre-infusion on or off
with the
or
button.
Factory setting = Small espresso: Pre-infusion is ON
Medium espresso: Pre-infusion is OFF
Large espresso: Pre-infusion is OFF
Description for general settings programming
Description about the general settings for display language, brewing
temperature, Stand-by time and service telephone number.
Select the display language (English / Dutch / Spanish / German / French
or Italian) with the or buttons.
Factory setting = English
Select the brewing temperature between 82 °C and 94 °C with
the or buttons.
Factory setting = 92 °C
Select the time (hours) until Stand-by mode appears between 0 h and 5 h
with the or buttons.
Factory setting = 0 hours
The telephone number for any service support appears.
No changes are possible in this parameter.
Shot size 50
Regular 8.50
Preinfusion ON
Decaf 8.00
English
Temp. 92 °C
Standby 0h
+1 (562) 989-3004
Page 33

Programming
User manual E6 - 06 USA 33
Version 01 / 03.2005 / REWE www.schaererusa.com
Page 34

Cleaning
34 User manual E6 - 07 USA
www.schaererusa.com Version 01 / 03.2005 / REWE
Cleaning
Introduction
This chapter describes the cleaning of the coffee machine. Read them
carefully to ensure easy and problem-free cleaning operation.
Please refer to the Safety instructions during cleaning on page 12.
After the coffee serving has ended (e.g. over night) we recommend to do
the daily cleaning.
• During cleaning and usage of cleaning tools or products,
there is a risk of injury.
• Never mix cleaning agents!
Page 35

Cleaning
User manual E6 - 07 USA 35
Version 01 / 03.2005 / REWE www.schaererusa.com
Daily cleaning procedure
Read the information given in the user manual carefully as it contains important information regarding
safety, hygiene, use and maintenance of the machine.
During the automatic cleaning never reach into the machine or under the beverage outlets.
Risk on burning and scalding!
The status of the cleaning and some cleaning steps are shown in the display.
remove container
Cleaning
Man. cleaning
Tablet
Cleaning
• Press the [CLEANING] button.
The display shows alternately:
• Remove the grounds bin
(within 5 sec.).
The display shows:
• Both the [CLEANING] and [SMALL]
button lights will be flashing.
• Open the front door.
• Use the brush to remove the coffee
grounds from the brew unit and
from its surrounding.
• Clean the grounds container and
place it back into the machine.
• When the grounds container is
reinserted into the machine, the
brew unit will move back to its home
position.
• Wait until the display shows: • Close the front door and place a
large pitcher (Volume min.: 1 litre)
underneath the coffee outlet.
• Press the [CLEANING] button to
continue the cleaning cycle.
On the Display appears:
Inserting the tablet before the
message appears may cause
malfunction.
• Drop one cleaning tablet into the
brewing unit as shown.
Never reach into the machine
or under the beverage outlets
during cleaning.
The cleaning cycle is running
(duration: approx. 7 minutes).
The selection of beverages
is locked.
If the grounds container
is not removed within 5
seconds, the machine will
resume to "Ready" mode.
1 2 3
4 5 6
Page 36

Cleaning
36 User manual E6 - 07 USA
www.schaererusa.com Version 01 / 03.2005 / REWE
Ready
• Once the cleaning cycle is finished
the screen will display this message:
• Remove the pitcher.
• Remove the drip tray and drip grid
and clean both thoroughly.
• Clean the exterior with a damp
tissue.
Do not use any abrasives!
• Remove the beans from the bean
container(s).
• Take off the bean container(s) and
clean them under warm, running
water.
• Dry the bean container(s) with a
clean paper tissue.
If the oil persists, use some dish
washing soap.
(Only required if the bean
container(s) is/are dirty!)
7
8
9
Page 37

Cleaning
User manual E6 - 07 USA 37
Version 01 / 03.2005 / REWE www.schaererusa.com
Page 38

Error messages
38 User manual E6 - 08 USA
www.schaererusa.com Version 01 / 03.2005 / REWE
<< Stand-by >>
Heating
Remove cont.
Man. cleaning
Tablet
Cleaning
Container full
Container
Error messages
Display and error messages
The machine is switched off and the background of the display is
darkened. Product delivery is disabled. The boiler is not heated. Press the
[ON/OFF] button to switch the machine on.
When the machine is switched on after it has been in "Stand-by" mode for
a while, it takes a few moments for the machine to heat up. Products can
be made after approximately five (5) minutes. If this message persists, call
for service.
The red light next to the cleaning button will begin flashing when the
machine has reached a preset number of beverages without a cleaning.
The display will not show a text message. The only way to resume normal
operation is by executing the cleaning process.
When the [CLEANING] button is pressed to initiate the cleaning process,
the display screen prompts to remove the grounds bin. This must be done
within six (6) seconds.
After removal of the grounds container during the cleaning program, the
machine reminds to use the cleaning brush to remove any excess coffee
grounds from the brewing unit.
During the cleaning process the machine will prompt to drop a Schaerer
cleaning tablet into the brewing unit.
This message appears while the cleaning program is in progress. During the
cleaning cycle, all product buttons are locked. The machine can be used
again when "Ready" appears on the display. If the message persists for
more than eight (8) minutes, call for service.
The grounds bin is full. The product buttons will not work until the bin is
removed, emptied and placed back into the machine. If the message
persists, call for service.
This message indicates that the grounds bin is not making contact with a
designated switch inside the machine. The bin is either not in the machine
or not placed all the way into the correct position. Slide the bin all the way
in. If the message persists, call for service.
Page 39

Error messages
User manual E6 - 08 USA 39
Version 01 / 03.2005 / REWE www.schaererusa.com
No beans G1
Grind-1 block
Motor control
NTC-water
Prod. data error!
Service!!!
Sys. config error!
Timeout
Door open
One or both of the bean containers are empty. Fill the container(s) with
beans and press the [SMALL] product button. Press the product button
again to continue the dispensing of the product.
It may also mean that the bean flow into the grinder is obstructed. If the
hopper is full, stir the beans with the back of the cleaning brush, then press
the product button again, it might be necessary to repeat this two or three
times. If the message persists, call for service.
An object is blocking the bean flow into the grinder. Switch the machine off
and on, and then press the [SMALL] product button again. If the message
persists, disconnect the machine from its power supply and vacuum out
the remaining beans from the grinder. Check the grinder for obstructions. If
the problem persists, call for service.
The machine is registering a disruption in the control function of the brewer
motor. Switch the machine off and back on again. Press the [SMALL]
espresso product button. If the message disappears, it was temporary
(i.e. voltage drop). If the message persists, call for service.
The machine is registering a failure in the temperature probe of the hot
water boiler. Turn the machine off and back on again. If the message
persists, call for service.
The machine will operate, however it is registering a memory failure in
either the Ram or the E-prom chip. This is usually caused by a power surge
or a loose chip. Call for service.
While the machine will continue to operate normally, it has now served the
programmed number of drinks or reached the programmed time limit that
prompts for its next (preventive) service. Call for service.
The machine will operate, however it is registering a memory failure in
either the Ram or the E-prom chip. This is usually caused by a power surge
or a loose chip. Call for service.
The machine is registering a disruption in the control function of the brewer
because the neutral position cannot be detected . Switch the machine off
and back on again. Press the [SMALL] espresso product button. If message
persists, call for service.
The front door is open. The product buttons are locked until the door
is closed. Close the front door securely. If the message persists, call for
service.
No beans G2
Grind-2 block
Page 40

Error messages
40 User manual E6 - 08 USA
www.schaererusa.com Version 01 / 03.2005 / REWE
Page 41

Appendix
User manual E6 - 09 USA 41
Version 01 / 03.2005 / REWE www.schaererusa.com
Appendix
Cleaning agent
Cleaning tablet for the espresso machine
Read the label on the cleaning tablet container and the "MATERIAL
SAFETY DATA SHEET" before using the tablets. If this document is not in your
possession order it from the distributing company.
Purpose:
For the daily cleaning of the espresso machine’s espresso system.
Appearance and odour:
See "MATERIAL SAFETY DATA SHEET".
Use:
• Keep the cleaning tablet away from children and unauthorized
persons.
• Do not swallow!
• Do not eat or drink while using the cleaning tablet.
• Wash hands immediately after using the cleaning tablet.
• Never mix the cleaning tablet with any other substances.
Emergency information:
Ask the distributing company or a customer service authorized by the
distributor for the telephone number of the emergency information center
(toxicological information center) in your country.
If your country has no such or similar institution, call the following number in
Switzerland for information in emergencies.
++41 01 251 51 51 (Toxicological Information Center)
First aid:
See "MATERIAL SAFETY DATA SHEET".
Important for the doctor:
If possible show the doctor the label of the cleaning agent or the
"MATERIAL SAFETY DATA SHEET".
Storage of the cleaning tablet:
• Keep out of the reach of children and unauthorized persons.
• Protect from heat, direct light and moisture.
• Do not store together with acids or alkalines.
• Store only in original container/packaging.
• Do not store together with food, beverages and consumption items.
• Always comply with local regulations concerning the storage of
cleaning agents.
Page 42

Appendix
42 User manual E6 - 09 USA
www.schaererusa.com Version 01 / 03.2005 / REWE
Technical data
Instant heater (Art.-No.: 068‘557)
Manufacturer‘s sign ......................................................................................... HW
Operating over pressure .............................................................................. 8 bar
Admissible operating over pressure (p max) ........................................... 14 bar
Test over pressure ........................................................................................ 14 bar
Admissible operating temperature (T max) .............................................. 192˚C
Minimum operating temperature (T min) .................................................... 10˚C
Operating temperature (adjustable) .......................................................... 95˚C
Water content (Volume) ...............................................................................0.35 l
Voltage (U) .............................................................................................. 120 VAC
Power consumption (P) ............................................................................. 1000 W
Year of manufacture ...................................................................................... 20...
Serial No. ........................................................................................................ HW...
Environmental aspects
Spare parts:
Parts exchanged during a service are reconditioned as far as possible and
used again.
Cleaning agents:
Environmental protection!
If no re-use is possible, cleaning agents and their packaging must be
disposed of in line with local laws and regulations in accordance with the
"HEALTH AND SAFETY DATA SHEET".
Energy consumption:
The energy consumption corresponds to the technical state of the art at
the time the machine was developed.
Disposal:
Environmental protection!
The machines must be disposed of correctly and in accordance with local
laws and regulations.
Page 43

Appendix
User manual E6 - 09 USA 43
Version 01 / 03.2005 / REWE www.schaererusa.com
Page 44

Appendix
44 User manual E6 - 09 USA
www.schaererusa.com Version 01 / 03.2005 / REWE
 Loading...